Embed Size (px)
Citation preview

This guide is intended to provide high level information about the onboarding process in
Workday. Please contact the Human Resources’ Shared Services Unit if you have additional
questions or require assistance with completing your onboarding steps.
BEFORE YOU BEGIN .................................................................................................................................. 2
WHAT TO EXPECT ........................................................................................................................................ 2
SECURING YOUR WORKDAY LOG IN CREDENTIALS ........................................................................................... 3
New Employees to the University .......................................................................................................... 3
Re-hired Employees to the University ................................................................................................... 3
McGill Student Hires or Re-Hires to the University ............................................................................... 4
HOW TO LOG INTO WORKDAY FOR THE FIRST TIME ......................................................................................... 5
New Employees and Re-hires to the University .................................................................................... 5
McGill Students ..................................................................................................................................... 5
WORKDAY BASIC NAVIGATION ...................................................................................................................... 6
Onboarding Dashboard ......................................................................................................................... 6
Key Workday Terms and Symbols ........................................................................................................ 7
YOUR ONBOARDING TASKS ..................................................................................................................... 8
MANAGE PAYMENT ELECTIONS ..................................................................................................................... 8
COMPLETE PROVINCE TAX ELECTIONS .......................................................................................................... 8
COMPLETE FEDERAL WITHHOLDINGS ELECTIONS .......................................................................................... 9
CHANGE BENEFITS ELECTIONS ................................................................................................................... 10
Supporting Documentation .................................................................................................................. 10
Health Care Elections .......................................................................................................................... 11
Insurance Elections ............................................................................................................................. 11
Retirement Savings Elections.............................................................................................................. 12
Beneficiary Designations ..................................................................................................................... 12
Additional Benefit Elections ................................................................................................................. 12
Benefit Elections Review ..................................................................................................................... 13
Submit Elections Confirmation ............................................................................................................ 13
CHANGE EMERGENCY CONTACTS ............................................................................................................... 13
HIRE TASKS TO COMPLETE IN WORKDAY: .......................................................................................... 15
NEXT STEPS (OPTIONAL) ........................................................................................................................ 16
HELPFUL RESOURCES / CONTACT INFORMATION ............................................................................. 16
Working at McGill University – Onboarding Guide
BEFORE YOU BEGIN
Welcome to McGill University! As part of your onboarding, you received a notification in Workday informing you that critical tasks await you in Workday. A Workday onboarding notification email will also be sent to the primary work email (if you already have a work email address) and to your primary home email. You are responsible for taking appropriate action on your onboarding tasks within 48 hours.
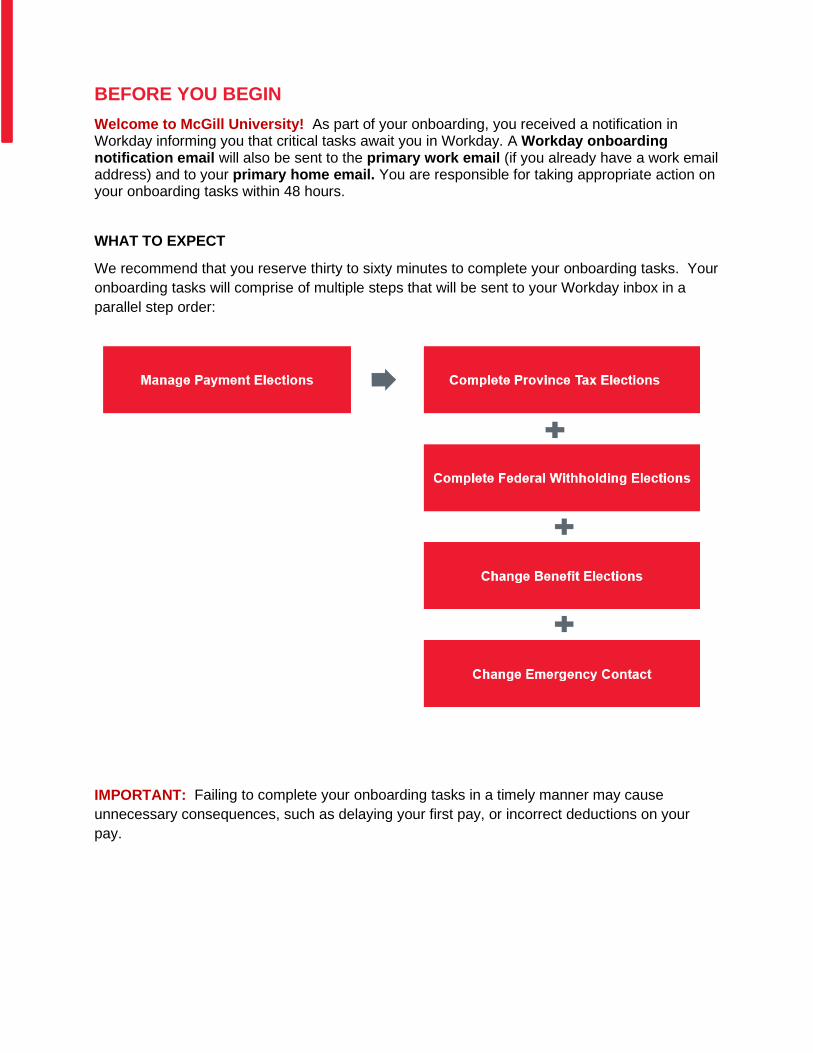
WHAT TO EXPECT
We recommend that you reserve thirty to sixty minutes to complete your onboarding tasks. Your
onboarding tasks will comprise of multiple steps that will be sent to your Workday inbox in a
parallel step order:
IMPORTANT: Failing to complete your onboarding tasks in a timely manner may cause
unnecessary consequences, such as delaying your first pay, or incorrect deductions on your
pay.
SECURING YOUR WORKDAY LOG IN CREDENTIALS
New Employees to the University
If you are a new hire to the university, you will also receive an email from McGill IT Services
that contains the following (it is important to not attempt to log into Workday before receiving the
McGill IT Services’ email):
• Your McGill Username/email address: e.g. [email protected]
• McGill Username password set-up instructions
• Two-factor authentication (2FA) set-up instructions
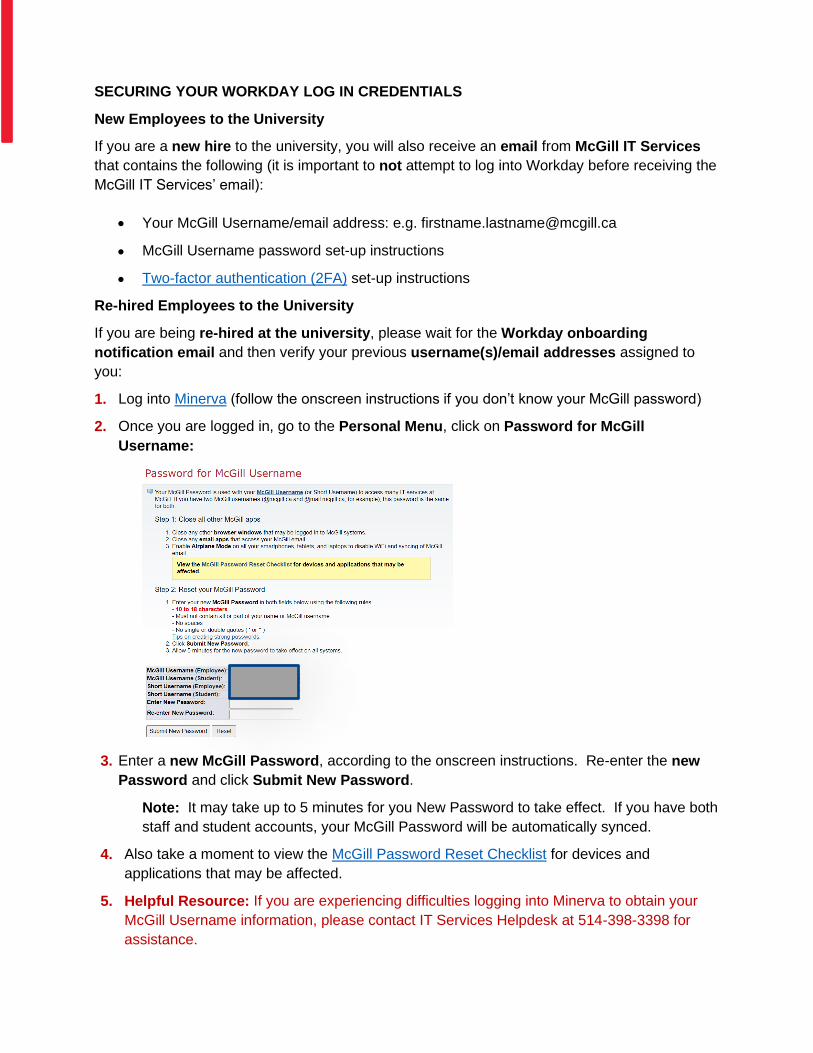
Re-hired Employees to the University
If you are being re-hired at the university, please wait for the Workday onboarding
notification email and then verify your previous username(s)/email addresses assigned to
you:
1. Log into Minerva (follow the onscreen instructions if you don’t know your McGill password)
2. Once you are logged in, go to the Personal Menu, click on Password for McGill
Username:
3. Enter a new McGill Password, according to the onscreen instructions. Re-enter the new
Password and click Submit New Password.
Note: It may take up to 5 minutes for you New Password to take effect. If you have both
staff and student accounts, your McGill Password will be automatically synced.
4. Also take a moment to view the McGill Password Reset Checklist for devices and
applications that may be affected.
5. Helpful Resource: If you are experiencing difficulties logging into Minerva to obtain your
McGill Username information, please contact IT Services Helpdesk at 514-398-3398 for
assistance.

McGill Student Hires or Re-Hires to the University
If you are a McGill student that previously worked at McGill, it is possible that an Employee
Username/Email Address already exists for you. You therefore may have two McGill
Username/Email Accounts under your name:
• Your Student Username/Email Address: [email protected]
• Your Employee Username/Email Address: [email protected]
To verify the Username(s)/Email Address(es) assigned to you:
1. Log into Minerva (follow the onscreen instructions if you don’t know your McGill
password)
2. Once you are logged in, go to the Personal Menu, click on Password for McGill
Username:
3. You can take a moment to reset your McGill Password (according to the onscreen
instructions) if you’d like. Re-enter the New Password and click Submit New
Password button.
Note: It may take up to 5 minutes for you New Password to take effect. If you
have both staff and student accounts, your McGill Password will be automatically
synced.
4. Also take a moment to view the McGill Password Reset Checklist for devices and
applications that may be affected.
5. Helpful Resource: If you are experiencing difficulties logging into Minerva to obtain your
McGill Username information, please contact IT Services Helpdesk at 514-398-3398 for
assistance.
Note: Employee Username/Email Accounts are no longer automatically created for students,
unless requested by a department.

HOW TO LOG INTO WORKDAY FOR THE FIRST TIME
New Employees and Re-hires to the University
1. If you are working off campus, first log into the Virtual Private Network VPN and then log into
Workday. Also keep in mind that McGill 2FA is mandatory for VPN use.
2. Enter Workday link: https://workday.mcgill.ca/
Note: Use the McGill URL provided above to log into Workday. Do not search “Workday”
in your internet browser as this will take you to the Workday Community, which is a
Workday general site that is not linked to McGill.
3. Sign in using your McGill Employee Username/Email Address and password:
McGill Students
If you already have an Employee McGill Username/Email Address
([email protected]), please only use your Employee McGill Username/Email
Address when logging into Workday.
If you only have a Student McGill Username/Email Address
([email protected]) email account, please log into Workday with this
account. Suggestion: when logging into Workday with a Student McGill username, it is
suggested by IT Services to use a private browser (e.g. incognito window).

WORKDAY BASIC NAVIGATION
The first page that you see when logging into Workday is called the Home Page. It contains all
you need to view your employee record and initiate tasks for yourself.
Tip: Clicking on the McGill logo will bring you back to the Home Page at any time.
Onboarding Dashboard
To verify the progress and/or completion of your onboarding steps, we recommend navigating to
your Onboarding Dashboard:
1. From the Home Page, click on Onboarding in the Announcement Section:
Inbox
Notification Bell
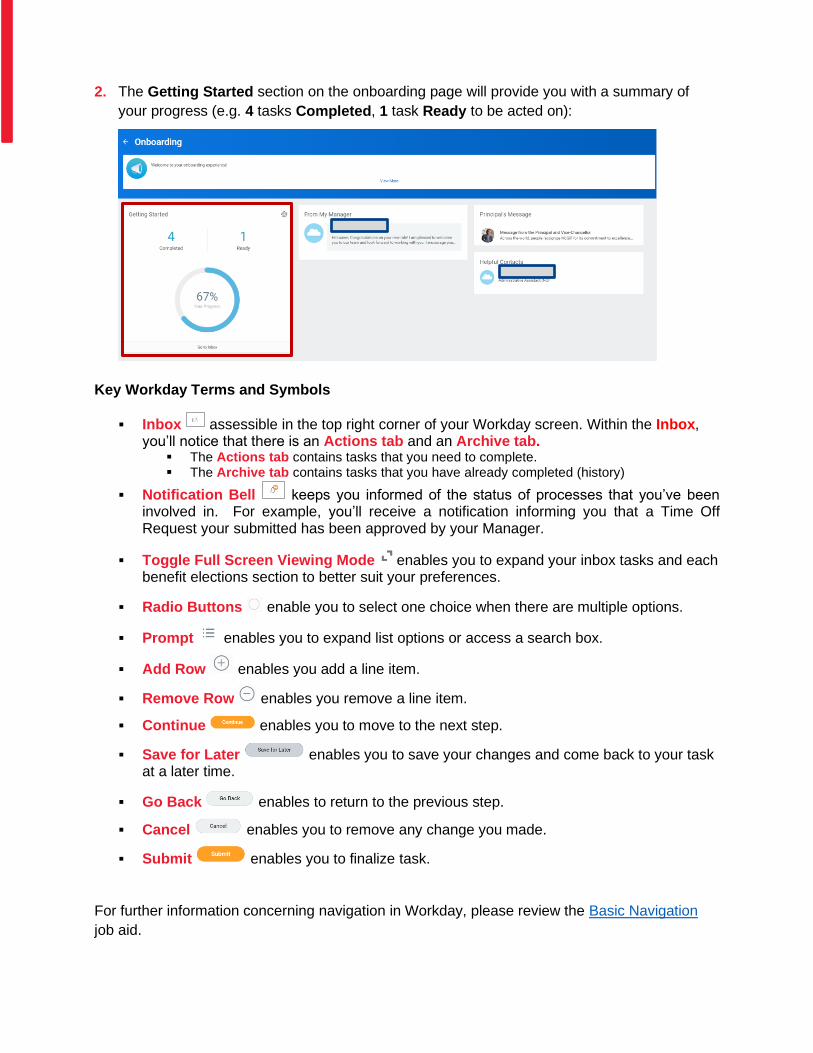
2. The Getting Started section on the onboarding page will provide you with a summary of
your progress (e.g. 4 tasks Completed, 1 task Ready to be acted on):
Key Workday Terms and Symbols
▪ Inbox assessible in the top right corner of your Workday screen. Within the Inbox, you’ll notice that there is an Actions tab and an Archive tab.
▪ The Actions tab contains tasks that you need to complete. ▪ The Archive tab contains tasks that you have already completed (history)
▪ Notification Bell keeps you informed of the status of processes that you’ve been involved in. For example, you’ll receive a notification informing you that a Time Off Request your submitted has been approved by your Manager.
▪ Toggle Full Screen Viewing Mode enables you to expand your inbox tasks and each benefit elections section to better suit your preferences.
▪ Radio Buttons enable you to select one choice when there are multiple options.
▪ Prompt enables you to expand list options or access a search box.
▪ Add Row enables you add a line item.
▪ Remove Row enables you remove a line item.
▪ Continue enables you to move to the next step.
▪ Save for Later enables you to save your changes and come back to your task at a later time.
▪ Go Back enables to return to the previous step.
▪ Cancel enables you to remove any change you made.
▪ Submit enables you to finalize task.
For further information concerning navigation in Workday, please review the Basic Navigation
job aid.

YOUR ONBOARDING TASKS
MANAGE PAYMENT ELECTIONS
Your payment elections refer to the active bank account used by the Payroll office. In particular,
it is for the direct deposit of your pay. The banking information you are required to enter can be
found at the bottom of a cheque for the bank account you would like use.
Important: To finalize your onboarding process steps, you are required to add your banking information even if you are not currently receiving remuneration from the university.
1. Review instructional text.
2. Optionally, enter an Account Nickname to help you identify this account.
3. Enter your Institution Number.
4. Review your Bank Name.
5. Enter your Branch ID.
6. Click Checking or Savings as your Account Type.
7. Enter your Account Number.
8. Click OK.
9. Review all information entered on the previous screen.
10. Click Submit.
11. Click Done.
12. Click Refresh on your left to view updated information in your inbox.
COMPLETE PROVINCE TAX ELECTIONS
The Complete Province Tax Elections task (i.e. TP-1015) enables you to review and update
the amount of tax to be deducted from your employment income or other income, such as
pension income. You are permitted to modify fields in this task if you have allowable exemption
amounts defined by Revenue Québec, or if you have more than one employer/payer at the
same time. If you do not have special provincial income tax requirements, you may select the “I
certify...” checkbox at the bottom of this task to default your tax deductions to the amounts set
forth by Revenue Québec.
For more information on the Provincial TP-1015 form, click here (page 4).
If you have any questions concerning regarding your allowable exemptions, we recommend that
you contact your personal Financial Advisor.
1. Review instructional text.

2. Enter a value in the fields that apply to you and/or click on the checkboxes that apply to you.
You may skip this step if you do not have special provincial income tax requirements.
3. Click the checkbox at the bottom of the task, which reads “I certify that the information
provided in this return is accurate and complete”.
4. Click Submit.
5. Click Done.
6. Refresh your browser to view updated information in your inbox.
COMPLETE FEDERAL WITHHOLDINGS ELECTIONS
The Complete Federal Withholding Elections task (i.e. TD1) enables you to review and
update the amount of tax to be deducted from your employment income or other income, such
as pension income. You are permitted to modify fields in this task if you have allowable
exemption amounts defined by the Canada Revenue Agency or if you have more than one
employer/payer at the same time. If you do not have special federal income tax requirements,
you may select the “I certify…” checkbox at the bottom on this task to default your tax
deductions to the amounts set forth by the Canada Revenue Agency.
For more information on the Federal TD1 form, click here.
If you have any questions regarding your allowable exemptions, we recommend that you contact
your personal Financial Advisor.
1. Review instructional text.
2. Enter a value in the fields that apply to you and/or click on the checkboxes that apply to you.
You may skip this step if you do not have special federal income tax requirements.
3. Click the checkbox at the bottom of the task, which reads “I certify that the information given
on this form is correct and complete”.
4. Click Submit.
5. Click Done.
6. Refresh your browser to view updated information in your inbox.

CHANGE BENEFITS ELECTIONS
As part of your onboarding, you received a Benefit Change task in your Workday inbox if you
are eligible to one or more benefit plans (you may skip to the next step if this task is not in your
inbox). You are responsible for carefully reviewing all information in each step of this task and, if
applicable, attaching appropriate supporting documentation before submitting your benefit
enrollment.
We recommend that you reserve thirty minutes to complete your benefit enrollment. Your
Benefit Change task is comprised of multiple steps that are organized by coverage type (e.g.
Health Care Elections). The number of steps in this task will vary, from two to six, based on your
benefit eligibility.
After you submit your enrollment, a HR Partner (SSU) will approve your benefit elections or, if
required, send back your benefit enrollment for correction. You will be contacted via your work
email to complete an Evidence of Insurability (EOI) form if you elect Optional Life Insurance
coverage in excess of $100,000.
Supporting Documentation
Your supporting documentation must be attached on the Benefit Elections Review page, at the
end of your enrollment. Your benefit elections will not be effective until your supporting
documentation is received and reviewed by HR Partner (SSU).
If You Please Provide
Are not covered by a Canadian health insurance plan Proof of registration with RAMQ
Application for Provincial Plan Replacement Coverage
Add an over-age dependent who is a full-time student Proof of Study Form
Add an over-age dependent who has a disability Application for Disabled Dependent Coverage
Designate a beneficiary for your life insurance policy Beneficiary Designation Form
Waive health coverage (< 65) Alternative Health Coverage Form
Tip
▪ Prepare your supporting documentation before you begin your enrollment.
▪ Retrieve your Notice of Assessment from the Canada Revenue Agency, if you would like
to enroll in a Group Retirement Savings Plan. You are responsible for ensuring that you
do not exceed your Registered Retirement Savings Plan deduction limit.
▪ Review the Canada Revenue Agency’s Tax Free Savings Account Guide for Individuals if
you would like to enroll in the Tax Free Savings Account. You are responsible for ensuring
that you do not exceed your contribution room.
Initiation
Approval Manage EOI Completion
Approval Completion
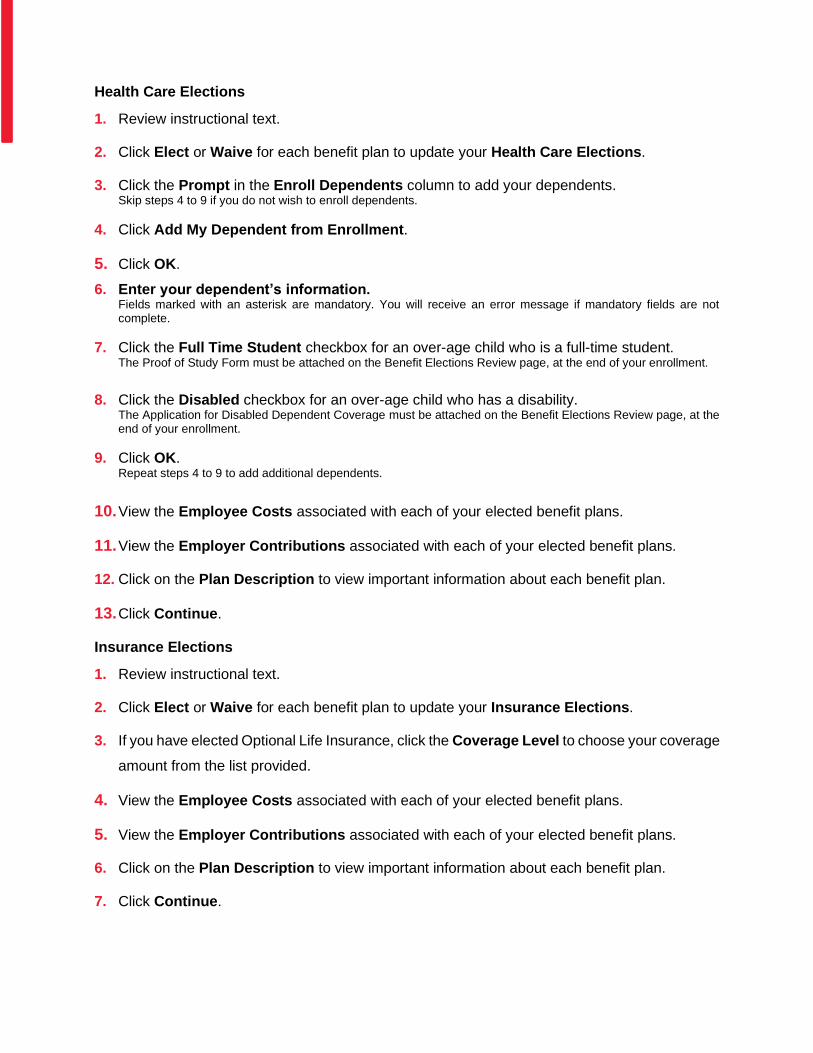
Health Care Elections
1. Review instructional text.
2. Click Elect or Waive for each benefit plan to update your Health Care Elections.
3. Click the Prompt in the Enroll Dependents column to add your dependents. Skip steps 4 to 9 if you do not wish to enroll dependents.
4. Click Add My Dependent from Enrollment.
5. Click OK.
6. Enter your dependent’s information. Fields marked with an asterisk are mandatory. You will receive an error message if mandatory fields are not complete.
7. Click the Full Time Student checkbox for an over-age child who is a full-time student. The Proof of Study Form must be attached on the Benefit Elections Review page, at the end of your enrollment.
8. Click the Disabled checkbox for an over-age child who has a disability. The Application for Disabled Dependent Coverage must be attached on the Benefit Elections Review page, at the end of your enrollment.
9. Click OK. Repeat steps 4 to 9 to add additional dependents.
10. View the Employee Costs associated with each of your elected benefit plans.
11. View the Employer Contributions associated with each of your elected benefit plans.
12. Click on the Plan Description to view important information about each benefit plan.
13. Click Continue.
Insurance Elections
1. Review instructional text.
2. Click Elect or Waive for each benefit plan to update your Insurance Elections.
3. If you have elected Optional Life Insurance, click the Coverage Level to choose your coverage
amount from the list provided.
4. View the Employee Costs associated with each of your elected benefit plans.
5. View the Employer Contributions associated with each of your elected benefit plans.
6. Click on the Plan Description to view important information about each benefit plan.
7. Click Continue.

Retirement Savings Elections
1. Review instructional text.
2. Click Elect or Waive for each benefit plan to update your Retirement Savings Elections.
3. Enter the Amount to specify your biweekly contribution for your Group Retirement Savings
Plans and/or Tax-Free Savings Account.
4. Click on the Plan Description to view important information about each benefit plan.
5. Click Continue.
Beneficiary Designations
1. Click the Add Row icon.
2. Click the Prompt in the *Beneficiary column to add your beneficiary.
3. Click Create.
4. Click Add Beneficiary.
5. Enter your beneficiary’s information. Fields marked with an asterisk are mandatory. You will receive an error message if mandatory fields are not complete.
6. Click OK. Repeat steps 1 to 6 to add additional beneficiaries.
7. Click Primary Percentage. You must elect one or more primary beneficiaries totaling 100%. After this, you can optionally designate one or more contingent beneficiaries, also totaling 100%.
8. Enter the percentage distribution.
9. Click Continue.
Additional Benefit Elections
1. Review additional benefit plans.
2. View the Employee Costs associated with your each of your elected benefit plans.
3. View the Employer Contributions associated with each of your elected benefit plans.
4. Click on the Plan Description to view important information about each benefit plan.
5. Click Continue.

Benefit Elections Review
1. Review instructional text.
2. Review your Elected Coverages.
3. Review your Waived Coverages.
4. Review your Beneficiary Designations.
5. Click Select File to attach your supporting documentation. Your benefit elections will be canceled if you are unable to provide the documentation required to support your request.
6. Review the Electronic Signature statement.
7. Click the I Agree checkbox.
8. Click Submit.
Submit Elections Confirmation
1. Review the confirmation page.
2. Click Print > Click to Download to save a copy of your changes.
3. Click Done.
CHANGE EMERGENCY CONTACTS
You are required to enter one emergency contact and you may optionally add an alternate
emergency contact. At all times, your emergency contact must have one valid phone number or
email address on file.
1. Review instructional text.
2. Click on Legal Name.
3. Enter a First Name and Last Name for your emergency contact.
4. Click Save (checkmark icon).
5. Click on Relationship.
6. Click the Prompt and select a Relationship.
7. Click Save.
8. Click on Preferred Language.
9. Click the Prompt and select a Preferred Language.
10. Click Save.
11. Click Add under Primary Phone.
12. Click the Prompt and select a Phone Device.
13. Enter a Phone Number for your emergency contact.
14. Click Save.
15. Click Add under Primary Email.
16. Enter an email Address for your emergency contact.
17. Click Save.
18. Optionally, you may add additional emergency contacts by click Add under Alternate
Emergency Contacts. Please note that all fields marked with an asterisk are mandatory. You
will receive an error message if mandatory fields are not complete.
19. Click Submit.
20. Click Done.
Congratulations, you have completed your onboarding and
benefits enrollment!

HIRE TASKS TO COMPLETE IN WORKDAY:
In addition to onboarding tasks, you will receive three mandatory hire tasks to complete in your
Workday inbox (you will also receive an email reminder to your work and personal email
addresses).
These tasks are equally important and timely to do as they are required for compliance and
university reporting purposes.
Please complete these tasks within 1 weeks’ time of receiving the inbox items:
NEXT STEPS (OPTIONAL)
There are Workday self-service functionalities that are available to you.
If you want to review or update your personal information (e.g. contact information, emergency
contact, IDs, name, photo), please refer to the Modify Personal Information job aid.
If you are a re-hire to the university, we highly recommend that you verify your personal
information is up to date.
HELPFUL RESOURCES / CONTACT INFORMATION
Human Resources Website
▪ Onboarding Website: Welcome to McGill Message from the Principal.
▪ Benefits: available information programs, policies, procedures, and more about your benefit
plans and insurance.
▪ Pensions and Retirement: available information on policies, procedures, video capsules, and
more about your retirement savings plans.
▪ Insurance and Plan Details: available information on Provincial Plan Replacement Coverage,
Health, Dental, Disability, Life Insurance plans, plan rates and much more.
▪ Human Resources Forms: General forms (dental, timesheets, tax etc.), Savings Program
forms and Union/Association Forms.
Workday Knowledge Base
▪ Review the Employee Self-Service section in the Workday Knowledge Base
IT Services
▪ For urgent issues: call at 514-398-3398
▪ Get started with IT
▪ IT Services Homepage
▪ IT Knowledge Base: Search or browse knowledge articles, make requests for standard IT
services, report issues or ask questions, follow up on your tickets, view the status of
systems, and more.
▪ McGill Username and Password
▪ Virtual Private Network (VPN)
▪ 2 Factor Authentication (2FA)
▪ Working Remotely
HR Shared Services Unit (SSU): Email: [email protected]. Phone number: 514-398-4747
▪ Workday how-to questions
▪ Human Resources processes
▪ Training requests