Embed Size (px)
Citation preview


WEDDING PLANNERS
MODULE-04

1
4. Module 04-other things to consider when dressing the bridal party:
Table of Contents
4. Module 04-other things to consider when dressing the bridal party: .................................................. 1
4.1 Other things to consider when dressing the bridal party: ......................................................................... 2
4.2 Make Up - General tips .............................................................................................................................. 2
4.3 Hair colour and style ................................................................................................................................ 10
4.4 Nail care ................................................................................................................................................... 14
2
4.1 Other things to consider when dressing the bridal party:
• In European weddings, it is customary for the guests to wear short hemlines, so the sponsor must wear
a short length or cocktail dress. In America, for example, when guests wear a cocktail length, the
godmother can wear a full length dress. Accessories look best neutral so the dress is prominent.
• If the wedding is in a cold season it would be ok to wear a coat of the same fabric, a shawl, stole or
pashmina. The handbag should tone with the suit, for example in satin fabric with sequins or rhinestones.
The shoes shouldn’t be too high and are often covered with the same fabric as the dress. The use of
sheer stockings always flatters and styles.
• Hats suit shorter length dresses but not full length. To look elegant, the hat shouldn’t be wider than the
shoulders. Traditionally, if a hat is worn, it’s kept on during the meal. If you use a hat it’s best not to use
a shawl or pashmina and allow shoulders to be bare.
• A comb and mantilla in ecru is traditional for a godmother who is single and black for married or widowed
women. One-piece suits with long or French sleeves suit married or widowed women and hair is usually
gathered under the hat or mantilla.
• For an evening wedding with dinner, guests usually wear long dresses, short only when dinner is held
outdoors and the occasion suits cocktail wear. The fabrics satin, taffeta, organza or with rhinestones are
rich and ornamental and distinguish evening occasions from morning ones. Handbags and purses should
be small, jewelled or embroidered. Sandals or high-heeled shoes are often ornate.
4.2 Make Up - General tips
Plan a makeover, not a fake over
• When planning your make up for your wedding day, plan to enhance your looks, not to show up as
someone your husband-to-be doesn’t recognise. Changes that are too drastic, like a tan that’s too dark
or a dramatic change of hair colour rarely work well. It’s much better to carefully experiment beforehand
with extra make up techniques that are more special than you usually wear, but that don’t change you
too much. He fell in love with the real you, keep yourself real.
Having said that, it is your very special day and you are the centre of attention. Your make up needs to last over a
long day and to look perfect in your photos. Do apply more make up than usual. Start with a little and add more
gradually. Lights and cameras tend to make you look a little paler; allow for that. It’s a good idea to have your picture
taken with make up on beforehand so you see how flash photography reacts with your finish.
Swap current trends for timeless elegance
• Think about viewing your wedding pictures in 20 years time and be careful to create a look that won’t
date too much in pictures. Trends in make up come and go. Try to wear a classic look that’s natural with
a little touch of glamour.
Tan in moderation
• If you feel you need to wear false tan, be moderate. A golden glow beats a Caribbean bronze. If you’re
applying a gel/cream tanning lotion or if you’re choosing a professional spray, complete it two days
before your wedding day so it has darkened fully and there’s no danger of unwanted staining.

3
Take steps to avoid disasters
• If you’re getting married in a warm environment, as much as possible avoid oily make up products and
take some blotting sheets to dab off oil in case you start to shine. Have your make up bag at hand to
touch up during the day. Lip colour is most likely to need refreshing regularly. So you don’t have to keep
running to a mirror, arrange with a bridesmaid or someone who’ll be close by to watch you closely and
let you know when any touching up is needed.
Prepare for tears
• It’s quite likely that you’ll well up or shed a tear at some point throughout the day. Even if you usually
avoid it, it’s a good idea to wear waterproof mascara for your wedding day. Keep some Q tips in your
make up bag. They’re safer than wipes for cleaning up small imperfections.
Foundation
• Good preparation is essential to have your skin at its best before applying your foundation. If you’re
having facial treatments, don’t plan any close to your big day. Skin reactions are the last thing you
need. Be kind to your skin to make sure it’s looking fresh. Coming up to your wedding drink plenty of
water, eat lots of fresh fruit and vegetables and avoid sugar and processed food.
• Apply your make up in a position where there is very good natural light. If you wear contact lenses,
remember to pop them in before you start. Thoroughly cleanse and moisturise your skin and allow
moisture to penetrate before applying foundation. Next, apply your magic ingredient - primer. This
creates a lovely smooth base for your foundation and gives it staying power for the day.
• Match your foundation to your skin tone and check it in both daylight and artificial light. Make sure you
have a good quality sponge or brush for applying foundation. With a sponge, use a dabbing rather than
a wiping motion for a smoother finish. Make sure you give good coverage to the T zone; the nose and
chin areas are most likely to need extra make up. If you’re wearing a low cut dress, think about how
your neck and décolleté blend with your face.
• If you feel you need concealer, wait until after you apply foundation. If you apply it before you may
apply more than you need and look caked. The less you use the better. Finish off with a light dusting of
powder, preferably translucent. Subtle use of highlighter on your cheekbones, around the inner
corners of eyes and under eyebrows adds a nice special touch, but don’t overdo it.
Eyes
• Just like preparing your face for applying foundation, it is also essential to apply primer on your eyes
before applying eye make up. It helps powder glide on smoothly, avoid smudging and look well for
many hours.
• When choosing shades of powder, follow the usual rules; darker shades on the outer contours, lighter
towards the inner. Make your eyes look big and beautiful but don’t go for shades that are too dramatic.
Subtle, classic colours are more sophisticated, especially for day time. You can transform your eyes
using more bold colours when it approaches evening.
• To get a crisp look to your eyeliner, a gel works best and lasts longest. If you don’t have a steady
enough hand, ask someone who has. Nerves are understandable!
• False eyelashes have become such an acceptable addition to make up that they are pretty much an
essential on a day as special as your wedding. Again, use restraint and choose classic, discreet ones. If
you don’t want to wear a full lash strip you can find individual ones which are subtle. They really do
enhance and add to the allure of eye make up.
4
• Before gluing them on, apply mascara to your normal lashes and use an eyelash curler. Once they are
glued on and dry, apply more mascara and curl again, lightly squeezing at the root, middle and tips.
Make sure false lashes are the correct width – cut if too wide.
• To frame your eyes well, pay attention to your eyebrows. Have them nicely shaped - plucked or waxed
- at least a couple of days beforehand so any redness has settled down. Use an eyebrow pencil to fill in
any gaps or sparse areas and to help them look thicker. Choose a shade slightly lighter than your
natural hair colour. Anything darker will look too heavy and dark. If your brows are fair, don’t be
tempted to dye them anything but a subtle shade darker.
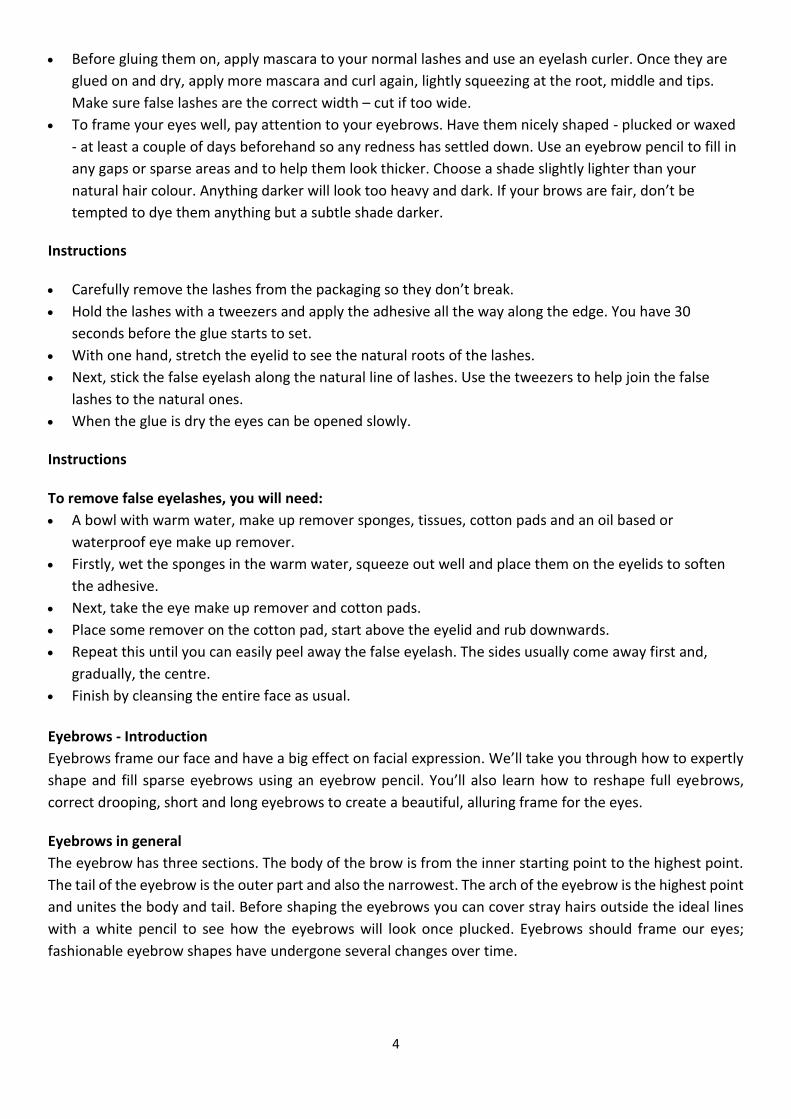
Instructions
• Carefully remove the lashes from the packaging so they don’t break.
• Hold the lashes with a tweezers and apply the adhesive all the way along the edge. You have 30
seconds before the glue starts to set.
• With one hand, stretch the eyelid to see the natural roots of the lashes.
• Next, stick the false eyelash along the natural line of lashes. Use the tweezers to help join the false
lashes to the natural ones.
• When the glue is dry the eyes can be opened slowly.
Instructions
To remove false eyelashes, you will need:
• A bowl with warm water, make up remover sponges, tissues, cotton pads and an oil based or
waterproof eye make up remover.
• Firstly, wet the sponges in the warm water, squeeze out well and place them on the eyelids to soften
the adhesive.
• Next, take the eye make up remover and cotton pads.
• Place some remover on the cotton pad, start above the eyelid and rub downwards.
• Repeat this until you can easily peel away the false eyelash. The sides usually come away first and,
gradually, the centre.
• Finish by cleansing the entire face as usual.
Eyebrows - Introduction
Eyebrows frame our face and have a big effect on facial expression. We’ll take you through how to expertly
shape and fill sparse eyebrows using an eyebrow pencil. You’ll also learn how to reshape full eyebrows,
correct drooping, short and long eyebrows to create a beautiful, alluring frame for the eyes.
Eyebrows in general
The eyebrow has three sections. The body of the brow is from the inner starting point to the highest point.
The tail of the eyebrow is the outer part and also the narrowest. The arch of the eyebrow is the highest point
and unites the body and tail. Before shaping the eyebrows you can cover stray hairs outside the ideal lines
with a white pencil to see how the eyebrows will look once plucked. Eyebrows should frame our eyes;
fashionable eyebrow shapes have undergone several changes over time.

5
• Raised eyebrows create a happy expression. These are the ideal to aim for. If the natural eyebrows are
too high, the top hairs can be waxed and the area slightly below the natural line can be filled in to bring
the eyebrows closer to the eyes.
• Drooping eyebrows can give the appearance of sadness. In these cases, pluck the hairs at the tail and
with a pencil, fill in a higher line.
• Short eyebrows can easily be lengthened by applying pencil lines to the inside and outside edges.
• Long eyebrows can be plucked to bring them into the ideal length according to the guidelines above.
• Thick eyebrows can also be plucked to suit the ideal shape described above and to suit the characteristics
of the eye.
• Thin eyebrows can be augmented by filling in with an eyebrow pencil above and below the eyebrow line,
emphasising the brow bone.
Corrections for Eyebrows. Before waxing eyebrows, use these guidelines to create the ideal frame for the
eyes:
1. Draw an imaginary line from the edge of the nostril to the inner corner of the eye, continuing directly
upwards to the eyebrow. This is the ideal starting point of the eyebrow.
2. Draw another imaginary line from the edge of the nostril to the outer edge of the eye, extending to the
outer part of the eyebrow. This point is the ideal end.
3. The third line starts at the corner of the lips, runs through the outer side of the iris and up to the eyebrow.
This marks the ideal arch point.
Instructions
Proportions of the eyebrows:
• Draw an imaginary line, beginning at the nostril, past the tear duct and continuing upward. This is the
ideal point for the eyebrow to begin.
• Draw another imaginary line from the corner of the mouth to the outer edge of the iris and upwards.
This point marks the ideal arch of the eyebrow.
• An imaginary line from the nostril to the outer corner of the eye marks the ideal end of the eyebrow.
• Match the eyebrows to the hair tone using eye shadow and a bevelled brush.
• There are brands that manufacture specific shadows for eyebrows with stencils that help to shape the
brows.
When choosing the tone for eyebrow makeup, always use the hair tone as a guide. The result should be as
natural as possible.
Cheeks
• You can afford to apply more blush than normal on your wedding day. Peachy pink shades suit most
skin tones and look classic and beautiful. If you have normal or dry skin, choose a cream blush. If you
have oily skin, use a powder. Use a good blush brush. Do a fish face to make the apples of your cheeks
stand out and apply blush where you would naturally blush. It should be no lower than your nostrils
and no closer to your nose than your pupil.
6
Lips
• Your lips will be doing a lot of smiling, kissing, eating and talking. They are also one of the main focuses
of attention so need to be perfect. To get them really smooth, try this trick: rest a toothbrush in a glass
of ice and then brush your lips to remove dead skin. Apply lip balm to make them extra smooth. Your
lip colour will both look better and last longer. Another good trick for long lasting colour is to use a lip
pencil over your whole lips and then apply lip gloss.
• As with the other elements of your make up, avoid fun shades or passing new trends. Classic, timeless,
sophisticated shades will look best both on the day and in your photos.
You need:
• Liquid foundation
• Concealer
• Translucent powder
• Eye primer
• Black eyeliner
• Eye shadow palette
• Black mascara
• Blusher in various shades to make corrections
• Lip liner
• Lipstick
Instructions:
• On clean, moisturised skin, begin to correct the imperfections. Apply concealer on dark circles with a
flat, synthetic brush.
• On areas of redness and pimples apply green concealer.
• Choose a foundation of the same skin tone as the bride and apply with a brush from the centre of the
face to the sides, so most product stays in the T zone and you avoid a mask effect on the contour of
face.
• Set the foundation with translucent powder, which doesn’t add colour, but mattifies and avoids glare
on photos and videos.
• Apply eye primer on the eyelids. This product smoothes the wrinkles on the eyelid, making it easier to
apply shadow. More importantly, it ensures that the shadow remains bright and long lasting so the
bride’s make up can look perfect throughout the day.
• Outline the eyes with black pencil. Draw a thin line on the upper lid, and on the bottom lid, draw a line
only on the outside of the lashes, from the centre to the outside edge of the eye.
• Draw a V shape on the end of the eyes. Draw first on one eye and then the other and compare to make
sure they are the same. Rectify if necessary until the result is uniform.
• Blur out the two lines with a flat bevelled brush.
• Choose a brown shade, and apply with an angled brush just above the line of the pencil, giving depth to
the roots of the lashes.
• With a synthetic brush, blend the shadow towards the temples.
• Highlight with shades of the same tone, but that have a shiny finish. Use brown and nude with a sable
brush.
• Apply black mascara. You can also use false eyelashes, depending on the look the bride wants.
7
• Choose a shade of blusher that most flatters the bride, that’s in keeping with the tone of the lips and
even the bouquet. Use a round brush.
• Subtly mark the line of the cheekbone with darker blusher and a straight brush.
• Profile the lips well, starting at the centre and moving towards the corners.
• Blur out the profiler with a lip brush.
• Lighten the centre of the lips with a highlighter or concealer.
• Lipstick should be matte or shimmery, but avoid gloss.
• With a large brush and compact powder, unify the colour of the face and neck.
Instructions
• To begin, the skin needs to be well hydrated.
• Choose a beige concealer to cover dark circles.
• Use green concealer for redness, pimples and irritations.
• Apply a very smooth and moisturising foundation, close to the tone of the skin, with a foundation
brush. Work from the centre of the face to the sides so you apply more product in the T-zone, less on
the sides and avoid a mask effect.
• With a powder puff and translucent loose powder, set the base on the face and eye lids. To create this
look, don’t add colour, but mystify and avoid the appearance of brightness in combination and oily
skin.
• Take a natural hair brush and a very neutral shade eye shadow. Draw a curved line in the crease of the
eye socket and blend towards the rim.
• Next, make up the lashes with a very fluid mascara, making sure that no eye lashes are caked or lumpy.
For blondes and red heads, use a brown shade. It looks more natural than black and nicely blended.
• Blusher should be in a natural tone.
• To achieve a flushed effect, use a round brush. Ask your model to do a forced smile and put the blush
on the cheek bone area that stands out the most.
• On the lips, just apply a lip moisturiser using a cotton swab or lip brush. If the lips are very dry, use a lip
balm.
You need:
• Tinted moisturiser for foundation
• Illuminator
• Translucent powder
• Eye liner
• Mascara
• Blusher
• Lip liner
• Mattelipstick, intense colour
Instructions:
• Apply the tinted moisturiser foundation from the centre to the outside of the face with a foundation
brush.
• Choose a medium tone illuminator and cover dark circles and imperfections.
• Mattify the foundation with the translucent powder and a powder puff.

8
• Now, for the eyes: take the eye liner brush and with the eye brow lifted slightly, trace along the line of
the lashes. Raising the eye brow allows you to see the lash line more clearly.
• Finish the line with a slightly upward angle.
• Apply several coats of black mascara, focusing more product at the outer edges of the eyes.
• With a round brush and burgundy blusher, highlight the cheek bone.
• Outline the lips with a bright red lip pencil and blend thoroughly.
• The lip stick for this look should be permanent. Permanent lip application has two phases: liquid lip
stick and moisturiser to finish.
Like the make up for the 20s age group, for the 30s age group we also need a make up look which is quick
to apply and gives great results. We choose a pin up style which is ultra-feminine and very quick to create.
You need:
• Primer
• A warm, bright eye shadow palette
• Eyeliner
• Mascara
• Illuminator
• Fluid foundation
• Bright blusher
• Copper lip colour
Instructions:
This make up look is inspired by Michelle Pfeiffer.
• Apply primer on the eyelids to prepare them for shadow.
• Choose a palette of warm, bright shades. Take a sable brush and cover the entire eyelid with a medium
tone shadow. Illuminate the brow bone with the lightest colour.
• With the eye liner, draw a thick line on the upper eyelid and a very thin one on the lower lid.
• Apply two coats of mascara.
• Cover dark circles with a medium tone illuminator.
• Choose a shade of foundation that’s similar to the skin tone.
• With a round brush, apply a bright pink blusher.
• Avoid lip liner. Apply a copper shade of lipstick directly with a lip brush.
You need:
• Liquid foundation
• Concealer
• Translucent powder
• Black eyeliner
• Eye shadow palette
• Black mascara
• Various shades of blusher to make corrections
• Lip liner
• Lipstick
• A synthetic brush for blending corrections on imperfections
9
Instructions:
• Apply the liquid foundation with a brush. You can also use a latex sponge or your fingers to remove any
streaks left by the brush.
• Using a powder puff, apply translucent powder. This doesn’t add colour, but secures the make up base
and removes shine.
• Outline the eyes with a black pencil, making a thin line on the upper lid. On the bottom lid, draw a line
that goes from the centre to the outside edge of the eye.
• Smudge out the two lines with a flat brush.
• Choose a brown eye shadow and with the angled brush, apply just above the pencil line, emphasising
the roots of the lashes.
• With a nude eye shadow and a natural hair brush, highlight the eyelid and under the brow bone.
• If necessary, correct the shade of the eye brows with matte shadow and set with a little hair spray.
• Define the lashes well with black mascara. It needs to be in perfect condition to avoid lumps and
caking.
• Correct any imperfections with dark compact foundation. Use two different brushes, one straight and
the other rounded. The straight brush is to mark the cheek bone, the round one for the temples and
jaw line. Your corrections should be nicely blended.
• Apply the peach toned blusher in a C shape.
• Outline the lips, starting at the centre and moving outwards to the corners.
• Smudge out the lip liner with a lip brush.
• Apply matte lipstick with a lip brush.
You need:
• Liquid foundation or moisturising foundation base; for oily skin - a compact powder.
• Illuminator
• Brown pencil
• Palette of natural eyeshadows
• Palette of natural blusher shades
• Brown mascara
• Natural lip liner
• Moisturised lip colour
• Latex sponge
Instructions:
• Prepare the lips by applying lip moisturiser.
• If the under eye area has dark circles, apply illuminator fluid and blend very well.
• Next, apply a very light foundation using a moistened latex sponge.
• Apply eyeliner in a natural earth shade from the middle to the outside edge of the eye, which gives a
warm look. For day make up, very neutral tones work well.
• With an angled brush, blend the line towards the temples. On that same line, to emphasise the roots of
the lashes, apply a tan shadow with the angled brush.
• For day time make up, use a brown mascara for a more natural look.
• Choose a shade of blusher that matches the skin tone. A trick for finding exactly where to place the
blusher is to ask your model to smile exaggeratedly. This clearly shows the cheekbones.

10
• Outline the lips with a tone very similar to the natural lip colour. Follow the natural outline. For day
time make up, there’s no need to correct the outline.
• Finally, apply the moisturising lip colour. Avoid excessive gloss, brightness or intensity of colour on the
lips.
Home beauty tips
Instructions
• To look your best, you don’t need to spend large sums of money on cosmetics.
• It’s very popular to use natural ingredients for beauty care. More and more Spas and beauty salons are
using natural products and techniques.
• Make a natural scrub by mixing salt and almond oil, prepared in a non-metallic bowl.
• Rub all areas lightly in a circular motion to exfoliate.
• Emphasise the elbows and knees and avoid sensitive areas such as around the eyes.
• Rinse with warm water.
• The result will be smooth and nourished skin with a healthy sheen.
• You can also make a very nourishing mask that will serve to moisturise and soften the skin on your face,
give shine to hair and prevent frizz.
• Take a very ripe avocado. Cut it in half, remove the stone and scrape the flesh into a bowl.
• Mash, and if you have very dry skin add olive oil.
• With a soft brush, apply the mask all over your face, avoiding the eye area and lips.
• Allow to be absorbed for 20 minutes to take effect. If you notice itching or any other reaction, remove
it immediately. Some natural products can also cause allergies.
• You can apply the same mixture to your hair.
• Remove the mask with warm water.
• If you’re prone to dry lips from being in windy or cold weather, rub them with a toothbrush to
exfoliate, removing dead skin. Then apply honey with a lip brush and leave on for 20 minutes. When
you remove the honey your lips will be nourished and healthy.
4.3 Hair colour and style
When advising the bride and groom on the hairstyles and hair colour for the wedding day, keep in mind the
following:
Which shades enhance which skin types & which colours don‘t work
Colours not only make life beautiful, they also bring change. This applies especially to hair color. If you want
to get a new look, there are many possibilities. However, not every hair shade suits every type of colouring.
Spring colour type
• Skin: The skin is bright and clear, it shimmers golden-yellow or peachy. The spring type has slightly red
cheeks and is very often prone to freckles.
• Eye colour: The color is bright and ranges from light blue to green, often with golden spots in the iris.
• Hair Colour: The hair is usually blonde, but there are also dark-haired or red-haired spring types. A
spring type inherently has a golden glow in the hair.
11
The colours that suit spring types:
• Choose warm colors. Golden blonde, honey blonde, golden brown, copper, golden red and warm bright
reds like strawberry blonde or warm, light to medium browns are ideal.
The colours that don‘t suit spring types:
• Avoid ash shades
• Don’t choose dark colours
Summer colour type
• Skin: The skin of the summer type looks bright and delicate and has a bluish to purple skin undertone.
• Eyes: The eyes are blue, blue-green, blue or gray-green and brown tones with a light blue, gray or green
glow.
• Hair Color: By nature, the summer type is blond or brunette with an ashy tone which sometimes seems
a little lacklustre.
The colours that suit summer types:
• Cool colours like ash blonde, ash brown or platinum blonde
• Red colours should have a bluish undertone, such as bordeaux or violet
This colours that don‘t suit summer types:
• Don‘t use warm reds such as mahogany, copper or golden hair shades.
Autumn colour type
• Skin: The skin may be very bright but also has a dark bronze shimmer and always has a yellowish-
golden undertone. This skin type often has freckles. The autumn skin type is comparatively rare - but is
also found in people of African, Asian and Southern European descent.
• Eyes: The eyes are brown with tones of all shades of green, blue or turquoise. Rarely, clear, bright blue
eyes occur in this type.
• Hair color: It is characterised by light to dark brown hair tinged with red or red hair with shades from
copper to mahogany.
The colours that suit autumn types:
• Hair color with warm red and copper tones
• Also suitable are all warm shades of brown, like auburn and chestnut
• If the your client has blonde hair, choose a golden blonde
• You can also choose highlights in blonde, gold or copper red
The colours that don‘t suit autumn types:
• All ash tones
• Clear blond colour or highlights look unnatural
12
Winter colour type
• Skin: The skin can be dark to very bright, often with a slightly greenish shimmer through the veins. In
most cases, the skin has a cool-bluish undertone. The winter type is a particularly common colour type
globally. Many Africans, Asians and Southern Europeans belong to this group.
• Eye colour: clear eyes in dark brown, gray, ice blue or deep green, clearly defined from the white of the
eye.
• Hair Color: The natural hair color is black to blue-black, dark or brown.
Colours that suit winter types:
• Blue-black, mahogany, aubergine or ash shades
Colours that don’t suit winter types:
• Yellowish-golden shades
• A lightening of the hair would lead to an unattractive, yellow-copper tone.
• Also, do not use highlights as these are usually reddish.
Colour type determination
Find out skin tone by taking the hair back and putting a white towel around neck and shoulders. Look in the
mirror: is the clean face yellowish? Then you have a warm complexion. If it looks slightly bluish, it's a cool
shade.
Which shape/style of hair suits which face shape?
The shape of your client’s face and head are unique. Use your observation skills to identify their individual
features. You should take these factors into account when you are helping a client to choose a hairstyle.
Here are some examples of how you can use particular cuts to disguise facial features:
1. Oval: The Ideal of all face shapes in men and women. Both soft and blunt. Oval faces are characterized by the fact that they are slightly wider at the cheekbones than the forehead or chin line. Most hair styles suit this balanced shape of face and it can carry either short or long styles. One good hairstyle for the oval face is a short crop which does not to work so well with other face shapes.
2. Square: The square face has a wide forehead and a pronounced, wide jawline. Narrower faces appear a more stretched shape, wider ones more square. In the latter, longer hair suits, with more volume on top and less on the sides. They can also wear a side pony and light, inward moving waves around the chin to give softer contours. For narrower faces, curly hairstyles can give the face more balance.
3. Triangle: Triangle faces have a narrow forehead and wide chin or a strong jawline. This face shape is well suited for shorter hairstyles with lots of volume. Short, wedge hairstyles with curls and volume on top balance out this face shape
4. Inverted Triangle: This face shape is characterised by a wide forehead and a narrower jaw line and chin. A hairstyle with front or side bangs and blunt-cut hair that ends at or just below the chin suits this face shape. Curls or waves can help the face to look wider at the narrow places of the face.
5. Round: A round face has little or no defined lines, full cheeks and softer "corners" along the jaw line and the forehead. With this face shape, it is important to stretch the face. A stepped section with maximum volume on top and minimum volume on the sides is a great way to make the face appear longer.

13
Instructions
• Traditionally, many brides wore their hair in a bun. Today, many still do, but there’s a wide range of
styles that are also very flattering for a bride. It’s important to style the bride’s hair to suit her and to
match the dress, the wedding party, theme and overall style of the event.
• Here, we’ll show you how to create an informal hairstyle with a headdress for straight hair. This style
can also be created with curly hair for a more romantic style.
• Firstly, prepare the hair by smoothing it with a dryer and a round brush, giving volume to the roots.
• Part the hair on the top and sides. Clip the top portion with a grip.
• Apply lacquer on the sides so the hair has more body and the style will last longer.
• With a boar brush, take back the left side and secure it with hair clips the same colour as the hair. A
boar brush is an essential tool when doing up styles.
• Do the same with the right side.
• Once the sides are pinned back, start back combing the crown area, layer by layer, applying lacquer to
each section.
• Brush all the hair to the left side, over the shoulder and clip well at the neck so that it remains in place.
• With a hot ceramic straightener, smooth each strand to close the hair cuticles and create shine.
• Use the straightener also to create soft curls with the fringe pieces.
• Now that you’ve created the style, finish it with strong lacquer. With the boar brush and wet fingers,
put the finishing touches.
• Place the headdress on the side and secure with hairclips.
• This is an attractive, simple hairstyle for a bride who doesn’t want to wear her hair up. It especially
enhances the features of a round shaped face.
OTHER TIPS
The following are a few expert hits and tips when it comes to make up and hair care:
• To keep the face bright, here’s a really good natural tonic. Place slices of cucumber on your cleansed
face, preferably using a cucumber that’s straight out of the fridge. It will add water and the coolness
will activate the circulation in the face. You’ll find the skin smooth and soft all day.
• For lips - take a toothbrush with medium bristles, insert it into iced water for 30 seconds and then
gently brush the lips. This will remove dead skin and also improve circulation. To finish, apply lip balm
or cocoa butter.
• On the run up to the wedding if your client has bags under their eyes, here's a useful tip to do from the
comfort of their own home. Place slices of cucumber on their eyes and let them sit for several minutes
to reduce puffiness and dark circles.
• For hair – it’s important to nourish it well. You can make a mask with honey and yoghurt which will
moisturise it naturally. Apply all over your hair, allow to penetrate overnight then wash normally with
warm water. If you can tolerate cold water, all the better as it increases shine!
14
4.4 Nail care
Photos of the big day are going to be kept forever, keep in mind that there will be photos taken of the bride
and groom's hands to show their new wedding bands. A manicure is something that most brides will think
of but the groom should also take care of their hands prior to the wedding. Here are some recommendations
for caring for hands:
DRY SKIN
• Dry skin is characterised by the lack of elasticity in the skin especially on the back of the hands. Symptoms
are peeling on the knuckle area or the spaces between the toes. Often, especially in winter, small cracks
appear that can become painful. It is advisable to drink lots of water, moisturise the skin and protect it
from the cold.
LOOSE SKIN
• Loose skin is a typical feature of old age. You’ll notice a slight excess of skin on the back of the hand. It
has a soft feel and look. It is advisable to do hand exercises and apply creams that improve elasticity. It’s
unusual to find loose skin on the feet as they are more likely to swell and retain fluid.
PIGMENTED SKIN
• With age, spots can appear on our skin, both on the hands and the feet. Sun exposure or the use of
chemicals can also encourage the appearance of dark pigmentation such as freckles or spots of
considerable surface area. It is advisable to apply sunscreen with a high protection factor when in the
sun. There are skin lightening creams that soften these spots.
SENSITIVE SKIN
• The skin on our hands and feet may be sensitive to sun exposure or to repeated use of chemicals which
can lead to allergies, sometimes quite annoying ones. Sensitive skin is a thin skin.
• Red spots may appear. This is due to the rupturing of superficial capillaries. Stress and poor circulation is
usually behind this tendency. Sensitive skin may also have small bumps caused by contact allergies. It is
advisable to apply sun protection creams when in sunshine.
THICK SKIN
• This skin type usually occurs in manual workers. The hands look rough. Corns and calluses are typical in
thick skin. On hands, you’ll see it at the base of the fingers and on feet at the heels, on toes and on the
ball of the foot.
• Weathered hands are usually caused by many years of manual work and a lot of sun exposure. We can
smooth the rough edges or file with a pumice. Moisturisers are recommended.
Instructions
• We start by filing and cutting the nails. Here you see a glass nail file, emery board and manicure
scissors.
• Cut the nails with the manicure scissors. If you want a nail with a square end, cut straight across the
nail and then trim the edges. If you want a nail with a round finish, trim the nail starting at one side and
making a semicircle. Cut each nail one by one.
15
• File the nails to soften and shape the edges. The correct way to file the nail is from the edge into the
centre of the nail. Glass nail files are perfect for soft, brittle or scaly nails. For stronger or hard nails you
can use a granulated file. Here we’re using a glass one.
• Place your hands in a bowl of neutral pH soap and warm water. Soak your hands for about 7 to 10
minutes. If the nails are brittle or soft, reduce the time by 5 minutes. Dry your hands with a towel.
• With an orange stick, remove excess filing powder, product or debris that may be under the nail. Clean
the orange stick with the towel.
• Apply cuticle product that will make the removal easier. Leave on for two minutes. You can do this
holding the orange stick sideways.
• With the orange stick, gently draw the cuticle back, nail by nail. Remove excess cuticle product with the
towel. If necessary, trim the excess skin of the cuticle, removing it with the manicure scissors.
• Apply moisturiser on the cuticle and leave on for about two minutes, massaging the cuticle area.
• Polish the nails with the 4 sided polisher. On each face of the prism there is a number. Start with the
side marked number one and finish with the side that says 4. It consists of several files with different
size grain, 1 to 3, and a smooth surface for polishing and shining on number 4.
• With the first three sides, file the surface of the nail, working in one direction only, not in circles, from
side to side or up and down. These three faces of the polisher help to leave a smooth, uniform finish
without striations on the nails. With side 4, polish with a firm, rapid motion to enhance the natural
shine of the nail.
• Apply more hand cream and massage the hands.
• Remove excess cream from the nails with the towel and add polish to the nails. Apply polish on the nail
from the centre to the sides.
Instructions
Demonstration Tutorial
• Place the feet in a bowl of warm water with PH neutral soap. Soak for 7-10 minutes. Dry the feet with a
towel.
• Cut the nails straight with the pedicure pliers. Toenails are thicker than fingernails and pliers help you
cut straight and smoothly. If you cut them rounded, the nails tend to cut into the skin on the sides and
this is uncomfortable and painful.
• File the nails with a coarse file, using a sideways movement.
• With an orange stick, remove excess filing powder, products or dirt that gathers under the nail (from
underneath the white part of the nail).
• Apply a cuticle remover product that will make it easier to remove. Leave for two minutes.
• With an orange stick, gently push the cuticle back, one nail at a time.
• If necessary, trim the excess skin of the cuticle, removing it with small pliers or nail scissors. Remove
excess cuticle product with the towel.
• Apply moisturiser on the cuticle and leave on for about two minutes while massaging the cuticle area.
• There are areas of the feet that are dry and rough. They usually appear on the ball of the foot and the
heel. There are also thick areas of skin on the lateral side of the foot.
• These areas need to be smoothed. For this you use the metal sandpaper and go over the parts that
have roughness or thickness. You do this by performing lateral movements.
• You also go over these areas with the file.
16
• Take the pumice and wet it. Again, go over the rough or thick areas of skin energetically.
• Polish the nails with the four sided polisher. On each face of the prism there is a number. Start with the
side marked number one and finish up with the side that says 4. Each side has a different grit size, 1 to
3, and a smooth surface for polishing and shining - number 4.
• With the first three sides, file the surface of the nail and file only in one direction, not doing circles,
from side to side or up and down. These three sides of the polisher help to leave the nails smooth and
uniform without striations on the nails.
• With side four of the polisher, do a strong and rapid friction to bring out the natural shine of the nail.
• You can also smooth the top layers of the nail with a low power lathe. You start with the thicker file
head and finish with the finest. You need to be careful and not let the lathe head rest on the nail. Do a
smooth and uniform motion from side to side on the nail.
• Next, apply a foot cream and massage the feet.
• Remove excess foot cream with a towel and put the toe separator in place. This helps to paint the nails
without smudging.
• Apply nail polish. In this case we use transparent polish.
• If dealing with nail disorders keep in mind the following recommendations for your clients:
SLOW GROWTH OF THE NAILS
• A normal nail grows between 3mm and 4mm per month. This is a little slower in childhood than in
adulthood. Factors such as poor diet lead to slow growth. By filing and buffing you activate growth, so it
is usually recommended to file nails regularly. You can also apply a gel activator. It's like a clear enamel.
This gel will help the nail grow faster.
BRITTLE OR SCALY NAILS
• This type of nail layers and is characterised by a longitudinal split or flaking off in thin layers.
• It’s usually caused by dehydration in the nail – a low moisture content alters the condition of the nail.
• The nails absorb water quickly, but also lose it quickly, particularly those who work with their hands in
water often. Therefore it is advisable to use gloves. It is a typical symptom of housewives, waiters, cooks
or cleaners. It helps to drink lots of water and apply specific moisturising products. The ingredient
ceramide protects nails and prevents breaking.
DISCOLOURED OR SPOTTED NAILS
• Spots are usually produced because of materials used in the workplace or from habits like smoking which
causes nails to turn yellow. Nail polish is usually recommended with 4-sided polishing to remove the top
layer of the nail that is discoloured. Vitamin C also performs the function of antioxidant and even restores
natural colour. It is a good idea to eat foods rich in this vitamin.
BRITTLE OR SOFT NAILS
• Brittle or soft nails are thin and bend easily. This may be due to a lack of keratin or from aggressive
cleaning products in the work environment. For these nails, apply a layer of product containing nail
keratin which you’ll find in the pharmacy. This treatment will help the nails to thicken and become more
resilient. Polishing is not advisable for this type of nail.