Embed Size (px)
Citation preview
WebSphere Message Broker Version 7.0.0.1
Pattern Authoring Lab 1
Creating a Basic Pattern
September, 2010
Version 1.0
Hands-on lab built at product Code level Version 7.0.0.1

WebSphere Message Broker V7.0.0.1 Patterns September 2010
Page 2 Pattern Authoring Lab 1 – Basic Introduction
1. Introduction to Pattern Authoring WebSphere Message Broker Version 7 introduced the capability to create message flows using a pattern-based approach, based on a set of IBM-supplied patterns. Fixpack 1 (also known as version 7.0.0.1) extended this facility by allowing you to create your own patterns. This hands-on lab is the first of several labs which show you how to create your own patterns. It starts by taking a simple message flow (an exemplar) and creating a pattern based on this flow. Later labs show you more sophisticated tools that you can use to refine your patterns.
2. Creating your new Pattern
1. If not already started, start the message broker toolkit by clicking its icon in the quick launch toolbar, or on the desktop. Use the pre-set workspace, TSS. If there are any artefacts already in the workspace, delete them all (you can select multiple projects with Ctrl-click). Import the project interchange file PatternAuthBasic_Exemplar.zip. (File, Import, Other, Project Interchange). This PI file is stored in the directory c:\tss\patterns. Select the Transform project; this will load the Transform message flow.
2.
WebSphere Message Broker V7.0.0.1 Patterns September 2010
Page 3 Pattern Authoring Lab 1 – Basic Introduction
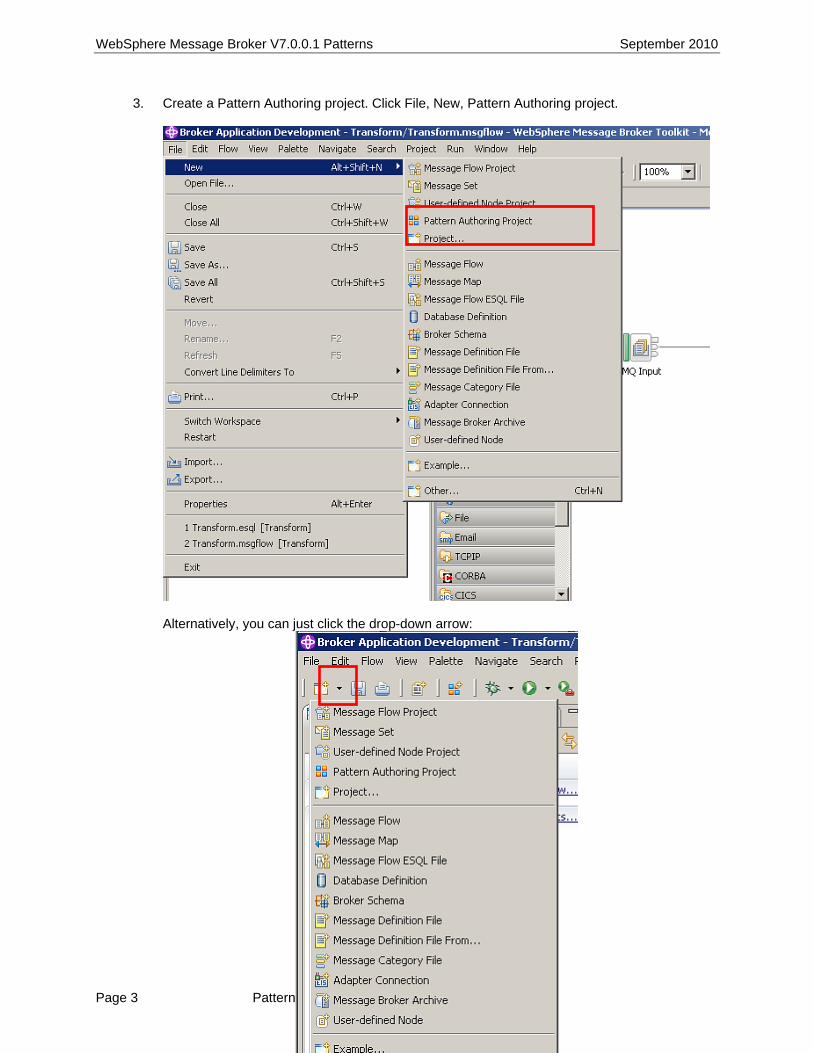
3. Create a Pattern Authoring project. Click File, New, Pattern Authoring project.
Alternatively, you can just click the drop-down arrow:
WebSphere Message Broker V7.0.0.1 Patterns September 2010
Page 4 Pattern Authoring Lab 1 – Basic Introduction
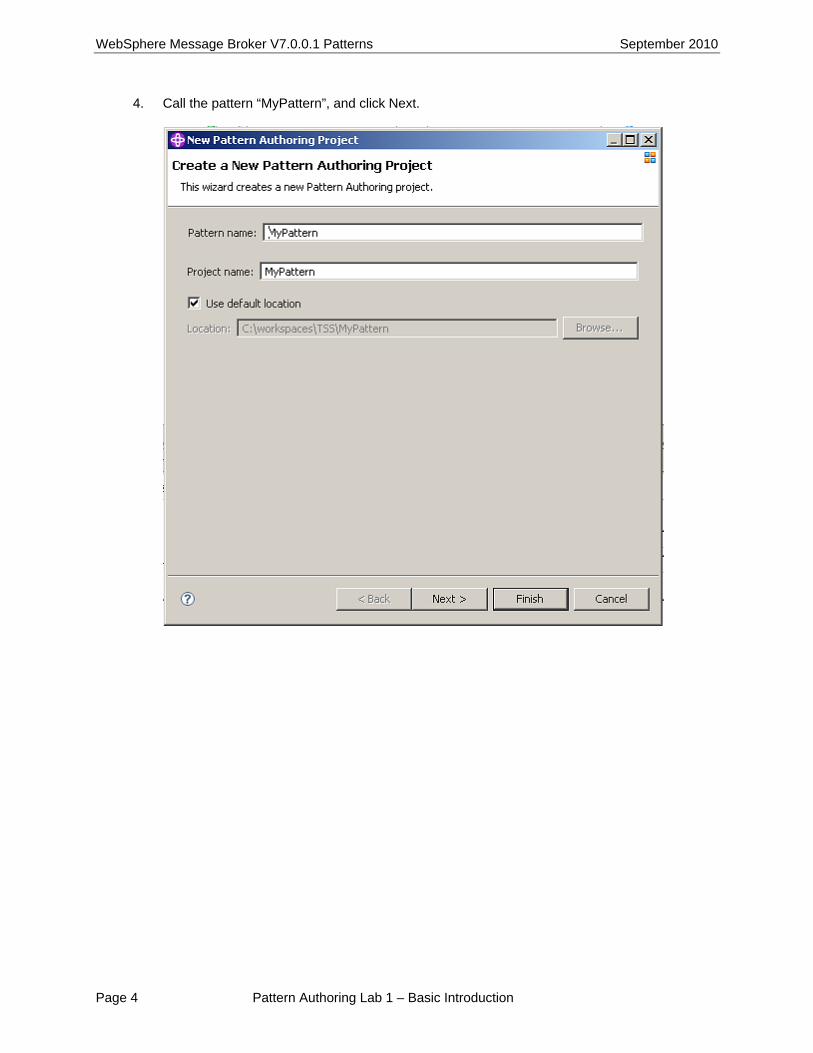
4. Call the pattern “MyPattern”, and click Next.

WebSphere Message Broker V7.0.0.1 Patterns September 2010
Page 5 Pattern Authoring Lab 1 – Basic Introduction
5. Select the required message flow project….. Transform, and click Finish.
WebSphere Message Broker V7.0.0.1 Patterns September 2010
Page 6 Pattern Authoring Lab 1 – Basic Introduction
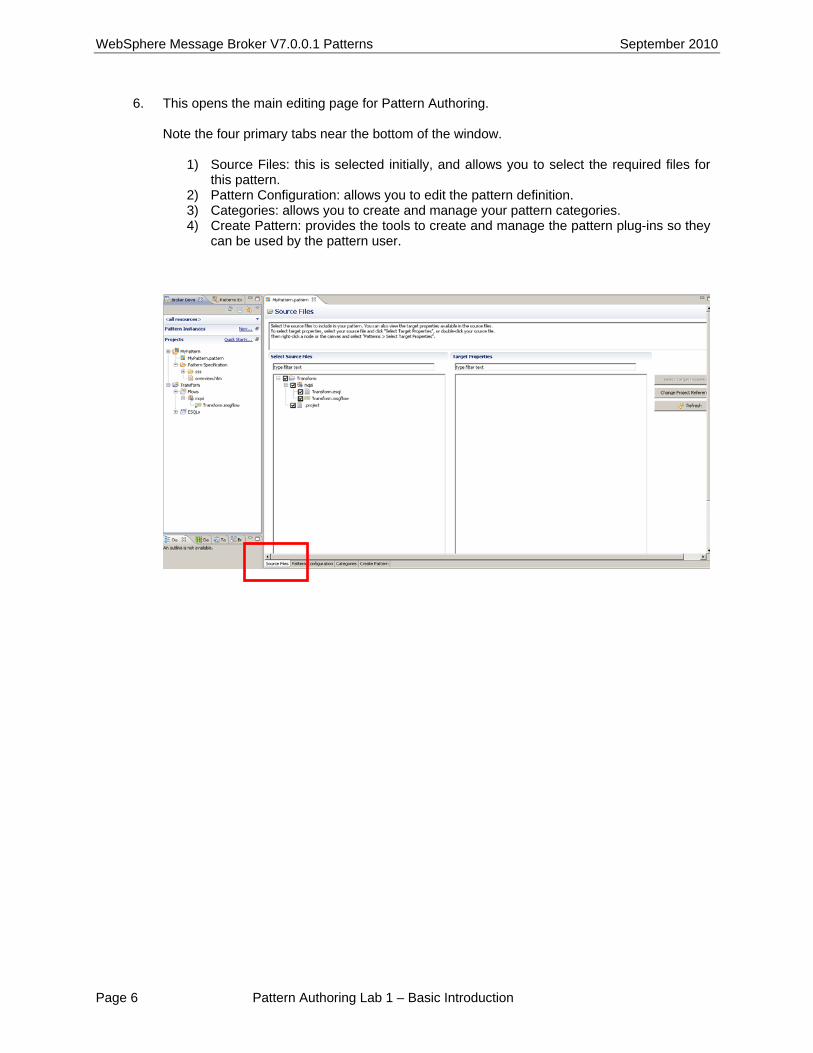
6. This opens the main editing page for Pattern Authoring. Note the four primary tabs near the bottom of the window.
1) Source Files: this is selected initially, and allows you to select the required files for this pattern.
2) Pattern Configuration: allows you to edit the pattern definition. 3) Categories: allows you to create and manage your pattern categories. 4) Create Pattern: provides the tools to create and manage the pattern plug-ins so they
can be used by the pattern user.

WebSphere Message Broker V7.0.0.1 Patterns September 2010
Page 7 Pattern Authoring Lab 1 – Basic Introduction
7. Now select the Transform.msgflow editor tab, and return to the flow editor.
8. Right-click the MQInput node, and select Pattern -> “Select Target Properties”.

WebSphere Message Broker V7.0.0.1 Patterns September 2010
Page 8 Pattern Authoring Lab 1 – Basic Introduction
9. Expand the Basic group, and select the “Queue Name” as a target property.
Then close the Target Properties dialogue pop-up, by clicking on the cross (top right).
10. Note that the message flow MQInput node now shows the “Pattern Authoring” icon close to the node itself. This indicates that at least one property of this node has been selected as a Target Property for pattern authoring. You can click directly on this icon to reopen the Target Properties editor.
WebSphere Message Broker V7.0.0.1 Patterns September 2010
Page 9 Pattern Authoring Lab 1 – Basic Introduction
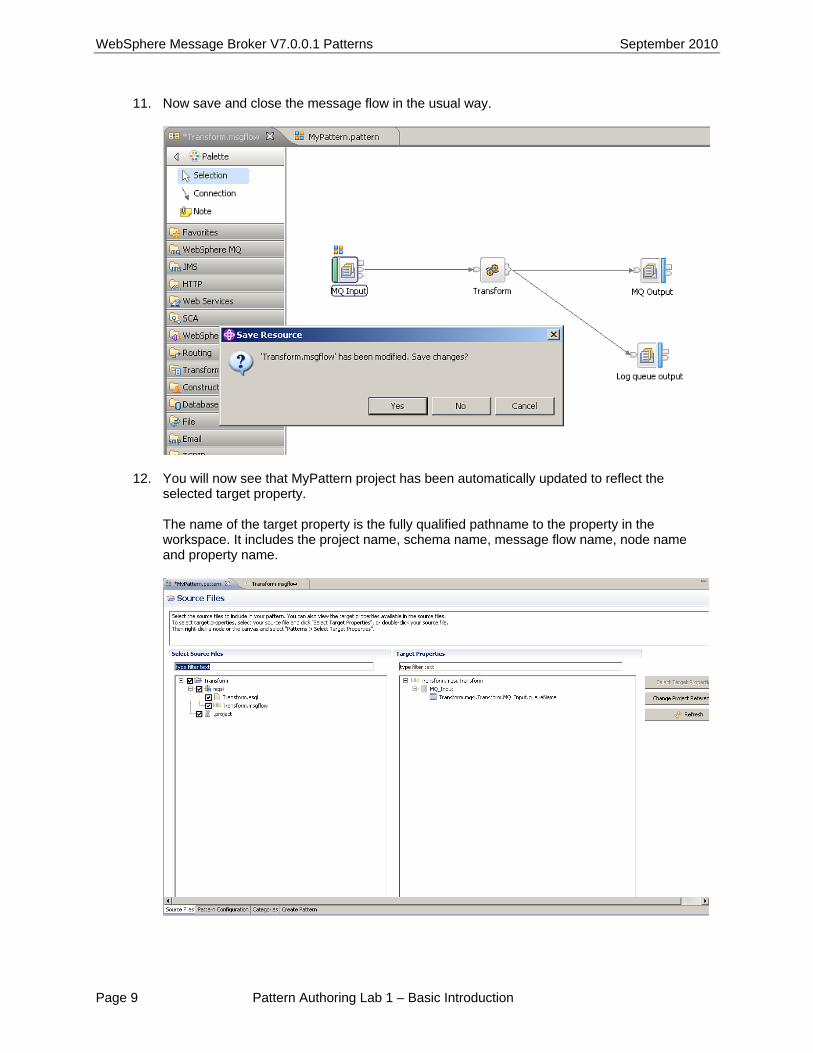
11. Now save and close the message flow in the usual way.
12. You will now see that MyPattern project has been automatically updated to reflect the selected target property. The name of the target property is the fully qualified pathname to the property in the workspace. It includes the project name, schema name, message flow name, node name and property name.

WebSphere Message Broker V7.0.0.1 Patterns September 2010
Page 10 Pattern Authoring Lab 1 – Basic Introduction
13. Now select the “Pattern Configuration” tab. Here, we are going to configure the user interface for the pattern. A pattern parameter has been automatically created for the target property. The pattern parameter has been added to a group whose name matches the node.

WebSphere Message Broker V7.0.0.1 Patterns September 2010
Page 11 Pattern Authoring Lab 1 – Basic Introduction
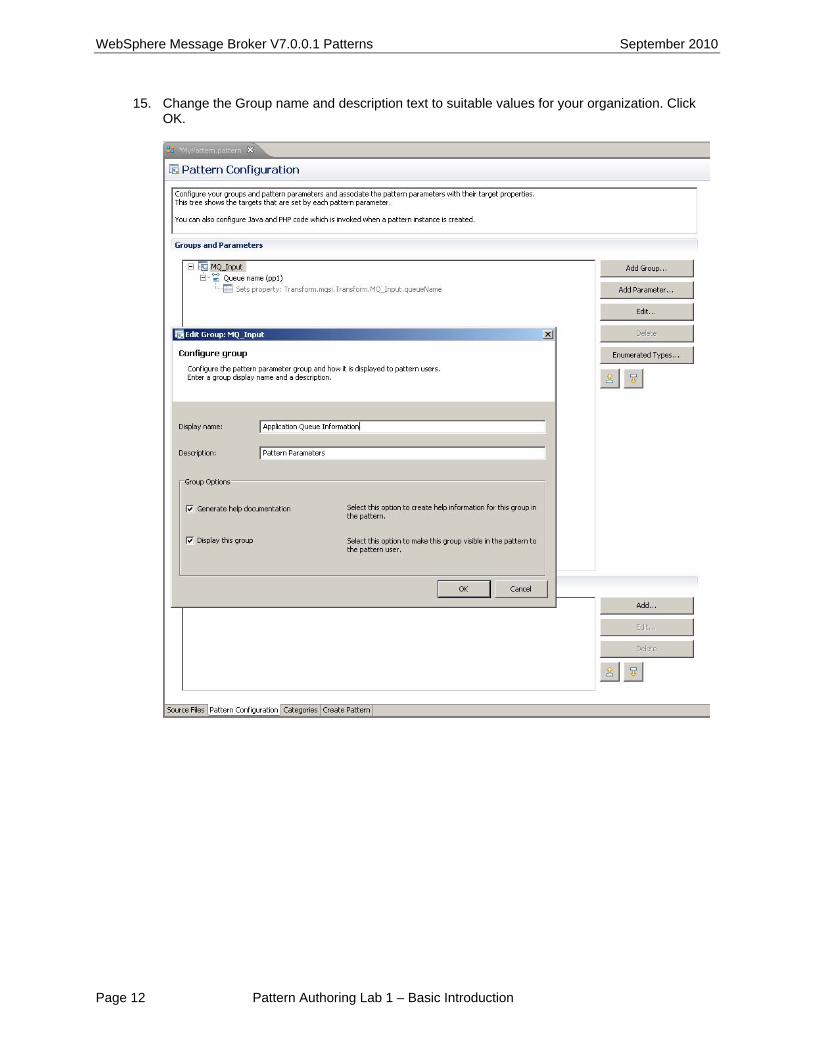
14. Select (highlight) the MQ_Input group, and the click the Edit button
WebSphere Message Broker V7.0.0.1 Patterns September 2010
Page 12 Pattern Authoring Lab 1 – Basic Introduction
15. Change the Group name and description text to suitable values for your organization. Click OK.

WebSphere Message Broker V7.0.0.1 Patterns September 2010
Page 13 Pattern Authoring Lab 1 – Basic Introduction
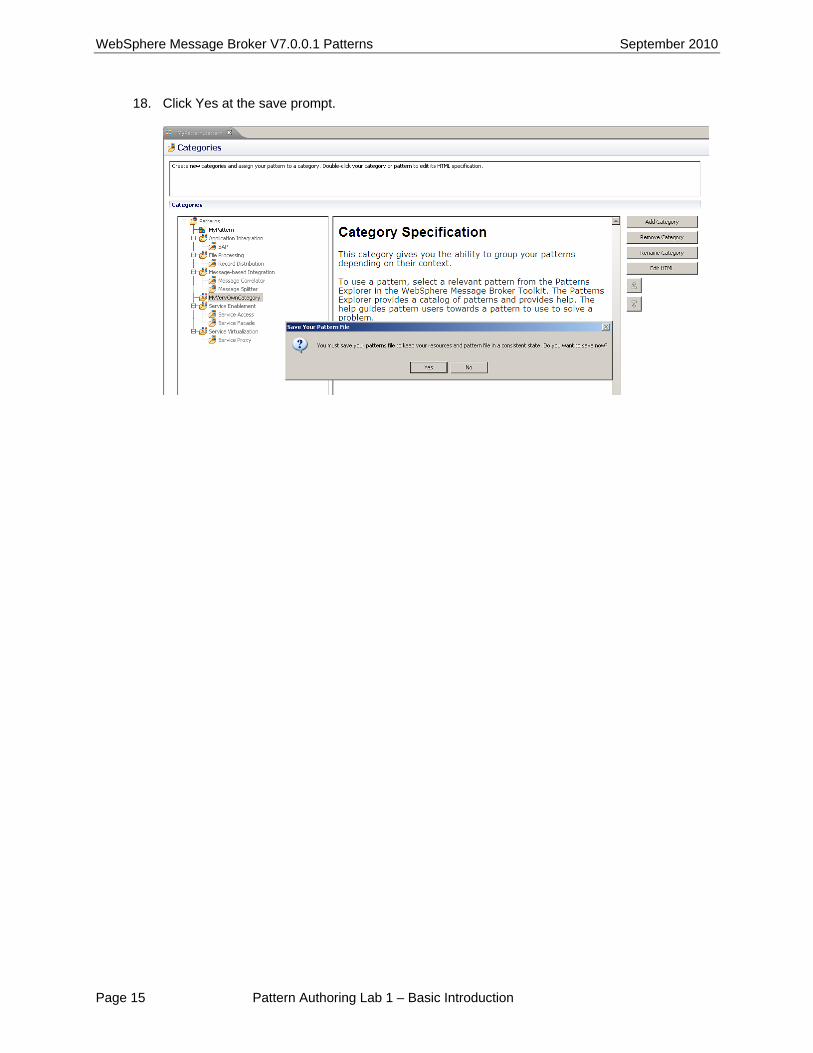
16. Now move on to the Categories tab. This page of the Pattern Authoring editor is where you create additional pattern categories. You also choose the category for this new pattern. The tree shows all of the categories that are currently available. The page also shows the pattern specification for the selected pattern. Pattern specifications describe the pattern, any constraints and limitations, and when to use it. The specifications are HTML files which you can edit directly. To ensure you see all the available buttons, you should maximize the editor (double-click the “MyPattern.pattern” tab).

WebSphere Message Broker V7.0.0.1 Patterns September 2010
Page 14 Pattern Authoring Lab 1 – Basic Introduction
17. Click “Add Category”, and choose a name for your new category (eg. MyVeryOwnCategory). Click OK.
WebSphere Message Broker V7.0.0.1 Patterns September 2010
Page 15 Pattern Authoring Lab 1 – Basic Introduction
18. Click Yes at the save prompt.

WebSphere Message Broker V7.0.0.1 Patterns September 2010
Page 16 Pattern Authoring Lab 1 – Basic Introduction
19. Now drag and drop the new pattern onto the new category. Before:
After:
WebSphere Message Broker V7.0.0.1 Patterns September 2010
Page 17 Pattern Authoring Lab 1 – Basic Introduction
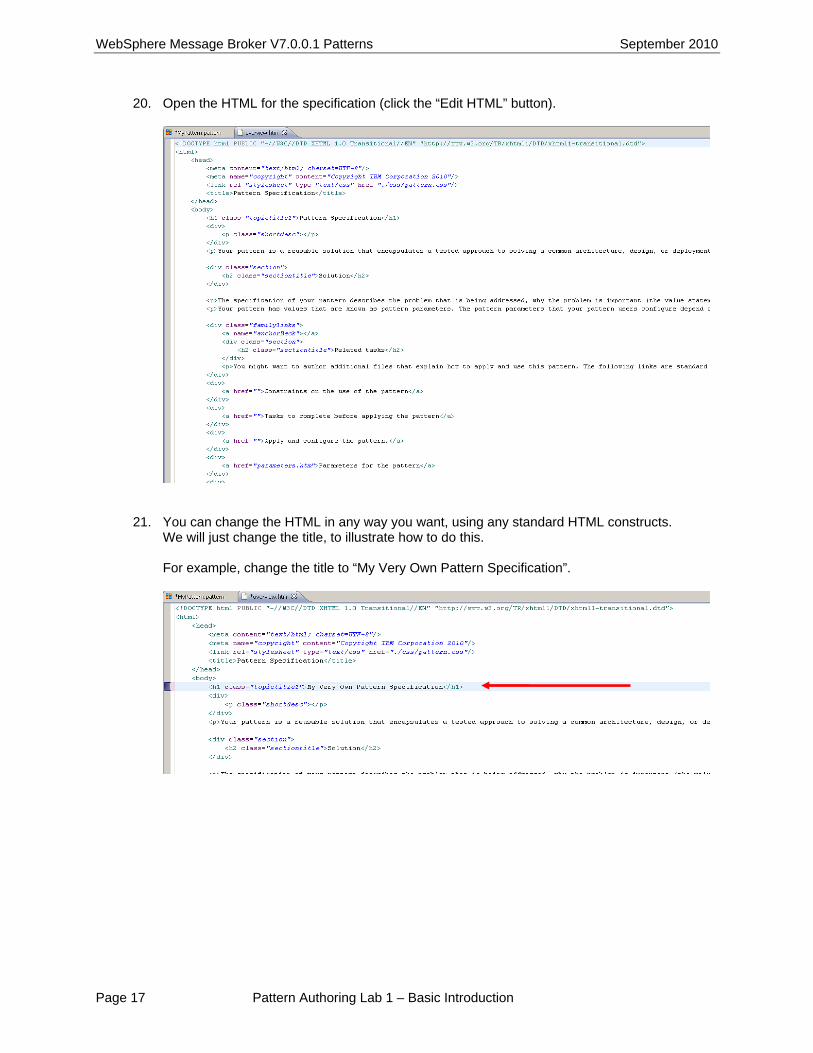
20. Open the HTML for the specification (click the “Edit HTML” button).
21. You can change the HTML in any way you want, using any standard HTML constructs. We will just change the title, to illustrate how to do this. For example, change the title to “My Very Own Pattern Specification”.

WebSphere Message Broker V7.0.0.1 Patterns September 2010
Page 18 Pattern Authoring Lab 1 – Basic Introduction
22. Save and close the HTML file. The pattern specification has been edited and saved. The Pattern Authoring editor has automatically updated the preview.

WebSphere Message Broker V7.0.0.1 Patterns September 2010
Page 19 Pattern Authoring Lab 1 – Basic Introduction
23. Now we must create the pattern plug-ins. Select the “Create Pattern” tab at the bottom of the editor. A pattern is implemented by two Eclipse plug-ins which are created by the pattern authoring tools. You can customize the plug-ins on this page. For example, you might want to change the provider, description, or version number.

WebSphere Message Broker V7.0.0.1 Patterns September 2010
Page 20 Pattern Authoring Lab 1 – Basic Introduction
24. In this exercise, we will not make any changes. Click the “Create Pattern Plug-ins” button. You will see a progress pop-up:

WebSphere Message Broker V7.0.0.1 Patterns September 2010
Page 21 Pattern Authoring Lab 1 – Basic Introduction
25. When the build process is complete, return to window-mode in the Eclipse workbench (double-click the MyPattern.pattern tab). Two plug-ins have been created in the workspace. These plug-ins implement this pattern. You can export these plug-ins and distribute them to pattern users who can load them into their Toolkit. You can test the pattern by launching a second instance of the Message Broker Toolkit. Click the “Launch Workbench” button. This may take a few moments to start up.

WebSphere Message Broker V7.0.0.1 Patterns September 2010
Page 22 Pattern Authoring Lab 1 – Basic Introduction
26. During the workbench start-up, you will see this splash screen.
27. When the workspace selection window opens, take the suggested default, and click OK.

WebSphere Message Broker V7.0.0.1 Patterns September 2010
Page 23 Pattern Authoring Lab 1 – Basic Introduction
28. This is the second instance of the Message Broker Toolkit. Select the Patterns Explorer view includes the pattern we have just created, under the new category (MyVeryOwnCategory).
29. Create a new instance of the pattern. click “Create New Instance”. Provide a suitable name for the new instance, then click OK.

WebSphere Message Broker V7.0.0.1 Patterns September 2010
Page 24 Pattern Authoring Lab 1 – Basic Introduction
30. Expand the Queue Information link. You will see that the field “Queue name” has been highlighted in pink. This means that it is a required parameter, and must be set before you can generate the new instance. When creating the pattern, you could have provided a default value for this property, and more detailed help to guide the pattern user. (We will examine this in a further exercise). Set a value for the QueueName property, then click “Generate”.
31. You will see a progress pop-up.
WebSphere Message Broker V7.0.0.1 Patterns September 2010
Page 25 Pattern Authoring Lab 1 – Basic Introduction
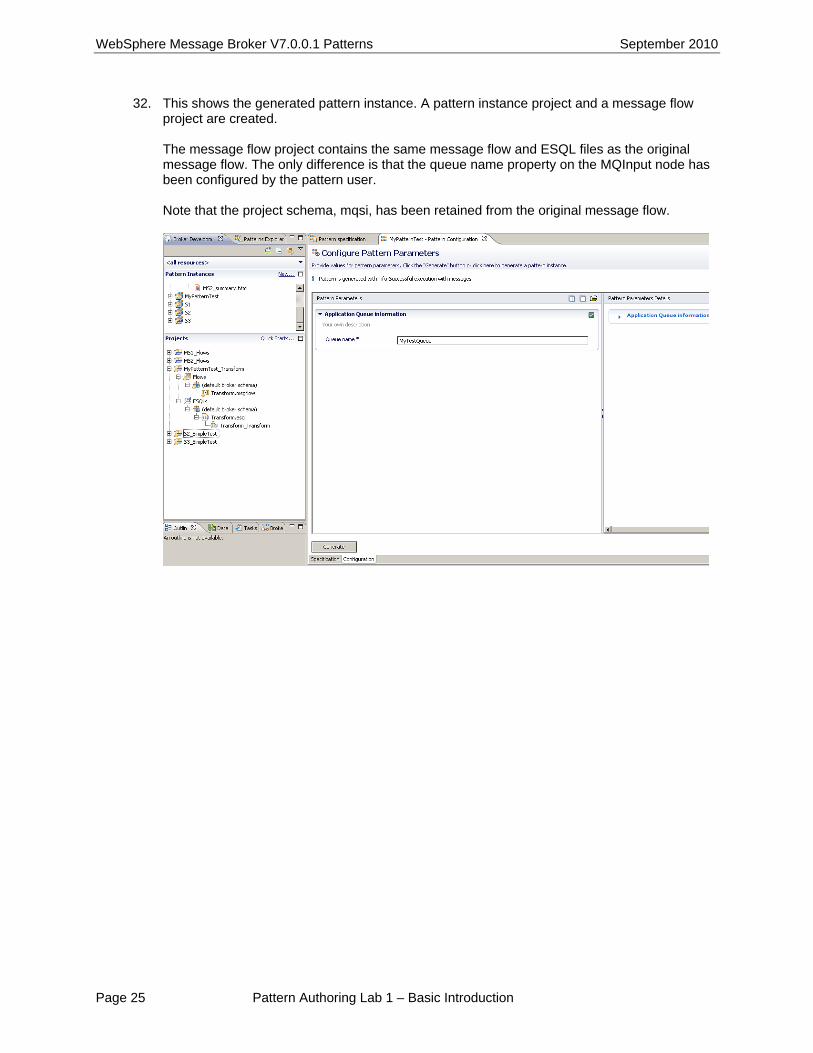
32. This shows the generated pattern instance. A pattern instance project and a message flow project are created. The message flow project contains the same message flow and ESQL files as the original message flow. The only difference is that the queue name property on the MQInput node has been configured by the pattern user. Note that the project schema, mqsi, has been retained from the original message flow.
WebSphere Message Broker V7.0.0.1 Patterns September 2010
Page 26 Pattern Authoring Lab 1 – Basic Introduction
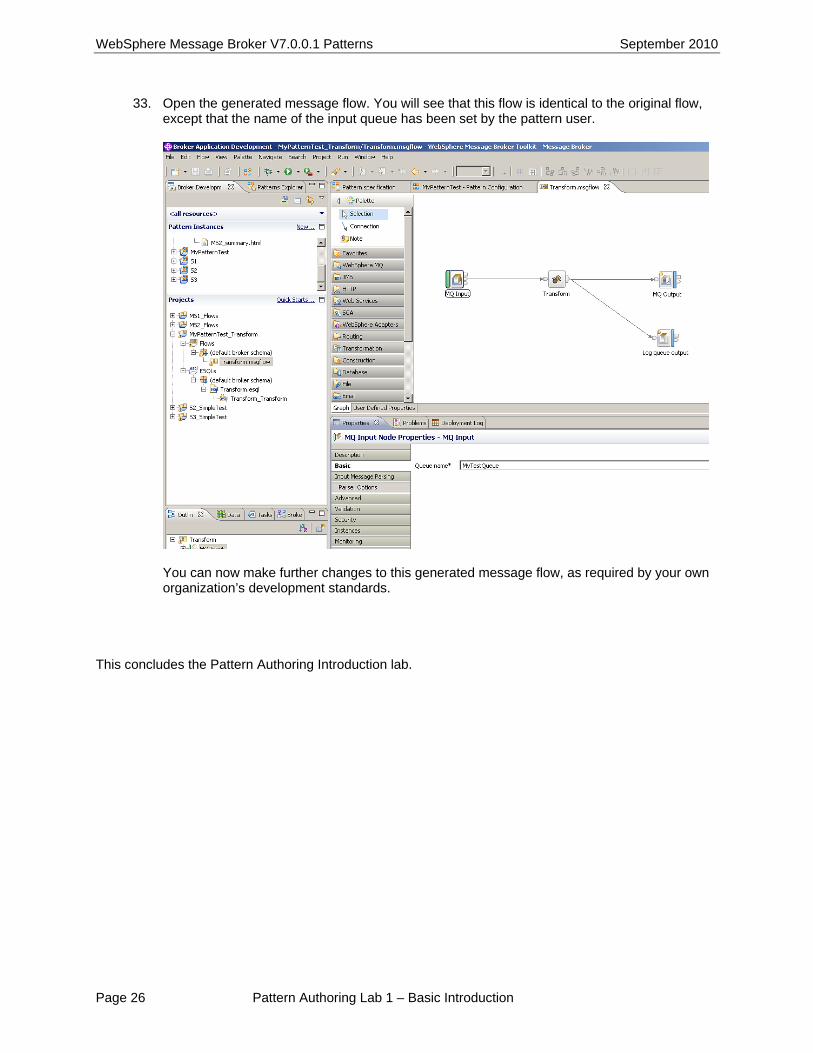
33. Open the generated message flow. You will see that this flow is identical to the original flow, except that the name of the input queue has been set by the pattern user.
You can now make further changes to this generated message flow, as required by your own organization’s development standards.
This concludes the Pattern Authoring Introduction lab.