Embed Size (px)
Citation preview
Jacob Levine & Ethan Redlich
November 2, 2017
Robotics CAD Challenge
The C-link
The C-link is a new vex part that will allow for c-channels to easily connect in multiple
ways that can be beneficial to making a chassis, tower, arm, etc. The C-link goes over the top of
a c-channel and can connect to another c-channel both perpendicularly and parallel. This can
open up a whole new way to build towers and chassis because it enables us to use less materials
and a simple piece to perform multiple functions. This can also be used to secure angle bars and
threaded beams across a robot easily. With this piece, no more cutting base-plates and angle bars
into small pieces to connect c-channels together. This piece is an all around great piece for many
functions in the robot. Our piece eliminates the clutter of screws in your designs and allows for a
cleaner way to design your robot.
Purpose
The purpose of the C-Link is to allow easy connections between multiple-channels. This
can help with creating big structure designs instead of using excess screws and small cut c-
channels/base plates. You can use the piece to connect 2 ends of a C-Channel together or the
sides of up to 4 c-channels interconnected by a single piece. You can also use this piece to
connect a C-Channel perpendicular to another C-Channel. Thirdly, you can use this piece to
connect 2 C-Channels parallel with one another along with a perpendicular C-Channel. The side
of the C-link is 2 by 3 holes side hanging off the top which allows easy connection for
perpendicular c-channels and other pieces to hang off one another.
Progress
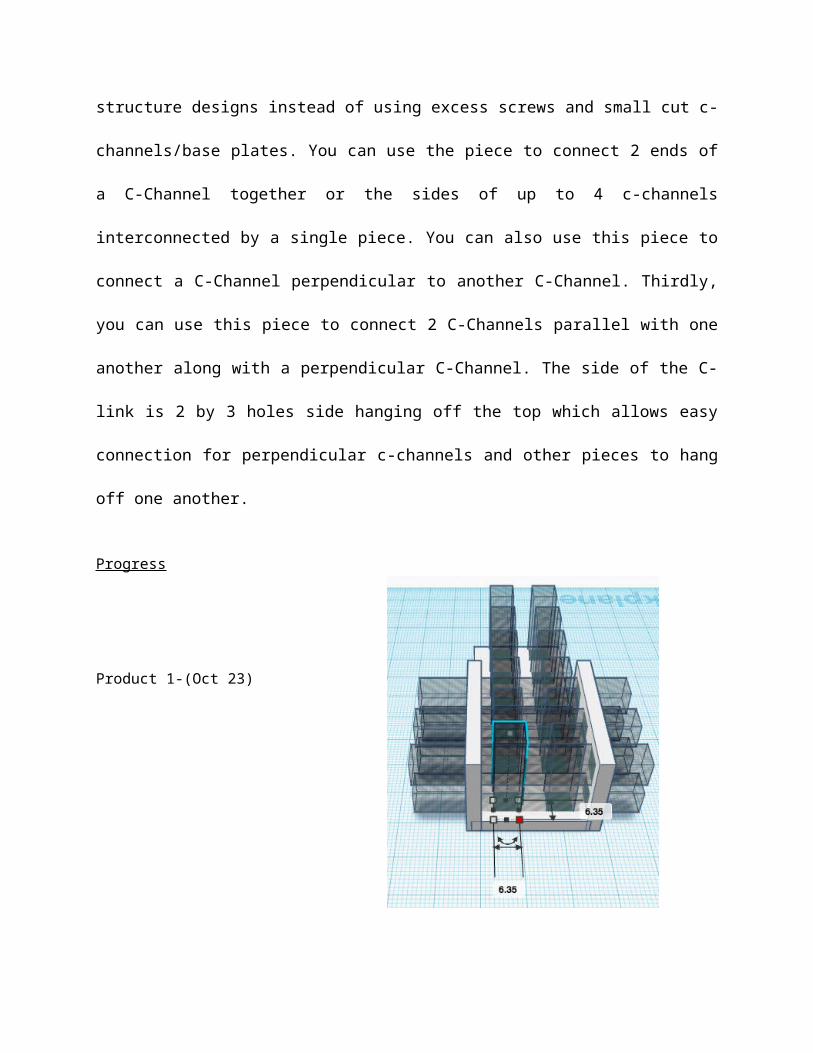
Product 1-(Oct 23)
Progress Update
These original designs for the C-
Link were made using measurements but
we forgot to account for the fact that the C-

Channel has to fit inside this C-Link and so it was too small for the C-Channel to fit in. These
measurements are in millimeters to be more exact for these small and minimal lengths but after
3-D printing are testing it with C-Channels, we went back to the drawing board on tinkercad.com
and expanded the C-Link with new measurements.
Product 2-(Nov 2)
Progress Update

We have obtained new measurements to add by subtracting the height difference when
the C-Channel was inside the prototype C-Link. We went back to tinkercad and changed it and
we are in the process of 3-D printing it and will test it once it is printed.
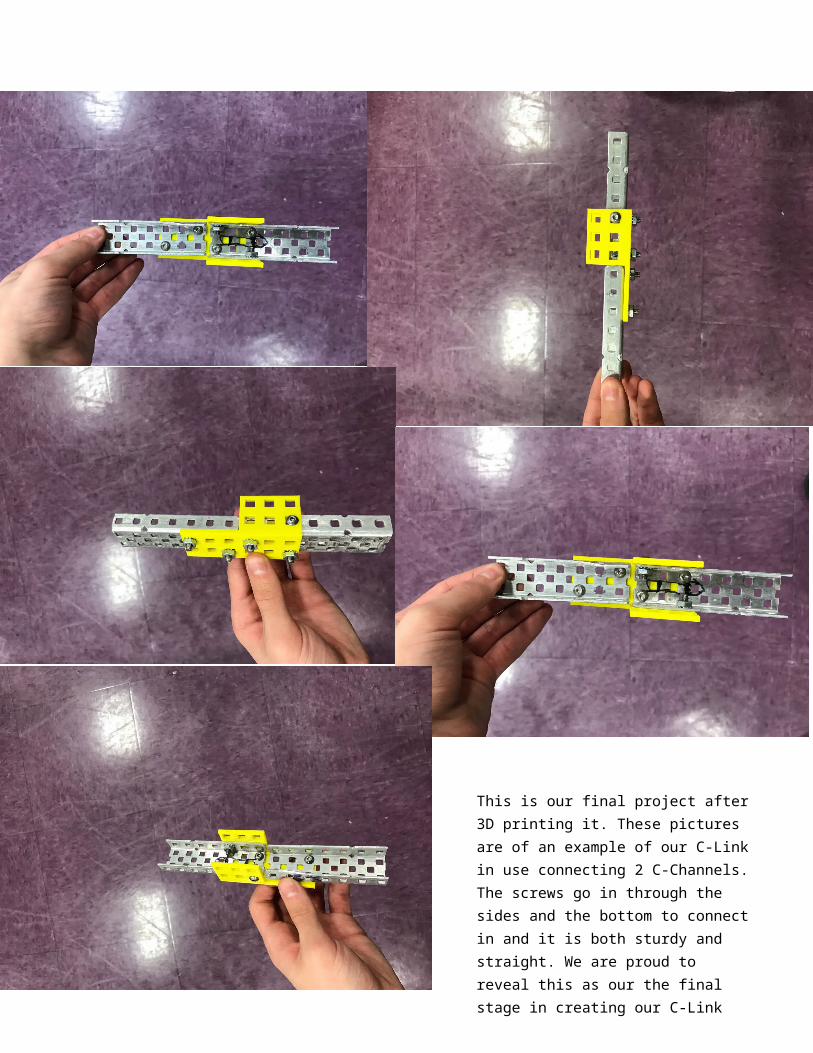
Product 3- (Nov 16)

This is our final project after 3D printing it. These pictures are of an example of our C-Link in use connecting 2 C-Channels. The screws go in through the sides and the bottom to connect in and it is both sturdy and straight. We are proud to reveal this as our the final stage in creating our C-Link