Embed Size (px)
Citation preview

VERIFONE OMNI 3300 & SC 550 OPERATING GUIDE
Technical Support: 1-877-777-6603
www.COLLECTIVEPOS.com
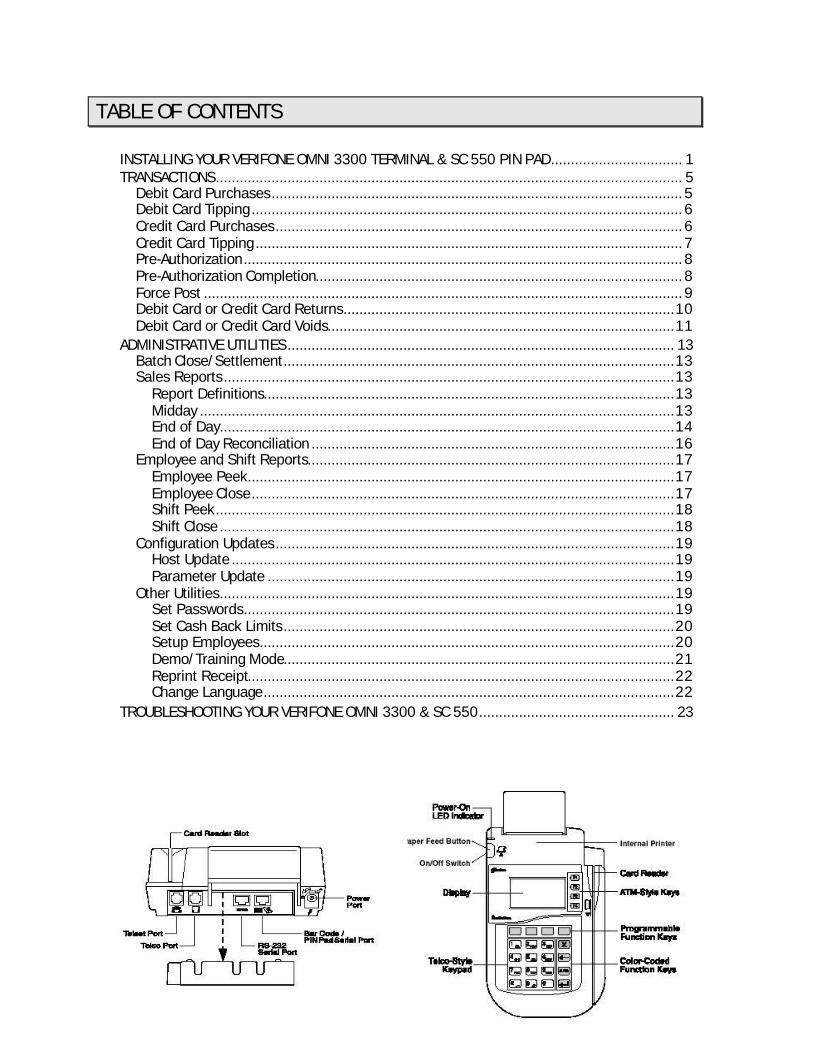
TABLE OF CONTENTS INSTALLING YOUR VERIFONE OMNI 3300 TERMINAL & SC 550 PIN PAD................................. 1 TRANSACTIONS..................................................................................................................... 5
Debit Card Purchases....................................................................................................... 5 Debit Card Tipping ............................................................................................................ 6 Credit Card Purchases...................................................................................................... 6 Credit Card Tipping ........................................................................................................... 7 Pre-Authorization.............................................................................................................. 8 Pre-Authorization Completion............................................................................................ 8 Force Post ........................................................................................................................ 9 Debit Card or Credit Card Returns...................................................................................10 Debit Card or Credit Card Voids.......................................................................................11
ADMINISTRATIVE UTILITIES ................................................................................................. 13 Batch Close/Settlement..................................................................................................13 Sales Reports.................................................................................................................13
Report Definitions.......................................................................................................13 Midday .......................................................................................................................13 End of Day..................................................................................................................14 End of Day Reconciliation ...........................................................................................16
Employee and Shift Reports............................................................................................17 Employee Peek...........................................................................................................17 Employee Close..........................................................................................................17 Shift Peek...................................................................................................................18 Shift Close ..................................................................................................................18
Configuration Updates....................................................................................................19 Host Update ...............................................................................................................19 Parameter Update ......................................................................................................19
Other Utilities..................................................................................................................19 Set Passwords............................................................................................................19 Set Cash Back Limits..................................................................................................20 Setup Employees........................................................................................................20 Demo/Training Mode..................................................................................................21 Reprint Receipt...........................................................................................................22 Change Language.......................................................................................................22
TROUBLESHOOTING YOUR VERIFONE OMNI 3300 & SC 550................................................. 23
VeriFone Omni 3300 Operating Guide
? Collective Logic Inc. & ? Collective Point of Sale Solutions Ltd.
CPOS Version 2.02 January 27, 2003
1
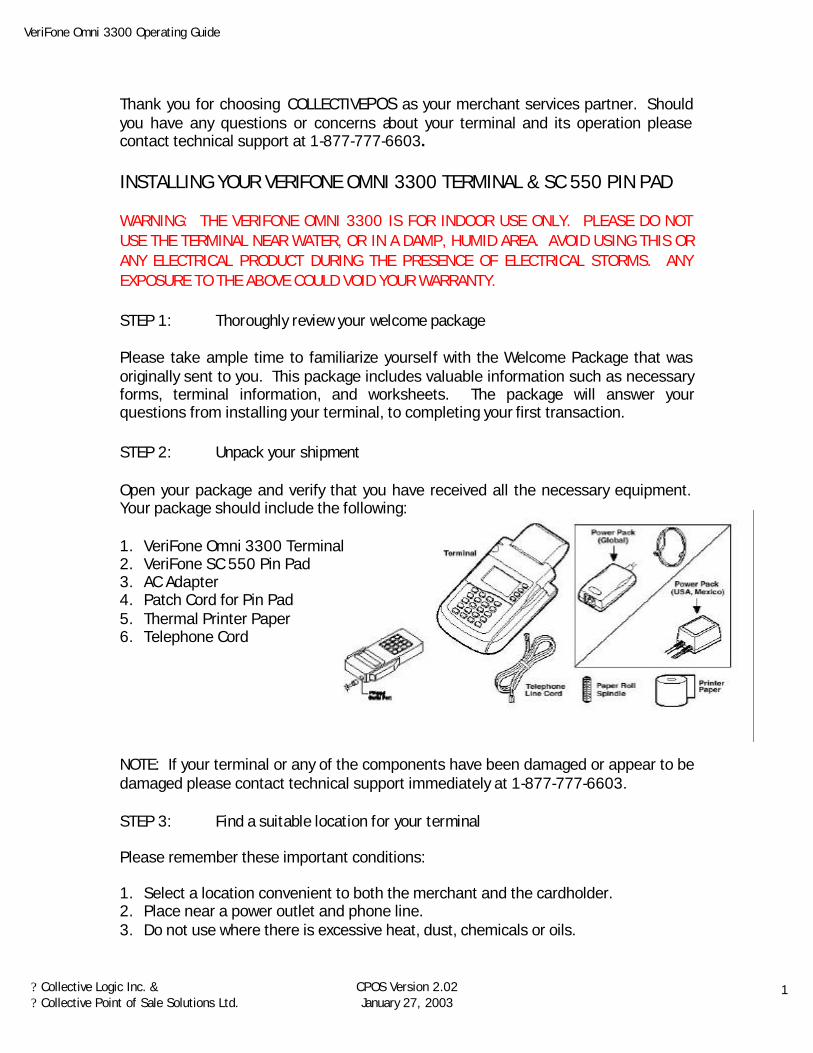
Thank you for choosing COLLECTIVEPOS as your merchant services partner. Should you have any questions or concerns about your terminal and its operation please contact technical support at 1-877-777-6603. INSTALLING YOUR VERIFONE OMNI 3300 TERMINAL & SC 550 PIN PAD WARNING: THE VERIFONE OMNI 3300 IS FOR INDOOR USE ONLY. PLEASE DO NOT USE THE TERMINAL NEAR WATER, OR IN A DAMP, HUMID AREA. AVOID USING THIS OR ANY ELECTRICAL PRODUCT DURING THE PRESENCE OF ELECTRICAL STORMS. ANY EXPOSURE TO THE ABOVE COULD VOID YOUR WARRANTY. STEP 1: Thoroughly review your welcome package Please take ample time to familiarize yourself with the Welcome Package that was originally sent to you. This package includes valuable information such as necessary forms, terminal information, and worksheets. The package will answer your questions from installing your terminal, to completing your first transaction. STEP 2: Unpack your shipment Open your package and verify that you have received all the necessary equipment. Your package should include the following: 1. VeriFone Omni 3300 Terminal 2. VeriFone SC 550 Pin Pad 3. AC Adapter 4. Patch Cord for Pin Pad 5. Thermal Printer Paper 6. Telephone Cord NOTE: If your terminal or any of the components have been damaged or appear to be damaged please contact technical support immediately at 1-877-777-6603. STEP 3: Find a suitable location for your terminal Please remember these important conditions: 1. Select a location convenient to both the merchant and the cardholder. 2. Place near a power outlet and phone line. 3. Do not use where there is excessive heat, dust, chemicals or oils.

VeriFone Omni 3300 Operating Guide
? Collective Logic Inc. & ? Collective Point of Sale Solutions Ltd.
CPOS Version 2.02 January 27, 2003
2
4. Do not use where there is excessive moisture or humidity. 5. Do not use near electrical appliances, these may cause voltage fluctuations or
electrical noise. (i.e. Air conditioners, electric motors, neon signs, computer equipment or security devices).
STEP 4: Connect a phone line to the terminal There are two possible connections for your phone line. The VeriFone Omni 3300 offers a pass through connection so that you can eliminate the use of a phone line splitter should you need to share the line between your terminal and a telephone set. At the left of the terminal’s back panel are two RJ11 type modular phone jacks. These are for connecting the terminal’s telephone lines. NOTE: Your terminal will only function properly on an analog line. A digital line may damage your equipment. Pass-through Connection: Both the first and the second port are used for a pass-through connection. In this setup, the terminal will share a phone line with a telephone set.
Use this port to connect a telephone set to your terminal. Use this port to connect your terminal to a telephone wall jack.
Connect the telephone set to the port identified with a telephone shaped icon and connect the other port (identified by a phone jack icon) to the wall jack provided by the telephone company. NOTE: In this setup the telephone line will be busy during usage (purchases and downloads).

VeriFone Omni 3300 Operating Guide
? Collective Logic Inc. & ? Collective Point of Sale Solutions Ltd.
CPOS Version 2.02 January 27, 2003
3
Direct Connection In this configuration the telephone line runs directly from the wall into the telephone port (identified by a phone jack icon) and the telephone set port is left empty. With a direct connection the phone line is dedicated to the terminal. WARNING: IF YOU USE A SINGLE TELPHONE LINE FOR BOTH YOUR TERMINAL AND TELEPHONE, DO NOT LIFT THE HANDSET DURING A TRANSACTION. THIS MAY CAUSE THE SIGNAL TO BE DISRUPTED AND THE TRANSACTION TO FAIL. STEP 5: Connect the terminal power pack Before you connect the power pack make certain that the power on your terminal is switched off! 1. Insert the round barrel into the power port of your terminal, (the power port is
identified by a lightning bolt icon). The barrel connector has a plastic lock that will keep the plug from dislodging from the back of the terminal. When you insert the plug turn it to the left, this will lock it in place. To release, turn the plug to the right.
2. Plug the power pack into a nearby socket. WARNING: DO NOT PLUG THE TERMINAL INTO AN OUTSIDE OUTLET. UNPLUGGING THE TERMINAL DURING A TRASACTION MAY CAUSE DATA FILES STORED IN THE TERMINAL TO BE LOST. When the terminal has power the display screen and the green LED lights will turn on. A flashing green light indicates no paper in the printer, a steady red light indicates a memory problem, and a flashing red light indicates the terminal is downloading printer-related files. STEP 6: Load the printer 1. Remove the paper roll cover by grasping the sides, (indicated by ridges on each
side), and lifting it up. 2. Cut a straight edge across the leading edge of the paper roll.
VeriFone Omni 3300 Operating Guide
? Collective Logic Inc. & ? Collective Point of Sale Solutions Ltd.
CPOS Version 2.02 January 27, 2003
4
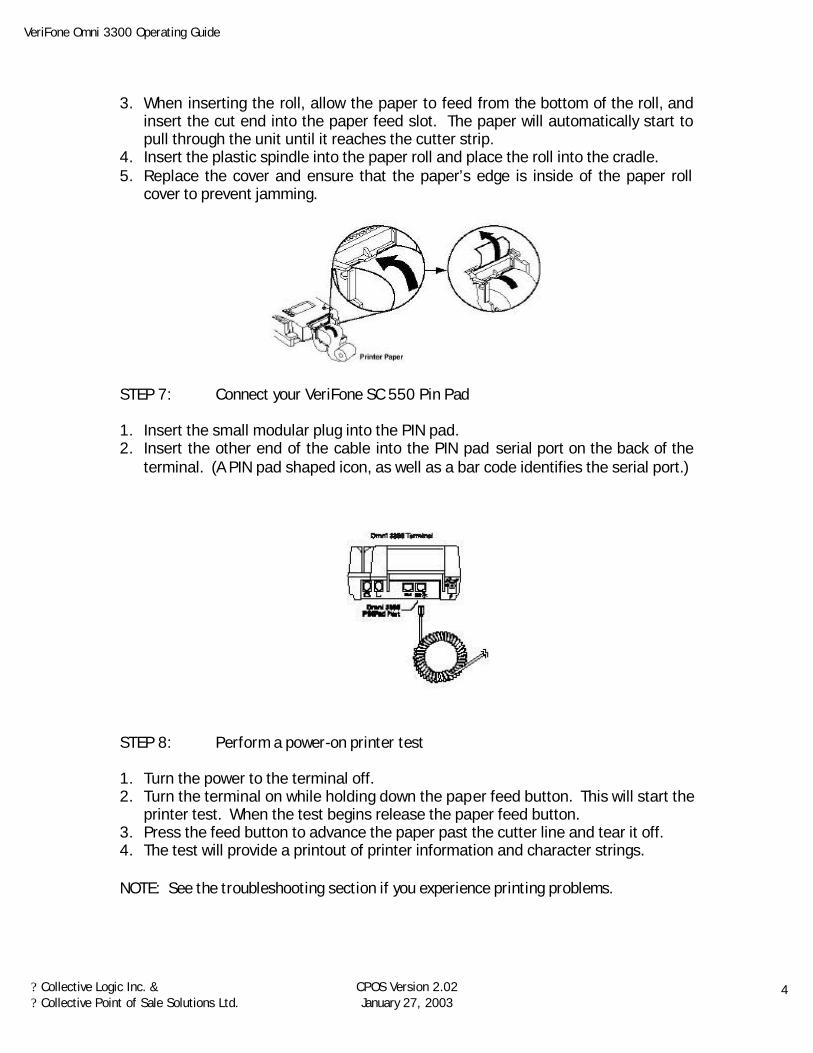
3. When inserting the roll, allow the paper to feed from the bottom of the roll, and insert the cut end into the paper feed slot. The paper will automatically start to pull through the unit until it reaches the cutter strip.
4. Insert the plastic spindle into the paper roll and place the roll into the cradle. 5. Replace the cover and ensure that the paper’s edge is inside of the paper roll
cover to prevent jamming. STEP 7: Connect your VeriFone SC 550 Pin Pad 1. Insert the small modular plug into the PIN pad. 2. Insert the other end of the cable into the PIN pad serial port on the back of the
terminal. (A PIN pad shaped icon, as well as a bar code identifies the serial port.) STEP 8: Perform a power-on printer test 1. Turn the power to the terminal off. 2. Turn the terminal on while holding down the paper feed button. This will start the
printer test. When the test begins release the paper feed button. 3. Press the feed button to advance the paper past the cutter line and tear it off. 4. The test will provide a printout of printer information and character strings. NOTE: See the troubleshooting section if you experience printing problems.
VeriFone Omni 3300 Operating Guide
? Collective Logic Inc. & ? Collective Point of Sale Solutions Ltd.
CPOS Version 2.02 January 27, 2003
5
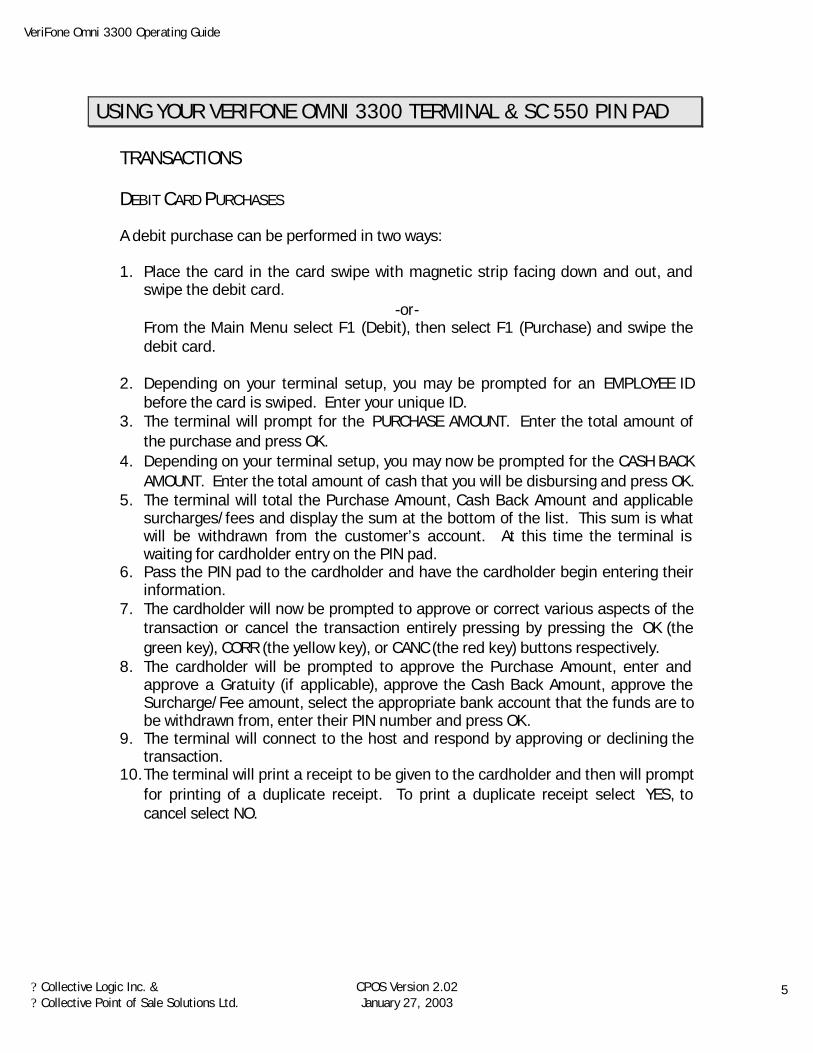
USING YOUR VERIFONE OMNI 3300 TERMINAL & SC 550 PIN PAD TRANSACTIONS DEBIT CARD PURCHASES A debit purchase can be performed in two ways: 1. Place the card in the card swipe with magnetic strip facing down and out, and
swipe the debit card. -or-
From the Main Menu select F1 (Debit), then select F1 (Purchase) and swipe the debit card.
2. Depending on your terminal setup, you may be prompted for an EMPLOYEE ID before the card is swiped. Enter your unique ID.
3. The terminal will prompt for the PURCHASE AMOUNT. Enter the total amount of the purchase and press OK.
4. Depending on your terminal setup, you may now be prompted for the CASH BACK AMOUNT. Enter the total amount of cash that you will be disbursing and press OK.
5. The terminal will total the Purchase Amount, Cash Back Amount and applicable surcharges/fees and display the sum at the bottom of the list. This sum is what will be withdrawn from the customer’s account. At this time the terminal is waiting for cardholder entry on the PIN pad.
6. Pass the PIN pad to the cardholder and have the cardholder begin entering their information.
7. The cardholder will now be prompted to approve or correct various aspects of the transaction or cancel the transaction entirely pressing by pressing the OK (the green key), CORR (the yellow key), or CANC (the red key) buttons respectively.
8. The cardholder will be prompted to approve the Purchase Amount, enter and approve a Gratuity (if applicable), approve the Cash Back Amount, approve the Surcharge/Fee amount, select the appropriate bank account that the funds are to be withdrawn from, enter their PIN number and press OK.
9. The terminal will connect to the host and respond by approving or declining the transaction.
10. The terminal will print a receipt to be given to the cardholder and then will prompt for printing of a duplicate receipt. To print a duplicate receipt select YES, to cancel select NO.
VeriFone Omni 3300 Operating Guide
? Collective Logic Inc. & ? Collective Point of Sale Solutions Ltd.
CPOS Version 2.02 January 27, 2003
6
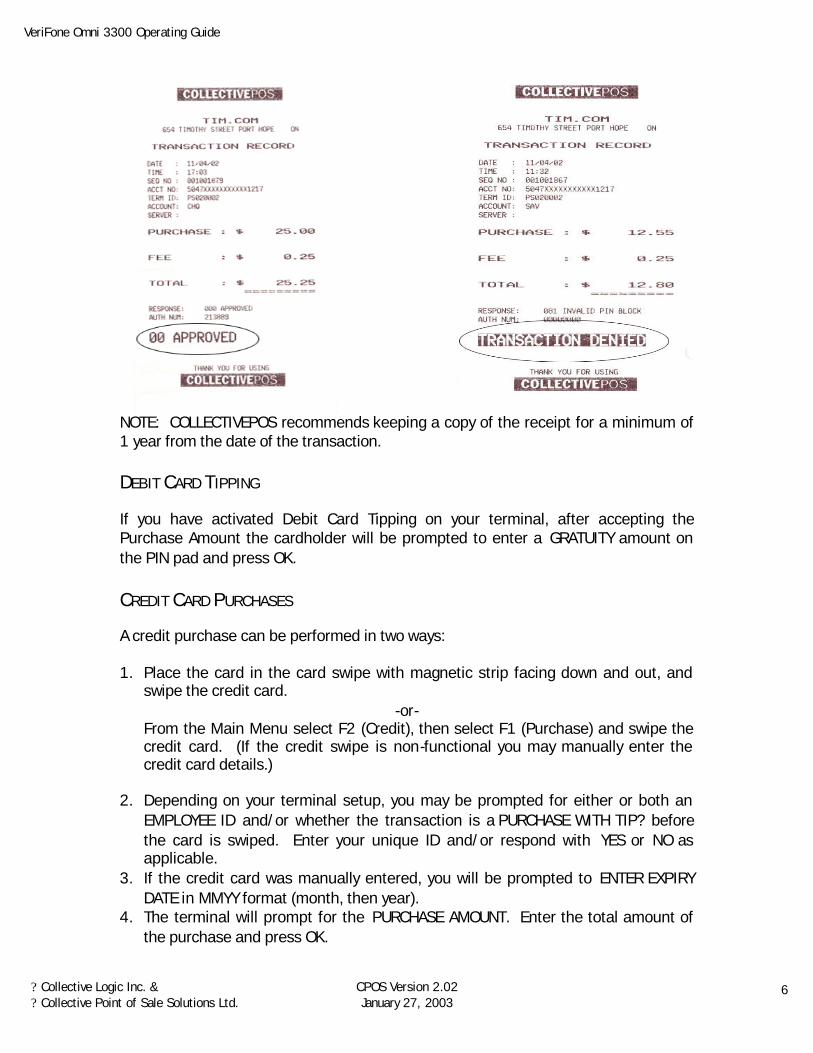
NOTE: COLLECTIVEPOS recommends keeping a copy of the receipt for a minimum of 1 year from the date of the transaction. DEBIT CARD TIPPING If you have activated Debit Card Tipping on your terminal, after accepting the Purchase Amount the cardholder will be prompted to enter a GRATUITY amount on the PIN pad and press OK. CREDIT CARD PURCHASES A credit purchase can be performed in two ways: 1. Place the card in the card swipe with magnetic strip facing down and out, and
swipe the credit card. -or-
From the Main Menu select F2 (Credit), then select F1 (Purchase) and swipe the credit card. (If the credit swipe is non-functional you may manually enter the credit card details.)
2. Depending on your terminal setup, you may be prompted for either or both an
EMPLOYEE ID and/or whether the transaction is a PURCHASE WITH TIP? before the card is swiped. Enter your unique ID and/or respond with YES or NO as applicable.
3. If the credit card was manually entered, you will be prompted to ENTER EXPIRY DATE in MMYY format (month, then year).
4. The terminal will prompt for the PURCHASE AMOUNT. Enter the total amount of the purchase and press OK.
VeriFone Omni 3300 Operating Guide
? Collective Logic Inc. & ? Collective Point of Sale Solutions Ltd.
CPOS Version 2.02 January 27, 2003
7
5. The terminal will connect to the host and respond by approving or declining the transaction.
6. The terminal will print a receipt to be given to the cardholder and then will prompt for printing of a duplicate receipt. To print a duplicate receipt select YES, to cancel select NO.
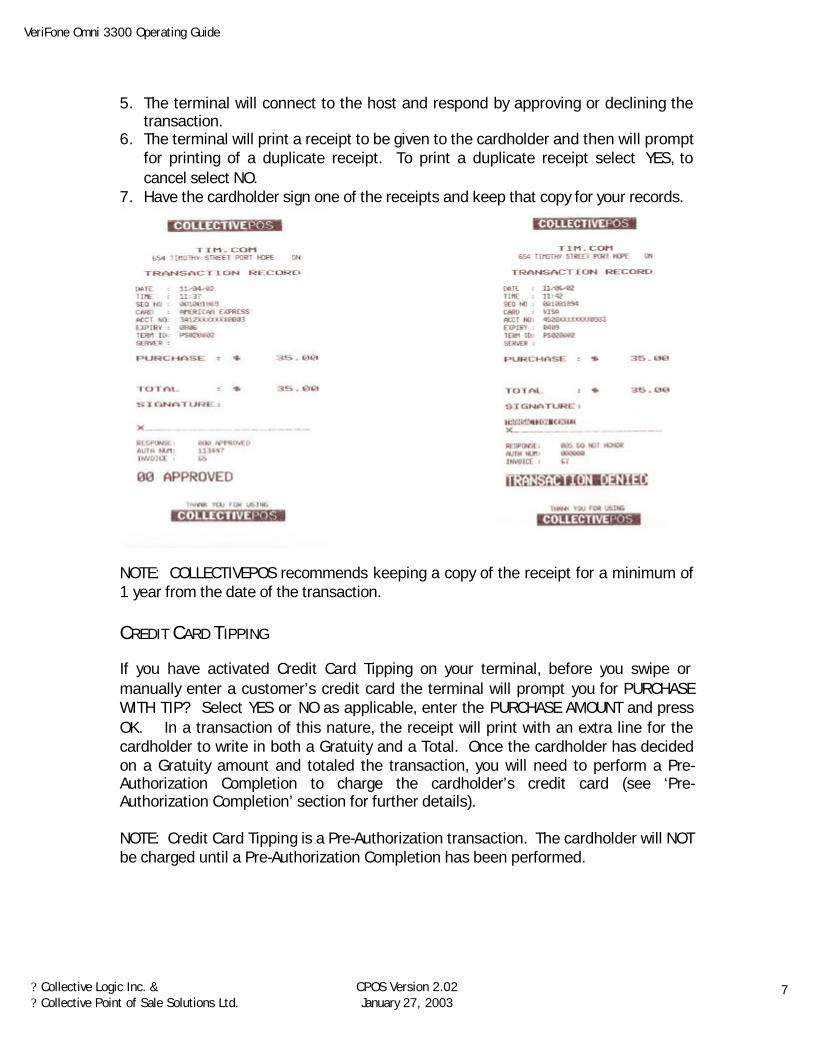
7. Have the cardholder sign one of the receipts and keep that copy for your records.
NOTE: COLLECTIVEPOS recommends keeping a copy of the receipt for a minimum of 1 year from the date of the transaction. CREDIT CARD TIPPING If you have activated Credit Card Tipping on your terminal, before you swipe or manually enter a customer’s credit card the terminal will prompt you for PURCHASE WITH TIP? Select YES or NO as applicable, enter the PURCHASE AMOUNT and press OK. In a transaction of this nature, the receipt will print with an extra line for the cardholder to write in both a Gratuity and a Total. Once the cardholder has decided on a Gratuity amount and totaled the transaction, you will need to perform a Pre-Authorization Completion to charge the cardholder’s credit card (see ‘Pre-Authorization Completion’ section for further details). NOTE: Credit Card Tipping is a Pre-Authorization transaction. The cardholder will NOT be charged until a Pre-Authorization Completion has been performed.
VeriFone Omni 3300 Operating Guide
? Collective Logic Inc. & ? Collective Point of Sale Solutions Ltd.
CPOS Version 2.02 January 27, 2003
8
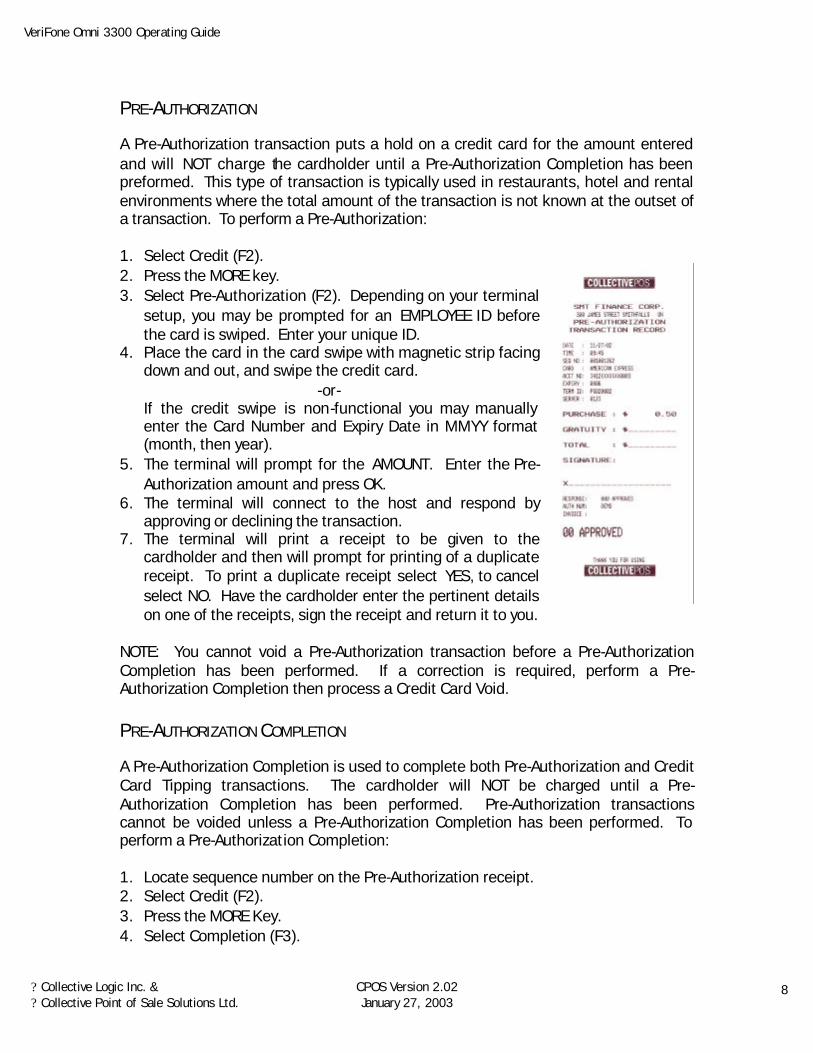
PRE-AUTHORIZATION A Pre-Authorization transaction puts a hold on a credit card for the amount entered and will NOT charge the cardholder until a Pre-Authorization Completion has been preformed. This type of transaction is typically used in restaurants, hotel and rental environments where the total amount of the transaction is not known at the outset of a transaction. To perform a Pre-Authorization: 1. Select Credit (F2). 2. Press the MORE key. 3. Select Pre-Authorization (F2). Depending on your terminal
setup, you may be prompted for an EMPLOYEE ID before the card is swiped. Enter your unique ID.
4. Place the card in the card swipe with magnetic strip facing down and out, and swipe the credit card.
-or- If the credit swipe is non-functional you may manually enter the Card Number and Expiry Date in MMYY format (month, then year).
5. The terminal will prompt for the AMOUNT. Enter the Pre-Authorization amount and press OK.
6. The terminal will connect to the host and respond by approving or declining the transaction.
7. The terminal will print a receipt to be given to the cardholder and then will prompt for printing of a duplicate receipt. To print a duplicate receipt select YES, to cancel select NO. Have the cardholder enter the pertinent details on one of the receipts, sign the receipt and return it to you.
NOTE: You cannot void a Pre-Authorization transaction before a Pre-Authorization Completion has been performed. If a correction is required, perform a Pre-Authorization Completion then process a Credit Card Void.
PRE-AUTHORIZATION COMPLETION A Pre-Authorization Completion is used to complete both Pre-Authorization and Credit Card Tipping transactions. The cardholder will NOT be charged until a Pre-Authorization Completion has been performed. Pre-Authorization transactions cannot be voided unless a Pre-Authorization Completion has been performed. To perform a Pre-Authorization Completion: 1. Locate sequence number on the Pre-Authorization receipt. 2. Select Credit (F2). 3. Press the MORE Key. 4. Select Completion (F3).
VeriFone Omni 3300 Operating Guide
? Collective Logic Inc. & ? Collective Point of Sale Solutions Ltd.
CPOS Version 2.02 January 27, 2003
9
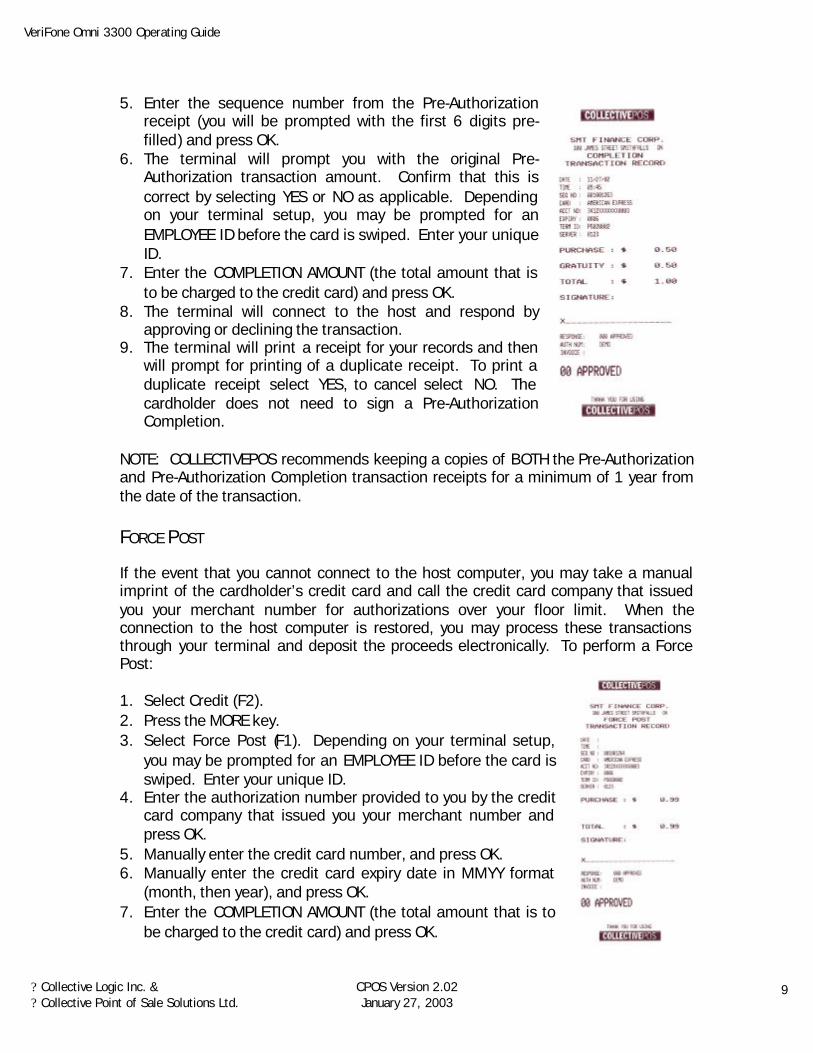
5. Enter the sequence number from the Pre-Authorization receipt (you will be prompted with the first 6 digits pre-filled) and press OK.
6. The terminal will prompt you with the original Pre-Authorization transaction amount. Confirm that this is correct by selecting YES or NO as applicable. Depending on your terminal setup, you may be prompted for an EMPLOYEE ID before the card is swiped. Enter your unique ID.
7. Enter the COMPLETION AMOUNT (the total amount that is to be charged to the credit card) and press OK.
8. The terminal will connect to the host and respond by approving or declining the transaction.
9. The terminal will print a receipt for your records and then will prompt for printing of a duplicate receipt. To print a duplicate receipt select YES, to cancel select NO. The cardholder does not need to sign a Pre-Authorization Completion.
NOTE: COLLECTIVEPOS recommends keeping a copies of BOTH the Pre-Authorization and Pre-Authorization Completion transaction receipts for a minimum of 1 year from the date of the transaction. FORCE POST If the event that you cannot connect to the host computer, you may take a manual imprint of the cardholder’s credit card and call the credit card company that issued you your merchant number for authorizations over your floor limit. When the connection to the host computer is restored, you may process these transactions through your terminal and deposit the proceeds electronically. To perform a Force Post: 1. Select Credit (F2). 2. Press the MORE key. 3. Select Force Post (F1). Depending on your terminal setup,
you may be prompted for an EMPLOYEE ID before the card is swiped. Enter your unique ID.
4. Enter the authorization number provided to you by the credit card company that issued you your merchant number and press OK.
5. Manually enter the credit card number, and press OK. 6. Manually enter the credit card expiry date in MMYY format
(month, then year), and press OK. 7. Enter the COMPLETION AMOUNT (the total amount that is to
be charged to the credit card) and press OK.
VeriFone Omni 3300 Operating Guide
? Collective Logic Inc. & ? Collective Point of Sale Solutions Ltd.
CPOS Version 2.02 January 27, 2003
10
8. The terminal will connect to the host and respond by approving or declining the transaction.
9. The terminal will print a receipt for your records and then will prompt for printing of a duplicate receipt. To print a duplicate receipt select YES, to cancel select NO.
NOTE: COLLECTIVEPOS recommends keeping a copy of BOTH the manually imprinted and Force Post transaction receipts for a minimum of 1 year from the date of the transaction. DEBIT CARD OR CREDIT CARD RETURNS A Debit Card or Credit Card Return can be performed at any time, in any amount, without an original sequence number and is used to refund amounts to a cardholder. To perform a Debit Card or Credit Card Return: 1. Select F1 (Debit) or F2 (Credit) as applicable. 2. Select F2 (Return). Depending on your terminal setup, you may be prompted for
an EMPLOYEE ID before the card is swiped. Enter your unique ID. 3. Place the card in the card swipe with magnetic strip facing down and out, and
swipe the credit card. -or-
FOR CREDIT CARDS ONLY: If the credit swipe is non-functional you may manually enter the Card Number and Expiry Date in MMYY format (month, then year).
4. Enter the RETURN AMOUNT. 5. FOR DEBIT CARDS ONLY: Pass the PIN pad to the cardholder and have the
cardholder begin entering their information. The cardholder will now be prompted to approve or correct various aspects of the transaction or cancel the transaction entirely pressing by pressing the OK (the green key), CORR (the yellow key), or CANC (the red key) buttons respectively. The cardholder will be asked to approve the Return Amount, select the appropriate bank account that the funds are to be deposited to, enter their PIN number and press OK.
6. The terminal will connect to the host and respond by approving or declining the transaction.
7. The terminal will print a receipt to be given to the cardholder and then will prompt for printing of a duplicate receipt. To print a duplicate receipt select YES, to cancel select NO.
VeriFone Omni 3300 Operating Guide
? Collective Logic Inc. & ? Collective Point of Sale Solutions Ltd.
CPOS Version 2.02 January 27, 2003
11
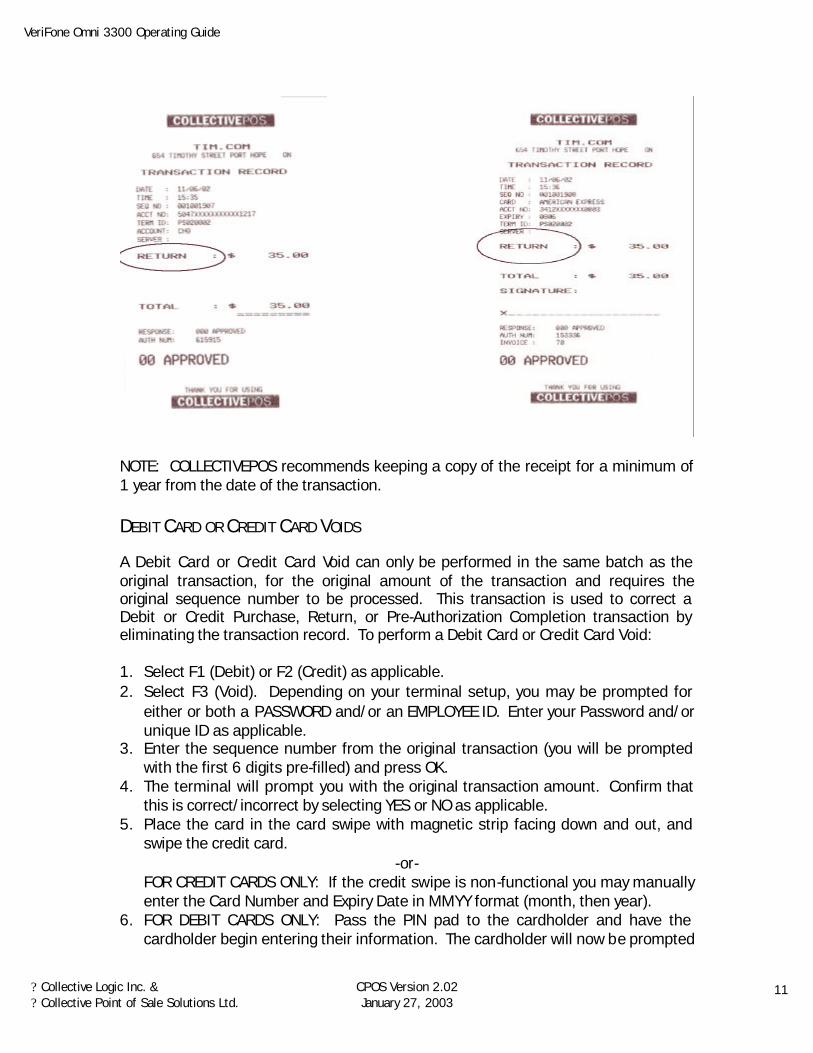
NOTE: COLLECTIVEPOS recommends keeping a copy of the receipt for a minimum of 1 year from the date of the transaction. DEBIT CARD OR CREDIT CARD VOIDS A Debit Card or Credit Card Void can only be performed in the same batch as the original transaction, for the original amount of the transaction and requires the original sequence number to be processed. This transaction is used to correct a Debit or Credit Purchase, Return, or Pre-Authorization Completion transaction by eliminating the transaction record. To perform a Debit Card or Credit Card Void: 1. Select F1 (Debit) or F2 (Credit) as applicable. 2. Select F3 (Void). Depending on your terminal setup, you may be prompted for
either or both a PASSWORD and/or an EMPLOYEE ID. Enter your Password and/or unique ID as applicable.
3. Enter the sequence number from the original transaction (you will be prompted with the first 6 digits pre-filled) and press OK.
4. The terminal will prompt you with the original transaction amount. Confirm that this is correct/incorrect by selecting YES or NO as applicable.
5. Place the card in the card swipe with magnetic strip facing down and out, and swipe the credit card.
-or- FOR CREDIT CARDS ONLY: If the credit swipe is non-functional you may manually enter the Card Number and Expiry Date in MMYY format (month, then year).
6. FOR DEBIT CARDS ONLY: Pass the PIN pad to the cardholder and have the cardholder begin entering their information. The cardholder will now be prompted
VeriFone Omni 3300 Operating Guide
? Collective Logic Inc. & ? Collective Point of Sale Solutions Ltd.
CPOS Version 2.02 January 27, 2003
12
to approve or correct various aspects of the transaction or cancel the transaction entirely pressing by pressing the OK (the green key), CORR (the yellow key), or CANC (the red key) buttons respectively. The cardholder will be asked to approve the Purchase Correction amount, select the appropriate bank account that the funds are to be deposited to, enter their PIN number and press OK.
7. The terminal will connect to the host and respond by approving or declining the transaction.
8. The terminal will print a receipt to be given to the cardholder and then will prompt for printing of a duplicate receipt. To print a duplicate receipt select YES, to cancel select NO.
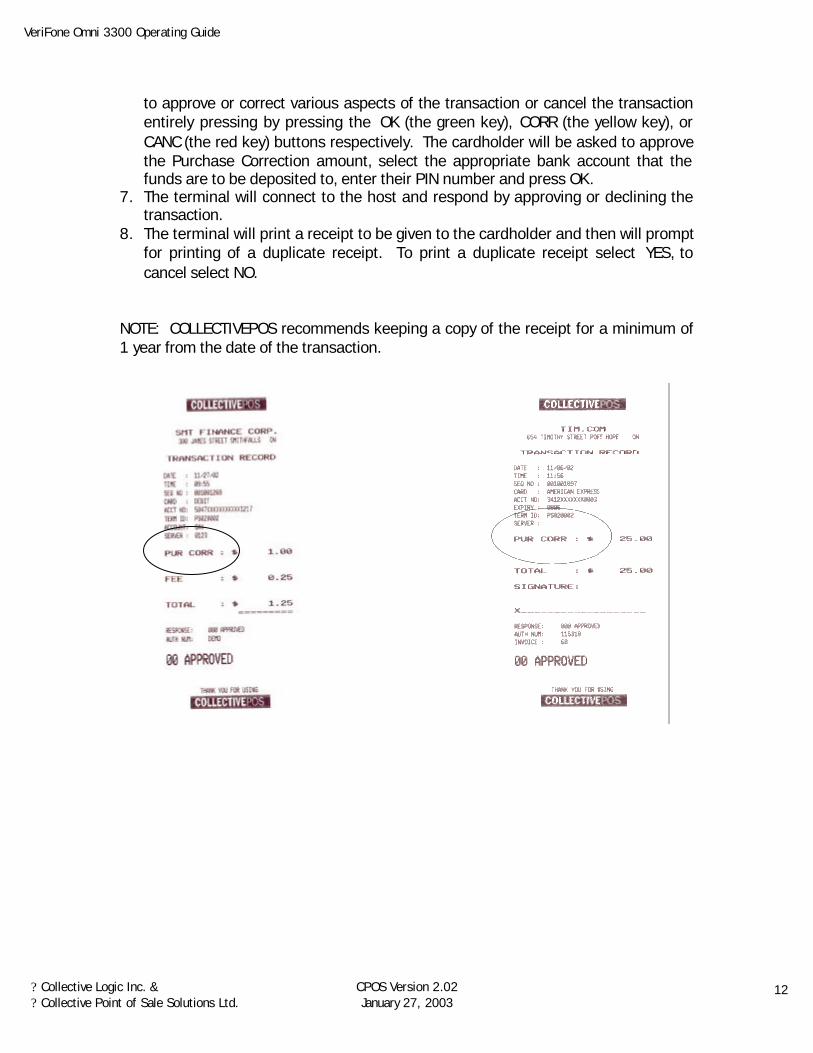
NOTE: COLLECTIVEPOS recommends keeping a copy of the receipt for a minimum of 1 year from the date of the transaction.
VeriFone Omni 3300 Operating Guide
? Collective Logic Inc. & ? Collective Point of Sale Solutions Ltd.
CPOS Version 2.02 January 27, 2003
13
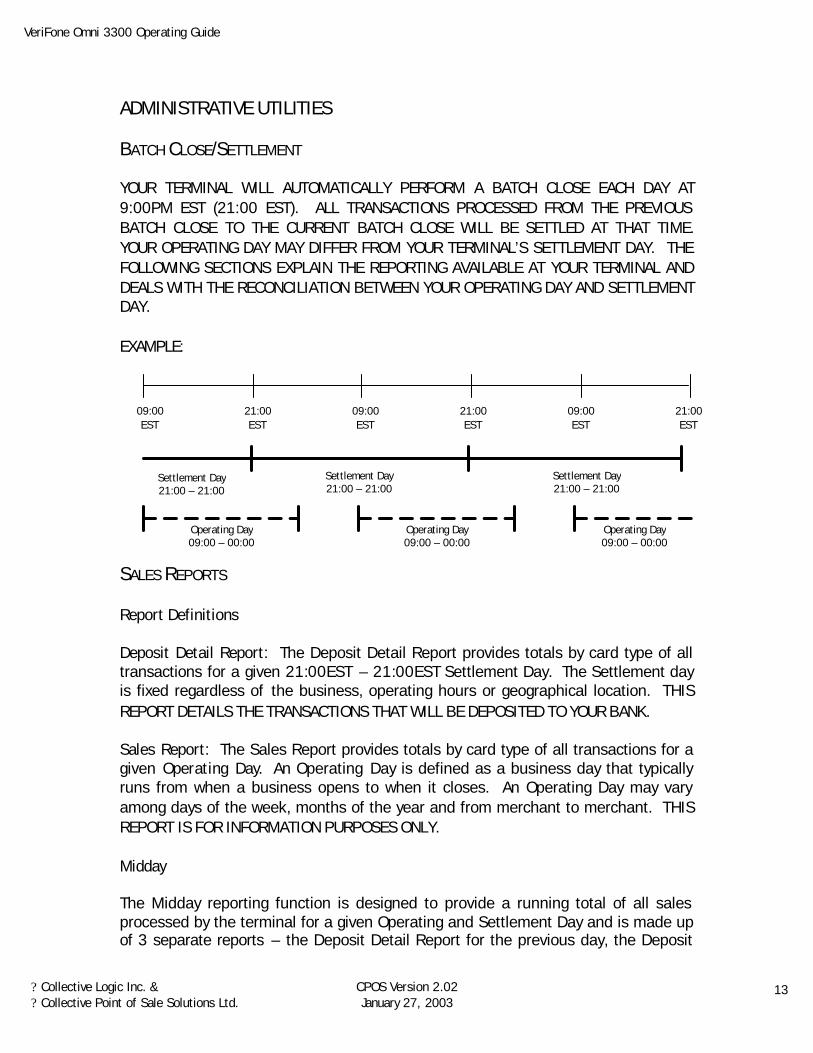
ADMINISTRATIVE UTILITIES BATCH CLOSE/SETTLEMENT YOUR TERMINAL WILL AUTOMATICALLY PERFORM A BATCH CLOSE EACH DAY AT 9:00PM EST (21:00 EST). ALL TRANSACTIONS PROCESSED FROM THE PREVIOUS BATCH CLOSE TO THE CURRENT BATCH CLOSE WILL BE SETTLED AT THAT TIME. YOUR OPERATING DAY MAY DIFFER FROM YOUR TERMINAL’S SETTLEMENT DAY. THE FOLLOWING SECTIONS EXPLAIN THE REPORTING AVAILABLE AT YOUR TERMINAL AND DEALS WITH THE RECONCILIATION BETWEEN YOUR OPERATING DAY AND SETTLEMENT DAY. EXAMPLE: SALES REPORTS Report Definitions Deposit Detail Report: The Deposit Detail Report provides totals by card type of all transactions for a given 21:00EST – 21:00EST Settlement Day. The Settlement day is fixed regardless of the business, operating hours or geographical location. THIS REPORT DETAILS THE TRANSACTIONS THAT WILL BE DEPOSITED TO YOUR BANK. Sales Report: The Sales Report provides totals by card type of all transactions for a given Operating Day. An Operating Day is defined as a business day that typically runs from when a business opens to when it closes. An Operating Day may vary among days of the week, months of the year and from merchant to merchant. THIS REPORT IS FOR INFORMATION PURPOSES ONLY. Midday The Midday reporting function is designed to provide a running total of all sales processed by the terminal for a given Operating and Settlement Day and is made up of 3 separate reports – the Deposit Detail Report for the previous day, the Deposit
09:00 EST
09:00 EST
09:00 EST
21:00 EST
21:00 EST
21:00 EST
Settlement Day 21:00 – 21:00
Settlement Day 21:00 – 21:00
Operating Day 09:00 – 00:00
Operating Day 09:00 – 00:00
Operating Day 09:00 – 00:00
Settlement Day 21:00 – 21:00
VeriFone Omni 3300 Operating Guide
? Collective Logic Inc. & ? Collective Point of Sale Solutions Ltd.
CPOS Version 2.02 January 27, 2003
14
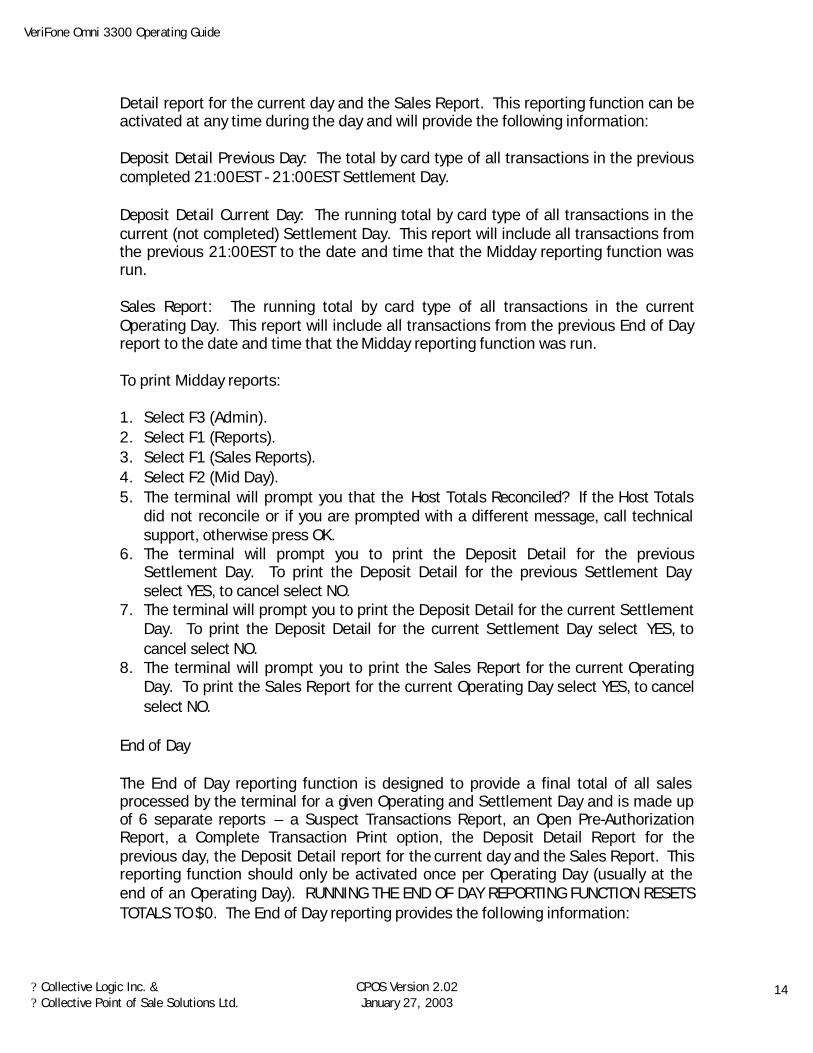
Detail report for the current day and the Sales Report. This reporting function can be activated at any time during the day and will provide the following information: Deposit Detail Previous Day: The total by card type of all transactions in the previous completed 21:00EST - 21:00EST Settlement Day. Deposit Detail Current Day: The running total by card type of all transactions in the current (not completed) Settlement Day. This report will include all transactions from the previous 21:00EST to the date and time that the Midday reporting function was run. Sales Report: The running total by card type of all transactions in the current Operating Day. This report will include all transactions from the previous End of Day report to the date and time that the Midday reporting function was run. To print Midday reports: 1. Select F3 (Admin). 2. Select F1 (Reports). 3. Select F1 (Sales Reports). 4. Select F2 (Mid Day). 5. The terminal will prompt you that the Host Totals Reconciled? If the Host Totals
did not reconcile or if you are prompted with a different message, call technical support, otherwise press OK.
6. The terminal will prompt you to print the Deposit Detail for the previous Settlement Day. To print the Deposit Detail for the previous Settlement Day select YES, to cancel select NO.
7. The terminal will prompt you to print the Deposit Detail for the current Settlement Day. To print the Deposit Detail for the current Settlement Day select YES, to cancel select NO.
8. The terminal will prompt you to print the Sales Report for the current Operating Day. To print the Sales Report for the current Operating Day select YES, to cancel select NO.
End of Day The End of Day reporting function is designed to provide a final total of all sales processed by the terminal for a given Operating and Settlement Day and is made up of 6 separate reports – a Suspect Transactions Report, an Open Pre-Authorization Report, a Complete Transaction Print option, the Deposit Detail Report for the previous day, the Deposit Detail report for the current day and the Sales Report. This reporting function should only be activated once per Operating Day (usually at the end of an Operating Day). RUNNING THE END OF DAY REPORTING FUNCTION RESETS TOTALS TO $0. The End of Day reporting provides the following information:
VeriFone Omni 3300 Operating Guide
? Collective Logic Inc. & ? Collective Point of Sale Solutions Ltd.
CPOS Version 2.02 January 27, 2003
15
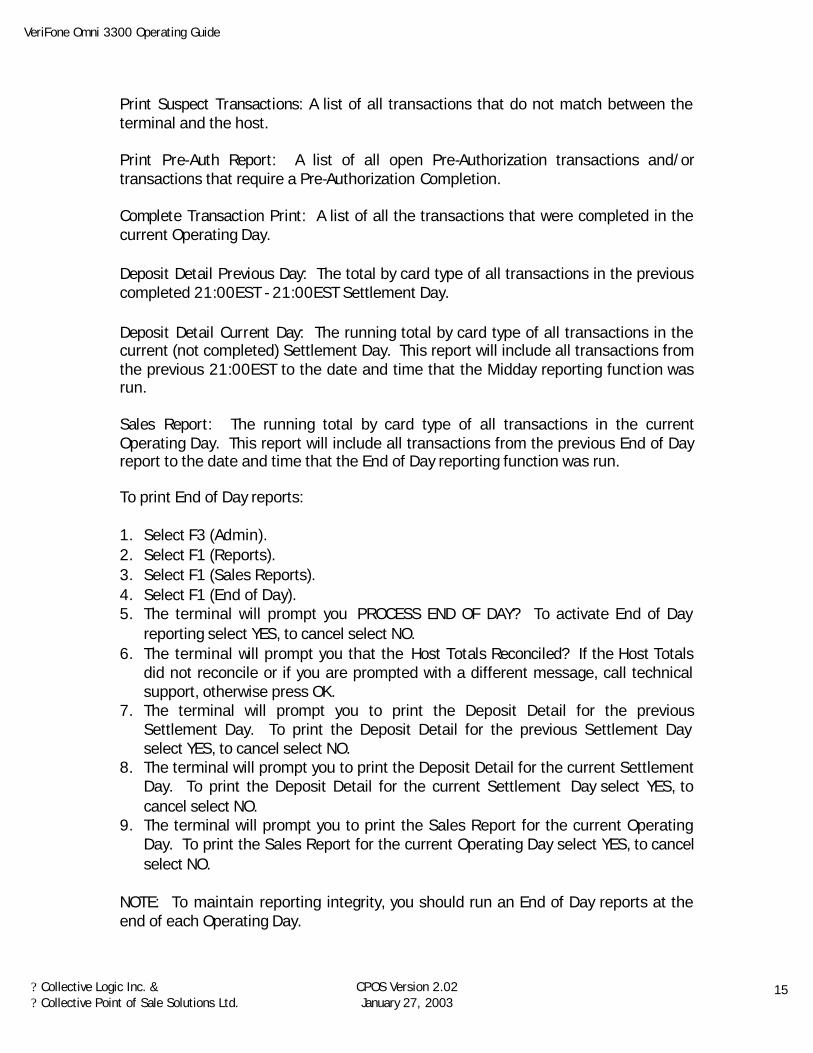
Print Suspect Transactions: A list of all transactions that do not match between the terminal and the host. Print Pre-Auth Report: A list of all open Pre-Authorization transactions and/or transactions that require a Pre-Authorization Completion. Complete Transaction Print: A list of all the transactions that were completed in the current Operating Day. Deposit Detail Previous Day: The total by card type of all transactions in the previous completed 21:00EST - 21:00EST Settlement Day. Deposit Detail Current Day: The running total by card type of all transactions in the current (not completed) Settlement Day. This report will include all transactions from the previous 21:00EST to the date and time that the Midday reporting function was run. Sales Report: The running total by card type of all transactions in the current Operating Day. This report will include all transactions from the previous End of Day report to the date and time that the End of Day reporting function was run. To print End of Day reports: 1. Select F3 (Admin). 2. Select F1 (Reports). 3. Select F1 (Sales Reports). 4. Select F1 (End of Day). 5. The terminal will prompt you PROCESS END OF DAY? To activate End of Day
reporting select YES, to cancel select NO. 6. The terminal will prompt you that the Host Totals Reconciled? If the Host Totals
did not reconcile or if you are prompted with a different message, call technical support, otherwise press OK.
7. The terminal will prompt you to print the Deposit Detail for the previous Settlement Day. To print the Deposit Detail for the previous Settlement Day select YES, to cancel select NO.
8. The terminal will prompt you to print the Deposit Detail for the current Settlement Day. To print the Deposit Detail for the current Settlement Day select YES, to cancel select NO.
9. The terminal will prompt you to print the Sales Report for the current Operating Day. To print the Sales Report for the current Operating Day select YES, to cancel select NO.
NOTE: To maintain reporting integrity, you should run an End of Day reports at the end of each Operating Day.

VeriFone Omni 3300 Operating Guide
? Collective Logic Inc. & ? Collective Point of Sale Solutions Ltd.
CPOS Version 2.02 January 27, 2003
16
End of Day Reconciliation As your Settlement Day may be different than your Operating Day, the following section deals with how the two are related and may be reconciled to each other. In order to reconcile however, YOU MUST ACTIVATE THE END OF DAY REPORTING FUNCTION EVERY DAY AT THE CLOSE OF BUSINESS. From the End of Day reporting you will require: the Deposit Detail Report form the current incomplete Settlement Day; the Deposit Detail Report from the previous complete Settlement Day; and the Deposit Detail for the incomplete Settlement day run at the previous End of Day. The formula is as follows:
Deposit Detail Current Incomplete Settlement Day
+ Deposit Detail Previous Complete Settlement Day
- Deposit Detail for Incomplete Settlement Day run from previous End of Day Report
= Operating Day (SalesReport) Example: The following location operates from 09:00EST to 00:00EST (Midnight). Each night, 3 hours of sales (from 21:00EST – 00:00EST) will be carried forward and deposited on the following Settlement Day.
Deposit Detail Current Incomplete Settlement Day
$200
+ Deposit Detail Previous Complete Settlement Day
$600
Operating Day 09:00 – 00:00
Operating Day 09:00 – 00:00
Settlement Day 21:00 – 21:00
Settlement Day 21:00 – 21:00
Settlement Day 21:00 – 21:00
$100 $500 $200
Deposit Detail Previous Complete Day
Deposit Detail for Incomplete Day run at previous End of Day
Report Deposit Detail Current
Incomplete Day
VeriFone Omni 3300 Operating Guide
? Collective Logic Inc. & ? Collective Point of Sale Solutions Ltd.
CPOS Version 2.02 January 27, 2003
17
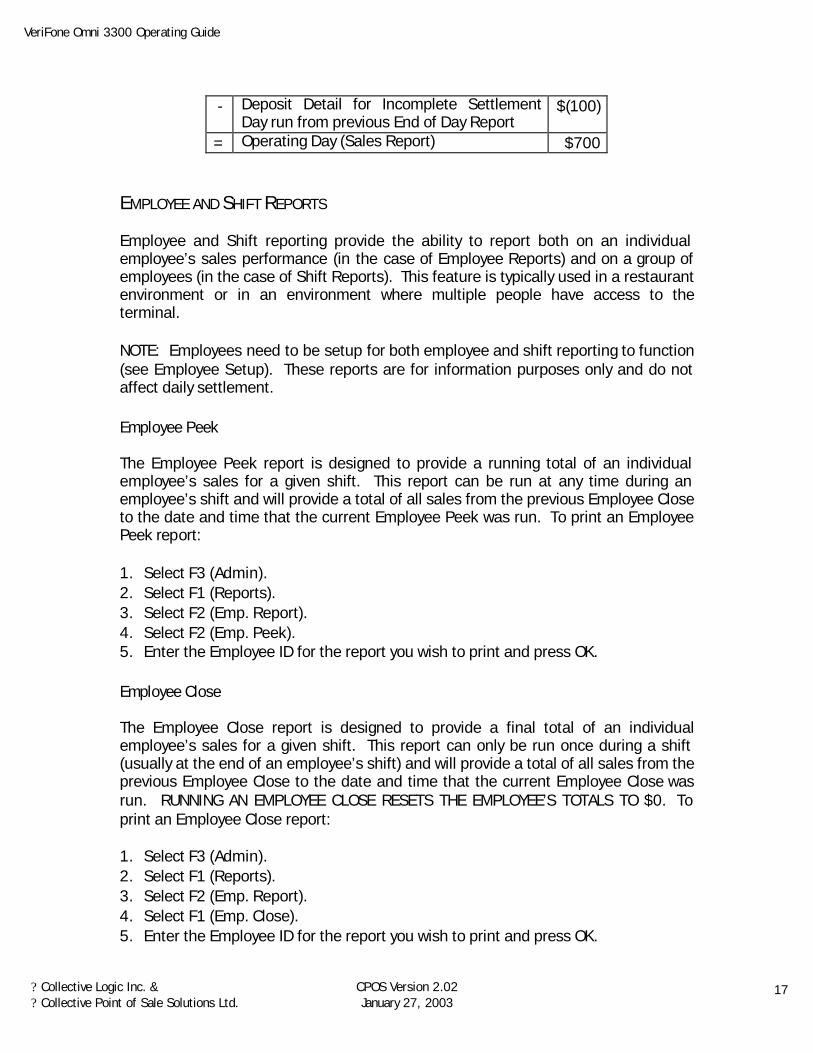
- Deposit Detail for Incomplete Settlement Day run from previous End of Day Report
$(100)
= Operating Day (Sales Report) $700
EMPLOYEE AND SHIFT REPORTS Employee and Shift reporting provide the ability to report both on an individual employee’s sales performance (in the case of Employee Reports) and on a group of employees (in the case of Shift Reports). This feature is typically used in a restaurant environment or in an environment where multiple people have access to the terminal. NOTE: Employees need to be setup for both employee and shift reporting to function (see Employee Setup). These reports are for information purposes only and do not affect daily settlement. Employee Peek The Employee Peek report is designed to provide a running total of an individual employee’s sales for a given shift. This report can be run at any time during an employee’s shift and will provide a total of all sales from the previous Employee Close to the date and time that the current Employee Peek was run. To print an Employee Peek report: 1. Select F3 (Admin). 2. Select F1 (Reports). 3. Select F2 (Emp. Report). 4. Select F2 (Emp. Peek). 5. Enter the Employee ID for the report you wish to print and press OK. Employee Close The Employee Close report is designed to provide a final total of an individual employee’s sales for a given shift. This report can only be run once during a shift (usually at the end of an employee’s shift) and will provide a total of all sales from the previous Employee Close to the date and time that the current Employee Close was run. RUNNING AN EMPLOYEE CLOSE RESETS THE EMPLOYEE’S TOTALS TO $0. To print an Employee Close report: 1. Select F3 (Admin). 2. Select F1 (Reports). 3. Select F2 (Emp. Report). 4. Select F1 (Emp. Close). 5. Enter the Employee ID for the report you wish to print and press OK.
VeriFone Omni 3300 Operating Guide
? Collective Logic Inc. & ? Collective Point of Sale Solutions Ltd.
CPOS Version 2.02 January 27, 2003
18
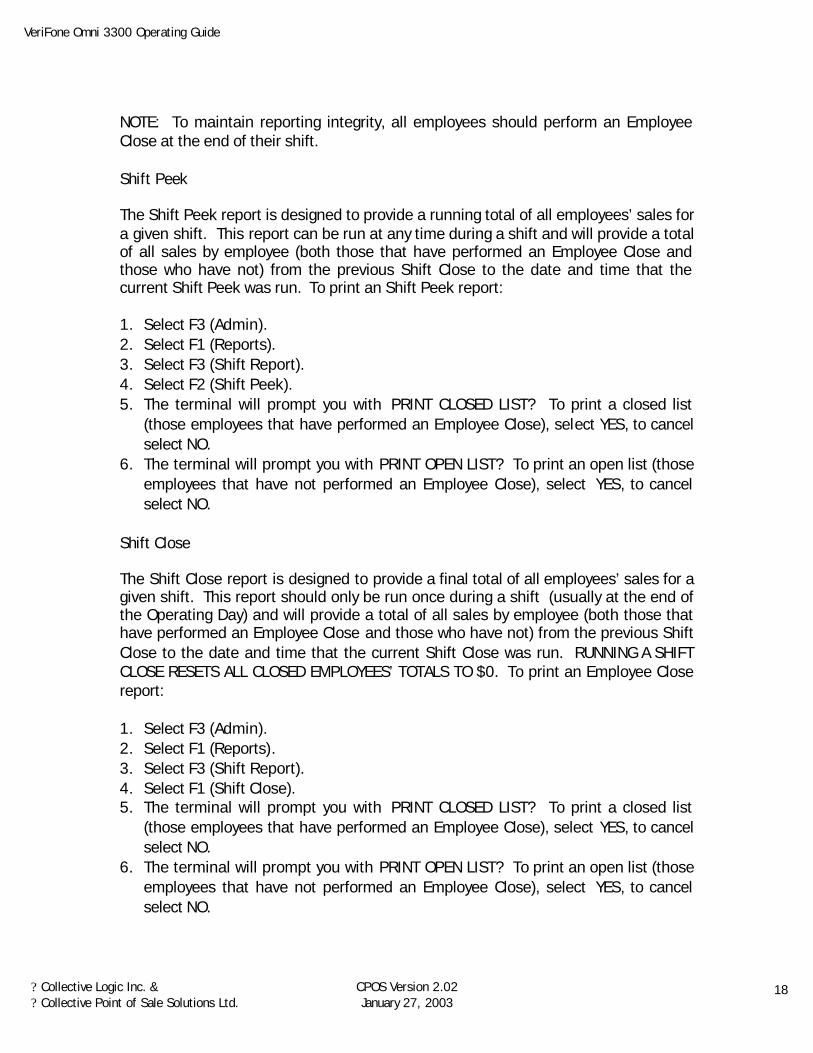
NOTE: To maintain reporting integrity, all employees should perform an Employee Close at the end of their shift. Shift Peek
The Shift Peek report is designed to provide a running total of all employees’ sales for a given shift. This report can be run at any time during a shift and will provide a total of all sales by employee (both those that have performed an Employee Close and those who have not) from the previous Shift Close to the date and time that the current Shift Peek was run. To print an Shift Peek report:
1. Select F3 (Admin). 2. Select F1 (Reports). 3. Select F3 (Shift Report). 4. Select F2 (Shift Peek). 5. The terminal will prompt you with PRINT CLOSED LIST? To print a closed list
(those employees that have performed an Employee Close), select YES, to cancel select NO.
6. The terminal will prompt you with PRINT OPEN LIST? To print an open list (those employees that have not performed an Employee Close), select YES, to cancel select NO.
Shift Close
The Shift Close report is designed to provide a final total of all employees’ sales for a given shift. This report should only be run once during a shift (usually at the end of the Operating Day) and will provide a total of all sales by employee (both those that have performed an Employee Close and those who have not) from the previous Shift Close to the date and time that the current Shift Close was run. RUNNING A SHIFT CLOSE RESETS ALL CLOSED EMPLOYEES’ TOTALS TO $0. To print an Employee Close report: 1. Select F3 (Admin). 2. Select F1 (Reports). 3. Select F3 (Shift Report). 4. Select F1 (Shift Close). 5. The terminal will prompt you with PRINT CLOSED LIST? To print a closed list
(those employees that have performed an Employee Close), select YES, to cancel select NO.
6. The terminal will prompt you with PRINT OPEN LIST? To print an open list (those employees that have not performed an Employee Close), select YES, to cancel select NO.
VeriFone Omni 3300 Operating Guide
? Collective Logic Inc. & ? Collective Point of Sale Solutions Ltd.
CPOS Version 2.02 January 27, 2003
19
NOTE: To maintain reporting integrity, a Shift Close should be run at the end of each business day and there should be no open employees. If an employee has failed to close at the end of a their shift, perform an Employee Close and rerun the Shift Close. CONFIGURATION UPDATES Configuration updates are used to update your terminal to reflect changes in your terminal setup. The most common updates are required due to address changes and banking changes. Depending on the nature of the change, either or both a Host Update and/or a Parameter Update may be required. If an update of this nature is required, you will be contacted by technical support. DO NOT ATTEMPT A CONFIGURATION UPDATE WITHOUT THE ASSISTANCE OF TECHNICAL SUPPORT. THIS MAY CAUSE YOUR TERMINAL TO STOP FUNCTIONING. Host Update 1. Select F3 (Admin). 2. Select F2 (Update Config). 3. Select F1 (Host). 4. Enter your password and press OK. 5. The terminal will connect to the Host, download the necessary files and
disconnect when complete. DO NOT INTERRUPT COMMUNICATION. THIS MAY CAUSE YOUR TERMINAL TO STOP FUNCTIONING.
Parameter Update 1. Select F3 (Admin). 2. Select F2 (Update Config). 3. Select F2 (Parameter). 4. Enter your password and press OK. 5. The terminal will connect to the Host, download the necessary files and
disconnect when complete. DO NOT INTERRUPT COMMUNICATION. THIS MAY CAUSE YOUR TERMINAL TO STOP FUNCTIONING.
OTHER UTILITIES Set Passwords The Set Passwords feature provides the ability to assign passwords that limit access to various transaction types and other functions of the terminal. This feature is especially useful in an environment where multiple people have access to the terminal. The functions that passwords can be applied to are: 1) Debit and Credit Purchases; 2) Debit and Credit Returns; 3) Debit and Credit Voids; 4) Sales Reports; 5) Shift Reports; 6) Employee Reports; 7) Pre-Authorization Completion; and 8) Force Post. To set, change or remove a password:
VeriFone Omni 3300 Operating Guide
? Collective Logic Inc. & ? Collective Point of Sale Solutions Ltd.
CPOS Version 2.02 January 27, 2003
20
1. Select F3 (Admin). 2. Press the MORE key. 3. Select F1 (Passwords). 4. Enter your password and press OK. 5. Press the MORE key to select the function that you would like to set, change or
remove the password from. This function will now be highlighted. 6. Press any numeric key or F2 to change the password of the highlighted function. 7. Enter the new password for the function and press OK. To remove an existing
password, simply press OK. 8. Press the CANCEL key when finished. Set Cash Back Limits If you have enabled the Debit Cash Back option on the PIN pad, you have the ability to set the Cash Back limit or the maximum amount a carholder will be able to request in a single transaction. To set the Cash Back Limit:
1. Select F3 (Admin). 2. Press the MORE key. 3. Select F2 (Cash Back). The cardholder cash back limit will now be displayed. 4. Select YES to change the Cash Back Limit. To keep the current limit select NO. 5. Enter the desired Cash Back Limit amount and press ENTER. NOTE: If the cardholder’s transaction was approved and you are unable to dispense the required cash back amount, you will need to process either a VOID or RETURN transaction. Please refer to the appropriate section for more details. Set Up Employees Employees may be set up for information and reporting purposes and must be set up for both employee and shift reporting to function. This functionality allows for the ability to report both on an individual employee’s sales performance (in the case of Employee Reports) and on a group of employees (in the case of Shift Reports). This feature is typically used in a restaurant environment or in an environment where multiple people have access to the terminal. Setting up employees does not affect daily settlement. To add an Employee: 1. Select F3 (Admin). 2. Press the MORE key. 3. Select F3 (Employee Setup). 4. Select F1 (Add). 5. Enter your password and press OK.
VeriFone Omni 3300 Operating Guide
? Collective Logic Inc. & ? Collective Point of Sale Solutions Ltd.
CPOS Version 2.02 January 27, 2003
21
6. Enter a unique Employee ID (between 1 – 4 digits) and press OK. If the Employee ID already exists in the terminal, a warning message will appear and you will be required to select another Employee ID.
7. If desired, enter the Employee’s Name (between 0 – 16 characters) and press OK. To use the alphabet, select the number corresponding to the letter you desire and press ALPHA until the letter appears on screen.
8. A confirmation message EMPLOYEE ADDED! will confirm that an employee was added successfully and you will be prompted to add another employee ID.
9. Press CANC to return to the to the main menu. To edit an Employee: NOTE: You cannot edit an Employee ID. The edit function applies to Employee Name only.
1. Select F3 (Admin). 2. Press the MORE key. 3. Select F3 (Employee Setup). 4. Select F2 (Edit). 5. Enter your password and press OK. 6. Press the MORE key to select the employee that you would like to edit. This
employee will now be highlighted. 7. Press any numeric key or F2 to edit the selected employee. 8. Enter the new employee information and press OK. 9. Press CANC to return to the to the main menu. To remove an Employee:
1. Select F3 (Admin). 2. Press the MORE key. 3. Select F3 (Employee Setup). 4. Select F3 (Remove). 5. Enter your password and press OK. 6. You will be prompted to REMOVE ALL? To remove all employees from the terminal
select YES, to remove less than all employees select NO. 7. Type the Employee ID you wish to remove and press OK. 8. A confirmation message EMPLOYEE DELETED! will confirm that an employee was
removed successfully and you will be prompted to remove another employee ID. 9. Press CANC to return to the to the main menu.
Demo/Training Mode Demo Mode can be used for training purposes and/or to experiment and learn about the various features and functions of your terminal. It is important to note that:
VeriFone Omni 3300 Operating Guide
? Collective Logic Inc. & ? Collective Point of Sale Solutions Ltd.
CPOS Version 2.02 January 27, 2003
22
TRANSACTIONS IN DEMO MODE ARE NOT LIVE TRANSACTIONS. CARDHOLDERS WILL NOT BE CHARGED FOR TRANSACTIONS PROCESSED IN DEMO MODE. The terminal will display TRAINING MODE on the screen to identify when the terminal is in Demo Mode. To enter Demo Mode: 1. Press the SHIFT key. 2. Press the #2 key. 3. Enter your password and press OK. To exit Demo Mode: 1. Press the SHIFT key. 2. Press the #2 key. Reprint Receipt To reprint a receipt, press the SHIFT key and then the #3 key. This will reprint the receipt from the last transaction stored in memory and then will prompt for printing of a duplicate receipt. To print a duplicate receipt select YES, to cancel select NO. Change Language Your terminal is fully bilingual in English and French. To change from one language to the other, press the SHIFT Key and then the #1 key.
VeriFone Omni 3300 Operating Guide
? Collective Logic Inc. & ? Collective Point of Sale Solutions Ltd.
CPOS Version 2.02 January 27, 2003
23
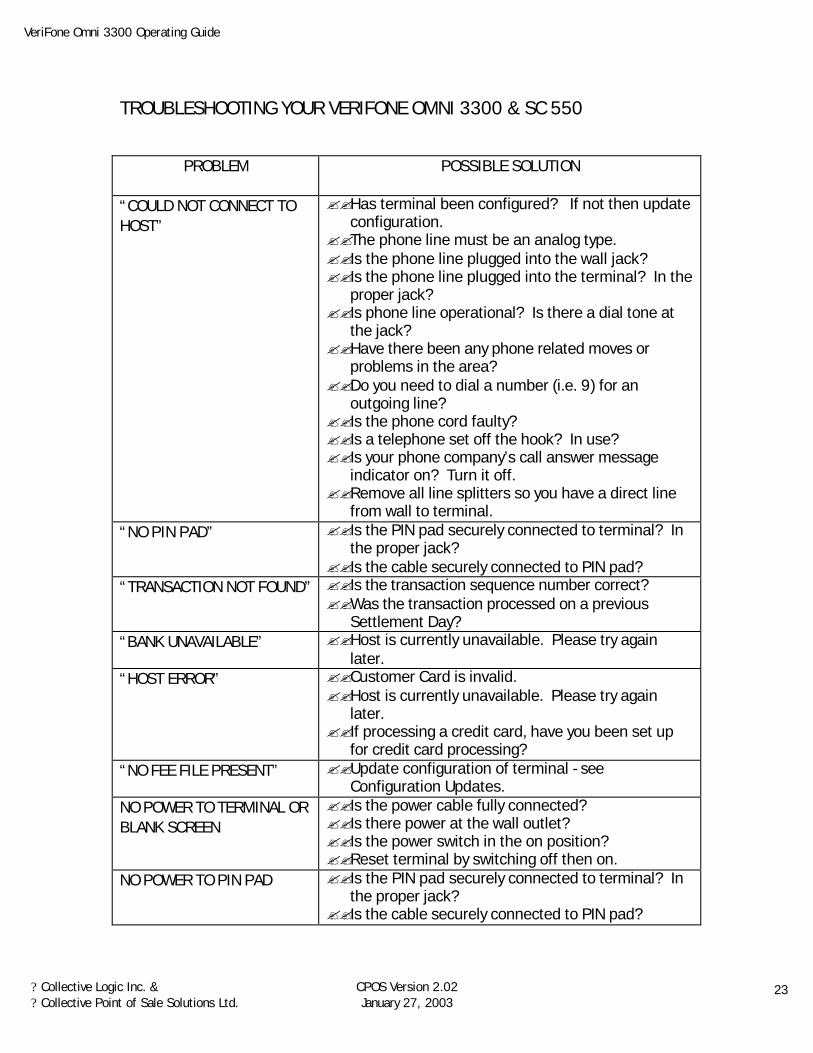
TROUBLESHOOTING YOUR VERIFONE OMNI 3300 & SC 550
PROBLEM
POSSIBLE SOLUTION
“COULD NOT CONNECT TO HOST”
??Has terminal been configured? If not then update configuration.
??The phone line must be an analog type. ??Is the phone line plugged into the wall jack? ??Is the phone line plugged into the terminal? In the
proper jack? ??Is phone line operational? Is there a dial tone at
the jack? ??Have there been any phone related moves or
problems in the area? ??Do you need to dial a number (i.e. 9) for an
outgoing line? ??Is the phone cord faulty? ??Is a telephone set off the hook? In use? ??Is your phone company’s call answer message
indicator on? Turn it off. ??Remove all line splitters so you have a direct line
from wall to terminal. “NO PIN PAD” ??Is the PIN pad securely connected to terminal? In
the proper jack? ??Is the cable securely connected to PIN pad?
“TRANSACTION NOT FOUND” ??Is the transaction sequence number correct? ??Was the transaction processed on a previous
Settlement Day? “BANK UNAVAILABLE” ??Host is currently unavailable. Please try again
later. “HOST ERROR” ??Customer Card is invalid.
??Host is currently unavailable. Please try again later.
??If processing a credit card, have you been set up for credit card processing?
“NO FEE FILE PRESENT” ??Update configuration of terminal - see Configuration Updates.
NO POWER TO TERMINAL OR BLANK SCREEN
??Is the power cable fully connected? ??Is there power at the wall outlet? ??Is the power switch in the on position? ??Reset terminal by switching off then on.
NO POWER TO PIN PAD ??Is the PIN pad securely connected to terminal? In the proper jack?
??Is the cable securely connected to PIN pad?
VeriFone Omni 3300 Operating Guide
? Collective Logic Inc. & ? Collective Point of Sale Solutions Ltd.
CPOS Version 2.02 January 27, 2003
24
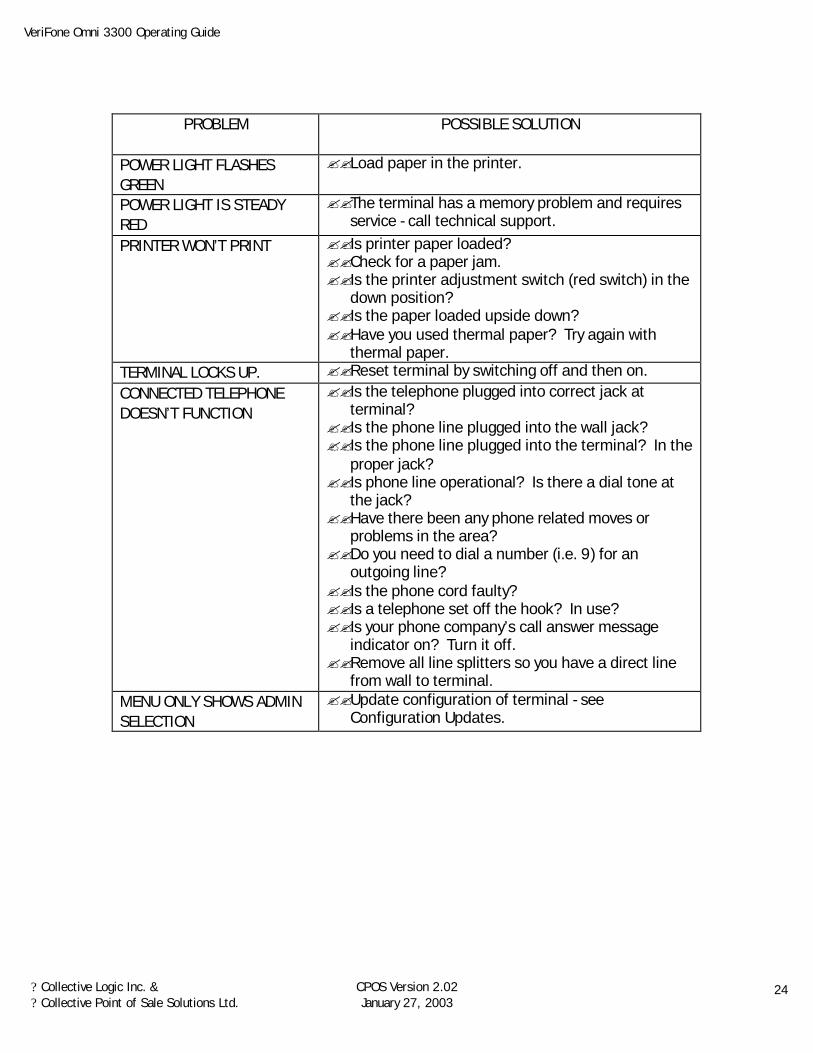
PROBLEM
POSSIBLE SOLUTION
POWER LIGHT FLASHES GREEN
??Load paper in the printer.
POWER LIGHT IS STEADY RED
??The terminal has a memory problem and requires service - call technical support.
PRINTER WON’T PRINT ??Is printer paper loaded? ??Check for a paper jam. ??Is the printer adjustment switch (red switch) in the
down position? ??Is the paper loaded upside down? ??Have you used thermal paper? Try again with
thermal paper. TERMINAL LOCKS UP. ??Reset terminal by switching off and then on. CONNECTED TELEPHONE DOESN’T FUNCTION
??Is the telephone plugged into correct jack at terminal?
??Is the phone line plugged into the wall jack? ??Is the phone line plugged into the terminal? In the
proper jack? ??Is phone line operational? Is there a dial tone at
the jack? ??Have there been any phone related moves or
problems in the area? ??Do you need to dial a number (i.e. 9) for an
outgoing line? ??Is the phone cord faulty? ??Is a telephone set off the hook? In use? ??Is your phone company’s call answer message
indicator on? Turn it off. ??Remove all line splitters so you have a direct line
from wall to terminal. MENU ONLY SHOWS ADMIN SELECTION
??Update configuration of terminal - see Configuration Updates.