Embed Size (px)
Citation preview
Leave Reporting Using
Self-Service Banner
User Guide for Monthly SPA non-Exempt
NC A&T State University

Page 1 Last update: 10/4/10
Table of Contents
Logging on to Self-Service Banner Page 2
Entering Leave and Hours Worked Page 5
Submit for Approval Page 21
Important Reminders Page 25
Page 2 Last update: 10/4/10
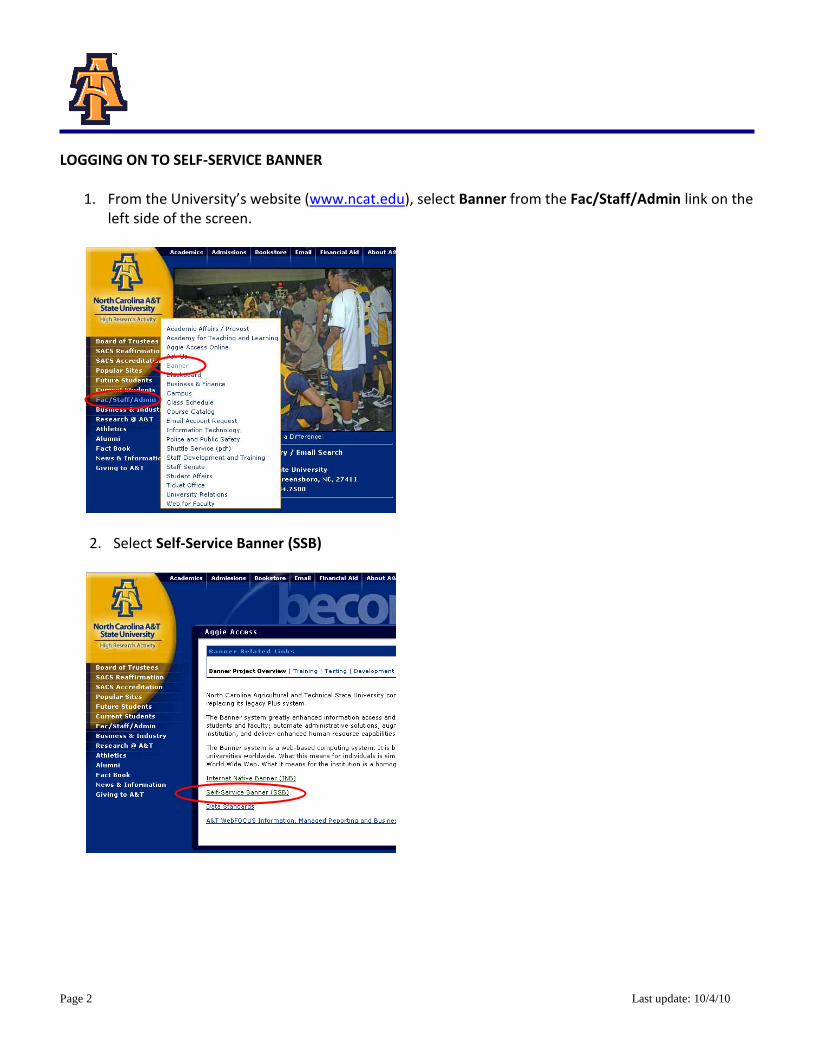
LOGGING ON TO SELF-SERVICE BANNER
1. From the University’s website (www.ncat.edu), select Banner from the Fac/Staff/Admin link on the left side of the screen.
2. Select Self-Service Banner (SSB)
Page 3 Last update: 10/4/10
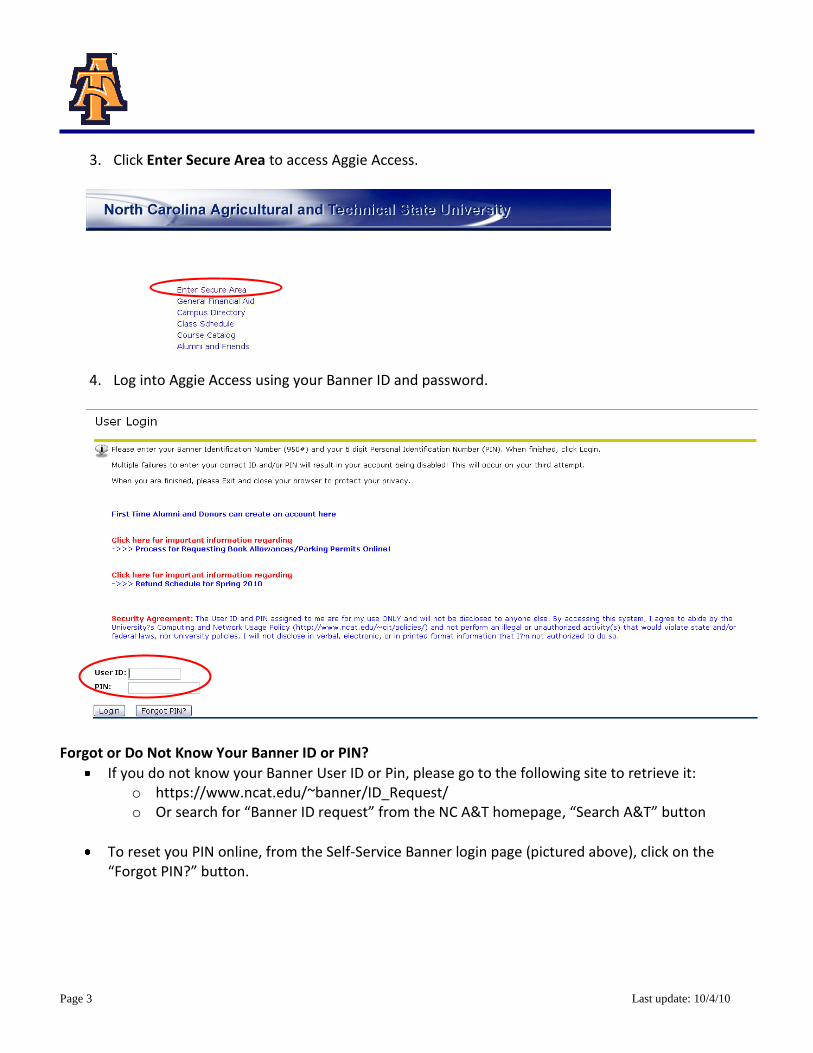
3. Click Enter Secure Area to access Aggie Access.
4. Log into Aggie Access using your Banner ID and password.
Forgot or Do Not Know Your Banner ID or PIN?
If you do not know your Banner User ID or Pin, please go to the following site to retrieve it: o https://www.ncat.edu/~banner/ID_Request/ o Or search for “Banner ID request” from the NC A&T homepage, “Search A&T” button
To reset you PIN online, from the Self-Service Banner login page (pictured above), click on the “Forgot PIN?” button.
Page 4 Last update: 10/4/10
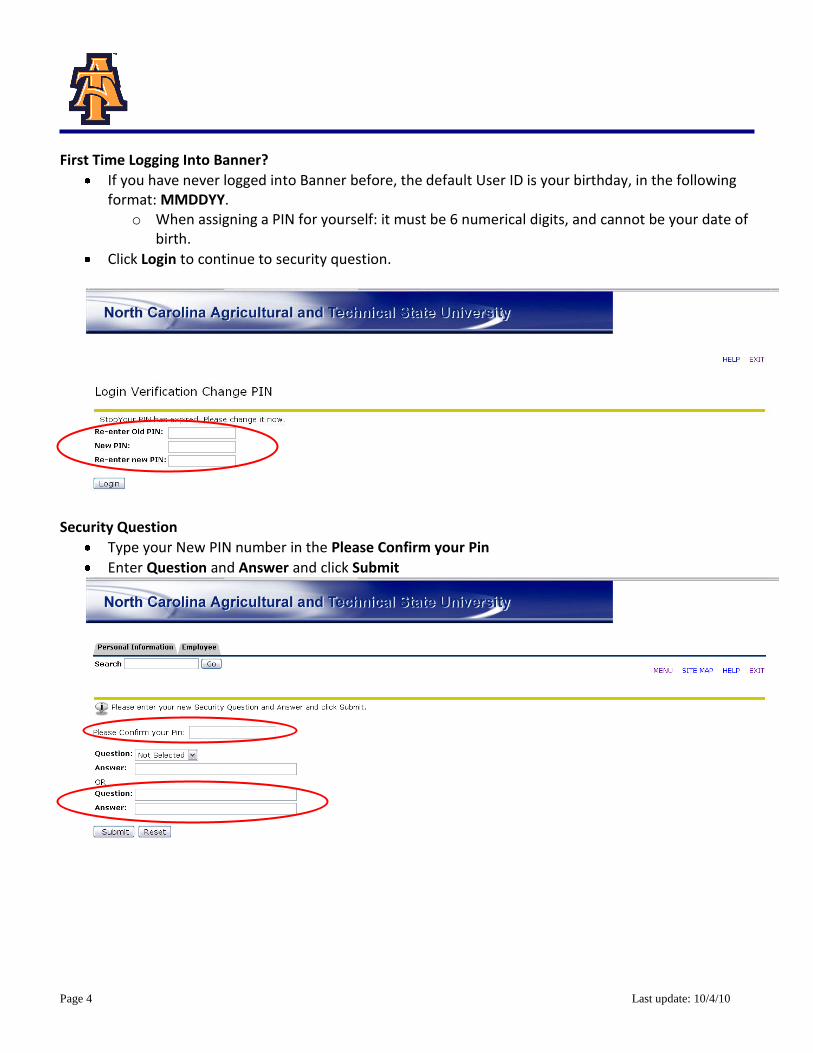
First Time Logging Into Banner?
If you have never logged into Banner before, the default User ID is your birthday, in the following format: MMDDYY.
o When assigning a PIN for yourself: it must be 6 numerical digits, and cannot be your date of birth.
Click Login to continue to security question.
Security Question
Type your New PIN number in the Please Confirm your Pin
Enter Question and Answer and click Submit

Page 5 Last update: 10/4/10
ENTERING LEAVE AND HOURS WORKED When Banner Self-Service opens, select Employee information.
Select Leave Report.
Select Access my Leave Report. Click Select.
Page 6 Last update: 10/4/10
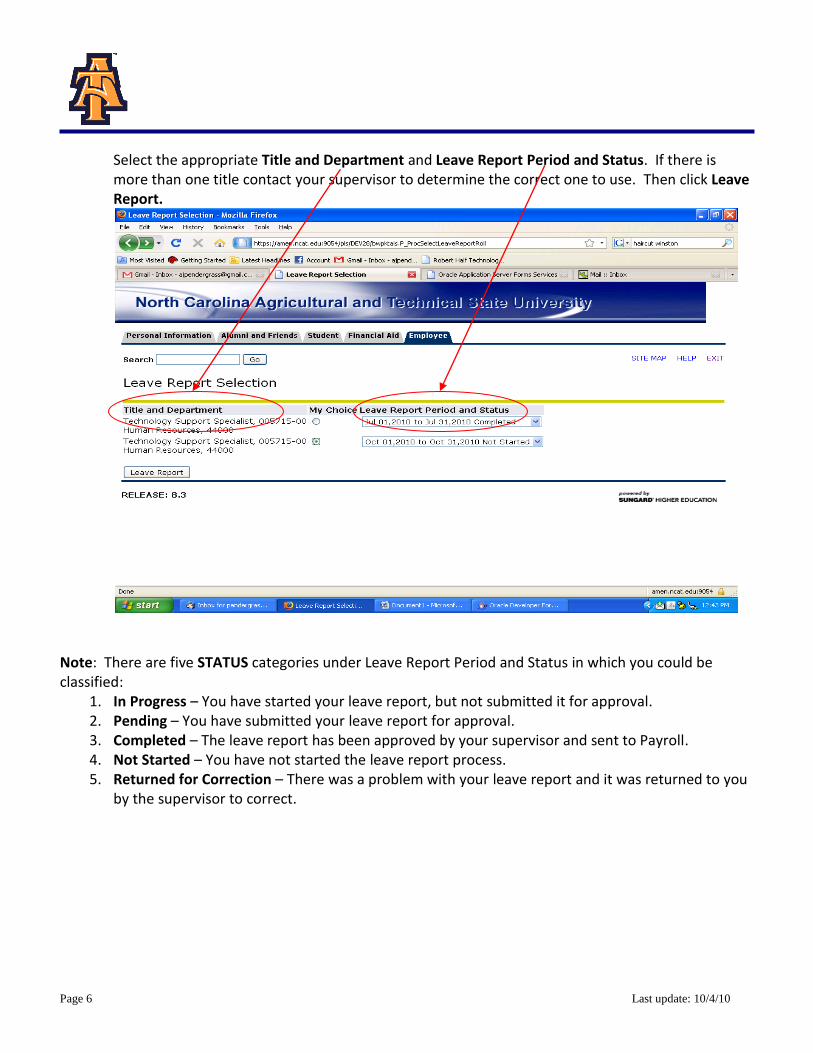
Select the appropriate Title and Department and Leave Report Period and Status. If there is more than one title contact your supervisor to determine the correct one to use. Then click Leave Report.
Note: There are five STATUS categories under Leave Report Period and Status in which you could be classified:
1. In Progress – You have started your leave report, but not submitted it for approval. 2. Pending – You have submitted your leave report for approval. 3. Completed – The leave report has been approved by your supervisor and sent to Payroll. 4. Not Started – You have not started the leave report process. 5. Returned for Correction – There was a problem with your leave report and it was returned to you
by the supervisor to correct.

Page 7 Last update: 10/4/10
You will see the Leave Reporting screen. On the top, you will see your title, department, and leave reporting period. Confirm you are on the right leave period.
Notice that the column headings across the top correspond to the first week of the month, starting with the first day of the MONTH on the far left.

Page 8 Last update: 10/4/10
The far left column, lists the work and leave categories. For complete description of the leave, refer to the “Leave Comparison Chart.”
The first day of the month is given in the next column with fields to enter hours for each work and leave category.
Page 9 Last update: 10/4/10
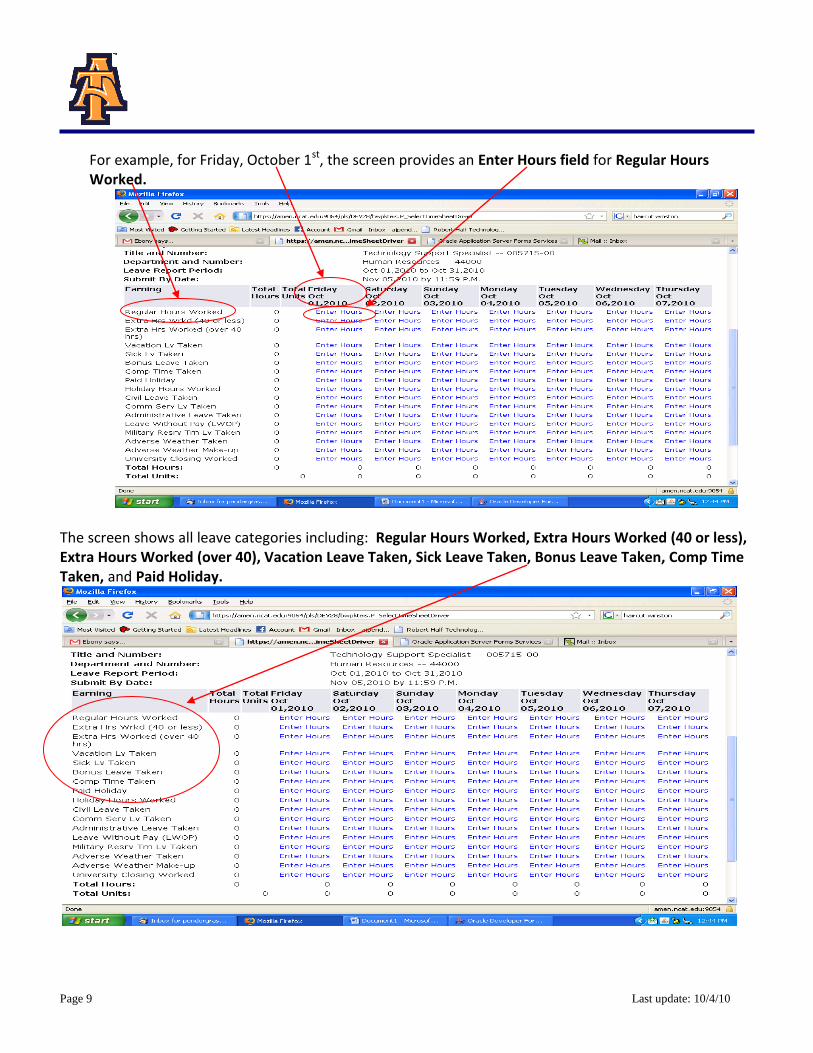
For example, for Friday, October 1st, the screen provides an Enter Hours field for Regular Hours Worked.
The screen shows all leave categories including: Regular Hours Worked, Extra Hours Worked (40 or less), Extra Hours Worked (over 40), Vacation Leave Taken, Sick Leave Taken, Bonus Leave Taken, Comp Time Taken, and Paid Holiday.
Page 10 Last update: 10/4/10
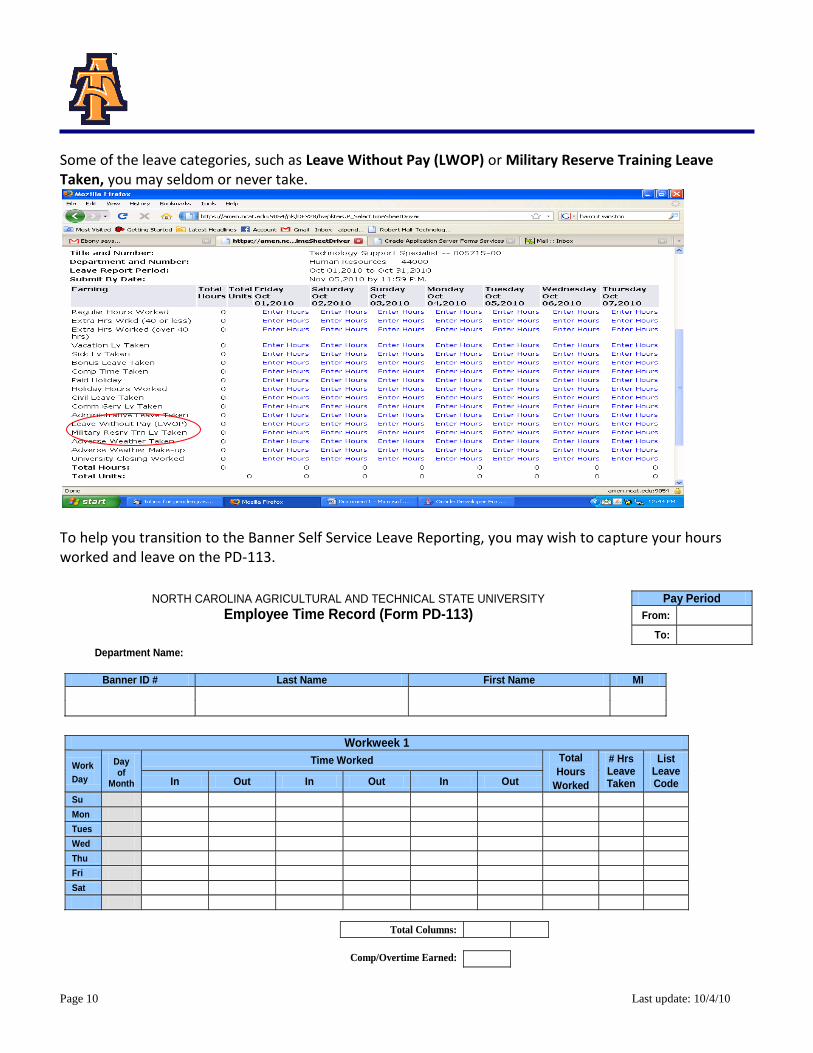
Some of the leave categories, such as Leave Without Pay (LWOP) or Military Reserve Training Leave Taken, you may seldom or never take.
To help you transition to the Banner Self Service Leave Reporting, you may wish to capture your hours worked and leave on the PD-113.
NORTH CAROLINA AGRICULTURAL AND TECHNICAL STATE UNIVERSITY
Employee Time Record (Form PD-113) Pay Period
From:
To:
Department Name:
Banner ID # Last Name First Name MI
Workweek 1
Work
Day
Day
of Month
Time Worked Total
Hours
Worked
# Hrs Leave Taken
List Leave Code In Out In Out In Out
Su Mon Tues Wed Thu Fri Sat
Total Columns:
Comp/Overtime Earned:
Workweek 2
Work
Day
Day
of Month
Time Worked Total
Hours
Worked
# Hrs Leave Taken
List Leave Code In Out In Out In Out
Su Mon Tues Wed Thu Fri Sat
Total Columns:
Comp/Overtime Earned:
Workweek 3
Work
Day
Day of
Month
Time Worked Total
Hours
Worked
# Hrs Leave Taken
List Leave Code In Out In Out In Out
Su Mon Tues Wed Thu Fri Sat
Total Columns:
Comp/Overtime Earned:
Page 11 Last update: 10/4/10
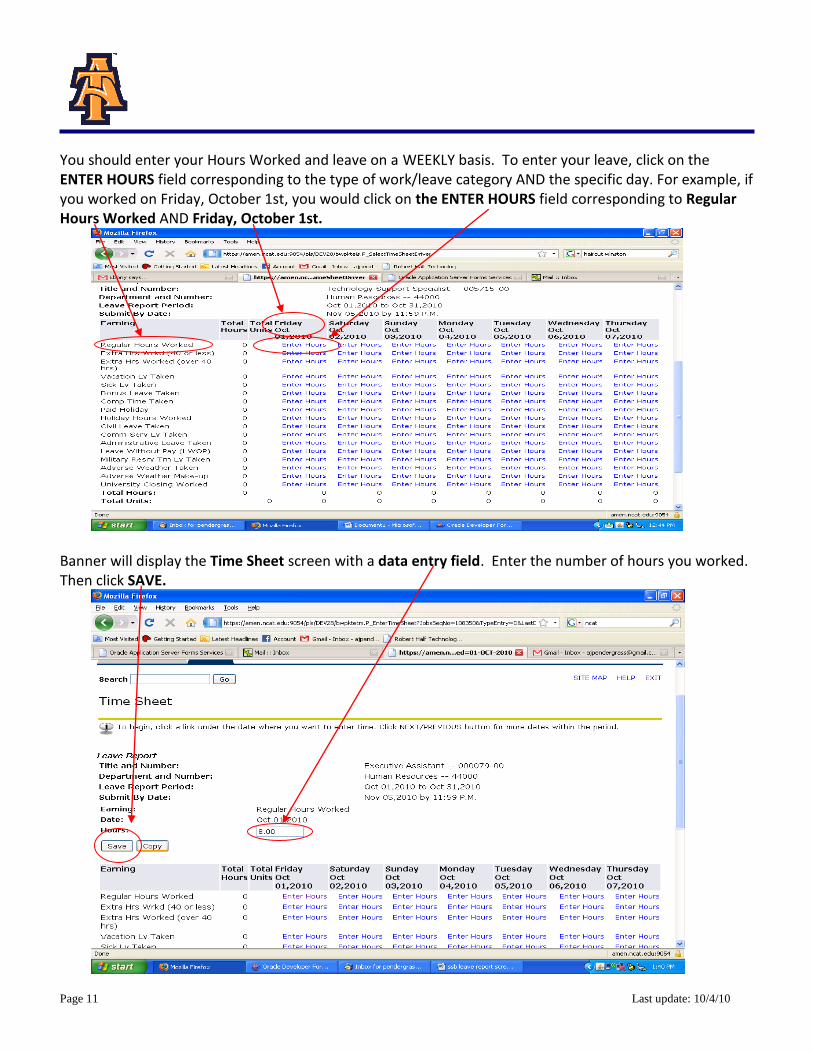
You should enter your Hours Worked and leave on a WEEKLY basis. To enter your leave, click on the ENTER HOURS field corresponding to the type of work/leave category AND the specific day. For example, if you worked on Friday, October 1st, you would click on the ENTER HOURS field corresponding to Regular Hours Worked AND Friday, October 1st.
Banner will display the Time Sheet screen with a data entry field. Enter the number of hours you worked. Then click SAVE.
Page 12 Last update: 10/4/10
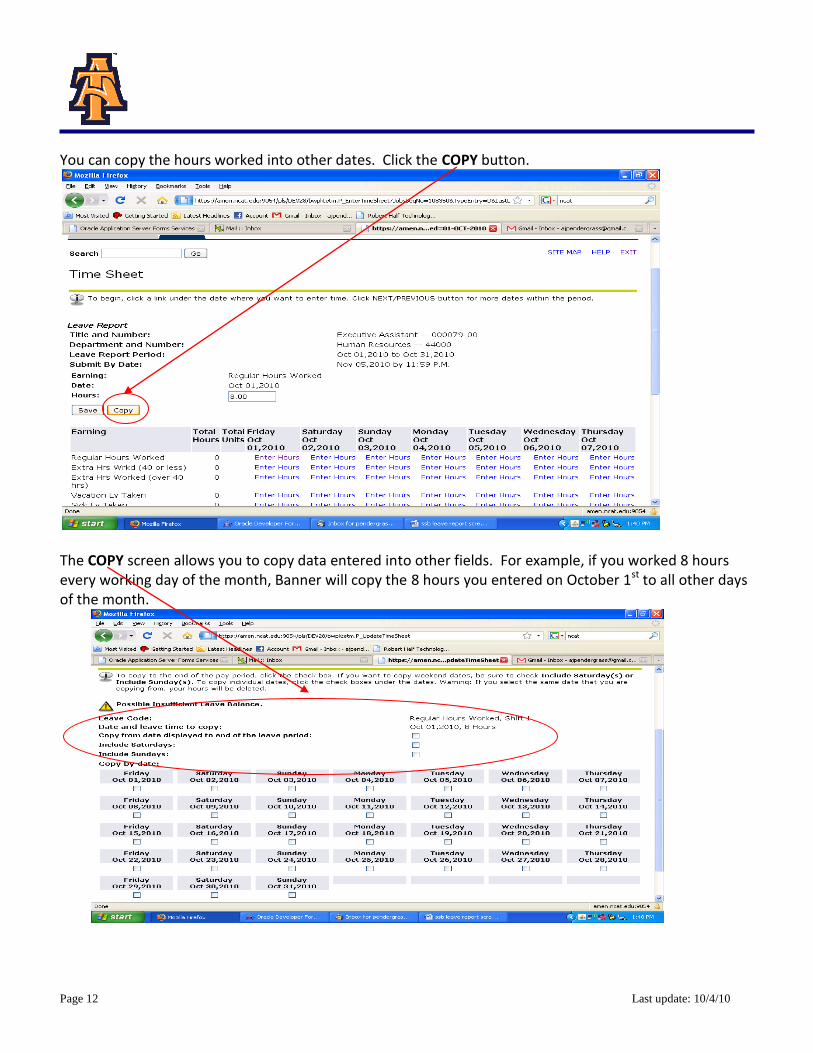
You can copy the hours worked into other dates. Click the COPY button.
The COPY screen allows you to copy data entered into other fields. For example, if you worked 8 hours every working day of the month, Banner will copy the 8 hours you entered on October 1st to all other days of the month.

Page 13 Last update: 10/4/10
Or you can copy into individual dates. For example, if you worked 8 hours each day of the week, October 4-8, then click each of these dates to copy the 8 hours worked into each day. Hit the COPY button.
You can enter leave the same way. For example, you take a vacation day the day before Homecoming. Find the ENTER HOURS field corresponding to Vacation Leave and October 8th.
Page 14 Last update: 10/4/10
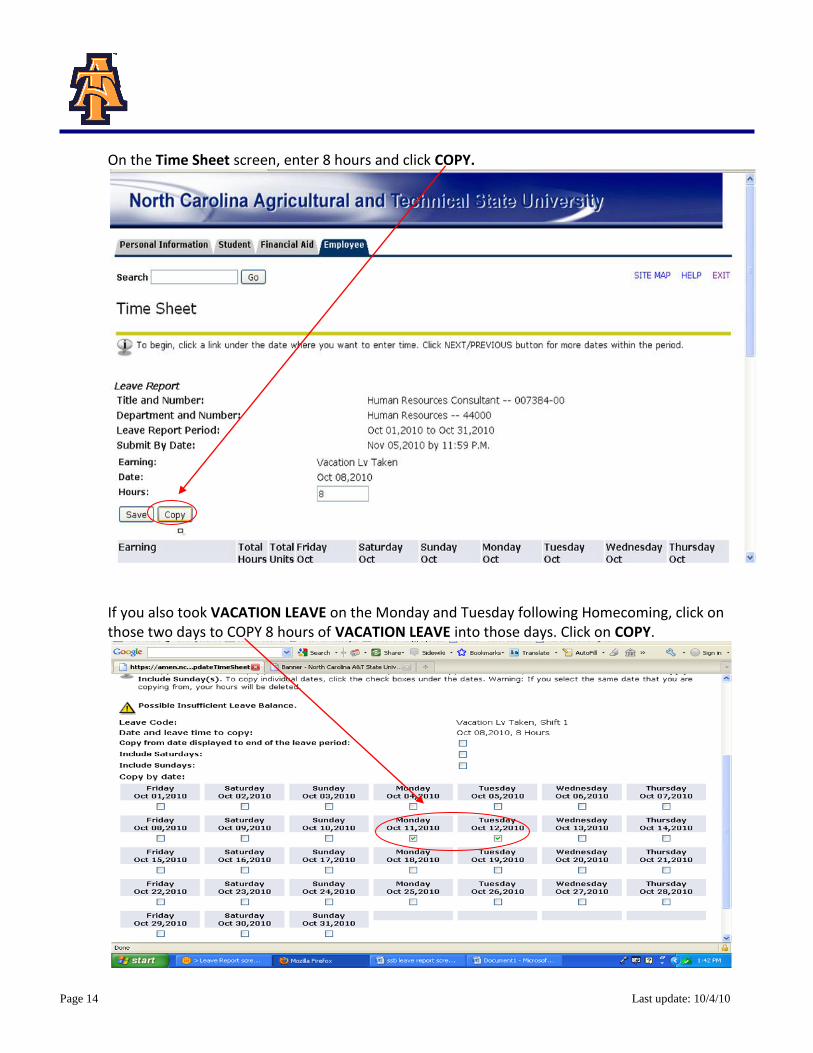
On the Time Sheet screen, enter 8 hours and click COPY.
If you also took VACATION LEAVE on the Monday and Tuesday following Homecoming, click on those two days to COPY 8 hours of VACATION LEAVE into those days. Click on COPY.

Page 15 Last update: 10/4/10
After you have finished entering hours worked or leave taken for the week and clicked on SAVE, EXIT.
***Note: Click Exit to logout without submitting time.***
When you return to Banner, click on NEXT button to enter the next week’s hours worked and leave taken.

Page 16 Last update: 10/4/10
***Note: DO NOT click the Restart button. Clicking the Restart button, will clear all information that was entered during the pay period!***
Position Selection Button - Displays the Selection page.
Comments Button - Displays the Comments page. The employee can enter freeform comments on this page.
Preview Button - Displays the Preview page. This page shows all time entered for the pay period.
Restart – clears all the information that was entered during the pay period Submit for Approval Button- Saves the data to the time entry tables, sets the status to Pending, and places the data into the approval queue.
Next Button - Displays the information for the following week in the pay period.

Page 17 Last update: 10/4/10
To view the leave entered from the previous week, click PREVIOUS.
Banner will display the previous week’s hours worked and leave taken.

Page 18 Last update: 10/4/10
To correct an earlier entry, click on ENTER HOURS corresponding to the date and the type of leave you wish to correct, then enter the right hours (such as 0 if you did not take leave), and then click SAVE.
After you enter your leave for the week, you will want to EXIT Banner.
Page 19 Last update: 10/4/10
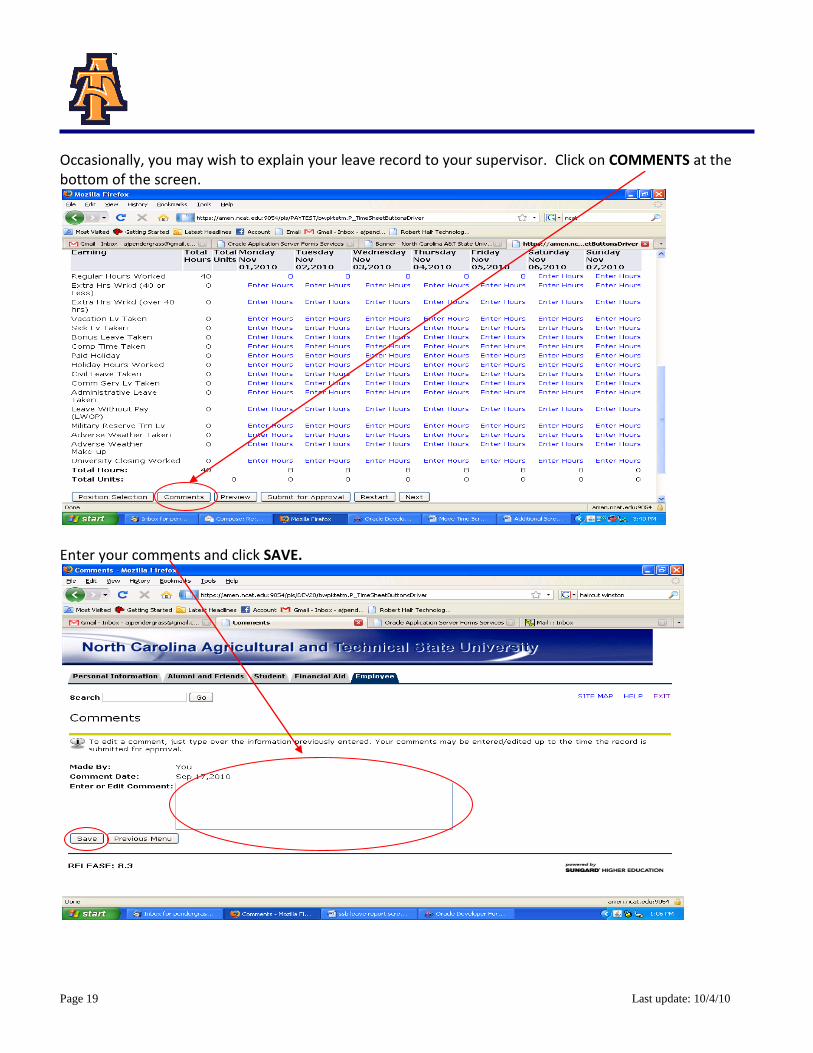
Occasionally, you may wish to explain your leave record to your supervisor. Click on COMMENTS at the bottom of the screen.
Enter your comments and click SAVE.

Page 20 Last update: 10/4/10
After you complete your LEAVE REPORT for the month, you may wish to PREVIEW.
The PREVIEW screen displays the hours worked and reported leave for the month. Ensure your leave record is accurate.
Page 21 Last update: 10/4/10
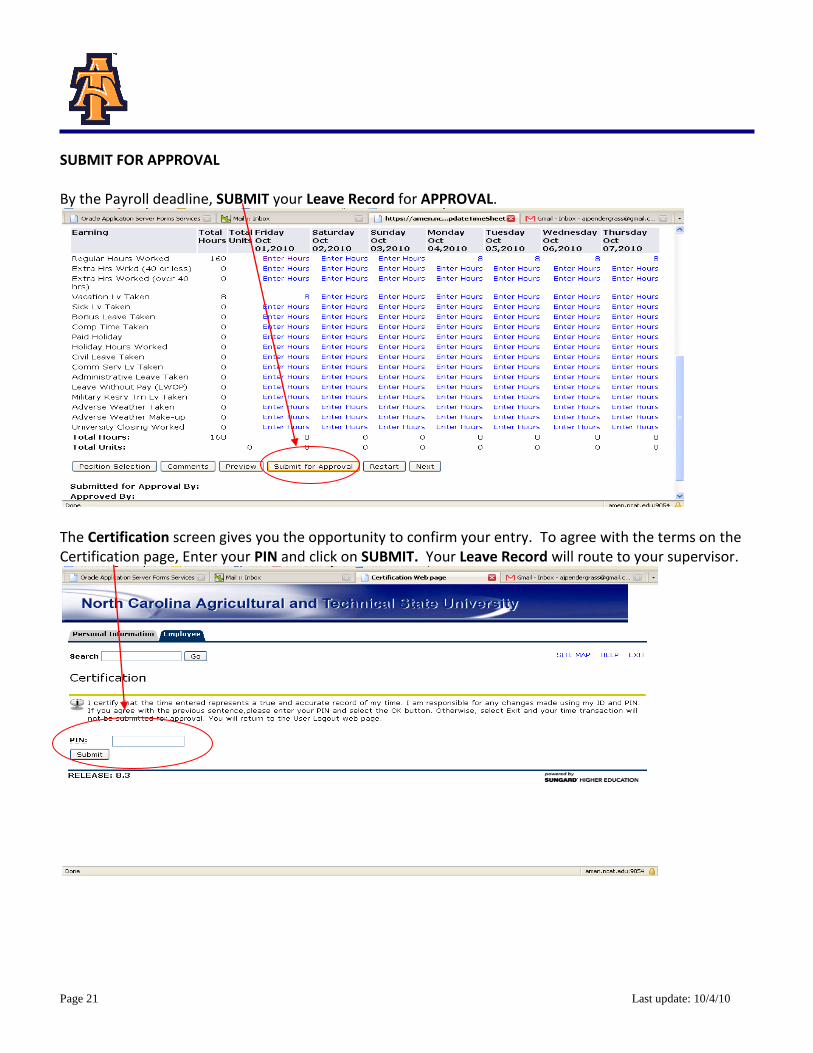
SUBMIT FOR APPROVAL By the Payroll deadline, SUBMIT your Leave Record for APPROVAL.
The Certification screen gives you the opportunity to confirm your entry. To agree with the terms on the Certification page, Enter your PIN and click on SUBMIT. Your Leave Record will route to your supervisor.

Page 22 Last update: 10/4/10
Banner will display a Confirmation screen.
Once you hit SUBMIT, your Leave Record routes to your supervisor for approval and you cannot change your Leave Record via your Banner ID.
***Note: DO NOT click the “Submit for Approval” until all leave has been entered for the period.***
Your supervisor or proxy, will approve your Leave Record and your leave will be recorded in Banner. To correct your Leave Record after you have submitted it, you can: Ask your supervisor to return it for correction. Ask your supervisor to correct your Leave Record on your behalf.

Page 23 Last update: 10/4/10
The Pay Period and Status will now show as Pending. Changes cannot be made when the Leave Report is in Pending status.
Once your supervisor (or proxy) approves your Leave Report, the Pay Period and Status will show as Completed.

Page 24 Last update: 10/4/10
If your supervisor returns your Leave Record to you for correction, the Pay Period and Status will show as Return for Correction.
Click Comments to review comments for correction. View the comments and make the corrections. Then re-submit your corrected Leave Report.
Page 25 Last update: 10/4/10
****IMPORTANT REMINDERS****
Employees must complete their Leave Report by Payroll deadlines. Supervisors must approve the Leave Report by Payroll deadlines.
Use Comments button to send messages to your Approver about your time entered.
Your Leave Balances represent your accrued leave as of the last Payroll cycle.
Enter your time and leave accurately.
Your Leave Report cannot be changed by you via your Banner ID once it has been
submitted. Contact your supervisor (or proxy), if you discover a problem.
Clicking the Restart button will erase all time for the entire pay period.
IMPORTANT: FAILURE TO MEET A DEADLINE CAN RESULT IN YOUR PAY BEING DEFERRED UNTIL THE NEXT PAY