Embed Size (px)
Citation preview
1/108876# SFC 2856500.1
# SFC 2830900.1
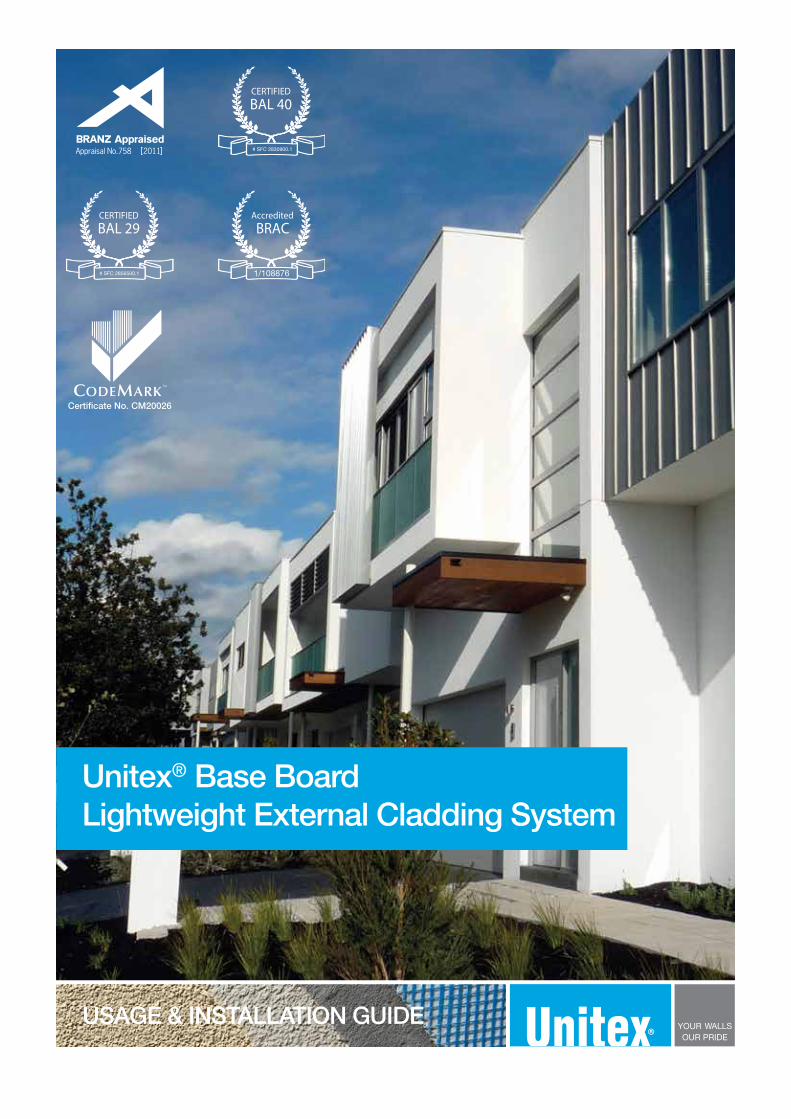
Unitex® Base BoardLightweight External Cladding System
USAGE & INSTALLATION GUIDE
Page 2Date of Issue: October 2013
USAGE & INSTALLATION GUIDE: Unitex® Base Board System
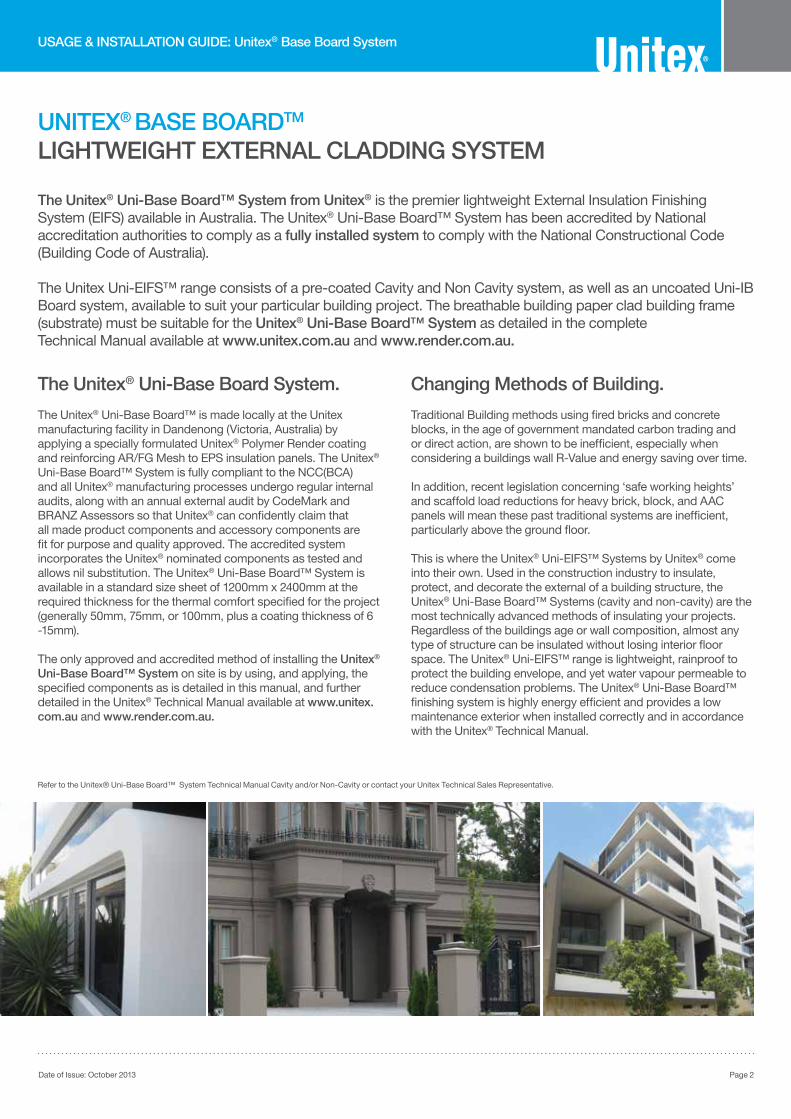
UNITEX® BASE BOARDTM
LIGHTWEIGHT EXTERNAL CLADDING SYSTEM
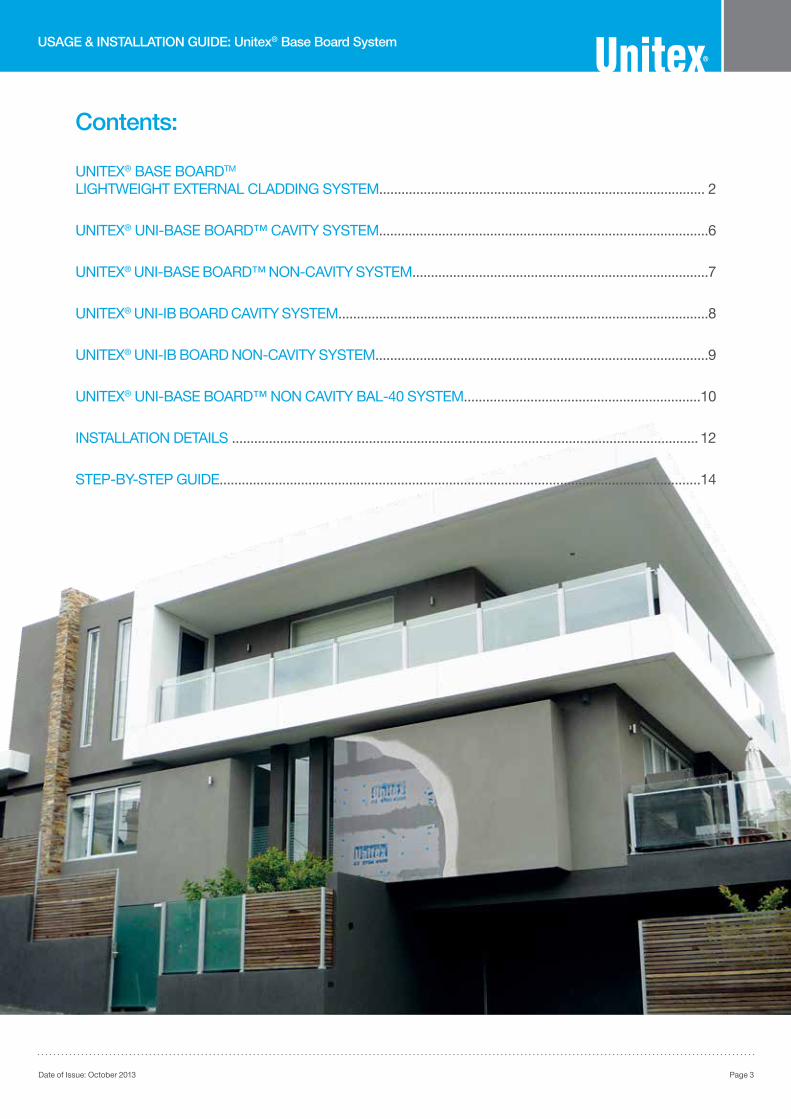
The Unitex® Uni-Base Board™ System from Unitex® is the premier lightweight External Insulation Finishing System (EIFS) available in Australia. The Unitex® Uni-Base Board™ System has been accredited by National accreditation authorities to comply as a fully installed system to comply with the National Constructional Code (Building Code of Australia).
The Unitex Uni-EIFS™ range consists of a pre-coated Cavity and Non Cavity system, as well as an uncoated Uni-IB Board system, available to suit your particular building project. The breathable building paper clad building frame (substrate) must be suitable for the Unitex® Uni-Base Board™ System as detailed in the complete Technical Manual available at www.unitex.com.au and www.render.com.au.
The Unitex® Uni-Base Board System.
The Unitex® Uni-Base Board™ is made locally at the Unitex manufacturing facility in Dandenong (Victoria, Australia) by applying a specially formulated Unitex® Polymer Render coating and reinforcing AR/FG Mesh to EPS insulation panels. The Unitex® Uni-Base Board™ System is fully compliant to the NCC(BCA) and all Unitex® manufacturing processes undergo regular internal audits, along with an annual external audit by CodeMark and BRANZ Assessors so that Unitex® can confidently claim that all made product components and accessory components are fit for purpose and quality approved. The accredited system incorporates the Unitex® nominated components as tested and allows nil substitution. The Unitex® Uni-Base Board™ System is available in a standard size sheet of 1200mm x 2400mm at the required thickness for the thermal comfort specified for the project (generally 50mm, 75mm, or 100mm, plus a coating thickness of 6 -15mm).
The only approved and accredited method of installing the Unitex® Uni-Base Board™ System on site is by using, and applying, the specified components as is detailed in this manual, and further detailed in the Unitex® Technical Manual available at www.unitex.com.au and www.render.com.au.
Changing Methods of Building.
Traditional Building methods using fired bricks and concrete blocks, in the age of government mandated carbon trading and or direct action, are shown to be inefficient, especially when considering a buildings wall R-Value and energy saving over time.
In addition, recent legislation concerning ‘safe working heights’ and scaffold load reductions for heavy brick, block, and AAC panels will mean these past traditional systems are inefficient, particularly above the ground floor.
This is where the Unitex® Uni-EIFS™ Systems by Unitex® come into their own. Used in the construction industry to insulate, protect, and decorate the external of a building structure, the Unitex® Uni-Base Board™ Systems (cavity and non-cavity) are the most technically advanced methods of insulating your projects. Regardless of the buildings age or wall composition, almost any type of structure can be insulated without losing interior floor space. The Unitex® Uni-EIFS™ range is lightweight, rainproof to protect the building envelope, and yet water vapour permeable to reduce condensation problems. The Unitex® Uni-Base Board™ finishing system is highly energy efficient and provides a low maintenance exterior when installed correctly and in accordance with the Unitex® Technical Manual.
Refer to the Unitex® Uni-Base Board™ System Technical Manual Cavity and/or Non-Cavity or contact your Unitex Technical Sales Representative.
Page 3Date of Issue: October 2013
USAGE & INSTALLATION GUIDE: Unitex® Base Board System
Contents:
UNITEX® BASE BOARDTM LIGHTWEIGHT EXTERNAL CLADDING SYSTEM........................................................................................ 2
UNITEX® UNI-BASE BOARD™ CAVITY SYSTEM......................................................................................... 6
UNITEX® UNI-BASE BOARD™ NON-CAVITY SYSTEM................................................................................7
UNITEX® UNI-IB BOARD CAVITY SYSTEM....................................................................................................8
UNITEX® UNI-IB BOARD NON-CAVITY SYSTEM..........................................................................................9
UNITEX® UNI-BASE BOARD™ NON CAVITY BAL-40 SYSTEM................................................................10
INSTALLATION DETAILS .............................................................................................................................. 12
STEP-BY-STEP GUIDE..................................................................................................................................14
Page 4Date of Issue: October 2013
USAGE & INSTALLATION GUIDE: Unitex® Base Board System
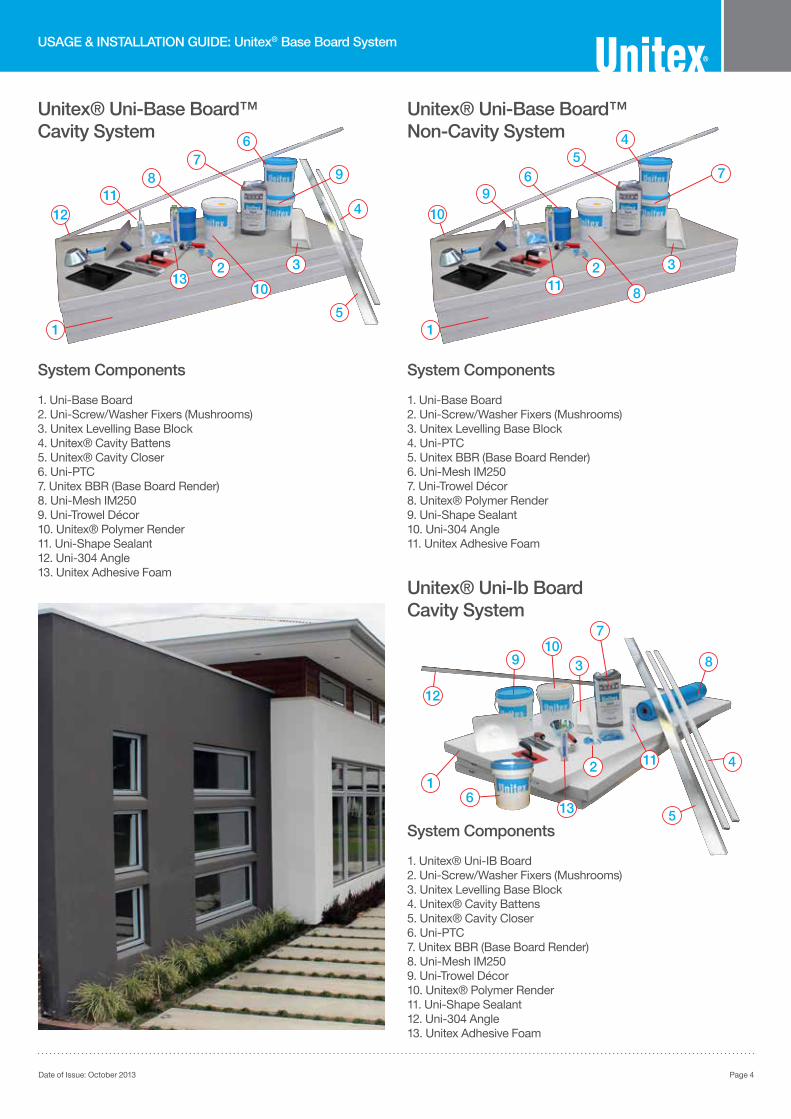
System Components
1. Uni-Base Board2. Uni-Screw/Washer Fixers (Mushrooms)3. Unitex Levelling Base Block4. Uni-PTC5. Unitex BBR (Base Board Render)6. Uni-Mesh IM2507. Uni-Trowel Décor8. Unitex® Polymer Render9. Uni-Shape Sealant10. Uni-304 Angle11. Unitex Adhesive Foam
Unitex® Uni-Base Board™Non-Cavity System
System Components
1. Uni-Base Board2. Uni-Screw/Washer Fixers (Mushrooms)3. Unitex Levelling Base Block4. Unitex® Cavity Battens5. Unitex® Cavity Closer6. Uni-PTC7. Unitex BBR (Base Board Render)8. Uni-Mesh IM2509. Uni-Trowel Décor10. Unitex® Polymer Render11. Uni-Shape Sealant12. Uni-304 Angle13. Unitex Adhesive Foam
Unitex® Uni-Base Board™Cavity System
System Components
1. Unitex® Uni-IB Board2. Uni-Screw/Washer Fixers (Mushrooms)3. Unitex Levelling Base Block4. Unitex® Cavity Battens5. Unitex® Cavity Closer6. Uni-PTC7. Unitex BBR (Base Board Render)8. Uni-Mesh IM2509. Uni-Trowel Décor10. Unitex® Polymer Render11. Uni-Shape Sealant12. Uni-304 Angle13. Unitex Adhesive Foam
Unitex® Uni-Ib BoardCavity System
1
1
1
10
10
1011
11
11
12
12
13
13
2
2
23
3
3
4
4
4
5
5
56
6
67
7
78
8
8
9
9
9
Page 5Date of Issue: October 2013
USAGE & INSTALLATION GUIDE: Unitex® Base Board System
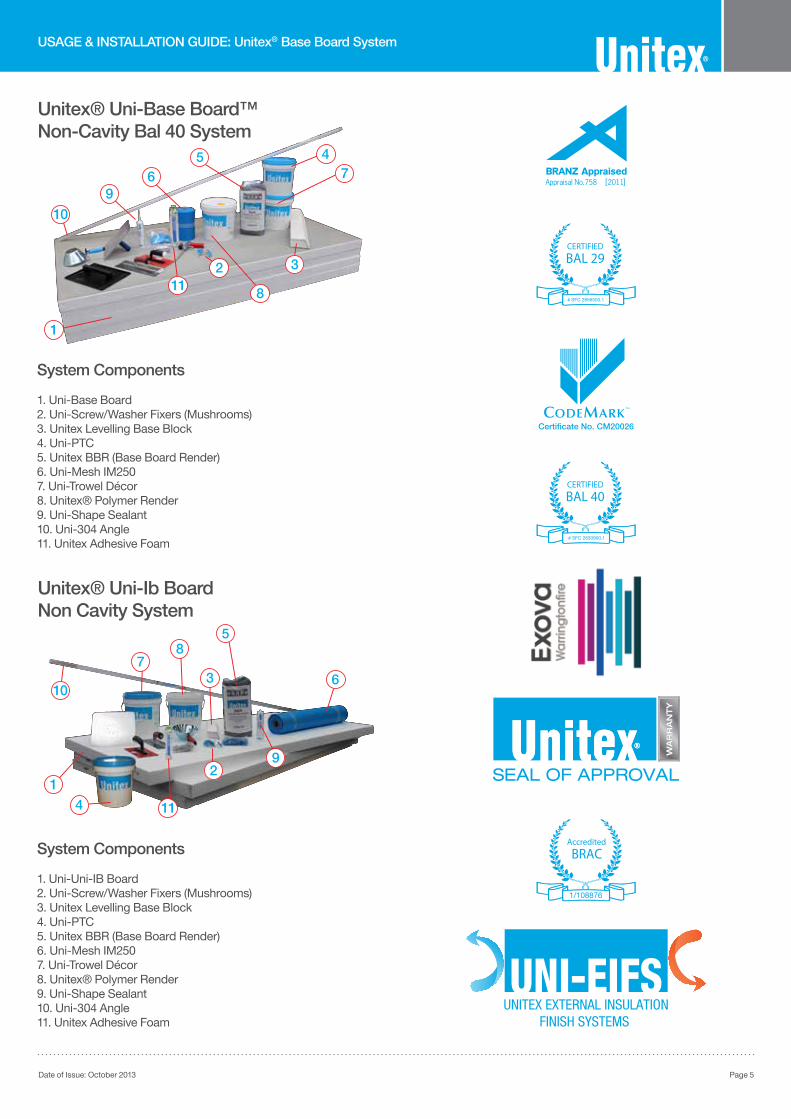
Unitex® Uni-Ib BoardNon Cavity System
Unitex® Uni-Base Board™Non-Cavity Bal 40 System
System Components
1. Uni-Base Board2. Uni-Screw/Washer Fixers (Mushrooms)3. Unitex Levelling Base Block4. Uni-PTC5. Unitex BBR (Base Board Render)6. Uni-Mesh IM2507. Uni-Trowel Décor8. Unitex® Polymer Render9. Uni-Shape Sealant10. Uni-304 Angle11. Unitex Adhesive Foam
System Components
1. Uni-Uni-IB Board2. Uni-Screw/Washer Fixers (Mushrooms)3. Unitex Levelling Base Block4. Uni-PTC5. Unitex BBR (Base Board Render)6. Uni-Mesh IM2507. Uni-Trowel Décor8. Unitex® Polymer Render9. Uni-Shape Sealant10. Uni-304 Angle11. Unitex Adhesive Foam
WA
RR
AN
TY
WA
RR
AN
TY
WA
RR
AN
TY
SEAL OF APPROVAL
UNITEX EXTERNAL INSULATIONFINISH SYSTEMS
UNI-EIFS
1/108876
# SFC 2856500.1
# SFC 2830900.1
1
1
10
10
11
11
2
2
3
3
4
4
5
5
6
6
7
7
8
8
9
9
Page 6Date of Issue: October 2013
USAGE & INSTALLATION GUIDE: Unitex® Base Board System
UNITEX® UNI-BASE BOARD™ CAVITY SYSTEM
Unitex® Uni-Base Board™ Cavity System to be applied over breathable building paper clad suitable substrate.
1. Seal all the building wrap with Unitex® flashing tape, at all wrap junctions, around all windows doors and penetrations, from the wrap to the solid adjoining surface.
2. After builder has installed all flashing install the Unitex® Cavity Closer to the base of the wall frame. Mechanical fixing with class 3 minimum coated screw or nail min 30 mm into substrate stud/ base plate.
3. Install the Unitex® Cavity Battens over appropriately installed and sealed breathable building paper fixed to system approved building frame (studs). The battens to be tacked or temp adhesively (Unitex® Angle Adhesive) fitted to perpendicular line (vertically) of all studs (from cavity closer to top of wall). Top plate to be battened out horizontally to air seal cavity to roof cavity.
4. Install Unitex® levelling Base Blocks to the base plate of the frame adjacent to the Unitex® Cavity Closer, mechanically with class 3 minimum coated screws in a non-marine environment, or stainless steel grade 304 or 416 in a marine environment. Butt ends to be joined and must be back-supported onto base plate or noggin, and adhesively joined with Unitex® Foam Adhesive. Unitex® Base Blocks come in lengths of 2.4 lineal meters x150mm height (approximately), and are base angled for drip protection. The Unitex® Base Block is a starter support to provide a sealed and level edging so that the Unitex® Uni-Base Board™ cut edge is not exposed to the elements and to prevent moisture ingress near ground level.
5. Install the Unitex® Sill Block using Unitex class 3 minimum coated screws to below the window. This is an optional component though technically preferred. The alternative is to use the complete Unitex® Base Board system then coat and render back sills. Install Unitex® Wedge Head Protectors to meter boxes. It is correct practice to always screw to a minimum depth of 25mm in stud or substrate, and into each stud and noggin base plate.
6. Cut Unitex® Uni-Base Board™ (pre-coated) to size and fix Unitex® Uni-Base Board™ to frame through battens with Unitex® screw fixers and washers. Ensure washers are screwed into Unitex® Uni-Base Board™ at a minimum 5mm below board surface and flush over-coat or patch with Unitex® Polymer Render (5% cement to be added). Fixings to be approximately 8 fixings per square meter (refer to page 12). Apply Unitex® Adhesive Foam to forward half of butt joint, and between all Unitex® Uni-Base Board™ sheets. Standard sizes and thickness of Unitex® Uni-Base Board™ are 1200mm x 2400 mm at 75mm, 50mm, or 100mm thickness.
7. The Builder to install builder’s waterproof flashing between floors, at ground level, parapet metal flashing, and other specified flashings. Builder to install termite protection company system/s.
8. Builder to install waterproof sealing to Windows (if required by design). Unitex® recommends Uni-Shape™ Sealant or Unitex® Window Seal Strips. Windows must be protected from trade damage with masking tape and plastic wrap.
9. Install Unitex® supplied corner protection angles of stainless steel 304, or Aluminium, to allow minimum 5mm BBR (Unitex® Base Board
Render, 8.5kg) thickness to be applied to align with corner protecting Unitex® ex-angles. To be adhesively installed with Unitex® Polymer Render or Unitex® Angle Adhesive. Unitex® Reinforcing Fibreglass Mesh can be installed under or over the Unitex® Ex-angle, and allowing correct minimum render thickness.
10. Apply Unitex® Uni-Mesh IM 250 reinforcing mesh and imbed into Unitex® Polymer Render (5-10% cement added) at all Unitex® Uni-Base Board™ junctions. Patch Unitex® washers and buttons to be level with surface using Unitex® Polymer Render (already imbedded into Unitex® Uni-Base Board™ sheets 5mm below surface). Unitex® Polymer Render is the strongest adhesive render from Unitex® and is also used to stop, embed, and adhere the Unitex® corner angles.
11. When the Unitex® Uni-Base Board™ surface is dry and acceptable, mix Unitex® BBR as per instructions (on bag), apply and float to true and level surface. Unitex requires a minimum Unitex® BBR thickness over all surfaces of 5mm (especially over the previously patched fixers and washers to prevent thermal bridging or surface blemishes).
12. When the Unitex® BBR coat is dry and fully cured, cut in all expansion joints to penetrations (as detailed on page 12) to relieve potential stress points in walling. In order to reduce substrate movement cracking risk Unitex® strongly recommends more than less joints be cut, and are a must for this system and all rendered walls. Apply Unitex® Uni-Shape™ Sealant to approximately 8-10 mm wide expansion joints and to a depth of approximately 5-7mm (i.e. render thickness needs to be thicker than required mastic depth). Unitex® Uni-Shape™ Sealant is used to provide a flexible waterproof seal at expansion joints for the life of the sealant. NOTE. Baseboard EPS to be hot knife or saw cut to 75% of depth behind expansion joints.
IMPORTANT NOTE (point 12): If the Builder, Owner or Specifier disputes the installation of required expansion joints then Unitex recommends that you obtain written instructions to relieve you of responsibility for potential cracking issues arising from lack of installed expansion joints.
13. Apply Unitex® surface Applied Texture Finish in a tradesman like manner (Unitex® Uni-Trowell Décor) to all rendered Unitex® Uni-Base Board™ surfaces (not over sealant). There are various grades and colours available from fine sand to coarse scratch (graffiato) finishes. When texture coats are dry, apply as needed (or a minimum 2 coats) of Unitex® Uni-PTC protective top coat over all Unitex® Uni-Base Board™ surfaces including sealant joints. Unitex® Uni-PTC is a slightly flexible, usually matt topcoat and they provide for ease of cleaning and protection against salty and polluted atmospheres and certain climatic conditions.
IMPORTANT NOTE (point 13): Dry powder unpigmented Unitex® texture coats (Unitex® Texture 800 range) must be over coated with a sealer coat and two top coats of Unitex® Uni-PTC.
14. Leave all adjoining areas and surfaces clean, and remove all protective masking tapes and window protection. Carry out final inspection with a Unitex® Technical Representative for accreditation and warranties.
15. Unitex® Uni-Base Board™ Cavity System has been installed.
Page 7Date of Issue: October 2013
USAGE & INSTALLATION GUIDE: Unitex® Base Board System
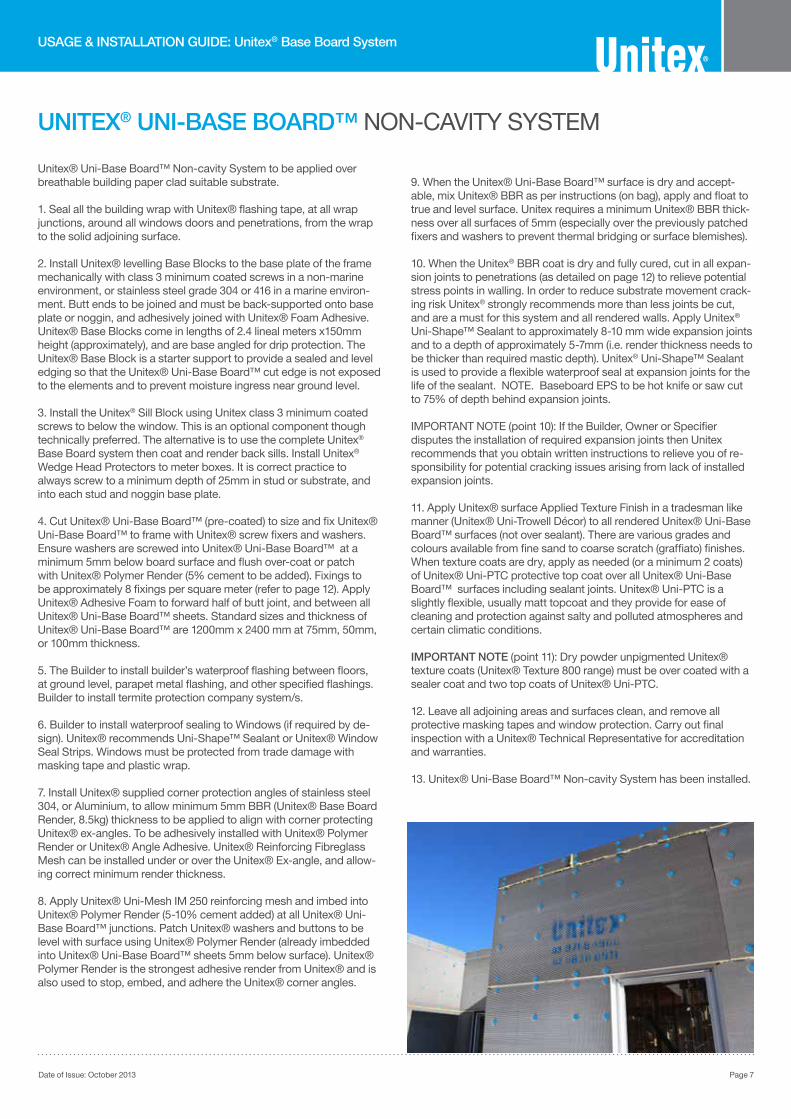
UNITEX® UNI-BASE BOARD™ NON-CAVITY SYSTEM
Unitex® Uni-Base Board™ Non-cavity System to be applied over breathable building paper clad suitable substrate.
1. Seal all the building wrap with Unitex® flashing tape, at all wrap junctions, around all windows doors and penetrations, from the wrap to the solid adjoining surface.
2. Install Unitex® levelling Base Blocks to the base plate of the frame mechanically with class 3 minimum coated screws in a non-marine environment, or stainless steel grade 304 or 416 in a marine environ-ment. Butt ends to be joined and must be back-supported onto base plate or noggin, and adhesively joined with Unitex® Foam Adhesive. Unitex® Base Blocks come in lengths of 2.4 lineal meters x150mm height (approximately), and are base angled for drip protection. The Unitex® Base Block is a starter support to provide a sealed and level edging so that the Unitex® Uni-Base Board™ cut edge is not exposed to the elements and to prevent moisture ingress near ground level.
3. Install the Unitex® Sill Block using Unitex class 3 minimum coated screws to below the window. This is an optional component though technically preferred. The alternative is to use the complete Unitex® Base Board system then coat and render back sills. Install Unitex® Wedge Head Protectors to meter boxes. It is correct practice to always screw to a minimum depth of 25mm in stud or substrate, and into each stud and noggin base plate.
4. Cut Unitex® Uni-Base Board™ (pre-coated) to size and fix Unitex® Uni-Base Board™ to frame with Unitex® screw fixers and washers. Ensure washers are screwed into Unitex® Uni-Base Board™ at a minimum 5mm below board surface and flush over-coat or patch with Unitex® Polymer Render (5% cement to be added). Fixings to be approximately 8 fixings per square meter (refer to page 12). Apply Unitex® Adhesive Foam to forward half of butt joint, and between all Unitex® Uni-Base Board™ sheets. Standard sizes and thickness of Unitex® Uni-Base Board™ are 1200mm x 2400 mm at 75mm, 50mm, or 100mm thickness.
5. The Builder to install builder’s waterproof flashing between floors, at ground level, parapet metal flashing, and other specified flashings. Builder to install termite protection company system/s.
6. Builder to install waterproof sealing to Windows (if required by de-sign). Unitex® recommends Uni-Shape™ Sealant or Unitex® Window Seal Strips. Windows must be protected from trade damage with masking tape and plastic wrap.
7. Install Unitex® supplied corner protection angles of stainless steel 304, or Aluminium, to allow minimum 5mm BBR (Unitex® Base Board Render, 8.5kg) thickness to be applied to align with corner protecting Unitex® ex-angles. To be adhesively installed with Unitex® Polymer Render or Unitex® Angle Adhesive. Unitex® Reinforcing Fibreglass Mesh can be installed under or over the Unitex® Ex-angle, and allow-ing correct minimum render thickness.
8. Apply Unitex® Uni-Mesh IM 250 reinforcing mesh and imbed into Unitex® Polymer Render (5-10% cement added) at all Unitex® Uni-Base Board™ junctions. Patch Unitex® washers and buttons to be level with surface using Unitex® Polymer Render (already imbedded into Unitex® Uni-Base Board™ sheets 5mm below surface). Unitex® Polymer Render is the strongest adhesive render from Unitex® and is also used to stop, embed, and adhere the Unitex® corner angles.
9. When the Unitex® Uni-Base Board™ surface is dry and accept-able, mix Unitex® BBR as per instructions (on bag), apply and float to true and level surface. Unitex requires a minimum Unitex® BBR thick-ness over all surfaces of 5mm (especially over the previously patched fixers and washers to prevent thermal bridging or surface blemishes).
10. When the Unitex® BBR coat is dry and fully cured, cut in all expan-sion joints to penetrations (as detailed on page 12) to relieve potential stress points in walling. In order to reduce substrate movement crack-ing risk Unitex® strongly recommends more than less joints be cut, and are a must for this system and all rendered walls. Apply Unitex® Uni-Shape™ Sealant to approximately 8-10 mm wide expansion joints and to a depth of approximately 5-7mm (i.e. render thickness needs to be thicker than required mastic depth). Unitex® Uni-Shape™ Sealant is used to provide a flexible waterproof seal at expansion joints for the life of the sealant. NOTE. Baseboard EPS to be hot knife or saw cut to 75% of depth behind expansion joints.
IMPORTANT NOTE (point 10): If the Builder, Owner or Specifier disputes the installation of required expansion joints then Unitex recommends that you obtain written instructions to relieve you of re-sponsibility for potential cracking issues arising from lack of installed expansion joints.
11. Apply Unitex® surface Applied Texture Finish in a tradesman like manner (Unitex® Uni-Trowell Décor) to all rendered Unitex® Uni-Base Board™ surfaces (not over sealant). There are various grades and colours available from fine sand to coarse scratch (graffiato) finishes. When texture coats are dry, apply as needed (or a minimum 2 coats) of Unitex® Uni-PTC protective top coat over all Unitex® Uni-Base Board™ surfaces including sealant joints. Unitex® Uni-PTC is a slightly flexible, usually matt topcoat and they provide for ease of cleaning and protection against salty and polluted atmospheres and certain climatic conditions.
IMPORTANT NOTE (point 11): Dry powder unpigmented Unitex® texture coats (Unitex® Texture 800 range) must be over coated with a sealer coat and two top coats of Unitex® Uni-PTC.
12. Leave all adjoining areas and surfaces clean, and remove all protective masking tapes and window protection. Carry out final inspection with a Unitex® Technical Representative for accreditation and warranties.
13. Unitex® Uni-Base Board™ Non-cavity System has been installed.
Page 8Date of Issue: October 2013
USAGE & INSTALLATION GUIDE: Unitex® Base Board System
UNITEX® UNI-IB BOARD CAVITY SYSTEM
When choosing bare uncoated EPS sheets for the installation of the Unitex base Board Cavity and Non-cavity Systems only Unitex supplied and approved EPS Polystyrene is acceptable under warranty.
Unitex® Uni-IB Board Cavity System to be applied over breathable building paper clad suitable substrate.
1. Seal all the building wrap with Unitex® flashing tape, at all wrap junctions, around all windows doors and penetrations, from the wrap to the solid adjoining surface.
2. After builder has installed all flashing install the Unitex® Cavity Closer to the base of the wall frame. Mechanical fixing with class 3 minimum coated screw or nail min 30 mm into substrate stud/ base plate.
3. Install the Unitex® Cavity Battens over appropriately installed and sealed breathable building paper fixed to system approved building frame (studs). The battens to be tacked or temp adhesively (Unitex® Angle Adhesive) fitted to perpendicular line (vertically) of all studs (from cavity closer to top of wall). Top plate to be battened out horizontally to air seal cavity to roof cavity.
4. Install Unitex® levelling Base Blocks to the base plate of the frame adjacent to the Unitex® Cavity Closer, mechanically with class 3 minimum coated screws in a non-marine environment, or stainless steel grade 304 or 416 in a marine environment. Butt ends to be joined and must be back-supported onto base plate or noggin, and adhesively joined with Unitex® Foam Adhesive. Unitex® Base Blocks come in lengths of 2.4 lineal meters x150mm height (approximately), and are base angled for drip protection. The Unitex® Base Block is a starter support to provide a sealed and level edging so that the Unitex® Uni-Base Board™ cut edge is not exposed to the elements and to prevent moisture ingress near ground level.
5. Install the Unitex® Sill Block using Unitex class 3 minimum coated screws to below the window. This is an optional component though technically preferred. The alternative is to use the complete Unitex® Base Board system then coat and render back sills. Install Unitex® Wedge Head Protectors to meter boxes. It is correct practice to always screw to a minimum depth of 25mm in stud or substrate, and into each stud and noggin base plate.
6. Cut Unitex® Uni-IB Board to size and fix Unitex® Uni-IB Board to frame through battens with Unitex® screw fixers and washers. Ensure washers are screwed into Unitex® Uni-IB Board at a minimum 5mm below board surface and flush over-coat or patch with Unitex® Polymer Render (5% cement to be added). Fixings to be approximately 8 fixings per square meter (refer to page 12). Apply Unitex® Adhesive Foam to forward half of butt joint, and between all Unitex® Uni-IB Board sheets. Standard sizes and thickness of Unitex® Uni-IB Board are 1200mm x 2400 mm at 75mm, 50mm, or 100mm thickness.
7. The installed Unitex® Uni-IB Board is now to be fully coated with Unitex® Polymer Render (plus 5-10% cement to be added), trowel applied and with embedded alkali resistant E-Glass mesh (Uni mesh IM) in 1 meter wide bands and over lapping by 100mm. Thickness of the Unitex® Polymer Render mesh-reinforced ground coat is minimum 2mm. Finish surface best broomed rough for following render coat bonding.
8. The Builder to install builder’s waterproof flashing between floors, at ground level, parapet metal flashing, and other specified flashings. Builder to install termite protection company system/s.
9. Builder to install waterproof sealing to Windows (if required by design). Unitex® recommends Uni-Shape™ Sealant or Unitex® Window Seal Strips. Windows must be protected from trade damage with masking tape and plastic wrap.
10. Install Unitex® supplied corner protection angles of stainless steel 304, or Aluminium, to allow minimum 5mm BBR (Unitex® Base Board Render, 8.5kg) thickness to be applied to align with corner protecting Unitex® ex-angles. To be adhesively installed with Unitex® Polymer Render or Unitex® Angle Adhesive. Unitex® Reinforcing Fibreglass Mesh can be installed under or over the Unitex® Ex-angle, and allowing correct minimum render thickness.
11. Apply Unitex® Uni-Mesh IM 250 reinforcing mesh and imbed into Unitex® Polymer Render (5-10% cement added) at all Unitex® Uni-IB Board junctions. Patch Unitex® washers and buttons to be level with surface using Unitex® Polymer Render (already imbedded into Unitex® Uni-IB Board sheets 5mm below surface). Unitex® Polymer Render is the strongest adhesive render from Unitex® and is also used to stop, embed, and adhere the Unitex® corner angles.
12. When the Unitex® Uni-IB Board surface is dry and acceptable, mix Unitex® BBR as per instructions (on bag), apply and float to true and level surface. Unitex requires a minimum Unitex® BBR thickness over all surfaces of 5mm (especially over the previously patched fixers and washers to prevent thermal bridging or surface blemishes).
13. When the Unitex® BBR coat is dry and fully cured, cut in all expansion joints to penetrations (as detailed on page 12) to relieve potential stress points in walling. In order to reduce substrate movement cracking risk Unitex® strongly recommends more than less joints be cut, and are a must for this system and all rendered walls. Apply Unitex® Uni-Shape™ Sealant to approximately 8-10 mm wide expansion joints and to a depth of approximately 5-7mm (i.e. render thickness needs to be thicker than required mastic depth). Unitex® Uni-Shape™ Sealant is used to provide a flexible waterproof seal at expansion joints for the life of the sealant. NOTE. Baseboard EPS to be hot knife or saw cut to 75% of depth behind expansion joints.
IMPORTANT NOTE (point 13): If the Builder, Owner or Specifier disputes the installation of required expansion joints then Unitex recommends that you obtain written instructions to relieve you of responsibility for potential cracking issues arising from lack of installed expansion joints.
14. Apply Unitex® surface Applied Texture Finish in a tradesman like manner (Unitex® Uni-Trowel Décor) to all rendered Unitex® Uni-IB Board surfaces (not over sealant). There are various grades and colours available from fine sand to coarse scratch (graffiato) finishes. When texture coats are dry, apply as needed (or a minimum 2 coats) of Unitex® Uni-PTC protective top coat over all Unitex® Uni-IB Board surfaces including sealant joints. Unitex® Uni-PTC is a slightly flexible, usually matt topcoat and they provide for ease of cleaning and protection against salty and polluted atmospheres and certain climatic conditions.
IMPORTANT NOTE (point 14): Dry powder unpigmented Unitex® texture coats (Unitex® Texture 800 range) must be over coated with a sealer coat and two top coats of Unitex® Uni-PTC.
15. Leave all adjoining areas and surfaces clean, and remove all protective masking tapes and window protection. Carry out final inspection with a Unitex® Technical Representative for accreditation and warranties.
16. Unitex® Uni-IB Board Cavity System has been installed.
Page 9Date of Issue: October 2013
USAGE & INSTALLATION GUIDE: Unitex® Base Board System
UNITEX® UNI-IB BOARD NON-CAVITY SYSTEM
When choosing bare uncoated EPS sheets for the installation of the Unitex base Board Cavity and Non-cavity Systems only Unitex supplied and approved EPS Polystyrene is acceptable under warranty.
Unitex® Uni-IB Board Non-cavity System to be applied over breathable building paper clad suitable substrate.
1. Seal all the building wrap with Unitex® flashing tape, at all wrap junctions, around all windows doors and penetrations, from the wrap to the solid adjoining surface.
2. Install Unitex® levelling Base Blocks to the base plate of the frame mechanically with class 3 minimum coated screws in a non-marine environment, or stainless steel grade 304 or 416 in a marine environment. Butt ends to be joined and must be back-supported onto base plate or noggin, and adhesively joined with Unitex® Foam Adhesive. Unitex® Base Blocks come in lengths of 2.4 lineal meters x150mm height (approximately), and are base angled for drip protection. The Unitex® Base Block is a starter support to provide a sealed and level edging so that the Unitex® Uni-Base Board™ cut edge is not exposed to the elements and to prevent moisture ingress near ground level.
3. Install the Unitex® Sill Block using Unitex class 3 minimum coated screws to below the window. This is an optional component though technically preferred. The alternative is to use the complete Unitex® Base Board system then coat and render back sills. Install Unitex® Wedge Head Protectors to meter boxes. It is correct practice to always screw to a minimum depth of 25mm in stud or substrate, and into each stud and noggin base plate.
4. Cut Unitex® Uni-IB Board to size and fix Unitex® Uni-IB Board to frame with Unitex® screw fixers and washers. Ensure washers are screwed into Unitex® Uni-IB Board at a minimum 5mm below board surface and flush over-coat or patch with Unitex® Polymer Render (5% cement to be added). Fixings to be approximately 8 fixings per square meter (refer to page 12). Apply Unitex® Adhesive Foam to forward half of butt joint, and between all Unitex® Uni-IB Board sheets. Standard sizes and thickness of Unitex® Uni-IB Board are 1200mm x 2400 mm at 75mm, 50mm, or 100mm thickness.
5. The installed Unitex® Uni-IB Board is now to be fully coated with Unitex® Polymer Render (plus 5-10% cement to be added), trowel applied and with embedded alkali resistant E-Glass mesh (Uni mesh IM) in 1 meter wide bands and over lapping by 100mm. Thickness of the Unitex® Polymer Render mesh-reinforced ground coat is minimum 2mm. Finish surface best broomed rough for following render coat bonding.
6. The Builder to install builder’s waterproof flashing between floors, at ground level, parapet metal flashing, and other specified flashings. Builder to install termite protection company system/s.
7. Builder to install waterproof sealing to Windows (if required by design). Unitex® recommends Uni-Shape™ Sealant or Unitex® Window Seal Strips. Windows must be protected from trade damage with masking tape and plastic wrap.
8. Install Unitex® supplied corner protection angles of stainless steel 304, or Aluminium, to allow minimum 5mm BBR (Unitex® Base Board Render, 8.5kg) thickness to be applied to align with corner protecting Unitex® ex-angles. To be adhesively installed with Unitex® Polymer Render or Unitex® Angle Adhesive. Unitex® Reinforcing Fibreglass Mesh can be installed under or over the Unitex® Ex-angle, and allowing correct minimum render thickness.
9. Unitex® Polymer Render is the strongest adhesive render from Unitex® and is also used to stop, embed, and adhere the Unitex® corner angles.
10. When the Unitex® Uni-IB Board surface, now base coated, is dry and acceptable, mix Unitex® BBR as per instructions (on bag), apply and float to true and level surface. Unitex requires a minimum Unitex® BBR thickness over all surfaces of 5mm (especially over the previously patched fixers and washers to prevent thermal bridging or surface blemishes).
11. When the Unitex® BBR coat is dry and fully cured, cut in all expansion joints to penetrations (as detailed on page 12) to relieve potential stress points in walling. In order to reduce substrate movement cracking risk Unitex® strongly recommends more than less joints be cut, and are a must for this system and all rendered walls. Apply Unitex® Uni-Shape™ Sealant to approximately 8-10 mm wide expansion joints and to a depth of approximately 5-7mm (i.e. render thickness needs to be thicker than required mastic depth). Unitex® Uni-Shape™ Sealant is used to provide a flexible waterproof seal at expansion joints for the life of the sealant. NOTE. Baseboard EPS to be hot knife or saw cut to 75% of depth behind expansion joints.
IMPORTANT NOTE (point 11): If the Builder, Owner or Specifier disputes the installation of required expansion joints then Unitex recommends that you obtain written instructions to relieve you of responsibility for potential cracking issues arising from lack of installed expansion joints.
12. Apply Unitex® surface Applied Texture Finish in a tradesman like manner (Unitex® Uni-Trowel Décor) to all rendered Unitex® Uni-IB Board surfaces (not over sealant). There are various grades and colours available from fine sand to coarse scratch (graffiato) finishes. When texture coats are dry, apply as needed (or a minimum 2 coats) of Unitex® Uni-PTC protective top coat over all Unitex® Uni-IB Board surfaces including sealant joints. Unitex® Uni-PTC is a slightly flexible, usually matt topcoat and they provide for ease of cleaning and protection against salty and polluted atmospheres and certain climatic conditions.
IMPORTANT NOTE (point 12): Dry powder unpigmented Unitex® texture coats (Unitex® Texture 800 range) must be over coated with a sealer coat and two top coats of Unitex® Uni-PTC.
13. Leave all adjoining areas and surfaces clean, and remove all protective masking tapes and window protection. Carry out final inspection with a Unitex® Technical Representative for accreditation and warranties.
14. Unitex® Uni-IB Board Non-cavity System has been installed.
Page 10Date of Issue: October 2013
USAGE & INSTALLATION GUIDE: Unitex® Base Board System
UNITEX® UNI-BASE BOARD™ NON CAVITY BAL-40 SYSTEM
Unitex® Uni-Base Board™ Non-cavity System to be applied over breathable building paper clad suitable substrate.
1. Seal all the building wrap with Unitex® flashing tape, at all wrap junctions, around all windows doors and penetrations, from the wrap to the solid adjoining surface.
2. Install Unitex® levelling Base Blocks to the base plate of the frame adjacent to the Unitex® Cavity Closer, mechanically with class 3 minimum coated screws in a non-marine environment, or stainless steel grade 304 or 416 in a marine environment. Butt ends to be joined and must be back-supported onto base plate or noggin, and adhesively joined with Unitex® Foam Adhesive. Unitex® Base Blocks come in lengths of 2.4 lineal meters x150mm height (approximately), and are base angled for drip protection. The Unitex® Base Block is a starter support to provide a sealed and level edging so that the Unitex® Uni-Base Board™ cut edge is not exposed to the elements and to prevent moisture ingress near ground level.
3. Install the Unitex® Sill Block using Unitex class 3 minimum coated screws to below the window. Install Unitex® Wedge Head Protectors to meter boxes. It is correct practice to always screw to a minimum depth of 25mm in stud or substrate, and into each stud and noggin base plate.
4. Cut Unitex® Uni-Base Board™ (pre-coated) to size and fix Unitex® Uni-Base Board™ to frame with Unitex® screw fixers and washers. Ensure washers are screwed into Unitex® Uni-Base Board™ at a minimum 5mm below board surface and flush over-coat or patch with Unitex® Polymer Render (5% cement to be added). Fixings to be approximately 8 fixings per square meter (refer to page 12). Apply Unitex® Adhesive Foam to forward half of butt joint, and between all Unitex® Uni-Base Board™ sheets. Standard sizes and thickness of Unitex® Uni-Base Board™ are 1200mm x 2400 mm at 75mm, 50mm, or 100mm thickness.
5. The Builder to install builder’s waterproof flashing between floors, at ground level, parapet metal flashing, and other specified flashings. Builder to install termite protection company system/s.
6. Builder to install waterproof sealing to Windows (if required by design). Unitex® recommends Uni-Shape™ Sealant or Unitex® Window Seal Strips. Windows must be protected from trade damage with masking tape and plastic wrap.
7. Install Unitex® supplied corner protection angles of stainless steel 304, or Aluminium, to allow minimum 5mm BBR (Unitex® Base Board Render, 8.5kg) thickness to be applied to align with corner protecting Unitex® ex-angles. To be adhesively installed with Unitex® Polymer Render or Unitex® Angle Adhesive. Unitex® Reinforcing Fibreglass Mesh can be installed under or over the Unitex® Ex-angle, and allowing correct minimum render thickness.
8. Apply Unitex® Uni-Mesh IM 250 reinforcing mesh and imbed into Unitex® Polymer Render (5-10% cement added) at all Unitex® Uni-Base Board™ junctions. Patch Unitex® washers and buttons to be level with surface using Unitex® Polymer Render (already imbedded into Unitex® Uni-Base Board™ sheets 5mm below surface). Unitex® Polymer Render is the strongest adhesive render from Unitex® and is also used to stop, embed, and adhere the Unitex® corner angles.
9. When the Unitex® Uni-Base Board™ surface is dry and acceptable, mix Unitex® BBR as per instructions (on bag), apply and float to true and level surface. Unitex requires a minimum Unitex® BBR thickness over all surfaces of 15mm (especially over the previously patched fixers and washers to prevent thermal bridging or surface blemishes).(Total overall coatings thickness including re-inforced base render and top coat, minimum 17.5mm)
IMPORTANT NOTE (Item 9): BAL-29 is achieved with minimum 5mm BBR thickness.
10. When the Unitex® BBR coat is dry and fully cured, cut in all expansion joints to penetrations (as detailed on page 12) to relieve potential stress points in walling. In order to reduce substrate movement cracking risk Unitex® strongly recommends more than less joints be cut, and are a must for this system and all rendered walls. Apply Unitex® supplied fire rated special Sealant (H.B Fuller Firesoundtm mastic)to approximately 8-10 mm wide expansion joints and to a depth of approximately 5-7mm or as per H.B Fuller instructions (i.e. render thickness needs to be thicker than required mastic depth). Unitex® Uni-Shape™ Sealant is used to provide a flexible waterproof seal at expansion joints for the life of the sealant. NOTE. Baseboard EPS to be hot knife or saw cut to 75% of depth behind expansion joints.
IMPORTANT NOTE (point 10): If the Builder, Owner or Specifier disputes the installation of required expansion joints then Unitex recommends that you obtain written instructions to relieve you of responsibility for potential cracking issues arising from lack of installed expansion joints.
11. Apply Unitex® surface Applied Texture Finish in a tradesman like manner (Unitex® Uni-Trowell Décor) to all rendered Unitex® Uni-Base Board™ surfaces (not over sealant). There are various grades and colours available from fine sand to coarse scratch (graffiato) finishes. When texture coats are dry, apply as needed (or a minimum 2 coats) of Unitex® Uni-PTC protective top coat over all Unitex® Uni-Base Board™ surfaces including sealant joints. Unitex® Uni-PTC is a slightly flexible, usually matt topcoat and they provide for ease of cleaning and protection against salty and polluted atmospheres and certain climatic conditions.
IMPORTANT NOTE (point 11): Dry powder unpigmented Unitex® texture coats (Unitex® Texture 800 range) must be over coated with a sealer coat and two top coats of Unitex® Uni-PTC.
12. Leave all adjoining areas and surfaces clean, and remove all protective masking tapes and window protection. Carry out final inspection with a Unitex® Technical Representative for accreditation and warranties.
13. Unitex® Uni-Base Board™ Non-cavity BAL-40 System has been installed.
IMPORTANT NOTE (Item 13): External testing authority (Exova Warringtonfire) has tested the above system and has rated the above system as complying with BAL-40. Please ensure your Applicator and/or Builder follow the above procedure.
Page 11Date of Issue: October 2013
USAGE & INSTALLATION GUIDE: Unitex® Base Board System
UNITEX® UNI-BASE BOARD™ FULLY ACCREDITED SYSTEMS
When specifying accredited systems under CodeMark, BAL 29, and BAL 40 the Specifier is fully protected as the Unitex Baseboard System is deemed to satisfy all requirements of the Building Code of Australia (BCA/NCC).
Unitex is proud to be fully accredited by the following professional building industry regulators:
BRAC – Certificate no. V11/03 Non-cavity System (system document review)
BRANZ – No. 758 (2011) Cavity System (full system full wall laboratory testing)
CodeMark – Certificate no. CM20026 Cavity System (full system full wall laboratory testing; full manufacturing process & procedures; quality audits)
BAL 29 – Certificate no. SFC 2856500.1 (full system with 75mm pre coated Base Board sheets, 8mm Unitex BBR Render, 3mm Unitex Texture 855, added Unitex Levelling Base Blocks, added Unitex Sill Blocks)
BAL 40 – Certificate no. SFC 2830900.1 (full system with 75mm pre coated Base Board sheets, 14.5mm Unitex BBR Render, 3mm Unitex Texture 855, no aluminium angles, added Unitex Levelling Base Blocks, added Unitex Sill Blocks)
CSIRO (previously – now ceased to be provided)
ABSAC (previously – now ceased to provided)
Unitex recommends the following specification clause:
Unitex Baseboard System – CodeMark accredited to comply with the Building Code of Australia – the leading Australian CodeMark accredited full system.
Unitex recommends for you and your clients safety and protection to PC Unitex Baseboard System as your external cladding. This is because it ALWAYS works, and offers the highest wall insulation R-values available for greener buildings. As the leading fully accredited full cladding system in Australia – your design specification and reputation is firmly protected.
Page 12Date of Issue: October 2013
USAGE & INSTALLATION GUIDE: Unitex® Base Board System
1
2
3
4
5
6
8
7
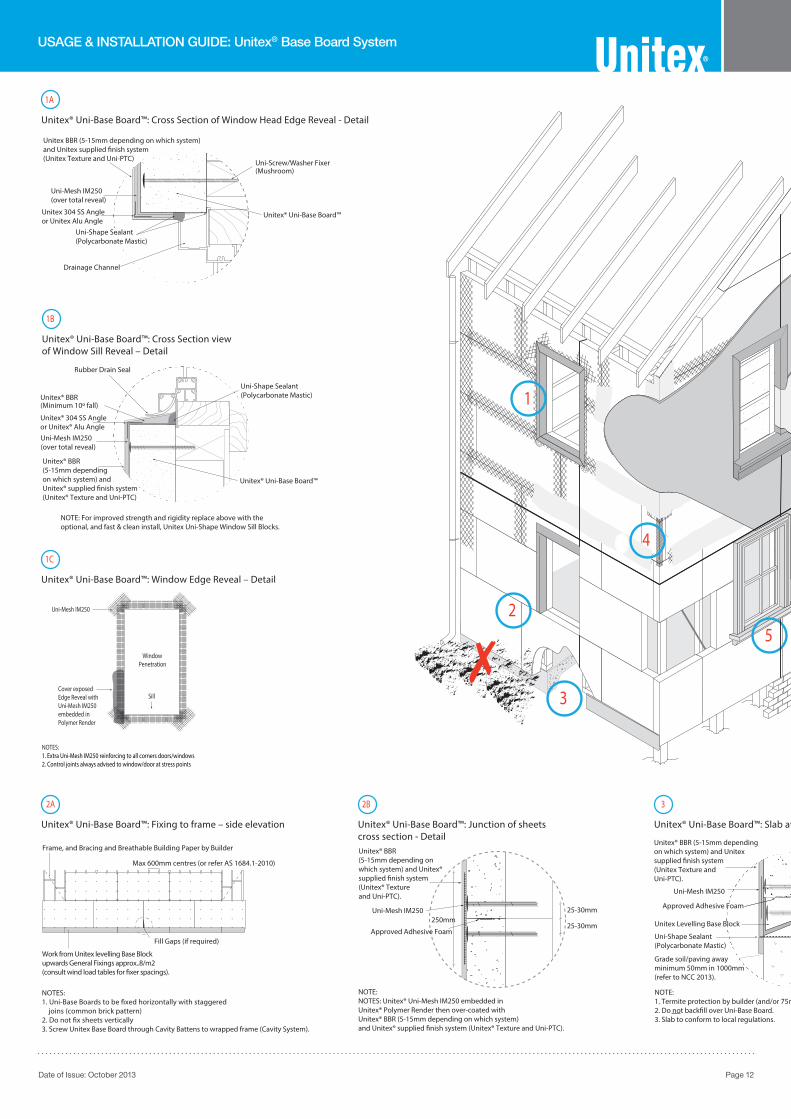
1A
Unitex BBR (5-15mm depending on which system)and Unitex supplied �nish system(Unitex Texture and Uni-PTC) Uni-Screw/Washer Fixer
Unitex® Uni-Base Board™
(Mushroom)
Uni-Mesh IM250(over total reveal)
Unitex 304 SS Angleor Unitex Alu Angle
Unitex® Uni-Base Board™: Cross Section of Window Head Edge Reveal - Detail
Drainage Channel
Uni-Shape Sealant(Polycarbonate Mastic)
Unitex® Uni-Base Board™: Cross Section viewof Window Sill Reveal – Detail
Unitex® BBR(5-15mm depending on which system) and Unitex® supplied �nish system(Unitex® Texture and Uni-PTC)
Unitex® BBR(Minimum 10º fall)
Rubber Drain Seal
NOTE: For improved strength and rigidity replace above with the optional, and fast & clean install, Unitex Uni-Shape Window Sill Blocks.
Uni-Mesh IM250(over total reveal)
Unitex® 304 SS Angleor Unitex® Alu Angle
1B
Uni-Shape Sealant(Polycarbonate Mastic)
Unitex® Uni-Base Board™
Unitex® Uni-Base Board™: Window Edge Reveal – Detail
1C
NOTES: 1. Extra Uni-Mesh IM250 reinforcing to all corners doors/windows2. Control joints always advised to window/door at stress points
Cover exposedEdge Reveal withUni-Mesh IM250embedded inPolymer Render
Uni-Mesh IM250
WindowPenetration
Sill
Unitex® Uni-Base Board™: Fixing to frame – side elevation
Frame, and Bracing and Breathable Building Paper by Builder
Fill Gaps (if required)
Work from Unitex levelling Base Blockupwards General Fixings approx..8/m2(consult wind load tables for �xer spacings).
NOTES:1. Uni-Base Boards to be �xed horizontally with staggered joins (common brick pattern)2. Do not �x sheets vertically3. Screw Unitex Base Board through Cavity Battens to wrapped frame (Cavity System).
2A
Max 600mm centres (or refer AS 1684.1-2010)
Unitex® Uni-Base Board™: Junction of sheetscross section - Detail
25-30mm
25-30mm250mm
NOTE:NOTES: Unitex® Uni-Mesh IM250 embedded inUnitex® Polymer Render then over-coated withUnitex® BBR (5-15mm depending on which system)and Unitex® supplied �nish system (Unitex® Texture and Uni-PTC).
2B
Unitex® BBR(5-15mm depending onwhich system) and Unitex®supplied �nish system(Unitex® Textureand Uni-PTC).
Uni-Mesh IM250
Approved Adhesive Foam
undUnitex® Uni-Base Board™: Slab at ground
Grade soil/paving awayminimum 50mm in 1000mm(refer to NCC 2013).
Unitex® BBR (5-15mm dependingon which system) and Unitexsupplied �nish system(Unitex Texture andUni-PTC).
Approved Adhesive Foam
Uni-Mesh IM250
Unitex Levelling Base Block
Uni-Shape Sealant(Polycarbonate Mastic)
3
NOTE:
2. Do not back�ll over Uni-Base Board.3. Slab to conform to local regulations.
Slab
1. Termite protection by builder (and/or 75mm clearance).
Page 13Date of Issue: October 2013
USAGE & INSTALLATION GUIDE: Unitex® Base Board System
1
2
3
4
5
6
8
7
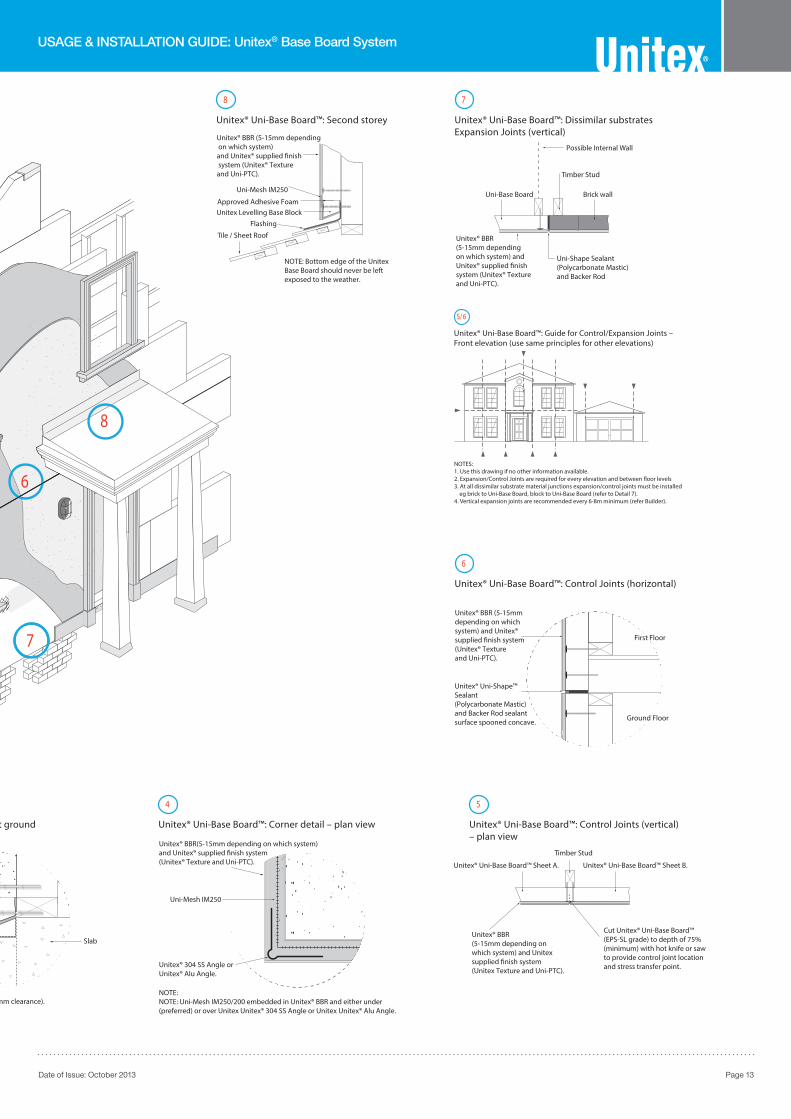
undUnitex® Uni-Base Board™: Slab at ground
Grade soil/paving awayminimum 50mm in 1000mm(refer to NCC 2013).
Unitex® BBR (5-15mm dependingon which system) and Unitexsupplied �nish system(Unitex Texture andUni-PTC).
Approved Adhesive Foam
Uni-Mesh IM250
Unitex Levelling Base Block
Uni-Shape Sealant(Polycarbonate Mastic)
3
NOTE:
2. Do not back�ll over Uni-Base Board.3. Slab to conform to local regulations.
Slab
1. Termite protection by builder (and/or 75mm clearance).
Unitex® Uni-Base Board™: Corner detail – plan view
4
NOTE:NOTE: Uni-Mesh IM250/200 embedded in Unitex® BBR and either under(preferred) or over Unitex Unitex® 304 SS Angle or Unitex Unitex® Alu Angle.
Uni-Mesh IM250
Unitex® 304 SS Angle orUnitex® Alu Angle.
Unitex® BBR(5-15mm depending on which system)and Unitex® supplied �nish system(Unitex® Texture and Uni-PTC).
5
Timber Stud
Unitex® Uni-Base Board™ Sheet A. Unitex® Uni-Base Board™ Sheet B.
Unitex® BBR(5-15mm depending on which system) and Unitexsupplied �nish system(Unitex Texture and Uni-PTC).
Cut Unitex® Uni-Base Board™(EPS-SL grade) to depth of 75%(minimum) with hot knife or sawto provide control joint locationand stress transfer point.
Unitex® Uni-Base Board™: Control Joints (vertical)– plan view
Unitex® Uni-Base Board™: Guide for Control/Expansion Joints – Front elevation (use same principles for other elevations)
5/6
NOTES:1. Use this drawing if no other information available.2. Expansion/Control Joints are required for every elevation and between �oor levels3. At all dissimilar substrate material junctions expansion/control joints must be installed eg brick to Uni-Base Board, block to Uni-Base Board (refer to Detail 7).4. Vertical expansion joints are recommended every 6-8m minimum (refer Builder).
Unitex® Uni-Base Board™: Control Joints (horizontal)
6
Ground Floor
First Floor
Unitex® Uni-Shape™Sealant(Polycarbonate Mastic)and Backer Rod sealantsurface spooned concave.
Unitex® BBR (5-15mmdepending on whichsystem) and Unitex®supplied �nish system(Unitex® Textureand Uni-PTC).
Unitex® Uni-Base Board™: Dissimilar substratesExpansion Joints (vertical)
7
Uni-Shape Sealant(Polycarbonate Mastic)and Backer Rod
Timber Stud
Possible Internal Wall
Uni-Base Board Brick wall
Unitex® BBR(5-15mm dependingon which system) andUnitex® supplied �nishsystem (Unitex® Textureand Uni-PTC).
Unitex® Uni-Base Board™: Second storey
8
Tile / Sheet Roof
Flashing
Unitex® BBR (5-15mm depending on which system)and Unitex® supplied �nish system (Unitex® Textureand Uni-PTC).
NOTE: Bottom edge of the UnitexBase Board should never be leftexposed to the weather.
Approved Adhesive Foam
Uni-Mesh IM250
Unitex Levelling Base Block

Page 14Date of Issue: October 2013
USAGE & INSTALLATION GUIDE: Unitex® Base Board System
Unitex® Levelling Base BlockStart by levelling and mechanically fixingthe Unitex® Levelling Base Block to asuitable frame with breathable building foil (min. studs 600 mm centres). Use Uni-Screw/Washer Fixers at least 25 mm longer than the thickness of the Unitex® Uni-Base Board™ and fix to the base of the framing. (Non Cavity depicted)
Seal windows and measure openingsSeal windows to wrap with ducting/alumini-um tape and apply Uni-Shape Sealant mastic to window frames as required. Where openings (windows and/or doors) penetrate the wall elevation, measure off wall and transfer these measurements to the Unitex® Uni-Base Board™.(Cavity depicted)
Cut Uni-Base Board to sizeIt’s always a good idea to measure twiceand cut once. After measuring the wall andmarking-up Unitex® Uni-Base Board™, saw cut to size. Cut either manually or with an electric saw. All waste pieces and sawing scrap should be bagged and binned or returned to Unitex for reprocessing.
Fixing Uni-Base BoardUnitex® Uni-Base Board™ should be held securely to the studs of the framing. Install extra blocking and/or noggings if required so that the sheets are held firmly. Use eight (8) Uni-Screw/Washer Fixers per square metre. All sheet to sheet junctions are to fit snugly together with no open gaps.
Unitex® Uni-Base Board™ to Unitex® Uni-Base Board™ (return edges/sealing)Once the first sheet has been fixed, applyUnitex® Adhesive Foam from a gun to alledges (front half of edge) of the Unitex® Uni-Base Board™ that come in contact with the next installed sheet. Ensure that there are no gaps between the sheets and that sheets are level.
Laying out Unitex® Uni-Base Board™Stagger all joints as per a common bondbrick pattern. At the corners, stagger thesheets, overlap as shown above. Cornersmay require extra studs for added strengthand rigidity. Use extra Uni-Screw/WasherFixers (mushrooms) if required.
Sealing at windowsApply Uni-Shape Sealant mastic to the rearof Unitex® Uni-Base Board™ adjacent to the window frame around the window. Cut Unitex® Uni-Base Board™ so that it is 5 mm clear of window frame and a minimum of 20 mm free of the frame at the window sill. Cut the window sill on an angle to allow for ~10º slope/fall. Surface mastic sealing (see Diagrams 1A, 1B & 1C) or alternatively pre-made Uni-Shape™ Window Sill Blocks.
Window and corner protectionAll windows and corners are to be extrareinforced with Uni-Mesh IM250 (250 mm)patches overlapping into reveals. Thefibreglass mesh should return and coverthe reveal and can be installed under orover the Uni-304 SS Angle/Alu Angle and into wall face for a minimum 125 mm. (In this case mesh is under the Uni-304 SS Angle/Alu Angle).
Edge protection for Uni-Base Board(refer to the Unitex® Uni-Base Board™ System Technical Manuals for variations, at www.unitex.com.au or www.render.com.au)All Unitex® Uni-Base Board™ edges are to be further protected with the Uni 304 SS Angle/Alu Angle embedded in Unitex® Polymer Render(5% - 10% cement). They must be full lengths from corner to corner and also overlap at the corners.
1 2 3
4 5 6
7 8 9
Page 15Date of Issue: October 2013
USAGE & INSTALLATION GUIDE: Unitex® Base Board System
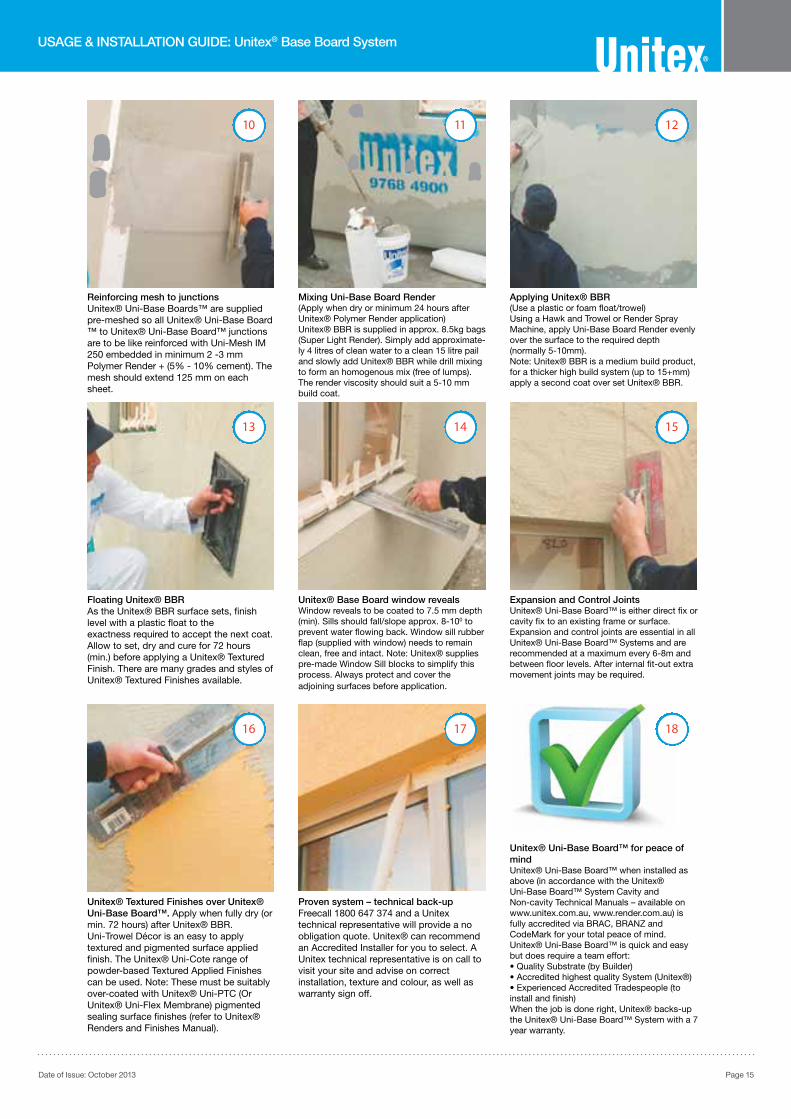
Reinforcing mesh to junctionsUnitex® Uni-Base Boards™ are supplied pre-meshed so all Unitex® Uni-Base Board™ to Unitex® Uni-Base Board™ junctions are to be like reinforced with Uni-Mesh IM 250 embedded in minimum 2 -3 mm Polymer Render + (5% - 10% cement). The mesh should extend 125 mm on each sheet.
Mixing Uni-Base Board Render(Apply when dry or minimum 24 hours after Unitex® Polymer Render application)Unitex® BBR is supplied in approx. 8.5kg bags (Super Light Render). Simply add approximate-ly 4 litres of clean water to a clean 15 litre pail and slowly add Unitex® BBR while drill mixing to form an homogenous mix (free of lumps). The render viscosity should suit a 5-10 mm build coat.
Applying Unitex® BBR(Use a plastic or foam float/trowel)Using a Hawk and Trowel or Render SprayMachine, apply Uni-Base Board Render evenly over the surface to the required depth (normally 5-10mm).Note: Unitex® BBR is a medium build product, for a thicker high build system (up to 15+mm) apply a second coat over set Unitex® BBR.
Floating Unitex® BBRAs the Unitex® BBR surface sets, finish level with a plastic float to theexactness required to accept the next coat.Allow to set, dry and cure for 72 hours (min.) before applying a Unitex® Textured Finish. There are many grades and styles of Unitex® Textured Finishes available.
Unitex® Base Board window revealsWindow reveals to be coated to 7.5 mm depth (min). Sills should fall/slope approx. 8-100 to prevent water flowing back. Window sill rubber flap (supplied with window) needs to remainclean, free and intact. Note: Unitex® supplies pre-made Window Sill blocks to simplify this process. Always protect and cover the adjoining surfaces before application.
Expansion and Control JointsUnitex® Uni-Base Board™ is either direct fix or cavity fix to an existing frame or surface. Expansion and control joints are essential in all Unitex® Uni-Base Board™ Systems and are recommended at a maximum every 6-8m and between floor levels. After internal fit-out extramovement joints may be required.
Unitex® Textured Finishes over Unitex® Uni-Base Board™. Apply when fully dry (or min. 72 hours) after Unitex® BBR.Uni-Trowel Décor is an easy to applytextured and pigmented surface appliedfinish. The Unitex® Uni-Cote range of powder-based Textured Applied Finishes can be used. Note: These must be suitably over-coated with Unitex® Uni-PTC (Or Unitex® Uni-Flex Membrane) pigmented sealing surface finishes (refer to Unitex® Renders and Finishes Manual).
Proven system – technical back-upFreecall 1800 647 374 and a Unitextechnical representative will provide a no obligation quote. Unitex® can recommend an Accredited Installer for you to select. A Unitex technical representative is on call to visit your site and advise on correct installation, texture and colour, as well as warranty sign off.
10 11 12
13 14 15
16 17 18
Unitex® Uni-Base Board™ for peace of mindUnitex® Uni-Base Board™ when installed as above (in accordance with the Unitex® Uni-Base Board™ System Cavity and Non-cavity Technical Manuals – available on www.unitex.com.au, www.render.com.au) is fully accredited via BRAC, BRANZ and CodeMark for your total peace of mind. Unitex® Uni-Base Board™ is quick and easy but does require a team effort:• Quality Substrate (by Builder)• Accredited highest quality System (Unitex®)• Experienced Accredited Tradespeople (to install and finish)When the job is done right, Unitex® backs-up the Unitex® Uni-Base Board™ System with a 7 year warranty.
Page 16Date of Issue: October 2013
USAGE & INSTALLATION GUIDE: Unitex® Base Board System
® Registered Trademarks of Unitex Granular Marble Pty Ltd. ABN 42 087 324 477 © 2013 Date of Publication October 2013
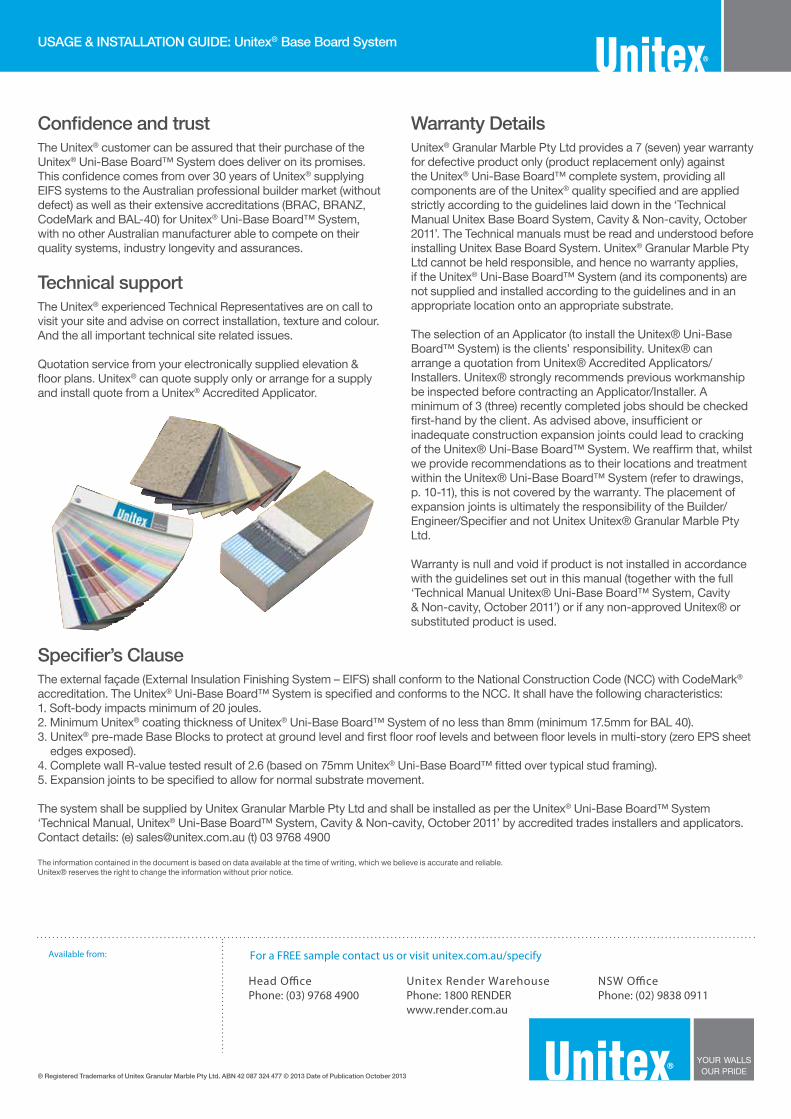
Confidence and trustThe Unitex® customer can be assured that their purchase of the Unitex® Uni-Base Board™ System does deliver on its promises. This confidence comes from over 30 years of Unitex® supplying EIFS systems to the Australian professional builder market (without defect) as well as their extensive accreditations (BRAC, BRANZ, CodeMark and BAL-40) for Unitex® Uni-Base Board™ System, with no other Australian manufacturer able to compete on their quality systems, industry longevity and assurances.
Technical supportThe Unitex® experienced Technical Representatives are on call to visit your site and advise on correct installation, texture and colour. And the all important technical site related issues.
Quotation service from your electronically supplied elevation & floor plans. Unitex® can quote supply only or arrange for a supply and install quote from a Unitex® Accredited Applicator.
Warranty DetailsUnitex® Granular Marble Pty Ltd provides a 7 (seven) year warranty for defective product only (product replacement only) against the Unitex® Uni-Base Board™ complete system, providing all components are of the Unitex® quality specified and are applied strictly according to the guidelines laid down in the ‘Technical Manual Unitex Base Board System, Cavity & Non-cavity, October 2011’. The Technical manuals must be read and understood before installing Unitex Base Board System. Unitex® Granular Marble Pty Ltd cannot be held responsible, and hence no warranty applies, if the Unitex® Uni-Base Board™ System (and its components) are not supplied and installed according to the guidelines and in an appropriate location onto an appropriate substrate.
The selection of an Applicator (to install the Unitex® Uni-Base Board™ System) is the clients’ responsibility. Unitex® can arrange a quotation from Unitex® Accredited Applicators/Installers. Unitex® strongly recommends previous workmanship be inspected before contracting an Applicator/Installer. A minimum of 3 (three) recently completed jobs should be checked first-hand by the client. As advised above, insufficient or inadequate construction expansion joints could lead to cracking of the Unitex® Uni-Base Board™ System. We reaffirm that, whilst we provide recommendations as to their locations and treatment within the Unitex® Uni-Base Board™ System (refer to drawings, p. 10-11), this is not covered by the warranty. The placement of expansion joints is ultimately the responsibility of the Builder/Engineer/Specifier and not Unitex Unitex® Granular Marble Pty Ltd.
Warranty is null and void if product is not installed in accordance with the guidelines set out in this manual (together with the full ‘Technical Manual Unitex® Uni-Base Board™ System, Cavity & Non-cavity, October 2011’) or if any non-approved Unitex® or substituted product is used.
Specifier’s ClauseThe external façade (External Insulation Finishing System – EIFS) shall conform to the National Construction Code (NCC) with CodeMark® accreditation. The Unitex® Uni-Base Board™ System is specified and conforms to the NCC. It shall have the following characteristics:1. Soft-body impacts minimum of 20 joules.2. Minimum Unitex® coating thickness of Unitex® Uni-Base Board™ System of no less than 8mm (minimum 17.5mm for BAL 40).3. Unitex® pre-made Base Blocks to protect at ground level and first floor roof levels and between floor levels in multi-story (zero EPS sheet
edges exposed).4. Complete wall R-value tested result of 2.6 (based on 75mm Unitex® Uni-Base Board™ fitted over typical stud framing).5. Expansion joints to be specified to allow for normal substrate movement.
The system shall be supplied by Unitex Granular Marble Pty Ltd and shall be installed as per the Unitex® Uni-Base Board™ System ‘Technical Manual, Unitex® Uni-Base Board™ System, Cavity & Non-cavity, October 2011’ by accredited trades installers and applicators.Contact details: (e) [email protected] (t) 03 9768 4900
The information contained in the document is based on data available at the time of writing, which we believe is accurate and reliable. Unitex® reserves the right to change the information without prior notice.