Embed Size (px)
Citation preview


The PurposeThe Purpose

IntroductionIntroduction
• Covenant College has a new athletic facility
• One room has all free weight exercising equipment
• The other, shown in the picture, contains cable weight machines, workout machines, and other exercise equipment
• Disclaimer-be careful when using any of the machines. Always follow the directions, and read the warning

The Proper ClothingThe Proper Clothing
• Make sure that you wear a comfortable shirt that allows you to move freely and will not restrict movement
• Wear clothing that you will not get too hot in
• Make sure that you wear comfortable pants or shorts that allow you to move freely
• Make sure that you wear tennis shoes/athletic shoes that have good tread

How to Work the TreadmillHow to Work the Treadmill
• Press the green start button located on the bottom right corner of the control panel
• Follow the directions that appear in the middle of the control panel on the rectangular screen

How to Work the BikeHow to Work the Bike
• Start pedaling and the screen will light up with a large orange arrow.
• The display screen with words will tell you to choose a program and then press the start/enter button.
• Once you have done that, follow the rest of the directions.

How to Work the Elliptical How to Work the Elliptical MachineMachine
• Get on the machine and start striding
• Press the quick start button on the lower right corner of the control panel
• Follow the directions that flash from the control panel

How to Work the StairstepperHow to Work the Stairstepper
• Get on the machine and start stepping
• Press the green start button located at the bottom right corner of the control panel
• Choose a program, and follow the rest of the directions given to you on the display screen

Adjusting the Seats Adjusting the Seats
• If when you sit down on the seat to begin lifting and your knees are not bent at a 90 degree angle you know that you need to adjust the seat of that machine
• To adjust it, bend down, and grab the seat with two hands
• You then must pull towards you, and move the seat up or down
• Lastly, you need to hook the seat and push it in so that it is sturdy
Adjusting the WeightsAdjusting the Weights
• To adjust the amount of weight that you want to lift, push the silver button on the key like instrument and pull it out
• Next, you need to place the key like instrument in the hole of the amount of weight that you would like to life

Starting Lifting with Small Starting Lifting with Small Weights Weights
• It is important to choose the correct amount of weight to lift
• A test to know if the amount is heavy enough, but not too heavy, is you should be able to lift the weight no more than 12-15 times and no less than 5 times
• If you can lift the weight more than 15 times you need to increase the amount, if you can lift the weight 5 times or less, you may need to decrease the weight

Dual Axis Pulldown Starting Dual Axis Pulldown Starting PositionPosition
• When beginning, you want to keep your hand shoulder width apart
• Sit with your legs held firmly under the pad
• Arch your back, poking out your chest
• Lean back slightly, rotating at the hips

Dual Axis Pulldown Finishing Dual Axis Pulldown Finishing PositionPosition
• Keep hands approximately should width apart
• Pull down in a smooth motion
• Pinch shoulder blades together

Dual Axis Overhead Press StartDual Axis Overhead Press Start
• Sit back in seat with back straight on the pad
• Keep head back and look straight ahead
• Have a neutral grip, also a wider grip is available for the more advanced

Dual Axis Overhead Press FinishDual Axis Overhead Press Finish
• Push the weight upwards in a smooth motion
• Keep body in small position

Dual Axis Chest Press StartDual Axis Chest Press Start
• Sit back in the seat with your back flat on the pad
• Keep your head back and look straight ahead
• Poke chest out

Dual Axis Chest Press FinishDual Axis Chest Press Finish
• Push the weight in a smooth motion
• Keep your body in the same position

Dual Axis Incline Press StartDual Axis Incline Press Start
• Sit back in the seat with your head and back against the pad
• Look straight forward
• Poke your chest out

Dual Axis Incline Press FinishDual Axis Incline Press Finish
• Push weight out in a smooth motion
• Keep your body in the same position as when you started
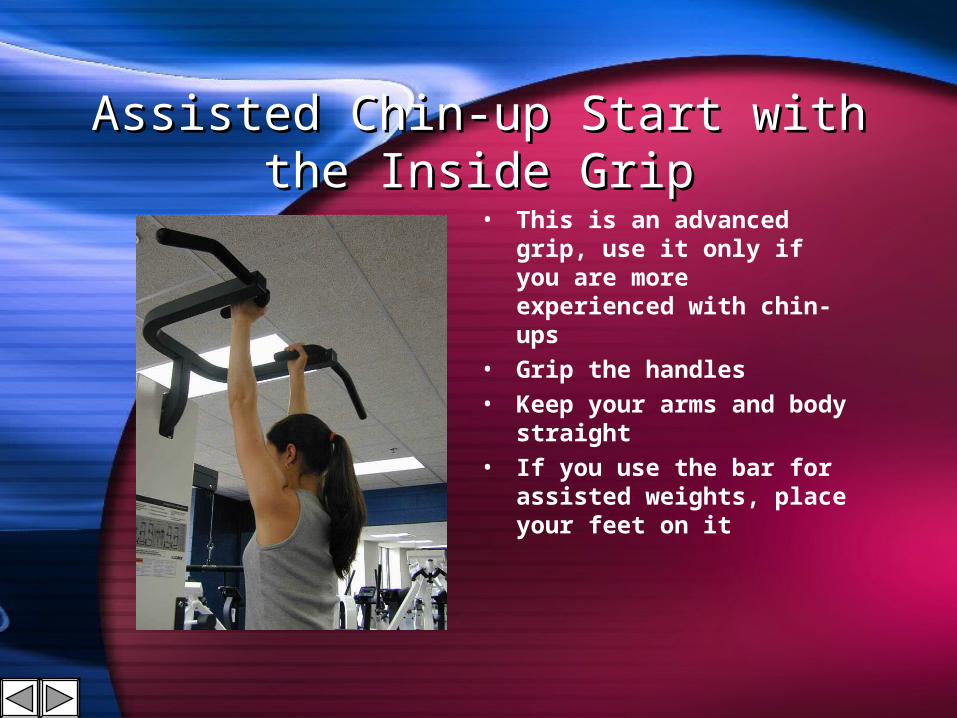
Assisted Chin-up Start with the Assisted Chin-up Start with the Inside GripInside Grip
• This is an advanced grip, use it only if you are more experienced with chin-ups
• Grip the handles
• Keep your arms and body straight
• If you use the bar for assisted weights, place your feet on it

Assisted Chin-up FinishAssisted Chin-up Finish• Pull your body up until your
chin is above the bar parallel to your hands
• Return your body to the starting position

Assisted Chin-up Start with the Assisted Chin-up Start with the Outside GripOutside Grip
• Grip the handles using the wide grip
• Keep arms and body straight
• Use assisted weight if needed

Assisted Chin-up FinishAssisted Chin-up Finish
• Pull yourself straight up using a smooth motion
• Pinch shoulder blades together
• Get chin at least to hand level, if not higher

Dips StartDips Start
• Keep arms and back straight
• Look straight ahead
• If using assisted weight, place your feet on the bar

Dips FinishDips Finish
• Lower your body until your arms form a 90 degree angle
• Return your body to starting position
• Be careful not to lock your elbows when you reach the starting position again

Modular Triceps Pushdown Using Modular Triceps Pushdown Using the Ropethe Rope
• Stand straight with back against pad and do not lock your knees
• Grip the rope securely
• Start with arms at a 90 degree angle

Modular Triceps Pushdown Modular Triceps Pushdown FinishFinish
• Push weight down in a smooth motion
• Keep back straight making sure not to lean forward
• End in the starting position with your arms at a 90 degree angle
• Using the rope allows for more flexibility than the straight bar, so make sure to flare the wrists out after fully extending triceps

Modular Triceps Pushdown Start Modular Triceps Pushdown Start Using the BarUsing the Bar
• Stand straight with back against pad and do not lock your knees
• Grip the bar securely
• Start with arms at a 90 degree angle

Modular Triceps Pushdown Modular Triceps Pushdown FinishFinish
• Push weight down in a smooth motion
• Keep back straight making sure not to lean forward
• Fully extend triceps, and return to starting position

Modular Arm Curl StartModular Arm Curl Start
• Be sure you adjust the weights appropriately
• Grip the bar with your arms extended
• Make sure that your thumb is higher than your little finger when you grip the bar

Modular Arm Curl FinishModular Arm Curl Finish
• Pull arms forward as far as you can bending at the elbow
• Pinch biceps and forearms together for maximum effect
• Slowly return arms to starting position

Cable Cross-over StartCable Cross-over Start
• Grip handles and hold them about shoulder high
• Keep elbows slightly bent
• Put one foot in front of the other for balance
• Lean forward slightly at the hips

Cable Cross-over FinishCable Cross-over Finish• Pull cables smoothly
together in front of your chest
• Keep elbows in the same position as the start, making sure not to bend them
• Cross one hand over the other at the waist
• Remember to lean forward at the hips, but not too much
• Pinch chest muscles together in the center as if you were trying to hold a piece of paper between your pecs.

Plate Loaded Row StartPlate Loaded Row Start
• Sit straight up with head level, back straight, and and chest flat against the pad
• There are two grips--the one shown is the neutral grip
• Rest feet on the bars on the machine, called feet bars
• Adjust chest pad so that you can reach the grips but at the same time when arms are extended the weight isn’t rested

Plate Loaded Row FinishPlate Loaded Row Finish
• Keep head and back straight
• Pull weight back in a smooth motion
• Pinch shoulder blades together

Glute-Ham StartGlute-Ham Start
• Keep feet flat against plate
• Pad should rest just above the heel and just below the calf
• Knees should be about two inches from abdominal pad
• Keep back straight, look down, and cross arms
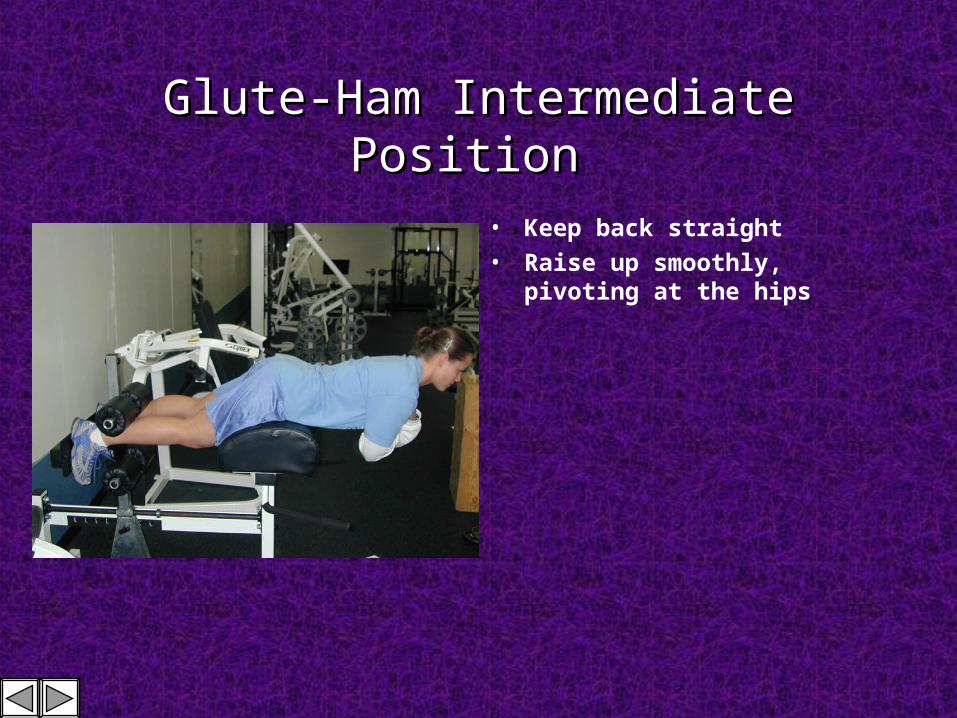
Glute-Ham Intermediate PositionGlute-Ham Intermediate Position
• Keep back straight
• Raise up smoothly, pivoting at the hips

Glute-Ham FinishGlute-Ham Finish
• Continue looking straight ahead
• Arch back slightly pivoting at hips
• Raise up in a smooth motion to about a 45 degree angle
• Be sure not to put too much stress on the lower back by trying to go higher--this could lead to injury

Ab Crunch Starting PositionAb Crunch Starting Position
• Sit with your feet facing forward on the ground
• Buckle the seat belt for added security
• Place arms folded across each other on top of the arm pad

Ab Crunch Finishing PositionAb Crunch Finishing Position
• Pull your upper body down towards the floor
• Keep yourself from going too far down or not down enough
• Return body back into starting position and repeat exercise

Hip Adduction StartHip Adduction Start
• Place your feet level on the first bar with your heel placed between the two bars, not on top of the back bar
• Keep your back against the seat
• Spread legs outward with your feet until you reach the desired width (you will hear a clicking noise)
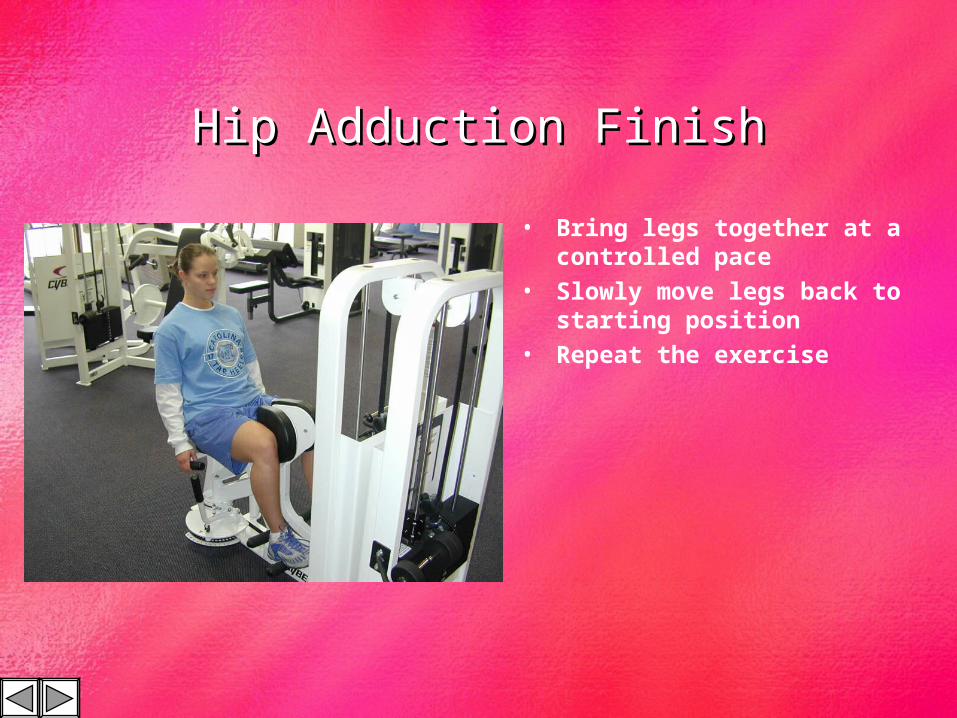
Hip Adduction FinishHip Adduction Finish
• Bring legs together at a controlled pace
• Slowly move legs back to starting position
• Repeat the exercise

Hip Abduction StartHip Abduction Start
• Place your feet level on the first bar with your heel placed between the two bars, not on top of the back bar
• Keep your back against the seat
• Make sure weight is adjusted properly
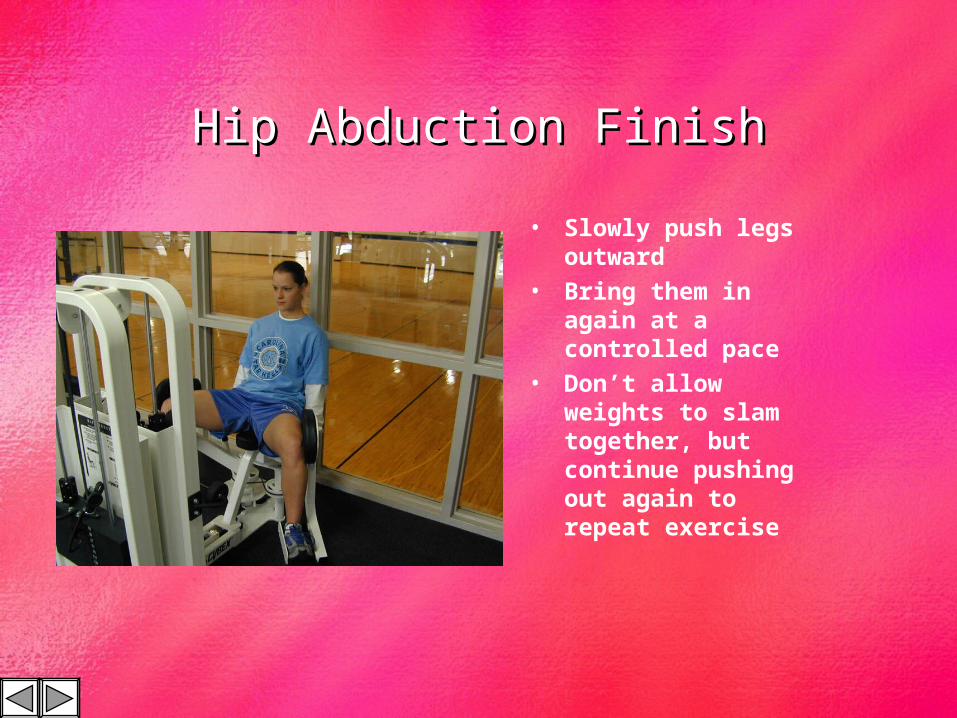
Hip Abduction FinishHip Abduction Finish
• Slowly push legs outward
• Bring them in again at a controlled pace
• Don’t allow weights to slam together, but continue pushing out again to repeat exercise

Rotary Calf StartRotary Calf Start
• Place feet on angled foot bar
• Keep legs slightly bent
• Grip the handles for stability

Rotary Calf FinishRotary Calf Finish
• Press toes forward in a smooth motion
• Do not lock your knees
• Bring toes backward without smashing weights together

Prone Leg Curl StartProne Leg Curl Start
• Get on the machine, and hold onto the handle grips
• Your knees should be about two inches off of the pad
• The pad that is resting across your legs should be above your ankles

Prone Leg Curl FinishProne Leg Curl Finish
• Raise your legs in a smooth motion, while looking down at the floor
• Bring your legs up until you touch your rear end
• Slowly lower your legs until you get to the starting position

Leg Extension StartLeg Extension Start
• Get on the machine, rest your back on the pad, and hold onto the handle grips at your side
• Your should be sitting up at about a 90 degree angle
• The pad resting on your leg should be above your ankles
• Your toes should be pointing up and towards the ceiling

Leg Extension FinishLeg Extension Finish
• Raise your legs in a smooth motion
• Keep your toes pointing towards the ceiling
• Bring your legs up until they are straight
• Lower them slowly until they are at the starting position

Seated Leg Press StartSeated Leg Press Start
• Get onto the machine, hold the hand grips at your side, and rest your back on the pad
• Place your feet on the platform so that your legs are at a 90 degree angle

Seated Leg Press FinishSeated Leg Press Finish
• Push your legs out, but do not lock your knees
• Slowly bend your knees again, until you are at the starting position

ConclusionConclusion
• Next time you go to the exercise room, you can feel sure of what you are doing
• No longer will you feel perplexed about working out
• Also now that you have gone through the slides, you will work your muscles properly using the correct techniques
• If you ever feel sore the day after a workout, you may want to decrease the amount of weight that you are doing
• Enjoy working out!