Embed Size (px)
Citation preview


The Complete Redux BookEverything you need to build real projects with Redux
Ilya Gelman and Boris Dinkevich
This book is for sale at http://leanpub.com/redux-book
This version was published on 2017-01-30
This is a Leanpub book. Leanpub empowers authors and publishers with the Lean Publishingprocess. Lean Publishing is the act of publishing an in-progress ebook using lightweight tools andmany iterations to get reader feedback, pivot until you have the right book and build traction onceyou do.
© 2015 - 2017 Ilya Gelman and Boris Dinkevich

Tweet This Book!Please help Ilya Gelman and Boris Dinkevich by spreading the word about this book on Twitter!
The suggested tweet for this book is:
Time to learn Redux!
The suggested hashtag for this book is #ReduxBook.
Find out what other people are saying about the book by clicking on this link to search for thishashtag on Twitter:
https://twitter.com/search?q=#ReduxBook

Contents
Should I Read This Book? . . . . . . . . . . . . . . . . . . . . . . . . . . . . . . . . . . . . . 1
How to Read This Book . . . . . . . . . . . . . . . . . . . . . . . . . . . . . . . . . . . . . . 2
Acknowledgements . . . . . . . . . . . . . . . . . . . . . . . . . . . . . . . . . . . . . . . . 3
Code Repository . . . . . . . . . . . . . . . . . . . . . . . . . . . . . . . . . . . . . . . . . . 4
Part 1. Introduction to Redux . . . . . . . . . . . . . . . . . . . . . . . . . . . . . . . . . . 5
Chapter 1. Core Concepts of Flux and Redux . . . . . . . . . . . . . . . . . . . . . . . . . 6What Is Flux? . . . . . . . . . . . . . . . . . . . . . . . . . . . . . . . . . . . . . . . . . 6Redux and Flux . . . . . . . . . . . . . . . . . . . . . . . . . . . . . . . . . . . . . . . . 8Redux Terminology . . . . . . . . . . . . . . . . . . . . . . . . . . . . . . . . . . . . . . 10General Concepts . . . . . . . . . . . . . . . . . . . . . . . . . . . . . . . . . . . . . . . 12Redux and React . . . . . . . . . . . . . . . . . . . . . . . . . . . . . . . . . . . . . . . . 14Basic Redux Implementation . . . . . . . . . . . . . . . . . . . . . . . . . . . . . . . . . 15Summary . . . . . . . . . . . . . . . . . . . . . . . . . . . . . . . . . . . . . . . . . . . . 22
Chapter 2. Your First Redux Application . . . . . . . . . . . . . . . . . . . . . . . . . . . . 23Starter Project . . . . . . . . . . . . . . . . . . . . . . . . . . . . . . . . . . . . . . . . . 23Our First Application . . . . . . . . . . . . . . . . . . . . . . . . . . . . . . . . . . . . . 25Setting Up the Store . . . . . . . . . . . . . . . . . . . . . . . . . . . . . . . . . . . . . . 27Adding Recipes . . . . . . . . . . . . . . . . . . . . . . . . . . . . . . . . . . . . . . . . 28Adding Ingredients . . . . . . . . . . . . . . . . . . . . . . . . . . . . . . . . . . . . . . 30Structuring the Code . . . . . . . . . . . . . . . . . . . . . . . . . . . . . . . . . . . . . . 31A Closer Look at Reducers . . . . . . . . . . . . . . . . . . . . . . . . . . . . . . . . . . 31Handling Typos and Duplicates . . . . . . . . . . . . . . . . . . . . . . . . . . . . . . . . 33Simple UI . . . . . . . . . . . . . . . . . . . . . . . . . . . . . . . . . . . . . . . . . . . . 34Logging . . . . . . . . . . . . . . . . . . . . . . . . . . . . . . . . . . . . . . . . . . . . . 36Getting Data from the Server . . . . . . . . . . . . . . . . . . . . . . . . . . . . . . . . . 37Summary . . . . . . . . . . . . . . . . . . . . . . . . . . . . . . . . . . . . . . . . . . . . 40
Part 2. Real World Usage . . . . . . . . . . . . . . . . . . . . . . . . . . . . . . . . . . . . . 41
Chapter 3. State Management . . . . . . . . . . . . . . . . . . . . . . . . . . . . . . . . . . 42

CONTENTS
The Concept of Separation . . . . . . . . . . . . . . . . . . . . . . . . . . . . . . . . . . 42State as a Database . . . . . . . . . . . . . . . . . . . . . . . . . . . . . . . . . . . . . . 45Keeping a Normalized State . . . . . . . . . . . . . . . . . . . . . . . . . . . . . . . . . . 47Persisting State . . . . . . . . . . . . . . . . . . . . . . . . . . . . . . . . . . . . . . . . . 50Real-World State . . . . . . . . . . . . . . . . . . . . . . . . . . . . . . . . . . . . . . . . 51Summary . . . . . . . . . . . . . . . . . . . . . . . . . . . . . . . . . . . . . . . . . . . . 53
Chapter 4. Server Communication . . . . . . . . . . . . . . . . . . . . . . . . . . . . . . . . 54Using Promises in Action Creators . . . . . . . . . . . . . . . . . . . . . . . . . . . . . . 54API Middleware . . . . . . . . . . . . . . . . . . . . . . . . . . . . . . . . . . . . . . . . 55Moving Code from Action Creators . . . . . . . . . . . . . . . . . . . . . . . . . . . . . 56Using the API Middleware . . . . . . . . . . . . . . . . . . . . . . . . . . . . . . . . . . 57Error Handling . . . . . . . . . . . . . . . . . . . . . . . . . . . . . . . . . . . . . . . . . 58Loading Indicator (Spinner) . . . . . . . . . . . . . . . . . . . . . . . . . . . . . . . . . . 59Dynamic Action Types . . . . . . . . . . . . . . . . . . . . . . . . . . . . . . . . . . . . 60Authentication . . . . . . . . . . . . . . . . . . . . . . . . . . . . . . . . . . . . . . . . . 62More Extensions . . . . . . . . . . . . . . . . . . . . . . . . . . . . . . . . . . . . . . . . 62Chaining APIs . . . . . . . . . . . . . . . . . . . . . . . . . . . . . . . . . . . . . . . . . 63Canceling API Requests . . . . . . . . . . . . . . . . . . . . . . . . . . . . . . . . . . . . 67Summary . . . . . . . . . . . . . . . . . . . . . . . . . . . . . . . . . . . . . . . . . . . . 69
Chapter 5. WebSockets . . . . . . . . . . . . . . . . . . . . . . . . . . . . . . . . . . . . . . 70Basic Architecture . . . . . . . . . . . . . . . . . . . . . . . . . . . . . . . . . . . . . . . 70Redux Link . . . . . . . . . . . . . . . . . . . . . . . . . . . . . . . . . . . . . . . . . . . 70Code Implementation . . . . . . . . . . . . . . . . . . . . . . . . . . . . . . . . . . . . . 71Complete WebSocket Middleware Code . . . . . . . . . . . . . . . . . . . . . . . . . . . 76Authentication . . . . . . . . . . . . . . . . . . . . . . . . . . . . . . . . . . . . . . . . . 77Summary . . . . . . . . . . . . . . . . . . . . . . . . . . . . . . . . . . . . . . . . . . . . 80
Chapter 6. Tests . . . . . . . . . . . . . . . . . . . . . . . . . . . . . . . . . . . . . . . . . . 81Test Files and Directories . . . . . . . . . . . . . . . . . . . . . . . . . . . . . . . . . . . 81Testing Action Creators . . . . . . . . . . . . . . . . . . . . . . . . . . . . . . . . . . . . 82Async Action Creators . . . . . . . . . . . . . . . . . . . . . . . . . . . . . . . . . . . . 86Reducer Tests . . . . . . . . . . . . . . . . . . . . . . . . . . . . . . . . . . . . . . . . . . 90Testing Middleware . . . . . . . . . . . . . . . . . . . . . . . . . . . . . . . . . . . . . . 98Integration Tests . . . . . . . . . . . . . . . . . . . . . . . . . . . . . . . . . . . . . . . . 107Summary . . . . . . . . . . . . . . . . . . . . . . . . . . . . . . . . . . . . . . . . . . . . 109
Part 3. Advanced Concepts . . . . . . . . . . . . . . . . . . . . . . . . . . . . . . . . . . . . 110
Chapter 7. The Store . . . . . . . . . . . . . . . . . . . . . . . . . . . . . . . . . . . . . . . 111Creating a Store . . . . . . . . . . . . . . . . . . . . . . . . . . . . . . . . . . . . . . . . 111Decorating the Store . . . . . . . . . . . . . . . . . . . . . . . . . . . . . . . . . . . . . . 116Summary . . . . . . . . . . . . . . . . . . . . . . . . . . . . . . . . . . . . . . . . . . . . 123

CONTENTS
Chapter 8. Actions and Action Creators . . . . . . . . . . . . . . . . . . . . . . . . . . . . 124Passing Parameters to Actions . . . . . . . . . . . . . . . . . . . . . . . . . . . . . . . . 125Action Creators . . . . . . . . . . . . . . . . . . . . . . . . . . . . . . . . . . . . . . . . 125Flux Standard Actions . . . . . . . . . . . . . . . . . . . . . . . . . . . . . . . . . . . . . 127String Constants . . . . . . . . . . . . . . . . . . . . . . . . . . . . . . . . . . . . . . . . 129Testing Action Creators . . . . . . . . . . . . . . . . . . . . . . . . . . . . . . . . . . . . 131redux-thunk . . . . . . . . . . . . . . . . . . . . . . . . . . . . . . . . . . . . . . . . . . 132redux-actions . . . . . . . . . . . . . . . . . . . . . . . . . . . . . . . . . . . . . . . . . . 137Summary . . . . . . . . . . . . . . . . . . . . . . . . . . . . . . . . . . . . . . . . . . . . 142
Chapter 9. Reducers . . . . . . . . . . . . . . . . . . . . . . . . . . . . . . . . . . . . . . . . 143Reducers in Practice . . . . . . . . . . . . . . . . . . . . . . . . . . . . . . . . . . . . . . 143Avoiding Mutations . . . . . . . . . . . . . . . . . . . . . . . . . . . . . . . . . . . . . . 149Ensuring Immutability . . . . . . . . . . . . . . . . . . . . . . . . . . . . . . . . . . . . . 155Higher-Order Reducers . . . . . . . . . . . . . . . . . . . . . . . . . . . . . . . . . . . . 157Testing Reducers . . . . . . . . . . . . . . . . . . . . . . . . . . . . . . . . . . . . . . . . 158Summary . . . . . . . . . . . . . . . . . . . . . . . . . . . . . . . . . . . . . . . . . . . . 158
Chapter 10. Middleware . . . . . . . . . . . . . . . . . . . . . . . . . . . . . . . . . . . . . 159Understanding next() . . . . . . . . . . . . . . . . . . . . . . . . . . . . . . . . . . . . . 160Our First Middleware . . . . . . . . . . . . . . . . . . . . . . . . . . . . . . . . . . . . . 160Async Actions . . . . . . . . . . . . . . . . . . . . . . . . . . . . . . . . . . . . . . . . . 162Using Middleware for Flow Control . . . . . . . . . . . . . . . . . . . . . . . . . . . . . 165Other Action Types . . . . . . . . . . . . . . . . . . . . . . . . . . . . . . . . . . . . . . 167Difference Between next() and dispatch() . . . . . . . . . . . . . . . . . . . . . . . . . 168Parameter-Based Middleware . . . . . . . . . . . . . . . . . . . . . . . . . . . . . . . . . 169How Are Middleware Used? . . . . . . . . . . . . . . . . . . . . . . . . . . . . . . . . . 170Summary . . . . . . . . . . . . . . . . . . . . . . . . . . . . . . . . . . . . . . . . . . . . 171
Further Reading . . . . . . . . . . . . . . . . . . . . . . . . . . . . . . . . . . . . . . . . . . 172Resource Repositories . . . . . . . . . . . . . . . . . . . . . . . . . . . . . . . . . . . . . 172Useful Libraries . . . . . . . . . . . . . . . . . . . . . . . . . . . . . . . . . . . . . . . . 172Courses and Tutorials . . . . . . . . . . . . . . . . . . . . . . . . . . . . . . . . . . . . . 173

Should I Read This Book?There are many tutorials and blog posts about Redux on the Internet. The library also has greatofficial documentation. This book isn’t supposed to be either a tutorial or documentation. The goalis to provide a methodical explanation of Redux core concepts and how those can be extended andused in large and complex Redux applications.
As a frontend consultancy, we help dozens of companies build great projects using Redux. Manyprojects face the same problems and ask the same questions. How should we structure theapplication? What is the best way to implement server communication? What is the best solutionfor form validation?Where should we handle side effects? Howwill Redux benefit our applications?
This book is intended to serve as a companion for developers using Redux on a daily basis. It aims togive answers to many of the above questions and provide solutions to the most common problemsin real-world applications. It can be used to learn Redux from the ground up, to better understandthe structure of a large application, and as a reference during development.
The book is structured in a way that doesn’t force the reader to read it start to finish but ratherallows you to skip parts and come back to them when you face the problem at hand or have freetime to deepen your knowledge. We love Redux, and we have tried to share our excitement about itin this book. We hope that you will find it useful.

How to Read This BookWhile Redux in itself is a small library, the underlying concepts and the ecosystem around it arelarge and complex. In this book we cover the core and common concepts and methods a developerneeds to work with Redux on both small and large-scale applications.
The book is separated into three parts. In the first part you will learn the basics of Redux. Chapter1 covers the core concepts behind Redux, introducing the different “actors” and how it is built. InChapter 2, we build an example project step by step; here, you will learn how to use Redux in aproject.
The second part of the book is about examples and use cases from real applications. Redux hasa great ecosystem, and there are a lot of tips, tricks, and libraries that can be applied to manyprojects of different scale. We provide you with solutions for common problems including servercommunications, authorization, internationalization, routing, forms, wizards, and more.
The third part is a deep dive into Redux usage. It is separated into chapters by Redux entity types:actions, middleware, reducers, and the store and store enhancers. The chapters in this section includeadvanced explanations of Redux internals and how to properly use them in complex scenarios, andthey are a must-read for anyone considering building large applications with Redux.
It is highly recommended that you start by reading the first part as a whole. Even if you already haveknowledge of Redux and have used it, the opening chapters will clarify all the underlying conceptsand lay down the groundwork for the code we will use throughout the second and third parts of thebook.
No matter who you are—an explorer learning about Redux for fun, or a hard-working professionalwho needs to solve real problems fast—this book will provide new ideas and insights to help you onyour path.

AcknowledgementsWriting a technical book on a popular JavaScript library nowadays isn’t a simple task. Newtechniques, best practices and opinions keep popping up every other week. Combined with dailyjob and a family makes it even harder. The only way we could succeed is with a help from otherawesome people along the way.
To Redux creators, Dan Abramov and Andrew Clark, as well as to many contributors to Redux andits ecosystem, thank you for improving data management and making this book relevant.
To our technical copyeditor, Rachel Head¹, thank you so much for fixing our English and makingthis book more understandable.
To all our colleagues at 500Tech², thanks for being awesome and making us feel good everyday.
And obviously thank you, our dear reader, for deciding to spend your time and money on readingthis book. We hope you enjoy reading it as much as we did writing it.
Boris & Ilya
¹https://fr.linkedin.com/in/rachel-head-a45258a2²http://500tech.com

Code RepositoryThe code samples from this book are available in the book repository on Github and should workin all modern browsers.
https://github.com/redux-book

Part 1. Introduction to Redux

Chapter 1. Core Concepts of Flux andReduxPenicillin, x-rays, and the pacemaker are famous examples of unintended discoveries³. Redux, in asimilar way, wasn’t meant to become a library, but turned out to be a great Flux implementation.In May 2015, one of its authors, Dan Abramov⁴, submitted a talk to the ReactEurope conferenceabout “hot reloading and time travel.” He admits he had no idea how to implement time travel atthat point. With some help from Andrew Clark⁵ and inspired by some elegant ideas from the Elm⁶language, Dan eventually came up with a very nice architecture. When people started catching onto it, he decided to market it as a library.
In less than half a year, that small (only 2 KB) library became the go-to framework for Reactdevelopers, as its tiny size, easy-to-read code, and very simple yet neat ideas were much easier toget to grips with than competing Flux implementations. In fact, Redux is not exactly a Flux library,though it evolved from the ideas behind Facebook’s Flux architecture. The official definition ofRedux⁷ is a predictable state container for JavaScript applications. This simply means that you storeall of your application state in one place and can know what the state is at any given point in time.
What Is Flux?
Before diving into Redux, we should get familiar with its base and predecessor, the Flux architecture.“Flux” is a generic architecture or pattern, rather than a specific implementation. Its ideas werefirst introduced publicly by Bill Fisher and Jing Chen at the Facebook F8 conference in April 2014.Flux was touted as redefining the previous ideas of MVC (Model–View–Controller) and MVVM(Model–View–ViewModel) patterns and two-way data binding introduced by other frameworks bysuggesting a new flow of events on the frontend, called the unidirectional data flow.
In Flux events are managed one at a time in a circular flow with a number of actors: dispatcher,stores, and actions. An action is a structure describing any change in the system: mouse clicks,timeout events, Ajax requests, and so on. Actions are sent to a dispatcher, a single point in thesystem where anyone can submit an action for handling. The application state is then maintainedin stores that hold parts of the application state and react to commands from the dispatcher.
³http://www.businessinsider.com/these-10-inventions-were-made-by-mistake-2010-11?op=1&IR=T⁴http://survivejs.com/blog/redux-interview/⁵https://twitter.com/acdlite⁶http://elm-lang.org⁷http://redux.js.org/

Chapter 1. Core Concepts of Flux and Redux 7
Here is the simplest Flux flow:
1. Stores subscribe to a subset of actions.2. An action is sent to the dispatcher.3. The dispatcher notifies subscribed stores of the action.4. Stores update their state based on the action.5. The view updates according to the new state in the stores.6. The next action can then be processed.
Flux overview
This flow ensures that it’s easy to reason about how actions flow in the system, what will cause thestate to change, and how it will change.
Consider an example from a jQuery or AngularJS application. A click on a button can cause multiplecallbacks to be executed, each updating different parts of the system, which might in turn triggerupdates in other places. In this scenario it is virtually impossible for the developer of a largeapplication to know how a single event might modify the application’s state, and in what orderthe changes will occur.
In Flux, the click event will generate a single action that will mutate the store and then the view. Anyactions created by the store or other components during this process will be queued and executedonly after the first action is done and the view is updated.
Facebook’s developers did not initially open-source their implementation of Flux, but rather releasedonly parts of it, like the dispatcher. This caused a lot of open-source implementations to be built bythe community, some of them significantly different and some only slightly changing the original

Chapter 1. Core Concepts of Flux and Redux 8
patterns. For example, some moved to having multiple dispatchers or introduced dependenciesbetween stores.
Dmitri Voronianski has a good comparison of various Flux implementations on GitHub⁸.
Redux and Flux
While Redux derives from Flux concepts, there are a few distinctions between the two architectures.In contrast to Flux, Redux only has a single store that holds no logic by itself. Actions are dispatchedand handled directly by the store, eliminating the need for a standalone dispatcher. In turn, the storepasses the actions to state-changing functions called reducers, a new type of actor added by Redux.
Dispatcher out, reducers in
To better understand Redux, let’s imagine an application that helps us manage a recipe book. TheRedux store is where the recipe book itself will be saved, in a structure that might be a list of recipesand their details.
The app will allow us to perform different actions like adding a recipe, adding ingredients to arecipe, changing the quantity of an ingredient, and more. To make our code generic, we can create anumber of services. Each service will know how to handle a group of actions. For example, the bookservice will handle all the add/remove recipe actions, the recipe service will handle changing recipeinformation, and the recipe-ingredients service will handle the actions to do with ingredients. Thiswill allow us to better divide our code and in the future easily add support for more actions.
To make it work, our store could call each of our services and pass them two parameters: the currentrecipe book and the action we want to perform. Each service in turn will modify the book if theaction is one it knows how to handle. Why pass the action to all the services? Maybe some actions
⁸https://github.com/voronianski/flux-comparison

Chapter 1. Core Concepts of Flux and Redux 9
affect more than one service. For example, changing the measurements from grams to ounces willcause the ingredients service to recalculate the amounts and the recipe service to mark the recipe asusing imperial measurements. In Redux, these services are the reducers.
We might want to add another layer, themiddleware. Every action will be first passed through a listof middleware. Unlike reducers, middleware can modify, stop, or add more actions. Examples mightinclude: a logging middleware, an authorization middleware that checks if the user has permissionsto run the action, or an API middleware that sends something to the server.
This simple example shows the base of Redux. We have a single store to control the state, actions todescribe the changes we want to make, reducers (services, in our example) that know how to mutatethe state based on the requested action, and middleware to handle the housekeeping tasks.
What makes Redux special, and sometimes hard to understand, is that reducers never change thestate (in our case, the recipe book), since it is immutable. Instead, the reducers must create a newcopy of the book, make the needed changes to the copy, and return the new, modified book to thestore. This approach allows Redux and the view layers to easily do change detection. In later chapterswe will discuss in detail why and how this approach is used.
It is important to note that the whole application state is kept in a single location, the store. Having asingle source of data provides enormous benefits during debugging, serialization, and development,as will become apparent in the examples in this book.
Redux overview

Chapter 1. Core Concepts of Flux and Redux 10
Redux Terminology
Actions and Action Creators
The only way for an application to change the state is by processing actions. In most cases, actions inRedux are nothingmore than plain JavaScript objects passed to the store that hold all the informationneeded for the store to be able to modify the state:
Example of an action object
1 {
2 type: 'INCREMENT',
3 payload: {
4 counterId: 'main',
5 amount: -10
6 }
7 }
Since these objects might have some logic and be used in multiple places in an application, they arecommonly wrapped in a function that can generate the objects based on a parameter:
A function that creates an action object
1 function incrementAction(counterId, amount) {
2 return {
3 type: 'INCREMENT',
4 payload: {
5 counterId,
6 amount
7 }
8 };
9 };
As these functions create action objects, they are aptly named action creators.
Reducers
Once an action is sent to the store, the store needs to figure out how to change the state accordingly.To do so, it calls a function, passing it the current state and the received action:

Chapter 1. Core Concepts of Flux and Redux 11
A function that calculates the next state
1 function calculateNextState(currentState, action) {
2 ...
3 return nextState;
4 }
This function is called a reducer. In real Redux applications, there will be one root reducer functionthat will call additional reducer functions to calculate the nested state.
A simple reducer implementation
1 function rootReducer(state, action) {
2 switch (action.type) {
3
4 case 'INCREMENT':
5 return { ...state, counter: state.counter + action.payload.amount };
6
7 default:
8 return state;
9 }
10 }
Reducers never modify the state; they always create a new copy with the needed modifi-cations.
Middleware
Middleware is a more advanced feature of Redux and will be discussed in detail in later chapters.The middleware act like interceptors for actions before they reach the store: they can modify theactions, create more actions, suppress actions, and much more. Since the middleware have access tothe actions, the dispatch() function, and the store, they are the most versatile and powerful entitiesin Redux.
Store
Unlike many other Flux implementations, Redux has a single store that holds the applicationinformation but no user logic. The role of the store is to receive actions, pass them through allthe registered middleware, and then use reducers to calculate a new state and save it.
When it receives an action that causes a change to the state, the store will notify all the registeredlisteners that a change to the state has been made. This will allow various parts of the system, likethe UI, to update themselves according to the new state.

Chapter 1. Core Concepts of Flux and Redux 12
General Concepts
Redux is about functional programming and pure functions. Understanding these concepts is crucialto understanding the underlying principles of Redux.
Functional programming has become a trendy topic in the web development domain lately, but itwas invented around the 1950s. The paradigm centers around avoiding changing state and mutabledata—in other words, making your code predictable and free of side effects.
JavaScript allows you to write code in a functional style, as it treats functions as first-class objects.This means you can store functions in variables, pass them as arguments to other functions, andreturn them as values of other functions. But since JavaScript was not designed to be a functionalprogramming language per se, there are some caveats that you will need to keep in mind. In orderto get started with Redux, you need to understand pure functions and mutation.
Pure and Impure Functions
A pure function returns values by using only its arguments: it uses no additional data and changesno data structures, touches no storage, and emits no external events (like network calls). This meansthat you can be completely sure that every time you call the function with the same arguments, youwill always get the same result. Here are some examples of pure functions:
An example of a pure function
1 function square(x) {
2 return x * x;
3 }
4
5 Math.sin(y);
6
7 arr.map((item) => item.id);
If a function uses any variables not passed in as arguments or creates side effects, the function isimpure. When a function depends on variables or functions outside of its lexical scope, you can neverbe sure that the function will behave the same every time it’s called. For example, the following areimpure functions:

Chapter 1. Core Concepts of Flux and Redux 13
An example of an impure function
1 function getUser(userId) {
2 return UsersModel.fetch(userId).then((result) => result);
3 }
4
5 Math.random();
6
7 arr.map((item) => calculate(item));
Mutating Objects
Another important concept that often causes headaches for developers starting to work with Reduxis immutability. JavaScript has limited tooling for managing immutable objects, and we are oftenrequired to use external libraries.
Immutability means that something can’t be changed, guaranteeing developers that if you create anobject, it will have the same properties and values forever. For example, let’s declare a simple objectas a constant:
Object defined as constant in JavaScript
1 const colors = {
2 red: '#FF0000',
3 green: '#00FF00',
4 blue: '#0000FF'
5 };
Even though the colors object is a constant, we can still change its content, as constwill only checkif the reference to the object is changed:
JavaScript allows changes of const defined objects
1 colors = {};
2 console.log(colors);
3
4 colors.red = '#FFFFFF';
5 console.log(colors.red);
Try writing this in the developer console. You will see that you can’t reassign an empty object tocolors, but you can change its internal value.
To make the colors object appear immutable, we can use the Object.freeze() method:

Chapter 1. Core Concepts of Flux and Redux 14
Making a plain object immutable
1 Object.freeze(colors);
2
3 colors.red = '#000000';
4
5 console.log(colors.red);
The value of the red property will now be '#FFFFFF'. If you thought that the value should be'#FF0000', you missed that we changed the red property before we froze the object. This is a goodexample of how easy it is to miss this kind of thing in real applications.
Here, once we used Object.freeze(), the colors object became immutable. In practice thingsare often more complicated, though. JavaScript does not provide good native ways to make datastructures fully immutable. For example, Object.freeze() won’t freeze nested objects:
Object.freeze() does not freeze nested objects
1 const orders = {
2 bread: {
3 price: 10
4 },
5 milk: {
6 price: 20
7 }
8 };
9
10 Object.freeze(orders);
11
12 orders.milk.price -= 15;
13
14 console.log(orders.milk.price);
To work around the nature of our beloved language, we have to use third-party libraries like deep-freeze⁹ or ImmutableJS¹⁰. We will talk about different immutable libraries later in the book.
Redux and React
Redux started out as a companion to React, but has started to gather a major following with otherframeworks like Angular. At its base Redux is fully framework-agnostic, and it can easily be usedwith any JavaScript framework to handle state and changes.
⁹https://github.com/substack/deep-freeze¹⁰https://facebook.github.io/immutable-js/

Chapter 1. Core Concepts of Flux and Redux 15
The connection to different frameworks is done with the help of third-party libraries that providea set of convenience functions for each framework in order to seamlessly connect to Redux. Thelibrary that we will use to connect Redux and React is called react-redux, and we will be coveringit extensively later in the book.
Basic Redux Implementation
People love Redux because of its simplicity. In fact, it is so simple that we can implement most of itin a handful of lines of code. Thus, unlike with other frameworks, where the only way to learn is tostudy the API, here we can start by implementing Redux ourselves.
The basic premise behind Redux is the idea that all the application state is saved in one place, thestore. To use this idea in applications we will need to find a way to:
1. Modify the state as a result of events (user-generated or from the server).2. Monitor state changes so we can update the UI.
The first part can be split into two blocks of functionality:
1. Notify the store that an action has happened.2. Help the store figure out how to modify the state according to our application’s logic.
Using this structure, let’s build a simple application that will implement a counter. Our applicationwill use pure JavaScript and HTML and require no additional libraries. We are going to have twobuttons that allow us to increment and decrement a simple counter, and a place where we can seethe current counter value:
The index.html file
1 <div>
2 Counter:
3 <span id='counter'></span>
4 </div>
5
6 <button id='inc'>Increment</button>
7 <button id='dec'>Decrement</button>
Our application state will simply hold the counter value:

Chapter 1. Core Concepts of Flux and Redux 16
A simple state holding a counter
1 let state = {
2 counter: 3
3 };
To make our demo functional, let’s create a click handler for each button that will use a dispatch()function to notify our store that an action needs to be performed:
A basic dispatch API
1 function dispatch(action) { ... };
Connect click events to dispatch
1 // Listen to click events
2 document.querySelector('#inc').onclick = () => dispatch('INC');
3 document.querySelector('#dec').onclick = () => dispatch('DEC');
We will come back to its implementation later in this chapter. Also, let’s define a function that willupdate the counter’s value in the HTML based on application state received as an argument:
Code to update the counter in the DOM
1 // Update view (this might be React or Angular2 in a real app)
2 function updateView() {
3 document.querySelector('#counter').innerText = state.counter;
4 }
Since we want our view to represent the current application state, we need it to be updated everytime the state (and the counter) changes. For that, we will use the subscribe() function, whichwe will also implement a bit later. The role of the function will be to call our callback every timeanything in the state changes:
Subscribe to changes API
1 subscribe(updateView);
We have now created a basic application structure with a simple state, implemented a function thatwill be responsible for updating the HTML based on the state, and defined two “magic” functions—dispatch() and subscribe()—to dispatch actions and subscribe to changes in state. But there is

Chapter 1. Core Concepts of Flux and Redux 17
still one thing missing. How will our mini-Redux know how to handle the events and change theapplication state?
For this, we define an additional function. On each action dispatched, Redux will call our function,passing it the current state and the action. To be compliant with Redux’s terminology, we will callthe function a reducer. The job of the reducer will be to understand the action and, based on it, createa new state.
In our simple example our state will hold a counter, and its value will be incremented or decrementedbased on the action:
Simple reducer for INC and DEC actions
1 // Our mutation (reducer) function creates a new state based on the action passed
2 function reducer(state, action) {
3 switch (action) {
4 case 'INC':
5 return { ...state, counter: state.counter + 1 };
6 case 'DEC':
7 return { ...state, counter: state.counter - 1 };
8 default:
9 return state;
10 }
11 }
An important thing to remember is that reducers must always return a new, modified copy of thestate. They shouldn’t mutate the existing state, like in this example:
Incorrect way to change state
1 // This is wrong!
2 state.counter = state.counter + 1;
Later in the book you will learn how you can avoid mutations in JavaScript with and without thehelp of external libraries.
Now it’s time to implement the actual change of the state. Since we are building a generic framework,we will not include the code to increment/decrement the counter (as it is application-specific) butrather will call a function that we expect the user to supply, called reducer(). This is the reducerwe mentioned before.
The dispatch() function calls the reducer() implemented by the application creator, passing it boththe current state and the action it received. This information should be enough for the reducer()function to calculate a new state. We then check if the new state differs from the old one, and if itdoes, we replace the old state and notify all the listeners of the change:

Chapter 1. Core Concepts of Flux and Redux 18
Implementation of the disptach API
1 let state = null;
2
3 function dispatch(action) {
4 const newState = reducer(state, action);
5
6 if (newState !== state) {
7 state = newState;
8
9 listeners.forEach(listener => listener());
10 }
11 }
Again, it is very important to note that we expect a reducer to create a new state and not just modifythe existing one. We will be using a simple comparison by reference to check whether the state haschanged.
One remaining task is to notify our view of the state change. In our example we only have a singlelistener, but we already can implement full listener support by allowingmultiple callbacks to registerfor the “state change” event. We will implement this by keeping a list of all the registered callbacks:
Implementation of the subscribe API
1 const listeners = [];
2
3 function subscribe(callback) {
4 listeners.push(callback);
5 }
This might surprise you, but we have just implemented the major part of the Redux framework. Thereal code¹¹ isn’t much longer, and we highly recommended that you take half an hour to read it.
Using the Real Redux
To complete our example, let’s switch to the real Redux library and see how similar the solutionremains. First we’ll add the Redux library, for now using CDNJS:
¹¹https://github.com/reactjs/redux/tree/master/src

Chapter 1. Core Concepts of Flux and Redux 19
Adding Redux to a project
1 <script src="https://cdnjs.cloudflare.com/ajax/libs/redux/3.6.0/redux.min.js" />
We will change our previous state definition to be a constant that only defines the initial value ofthe state:
The initial state
1 const initialState = {
2 counter: 3
3 };
Now we can use it to create a Redux store:
Creating a Redux store
1 const store = Redux.createStore(reducer, initialState);
As you can see, we are using our reducer from before. The only change that needs to be made to thereducer is the switch statement. Instead of doing:
Previous reducer code
1 switch (action)
Changes to
New reducer code
1 switch (action.type)
The reason behind this is that actions in Redux are objects that have the special type property, whichmakes reducer creation and action data more consistent.
The Redux store will also give us all the features we implemented ourselves before, like subscribe()and dispatch(). Thus, we can safely delete these methods.
To subscribe to store changes, we will simply call the subscribe() method of the store:

Chapter 1. Core Concepts of Flux and Redux 20
Subscribing to store updates
1 store.subscribe(updateView);
Since subscribe() does not pass the state to the callback, wewill need to access it via store.getState():
Update view by getting the state out of the store
1 // Update view (this might be React in a real app)
2 function updateView() {
3 document.querySelector('#counter').innerText = store.getState().counter;
4 }
5
6 store.subscribe(updateView);
The last change is in the dispatch() method. As mentioned previously, our actions now need tohave the type property. Thus, instead of simply sending the string 'INC' as the action, we now needto send { type: 'INC' }.

Chapter 1. Core Concepts of Flux and Redux 21
The Complete Example
The HTML
1 <script src="https://cdnjs.cloudflare.com/ajax/libs/redux/3.6.0/redux.min.js" />
2
3 <div>
4 Counter:
5 <span id='counter'> </span>
6 </div>
7
8 <button id='inc'>Increment</button>
9 <button id='dec'>Decrement</button>
The JavaScript
1 // Our mutation (Reducer) function,
2 // create a _new_ state based on the action passed
3 function reducer(state, action) {
4 switch(action.type) {
5 case 'INC':
6 return { ...state, counter: state.counter + 1 };
7 case 'DEC':
8 return { ...state, counter: state.counter - 1 };
9 default:
10 return state;
11 }
12 }
13
14 const initialState = {
15 counter: 3
16 };
17
18 const store = Redux.createStore(reducer, initialState);
19
20 // Update view (this might be React in a real app)
21 function updateView() {
22 document.querySelector('#counter').innerText = store.getState().counter;
23 }
24
25 store.subscribe(updateView);
26

Chapter 1. Core Concepts of Flux and Redux 22
27 // Update view for the first time
28 updateView();
29
30 // Listen to click events
31 document.getElementById('inc').onclick = () => store.dispatch({ type: 'INC' });
32 document.getElementById('dec').onclick = () => store.dispatch({ type: 'DEC' });
Summary
In this chapter we briefly covered the history of Redux and Flux, and learned how Redux works at itscore. We also learned a bit about basic functional programming principles, such as pure functionsand immutability. As they are very important for our real-world applications, we will talk aboutthese concepts more later in the book. In the next chapter we are going to see how to actually workwith Redux by building a simple recipe book application.

Chapter 2. Your First ReduxApplicationIn the previous chapter we learned what Redux is and how it works. In this chapter we will learnhow to use it for a simple project. The code base created in this chapter will be used as the base forall the examples in the rest of this book. It is highly recommended that you follow along with andfully understand this chapter and its code before moving on to more advanced topics.
Starter Project
Modern client-side applications often require a set of so-called boilerplate in order to make devel-opment easier. The boilerplate may include things such as directory structure, code transformationtools like SCSS and ES2016 compilers, testing infrastructure, and production pipeline tools for taskssuch as minification, compression, and concatenation.
To ease the chore of setting up a new project, the open-source community has created dozens ofdifferent starter projects. The larger ones, like react-redux-starter-kit¹², consist of over a hundredfiles. We will use a much simpler boilerplate, just enough to cover all the concepts explained in thisbook.
As our project will be pure Redux, it will require no React or related libraries. We will useWebpack¹³as our main tool to handle all code transformation and production flow tasks.
Skeleton Overview
To start things off, let’s clone the starter project, install the needed packages, and verify that ourenvironment is ready:
Setting up the starter project
1 git clone http://github.com/redux-book/starter
2 cd starter
3 npm install
4 npm start
¹²https://github.com/davezuko/react-redux-starter-kit¹³https://webpack.js.org/

Chapter 2. Your First Redux Application 24
If everything went smoothly, you should be able to access http://localhost:8080¹⁴ and see a pageshowing “A simple Redux starter” and a running counter. If you open the JavaScript console in theDeveloper Tools, you should also see “Redux started” output. Our project is ready!
Time to open the code editor and go over the five files currently making up the project:
1. .gitignore – A list of filename patterns for Git to ignore when managing our repository.2. package.json – A list of all properties of our project and packages used.3. webpack.config.js – Webpack configuration.4. app/index.html – The HTML entry point for the project.5. app/app.js – The JavaScript entry point to our code.6. app/assets/stylesheets/main.css – Some basic CSS for the sample project.
.gitignore
This is a special configuration file for Git¹⁵ version control system, this file instructs Git which filesand directories should not be managed by it (for example, node_modules).
package.json
While the majority of the fields in this file are irrelevant at this point, it is important to note twosections, devDependencies and dependencies. The former is the list of all the tools needed to buildthe project. It currently includes only webpack-tools and the Babel transpiler, required to transpileES2016. The dependencies section lists all the packages we will bundle with our application. Itincludes only the redux library itself.
webpack.config.js
This is the main Webpack configuration file. This settings file instructs Webpack how to chaintranspile tools and how to build packages, and holds most of the configuration of our project’stooling. In our simple project there is only one settings file (larger projects might have more granularfiles for testing, development, production, etc.). Our webpack.config.js file sets up Babel to transpileES2016 into ES5 and defines the entry point of our application.
index.html / app.js
Single-page applications, unlike their server-generated cousins, have a single entry point. In ourproject every part and page of the application will be rendered starting from index.html and all theJavaScript-related startup code will be in app.js.
¹⁴http://localhost:8080¹⁵https://git-scm.com/

Chapter 2. Your First Redux Application 25
Our First Application
To learn how to use different parts of Redux, we will be building a Recipe Book application. It willallow adding recipes and ingredients for each recipe, andwill fetch an initial recipe list from a remoteserver. In accordance with Redux principles, the application will keep all its state in our global store,including some parts of the UI.
The first step with any Redux-based app is to plan how data will be arranged in the store. Our recipeobject will start out holding only the recipe’s name (we will add more fields as needed). To store thecurrent list, we can use a regular array:
Simple state
1 recipes = [
2 { name: 'Omelette' },
3 ...
4 ];
Ingredients for each recipe will contain a name and a quantity. Connecting them to the state willbe a bigger challenge. There are three general approaches to make this connection.
The nested objects approach is to hold the ingredients as an array inside a recipe itself:
Nested objects state
1 state = {
2 recipes: [
3 {
4 name: 'omelette',
5 ingredients: [
6 {
7 name: 'eggs',
8 quantity: 2
9 }
10 ]
11 },
12 ...
13 ]
14 };
The nested reference approach is to store the recipe ingredient information directly in the state andhold an array of “recipe ingredient IDs” in each recipe:

Chapter 2. Your First Redux Application 26
Nested reference state
1 state = {
2 recipes: [
3 {
4 name: 'omelette',
5 ingredients: [2, 3]
6 }
7 ],
8 ingredients: {
9 2: {
10 name: 'eggs',
11 quantity: 2
12 },
13 3: {
14 name: 'milk',
15 quantity: 1
16 }
17 }
18 };
The separate object approach is to store the ingredients as a standalone array in the state, and putthe ID of the recipe the array is connected to inside of it:
Separate objects state
1 state = {
2 recipes: [
3 {
4 id: 10,
5 name: 'omelette'
6 }
7 ],
8 ingredients: [
9 {
10 recipe_id: 10,
11 name: 'eggs',
12 quantity: 2
13 },
14 {
15 recipe_id: 10,
16 name: 'milk',
17 quantity: 1

Chapter 2. Your First Redux Application 27
18 }
19 ]
20 };
While all the approaches have their upsides and downsides, we will quickly discover that in Redux,keeping the structure as flat and normalized as possible (as in the second and third examples shownhere) makes the code cleaner and simpler. The state’s structure implies the use of two separatereducers for recipes and ingredients. We can process both independently.
The biggest difference between the second and third options is how the link is made (who holds theID of whom). In the second example, adding an ingredient will require an update in two differentparts of the state—in both the recipes and ingredients subtrees—while in the third approach, wecan always update only one part of the tree. In our example we will use this method.
The subject of state management is covered in detail in the State Management Chapter inPart 2.
Setting Up the Store
We will start by creating the store. In Redux there is only one store, which is created and initializedby the createStore() method. Let’s open our index.js file and create the store:
Creating the Redux store
1 import { createStore } from 'redux';
2
3 const reducer = (state, action) => state;
4 const store = createStore(reducer);
The createStore() function can receive a number of parameters, with only one being required—thereducer. In our example, the reducer simply returns the same state regardless of the action.
To make things more interesting, we can provide a default state to the store. This is useful whenlearning, but the real use of this feature is mainly with server rendering, where you precalculate thestate of the application on the server and then can create the store with the precalculated state onthe client.

Chapter 2. Your First Redux Application 28
Create store with an initial state
1 const initialState = {
2 recipes: [
3 {
4 name: 'Omelette'
5 }
6 ],
7 ingredients: [
8 {
9 recipe: 'Omelette',
10 name: 'Egg',
11 quantity: 2
12 }
13 ]
14 };
15
16 const reducer = (state, action) => state;
17 const store = createStore(reducer, initialState);
18
19 window.store = store;
In the last line we make the store globally available by putting it on the window object. If we go tothe JavaScript console, we can now try playing with it:
Trying out the APIs in the console
1 store.getState()
2 // Object {recipes: Array[1], ingredients: Array[1]}
3
4 store.subscribe(() => console.log("Store changed"));
5
6 store.dispatch({ type: 'ACTION' });
7 // Store changed
As you can see, we can use the store object to access the current state using getState(), subscribeto get notifications on store changes using subscribe(), and send actions using dispatch().
Adding Recipes
To implement adding recipes, we need to find a way to modify our store. As we learned in theprevious chapter, store modifications can only be done by reducers in response to actions. Thismeans we need to define an action structure and modify our (very lean) reducer to support it.

Chapter 2. Your First Redux Application 29
Actions in Redux are nothing more than plain objects that have a mandatory type property. We willbe using strings to name our actions, with the most appropriate in this case being 'ADD_RECIPE'.Since a recipe has a name, we will add it to the action’s data when dispatching:
Dispatching a Redux object
1 store.dispatch({ type: 'ADD_RECIPE', name: 'Pancake' });
Let’s modify our reducer to support the new action. A simple approach might appear to be thefollowing:
Reducer that supports ADD_RECIPE
1 const reducer = (state, action) => {
2 switch (action.type) {
3 case 'ADD_RECIPE':
4 state.recipes.push({ name: action.name });
5 }
6
7 return state;
8 };
While this looks correct (and works when tested in our simple example), this code violates the basicRedux principle of store immutability. Our reducers must never change the state, but only create anew copy of it, with any modifications needed. Thus, our reducer code needs to be modified:
Correct way to build a reducer
1 const reducer = (state, action) => {
2 switch (action.type) {
3 case 'ADD_RECIPE':
4 return Object.assign({}, state, {
5 recipes: state.recipes.concat({ name: action.name })
6 });
7 }
8
9 return state;
10 };
The 'ADD_RECIPE' case has become more complex but works exactly as expected. We are usingthe Object.assign()method Object.assign({}, state, { key: value }) to create a new objectthat has all the key/value pairs from our old state, but overrides the recipes key with a new value. Tocalculate the list of new recipes we use concat() instead of push(), as push()modifies the originalarray while concat() creates a new array containing the original values and the new one.
More information about the Object.assign() method is available in the Reducers Chapter.
Chapter 2. Your First Redux Application 30
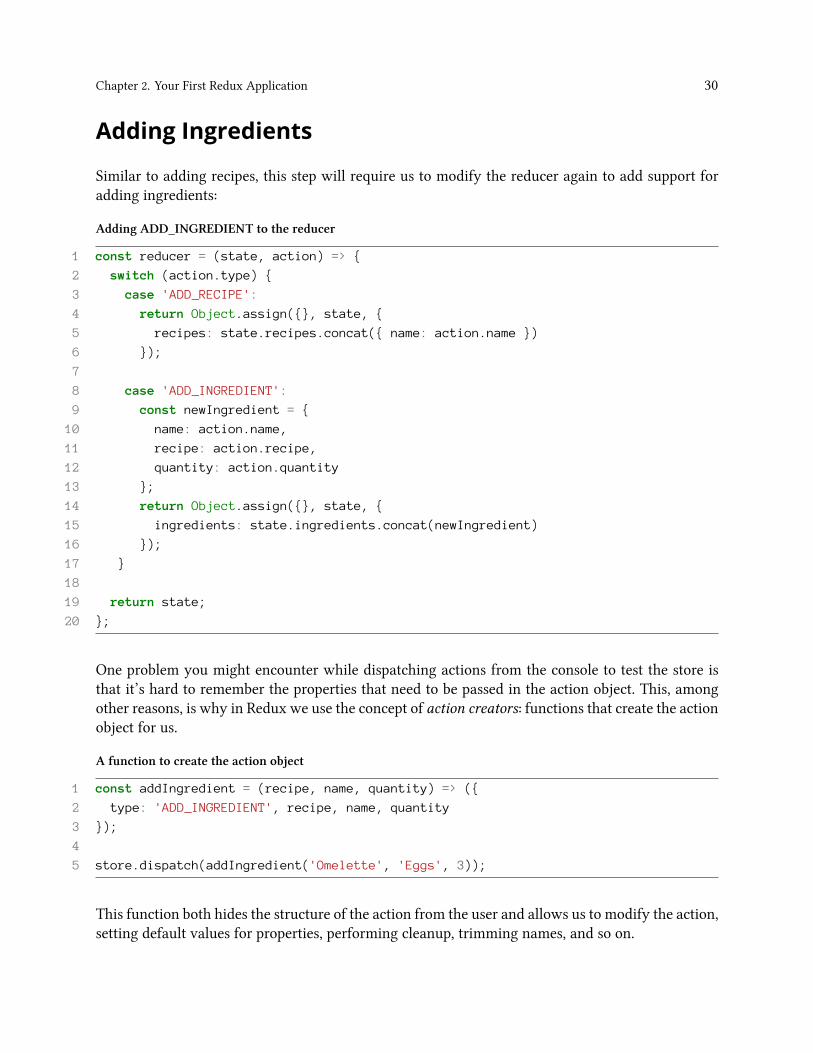
Adding Ingredients
Similar to adding recipes, this step will require us to modify the reducer again to add support foradding ingredients:
Adding ADD_INGREDIENT to the reducer
1 const reducer = (state, action) => {
2 switch (action.type) {
3 case 'ADD_RECIPE':
4 return Object.assign({}, state, {
5 recipes: state.recipes.concat({ name: action.name })
6 });
7
8 case 'ADD_INGREDIENT':
9 const newIngredient = {
10 name: action.name,
11 recipe: action.recipe,
12 quantity: action.quantity
13 };
14 return Object.assign({}, state, {
15 ingredients: state.ingredients.concat(newIngredient)
16 });
17 }
18
19 return state;
20 };
One problem you might encounter while dispatching actions from the console to test the store isthat it’s hard to remember the properties that need to be passed in the action object. This, amongother reasons, is why in Redux we use the concept of action creators: functions that create the actionobject for us.
A function to create the action object
1 const addIngredient = (recipe, name, quantity) => ({
2 type: 'ADD_INGREDIENT', recipe, name, quantity
3 });
4
5 store.dispatch(addIngredient('Omelette', 'Eggs', 3));
This function both hides the structure of the action from the user and allows us to modify the action,setting default values for properties, performing cleanup, trimming names, and so on.

Chapter 2. Your First Redux Application 31
For more information on action creators, consult the Actions and Action Creators Chapterin Part 3.
Structuring the Code
Having all our code in a single file is obviously a bad idea. In Redux, it’s common for the directorystructure to follow the names of the Redux “actors.” Reducers are placed in the reducers directory, andthe main reducer (commonly called the root reducer) is placed in the root.js file. Action creators go inthe actions directory, divided by the type of object or data they handle—in our case, actions/recipes.jsand actions/ingredients.js. Since we only have a single store, we can put all its code in one file:store/store.js.
After all the changes, the index.js file should look like the following:
Final index.js
1 import store from './store/store';
2 import { addRecipe } from './actions/recipes';
3 import { addIngredient } from './actions/ingredients';
4
5 store.dispatch(addRecipe('Pancake'));
6 store.dispatch(addIngredient('Pancake', 'Eggs', 3));
7
8 window.store = store;
A Closer Look at Reducers
If you open the reducers/root.js file, youwill find that the same reducer is now taking care of differentparts of our state tree. As our application grows, more properties will be added to both the recipesand the ingredients subtrees. Since the code in both handlers is not interdependent, we can split itfurther into three reducers, each one responsible for a different part of the state:

Chapter 2. Your First Redux Application 32
Multi-responsibility reducer
1 const recipesReducer = (recipes, action) => {
2 switch (action.type) {
3 case 'ADD_RECIPE':
4 return recipes.concat({name: action.name});
5 }
6
7 return recipes;
8 };
9
10 const ingredientsReducer = (ingredients, action) => { … }
11
12 const rootReducer = (state, action) => {
13 return Object.assign({}, state, {
14 recipes: recipesReducer(state.recipes, action),
15 ingredients: ingredientsReducer(state.ingredients, action)
16 });
17 };
There are three main benefits here. First, our root reducer is now very simple. All it does is create anew state object by combining the old state and the results of each of the subreducers. Second, ourrecipes reducer is much simpler as it only has to handle the recipes part of the state. And best ofall, our root, ingredients, and any other reducers that we might create don’t need to know or careabout the internal structure of the recipes subtree. Thus, changes to that part of the tree will onlyaffect the recipes part. A side effect of this is that we can tell each reducer how to initialize its ownsubtree, by using default parameters from ES2016:
Reducer for recipes
1 const recipesReducer = (recipes = [], action) => { ... };
Note the default [] set for recipes.
Since combining multiple reducers is a very common pattern, Redux has a special utility function,combineReducers(), which does exactly what our root reducer does:
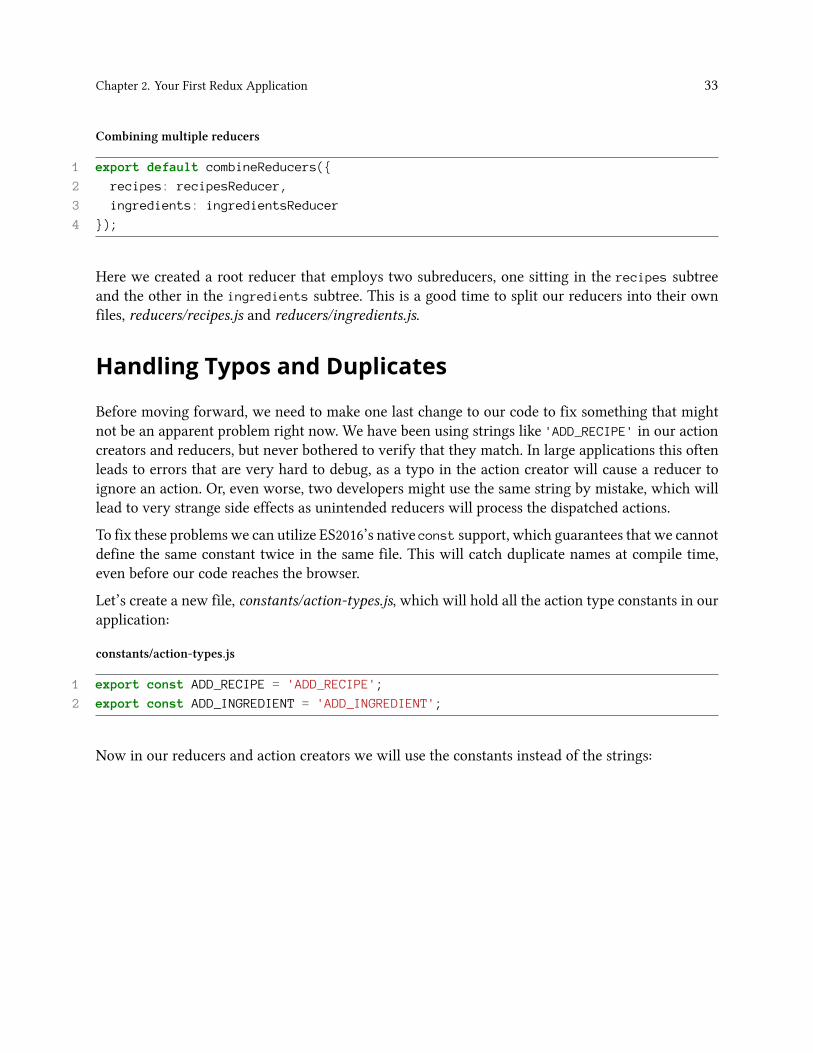
Chapter 2. Your First Redux Application 33
Combining multiple reducers
1 export default combineReducers({
2 recipes: recipesReducer,
3 ingredients: ingredientsReducer
4 });
Here we created a root reducer that employs two subreducers, one sitting in the recipes subtreeand the other in the ingredients subtree. This is a good time to split our reducers into their ownfiles, reducers/recipes.js and reducers/ingredients.js.
Handling Typos and Duplicates
Before moving forward, we need to make one last change to our code to fix something that mightnot be an apparent problem right now. We have been using strings like 'ADD_RECIPE' in our actioncreators and reducers, but never bothered to verify that they match. In large applications this oftenleads to errors that are very hard to debug, as a typo in the action creator will cause a reducer toignore an action. Or, even worse, two developers might use the same string by mistake, which willlead to very strange side effects as unintended reducers will process the dispatched actions.
To fix these problems we can utilize ES2016’s native const support, which guarantees that we cannotdefine the same constant twice in the same file. This will catch duplicate names at compile time,even before our code reaches the browser.
Let’s create a new file, constants/action-types.js, which will hold all the action type constants in ourapplication:
constants/action-types.js
1 export const ADD_RECIPE = 'ADD_RECIPE';
2 export const ADD_INGREDIENT = 'ADD_INGREDIENT';
Now in our reducers and action creators we will use the constants instead of the strings:

Chapter 2. Your First Redux Application 34
Using constants
1 import { ADD_RECIPE } from 'constants/action-types';
2
3 const recipesReducer = (recipes = [], action) => {
4 switch (action.type) {
5 case ADD_RECIPE:
6 …
Simple UI
To get a feeling for how a simple UI can be connected to Redux, we will be using a bit of jQuerymagic. Note that this example is very simple and should never be used in a real application, althoughit should give you a general feeling of how “real” applications connect to Redux.
Let’s store our current UI in ui/jquery/index.js. The jQuery UI will create a simple view of currentrecipes in the store:
ui/jquery/index.js
1 import $ from 'jquery';
2 import store from 'store/store';
3
4 function updateUI() {
5 const { recipes } = store.getState();
6 const renderRecipe = (recipe) => `<li>${ recipe.name }</li>`;
7
8 $('.recipes > ul').html(recipes.map(renderRecipe));
9 }
10
11 export default function loadUI() {
12 $('#app').append(`
13 <div class="recipes">
14 <h2>Recipes:</h2>
15 <ul></ul>
16 </div>
17 `);
18
19 updateUI();
20 }
We are using jQuery’s append()method to add a new div to our application container and using theupdateUI() function to pull the recipes list from our state and display them as a list of unorderedelements.

Chapter 2. Your First Redux Application 35
To make our UI respond to updates, we can simply register the updateUI() function within ourstore, inside loadUI():
Register updateUI with the store
1 store.subscribe(updateUI);
To support adding recipes, we will add a simple input and button and use our store’s dispatch()method together with the addRecipe() action creator to send actions to the store:
Add support for click events
1 import $ from 'jquery';
2 import store from 'store/store';
3 import { addRecipe } from 'actions/recipes';
4
5 function updateUI() {
6 const { recipes } = store.getState();
7 const renderRecipe = (recipe) => `<li>${ recipe.name }</li>`;
8
9 $('.recipes > ul').html(recipes.map(renderRecipe));
10 }
11
12 function handleAdd() {
13 const $recipeName = $('.recipes > input');
14
15 store.dispatch(addRecipe($recipeName.val()));
16
17 $recipeName.val('');
18 }
19
20 export default function loadUI() {
21 $('#app').append(`
22 <div class="recipes">
23 <h2>Recipes:</h2>
24 <ul></ul>
25 <input type="text" />
26 <button>Add</button>
27 </div>
28 `);
29
30 store.subscribe(updateUI);
31

Chapter 2. Your First Redux Application 36
32 $(document).on('click', '.recipes > button', handleAdd);
33
34 updateUI();
35 }
Logging
Now that our UI allows us to add new recipes, we find that it’s hard to see what actions are sent tothe store. One option is to log received actions from the root reducer—but as we will see shortly, thiscan be problematic. Another option is to use the middleware we discussed in the previous chapter.
The store holds a connection to all the middleware and they get actions before the reducers, whichmeans they have access to any actions dispatched to the store. To test this, let’s create a simplelogging middleware that will print any action sent to the store:
A simple logging middleware
1 const logMiddleware = ({ getState, dispatch }) => (next) => (action) => {
2 console.log(`Action: ${ action.type }`);
3
4 next(action);
5 };
6
7
8 export default logMiddleware;
The structure might seem strange at first, as we are creating a function that returns a function thatreturns a function. While this might be a little confusing, it is required by the way Redux combinesmiddlewares in its core. In practice, in the inner most function we have access to the dispatch()and getState()methods from the store, the current action being processed, and the next()method,which allows us to call the next middleware in line.
Our logger prints the current action and then calls next(action) to pass the action on to thenext middleware. In some cases, middleware might suppress actions or change them. That is whyimplementing a logger in a reducer is not a viable solution: some of the actions might not reach it.
To connect the middleware to our store, we need to modify our store/store.js file to use Redux’sapplyMiddleware() utility function:

Chapter 2. Your First Redux Application 37
Connecting a middleware to the store
1 import { createStore, applyMiddleware } from 'redux';
2 import rootReducers from 'reducers/root';
3 import logMiddleware from 'middleware/log';
4
5 const initialState = { ... };
6
7 export default createStore(
8 rootReducers,
9 initialState,
10 applyMiddleware(logMiddleware)
11 );
Getting Data from the Server
Fetching data from a server, like anything with Redux, happens as a result of a dispatched action. Inour case, the UI should dispatch an action when it loads to ask Redux to bring data to the store.
For this we will need to add a new constant to constants/action-types.js and a new action creator inactions/recipes.js. Our action will be called 'FETCH_RECIPES'.
Sadly, we can’t handle the action inside a reducer. Since the action requires server access that mighttake time, our reducer will not be able to handle the response—reducers should return the modifiedstate immediately.
Luckily, we have middleware, which have access to the store and thus the store’s dispatch()
method. This means we can catch the action in a middleware, submit an Ajax request, and thensend a new action to the reducers with the data already inside.
Here is a simple API middleware that listens to 'FETCH_RECIPES' and dispatches 'SET_RECIPES'when the data arrives:
API middleware
1 import { FETCH_RECIPES } from 'constants/action-types';
2 import { setRecipes } from 'actions/recipes';
3
4 const URL = 'https://s3.amazonaws.com/500tech-shared/db.json';
5
6 function fetchData(url, callback) {
7 fetch(url)
8 .then((response) => {
9 if (response.status !== 200) {
10 console.log(`Error fetching recipes: ${ response.status }`);

Chapter 2. Your First Redux Application 38
11 } else {
12 response.json().then(callback);
13 }
14 })
15 .catch((err) => console.log(`Error fetching recipes: ${ err }`))
16 }
17
18 const apiMiddleware = ({ dispatch }) => next => action => {
19 if (action.type === FETCH_RECIPES) {
20 fetchData(URL, data => dispatch(setRecipes(data)));
21 }
22
23 next(action);
24 };
25
26 export default apiMiddleware;
The main code of our middleware is a simple if statement that calls the fetchData() function andpasses it a callback that dispatches setRecipes() with the returned data:
Catching API requests
1 if (action.type === FETCH_RECIPES) {
2 fetchData(URL, data => store.dispatch(setRecipes(data)));
3 }
The fetchData() code itself is a generic use of the fetch API.
To make this middleware work, we need to add it to our store:
Adding the API middleware to the store
1 import { createStore, applyMiddleware } from 'redux';
2 import rootReducers from 'reducers/root';
3 import logMiddleware from 'middleware/log';
4 import apiMiddleware from 'middleware/api';
5
6 const initialState = { … };
7
8 export default createStore(
9 rootReducers,
10 initialState,
11 applyMiddleware(logMiddleware, apiMiddleware)
12 );

Chapter 2. Your First Redux Application 39
We also need to modify our reducers/recipes.js to support the new 'SET_RECIPES' action:
Adding support for SET_RECIPES in the recipes reducer
1 import { ADD_RECIPE, SET_RECIPES } from 'constants/action-types';
2
3 const recipesReducer = (recipes = [], action) => {
4 switch (action.type) {
5 case ADD_RECIPE:
6 return recipes.concat({name: action.name});
7
8 case SET_RECIPES:
9 return action.data.recipes;
10 }
11
12 return recipes;
13 };
14
15 export default recipesReducer;
The code for the reducer is surprisingly simple. Since we get a new list of recipes from the server,we can just return that list as the new recipes list:
Simple SET_RECIPES implementation
1 case SET_RECIPES:
2 return action.data.recipes;
Finally, we can remove the initialState we passed to our store, since we will be getting data fromthe server. Each of the reducers has default values for its subtrees (remember the recipes = [] fromabove?), and the reducers will be the one to construct the initial state automatically. This magic isexplained in the Reducers Chapter.
Here’s our new store/store.js:

Chapter 2. Your First Redux Application 40
store/store.js
1 import { createStore, applyMiddleware } from 'redux';
2 import rootReducers from 'reducers/root';
3 import logMiddleware from 'middleware/log';
4 import apiMiddleware from 'middleware/api';
5
6 export default createStore(
7 rootReducers,
8 applyMiddleware(logMiddleware, apiMiddleware)
9 );
In a real application the API middleware will be more generic and robust. We will go intomuch more detail in the Middleware Chapter.
Summary
In this chapter we built a simple Redux application that supports multiple reducers, middleware,and action creators. We set up access to a server and built a minimal UI using jQuery. In the book’sGit repository¹⁶, you can find the full source code for this example, including the missing parts (likethe ingredients UI).
¹⁶https://github.com/redux-book

Part 2. Real World Usage

Chapter 3. State ManagementOne of the main strengths of Redux is the separation of state (data) management from thepresentation and logic layers. Due to its division of responsibilities, the design of the state layoutcan be done separately from the design of the UI and any complex logic flows.
The Concept of Separation
To illustrate the concept, let’s consider our recipe book application. The app can manage multiplerecipe books, each having multiple recipes. A recipe, in turn, is an object containing a list ofingredients, preparation instructions, images, a favorited flag, etc.:
Simple structure of recipe app state
1 const state = {
2 books: [
3 {
4 id: 21,
5 name: 'Breakfast',
6 recipes: [
7 {
8 id: 63,
9 name: 'Omelette',
10 favorite: true,
11 preparation: 'How to prepare...',
12 ingredients: [...]
13 },
14 {...},
15 {...}
16 ]
17 },
18 {...},
19 {...}
20 ]
21 };
While this state layout contains all the required information and conforms exactly to the descriptionof our application, it has a couple of issues:

Chapter 3. State Management 43
• Reducer nesting and coupling• Access to multiple nested data entities
Reducer Nesting and Coupling
Let’s try to implement a reducer that supports an action that adds a new ingredient to a recipe.There are two main approaches, one where all the reducers in the chain are aware of the actionbeing passed and one where each reducer only passes the information down to its children.
Let’s investigate where the problems lie and how we can deal with them. The first approach couldbe implemented as follows:
Action-aware reducers
1 const booksReducer = (state, action) => {
2 switch(action.type) {
3 case ADD_INGREDIENT:
4 return Object.assign({}, state, {
5 books: state.books.map(
6 book => book.id !== action.payload.bookId
7 ? book
8 : recipesReducer(book, action)
9 )
10 });
11 }
12 };
13
14 const recipesReducer = (book, action) => {
15 switch(action.type) {
16 case ADD_INGREDIENT:
17 return Object.assign({}, book, {
18 recipes: book.recipes.map(
19 recipe => recipe.id !== action.payload.recipeId
20 ? recipe
21 : ingredientsReducer(recipe, action)
22 )
23 });
24 }
25 };
26
27 const ingredientsReducer = (recipe, action) => {
28 // Regular reducer
29 };

Chapter 3. State Management 44
In this implementation, all the “parent” reducers must be aware of any actions used in their children.Any changes or additions will require us to check multiple reducers for code changes, thus breakingthe encapsulation benefits of multireducer composition and greatly complicating our code.
The second option is for reducers to pass all actions to their children:
Action-passing reducer
1 const booksReducer = (books, action) => {
2 const newBooks = handleBookActions(books, action);
3
4 // Apply recipes reducers
5 return newBooks.map(book => Object.assign({}, book, {
6 recipes: recipesReducer(book.recipes, action)
7 }));
8 };
9
10 const recipesReducer = (recipes, action) => {
11 const newRecipes = handleRecipeActions(book, action);
12
13 // Apply ingredients reducers
14 return newRecipes.map(recipe => Object.assign({}, recipe, {
15 ingredients: ingredientsReducer(recipe.ingredients, action)
16 }));
17 };
In this implementation, we separate the reducer logic into two parts: one to allow any child reducersto run and the second to handle the actions for the reducer itself.
While this implementation doesn’t require the parent to know about the actions supported by it’schildren, we are forced to run a very large number of reducers for each recipe. A single call to anaction unrelated to recipes, like UPDATE_PROFILE, will run recipesReducer() for each recipe, andhave it in turn run ingredientsReducer() for each of the ingredients.
Access to Multiple Nested Data Entities
Another problem with the nested state approach is retrieving data. If we would like to show all of auser’s favorite recipes, we need to scan all the books to find the relevant ones:

Chapter 3. State Management 45
Get list of favorite recipes
1 const getFavorites = (state) => {
2 const recipes = state.books.map(
3 book => book.filter(recipe => favorite)
4 );
5
6 // Strip all null values
7 return recipes.filter(recipe => recipe);
8 };
Also, since this code (or similar) will be used for the UI, any changes to the structure of the state willneed to be reflected not just in the reducers but in the UI as well. This approach breaks our separationof concerns model and might require extensive changes to the UI layer(s) on state structure changes.
State as a Database
A recommended approach to solve the various issues raised above is to treat the application state asa database of entities. In our example, we will break down the nesting to make our state as shallowas possible and express connections using IDs:
Normalized state
1 const state = {
2 books: {
3 21: {
4 id: 21,
5 name: 'Breakfast',
6 recipes: [63, 78, 221]
7 }
8 },
9
10 recipes: {
11 63: {
12 id: 63,
13 book: 21,
14 name: 'Omelette',
15 favorite: true,
16 preparation: 'How to prepare...',
17 ingredients: [152, 121]
18 },
19 78: {},

Chapter 3. State Management 46
20 221: {}
21 },
22
23 ingredients: {}
24 };
In this structure, each object has its own key right in the root of our state. Any connections betweenobjects (e.g., ingredients used in a recipe) can be expressed using a regular ordered array of IDs.
Reducer Nesting and Coupling
Let’s examine the implementation of the reducers needed to handle the ADD_INGREDIENT action usingthe new state:
Reducers for adding a new ingredient
1 const booksReducer = (books, action) => {
2 // Not related to ingredients any more
3 };
4
5 const recipeReducer = (recipe, action) => {
6 switch (action.type) {
7 case ADD_INGREDIENT:
8 return Object.assign({}, recipe, {
9 ingredients: [...recipe.ingredients, action.payload.id]
10 });
11 }
12
13 return recipe;
14 };
15
16 const recipesReducer = (recipes, action) => {
17 switch(action.type) {
18
19 case ADD_INGREDIENT:
20 return recipes.map(recipe =>
21 recipe.id !== action.payload.recipeId
22 ? recipe
23 : recipesReducer(recipe, action));
24 }
25 };
26

Chapter 3. State Management 47
27 const ingredientsReducer = (ingredients, action) => {
28 switch (action.type) {
29 case ADD_INGREDIENT:
30 return [...ingredients, action.payload]
31 }
32 };
There are two things to note in this implementation compared towhatwe sawwith the denormalizedstate:
The books reducer is not even mentioned. Nesting levels only affect the parent and children, neverthe grandparents. The recipes reducer only adds an ID to the array of ingredients, not the wholeingredient object.
To take this example further, the implementation of UPDATE_RECIPE would not even require anychange to the recipes reducer, as it can be wholly handled by the ingredients reducer.
Access to Multiple Nested Data Entities
Getting a list of favorite recipes is much simpler in the normalized state, as we only need to scanthe recipes “table.” This can be done in the UI using a function called a selector. If you think of thestate as a database, you can imagine selectors as database queries:
Favorite recipes selector
1 const getFavorites = (state) =>
2 state.recipes.filter(recipe => favorite);
The main improvement is that we do not need to be aware of the structure or nesting of the state toaccess deeply nested information. Rather, we treat our state as a conventional database from whichto extract information for the UI.
Keeping a Normalized State
While normalized state might seem like a great idea, often the data returned from the server isstructured in a deeply nested way. A possible example of fetching data from the /recipes/123 APIendpoint might look like this:

Chapter 3. State Management 48
Data returned from /recipes/123
1 {
2 id: 63,
3 name: 'Omelette',
4 favorite: true,
5 preparation: 'How to prepare...',
6 ingredients: [
7 {
8 id: 5123,
9 name: 'Egg',
10 quantity: 2
11 },
12 {
13 id: 729,
14 name: 'Milk',
15 quantity: '2 cups'
16 }
17 ]
18 };
Since the only way to update the Redux store is by sending actions to the reducers, we must build apayload that can be easily handled by our reducers and find a way to extract the payload from thedenormalized server-returned data.
Building the Generic Action
Potentially, we would like each of our data reducers to be able to handle a special UPDATE_DATAaction and extract the relevant parts it needs:
Sample UPDATE_DATA action
1 const updateData = ({
2 type: UPDATE_DATA,
3 payload: {
4 recipes: {
5 63: {
6 id: 63,
7 name: 'Omelette',
8 favorite: true,
9 preparation: 'How to prepare...',
10 ingredients: [5123, 729]
11 }

Chapter 3. State Management 49
12 },
13 ingredients: {
14 5123: {
15 id: 5123,
16 name: 'Egg',
17 quantity: 2
18 },
19 729: {
20 id: 729,
21 name: 'Milk',
22 quantity: '2 cups'
23 }
24 }
25 }
26 });
Using this approach, our recipes reducer’s support for UPDATE_DATA can be as simple as:
Recipes reducer support for UPDATE_DATA
1 const recipesReducer = (state, action) => {
2 switch(action.type) {
3 case UPDATE_DATA:
4 if (!('recipes' in action.payload)) return state;
5
6 return Object.assign({}, state, {
7 recipes: Object.assign({},
8 state.recipes,
9 action.payload.recipes
10 )
11 });
12 }
13 };
Our reducer checks if the payload contains any recipes and merges the new data with the oldrecipes object (thus adding to or otherwise modifying it as needed).
Normalizing the Data
With the reducers updated and the action structure defined, we are left with the problem ofextracting the payload from the denormalized data we got from the server.

Chapter 3. State Management 50
A simple approach might be to have a custom function that knows each API’s return data andnormalizes the returned nested JSON into a flat structure with custom code.
Since this is quite a common practice, the custom code can be replaced by the normalizr¹⁷ library.Using this library, we can define the schema of the data coming from the server and have thenormalizr code turn our nested JSON into a normalized structure we can pass directly into ournew UPDATE_DATA action.
Persisting State
In many cases, we will want to keep the current state even across a page refresh or the application’stab being closed. The simplest approach to persisting the state is keeping it in the browser’s localstorage.
To easily sync our store with local storage (or any other storage engine), we can use the redux-
persist¹⁸ library. This will automatically serialize and save our state once it has been modified.
To use the library, simply install it with npm and modify the store creation file to wrap createStore
with an enhancer:
Setting up redux-persist
1 import { createStore } from 'redux';
2 import { persistStore, autoRehydrate } from 'redux-persist';
3 import rootReducer from 'reducers/root';
4
5 const store = createStore(rootReducer, autoRehydrate());
6
7 persistStore(store);
Once persistStore(store) has been called, our store and the browser’s local storage will automat-ically be in sync and our store will persist across page refresh.
Advanced State Sync
The redux-persist library has advanced functionality that will allow us to whitelist only partof the state to persist and to specify special serializers for the part of the state that cannotbe serialized with JSON.stringify() (functions, symbols, etc.). We recommend you review thelibrary’s documentation for details on the more advanced features.
¹⁷https://github.com/paularmstrong/normalizr¹⁸https://github.com/rt2zz/redux-persist

Chapter 3. State Management 51
Real-World State
In a real-world application, our state will usually contain a number of different entities, including theapplication data itself (preferably normalized) and auxiliary data (e.g., current access token, pendingnotifications, etc.).
Structure of a Common State
Unlike the data coming from the server, some information will be used exclusively by our frontendapplication for its internal needs. A common example would be keeping the total number of activeserver requests in order to know whether to display a spinner. Or we might have a currentUser
property where we keep information about the current user, such as the username and access token:
Sample state
1 const state = {
2 books: { },
3 recipes: { },
4 ingredients: { },
5 ui: {
6 activeRequests: 0
7 },
8 currentUser: {
9 name: 'Kipi',
10 accessToken: 'topsecrettoken'
11 }
12 };
As our application grows, more types of state entities will creep in. Some of these will come fromexternal libraries like redux-forms, react-redux-router, and others that require their own place inour state. Other entities will come from the application’s business needs.
For example, if we need to support editing of the user’s profile with the option to cancel, ourimplementation might create a new temp key where we will store a copy of the profile while itis being edited. Once the user clicks “confirm” or “cancel,” the temp copy will either be copied overto become the new profile or simply deleted.
Keeping the State Manageable
To make things as simple as possible, it is best to have a reducer for each key in the base state. Thiswill allow for an encapsulation approach where it is immediately clear who can modify which partsof our state.
For a very large project, it might be beneficial to separate the “server data” and the “auxilary/tempdata” under different root keys:

Chapter 3. State Management 52
Large nested state
1 const state = {
2 db: {
3 books: { },
4 recipes: { },
5 ingredients: { },
6 },
7 local: {
8 ui: {
9 activeRequests: 0
10 },
11 user: {
12 name: 'Kipi',
13 accessToken: 'topsecrettoken'
14 }
15 },
16 vendor: {
17 forms: {},
18 router: {}
19 }
20 };
This allows for easier management of the different parts when deciding what needs to be synced tolocal storage, or when clearing stale data.
In general, the state is the frontend’s database and should be treated as such. It is important toperiodically check the current layout and do any refactoring to make sure the state’s structure isclean, clear, and easy to extend.
What to Put in the State
A common issue when working with Redux is deciding what information goes inside our state andwhat is left outside, either in React’s state, Angular’s services, or other storage methods of differentUI libraries.
There are a few questions to consider when deciding whether to add something to the state:
• Should this data be persisted across page refresh?• Should this data be persisted across route changes?• Is this data used in multiple places in the UI?
Chapter 3. State Management 53
If the answer to any of these questions is “yes,” the data should go into the state. If the answer to allof these questions is “no,” it could still go into the state, but it’s not a must.
A few examples of data that can be kept outside of the state:
• Currently selected tab in a tab control on a page• Hover visibility/invisibiity on a control• Lightbox being open/closed• Currently displayed errors
We can consider this similar to putting data in a database or keeping it temporarily in memory.Some information can be safely lost without affecting the user’s experience or corrupting his data.
Summary
In this chapter we discussed the structure of our Redux state and how it should be managed foreasier integration with reducers and the UI. We also learned that the state should be considered theapplication’s database and be designed separately from the presentation or logic layers.
In the next chapter we will talk about server communication, the best method of sending andreceiving data to and from our server using middleware.

Chapter 4. Server CommunicationServer communication is one of the more important parts of any application. And while thebasic implementation can be done in a few lines of code, it can quickly grow into a complicatedmechanism able to handle authentication, caching, error handling, WebSockets, and a myriad ofother functionality and edge cases.
Online tutorials usually devote little time to this topic, and suggest using regular promises and theredux-thunk middleware to let action creators dispatch() actions when data is fetched. When aproject grows, however, it becomes clear that it’s best to have a single place to handle authentication(setting custom headers), error handling, and features like caching. Considering this, we need tobe able to both access the store and dispatch asynchronous events—which is the perfect job for amiddleware.
Before reading this chapter, it is strongly recommended that you read the MiddlewareChapter.
Using Promises in Action Creators
Let’s start by looking at server communicationwhen implemented using async action creators (usinglibraries such as redux-thunk), to understand the underlying pitfalls of this approach:
Promise in action creator
1 const fetchUser = id => (dispatch) =>
2 fetch(`user/${id}`)
3 .then(response => response.json())
4 .then(userData => dispatch(setUserData(userData))
5 .catch(error => dispatch(apiError(error)));
Did you notice we handled the error in response.json() instead of the fetch() API?

Chapter 4. Server Communication 55
There are a few issues with this code:
1. We can’t see an action going out in our logs before the fetch() completes, preventing theregular Redux debug flow.
2. Every action creator will need to have the repetitive functionality to handle errors and setheaders.
3. Testing gets harder as more async action creators are added.4. If you want to change the server communication strategy (e.g., replace fetch() with
WebSockets), you need to change multiple places in the code.
Keeping the code as short and stateless as possible, in keeping with the spirit of Redux, is easierwhen all the action creators are simple functions. This makes them easier to understand, debug, andtest. Keeping the action creators “clean” from async code means moving it into another part of thestack. Luckily, we have the perfect candidate—middleware. As we will see, using this approach wecan keep the action creators simple and generate actions that contain all the information needed fora middleware to perform the API request.
Here, we are using the Fetch API¹⁹ to access the server. Our target URL is built from aconstant specifying the root (e.g., 'http://google.com/') and the sub-URL we want toaccess, passed to us in the action object.
API Middleware
Our goal is to create a generic middleware that can serve any API request and requires only theinformation passed to it in an action. The simplest solution is to define a new action type that isunique to API-related events:
Simple API middleware
1 const apiMiddleware = ({ dispatch }) => next => action => {
2 if (action.type !== 'API') {
3 return next(action);
4 }
5
6 // Handle API code
7 };
Our middleware will listen to any action with type 'API' and use the information in it’s payload tomake a request to the server. It will let any other actions flow down the middleware chain.
¹⁹https://developer.mozilla.org/en/docs/Web/API/Fetch_API

Chapter 4. Server Communication 56
Moving Code from Action Creators
The original async example used the following code to communicate with the server:
Promise in action creator
1 fetch(`user/${id}`)
2 .then(response => response.json()
3 .then(userData => dispatch(setUserData(userData))
4 .catch(error => dispatch(apiError(error)));
This code has a few hardcoded issues that we will need to address in our generic API:
• How to construct the URL• What HTTP verb to use (GET/POST/etc)• What action to dispatch on success or error
Since we plan to pass all this information inside our action object, we can expect the correspondingaction creator to pass in all the required parameters.
The URL-building issue is simple to solve, simply by passing the required URL in the action object(we will start with GET-only APIs):
Target URL
1 fetch(BASE_URL + action.url)
Tomake thingsmore generic, actionswill only hold the relative part of the server’s full URL.This will allow us to easily set the BASE_URL to be different in production, development,and testing.
Handling the return value from the call is a bit more complex, as our middleware needs to figureout what action to dispatch. A simple solution is to pass the next action to be dispatched inside theAPI action. In our case we will use the Flux Standard Action (FSA) convention and put the ID of thenext action inside the success key (i.e., action.payload.success):
Handling the result
1 dispatch({ type: action.payload.success, response });

Chapter 4. Server Communication 57
Combining these two ideas results in the following basic API middleware:
Basic API middleware
1 const apiMiddleware = ({ dispatch }) => next => action => {
2 if (action.type !== 'API') {
3 return next(action);
4 }
5
6 const { payload } = action;
7
8 fetch(BASE_URL + action.url)
9 .then(response => response.json())
10 .then(response => dispatch({ type: payload.success, response }))
11 );
12 };
Using the API Middleware
To use our middleware we need to craft a special action object for it:
Sample action creator
1 import { API, SET_RECIPES } from 'constants/action-types';
2
3 const fetchRecipes = () => ({
4 type: API,
5 payload: {
6 url: 'recipes.json',
7 success: SET_RECIPES
8 }
9 })
Our middleware should call the server and resume the regular application flow. At a later time, oncethe call from the server completes, it should dispatch a new action to the store:

Chapter 4. Server Communication 58
The resulting action dispatched after a successful call
1 {
2 type: SET_RECIPES,
3 payload: [ .. array of recipes from server ..]
4 };
Error Handling
Our current example ignores any error handling. To solve this problem, we need to extend ourmiddleware to catch server errors and dispatch events when they happen.
Error handling could be done in a number of ways:
• Dispatch a custom error message (based on data in the action object) on an error event.• Dispatch a generic API error action to be handled by a special reducer or another middleware.• Combine both approaches with a fallback for #2 if #1 was not provided.
For example, here we are using FSA-compliant action creators to send a generic apiError()messageon any failed server request:
Handle API errors with generic callback only
1 const handleError = error => dispatch(apiError(error));
2
3 fetch(BASE_URL + action.url)
4 .then(response => {
5 if (response.status >= 300) {
6 handleError(response.status);
7 } else {
8 response.json()
9 .then(data => dispatch({ type: action.next, data }))
10 }
11 })
12 .catch(handleError);
We leave it to you as an exercise to add support for custom error handling for actions (a way for anaction creator to specify it wants a different error flow than the default).

Chapter 4. Server Communication 59
Loading Indicator (Spinner)
A common question when using Redux is how to show a spinner when server requests are inprogress. The middleware approach provides an answer using additional dispatch() calls. Beforea request starts or after it completes, we can dispatch a special action to be caught by reducersresponsible for the UI state. Here, we dispatch an apiStart() action before starting any servercommunication and dispatch apiDone() on both successful and failed server responses:
Show and hide spinner
1 dispatch(apiStart());
2
3 fetch(BASE_URL + action.payload.url)
4 .then(response => {
5 dispatch(apiDone());
6 // ...
7 })
8 .catch(error => {
9 dispatch(apiDone());
10 // ...
11 })
12 }
To keep track of pending requests, we can keep a counter in the state under a serverStatus or uicontainers in the state. The counter can be used by the UI to show a spinner if the number of pendingrequests is greater than zero:
UI reducer to handle the requests counter
1 const uiReducer = (state, action) => {
2 switch (action.type) {
3 case API_START:
4 return Object.assign({}, state, {
5 requests: state.requests + 1
6 });
7
8 case API_DONE:
9 return Object.assign({}, state, {
10 requests: state.requests - 1
11 });
12 }
13 };

Chapter 4. Server Communication 60
Dynamic Action Types
Building on the loading indicator example, we might want to handle multiple indicators for differentparts of our application, by having multiple subtrees in the ui state sub-tree. Unfortunately, this doesnot work with generic success/error actions.
One way to handle multiple pending, success, and error actions is to pass them in the dispatchedaction:
Action creator with custom pending action
1 const fetchRecipes = () => ({
2 type: 'API',
3 payload: {
4 url: 'recipes.json',
5 pending: 'FETCH_RECIPES_PENDING',
6 success: 'FETCH_RECIPES_SUCCEESS',
7 error: 'FETCH_RECIPES_FAILURE'
8 }
9 });
This method allows us to handle different action types in different reducers. However, this approachis not flexible, encourages code repetition, and forces us to have multiple action types defined forevery API action.
Another approach is to store the response status in the dispatched action:
1 dispatch({ type: FETCH_RECIPES, status: 'SUCCESS', response });
This might look simple, as you can reuse one action in the middleware, but it causes reducers tocontain more control flow and logic and it makes logging and debugging more difficult (because weget the same action types in the log and need to accurately verify which one of them had a particularstatus).
A third approach is to create dynamic action types that will follow a single convention:

Chapter 4. Server Communication 61
constants/action-types.js
1 const asyncActionType = (type) => ({
2 PENDING: `${type}_PENDING`,
3 SUCCESS: `${type}_SUCCESS`,
4 ERROR: `${type}_ERROR`,
5 });
6
7 export const LOGIN = asyncActionType('LOGIN');
8 export const FETCH_RECIPES = asyncActionType('FETCH_RECIPES');
With this approach we can use the same action type constant to handle three cases for async actions:
reducers/recipes.js
1 import { FETCH_RECIPES } from 'constants/action-types';
2
3 const recipesReducer = (state, action) => {
4
5 switch (action.type) {
6 case FETCH_RECIPES.SUCCESS:
7 // Handle success
8
9 case FETCH_RECIPES.ERROR:
10 // Handle failure
11 ...
12 }
13 }
Since our API middleware is already checking for success and pending in the action.payload, theaction creators can simply merge the “async-ready costs” into the resulting payload:
API action creator with custom status handling
1 const fetchRecipes = () => ({
2 type: API,
3 payload: Object.assign({ url: 'recipes' }, FETCH_RECIPES)
4 });
This action creator will result in the following action being returned:

Chapter 4. Server Communication 62
Action with custom status handling
1 {
2 type: 'API',
3 payload: {
4 url: 'recipes',
5 PEDNING: 'RECIPES_PENDING',
6 SUCCESS: 'RECIPES_SUCCESS',
7 ERROR: 'RECIPES_ERROR'
8 }
9 };
Authentication
A common place to store the current user’s information (such as the access token) is in the Reduxstore. As all our API logic is now located in one place and the middleware have full access to thestore using the getState() method, we can extract the accessToken from the state and set it as aheader for our server requests:
Setting access token
1 const { accessToken } = getState().currentUser;
2
3 if (accessToken) {
4 // Set headers
5 }
All our server calls will now automatically get the correct headers without us having to worry aboutthis in any other parts of our application.
More Extensions
There are still quite a few things missing from our API middleware to make it usable in thereal world. We need support for more verbs (not just GET), setting of custom headers, timeouts,caching, and more. Much of this can be done by taking data from the action object or fromthe store itself. A robust API middleware solution is already available as (redux-api-middle-ware)[https://github.com/agraboso/redux-api-middleware].

Chapter 4. Server Communication 63
Chaining APIs
Sometimes fetching data from a server requires a number of different calls—for instance, when thereturned data from one is needed to issue additional calls. A simple example might be fetching thecurrent user and then the user’s profile. If we were to use promises in an action creator, the solutionwould appear to be quite straightforward:
Chaining promises
1 const fetchCurrentUser = () => (dispatch) => fetch(`user`)
2 .then(response => response.json())
3 .then(userData => {
4 dispatch(setUserData(userData));
5
6 // Get user's profile
7 fetch(`profile/${userData.profileId}`)
8 .then(response => response.json())
9 .then(profileData => dispatch(setProfileData(profileData)));
10 }
11 );
12 };
Scary stuff there. There are a few issues with this code:
• Error handling – Exact branching and catching of errors is not obvious and can becomecomplex as the chain grows.
• Debugging – It is hard to debug and understand what stage in the chain we are at.• Cancellation and recovery – It is nearly impossible to cancel or abort the chain if the usernavigates to a different part of the UI and the current request chain is no longer needed.
As we can see, chaining promises is not an ideal solution. When working with Redux we have twoother alternatives to use, middleware and sagas.
Using Middleware for Flow
In the middleware approach, we split the code handling server access and logic flow. Our APImiddleware stays the same, and we only need to find another place to put the logic flow. Oneapproach, discussed in the Middleware Chapter, is to create additional middleware to handle flowmanagement:

Chapter 4. Server Communication 64
Sample middleware to handle user flow
1 const userFlowMiddleware = ({ dispatch }) => next => action => {
2 switch (action.type) {
3 case FETCH_CURRENT_USER:
4 dispatch(fetchCurrentUser());
5 break;
6 case SET_CURRENT_USER:
7 dispatch(fetchProfile(action.payload.userId));
8 break;
9 };
10
11 next(action);
12 }
Unfortunately, this approach has its problems too. This setup will cause the fetchProfile() actionto be dispatched every time someone dispatches SET_CURRENT_USER. There might be a flow wherewe don’t need the profile fetch but can’t prevent the middleware from scheduling it.
We can solve this problem by creating a special action flow that has similar behavior to fetchCur-
rentUser() but also triggers the fetchProfile() acton. This can be done by creating a new actioncreator and action:
Handle flow with custom action
1 const fetchCurrentUser = (next = SET_CURRENT_USER) => ({
2 type: API,
3 url: 'user',
4 next
5 });
6
7 const userFlowMiddleware = ({ dispatch }) => next => action => {
8 switch (action.type) {
9 case FETCH_CURRENT_USER:
10 dispatch(fetchCurrentUser(SPECIAL_SET_CURRENT_USER);
11 break;
12
13 case SPECIAL_SET_CURRENT_USER:
14 dispatch(setCurrentUser(action.payload));
15 dispatch(fetchProfile(action.payload.userId));
16 break;
17 };
18

Chapter 4. Server Communication 65
19 next(action);
20 }
This approach requires changing our action creators in a somewhat unclear way. While it will work,it might cause bugs if we forget to issue the regular setCurrentUser() call from our special actionhandler. On the positive side, it will be much easier to debug as it’s clear exactly what type of fetchwe are performing.
A cleaner approach would be to allow our async action creators to pass an array of actions that theAPI middleware needs to dispatch() when a request completes successfully:
Action creator that allows multiple success callbacks
1 const fetchCurrentUser = (extraActions = []) => ({
2 type: API,
3 payload: {
4 url: 'user',
5 success: extraActions.concat(SET_CURRENT_USER)
6 }
7 });
API middleware with support for multiple success callbacks
1 const notify = (data) => {
2 action.next.each(type => dispatch({ type, data });
3 };
4
5 fetch(`user/${id}`)
6 .then(response => response.json())
7 .then(notify)
8 .catch(error => dispatch(apiError(error)));
This new feature will allow us to clean up the flow middleware:

Chapter 4. Server Communication 66
Handle flow with multiple actions
1 const userFlowMiddleware = ({ dispatch }) => next => action => {
2 switch (action.type) {
3 case FETCH_CURRENT_USER:
4 dispatch(fetchCurrentUser(FETCH_PROFILE);
5 break;
6
7 case FETCH_PROFILE:
8 dispatch(fetchProfile(action.payload.userId));
9 break;
10 };
11
12 next(action);
13 }
This approach allows us to fetch the current user with or without a profile update:
Fetch current user with and without a profile update
1 // Regular current user fetch
2 dispatch(fetchCurrentUser());
3
4 // With profile update
5 dispatch(fetchCurrentUser(FETCH_PROFILE));
There are a number of suggestions on flow handling in the Middleware Chapter that might makethis flow even simpler to manage—for example, using sagas.
Using Sagas for Flow
A cleaner approach for flow management is using redux-saga²⁰. This library allows us to buildcomplex asynchronous flow management solutions using sagas and effects. In essence, it uses aspecial middleware to add a new actor to the Redux world.
While Redux sagas are not covered in detail in this book, a simple example of using sagas to controlthe flow can be seen here:
²⁰https://github.com/redux-saga/redux-saga

Chapter 4. Server Communication 67
Using redux saga for flow control
1 import { call, put } from 'redux-saga/effects'
2
3 export function *fetchCurrentUser() {
4 while (true) {
5 yield take(FETCH_CURRENT_USER);
6
7 const action = yield take(SET_CURRENT_USER);
8
9 yield put(fetchProfile(action.payload.userId));
10 }
11 };
In this example we have an endless loop that waits for the FETCH_CURRENT_USER action to bedispatched. When this occurs, the code starts waiting for the corresponding SET_CURRENT_USER
action. The payload can be used to dispatch a fetchProfile() action to get the corresponding profilefrom the server.
This is a very basic example of saga usage and does not handle error or allows to cancel requestsof flows. For more information on sagas, consult the extensive documentation at the official redux-saga documentation site²¹.
Canceling API Requests
During the app’s flow we might issue a number of long requests that we need to cancel (e.g., whenthe user navigates to a different page of the app). Some promise implementations support this feature,but it is also quite doable with the API middleware approach.
To allow canceling we need to give a unique ID to each request being sent and keep it for thecancellation phase. This will require us to add ID support to our action creators:
²¹http://redux-saga.github.io/redux-saga/index.html

Chapter 4. Server Communication 68
Action creator with ID support
1 const fetchUser = (id, cancelable) => ({
2 type: API,
3 url: `user/${id}`,
4 next: SET_USER,
5 cancelable
6 });
7
8 const actionId = uuid.generate();
9 dispatch(fetchUser(100, actionId));
In this code we used a fake uuid.generate() function; there are a number of different implemen-tations of such a function, with a simple one being a global counter.
If at a later stage we want to cancel a particular API request, we will need to dispatch a specialaction to our middleware with the ID generated for the original action being canceled:
Action to cancel an API request
1 const cancelAPI = (id) => ({
2 type: CANCEL_API,
3 id
4 });
To handle this in our API middleware, we must either cancel the promise (when using implemen-tations that support this feature) or let the request finish and ignore the response (simply dispatchnothing):
API middleware with cancellation support
1 const canceled = {};
2
3 const apiMiddleware = ({ dispatch }) => next => action => {
4
5 const handleResponse = (data) => {
6 if (action.cancelable && canceled[action.cancelable]) {
7 return;
8 }
9
10 dispatch({ type: action.next, data });
11 };
12

Chapter 4. Server Communication 69
13 switch (action.type) {
14 case API:
15 fetch(BASE_URL + action.url)
16 .then(response => response.json())
17 .then(handleResponse)
18 );
19 return;
20
21 case CANCEL_API:
22 canceled[action.id] = true;
23 setTimeout(() => delete canceled[action.id], 5000);
24 }
25
26 return next(action);
27 };
To implement this functionality, we simply added an object with keys corresponding to canceledrequests. The setTimeout() function is used to clear canceled requests after 5 seconds to preventthe object from filling up needlessly.
With this functionality we can cancel requests at any time and not have to worry about requestcompletion happening long after the user has navigated away from the original location in the appor after a later request has completed (for example, two consecutive filter requests for data beingsent and the first one returning after the latter one).
Summary
In this chapter we have learned how to set up a comprehensive mechanism for server commu-nication. We have used Redux’s concept of middleware to move most of the complicated andasynchronous logic away from our action creators and created a single place where error handling,caching, and other aspects of server requests can be concentrated.
In the next chapter we will cover WebSocket based communication and how well it can work withthe Redux architecture.

Chapter 5. WebSocketsWebSockets have brought a robust socket communication method directly into our browsers. Whatstarted as a solution for polling data changes on the server is slowly taking over more and moreresponsibilities from traditional REST endpoints. The action-based architecture of Redux makesworking with WebSockets exceptionally easy and natural, as it involves using WebSockets as a pipeto pass actions to and from the server.
Basic Architecture
WebSockets allow us to open a connection to a server and send or receive messages in a fullyasynchronous way. The native implementation in browsers has only four callback methods thatare required to fully support WebSockets:
• onopen – A connection has become active.• onclose – A connection has been closed.• onerror – An error related to WebSocket communication has been raised.• onmessage – A new message has been received.
While multiple WebSockets might be used, most applications will require a single one or at most afew connections for different servers based on function (chat server, notifications server, etc.).
To start, we will build a system to communicate with a single WebSocket, which can later beextended for multi-WebSocket support.
Redux Link
The general Redux architecture is all about sending well-defined messages to the store. This samescheme can work perfectly for server communication over WebSockets. The same structure of plainobjects with the type property can be sent to the server, and we can receive a similarly structuredresponse back:

Chapter 5. WebSockets 71
Sample communication flow
1 > TO-SERVER: { type: 'GET_USER', id: 100 }
2 < FROM-SERVER: { type: 'USER_INFO', data: { ... }}
Amore robust example might be a chat server, where we can dispatch to the store a message similarto: { id: 'XXX’, type: 'ADD_MESSAGE', msg: 'Hello' }. Our store can handle this immediatelyby adding the message to the current messages array and send it “as is” over a WebSocket to theserver. The server, in turn, can broadcast the message to all other clients. Each will get a perfectlystandard Redux action that can be passed directly to their stores.
This way our frontend can use Redux actions to pass information between browser windows andmachines, using the server as a generic dispatcher. Our server might do some additional work, likeauthentication and validation to prevent abuse, but in essence can serve as a message passer.
An ideal WebSocket implementation for Redux would allow us to dispatch() actions and havethem smartly routed to the server when needed, and have any actions coming from the WebSocketbe dispatched directly to the store.
Code Implementation
As with any infrastructure-related code, middleware is the perfect place for our WebSocketimplementation. It will allow us to catch any actions that are required to be sent over theWebSocketand dispatch() anything coming from the server.
Basic structure of a WebSocket setup
1 const WS_ROOT = "ws://echo.websocket.org/";
2
3 const websocket = new WebSocket(WS_ROOT);
4
5 websocket.onopen = () => {};
6 websocket.onclose = () => {};
7 websocket.onerror = event => {};
8 websocket.onmessage = event => {};
To make the code more readable, we can replace the four different assignments with a single use ofObject.assign() and use code similar to this:

Chapter 5. WebSockets 72
Using Object.assign
1 Object.assign(websocket, {
2 onopen() { },
3 onclose() { },
4 onerror(e) { },
5 onmessage(e) { }
6 });
In our middleware, we want to make sure a WebSocket is created only once. Thus, we cannot putthe setup code inside the action handler:
The wrong way to initialize in middleware
1 const wsMiddleware = ({ dispatch, getState }) => next => action => {
2 // Initialization not allowed
3 };
The code in the innermost block gets called every time an action is dispatched, so this would causeour setup and WebSocket creation code to be called multiple times. To prevent this, we can do theinitialization outside the action callback block:
Correct way to initialize in middleware
1 const wsMiddleware = ({ dispatch, getState }) => next => {
2
3 // TODO: Initialization
4
5 return action => {
6 // TODO: Middleware code
7 };
8 };
Let’s get back to the initialization code and consider how to handle each of the four callbacks: onopen,onclose, onerror, and onmessage.
onopen
This is mainly an informative stage; we need to indicate to ourselves that the socket is ready to sendand receive data and might choose to notify the rest of the Redux application that the socket is ready(perhaps to show some indication in the UI).
Once the socket is open, we dispatch a simple { type: 'WS_CONNECTED' } action to notify the restof Redux:

Chapter 5. WebSockets 73
Handling onopen
1 websocket.onopen = () => dispatch(wsConnected());
The wsConnected() function is a simple action creator that should be implemented in one of theaction creator files:
app/actions/ui.js
1 import { WS_CONNECTED } from 'consts/action-types';
2
3 const wsConnected = () => ({ type: WS_CONNECTED });
onclose
The close or disconnect event is very similar to onopen and can be handled in the exact same way:
Handling onclose
1 websocket.onclose = () => dispatch(wsDisconnected());
onerror
The WebSocket implementation in a browser can provide information on various failures in theunderlying socket communication. Handling these errors is similar to handling regular REST APIerrors, and might involve dispatching an action to update the UI or closing the socket if needed.
In this example we will stop at a generic console.log() and leave it to the reader to consider moreadvanced error handling methods:
Handling onclose
1 Websocket.onerror = (error) =>
2 console.log("WS Error", error.data);
onmessage
This callback is called every time a new message is received over a WebSocket. If we have built ourserver to be fully compatible with Redux actions, the message can simply be dispatched to the store:
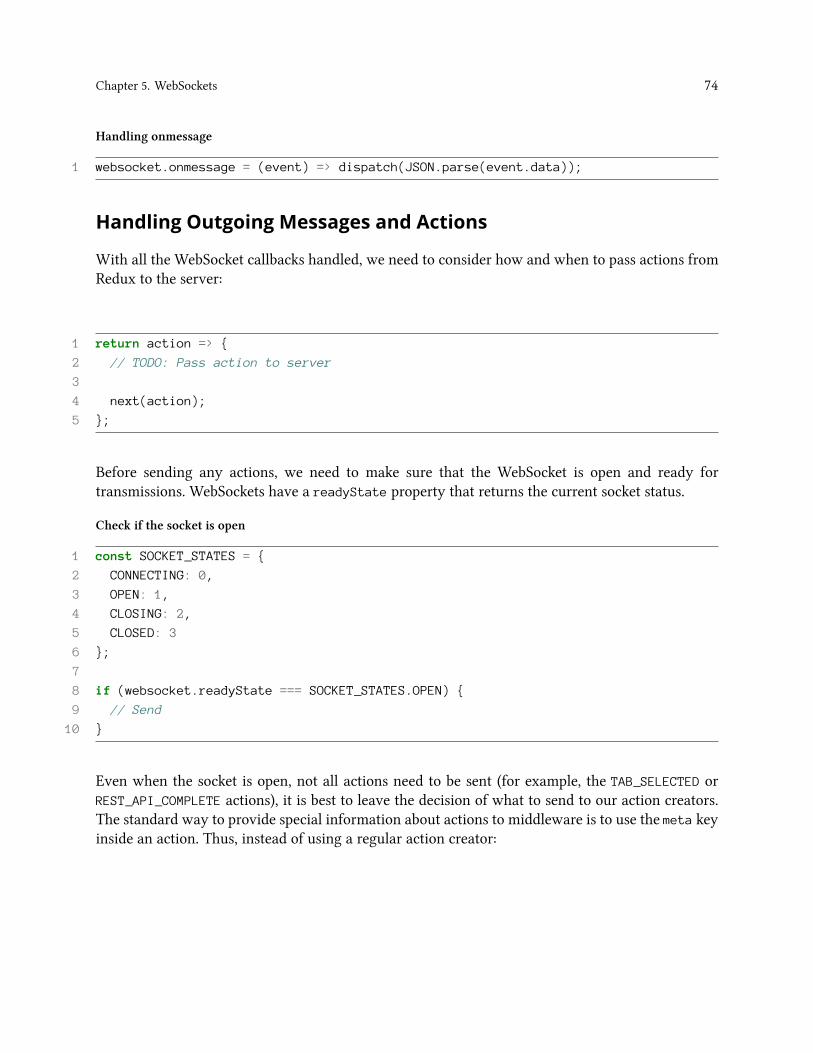
Chapter 5. WebSockets 74
Handling onmessage
1 websocket.onmessage = (event) => dispatch(JSON.parse(event.data));
Handling Outgoing Messages and Actions
With all the WebSocket callbacks handled, we need to consider how and when to pass actions fromRedux to the server:
1 return action => {
2 // TODO: Pass action to server
3
4 next(action);
5 };
Before sending any actions, we need to make sure that the WebSocket is open and ready fortransmissions. WebSockets have a readyState property that returns the current socket status.
Check if the socket is open
1 const SOCKET_STATES = {
2 CONNECTING: 0,
3 OPEN: 1,
4 CLOSING: 2,
5 CLOSED: 3
6 };
7
8 if (websocket.readyState === SOCKET_STATES.OPEN) {
9 // Send
10 }
Even when the socket is open, not all actions need to be sent (for example, the TAB_SELECTED orREST_API_COMPLETE actions), it is best to leave the decision of what to send to our action creators.The standard way to provide special information about actions to middleware is to use the meta keyinside an action. Thus, instead of using a regular action creator:

Chapter 5. WebSockets 75
A regular action creator
1 export const localAction = (data) => ({
2 type: TEST,
3 data
4 });
we can add special information to the metadata part of the action:
An action creator for an action to be sent to the server
1 export const serverAction = (data) => ({
2 type: TEST,
3 data,
4 meta: { websocket: true }
5 });
This way our middleware can use the meta.websocket field to decide whether to pass the action onor not:
Sending actions to the server
1 return action => {
2 if (websocket.readyState === SOCKET_STATES.OPEN &&
3 action.meta &&
4 action.meta.websocket) {
5 websocket.send(JSON.stringify(action));
6 }
7
8 next(action);
9 };
Note, however, that this code might cause a surprising bug. Since we are sending the whole actionto the server, it might in turn broadcast it to all other clients (even ourselves). And because we didn’tremove the action’s meta information, the other clients’ WebSocket middleware might rebroadcastit again and again.
A Redux-aware server should consider stripping all meta information for any action it receives. Inour implementation we will remove this on the client side, though the server should still do thecheck:

Chapter 5. WebSockets 76
Sending actions to the server (without metadata)
1 return next => action => {
2 if (websocket.readyState === SOCKET_STATES.OPEN &&
3 action.meta &&
4 action.meta.websocket) {
5
6 // Remove action metadata before sending
7 const cleanAction = Object.assign({}, action, { meta: undefined });
8 websocket.send(JSON.stringify(cleanAction));
9 }
10
11 next(action);
12 };
Using this approach, sending actions to our server via a WebSocket becomes as simple as setting themeta.websocket field to true.
Complete WebSocket Middleware Code
middleware/ws.js
1 import { wsConnected, wsDisconnected } from 'actions';
2 import { WS_ROOT } from 'const/global';
3
4 const SOCKET_STATES = {
5 CONNECTING: 0,
6 OPEN: 1,
7 CLOSING: 2,
8 CLOSED: 3
9 };
10
11 const wsMiddleware = ({ dispatch }) => next => {
12
13 const websocket = new WebSocket(WS_ROOT);
14
15 Object.assign(websocket, {
16 onopen() {
17 active = true;
18 dispatch(wsConnected())
19 },

Chapter 5. WebSockets 77
20
21 onclose() {
22 active = false;
23 dispatch(wsDisconnected())
24 },
25
26 onerror(error) {
27 console.log(`WS Error: ${ error.data }`);
28 },
29
30 onmessage(event) {
31 dispatch(JSON.parse(event.data));
32 }
33 });
34
35 return action => {
36 if (websocket.readyState === SOCKET_STATES.OPEN &&
37 action.meta &&
38 action.meta.websocket) {
39
40 // Remove action metadata before sending
41 const cleanAction = Object.assign({}, action, {
42 meta: undefined
43 });
44 websocket.send(JSON.stringify(cleanAction));
45 }
46
47 next(action);
48 };
49
50 export default wsMiddleware;
Authentication
Handling authentication withWebSockets might be a little tricky as in many applications, WebSock-ets are used alongside regular HTTP requests. The authentication will usually be done via regularREST or OATH calls and the frontend granted a token - either set in cookies or to be saved inLocalStorage.
To allow the server to authenticate a WebSocket, a special - agreed upon action - needs to be sentby the client. In the case of Redux, a special action object can be serialized and sent before doingany other work over WebSockets.

Chapter 5. WebSockets 78
Sample Flow
A simple way to implement authentication might be to send an API action to our server containingan email and a password:
Sample action to authenticate with the server
1 dispatch({
2 type: API,
3 payload: {
4 url: 'login',
5 method: 'POST',
6 success: LOGIN_SUCCEESS,
7 data: {
8 email: '[email protected]',
9 password: 'top secret'
10 }
11 }
12 });
If successful, our API Middleware will dispatch the LOGIN_SUCCESS action containing the informa-tion returned from the server:
Action dispatched on successful login
1 {
2 type: LOGIN_SUCCEESS,
3 payload: {
4 token: 'xxxYYYzzzz'
5 }
6 }
Our user’s reducer will probably act on this action to add the token to the state - to be passed inheaders of future API requests to the server.
To make WebSockets authenticate using this token, we can add special code to our WebSocket APIthat will check for LOGIN_SUCCESS (and LOGOUT_SUCCESS)

Chapter 5. WebSockets 79
Authentication code in the WebSocket middleware
1 if (action.type === LOGIN_SUCCESS) {
2 dispatch({
3 type: WEBSOCKET_AUTH,
4 payload: action.payload.token,
5 meta: { websocket: true }
6 });
7 }
8
9 if (action.type === LOGOUT_SUCCESS) {
10 dispatch({
11 type: WEBSOCKET_LOGOUT,
12 meta: { websocket: true }
13 });
14 }
Now the passage of LOGIN_SUCCESS will cause a new WebSocket enabled action to be dispatchedand processed by our middleware to authenticate with the server.
The flow of actions
1 > Store:
2 { type: API, payload: ... }
3
4 > Server:
5 POST http://.../login
6
7 > Store:
8 { type: LOGIN_SUCCESS, payload: token }
9
10 > Store:
11 { type: WEBSOCKET_AUTH, payload: token, meta: { websocket: true }}
12
13 > WebSocket:
14 { type: WEBSOCKET_AUTH, payload: token }
Notes
For a full flow of the WebSocket middleware, it would be best to keep track of the authenticationstate of the WebSocket and prevent actions from being sent or received before the WebSocket hasbeen authentication or after it has been logged out from.

Chapter 5. WebSockets 80
When the token is already present in cookie it will be passed to WebSocket as soon as the socketis openned. This might cause problems if the login process happens after the application loads. Oreven worse, when the user logs out our WebSocket might still stay authenticated. It is better to usethe action based authentication approach described above to avoid these and similar issues.
Summary
This chapter has illustrated how well WebSockets work with Redux and the practical steps neededto set up WebSocket-based communication.
In the next chapter we will cover the subject of testing and how each part of our Redux applicationcan be tested separately and together.

Chapter 6. TestsOne of the key strengths of Redux is its ease of testability. To fully automate the testing suite, wecan create unit tests for each of the different actors (reducers, action creators, and middleware) andcombine them together for comprehensive integration tests.
There are a large number of testing tools available, but the exact tooling is less important asmost parts of our Redux application will rely on plain JavaScript functions and objects with nocomplicated libraries or async flows to test.
As our testing framework we will be using the excellent Jest²² library from Facebook, the latestversion of which proves to be an excellent choice for testing Redux. Using other frameworks andtools such as Karma, Mocha, and so on should look very similar to the examples in this chapter.
To find the best way to add Jest to your project and operating system, please followJest’s getting started guide²³.
Test Files and Directories
To start off we need a way to organize our tests. There are two main approaches: putting the teststogether in the same directory with the implementation files, or putting them in a separate directory.In this guide we will use the latter. The choice is a matter of convenience and personal preference,with the only side effects being different test runner configurations.
We will create a separate test file for each implementation file in our project. In the case ofapp/actions/recipes.js, our test file will be tests/actions/recipes.test.js.
Test File Structure
In our test files we will use a describe() function to wrap all our tests. The first string parameterin this function will allow us to easily determine which group of tests are failing or succeeding:
²²https://facebook.github.io/jest/²³https://facebook.github.io/jest/#getting-started

Chapter 6. Tests 82
Sample test file structure
1 describe('actions', () => {
2 // TODO: Add tests
3 });
Inside this function other nested describe() functions can be used, to further distinguish betweendifferent sets of states (for example, testing failing or succeeding API calls).
Each test in Jest is wrapped within an it() block describing what the test does. To keep the testsreadable and easy to understand, it is generally recommended to create as many short tests aspossible (each within its own it() block) rather than creating very large single test functions:
Sample test file with test placeholders
1 describe('actions', () => {
2 it('should create an action to add a todo', () => {
3 // TODO: Implement test
4 });
5
6 it('should create an action to delete a todo', () => {
7 // TODO: Implement test
8 });
9 });
Testing Action Creators
Throughout this book we have tried to keep asynchronous flows out of action creators by movingthem into middleware and utility functions. This approach allows for very easy testing of actioncreators, as they are functions that simply return plain JavaScript objects:
Simple action creator
1 import * as actions from 'constants/action-types';
2
3 export const setRecipes = (recipes) => ({
4 type: actions.SET_RECIPES,
5 payload: recipes
6 });
Our setRecipes() action creator receives a single parameter and creates a plain JavaScript objectin return. Since there is no control flow logic or side effects, any call to this function will alwaysreturn the same value, making it very easy to test:

Chapter 6. Tests 83
Simple test for setRecipes
1 import * as actions from 'actions'
2
3 describe('actions', () => {
4 it('should create an action to add a todo', () => {
5 const expected = { type: 'ADD_RECIPE', payload: 'test' };
6 const actual = actions.addRecipe('test');
7
8 expect(actual).toEqual(expected);
9 });
10 });
This test is built in three parts. First, we calculate what our action creator should return when calledwith 'test' as an argument—in this case a JavaScript object containing two keys, type and payload:
Calculate expected result
1 const expected = { type: 'ADD_RECIPE', payload: 'test' };
The second stage is running the action creator actions.addRecipe('test') to get the value builtby our action creator’s implementation:
Calculate actual result
1 const actual = actions.addRecipe('test');
And the final stage is using Jest’s expect() and toEqual() functions to verify that the actual andexpected results are the same:
Verify results match
1 expect(actual).toEqual(expected);
If the expected and actual objects differ, Jest will throw an error and provide information describingthe differences, allowing us to catch incorrect implementations.
Improving the Code
Due to the simplicity of this code, it is common to combine multiple stages into a single call andrewrite the test as follows:

Chapter 6. Tests 84
Shorter version of the test
1 it('should create an action to add a recipe', () => {
2 const expected = { type: 'ADD_RECIPE', payload: 'test' };
3
4 expect(actions.addRecipe('test')).toEqual(expected);
5 });
Using Snapshots
The approach of calculating the expected value and then comparing it to dynamically calculatedvalues is very common in Redux tests. To save typing time and make the code cleaner to read, wecan use one of Jest’s greatest features, snapshots²⁴.
Instead of building the expected result, we can ask Jest to run the expect() block and save the resultin a special .snap file, generating our expected object automatically and managing it for us:
Test with snapshot
1 it('should create an action to add a recipe', () => {
2 expect(actions.addRecipe('test')).toMatchSnapshot();
3 });
The expected calculation is gone, and instead of using isEqual(), Jest will now compare the resultof the expression inside expect() to a version it has saved on disk. The actual snapshot is placed ina __snapshots__ directory in a file with the same name as the test file plus the .snap extension:
snapshots/action.test.js.snap
1 exports[`actions should create an action to add a recipe 1`] = `
2 Object {
3 "payload": "test",
4 "type": "ADD_RECIPE",
5 }
6 `;
²⁴https://facebook.github.io/jest/docs/tutorial-react.html#snapshot-testing

Chapter 6. Tests 85
The structure is more complicated than that of a regular JavaScript object, but the result is exactlythe same as our original expected calculation:
Calculate expected result1 const expected = { type: 'ADD_RECIPE', payload: 'test' };
What happens when our code changes? In some cases we want to intentionally changethe structure of our action object. In these cases, Jest will detect that the returned valuedoes not match what is saved inside its snapshot file and throw an error. But if wedetermine that the new result is the correct one and the cached snapshot is no longervalid, we can easily tell Jest to update its snapshot version to the new one.
Dynamic Action Creators
In some cases, action creators might contain logic that emits different action objects based on itsinput parameters. As long as no asynchronous code or other external entities (like localStorage)are touched, we can easily test the logic by providing different input parameters to the action creatorand verifying it creates the correct object every time:
An action creator that modifies the input1 export const addRecipe = (title) => ({
2 type: actions.ADD_RECIPE,
3 payload: title || "Default"
4 });
The modified addRecipe() action creator will set payload to "Default" if the user does not providea title. To test this behavior we can create two tests, one that provides a parameter (as we already did)and one that provides an empty string. A fully comprehensive test might contain multiple “emptystring” cases, for null, undefined, and '':
Combined test of multiple emptystring input values1 it('should add recipe with default parameter', () => {
2 expect(actions.addRecipe(undefined)).toMatchSnapshot();
3 expect(actions.addRecipe(null)).toMatchSnapshot();
4 expect(actions.addRecipe('')).toMatchSnapshot();
5 });
In contrast to what we discussed earlier, here we tried putting multiple expect() functions into thesame test. While this approach will work, it will be harder to identify which of the test cases failedin the event of an error.
Since we are using JavaScript to write our tests, we can easily create test cases for each input valuewithout increasing our code size significantly (by creating an it() clause for each). We can do thatby adding all the possible inputs into an array and automatically creating corresponding it() blocks:

Chapter 6. Tests 86
Automatically create tests for each test case
1 [undefined, null, ''].forEach((param) =>
2 it(`should add recipe with default parameter ${param}` , () => {
3 expect(actions.addRecipe(param)).toMatchSnapshot()
4 }));
Using this approach we get three different it() blocks automatically generated by JavaScript,keeping our tests clear and the code short.
Async Action Creators
Throughout this book we have tried to discourage the use of asynchronous action creators andfunctions that have side effects and have used various libraries like redux-thunk²⁵ to allow actioncreators to schedule async work and be non-idempotent. One of the main benefits is the ease oftesting regular action creators offer—more information on this can be found in the Action CreatorsChapter.
For our example we will create a simple async action creator that uses redux-thunk and the fetch()API to get recipe data from a server and dispatches the result with a SET_RECIPE action:
Async action creator
1 export const setRecipe = (id, data) => ({
2 type: actions.SET_RECIPE,
3 payload: { id, data }
4 });
5
6 export const fetchRecipe = id => dispatch => {
7 return fetch('recipe/' + id)
8 .then(response => response.json())
9 .then(json => dispatch(setRecipe(id, json)))
10 };
With redux-thunk, our action creators can return a function instead of a plain JavaScript object.The thunk middleware will call such a function and pass it the store’s dispatch() and getState()
methods. This allows the action creator to use the async fetch() API to get data from the serverand dispatch an action when it’s done using dispatch().
²⁵https://github.com/gaearon/redux-thunk

Chapter 6. Tests 87
Stubbing fetch()
Before we move on to the actual tests, we need to lay out some infrastructure for stubbing thefetch() API. We are going to create a mock response object and then stub the fetch() API on ourwindow object:
Create a fake response object1 export const mockResponse = (status, statusText, response) => {
2 return new window.Response(response, {
3 status: status,
4 statusText: statusText,
5 headers: {
6 'Content-type': 'application/json'
7 }
8 });
9 };
Stub a successful fetch1 export const mockFetch = (status, data) => {
2 window.fetch = jest.fn().mockImplementation(
3 () => Promise.resolve(mockResponse(status, null, data)));
4 };
Stub a failing fetch1 export const mockFetchError = (state, error) => {
2 window.fetch = jest.fn().mockImplementation(
3 () => Promise.reject(mockResponse(state, error, '{}'))
4 );
5 };
The mock fetch() call will return a resolved promise that is similar to the real result from a fetch()call:
Sample mocked fetch code1 mockFetch(200, '{"key":"value"}');
2 fetch('test.json')
This code will allow us to call mockFetch() or mockFetchError(), causing the next call to fetch()
to return with our mocked response. The only issue with this implementation is that it stubs all thefetch() calls in the system, regardless of the URL.
Since the first parameter to fetch() is the URL, we can use the common handleResponse() functionto first verify that the URL passed to fetch() is the URL we have stubbed:

Chapter 6. Tests 88
Stubbing with URL verification
1 const handleResponse = (mockedUrl, response) =>
2 window.fetch = jest.fn().mockImplementation(url => {
3 if (url === mockedUrl) {
4 return response;
5 }
6 throw('Unknown URL: ' + url);
7 });
8
9 export const mockFetch = (mockedUrl, status, data) =>
10 handleResponse(
11 mockedUrl,
12 Promise.resolve(mockResponse(status, null, data)));
13
14 export const mockFetchError = (mockedUrl, state, error) =>
15 handleResponse(
16 mockedUrl,
17 Promise.reject(mockResponse(state, error, '{}')));
Creating a Mock Store
Unlike simple action creators, our code now relies on dispatch() being used, which forces us tocreate a mock instance of a store. To do so, we will use the redux-mock-store²⁶ library:
Create a mock store
1 import configureStore from 'redux-mock-store';
2 import thunk from 'redux-thunk';
3
4 const mockStore = configureStore([ thunk ]);
Here we create a mock store object with a single thunk middleware. This store object can be usedas a regular Redux store; it supports dispatching of actions and will later allow us to assert that thecorrect set of actions was sent to our store.
Async Action Creator Test Structure
Since async action creators might contain different flows based on the result of the async action, itis best to put them into their own describe() blocks in the tests. This will also allow us to easilycreate a fresh “mock store” for each of the test cases using Jest’s beforeEach() method:
²⁶https://github.com/arnaudbenard/redux-mock-store

Chapter 6. Tests 89
Structure of an async test block
1 describe('fetch recipe', () => {
2 let store;
3
4 beforeEach(() => store = mockStore({}));
5
6 it('should fetch recipe if it exists');
7
8 ...
9 });
Our mock store gets automatically re-created before each iteration of the tests, clearing any actionscached from the previous run.
Basic Async Action Creator Test
Jest handles async tests by allowing us to return a promise as the test’s result. If a promise is returned,the test runner will wait for the promise to resolve and only then continue to the next test:
Async test
1 it('should fetch recipe if it exists', () => {
2 return store.dispatch(actions.fetchRecipe(100));
3 });
Since store.dispatch() in this case returns a promise (remember our fetchRecipe() action creatorreturns a call to the fetch() API), we can use it to create an async test.
To add an expect() clause to the code, we can use the same promise and run our tests as soon as itis resolved:
Adding expect calls to async tests
1 it('should fetch recipe if it exists', () => {
2 return store.dispatch(actions.fetchRecipe(100))
3 .then(() => expect(store.getActions()).toEqual([]))
4 });
The expect() clause is similar to what we used in our previous tests. We are using themocked store’sgetActions()method to get an array of all the actions dispatched to the store. In our implementationwe expect a successful call to fetch() to dispatch the result of the setRecipe() action creator.
Running this test now will fail, since we didn’t mock the fetch()API. Using the small utility librarywe created previously, we can create the mock that will result in the correct action sequence:

Chapter 6. Tests 90
Full async test
1 it('should fetch recipe if it exists', () => {
2 mockFetch('recipe/100', 200, '{"title":"hello"}');
3
4 return store.dispatch(actions.fetchRecipe(100))
5 .then(() => expect(store.getActions()).toMatchSnapshot())
6 });
Here wemock a 200 successful response from the fetch()API and expect that dispatching the asyncaction created by fetchRecipe(100) results in a later dispatch of the action created by setRecipe().
Async Tests Summary
As can be seen from this minimal example, testing async action creators is much more complicatedthan testing regular action creators. If we add proper error handling and branching, the tests quicklybecome very hard to reason out and build.
The Middleware Chapter offers an alternative to async action creators by moving the asynchronouslogic into middleware. This allows us to test and concentrate all the async code of an application ina single place.
Reducer Tests
Testing reducers is very similar to testing action creators, as reducers by definition are idempotent(given a state and an action, the same new state will be returned every time).
This makes reducer tests very easy to write, as we simply need to call the reducer with differentcombinations of input to verify the correctness of the output.
Basic Reducer Test
For our test, we can create a very crude reducer that handles a single ADD_RECIPE action and whosestate is simply an array of recipes:

Chapter 6. Tests 91
Simple recipes reducer
1 import { ADD_RECIPE } from 'consts.js';
2
3 const reducer = (state = initialState, action) => {
4 switch(action.type) {
5 case ADD_RECIPE:
6 return state.concat({ title: action.payload });
7 }
8
9 return state;
10 };
11
12 export default reducer;
There are two main test cases to consider, adding a recipe to an empty list and a non-empty one. Wecan test the first case as follows:
Simple recipes reducer test
1 import reducer from 'reducers/recipes';
2
3 import { ADD_RECIPE } from 'consts';
4
5 describe("recipes reducer", () => {
6 it('should add recipe to empty list', () => {
7 const initialState = [];
8 const action = { type: ADD_RECIPE, payload: 'test' };
9 const expected = [{ title: "test" }];
10 const actual = reducer(initialState, action);
11
12 expect(actual).toEqual(expected);
13 });
14 };

Chapter 6. Tests 92
The steps taken here should already be familiar:
1. Calculate the initial state (an empty array in our case).2. Build the action to send.3. Set the expected state the reducer should return.4. Call reducer() to calculate the state based on the empty array and our action.5. Verify that the actual and expected states match.6. Calculating the initial state
Before we simplify the code, let’s consider the second test case, adding a recipe to a non-empty list:
Test of adding a recipe to a non-empty list
1 it('should add recipe to non-empty list', () => {
2 const initialState = [{ title: "first" }];
3 const action = { type: ADD_RECIPE, payload: 'test' };
4 const expected = [{ title: "first" }, { title: "test" }];
5 const actual = reducer(initialState, action);
6
7 expect(actual).toEqual(expected);
8 });
In this test we start with a list containing a single item and update our expected result to match.While this works, it has a maintenance problem. What will happen if our recipes contain more fieldsin the future?
Using this method of writing tests, we will need to find each test definition’s initial state and addmore properties to it. This complicates the test writer’s job without providing any benefits. Luckily,we already have a way to create non-empty states: the reducer! Since we already tested adding to anempty list in the first test, we can rely on our reducer to create a non-empty list with all the requiredrecipe information:
Build initial state using the reducer
1 const initialState = reducer([], { type: ADD_RECIPE, payload: 'first' });
This only partially solves the problem, though, as we are still treating the initial state as an emptyarray ([]). While this is true in our test case, other reducers might have more complicated structuresto deal with. A simple solution would be to create a const initialState = {} at the root of thetests and rely on it when needed:

Chapter 6. Tests 93
Set initial state for all tests
1 describe("recipes reducer", () => {
2 const initialState = [];
3
4 it('should add recipe to empty list', () => {
5 const action = { type: ADD_RECIPE, payload: 'test' };
6 const expected = [{ title: "test" }];
7 const actual = reducer(initialState, action);
8
9 expect(actual).toEqual(expected);
10 });
11
12 it('should add recipe to non-empty list', () => {
13 const testState = reducer(initialState, { type: ADD_RECIPE, payload: 'fir\
14 st' });
15 const action = { type: ADD_RECIPE, payload: 'test' };
16 const expected = [{ title: "first" }, { title: "test" }];
17 const actual = reducer(testState, action);
18
19 expect(actual).toEqual(expected);
20 });
21 };
The same initialState is used in all the tests, but it is still hardcoded in our test file. If our reducerchanges the way state is built, we will be forced to update the test files accordingly. To remove thisdependency we can rely on a feature that is forced by Redux’s combineReducers(). It mandates thatany reducer called with an undefined state must return its part of the initial state structure:
Excerpt from our reducer
1 const initialState = [];
2
3 const reducer = (state = initialState, action) => {
4 ...
5 };
This means we can use the reducer to get the initial state to use for all of our tests, simply by callingit with undefined and any action:

Chapter 6. Tests 94
Generate the initial state using our reducer
1 const initialState = reducer(undefined, { type: 'INIT' });
The result will put the same [] in the initial state, but now any changes to what the reducer considersto be the initial state will be automatically picked up by the tests as well.
Making the Tests Pretty
Now that we’ve solved all the functionality issues, we can use the same tricks we used in the actioncreator tests to simplify our reducer tests. Here are the original tests:
Original tests
1 it('should add recipe to empty list', () => {
2 const action = { type: ADD_RECIPE, payload: 'test' };
3 const expected = [{ title: "test" }];
4
5 expect(reducer(initialState, action)).toEqual(expected);
6 });
7
8 it('should add recipe to empty list', () => {
9 const baseState = reducer(initialState,
10 { type: ADD_RECIPE, payload: 'first' });
11 const action = { type: ADD_RECIPE, payload: 'test' };
12 const expected = [{ title: "first" }, { title: "test" }];
13 const actual = reducer(baseState, action);
14
15 expect(actual).toEqual(expected);
16 });
The first step will be to combine action, actual, and expect() into a single line:

Chapter 6. Tests 95
Simplified tests
1 it('should add recipe to empty list', () => {
2 const expected = [{ title: "test" }];
3
4 expect(reducer(initialState, { type: ADD_RECIPE, payload: 'test' }))
5 .toEqual(expected);
6 });
7
8 it('should add recipe to empty list', () => {
9 const baseState = reducer(initialState, { type: ADD_RECIPE, payload: 'first' }\
10 );
11 const expected = [{ title: "first" }, { title: "test" }];
12
13 expect(reducer(baseState, { type: ADD_RECIPE, payload: 'test' }))
14 .toEqual(expected);
15 });
The second step is to use Jest’s snapshots instead of manually calculated expected values:
Simplified tests, stage 2
1 it('should add recipe to empty list', () => {
2 expect(reducer(initialState, { type: ADD_RECIPE, payload: 'test' }))
3 .toMatchSnapshot()
4 });
5
6 it('should add recipe to empty list', () => {
7 const baseState = reducer(initialState, { type: ADD_RECIPE, payload: 'first' }\
8 );
9
10 expect(reducer(baseState, { type: ADD_RECIPE, payload: 'test' }))
11 .toMatchSnapshot();
12 });
Avoiding Mutations
One key requirement is that our reducers never modify the state, but only create a new one.Our current tests do not catch these issues (try changing .concat() to .push() in the reducerimplementation).

Chapter 6. Tests 96
While we can try to catch these mistakes by manually verifying that the initial state did not change,a simpler approach would be to “freeze” the initial state and have any changes to it automaticallystop the tests. To achive this we can use the excellent deep-freeze²⁷ library, installed as follows:
Installing deep-freeze
1 npm install deep-freeze --save
To use deep-freeze, we wrap our initial state with a call to deepFreeze():
Using deep-freeze
1 import deepFreeze from 'deep-freeze';
2
3 const initialState = deepFreeze(reducer(undefined, { type: 'INIT' }));
Any attempt by any parts of our code to modify initialState will now automatically throw anerror:
Automatically catch change attempts
1 initialState.push('test');
2 > TypeError: Can't add property 0, object is not extensible
To ensure that our reducers never change the original state, we can always call deepFreeze() onthe state passed as the first parameter to a reducer:
Updated add to non-empty list test
1 it('should add recipe to empty list', () => {
2 const baseState = reducer(initialState, { type: ADD_RECIPE, payload: 'first' }\
3 );
4
5 expect(reducer(
6 deepFreeze(baseState),
7 { type: ADD_RECIPE, payload: 'test' }
8 )
9 ).toMatchSnapshot();
10 });
²⁷https://github.com/substack/deep-freeze

Chapter 6. Tests 97
Action Creators and Reducers
Usually when writing unit tests it is recommended to test each part of the system separately andonly test connections and interfaces in the integration tests. In the case of Redux, though, it is worthconsidering the connection between action creators and reducers.
In the current way we’ve built our tests, the ADD_RECIPE action object is defined in three differentplaces: the recipe’s action creators, the recipe’s tests, and the reducer’s tests.
If, in the future, we decide to change the structure of the ADD_RECIPE action, our action creator testswill catch the change and remind us to update the test code. But the reducer’s tests will continue topass unless we remember to change the hardcoded ADD_RECIPE action objects used in those tests aswell.
This can lead to painful edge cases where all the tests pass, but the system doesn’t work. To avoidthis, we can stop using hardcoded action objects in reducers and rely on action creators directly:
Reducer tests modified to use action creators directly
1 it('should add recipe to empty list', () => {
2 expect(reducer(initialState, addRecipe('test'))).toMatchSnapshot()
3 });
4
5 it('should add recipe to empty list', () => {
6 const baseState = deepFreeze(reducer(initialState, addRecipe('first')));
7
8 expect(reducer(baseState, addRecipe('test'))).toMatchSnapshot();
9 });
While somewhat breaking the unit test principle, combining the reducers with action creators resultsin cleaner code, fewer bugs, and less duplication.
Unknown Actions
One last issue to test with reducers is that they gracefully handle unknown actions and return theoriginal state passed to them without modifications.
Since every action can propagate to the whole reducer tree, it is important for thereducer to return the original state and not a modified copy. This will allow UI librariesto identify changes in the tree using reference comparison.
We can do this as follows:
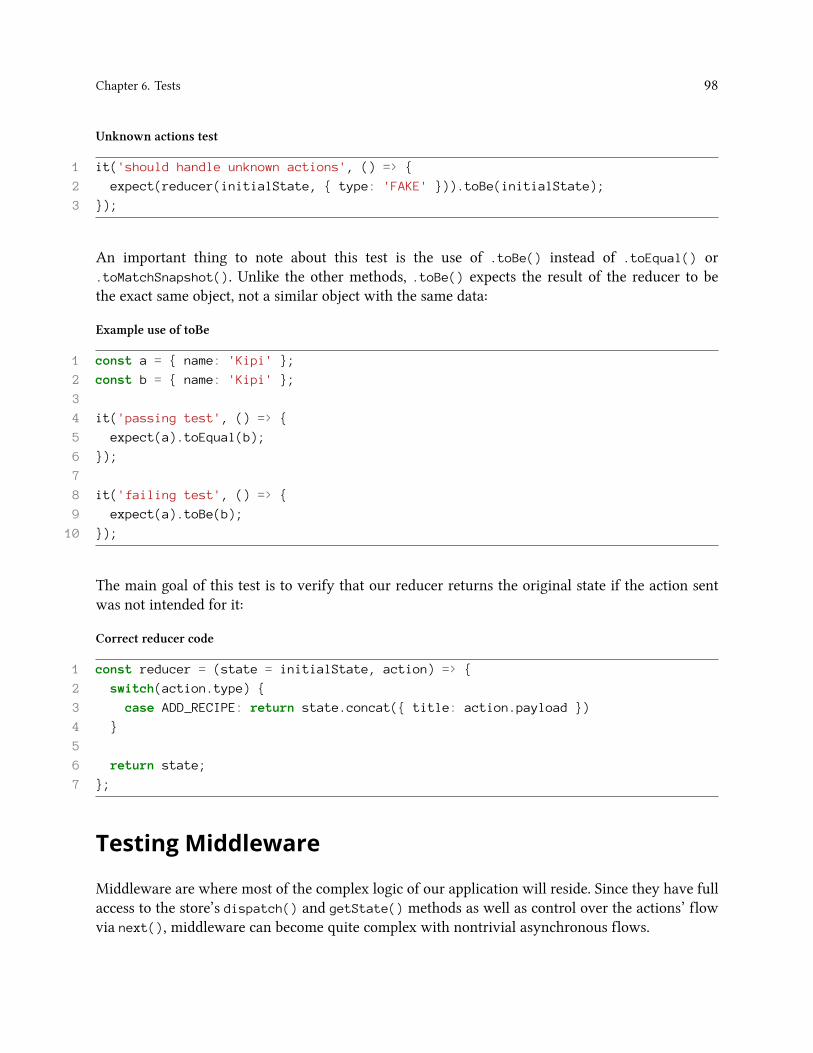
Chapter 6. Tests 98
Unknown actions test
1 it('should handle unknown actions', () => {
2 expect(reducer(initialState, { type: 'FAKE' })).toBe(initialState);
3 });
An important thing to note about this test is the use of .toBe() instead of .toEqual() or.toMatchSnapshot(). Unlike the other methods, .toBe() expects the result of the reducer to bethe exact same object, not a similar object with the same data:
Example use of toBe
1 const a = { name: 'Kipi' };
2 const b = { name: 'Kipi' };
3
4 it('passing test', () => {
5 expect(a).toEqual(b);
6 });
7
8 it('failing test', () => {
9 expect(a).toBe(b);
10 });
The main goal of this test is to verify that our reducer returns the original state if the action sentwas not intended for it:
Correct reducer code
1 const reducer = (state = initialState, action) => {
2 switch(action.type) {
3 case ADD_RECIPE: return state.concat({ title: action.payload })
4 }
5
6 return state;
7 };
Testing Middleware
Middleware are where most of the complex logic of our application will reside. Since they have fullaccess to the store’s dispatch() and getState() methods as well as control over the actions’ flowvia next(), middleware can become quite complex with nontrivial asynchronous flows.

Chapter 6. Tests 99
Middleware Test Structure
At their core middleware are functions that receive actions to process, albeit with a complicatedsignature (a function, returning a function, returning a function). The first two function calls aremade by Redux during startup. Only the last call is made dynamically, when new actions need tobe processed. The basic signature looks like this:
Middleware signature
1 function sampleMiddleware({ dispatch, getState }) {
2 return function nextWrapper(next) {
3 return function innerCode(action) {
4 // TODO: Implement the middleware
5
6 next(action);
7 }
8 }
9 }
To test middleware we will need to mock dispatch(), getState(), and mock() and call sampleMid-dleware() and nextWrapper() to get our test target, the innerCode() function:
Setting up middleware for tests
1 const next = jest.fn();
2 const dispatch = jest.fn();
3 const getState = jest.fn();
4 const middleware = apiMiddleware({ dispatch, getState })(next);
We can now use the regular Jest tests to test the middleware() function we built by calling it withaction objects:
Simple middleware test call
1 it('should process action', () => {
2 const next = jest.fn();
3 const dispatch = jest.fn();
4 const getState = jest.fn();
5 const middleware = sampleMiddleware({ dispatch, getState })(next);
6
7 const sampleAction = { type: 'SAMPLE_ACTION' };
8
9 middleware(sampleAction);
10
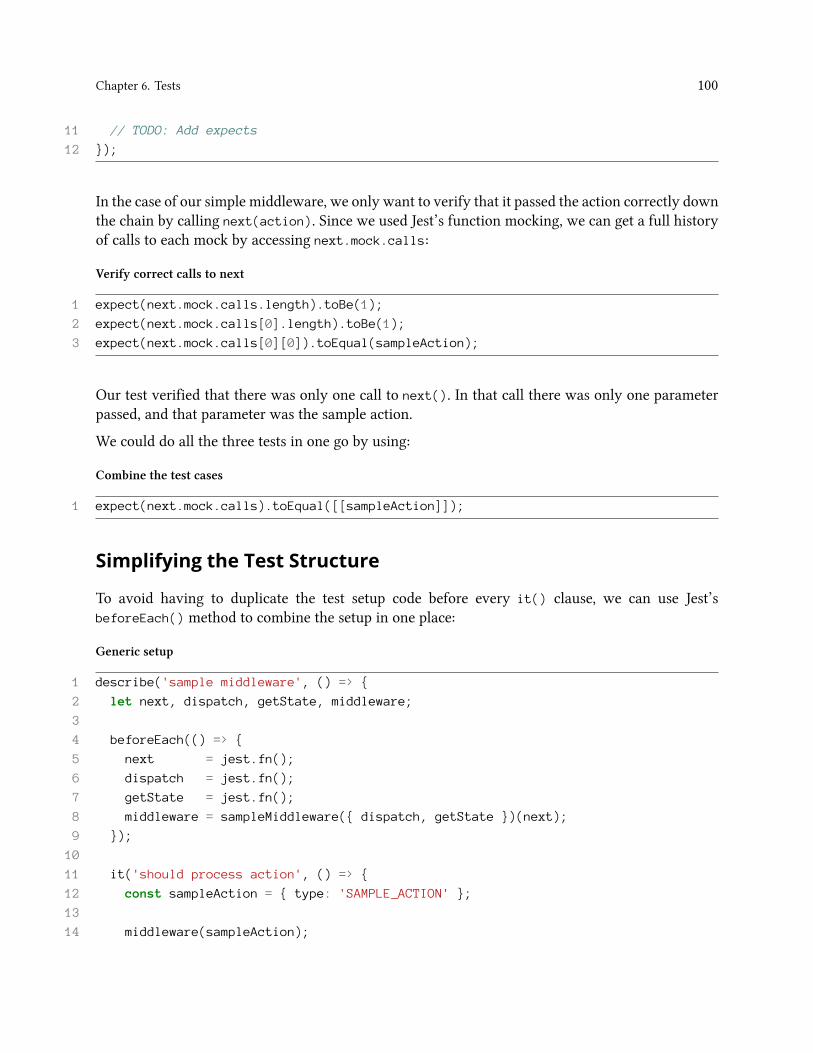
Chapter 6. Tests 100
11 // TODO: Add expects
12 });
In the case of our simple middleware, we only want to verify that it passed the action correctly downthe chain by calling next(action). Since we used Jest’s function mocking, we can get a full historyof calls to each mock by accessing next.mock.calls:
Verify correct calls to next
1 expect(next.mock.calls.length).toBe(1);
2 expect(next.mock.calls[0].length).toBe(1);
3 expect(next.mock.calls[0][0]).toEqual(sampleAction);
Our test verified that there was only one call to next(). In that call there was only one parameterpassed, and that parameter was the sample action.
We could do all the three tests in one go by using:
Combine the test cases
1 expect(next.mock.calls).toEqual([[sampleAction]]);
Simplifying the Test Structure
To avoid having to duplicate the test setup code before every it() clause, we can use Jest’sbeforeEach() method to combine the setup in one place:
Generic setup
1 describe('sample middleware', () => {
2 let next, dispatch, getState, middleware;
3
4 beforeEach(() => {
5 next = jest.fn();
6 dispatch = jest.fn();
7 getState = jest.fn();
8 middleware = sampleMiddleware({ dispatch, getState })(next);
9 });
10
11 it('should process action', () => {
12 const sampleAction = { type: 'SAMPLE_ACTION' };
13
14 middleware(sampleAction);

Chapter 6. Tests 101
15
16 expect(next.mock.calls).toEqual([[sampleAction]]);
17 };
18 };
Using this structure, our middleware will be rebuilt before each test and all the mocked functionswill be reset, keeping the testing code itself as short as possible.
Testing Async Middleware
For a more complete example, let’s use an API middleware similar to the one discussed in the ServerCommunication Chapter:
API middleware
1 import 'whatwg-fetch';
2 import { API } from 'consts';
3 import { apiStarted, apiFinished, apiError } from 'actions/ui';
4
5 const apiMiddleware = ({ dispatch }) => next => action => {
6 if (action.type !== API) {
7 return next(action);
8 }
9
10 const { url, success } = action.payload;
11
12 dispatch(apiStarted());
13
14 return fetch(url)
15 .then(response => response.json())
16 .then(response => {
17 dispatch(apiFinished());
18 dispatch(success(response));
19 })
20 .catch(({ status, statusText }) =>
21 dispatch(apiError(new Error({ status, statusText }))))
22 };
23
24 export default apiMiddleware;
Our middleware catches any actions of the type ’API’, which must contain a payload key with a urlto make a request to and a success parameter that holds an action creator to call with the returneddata:

Chapter 6. Tests 102
Sample API action
1 const setData = data => ({
2 type: 'SET_DATA',
3 payload: data
4 });
5
6 const apiAction = () => ({
7 type: API,
8 payload: {
9 success: setData,
10 url: 'fake.json'
11 }
12 });
In our Redux call, calling dispatch(apiAction()) will result in our API middleware doing a GET
request for server/fake.json and (if successful) dispatching the SET_DATA action with payload
set to the response. When there is an error, an action created by apiError() will be dispatchedcontaining status and statusText.
Another important feature of the API middleware is that it will dispatch apiStarted() beforecontacting the server and apiFinished() on success (or apiError() on failure). This allows theapplication to keep track of the number of active requests to the server and display a spinner orsome other user indication.
To fully test this middleware we can split the tests into three groups: general tests, success tests, andfailure tests.
Setup
To make our tests cleaner we will be using the structure discussed previously and mocking thefetch() API as discussed in the “Async Action Creators” section of this chapter.
Wewill also use the sample API action creators from earlier to drive the tests and a fake data responsefrom the server:

Chapter 6. Tests 103
Base of the API middleware tests
1 import apiMiddleware from 'middleware/api';
2 import { mockFetch, mockFetchError } from 'test-utils';
3 import { API_STARTED, API_FINISHED, API, API_ERROR } from 'consts';
4
5 const data = { title: 'hello' };
6
7 const setData = data => ({
8 type: 'SET_DATA',
9 payload: data
10 });
11
12 const apiAction = () => ({
13 type: API,
14 payload: {
15 success: setData,
16 url: 'fake.json'
17 }
18 });
19
20 describe("api middleware", () => {
21 let next, dispatch, middleware;
22
23 beforeEach(() => {
24 next = jest.fn();
25 dispatch = jest.fn();
26 middleware = apiMiddleware({ dispatch })(next);
27 });
28
29 describe('general', () => {
30 // TODO
31 });
32
33 describe('success', () => {
34 // TODO
35 });
36
37 describe('error', () => {
38 // TODO
39 });
40 });

Chapter 6. Tests 104
General tests
The first test for any middleware is to ensure that it passes unknown actions down the chain. If weforget to use next(action), no actions will reach the reducers:
Verify unknown actions are handled correctly
1 it('should ignore non-API actions', () => {
2 const sampleAction = { type: 'SAMPLE_ACTION' };
3
4 middleware(sampleAction);
5
6 expect(dispatch.mock.calls.length).toBe(0);
7 expect(next.mock.calls).toEqual([[sampleAction]]);
8 });
Here we verify that dispatch() is never called and next() is called exactly once with oursampleAction. Since we will be using dispatch.mock.calls and next.mock.calls very often inour tests, we can shorten them a little by adding the following to our setup code:
Improve the setup code
1 let next, dispatch, middleware, dispatchCalls, nextCalls;
2
3 beforeEach(() => {
4 next = jest.fn();
5 dispatch = jest.fn();
6
7 dispatchCalls = dispatch.mock.calls;
8 nextCalls = next.mock.calls;
9
10 middleware = apiMiddleware({ dispatch })(next);
11 });
Now instead of expect(next.mock.calls) we can use expect(nextCalls).
Another general test could be to verify that the API_STARTED action is dispatched every time themiddleware is about to access the server:

Chapter 6. Tests 105
Test that API_STARTED is dispatched
1 it('should dispatch API_STARTED', () => {
2 middleware(apiAction());
3 expect(dispatchCalls[0]).toEqual([{ type: API_STARTED }]);
4 });
Our expect() call only checks that the first dispatch() action is API_STARTED because themiddleware might call additional actions later on.
Successful server access
In the success scenario, we need to mock our fetch() API to return a successful response. We willbe using the same mockFetch() utility created in the “Async Action Creators” section of this chapter.
Our basic success tests need to check that API_FINISHED is dispatched once the API is done and thatour success() action creator is called, passed the response, and dispatched to the store:
Success tests framework
1 describe('success', () => {
2 beforeEach(() => mockFetch('recipes.json', 200, JSON.stringify(data)));
3
4 it('should dispatch API_FINISHED');
5
6 it('should dispatch SET_DATA');
7 });
A first attempt at testing the first case might look similar to the API_STARTED test:
Test that API_FINISHED is dispatched
1 it('should dispatch API_FINISHED', () => {
2 middleware(apiAction());
3 expect(dispatchCalls[2]).toEqual([{ type: API_FINISHED }]);
4 });
Unfortunately, this code will not work. Since API_FINISHED is only dispatched after the fetch()
promise is resolved, we need to wait for that to happen before calling expect().
As discussed in the “Async Action Creators” section of this chapter, we rely on our call to themiddleware to return a promise that gets resolved once the fetch() call completes. Only then canwe run assertions and verify that everything behaved according to our expectations:

Chapter 6. Tests 106
The correct API_FINISHED test
1 it('should dispatch API_FINISHED', () => {
2 return middleware(apiAction())
3 .then(() => {
4 expect(dispatchCalls[2]).toEqual([{ type: API_FINISHED }]);
5 });
6 });
In this version of the test, only once the promise returned by the call to middleware() is resolved dowe check the array of calls to dispatch(). Since our new test is a one-liner, we can use some ES2016magic and Jest’s toMatchSnapshot() method to shorten the code:
Short API_FINISHED test
1 it('should dispatch API_FINISHED', () =>
2 middleware(apiAction()).then(() =>
3 expect(dispatchCalls[2]).toMatchSnapshot()));
Testing that the API middleware correctly sends the response from the server via the action creatorprovided in action.payload.success is very similar:
Test that SET_DATA was dispatched
1 it('should dispatch SET_DATA', () =>
2 middleware(apiAction()).then(() =>
3 expect(dispatchCalls[1]).toEqual([setData(data)])));
After the fetch()method is done, we check that the third call to dispatch() sent us the same actionobject as a direct call to the setData(data) action creator.
Remember that we mocked the server response for fetch() with mockFetch(), passing itthe stringified version of data.
Failed server access
The failing case is similar to the success one, except that we mock fetch() to fail. There are two testsin this scenario, verifying that API_FINISHEDwas not dispatched and that API_ERRORwas dispatchedinstead:

Chapter 6. Tests 107
The failure case scenario tests
1 describe('error', () => {
2 beforeEach(() => mockFetchError('recipes.json', 404, 'Not found'));
3
4 it('should NOT dispatch API_FINISHED', () =>
5 middleware(apiAction()).then(() =>
6 expect(dispatchCalls[1][0].type).not.toBe(API_FINISHED)));
7
8 it('should dispatch error', () =>
9 middleware(apiAction()).then(() =>
10 expect(dispatchCalls[1]).toMatchSnapshot()));
11 });
Here we have used all the methods discussed previously to test both cases.
Middleware Tests Summary
As our application grows, more complex and asynchronous code will be moved to middleware.While this will cause the tests for the middleware to become complex, it will keep the complexityfrom spreading to other parts of our Redux application.
The basic structure discussed here for the API middleware should be enough to cover mostimplementations.
We have left mocking getState() as an exercise for the reader. It is suggested that you take thesample project and modify the API middleware to read something from the state before the codethat performs the API request (e.g., get an access token), and that you correctly update the tests tocheck that the store is accessed and correct values are used in the middleware.
Integration Tests
The role of the integration tests is to verify that all the parts of the application work correctlytogether. A comprehensive unit test suite will ensure all the reducers, action creators, middleware,and libraries are correct. With integration tests, we will try to run them together in a single test tocheck system-wide behavior.
As an example of an integration test, we will verify that when the fetchRecipes() action creatoris dispatched, data is correctly fetched from the server and the state is updated. In this flow we willcheck that the API middleware is correctly set up, all the required action creators are correct, andthe recipes reducer updates the state as needed.

Chapter 6. Tests 108
Basic Setup
Since the integration tests will be using the real store, we can simple require and initialize it as inour regular application:
Integration test skeleton
1 import store from 'store';
2
3 describe('integration', () => {
4 it('should fetch recipes from server', () => {
5 // TODO
6 });
7 });
Basic Integration Test
Our test will include four steps:
1. Verify the initial state.2. Mock the data returned from the server.3. Dispatch the action created by fetchRecipes().4. Verify that our state’s recipes key holds the data returned from the server.
The full test looks like this:
Full integration test
1 import store from 'store';
2 import { fetchRecipes } from 'actions/recipes';
3 import { mockFetch } from 'test-utils';
4
5 describe('integration', () => {
6 it('should fetch recipes from server', () => {
7 const data = [{ title: 'test' }];
8
9 expect(store.getState().recipes).toEqual([]);
10
11 mockFetch('recipes.json', 200, JSON.stringify(data));
12
13 return store.dispatch(fetchRecipes())
14 .then(() => expect(store.getState().recipes).toEqual(data));
15 });
16 });

Chapter 6. Tests 109
To make sure our reducer updates the state, we first verify that our initial recipes list is emptyand check that it was changed to contain the server-returned data after the fetchRecipes() actioncompleted.
Integration Tests Summary
As can be seen from this simple test, doing integration tests in Redux is usually fairly straight-forward. Since everything is driven by actions, in most cases our integration tests will follow thefour steps outlined above: we verify the initial state of the system, mock any external dependencies,dispatch an action, and verify that the state has changed and any external APIs were called asexpected.
Summary
In this chapter we have discussed in detail various methods of testing Redux using the Jest library.Given the clear division of responsibilities in Redux and in keeping with its plain JavaScript objectsand idempotent functions, most unit tests (and integration tests) are short and simple to write.
This is in turn means that we, as developers, can minimize the time we spend writing tests and stillhave a comprehensive and understandable testing suite.
This is the last chapter in the “Real World” part of this book. In the next part, “Advanced Redux,”we will delve deeper into each of Redux’s actors and learn advanced methods for organizing andmanaging our code.

Part 3. Advanced Concepts

Chapter 7. The StoreIn contrast to most other Flux implementations, in Redux there is a single store that holds allof the application state in one object. The store is also responsible for changing the state whensomething happens in our application. In fact, we could say that Redux is the store. When we talkabout accessing the state, dispatching an action, or listening to state changes, it is the store that isresponsible for all of it.
Sometimes the concern is raised that storing the whole state in one huge JavaScript objectmight be wasteful. But since objects are reference-type values and the state is just an objectholding a reference to other objects, it doesn’t have anymemory implications; it is the sameas storing many objects in different variables.
Creating a Store
To create the store we use the createStore() factory function exported by Redux. It accepts threearguments: a mandatory reducer function, an optional initial state, and an optional store enhancer.We will cover store enhancers later in this chapter and start by creating a basic store with a dummyreducer that ignores actions and simply returns the state as it is:
Sample store
1 import { createStore } from 'redux';
2
3 const initialState = {
4 recipes: [],
5 ingredients: []
6 }
7 const reducer = (state, action) => state;
8
9 const store = createStore(reducer, initialState);
The initialState parameter is optional, and usually we delegate the task of building aninitial state to reducers, as described in the Reducers Chapter. However, it is still usefulwhen you want to load the initial state from the server to speed up page load times. Statemanagement is covered extensively in the State Management Chapter .
The simple store that we have just created has five methods that allow us to access, change, andobserve the state. Let’s examine each of them.

Chapter 7. The Store 112
Accessing the State
The getState() method returns the reference to the current state:
Get current state from store
1 store.getState();
2 // => { recipes: [], ingredients: [] }
Changing the State
Redux does not allow external changes to the state. Using the state object received from getState()
and changing values directly is prohibited. The only way to cause a change of the state is by passingactions to the reducer function. Actions sent to the store are passed to the reducer and the result isused as the new global state.
Sending action objects to reducers is done via the store using the store’s dispatch()method, whichaccepts a single argument, the action object:
Dispatch action to store
1 const action = { type: 'ADD_RECIPE', ... }
2 store.dispatch(action);
Now we can rewrite our reducer to make it able to create an updated state for actions of type'ADD_RECIPE' and return the current state otherwise:
Sample reducer code
1 const reducer(state, action) => {
2 switch (action.type) {
3 case 'ADD_RECIPE':
4 return Object.assign(...);
5 default:
6 return state;
7 }
8 };
Listening to Updates
Now that we know how the store updates the state, we need a way to update the UI or other partsof our application when the state changes. The store allows us to subscribe to state changes usingthe subscribe() method. It accepts a callback function, which will be executed after every actionhas been dispatched:

Chapter 7. The Store 113
The subscribe method
1 const store = createStore((state) => state);
2
3 const onStoreChange = () => console.log(store.getState());
4
5 store.subscribe(onStoreChange);
The subscribed callback does not get passed any arguments, and we need to access thestate. So, we must call store.getState() ourselves.
The return value of the subscribe() method is a function that can be used to unsubscribe from thestore. It is important to remember to call unsubscribe() for all subscriptions to prevent memoryleaks:
Unsubscribing from store updates
1 const unsubscribe = store.subscribe(onStoreChange);
2
3 // When the subscription is no longer needed
4 unsubscribe();
Replacing the Reducer
When creating the Redux store, a reducer function (often referred to as the root reducer) is passedas the first parameter to createStore(). During runtime we can use the store’s replaceReducer()method to replace this reducer function. Usually this method is used in development to allow hotreplacement of reducers. In complex applications it might be used to dynamically decorate or replacethe root reducer to allow code splitting.
If your application is too large to bundle into a single file or if you want to gain extraperformance, you usually use a technique called code splitting—separating the productionbundle into multiple files and loading them on demand when the user performs someinteraction or takes a specific route. Implementing lazy loading is outside the scope of thisbook, but you might want to know that code splitting also can be applied to the Reduxstore, thanks to the replaceReducer() method.
Let’s look at a simple example with some functionality available only for authenticated users. Atinitial load, our store will only handle the currentUser substate—just enough for the authentication:

Chapter 7. The Store 114
Basic reducer setup
1 import { combineReducers } from 'redux';
2 import { currentUser } from 'reducers/current-user';
3
4 const reducer = (state, action) => combineReducers({ currentUser });
5
6 const store = createStore(reducer);
If combineReducers() looks unfamiliar to you, take a look at Chapter 9 to learn about this technique.For now, let’s just assume the functions inside are going to handle a currentUser substate. After theuser signs in, we load the new functionality. Nowwe need to make our store aware of the new subsetof our application state and the function that should handle it. Here is where the replaceReducer()method comes in handy:
Replacing the root reducer
1 const newReducer = (state, action) => combineReducers({ currentUser, recipes });
2
3 store.replaceReducer(newReducer);
Keep in mind that when you call replaceReducer(), Redux automatically calls the same initialaction it calls when you first create the store, so your new reducer automatically gets executed andthe new state is immediately available via the store.getState() method. For more on the initialaction, see Chapter 9.
The same technique can be used by development tools to implement the hot reloading mechanismfor a better developer experience. Hot reloading is a concept where source code changes don’t causea full page reload, but rather the affected code is swapped in place by special software and theapplication as a whole is kept in the same state that it was in before the code change. Hot reloadingtools are outside the scope of this book, but you can easily find more information online.
Store as Observable
Starting from version 3.5.0, Redux store can also act as an Observable. This allows libraries likeRxJS to subscribe to the store’s state changes. This subscription method is different from the regularsubscribe() method of the store: when subscribing to the store as an observable, the latest state ispassed without the need to call store.getState().
To support older browsers, Redux uses the symbol-observable²⁸ polyfill when Sym-bol.observable is not natively supported.
²⁸https://github.com/blesh/symbol-observable

Chapter 7. The Store 115
Integration with RxJS
1 import store from "store";
2 import { Observable } from "rxjs";
3
4 const store$ = Observable.from(store);
5
6 store$.forEach((state) => console.log(state))
This basic API is interoperable with most common reactive libraries (e.g. RxJS). Any library thatexports the next() method can be subscribed and receive updates. This implementation alsoconforms to the tc39/proposal-observable²⁹.
If you don’t use reactive libraries, you can still subscribe to the store by accessing the Sym-bol.observable property (or using symbol-observable polyfill like Redux does):
Getting the Redux store observable
1 const observable = store[Symbol.observable]();
Subscribing with a generic observer will cause the observer’s next() be called on every state changeand be passed the current store state.
Subscribing to changes
1 const observer = {
2 next(state) {
3 console.log("State change", state);
4 }
5 };
6
7 const observable = store.$$observable();
8
9 const unsubscribe = observable.subscribe(observer);
To unsubscribe, we simply call the function returned from the call to subscribe()
²⁹https://github.com/tc39/proposal-observable

Chapter 7. The Store 116
Unsubscribing from changes
1 const observable = store[Symbol.observable]();
2 const unsubscribe = observable.subscribe(observer);
3
4 unsubscribe();
Full Store API
The five methods of the store—getState(), dispatch(), subscribe(), replaceReducer(), and theobservable symbol—make up the whole of the store’s API and most of the API Redux exports. Inthe first chapter of this book we learned how the first three are enough to build a fully functionalapplication. This low API footprint, coupled with strong versatility, is what makes Redux socompelling and easy to understand.
Decorating the Store
The basic store functionality in Redux is very simple and sufficient for most use cases. Yet sometimesit is useful to slightly change one of the methods, or even add new ones to support more advanceduse cases. This can be done by decorating the store. In previous versions of Redux (prior to 3.1.0)higher-order functions were used to decorate the store, but because of complicated syntax, thecreateStore() API has changed and it now supports an optional parameter for a store decorator.
Higher-Order Functions
Before we proceed, let’s do a quick overview of what higher-order functions are. We can definethe term as referring to a function that either takes one or more functions as arguments, returns afunction as its result, or does both. Here’s an example:
Sample higher-order function
1 function output(message) {
2 console.log(message);
3 }
4
5 function addTimeStamp(fn) {
6 return function(...args) {
7 console.log(`Executed at: ${Date.now()}`);
8 fn(...args);
9 }
10 }

Chapter 7. The Store 117
11
12 const timedOutput = addTimeStamp(output);
13
14 timedOutput('Hello World!');
15
16 > Executed at: 1464900000001
17 > Hello World!
Here, the output() function prints our message to the console. The addTimeStamp() function isa higher-order function that can take any other function and log the time of execution. CallingaddTimeStamp() with output() as the parameter creates a new “wrapped” function that hasenhanced functionality. It still has the signature of the original output() function but now alsoprints the timestamp.
The compose() Function
The use of higher-order functions is very common in Redux applications, as it allows us to easilyextend the behavior of other parts of the code. Take a look at an imaginary example where we haveto wrap our original function in three wrappers:
Multiple decoration
1 const wrapped = third(second(first(originalFn)));
2
3 wrapped();
Using multiple decorators is a valid and practical approach, but the resulting code can be hard toread and appear somewhat cumbersome. Instead, Redux provides the compose() function to handlemultiple wrappers in a cleaner manner:
Multiple wrappers with compose
1 import { compose } from 'redux';
2
3 const wrapped = compose(third, second, first)(originalFn);
4
5 wrapped();
The simplest implementation of that function is very neat. Notice the use of the reduceRight()
method on the array of functions, which ensures that wrapping of higher-order functions happensfrom right to left:

Chapter 7. The Store 118
Implementation of compose
1 function compose(...funcs) {
2 return (...args) => {
3 const last = funcs[funcs.length - 1]
4 const rest = funcs.slice(0, -1)
5
6 return rest.reduceRight(
7 (composed, f) => f(composed),
8 last(...args)
9 )
10 }
11 }
Store Enhancers
Store enhancers are higher-order functions used to enhance the default behavior of the Redux store.In contrast to middleware and reducers, they have access to all internal store methods (even thosenot available to middleware, such as subscribe()).
To give a few examples, there are store enhancers for:
• Store synchronization (between browser tabs or even network clients)• State persistence• Integration with developer tools
Let’s build an example store enhancer that will persist state changes and load initial state fromlocalStorage. To enhance or decorate a store, we need to write a higher-order function that receivesthe original store factory function as a parameter and returns a function similar in signature tocreateStore():
Implementation of store enhancer
1 import { createStore } from 'redux';
2 import { rootReducer } from 'reducers/root';
3
4 const persistStore = () => (next) =>
5 (reducer, initialState, enhancer) => {
6 let store;
7
8 if (typeof initialState !== 'function') {
9 store = next(reducer, initialState, enhancer);
10 } else {

Chapter 7. The Store 119
11 const preloadedState = initialState ||
12 JSON.parse($localStorage.getItem('@@PersistedState') || {})
13
14 store = next(reducer, preloadedState, enhancer);
15 }
16
17 store.subscribe(() => $localStorage.setItem(
18 '@@PersistedState',
19 JSON.stringify(store.getState())
20 ));
21
22 return store;
23 }
We start by creating a store. We first check if an initialState was originally passed. If it was, wecreate the store with it. Otherwise, we read the initial state from localStorage:
Check if initialState was provided
1 let store;
2
3 if (typeof initialState !== 'function') {
4 store = next(reducer, initialState, enhancer);
5 } else {
6 const preloadedState = initialState ||
7 JSON.parse($localStorage.getItem('@@PersistedState') || {})
8
9 store = next(reducer, preloadedState, enhancer);
10 }
Right after our store is initiated, we subscribe to state updates and save the state to localStorage onevery change. This will ensure our state and the local storage are always in sync. Finally, we returnthe decorated store:

Chapter 7. The Store 120
Sync local storage with latest state
1 store.subscribe(() => $localStorage.setItem(
2 '@@PersistedState',
3 JSON.stringify(store.getState())
4 ));
5
6 return store;
This example doesn’t handle errors or edge cases, but it showcases the base of a store enhancer.
To simplify the syntax, Redux allows us to pass the store enhancer as a parameter to createStore():
Passing store enhancer as an argument
1 import { createStore } from 'redux';
2
3 const store = createStore(rootReducer, persistStore());
If you’ve been following along carefully, you may have noticed that in the sample code at thebeginning of the chapter the second parameter to the createStore() function was initialState.Both parameters are optional, and Redux is smart enough to distinguish between the state objectand the store enhancer when you pass only two arguments. However, if you also need an initialstate, the parameters of createStore() should come in the following order:
Passing initial state before store enhancer
1 createStore(rootReducer, initialState, persistStore());
We can use multiple store enhancers to create the final store for our application, and the samecompose() method we saw earlier can be used for store composition as well:
Using compose to combine store enhancers
1 const storeEnhancers = compose(
2 // ...other decorators
3 decorateStore
4 );
5
6 const store = createStore(rootReducer, storeEnhancers);
7
8 store.createdAt // -> timestamp

Chapter 7. The Store 121
applyMiddleware()
One of the best-known store enhancers is called applyMiddleware(). This is currently the only storeenhancer provided by Redux (if you aren’t familiar with middleware, head to Chapter 10 for an in-depth explanation).
Implementation of applyMiddleware
1 export default function applyMiddleware(...middlewares) {
2 return (createStore) => (reducer, preloadedState, enhancer) => {
3 var store = createStore(reducer, preloadedState, enhancer)
4 var dispatch = store.dispatch
5 var chain = []
6
7 var middlewareAPI = {
8 getState: store.getState,
9 dispatch: (action) => dispatch(action)
10 }
11 chain = middlewares.map(middleware => middleware(middlewareAPI))
12 dispatch = compose(...chain)(store.dispatch)
13
14 return { ...store, dispatch }
15 }
16 }
In this example, the word middlewares is used as plural form to distinguish betweensingular form in the ‘map’ function. It is the actual source code of applyMiddleware().
At its core, applyMiddleware() changes the store’s default dispatch() method to pass the actionthrough the chain of middleware provided:
Setup of store
1 var store = createStore(reducer, preloadedState, enhancer)
2 var dispatch = store.dispatch
3 var chain = []
4
5 var middlewareAPI = {
6 getState: store.getState,
7 dispatch: (action) => dispatch(action)
8 }

Chapter 7. The Store 122
First a store is created and the core getState() and dispatch()methods arewrapped into somethingcalled middlewareAPI. This is the object our middleware receives as the first parameter (commonlyconfused with store):
Building the middleware chain
1 chain = middlewares.map(middleware => middleware(middlewareAPI))
The array of middleware is transformed into the result of calling middleware()with middlewareAPI
as its argument. Since the structure of a middleware is api => next => action => {}, after thetransformation, chain holds an array of functions of type next => action => {}.
The last stage is to use the compose() function to decorate the middleware one after another:
Building the dispatch chain
1 dispatch = compose(...chain)(store.dispatch)
This line causes each middleware to decorate the chain of previous ones in a fashion similar to this:
Composing middleware without compose
1 middlewareA(middlewareB(middlewareC(store.dispatch)));
The original store.dispatch() is passed as a parameter to the first wrapper in the chain.
This implementation explains the strange syntax of the Redux middleware (the 3-functionstructure):
1 const myMiddleware =
2 ({ getState, dispatch }) => (next) => (action) => { … }
Other Uses
Store enhancers are powerful tools that allow us to debug stores, rehydrate state on applicationload, persist state to localStorage on every action, sync stores across multiple tabs or even networkconnections, add debugging features, and more. If you’d like an idea of what’s available, MarkErikson has composed a list of third-party store enhancers³⁰ in his awesome redux-ecosystem-links³¹repository.
³⁰https://github.com/markerikson/redux-ecosystem-links/blob/master/store.md³¹https://github.com/markerikson/redux-ecosystem-links

Chapter 7. The Store 123
Summary
In this chapter we learned about the central, most important part of Redux, the store. It holds thewhole state of the application, receives actions, passes them to the reducer function to replacethe state, and notifies us on every change. Basically, you could say that Redux is the storeimplementation.
We learned about higher-order functions, a very powerful functional programming concept thatgives us incredible power to enhance code without touching the source. We also covered uses forstore enhancers in Redux, and took a look at the most common store enhancer, applyMiddleware().This function allows us to intercept and transform dispatched actions before they are propagated toreducers, and we will take a deeper look at it in Chapter 10.
In the next chapter we will look at actions and action creators, the entities we dispatch to the storeto make changes to the application state.

Chapter 8. Actions and ActionCreatorsActions are the driving force of every dynamic application, as they are the medium by which allchanges are communicated within a Redux application. In a Redux application we have two sides:the senders of actions and their receivers. The senders might be event handlers (like keypresses),timeouts, network events, or middleware. The receivers are more limited; in the case of Redux theyare middleware and reducers.
A connection between a sender and a receiver is not necessarily one-to-one. A keypress might causea single action to be sent that will in turn cause both a middleware to send a message to the serverand a reducer to change the state, resulting in a pop-up appearing. This also holds true in the otherdirection, where a single reducer might be listening to multiple actions. While in very simple Reduxapplications theremight be a reducer for each action and vice versa, in large applications this relationbreaks down, and we have multiple actions handled by a single reducer and multiple reducers andmiddleware listening to a single action.
Since the side emitting the actions doesn’t know who might be listening to it, our actions have tocarry all the information needed for the receiving end to be able to understand how to respond.
The simplest way to hold information in JavaScript is to use a plain object, and that is exactly whatan action is:
Plain object-based Action
1 const action = { type: 'MARK_FAVORITE' };
Actions are plain objects containing one required property, the type. The type is a unique keydescribing the action, and it is used by the receiving end to distinguish between actions.
The value of the type property can be anything, though it is considered good practice touse strings to identify actions. While on first thought numbers or ES2016 symbols mightsound like a better solution, both have practical downsides: using numbers makes it hardto debug an application and gives little benefit spacewise, whereas ES2016 symbols willcause issues with server rendering and sending actions across the network to other clients.
In Redux, we send actions to the store, which passes them to middleware and then to reducers. Inorder to notify a store about an action, we use the store’s dispatch() method.
Unlike many Flux implementations, in Redux the store’s dispatch() API is not globally available.You have a few options to access it:

Chapter 8. Actions and Action Creators 125
1. By holding a reference to the store2. Inside middleware3. Through methods provided by special libraries for different frameworks
Here’s a simple example for dispatching actions by holding a direct reference to the store:
Dispatching a simple action
1 import { store } from './lib/store';
2
3 store.dispatch({ type: 'MARK_FAVORITE' });
Passing Parameters to Actions
While the type property in an action is enough for reducers and middleware to know what actionto process, in most cases more information will be required. For example, instead of sending theINCREMENT_COUNTER action 10 times, we could send a single action and specify 10 as an additionalparameter. Since actions in Redux are nothing more than objects, we are free to add as manyproperties as needed. The only limitation is that the type property is required by Redux:
Standard action object
1 store.dispatch({
2 type: 'MARK_FAVORITE',
3 recipeId: 21
4 …
5 });
The object passed to dispatch() will be available to our reducers:
Accessing actions in reducers
1 function reducer(state, action) {
2 console.log(action);
3 return state;
4 }
5
6 // -> { type: 'MARK_FAVORITE', recipeId: 21, ... }
To keep our actions consistent across a large code base, it is a good idea to define a clear scheme forhow the action objects should be structured. We will discuss the scheme later in this chapter.
Action Creators
As our applications grow and develop, we will start encountering more and more code like this:

Chapter 8. Actions and Action Creators 126
Direct object dispatch1 dispatch({
2 type: 'ADD_RECIPE',
3 title: title.trim(),
4 description: description ? description.trim() : ''
5 });
If we decide to use the same action in other places, we will end up duplicating the logic in multiplelocations. Such code is hard to maintain, as we will have to synchronize all the changes between allthe occurrences of the action.
A better approach is to keep the code in one place. We can create a function that will create theaction object for us:
Function to create an action object1 const addRecipe = (title, description = '') => ({
2 type: 'ADD_RECIPE',
3 title: title.trim(),
4 description:description.trim()
5 });
Now we can use it in our code:
Using an action creator1 dispatch(addRecipe(title, description);
Any modification to the content or logic of the action can now be handled in one place: the actioncreation function, also known as the action creator.
Beyond improving the maintainability of our applications, moving the action object creation to afunction allows us to write simpler tests. We can test the logic separately from the place from whichthe function is called.
In a large project, most—if not all—of our actions will have a corresponding action creator function.We will try to never call the dispatch() method by handcrafting the appropriate action object,but rather use an action creator. This might appear to be a lot of overhead initially, but its valuewill become apparent as the project grows. Also, to help reduce boilerplate, there are a number oflibraries and concepts that ease the creation and use of action creators. Those will be discussed laterin this chapter.
Directory Organization
In order to better manage our action creators, we will create a separate directory for them in ourcode base. For smaller projects, it may be enough to group actions in files according to their usagein reducers:

Chapter 8. Actions and Action Creators 127
Simple directory structure
1 actions/
2 recipes.js // Recipe manipulation actions
3 auth.js // User actions (login, logout, etc.)
4 ...
But as our projects grow in both size and complexity, we will subdivide our action creator directorystructure even more. The common approach is to nest actions based on the data type they modify:
Advanced directory structure
1 actions/
2 recipes/
3 favorites.js // Handle favorite recipe logic
4 ...
5 auth/
6 resetting-password.js // Handle password logic
7 permissions.js // Some actions for permissions
8 ...
9 ...
At first glance it might look easier to put action creators with their corresponding reducers,sometimes even in the same files. While this approach might work perfectly in thebeginning, it will start breaking down in large projects. As the complexity grows, theapplication might have multiple reducers acting on the same action or multiple actionswatched by a single reducer. In these cases the grouping stops working, and the developer isforced to start decoupling some of the actions or moving them, ending upwith the structuresuggested here.
Flux Standard Actions
As projects and teams grow in size, it is important to create a convention on the structure of actionobjects. To this end, the open-source community has come together to create the Flux StandardAction³² (FSA) specification. The goal is to have consistency across both a project and third-partylibraries.
The FSA spec defines the structure of actions and a number of optional and required properties. Atits base, an action should have up to four fields:
³²https://github.com/acdlite/flux-standard-action

Chapter 8. Actions and Action Creators 128
FSA object sample
1 const action = {
2 type,
3 error,
4 payload,
5 meta
6 };
Each field has a distinct role:
• type is the regular Redux action identifier.• The error property is a Boolean that indicates whether the action is in an error state. Therationale behind this is that instead of having multiple actions, like 'ADD_RECIPE_SUCCESS'
and 'ADD_RECIPE_ERROR', we can have only one action, 'ADD_RECIPE', and use the error flagto determine the status.
• payload is an object holding all the information needed by the reducers. In our example, thetitle and description would both be passed as the payload property of the action.
• The meta property holds additional metadata about the action that is not necessarily neededby the reducers, but could be consumed by middleware. We will go into detail on how themeta property could be used in the Middleware Chapter.
Implemented as an FSA, our action looks like this:
FSA action example
1 store.dispatch({
2 type: 'ADD_RECIPE',
3 payload: {
4 title: 'Omelette',
5 description: 'Fast and simple'
6 }
7 });;
If the action were in the error state (for example, in the event of a rejected promise or API failure),the payload would hold the error itself, be it an Error() object or any other value defining the error:

Chapter 8. Actions and Action Creators 129
FSA action in error state
1 const action = {
2 type: 'ADD_RECIPE',
3 error: true,
4 payload: new Error('Could not add recipe because...')
5 };
String Constants
In Chapter 2 we briefly discussed the idea of using string constants. To better illustrate the reasoningbehind this approach, let’s consider the problems that using strings for type can cause in a large codebase:
1. Spelling mistakes—If we spell the same string incorrectly in the action or the reducer, ouraction will fire but result in no changes to the state. Worst of all, this will be a silent failurewithout any message to indicate why our action failed to produce its desired effect.
2. Duplicates—Another developer, in a different part of the code base, might use the same stringfor an action. This will result in issues that are very hard to debug, as our action will suddenlycause that developer’s reducers to fire as well, creating unexpected changes to the state.
To avoid these issues, we need to ensure a unique naming convention for our actions to allow bothaction creators and reducers to use the exact same keys. Since JavaScript doesn’t have native enumstructures, we use shared constants to achieve this goal. All the keys used for type are stored in asingle constants file and imported by both action creators and reducers. Using a single file allowsus to rely on JavaScript itself to catch duplication errors. The file will have this form:
constants/action-types.js
1 export const MARK_FAVORITE = 'MARK_FAVORITE';
2 export const ADD_RECIPE = 'ADD_RECIPE';
3 ...
In large applications the naming convention will be more complicated to allow developers morefreedom to create constants for different parts of the application. Even in our simple example, beingable to mark both recipes and comments as favorites will require two different MARK_FAVORITEactions (e.g., RECIPE__MARK_FAVORITE and COMMENT__MARK_FAVORITE):

Chapter 8. Actions and Action Creators 130
constants/action-types.js
1 // Recipes
2 export const ADD_RECIPE = 'ADD_RECIPE';
3 export const DELETE_RECIPE = 'DELETE_RECIPE';
4 export const RECIPE__MARK_FAVORITE = 'RECIPE__MARK_FAVORITE';
5
6 // Comments
7 export const ADD_COMMENT = 'ADD_COMMENT';
8 export const DELETE_COMMENT = 'DELETE_COMMENT';
9 export const COMMENT__MARK_FAVORITE = 'COMMENT__MARK_FAVORITE';
10 ...
Full Action Creators and React Example
Here’s the full example code for using action creators:
constants/action-types.js
1 export const MARK_FAVORITE = 'MARK_FAVORITE';
actions/places.js
1 import { MARK_FAVORITE } from 'constants/action-types';
2
3 const markFavorite = (recipeId) => ({
4 type: MARK_FAVORITE,
5 recipeId,
6 timestamp: Date.now()
7 });
8
9 export markFavorite;
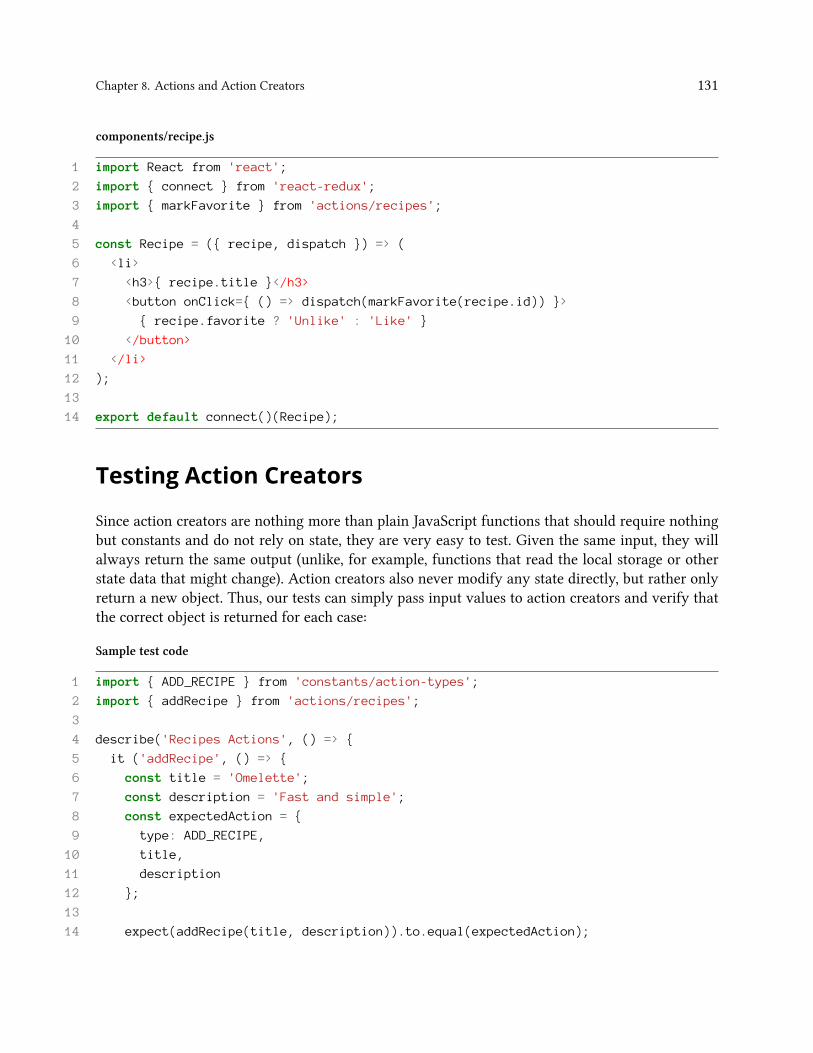
Chapter 8. Actions and Action Creators 131
components/recipe.js
1 import React from 'react';
2 import { connect } from 'react-redux';
3 import { markFavorite } from 'actions/recipes';
4
5 const Recipe = ({ recipe, dispatch }) => (
6 <li>
7 <h3>{ recipe.title }</h3>
8 <button onClick={ () => dispatch(markFavorite(recipe.id)) }>
9 { recipe.favorite ? 'Unlike' : 'Like' }
10 </button>
11 </li>
12 );
13
14 export default connect()(Recipe);
Testing Action Creators
Since action creators are nothing more than plain JavaScript functions that should require nothingbut constants and do not rely on state, they are very easy to test. Given the same input, they willalways return the same output (unlike, for example, functions that read the local storage or otherstate data that might change). Action creators also never modify any state directly, but rather onlyreturn a new object. Thus, our tests can simply pass input values to action creators and verify thatthe correct object is returned for each case:
Sample test code
1 import { ADD_RECIPE } from 'constants/action-types';
2 import { addRecipe } from 'actions/recipes';
3
4 describe('Recipes Actions', () => {
5 it ('addRecipe', () => {
6 const title = 'Omelette';
7 const description = 'Fast and simple';
8 const expectedAction = {
9 type: ADD_RECIPE,
10 title,
11 description
12 };
13
14 expect(addRecipe(title, description)).to.equal(expectedAction);

Chapter 8. Actions and Action Creators 132
15 });
16
17 it ('should set timestamp to now if not given', () => {
18 const description = 'Fast and simple';
19 const expectedAction = {
20 type: ADD_RECIPE,
21 title: 'Untitled',
22 description
23 };
24
25 expect(addRecipe(null, description)).to.equal(expectedAction);
26 });
27 });
More complex action creatorsmight use helper functions to build the action object. A simple examplemight be a helper function trimTitle() that removes whitespace from around a string and is usedby a SET_TITLE action. We would test the method separately from the action creator function itself,only verifying that the action creator called that method and passed it the needed parameters.
redux-thunk
The real power of actions comes with the use of various middleware (discussed more in theMiddleware Chapter). One of themost common and useful ones for learning Redux is redux-thunk³³.In contrast to what we learned before, actions passed to dispatch() don’t have to be objects, as theonly part of Redux that requires actions to be objects is the reducers. Since the middleware get calledbefore an action is passed to the reducers, they can take any type of input and convert it into anobject.
This is exactly what redux-thunk does. When it notices that the action is of type “function” insteadof “object,” it calls the function, passing it the dispatch() and getState() functions as parameters,and passes on the return value of this function as the action to perform. That is, it replaces thefunction with its return value, which should be the plain JavaScript object the reducers expect.
This approach makes our action creators much more powerful, since they now have access to thecurrent state via getState() and can submit more actions via dispatch().
Adding redux-thunk to a project takes two steps:
1. Add the middleware to your project by running npm install --save redux-thunk.2. Load the middleware by adding it to the store using the applyMiddleware() function:
³³https://github.com/gaearon/redux-thunk

Chapter 8. Actions and Action Creators 133
store/store.js
1 import { createStore, applyMiddleware } from 'redux';
2 import thunk from 'redux-thunk';
3 import rootReducer from 'reducers/index';
4
5 const store = createStore(
6 rootReducer,
7 applyMiddleware(thunk)
8 );
9
10 export default store;
This is generic code for adding middleware to your project. We will cover this in moredetail in the Middleware Chapter.
With redux-thunk installed, we can start writing action creators that return functions instead ofobjects. Going back to our previous example, let’s create an action creator that simulates servercommunication by using a delay:
Sample action
1 import { trimmedTitle } from 'utils/strings';
2 import { ADD_RECIPE_STARTED } from 'actions/recipes';
3
4 function addRecipe(title) {
5 return function (dispatch, getState) {
6 const trimmedTitle = trimTitle(title);
7
8 dispatch({ type: ADD_RECIPE_STARTED });
9
10 setTimeout(
11 () => dispatch({ type: ADD_RECIPE, title: trimmedTitle }),
12 1000
13 );
14 }
15 }
The main difference from our previous creators is that we are no longer returning an object butrather a function:

Chapter 8. Actions and Action Creators 134
Sample action
1 function addRecipe(title) {
2 return function(dispatch, getState) {
3 // Action creator's code
4 };
5 }
Or, if we used the ES2016 arrow function style:
Sample action using ES2016 style
1 const addRecipe = (title) => (dispatch, getState) => {
2 // Action creator's code
3 };
First, we use a helper function to remove unneeded whitespace from our titles:
Using helpers in action creators
1 const trimmedTitle = trimTitle(title);
Next, we dispatch an action that might show a spinner in our application by setting a fetching flagsomewhere in our state:
Dispatch on load
1 dispatch({ type: ADD_RECIPE_STARTED });
The last step is to send the ADD_RECIPE action, but delayed by one second:
Set timeout to add recipe after a delay
1 setTimeout(
2 () => dispatch({ type: ADD_RECIPE, title: trimmedTitle }),
3 1000
4 );
In this example one action creator ended up dispatching two different actions. This gives us a newtool, allowing us to generate as many granular actions as needed and even to dispatch no actions atall in certain conditions.
Server Communication
The redux-thunk method can be used to allow simple server communications, simply by replacingthe setTimeout() call from the previous example with an Ajax call to the server:

Chapter 8. Actions and Action Creators 135
An action that goes to the server
1 import * as consts from 'constants/action-types';
2
3 function checkStatus(response) {
4 if (response.status >= 200 && response.status < 300) {
5 return response;
6 }
7
8 throw (new Error(response.statusText));
9 }
10
11 const getRecipes = (limit = 100) => (dispatch) => {
12 dispatch({ type: consts.FETCH_RECIPES_START, limit });
13
14 fetch(`recipes?limit=${ limit }`)
15 .then(checkStatus)
16 .then(response => response.json())
17 .then(data => dispatch({type: consts.FETCH_RECIPES_DONE, data}))
18 .catch(error => dispatch({type: consts.FETCH_RECIPES_ERROR, error}));
19 };
20
21 export getRecipes;
This code might be good for a very simple project, but it includes a lot of boilerplate that will beneeded for each API call we make. In the Middleware Chapter we will discuss a more generic andcleaner approach to server communication.
Using State
Another feature we gain by using redux-thunk is access to the state when processing the action. Thisallows us to dispatch or suppress actions according to the current application state. For example, wecan prevent actions from trying to add recipes with duplicate titles:

Chapter 8. Actions and Action Creators 136
An action that accesses state
1 const addRecipe = (title) => (dispatch, getState) => {
2 const trimmedTitle = trimTitle(title);
3
4 // We don't allow duplicate titles
5 if (getState().recipes.find(place => place.title == trimmedTitle)) {
6 return; // No action is performed
7 }
8
9 dispatch({
10 type: ADD_RECIPE,
11 payload: { title: trimmedTitle }
12 });
13 };
Two new concepts can be seen in this code. We used getState() to get access to the full applicationstate and used a return statement that made our action creator emit no action at all:
An action that accesses state
1 if (getState().recipes.find(place => place.title == trimmedTitle)) {
2 return; // No action is performed
3 }
It is important to consider where such checks are performed. While multiple actions might dispatchrecipe-related manipulations, we might think it is best to do the check on the reducer level (as itis the one modifying the state). Unfortunately, there is no way for the reducer to communicate theproblem back to us, and while it can prevent an action from adding duplicate titles to the list, it can’tdispatch a message out. The only thing a reducer can do in this case is add the error directly to thestate tree.
While this approach might work, it adds complications to the reducer and causes it to be aware ofmultiple parts of the state tree—in our example, not just recipes but also the notifications area—which will make it harder to test and break down to multiple reducers. Thus, it is better to have thevalidation logic in actions or middleware.
Testing
Testing redux-thunk-based actions is usually more complicated than testing regular actions, as itmay require the use of mocks and spies. As such, it is recommended to keep the actions as simpleas possible and break them into multiple functions and helpers to ease testing and understanding.
Let’s create a sample redux-thunk-based action:

Chapter 8. Actions and Action Creators 137
Sample redux-thunk action
1 export const myAction = () => (dispatch, getState) => {
2 const payload = getState();
3
4 dispatch({
5 type: 'MY_ACTION',
6 payload
7 });
8 };
Our action will use the dispatch()method to send an action of type 'MY_ACTION' and use the wholeapplication’s state, obtained via getState(), as a payload.
Unlike with regular actions, we can’t just compare the return value and verify it’s a valid object.Instead, we will need to rely on a new feature, createSpy(). jasmine.createSpy() creates a specialfunction that records any calls made to it by our application. This allows our test to check if thefunction was called, and if so how many times and with what parameters:
Sample test for redux-thunk action
1 describe(actions, () => {
2 it('MY_ACTION', () => {
3 const getState = () => 'DATA';
4 const dispatch = jasmine.createSpy();
5 const expectedAction = { type: 'MY_ACTION', payload: getState() };
6
7 myAction()(dispatch, getState);
8
9 expect(dispatch).toHaveBeenCalledWith(expectedAction);
10 })
11 });
In this example we pass the action creator myAction() twomocked functions: a getState() functionthat returns a const value and a mocked dispatch(). Thus, after calling the action creator, we canverify that the dispatch() function was called correctly and a valid action was passed.
redux-actions
When you start writing a large number of actions, you will notice that most of the code looks thesame and feels like a lot of boilerplate. There are multiple third-party libraries to make the process

Chapter 8. Actions and Action Creators 138
easier and cleaner. The redux-actions³⁴ library is one of the recommended ones, as it is both simpleand FSA-compliant. The library allows us to easily create new actions using the newly providedcreateAction() function. For example:
actions/recipes.js
1 import { createAction } from 'redux-actions';
2 import { ADD_RECIPE } from 'constants/action-types';
3
4 const addRecipePayload = (title) => ({ title });
5
6 export const addRecipe = createAction(ADD_RECIPE, addRecipePayload);
This code generates an action creator that will return an FSA-compliant action. The generated actioncreator will have functionality similar to this function:
Generated action creator
1 function addRecipe(title) {
2 return {
3 type: ADD_RECIPE,
4 payload: {
5 title
6 }
7 };
8 }
If the title is our only payload, we could simplify the call by omitting the second argument:
Simpler action creator
1 export const addRecipe = createAction(ADD_RECIPE);
The resulting action creator would be as follows:
³⁴https://github.com/acdlite/redux-actions

Chapter 8. Actions and Action Creators 139
Simpler action creator’s result
1 function addRecipe(title) {
2 return {
3 type: ADD_RECIPE,
4 payload: {
5 title
6 }
7 };
8 }
We could also pass metadata to the FSA action. For that, we could include a metadata object as athird argument:
Passing metadata
1 export const addRecipe = createAction(
2 ADD_RECIPE,
3 (title) => ({ title }),
4 { silent: true }
5 );
Or, instead of a metadata object, we could use a function to calculate the metadata based on theparameters we pass in the payload:
Dynamic metadata
1 const addRecipeMetadata = (title) => ({
2 silent: true,
3 notifyAdmin: title === 'Omelette'
4 });
5
6 export const addRecipe = createAction(
7 ADD_RECIPE,
8 (title) => ({ title }),
9 addRecipeMetadata
10 );
The usage of the action creator is the same as before. We simply call it with the desired parameters:

Chapter 8. Actions and Action Creators 140
Resulting object with dynamic metadata
1 dispatch(addRecipe('Belgian Waffles'));
2
3 // The dispatched object:
4 {
5 type: 'ADD_RECIPE',
6 error: false,
7 payload: {
8 title: 'Belgian Waffles'
9 },
10 meta: {
11 silent: true,
12 notifyAdmin: false
13 }
14 }
Errors
The action creator will automatically handle errors for us if passed an Error object. It will generatean object with error = true and the payload set to the Error object:
Dispatching errors
1 const error = new Error('Server responded with 500');
2
3 dispatch(addRecipe(error));
4
5 // The dispatched object:
6 {
7 type: 'ADD_RECIPE',
8 error: true,
9 payload: Error(...),
10 meta: { ... }
11 }
createAction() Example
Here’s a full example of using createAction():

Chapter 8. Actions and Action Creators 141
Dispatching errors
1 const addRecipe = createAction(
2 ADD_RECIPE,
3 (title, description ) => (...args),
4 { silent: true }
5 );
6
7 const addRecipeAsync = (title, description = '') => {
8 const details = { ...args };
9
10 return (dispatch) => {
11 fetch('/recipes', {
12 method: 'post',
13 body: JSON.stringify(details)
14 })
15 .then(
16 response => dispatch(addRecipe(details)),
17 error => dispatch(addRecipe(new Error(error)))
18 );
19 }
20 };
In this example, we use the fetch promise to determine whether to create a successful action or anerror one:
Passing the promise directly to the action creator
1 response => dispatch(addRecipe(details)),
2 error => dispatch(addRecipe(new Error(error)))
Using redux-actions with redux-promise
redux-actions can be used in conjunction with redux-promise³⁵ to simplify the code even more.
The redux-promise library can automatically dispatch FSA-compliant actions and set the error andpayload fields for us. It adds the ability to dispatch() a promise (not just an object or function) andknows how to automatically handle the resolve and reject functionality of promises:
³⁵https://github.com/acdlite/redux-promise

Chapter 8. Actions and Action Creators 142
Automatically handling promises
1 const addRecipe = createAction(ADD_RECIPE);
2
3 export function addRecipeAsync(details) {
4 return () => addRecipe(
5 fetch('/recipes', {
6 method: 'post',
7 body: JSON.stringify(details)
8 })
9 .then(response => response.json())
10 );
11 }
The magic part here is that we pass a promise to addRecipe() that will take care of creating theappropriate FSA-compliant action depending on whether the promise is resolved or rejected:
Passing a promise to an action creator
1 return () => addRecipe(
2 fetch('/recipes', {
Our only use of then() is to convert the data we get from fetch() into JSON:
Adding another stage to promise resolution
1 .then(response => response.json())
This line doesn’t return data, but only modifies the promise that we return from the action creatorand that the caller will send to dispatch().
Summary
In this chapter we covered action creators, the fuel running our application’s engine. We sawthat Redux is all about simplicity—actions are plain objects and action creators are just functionsreturning plain objects.
We also saw how we can benefit from ES2016 by dramatically simplifying our syntax.
In the next chapter we will look at reducers, the components of our Redux application that respondto actions.

Chapter 9. ReducersThe word reducer is commonly associated in computer science with a function that takes an arrayor object and converts it to a simpler structure—for example, summing all the items in an array. InRedux, the role of the reducer is somewhat different: reducers create a new state out of the old one,based on an action.
In essence, a reducer is a simple JavaScript function that receives two parameters (two objects) andreturns an object (a modified copy of the first argument):
A simple reducer example
1 const sum = (result, next) => result + next;
2
3 [1,2,3].reduce(sum); // -> 6
Reducers in Redux are pure functions, meaning they don’t have any side effects such as changinglocal storage, contacting the server, or saving any data in variables. A typical reducer looks like this:
Basic reducer
1 function reducer(state, action) {
2 switch (action.type) {
3
4 case 'ADD_RECIPE':
5 // Create new state with a recipe
6
7 default:
8 return state;
9 }
10 }
Reducers in Practice
In Redux, reducers are the final stage in the unidirectional data flow. After an action is dispatchedto the store and has passed through all the middleware, reducers receive it together with the currentstate of the application. Then they create a new state that has been modified according to the actionand return it to the store.

Chapter 9. Reducers 144
The way we connect the store and the reducers is via the createStore()method, which can receivethree parameters: a reducer, an optional initial state, and an optional store enhancer (covered indetail in the Store and Store Enhancers Chapter.
As an example, we will use the application built in Chapter 2—a simple Recipe Book application.
Our state contains three substates:
• Recipes – A list of recipes• Ingredients – A list of ingredients and amounts used in each recipe• UI – An object containing the state of various UI elements
We support a number of actions, like ADD_RECIPE, FETCH_RECIPES, and SET_RECIPES.
The simplest approach to build a reducer would be to use a large switch statement that knows howto handle all the actions our application supports. But it is quite clear that this approach will breakdown fast as our application (and the number of actions) grows.
Using a switch statement to build a reducer
1 switch (action.type) {
2
3 case ‘ADD_RECIPE’:
4 /* handle add recipe action */
5
6 case ‘FETCH_RECIPES’:
7 /* handle fetch recipes action */
8
9 ...
10 }
Reducer Separation
The obvious solution would be to find a way to split the reducer code into multiple chunks. Theway Redux handles this is by creating multiple reducers. The reducer passed as a first argument tocreateStore() is a plain function, and we can extract code out of it to put in other functions.
Splitting and writing reducers becomes a much easier job if we correctly build the structure of thestate in our store. Given our example of the Recipe Book, we can see that we can create a reducerfor each of the substates. What’s more, each of the reducers only needs to know about its part of thestate, and they have no dependency on each other. For example, the recipes reducer only handlesrecipe management, like adding and removing recipes, and doesn’t care about how ingredients orthe UI states are managed.

Chapter 9. Reducers 145
Following this separation of concerns, we can put each reducer into a different file and have a singleroot reducer manage all of them. Another side effect of this approach is that the root reducer willpass each of its children only the part of the state that it cares about (e.g., the ingredients reducerwill only get the ingredients substate of the store). This ensures the individual reducers can’t “breakout” out of their encapsulation.
Recipes reducer
1 const initialState = [];
2
3 export default function recipesReducer(recipes = initialState, action) {
4 switch (action.type) {
5 case ADD_RECIPE:
6 return [...recipes, action.payload];
7 ...
8 }
9 }
Ingredients reducer
1 const initialState = [];
2
3 export default function ingredientsReducer(ingredients = initialState, action) {
4 switch (action.type) {
5 case ADD_INGREDIENT:
6 return [...ingredients, action.payload];
7 ...
8 }
9 }
Root reducer
1 import recipesReducer from 'reducers/recipes';
2 import ingredientsReducer from 'reducers/ingredients';
3
4 const rootReducer = (state = {}, action) => Object.assign({}, state, {
5 recipes: recipesReducer(state.recipes, action),
6 ingredients: ingredientsReducer(state.ingredients, action)
7 });
8
9 export default rootReducer;

Chapter 9. Reducers 146
This approach results in smaller, cleaner, more testable reducers. Each of the reducers receives asubset of the whole state tree and is responsible only for that, without even being aware of the otherparts of the state. As the project and the complexity of the state grows, more nested reducers appear,each responsible for a smaller subset of the state tree.
Combining Reducers
This technique of reducer combination is so convenient and broadly used that Redux provides a veryuseful function named combineReducers() to facilitate it. This helper function does exactly whatrootReducer() did in our previous example, with some additions and validations:
Root reducer using combineReducers()
1 import { combineReducers } from 'redux';
2 import recipesReducer from 'reducers/recipes';
3 import ingredientsReducer from 'reducers/ingredients';
4
5 const rootReducer = combineReducers({
6 recipes: recipesReducer,
7 ingredients: ingredientsReducer
8 });
9
10 export const store = createStore(rootReducer);
We can make this code even simpler by using ES2016’s property shorthand feature:
Using ES2016 syntax in combineReducers()
1 import { combineReducers } from 'redux';
2 import recipes from 'reducers/recipes';
3 import ingredients from 'reducers/ingredients';
4
5 const rootReducer = combineReducers({ recipes, ingredients });
6
7 export const store = createStore(rootReducer);
In this example we provided combineReducers() with a configuration object holding two keysnamed recipes and ingredients. The ES2016 syntax we used automatically assigned the valueof each key to be the corresponding reducer.
It is important to note that combineReducers() is not limited to the root reducer only. As our stategrows in size and depth, nested reducers will be combining other reducers for substate calculations.Using nested combineReducers() calls and other combination methods is a common practice inlarger projects.

Chapter 9. Reducers 147
Default Values
One of the requirements of combineReducers() is for each reducer to define the default value forits substate. Both our recipes and ingredients reducers defined the initial state for their subtrees asan empty object. Using this approach, the structure of the state tree as a whole is not defined in asingle place but rather built up by the reducers. This guarantees that changes to the tree require usonly to change the applicable reducers and do not affect the rest of the tree.
This is possible because when the store is created, Redux dispatches a special action called@@redux/INIT. Each reducer receives that action together with the undefined initial state, whichgets replaced with the default parameter defined inside the reducer. Since our switch statements donot process this special action type and simpy return the state (previously assigned by the defaultparameter), the initial state of the store is automatically populated by the reducers.
Tree Mirroring
This brings us to an important conclusion: that we want to structure our reducers tree to mimicthe application state tree. As a rule of thumb, we will want to have a reducer for each leaf of thetree. It would also be handy to mimic the folder structure in the reducers directory, as it will beself-depicting of how the state tree is structured.
As complicated manipulations might be required to add some parts of the tree, some reducersmight not fall into this pattern. We might find ourselves having two or more reducers processthe same subtree (sequentially), or a single reducer operating on multiple branches (if it needs toupdate structures at two different branches). This might cause complications in the structure andcomposition of our application. Such issues can usually be avoided by normalizing the tree, splittinga single action into multiple ones, and other Redux tricks.
Alternative to switch Statements
After a while, it becomes apparent that most reducers are just switch statements over action.type.Since the switch syntax can be hard to read and prone to errors, there are a few libraries that try tomake writing reducers easier and cleaner.
While it is most common for a reducer to examine the type property of the action todetermine if it should act, in some cases other parts of the action’s object are used. Forexample, you might want to show an error notification on every action that has an errorin the payload.
A common library is redux-create-reducer³⁶, which builds a reducer from a configuration objectthat defines how to respond to different actions:
³⁶https://github.com/kolodny/redux-create-reducer
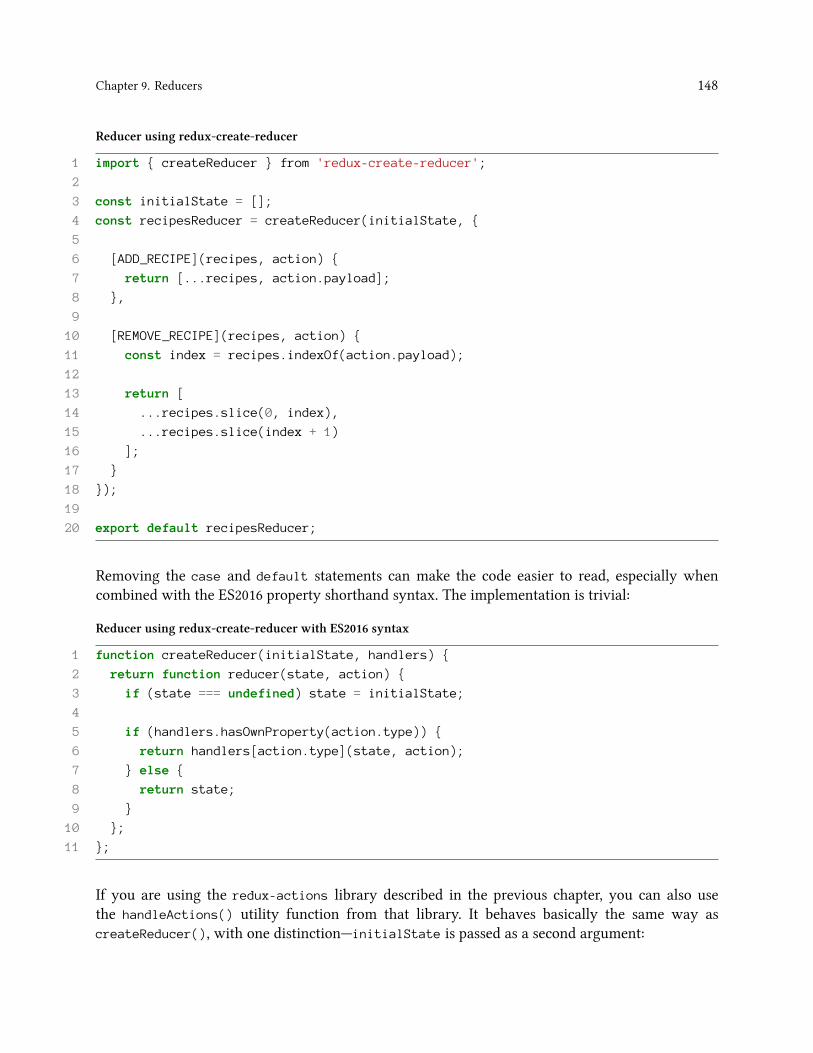
Chapter 9. Reducers 148
Reducer using redux-create-reducer
1 import { createReducer } from 'redux-create-reducer';
2
3 const initialState = [];
4 const recipesReducer = createReducer(initialState, {
5
6 [ADD_RECIPE](recipes, action) {
7 return [...recipes, action.payload];
8 },
9
10 [REMOVE_RECIPE](recipes, action) {
11 const index = recipes.indexOf(action.payload);
12
13 return [
14 ...recipes.slice(0, index),
15 ...recipes.slice(index + 1)
16 ];
17 }
18 });
19
20 export default recipesReducer;
Removing the case and default statements can make the code easier to read, especially whencombined with the ES2016 property shorthand syntax. The implementation is trivial:
Reducer using redux-create-reducer with ES2016 syntax
1 function createReducer(initialState, handlers) {
2 return function reducer(state, action) {
3 if (state === undefined) state = initialState;
4
5 if (handlers.hasOwnProperty(action.type)) {
6 return handlers[action.type](state, action);
7 } else {
8 return state;
9 }
10 };
11 };
If you are using the redux-actions library described in the previous chapter, you can also usethe handleActions() utility function from that library. It behaves basically the same way ascreateReducer(), with one distinction—initialState is passed as a second argument:

Chapter 9. Reducers 149
Using redux-actions instead of createReducer()
1 import { handleActions } from 'redux-actions';
2
3 const initialState = [];
4
5 const recipesReducer = handleActions({
6 [ADD_RECIPE](recipes, action) {
7 return [...recipes, action.payload];
8 },
9
10 [REMOVE_RECIPE](recipes, action) {
11 const index = recipes.indexOf(action.payload);
12 return [
13 ...recipes.slice(0, index),
14 ...recipes.slice(index + 1)
15 ];
16 }
17 }, initialState);
18
19 export default recipesReducer;
If you are using Immutable.js, you might also want to take a look at the redux-immutablejs³⁷ library,which provides you with createReducer() and combineReducers() functions that are aware ofImmutable.js features like getters and setters.
Avoiding Mutations
The most important thing about reducers in Redux is that they should never mutate the existingstate. There are a number of functions in JavaScript that can help when working with immutableobjects.
Why Do We Need to Avoid Mutations?
One of the reasons behind the immutability requirement for the reducers is due to change detectionrequirements. After the store passes the current state and action to the root reducer, it and the variousUI components of the application need a way to determine what changes, if any, have happened tothe global state. For small objects, a deep compare or other similar methods might suffice. But if thestate is large and only a small part may have changed due to an action, we need a faster and bettermethod.
³⁷https://github.com/indexiatech/redux-immutablejs

Chapter 9. Reducers 150
There are a number of ways to detect a change made to a tree, each with its pros and cons. Amongthe many solutions, one is to mark where changes were made in the tree. We can use simple methodslike setting a dirty flag, use more complicated approaches like adding a version to each node, or(the preferred Redux way) use reference comparison.
If you are unsure of how references work, jump ahead to the next two chapters and comeback to this one after.
Redux and its accompanying libraries rely on reference comparison. After the root reducer has run,we should be able to compare the state at each level of the state tree with the same level on theprevious tree to determine if it has changed. But instead of comparing each key and value, we cancompare only the reference or the pointer to the structure.
In Redux, each changed node or leaf is replaced by a new copy of itself that has the changed data.Since the node’s parent still points to the old copy of the node, we need to create a copy of it aswell, with the new copy pointing to the new child. This process continues with each parent beingrecreated until we reach the root of the tree. This means that a change to a leaf must cause its parent,the parent’s parent, etc. to be modified—i.e., it causes new objects to be created. The followingillustration shows the state before and after it is run through a reducers tree and highlights thechanged nodes.

Chapter 9. Reducers 151
Example of changing nodes
The main reason reference comparison is used is that this method ensures that each reference to theprevious state is kept coherent. We can examine it at any time and get the state exactly as it wasbefore a change. If we create an array and push the current state into it before running actions, wewill be able to pick any of the pointers to the previous state in the array and see the state tree exactlyas it was before all the subsequent actions happened. And no matter how many more actions weprocess, our original pointers stay exactly as they were.
This might sound similar to copying the state each time before changing it, but the reference systemwill not require 10 times the memory for 10 states. It will smartly reuse all the unchanged nodes.Consider the next illustration, where two different actions have been run on the state, and how thethree trees look afterward.
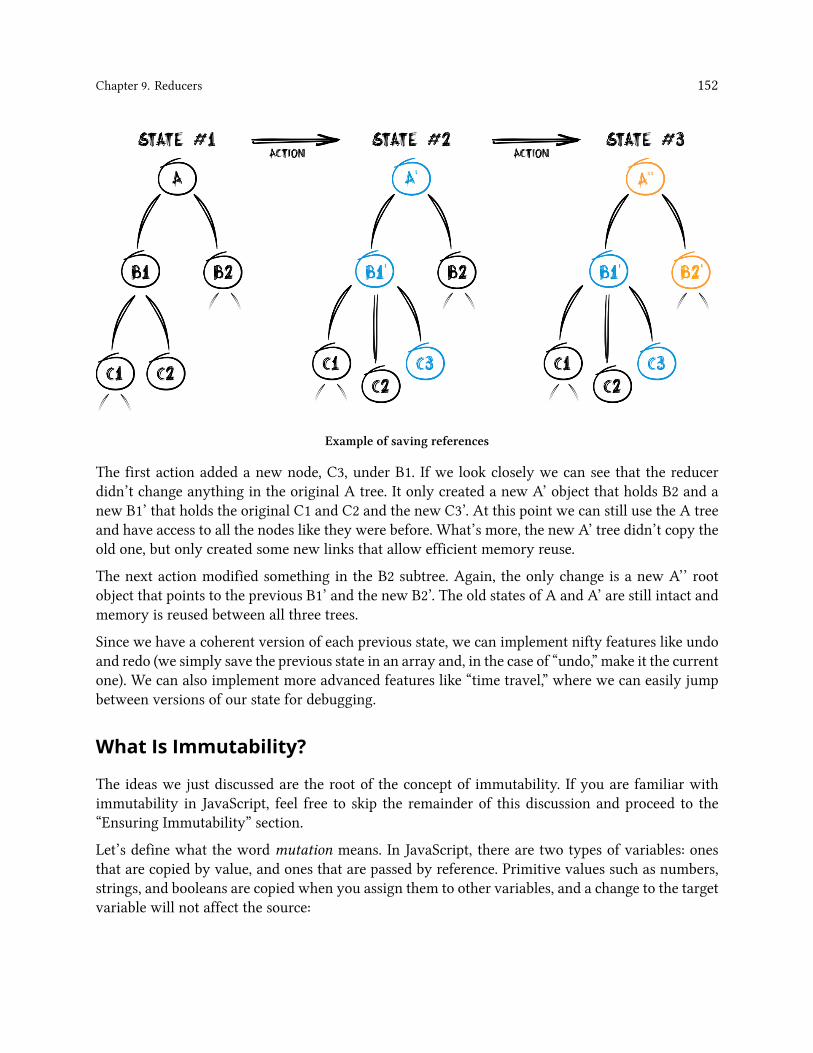
Chapter 9. Reducers 152
Example of saving references
The first action added a new node, C3, under B1. If we look closely we can see that the reducerdidn’t change anything in the original A tree. It only created a new A’ object that holds B2 and anew B1’ that holds the original C1 and C2 and the new C3’. At this point we can still use the A treeand have access to all the nodes like they were before. What’s more, the new A’ tree didn’t copy theold one, but only created some new links that allow efficient memory reuse.
The next action modified something in the B2 subtree. Again, the only change is a new A’’ rootobject that points to the previous B1’ and the new B2’. The old states of A and A’ are still intact andmemory is reused between all three trees.
Since we have a coherent version of each previous state, we can implement nifty features like undoand redo (we simply save the previous state in an array and, in the case of “undo,” make it the currentone). We can also implement more advanced features like “time travel,” where we can easily jumpbetween versions of our state for debugging.
What Is Immutability?
The ideas we just discussed are the root of the concept of immutability. If you are familiar withimmutability in JavaScript, feel free to skip the remainder of this discussion and proceed to the“Ensuring Immutability” section.
Let’s define what the word mutation means. In JavaScript, there are two types of variables: onesthat are copied by value, and ones that are passed by reference. Primitive values such as numbers,strings, and booleans are copied when you assign them to other variables, and a change to the targetvariable will not affect the source:

Chapter 9. Reducers 153
Primitive values example
1 let string = "Hello";
2 let copiedString = string;
3
4 copiedString += " World!";
5
6 console.log(string); // => "Hello"
7 console.log(copiedString); => "Hello World!"
In contrast, collections in JavaScript aren’t copied when you assign them; they only receive a pointerto the location inmemory of the object pointed to by the source variable. This means that any changeto the new variable will modify the same memory location, which is pointed to by both the old andnew variables:
Collections example
1 const object = {};
2 const referencedObject = object;
3
4 referencedObject.number = 42;
5
6 console.log(object); // => { number: 42 }
7 console.log(referencedObject); // => { number: 42 }
As you can see, the original object is changed when we change the copy. We used const here toemphasize that a constant in JavaScript holds only a pointer to the object, not its value, and no errorwill be thrown if you change the properties of the object (or the contents of an array). This is alsotrue for collections passed as arguments to functions, as what is being passed is the reference andnot the value itself.
Luckily for us, ES2016 lets us avoid mutations for collections in a much cleaner way than before,thanks to the Object.assign() method and the spread operator.
The spread operator is fully supported by the ES2016 standard. More information isavailable on MDN³⁸.
³⁸https://developer.mozilla.org/en/docs/Web/JavaScript/Reference/Operators/Spread_operator

Chapter 9. Reducers 154
Objects
Object.assign() can be used to copy all the key/value pairs of one or more source objects into onetarget object. The method receives the following parameters:
1. The target object to copy to2. One or more source objects to copy from
Complete Object.assign() documentation is available on MDN³⁹.
Since our reducers need to create a new object and make some changes to it, we will pass a newempty object as the first parameter to Object.assign(). The second parameter will be the originalsubtree to copy and the third will contain any changes we want to make to the object. This willresult in us always having a fresh object with a new reference, having all the key/value pairs fromthe original state and any overrides needed by the current action:
Example of Object.assign()
1 function reduce(state, action) {
2 const overrides = { price: 0 };
3
4 return Object.assign({}, state, overrides);
5 }
6
7 const state = { ... };
8 const newState = reducer(state, action);
9
10 state === newState; // false!
Deleting properties can be done in a similar way using ES2016 syntax. To delete the key name fromour state we can use the following:
Example of deleting a key from an object
1 return Object.assign({}, state, { name: undefined } );
Arrays
Arrays are a bit trickier, since they have multiple methods for adding and removing values. Ingeneral, you just have to remember which methods create a new copy of the array and which changethe original one. For your convenience, here is a table outlining the basic array methods.
³⁹https://developer.mozilla.org/en/docs/Web/JavaScript/Reference/Global_Objects/Object/assign

Chapter 9. Reducers 155
Mutating arrays
Safe methods Mutating methods
concat() push()
slice() splice()
map() pop()
reduce() shift()
reduceRight() unshift()
filter() fill()
reverse()
sort()
The basic array operations we will be doing in most reducers are appending, deleting, andmodifyingan array. To keep to the immutability principles, we can achieve these using the following methods:
Adding items to an array with ES2016
1 function reducer(state, action) {
2 return state.concat(newValue);
3 }
Removing items from an array with ES2016
1 function reducer(state, action) {
2 return state.filter(item => item.id !== action.payload);
3 }
Changing items in an array with ES2016
1 function reducer(state, action) {
2 return state.map((item) => item.id !== action.payload
3 ? item
4 : Object.assign({}, item, { favorite: action.payload }
5 );
6 }
Ensuring Immutability
The bitter truth is that in teams with more than one developer, we can’t always rely on everyoneavoiding state mutations all the time. As humans, we make mistakes, and even with the strictest pullrequest, code review, and testing practices, sometimes they crawl into the code base. Fortunately,

Chapter 9. Reducers 156
there are a number of methods and tools that strive to protect developers from these hard-to-findbugs.
One approach is to use libraries like deep-freeze⁴⁰ that will throw errors every time someone triesto mutate a “frozen” object. While JavaScript provides an Object.freeze() method, it freezes onlythe object it is applied to, not its children. deep-freeze and similar libraries perform nested freezesand method overrides to better catch such errors.
Another approach is to use libraries that manage truly immutable objects. While they add additionaldependencies to the project, they offer a number of benefits as well: they ensure true immutability,offer cleaner syntax to update collections, support nested objects and provide performance improve-ments on very large data sets.
The most common library is Facebook’s Immutable.js⁴¹, which offers a number of key advantages(in addition to many more advanced features):
• Fast updates on very large objects and arrays• Lazy sequences• Additional data types not available in plain JavaScript• Convenient methods for deep mutation of trees• Batched updates
It also has a few disadvantages:
• Additional large dependency for the project• Requires the use of custom getters and setters to access the data• Might degrade performance where large structures are not used
It is important to carefully consider your state tree before choosing an immutable library. Theperformance gains might only become perceptible for a small percentage of the project, and thelibrarywill require all of the developers to understand a new access syntax and collection ofmethods.
Another library in this space is seamless-immutable⁴², which is smaller, works on plain JavaScriptobjects, and treats immutable objects the same way as regular JavaScript objects (though it hassimilar convenient setters to Immutable.js). Its author has written a great post⁴³ where he describessome of the issues he had with Immutable.js and what his reasoning was for creating a smallerlibrary.
seamless-immutable does not offer many of the advantages of Immutable.js (sequences,batching, smart underlying data structures, etc.), and you can’t use advanced ES2016 datastructures with it, such as Map, Set, WeakMap, and WeakSet.
⁴⁰https://www.npmjs.com/package/deep-freeze⁴¹https://facebook.github.io/immutable-js/⁴²https://github.com/rtfeldman/seamless-immutable⁴³http://tech.noredink.com/post/107617838018/switching-from-immutablejs-to-seamless-immutable

Chapter 9. Reducers 157
The last approach is to use special helper functions that can receive a regular object and aninstruction on how to change it and return a new object as a result. There is such an immutabilityhelper⁴⁴ named update(). Its syntax might look a bit weird, but if you don’t want to work withimmutable objects and clog object prototypes with new functions, it might be a good option.
Example of using the update() function
1 import update from 'immutability-helper';
2
3 const newData = update(myData, {
4 x: { y: { z: { $set: 7 }}},
5 a: { b: { $push: [9] }}
6 });
Higher-Order Reducers
The power of Redux is that it allows you to solve complex problems using functional programming.One approach is to use higher-order functions. Since reducers are nothing more than pure functions,we canwrap them in other functions and create very simple solutions for very complicated problems.
There are a few good examples of using higher-order reducers—for example, for implementingundo/redo functionality. There is a library called redux-undo⁴⁵ that takes your reducer and enhancesit with undo functionality. It creates three substates: past, present, and future. Every time yourreducer creates a new state, the previous one is pushed to the past states array and the new onebecomes the present state. You can then use special actions to undo, redo, or reset the present state.
Using a higher-order reducer is as simple as passing your reducer into an imported function:
Using a higher-order reducer
1 import { combineReducers } from 'redux';
2 import recipesReducer from 'reducers/recipes';
3 import ingredientsReducer from 'reducers/ingredients';
4 import undoable from 'redux-undo';
5
6 const rootReducer = combineReducers({
7 recipes: undoable(recipesReducer),
8 ingredients: ingredientsReducer
9 });
⁴⁴https://github.com/kolodny/immutability-helper⁴⁵https://github.com/omnidan/redux-undo

Chapter 9. Reducers 158
Another example of a higher-order reducer is redux-ignore⁴⁶. This library allows your reducers toimmediately return the current state without handling the passed action, or to handle only a definedsubset of actions.
The following example will disable removing recipes from our recipe book. You might even use itto filter allowed actions based on user roles:
Using the ignoreActions() higher-order reducer
1 import { combineReducers } from 'redux';
2 import recipesReducer from 'reducers/recipes';
3 import ingredientsReducer from 'reducers/ingredients';
4 import { ignoreActions } from 'redux-ignore';
5 import { REMOVE_RECIPE } from 'constants/action-types';
6
7 const rootReducer = combineReducers({
8 recipes: ignoreActions(recipesReducer, [REMOVE_RECIPE])
9 ingredients: ingredientsReducer
10 });
Testing Reducers
The fact that reducers are just pure functions allows us to write small and concise tests for them. Totest a reducer we need to define an initial state, an action and the state we expect to have. Callingthe reducer with the first two should always produce the expected state.
This idea works best when we avoid a lot of logic and control flow in reducers.
Two things that are often forgotten while testing reducers are testing unknown actions andensuring the immutability of initial and expected objects.
Summary
In this chapter we learned about the part of Redux responsible for changing the applicationstate. Reducers are meant to be pure functions that should never mutate the state or make anyasynchronous calls. We also learned how to avoid and catch mutations in JavaScript.
In the next and final chapter, we are going to talk about middleware, the most powerful entityprovided by Redux. When used wisely, middleware can reduce a lot of code and let us handle verycomplicated scenarios with ease.
⁴⁶https://github.com/omnidan/redux-ignore

Chapter 10. MiddlewareMiddleware are one of Redux’s most powerful concepts and will hold the bulk of our application’slogic and generic service code.
To understand the concept of middleware, it’s best first to examine the regular data flow in Redux.Any action dispatched to the store is passed to the root reducer together with the current state togenerate a new one. The concept of middleware allows us to add code that will run before the actionis passed to the reducer.
In essence, we can monitor all the actions being sent to the Redux store and execute arbitrary codebefore allowing an action to continue to the reducers. Multiple middleware can be added in a chain,thus allowing each to run its own logic, one after another, before letting the action pass through.The basic structure of a middleware is as follows:
Basic structure of a middleware
1 const myMiddleware = ({ getState, dispatch }) => next => action => {
2 next(action);
3 };
This declarationmight seem confusing, but it should become clear once it’s examined step by step. Atits base, a middleware is a function that receives from Redux an object that contains the getState()and dispatch() functions. The middleware returns back a function that receives next() and in turnreturns another function that receives action and finally contains our custom middleware code.
From the user’s perspective, a simple const myMiddleware = ({ getState, dispatch,
next, action }) => {} might have seemed sufficient. The more complicated structure isdue to Redux internals.
The getState() and dispatch()methods should be familiar as they are APIs from the Redux store.The action parameter is the current Redux action being passed to the store. Only the next() functionshould look unfamiliar at this point.
It is sometimes incorrectly noted in teaching material that the parameter passed to themiddleware is store (as it appears to have getState() and dispatch()). In practice, it’san object holding only those two APIs and not the other APIs exported by the Redux store.

Chapter 10. Middleware 160
Understanding next()
If we were to build our own implementation of a middleware, we would probably want the abilityto run code both before an action is passed to the reducers and after. One approach would be todefine two different callbacks for before and after.
Redux middleware takes a different approach and gives us the next() function. Calling it with anaction will cause it to propagate down the middleware chain, calling the root reducer and updatingthe state of the store. This allows us to add code before and after passing the action to the reducers:
Example of code
1 const logMiddleware => ({ getState, dispatch }) => next => action => {
2 console.log("Before reducers have run");
3 next(action);
4 console.log("After the reducers have run");
5 };
This nifty trick gives us more power than might initially be apparent. Since we are responsible forcalling next() and passing it the action, we can choose to suppress next() in certain conditions orevenmodify the current action before passing it on. Failing to call next(action) inside amiddlewarewill prevent the action from reaching the other middleware and the store.
Our First Middleware
To demonstrate the power of middleware, let’s build a special debug middleware that measures howmuch time it takes for our reducers to process an action.
Folder Structure
A common approach is to keep all our middleware implementations in a middleware directory atour application root (similar to reducers and actions). As our application grows, we might findourselves adding more subdirectories to organize the middleware, usually by functionality (utilityor authorization).
As with software and hardware, we use middleware as both the singular and the pluralform of the word. In some sources, including the code for applyMiddleware() shown inChapter 8, you may see middlewares used as the plural form.
The Measure Middleware
Our time measuring middleware looks like this:

Chapter 10. Middleware 161
middleware/measure.js
1 const measureMiddleware = () => next => action => {
2 console.time(action.type);
3 next(action);
4 console.timeEnd(action.type);
5 };
6
7 export default measureMiddleware;
To create this middleware we used the time() and timeEnd() console methods that record abenchmark with the name provided as a string. We start the timing before running an action, usingthe action.type as a name. Then, we tell the browser to print the timing after the action is done.This way we can potentially catch poorly performing reducer implementations.
An interesting thing to note here is that this middleware completely ignores the first parameter (theobject holding getState() and dispatch()), as we simply don’t need it for our example.
Connecting to Redux
Adding a middleware to the Redux store can be done only during the store creation process:
Regular Redux store
1 import { createStore } from 'redux';
2 import reducer from 'reducers/root';
3
4 const store = createStore(reducer);
5 };
The simplest way to connect a middleware to the Redux store is to use the applyMiddleware() storeenhancer available as an API from Redux itself (store enhancers are explained in Chapter 8:
Create store and register the measureMiddleware
1 import { createStore, applyMiddleware } from 'redux';
2 import reducer from 'reducers/root';
3 import measureMiddleware from 'middleware/measure';
4
5 const store = createStore(reducer, applyMiddleware(measureMiddleware));
The applyMiddleware() function can receive an arbitrary number of middleware as arguments andcreate a chain to be connected to the store:

Chapter 10. Middleware 162
1 applyMiddleware(middlewareA, middlewareB, middlewareC);
Note that the order of registration is important. The first middleware, in our casemiddlewareA, will get the action before middlewareB. And if the code there decides tomodify or suppress the action, it will never reach either middlewareB or middlewareC.
In real-world applications, you may prefer to apply some middleware only in development or pro-duction environments. For example, our measureMiddleware might output unwanted informationin the live product, and an analyticsMiddleware might report false analytics in development.
Using the spread operator from ES2016, we can apply middleware to the store conditionally:
Conditionally apply middleware
1 const middleware = [apiMiddleware];
2
3 if (development) {
4 middleware.push(measureMiddleware);
5 } else {
6 middleware.push(analyticsMiddleware);
7 }
8
9 const store = createStore(reducer, applyMiddleware(...middleware));
Async Actions
What makes middleware so powerful is the access to both getState() and dispatch(), as thesefunctions allow a middleware to run asynchronous actions and give it full access to the store. Avery simple example would be an action debounce middleware. Suppose we have an autocompletefield, and we want to prevent the AUTO_COMPLETE action from running as the user types in a searchterm. We would probably want to wait 500ms for the user to type in part of the search string, andthen run the query with the latest value.
We can create a debounce middleware that will catch any action with the debounce key set in itsmetadata and ensure it is delayed by that number of milliseconds. Any additional action of the sametype that is passed before the debounce timer expires will not be passed to reducers but only savedas the “latest action” and executed once the debounce timer has expired:

Chapter 10. Middleware 163
Debounce flow
1 0ms: dispatch({ type: 'AUTO_COMPLETE', payload: 'c', meta: { debounce: 50 }};
2 // Suppressed
3
4 10ms: dispatch({ type: 'AUTO_COMPLETE', payload: 'ca', meta: { debounce: 50 }};
5 // Suppressed
6
7 20ms: dispatch({ type: 'AUTO_COMPLETE', payload: 'cat', meta: { debounce: 50 }};
8 // Suppressed
9
10 50ms:
11 // The action with payload 'cat' is dispatched by the middleware.
The skeleton of our middleware needs to inspect only actions that have the required debounce keyset in their metadata:
Debounce middleware skeleton
1 const debounceMiddleware = () => next => action => {
2 const { debounce } = action.meta || {};
3
4 if (!debounce) {
5 return next(action);
6 }
7
8 // TODO: Handle debouncing
9 };
10
11 export default debounceMiddleware;
Since we want each action type to have a different debounce queue, we will create a pending objectthat will hold information for each action type. In our case, we only need a handle to the latesttimeout for each action type:

Chapter 10. Middleware 164
Saving latest debounced action object
1 // Object to hold debounced actions (referenced by action.type)
2 const pending = {};
3
4 const debounceMiddleware = () => next => action => {
5 const { debounce } = action.meta || {};
6
7 if (!debounce) {
8 return next(action);
9 }
10
11 if (pending[action.type]) {
12 clearTimeout(pending[action.type])
13 }
14
15 // Save latest action object
16 pending[action.type] = setTimeout(/* implement debounce */);
17 };
If there is already a pending action of this type, we cancel the timeout and create a new timeoutto handle this action. The previous one can be safely ignored—for example, in our case if an ac-tion { type: 'AUTO_COMPLETE', payload: 'cat' } comes right after { type: 'AUTO_COMPLETE',
payload: 'ca' }, we can safely ignore the one with 'ca' and only call the autocomplete API for'cat':
Timeout handler code
1 setTimeout(
2 () => {
3 delete pending[action.type];
4 next(action);
5 },
6 debounce
7 );
Once the timeout for the latest action has elapsed, we clear the key from our pending object andnext()method to allow the last delayed action to finally pass through to the other middleware andthe store:

Chapter 10. Middleware 165
Complete debounce middleware code
1 // Object to hold debounced actions (referenced by action.type)
2 const pending = {};
3
4 const debounceMiddleware = () => next => action => {
5 const { debounce } = action.meta || {};
6
7 if (!debounce) {
8 return next(action);
9 }
10
11 if (pending[action.type]) {
12 clearTimeout(pending[action.type]);
13 }
14
15 pending[action.type] = setTimeout(
16 () => {
17 delete pending[action.type];
18 next(action);
19 },
20 debounce
21 );
22 };
23
24 export default debounceMiddleware;
With this basic middleware we have created a powerful tool for our developers. A simple meta
setting on an action can now support debouncing of any action in the system. We have also usedthe middleware’s support for the next() method to selectively suppress actions. In the ServerCommunication Chapter wewill learn aboutmore advanced uses of the async flow to handle genericAPI requests.
Using Middleware for Flow Control
One important usage of middleware is for the control of application flow and logic. Let’s consider asample user login flow:
Send POST request to server to log in Save access token in store Fetch current user’s profileinformation Fetch latest notifications
Usually our flow will begin with a 'LOGIN' action containing the login credentials:
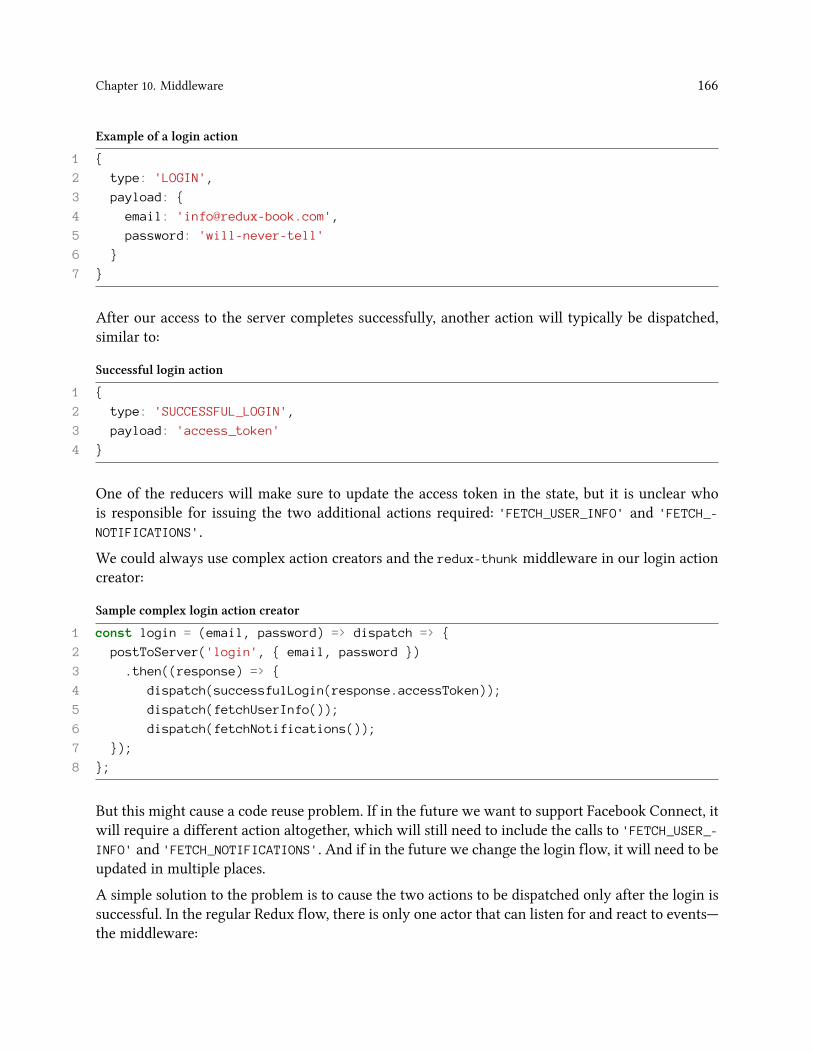
Chapter 10. Middleware 166
Example of a login action
1 {
2 type: 'LOGIN',
3 payload: {
4 email: '[email protected]',
5 password: 'will-never-tell'
6 }
7 }
After our access to the server completes successfully, another action will typically be dispatched,similar to:
Successful login action
1 {
2 type: 'SUCCESSFUL_LOGIN',
3 payload: 'access_token'
4 }
One of the reducers will make sure to update the access token in the state, but it is unclear whois responsible for issuing the two additional actions required: 'FETCH_USER_INFO' and 'FETCH_-
NOTIFICATIONS'.
We could always use complex action creators and the redux-thunk middleware in our login actioncreator:
Sample complex login action creator
1 const login = (email, password) => dispatch => {
2 postToServer('login', { email, password })
3 .then((response) => {
4 dispatch(successfulLogin(response.accessToken));
5 dispatch(fetchUserInfo());
6 dispatch(fetchNotifications());
7 });
8 };
But this might cause a code reuse problem. If in the future we want to support Facebook Connect, itwill require a different action altogether, which will still need to include the calls to 'FETCH_USER_-INFO' and 'FETCH_NOTIFICATIONS'. And if in the future we change the login flow, it will need to beupdated in multiple places.
A simple solution to the problem is to cause the two actions to be dispatched only after the login issuccessful. In the regular Redux flow, there is only one actor that can listen for and react to events—the middleware:

Chapter 10. Middleware 167
Login flow middleware
1 const loginFlowMiddleware = ({ dispatch }) => next => action => {
2 // Let the reducer save the access token in the state
3 next(action);
4
5 if (action.type === SUCCESSFUL_LOGIN) {
6 dispatch(fetchUserInfo());
7 dispatch(fetchNotifications());
8 }
9 };
Our new code holds the flow in a single place and will allow us to easily support login via Twitter,Google Apps, and more.
In practice we can combine flows together and add conditions and more complicated logic, as wehave full access to both dispatch() and getState().
There are a few external libraries that try to make flow management easier, such asredux-saga⁴⁷.
Other Action Types
When learning the basics of Redux, developers are usually taught that actions in Redux can onlybe objects and they must contain the 'type' key. In practice, reading this book and online material,you’ll notice Error objects, functions, and promises being passed to dispatch().
The underlying rule is simple: our root reducer requires an object as an action, but our middlewarehave no such limits and are free to handle any type of data passed to dispatch().
Try running dispatch(null). You should get an error from Redux similar to:
Passing a non-object to dispatch
1 store.dispatch(null);
2 > Uncaught TypeError: Cannot read property 'type' of null(...)
To add support for null we can create our own nullMiddleware:
⁴⁷https://github.com/yelouafi/redux-saga

Chapter 10. Middleware 168
Simple null middleware
1 const nullMiddleware = () => next => action => {
2 next(action !== null ? action : { type: 'UNKNOWN' });
3 };
In this middleware we catch any attempt to send null instead of the action object and dispatch()
a fake { type: 'UNKNOWN' } instead. While this middleware has no practical value, it should beapparent how we can use the middleware’s power to change actions to support any input type.
The famous redux-thunk⁴⁸ middleware is in essence the following code:
Simplified redux-thunk
1 const thunkMiddleware = ({ dispatch, getState }) => next => action => {
2 if (typeof action === 'function') {
3 return action(dispatch, getState);
4 }
5
6 return next(action);
7 };
It checks if the action passed is 'function' instead of the regular object, and if it is a function it“calls” it, passing dispatch() and getState().
A similar approach is used by other helper middleware that know how to accept the following, andmore:
• Promises (e.g., dispatch a regular action when resolved)• Error objects (e.g., report errors)• Arrays (e.g., execute a list of actions provided in parallel or sequentially)
Difference Between next() and dispatch()
A common point of confusion is the difference between the next() and dispatch() functions passedto the middleware. While both accept an action, they follow a different flow in Redux.
Calling next() within a middleware will pass the action along the middleware chain (from thecurrent middleware) down to the reducer. Calling dispatch() will start the action flow from thebeginning (the first middleware in the chain), so it will eventually reach the current one as well.
⁴⁸https://github.com/gaearon/redux-thunk

Chapter 10. Middleware 169
Store setup
1 createStore(reducer,
2 applyMiddleware(
3 middlewareA,
4 middlewareB,
5 middlewareC
6 )
7 );
Calling next(action) within middlewareB will cause the action to be passed to middlewareC andthen the reducer.
Calling dispatch(action) within middlewareB will cause the action to be passed to middlewareA,then middlewareB, then middlewareC, and finally to the reducer, returning the execution back tomiddlewareB.
Calling dispatch() multiple times is a common and valid practice. next() can also be called morethan once, but this is not recommended as any action passed to next() will skip the middlewarebefore the current one (for example, potentially skipping the logging middleware).
Parameter-Based Middleware
Beyond the middleware we’ve discussed so far in this chapter, some middleware might be reusableand support parameters being passed during their creation.
For example, consider the nullMiddleware we created earlier in this chapter:
Simple null middleware
1 const nullMiddleware = () => next => action => {
2 next(action !== null ? action : { type: 'UNKNOWN' });
3 };
4
5 export default nullMiddleware;
The 'UNKNOWN' key is hardcoded into our middleware and will not allow easy reuse in our otherprojects. Tomake this middlewaremore generic, wemight want to be able to support arbitrary actiontypes and use the applyMiddleware() stage to specify how we want our middleware to behave:

Chapter 10. Middleware 170
Customizable middleware
1 import { createStore, applyMiddleware } from 'redux';
2 import reducer from 'reducers/root';
3 import nullMiddleware from 'middleware/null';
4
5 const store = createStore(reduce, applyMiddleware(nullMiddleware('OH_NO'));
6 };
Here we want our nullMiddleware to dispatch 'OH_NO' instead of the default 'UNKNOWN'. To supportthis we must turn our middleware into a “middleware creator”:
Null middleware creator
1 const nullMiddlewareCreator = param => store => next => action => {
2 next(action !== null ? action : { type: param || 'UNKNOWN' });
3 };
4
5 export default nullMiddlewareCreator;
Now instead of returning the middleware directly, we return a function that creates a middlewarewith custom parameters passed in.
This behavior can be further extended and allow for creation of complex middleware as librariesthat can be easily customized when added to the store.
How Are Middleware Used?
In real-life applications, middleware are often where most of the logic and complex code resides.They also hold most of the utility functionality, such as logging, error reporting, analytics,authorization, and more. Many of the enhancement libraries used in this book require the additionof their custom middleware to the chain in order to support their functionality.
There is a long list of open source projects that implement various useful middleware. A fewexamples are:
• redux-analytics⁴⁹• redux-thunk⁵⁰• redux-logger⁵¹
⁴⁹https://github.com/markdalgleish/redux-analytics⁵⁰https://github.com/gaearon/redux-thunk⁵¹https://github.com/fcomb/redux-logger

Chapter 10. Middleware 171
Summary
Middleware are an exceptionally versatile and useful part of Redux, and they are commonly usedto hold the most complicated and generic parts of an application. They have access to the currentaction, to the store, and to the dispatch() method, giving them more power than any other part ofRedux.
Our exploration of advanced Redux concepts ends here. In the next section you will find links tomaterials for further reading and learning. Thank you for reading our book, and don’t forget to sendus your feedback at [email protected]. Happy coding!

Further ReadingDespite its small size, the Redux library has had a huge effect on the way developers handle datamanagement in single-page applications. It’s already used in many large production applicationsand has grown a large ecosystem around itself.
Today, there are a lot of great materials about Redux all over the Internet. This book attempts togroup together all the best practices for real-world use of Redux and show how to use it correctlyin large applications. But since the web world is constantly moving forward, it is always good tokeep up to date and explore new libraries and methods. In this section of the book, we would like tomention some good Redux-related sources for further learning.
Resource Repositories
The Redux repository on GitHub has an Ecosystem documentation section⁵² where you’ll find acurated list of Redux-related tools and resources.
There is also a less curated (and thus much larger) resource catalog managed by the communitycalledAwesome Redux⁵³. This repository contains a good amount of resources related to using Reduxwith different libraries such as Angular, Vue, Polymer, and others.
If you are looking for more React/Redux-focused material, Mark Erikson⁵⁴ maintains a resourcerepository called React/Redux Links⁵⁵. The materials there are separated by difficulty level, and abroad range of topics are covered (state management, performance, forms, and many others).
The same author also maintains a more Redux-focused resource list called Redux Ecosystem Links⁵⁶,which has a similar structure.
Useful Libraries
The Redux ecosystem now includes dozens (if not hundreds) of useful libraries that complementor extend its features. Here’s a short list of libraries that have gained widespread popularity andare strongly recommended for use in large Redux projects—we recommend that you check out thesource code of these libraries to get a deeper understanding of the extensibility of Redux:
⁵²https://github.com/reactjs/redux/blob/master/docs/introduction/Ecosystem.md⁵³https://github.com/xgrommx/awesome-redux⁵⁴https://github.com/markerikson⁵⁵https://github.com/markerikson/react-redux-links⁵⁶https://github.com/markerikson/redux-ecosystem-links

Further Reading 173
reselect⁵⁷
If you count the Redux store as a client-side database of your application, you can definitely countselectors as queries to that database. reselect allows you to create and manage composable andefficient selectors, which are crucial in any large application.
redux-actions⁵⁸
Written by Redux cocreator Andrew Clark⁵⁹, this library can reduce the amount of boilerplate codeyou need to write when working with action creators and reducers. We find it particularly usefulfor writing reducers in a more ES2016 fashion, instead of using large switch statements.
redux-undo⁶⁰
If you ever need to implement undo/redo/reset functionality in some parts of your application, werecommend using this awesome library. It provides a higher-order reducer that can relatively easilyextend your existing reducers to support action history.
redux-logger⁶¹
redux-logger is a highly configurable middleware for logging Redux actions, including the statebefore and after the action, in the browser console. It should only be used in development. Our adviceis to use the collapsed: true option to make the console output more readable and manageable.
redux-localstorage⁶²
This reasonably simple store enhancer enables persisting and rehydrating parts of the store in thebrowser’s localStorage. It does not support other storage implementations, such as sessionStor-age. Beware that localStorage isn’t supported in private mode in some browsers and always checkits performance in large applications.
Courses and Tutorials
“Getting Started with Redux”⁶³ is a great free video course by Redux cocreator Dan Abramov, wherehe implements Redux from scratch and shows how to start using it with ReactJS.
Learn Redux⁶⁴ is a free screensact series by Wes Bos. You can follow along with the series to builda simple photo app using React and Redux.
Finally, the official Redux documentation⁶⁵ is a truly great resource: a well-maintained, constantlyimproving source of knowledge for this tiny yet powerful library.
⁵⁷https://github.com/reactjs/reselect⁵⁸https://github.com/acdlite/redux-actions⁵⁹https://github.com/acdlite⁶⁰https://github.com/omnidan/redux-undo⁶¹https://github.com/evgenyrodionov/redux-logger⁶²https://www.npmjs.com/package/redux-localstorage⁶³https://egghead.io/courses/getting-started-with-redux⁶⁴https://learnredux.com/⁶⁵http://redux.js.org/