Embed Size (px)
DESCRIPTION
cat 3412
Citation preview

Fuel System
SMCS - 1250
S/N - 5FL1-UP
S/N - 9EP1-UP
S/N - DJN1-UP
S/N - BCW1-UP
S/N - 1EZ1-UP
S/N - 4BZ1-UP
S/N - RTY1-UP
S/N - TFT1-UP
S/N - BLG1-UP
S/N - BPG1-UP
S/N - TGC1-UP

Fuel System Identification
Fuel injection pump and governor drive group (typical example)
1. The part number is stamped in this location.
Table 1
3412C Fuel System With Caterpillar Dashpot Governors
Engine Arrangement In. Pump & Governor Group or Drive Injection Pump
148-3590
148-3592
148-3594
166-8581
166-8583
166-8585
4W-8296
148-3598 7W-7131
4N-1101

148-3600
166-8589
166-8591
186-4817
149-7505 131-3239
186-4816 108-3698
186-4819 108-3697
148-3591
148-3593
148-3595
148-3599
148-3601
166-8582
166-8584
166-8586
166-8590
166-8592
171-5336
187-0557
189-8854
4W-6074 4W-6073
149-7506 131-3240 131-3281
Fuel System
Either too much fuel for combustion or not enough fuel for combustion can be the cause
of a problem in the fuel system. It is difficult to evaluate the source of the problem,
especially when smoke rises from the exhaust. Therefore, work is often done on the fuel
system when the problem is really with some other part of the engine.
When noticeable smoke rises from the exhaust, this problem can be caused by a worn
unit injector. This unusual smoke can also be caused by one or more of the reasons that
follow:
• Not enough air for good combustion

• Oil leakage into combustion chamber
• Not enough compression
Fuel System Inspection
A problem with the components that send fuel to the engine can cause low fuel
pressure. This can decrease engine performance.
1. Check the fuel level in the fuel tank. Inspect the cap for the fuel tank. Make sure
that the vent is not filled with dirt.
2. Check the fuel lines for fuel leakage. Make sure that none of the fuel lines have
a restriction or a faulty bend.
3. Install a new fuel filter. Clean the primary fuel filter.
4. Remove any air that may be in the fuel system.
If there is air in the fuel system, use the priming pump to open the drain valve on
the fuel injection pump housing. Drain the fuel system until fuel without air
flows from the drain line.
Checking Engine Cylinders Separately
If any of the following conditions occur, check the individual engine cylinders:
• The engine runs rough.
• The engine misfires.
• The exhaust system blows out black smoke.
Use this procedure to check the engine cylinders separately:
1. Run the engine at the roughest speed.
2. Loosen the fuel line nut at a fuel injection pump. This will stop the flow of fuel
to that engine cylinder.
After you shut off an engine cylinder's fuel flow, the engine should run more
roughly.
3. Tighten the fuel line nut.
4. Repeat this maneuver with each engine cylinder in sequence until you discover a
loosened fuel line that does NOT affect the engine's performance.
5. When you find the engine cylinder that does NOT affect the engine's
performance, perform the following operations:
a. Test the fuel injection pump.

b. Test the fuel injection valve.
When an engine runs at low idle rpm, the temperature of an exhaust manifold can also
indicate the condition of a fuel injection valve. A low temperature indicates that no fuel
is reaching the cylinder. This can possibly signify that the fuel injection valve has a
defect.
When an engine runs at low idle rpm and the temperature of an exhaust manifold is at
an extra high temperature, too much fuel is probably flowing into the engine cylinder.
This can also signify that the fuel injection valve has a defect.
The most common defects on fuel injection valves include the following defects:
• Any carbon on the tip of a nozzle
• Any carbon in the nozzle orifice
• Orifice wear
• Dirty nozzle screen
Testing Fuel Injector Nozzles
The injectors must be off of the engine before being tested.
Note: Refer to Special Instruction, SEHS7292, "Use Of 5P-4150 Nozzle Assembly" for
more information.
Fuel Injection Lines
Fuel from the fuel injection pumps is sent through the fuel injection lines to the fuel
injection valves.
Each fuel injection line of an engine has a special design. Each fuel injection line must
be installed in a certain location. When fuel injection lines are removed from an engine,
put identification marks or put tags on the fuel lines as the lines are removed. This will
allow the lines to be installed in the correct location.
The nuts that hold a fuel injection line to an injection valve and to an injection pump
must be kept tight. Tighten the fuel line nuts to 40 ± 7 N·m (30 ± 5 lb ft).
Fuel Bypass Valve
The fuel bypass valve controls fuel pressure to the fuel injection pump. At full speed,
the pressure is limited to 230 ± 35 kPa (33 ± 5 psi).
Finding the Top Center Position for No. 1 Piston
Table 2
Tools Needed

9S-9082 Engine Turning Tool 1
Note: The starting position for all timing procedures is with the No. 1 piston at the top
center position on the compression stroke.
Locating the top center position (typical example)
(1) The storage location for the timing bolt
(2) Plug
(3) Bolt
(4) Cover
1. Remove the timing bolt (1), the bolt (3), and the cover (4) .
2. Remove the plug (2) .
The 9S-9082 Engine Turning Tool is installed.
(1) The installed timing bolt
(5) 9S-9082 Engine Turning Tool
3. Install 9S-9082 Engine Turning Tool (5) in the housing.

4. Once plug (2) has been removed, insert the timing bolt (1) through the hole.
Hold the timing bolt (1) against the flywheel.
5. Turn the flywheel in the direction of normal engine rotation until the timing bolt
engages with the threaded hole. The No. 1 piston is at the top center position on
the engine.
Note: If the flywheel is turned beyond the point of engagement, the flywheel
must be turned in the direction that is opposite of normal engine rotation. Turn
the flywheel by approximately 30 degrees. Then turn the flywheel in the
direction of normal engine rotation until the timing bolt engages with the
threaded hole. When the No. 1 piston is at the top center position, this procedure
will remove the play from the gears.
Cylinder and valve location
(A) Inlet
(B) Exhaust
(C) Fuel injection pumps
6. Remove the left front valve cover. Look at the valves of No. 1 cylinder. The
valves will be closed if the No. 1 piston is on the compression stroke. You can
move rocker arms up and down with your hand. If the No. 1 piston is not on the
compression stroke, perform the following steps.
7. Remove the timing bolt from the flywheel.
8. Rotate the crankshaft counterclockwise by 360 degrees. Install the timing bolt.
Note: If the flywheel is turned beyond the point of engagement, the flywheel must be
turned in the direction that is opposite of normal engine rotation. Turn the flywheel by
approximately 30 degrees. Then turn the flywheel in the direction of normal engine

rotation until the timing bolt engages with the threaded hole. When the No. 1 piston is at
the top center position, this procedure will remove the play from the gears.
Checking Engine Timing with 8T-5300 Engine Timing
Indicator Group and 8T-5301 Diesel Engine Timing
Adapter Group
Table 3
Tools Needed
8T-5300 Engine Timing Indicator Group 1
8T-5301 Diesel Engine Timing Adapter Group 1
8T-5300 Engine Timing Indicator Group
(1) 8T-5250 Engine Timing Indicator
(2) 5P-7366 Power Cable
(3) 6V-2197 Magnetic Transducer
(4) 5P-7362 Cable
(5) 5P-7362 Cable, 6V-2199 Transducer Adapter and 6V-3093 Transducer Adapter
(6) 8D-4644 Corner
The 8T-5300 Timing Indicator Group must be used with 8T-5301 Diesel Engine
Timing Adapter Group.

8T-5301 Diesel Engine Timing Adapter Group
(7) 5P-7437 Adapter
(8) 6V-2198 Cable
(9) 5P-7436 Adapter
(10) 6V-7910 Transducer
(11) 5P-7435 Adapter
(12) 6V-3016 Washer
When you check for the dynamic timing on an engine without a mechanical advance,
Caterpillar Inc. recommends the recording of the calculations for the dynamic timing
onto paper. Then, the service person can create a graph of the dynamic advance.
Note: Worksheets are available in pads of fifty. Order one Special Instruction,
SEHS8140. See Special Instruction, SEHS8580 for information on calculating the
timing curve.
After the timing values are calculated and the timing values are plotted, the dynamic
timing should be checked with the 8T-5300 Engine Timing Indicator Group .
1. Operate the engine from 1000 rpm (base rpm) to high idle.
2. Continue running the engine now from high idle to 1000 rpm (base rpm).
Unstable readings often appear below 1000 rpm.
3. Record the dynamic timing at each 100 rpm and at the specified speeds during
acceleration and during deceleration.
4. Finally, plot the results onto the worksheet. Review the plotted values.
Use Special Instruction, SEHS8580 to see the correct specifications for calculating the
timing curve.
You can find these specifications in three places:

• The Operating Instructions inside the lid of the 8T-5300 Engine Timing
Indicator Group
• The Special Instruction, SEHS8580
• The Engine Information Plate for the performance specification number
The performance specification number can be used to refer to the TMI. Here, you will
find the correct timing specifications to use.
Personal injury or death can result from not following the proper
procedures.
To avoid the possibility of injury or death, follow the established
procedure.
Transducer in position
(10) 6V-7910 Transducer
(13) Fuel injection line for No. 1 cylinder
1. The engine must be stopped before installing the engine timing indicator group.
2. A high pressure fuel line must be disconnected and a probe must be installed
into the flywheel housing.
3. Disconnect the fuel injection line (13) for the No. 1 cylinder. Slide the nut
upward. Slide the nut out of the way. Attach the 5P-7436 Adapter (9). Tighten
5P-7436 Adapter (9) onto the pump bonnet. Turn adapter (9) onto the pump
bonnet. Continue until the top of the bonnet's threads line up with the bottom of
the opening in adapter (9) .
4. Attach 5P-7435 Adapter (11) onto injection transducer (10). Then, connect 5P-
7435 Adapter (11) in the opening of 5P-7436 Adapter (9) .
5. Place fuel injection line (13) on top of 5P-7435 Adapter (11). Install 5P-7437
Adapter (7). Tighten the adapter to a torque of no more than 40 N·m (30 lb ft).

Timing hole location (Starting motor is not mounted)
(14) Plug
6. Remove the plug (14) from the flywheel housing. Install transducer adapter (5)
into the hole that is remaining from the plug's removal. Tighten transducer
adapter (5) only by a small amount.
7. Push magnetic transducer (3) into transducer adapter (5) until this adapter
contacts the flywheel. Pull the magnetic transducer (3) out of the transducer
adapter by 1.5 mm (0.06 inch). Then, lightly tighten the knurled locknut.
Transducer in position (starting motor is not mounted)
(3) 6V-2197 Magnetic Transducer
8. Connect the cables from the magnetic transducer (3) to 8T-5250 Engine timing
indicator (1). Calibrate the indicator, and make any necessary adjustments.
Note: See Special Instruction, SEHS8580 for more information on the
calibration procedure.
9. Start the engine, and allow the engine to reach operating temperature. Then, run
the engine at approximately one half throttle for eight to ten minutes. After this
amount of time, measure the engine's timing.

10. Run the engine at increments of 100 rpm between 1000 rpm (base rpm) and high
idle. Record the readings for engine timing, and then plot these readings onto a
graph.
Note: Use smaller increments to pinpoint the times when the timing advance
starts. You can also use smaller increments to pinpoint the times when the
timing advance stops.
11. If the automatic timing advance is not correct, repair the automatic timing
advance unit, or replace the automatic timing advance unit. There is no
adjustment to the unit.
Fuel System Adjustments on the Engine
Camshaft Timing for Fuel Injection Pump
Table 4
Tools Needed
6V-4186 Fuel Pump Timing Pin 1
1. Position the No. 1 piston at the top center position on the compression stroke.
Refer to "Finding The Top Center Position For No. 1 Piston".
Note: A 1P-3566 Hex Bit 9/16 inch cut to a length of 25.4 mm (1.00 inch) can
be used to remove the plug from the front end of the injection pump housing.
Remove the timing pin plug (typical example).
(1) Timing pin plug
2. Remove the plug at the front end of the fuel injection pump housing.
3. Install 6V-4186 Fuel Pump Timing Pin (end with taper) through the hole in the
injection pump housing.

4. If the timing is correct, the timing pin will go into the notch in the camshaft and
the timing bolt will turn into the threaded hole in the flywheel. If the timing is
NOT correct, the timing must be changed.
Note: If the timing is correct, BE SURE TO REMOVE THE TIMING PIN
AND BE SURE TO REMOVE THE TIMING BOLT.
If the timing was NOT correct, remove the timing pin. Use the procedure that
follows to change the timing.
Access cover to automatic timing advance unit (typical example)
(2) Cover
a. Remove cover (2) that covers the four bolts of the automatic timing
advance unit.
Automatic timing advance unit (typical example)
(3) Bolts
(4) Automatic timing advance unit
b. Make sure that the timing pin is removed before the bolts are loosened.
Loosen the four bolts (3) that hold the automatic timing advance unit (4)
onto the fuel pump camshaft.

c. Tighten the bolts (3) with fingers until there is a small amount of friction
(slight drag) between the retainer and the automatic timing advance unit
(4). This friction will hold the unit against the timing gears. This
prevents play (backlash) when gears are turned to the correct position.
d. Remove the timing bolt. Turn the flywheel until the timing pin will go
into the groove in the fuel injection pump camshaft.
e. With the timing pin installed, turn the flywheel clockwise a minimum of
30 degrees. This is the opposite direction of the engine rotation. When
the No. 1 piston is at the top center position, this procedure will remove
the play from the gears.
f. Then, turn the flywheel in the direction of normal engine rotation until
the timing bolt engages with the threaded hole.
g. Tighten the bolts (3) to 25 N·m (20 lb ft). Then, remove the timing pin
from the injection pump housing.
h. Tighten the bolts (3) to 230 ± 15 N·m (170 ± 11 lb ft). Then, remove the
timing bolt from the flywheel.
5. Rotate the crankshaft counterclockwise for two revolutions. Check the timing
again. If the timing bolt can be installed in the flywheel and the timing pin can
be installed in the camshaft, the timing is correct.
6. If the timing is not correct, refer to 4.b through 4.h.
Note: If timing is correct, BE SURE TO REMOVE THE TIMING PIN AND BE SURE
TO REMOVE THE TIMING BOLT.
Governor Adjustments
Table 5
Tools Needed
Part Number Part Name Quantity
9U-7400 Multitach 1
NOTICE
A service technician with training in governor adjustments is the only
one to make the adjustment to the set point rpm.
Check engine rpm with an accurate tachometer. Refer to "Measuring Engine Speed" for
more information about checking engine rpm.
High and Low Idle Adjustment

Adjustment screw cover
(1) Cover
Personal injury can result from rotating and moving parts.
Moving fan blades and moving parts will throw or cut any object or tool
that falls or is pushed into them.
Ensure that no one is working on, underneath or close to the machine
before starting the engine. Ensure the area is free of personnel.
Start the engine and check the low idle rpm. Check the high idle rpm. Refer to Fuel
Setting Information for the correct low idle and the correct high idle rpm.
Idle adjustment
(2) High idle screw
(3) Low idle screw
If an adjustment is necessary, remove cover (1) and use the following procedure.
1. To adjust the low idle rpm, move the governor linkage to the LOW IDLE
position. Turn screw (3). Increase the engine speed and then return the linkage
back to LOW IDLE position. Recheck the setting.

2. Move the governor linkage to HIGH IDLEposition. Turn screw (2) in order to
adjust the HIGH IDLE rpm. When the specific rpm setting is made, move the
governor control to reduce engine speed, then move the linkage to HIGH IDLE.
Recheck the setting. Repeat this procedure until the rpm setting is correct.
3. When the governor adjustment is correct, install the cover on top of the
governor.
When the cover is installed on the governor, the idle adjustment screws fit into
holes in the cover. The shape of the holes will not allow the idle adjustment
screw to turn after the idle adjustment is completed and the cover is installed.
4. Install a new wire and install a new seal to the cover bolt.
Dashpot Adjustment
The dashpot governor does not work properly when one of the following items occur:
• No stability of rpm
• Slow changes of rpm when the engine load changes.
• Variable performance
Adjust the governor if one of the problems occur.
Side view of governor
(1) Adjustment screw for dashpot
(2) Adjustment screw for supply oil to reservoir
1. With the engine in operation, loosen adjustment screw (2) on the top of the
governor. Loosen the screw (2) two to three turns. The oil flow will clean the
orifice in the oil passage. Next, tighten screw (2) only 1/16 of one turn to 1/4
turn of one turn. This will allow the correct amount of oil flow to the dashpot
reservoir.
Note: The adjustment controls oil flow into the top reservoir. Too much oil flow
will fill the governor with oil. This will decrease performance. Too little oil flow
will allow the reservoir to become empty. This will allow air in the dashpot

chamber. This will allow the governor to hunt. A hunting condition is when the
engine speed constantly increases or decreases.
2. An adjustment screw (1) is located on the right side of the governor. Loosen
adjustment screw (1) two to three turns. The oil flow into and out of the dashpot
chamber will clean the orifice in the oil passage. Next, tighten adjustment screw
(1) until it stops. Then, loosen adjustment screw (1) 1/4 of one turn to one full
turn. This will make the correct restriction for the dashpot operation. The exact
point of adjustment is the point the governor provides the best performance.
Note: This adjustment controls the amount of restriction of the oil flow into and
out of the dashpot chamber. Too much oil flow will cause the governor to hunt.
Too little flow will cause a slow action of the governor.
Measuring Engine Speed
Table 6
Required Tools
Part Number Part Name Quantity
9U-7400 Multitach 1
6V-4950 Speed Pickup 1
9U-7400 Multitach
The 9U-7400 Multitach can measure engine speed from a tachometer drive on the
engine. The multitach also has the ability to measure engine speed from visual engine
parts in rotation.
Refer to Special Instruction, SEHS7807 for instructions about the test procedure.
The 6V-4950 Speed Pickup is another diagnostic tool accessory that can be used with
the 9U-7400 Multitach. The speed pickup can be used on all Caterpillar Diesel Engines
that are equipped with 6 mm (0.25 inch) single wall fuel injection lines. Engine speed
can be measured quickly and automatically with this pickup group. The accuracy is ± 1
rpm.
6V-4950 Speed Pickup
(1) 6V-6113 Pickup Amplifier
(2) 6V-6114 Pickup
Refer to Special Instruction, SEHS8029 for instructions on using the 6V-4950 Speed
Pickup .
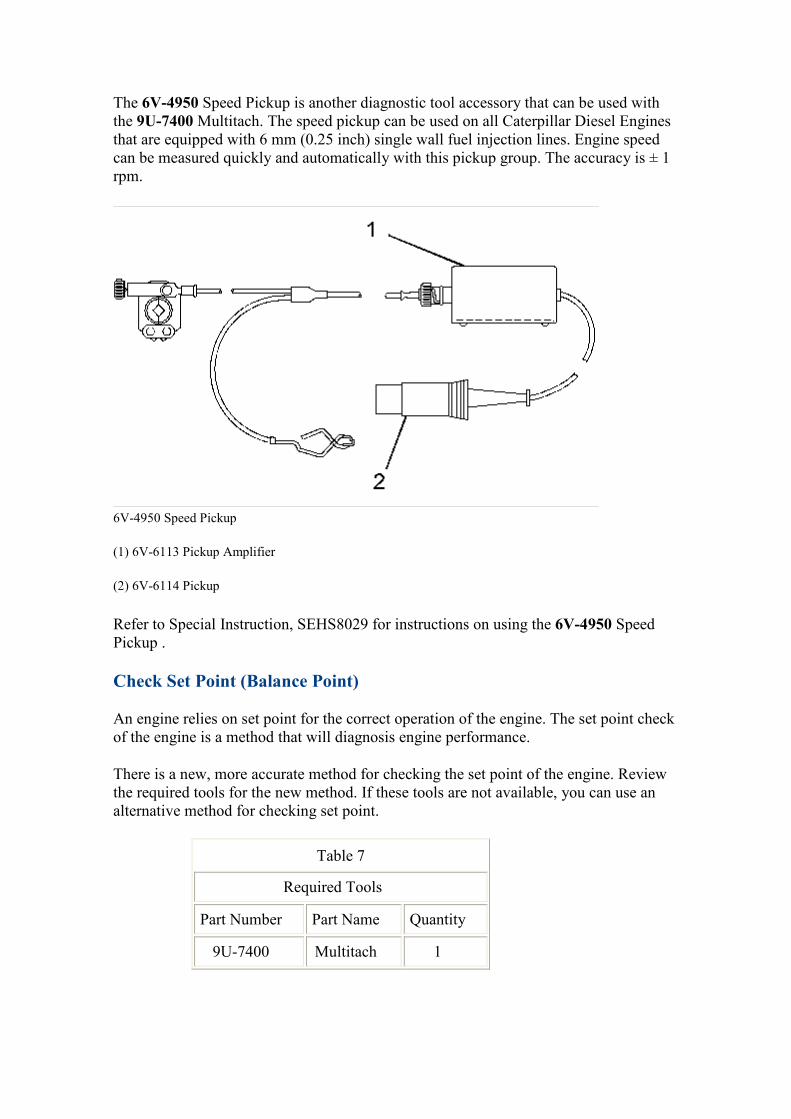
Check Set Point (Balance Point)
An engine relies on set point for the correct operation of the engine. The set point check
of the engine is a method that will diagnosis engine performance.
There is a new, more accurate method for checking the set point of the engine. Review
the required tools for the new method. If these tools are not available, you can use an
alternative method for checking set point.
Table 7
Required Tools
Part Number Part Name Quantity
9U-7400 Multitach 1

9U-7400 Multitach
You can use the 9U-7400 Multitach to check the set point. Refer to Special Instruction,
SEHS7931 for instructions on using this tool group.
Alternate Method for Checking Set Point
Table 8
Required Tools
Part Number Part Name Quantity
9U-7400 Multitach 1
8T-0500 Continuity Tester 1
If the set point is correct and the high idle rpm is within specifications, the fuel system
operation of the engine is correct. The set point for the engine is determined by these
factors:
• 20 rpm greater than full load rpm.
• The rpm upon contact between the rack stop collar and the torque spring or the
stop bar.
• The rpm where the engine gets the maximum amount of fuel per stroke.
• The rpm where the engine has maximum horsepower output.
• The rpm where an increase in load on the engine puts the engine in a lug
condition. A lug condition is where a small increase in load causes the engine
speed to decrease.
Use the following procedure to check the set point.

Circuit tester (installed)
(1) Brass terminal screw
(2) 8T-0500 Continuity Tester
Note: Refer to Special Instruction, SEHS7050, "Techniques for Loading Engines" for
more information.
1. Connect an accurate tachometer to the tachometer drive.
2. Connect the clip end of the 8T-0500 Continuity Tester to the brass terminal
screw (1) on the governor housing.
3. Then, connect the other end of the tester to a place on the fuel system with a
good ground connection.
Personal injury can result from rotating and moving parts.
Moving fan blades and moving parts will throw or cut any object or tool
that falls or is pushed into them.
Ensure that no one is working on, underneath or close to the machine
before starting the engine. Ensure the area is free of personnel.
4. Start the engine.
5. With the engine at normal operating conditions, operate the engine at high idle.
6. Record the rpm of the engine at high idle.
7. Slowly add load to the engine until the circuit tester light shows a minimum
light output.
This is the set point.

8. Record the engine rpm at set point.
9. Repeat 7 for several times in order to ensure that the reading is correct.
10. Stop the engine.
11. Compare the records from both Steps 6 and 8 with the information from the
FUEL SETTING INFORMATION.
12. If the set point is correct, the governor setting is adjusted correctly. If the set
point is not correct, adjust the high idle rpm until you get the correct set point.
NOTICE
To help prevent engine damage, never exceed the high idle rpm. An
overspeed can result in serious damage to the engine. The engine can
be operated at high idle without damage, but the engine should never
be allowed to exceed the high idle rpm.