Embed Size (px)
Citation preview
S.Y.B.Sc. Animation
(Under Science Faculty)
Lab Book
New Revised Syllabus
2015-16 Pattern

Chairman’s Message It is a great pleasure for me to introduce first workbook on revised syllabus of B.Sc.
(Animation). This workbook includes sample practical and guidelines regarding the delivery of
the syllabus. Board of Study, B. Sc. (Animation) has taken Industry Experts’ opinions and help
while framing the syllabus. The relevance of the new syllabus in the contemporary organization
setting is considered. This course includes lot of practical work and involves students’ active
participation in the software development. It provides new vision to students in the field of
Animation. For the formation of new syllabus Savitribai Phule Pune University has helped a lot.
I am deeply indebted to the Vice Chancellor of Savitribai Phule Pune University, Dr. V. B.
Gaikwad- Director, BCUD, SPPU and Dr. Vilas Kharat, Head; Department of Computer Science
SPPU for their valuable guidance and help whenever needed. I am grateful to all my colleagues
of Board of study, B. Sc. (Animation) and teacher concerned for their support and cooperation to
complete the task.
Dr. S. N. Shinde
Chairman,
BOS, Animation
SPPU, Pune
S.Y.B.Sc Animation
(Under Science Faculty)
Lab Course –I
3-D Production I & II
Workbook
(From Academic year 2016-17)
Name: ____________________________________________ College Name: _____________________________________ Roll No. : ____________ Academic Year: ____________

PREPARED BY: 3-D Production I & II Prof. Anjali Sardesai (Chairperson) Prof. Vaidya (Co-ordinator) Prof. Rahul Shivade (Member) Prof. Rachana Khake (Member) Reviewed By: BOARD OF STUDY (Animation) MEMBERS:
Dr. Shinde S.N. (Chairman) Prof. Anjali Sardesai (Chairperson, S.Y. B.Sc. (Ani.) Syllabus Reframing) Prof. Rahul Patil (Member) Dr. Chitra Desai (Member) Prof. Dr. R. R. Deshmukh (Member)
About The Work Book :
• Objectives –
� The scope of the course. � Bringing uniformity in the way course is conducted across different
Colleges. � Continuous assessment of the students. � Providing ready references for students while working in the lab.
• How to use this book?
This book is mandatory for the completion of the laboratory course. It is a measure of the performance of the student in the laboratory for the entire duration of the course.

• Instructions to the Instructors: Instructors should explain assignment before implement to the students. Minimum ten minutes should be required to explain the assignment.
• Instructions to the students
1. Students should carry this book during practical sessions of Computer Science.
2. Printouts of the source code and output is not compulsory but optional. 3. Students should read the topics mentioned in reading section of this Book
before coming for practical. 4. Students should solve all exercises which are selected by Practical in-charge. 5. Students will be assessed for each exercise on a scale of 5
1 Not done 0 2 Incomplete 1 3 Late complete 2 4 Needs improvement 3 5 Complete 4 6 Well-done 5

Practical Exercise : 1 Start Date / / Objective : 1) To understand different modeling techniques. 2) To know texturing, lighting & rendering in Maya Instructions : 1) Size : 800 X 600 pix 2) Save output in 3 different camera angles 3) Apply your own creativity for improvisation Assignment : Create a Vintage Car Model as per given reference.
Assignment Evaluation : 0 : Not Done [ ] 1 : Incomplete [ ] 2 : Late complete [ ] 3 : Need Improvement [ ] 4 : Complete [ ] 5 : Well Done [ ] Signature of Instructor Date of completion : / /

Practical Exercise : 2 Start Date / / Objective : 1) To understand different modeling techniques. 2) To know texturing, lighting & rendering in Maya Instructions : 1) Size : 800 X 600 pix 2) Save output in 3 different camera angles 3) Apply your own creativity for improvisation Assignment : Create a Bike as per given reference.
Assignment Evaluation : 0 : Not Done [ ] 1 : Incomplete [ ] 2 : Late complete [ ] 3 : Need Improvement [ ] 4 : Complete [ ] 5 : Well Done [ ] Signature of Instructor Date of completion : / /

Practical Exercise : 3 Start Date / / Objective : 1) To understand different modeling techniques. 2) To know texturing, lighting & rendering in Maya Instructions : 1) Size : 800 X 600 pix 2) Save output in 3 different camera angles 3) Apply your own creativity for improvisation Assignment : Create a Lamp as per given reference.
Assignment Evaluation : 0 : Not Done [ ] 1 : Incomplete [ ] 2 : Late complete [ ] 3 : Need Improvement [ ] 4 : Complete [ ] 5 : Well Done [ ] Signature of Instructor Date of completion : / /

Practical Exercise : 4 Start Date / / Objective : 1) To understand different modeling techniques. 2) To know texturing, lighting & rendering in Maya Instructions : 1) Size : 800 X 600 pix 2) Save output in 3 different camera angles 3) Apply your own creativity for improvisation Assignment : Create a Fruit Bowl as per given reference..
Assignment Evaluation : 0 : Not Done [ ] 1 : Incomplete [ ] 2 : Late complete [ ] 3 : Need Improvement [ ] 4 : Complete [ ] 5 : Well Done [ ] Signature of Instructor Date of completion : / /

Practical Exercise : 5 Start Date / / Objective : 1) To understand different modeling techniques. 2) To know texturing, lighting & rendering in Maya Instructions : 1) Size : 800 X 600 pix 2) Save output in 3 different camera angles 3) Apply your own creativity for improvisation Assignment : Create a Airoplane as per given reference.
Assignment Evaluation : 0 : Not Done [ ] 1 : Incomplete [ ] 2 : Late complete [ ] 3 : Need Improvement [ ] 4 : Complete [ ] 5 : Well Done [ ] Signature of Instructor Date of completion : / /

Practical Exercise : 6 Start Date / / Objective : 1) To understand different modeling techniques. 2) To know texturing, lighting & rendering in Maya Instructions : 1) Size : 800 X 600 pix 2) Save output in 3 different camera angles 3) Apply your own creativity for improvisation Assignment : Create a Human character model .
Assignment Evaluation : 0 : Not Done [ ] 1 : Incomplete [ ] 2 : Late complete [ ] 3 : Need Improvement [ ] 4 : Complete [ ] 5 : Well Done [ ] Signature of Instructor Date of completion : / /
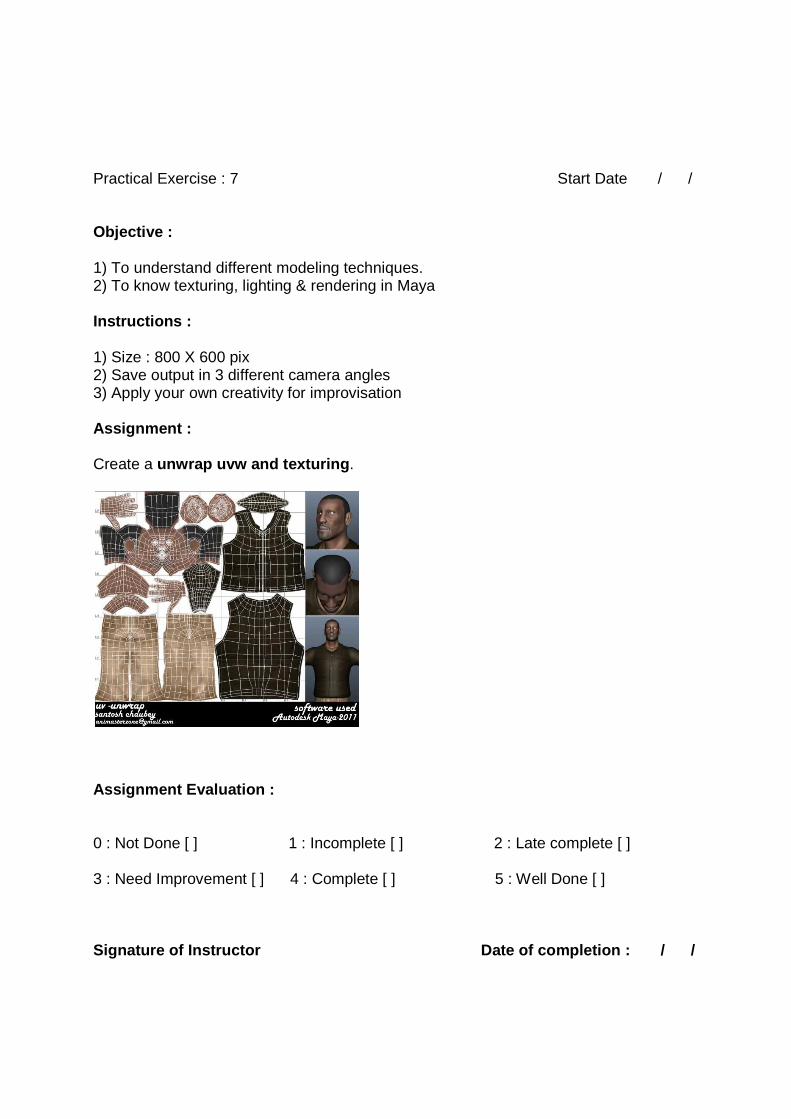
Practical Exercise : 7 Start Date / / Objective : 1) To understand different modeling techniques. 2) To know texturing, lighting & rendering in Maya Instructions : 1) Size : 800 X 600 pix 2) Save output in 3 different camera angles 3) Apply your own creativity for improvisation Assignment : Create a unwrap uvw and texturing .
Assignment Evaluation : 0 : Not Done [ ] 1 : Incomplete [ ] 2 : Late complete [ ] 3 : Need Improvement [ ] 4 : Complete [ ] 5 : Well Done [ ] Signature of Instructor Date of completion : / /

Practical Exercise : 8 Start Date / / Objective : 1) To understand different modeling techniques. 2) To know texturing, lighting, rigging, & rendering in Maya Instructions : 1) Size : 800 X 600 pix 2) Save output in 3 different camera angles 3) Rig the character 4) Save the animation in AVI format. Assignment : Create a Any Human Character Riging .
Assignment Evaluation : 0 : Not Done [ ] 1 : Incomplete [ ] 2 : Late complete [ ] 3 : Need Improvement [ ] 4 : Complete [ ] 5 : Well Done [ ] Signature of Instructor Date of completion : / /

Practical Exercise : 9 Start Date / / Objective : 1) To understand different modeling techniques. 2) To know texturing, lighting, rigging, animation & rendering in Maya Instructions : 1) Size : 800 X 600 pix 2) Save output in 3 different camera angles 3) Rig the character & animate jumping movement. 4) Save the animation in AVI format. Assignment : Create a Frog as per given reference.
Assignment Evaluation : 0 : Not Done [ ] 1 : Incomplete [ ] 2 : Late complete [ ] 3 : Need Improvement [ ] 4 : Complete [ ] 5 : Well Done [ ] Signature of Instructor Date of completion : / /

Practical Exercise : 10 Start Date / / Objective : 1) To understand different modeling techniques. 2) To know texturing, lighting & rendering in Maya Instructions : 1) Size : 800 X 600 pix 2) Save output in 3 different camera angles 3) Apply your own creativity for improvisation Assignment : Create a Wall Clock as per given reference.
Assignment Evaluation : 0 : Not Done [ ] 1 : Incomplete [ ] 2 : Late complete [ ] 3 : Need Improvement [ ] 4 : Complete [ ] 5 : Well Done [ ] Signature of Instructor Date of completion : / /

Practical Exercise : 11 Start Date / / Objective : 1) To understand different modeling techniques. 2) To know texturing, lighting & rendering in Maya Instructions : 1) Size : 800 X 600 pix 2) Save output in 3 different camera angles 3) Apply your own creativity for improvisation Assignment : Create a Table Fan as per given reference.
Assignment Evaluation : 0 : Not Done [ ] 1 : Incomplete [ ] 2 : Late complete [ ] 3 : Need Improvement [ ] 4 : Complete [ ] 5 : Well Done [ ] Signature of Instructor Date of completion : / /

Practical Exercise : 12 Start Date / / Objective : 1) To understand different modeling techniques. 2) To know texturing, lighting & rendering in Maya Instructions : 1) Size : 800 X 600 pix 2) Save output in 3 different camera angles 3) Apply your own creativity for improvisation Assignment : Create a Gramophone as per given reference.
Assignment Evaluation : 0 : Not Done [ ] 1 : Incomplete [ ] 2 : Late complete [ ] 3 : Need Improvement [ ] 4 : Complete [ ] 5 : Well Done [ ] Signature of Instructor Date of completion : / /

Practical Exercise : 13 Start Date / / Objective : 1) To understand different modeling techniques. 2) To know texturing, lighting & rendering in Maya Instructions : 1) Size : 800 X 600 pix 2) Save output in 3 different camera angles 3) Apply your own creativity for improvisation Assignment : Create a Interior Modeling as per given reference.
Assignment Evaluation : 0 : Not Done [ ] 1 : Incomplete [ ] 2 : Late complete [ ] 3 : Need Improvement [ ] 4 : Complete [ ] 5 : Well Done [ ] Signature of Instructor Date of completion : / /

Practical Exercise : 14 Start Date / / Objective : 1) To understand different modeling techniques. 2) To know texturing, lighting, animation & rendering in Maya Instructions : 1) Size : 800 X 600 pix 2) Save output in 3 different camera angles 3) Bouncing ball animation. followed by Animation principles. 4) Save the animation in AVI format. Assignment : Create a Bouncing Ball Animation , followed by Animation principles.
Assignment Evaluation : 0 : Not Done [ ] 1 : Incomplete [ ] 2 : Late complete [ ] 3 : Need Improvement [ ] 4 : Complete [ ] 5 : Well Done [ ] Signature of Instructor Date of completion : / /
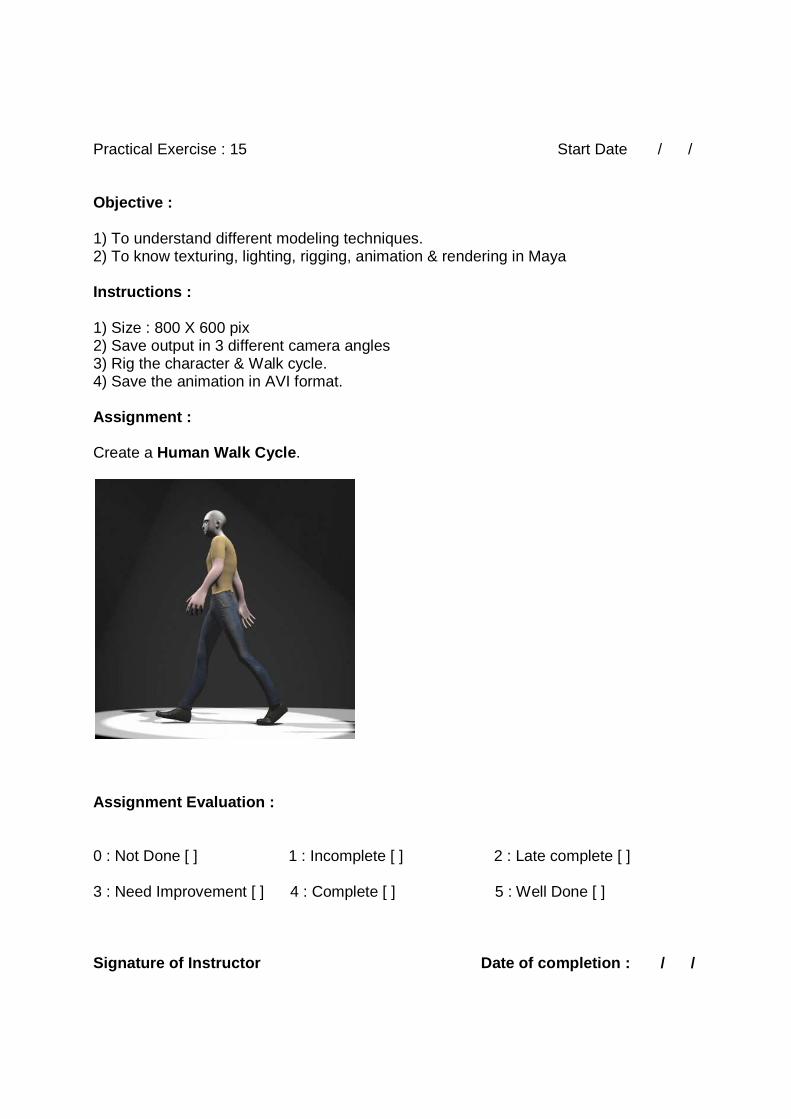
Practical Exercise : 15 Start Date / / Objective : 1) To understand different modeling techniques. 2) To know texturing, lighting, rigging, animation & rendering in Maya Instructions : 1) Size : 800 X 600 pix 2) Save output in 3 different camera angles 3) Rig the character & Walk cycle. 4) Save the animation in AVI format. Assignment : Create a Human Walk Cycle .
Assignment Evaluation : 0 : Not Done [ ] 1 : Incomplete [ ] 2 : Late complete [ ] 3 : Need Improvement [ ] 4 : Complete [ ] 5 : Well Done [ ] Signature of Instructor Date of completion : / /

Practical Exercise : 16 Start Date / / Objective : 1) To understand different modeling techniques. 2) To know texturing, lighting, animation & rendering in Maya Instructions : 1) Size : 800 X 600 pix 2) Save output in 3 different camera angles 3) Cloth Simulation using dynamic. 4) Save the animation in AVI format. Assignment : Create a Cloth Simulation
Assignment Evaluation : 0 : Not Done [ ] 1 : Incomplete [ ] 2 : Late complete [ ] 3 : Need Improvement [ ] 4 : Complete [ ] 5 : Well Done [ ] Signature of Instructor Date of completion : / /
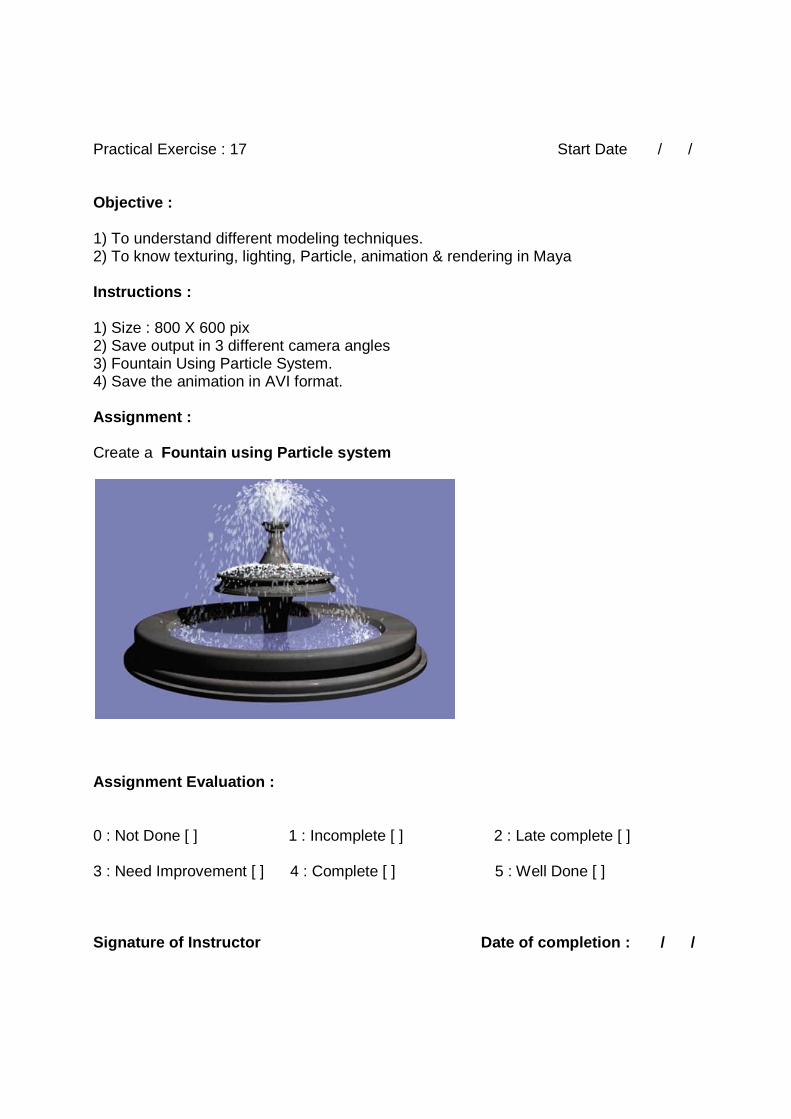
Practical Exercise : 17 Start Date / / Objective : 1) To understand different modeling techniques. 2) To know texturing, lighting, Particle, animation & rendering in Maya Instructions : 1) Size : 800 X 600 pix 2) Save output in 3 different camera angles 3) Fountain Using Particle System. 4) Save the animation in AVI format. Assignment : Create a Fountain using Particle system
Assignment Evaluation : 0 : Not Done [ ] 1 : Incomplete [ ] 2 : Late complete [ ] 3 : Need Improvement [ ] 4 : Complete [ ] 5 : Well Done [ ] Signature of Instructor Date of completion : / /

Practical Exercise : 18 Start Date / / Objective : 1) To understand different modeling techniques. 2) To know lighting, Blend Shapes animation & rendering in Maya Instructions : 1) Size : 800 X 600 pix 2) Save output in 3 different camera angles 3) Blend Shapes. 4) Save the animation in AVI format. Assignment : Create Blend shapes / Fecel expression using Human Face
Assignment Evaluation : 0 : Not Done [ ] 1 : Incomplete [ ] 2 : Late complete [ ] 3 : Need Improvement [ ] 4 : Complete [ ] 5 : Well Done [ ] Signature of Instructor Date of completion : / /

Practical Exercise : 19 Start Date / / Objective : 1) To understand different modeling techniques. 2) To know texturing, lighting & rendering in Maya Instructions : 1) Size : 800 X 600 pix 2) Save output in 3 different camera angles 3) Apply your own creativity for improvisation Assignment : Create a Glass object, Caustics, FG effect with Mental ray r ender .
Assignment Evaluation : 0 : Not Done [ ] 1 : Incomplete [ ] 2 : Late complete [ ] 3 : Need Improvement [ ] 4 : Complete [ ] 5 : Well Done [ ] Signature of Instructor Date of completion : / /

Practical Exercise : 20 Start Date / / Objective : 1) To understand different modeling techniques. 2) To know texturing, lighting & rendering in Maya Instructions : 1) Size : 800 X 600 pix 2) Save output in 3 different camera angles 3) Apply your own creativity for improvisation Assignment : Create a Exterior view render with multiple render passes .
Assignment Evaluation : 0 : Not Done [ ] 1 : Incomplete [ ] 2 : Late complete [ ] 3 : Need Improvement [ ] 4 : Complete [ ] 5 : Well Done [ ] Signature of Instructor Date of completion : / /

S.Y.B.Sc Animation
(Under Science Faculty)
Lab Course –II (Sem I )
Graphics Art
Workbook
(From Academic year 2016-17)
Name: ____________________________________________ College Name: _____________________________________ Roll No. : ____________ Academic Year: ____________

PREPARED BY: 3 Graphics Art Prof. Anjali Sardesai (Chairperson) Prof. Rahul Shivade (Co-ordinator) Prof. Prasad Shukla (Member) Prof. Sameer Nerlekar (Member) Reviewed By: BOARD OF STUDY (Animation) MEMBERS:
Dr. Shinde S.N. (Chairman) Prof. Anjali Sardesai (Chairperson, S.Y. B.Sc. (Ani.) Syllabus Reframing) Prof. Rahul Patil (Member) Dr. Chitra Desai (Member) Prof. Dr. R. R. Deshmukh (Member)
About The Work Book :
• Objectives –
� The scope of the course. � Bringing uniformity in the way course is conducted across different
Colleges. � Continuous assessment of the students. � Providing ready references for students while working in the lab.
• How to use this book?
This book is mandatory for the completion of the laboratory course. It is a measure of the performance of the student in the laboratory for the entire duration of the course.
• Instructions to the Instructors: Instructors should explain assignment before implement to the students. Minimum ten minutes should be required to explain the assignment.

• Instructions to the students
6. Students should carry this book during practical sessions of Computer
Science. 7. Printouts of the source code and output is not compulsory but optional. 8. Students should read the topics mentioned in reading section of this Book
before coming for practical. 9. Students should solve all exercises which are selected by Practical in-charge. 10. Students will be assessed for each exercise on a scale of 5
1 Not done 0 2 Incomplete 1 3 Late complete 2 4 Needs improvement 3 5 Complete 4 6 Well-done 5

Practical Exercise : 1 Start Date / / Objective : 1) To develop a sense of design. 2) To understand the typographical layout principals. 3) To improve the knowledge of use of different color schemes in design. 4) Practicing various graphic design software tools. Instructions : 1) Size : A3 2) Five column Grid 3) Apply your own creativity for improvisation 4) Use dummy images, names & text. Assignment : Create a News Paper Front page. Title - ‘Animation Times’. Assignment Evaluation : 0 : Not Done [ ] 1 : Incomplete [ ] 2 : Late complete [ ] 3 : Need Improvement [ ] 4 : Complete [ ] 5 : Well Done [ ] Signature of Instructor Date of completion : / /

Practical Exercise : 2 Start Date / / Objective : 1) To develop a sense of design. 2) To understand the typographical layout principals. 3) To improve the knowledge of use of different color schemes in design. 4) Practicing various graphic design software tools. Instructions : 1) Size : A4 2) Two column Grid 3) Apply your own creativity for improvisation 4) Use dummy images, names & text. Assignment : Magazine Page layout. Assignment Evaluation : 0 : Not Done [ ] 1 : Incomplete [ ] 2 : Late complete [ ] 3 : Need Improvement [ ] 4 : Complete [ ] 5 : Well Done [ ] Signature of Instructor Date of completion : / /

Practical Exercise : 3 Start Date / / Objective : 1) To develop a sense of design. 2) To understand the typographical layout principals. 3) To improve the knowledge of use of different color schemes in design. 4) Practicing various graphic design software tools. Instructions : 1) Size : A4 2) Show left & right pages 3) Apply your own creativity for improvisation 4) Use dummy images, names & text. Assignment : Book Page Layout. Title - ‘History of Animation’ Assignment Evaluation : 0 : Not Done [ ] 1 : Incomplete [ ] 2 : Late complete [ ] 3 : Need Improvement [ ] 4 : Complete [ ] 5 : Well Done [ ] Signature of Instructor Date of completion : / /

Practical Exercise : 4 Start Date / / Objective : 1) To develop a sense of design. 2) To understand the typographical layout principals. 3) To improve the knowledge of use of different color schemes in design. 4) Practicing various graphic design software tools. Instructions : 1) Size : A4 2) Create portrait & landscape both layouts 3) Apply your own creativity for improvisation 4) Use dummy images, names & text. Assignment : News Paper Advertisement of ‘Global Insurance’ company. Assignment Evaluation : 0 : Not Done [ ] 1 : Incomplete [ ] 2 : Late complete [ ] 3 : Need Improvement [ ] 4 : Complete [ ] 5 : Well Done [ ] Signature of Instructor Date of completion : / /

Practical Exercise : 5 Start Date / / Objective : 1) To develop a sense of design. 2) To understand the typographical layout principals. 3) To improve the knowledge of use of different color schemes in design. 4) Practicing various graphic design software tools. Instructions : 1) Size : A4 2) Create portrait & landscape both layouts 3) Apply your own creativity for improvisation 4) Use dummy images, names & text. Assignment : Magazine Advertisement of ‘Unique Computers ’. Assignment Evaluation : 0 : Not Done [ ] 1 : Incomplete [ ] 2 : Late complete [ ] 3 : Need Improvement [ ] 4 : Complete [ ] 5 : Well Done [ ] Signature of Instructor Date of completion : / /

Practical Exercise : 6 Start Date / / Objective : 1) To develop a sense of design. 2) To understand the typographical layout principals. 3) To improve the knowledge of use of different color schemes in design. 4) Practicing various graphic design software tools. Instructions : 1) Size : A3 2) Five column Grid 3) Apply your own creativity for improvisation 4) Use dummy images, names & text. Assignment : News paper page layout of an interview of an Industrialist. Assignment Evaluation : 0 : Not Done [ ] 1 : Incomplete [ ] 2 : Late complete [ ] 3 : Need Improvement [ ] 4 : Complete [ ] 5 : Well Done [ ] Signature of Instructor Date of completion : / /
Practical Exercise : 7 Start Date / / Objective : 1) To develop a sense of design. 2) To understand the typographical layout principals. 3) To improve the knowledge of use of different color schemes in design. 4) Practicing various graphic design software tools. Instructions : 1) Size : A3 2) Five column Grid 3) Apply your own creativity for improvisation 4) Use dummy images, names & text. Assignment : News paper page layout of an interview of a Film star . Assignment Evaluation : 0 : Not Done [ ] 1 : Incomplete [ ] 2 : Late complete [ ] 3 : Need Improvement [ ] 4 : Complete [ ] 5 : Well Done [ ] Signature of Instructor Date of completion : / /

Practical Exercise : 8 Start Date / / Objective : 1) To develop a sense of design. 2) To understand the typographical layout principals. 3) To improve the knowledge of use of different color schemes in design. 4) Practicing various graphic design software tools. Instructions : 1) Size : A4 2) Show left & right pages 3) Apply your own creativity for improvisation 4) Use dummy images, names & text. Assignment : Book Page layout of a children’s story book. Title - ‘Treasure Hunt ’. Assignment Evaluation : 0 : Not Done [ ] 1 : Incomplete [ ] 2 : Late complete [ ] 3 : Need Improvement [ ] 4 : Complete [ ] 5 : Well Done [ ] Signature of Instructor Date of completion : / /

Practical Exercise : 9 Start Date / / Objective : 1) To develop a sense of design. 2) To understand the typographical layout principals. 3) To improve the knowledge of use of different color schemes in design. 4) Practicing various graphic design software tools. Instructions : 1) Size : Custom 2) Use a paper folding style with your imagination 3) Apply your own creativity for improvisation 4) Use dummy images, names & text. Assignment : Table Calendar Layout of one month. Assignment Evaluation : 0 : Not Done [ ] 1 : Incomplete [ ] 2 : Late complete [ ] 3 : Need Improvement [ ] 4 : Complete [ ] 5 : Well Done [ ] Signature of Instructor Date of completion : / /

Practical Exercise : 10 Start Date / / Objective : 1) To develop a sense of design. 2) To understand the typographical layout principals. 3) To improve the knowledge of use of different color schemes in design. 4) Practicing various graphic design software tools. Instructions : 1) Size : Custom 2) Use a paper folding style with your imagination 3) Apply your own creativity for improvisation 4) Use dummy images, names & text. Assignment : Create a Hotel Menu Card Assignment Evaluation : 0 : Not Done [ ] 1 : Incomplete [ ] 2 : Late complete [ ] 3 : Need Improvement [ ] 4 : Complete [ ] 5 : Well Done [ ] Signature of Instructor Date of completion : / /

Practical Exercise : 11 Start Date / / Objective : 1) To develop a sense of design. 2) To understand the typographical layout principals. 3) To improve the knowledge of use of different color schemes in design. 4) Practicing various graphic design software tools. Instructions : 1) Size : use standard measurements of a bank cheque. 2) Create a logo & emblem of bank 3) Apply your own creativity for improvisation 4) Use dummy images, names & text. Assignment : Bank Cheque Design. Title - ‘Opera Bank ’ Assignment Evaluation : 0 : Not Done [ ] 1 : Incomplete [ ] 2 : Late complete [ ] 3 : Need Improvement [ ] 4 : Complete [ ] 5 : Well Done [ ] Signature of Instructor Date of completion : / /

Practical Exercise : 12 Start Date / / Objective : 1) To develop a sense of design. 2) To understand the typographical layout principals. 3) To improve the knowledge of use of different color schemes in design. 4) Practicing various graphic design software tools. Instructions : 1) Size : A4 2) Create a logo & emblem of Company 3) Apply your own creativity for improvisation 4) Use dummy images, names & text. Assignment : Cash Memo / Bill Design. Title ‘ Spectrum Graphics ’ Assignment Evaluation : 0 : Not Done [ ] 1 : Incomplete [ ] 2 : Late complete [ ] 3 : Need Improvement [ ] 4 : Complete [ ] 5 : Well Done [ ] Signature of Instructor Date of completion : / /

Practical Exercise : 13 Start Date / / Objective : 1) To develop a sense of design. 2) To understand the typographical layout principals. 3) To improve the knowledge of use of different color schemes in design. 4) Practicing various graphic design software tools. Instructions : 1) Size : use standard measurements of a match box 2) Create a logo & emblem of company 3) Apply your own creativity for improvisation 4) Use dummy images, names & text. Assignment : Match Box Cover Design. Title - ‘SPARK safety matches ’. Assignment Evaluation : 0 : Not Done [ ] 1 : Incomplete [ ] 2 : Late complete [ ] 3 : Need Improvement [ ] 4 : Complete [ ] 5 : Well Done [ ] Signature of Instructor Date of completion : / /

Practical Exercise : 14 Start Date / / Objective : 1) To develop a sense of design. 2) To understand the typographical layout principals. 3) To improve the knowledge of use of different color schemes in design. 4) Practicing various graphic design software tools. Instructions : 1) Size : use standard measurements of a CD Sticker, cover & Carton. 2) Create a logo & emblem of music company 3) Apply your own creativity for improvisation 4) Use dummy images, names & text. Assignment : Music CD Sticker, CD cover & CD Carton design. Title - ‘MAGICAL MELODIES’ Assignment Evaluation : 0 : Not Done [ ] 1 : Incomplete [ ] 2 : Late complete [ ] 3 : Need Improvement [ ] 4 : Complete [ ] 5 : Well Done [ ] Signature of Instructor Date of completion : / /

Practical Exercise : 15 Start Date / / Objective : 1) To develop a sense of design. 2) To understand the typographical layout principals. 3) To improve the knowledge of use of different color schemes in design. 4) Practicing various graphic design software tools. Instructions : 1) Size : 8 cm (Width) X 20 cm (Height) 2) Create slogan & body copy by your imagination. 3) Apply your own creativity for improvisation 4) Use dummy images, names & text. Assignment : Employment Advertisement for newspaper. Title - ‘Wanted Graphic Designers ’ Assignment Evaluation : 0 : Not Done [ ] 1 : Incomplete [ ] 2 : Late complete [ ] 3 : Need Improvement [ ] 4 : Complete [ ] 5 : Well Done [ ] Signature of Instructor Date of completion : / /
Practical Exercise : 16 Start Date / / Objective : 1) To develop a sense of design. 2) To understand the typographical layout principals. 3) To improve the knowledge of use of different color schemes in design. 4) Practicing various graphic design software tools. Instructions : 1) Size : 12 feet (Width) X 8 feet (Height) 2) Create slogan & content by your imagination. 3) Apply your own creativity for improvisation 4) Use dummy images, names & text. Assignment : Create a Flex banner for shopping mall Title - ‘GRAND DISCOUNT SALE ’ Assignment Evaluation : 0 : Not Done [ ] 1 : Incomplete [ ] 2 : Late complete [ ] 3 : Need Improvement [ ] 4 : Complete [ ] 5 : Well Done [ ] Signature of Instructor Date of completion : / /
Practical Exercise : 17 Start Date / / Objective : 1) To develop a sense of design. 2) To understand the typographical layout principals. 3) To improve the knowledge of use of different color schemes in design. 4) Practicing various graphic design software tools. Instructions : 1) Size : use standard measurements of a 200 gm tooth paste. 2) Create a logo & emblem of manufacturing company 3) Apply your own creativity for improvisation 4) Use dummy images, names & text. Assignment : Develop a cartoon character from following objects...
Create a Tooth paste cartoon Title - ‘ZIGMA White Fresh ’ Assignment Evaluation : 0 : Not Done [ ] 1 : Incomplete [ ] 2 : Late complete [ ] 3 : Need Improvement [ ] 4 : Complete [ ] 5 : Well Done [ ] Signature of Instructor Date of completion : / /

Practical Exercise : 18 Start Date / / Objective : 1) To develop a sense of design. 2) To understand the typographical layout principals. 3) To improve the knowledge of use of different color schemes in design. 4) Practicing various graphic design software tools. Instructions : 1) Size : use standard measurements of railway kiosk. 2) Create a logo & emblem of social organization. 3) Apply your own creativity for improvisation 4) Use dummy images, names & text. Assignment : Create a railway kiosk Title - ‘SAVE WATER, SAVE EARTH ’ Assignment Evaluation : 0 : Not Done [ ] 1 : Incomplete [ ] 2 : Late complete [ ] 3 : Need Improvement [ ] 4 : Complete [ ] 5 : Well Done [ ] Signature of Instructor Date of completion : / /

Practical Exercise : 19 Start Date / / Objective : 1) To develop a sense of design. 2) To understand the typographical layout principals. 3) To improve the knowledge of use of different color schemes in design. 4) Practicing various graphic design software tools. Instructions : 1) Size : A4 2) Create only symbols, don’t use any text
Assignment : Create Icons for following messages - NO MOBILE ZONE FOOD MALL AHEAD KEEP SILENCE DO NOT TOUCH PULL THE DOOR BOOK SHOP SWIMMING PROHIBITED FREE WI-FI ZONE Assignment Evaluation : 0 : Not Done [ ] 1 : Incomplete [ ] 2 : Late complete [ ] 3 : Need Improvement [ ] 4 : Complete [ ] 5 : Well Done [ ] Signature of Instructor Date of completion : / /

Practical Exercise : 20 Start Date / / Objective : 1) To develop a sense of design. 2) To understand the typographical layout principals. 3) To improve the knowledge of use of different color schemes in design. 4) Practicing various graphic design software tools. Instructions : 1) Size : A4 2) Create an emblem of institution 3) Apply your own creativity for improvisation 4) Use dummy images, names & text. Assignment : Award Certificate for Animation Competition
Assignment Evaluation : 0 : Not Done [ ] 1 : Incomplete [ ] 2 : Late complete [ ] 3 : Need Improvement [ ] 4 : Complete [ ] 5 : Well Done [ ] Signature of Instructor Date of completion : / /
S.Y.B.Sc Animation (Under Science Faculty)
Lab Course –II (Sem I I)
Introduction to Action Script
Workbook
(From Academic year 2016-17)
Name: ____________________________________________ College Name: _____________________________________ Roll No. : ____________ Academic Year: ____________

PREPARED BY: Introduction to Action Script Prof. Anjali Sardesai (Chairperson) Prof. Yoginder Vaidya (Co-ordinator) Prof. Rahul Shivade (Member) Prof. Sameer Nerlekar (Member) Reviewed By: BOARD OF STUDY (Animation) MEMBERS:
Dr. Shinde S.N. (Chairman) Prof. Anjali Sardesai (Chairperson, S.Y. B.Sc. (Ani.) Syllabus Reframing) Prof. Rahul Patil (Member) Dr. Chitra Desai (Member) Prof. Dr. R. R. Deshmukh (Member)
About The Work Book :
• Objectives –
� The scope of the course. � Bringing uniformity in the way course is conducted across different
Colleges. � Continuous assessment of the students. � Providing ready references for students while working in the lab.
• How to use this book?
This book is mandatory for the completion of the laboratory course. It is a measure of the performance of the student in the laboratory for the entire duration of the course.
• Instructions to the Instructors: Instructors should explain assignment before implement to the students.

Minimum ten minutes should be required to explain the assignment.
• Instructions to the students
11. Students should carry this book during practical sessions of Computer Science.
12. Printouts of the source code and output is not compulsory but optional. 13. Students should read the topics mentioned in reading section of this Book
before coming for practical. 14. Students should solve all exercises which are selected by Practical in-charge. 15. Students will be assessed for each exercise on a scale of 5
1 Not done 0 2 Incomplete 1 3 Late complete 2 4 Needs improvement 3 5 Complete 4 6 Well-done 5

Assignment 1
Variable & Data Types
What is Variable?
In computer programming, a variable or scalar is a storage location paired with an associated symbolic name (an identifier), which contains some known or unknown quantity of information referred to as a value. The variable name is the usual way to reference the stored value; this separation of name and content allows the name to be used independently of the exact information it represents. The identifier in computer source code can be bound to a value during run time, and the value of the variable may thus change during the course of program execution.
Step 1:Declaring a Variable
Create a new Flash document (ActionScript 3.0). Click on the first frame of the first layer (it
should be the only frame).
Open up the Actions panel by choosing Window > Actions (or pressing F9 on Windows or Opt-
F9 on Mac).
In the Actions panel, type the following:
var message;
This is the bare minimum you need to declare a variable. The word "var" is known as a keyword,
Step 2: Setting a Value
Now that our variable is declared, we can put a value into it. On the next line of the Actions
panel, type the following code:
message = “Hello”;
Step 3: Getting the Value
We now have a named container that has a value inside of it. Let's access that value. In this
case, we'll simply trace the value to the Output panel.
On a new line of code, write the following:
trace(message);
Practical
Step 3: Final Coding
var message; message = “Hello”; trace(message); message = “How are you?”; trace(message);

Output:
Hello How are you?

Step 4: Understanding Data Types
ActionScript 3 has many data types to use as the type for the variables you create. A primitive
value is a value that belongs to one of the following data types: String, Number, int, uint,
Boolean, Null, and void.
ActionScript supports something called strong typing. It's an interesting language in that it's
only strongly-typed if you tell it to be so and it can be strongly-typed at certain points and
weakly-typed in others. There is something to be said for the ease of use of a weakly-typed
language, but most serious programmers will be able to talk for a few hours on the merits of
strong typing.
• String : a textual value, like a name or the text of a book chapter
• Numeric: ActionScript 3 includes three specific data types for numeric data:
• Number : any numeric value, including values with or without a fraction
• int : an integer (a whole number without a fraction)
• uint : an "unsigned" integer, meaning a whole number that is not negative
• Boolean : a true-or-false value, such as whether a switch is on or whether two values
are equal
Practical
Step 5: Final Coding
varmessage:String; message = 42; trace(message);
Test the movie and you should see the following error:
Output:error
1067: Implicit coercion of a value of type int to an unrelated type String.
Assignment Evaluation
0: Not Done [ ] 1: Incomplete [ ] 2: Late Complete
[ ]
3: Need Improvement [ ] 4: Complete [ ] 5: Well Done
[ ]

Signature of the Instructor Date of Completion ___ / __
/ _____

Assignment 2
Array & Types of Array
What's an Array?
An array is a systematic arrangement of similar objects, usually in rows and columns.
Step 1: Creating Array
There are actually two ways to create Arrays, and both of those ways allow you to create them
with elements in them or not.
varary:Array = new Array(“one”,”two”,“three”);
or
varary:Array = [“one”,”two”,”three”];
trace(ary);
output:
one,two,three
Step 2: Adding item to an Array
Three ways to add an array:
1. Zero-based index
2. push method - put a value into the Array at the end. 3. unshift method - add items to the beginning
Keeping in mind that Arrays identify their members by a numeric, zero-based index, let's look at
the most straightforward way to get items into an Array after it has been created:
Practical
varary:Array = new Array(“one”,”two”,“three”); ary[3] = “four”; ary.push(“five”); ary.push(“six”,”seven”,”eight”); ary.unshift(“zero”); trace(ary);
output:
zero,one,two,three,four,five,six,seven,eight
Step 3: Accessing Item in an Array
Three ways to accessing array:
1. Zero-based index

2. pop method - remove last item
3. shift method - remove first item
Array access notation can be used to get data out just as easily as getting it in. Assuming we still
have the "ary" variable still available to us, and that it has 9 items in it, form "zero" to "eight,"
The following:Practical
trace(ary[4]); // four
2. pop method
trace(ary); trace(ary.pop()); trace(ary);
output:
zero,one,two,three,four,five,six,seven,eight eight zero,one,two,three,four,five,six,seven
3. shift method
trace(ary); trace(ary.shift()); trace(ary);
output:
zero,one,two,three,four,five,six,seven zero one,two,three,four,five,six,seven
Step 4: How many items?
It's very common to want to know how many items are in an Array. We can ask the Array itself
for its length. For example:
trace(ary.length); // 7
Step 4: Manipulating Array
join takes the Array and builds a String representation of it. You can (and probably should)
specify the delimiter (that is, the String to use in between each element). By default it is a
comma, but using a newline character can be useful when tracing Arrays:Practical
varary:Array = new Array(“one”,”two”,“three”); trace(ary); trace(ary.join(“/”));
output:

zero,one,two,three zero/one/two/three
Assignment Evaluation
0: Not Done [ ] 1: Incomplete [ ] 2: Late Complete
[ ]
3: Need Improvement [ ] 4: Complete [ ] 5: Well Done
[ ]
Signature of the Instructor Date of Completion ___ / __
/ _____
Assignment 3
Loops
What’s a loops?
A loop in programming is a control block, similar in essence to an if statement or a function, in
that there's a bit of code that resides between curly braces, and that block is controlled by
some form of control structure. In this case, the control allows the block to be executed over
and over, most likely with slight variations, until it is told to stop.
There are three kinds of loops in ActionScript, the for loop, the while loop, and the do loop.
There are also two other kinds that are loops used specifically for traversing a collection such as
an Array, and can't be used in any other way. These are the for...in loop and the for...each loop.
Step 1: The For Loop
The most commonly used kind of loop, in any language, is probably the for loop. Three of the
five loop constructs actually use the word for, but one is referred to simply as the "for loop"
because there are no other keywords involved in making one.
Practical: For Loop
vartotal:int = 1; for(var i:int=0; i<4; i++) { total *= 2; trace(total); }

output:
2 4 8 16
Step 2: While and Do
There are two other "standard" loops that are really just variations on the same idea. We'll look
at them briefly for completeness sake.
1. The while loops are used to repeat a block of code as long as a specified condition is true.
2. The do while loop is a variant of the "while()" loop. The difference is that "do while" loop first
executes the block of code, and then evaluates the condition.
Practical: While Loop
vartotal:int = 1; var i:int=0; while(i<4) { total *= 2; trace(total); i++; }
output:
2 4 8 16
Practical: Do While Loop
vartotal:int = 1; var i:int=1; do { total *= 2; trace ("Total is " + total); i++; }while(i<0);
output:
Total is 2
Step 4: Break & Continue Statement
break is an instruction that allows you to stop processing a loop (or "switch" conditional).
If you want to end a loop before its condition is false, you can use the break instruction after a
conditional "if()".
Practical: Break

vartotal:int = 1; for(var i:int=0; i<4; i++) { total *= 2; if(total==8) break; trace('i=' + i+ ' i-total=' + total); }
output:
i=0 i-total=2 i=0 i-total=4
The continueinstruction skips the remaining statements in the current loop and begins the next
iteration at the top of the loop.
The difference between "break" and "continue" is that the "break" statement ends completely
the loop, while "continue" ends the current iteration only, and lets the loop to continue with
the next iteration.
Practical: continue
vartotal:int = 1; for(var i:int=0; i<4; i++) { total *= 2; if(total==4 || total==8) continue; trace('i=' + i+ ' i-total=' + total); }
output:
i=0 i-total=2 i=0 i-total=16

Assignment Evaluation
0: Not Done [ ] 1: Incomplete [ ] 2: Late Complete
[ ]
3: Need Improvement [ ] 4: Complete [ ] 5: Well Done
[ ]
Signature of the Instructor Date of Completion ___ / __
/ _____

Assignment 4
Conditional Statements
Conditional statements enable you to program a script to make decisions based on one or more
conditions.
All conditional statements deal with Boolean values (true and false). They can execute certain
instructions if a condition is true, and other instructions if it is false.
This tutorial explains the following conditionals:
• if - executes a piece of code only if a certain condition is true
• if ... else - executes some instructions if a condition is true, and other instructions if it's
false
• switch - selects which piece of code to be executed
• ? : - conditional operator
Practical: if … else
varuserInput = 5; if (userInput<10) { trace(“smaller”); } else { if(userInput>10){ trace(“Greater”); } else{ trace(“Equal”); }
}
output:
smaller
Practical: switch case
var light = "red"; switch (light){ case"green": trace("GO"); break; case"red": trace("STOP"); break;

case"yellow": trace("READY"); break; default: trace("Wrong Value!"); } output:
STOP
Assignment Evaluation
0: Not Done [ ] 1: Incomplete [ ] 2: Late Complete
[ ]
3: Need Improvement [ ] 4: Complete [ ] 5: Well Done
[ ]
Signature of the Instructor Date of Completion ___ / __
/ _____

Assignment 5
Function, Method, & Parameter
What is Function?
A function is a set of instructions (a block of code) that are executed only when you access the
functions.
Functions allow you to organize your code into independent pieces that can accomplish
different tasks.
Functions can be used more than once within a script to perform their task. Rather than
rewriting the entire block of code, you can simply call the function again.
There are two general kind of functions:
• predefined - which are included in the programming language (e.g. trace(), addChild(),
etc.)
• created by programmer:
that returns a value (uses the "return" statement)
not returns a value
Step 1:Calling a Function
Practical:
functiongetMsg(msg:String) { trace(msg); } varsite:String = 'coursesweb.net'; getMsg('Welcome to'); getMsg(site);
output:
Welcome to coursesweb.net
Step 2: Using the return
Practical:
functionaddAB(a:Number, b:int) { var c:Number = a+b; return c; } var adds = addAB(7.5, 8); trace(“Total is = ” + adds);

output:
Total is = 15.5

Assignment Evaluation
0: Not Done [ ] 1: Incomplete [ ] 2: Late Complete
[ ]
3: Need Improvement [ ] 4: Complete [ ] 5: Well Done
[ ]
Signature of the Instructor Date of Completion ___ / __
/ _____

Assignment 6
Button Event Handling - Create Play and Stop Buttons
Step 1: Create new flash document
Step 2: Create Three layers
1. For ActionScript
2. For two buttons
3. For Object
Step 3: Animate the Object
Step 4: Give Instance name two buttons
1. Button first - play_btn
2. Button Second - stop_btn
Step 5: type following ActionScript on ActionScript Layer, frame 1
play_btn.addEventListener(MouseEvent.CLICK, play_button_onMouseClick); stop_btn.addEventListener(MouseEvent.CLICK, stop_button_onMouseClick); functionplay_button_onMouseClick(e:MouseEvent):void { play(); } functionstop_button_onMouseClick(e:MouseEvent):void

{ stop(); }

Assignment Evaluation
0: Not Done [ ] 1: Incomplete [ ] 2: Late Complete
[ ]
3: Need Improvement [ ] 4: Complete [ ] 5: Well Done
[ ]
Signature of the Instructor Date of Completion ___ / __
/ _____
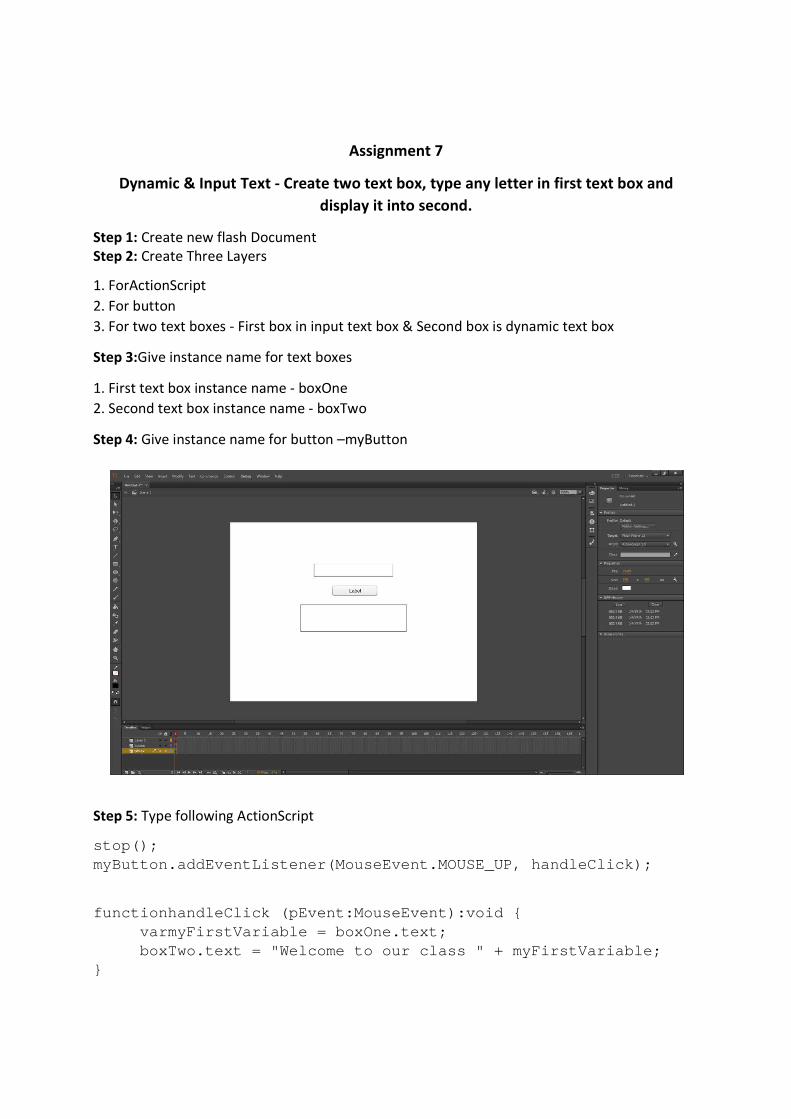
Assignment 7
Dynamic & Input Text - Create two text box, type any letter in first text box and
display it into second.
Step 1: Create new flash Document
Step 2: Create Three Layers
1. ForActionScript
2. For button
3. For two text boxes - First box in input text box & Second box is dynamic text box
Step 3:Give instance name for text boxes
1. First text box instance name - boxOne
2. Second text box instance name - boxTwo
Step 4: Give instance name for button –myButton
Step 5: Type following ActionScript
stop(); myButton.addEventListener(MouseEvent.MOUSE_UP, hand leClick);
functionhandleClick (pEvent:MouseEvent):void { varmyFirstVariable = boxOne.text; boxTwo.text = "Welcome to our class " + myFirstVar iable; }


Assignment Evaluation
0: Not Done [ ] 1: Incomplete [ ] 2: Late Complete
[ ]
3: Need Improvement [ ] 4: Complete [ ] 5: Well Done
[ ]
Signature of the Instructor Date of Completion ___ / __
/ _____

Assignment 8
Math - Generate random number between 1 to 100 and display in text box.
Step 1: Create new flash document.
Step 2:Create three layers
1. For ActionScript
2. For Button
3. For Text Box
Step 3: Give Instance names for button and text box
1. Text box instance name - showRandom_txt
2. Button instance name - generate_btn
Step 4: Type following ActionScript
stop();
functionrandomNumbers(min:Number,max:Number) {
varResults:Number=Math.floor(Math.random()*max)+min ;
return Results;
}
generate_btn.addEventListener(MouseEvent.CLICK, showRandomnumber);
functionshowRandomnumber(event:MouseEvent):void{
showRandom_txt.text = randomNumbers(1,100);

}

Assignment Evaluation
0: Not Done [ ] 1: Incomplete [ ] 2: Late Complete
[ ]
3: Need Improvement [ ] 4: Complete [ ] 5: Well Done
[ ]
Signature of the Instructor Date of Completion ___ / __
/ _____

Assignment 9
Start Drag and Stop Drag Functions
Drag-and-drop is the action of clicking on a virtual object and dragging it to a different location
or onto another virtual object. In general, it can be used to invoke many kinds of actions, or
create various types of associations between two objects.
Step 1: Create flash document
Step 2: Create three layers
1. For ActionScript
2. For MovieClips(object) - object convert into movieClip by pressing F8 key.
3. Text box
Step 3: Give instance names for movie clips and text box
1. First movieClip instance name: rect_movieClip
2. Second movieClip instance name: circle_movieClip
3. Text box instance name: textField_txt
Step 4: Type following ActionScript in ActionScript layer, Frame 1
rect_movieClip.addEventListener(MouseEvent.MOUSE_DO WN, mouseDownHandler);
rect_ movieClip.addEventListener(MouseEvent.MOUSE_U P, mouseUpHandler);
circle_ movieClip.addEventListener(MouseEvent.MOUSE _DOWN, mouseDownHandler);
circle_ movieClip.addEventListener(MouseEvent.MOUSE _UP, mouseUpHandler);

functionmouseDownHandler (evt:MouseEvent):void {
var object=evt.target;
object.startDrag();
}
functionmouseUpHandler(evt:MouseEvent):void {
varobj=evt.target;
var target = obj.dropTarget;
if (target != null &&target.parent == rect_mc)
{
textField_txt.text = "Make it !!";
}else {
textField_txt.text = "Missed";
}
obj.stopDrag();
obj.removeEventListener(MouseEvent.MOUSE_DOWN, mouseDownHandler);
obj.removeEventListener(MouseEvent.MOUSE_UP, mouseUpHandler);
}
Assignment Evaluation
0: Not Done [ ] 1: Incomplete [ ] 2: Late Complete
[ ]
3: Need Improvement [ ] 4: Complete [ ] 5: Well Done
[ ]

Signature of the Instructor Date of Completion ___ / __
/ _____

Assignment 10
Create Two Buttons P, Q
When the user click on P, display a square followed by circle.
When the user click on Q, display a circle followed by square.
Step 1: Create new flash document
Step 2: Create three layers
1. For ActionScript
2. For movieClip (object)
3. For buttons
Step 3: Give instance names for movieClip and buttons
1. MovieClip instance name: rect_movieClip
2. Button instance name: p_btn, q_btn
Step 4: Type following script into ActionScript layer, frame 1
p_btn.addEventListener(MouseEvent.CLICK, square);
q_btn.addEventListener(MouseEvent.CLICK, circle);
function square (e:MouseEvent):void {
rect_movieClip.gotoAndStop(20);
}
function circle(e:MouseEvent):void {
rect_movieClip.gotoAndStop(1);
}

Assignment Evaluation
0: Not Done [ ] 1: Incomplete [ ] 2: Late Complete
[ ]
3: Need Improvement [ ] 4: Complete [ ] 5: Well Done
[ ]
Signature of the Instructor Date of Completion ___ / __
/ _____

Assignment 11
Create Log-in panel - when user input wrong username and password display message
“Username and password is incorrect.”
Step 1: Create new flash document
Step 2: Create following layers
1. For ActionScript
2. For dynamic text box for message - “username or password incorrect”
3. For button - login in first frame, second button insert in second frame same layer
4. For text - username, password
5. For two input text - 1. Username, 2. Password
6. For header - company name
7. For BG
Step 3: Give instance names
1. Dynamic text box instance name - messageTxt
2. Input text boxes instance name - 1. userTxt, 2. passTxt
3. Buttons instance name - login_btn, logout_btn
Step 4: Type following script in ActionScript layer, Frame 1
stop(); login_btn.buttonMode = true; // show hand cursor //adding event listener login_btn.addEventListener(MouseEvent.CLICK, loginU ser); functionloginUser(e:MouseEvent):void{

//if username & password are correct allow entry if(userTxt.text == "graphic" &&passTxt.text == "ma nia"){ gotoAndStop(2); }else { //otherwise show an error message varalert:TextFormat = new TextFormat(); alert.color = 0xff0000; //red font messageTxt.text = "Incorrect username or password "; messageTxt.setTextFormat(alert); } }
Step 5: Type following script in ActionScript layer, Frame 2
stop(); logout_btn.buttonMode = true; // show hand cursor //adding event listener logout_btn.addEventListener(MouseEvent.CLICK, logou tUser); functionlogoutUser(e:MouseEvent):void{ gotoAndStop(1); }
Assignment Evaluation
0: Not Done [ ] 1: Incomplete [ ] 2: Late Complete
[ ]
3: Need Improvement [ ] 4: Complete [ ] 5: Well Done
[ ]
Signature of the Instructor Date of Completion ___ / __
/ _____

Assignment 12
Loading external images or swf using loader function
Step 1: Create new flash document
Step 2:Create three layers
1. For ActionScript
2. For button
3. For Container - create box convert to movieClip
Step 3: Give the instance names
1. Button instance name: loader_btn
2. Container instance name:loaderImg
Step 4: Type script in ActionScript layer, frame 1
var img1Request:URLRequest = new URLRequest("img/1. jpg");
var img1Loader:Loader = new Loader();
loader_btn.addEventListener(MouseEvent.CLICK, loadI mg);
functionloadImg(event:MouseEvent):void {
img1Loader.load(img1Request);
img1Loader.contentLoaderInfo.addEventListener(Even t.COMPLETE, loadNow);
functionloadNow(event:Event):void {
loaderImg.addChild(img1Loader);

}
}
Assignment Evaluation
0: Not Done [ ] 1: Incomplete [ ] 2: Late Complete
[ ]
3: Need Improvement [ ] 4: Complete [ ] 5: Well Done
[ ]
Signature of the Instructor Date of Completion ___ / __
/ _____

Assignment 13
Create three buttons Red, Green, Blue and change the object colors using instance
properties.
Step 1: Create new flash document
Step 2: Create following layers
1. For ActionScript
2. For Button - Three Button
3. For MovieClip (rectangular object)
Step 3: Give Proper instance name
1. MovieClip instance name: rectObj
2. Button instance name: btn1, btn2, btn3
Step 4: Type following script in ActionScript layer, frame 1
varobj_color:ColorTransform = new ColorTransform(); obj_color.color = 0xff0000; mcRect.transform.colorTransform = obj_color; // an Array with the instances of the buttons varbtts:Array = [btn1, btn2, btn3]; // sets an object with colors for each button varset_colors:Object = {'btn1':0xff0000, 'btn2':0x0 0ff00, 'btn3':0x0000ff}; // traverse the "btts" array with button instances for(var i:int=0; i<btts.length; i++) {

// register CLICK event for each button btts[i].addEventListener(MouseEvent.CLICK, changeCo lor); } // function called by CLICK events functionchangeColor(evt:Event):void { // get the instance name of the clicked button varb_name = evt.target.name; // set and change the square (sqr) color obj_color.color = set_colors[b_name]; mcRect.transform.colorTransform = obj_color; }
Assignment Evaluation
0: Not Done [ ] 1: Incomplete [ ] 2: Late Complete
[ ]
3: Need Improvement [ ] 4: Complete [ ] 5: Well Done
[ ]
Signature of the Instructor Date of Completion ___ / __
/ _____

Assignment 14
Create form using AS 3.0
Step 1: Create simple php file using notepad software script detail following and create folder
save php file in this folder extension .php
<?php $to = " [email protected] "; $subject = ($_POST['senderName']); $message = ($_POST['senderMsg']); $message .= "\n\n---------------------------\n"; $message .= "E-mail Sent From: " . $_POST['senderNa me'] . " <" . $_POST['senderEmail'] . ">\n"; $headers = "From: " . $_POST['senderName'] . " <" . $_POST['senderEmail'] . ">\n"; if(@mail($to, $subject, $message, $headers)) { echo "answer=ok"; } else { echo "answer=error"; } ?>
Step 2: Create new flash document ActionScript 3.0 save file same folder first php files save
folder
Step 3:Create three layers
1. For ActionScript
2. For Button
3. For input texts - email, name, message there are three input text boxes
Step 4:Give the instance names for
1. Button instance name: submit_btn
2. Input text boxes instance name: email_txt, name_txt, message_txt


Step 5: Type following script in ActionScript layer, frame 1
submit_btn.addEventListener(MouseEvent.CLICK, sendM essage); functionsendMessage(e:MouseEvent):void { varmy_vars:URLVariables = new URLVariables(); my_vars.senderName = name_txt.text; my_vars.senderEmail = email_txt.text; my_vars.senderMsg = message_txt.text; varmy_url:URLRequest = new URLRequest("mail.php"); my_url.method = URLRequestMethod.POST; my_url.data = my_vars; varmy_loader:URLLoader = new URLLoader(); my_loader.dataFormat = URLLoaderDataFormat.VARIABL ES; my_loader.load(my_url); name_txt.text = ""; email_txt.text = ""; message_txt.text = "Message Sent"; }
Assignment Evaluation
0: Not Done [ ] 1: Incomplete [ ] 2: Late Complete
[ ]
3: Need Improvement [ ] 4: Complete [ ] 5: Well Done
[ ]
Signature of the Instructor Date of Completion ___ / __
/ _____

Assignment 15
Object Oriented Programming - use the external ActionScript Files, Classes, & Objects
Step 1: What is OOP?
Object-Oriented Programming (or OOP for short) is not the only or even necessarily the best
way to program in ActionScript 3. There seems to be a myth floating around ever since
ActionScript 3 debuted that, in order to use AS3, you need to use OOP.
Step 2: Object and Classes
Object-Oriented Programming really boils down to two fundamental units: classes and objects.
The two are intrinsically related: a class begets an object.
Think of a class as a blueprint of a house, and an object as an actual house. The blueprint is
more of a schematic for what the house will be like, not an actual house. When you write
object-oriented code, you write the blueprints, the classes. Your code then creates the objects
from these classes when it runs.
The term instance is a word that describes an object. When an object is created from a class, it
is said to beinstantiated, and thus an instance of the class is born. The word object is typically
synonymous withinstance.
Step 3: Make a Project Folder
Let's make a document class, which will act as a basis for steps later in this tutorial. To do so,
first create a folder on your filesystem that will house this particular project.
Now make a Flash file (ActionScript 3.0), and save it to this folder. The name isn't terribly
important, naming OOP.fla
Step 4: Document Class Text File
All that being said, create a new file in the editor of your choosing (if you're using Flash CS3+, go
to the File menu, choose New, and then choose ActionScript File from the list).
Save this file as DocumentClass.as in the same folder as your Flash file. This is important: the
location and the name matter very much. The name doesn't have to actually be
"DocumentClass.as" but it's what I'll be using and to prevent confusion, I recommend you just
do what I do. The name can be anything you want (more or less), but my point is that the name
plays an important role in AS3 OOP, so be paying attention. Same deal with the location of the
file; technically it can be anywhere but for convenience just follow my lead. More options will
be revealed by the end of this series.


Step 5: Write the Document Class
You are now faced with an empty file. If you've ever suffered writer's block (I have, which
regular readers might have guessed...), you can be comforted in the fact that the first thing you
need to write is actuallyboilerplate
package{
importflash.display. MovieClip; importflash.text.TextField; publicclassDocumentClass extendsMovieClip { publicfunctionDocumentClass() { vartf:TextField = newTextField(); addChild(tf); tf.text = "Hello World"; } } }
Step 6: Assigning Document Class
As mentioned at the end of the last step, the Flash file (OOP.fla
that it has a specific document class associated with it. Technically, it
class, only the document class is just plain old
It's good to know that, but what we really want right now is to let this Flash file know
DocumentClass.as file we just wrote is. To do that, first make sure nothing is selected (you can
click anywhere on the stage where there isn't a visual asset, or you can choose
All, or press Command-Shift-A or Control
Next, open up the Properties panel. If you've successfully deselected everything, the Properties
panel should say "Document" at the top
Once everything checks out, go ahead and test your movie. You should see a plain window with
the words Hello World in it:
Step 5: Write the Document Class
are now faced with an empty file. If you've ever suffered writer's block (I have, which
regular readers might have guessed...), you can be comforted in the fact that the first thing you
boilerplate. You'll need to write the following:
importflash.display. MovieClip; importflash.text.TextField; publicclassDocumentClass extendsMovieClip {
publicfunctionDocumentClass() { TextField = newTextField();
addChild(tf); tf.text = "Hello World";
Step 6: Assigning Document Class
As mentioned at the end of the last step, the Flash file (OOP.fla in my case) doesn't yet know
ific document class associated with it. Technically, it does
class, only the document class is just plain old MovieClip, so it's not going to do much.
It's good to know that, but what we really want right now is to let this Flash file know
file we just wrote is. To do that, first make sure nothing is selected (you can
click anywhere on the stage where there isn't a visual asset, or you can choose
A or Control-Shift-A).
xt, open up the Properties panel. If you've successfully deselected everything, the Properties
panel should say "Document" at the top
Once everything checks out, go ahead and test your movie. You should see a plain window with
are now faced with an empty file. If you've ever suffered writer's block (I have, which
regular readers might have guessed...), you can be comforted in the fact that the first thing you
in my case) doesn't yet know
does have a document
MovieClip, so it's not going to do much.
It's good to know that, but what we really want right now is to let this Flash file know where the
file we just wrote is. To do that, first make sure nothing is selected (you can
click anywhere on the stage where there isn't a visual asset, or you can choose Edit > Deselect
xt, open up the Properties panel. If you've successfully deselected everything, the Properties
Once everything checks out, go ahead and test your movie. You should see a plain window with


Step 7: Create a Button Class
We'll create a class that, when instantiated, draws a rectangle, puts text into a label, handles
roll overs and outs, and can respond to clicks. Start by creating a new text file in your text
editor. Save it as "Button101.as"in the same folder as your Flash file. This is important.
Step 8: Type following script in button101.as file
package { importflash.display.Shape; importflash.display.Sprite; importflash.events.MouseEvent; importflash.text.TextField; importflash.text.TextFormat; public class Button101 extends Sprite { privatevarbgd:Shape; privatevarlabelField:TextField; privatevar _url:String; public function Button101() { bgd = new Shape(); bgd.graphics.beginFill(0x999999, 1); bgd.graphics.drawRect(0, 0, 200, 50); addChild(bgd); labelField = new TextField(); labelField.width = 200; labelField.height = 30; labelField.y = 15; varformat:TextFormat = new TextFormat(); format.align = "center"; format.size = 14; format.font = "Verdana"; labelField.defaultTextFormat = format; addChild(labelField); addEventListener(MouseEvent.ROLL_OVER, onOver); addEventListener(MouseEvent.ROLL_OUT, onOut); mouseChildren = false; buttonMode = true; } public function set label(text:String):void { labelField.text = text; varautoWidth:Number = Math.max(200, labelField.textWidth + 40); this.width = autoWidth; } public function get label():String { returnlabelField.text; }

private function onOver(e:MouseEvent):void { bgd.alpha = 0.8; } private function onOut(e:MouseEvent):void { bgd.alpha = 1; } public function set url(theUrl:String):void { if (theUrl.indexOf("http://") == -1) { theUrl = "http://" + theUrl; } _url = theUrl; } public function get url():String { return _url; } override public function set width(w:Number):void { labelField.width = w; bgd.width = w; } override public function set height(h:Number):void { labelField.height = h; labelField.y = (h - labelField.textHeight) / 2 - 3; bgd.height = h; } } }
Step 9:Type following Script in DocumentClass.as file
package { import flash.display. MovieClip; importflash.text.TextField; importflash.events.MouseEvent; import flash.net.*; public class DocumentClass extends MovieClip { privatevartf:TextField; privatevar button:Button101; privatevar button2:Button101; public function DocumentClass() { tf = new TextField(); addChild(tf); tf.text = "Hello World"; button = new Button101(); button.x = 10;

button.y = 200; button.label = "Active Tuts"; button.url = "http://active.tutsplus.com"; addChild(button); button.addEventListener(MouseEvent.CLICK, onButtonClick); button2 = new Button101(); button2.x = 220; button2.y = 200; button2.label = "Press This Button To Hack the Gibson"; button2.url = "http://www.google.com/search?q=actionscript+3+tutorials"; addChild(button2); button2.addEventListener(MouseEvent.CLICK, onButtonClick); button.height = 100; } private function onButtonClick(e:MouseEvent):void { navigateToURL(new URLRequest(e.target.url)); } } }
Assignment Evaluation
0: Not Done [ ] 1: Incomplete [ ] 2: Late Complete
[ ]
3: Need Improvement [ ] 4: Complete [ ] 5: Well Done
[ ]
Signature of the Instructor Date of Completion ___ / __
/ _____

Assignment 16
Create Calculator using AS 3.0
Step 1: Create new flash document
Step 2: Create following layers
1. ActionScript
2. Dynamic text box for symbol text
3. Input text box for inputRight
4. Input text box for inputLeft
5. Dynamic text box for results text
6. Buttons layer - five button on the layers plus, sub, mult, div, equal
7. Text layer for “Flash Calculator”
Step 3: Give instance name for button, input text, and dynamic text
1. Dynamic text box instance name on second layer text box: results_txt
2. Input text instance name on third layer: inputRight
3. Input text instance name on fourth layer: inputLeft
4. Dynamic text box instance name on fifth layer: results_txt
5. Buttons instance name on sixth layer: plus_btn, sub_btn, mult_btn, div_btn,
equal_btn
Step 4: Result on the workspace as a below:
Step 5: Type following Script in ActionScript layer, frame 1
plus_btn.addEventListener(MouseEvent.CLICK, plusClick); sub_btn.addEventListener(MouseEvent.CLICK, subClick); mult_btn.addEventListener(MouseEvent.CLICK, multClick); div_btn.addEventListener(MouseEvent.CLICK, divClick); equal_btn.addEventListener(MouseEvent.CLICK, equClick);

varplusSym:Boolean = false; varsubSym:Boolean = false; varmultSym:Boolean = false; vardivSym:Boolean = false; num1.border = true; num2.border = true; num1.restrict = "0-9"; num2.restrict = "0-9"; functionplusClick(event:MouseEvent):void { plusSym = true; subSym = false; multSym = false; divSym = false; sym_txt.text = "+"; } functionsubClick(event:MouseEvent):void { plusSym = false; subSym = true; multSym = false; divSym = false; sym_txt.text = "-"; } functionmultClick(event:MouseEvent):void { plusSym = false; subSym = false; multSym = true; divSym = false; sym_txt.text = "x"; } functiondivClick(event:MouseEvent):void { plusSym = false; subSym = false; multSym = false; divSym = true; sym_txt.text = "/"; } //----------------Numbers----------------\\ var input1:String; var input2:String; varplusRes:Number; varsubRes:Number; varmultRes:Number; vardivRes:Number; functionequClick(event:MouseEvent):void {

input1 = num1.text; input2 = num2.text; if(plusSym == true) { plusRes = parseInt(input1) + parseInt(input2); plusRes.toString(); results_txt.text = String(plusRes); }else if(subSym == true) { subRes = parseInt(input1) - parseInt(input2); subRes.toString(); results_txt.text = String(subRes); }else if(multSym == true) { multRes = parseInt(input1) * parseInt(input2); multRes.toString(); results_txt.text = String(multRes); }else if(divSym == true) { divRes = parseInt(input1) / parseInt(input2); divRes.toString(); results_txt.text = String(divRes); }else { results_txt.text = "Please choose an oprator."; } } Assignment Evaluation
0: Not Done [ ] 1: Incomplete [ ] 2: Late Complete
[ ]
3: Need Improvement [ ] 4: Complete [ ] 5: Well Done
[ ]
Signature of the Instructor Date of Completion ___ / __
/ _____

Assignment 17
Create 3 Buttons Navigation Bar – Home, Product, and Contact. Loading different
images clicking the buttons.
Step 1: Create new flash document
Step 2:Create three layers
1. For ActionScript
2. For button
3. For Container - create box convert to movieClip
Step 3: Give the instance names
1. Button instance name: home_btn, product_btn, contact_btn
2. Container instance name: loaderImg
Step 4: Type script in ActionScript layer, frame 1
var img1Request:URLRequest = new URLRequest("img/1. jpg");
var img1Loader:Loader = new Loader();
home_btn.addEventListener(MouseEvent.CLICK, homeImg );

functionhomeImg(event:MouseEvent):void {
img1Loader.load(img1Request);
img1Loader.contentLoaderInfo.addEventListener(Even t.COMPLETE, loadNow);
functionloadNow(event:Event):void {
loaderImg.addChild(img1Loader);
}
}
Note:Same Script use another two buttons
1. Home page loading image
2. Product page loading gif file
3. Contact page loading swf file
Assignment Evaluation
0: Not Done [ ] 1: Incomplete [ ] 2: Late Complete
[ ]
3: Need Improvement [ ] 4: Complete [ ] 5: Well Done
[ ]
Signature of the Instructor Date of Completion ___ / __
/ _____

Assignment 18
Create preloader using AS3.0
Step 1: Create new flash document
Step 2: Create following layers
1. For ActionScript
2. For Preloader
3. For content put into any images or videos on frame 2
Step 3: In Preloader layer create new symbol movie clip insert > symbol > movie clip
Into movie clip create three layers
1. Dynamic text - three dynamic text boxes for percent, of bytes, and total bytes
2. Visual - loading bar border
3. Fill - loading bar
Step 4: Give instance names
1. Main movie clip instance name: preloader_mclip
2. Dynamic text boxes instance name: precent_txt, ofBytes_txt, totalBytes_txt
Step 5:Type following script in ActionScript layer, frame 1
stop(); this.addEventListener(Event.ENTER_FRAME, loading); function loading (e:Event):void { vartoLoad:Number = this.stage.loaderInfo.bytesTotal; varloaded:Number = this.stage.loaderInfo.bytesLoaded; vartotal:Number = loaded/toLoad;

preloader_mc.preloaderFill_mc.scaleX = loaded/toLoad; preloader_mc.percent_txt.text = Math.floor ((loaded/toLoad)*100) + "%"; preloader_mc.ofBytes_txt.text = loaded + "bytes"; preloader_mc.totalBytes_txt.text = toLoad + "bytes"; if (toLoad == loaded) { play(); this.removeEventListener(Event.ENTER_FRAME, loading); } }
Step 6: Type following script in ActionScript layer, frame 2 stop(); Assignment Evaluation
0: Not Done [ ] 1: Incomplete [ ] 2: Late Complete
[ ]
3: Need Improvement [ ] 4: Complete [ ] 5: Well Done
[ ]
Signature of the Instructor Date of Completion ___ / __
/ _____

Assignment 19
Create Basic Dynamic Website in Flash
Create following website in flash, use your login and coding concept to create dynamic
webpages in flash using ActionScript 3.0
Page 1: Home Page
Page 2: About

Page 3: Building Gallery
Page 4: Buying


Page 5: Contacts
Assignment Evaluation
0: Not Done [ ] 1: Incomplete [ ] 2: Late Complete
[ ]
3: Need Improvement [ ] 4: Complete [ ] 5: Well Done
[ ]
Signature of the Instructor Date of Completion ___ / __
/ _____

Assignment 20
Create Basic Game in Flash using AS 3.0
Step 1: Create new flash document
Step 2: Create layers as u need
Step 3: Start the game design
a simple shoot-em-up game, based loosley (extremely loosely) on the classic Asteroids. We'll
use loops to iterate over collections of bullets and enemies, and perform hit tests on each.
Don't expect too much in terms of game play; our purpose is to use loops in a practical setting,
not learn the ins and outs of game design.
A quick tour of the FLA is in order, however. There exist a few items in the library, most of
which are on the stage. There is the player's ship:
This is on the stage at the left, facing right. It has an instance name of ship. The ship will move
vertically in response to the player's mouse movement, and will never change its rotation or its
horizontal position. You may notice that the registration point of the ship is centered, to make
it easier to position to the mouse.
There is a symbol called Asteroid, representing something for the player to fight.
This isn't placed on stage, but is instead prepared for use with ActionScript. You might notice in
the library that this symbol has an entry under "Linkage". This lets us work with the symbol, and
set up individual instances, through code. Asteroids will move in a random direction, and wrap
around the edges of the stage.
There's another symbol called Bullet:
It is not on the stage, but has a Linkage identifier, like the Asteroid symbol. Bullets will become
attached to the stage programatically, and shoot from the player's ship toward the right. If
there's a collision between any bullet and any asteroid, both of them are removed.
This actually leads to one of the tricks involved in programming Arrrays and loops. We'll get into
the details soon enough, but keep an eye out for a few gotchas with our looping.
Finally, there's a "You win!" sign, placed on stage in the center with the instance name win.
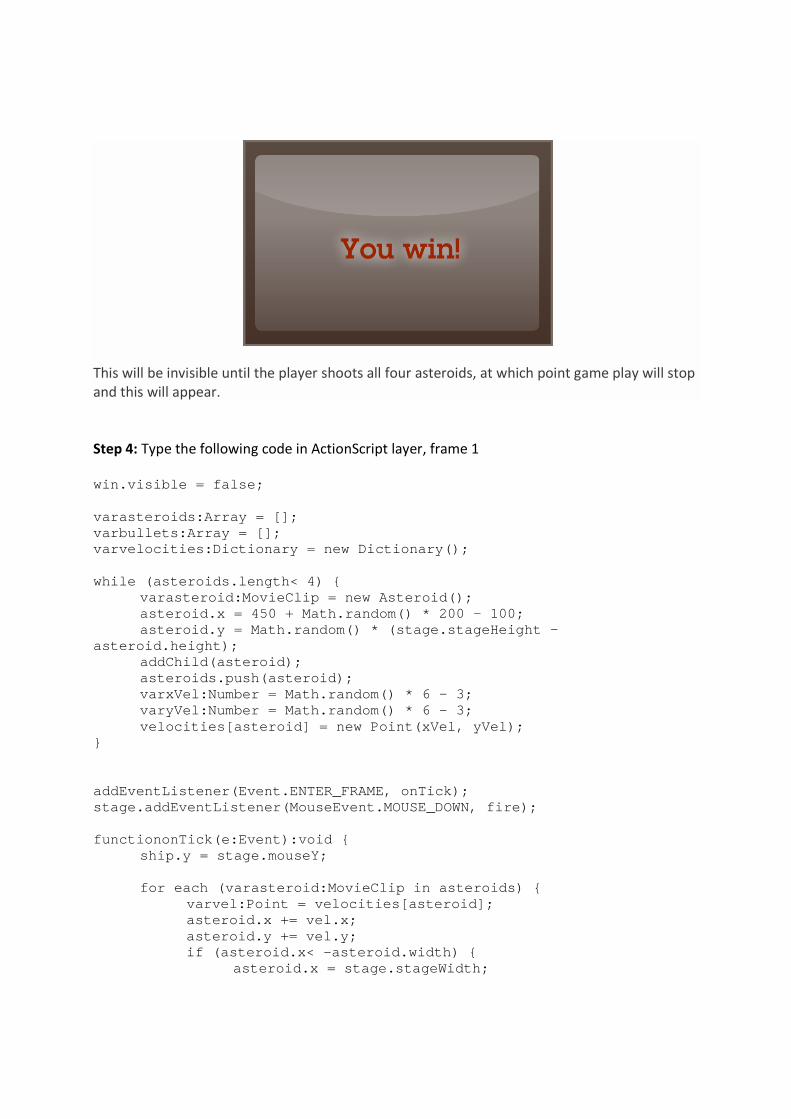
This will be invisible until the player shoots all four asteroids, at which point game play will stop
and this will appear.
Step 4: Type the following code in ActionScript layer, frame 1
win.visible = false; varasteroids:Array = []; varbullets:Array = []; varvelocities:Dictionary = new Dictionary(); while (asteroids.length< 4) { varasteroid:MovieClip = new Asteroid(); asteroid.x = 450 + Math.random() * 200 - 100; asteroid.y = Math.random() * (stage.stageHeight - asteroid.height); addChild(asteroid); asteroids.push(asteroid); varxVel:Number = Math.random() * 6 - 3; varyVel:Number = Math.random() * 6 - 3; velocities[asteroid] = new Point(xVel, yVel); } addEventListener(Event.ENTER_FRAME, onTick); stage.addEventListener(MouseEvent.MOUSE_DOWN, fire); functiononTick(e:Event):void { ship.y = stage.mouseY; for each (varasteroid:MovieClip in asteroids) { varvel:Point = velocities[asteroid]; asteroid.x += vel.x; asteroid.y += vel.y; if (asteroid.x< -asteroid.width) { asteroid.x = stage.stageWidth;

} else if (asteroid.x>stage.stageWidth) { asteroid.x = -asteroid.width; } if (asteroid.y< -asteroid.height) { asteroid.y = stage.stageHeight; } else if (asteroid.y>stage.stageHeight) { asteroid.y = -asteroid.height; } } for (var i:int = 0; i<bullets.length; i++) { varbullet:Bullet = bullets[i]; bullet.x += 3; if (bullet.x>stage.stageWidth + 2) { removeChild(bullet); bullets.splice(i, 1); i--; } } for (i = 0; i<asteroids.length; i++) { asteroid = asteroids[i]; for (var j:int = 0; j <bullets.length; j++) { bullet = bullets[j]; if (asteroid.hitTestObject(bullet)) { removeChild(asteroid); removeChild(bullet); asteroids.splice(i, 1); bullets.splice(j, 1); i--; break; } } } if (asteroids.length == 0) { win.visible = true; setChildIndex(win, numChildren - 1); removeEventListener(Event.ENTER_FRAME, onTick); } } function fire(me:MouseEvent):void { var b:Bullet = new Bullet(); b.x = 110; b.y = ship.y; bullets.push(b);

addChild(b); }
Assignment Evaluation
0: Not Done [ ] 1: Incomplete [ ] 2: Late Complete
[ ]
3: Need Improvement [ ] 4: Complete [ ] 5: Well Done
[ ]
Signature of the Instructor Date of Completion ___ / __ / _____

S.Y.B.Sc Animation
(Under Science Faculty)
Lab Course –II (Sem I)
Animation Techniques I & II
Workbook
(From Academic year 2016-17)
Name: ____________________________________________ College Name: _____________________________________ Roll No. : ____________ Academic Year: ____________
PREPARED BY: Animation Techniques I & II Prof. Anjali Sardesai (Chairperson) Prof. Pravin Karle (Co-ordinator) Prof. Madhura Khoje (Member) Reviewed By: BOARD OF STUDY (Animation) MEMBERS:
Dr. Shinde S.N. (Chairman) Prof. Anjali Sardesai (Chairperson, S.Y. B.Sc. (Ani.) Syllabus Reframing) Prof. Rahul Patil (Member) Dr. Chitra Desai (Member) Prof. Dr. R. R. Deshmukh (Member)
About The Work Book :
• Objectives –
� The scope of the course. � Bringing uniformity in the way course is conducted across different
Colleges. � Continuous assessment of the students. � Providing ready references for students while working in the lab.
• How to use this book?
This book is mandatory for the completion of the laboratory course. It is a measure of the performance of the student in the laboratory for the entire duration of the course.
• Instructions to the Instructors: Instructors should explain assignment before implement to the students.
Minimum ten minutes should be required to explain the assignment.
• Instructions to the students
16. Students should carry this book during practical sessions of Computer Science.
17. Printouts of the source code and output is not compulsory but optional. 18. Students should read the topics mentioned in reading section of this Book
before coming for practical. 19. Students should solve all exercises which are selected by Practical in-charge. 20. Students will be assessed for each exercise on a scale of 5
1 Not done 0 2 Incomplete 1 3 Late complete 2 4 Needs improvement 3 5 Complete 4 6 Well-done 5

Animation Technique
1. Strawberry fruit (Clay)
Practice Exercise :1 Start Date
/ /
• Objective:
1. To understand the concept of clay modeling.
2. To understand the clay texture.
• Instructions:
1. Bring Pink, Blue, Green, yellow, Orange color Clay and clay tools.
• Assignment – Create cartoon clay modal for a Strawberry fruit.
Example

2.Create Cartoon sofa (Clay)
Practice Exercise :2 Start Date
/ /
• Objective:
1. To understand the concept Basic shapes.
• Instructions:
1. Bring clay of your choice.
Signature of Instructor: Date: Remark :

2. Bring flat Plastic sheet.
• Assignment 2 – Create clay modal for cartoon sofa.
Example
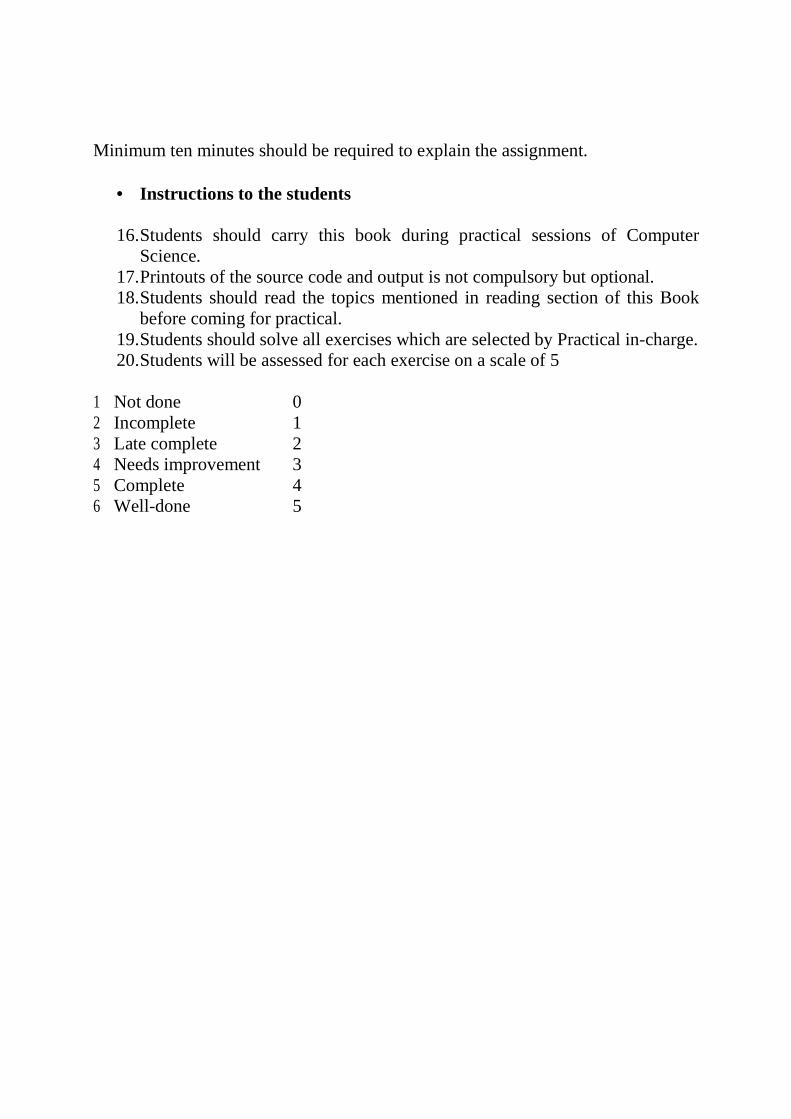
3. Create CartoonBackground (Clay)
Practice Exercise :3 Start Date
/ /
Signature of Instructor: Date: Remark :
• Objective:
1. To understand the basic concept of background making. 2. To understand material used for BG.
• Instructions:
1. Student should bring their own material.
2. Go through the “Making of Titling of ‘Tare Zameen par’ Bollywood movie”
Assignment 3 –Create a clay model for Cartoon Background for the following
theme A. Bedroom / B. student classroom
Example:
Signature of Instructor: Date: Remark :

4. Create Gaming or Movie Character (Clay)
Practice Exercise :4 Start Date
/ /
• Objective:
1. To understand the Basic wire Armature for a character. 2. To understand Primary, Secondary and Tertiary color schemes.
• Instructions:
1. Student should bring thin wire for making Armature. 2. Student should bring Reference Image. 3. Students can create their own design with permission only.
• Assignment 4- Create a clay model for gaming character of Mario or Any other Gaming or movie character of your choice.
Example:

5.
Create Cartoon Mobile (Clay)
Practice Exercise :5 Start Date
/ /
• Instructions:
2. Student should bring Reference Image. 3. Students can create their own design with permission only.
• Assignment 5 - Create a clay model Cartoon Mobile
Example:
Signature of Instructor: Date: Remark :

6. Create Cut out Character for Cartoon Cat
Practice Exercise :6 Start Date
Signature of Instructor: Date: Remark :

/ /
� Objective:
1. To understand the Animal walk cycle. 2. To overcome the obstacles come while doing animal walk cycle. � Assignment 6 – Create a cut out animation character for a cartoon Cat.
Example:
Signature of Instructor: Date: Remark :

7. Create Cut Out character for a professional manager
Practice Exercise :7 Start Date
/ /
� Objective:
1. To understand the character of older age.and to get the expected result.
� Assignment – 7.A cut out animation character for a professional
manager Around 45.
Example:
8. cut out animation character for a school going girl
Practice Exercise :8 Start Date
/ /
� Objective:
Signature of Instructor: Date: Remark :

1. To understand the basic concept and body structure of Teen age character.
2. To understand details of character.
� Assignment 8 – Create a cut out animation character for a school going
girl, age 10-12.
Example
Signature of
Instructor:
Date: Remark :

Assignment 09 Rotoscopy use and methods
What is rotoscopy VFX. Rotoscoping, the process of manually tracing shapes through a captured image sequence, has become a central and critical part of creating computer-generated imagery (CGI). Nearly every modern film with special effects involves copious rotoscoping, often consuming up to twenty percent of the human time required for a CGI project [Goldman 2003]. Rotoscoping is used in multiple ways. Frequently, it is used to create mattes to place an actor into a different scene; conversely, it can be used to replace a real prop with a CGI element. Rotoscoped mattes can be used to apply image filters selectively over parts of a video frame. Rotoscoping can also be used to create 2D animation from captured video. Step 1:Examine the footage import the video file in after effect software to import video file in software Dabble click on project panel in after effect and show the path of video footage
1. In the Project panel, Ctrl-click (Windows) or Command-click (Mac OS) to select the bg w text composition as well as the dancers, gc adobe dance, vertical waveforms, and pulsating radial waves footage items. 2. Drag the selected footage items into the Timeline panel. The New Composition From Selection dialog box appears.
Check the video footage for objects movement for roto mask Step 2: Draw the mask now on composition panel dabble click on footage to open layer panel. On layer panel select the pen tool and draw the shape for the object which we want to rotoscop. Step 3: Activate the key to Mask. After the shape completed we have to animate the mask so in time line panel go to layer property or Press shortcut (M) The mask property are open on mask property back side the option of mask position the symbol of watch dabble click and activate that symbol Step 4: Animate the mask When the key got activated when we move masks position we generate the new key to save mask path to animate roto mask Output: Thru that mask roto we cut out the specific object from our source video and we have a separate object to create effects Assignment Evaluation 0: Not Done [ ] 1: Incomplete [ ] 2: Late Complete [ ] 3: Need Improvement [ ] 4: Complete [ ] 5: Well Done [ ]

Signature of the Instructor Date of Completion ___ / __ / _____

Assignment 10
A SFX Clip to make video Show real What is SFX SFX – Special Effects? VFX – Visual Effects SFX are done ‘in camera,’ that is to say they actually, physically happen. If you drop a match in a can of petrol and record the resultant explosion, that’s SFX. If you build a prosthetic arm, then attach it to your actor then have it ripped off and blood spurt out, that’s SFX. So are gunshot wounds, firing blanks, stabbing people etc. VFX are done in post-production, through the power of a computer. If you create a computer model of a spaceship and fly it across the background of your scene, that’s VFX. If you green screen an actor to make it look like he’s falling from a plane, that’s VFX. Now, these days, VFX is often cheaper than SFX so often explosions, spurting blood and muzzle-flashes are done as VFX Step 1: Create a shooting Setup for battle ship to create SFX of battle Ship Video. Cover the table and surrounded aria with similar color shed green cartons On table get one big tub filled with water in green or blue color shed and a handy camera set on tubs border A big table Fan set on opposite Direction of camera Step 2: Shoot tae storm in the ocean Set the object (Small ship) on center of the tub in water In between the shoot flash lights on object to create the fill of Storm and fan for Blunder Output: Video of battleship in the storm SFX Video PracticalEquipment’s Handy camera Green color tub Water Reflector Flash lights A small toy ship A table Fan Assignment Evaluation 0: Not Done [ ] 1: Incomplete [ ] 2: Late Complete [ ] 3: Need Improvement [ ] 4: Complete [ ] 5: Well Done [ ]

Signature of the Instructor Date of Completion ___ / __ / _____

Assignment 11 Chroma Shoot & Chroma Keying
What is Chroma Shoot & Chroma Keying? Chroma key compositing, or Chroma keying, is a special effects / post-production technique for compositing (layering) two images or video streams together based on color hues (Chroma range). The technique has been used heavily in many fields to remove a background from the subject of a photo or video – particularly the news casting, motion picture and videogame industries. A color range in the foreground footage is made transparent, allowing separately filmed background footage or a static image to be inserted into the scene. The Chroma keying technique is commonly used in video production and post-production. This technique is also referred to as color keying, color-separation overlay (CSO; primarily by the BBC), or by various terms for specific color-related variants such as green screen, and blue screen – Chroma keying can be done with backgrounds of any color that are uniform and distinct, but green and blue backgrounds are more commonly used because they differ most distinctly in hue from most human skin colors. No part of the subject being filmed or photographed may duplicate the color used as the backing. Step 1: Create the Chroma shoot With the Green Screen Background Create a video Footage of Weather News Report. Step 2: Create New Composition Import the footage in after effect and create new composition drag down the Chroma footage to timeline of your composition Step 3: Apply the keying effect on footage 1 wright click on Chroma footage in timeline go to effects +key Light + Keying 2 Select the footage + go to menu bar effects + key light + keying Step 4: Operate the Effect Control panel Select the eyedropper next to Screen Color, and then sample an area of the green near the object. Step 5: Replace the background Thru the key light tool we remove the green background of footage then get some different background plates (BG Plates) to lower side of footage in time line to adjust the composition in the view panel Step 6: Color correction Add cc correction effect to finalize footage Write click on footage + effects + Color correction to adjust the footage color combination Output: Weather News Report Video Assignment Evaluation 0: Not Done [ ] 1: Incomplete [ ] 2: Late Complete [ ] 3: Need Improvement [ ] 4: Complete [ ] 5: Well Done [ ]

Signature of the Instructor Date of Completion ___ / __ / _____

Assignment 12 Clean plate in after effects
What is cleanplates? In film term, plates are generally the live action footage you apply your VFX too. ... You may also encounter the term "clean plate" which is basically live footages with certain unwanted objects removed: wires, markers, even un-needed people and more. Cloning an object in a scene you can copy an object, and then use motion tracking to ensure it remains in sync with the rest of the scene. You’ll use the Clone tool to place a second light on the other side of the door in the background of the Close Shot clip. Cloning in After Effects is similar to cloning in Photoshop, but in After Effects, you can clone across the entire timeline, rather than in a single image. Step: 1. Press the Home key, or move the current-time indicator to the beginning of the time ruler. Step: 2. Double-click the lower Final Effect layer in the Timeline panel to open the Final Effect composition. You want to make the change to the copy of the composition that is not blurred. Step: 3. Double-click the Close Shot layer in the Timeline panel to open it in the Layer panel. You can paint only on individual layers—not on the composition as a whole. Step: 4. Select the Clone Stamp tool in the Tools panel. The Clone Stamp tool samples the pixels on a source layer and applies the sampled pixels to a target layer; the target layer can be the same layer or a different layer in the same composition. When you select the Clone Stamp tool, After Effects adds the Brushes and Paint panels to the stack. Step: 5. enlarge the Brushes panel if necessary, and then change the Diameter to 10 pixels, and the Hardness value to 60%. Step: 6. Enlarge the Paint panel. Make sure the Mode is set to Normal and the Duration to Constant. The source should be set to Current Layer. Select Aligned and Lock Source Time, and make sure the Source Time Shift is set to 0 frames. The Constant setting applies the Clone Stamp effect from the current time forward. Because you’re starting at the beginning of the timeline, the changes you make will affect every frame in the layer. When Aligned is selected in the Paint panel, the position of the sample point —the clone position changes for subsequent strokes to match the movement of the Clone Stamp tool in the target Layer panel so you can use multiple strokes to paint the entire cloned object. The Lock Source Time option lets you clone a single source frame. Step: 7. In the Layer panel, position the cursor at the top of the lamp. Alt-click (Windows) or Option-click (Mac OS) to designate a source point for cloning. Step: 8. Click next to the left side of the door, and then click and drag to clone the light. Be careful not to clone part of the door in the process. If you make a mistake, undo and start over with a new source point. Assignment Evaluation 0: Not Done [ ] 1: Incomplete [ ] 2: Late Complete [ ] 3: Need Improvement [ ] 4: Complete [ ] 5: Well Done [ ]

Signature of the Instructor Date of Completion ___ / __ / _____

Assignment 13 Creating twin character effect using mask
Clone Character or dabble roll Effect To create show real with this effect we Need to shoot couple of footage to create illugan of dabble roll or twin Characters for the effect Step 1 Shoot the Video footage with Steady Camera and Same Camera Angle on Same Background with Different act of your character in different costume Step 2 Shoot a Video for BG Plates without characters with same position and camera angle Step 3 Now when we have Video footage ready first import all footage in after effect (dabble Click in project panel or just drag the video to project Panel Create new composition and import footage in time line Step 4 We have 3 layers to work Layer 1 character’s act in costume one Layer 2 characters’ act in costume two Layer 3 Background footage and no characters We have to cut characters from layer 1 & 2 with roto mask and animate the mask with feather (.03) Step 5 After roto mask we get both characters and background in visual compose the timing of both footages to match their act with right click on footage + speed Duration new window will open for time remapping Output: A visual effects show real with twin characters Assignment Evaluation 0: Not Done [ ] 1: Incomplete [ ] 2: Late Complete [ ] 3: Need Improvement [ ] 4: Complete [ ] 5: Well Done [ ] Signature of the Instructor Date of Completion ___ / __ / _____

Assignment 14 Create an act of puppet animation The Puppet tools in Adobe After Effects let you add natural motion to raster images and vector graphics. Three tools create pins to define the point of deformation, areas of overlap, and areas that should remain more rigid. An additional tool, the Puppet Sketch tool, lets you record animation in real time. In this practical you’ll use the Puppet tools to animate a character slipping on a banana peel. Step 1 You’ll import three Adobe Photoshop files, which you’ll use to create the scene and modified in Photoshop with proper selection. 1 Choose File > Import > File. 2 Navigate to the AECS6_CIB/Lessons/Lesson08/Assets folder. Shift-click to select the backdrop’s, banana’s, and man’s files, and then click Open. The footage items appear in the Project panel. Step 2 Creating the composition As with any project, you need to create a new composition. 1 Choose Composition > New Composition. 2 Name the composition Walking Man. 3 Choose NTSC DV from the Preset pop-up menu. The preset automatically sets the width, height, pixel aspect ratio, and frame rate for the composition. 4 In the Duration field, type 500 to specify 5 seconds, and then click OK. Step 3 adding the background It’s easier to animate a character in context, so first you’ll add the background to the composition. 1 Press the Home key, or move the current-time indicator to the beginning of the composition. 2 Drag the backdrop’s file to the Timeline panel. 3 Lock the layer to prevent accidental changes to it. Step 4 Scaling an object Next, you’ll add the banana peel. At its default size, it’s large enough to do real damage to anyone who slips on it. You’ll scale it to a more proportional size for the scene. 1 Drag the banana’s file from the Project panel to the top layer in the Timeline panel. 2 Select the banana’s layer in the Timeline panel, and press S to display its Scale property. 3 Change the Scale value to 15%. ptg8286261 Adobe After effects Cs6 Classroom in A book 211 4 Press P to display the layer’s Position property. 5 Change the Position to 160, 420. The banana peel moves to the left side of the composition. 6 Hide the properties for the banana’s layer. Step 5 adding the character The last element in the scene is the character himself. You’ll add him to the composition and then scale and position him appropriately. 1 Drag the man’s footage item from the Project panel to the Timeline panel at the top of the layer stack. 2 Select the man’s layer, and press S to display its Scale property. 3 Change the Scale value to 15%. 4 Press P to display the Position property, and change the Position to 575, 300. 5 Press P again to hide the Position property for the layer. 6 Choose File > Save to save your work so far. Step 6 Use OF puppet Pin tool

1 Select the Puppet Pin tool in the Tools panel. 2 In the Composition panel, place a Deform pin in the character’s right arm, near the wrist. You may find it helpful to zoom in to see the character more clearly. A yellow dot representing the Deform pin appears in the Composition panel. If at this point you were to use the Selection tool to move the Deform pin, the entire character would move with it. You need more pins to keep the other parts of the mesh in place. 3 Using the Puppet Pin tool, place another Deform pin in the left arm near the wrist. Now you can move the right hand with the Selection tool. The more pins you place, the smaller the area of influence for each pin, and the less each area will stretch. If you experimented, undo any stretching by pressing Ctrl+ Z (Windows) or Command+Z (Mac OS). 4 Place additional Deform pins in the man’s right and left legs (near the ankles), torso (near the bottom of the tie), and forehead. 5 In the Timeline panel, expand the Mesh 1 > Deform properties. Each Deform pin is listed. To keep track of each pin, you’ll rename them. 6 Select Puppet Pin 1, press Enter or Return, and rename the pin Right Arm. Press Enter or Return again to accept the new name. 7 Rename the remaining pins (Puppet Pin 2 through Puppet Pin 6) Left Arm, Right Leg, Left Leg, Torso, and Head, respectively. 8 Select Show in the options section of the Tools panel to display the distortion mesh. 9 Change the Triangles value in the options section of the Tools panel to 300. This setting determines how many triangles are included in the mesh. Increasing the number of triangles results in a smoother animation, but also increases rendering time. 10 Choose Fit Up To 100% in the Magnification pop-up menu at the bottom of the Composition panel so you can see the entire composition. Then make a RAM preview and view your animation. If necessary, adjust the Position property for the Deform pins in the Timeline panel. Then choose File > Save. Assignment Evaluation 0: Not Done [ ] 1: Incomplete [ ] 2: Late Complete [ ] 3: Need Improvement [ ] 4: Complete [ ] 5: Well Done [ ] Signature of the Instructor Date of Completion ___ / __ / _____

Assignment 15 Creating a lens flare effect In photography, when bright light (such as sunlight) reflects off the lens of a camera, it causes a flare effect. Lens flares can be bright, colorful circles and halos, depending on the type of lens in the camera. After Effects offers a few lens flare effects. You’ll add one now to enhance the realism of this time-lapse photography composition. Step 1 import the footage of sun or any bright object you want to shine like diamonds Step 2 Choose Layer > New > Solid. Step 3 In the Solid Settings dialog box, name the layer Lens Flare, and click the Make Comp Size button. Then set the Color to black by clicking the swatch and setting all the RGB values to 0 in the Solid Color dialog box. Click OK to return to the Solid Settings dialog box. Step 4 Click OK to create the Lens Flare layer. Step 5 With the Lens Flare layer selected in the Timeline panel, choose Effect > Generate > Lens Flare. The Composition panel and the Effect Controls panel display the visual and numeric default Lens Flare settings, respectively; you’ll customize the effect for this composition. Step 6 Drag the Flare Center cross-hair icon in the Composition panel to the center of the object of video footage you want to target. You cannot see the object in the Composition panel; the x, y coordinates, which you can read in the Effect Controls or Info panel, are approximately 455, 135. Step 7 In the Effect Controls panel, change the Lens Type to 35mm Prime, a more diffuse flare effect. Step 8 In the Effect Controls panel, click the stopwatch icon for the Flare Brightness property to set a key frame at the default value of 100%. Step 9 Adjust the brightness of the lens flare to peak when the object is bright: Step 10 With the Lens Flare layer selected in the Timeline panel, choose Layer > Blending Mode > Screen to change the blending mode. Step 11 Press the Home key, or move the current-time indicator to the beginning of the time ruler, and then press the spacebar to preview the Lens Flare effect. When you’re done, press the spacebar again. Step 12 Choose File > Save to save your project. Output Shining the objects or creating computer garneted sun for effects Assignment Evaluation 0: Not Done [ ] 1: Incomplete [ ] 2: Late Complete [ ] 3: Need Improvement [ ] 4: Complete [ ] 5: Well Done [ ]

Signature of the Instructor Date of Completion ___ / __ / _____

Assignment 16
Creating a particle simulation After Effects includes several effects that do an excellent job of creating particle simulations. Two of them—CC Particle Systems II and CC Particle World—are based on the same engine. The major difference between the two is that Particle World enables you to move the particles in 3D space, rather than in a 2D layer. In this exercise, you’ll learn how to use the CC Particle Systems II effect to create a supernova that could be used as the opening of a science program or as a motion background. If you haven’t already watched the sample movie for this exercise, do so now before continuing. Step 1 Setting up the project Start by launching After Effects and creating a new project. 1 If it’s not already open, start After Effects, and then immediately hold down Ctrl + Alt + Shift (Windows) or Command + Option + Shift (Mac OS) to restore default preferences settings. When prompted, click OK to delete your preferences file, and click Close to close the Welcome screen. After Effects opens to display an empty, untitled project. 2 Choose File > Save As > Save As. 3 In the Save As dialog box, navigate to the AECS6_CIB/Lessons/Lesson13/ Finished Projects folder. 4 Name the project Example, and then click Save. Step 2 Creating the composition you don’t need to import any footage items for this exercise. However, you do need to create the composition. 1 In After Effects, press Ctrl + N (Windows) or Command + N (Mac OS). 2 In the Composition Settings dialog box, type Supernova in the Composition Name field. 3 Choose NTSC D1 from the Preset pop-up menu. This automatically sets the width, height, pixel aspect ratio, and frame rate for the composition. 4 Set the Duration to 10:00, and then click OK. Creating a particle system You will build the particle system from a solid layer, so you’ll create that next. 1 Choose Layer > New > Solid to create a new solid layer. 2 In the Solid Settings dialog box, type Particles in the Name box. 3 Click Make Comp Size to make the layer the same size as the composition. Then click OK. 4 With the Particles layer selected in the Timeline panel, choose Effect > Simulation > CC Particle Systems II. 5 Go to 4:00 to see the particle system. A large stream of yellow particles appears in the Composition panel. Customizing the particle effect You will turn this stream of particles into a supernova by customizing the settings in the Effect Controls panel. 1 Expand the Physics property group in the Effect Controls panel. The Explosive Animation setting works fine for this project, but instead of the particles falling down, you want them to flow out in all directions, so change the Gravity value to 0.0. 2 Hide the Physics property group, and expand the Particle property group. Then choose Faded Sphere from the Particle Type menu. Now the particles look intergalactic. Don’t stop there, though. 3 Change the Death Size to 1.50, and increase the Size Variation to 100%. This allows the particles to change birth size randomly. 4 Reduce the Max Opacity to 55%. This make the particles semi-transparent. 5 Click the Birth Color swatch, and change the color to R=255, G=200, B=50 to give the particles a yellow hue at birth. Then click OK.

6 Click the Death Color swatch, and change the color to R=180, G=180, B=180 to give the particles a light gray hue as they fade out. Then click OK 7 To keep the particles from staying onscreen too long, decrease the Longevity value to 0.8 seconds. The Faded Sphere particle type softens the look, but the particle shapes are still too sharply defined. You will fix that by blurring the layer to blend the particles with one another. Assignment Evaluation 0: Not Done [ ] 1: Incomplete [ ] 2: Late Complete [ ] 3: Need Improvement [ ] 4: Complete [ ] 5: Well Done [ ] Signature of the Instructor Date of Completion ___ / __ / _____

Assignment 17 Using multipoint tracking After Effects also offers two more advanced types of tracking that use multiple tracking points: parallel corner-pinning and perspective corner-pinning. When you track using parallel corner-pinning, you simultaneously track three points in the source footage. After Effects calculates the position of a fourth point to keep the lines between the points parallel. When the movement of the points is applied to the target layer, the Corner Pin effect distorts the layer to simulate skew, scale, and rotation, but not perspective. Parallel lines remain parallel, and relative distances are preserved. When you track using perspective corner-pinning, you simultaneously track four points in the source footage. When applied to the target footage, the Corner Pin effect uses the movement of the four points to distort the layer, simulating changes in perspective. You’ll attach an animation to a computer monitor using perspective corner-pinning. If you haven’t already watched the sample movie for this exercise, do so now. Step 1 Importing the footage You need to import two footage items for this exercise. 1 Double-click an empty area of the Project panel to open the Import File dialog box. 2 Navigate to the AECS6_CIB/Lessons/Lesson13/Assets folder. 3 Ctrl-click (Windows) or Command-click (Mac OS) to select both the majorspoilers.mov and multipoint_tracking.mov files, and then click Open. Step 2 Creating the composition Now, you’ll create a new composition. 1 Press Ctrl+N (Windows) or Command+N (Mac OS). 2 In the Composition Settings dialog box, type Multipoint_Tracking in the Composition Name field. 3 Make sure the Preset pop-up menu is set to NTSC DV. This automatically sets the width, height, pixel aspect ratio, and frame rate for the composition. Step 3 Positioning the track points You’re ready to add the track points to the multipoint_tracking.mov layer. 1 Select the multipoint_tracking.mov layer in the Timeline panel. 2 Choose Window > Tracker to open the Tracker panel if it isn’t open. 3 In the Tracker panel, choose footage from the Motion Source menu. 4 Select the Footage layer again, and then click Track Motion. The desk scene opens in the Layer panel, with a track point indicator in the center of the image. However, you will be tracking four points in order to attach the animated movie to the computer screen. 5 Choose Perspective Corner Pin from the Track Type menu. Three more track point indicators appear in the Layer panel 6 Drag the track points to four different high-contrast areas of the image. The four corners of the computer screen provide excellent contrast. Use the following image as a guide. (Because the areas of high contrast are also where you want to attach the major spoilers layer, you don’t need to move the attach points.) Step 4 applying the multipoint tracker You’re ready to analyze the data and apply the tracker. 1 Click the Analyze Forward button in the Tracker panel. When the analysis is complete, click the Apply button to calculate the tracking. 2 Notice the results in the Timeline panel: You can see the Corner Pin and Position property key frames for the major spoiler’s layer and the track point data for the motion tracking layer.

3 Make the major spoilers layer visible again, move the current-time indicator to the beginning of the timeline, and watch a RAM preview to see the results of the tracker. 4 When you’re done watching the preview, press the spacebar to stop playback. If you don’t like the results, return to the Tracker panel, click the Reset button, and try again. With practice, you will become adept at identifying good feature regions. 5 Hide the layer properties to keep the Timeline panel neat, and choose File > Save to save your work. 6 Choose File > Close Project. Output Video Show real with mortise video out put Assignment Evaluation 0: Not Done [ ] 1: Incomplete [ ] 2: Late Complete [ ] 3: Need Improvement [ ] 4: Complete [ ] 5: Well Done [ ] Signature of the Instructor Date of Completion ___ / __ / _____
Assignment 18 Applying Warp Stabilizer VFX for Shaky footage Warp Stabilizer VFX starts analyzing footage as soon as you apply it. Stabilization is a background process, so you can work on other compositions while it finishes. How long it takes depends on your system. After Effects displays a blue banner while it analyzes the footage and an orange banner while it applies stabilization. 1. Select the flowers.mov layer in the Timeline panel, and choose Animation > Warp Stabilizer VFX. The blue banner appears immediately. 2. When Warp Stabilizer VFX has finished stabilizing, and the orange banner has disappeared, press the spacebar to preview the changes 3. Press the spacebar to stop the preview. Warp Stabilizer VFX moved and repositioned the footage. To see how it applied changes, view the effects in the Effect Controls panel. For example, the clip’s borders were scaled up (to about 103%) to hide black gaps that occur when the image is repositioned in the stabilization process. You’ll adjust the settings that Warp Stabilizer VFX uses. Adjusting the Warp Stabilizer VFX settings You’ll change the settings in the Effect Controls panel to make the shot smoother.
1. In the Effect Controls panel, increase the Smoothness amount to 75%. Warp Stabilizer VFX immediately begins stabilizing again. It doesn’t need to analyze the footage, because the initial analysis data is stored in memory
2. When Warp Stabilizer VFX has finished, preview the changes. 3. Press the spacebar to stop playback when you’re done. It’s better, but still a little
rough. The Auto-scale setting in the Effect Controls panel now displays 103.7%; the effect moved the frames more dramatically, requiring more scaling to eliminate black gaps around the edges. Rather than change the amount Warp Stabilizer VFX smooths the footage, now you’ll change its goal.
4. In the Effect Controls panel, choose No Motion from the Result menu. With this setting, Warp Stabilizer VFX attempts to lock the camera in position. This requires even more scaling. When No Motion is selected, the Smoothness option is dimmed.
5. When the orange banner disappears, preview the changes again. Press the spacebarto stop the playback.
Output Stabilize the video footage to improve the quality Assignment Evaluation

0: Not Done [ ] 1: Incomplete [ ] 2: Late Complete [ ] 3: Need Improvement [ ] 4: Complete [ ] 5: Well Done [ ] Signature of the Instructor Date of Completion ___ / __ / _____

Assignment 19 Create a Tittle Sequence with proper theme related to your video content About text layers In After Effects, you can add text with flexibility and precision. The Tools, Character, and Paragraph panels contain a wide range of text controls. You can create and edit horizontal or vertical text directly on the screen in the Composition panel, and quickly change the font, style, size, and color of the text. You can apply changes to individual characters and set formatting options for entire paragraphs, including alignment, justification, and word wrapping. In addition to all of these style features, After Effects provides tools for easily animating specific characters and properties, such as text opacity and hue. After Effects uses two types of text: point text and paragraph text. Use point text to enter a single word or line of characters; use paragraph text to enter and format text as one or more paragraphs. In many ways, text layers are just like any other layers in After Effects. You can apply effects and expressions to text layers, animate them, designate them as 3D layers, and edit the 3D text while viewing from multiple angles. As with layers imported from Illustrator, text layers are continuously rasterized, so when you scale the layer or resize the text, it retains crisp, resolution-independent edges. The two main differences between text layers and other layers are that you cannot open a text layer in its own Layer panel and you can animate the text in a text layer using special text-animator properties and selectors. Installing a font using Type kitHundreds of fonts are available through Adobe Type kit. You’ll use Type kit to install a font that will work well for the title text. Creating and formatting point text When you enter point text, each line of text is independent—the length of a line increases or decreases as you edit the text, but it doesn’t wrap to the next line. The text you enter appears in a new text layer. The small line through the I-beam marks the position of the text baseline.
1. In the Tools panel, select the Horizontal Type tool. 2. Click anywhere in the Composition panel, and type Road Trip. Then press Enter on the numeric
keypad to exit text-editing mode and to select the text layer in the Composition panel. Or, you can select the layer name to exit text-editing mode.
Using the Character panel The Character panel provides options for formatting characters. If text is highlighted, changes you make in the Character panel affect only the highlighted text. If no text is highlighted, changes you make in the Character panel affect the selected text layers and the text layers’ selected Source Text key frames, if any exist. If no text is highlighted and no text layers are selected, changes you make in the Character panel become the new defaults for the next text entry.
1. Choose Window > Workspace > Text to display only those panels you need while working with text.
2. Select the Road Trip text layer in the Timeline panel. 3. In the Character panel, choose Calluna Sans from the Font Family menu. 4. Choose Bold from the Font Style menu. 5. Set the Font Size to 90 pixels. 6. Leave all other options at their default settings.
Using the Paragraph panel Use the Paragraph panel to set options that apply to an entire paragraph, such as alignment, indentation, and leading. For point text, each line is a separate paragraph. You can use the Paragraph panel to set formatting options for a single paragraph, multiple paragraphs, or all paragraphs in a text layer. You just need to make one adjustment in the Paragraph panel for this composition’s title text.
1. In the Paragraph panel, click the Center Text button. This aligns horizontal text to the center of the layer, not to the center of the composition.
2. Leave all other options at their default settings. Positioning the type

To precisely position layers, such as the text layer you’re working on now, you can display rulers, guides, and grids in the Composition panel. These visual reference tools don’t appear in the final rendered movie. 1. Make sure the Road Trip text layer is selected in the Timeline panel. 2. Choose Layer > Transform > Fit to Comp Width. This scales the layer to fit to the width of the composition. Now you can position the text layer using a grid. 3. Choose View > Show Grid and then View > Snap to Grid. 4. Using the Selection tool drag the text up in the Composition panel until the base of the letters sits on the horizontal gridline in the center of the composition. Press Shift after you start dragging to constrain the movement and help you position the text. When the layer is in position, choose View > Show Grid again to hide the grid. This project isn’t destined for broadcast TV, so it’s okay that the title extends beyond the title-safe and action-safe areas of the composition at the beginning of the animation. 6. Click Essentials in the Workspace bar at the top of the application window to return to the Essentials workspace. (Click the double arrows to see Essentials if it doesn’t fit in the Workspace bar.) 7. Choose File > Save to save your project. OUTPUT Title theme for the Short Film or student Show real Assignment Evaluation 0: Not Done [ ] 1: Incomplete [ ] 2: Late Complete [ ] 3: Need Improvement [ ] 4: Complete [ ] 5: Well Done [ ] Signature of the Instructor Date of Completion ___ / __ / _____

Assignment 20 On the Last project student has to make a Short Film / music video / News report /documentary / Biographical videoVFX Show Real with duration of minimum 3 mints with proper production pipeline * Visual effects are mandatory for the projects Sir No
Production Pipeline Teacher ‘s Sign Student’s Sign Remark
1 Story 2 Script 3 Storyboard
4 Layout Shot break down 5 Shooting Scheduled 6 Log Sheet 7 Post Production Scheduled 8 VFX Layout Shot Break Down 9 Group credit list 10 Project File Output VFX Show real Assignment Evaluation 0: Not Done [ ] 1: Incomplete [ ] 2: Late Complete [ ] 3: Need Improvement [ ] 4: Complete [ ] 5: Well Done [ ] Signature of the Instructor Date of Completion ___ / __ / _____

S.Y.B.Sc Animation (Under Science Faculty)
Lab Course –II (Sem II)
Production Process I & II
Workbook
(From Academic year 2016-17)
Name: ____________________________________________ College Name: _____________________________________ Roll No. : ____________ Academic Year: ____________

Practical Exercise : 1 Start Date / / Objective : 1) To develop a sense of Story writing & Story board 2) To understand the animation principals. Assignment : Draw a story board of minimum 20 thumbnails based on an imaginary story of ‘A Hungry Mouse’ Assignment Evaluation : 0 : Not Done [ ] 1 : Incomplete [ ] 2 : Late complete [ ] 3 : Need Improvement [ ] 4 : Complete [ ] 5 : Well Done [ ] Signature of Instructor Date of completion : / /

Practical Exercise : 2 Start Date / / Objective : 1) To develop a sense of Character designing. 2) To understand the animation principals. Assignment : Draw a Model Sheet of any imaginary cartoon character showing 20 different facial expressions. Assignment Evaluation : 0 : Not Done [ ] 1 : Incomplete [ ] 2 : Late complete [ ] 3 : Need Improvement [ ] 4 : Complete [ ] 5 : Well Done [ ] Signature of Instructor Date of completion : / /

Practical Exercise : 3 Start Date / / Objective : 1) To develop a sense of Animatics. 2) To understand the animation principals. Assignment : Create an animatic of Flying Bird movements. Use light board for drawing in-betweens & any line testing software. Assignment Evaluation : 0 : Not Done [ ] 1 : Incomplete [ ] 2 : Late complete [ ] 3 : Need Improvement [ ] 4 : Complete [ ] 5 : Well Done [ ] Signature of Instructor Date of completion : / /

Practical Exercise : 4 Start Date / / Objective : 1) To develop a sense of Animatics. 2) To understand the animation principals. Assignment : Create an animatic of Bi-ped Walk cycle movements. Use light board for drawing in-betweens & any line testing software. Assignment Evaluation : 0 : Not Done [ ] 1 : Incomplete [ ] 2 : Late complete [ ] 3 : Need Improvement [ ] 4 : Complete [ ] 5 : Well Done [ ] Signature of Instructor Date of completion : / /

Practical Exercise : 5 Start Date / / Objective : 1) To develop a sense of Story writing & Story board 2) To understand the animation principals. Assignment : Draw a story board of minimum 20 thumbnails based on an imaginary story of ‘A Water Drop’ Assignment Evaluation : 0 : Not Done [ ] 1 : Incomplete [ ] 2 : Late complete [ ] 3 : Need Improvement [ ] 4 : Complete [ ] 5 : Well Done [ ] Signature of Instructor Date of completion : / /

Practical Exercise : 6 Start Date / / Objective : 1) To develop a sense of Background designing 2) To understand the animation principals. Assignment : Create a background design based on the theme - ‘Jungle’ Draw sketches on paper & do finishing work in Photoshop Software. Assignment Evaluation : 0 : Not Done [ ] 1 : Incomplete [ ] 2 : Late complete [ ] 3 : Need Improvement [ ] 4 : Complete [ ] 5 : Well Done [ ] Signature of Instructor Date of completion : / /

Practical Exercise : 7 Start Date / / Objective : 1) To develop a sense of Background designing 2) To understand the animation principals. Assignment : Create a background design based on the theme - ‘Space City’ Draw sketches on paper & do finishing work in Photoshop Software. Assignment Evaluation : 0 : Not Done [ ] 1 : Incomplete [ ] 2 : Late complete [ ] 3 : Need Improvement [ ] 4 : Complete [ ] 5 : Well Done [ ] Signature of Instructor Date of completion : / /

Practical Exercise : 8 Start Date / / Objective : 1) To develop a sense of Background designing 2) To understand the animation principals. Assignment : Create a background design based on the theme - ‘Indian typical village’ Draw sketches on paper & do finishing work in Photoshop Software. Assignment Evaluation : 0 : Not Done [ ] 1 : Incomplete [ ] 2 : Late complete [ ] 3 : Need Improvement [ ] 4 : Complete [ ] 5 : Well Done [ ] Signature of Instructor Date of completion : / /
Practical Exercise : 9 Start Date / / Objective : 1) To develop a sense of Animatics. 2) To understand the animation principals. Assignment : Create an animatic of Running Horse movements . (Quadruped animal) Use light board for drawing in-betweens & any line testing software. Assignment Evaluation : 0 : Not Done [ ] 1 : Incomplete [ ] 2 : Late complete [ ] 3 : Need Improvement [ ] 4 : Complete [ ] 5 : Well Done [ ] Signature of Instructor Date of completion : / /

Practical Exercise : 10 Start Date / / Objective : 1) To develop a sense of Character designing. 2) To understand the animation principals. Assignment : Design a cartoon character of ‘Chef Monkey’ Draw turn- arounds of the character showing front view, side view, back view & three-forth view. Give appropriate name to the character. Write the background history of character. Assignment Evaluation : 0 : Not Done [ ] 1 : Incomplete [ ] 2 : Late complete [ ] 3 : Need Improvement [ ] 4 : Complete [ ] 5 : Well Done [ ] Signature of Instructor Date of completion : / /

Practical Exercise : 11 Start Date / / Objective : 1) To develop a sense of Character designing. 2) To understand the animation principals. Assignment : Design a character of ‘Historical Warrior’ Draw turn-arounds of the character showing front view, side view, back view & three-forth view. Give appropriate name to the character. Write the background history of character. Assignment Evaluation : 0 : Not Done [ ] 1 : Incomplete [ ] 2 : Late complete [ ] 3 : Need Improvement [ ] 4 : Complete [ ] 5 : Well Done [ ] Signature of Instructor Date of completion : / /

Practical Exercise : 12 Start Date / / Objective : 1) To develop a sense of Character designing. 2) To understand the animation principals. Assignment : Design a character of ‘Villain’ Draw turn-arounds of the character showing front view, side view, back view & three-forth view. Give appropriate name to the character. Write the background history of character. Assignment Evaluation : 0 : Not Done [ ] 1 : Incomplete [ ] 2 : Late complete [ ] 3 : Need Improvement [ ] 4 : Complete [ ] 5 : Well Done [ ] Signature of Instructor Date of completion : / /

Practical Exercise : 13 Start Date / / Objective : 1) To develop a sense of Character designing. 2) To understand the animation principals. Assignment : Design a character of ‘Princes’. Draw turn-arounds of the character showing front view, side view, back view & three-forth view. Give appropriate name to the character. Write the background history of character. Assignment Evaluation : 0 : Not Done [ ] 1 : Incomplete [ ] 2 : Late complete [ ] 3 : Need Improvement [ ] 4 : Complete [ ] 5 : Well Done [ ] Signature of Instructor Date of completion : / /

Practical Exercise : 14 Start Date / / Objective : 1) To develop a sense of Prop designing. 2) To understand the animation principals. Assignment : Prop designing Draw 10 types of imaginary Weapons Assignment Evaluation : 0 : Not Done [ ] 1 : Incomplete [ ] 2 : Late complete [ ] 3 : Need Improvement [ ] 4 : Complete [ ] 5 : Well Done [ ] Signature of Instructor Date of completion : / /

Practical Exercise : 15 Start Date / / Objective : 1) To develop a sense of Background designing 2) To understand the animation principles. Assignment : Create a background design based on the theme - ‘Castle’ Draw sketches on paper & do finishing work in Photoshop Software. Assignment Evaluation : 0 : Not Done [ ] 1 : Incomplete [ ] 2 : Late complete [ ] 3 : Need Improvement [ ] 4 : Complete [ ] 5 : Well Done [ ] Signature of Instructor Date of completion : / /

Practical Exercise : 16 Start Date / / Objective : 1) To develop a sense of Character designing. 2) To understand the animation principles. Assignment : Design a cartoon character of ‘Thief ’ Draw turn-arounds of the character showing front view, side view, back view & three-forth view. Give appropriate name to the character. Write the background history of character. Assignment Evaluation : 0 : Not Done [ ] 1 : Incomplete [ ] 2 : Late complete [ ] 3 : Need Improvement [ ] 4 : Complete [ ] 5 : Well Done [ ] Signature of Instructor Date of completion : / /

Practical Exercise : 17 Start Date / / Objective : 1) To develop a sense of Character designing. 2) To understand the animation principals. Assignment : Develop a cartoon character from following objects...
Bottle Pencil Wall clock Draw turn-arounds of the character showing front view, side view, back view & three-forth view. Give appropriate name to the character. Write the background history of character. Assignment Evaluation : 0 : Not Done [ ] 1 : Incomplete [ ] 2 : Late complete [ ] 3 : Need Improvement [ ] 4 : Complete [ ] 5 : Well Done [ ] Signature of Instructor Date of completion : / /
Practical Exercise : 18 Start Date / / Objective : 1) To develop a sense of Animatics. 2) To understand the animation principals. Assignment : Create an animatic of Swimming movements. Use light board for drawing in-betweens & any line testing software. Assignment Evaluation : 0 : Not Done [ ] 1 : Incomplete [ ] 2 : Late complete [ ] 3 : Need Improvement [ ] 4 : Complete [ ] 5 : Well Done [ ] Signature of Instructor Date of completion : / /
Practical Exercise : 19 Start Date / / Objective : 1) To develop a sense of Story writing & Story board 2) To understand the animation principals. Assignment : Develop a story from bellow given points & draw a story board. Draw 10 thumbnails. Write the points in between first & last point with your own imagination. Point 1: He left the house early in the morning. Point 2: ...................................................................................................... Point 3: ...................................................................................................... Point 4: ...................................................................................................... Point 5: ...................................................................................................... Point 6: ...................................................................................................... Point 7: ...................................................................................................... Point 8: ...................................................................................................... Point 9: ...................................................................................................... Point 10 : That night he was very relaxed and went to bed very happily. Give suitable title to your story. Assignment Evaluation : 0 : Not Done [ ] 1 : Incomplete [ ] 2 : Late complete [ ] 3 : Need Improvement [ ] 4 : Complete [ ] 5 : Well Done [ ] Signature of Instructor Date of completion : / /

Practical Exercise : 20 Start Date / / Objective : 1) To develop a sense of Story writing & Story board & Animation 2) To understand the animation principals. Assignment : Create a complete Animation Project based on following story ( Choose any Animation type like 2D, 3D, Claymation or else.
The Monkey and the Wedge
There was once a merchant who employed many carpenters and masons to build a temple in his garden. Regularly, they would start work in the morning; take a break for the mid-day meals, and return to resume work till evening. One day, a group of monkey arrived at the site of the building and watched the workers leaving for their mid-day meals. One of the carpenters was sawing a huge log of wood. Since, it was only half-done; he placed a wedge in between to prevent the log from closing up. He then went off along with the other workers for his meal. When all the workers were gone, the monkeys came down from the trees and started jumping around the site, and playing with the instruments. There was one monkey, who got curious about the wedge placed between the log. He sat down on the log, and having placed himself in between the half-split log, caught hold of the wedge and started pulling at it. All of a sudden, the wedge came out. As a result, the half-split log closed in and the monkey got caught in the gap of the log. As was his destiny, he was severely wounded. The wise indeed say: One, who interferes in other's work, surely comes to grief. Assignment Evaluation : 0 : Not Done [ ] 1 : Incomplete [ ] 2 : Late complete [ ] 3 : Need Improvement [ ] 4 : Complete [ ] 5 : Well Done [ ] Signature of Instructor Date of completion : / /


![I :@ f COIQBOQ ]:collegecirculars.unipune.ac.in/sites/documents/BSW Circulars/NSS... · coÎ tb iqfo boq1](https://img.dokumen.tips/doc/110x75/5c9541e709d3f2a67b8c545f/i-f-coiqboq-circularsnss-coi-tb-iqfo-boq1.jpg)