Embed Size (px)
Citation preview

Supports
SYSQUE.COM 2
Summary Learn how to utilize SysQue Submittals.
Contents Introduction
Place Hangers
SysQue Supports “Manage Points”
View Point File
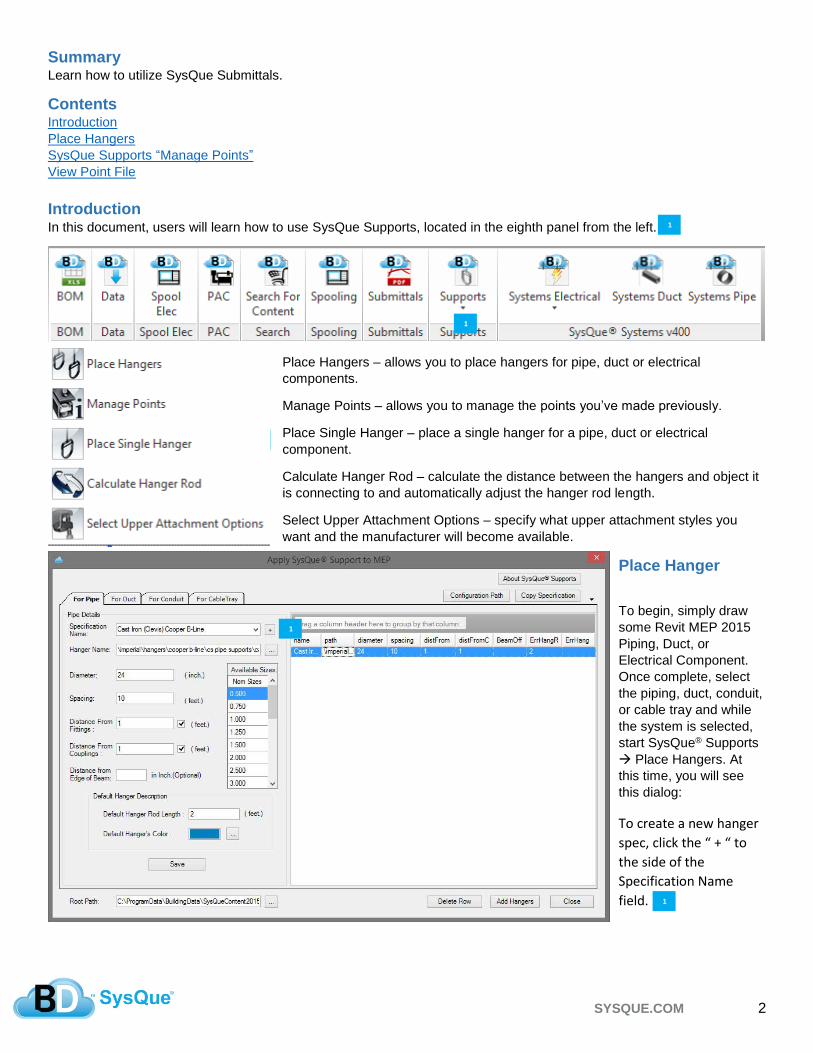
Introduction In this document, users will learn how to use SysQue Supports, located in the eighth panel from the left.
Place Hangers – allows you to place hangers for pipe, duct or electrical
components.
Manage Points – allows you to manage the points you’ve made previously.
Place Single Hanger – place a single hanger for a pipe, duct or electrical
component.
Calculate Hanger Rod – calculate the distance between the hangers and object it
is connecting to and automatically adjust the hanger rod length.
Select Upper Attachment Options – specify what upper attachment styles you
want and the manufacturer will become available.
Place Hanger
To begin, simply draw
some Revit MEP 2015
Piping, Duct, or
Electrical Component.
Once complete, select
the piping, duct, conduit,
or cable tray and while
the system is selected,
start SysQue® Supports
Place Hangers. At
this time, you will see
this dialog:
To create a new hanger
spec, click the “ + “ to
the side of the
Specification Name
field.
1
1
2
3
1
1
1

SYSQUE.COM 3
‘Place Hangers’ feature in order –
Hanger Name
o When a Specification is chosen and a hanger is selected from the list that appears on the right, the path
for that hanger will appear in this textbox
Specification Name
o Allows the saving of pre-defined hanger settings. Upon initial installation of SysQue® Supports, there will be
5 sample hanger settings available.
Cast Iron (Clevis)
Cast Iron (J-Hanger)
Carbon Steel (Roller)
Carbon Steel x Copper (Roller x Clevis)
o Selecting a spec will display a list of hangers associated with that spec in the frame at right along with the
settings as detailed in the textboxes below
Diameter
o The maximum value of pipe diameter that particular hanger will be used to support
Spacing
o This value will be the maximum spacing between hangers along straight runs.
Distance from Fittings
o This value will be the maximum distance from a fitting or open end.
Distance from Couplings
o This value will be the maximum distance from the join of two pipes.
Distance from Edge of Beam
o This will set a defined offset from the center of a steel beam to allow for correct positioning using a beam
clamp upper attachment method.
Default Hanger Rod Length
o SysQue® Supports will automatically extend their rods up to the structure above. This is so the user can
obtain correct rod lengths. If supports are added to a system within a model that does not have the
structural components and floors in it, the support rods will not have a structure to locate. When this is the
case, the rods will use the value in this field.
Default Hanger’s Color
o When the system uses the above value, the hangers will also change to the color indicated here.
(Example below of hangers added without a structure so the “Default Length” and “Default Hanger’s
Color” were used.)
SYSQUE.COM 4
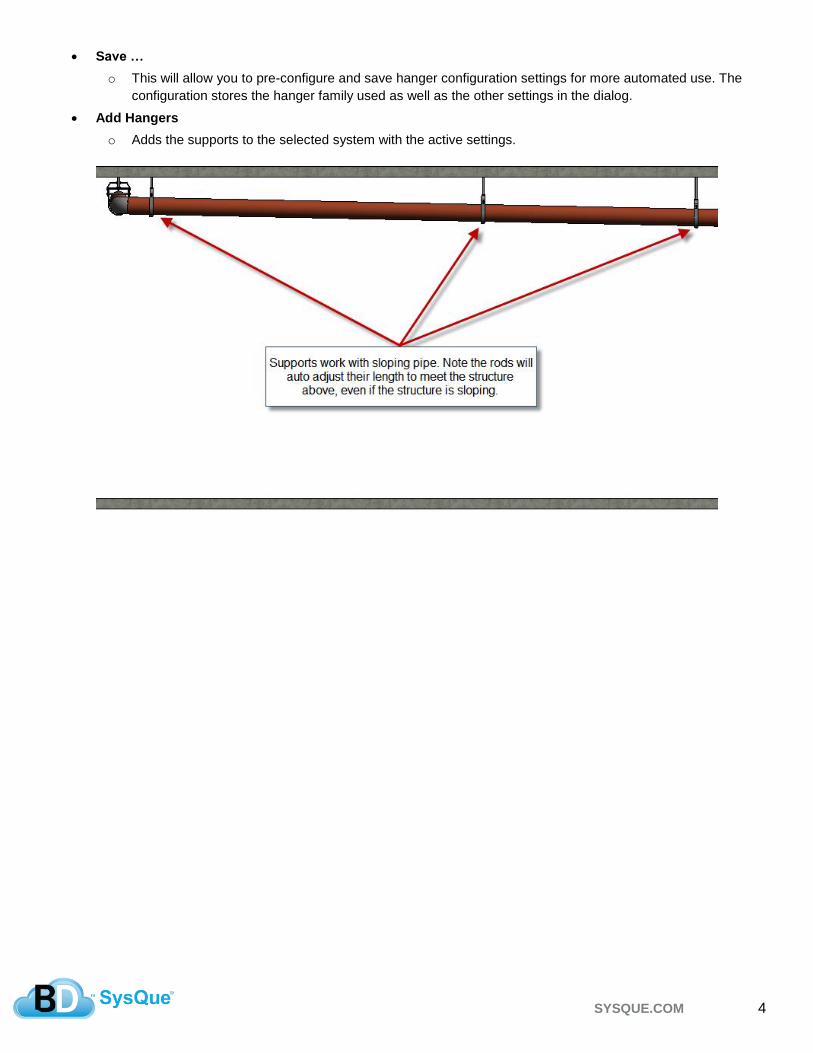
Save …
o This will allow you to pre-configure and save hanger configuration settings for more automated use. The
configuration stores the hanger family used as well as the other settings in the dialog.
Add Hangers
o Adds the supports to the selected system with the active settings.

SYSQUE.COM 5
SysQue Supports “Manage Points”
o MEP and TFL files
The MEP and TFL file types allow the exporting of the points from Revit MEP into the Trimble MEP
compatible format for use with the Trimble MEP Total Station.
Open SysQue Manage Points and click “file” to create a new file to
save your points to.
This will bring up a save location. Please select the folder you would like
to save to as well as the name of the point file.
The dropdown under the file name you designate, will dictate which
format is being exported from the Pont manager….tfl, .mep or .txt
Once you have the file saved in the desired location with the appropriate file type, you will return to the Point
Manager window.
Click the “Select” button to make your point selection.
This will then take you to the Revit window. You can select your points by using the Revit drag select window.
Note: Be sure to only click once and dag your cursor. If there is a mis-click, you may miss some of your points,
and need to reselect them all.
1 1
2
2
3
3
4
4

SYSQUE.COM 6
Once your selected points are in, you can highlight all rows and click to “Save Points to File”
Your points will now be save to your file

SYSQUE.COM 7
View Point File/View Sleeve Points
MEP and TFL files
o The SysQue® Supports ADDIN comes complete with an MEP and TFL file viewer that will allow you to view,
add, remove, and/or merge your point exports prior to sending to the field for layout. The file can only be
opend in the project you pulled the points from.
o The viewer also allows you to export your points to Excel so you can quickly take your points out to Excel,
renumber them with a prefix of your choice, then import back in prior to export.
Place Single Hanger
Once you have selected the system you would wish to place the single hanger,
press “place single hanger”. After this is done, SysQue Supports will place a
hanger in the middle of the system and you can adjust the placement accordingly.
Calculate Hanger Rod Length
If you notice that your hangers did not attach to the object above or you place it in later. Select the hangers in question
and select this option. SysQue® Supports then will calculate the distance between the hangers and object it is connecting
to and automatically adjust the hanger rod length to attach. Ensure that you have some hangers already selected.
Select Upper Attachments
Selecting this option will tell SysQue® to specify what upper attachment style
you want, then based on the manufacturer, that manufacturer upper attachment will
become available in the schedule for that hanger.


![Position Description - Supports Broker[1] - Values Into …valuesintoactionpa.org/.../Position-Description-Supports-Broker1.pdf · Position Description – Supports Broker Position](https://img.dokumen.tips/doc/110x75/5ab1df9e7f8b9a00728cd407/position-description-supports-broker1-values-into-description-supports.jpg)