Embed Size (px)
Citation preview

www.AwesomePCB.com
How to make wearable display - OLED SSD1306 displayrun by ATtiny85
Step by step tutorial, with no steps to skip.
Step 1 - What do we need?
Step 2 – Preparing leather
Step 3 - Display preparing
Step 4 – Sew snaps to leather
Step 5 - Sew snaps to OLED display
Step 6 – Extras
Instructable_How to make wearable display - OLED SSD1306 display run by ATtiny85_rev01.pdf 1
www.AwesomePCB.com
The main goal of this tutorial is to show how to make wearable display run by Attiny85 and OLED display SDD1306.
Due to running campaign for ATtiny25/45/85 PCB TINY CHEAP VERSATILEArduino compatible on Indiegogo I did prototype of wearable display base on natural leather, to show what is possible with ATtiny25/45/85 PCB.
This tutorial will give expanation for this question.
Soldering is not the subject of this instructable but you can check how to do this here.
Step 1
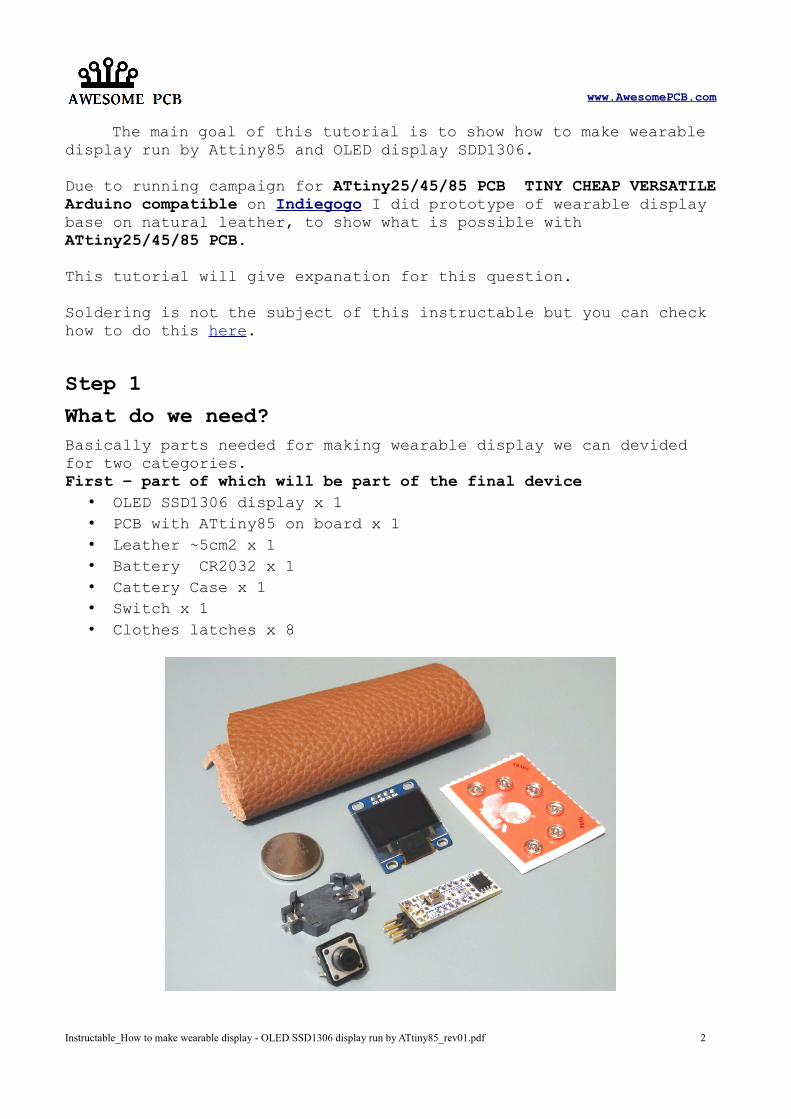
What do we need?Basically parts needed for making wearable display we can devided for two categories. First – part of which will be part of the final device
• OLED SSD1306 display x 1• PCB with ATtiny85 on board x 1• Leather ~5cm2 x 1• Battery CR2032 x 1• Cattery Case x 1• Switch x 1• Clothes latches x 8
Instructable_How to make wearable display - OLED SSD1306 display run by ATtiny85_rev01.pdf 2

www.AwesomePCB.com
Second - parts which we will use to prepare wearable display • Ruler x 1• Scissors x 1 • scalpel x 1• Super glue x 1• soldering iron x 1• Tin x 1• Rosin x 1• Connecting cable x 1• Pen x 1
Step 2 Preparing leather In this step we are going to prepare natural leather. Place your display on the leather. This will give you idea how big the leather should be.
Instructable_How to make wearable display - OLED SSD1306 display run by ATtiny85_rev01.pdf 3

www.AwesomePCB.com
In our case it's going to be rectangle about size 60x70mm.Draw with pen rectangle on the internal side of the leather.
Instructable_How to make wearable display - OLED SSD1306 display run by ATtiny85_rev01.pdf 4

www.AwesomePCB.com
Inside rectangle draw another rectangle which fit to active area of your display.
Now it is time to place 4 clothes latches on the leather and give them right place.
Instructable_How to make wearable display - OLED SSD1306 display run by ATtiny85_rev01.pdf 5

www.AwesomePCB.com
With pen draw small dots on the leather.
With scissors cut drawed before selected outer shape.
Instructable_How to make wearable display - OLED SSD1306 display run by ATtiny85_rev01.pdf 6

www.AwesomePCB.com
Be aware on your finger. This kind of knife is very sharp!If you are not sure if you can make it ask someone more experienced.Now with knife cut internal window for OLED dispaly.This can take some time depending on the thickness of the leather.
After all we will get open window inside of leather.
Instructable_How to make wearable display - OLED SSD1306 display run by ATtiny85_rev01.pdf 7

www.AwesomePCB.com
Now you can check if display can be seen through the cutted window.
Step 3Display preparing In this step we are going to prepare display to allow easy connecting with the leather.Solder 4 clothes latches to display, like it is shown on photo.
Instructable_How to make wearable display - OLED SSD1306 display run by ATtiny85_rev01.pdf 8

www.AwesomePCB.com
And view from the bottom side of the OLED display.
Make it GND pin shorter.
Instructable_How to make wearable display - OLED SSD1306 display run by ATtiny85_rev01.pdf 9

www.AwesomePCB.com
This is not mandatory step, you can skip, but switch can give additional functionality.
Stick with the glue switch to PCB.
Solder one leg of switch to +5V and second to pin P3 not to pin P5 like it is done on the photo – P5 it is a reset signal.Solder leg of the diplay to PCB.
Instructable_How to make wearable display - OLED SSD1306 display run by ATtiny85_rev01.pdf 10
www.AwesomePCB.com
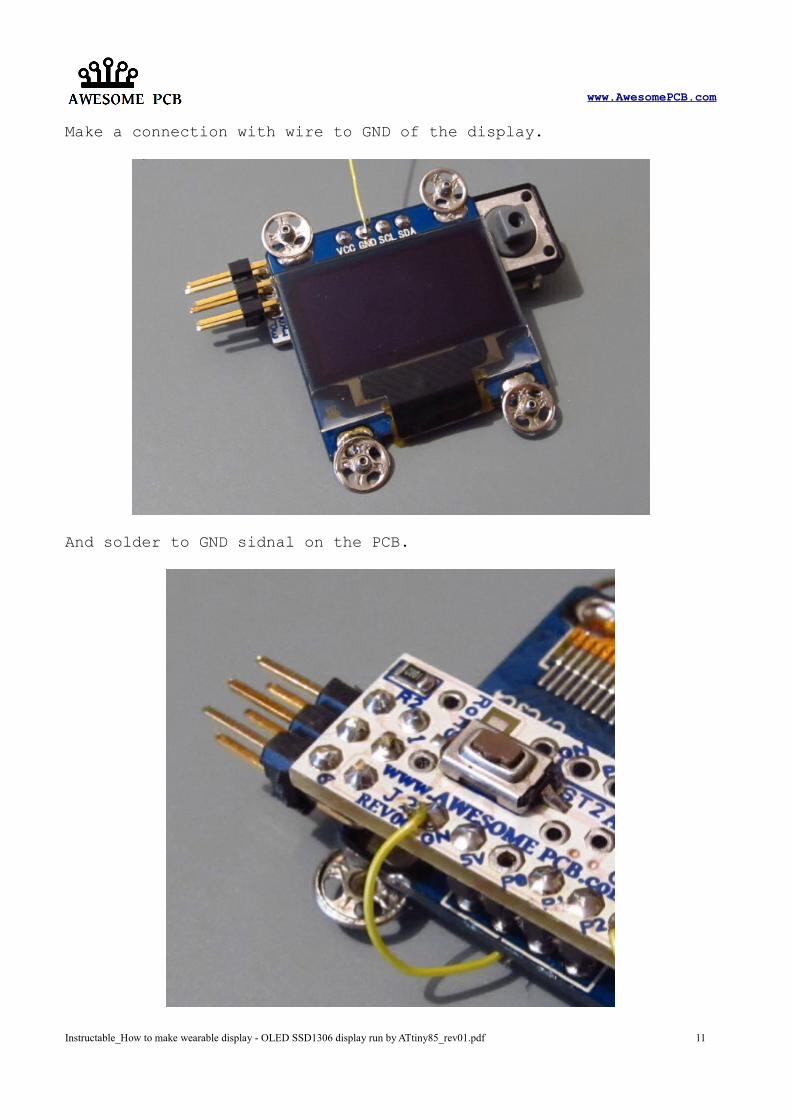
Make a connection with wire to GND of the display.
And solder to GND sidnal on the PCB.
Instructable_How to make wearable display - OLED SSD1306 display run by ATtiny85_rev01.pdf 11
www.AwesomePCB.com
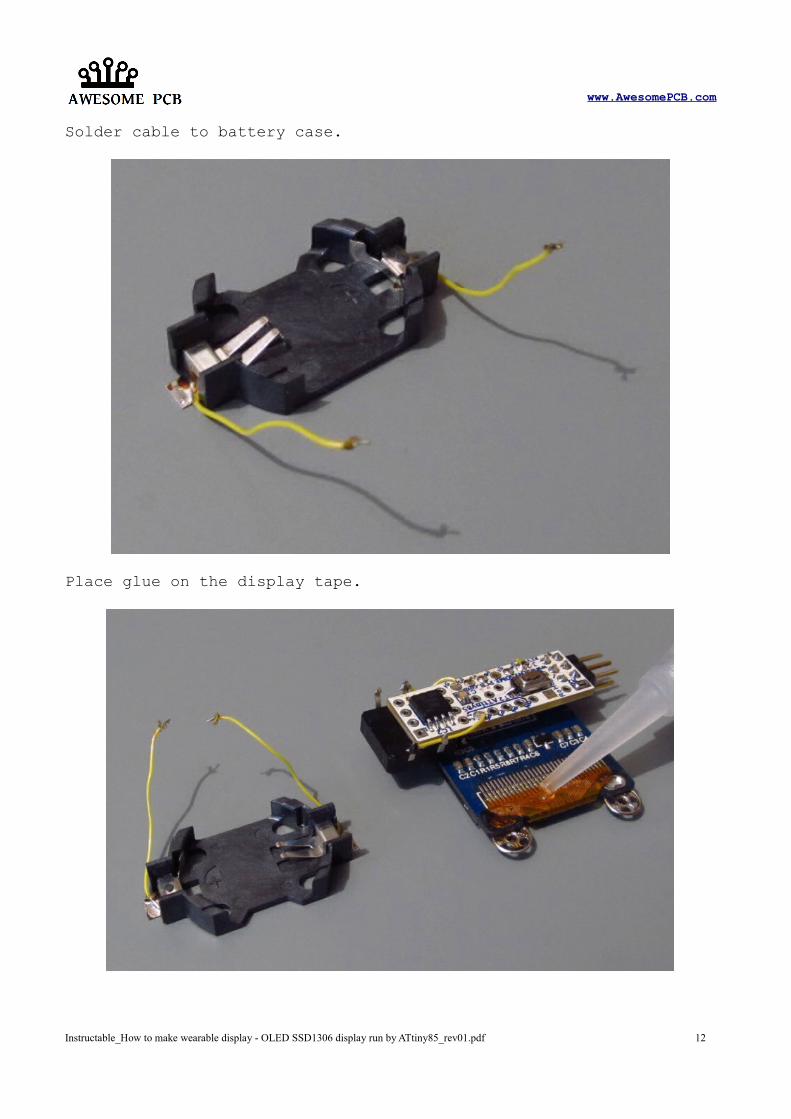
Solder cable to battery case.
Place glue on the display tape.
Instructable_How to make wearable display - OLED SSD1306 display run by ATtiny85_rev01.pdf 12

www.AwesomePCB.com
Pleace battery case on display tape and wait 1 minute, until the theglue binds.
Solder cables from battery to PCB. Be aware of right polarisation ofthe battery. + of battery to +5V and – of battery to GN.
Instructable_How to make wearable display - OLED SSD1306 display run by ATtiny85_rev01.pdf 13

www.AwesomePCB.com
Before you place battery. Upload hex file to Attiny85.Make sure that you connect ISP programming cable in the right way.
Step 4 Sew snaps to leather
In this step we are going to sew clothes latches to the leather.
Instructable_How to make wearable display - OLED SSD1306 display run by ATtiny85_rev01.pdf 14

www.AwesomePCB.com
Sew step by steps all latches. Be aware of your fingers because of the needle.
Other side view.
Instructable_How to make wearable display - OLED SSD1306 display run by ATtiny85_rev01.pdf 15

www.AwesomePCB.com
4 tabs have been sewn
With scissors you can make round corner of the leather.
Instructable_How to make wearable display - OLED SSD1306 display run by ATtiny85_rev01.pdf 16

www.AwesomePCB.com
Step 5 Sew snaps to OLED display
This step is similar to step 4. Now we are going to sew 4 latches toOLED display. Mark on the leather position of the latches from OLED display.
Check if everything fit in to the right place.
Instructable_How to make wearable display - OLED SSD1306 display run by ATtiny85_rev01.pdf 17
www.AwesomePCB.com
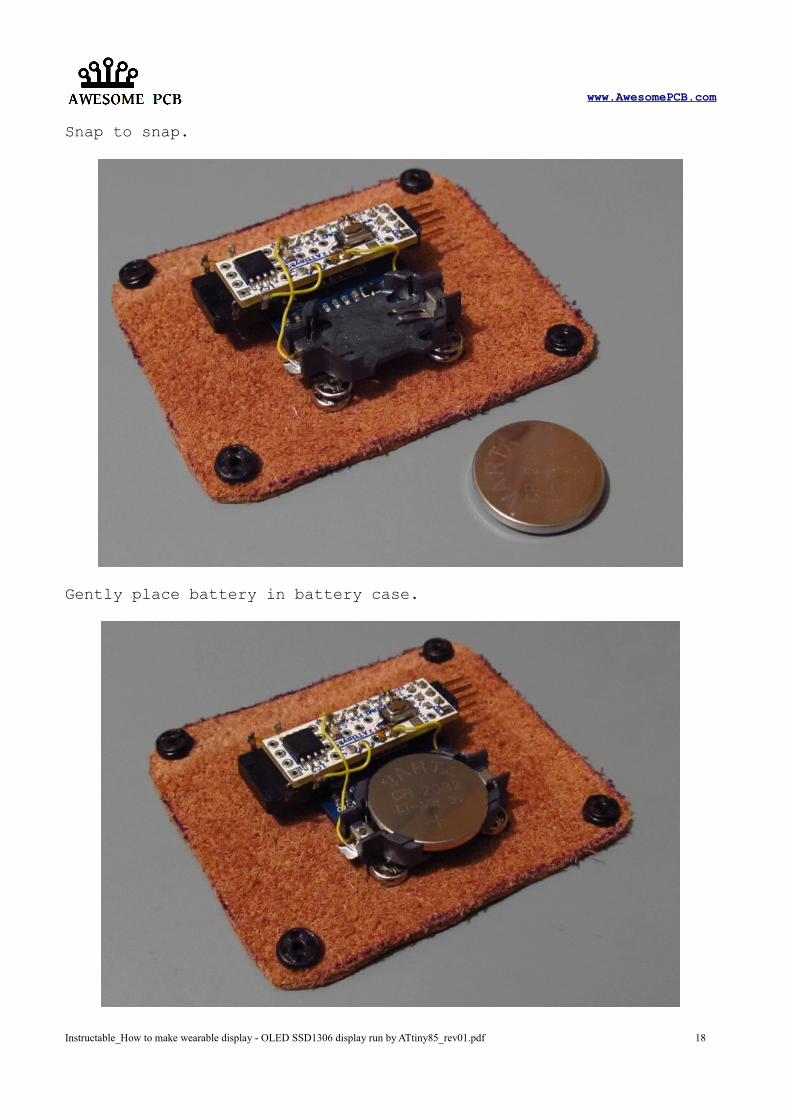
Snap to snap.
Gently place battery in battery case.
Instructable_How to make wearable display - OLED SSD1306 display run by ATtiny85_rev01.pdf 18

www.AwesomePCB.com
Flip to the display side:)
Now stick outer latches to your clothes and ready!
Instructable_How to make wearable display - OLED SSD1306 display run by ATtiny85_rev01.pdf 19

www.AwesomePCB.com
Step 6 Extras
Attiny25/45/85 PCB project is created with the basic idea to providetiny, cheap and versatile PCB for ATtiny25/45/85 microcontroler, that you can leave it in your project with no regret of losing expensive Arduino board.
Please check running campaing on Indiegogo and AwesomePCB.
Tech spec of the Attiny25/45/85 PCB• size: 33.5 x 11.2 mm • package: THT DIP8 ATtiny25/45/85 • package: SMD SO08 ATtiny25/45/85 • reset switch, top and bottom side. • reversible components THT - top side, SMD - bottom side • standard 6 pin ISP programming connector. • 2 output connector with access for all pins of uC • schematic
Instructable_How to make wearable display - OLED SSD1306 display run by ATtiny85_rev01.pdf 20