Embed Size (px)
Citation preview
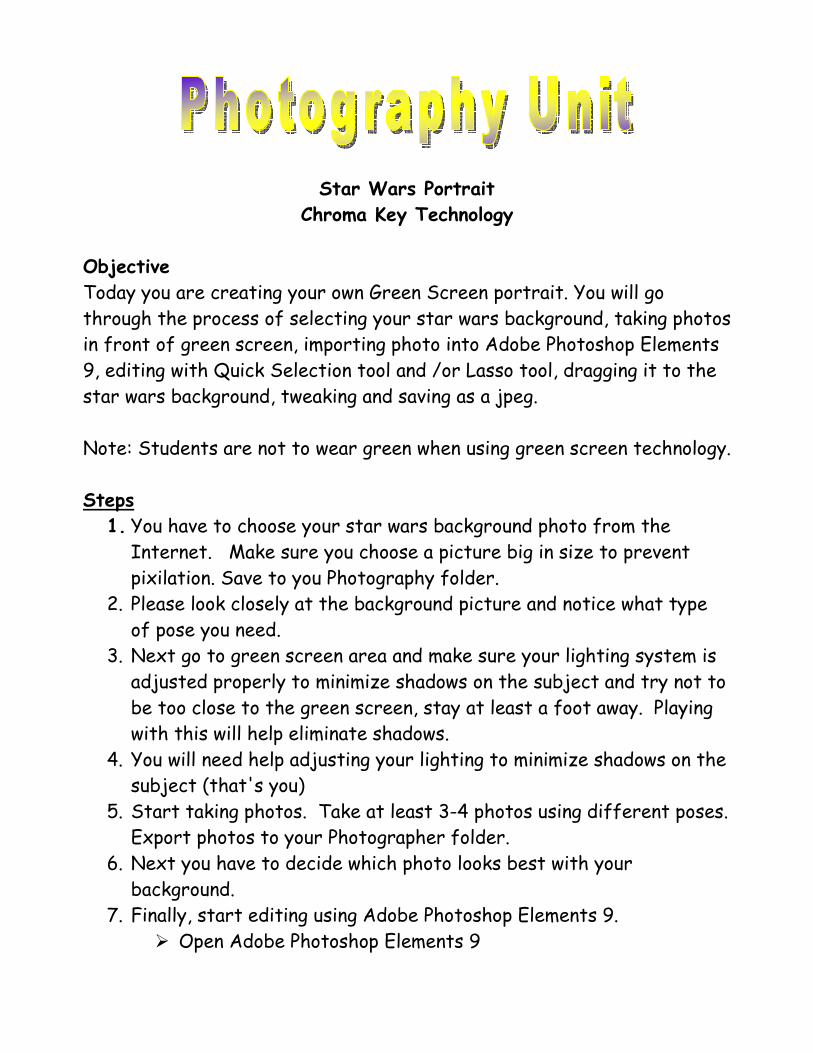
Star Wars Portrait
Chroma Key Technology
Objective
Today you are creating your own Green Screen portrait. You will go
through the process of selecting your star wars background, taking photos
in front of green screen, importing photo into Adobe Photoshop Elements
9, editing with Quick Selection tool and /or Lasso tool, dragging it to the
star wars background, tweaking and saving as a jpeg.
Note: Students are not to wear green when using green screen technology.
Steps
1. You have to choose your star wars background photo from the
Internet. Make sure you choose a picture big in size to prevent
pixilation. Save to you Photography folder.
2. Please look closely at the background picture and notice what type
of pose you need.
3. Next go to green screen area and make sure your lighting system is
adjusted properly to minimize shadows on the subject and try not to
be too close to the green screen, stay at least a foot away. Playing
with this will help eliminate shadows.
4. You will need help adjusting your lighting to minimize shadows on the
subject (that's you)
5. Start taking photos. Take at least 3-4 photos using different poses.
Export photos to your Photographer folder.
6. Next you have to decide which photo looks best with your
background.
7. Finally, start editing using Adobe Photoshop Elements 9.
� Open Adobe Photoshop Elements 9
� First open your green screen photo. Go to file open>browse for
picture.
� Next, use the Quick Selection tool to remove the green
screen. To do so, click and drag on the green screen, you will
notice that most of your selection will be the green screen. If
you notice that part of the subject has been selected, go to
the quick selection tool icon and click subtract from selection
icon . Move your mouse carefully over the
selected area until all of the area has been deselected. Once
your selection has been complete, click the Magic Erase tool
and click on the green part of photo. All of the green screen
should disappear. If for some reason some of the green
remains on the photo you can erase the green using the eraser
tool or you can select the area with the Lasso tool then click
the delete key.
8. Save your picture as PSD format just encase you have to modify
later and then save as a TIFF format.
9. Background Photo
� When choosing the background it has to be big in size. Choose
a picture with high resolution and save to your photography
folder.
� Open background in Photoshop>Go to File>click open (you have
to browse for you picture)double click your star wars
background picture and notice that it has loaded into the
Photoshop project bin. To the right of your screen, right click
the Background layer and create a duplicate. You should have
two layers.
� Next open up the picture of you with background removed and
you will notice to your right that another layer has been added.
Totaling three.
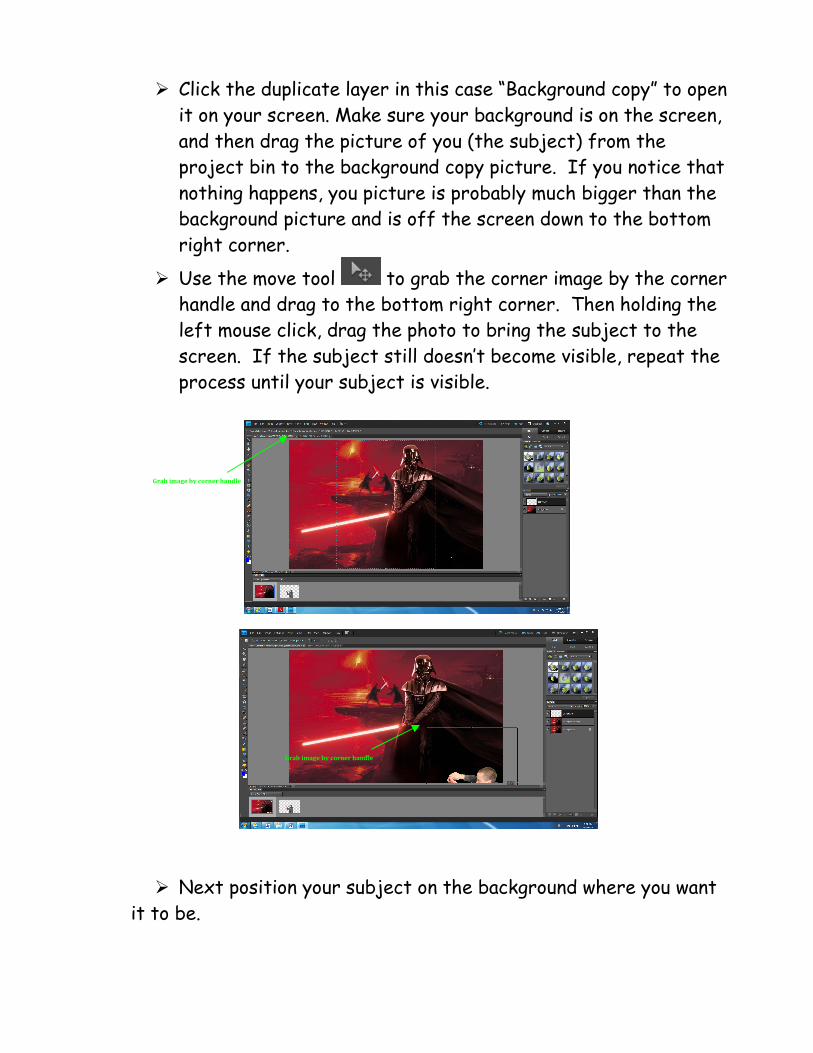
� Click the duplicate layer in this case “Background copy” to open
it on your screen. Make sure your background is on the screen,
and then drag the picture of you (the subject) from the
project bin to the background copy picture. If you notice that
nothing happens, you picture is probably much bigger than the
background picture and is off the screen down to the bottom
right corner.
� Use the move tool to grab the corner image by the corner
handle and drag to the bottom right corner. Then holding the
left mouse click, drag the photo to bring the subject to the
screen. If the subject still doesn’t become visible, repeat the
process until your subject is visible.
� Next position your subject on the background where you want
it to be.
Grab image by corner handle
Grab image by corner handle

� You may notice that you have made your subject too small, so
you have to resize it. Again, grab the corner handle and drag to the
size that suits your background. Don’t grab the side handles!!
� Place your subject in the position where you want it to be.
10. Draw light Saber
� As you will notice you have two layers open on your screen. To
the right of your screen click on the subject layer TIFF to
activate it and now it’s time to add the light saber.
� First, you want to set the colour for your light saber. To do so,
click
the blue square in the toolbar and a colour picker dialogue box opens.
Pick a colour you would like for your light saber. In this case, I
picked fluorescent green because I wanted something bright that
would stand out. You might want to pick a colour that matches the
light saber on your background image. Entirely up to you. Click OK
� Next you have to select the brush tool to make a spot on the
end of the flashlight. You may have to play with the brush tool
sizes before you get the correct size you want. Make sure you
click the layer you want to work with and in this case, it is the
layer with the subject (you), with the background removed and
then click the brush tool.
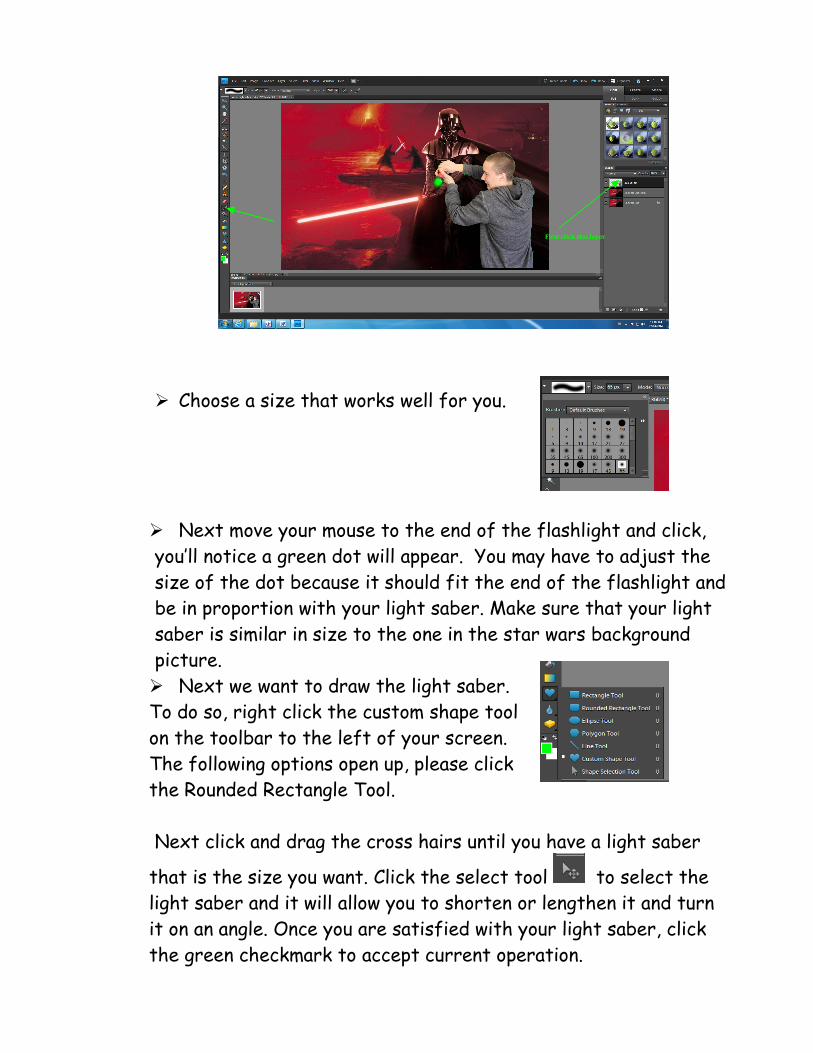
� Choose a size that works well for you.
� Next move your mouse to the end of the flashlight and click,
you’ll notice a green dot will appear. You may have to adjust the
size of the dot because it should fit the end of the flashlight and
be in proportion with your light saber. Make sure that your light
saber is similar in size to the one in the star wars background
picture.
� Next we want to draw the light saber.
To do so, right click the custom shape tool
on the toolbar to the left of your screen.
The following options open up, please click
the Rounded Rectangle Tool.
Next click and drag the cross hairs until you have a light saber
that is the size you want. Click the select tool to select the
light saber and it will allow you to shorten or lengthen it and turn
it on an angle. Once you are satisfied with your light saber, click
the green checkmark to accept current operation.
First click this layer
Next click the brush tool.
First click this layer

� Next you want to give your light saber a
glowing effect. To do so> select the light saber>go
to Filter on menu>click Blur>click Gaussion Blur. You’ll
be prompted to simplify the shape. Click OK.
� A Gaussian Blur dialogue box opens, here you’ll use the slider
to set the radius of the light saber to 9 or close to it. As you move
the slider, you will notice that your light saber will glow. You may
have to adjust to suit your picture.
11. Blending the subject with the background image
� Please note that when you look at the
subject and your background, the subject stands out.
You may want tone down the photo. To do so>go to
enhance on menu>click adjust colour>click
Hue/Saturation, a dialogue box opens. Play with the
sliders until your image looks like it is starting to blend with the
background.
� Next you want to tone down the edges of the subject, and to
do this we will need to add some shadows. First click the eyedropper
tool , then click on the image to get a similar colour from the
background. This will allow you have the same colour that is in the
background for that given area. Next click the brush tool , click
the brush presets and choose a soft round brush. Finally,
you’ll adjust the size of your brush tool depending on
what part of the image you are trying to manipulate. Repeat this
process until your image looks like it blends in with the background.
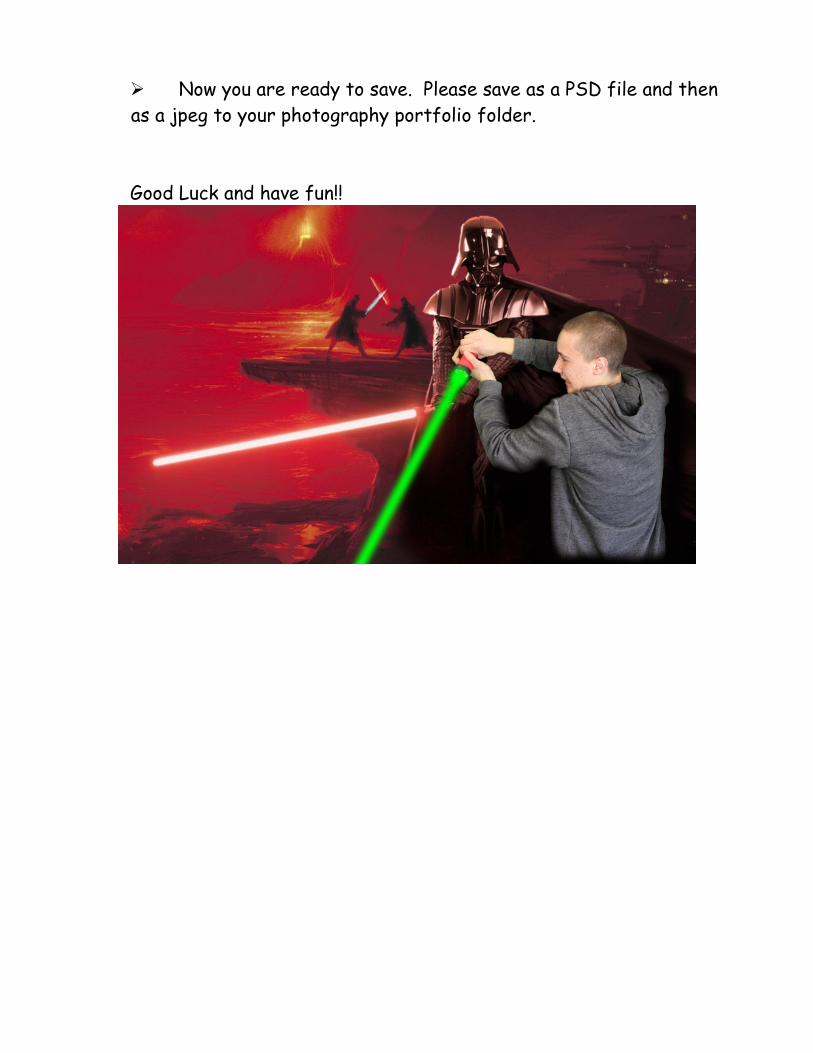
� Now you are ready to save. Please save as a PSD file and then
as a jpeg to your photography portfolio folder.
Good Luck and have fun!!