Embed Size (px)
Citation preview

Small Scale Laboratory: Organic Chemistry at University Level
Compiled and Edited by Associate Professor Supawan Tantayanon
Department of Chemistry, Faculty of Science Chulalongkorn University, Bangkok, THAILAND

Department of Chemistry, Faculty of Science, Chulalongkorn University, Bangkok, Thailand 10330 Tel / Fax +66 2218 7641, e-mail: [email protected]
2
Department of Chemistry, Faculty Thai Research Fund
of Science, Chulalongkorn University
Thailand
Chemical Society of Thailand Federation of Asian Chemical Society

Department of Chemistry, Faculty of Science, Chulalongkorn University, Bangkok, Thailand 10330 Tel / Fax +66 2218 7641, e-mail: [email protected]
3
Small Scale Laboratory:
Organic Chemistry at University Level
FOREWORD 6
INTRODUCTION 8
• COMPONENTS OF SMALL-LAB KIT 9 • SMALL-SCALE APPARATUS AND TECHNIQUE 11
CHAPTER I: TECHNIQUES IN THE ORGANIC CHEMISTRY LABORATORY 19
• RECRYSTALLIZATION 20 • DISTILLATION 25 • SUBLIMATION 31 • CHROMATOGRAPHY 33
CHAPTER II: SEPARATION OF MIXTURE BY EXTRACTION 39
• SEPARATION OF ACIDIC AND NEUTRAL SUBSTANCES 40 • SMALL SCALE SEPARATION OF ACIDIC, BASIC AND NEUTRAL SUBSTANCE 45
CHAPTER III: IDENTIFICATION OF SUBSTANCES 51
• DETERMINATION OF AN UNKNOWN ALCOHOL BY OXIDATION REACTION 52 • POLYFUNCTIONAL COMPOUNDS OBJECTIVE 56 • IDENTIFICATION OF SUGARS FROM NATURAL SOURCES 60
CHAPTER IV: SYNTHESIS OF COMPOUNDS 64
• A SAFER AND RAPID BROMINATION OF ALKENES 65 • BROMINATION OF ACETANILIDE 73 • SYNTHESIS OF T-PENTYL CHLORIDE BY UNIMOLECULAR NUCLEOPHILIC
SUBSTITUTION 76 • SYNTHESIS OF ARYLOXYACETIC ACID BY BIMOLECULAR NUCLEOPHILIC
SUBSTITUTION 80 • DEHYDRATION OF ALCOHOL USING A CATION EXCHANGE RESIN CATALYST 84 • PREPARATION OF SALICYLIC ACID FROM WINTERGREEN OIL 87 • ESTERIFICATION: SYNTHESIS OF METHYL P-CHLOROBENZOATE 91 • INDIGO SYNTHESIS AND DYEING 94 • A GRIGNARD-LIKE ORGANIC REACTION 101 • DIELS-ALDER REACTION 104 • SYNTHESIS OF γ-BUTYROLACTONE 109 • SYNTHESIS OF COUMARIN USING A RESIN AS CATALYST 112 • SYNTHESIS OF CYCLIC ACETAL 115

Department of Chemistry, Faculty of Science, Chulalongkorn University, Bangkok, Thailand 10330 Tel / Fax +66 2218 7641, e-mail: [email protected]
4
• SYNTHESIS OF ASPIRIN 118 • ALDOL CONDENSATION REACTION 121 • OXIDATION OF BORNEOL TO CAMPHOR WITH ACTIVE MANGANESE DIOXIDE ON
SILICA 124
CHAPTER V: ISOLATION OF NATURAL PRODUCTS 128
• ISOLATION OF PIGMENTS FROM PLANT LEAVES 129 • EXTRACTION OF PIGMENTS FROM TOMATO, PAPAYA AND CARROT 133 • EXTRACTION AND ANALYSIS OF AN ESSENTIAL OIL 137 • ISOLATION AND HYDROLYSIS OF TRIMYRISTIN FROM NUTMEG SEED 145 • EXTRACTION OF LECITHIN AND CHOLESTEROL FROM EGG YOLK 150
REFERENCES 157

Department of Chemistry, Faculty of Science, Chulalongkorn University, Bangkok, Thailand 10330 Tel / Fax +66 2218 7641, e-mail: [email protected]
5
Small Scale Laboratory: Organic Chemistry at University Level
Compiled, Tested the Experiments and Written (in Thai) by
Associate Professor Dr. Supawan Tantayanon, Chulalongkorn University Associate Professor Dr. Wasna Jaturonrusmee, King Mongkut’s University of
Technology Thonburi Associate Professor Gaysorn Veerachato, Chulalongkorn University Associate Professor Dr. Duang Buddasu,Chiang Mai University Assistant Professor Dr. Chatchanok Kalalai, Prince of Songkhla University Assistant Professor Dr. Chuleewan Rajviroongit, Mahidol University Assistant Professor Dr. Parinya Theramongkol, Khon Kaen University Assistant Professor Panor Asvarujanon, Srinakharinwirot University
Modified and Edited (in English) under UNESCO contract no. 4500050667 by
Associate Professor Dr. Supawan Tantayanon
Department of Chemistry, Faculty of Science, Chulalongkorn University
Bangkok, THAILAND
Department of Chemistry, Faculty of Science, Chulalongkorn University, Bangkok, Thailand 10330 Tel / Fax +66 2218 7641, e-mail: [email protected]
6
FOREWORD
Much attention has increasingly been paid on safety, health and environmental issues, not only in industry but also in the university. Small scale experiments are safer in lowering the risk of chemical contact, more environmentally friendly, produce less waste and gain many other benefits. Although several universities are familiar with small scale chemistry and some universities have operated small scale chemistry laboratories successfully, several other universities have not yet adopted these practices, particularly for organic chemistry laboratory. Due to the nature of the organic chemistry laboratory which is more complicated than the general chemistry laboratory, many kinds of special glassware and equipments are required. It would therefore be ideal to have a set of small scale glassware and equipment that can readily be used safely and conveniently for performing organic chemistry experiments even if when a standard laboratory is not available.
In this workbook, experiments are elaborated using small scale glassware and equipments from a Small-Lab Kit, developed at the Department of Chemistry, Faculty of Science, Chulalongkorn University in Thailand. This Small-Lab Kit was created as a result of the research project entitled “Chemistry Laboratory Based on Chemical Safety and Pollution Minimization” sponsored by Thai Research Fund (RDG 3/07/2543). One of the outcomes of this project is the organic laboratory book entitled “Organic Chemistry Laboratory Based on Chemical Safety and Pollution Minimization” written in Thai by professors from 7 universities in this project. They compiled, adjusted and tested the experiments taken from several traditional organic chemistry laboratory books using the prototype of Small-Lab Kit. Currently, some selected experiments from this Thai organic chemistry laboratory text have further been modified, rewritten and edited in English as appeared in this workbook. Some experiments are long, but can be divided into parts to be accomplished in a few laboratory periods or selected to do some parts suitable for one laboratory period. I hope the users will find these experiments more convenient and enjoyable to be performed.
I would like to thank Wasna Jaturonrusmee, Gaysorn Veerachato, Duang Buddasuk, Chatchanok Kalalai, Chuleewan Rajviroongit, Parinya Theramongkol, Panor Asvarujanon, the professors from 7 universities in Thailand for their contribution in my research project. I am grateful to Professor Datin Zuriati Zakaria, the Secretary-General of Federation of Asian Chemical Societies (FACS), for her proof readings and comments on the experiments in this workbook. I appreciate Thai Research Fund for the financial support on my research project, Chemical Society of Thailand and Federation of Asian Chemical Societies for their encouragement and kind support to me in many ways. Finally, I would like to express my sincere thank to UNESCO for the opportunity to share my experience and Small-Lab Kit with the public worldwide.
Associate Professor Supawan Tantayanon, Ph.D. Department of Chemistry, Faculty of Science, Chulalongkorn University, Thailand. President, Chemical Society of Thailand. Director, Low-cost Instrumentation and Microscale Chemistry, Federation of Asian Chemical Societies.

Department of Chemistry, Faculty of Science, Chulalongkorn University, Bangkok, Thailand 10330 Tel / Fax +66 2218 7641, e-mail: [email protected]
7
The Global Microscience Experiments Project, created by UNESCO in close cooperation with various international and national organizations, is well known throughout the world. Many teaching and learning materials on Microscience experiments covering primary sciences, chemistry, biology and physics have been prepared and are available free on the UNESCO website. These materials cover principally primary and secondary educational levels.
The present educational materials has been developed by our Thai partners, in particular, the Department of Chemistry in the Faculty of Science of Chulalongkorn University of Thailand under UNESCO contract no. 4500050667.
The workbook contains instructions for practical experimentation in organic chemistry using a Small-Lab Kit developed by Chulalongkorn University and containing small scale apparatus, thus, succeeding in the challenge of making experimentation safer, cost effective and environmentally sound. The publication corresponds fully to the higher educational level including Masters Level and can also be used for teacher training for application in higher secondary education. We would like to congratulate warmly our Thai colleagues for the present publication and for their development of the Small-Lab Kit. The experiments published constitute an example at the tertiary level of application of the same methodological concept as the Global Microscience Experiments Project. We hope that this workbook and the Thai Organic Chemistry Microscience kit (Small-Lab Kit) will be examined by other interested countries for possible use, totally or partially, in their own educational programs in chemistry and biology. Maria Liouliou PROJECT COORDINATOR UNESCO, NATURAL SCIENCES SECTOR DIVISION OF BASIC AND ENGINEERING SCIENCES Academician Alexandre Pokrovsky DIRECTOR MICROSCIENCE EXPERIMENTS PROGRAM OF INTERNATIONAL ORGANISATION FOR CHEMICAL SCIENCES IN DEVELOPMENT (IOCD)

Department of Chemistry, Faculty of Science, Chulalongkorn University, Bangkok, Thailand 10330 Tel / Fax +66 2218 7641, e-mail: [email protected]
8
INTRODUCTION

Department of Chemistry, Faculty of Science, Chulalongkorn University, Bangkok, Thailand 10330 Tel / Fax +66 2218 7641, e-mail: [email protected]
9
COMPONENTS OF SMALL-LAB KIT
1. lab stand pole 2. lab stand base 3. hot plate 4. heat dissipation block 5. clamps (2) 6. clamp holders (2) 7. thermometers (2) 8. capillary tubes 9. joint clips (5) 10. rubber bulb 11. stirring rod 12. pasteur pipette 13. receiver distilling still 14. suction glass funnel 15. filtering flask 16. suction flask 17. condenser 18. thermometer adapter 19. round bottom flasks (2) 20. cold finger 21. glass stoppers (2) 22. three-way adapter 23. fractionation column 24. receiver adapter 25. test tube 26. conical bottom flasks (4)

Department of Chemistry, Faculty of Science, Chulalongkorn University, Bangkok, Thailand 10330 Tel / Fax +66 2218 7641, e-mail: [email protected]
10
HEATING EQUIPMENT IN SMALL-LAB KIT
ADDITIONAL EQUIPMENTS TO SMALL-LAB KIT
Observation window Melting point determination bullet
Thermometer slots
Cylindrical mantles
Round bottom mantles
Three-way pipette rubber bulb for suction filtration
Miniature water pump for circulating cool water

Department of Chemistry, Faculty of Science, Chulalongkorn University, Bangkok, Thailand 10330 Tel / Fax +66 2218 7641, e-mail: [email protected]
11
SMALL-SCALE APPARATUS AND TECHNIQUE
SETTING A LAB STAND 1. Take the lab stand pole and push the grooved end all the way through the hole of
the lab stand base. 2. Tighten the screw to hold the pole straight. 3. Check the firmness of the stand.
12
SELECTING THE GLASSWARE 1. Use normal glassware available in the lab whenever possible. 2. Choose the proper container for an experimental operation on the basis that it
should be between quarter and half full when all reagents and reactants have been added.
3. When heating is required, only use the proper glassware in Small-Lab Kit box.
WEIGHING A SUBSTANCE
Weighing a substance in small scale can be performed using a high precision pocket scale, for weighing Jewelry with two decimals, but should be used at the area where no or less interference of air current. The procedures are as follows:
1. Zero the balance. 2. Place the container on the pan. 3. Record the weight of the container. 4. Take out the container from the balance and add a substance to be weighed.

Department of Chemistry, Faculty of Science, Chulalongkorn University, Bangkok, Thailand 10330 Tel / Fax +66 2218 7641, e-mail: [email protected]
12
: In case of weighing a liquid, the container must be capped to avoid the evaporation of the liquid.
5. Place the container with a substance on the pan. 6. Record the total weight and calculate the weight of a substance.
HEATING SAMPLES Hot plate and heat dissipation block are used for heating in this workbook. The procedures are as follows:
1. Place the heat dissipation block on the hot plate at the right position so that the block cannot be fallen off the hot plate.
2. Place the flask containing solution in the proper well of the block. If the flask equipped with some glassware on top, clamping the apparatus assembly at a certain point is necessary.
3. Place a thermometer in the proper thermometer slot to read the temperature of the block while heating.
4. Plug the power cord.
: Always plug the power cord as the last step before operating the experiment. 5. Turn on the heat control knob and the red light will display while the green light
will start blinking. When the temperature reaches at the setting point, the green light will stop blinking.
: This hot plate is not explosion proof design. Do not use this instrument with highly volatile liquid. Keep the power cord off the hot plate while heating.
1
23
45
ASSEMBLING APPARATUS FOR REFLUX AND DISTILLATION
1. Connect two water hoses to the side arms of the condenser. 2. Connect the end of one water hose to a miniature water pump for ‘water in’ and the
other hose for ‘water out’. 3. Put the miniature water pump in water in a bucket or any suitable container.
: The water should cover the entire pump. Ice can be added in water to obtain the lower temperature than room temperature. Remember that do not plug in until it is ready to operate the experiment.

Department of Chemistry, Faculty of Science, Chulalongkorn University, Bangkok, Thailand 10330 Tel / Fax +66 2218 7641, e-mail: [email protected]
13
4. Add a boiling stone to the flask containing solution either for refluxing or distillation.
5. For refluxing, equip a condenser to the flask.
: Grease all glassware joints very lightly. However, PTFE tape is more appropriate. Use it with a length just enough for a one round wrap at the connector of the condenser.
6. Secure every connection with a joint clip. 7. Place the flask with a condenser in the proper well of the heat dissipation block on
the hot plate. 8. Clamp the apparatus assembly not too tight and not too loose at the proper position
of the condenser with a lab stand. 9. In case of distillation, a three-way adapter with a thermometer is attached to the
flask and the head of the condenser, while a distillation receiver adapter connected to a receiving container is attached to the down end of the condenser. Then follow the procedure in steps 7 and 8, but the lab stand must be placed aside the hot plate.
7
8
Clamp to lab standat this point
9
Setup for refluxing Setup for distillation

Department of Chemistry, Faculty of Science, Chulalongkorn University, Bangkok, Thailand 10330 Tel / Fax +66 2218 7641, e-mail: [email protected]
14
TRANSFERRING LIQUID Transferring a liquid using a pipette or a dropper is better than by pouring. The procedures are as follows:
1. Put the two containers close together to avoid losses of material through the pipette dripping during transferring.
2. Hold the pipette by keeping the tip pointing downwards. 3. Draw the material up into the pipette and expel it down to the other container as
much as required. For more accurate method of measuring liquid, a variable volume dispensing pipette, graduated pipette or syringe is used.
FILTRATION WITH PASTEUR PIPETTE Filtration of small volume of solution can be performed using in two ways as follows: Pasteur filtering pipette method:
1. Insert a small amount of cotton wool and push it into the neck of a Pasteur pipette
: Use a short tip Pasteur pipette to avoid the flow restriction of the filtrate. 2. Clamp the filtering pipette to the lab stand and place the proper flask underneath it. 3. Use another Pasteur pipette or a dropper to transfer the solution into the filtering
pipette. If the flow is slow, attach the rubber bulb onto the filtering pipette and squeeze the rubber bulb gently.
4. Rinse the filtering pipette with a little amount of solvent (if necessary). 5. Expel the remaining liquid on cotton wool in the filtering pipette into the receiving
flask using the rubber bulb. Pasteur filter-tip pipette method (suitable for filtration of a minute amount of solution):
6. Attach the rubber bulb onto the Pasteur pipette and wrap the pipette tip with a small wad of cotton wool.
7. Immerse the pipette into the solution until the pipette tip reaches the bottom of the flask while squeezing the rubber bulb.
8. Draw the solution up into the pipette by releasing the bulb carefully.
: Be careful not to lose the cotton wool during suction. 9. Take off the cotton wad from the pipette tip. Expel the solution into the proper
container.
1 2 3 4 5 6

Department of Chemistry, Faculty of Science, Chulalongkorn University, Bangkok, Thailand 10330 Tel / Fax +66 2218 7641, e-mail: [email protected]
15
S
1 2
SUCTION FILTRATION
A solid compound from a suspension or a solution can be isolated by suction filtration as follows:
1. Assemble a suction glass funnel to a filtering flask and clamp the flask securely. 2. Connect the side arm of the filtering flask to the suction valve (S) of a three-way
pipette rubber bulb. 3. Cut the filter paper to the right size and place at the bottom of the funnel. 4. Prepare for applying suction; expel air from the bulb by squeezing the air valve (A)
and the bulb simultaneously. 5. Wet the filter paper with a few drops of the solvent used and apply suction; squeeze
the suction valve (S).
: The paper should lie flat snugly against the bottom and cover all the holes of the funnel.
6. Immediately transfer the suspension on to the filter. 7. Continue applying suction by simultaneously squeezing the air valve (A) and the
bulb again, and then squeeze the suction valve (S) until all the liquid has been pulled through the filter paper.
Filter paper
A
3
4
5
8. If necessary, the solid can be washed on the suction glass funnel with fresh solvent. 9. Repeat the suction process until the solid is air-dry. 10. Release the suction by squeezing the empty valve (E).

Department of Chemistry, Faculty of Science, Chulalongkorn University, Bangkok, Thailand 10330 Tel / Fax +66 2218 7641, e-mail: [email protected]
16
STIRRING AND MIXING USING PASTUER PIPETTE
Stirring and mixing a small-scale suspension or mixture can be accomplished by air bubbling into it as follows:
1. Hold the Pasteur pipette attached with a rubber bulb and then lower the pipette into the suspension or mixture.
2. Squeeze the bulb with an appropriate force to expel air from the rubber bulb. 3. Lift out the pipette from the solution while squeezing the rubber bulb and repeat
this process until a well mix is obtained. 4. If the mixture is composed of two layers, draw a portion of the lower layer up into a
pipette and carefully expel it back into the container, through the upper layer, and doing this repeatedly for about three minutes.
: Be careful to avoid taking the mixture into the rubber bulb.
EXTRACTION
Isolation of an organic reaction product from water, with an organic solvent which does not mix with water, can be accomplished by procedure as follows:
1. Mix the two layers well by drawing a portion of the lower layer up into a pipette and carefully expel it back into the container, through the upper layer, and doing this repeatedly for about three minutes.
2. Allow two layers to separate. 3. If the whole volume is small, take it all up into the pipette. Allow the interface to
reform in the pipette. Expel slowly the lower layer back to the original container, and transfer the upper layer into a clean container.
4. If the whole volume is large, expel some air from the rubber bulb and lower the tip of the Pasteur pipette to the bottom of the flask. Carefully draw up the lower layer, stopping when the interface between the layers reaches the pipette tip. Lift out the pipette and expel any drops of the upper layer caught in the tip. Then transfer the lower layer in the pipette into another clean flask.
5. Extract the required layer further by adding another small portion of the solvent. Mix well and allow them to separate. Separate each of two layers as before and combine with the first separating layers.
6. Wash the combined organic fractions with a tiny amount of water (0.3 mL) to remove any inorganic materials dissolved in the organic layers by mixing and separating as before.
7. Dry the organic layer by adding a drying agent such as anhydrous magnesium sulfate.
: The indicators that the liquid is dry are: 1. The organic layer must be clear, if it is still cloudy, add more drying agent. 2. When the liquid is agitated, some of the drying agent will remain powdery and go into
suspension. The absence of such suspended powder indicates that this solution needs more drying agent to be added.
8. After the organic layer is dry, separate the solution from the drying agent using the Pasteur filter-tip pipette method as described earlier.
Department of Chemistry, Faculty of Science, Chulalongkorn University, Bangkok, Thailand 10330 Tel / Fax +66 2218 7641, e-mail: [email protected]
17
9. Rinse the drying agent with a further 0.5 mL of the solvent, if necessary. Combine this rinsing solvent.
10. Distil off the solvent to obtain the isolated product. If necessary, the product can be purified by recrystallization.
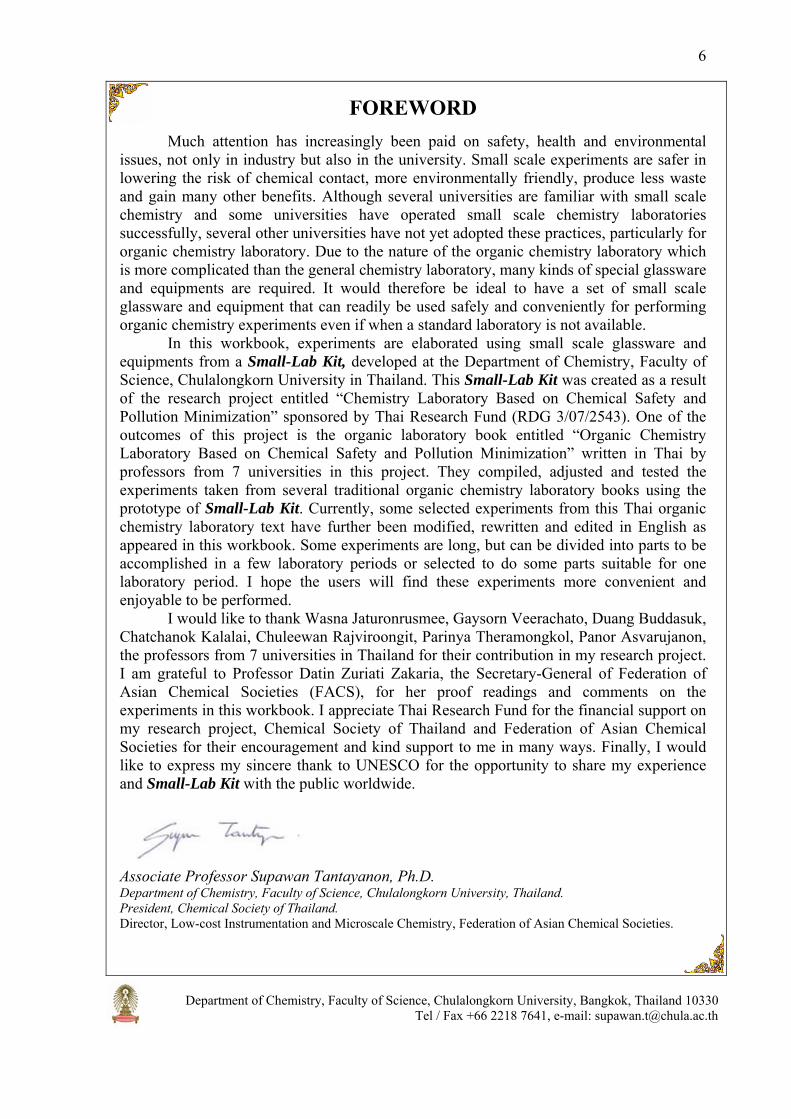
VOLUME REDUCTION The quick way to reduce the volume of a solution is rotatory evaporation, but the special apparatus is needed. Distillation using the receiver distilling still is more appropriate.
1. Add a boiling stone to a solution in the distilling flask. 2. Fit the distilling flask, the receiver distilling still and a water-cooled condenser. 3. Place the assembly in the right well of the heat dissipation block and clamp it gently
at the condenser, as shown below, to prevent it from toppling over. 4. Apply heating until the distillation is complete.
: A liquid with high boiling point often condenses before reaching the collecting trough. If this happens, wrap the part of the assembly between the top of the heat dissipation block and the bottom of the collecting trough with cotton wool, or with aluminum foil.
5. When the experimental operation has completed, lift the assembly out of the dissipation block and clamp and let it cool down outside the heat dissipation block. Disassemble the apparatus.
: Never leave the flask to cool down in the heat dissipation block. The flask will get stuck in the well of the heat dissipation block.
MELTING POINT DETERMINATION
Among several methods, capillary melting points are most often used for the determination of the melting point of a solid. By using the hot plate and heat dissipation block with a melting point determination bullet, the melting point determination can be easily accomplished as follows:
water in
water out

Department of Chemistry, Faculty of Science, Chulalongkorn University, Bangkok, Thailand 10330 Tel / Fax +66 2218 7641, e-mail: [email protected]
18
observation window
capillary tube with loaded sample
1. Grind sample to a fine powder. 2. Press the open end of the capillary tube on the heap of fine powder 3. Turn the capillary tube open end up and drop the tube, open end up, down a length
of glass tubing or a drinking straw onto a hard surface such as stone desk top, and the lab stand base.
4. Repeat steps 2-3 until the sample is tightly packed to a depth of 2-3 mm. 5. Insert the capillary filled with sample in melting point determination bullet and
place in the well with observation window of the heat dissipation block as shown below.
6. Place the thermometer in the nearest thermometer slot to the capillary. 7. Turn on the heat control knob and watch the rising temperature. 8. Observe the melting of sample through observation window. 9. Read the temperature when the sample starts to melt and when it completely melts,
as the melting point range of the sample.

Department of Chemistry, Faculty of Science, Chulalongkorn University, Bangkok, Thailand 10330 Tel / Fax +66 2218 7641, e-mail: [email protected]
19
CHAPTER I: TECHNIQUES IN THE ORGANIC CHEMISTRY LABORATORY

Department of Chemistry, Faculty of Science, Chulalongkorn University, Bangkok, Thailand 10330 Tel / Fax +66 2218 7641, e-mail: [email protected]
20
RECRYSTALLIZATION
OBJECTIVE 1. To learn and apply the technique of recrystallization for the purification of a crude
or impure organic substance.
BACKGROUND Recrystallization is the most convenient technique for purifying organic solids, if it
is feasible. It is based on the principles of solubility. In general, compounds (solutes) are more soluble in hot liquids (solvents) than cold liquids. If a saturated hot solution is allowed to cool, the solute is no longer soluble in the solvent and forms crystals of pure compound which can be separated from the dissolved impurities by filtration. Since the choice of solvent for recrystallization is often not specified and is seldom obvious, testing by trial and error on a small scale is generally required. Typically, a small amount (ca. 100 mg) of the substance to be purified is placed in a small test tube and then 1 to 2 ml of the solvent to be tested is added. If the solid dissolves cold, that solvent is obviously unsuitable. If the solid mixture is largely insoluble in the cold solvent, the mixture is warmed to its boiling point. If the material then dissolves, and reprecipitates on cooling, the solvent is a good candidate for the recrystallization procedure. Common solvents for crystallization are listed in the Table below.
Common solvents for crystallization
Solvent
Molecular structure
Bp (๐C)
Fp (๐C)
Water soluble
Dielectric constant (ε)
Flammable
Water H2O 100 0 Polar Diethyl ether (CH3CH2)2O 34 -116 - Medium- polar ++++ Dichloromethane CH2Cl2 40 -95 - Medium- polar 0 Acetone (CH3)2CO 56 -95 + Medium -polar +++ Petroleum ether --- 60-80 - Non-polar ++++ Chloroform CHCl3 61 -63 - Medium -polar 0 Methanol CH3OH 65 -98 + Polar ++ Hexane C6H14 69 -94 - Non-polar ++++ Carbon tetrachloride CCl4 77 -23 - Non-polar 0 Ethyl acetate CH3CO2C2H5 77 -84 - Medium -polar ++ Ethanol (95%) 95%C2H5OH 78 -117 + Polar ++ Acetic acid CH3CO2H 118 16 + Medium -polar +
Sometimes no single solvent is suitable and two miscible solvents can be combined to produce a suitable solvent. In this experiment, solvent selection for crystallization of known compounds will be performed. Then an unknown sample will be purified by crystallization.

Department of Chemistry, Faculty of Science, Chulalongkorn University, Bangkok, Thailand 10330 Tel / Fax +66 2218 7641, e-mail: [email protected]
21
REQUIREMENTS
Apparatus and materials: 1. Conical bottom flasks 2. Filtering flask 3. Test Tubes 4. Suction glass funnel
5. Pasteur pipettes 6. Activated charcoal 7. Hot plate and heat dissipation
blockChemicals : Acetanilide (C6H5-NHCOCH3); acetylsalicylic acid (2-HOOC-C6H4-OCOCH3); adipic acid (HOOC-(CH2)4-COOH); benzoic acid (C6H5-COOH); benzoin (C6H5-CO-CH(OH)-C6H5); benzil (C6H5-CO)2; 2-chlorobenzoic acid (2-Cl-C6H5-COOH); 4-nitroacetanilide (4-O2N-C6H4-NHCOCH3); phenyl benzoate (C6H5-COOC6H5); salicylic acid (2-HO-C6H4-COOH); acetone (CH3COCH3); ethanol (CH3CH2OH); ethyl acetate (CH3COOCH2CH3); hexane (C6H14); toluene (C6H5-CH3).
PROCEDURE PART I: Solvent selection
1. Place each of 10 finely crushed known samples, the size of half a grain of rice, in 6 test tubes.
2. Add 5 drops of water, 95% ethanol, ethyl acetate, acetone, toluene and hexane to test tubes No.1-6, respectively. Swirl the content in each tube and note whether the sample is soluble in the solvent at room temperature. Observe and record the observations.
: Some solvents tend to evaporate easily from the test tube so add the solvent, if necessary, to maintain the same amount of solvent for comparison.
3. Warm the test tubes containing insoluble sample in the conical well of the heat dissipation block on hot plate. Swirl the content in each tube and note whether the sample is soluble in hot solvents. Observe and record the observations.
: Be careful not to leave the solution heating without attention. 4. Let the solution cool and observe the crystals form. 5. Record each solvent tested and indicate which of the six solvents is the best solvent
suited for crystallization of each known sample. 6. Select the suitable solvent for recrystallization of an unknown sample, according to
the above procedures. Record the observations and the most suitable solvent for recrystallization.
PART II: Recrystallization of an unknown sample 7. Place 100 mg (accurately weigh) of the unknown sample for crystallization into 5-
mL conical bottom flask. Add 1 mL of the suited solvent. 8. Heat the mixture to a gentle boiling and often swirl the solution until the solid is all
dissolved.
: Be careful not to allow bumping which will cause a possible loss of material from the flask.
: If necessary, add 10 mg of activated carbon and reheat boiling for a few minutes to decolorize the solution.
Department of Chemistry, Faculty of Science, Chulalongkorn University, Bangkok, Thailand 10330 Tel / Fax +66 2218 7641, e-mail: [email protected]
22
: Let the solution cool down slightly before adding the activated carbon. 9. If the solid does not dissolve completely, add a few portions of 0.1 mL solvent and
continue heating. Observe at every addition whether any more solid dissolves. If not, it may be due to impurities. Filter the hot solution through a Pasteur filtering pipette to remove insoluble impurities or activated carbon.
: If no activated carbon has been added or no undissolved particles are in the solution, this step should be omitted.
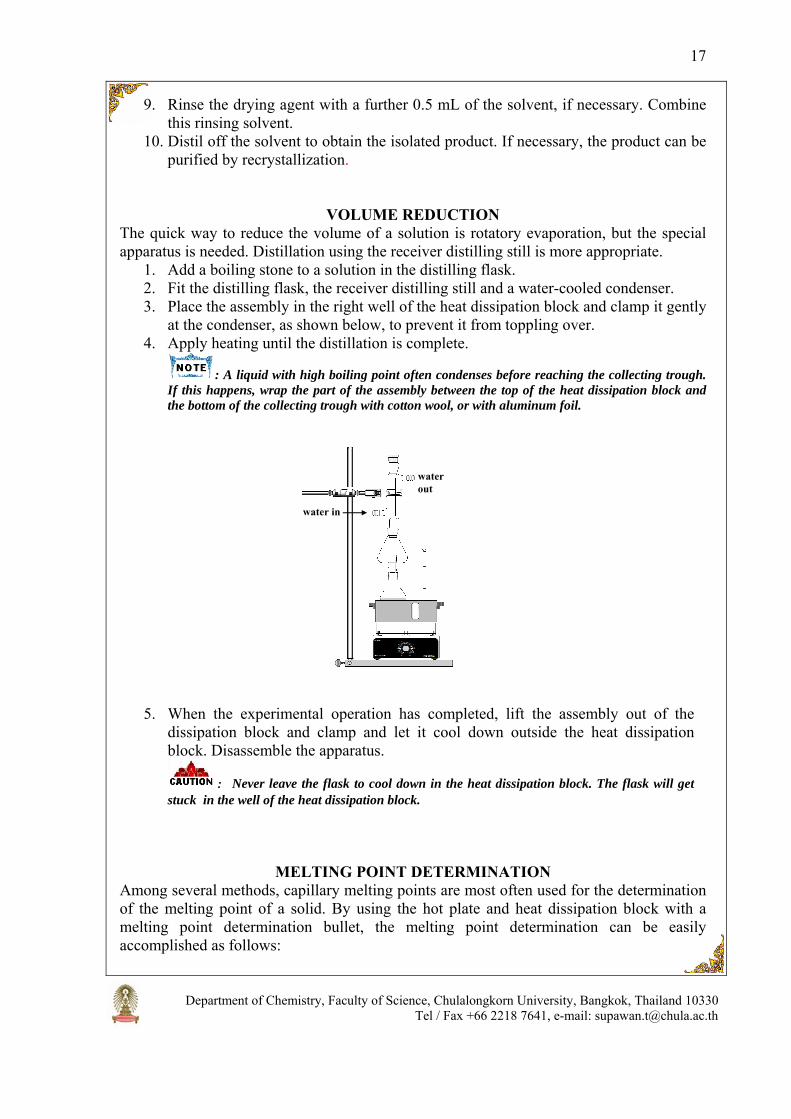
: Prepare a Pasteur filtering pipette by inserting a small piece of cotton wool in the top of Pasteur pipette and push it with a thin wire to the bottom of the pipette barrel.
10. Preheat the Pasteur filtering pipette by pulling hot solvent up into the barrel a few times. Transfer the hot solution in the flask into the Pasteur filtering pipette and receive the filtrate into another conical bottom flask as rapidly as possible. When the solution is filled up in the Pasteur filtering pipette, push the solution through by squeezing the rubber bulb on top of the pipette as shown in the figure below.
: Dilute the hot solution slightly to prevent crystallization from occurring during filtration.
11. Rinse the Pasteur filtering pipette with 0.5 mL of hot solvent to recover the solute that may have crystallized in the Pasteur filtering pipette and on the cotton wool.
12. Put the stopper on the flask. Allow the filtrate cool down. After the solution has come to room temperature, carefully set in an ice-water bath to complete the crystallization process.
: Do not disturb the solution. Slow cooling gives the best crystals. 13. In case of mixed-solvent crystallization, reheat the solution to boiling and add the
first solvent dropwise until the boiling solution remains cloudy or precipitate forms. Then add a drop of second solvent to restore the clear solution. Remove the flask from the heat, put the stopper on the flask. Allow the solution to cool to room temperature.
Cotton wool plug
Pasteur filtering pipette

Department of Chemistry, Faculty of Science, Chulalongkorn University, Bangkok, Thailand 10330 Tel / Fax +66 2218 7641, e-mail: [email protected]
23
: If no crystallization occurs after the solution has cooled, it indicates either too much solvent has been used or that the solution is supersaturated. The crystallization can be induced by adding a crystal of the original solid in a supersaturated solution. If no solid is available and a volatile solvent is being used, immerse the tip of a glass rod or metal spatula in the solution for a few seconds. The crystals that form at the end of the rod or spatula are then added into the solution to initiate crystallization.
14. Filter the crystals by suction filtration (Assemble a filtering glass funnel to a filtering flask and clamp. Connect the side arm of the filtering flask to the suction valve (S) of a three-way pipette bulb. Cut the filter paper to the right size and place at the bottom of the funnel. Expel air from the bulb by squeezing the air valve (A) and the bulb simultaneously. Wet the filter paper with a few drops of the solvent used and apply suction; squeeze the "suction" valve (S). Immediately transfer the suspension on to the filter. Continue applying suction by simultaneously squeezing the air valve (A) and the bulb again, and then squeeze the suction valve (S) until all the liquid has been pulled through the filter. If necessary, the solid can be washed on the filter with fresh solvent. Repeat the suction process until the solid is air-dry. Release the suction by squeezing the empty valve (E)). Rinse the crystals with a small portion of cool solvent, and continue suction to air-dry.
15. Weigh the crystal and calculate percent recovery. Determine the melting point and record.
: Consult the procedure for melting point determination on page 17.
CLEANUP 1. Place the cotton wool both with and without activated carbon in the appropriate
waste container. 2. Pour the solvents that are miscible with water down the drain and flush with
copious amount of water. 3. Pour the solvents that are immiscible with water into hydrocarbon or organic waste
container according to the organic classification.
QUESTIONS
1. If acetic acid and acetone are both suitable solvents for crystallization of an unknown sample, which solvent would you choose to use? Explain.
2. Why can the activated carbon decolorize the solution and why should it be used as little as possible?
3. While filtering the decolorized solution, why is it necessary to warm up the Pasteur filtering pipette?
4. Why should the solution filtrate be allowed to cool slowly? If it is cooled in an ice-water bath immediately, what will happen? Will it be an advantage or a disadvantage? Explain.

Department of Chemistry, Faculty of Science, Chulalongkorn University, Bangkok, Thailand 10330 Tel / Fax +66 2218 7641, e-mail: [email protected]
24
LAB REPORT
RECRYSTALLIZATION Solubility Tests
Compound Water
Hot/Cool
Ethanol
Hot/Cool
Ethyl acetate
Hot/Cool
Acetone
Hot/Cool
Toluene
Hot/Cool
Hexane
Hot /Cool
Solvent
Hot/Ccool
Appearance of Crystal
Acetanilide Adipic acid Acetyl salicylic acid
Benzoic acid Benzoin Benzil 2-chlorobenzoic acid
Phenyl benzoate
4-nitro acetanilide
Salicylic acid Unknown
: Mark √ for soluble, or × for insoluble. Unknown sample number………………….. Initial weight………………….g It’s appearance……………………………. Suitable solvent…………………………………………………………………….. Weight of crystals…………….g It’s appearance……………………………. Melting point range…………………°C The crystals are…………………………………………………………………………. Percent recovery =……………×100 =…………% Observation & Conclusion ……………………………………………………………………………………………….……………………………………………………………………………………..…………………………………………………………………………………………………………..………………………………………………………………………………………………... ………………………………………………………………………………………………... ………………………………………………………………………………………………..

Department of Chemistry, Faculty of Science, Chulalongkorn University, Bangkok, Thailand 10330 Tel / Fax +66 2218 7641, e-mail: [email protected]
25
DISTILLATION
OBJECTIVE 1. To practice basic technique of purifying the organic liquid by distillation.
BACKGROUND Distillation is a widely used method for separating and purifying a mixture of
liquids by heating the liquids to boiling at different temperatures to transform them into the vapor phase. The vapors are then condensed back into liquid form in a sequence from lower to higher boiling points. Distillation is used for many industrial processes, such as production of gasoline and kerosene, distilled water, organic solvents, and many other liquids.
There are 4 types of distillation including simple, fractional, steam and vacuum distillations. In simple distillation, all the hot vapors produced are immediately passed into a condenser to cool and condense the vapors back to liquid. Therefore, the distillate may not be pure depending on the composition of the vapors at the given temperature and pressure. Simple distillation is usually used only to separate liquids whose boiling points differ greatly (more than 25°C), or to separate liquids from nonvolatile solids or oils. In case of very close boiling points, fractional distillation must be used in order to separate the components well by repeated vaporization-condensation cycles within a fractionating column.
Steam distillation is a method for distilling compounds which are heat-sensitive by bubbling steam through a mixture. After the vapor mixture is cooled and condensed, a layer of oil and a layer of water are usually obtained. Some compounds have very high boiling points and may boil beyond their decomposition temperatures at atmospheric pressure. It is thus better to do vacuum distillation by lowering the pressure to the vapor pressure of the compound at a given temperature at which the compound is boiled, instead of increasing the temperature.
In this experiment, simple distillation and fractional distillation will be used to separate the rubbing alcohol.
REQUIREMENTS
Apparatus and materials: 1. Conical bottom flasks 2. Round bottom flasks 3. Erlenmeyer flasks 4. Graduated cylinders 5. Receiver distilling still 6. Condenser 7. Thermometer 8. Capillary tubes
9. Rubbing alcohol 10. Boiling stone 11. Aluminum foil 12. Pasteur pipette 13. Grease 14. TLC plate 15. Ruler and pencil

Department of Chemistry, Faculty of Science, Chulalongkorn University, Bangkok, Thailand 10330 Tel / Fax +66 2218 7641, e-mail: [email protected]
26
16. Hot plate and heat dissipation block
17. Miniature water pump
Chemicals: o-Nitrophenol (HO-C6H4-NO2); p-nitrophenol (HO-C6H4-NO2); dichloromethane (CH2Cl2); ethyl acetate (CH3COOCH2CH3); sodium sulfate (anh.Na2SO4).
PROCEDURE PART I: Simple distillation
1. Place 10 mL of rubbing alcohol in 25-mL round bottom flask. Add a boiling stone. Assemble the apparatus for simple distillation as shown below. (Connect a round bottom flask with a thermometer adapter fitted with a thermometer on top and a condenser at a side arm. Position the mercury bulb of thermometer adjacent to arm of the thermometer adapter. Connect the end of condenser with a receiving adapter attached with an appropriate container).
: Consult the procedure for the distillation apparatus assembles on page 12.
: Grease all glassware joints very lightly. However, PTFE tape is more appropriate. Use it with a length just enough for a one round wrap at each connector.
: Check all the connections for being well fitted and jointly clipped. Be sure that the position of the mercury bulb of the thermometer is below the neck of the three-way adapter so that it is immersed in the rising vapor and the accurate temperature can be read.
2. Turn on the miniature water pump to circulate the water into the condenser. 3. Turn on the hot plate and slowly raise the temperature until vapors can be seen in
the still. Control the rate of distillation for 1mL/ 4 min.
: Check the apparatus periodically during distillation to be sure that solvent vapors are not escaped.
4. Record the temperature and watch the time when the first drop of distillate was taken. Collect distillate in a flask or a graduated cylinder.
5. Record the temperature and volume (mL) of distillate at every 4 minutes during the entire distillation.
6. When no more distillate collects in the receiver flask, turn off the hot plate and lift up the apparatus from the heat dissipation block. Let it cool at room temperature.
7. Plot the graph of the collected boiling temperature (Y axis) versus volume (mL) of distillate (X axis).

Department of Chemistry, Faculty of Science, Chulalongkorn University, Bangkok, Thailand 10330 Tel / Fax +66 2218 7641, e-mail: [email protected]
27
PART II: Fractional distillation
8. Repeat the distillation as described in steps 1-7 with fractional distillation by assembling the apparatus as shown below. (Insert the fractionating column between the connections of a round bottom flask with a thermometer adapter).
: Wrap the conical bottom flask, fractionating column, and a thermometer adapter with aluminum foil.
9. Plot the collected boiling temperature (Y axis) versus volume (mL) of distillate (X axis) on the same graph in PART I.
10. Discuss the results from experiments in PART I and PART II according to the graphs.
PART III: Steam distillation
11. Place 100 mg of each of o-nitrophenol and p-nitrophenol and 5 mL of water in 10-mL conical bottom flask, Flask No.1. Add a boiling stone.
12. Connect the flask to a receiver distilling still fitted with a water-cooled condenser. Gradually heat the mixture until the product begins to distil at temperature 145-150 °C. Collect the distillate about 3 mL in the trough of the receiver distilling still. Then transfer it into a conical bottom flask, Flask No.2.
: Regulate heating so that the distillation takes 30-45 minutes. 13. Rinse the inside of receiver distilling still with two 1-mL portions of
dichloromethane and transfer into Flask No.2.
: Dichloromethane is flammable and toxic. Keep flame away and avoid breathing fumes. 14. Stir the mixture using a Pasteur pipette method. (Draw a portion of the lower layer up into
a pipette and expel it back carefully into the flask, through the upper layer. Do this repeatedly for a few times.).
15. Allow the mixture to separate completely into two distinct layers. Remove the lower dichloromethane layer, using a Pasteur pipette method (Squeeze the rubber bulb and lower the tip of the pipette to the bottom of the flask. Carefully draw up the lower layer until the interface between the layers reaches the pipette tip. Take off the cotton wool and expel any drops of the upper layer caught in the tip. Then transfer the lower layer in the pipette into another container). Transfer it into another conical bottom flask, Flask No.3.

Department of Chemistry, Faculty of Science, Chulalongkorn University, Bangkok, Thailand 10330 Tel / Fax +66 2218 7641, e-mail: [email protected]
28
16. Repeat the extraction of the upper aqueous layer with 1 mL of dichloromethane. Combine the lower dichloromethane layer in Flask No.3.
17. Add a tiny amount of anh.Na2SO4, and swirl the solution. Keep adding until some of it swirls freely, and then set aside the solution is no longer cloudy.
18. Filter the solution using a Pasteur filter-tip pipette method. (Wrap the Pasteur pipette tip with a small piece of cotton wool. Immerse the pipette into the solution until the pipette tip reaches the bottom of the flask while squeezing the rubber bulb. Draw the solution up into the pipette by releasing the rubber bulb. Take off the cotton wool and expel the solution in the pipette into the proper container).
: Be careful not to lose the cotton wool during suction. While lifting the pipette out, apply a little pressure by squeezing the bulb softly to prevent suction of unfiltered solution into the pipette.
19. Transfer the solution in the pipette into the conical bottom flask, Flask No.4. Add a boiling stone and connect the flask with a receiver distilling still and a water-cooled condenser. Distil off the dichloromethane to obtain the first yellow solid at the bottom of the flask.
20. Add 1 mL of dichloromethane to the solution in Flask No.1 from step 11. Do the extraction and separation as described in step 14-19 to obtain the second yellow solid.
21. Determine the melting points of both solids and keep them for thin-layer chromatography.
: Consult the procedure for melting point determination on page 17.
PART IV: Thin-layer chromatography.
21. Prepare 1 TLC plate (4x7 cm dimension).
: Handle it only on the edges, as fingerprints contain UV-active materials. Using a pencil draw a very light line across the sheet (short dimension) about 1 cm from one end. Then make 4 small light marks at even intervals along the line for spotting the samples. Draw another light line about 1 cm from another end of the plate for the solvent front.
22. Obtain a TLC chamber and place solvent, a 5% ethyl acetate in dichloromethane to 0.5 cm height. Place a piece of filter paper around the inside surface of the container and extend into the solvent.
: Ethyl acetate is strong smelling chemicals. Be very careful to place the stopper on the conical bottom flask immediately.
: A glass jar with a lid or a beaker with a watchglass or a cover of a Petri dish can be used as a TLC chamber, but it should be large enough so that the TLC plate can lean against one side.
23. Using clean capillary tubes, carefully spot four samples at four pencil marks as shown below.
: The spots should be as small as possible in order to minimize tailing and overlapping when the TLC plate is developed. If a more intense spot is desired, let the spot dry and re-spot in the same location.
24. When the spots are dry, place the TLC plate in the developing chamber. Then gently close the chamber.

Department of Chemistry, Faculty of Science, Chulalongkorn University, Bangkok, Thailand 10330 Tel / Fax +66 2218 7641, e-mail: [email protected]
29
: Be sure that the bottom edge of the TLC plate is in the solvent but the spots are above the solvent, and the filter paper does not touch the chromatographic sheet. Place a TLC plates at a time in a TLC chamber.
A: First yellow solid B: Second yellow solid
C: o-Nitrophenol D: p-Nitrophenol
25. When the solvent has moved to the front line, remove the plate. Lay it on a clean
surface in a fume hood or well ventilated area and allow the solvent to evaporate until the plate appears dry.
26. Visualize the plate under UV light and immediately draw a light pencil line around each spot.
: UV radiation is harmful to eyes. Do not look directly at the UV lamp.
: Alternatively, the spots can be visualized in an I2 chamber (small bottle containing a few I2 crystals).
27. Measure all the distances traveled by the compounds and solvent. Calculate the retention factor (Rf) for each compound.
CLEANUP
1. Pour the aqueous layer after extraction down the drain with copious amount of water.
2. Pour the developing solvent used in TLC into the halogenated hydrocarbon waste container.
3. Keep the recovered dichloromethane in dichloromethane container.
QUESTIONS 1. What is the effect of the atmospheric pressure to boiling point? 2. Explain why the vacuum distillation has more advantage than the simple
distillation? 3. Give two examples of materials that can be purified by steam distillation. 4. What are the first and second yellow solids in this experiment?
Start line
Front line of solvent
1.0 cm
0.5 cm
A B C D

Department of Chemistry, Faculty of Science, Chulalongkorn University, Bangkok, Thailand 10330 Tel / Fax +66 2218 7641, e-mail: [email protected]
30
LAB REPORT
DISTILLATION
Chemicals Bp(°C) Molecular weight (MW)
Volume (mL)
Methanol Acetone n-butanol
Time (min.)
Simple distillation Fractional distillation Volume (mL) Temperature(°C) Volume (mL) Temperature(°C)

Department of Chemistry, Faculty of Science, Chulalongkorn University, Bangkok, Thailand 10330 Tel / Fax +66 2218 7641, e-mail: [email protected]
31
SUBLIMATION
OBJECTIVE 1. To practice technique for purifying organic solid compounds with sublimation.
BACKGROUND Sublimation is a purification technique, in which a solid is directly converted to
vapor phase without passing through liquid phase. However, the compound must have a relatively high vapor pressure, and the impurities must have significantly lower vapor pressures. By heating, the solid will be vaporized and become solid again when the vapor contacts with the cold surface. Some solid compounds, such as iodine, camphor, naphthalene, acetanilide, benzoic acid, can be purified by sublimation at normal pressure. Several compounds will sublime when heating under reduced pressure.
In this experiment, the impure acetanilide and impure naphthalene will be purified using a suction flask with cold finger at atmospheric pressure.
REQUIREMENTS
Apparatus and materials: 1. Cold finger 2. Suction flask 3. Hot plate and heat dissipation
block
4. Spatula 5. Miniature water pump 6. Carbon black
Chemicals: Acetanilide (C6H5-NHCOCH3); naphthalene (C10H8); dichloromethane (CH2Cl2).
PROCEDURE PART I: Sublimation of impure acetanilide
1. Place 50 mg of impure acetanilide (mixed acetanilide with a minute amount of carbon black or other substance) in a suction flask.
2. Assemble the cold finger with water hoses connected to a miniature water pump and place the flask in a well with a window for observation in a heat dissipation block as shown below.
: Ice can be added in a water container to obtain much cooler water for circulating in the cold finger.

Department of Chemistry, Faculty of Science, Chulalongkorn University, Bangkok, Thailand 10330 Tel / Fax +66 2218 7641, e-mail: [email protected]
32
3. Turn on the heat and keep temperature stable at 135-140 ºC.
: Crystals will form on the cold finger. 4. Continue heating until sublimation is complete and no more crystals form on the
cold finger. 5. Turn off the heat. Remove the apparatus from the heat and allow it to cool at room
temperature. 6. Remove the cold finger from the suction flask gently. Scrape the crystals onto a tare
piece of weighing paper and reweigh. 7. Record the mass of pure acetanilide. Determine its melting point.
: Consult the procedure for melting point determination on page 17.
PART II: Sublimation of impure naphthalene
8. Place 50 mg of impure naphthalene (mix naphthalene with a minute amount of carbon black or other substance) in a suction flask.
: Avoid breathing in naphthalene vapour. 9. Sublime the impure naphthalene by heating at 105-110 ºC and following the
procedure in steps 2-7.
CLEANUP 1. Dissolve the residue in the suction flask with dichloromethane and pour the solution
into the chlorinated hydrocarbon waste container.
: Dichloromethane is flammable and toxic. Keep flame away and avoid breathing fumes.
LAB REPORT
SUBLIMATION
Compound Molecular weight
Appearance Temperature at
sublimation
mp (°C) %
Recovery Before sublimation
After sublimation
Acetanilide naphthalene Observation & Conclusion ………………………………………………………………………………………………………………………………………………………………………………………………………………………………………………………………………………………………………………………………………………………………………………………………………………………………………………………………………………………………

Department of Chemistry, Faculty of Science, Chulalongkorn University, Bangkok, Thailand 10330 Tel / Fax +66 2218 7641, e-mail: [email protected]
33
CHROMATOGRAPHY
OBJECTIVE 1. To practice technique of purification and separation of organic compounds from a
mixture with chromatography.
BACKGROUND Chromatography is an effective and very useful method for separation and purification of organic compounds. Chromatography separates components of a mixture based upon the principle that how well they are adsorbed on the stationary phase, versus how well they dissolve in the mobile phase. The components with greater affinity for the mobile phase will move faster than those components with greater affinity for the stationary phase, causing the components to separate. There are many chromatographic methods characterized by the nature of the stationary and mobile phases. Among these methods, column chromatography, thin-layer chromatography and paper chromatography are more common ones.
In this experiment, a mixture of dyes will be separated by column, thin-layer and paper chromatography.
REQUIREMENTS Apparatus and materials:
1. Pasteur pipette 2. Cotton wool 3. TLC plate 4. Filter paper (Watchman No. 1
size 7x10 cm)
5. Dyes (congo red, phenol red, bromophenol blue, methylene blue and methyl orange)
6. Alumina for column chromatography Chemicals: Ammonium hydroxide (2M NH4OH); ethanol (CH3CH2OH); butanol (CH3CH2CH2CH2OH); iodine (I2); β-naphthol (C10H7-OH); diphenylamine (C6H5-NH-C6H5); dichloromethane (CH2Cl2).
PROCEDURE PART I: Column Chromatography
1. Clamp a Pasteur pipette in a vertical position to a lab stand. Push a small piece of cotton wool with a copper wire to loosely pack at the neck of a Pasteur pipette. Add a small amount of fine sand to make a small layer before adding the adsorbent.
2. Weigh alumina 1 g in a 50-mL beaker or a small vial, add 4 mL of ethanol. Swirl or stir gently with a glass rod to obtain the slurry of alumina.
: The adsorbent should normally weigh about 100 times of the sample weight. If necessary, dry the adsorbent in the oven at 105°C and keep them in a desiccator to cool down to room temperature.
: Be careful not to breathe in the fine particles of absorbent.
: Ethanol is extremely flammable. Keep it away from flame and sources of electric spark.

Department of Chemistry, Faculty of Science, Chulalongkorn University, Bangkok, Thailand 10330 Tel / Fax +66 2218 7641, e-mail: [email protected]
34
3. Transfer the slurry of alumina dropwise using another Pasteur pipette into the prepared column containing 4 mL of ethanol (at the beginning, push gently at the tip of the pipette column with a finger until the alumina column 1 cm high is obtained).Tap the side of the column gently to produce even packing of the adsorbent in the column.
: Adsorbent swells and gives off heat as they take up solvent causing the occurrence of air pockets.
4. Allow the solvent to drain to the level of alumina. Add 1 drop of the mixture (methylene blue and methyl orange) to the top of alumina. Allow the mixture to adsorb into the top of the alumina.
: Do not allow the solvent to drain below the level of adsorbent at all time. 5. Add a few drops of ethanol and allow ethanol to drain to the top of adsorbent. 6. Fill up the column with ethanol. 7. When the first band comes down to the neck of the pipette column, collect it in a
container and stop adding ethanol. 8. Allow the solvent to drain to the level of alumina. Switch to the second eluting
solvent, water, and fill up the column with water. Collect the second band into another container.
PART II: Thin-layer chromatography
1. Prepare 3 TLC plates (2x7 cm dimension).
: Handle them only on the edges, as fingerprints contain UV-active materials. Using a pencil draw a very light line across the sheet (short dimension) about 1 cm from one end. Then make 2 small light marks at the appropriate interval along the line for spotting the samples. Draw another light line about 0.5 cm from another end of the plate for the solvent front.
2. Obtain a TLC chamber and place a solvent mixture, butanol: ethanol: 2M NH4OH (3:1:1) to 0.5 cm height. Place a piece of filter paper around the inside surface of the container and extend into the solvent.
: Both vapors of butanol and ammonia are toxic. Avoid contact or breathing in both vapors.
: A glass jar with a lid or a beaker with a watchglass or a cover of a Petri dish can be used as a TLC chamber, but it should be large enough so that the TLC plate can lean against one side.
3. Use clean capillary tubes, carefully spot one known sample with the unknown sample a mixture of the dyes) on each of three plates as follows: Plate 1: congo red and unknown sample Plate 2: phenol red and unknown sample
Plate 3: bromophenol blue and unknown sample
: The spots should be as small as possible in order to minimize tailing and overlapping when the TLC plate is developed. If a more intense spot is desired, let the spot dry and re-spot in the same location.
4. When the spots are dry, place three TLC plates in the developing chamber. Then gently close the chamber.

Department of Chemistry, Faculty of Science, Chulalongkorn University, Bangkok, Thailand 10330 Tel / Fax +66 2218 7641, e-mail: [email protected]
35
: Be sure that the bottom edge of the TLC plate is in the solvent but the spots are above the solvent, and the filter paper does not touch the chromatographic sheet. Place three TLC plates at a time in a TLC chamber, but do not allow them come into contact with each other. Plate No. 1 Plate No. 2 Plate No. 3
A. Congo red B. Phenol red
C. Bromophenol blue D. Unknown sample
5. When the solvent has moved to the front line, remove the plate. Lay it on a clean
surface in a fume hood or well ventilated area and allow the solvent to evaporate until the plate appears dry.
6. Measure all the distances traveled by the compounds and solvent. Calculate the retention factor (Rf) for each compound.
7. Repeat thin-layer chromatography similar to the procedure described in steps 1-6, by changing the samples to β-naphthol and diphenylamine which are colorless and dichloromethane as the developing solvent.
8. Visualize the plate under UV light and immediately draw a light pencil line around each spot.
: UV radiation is harmful to eyes. Do not look directly at the UV lamp.
: Alternatively, the spots can be visualized in an I2 chamber (small bottle containing a few iodine crystals).
9. Measure all the distances traveled by the compounds and solvent. Calculate the retention factor (Rf) for each compound.
Start line
Front line of solvent
1.0 cm
0.5 cm
A D B D C D A D B D C D

Department of Chemistry, Faculty of Science, Chulalongkorn University, Bangkok, Thailand 10330 Tel / Fax +66 2218 7641, e-mail: [email protected]
36
PART III: Paper Chromatography
1. Prepare a paper (7 x 10 cm in dimension) for spotting 4 samples, congo red, phenol red, bromophenol blue and unknown sample (the mixture of dyes).
A. Congo red B. Phenol red
C. Bromophenol blue D. The mixture of dyes
: Handle it only on the edges, as fingerprints contain UV-active materials. Using a pencil draw a very light line across the sheet (long dimension) about 1.5 cm from one end. Then make 4 small light marks at the even intervals along the line for spotting the samples. Draw another light line about 1 cm from another end of the paper for the solvent front.
1. When the spots are dry, roll the paper and clip both ends of the papers together using a staple but not allow them to come in contact.
2. Obtain a paper chromatography developing chamber and place a solvent mixture, butanol: ethanol: 2M NH4OH (3:1:1) to 0.5 cm height. Place a piece of filter paper around the inside surface of the container and extend into the solvent.
: Both vapors of butanol and ammonia are toxic. Avoid contact or breathing in both vapors.
: A beaker with a watchglass can be used as a paper chromatography chamber, but it should be large and tall enough to accomodate the chromatographic paper.
3. Place the prepared paper in the middle of the developing chamber. Gently close the chamber.
: Be sure that the bottom edge of the paper is in the solvent but the spots are above the solvent, and the paper does not touch another paper around the inside surface of the beaker.
4. When the solvent has moved to the front line, remove the paper. Take off the staples and lay it on a clean surface in a fume hood or well ventilated area and allow the solvent to evaporate until the paper appears dry.
5. Measure all the distances traveled by the compounds and solvent. Calculate the retention factor (Rf) for each compound.
Start line
Front line of solvent
1.5 cm
1.0 cm
A B C D

Department of Chemistry, Faculty of Science, Chulalongkorn University, Bangkok, Thailand 10330 Tel / Fax +66 2218 7641, e-mail: [email protected]
37
CLEANUP 1. Place alumina in the appropriate solid waste container. 2. Pour the mixed solvent and the separated dye solution in the appropriate waste
container.
QUESTION 1. A compound A has a lower affinity for the stationary phase than a compound B and
can dissolve well in the mobile phase. In the separation of the mixture of A and B by column chromatography, which compound will be eluted first from the column?
LAB REPORT
CHROMATOGRAPHY
Column Chromatography Absorbent……………………………………………… Eluent………………………………………………….. Samples…………………………………………..……. Colors of the separated compounds are ………………………………………………… The order of the affinity for the stationary phase is (from high to low)……………….. Thin-layer Chromatography Absorbent…………………………………………….. Eluent……………………………………… Color of samples are………………………………….. Draw the developed TLC plates after visualization: TLC plate No.1 TLC plate No.2 TLC plate No.3

Department of Chemistry, Faculty of Science, Chulalongkorn University, Bangkok, Thailand 10330 Tel / Fax +66 2218 7641, e-mail: [email protected]
38
Sample Distance traveled by compound (cm)
Distance traveled by solvent (cm)
Rf
A. Congo red B. Phenol red C. Bromophenol blue D. Unknown sample
Unknown sample is composed of………………………………….....
Sample Structural formula
Distance traveled by compound (cm)
Distance traveled by solvent (cm)
Rf
β-Naphthol Diphenylamine
Compound showing an opaque spot under UV visualization is ………….…………….. Compound giving a brown spot with iodine is…………………………………………… Compound having the highest polarity is……………………………………………….. Compound having the lowest polarity is…………………….……………….…………. Paper Chromatography
Sample Distance traveled by compound (cm)
Distance traveled by solvent (cm)
Rf
Congo red Phenol red Bromophenol blue Unknown sample
Unknown sample is composed of………………………………………………………

Department of Chemistry, Faculty of Science, Chulalongkorn University, Bangkok, Thailand 10330 Tel / Fax +66 2218 7641, e-mail: [email protected]
39
CHAPTER II: SEPARATION OF MIXTURE BY EXTRACTION
Department of Chemistry, Faculty of Science, Chulalongkorn University, Bangkok, Thailand 10330 Tel / Fax +66 2218 7641, e-mail: [email protected]
40
SEPARATION OF ACIDIC AND NEUTRAL SUBSTANCES
OBJECTIVES 1. To separate a two-component mixture into the individual components by acid-base
extraction. 2. To identify the separated compounds and their purity by melting point
determination.
BACKGROUND Separation is a routine method commonly used in organic chemistry to separate a
certain material from the others during the work-up of the organic chemical reactions and the isolation of the compounds from crude natural product extracts. The common methods for separating and purifying organic liquids and solids are distillation and recrystallization, respectively. However, another useful technique for this purpose is an extraction. Liquid-liquid extraction is one of the most common methods for removing an organic compound from a mixture. In some extractions, the distribution of a compound between two immiscible solvents simply occurs because of its different solubility in the two solvents. However, it is sometimes necessary to alter a compound chemically to change its distribution between the two different solvents which is most commonly done through an acid-base reaction.
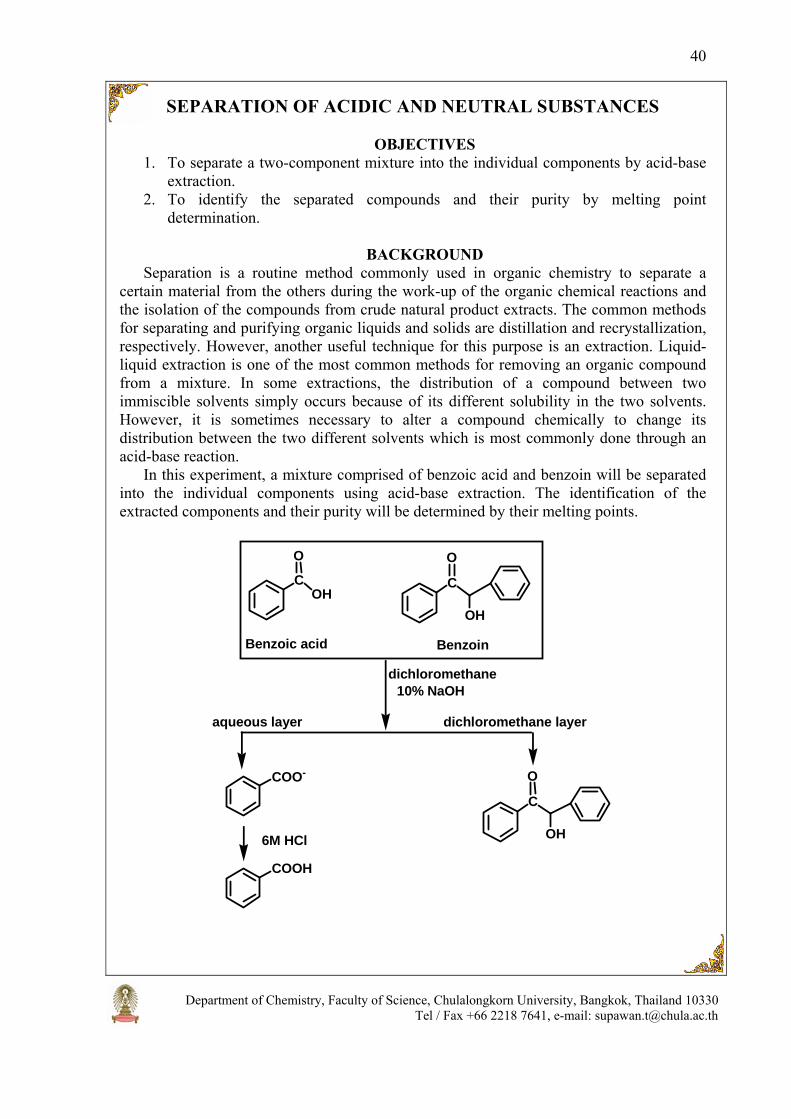
In this experiment, a mixture comprised of benzoic acid and benzoin will be separated into the individual components using acid-base extraction. The identification of the extracted components and their purity will be determined by their melting points.
COH
O
C
O
Benzoic acid Benzoin
OH
COO-
C
O
OH
COOH
6M HCl
aqueous layer dichloromethane layer
10% NaOHdichloromethane
Department of Chemistry, Faculty of Science, Chulalongkorn University, Bangkok, Thailand 10330 Tel / Fax +66 2218 7641, e-mail: [email protected]
41
REQUIREMENTS Apparatus and materials:
1. Conical bottom flasks 2. Erlenmeyer flasks 3. Pasteur pipettes 4. Filtering flask 5. Suction glass funnel
6. Receiver distilling still 7. Capillary tubes 8. Ice-water bath 9. Hot plate and heat dissipation block
Chemicals: Benzoic acid (C6H5-COOH); benzoin (C6H5-CH(OH)-CO-C6H5); dichloromethane (CH2Cl2); ethanol (CH3CH2OH); sodium hydroxide (10% NaOH); hydrochloric acid (6M HCl); sodium sulfate (anh.Na2SO4).
PROCEDURE PART I: Separation of benzoic acid and benzoin
1. Place benzoic acid and benzoin 300 mg each into 10-mL conical bottom flask, Flask No.1, containing 5 mL of dichloromethane. Swirl the mixture gently until all the solid has dissolved.
: Dichloromethane is volatile and dangerous. Avoid smelling and touching it. 2. Add 3 mL of 10% NaOH and stir the mixture using a Pasteur pipette method. (Draw
a portion of the lower layer up into a pipette and carefully expel it back into the flask, through the upper layer. Do this repeatedly for a few times).
: NaOH is corrosive. Prevent eye, skin, and clothing contact. Avoid inhaling or ingesting this compound.
: If the reagents are not thoroughly mixed, the incomplete separation and the impure products will be obtained.
3. Allow the mixture to separate completely into two distinct layers. Remove the lower dichloromethane layer, using a Pasteur pipette method (Squeeze the rubber bulb and lower the tip of the pipette to the bottom of the flask. Carefully draw up the lower layer until the interface between the layers reaches the pipette tip. Lift out the pipette and expel any drops of the upper layer caught in the tip. Then transfer the lower layer in the pipette into another container). Transfer it into another conical bottom flask, Flask No.2.
4. Repeat the extraction of the upper aqueous layer in Flask No.1 with 3 mL of dichloromethane. Combine the lower dichloromethane layer in Flask No.2 and save it for a later step.
PART II: Recovery of benzoic acid
5. Add small amount of 6M HCl dropwise to Flask No.1, swirl the mixture and check until it is just acidic with litmus paper.
: Conc.HCl is very strong acid and corrosive that will burn your skin. Wear gloves at all times.
: The white precipitate will occur. 6. Further add a few drops of 6M HCl until no more formation of white precipitate,
the product A, can be observed when a drop of 6M HCl reaches the solution. Place Flask No.1 in the ice-water bath for 5 minutes.
7. Collect the product A by suction filtration (Assemble a filtering glass funnel to a filtering flask and clamp. Connect the side arm of the filtering flask to the suction valve (S) of a three-way

Department of Chemistry, Faculty of Science, Chulalongkorn University, Bangkok, Thailand 10330 Tel / Fax +66 2218 7641, e-mail: [email protected]
42
pipette bulb. Cut the filter paper to the right size and place at the bottom of the funnel. Expel air from the bulb by squeezing the air valve (A) and the bulb simultaneously. Wet the filter paper with a few drops of the solvent used and apply suction; squeeze the "suction" valve (S). Immediately transfer the suspension on to the filter. Continue applying suction by simultaneously squeezing the air valve (A) and the bulb again, and then squeeze the suction valve (S) until all the liquid has been pulled through the filter. If necessary, the solid can be washed on the filter with fresh solvent. Repeat the suction process until the solid is air-dry. Release the suction by squeezing the empty valve (E)).
8. Weigh the product A and keep a small amount for its melting point determination. 9. Transfer the product A into a 10-mL conical bottom flask, add 3 mL of distilled
water, boil and often swirl the mixture until a clear solution is obtained.
: If the precipitate does not dissolve, add a small amount of distilled water until the solution is clear.
10. If there is an impurity which does not dissolve in hot water, filter it off using a Pasteur filter-tip pipette method (Wrap the Pasteur pipette tip with a small piece of cotton wool. Immerse the pipette into the solution until the pipette tip reaches the bottom of the flask while squeezing the rubber bulb. Draw the solution up into the pipette by releasing the rubber bulb. Take off the cotton wad and expel the solution in the pipette into the proper container).
: Be careful not to lose the cotton wool during suction. While lifting the pipette out, apply a little pressure by squeezing the bulb softly to prevent suction of unfiltered solution into the pipette.
11. Transfer the hot solution in the pipette into another flask. Rinse the pipette with a tiny amount of hot water into the receiving flask. Allow the solution to cool down. Then place the flask in an ice-water bath.
12. After crystallization is complete, collect the crystals by suction filtration as described in step 7. Wash the crystal A with a tiny amount of water and continue suction to air-dry.
13. Weigh the crystals of product A and calculate its percent recovery. Determine its melting point before and after crystallization and A mixed with benzoic acid (1:1) and A mixed with benzoin (1:1).
PART III: Recovery of benzoin
14. From the dichloromethane layer in Flask No.2 in step 4, wash it with 2 mL of 10% NaOH by stirring the mixture using a Pasteur pipette method as described in step 2.
15. Allow the mixture to separate completely into two distinct layers. Remove the lower dichloromethane layer, using a Pasteur pipette method as described in step 3. Transfer it into another conical bottom flask, Flask No.3.
16. Repeat the extraction of the upper aqueous layer in Flask No.2 with 3 mL of dichloromethane. Combine the lower dichloromethane layer in Flask No.3.
17. Add a tiny amount of anh.Na2SO4, and swirl the solution. Keep adding until some of it swirls freely, and then set aside when the solution no longer cloudy.
18. Filter the solution using a Pasteur filter-tip pipette method as described in step 10. 19. Transfer the solution in the pipette into another conical bottom flask. Connect the
flask with a receiver distilling still and condenser. Distil off the dichloromethane to obtain the solid, the product B, at the bottom of the flask.
20. Weigh the product B and keep a small amount for its melting point determination. 21. Transfer the product B into a 5-mL conical bottom flask, add 3 mL of ethanol, boil
gently and often swirl the mixture until clear solution is obtained.
Department of Chemistry, Faculty of Science, Chulalongkorn University, Bangkok, Thailand 10330 Tel / Fax +66 2218 7641, e-mail: [email protected]
43
: Ethanol is highly volatile and flammable solvent, keep flame away and avoid breathing
: If the precipitate does not dissolve, add a tiny amount of ethanol until the solution is clear.
22. If there is an impurity which does not dissolve in hot ethanol, filter it off using a Pasteur filter-tip pipette method as described in step 10.
23. Transfer the hot solution in the pipette into another flask. Rinse the pipette with a tiny amount of ethanol into the receiving flask. Allow the solution to cool down. Then place the flask in an ice-water bath.
24. After crystallization is complete, collect the crystals by suction filtration as described in step 7. Wash the crystals B with a small amount of the solvent, ethanol:water at 1:1, and continue suction to air-dry.
25. Weigh the crystals of product B and calculate its percent recovery. Determine its melting point before and after crystallization, and B mixed with benzoic acid (1:1), and B mixed with benzoin (1:1).
CLEANUP
1. Pour dichloromethane waste into a chlorinated hydrocarbon waste container. 2. Pour ethanol waste into an organic waste container. 3. Use sodium carbonate to neutralize the acid solvent and use acetic acid to neutralize
the base solvent before flushing them down the drain with copious amount of water.
QUESTIONS 1. What is the principle in benzoic acid and benzoin separation? 2. After adding 10% NaOH into a mixture of benzoic acid and benzoin in
dichloromethane, which ones are in the upper and lower layers? 3. During the filtration of crystals B, why it is necessary to wash the crystals with a
mixture of ethanol and water? Can it be washed by either ethanol or water, why? 4. Do you think the solvents used in crystallization of benzoic acid and benzoin are
suitable? If not, how it can be improved? 5. Do you know which extracted compound is benzoic acid and benzoin? Explain. 6. How much is the difference in the melting points of pure and impure compounds? 7. In determining the melting point of a substance, what precautions do you take in
order to have an accurate result? 8. Discuss about quantity and purity of the crystallized benzoic acid and benzoin. 9. Draw an extraction flow chart of the mixture of ethyl p-aminobenzoate (p-NH2-
C6H4-COOC2H5), benzophenone (C6H5-CO-C6H5) and benzoic acid.

Department of Chemistry, Faculty of Science, Chulalongkorn University, Bangkok, Thailand 10330 Tel / Fax +66 2218 7641, e-mail: [email protected]
44
LAB REPORT
SEPARATION OF ACIDIC AND NEUTRAL SUBSTANCES Weight of benzoic acid and benzoin mixture……………………….…….…..........mg Weight of A before crystallization …………...mg melting point…………......°C Weight of A after crystallization ……….…..mg melting point……..…........°C Melting point of crystal A mixed with benzoic acid…..…………………….….......°C Melting point of crystal A mixed with benzoin……..…………………...………....°C Weight of B before crystallization …………...mg melting point….………....°C Weight of B after crystallization ……….…..mg melting point….…............°C Melting point of crystal B mixed with benzoic acid…..……………..……...…......°C Melting point of crystal B mixed with benzoin…...………………….…....……....°C A is…………………… B is……………………… Observation & Conclusion ………………………………………………………………………………………………………………………………………………………………………………………………………………………………………………………………………………………………………………………………………………………………………………………………………………………………………………………………………………………………

Department of Chemistry, Faculty of Science, Chulalongkorn University, Bangkok, Thailand 10330 Tel / Fax +66 2218 7641, e-mail: [email protected]
45
SMALL SCALE SEPARATION OF ACIDIC, BASIC AND NEUTRAL SUBSTANCE
OBJECTIVES
1. To separate a multi-component mixture into the individual components by a sequential acid-base extraction.
2. To identify the extracted compounds by thin-layer chromatography.
BACKGROUND One or more extractions are routinely performed during the work-up of the organic chemical reactions and the isolation of the compounds from crude natural product extracts. It is often necessary to alter a compound chemically to change its distribution between the two different solvents which is most commonly done through an acid-base reaction. In this experiment, a mixture comprised of benzoic acid, p-nitroaniline, β-naphthol and naphthalene will be separated into the individual components using a sequential acid-base extraction based on their chemical properties as shown below. The identification of the extracted components will be determined by the thin-layer chromatography.
COOH NH2
ON2
NH3 + Cl -
ON2
NH2
ON2
6M NaOH
COO- Na+
COOH
6M HCl
O- Na+
OH
6M HCl
dichloromethane layer6 M HCl
dichloromethane layersatd. NaHCO3
dichloromethane layer3M NaOH
dichloromethane layer
aqueous layer
aqueous layer
OH
aqueous layer
Naphthalene
Benzoic acidp-Nitroaniline
Naphthol
REQUIREMENTS Apparatus and materials:
1. Conical bottom flasks 2. Erlenmeyer flasks 3. Vacuum filtration apparatus
4. Pasteur pipette 5. TLC plate

Department of Chemistry, Faculty of Science, Chulalongkorn University, Bangkok, Thailand 10330 Tel / Fax +66 2218 7641, e-mail: [email protected]
46
Chemicals: Benzoic acid (C6H5-COOH); p-nitroaniline (p-O2N-C6H4-NH3); β-naphthol (C10H7OH); naphthalene (C10H8); dichloromethane (CH2Cl2); hydrochloric acid (6M HCl); sodium hydroxide (3M and 6M NaOH); sodium bicarbonate (satd.NaHCO3); sodium chloride (satd.NaCl); sodium sulfate (anh.Na2SO4).
PROCEDURE PART I: Aqueous acid layer
1. Place 70 mg of each of benzoic acid, p-nitroaniline, β-naphthol and naphthalene in a 5-mL conical bottom flask, Flask No.1, containing 2.5 mL of dichloromethane. Swirl the mixture gently to dissolve all the solids.
: Dichloromethane is volatile and dangerous. Avoid smelling and touching it. 2. Add 1 mL of 6M HCl and stir the mixture using a Pasteur pipette method. (Draw a
portion of the lower layer up into a pipette and carefully expel it back into the flask through the upper layer. Do this repeatedly for a few times).
: Conc.HCl is very strong acid and corrosive that will burn your skin. Wear gloves at all times.
: If the reagents are not thoroughly mixed, the incomplete separation and the impure products will be obtained.
3. Allow the mixture to separate completely into two distinct layers. Remove the lower dichloromethane layer, using a Pasteur pipette method. (Squeeze the rubber bulb and lower the tip of the pipette to the bottom of the flask. Carefully draw up the lower layer until the interface between the layers reaches the pipette tip. Lift out the pipette and expel any drops of the upper layer caught in the tip. Then transfer the lower layer in the pipette into another container). Transfer it into another conical bottom flask, Flask No.2.
4. Repeat the extraction of the dichloromethane layer in Flask No.2 with another 1 mL of 6M HCl. (After stirring, take it all up into the pipette. Allow the interface to reform in the pipette. Expel slowly the lower layer back to the original container, and transfer the upper layer into another container). Transfer the upper aqueous acid layer in the pipette into Flask No.1 and save it for a later step.
PART II: Aqueous weak base layer
5. Add 1 mL of satd.NaHCO3 dropwise to the dichloromethane layer in Flask No.2, swirl and allow gas to escape after each addition until no more gas occurs.
: Immediately swirl the mixture after each addition of NaHCO3 until all foaming has subsided before next addition to avoid the abrupt escape of gaseous carbon dioxide.
6. Stir the mixture using a Pasteur pipette method as described in step 2. 7. Allow the mixture to separate completely into two distinct layers. Remove the
upper aqueous base layer, using a Pasteur pipette method as described in step 3. Transfer it into another conical bottom flask, Flask No.3.
8. Repeat the extraction of the dichloromethane layer in Flask No.2 with another 1 mL of satd.NaHCO3 as described in step 4. Transfer the upper aqueous base layer in the pipette into Flask No.3 and save it for a later step.

Department of Chemistry, Faculty of Science, Chulalongkorn University, Bangkok, Thailand 10330 Tel / Fax +66 2218 7641, e-mail: [email protected]
47
PART III: Aqueous strong base layer 9. Add 1 mL of 3M NaOH and stir the mixture using a Pasteur pipette method as
described in step 2.
: NaOH is corrosive. Prevent eye, skin, and clothing contact. Avoid inhaling or ingesting this compound.
10. Allow the mixture to separate completely into two distinct layers. Remove the upper aqueous base layer, using a Pasteur pipette method as described in step 3. Transfer it into another conical bottom flask, Flask No.4.
11. Repeat the extraction of the dichloromethane layer in Flask No.2 with another 1 mL of 3M NaOH as described in step 4. Transfer the upper aqueous base layer in the pipette into Flask No.4 and save it for a later step.
PART IV: Dichloromethane layer
12. Wash the dichloromethane layer in Flask No.2 with 1 mL of water and then 1 mL of satd.NaCl, using a Pasteur pipette method as described in steps 2 and 3.
: Discard the upper aqueous layer and expel the lower dichloromethane layer back to Flask No.2.
13. Add a minute amount of anh.Na2SO4, and swirl the solution. Keep adding until some of it swirls freely, and then set aside when the solution is no longer cloudy.
14. Filter the solution using a Pasteur filter-tip pipette method. (Wrap the Pasteur pipette tip with a small piece of cotton wool. Immerse the pipette into the solution until the pipette tip reaches the bottom of the flask while squeezing the rubber bulb. Draw the solution up into the pipette by releasing the rubber bulb. Take off the cotton wool and expel the solution in the pipette into the proper container).
: Be careful not to lose the cotton wool during suction. While lifting the pipette out, apply a little pressure by squeezing the bulb softly to prevent suction of unfiltered solution into the pipette.
15. Transfer the solution in the pipette into another conical bottom flask. Connect the flask with a receiver distilling still and a water-cooled condenser. Distil off the dichloromethane to obtain the solid at the bottom of the flask. Weigh the product.
PART V: Recovery of the extracted components
16. Add 6M NaOH to the solution in Flask No.1 until it is just basic with litmus paper. Add 0.5 mL more to ensure complete precipitation of the product.
: If it is not basic or acidic enough and not mixing well, low or no yield of the products will be obtained.
17. Add 6M HCl to the solutions in Flasks No.3 and 4 until both are just acidic with litmus paper, then add 0.5 mL more to ensure complete precipitation of the product.
18. Filter each precipitate separately by suction filtration (Assemble a filtering glass funnel to a filtering flask and clamp. Connect the side arm of the filtering flask to the suction valve (S) of a three-way pipette bulb. Cut the filter paper to the right size and place at the bottom of the funnel. Expel air from the bulb by squeezing the air valve (A) and the bulb simultaneously. Wet the filter paper with a few drops of the solvent used and apply suction; squeeze the "suction" valve (S). Immediately transfer the suspension on to the filter. Continue applying suction by simultaneously squeezing the air valve (A) and the bulb again, and then squeeze the suction valve (S) until all the liquid has been pulled through the filter. If necessary, the solid can be washed on the filter with fresh solvent. Repeat the suction process until the solid is air-dry. Release the suction by squeezing the

Department of Chemistry, Faculty of Science, Chulalongkorn University, Bangkok, Thailand 10330 Tel / Fax +66 2218 7641, e-mail: [email protected]
48
empty valve (E)). Wash the precipitate with a small amount of water, and continue suction to air-dry. Then weigh each compound and record the results.
PART VI: Thin-layer chromatography
19. Place a small amount of each compound in four separated test tubes containing a few drops of dichloromethane.
20. Prepare 1 TLC plate (4x7 cm dimension).
: Handle them only on the edges, as fingerprints contain UV-active materials. Using a pencil draw a very light line across the sheet (short dimension) about 1 cm from one end. Then make 4 small light marks at even intervals along the line for spotting the samples. Draw another light line about 0.5 cm from another end of the plate for the solvent front.
21. Obtain a TLC chamber and place solvent, a mixture (by volume) of 40% ethyl acetate in hexane to 0.5 cm height. Place a piece of filter paper around the inside surface of the container and extend into the solvent.
: A glass jar with a lid or a beaker with a watchglass or a cover of a Petri dish can be used as a TLC chamber, but it should be large enough so that the TLC plate can lean against one side.
: Ethyl acetate is strong smelling chemicals. Be very careful to place the stopper on the conical bottom flask immediately.
: Hexane is flammable, Keep flame away and avoid breathing fumes. 22. Use clean capillary tubes, carefully spot four known solutions at four pencil marks
as shown below.
: The spots should be as small as possible in order to minimize tailing and overlapping when the TLC plate is developed. If a more intense spot is desired, let the spot dry and re-spot in the same location.
23. When the spots are dry, place the TLC plate in the developing chamber. Then gently close the chamber.
: Be sure that the bottom edge of the TLC plate is in the solvent but the spots are above the solvent, and the filter paper does not touch the chromatographic sheet. Place a TLC plate at a time in a TLC chamber.
1. Sample from Flask No.1 2. Sample from Flask No.2
3. Sample from Flask No.3 4. Sample from Flask No.4
Start line
Front line of solvent
1 2 3 4 1.0 cm
0.5 cm

Department of Chemistry, Faculty of Science, Chulalongkorn University, Bangkok, Thailand 10330 Tel / Fax +66 2218 7641, e-mail: [email protected]
49
24. When the solvent has moved to the front line, remove the plates. Lay them on a clean surface in a fume hood or well ventilated area and allow the solvent to evaporate until the plates appear dry.
25. Then view the plates under UV light and immediately draw a light pencil line around each spot. Alternatively, the spots can be visualized in an I2 chamber (small bottle containing a few I2 crystals).
: UV radiation is harmful to eyes. Do not look directly at the UV lamp. 26. Measure all the distances traveled by the compounds and solvent. Calculate the
retention factor (Rf) for each component.
CLEANUP 1. Neutralize all the residual aqueous phases before flushing them down the drain with
copious amount of water. 2. Pour the mixture of dichloromethane to the waste container for halogenated
hydrocarbon. 3. Dissolve Na2SO4 in water and flush it down the drain with copious amount of water.
QUESTIONS
1. Explain why the dichloromethane is in the lower phase and the water is in the upper phase?
2. During an extraction, if it becomes uncertain which layer is the organic layer, how could one determine it experimentally?
3. Should it make any difference if the mixture is firstly extracted with 3M NaOH instead of satd.NaHCO3? Explain.
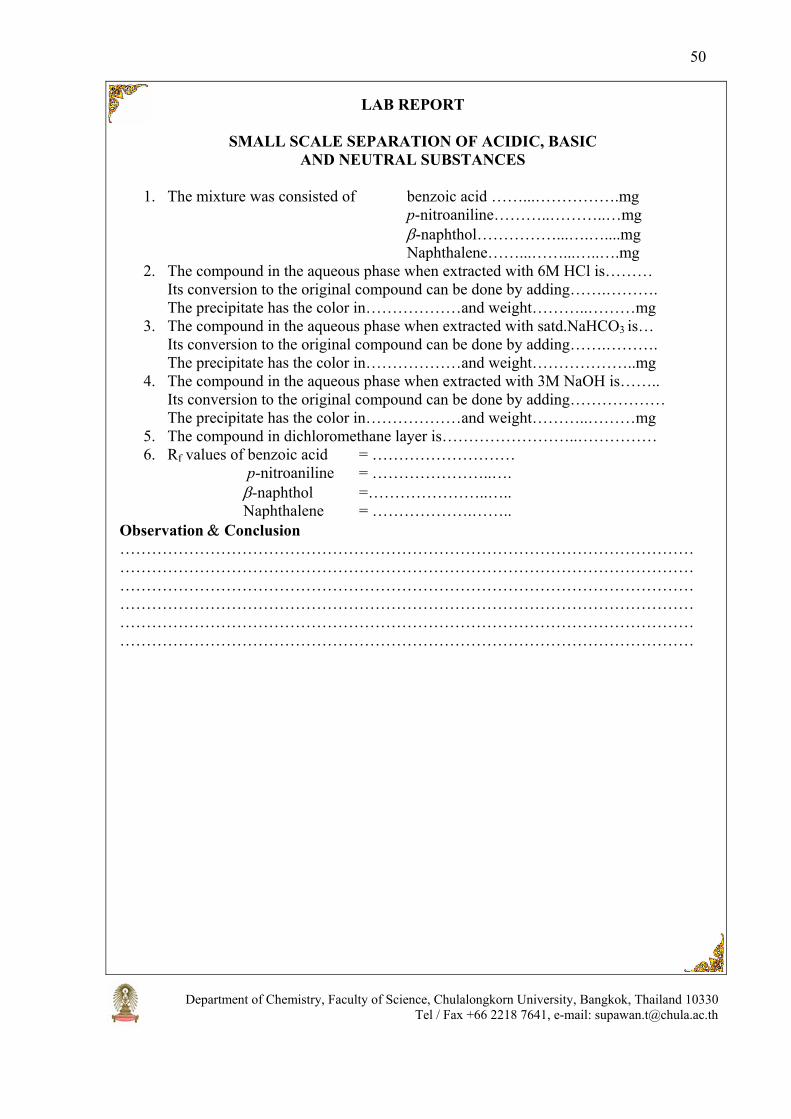
Department of Chemistry, Faculty of Science, Chulalongkorn University, Bangkok, Thailand 10330 Tel / Fax +66 2218 7641, e-mail: [email protected]
50
LAB REPORT
SMALL SCALE SEPARATION OF ACIDIC, BASIC AND NEUTRAL SUBSTANCES
1. The mixture was consisted of benzoic acid ……...…………….mg
p-nitroaniline………..………..…mg β-naphthol……………...….…....mg Naphthalene……...……...…..….mg
2. The compound in the aqueous phase when extracted with 6M HCl is……… Its conversion to the original compound can be done by adding…….………. The precipitate has the color in………………and weight………..………mg
3. The compound in the aqueous phase when extracted with satd.NaHCO3 is… Its conversion to the original compound can be done by adding…….……….
The precipitate has the color in………………and weight………………..mg 4. The compound in the aqueous phase when extracted with 3M NaOH is……..
Its conversion to the original compound can be done by adding……………… The precipitate has the color in………………and weight………..………mg
5. The compound in dichloromethane layer is……………………..…………… 6. Rf values of benzoic acid = ………………………
p-nitroaniline = …………………..…. β-naphthol =…………………..….. Naphthalene = ……………….…….. Observation & Conclusion ………………………………………………………………………………………………………………………………………………………………………………………………………………………………………………………………………………………………………………………………………………………………………………………………………………………………………………………………………………………………………………………………………………………………………………………………

Department of Chemistry, Faculty of Science, Chulalongkorn University, Bangkok, Thailand 10330 Tel / Fax +66 2218 7641, e-mail: [email protected]
51
CHAPTER III: IDENTIFICATION OF SUBSTANCES

Department of Chemistry, Faculty of Science, Chulalongkorn University, Bangkok, Thailand 10330 Tel / Fax +66 2218 7641, e-mail: [email protected]
52
DETERMINATION OF AN UNKNOWN ALCOHOL BY OXIDATION REACTION
OBJECTIVE
1. To identify the organic compound from its reaction product.
BACKGROUND
RR'CHOH RCOR'NO2
NO2
NO2
NO2
[R' = H or alkyl]
NHNH2
NHN=CRR'
Identification of organic compounds can be performed by either direct or indirect experimental methods. Direct experimental method is to determine the characteristics of a compound such as melting point or boiling point, elemental analysis and spectroscopic data. If the substance is impure or has a complicated structure, the indirect experimental method shall be applied by converting it to the other compound with the reaction that has been known for a suspected existing functional group. For example, primary and secondary alcohols are readily oxidized to aldehydes and ketones, respectively. Aldehydes and ketones can then be converted into the corresponding derivatives whose structures can be defined by any direct experimental method. The result can finally indicate the starting alcohol.
In this experiment, an unknown alcohol will be determined by converting it to the corresponding aldehyde or ketone and then 2,4-diphenylhydrazone derivatives. By comparison of the melting points of the prepared and known 2,4-diphenylhydrazone derivatives, the unknown alcohol will be identified.
REQUIREMENTS Apparatus and materials:
1. Round bottom flask 2. Conical bottom flask 3. Erlenmeyer flask 4. Receiver distilling still 5. Filtering flask 6. Suction glass funnel 7. Condenser
8. Pasteur pipette 9. Capillary tube 10. Boiling stone 11. Activated carbon 12. Hot plate and heat dissipation
block
Chemicals: Sulfuric acid (conc.H2SO4); potassium dichromate (K2Cr2O7); 2,4-dinitrophenylhydrazine (C6H3(NO2)2NHNH2); ethanol (CH3CH2OH); rosaniline hydrochloride (C20H19N3.HCl); sodium metabisulfite (Na2S2O5).
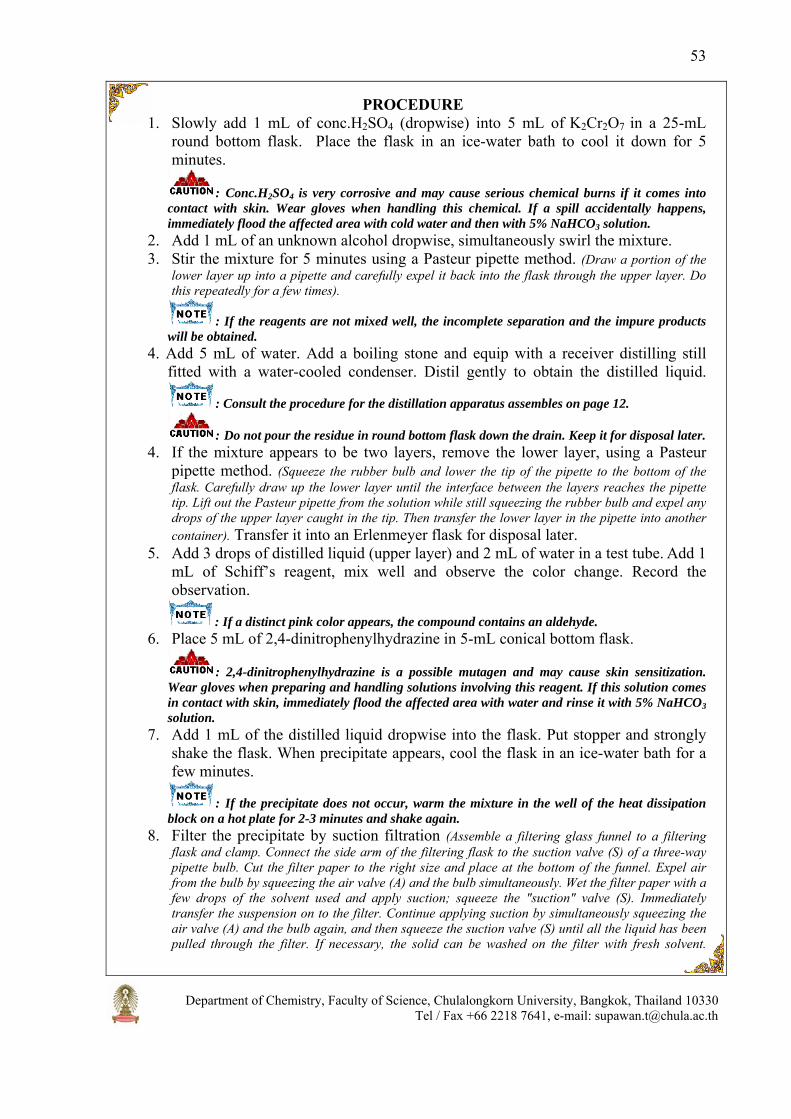
Department of Chemistry, Faculty of Science, Chulalongkorn University, Bangkok, Thailand 10330 Tel / Fax +66 2218 7641, e-mail: [email protected]
53
PROCEDURE 1. Slowly add 1 mL of conc.H2SO4 (dropwise) into 5 mL of K2Cr2O7 in a 25-mL
round bottom flask. Place the flask in an ice-water bath to cool it down for 5 minutes.
: Conc.H2SO4 is very corrosive and may cause serious chemical burns if it comes into contact with skin. Wear gloves when handling this chemical. If a spill accidentally happens, immediately flood the affected area with cold water and then with 5% NaHCO3 solution.
2. Add 1 mL of an unknown alcohol dropwise, simultaneously swirl the mixture. 3. Stir the mixture for 5 minutes using a Pasteur pipette method. (Draw a portion of the
lower layer up into a pipette and carefully expel it back into the flask through the upper layer. Do this repeatedly for a few times).
: If the reagents are not mixed well, the incomplete separation and the impure products will be obtained.
4. Add 5 mL of water. Add a boiling stone and equip with a receiver distilling still fitted with a water-cooled condenser. Distil gently to obtain the distilled liquid.
: Consult the procedure for the distillation apparatus assembles on page 12.
: Do not pour the residue in round bottom flask down the drain. Keep it for disposal later. 4. If the mixture appears to be two layers, remove the lower layer, using a Pasteur
pipette method. (Squeeze the rubber bulb and lower the tip of the pipette to the bottom of the flask. Carefully draw up the lower layer until the interface between the layers reaches the pipette tip. Lift out the Pasteur pipette from the solution while still squeezing the rubber bulb and expel any drops of the upper layer caught in the tip. Then transfer the lower layer in the pipette into another container). Transfer it into an Erlenmeyer flask for disposal later.
5. Add 3 drops of distilled liquid (upper layer) and 2 mL of water in a test tube. Add 1 mL of Schiff’s reagent, mix well and observe the color change. Record the observation.
: If a distinct pink color appears, the compound contains an aldehyde. 6. Place 5 mL of 2,4-dinitrophenylhydrazine in 5-mL conical bottom flask.
: 2,4-dinitrophenylhydrazine is a possible mutagen and may cause skin sensitization. Wear gloves when preparing and handling solutions involving this reagent. If this solution comes in contact with skin, immediately flood the affected area with water and rinse it with 5% NaHCO3 solution.
7. Add 1 mL of the distilled liquid dropwise into the flask. Put stopper and strongly shake the flask. When precipitate appears, cool the flask in an ice-water bath for a few minutes.
: If the precipitate does not occur, warm the mixture in the well of the heat dissipation block on a hot plate for 2-3 minutes and shake again.
8. Filter the precipitate by suction filtration (Assemble a filtering glass funnel to a filtering flask and clamp. Connect the side arm of the filtering flask to the suction valve (S) of a three-way pipette bulb. Cut the filter paper to the right size and place at the bottom of the funnel. Expel air from the bulb by squeezing the air valve (A) and the bulb simultaneously. Wet the filter paper with a few drops of the solvent used and apply suction; squeeze the "suction" valve (S). Immediately transfer the suspension on to the filter. Continue applying suction by simultaneously squeezing the air valve (A) and the bulb again, and then squeeze the suction valve (S) until all the liquid has been pulled through the filter. If necessary, the solid can be washed on the filter with fresh solvent.

Department of Chemistry, Faculty of Science, Chulalongkorn University, Bangkok, Thailand 10330 Tel / Fax +66 2218 7641, e-mail: [email protected]
54
Repeat the suction process until the solid is air-dry. Release the suction by squeezing the empty valve (E)).
9. Crystallize the precipitate from ethanol 3 mL. Filter the crystals by suction filtration as described in step 8. Wash the crystal with a minute amount of cool ethanol, and continue suction to air-dry.
10. Weigh and determine its melting point.
: Consult the procedure for melting point determination on page 17. 10. Identify the unknown alcohol by comparison of its corresponding 2,4-
diphenylhydrazone with other 2,4-diphenylhydrazone derivatives listed in the table below.
Aldehyde/Ketone Melting point of
2,4-diphenylhydrazone derivatives(°C) Propanal Butanal 2-Methylpropanal Pentanal Hexanal Acetone 2-Butanone 2-Pentanone 3-Pentanone Cyclohexanone
155 123 187 98 107 128 115 144 156 162
Preparation of Schiff’s reagent
1. Place 5 mL of distilled water and 0.015 g of rosaniline hydrochloride into 10-mL Erlenmeyer flask, and swirl the solution. Add 0.032 g of sodium metabisulfite, stir the mixture vigorously.
2. Add 0.13 mL of 6M H2SO4, mix well, stopper and allow standing overnight. 3. Add a minute amount of activated carbon to the mixture, swirling for 45 seconds.
Filter by suction filtration as described above in step 8.
CLEANUP 1. Treat chromium waste by slowly adding sodium thiosulfate into the waste.
: The color of the solution will turn blue and cloudy. Neutralize the solution with sodium carbonate. Leave the solution for one week.
Decant the supernatant liquid down the drain with copious amount of water. Let the residue dry and place it in the heavy metal waste container.
2. Pour other solutions into the organic waste container.
Department of Chemistry, Faculty of Science, Chulalongkorn University, Bangkok, Thailand 10330 Tel / Fax +66 2218 7641, e-mail: [email protected]
55
LAB REPORT
DETERMINATION OF AN UNKNOWN ALCOHOL BY OXIDATION REACTION
Alcohol sample (A) No ………… Write an equation for the reaction of A The product (B) obtained from the above reaction…………………… The observation from Schiff’s Test ……………………………………………………………………………………………………………………………………………………………………………………………… B reacted with 2, 4-dinitrophenylhydrazine to give the product (C) Melting point of C =……………………………°C Which is close to the melting point of ... ……………………………. Which has a melting point =……………………°C Structural formula of C is Structural formula of B is Structural formula of A is

Department of Chemistry, Faculty of Science, Chulalongkorn University, Bangkok, Thailand 10330 Tel / Fax +66 2218 7641, e-mail: [email protected]
56
POLYFUNCTIONAL COMPOUNDS
OBJECTIVE 1. To identify the functional groups present in the polyfunctional compounds.
BACKGROUND
The chemistry of an organic molecule is primarily dictated by its functional groups. Polyfunctional compounds may have properties of all functional groups that are contained in the molecule. However, different functional groups in one molecule may affect other functional groups, resulting in the molecule having new properties which are different from the original properties of each functional group, or some functional groups may decrease or increase the properties of other functional groups. This predictable reactivity can be useful for determining what functional group(s) are present. To apply any reaction as a test for a functional group, it is necessary that the product mixture must appear significantly different from the reactants, for example, the formation of a precipitate or colored product, or the disappearance of a solid or colored reactant. It is also useful to employ positive and negative controls to ensure that each test has been performed correctly.
In this experiment, the determination of the functional group(s) in polyfunctional compounds will be performed by testing with several reactions.
REQUIREMENTS Apparatus and materials:
1. Test tubes 2. Pasteur pipette 3. Litmus or pH papers.
4. Indicator (1% ethanolic phenolphthalein)
Chemicals: Ethanol (C2H5OH); ethanolamine (HOCH2CH2NH2); lactic acid (CH3CHOHCOOH); alanine (CH3CHNH2COOH); propane-1,2-diol (HOCH2CHOHCH3); propane-1,3-diol (HOCH2CH2CH2OH); acetone (CH3COCH3); diacetyl (CH3COCOCH3); acetylacetone (CH3COCH2COCH3); acetonylacetone (CH3COCH2CH2COCH3); ethyl acetoacetate (CH3COCH2COOC2H5); salicylic acid (HO-C6H4-COOH/ethanol); acetylsalicylic acid (CH3COOC6H4-COOH/ethanol); methyl salicylate (C6H4-(OH)-COOCH3/ethanol); methyl acetylsalicylate (C6H3-(OH)-COOCH3-COCH3/ethanol); ceric ammonium nitrate (5% (NH4)2Ce(NO3)6); nitric acid (conc.HNO3); periodic acid (0.5% HIO4); silver nitrate (3% AgNO3); sodium hydroxide (1% NaOH); borax (satd.Na2B4O7); ferric chloride (5% FeCl3); bromine (satd.Br2/H2O); sodium bicarbonate (5% NaHCO3).
PROCEDURE PART I: Testing for acidic, basic, neutral compounds
1.1 Reaction with (NH4)2Ce(NO3)6 1. Add 5 drops of (NH4)2Ce(NO3)6 solution into each of 4 test tubes. 2. Add a drop of ethanol, ethanolamine, lactic acid and alanine in each test tube
separately. 3. Record the observations and determine which functional group has influenced to the
other one(s). 1.2 Reaction with water
1. Add 2 drops of water into each of 4 test tubes.

Department of Chemistry, Faculty of Science, Chulalongkorn University, Bangkok, Thailand 10330 Tel / Fax +66 2218 7641, e-mail: [email protected]
57
2. Add a drop of ethanol, ethanolamine, lactic acid and alanine in each test tube separately.
3. Test the solution with litmus paper. Record the observation. PART II: Testing for diol compounds
2.1 Reaction with periodic acid 1. Add 1 drop of conc.HNO3 in 2-mL 5% HIO4 in a test tube. 2. Add 1 drop of propane-1,2-diol and shake the mixture for 15 seconds. 3. Add 2 drops of 3% AgNO3 and record the observation. 4. Repeat this reaction by using propane-1,3-diol and record the observation. 2.2 Reaction with satd.borax solution 1. Add 5 drops of propane-1,2-diol in 2 mL of water in each of test tubes, No.1 and
No.2. 2. Add 1 drop of 1% NaOH and 1 drop of phenolphthalein in both test tubes. Shake
the mixture. 3. Add 3 mL of satd.Na2B4O7 solution and 1 drop of phenolphthalein in the test tube
No.3. Shake the mixture. 4. Pour the mixture in the test tube No.3 equally into test tubes No.1 and No.2. Shake
it vigorously. 5. Compare the color of the three solutions and record the observation.
PART III: Testing for dicarbonyl compounds
3.1 Reaction with ferric chloride solution 1. Add 5 drops of ethanol into 5 test tubes containing one drop of acetone, diacetyl,
acetylacetone and acetonylacetone and water, separately. 2. Add 1 drop of 5% FeCl3 in each tube and shake the mixture. 3. Record the observations. 3.2 Reaction with satd. bromine in water solution 1. Add 5 drops of ethanol into 5 test tubes containing one drop of acetone, diacetyl,
acetylacetone and acetonylacetone and water, separately. 2. Add 2 drops of Br2/H2O in each tube and shake the mixture. 3. Record the observations.
: Bromine is an extremely hazardous oxidant and irritant. Wear gloves and work in a hood. If any bromine solution is spilled or comes in contact with the skin or its vapors are inhaled, inform the instructor immediately.
3.3 Reaction with ferric chloride solution and satd.bromine in water solution 1. Dilute 2 drops of acetylacetone in 1 mL of ethanol in test tube. 2. Add 1 drop of 5% FeCl3, shake the mixture and observe the color. 3. Add 1 mL of Br2/H2O, shake and leave for a few minutes. 4. Record the observations. 5. Repeat this reaction with ethyl acetoacetate. Record the observations.
PART IV: Sample verification
The samples A, B, C, D are the solutes in ethanol which have the following structures: HO-C6H4-CO2H, CH3COO-C6H4-CO2H,

Department of Chemistry, Faculty of Science, Chulalongkorn University, Bangkok, Thailand 10330 Tel / Fax +66 2218 7641, e-mail: [email protected]
58
HO-C6H4-CO2CH3 and CH3COO-C6H4-CO2CH3 Identify which structure belongs to which sample by testing as described in Parts I to III and the following methods;
a. Phenolic group; Add 1 drop of 5% FeCl3 in each of four test tubes containing a few drops of each sample separately. Shake the mixture vigorously. Record the observations.
b. Carboxylic group; Add 1 mL of 5% NaHCO3 in each of four test tubes containing a few drops of each sample separately. Shake the mixture vigorously. Record the observations.
CLEANUP
1. Pour all waste solutions in the appropriate waste containers.
LAB REPORT
POLYFUNCTIONAL COMPOUNDS
1. Acidic, basic, neutral compound testing
Compound Testing result
pH (red -> blue or blue -> red) (NH4)2Ce(NO3)6 Ethanol Ethanolamine Lactic Acid Alanine
2. Diols
Compound
Testing result HIO4 Na2B4O7
Propane-1,2-diol Propane-1,3-diol
3. Dicarbonyl
Compound
Testing result 5 % FeCl3 Br2/H2O FeCl3 + Br2/H2O
Acetone No experiment Diacetyl No experiment Acetylacetone Acetonylacetone No experiment Ethylacetoacetate No experiment No experiment
Compare the results of acetyl acetone to ethylacetoacetate to determine whether they are the same or different and give the explanation. ………………………………………………………………………………………............... …………………………………………………………………………………………..…….………………………………………………………………………………………………...

Department of Chemistry, Faculty of Science, Chulalongkorn University, Bangkok, Thailand 10330 Tel / Fax +66 2218 7641, e-mail: [email protected]
59
……………………………………………………………………………………………..….………………………………………………………………………………………………... 4. Sample verification
Reagent
Testing result Sample No….
Sample No….
Sample No….
Sample No….
pH (NH4)2Ce(NO3)6 HIO4 Na2B4O7 5% FeCl3 Br2/H2O FeCl3 + Br2/H2O NaHCO3
Sample verification results 1. Structural formula of sample No…. 2. Structural formula of sample No…. 3. Structural formula of sample No…. 4. Structural formula of sample No….

Department of Chemistry, Faculty of Science, Chulalongkorn University, Bangkok, Thailand 10330 Tel / Fax +66 2218 7641, e-mail: [email protected]
60
IDENTIFICATION OF SUGARS FROM NATURAL SOURCES
OBJECTIVES 1. To investigate the chemical reactivities of sugars using specific tests. 2. To identify unknown sugars.
BACKGROUND
Sugar is a basic food carbohydrate which primarily comes from sugar cane and sugar beet. Other sources of sugar include honey, maple syrup, and fruits. Glucose is a simple sugar and one of the most abundant sugars obtained from plant photosynthesis. Simple sugars are termed monosaccharide. Two monosaccharides may be combined with the loss of one molecule of water to form a disaccharide, and more monosaccharide units to form polysaccharides. Sugars may be classified into various categories: aldoses and ketoses, pentoses and hexoses, and reducing and non-reducing sugars. They can be distinguished according to a general type within a category by specific tests. In this experiment, 4 kinds of sugars from natural sources will be investigated by specific tests and their components will be identified.
REQUIREMENTS Apparatus and materials:
1. Test tubes 2. Hot plate and heat dissipation block 3. Standard sugar (xylose, glucose, fructose, sucrose, maltose and lactose) 4. Natural sugar (palm sugar, crystalline sugar, brown sugar and honey)
Chemicals: Sulfuric acid (conc.H2SO4); α-naphthol (C6H4-C4H3-OH); ethanol (95% CH3CH2OH); orcinol (C7H8O2); hydrochloric acid (conc.HCl); ferric chloride (10% FeCl3); dichloromethane (CH2Cl2); resorcinol (C6H4-(OH)2); sodium citrate (Na3C3H5O(CO2)3); sodium carbonate (Na2CO3); copper sulfate (CuSO4); cupric acetate (Cu(CH3COO)2); acetic acid (glacial CH3COOH).
PROCEDURE
1. Prepare a 1% aqueous solution of each sugar.
: The volume of total solution of each sugar can be calculated from the detail in the procedure below.
2. For every test, prepare 11 test tubes and label them well. Add 1 mL of each sample solution to 10 separate test tubes and add 1 mL of water to another test tube for a control test.
3. Follow the procedure below for each specific test. Molisch test Sugars are dehydrated by reacting with conc.H2SO4 to form furfural derivates (a cyclic aldehyde). Naphthol then reacts with the furfural derivative to form red-violet colored condensation products. Although this test will detect compounds other than carbohydrates, a negative result indicates the absence of carbohydrates.

Department of Chemistry, Faculty of Science, Chulalongkorn University, Bangkok, Thailand 10330 Tel / Fax +66 2218 7641, e-mail: [email protected]
61
4. Add 5 drops of Molisch reagent to each test tube. Mix thoroughly. 5. Incline the tube, and carefully add without mixing, 1 mL of conc.H2SO4 by pouring
it down the side of the tube. 6. Observe a color developed at the interface between the acid (bottom) and aqueous
(upper) layers in each tube.
: Handle conc.H2SO4 with extremely care. Working in a fume hood is recommended. Bial test Bial Test will distinguish between mono- and disaccharides, lactose will not react. A blue-green color indicates pentoses or substances containing pentoses; a yellow-green color indicates hexoses, and disaccharides are yellow.
7. Add 1 mL of Bial reagent to each test tube. Mix thoroughly. 8. Heat the mixture gently in the conical well of heat dissipation block to nearly
boiling for 2 minutes.
: Heat one or two test tubes at a time. 9. Observe and record the color of each solution.
: If it is difficult to determine the color, add 2.5 mL of water and 0.5 mL of 1-pentanol to the solution. Shake the test tube vigorously, and then let the layers separate. Observe the color in the 1-pentanol layer.
Seliwanoff test Aldoses and ketoses can be distinguished by their ability to form furfurals. Since ketoses form furfurals more rapidly than aldoses, ketoses immediately react with Seliwanoff reagent to give a red colored complex.
10. Add 1 mL of Seliwanoff reagent to each test tube. Mix thoroughly. 11. Heat the mixture gently in the conical well of heat dissipation block to nearly
boiling for 1 minute and record the color in each test tube. 12. Heat the unreacted test tubes and record the color and the time at which the color
changes. If no color change after 5 minutes has been observed, stop heating and record as no reaction.
: Heat one or two test tubes at a time. Benedict’s test Benedict’s solution contains soluble blue copper sulphate (copper(II) ions), which is reduced to insoluble red-brown copper oxide (copper(I) ions) which is seen as a precipitate. Non-reducing sugars such as sucrose and starch will remain in the blue solution.
13. Add 2 mL of Benedict's reagent to each test tube. Mix thoroughly. 14. Heat the mixture gently in the conical well of heat dissipation block to nearly
boiling for 3 minutes. 15. Observe and record the color of precipitate in each tube.
: Heat one or two test tubes at a time.

Department of Chemistry, Faculty of Science, Chulalongkorn University, Bangkok, Thailand 10330 Tel / Fax +66 2218 7641, e-mail: [email protected]
62
Barfoed’s test Barfoed’s Test uses cupric acetate in dilute acidic solution, reacting with monosaccharides to form a red precipitate after having been heated for 10 minutes. Barfoed's reagent reacts with monosaccharides to produce cuprous oxide at a faster rate than disaccharides do.
16. Add 2 mL of Barfoed's reagent to each test tube. Mix thoroughly. 17. Heat the mixture gently in the conical well of heat dissipation block to nearly
boiling for 3 minutes. 18. Observe and record the time of precipitate formation.
CLEANUP
1. Neutralize all aqueous solutions and flush them down the drain with copious amount of water.
2. Dispose of the solutions containing copper compounds in a waste container for copper waste.
Preparation of reagents:
1. Molisch reagent Dissolve 0.5 g of α-naphthol in 10 mL of 95%ethanol. Store the reagent away
from light at room temperature. 2. Bial reagent
Dissolve 0.03 g of orcinol in 10 mL of conc.HCl. Then add a few drops of 10%FeCl3. Store the reagent away from light at room temperature.
: Conc.HCl is very strong acid and corrosive that will burn your skin. Wear gloves at all times.
3. Seliwanoff reagent Dissolve 0.005 g of resorcinol in diluted HCl (HCl: water = 1:2 by volume) 10
mL. Store the reagent away from light at room temperature. 4. Benedict’s reagent
Dissolve 1.73 g of sodium citrate and 1 g of anh.Na2CO3 in 8 mL of distilled water. Warm up until it completely dissolves and add copper sulphate solution (1.73 g of CuSO4.5H2O in distilled water 10 mL). Adjust the volume to 10 mL.
5. Barfoed’s reagent Dissolve 0.66 g of cupric acetate in 10 mL of distilled water. Filter (if it
precipitates) and add 0.9 mL of glacial acetic acid.
: Glacial acetic acid is concentrated acetic acid, corrosive and causes burns. The vapor is extremely irritating to mucous membranes and the upper respiratory tract. Measure it in a fume hood and avoid contact with skin, eyes, and clothing.
QUESTIONS
1. What functional group will give a positive test in Molisch test? 2. Why do disaccharide and polysaccharide give a positive test in Molisch test? 3. Can Seliwanoff test be used to distinguish fructose from sucrose? 4. Why do maltose and sucrose react differently in Benedict’s test? 5. What is the condition of reaction in Barfoed’s test compared to Benedict’s test?

Department of Chemistry, Faculty of Science, Chulalongkorn University, Bangkok, Thailand 10330 Tel / Fax +66 2218 7641, e-mail: [email protected]
63
LAB REPORT
IDENTIFICATION OF SUGAR FROM NATURAL SOURCES
Sample Molisch test
Bial test
Seliwanoff test
Benedict’s test
Barfoed’s test
Water Xylose Glucose Fructose Sucrose Maltose Lactose Palm sugar Crystalline sugar Brown sugar Honey Palm sugar contains ……..…………... Crystalline sugar contains ……..…………… Brown sugar contains ……..…………… Honey contains ……..……………

Department of Chemistry, Faculty of Science, Chulalongkorn University, Bangkok, Thailand 10330 Tel / Fax +66 2218 7641, e-mail: [email protected]
64
CHAPTER IV: SYNTHESIS OF COMPOUNDS
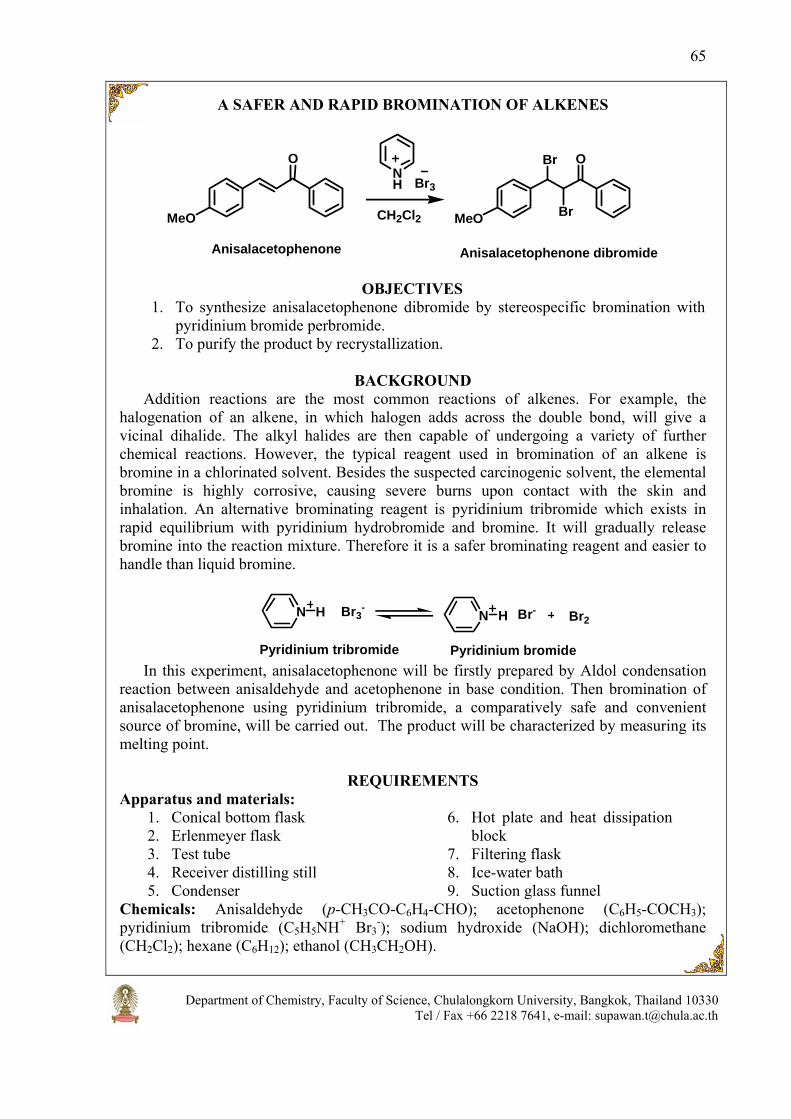
Department of Chemistry, Faculty of Science, Chulalongkorn University, Bangkok, Thailand 10330 Tel / Fax +66 2218 7641, e-mail: [email protected]
65
A SAFER AND RAPID BROMINATION OF ALKENES
O
MeO
NH
O
MeO
Br3
CH2Cl2
Br
Br
Anisalacetophenone Anisalacetophenone dibromide
OBJECTIVES 1. To synthesize anisalacetophenone dibromide by stereospecific bromination with
pyridinium bromide perbromide. 2. To purify the product by recrystallization.
BACKGROUND
Addition reactions are the most common reactions of alkenes. For example, the halogenation of an alkene, in which halogen adds across the double bond, will give a vicinal dihalide. The alkyl halides are then capable of undergoing a variety of further chemical reactions. However, the typical reagent used in bromination of an alkene is bromine in a chlorinated solvent. Besides the suspected carcinogenic solvent, the elemental bromine is highly corrosive, causing severe burns upon contact with the skin and inhalation. An alternative brominating reagent is pyridinium tribromide which exists in rapid equilibrium with pyridinium hydrobromide and bromine. It will gradually release bromine into the reaction mixture. Therefore it is a safer brominating reagent and easier to handle than liquid bromine.
N H Br3-
N H Br- Br2
Pyridinium tribromide Pyridinium bromide In this experiment, anisalacetophenone will be firstly prepared by Aldol condensation
reaction between anisaldehyde and acetophenone in base condition. Then bromination of anisalacetophenone using pyridinium tribromide, a comparatively safe and convenient source of bromine, will be carried out. The product will be characterized by measuring its melting point.
REQUIREMENTS Apparatus and materials:
1. Conical bottom flask 2. Erlenmeyer flask 3. Test tube 4. Receiver distilling still 5. Condenser
6. Hot plate and heat dissipation block
7. Filtering flask 8. Ice-water bath 9. Suction glass funnel
Chemicals: Anisaldehyde (p-CH3CO-C6H4-CHO); acetophenone (C6H5-COCH3); pyridinium tribromide (C5H5NH+ Br3
-); sodium hydroxide (NaOH); dichloromethane (CH2Cl2); hexane (C6H12); ethanol (CH3CH2OH).

Department of Chemistry, Faculty of Science, Chulalongkorn University, Bangkok, Thailand 10330 Tel / Fax +66 2218 7641, e-mail: [email protected]
66
PROCEDURE PART I: Preparation of anisalacetophenone
1. Place 544 mg (4 mmol) of anisaldehyde and 480 mg (4 mmol) of acetophenone in a 10-mL conical bottom flask.
: Anisaldehyde and acetophenone are irritating agents. Prevent eye, skin, and clothing contact. Avoid inhaling fumes and ingesting the compound.
2. Dissolve a minute amount of NaOH with 1 mL of ethanol in a test tube and add in the mixture.
: NaOH is corrosive. Prevent eye, skin, and clothing contact. Avoid inhaling or ingesting this compound.
3. Stir until it appears as yellow slurry and stir for another 5 minutes. Place the flask in an ice-water bath for 5 minutes.
4. Collect the precipitated product by suction filtration (Assemble a filtering glass funnel to a filtering flask and clamp. Connect the side arm of the filtering flask to the suction valve (S) of a three-way pipette bulb. Cut the filter paper to the right size and place at the bottom of the funnel. Expel air from the bulb by squeezing the air valve (A) and the bulb simultaneously. Wet the filter paper with a few drops of the solvent used and apply suction; squeeze the "suction" valve (S). Immediately transfer the suspension on to the filter. Continue applying suction by simultaneously squeezing the air valve (A) and the bulb again, and then squeeze the suction valve (S) until all the liquid has been pulled through the filter. If necessary, the solid can be washed on the filter with fresh solvent. Repeat the suction process until the solid is air-dry. Release the suction by squeezing the empty valve (E)). Wash the product with a tiny amount of ice-cold ethanol.
5. Crystallize the product from ethanol. Collect it by suction filtration as described in step 4 and continue suction to air-dry.
: Consult for the procedure of recrystallization on page 20.. 6. Measure its mass. Calculate the percent yield and determine its melting point.
PART II: Preparation of anisalacetophenone dibromide
7. Dissolve 238 mg (1 mmol) of anisalacetophenone with 5 mL of dichloromethane in a 10-mL conical bottom flask.
8. Gently add 336 mg (1.05 mmol) of pyridinium tribromide. Swirl the mixture gently until all the solid has dissolved.
: Pyridinium tribromide is corrosive and lachrymator. Prevent eye, skin, and clothing contact. Avoid inhaling or ingesting this compound. Use a fume hood to dispense this reagent.
9. Connect the flask with a receiver distilling still and a water-cooled condenser. Distil off the solvent.
10. Add 5 mL of distilled water and stir the mixture using a Pasteur pipette method. (Draw a portion of the lower layer up into a pipette and carefully expel it back into the flask through the upper layer. Do this repeatedly for a few times until the resulting mixture turns white).
: If the reagents are not mixing well, the incomplete separation and the impure product will be obtained.
11. Collect the precipitated product by suction filtration as described in step 4. 12. Crystallize the product from mixed solvent of dichloromethane and hexane (1:1) in
a 25-mL Erlenmeyer flask.
: Dichloromethane is flammable and toxic. Keep flame away and avoid breathing fumes.

Department of Chemistry, Faculty of Science, Chulalongkorn University, Bangkok, Thailand 10330 Tel / Fax +66 2218 7641, e-mail: [email protected]
67
: Hexane is flammable, Keep flame away and avoid breathing fumes.
: Consult for the procedure of recrystallization on page 18. 13. After crystallization is complete, collect the crystals by suction filtration as
described in step 4. Wash the crystal with a minute amount of cool mixed solvent and continue suction to air-dry.
14. Weigh the crystals of product and calculate its percent recovery. Determine its melting point.
: Consult the procedure for the melting point determination on page 17. CLEANUP
1. After filtration of ethanol, any remaining sodium hydroxide can be neutralized by acid and flush them down the drain with copious amount of water.
2. Pour any remaining mixed solution of dichloromethane in chlorinated hydrocarbon waste container.
3. Do not use acetone to rinse glassware containing residual bromine (to prevent the formation of bromoacetone, a severe lachrymator). Add solid sodium thiosulfate to all test solutions to destroy residual bromine, then neutralize and filter them. Flush the filtrate down the drain with copious amount of water and place the filter paper in the container for halogenated organic compounds.
QUESTIONS
1. What are the product structures obtained from the addition of bromine to cinnamic acid by using Br2/Et2O reagent? Show the stereochemistry of this compound.
2. What is the product structure when the reagent is changed to Br2/H2O-EtOH solution?
3. Predict the products for the Aldol condensation reactions of the following two compounds?
O O
H
a)
OO
Hc)
O O
Hb)
4. List the chiral center and stereoisomer of anisalacetophenone dibromide compound?

Department of Chemistry, Faculty of Science, Chulalongkorn University, Bangkok, Thailand 10330 Tel / Fax +66 2218 7641, e-mail: [email protected]
68
LAB REPORT
A SAFER AND RAPID BROMINATION OF ALKENES
Samples Appearance Mp/bp
(°C) MW Weight
(mg) Mole
(mmol) Volume
(mL)
Anisaldehyde Acetophenone Anisalacetophenone Pyridinium tribromide
Dichloromethane Anisalacetophenone dibromide
Observation & Conclusion ……………………………………………………………………………………………….………………………………………………………………………………………………. ………………………………………………………………………………………………………………………………………………………………………………………………………………………………………………………………………………………………………………………………………………………………………………………………

Department of Chemistry, Faculty of Science, Chulalongkorn University, Bangkok, Thailand 10330 Tel / Fax +66 2218 7641, e-mail: [email protected]
69
NITRATION OF PHENOL ON SOLID SURFACE
NO2
O
O
OHOHNO2
+ +
Phenol 2-Nitrophenol 4-Nitrophenol 1,4-Benzoquinone
OHSiO2..HNO3
CH2Cl2
OBJECTIVE 1. To synthesize nitrophenols from phenol using nitrated silica gel.
BACKGROUND
Electrophilic aromatic substitution is one of the fundamental organic reactions. It allows the introduction of many different functional groups onto an aromatic ring. The nitration of an aromatic ring containing an electron-donating substituent normally gives rise to a mixture of predominantly ortho- and para-nitrated products. The traditional nitration of phenol using nitric acid in sulfuric acid generally gives complex mixtures containing o- and p-nitrophenols, dinitrated phenols, along with tars of phenolic oxidation products which are difficult to be separated. In this experiment, the facile and greener nitration of phenols using nitrated silica gel will be carried out. The product mixture will be separated by column chromatography and the individual compound will be identified by its melting point determination. REQUIREMENTS Apparatus and materials:
1. Conical bottom flasks 2. Erlenmeyer flasks 3. Receiver distilling still 4. Condenser
5. Hot plate and heat dissipation block
6. Boiling stone 7. Burette column 1 cm diameter 8. Silica gel 60 (70-230 mesh)
Chemicals: Phenol (C6H5-OH); nitrated silica gel (SiO2.HNO3, 10.6% HNO3 w/w); dichloromethane (CH2Cl2); ethyl acetate (CH3COCH2CH3); hexane (C6H14).
PROCEDURE 1. Place 120 mg (1.27 mmol) of phenol in a 5-mL conical bottom flask, Flask No.1.
: Phenol is toxic and will cause burns to skin. 2. Add 2.5 mL of dichloromethane and swirl the mixture gently to dissolve all solid.
: Dichloromethane is flammable and toxic. Keep flame away and avoid breathing fumes. 3. Gently add 0.87 g of nitrated silica gel (10.6% HNO3 w/w) and occasionally swirl
for total 5 minutes. 4. Filter the solution using a Pasteur filter-tip pipette method. (Wrap the Pasteur pipette tip
with a small piece of cotton wool. Immerse the pipette into the solution until the pipette tip reaches the bottom of the flask while squeezing the rubber bulb. Draw the solution up into the pipette by

Department of Chemistry, Faculty of Science, Chulalongkorn University, Bangkok, Thailand 10330 Tel / Fax +66 2218 7641, e-mail: [email protected]
70
releasing the rubber bulb. Take off the cotton wool and expel the solution in the pipette into the proper container).
: Be careful not to lose the cotton wool during suction. While lifting the pipette out, apply a little pressure by squeezing the bulb softly to prevent suction of unfiltered solution into the pipette.
5. Transfer the solution in the pipette into another conical bottom flask, Flask No.2. 6. Add 1 mL of dichloromethane in Flask No.1 to rinse silica gel and filter the solution
using a Pasteur filter-tip pipette method as described in step 4. Combine the solution in Flask No.2.
7. Equip Flask No.2 with a receiver distilling still fitted with a water-cooled condenser. Add a boiling stone and distil at 60-80ºC to remove dichloromethane until the volume of the solution was about 0.5 mL.
8. Run column chromatography of the concentrated solution using 4 g of silica gel packed in a burette and 10% ethyl acetate in hexane as the eluent.
: Ethyl acetate is strong smelling chemicals. Be very careful to place the stopper on the conical bottom flask immediately.
: Hexane is flammable, Keep flame away and avoid breathing fumes. 9. Collect every 30 mL in a separate Erlenmeyer flask for 3 portions that elute from
the column. 10. Concentrate every fraction by distilling off the solvent using a receiver distilling
still fitted with a water-cooled condenser until nearly dry.
: Do distillation of each fraction twice in a pre-weighed 25-mL round bottom flask. Do not let it be heated to dryness, to prevent sublimation of the product. Remove the flask from the heat when it is nearly dry.
11. Leave each flask to stand till dryness. Weigh each flask with product and calculate the weight of each product. Identify the products by determination of their melting points and compare with the melting points of 2-nitrophenol, 4-nitrophenol and 1,4-benzoquinone, as reported in the literature.
: Consult the procedure for the melting point determination on page 17. Preparation of nitrated silica gel (SiO2.HNO3)
1. Mix 4.0 g of silica gel 60 (70-230 mesh) with 10 mL of 7.5 M HNO3 in a 50-mL Erlenmeyer flask.
: Nitric acid is very corrosive. Avoid contact with the skin. In case of accident, wash and clean the affected area immediately with copious amount of water for at least 15 minutes
2. Stir for 3 hours in a hood at room temperature and continuously dry in a hood for 12 hours and keep in the bottle.
3. Weigh nitrated silica gel 0.5 g (know the exact weight), add 10 mL of water and titrate with 0.1 M NaOH, use phenolphthalein as an indicator. Calculate the acid value in nitrated silica gel.
: NaOH is corrosive. Prevent eye, skin, and clothing contact. Avoid inhaling or ingesting this compound. In case of accident, wash and clean immediately for at least 15 minutes.

Department of Chemistry, Faculty of Science, Chulalongkorn University, Bangkok, Thailand 10330 Tel / Fax +66 2218 7641, e-mail: [email protected]
71
CLEANUP
1. Pour silica gel waste into the appropriate waste container. 2. Pour the dichloromethane solution into the halogenated hydrocarbon waste
container. 3. Pour ethyl acetate/hexane into the appropriate waste container.
QUESTIONS
1. Explain why 2-nitrophenol is less polar than 4-nitrophenol. 2. Why is 3-nitrophenol not produced from this reaction? Explain in terms of
mechanism of reaction using the resonance structures. 3. In the nitration reaction with nitrated silica gel, it works well for phenol but the
reaction does not occur if no hydroxyl group is on the aromatic ring. Explain.
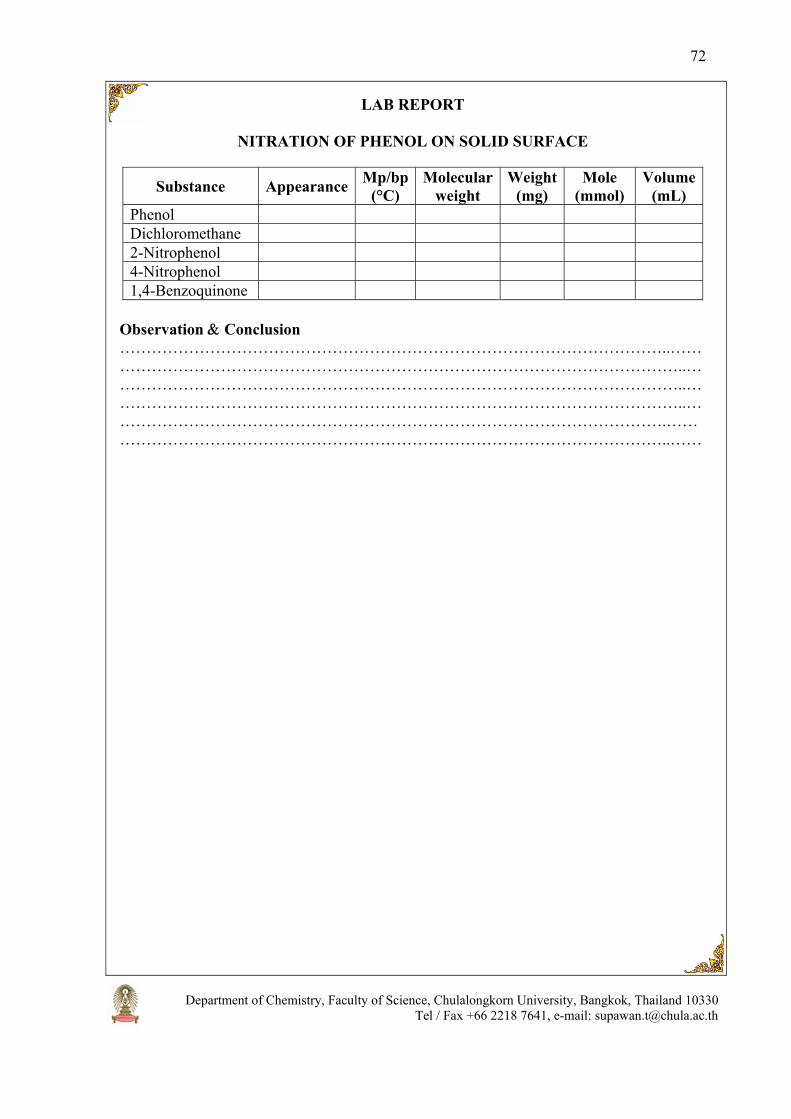
Department of Chemistry, Faculty of Science, Chulalongkorn University, Bangkok, Thailand 10330 Tel / Fax +66 2218 7641, e-mail: [email protected]
72
LAB REPORT
NITRATION OF PHENOL ON SOLID SURFACE
Observation & Conclusion …………………………………………………………………………………………..…………………………………………………………………………………………………..………………………………………………………………………………………………..… ……………………………………………………………………………………………..…………………………………………………………………………………………….………………………………………………………………………………………………..……
Substance Appearance Mp/bp(°C)
Molecular weight
Weight (mg)
Mole (mmol)
Volume (mL)
Phenol Dichloromethane 2-Nitrophenol 4-Nitrophenol 1,4-Benzoquinone

Department of Chemistry, Faculty of Science, Chulalongkorn University, Bangkok, Thailand 10330 Tel / Fax +66 2218 7641, e-mail: [email protected]
73
BROMINATION OF ACETANILIDE
HN C
OCH3
HN C
OCH3
Br
KBrO3, HBr
Acetanilide p-Bromoacetanilide
CH3COOH
OBJECTIVE 1. To brominate an activated aromatic compound and isolate the solid product.
BACKGROUND
Bromination of aniline via an electrophilic aromatic substitution usually gives only tribromoaniline. This is because the electron-donating amino group of aniline greatly activates the ring toward electrophiles. Acetylating the amino group of aniline moderates the activating effect of the non-bonded pair of electrons on the nitrogen atom which is delocalized by both the carbonyl group and the phenyl ring. The acetamido group is ortho- and para-directing, but the steric bulk of this substituent hinders the attack at the 2-position. Therefore the selective monobromination of acetanilide to give para-bromoacetanilide is strongly favored under mild condition such as bromine in acetic acid. However the elemental bromine is highly corrosive, causing severe burns upon contact with the skin and inhalation. An alternative brominating reagent is bromine generating in situ from the oxidation of bromide ion with potassium bromate, according to the following equation:
6H+ + 5Br- + BrO3
- 3Br2 + 3H2O The amount of bromine generated is determined by the amount of potassium bromate used. Potassium bromate is a granular solid that can be measured easily and accurately. In this experiment, bromination of acetanilide will be carried out using hydrobromic acid and potassium bromate.
REQUIREMENTS Apparatus and materials:
1. Conical bottom flasks 2. Pasteur pipette 3. Beaker 4. Magnetic stirrer
5. Receiver distilling still 6. Filtering flask 7. Suction glass funnel
Chemicals: Acetanilide (C6H5-NHCOCH3); potassium bromate (KBrO3); hydrobromic acid (48% HBr); glacial acetic acid (CH3COOH); sodium bisulfate (10% NaHSO3); ethanol (CH3CH2OH).

Department of Chemistry, Faculty of Science, Chulalongkorn University, Bangkok, Thailand 10330 Tel / Fax +66 2218 7641, e-mail: [email protected]
74
PROCEDURE 1. Weigh 200 mg (1.5 mmol) of acetanilide, 85 mg (0.5 mmol) of potassium bromate
in 10-mL conical bottom flask and 2 mL of glacial acetic acid to the flask and swirl the mixture until all the solid has dissolved.
: Acetanilide is toxic and irritant. Avoid contact with skin, eyes, and clothing.
: Glacial acetic acid is concentrated acetic acid, corrosive and causes burns. The vapor is extremely irritating to mucous membranes and the upper respiratory tract. Measure it in a fume hood and avoid contact with skin, eyes, and clothing.
2. Add 0.3 mL of 48% HBr and often stir the mixture at room temperature for a 30 minute period of reaction time using a Pasteur pipette method. (Draw a portion of the lower layer up into a pipette and carefully expel it back into the flask through the upper layer. Do this repeatedly for a few times).
: If the reagents are not mixing well, no reaction or low yield of the product will be obtained.
: A magnetic stirrer can be used, if it is available. Replace the conical bottom flask with an appropriate container.
: Hydrobromic acid is toxic, corrosive and causes severe burns. It may be harmful by inhalation, ingestion, and skin absorption. Wear appropriate gloves.
: Carry out the bromination procedure in a hood. The rest of the synthesis can be performed outside of a hood.
3. Pour the mixture into a 100-mL beaker containing 25 mL of water and stir the mixture rapidly for 15 minutes.
: A magnetic stirrer can be used, if it is available. 4. Collect the solid product on by suction filtration (Assemble a filtering glass funnel to a
filtering flask and clamp. Connect the side arm of the filtering flask to the suction valve (S) of a three-way pipette bulb. Cut the filter paper to the right size and place at the bottom of the funnel. Expel air from the bulb by squeezing the air valve (A) and the bulb simultaneously. Wet the filter paper with a few drops of the solvent used and apply suction; squeeze the "suction" valve (S). Immediately transfer the suspension on to the filter. Continue applying suction by simultaneously squeezing the air valve (A) and the bulb again, and then squeeze the suction valve (S) until all the liquid has been pulled through the filter. If necessary, the solid can be washed on the filter with fresh solvent. Repeat the suction process until the solid is air-dry. Release the suction by squeezing the empty valve (E)). Wash the precipitate with several drops of 10% NaHSO3 and water to remove any residual bromine.
5. Recrystallize the crude product from ethanol.
: Consult the procedure for recrystallization on page 18. 6. After crystallization is complete, collect the crystals by suction filtration as
described in step 4. Wash the product with cold ethanol and continue suction to air-dry.
: Ethanol is highly volatile and flammable solvent, keep flame away and avoid breathing Weigh the product and calculate its percent recovery. Determine its melting point.
: Consult the procedure for the melting point determination on page 17.

Department of Chemistry, Faculty of Science, Chulalongkorn University, Bangkok, Thailand 10330 Tel / Fax +66 2218 7641, e-mail: [email protected]
75
CLEANUP 1. Treat the filtrate with 10% NaHSO3 to destroy the left over HBr before pouring it
into the appropriate waste container.
QUESTIONS 1. Why is an acetamido group less reactive toward electrophilic aromatic substitution
at o- and p-positions than an amino group? Explain by using resonance structures. 2. Write the mechanism of the bromination reaction of acetanilide. 3. What is the purpose of adding 10% NaHSO3 to the solution? Write the equation of
this reaction.
LAB REPORT
BROMINATION OF ACETANILIDE
Substrate Appearance Mp/bp (°c)
MW Weight (mg)
Mol (mmol)
Volume (mL)
Acetanilide Potassium bromate
Hydrobromic acid p-Bromo-acetanilide
Observation & Conclusion ………………………………………………………………………………………………………………………………………………………………………………………………………………………………………………………………………………………………………………………………………………………………………………………………………………………………………………………………………………………………
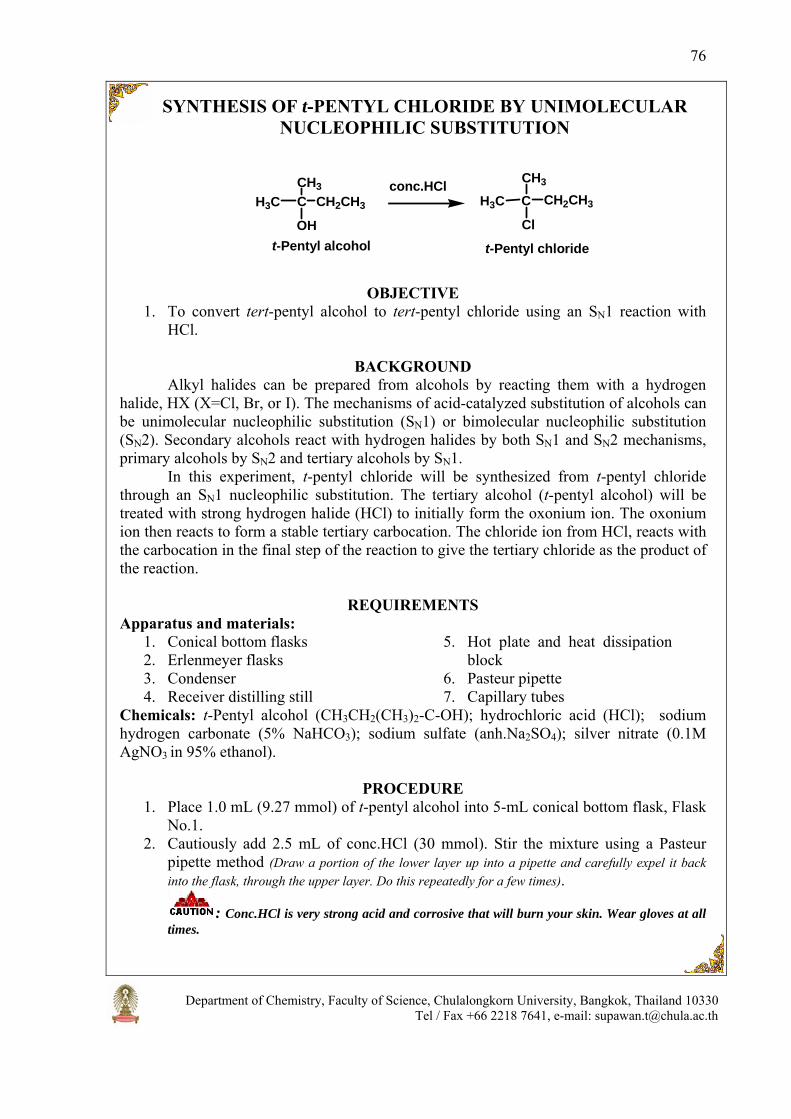
Department of Chemistry, Faculty of Science, Chulalongkorn University, Bangkok, Thailand 10330 Tel / Fax +66 2218 7641, e-mail: [email protected]
76
SYNTHESIS OF t-PENTYL CHLORIDE BY UNIMOLECULAR NUCLEOPHILIC SUBSTITUTION
CCH3
H3C CH2CH3
OH
CCH3
H3C CH2CH3
Cl
t-Pentyl chloride
conc.HCl
t-Pentyl alcohol
OBJECTIVE
1. To convert tert-pentyl alcohol to tert-pentyl chloride using an SN1 reaction with HCl.
BACKGROUND
Alkyl halides can be prepared from alcohols by reacting them with a hydrogen halide, HX (X=Cl, Br, or I). The mechanisms of acid-catalyzed substitution of alcohols can be unimolecular nucleophilic substitution (SN1) or bimolecular nucleophilic substitution (SN2). Secondary alcohols react with hydrogen halides by both SN1 and SN2 mechanisms, primary alcohols by SN2 and tertiary alcohols by SN1. In this experiment, t-pentyl chloride will be synthesized from t-pentyl chloride through an SN1 nucleophilic substitution. The tertiary alcohol (t-pentyl alcohol) will be treated with strong hydrogen halide (HCl) to initially form the oxonium ion. The oxonium ion then reacts to form a stable tertiary carbocation. The chloride ion from HCl, reacts with the carbocation in the final step of the reaction to give the tertiary chloride as the product of the reaction.
REQUIREMENTS Apparatus and materials:
1. Conical bottom flasks 2. Erlenmeyer flasks 3. Condenser 4. Receiver distilling still
5. Hot plate and heat dissipation block
6. Pasteur pipette 7. Capillary tubes
Chemicals: t-Pentyl alcohol (CH3CH2(CH3)2-C-OH); hydrochloric acid (HCl); sodium hydrogen carbonate (5% NaHCO3); sodium sulfate (anh.Na2SO4); silver nitrate (0.1M AgNO3 in 95% ethanol).
PROCEDURE 1. Place 1.0 mL (9.27 mmol) of t-pentyl alcohol into 5-mL conical bottom flask, Flask
No.1. 2. Cautiously add 2.5 mL of conc.HCl (30 mmol). Stir the mixture using a Pasteur
pipette method (Draw a portion of the lower layer up into a pipette and carefully expel it back into the flask, through the upper layer. Do this repeatedly for a few times).
: Conc.HCl is very strong acid and corrosive that will burn your skin. Wear gloves at all times.
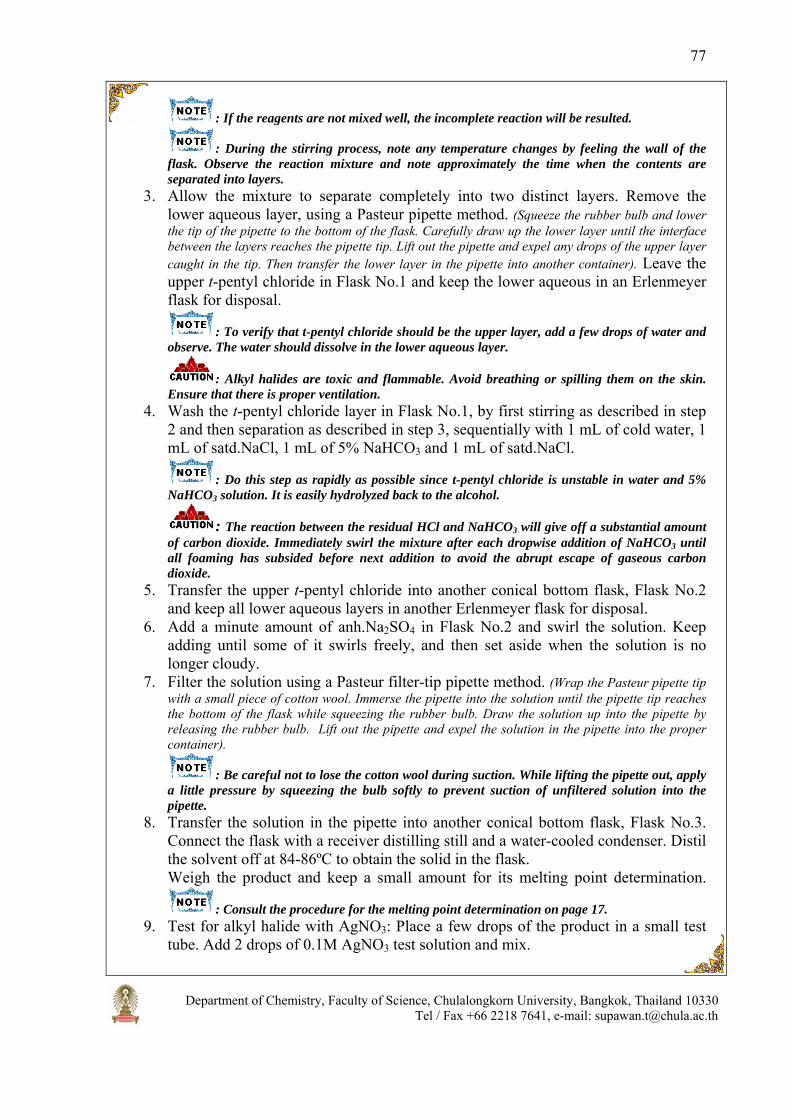
Department of Chemistry, Faculty of Science, Chulalongkorn University, Bangkok, Thailand 10330 Tel / Fax +66 2218 7641, e-mail: [email protected]
77
: If the reagents are not mixed well, the incomplete reaction will be resulted.
: During the stirring process, note any temperature changes by feeling the wall of the flask. Observe the reaction mixture and note approximately the time when the contents are separated into layers.
3. Allow the mixture to separate completely into two distinct layers. Remove the lower aqueous layer, using a Pasteur pipette method. (Squeeze the rubber bulb and lower the tip of the pipette to the bottom of the flask. Carefully draw up the lower layer until the interface between the layers reaches the pipette tip. Lift out the pipette and expel any drops of the upper layer caught in the tip. Then transfer the lower layer in the pipette into another container). Leave the upper t-pentyl chloride in Flask No.1 and keep the lower aqueous in an Erlenmeyer flask for disposal.
: To verify that t-pentyl chloride should be the upper layer, add a few drops of water and observe. The water should dissolve in the lower aqueous layer.
: Alkyl halides are toxic and flammable. Avoid breathing or spilling them on the skin. Ensure that there is proper ventilation.
4. Wash the t-pentyl chloride layer in Flask No.1, by first stirring as described in step 2 and then separation as described in step 3, sequentially with 1 mL of cold water, 1 mL of satd.NaCl, 1 mL of 5% NaHCO3 and 1 mL of satd.NaCl.
: Do this step as rapidly as possible since t-pentyl chloride is unstable in water and 5% NaHCO3 solution. It is easily hydrolyzed back to the alcohol.
: The reaction between the residual HCl and NaHCO3 will give off a substantial amount of carbon dioxide. Immediately swirl the mixture after each dropwise addition of NaHCO3 until all foaming has subsided before next addition to avoid the abrupt escape of gaseous carbon dioxide.
5. Transfer the upper t-pentyl chloride into another conical bottom flask, Flask No.2 and keep all lower aqueous layers in another Erlenmeyer flask for disposal.
6. Add a minute amount of anh.Na2SO4 in Flask No.2 and swirl the solution. Keep adding until some of it swirls freely, and then set aside when the solution is no longer cloudy.
7. Filter the solution using a Pasteur filter-tip pipette method. (Wrap the Pasteur pipette tip with a small piece of cotton wool. Immerse the pipette into the solution until the pipette tip reaches the bottom of the flask while squeezing the rubber bulb. Draw the solution up into the pipette by releasing the rubber bulb. Lift out the pipette and expel the solution in the pipette into the proper container).
: Be careful not to lose the cotton wool during suction. While lifting the pipette out, apply a little pressure by squeezing the bulb softly to prevent suction of unfiltered solution into the pipette.
8. Transfer the solution in the pipette into another conical bottom flask, Flask No.3. Connect the flask with a receiver distilling still and a water-cooled condenser. Distil the solvent off at 84-86ºC to obtain the solid in the flask. Weigh the product and keep a small amount for its melting point determination.
: Consult the procedure for the melting point determination on page 17. 9. Test for alkyl halide with AgNO3: Place a few drops of the product in a small test
tube. Add 2 drops of 0.1M AgNO3 test solution and mix.

Department of Chemistry, Faculty of Science, Chulalongkorn University, Bangkok, Thailand 10330 Tel / Fax +66 2218 7641, e-mail: [email protected]
78
: If no reaction is observed in 5 minutes at room temperature, warm the mixture and observe any change.
: Avoid skin contact. Silver nitrate produces long-lived brown stain on the skin. If it happens, immediately wash and clean the affected area with copious amount of water for at least 15 minutes. The appearance of a white precipitate indicates that a reaction has taken place between the alkyl halide and silver nitrate.
CLEANUP
1. Carefully dilute the aqueous layer with water and then neutralize it with sodium carbonate.
2. Combine the solution with other aqueous washes (water, NaHCO3) and flush them down the drain with copious amount of water.
3. Pour the contents of the test reaction in the halogenated waste.
QUESTIONS 1. Why is the t-pentyl chloride phase the upper layer? 2. NaHCO3 solution was used to wash the crude t-pentyl chloride,
- What was the purpose of this wash? Give equations. - Why is it undesirable to wash the crude halide with aqueous NaOH?
3. How was the unreacted t-pentyl alcohol removed in this experiment? 4. Explain why some 2-methyl-l-butene can be formed in this experiment.

Department of Chemistry, Faculty of Science, Chulalongkorn University, Bangkok, Thailand 10330 Tel / Fax +66 2218 7641, e-mail: [email protected]
79
LAB REPORT
SYNTHESIS OF t-PENTYL CHLORIDE BY UNIMOLECULAR NUCLEOPHILIC SUBSTITUTION
Compound Appearance Mp/bp
(°C) Molecular
weight Mass (mg)
Moles (mmol)
Volume (mL)
t-Pentyl alcohol
Conc. hydrochloric acid
t-Pentyl chloride
Observation & Conclusion ………………………………………………………………………………………………………………………………………………………………………………………………………………………………………………………………………………………………………………………………………………………………………………………………………………………………………………………………………………………………

Department of Chemistry, Faculty of Science, Chulalongkorn University, Bangkok, Thailand 10330 Tel / Fax +66 2218 7641, e-mail: [email protected]
80
SYNTHESIS OF ARYLOXYACETIC ACID BY BIMOLECULAR NUCLEOPHILIC SUBSTITUTION
OH
O2N
OCH2COOH
O2N
1. NaOH(excess)
2. ClCH2COOH3. H3O+
p-Nitrophenol p-Nitroaryloxyacetic acid
OBJECTIVES 1. To synthesize p-nitroaryloxyacetic acid from p-nitrophenol with bimolecular
nucleophilic substitution. 2. To practice reflux, extraction, thin-layer chromatography and recrystallization.
BACKGROUND
Nucleophilic substitution reactions are an important class of reactions which allow the displacement of one functional group or substituent on an sp3-hybridized carbon atom with another. There are two kinds of nucleophilic substitutions, unimolecular nucleophilic substitution (SN1) and bimolecular nucleophilic substitution (SN2). SN2 reactions occur as a concerted process. As the nucleophile approaches the carbon atom and bond forming begins, bond breaking between the carbon atom and the leaving group occurs simultaneously as shown below. The SN2 reaction thus proceeds with inversion (reversal of the configuration).
X CB
A
C B
A
X Nu
Nu CB
A
+ X-δ δ
Nu is a nucleophile, X- is a leaving group
In this experiment, p-nitroaryloxyacetic acid will be synthesized from the SN2 reaction of p-nitrophenol, a nucleophile, and chloroacetic acid which has chlorine as a leaving group.
REQUIREMENTS Apparatus and materials:
1. Conical bottom flask with stopper
2. Hot plate and heat dissipation block
3. Filtering glass funnel 4. Filtering flask
5. Pasteur pipette 6. Thin-layer chromatography
plates 7. Boiling stone 8. TLC chamber
Chemicals: p-Nitrophenol (p-NO2-C6H4-OH); sodium hydroxide (6M NaOH); chloroacetic acid (50% ClCH2COOH); hydrochloric acid (6M HCl); dichloromethane (CH2Cl2); sodium

Department of Chemistry, Faculty of Science, Chulalongkorn University, Bangkok, Thailand 10330 Tel / Fax +66 2218 7641, e-mail: [email protected]
81
carbonate (5% Na2CO3); sodium sulfate (anh.Na2SO4); ethyl acetate (CH3COOCH2CH3); hexane (C6H14).
PROCEDURE
PART I: Synthesis of aryloxyacetic acid 1. Place 400 mg (2.87 mmol) of p-nitrophenol and 2 mL of 6M NaOH in 10-mL
conical bottom flask, Flask No.1, and immediately swirl the mixture until all solid has dissolved.
: NaOH is very caustic! Wear gloves when handling this reagent. If the skin feels slippery, wash the affected area immediately under cold running water for at least 15 minutes.
2. Slowly add 1 mL (5.20 mmol) of chloroacetic acid and a boiling stone to the flask. 3. Equip the flask with a water-cooled condenser. Heat the solution to reflux at 90-100
ºC for 1.5 hour. 4. Allow the mixture to cool down. Add 4 mL of water and swirl to mix well. Add 6
M HCl to the solution until it is just acidic with litmus paper. 5. Add 1 mL of dichloromethane and stir the mixture using a Pasteur pipette method.
(Draw a portion of the lower layer up into a pipette and carefully expel it back into the flask through the upper layer. Do this repeatedly for a few times).
: If the reagents are not mixed thoroughly, the incomplete separation and the impure products or low yield will be obtained.
6. Allow the mixture to separate completely into two distinct layers. Remove the lower dichloromethane layer, using the Pasteur pipette method. (Squeeze the rubber bulb and lower the tip of the pipette to the bottom of the flask. Carefully draw up the lower layer until the interface between the layers reaches the pipette tip. Lift out the pipette and expel any drops of the upper layer caught in the tip. Then transfer the lower layer in the pipette into another container). Transfer it into another conical bottom flask, Flask No.2.
7. Extract the upper aqueous layer in Flask No.1 with another 1 mL of dichloromethane by stirring as described in step 5. Remove the lower dichloromethane layer as described in step 6. Combine the dichloromethane layer in Flask No.2.
8. Wash the dichloromethane layer in Flask No.2 with 2 mL of water and then 2 mL of 5%Na2CO3 using the Pasteur pipette method as described in steps 5 and 6.
: Aryloxyacetic acid should be extracted as a salt into the upper aqueous layer. 9. Transfer the upper solution in the pipette into another conical bottom flask. Add 6M
HCl to the solution until it is just acidic with litmus paper. Add 0.5 mL more to ensure complete precipitation of the product.
: If it is not acidic enough and is not mixed well, low or no yield of the product will be obtained.
10. Collect the product by suction filtration (Assemble a filtering glass funnel to a filtering flask and clamp. Connect the side arm of the filtering flask to the suction valve (S) of a three-way pipette bulb. Cut the filter paper to the right size and place at the bottom of the funnel. Expel air from the bulb by squeezing the air valve (A) and the bulb simultaneously. Wet the filter paper with a few drops of the solvent used and apply suction; squeeze the "suction" valve (S). Immediately transfer the suspension on to the filter. Continue applying suction by simultaneously squeezing the air valve (A) and the bulb again, and then squeeze the suction valve (S) until all the liquid has been pulled through the filter. If necessary, the solid can be washed on the filter with fresh solvent. Repeat the
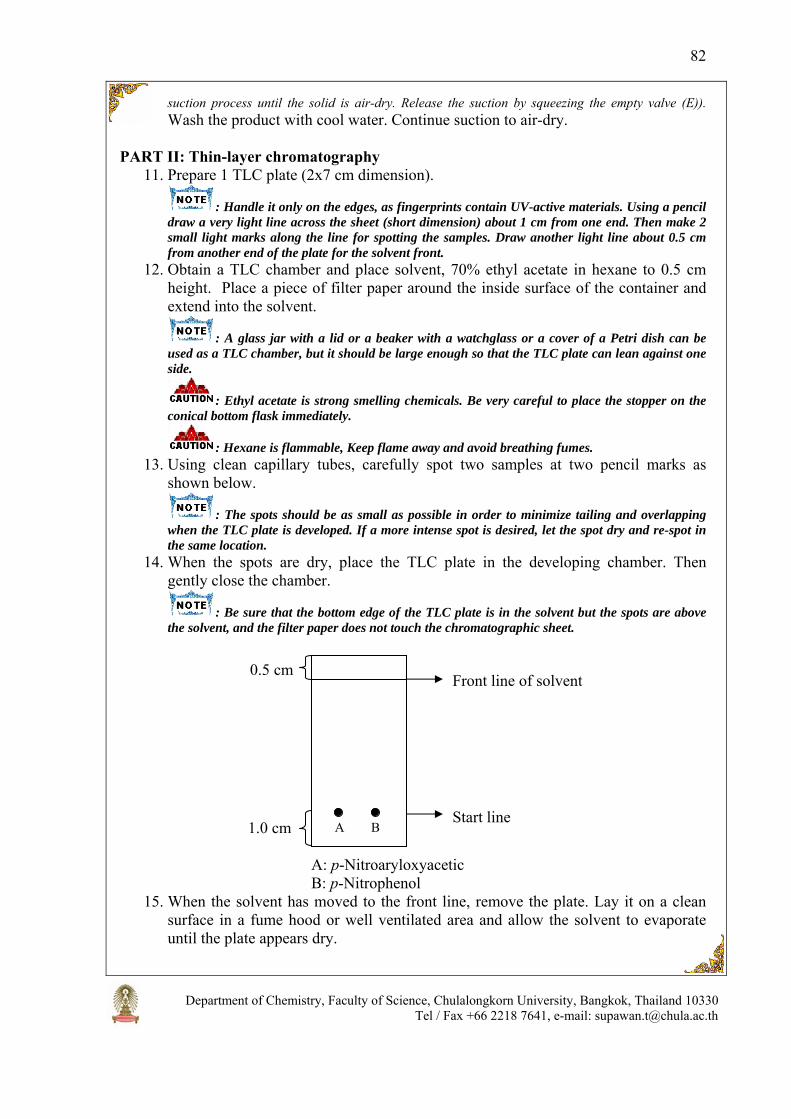
Department of Chemistry, Faculty of Science, Chulalongkorn University, Bangkok, Thailand 10330 Tel / Fax +66 2218 7641, e-mail: [email protected]
82
suction process until the solid is air-dry. Release the suction by squeezing the empty valve (E)). Wash the product with cool water. Continue suction to air-dry.
PART II: Thin-layer chromatography
11. Prepare 1 TLC plate (2x7 cm dimension).
: Handle it only on the edges, as fingerprints contain UV-active materials. Using a pencil draw a very light line across the sheet (short dimension) about 1 cm from one end. Then make 2 small light marks along the line for spotting the samples. Draw another light line about 0.5 cm from another end of the plate for the solvent front.
12. Obtain a TLC chamber and place solvent, 70% ethyl acetate in hexane to 0.5 cm height. Place a piece of filter paper around the inside surface of the container and extend into the solvent.
: A glass jar with a lid or a beaker with a watchglass or a cover of a Petri dish can be used as a TLC chamber, but it should be large enough so that the TLC plate can lean against one side.
: Ethyl acetate is strong smelling chemicals. Be very careful to place the stopper on the conical bottom flask immediately.
: Hexane is flammable, Keep flame away and avoid breathing fumes. 13. Using clean capillary tubes, carefully spot two samples at two pencil marks as
shown below.
: The spots should be as small as possible in order to minimize tailing and overlapping when the TLC plate is developed. If a more intense spot is desired, let the spot dry and re-spot in the same location.
14. When the spots are dry, place the TLC plate in the developing chamber. Then gently close the chamber.
: Be sure that the bottom edge of the TLC plate is in the solvent but the spots are above the solvent, and the filter paper does not touch the chromatographic sheet.
A: p-Nitroaryloxyacetic B: p-Nitrophenol
15. When the solvent has moved to the front line, remove the plate. Lay it on a clean surface in a fume hood or well ventilated area and allow the solvent to evaporate until the plate appears dry.
Start line
Front line of solvent 0.5 cm
1.0 cm A B

Department of Chemistry, Faculty of Science, Chulalongkorn University, Bangkok, Thailand 10330 Tel / Fax +66 2218 7641, e-mail: [email protected]
83
16. Visualize the plate under UV light and immediately draw a light pencil line around each spot.
: UV radiation is harmful to eyes. Do not look directly at the UV lamp. 17. Measure all the distances traveled by the compounds and solvent. Calculate the
retention factor (Rf) for each compound.
CLEANUP 1. Carefully dilute all solvents with water and flush them down the drain with copious
amount of water. 2. Pour the mixture of ethyl acetate and hexane to the organic waste container. 3. Pour the waste dichloromethane to the halogenated hydrocarbon waste container.
QUESTIONS
1. If p-nitrophenol is unavailable, can any other phenol be used in this reaction and which type of substitutions will make this reaction work well?
2. What is the purpose for the first acidification of the solutions with 6M HCl in this experiment?
3. Why is 5% Na2CO3, needed? Write the equation of this reaction.
LAB REPORT
SYNTHESIS OF ARYLOXYACETIC ACID BY BIMOLECULAR NUCLEOPHILIC SUBSTITUTION
Sample Appearance Mp /
bp (ºC)
MW Weight (mg)
Mole (mmol)
Volume (mL)
p-Nitrophenol Sodium hydroxide Chloroacetic acid p-Nitroaryloxyacetic
Observation & Conclusion …………………………………………………………………………………………………………………………………………………………………………………………………………………………………………………………………………………………………………………………………………………………………………………………………………………………………………………………………… Thin-layer chromatography Rf of p-nitrophenol = …………………….……. Rf of p-nitroaryloxyacetic acid = …………………………..

Department of Chemistry, Faculty of Science, Chulalongkorn University, Bangkok, Thailand 10330 Tel / Fax +66 2218 7641, e-mail: [email protected]
84
DEHYDRATION OF ALCOHOL USING A CATION EXCHANGE RESIN CATALYST
OH Amberlyst-15
heat
Cyclohexanol Cyclohexene
OBJECTIVES 1. To synthesize cyclohexene by dehydration of cyclohexanol using Amberlyst-15. 2. To practice distillation with the receiver distilling still and testing for unsaturation.
BACKGROUND
The most common methods for introducing unsaturation into the organic compounds, to prepare alkenes, are dehydration and dehydrohalogenation. This type of reactions is known as an elimination reaction. Dehydration reaction is readily accomplished by heating the alcohol in the presence of an acid catalyst such as sulfuric acid or phosphoric acid. It has recently been reported that a cation exchange resin can be used as a successful catalyst replacing those mineral acids which are corrosive.
In this experiment, dehydration of cyclohexanol will be carried out using Amberlyst-15, a cation exchange resin, as a catalyst. The product will be tested for the presence of unsaturation by reacting with bromine in carbon tetrachloride and potassium permanganate solution.
REQUIREMENTS Apparatus and materials:
1. Conical bottom flasks 2. Receiver distilling still 3. Condenser 4. Pasteur pipette 5. Thermometer
6. Hot plate and heat dissipation block
7. Boiling stone 8. Amberlyst-15
Chemicals: Cyclohexanol (C6H11-OH); sodium chloride (satd.NaCl); sodium sulfate (anh.Na2SO4); bromine in carbon tetrachloride (1%Br2/CCl4); potassium permanganate (5% KMnO4).
PROCEDURE 1. Place 2g (10 mmol) of cyclohexanol in a 5-mL conical bottom flask, Flask No.1.
Add 0.20 g of the ion exchange resin (Amberlyst 15) and a boiling stone to the flask.
: Cyclohexanol is a volatile and flammable liquid and is irritant. Keep flame away and avoid breathing fumes.
2. Connect the flask to a receiver distilling still fitted with a water-cooled condenser. Gradually heat the mixture until the product begins to distil.

Department of Chemistry, Faculty of Science, Chulalongkorn University, Bangkok, Thailand 10330 Tel / Fax +66 2218 7641, e-mail: [email protected]
85
: Regulate heating so that the distillation takes 30-45 minutes.
3. When the distillation is finished, transfer the crude product from the trough of the receiver distilling still by using a Pasteur pipette to another 5-mL conical bottom flask, Flask No.2.
4. Rinse the inside of the receiver distilling still with 1 mL of satd.NaCl solution and add this solution to Flask No.2.
5. Stir the mixture using a Pasteur pipette method. (Draw a portion of the lower layer up into a pipette and carefully expel it back into the flask, through the upper layer. Do this repeatedly for a few times).
: If the mixture is not mixing well, the incomplete separation and the impure products will be obtained.
6. Allow the mixture to separate completely into two distinct layers. Remove the lower aqueous layer, using a Pasteur pipette method (Squeeze the rubber bulb and lower the tip of the pipette to the bottom of the flask. Carefully draw up the lower layer until the interface between the layers reaches the pipette tip. Lift out the Pasteur pipette f and expel any drops of the upper layer caught in the tip. Then transfer the lower layer in the pipette into another container). Transfer it into another conical bottom flask, Flask No.3.
7. Add a minute amount of anh.Na2SO4, and swirl the solution. Keep adding until some of it swirls freely, and then set aside when the solution is no longer cloudy.
8. Filter the solution using a Pasteur filter-tip pipette method. (Wrap the Pasteur pipette tip with a small piece of cotton wool. Immerse the pipette into the solution until the pipette tip reaches the bottom of the flask while squeezing the rubber bulb. Draw the solution up into the pipette by releasing the rubber bulb. Take off the cotton wool and expel the solution in the pipette into the proper container).
: Be careful not to lose the cotton wool during suction. While lifting the pipette out, apply a little pressure by squeezing the bulb softly to prevent suction of unfiltered solution into the pipette.
9. While the product is drying, clean and dry the receiver distilling still.
: The receiver distilling still must be completely dry for the second distillation step. 10. Add a boiling stone into Flask No.3. Assemble the apparatus for simple distillation
(Connect the flask with a thermometer adapter fitted with a thermometer on top and a condenser at a side arm. Position the mercury bulb of thermometer adjacent to arm of the thermometer adapter. Connect the end of condenser with a receiving adapter attached with an appropriate container).
11. Distil the product. Collect the fraction that boils between 82 and 85oC. Weigh and calculate percent yield.
12. Test the product for unsaturation by adding it dropwise into two test tubes containing a few drops of 1% Br2/CH2Cl2 and 5% KMnO4 separately. Shake well after each addition and observe the change in color of both reagent solutions. Record the results.
CLEANUP
1. Place Amberlyst-15 in an appropriate waste container. 2. Aqueous solutions should be diluted and poured down the drain with copious
amount of water. 3. Pour the unsaturated testing solution into the appropriate waste container.

Department of Chemistry, Faculty of Science, Chulalongkorn University, Bangkok, Thailand 10330 Tel / Fax +66 2218 7641, e-mail: [email protected]
86
4. Add water to dissolve sodium sulfate until solid disappear and flush them down the drain with copious amount of water.
QUESTIONS
1. Write the equation showed the dehydration reaction from tertiary amyl alcohol by using Amberlyst-15 as a catalyst.
2. From Q1, what is the major product? Write the mechanism. 3. From Q1, is the reaction faster or slower than the dehydration of cyclohexanol?
Explain.
LAB REPORT
DEHYDRATION OF ALCOHOL BY USING A CATION EXCHANGE RESIN CATALYST
Compounds Appearance Mp/
bp (ºC)
MW Weight (mg)
Moles (mmol)
Volume (mL)
Other
Cyclohexanol Amberlyst-15 Cyclohexene
Product testing
Reagent Color of reagent Observed results 1. Br2/CCl4 2. KMnO4
Observation & Conclusion ………………………………………………………………………………………… ………………………………………………………………………………………… ………………………………………………………………………………………… ………………………………………………………………………………………… …………………………………………………………………………………………
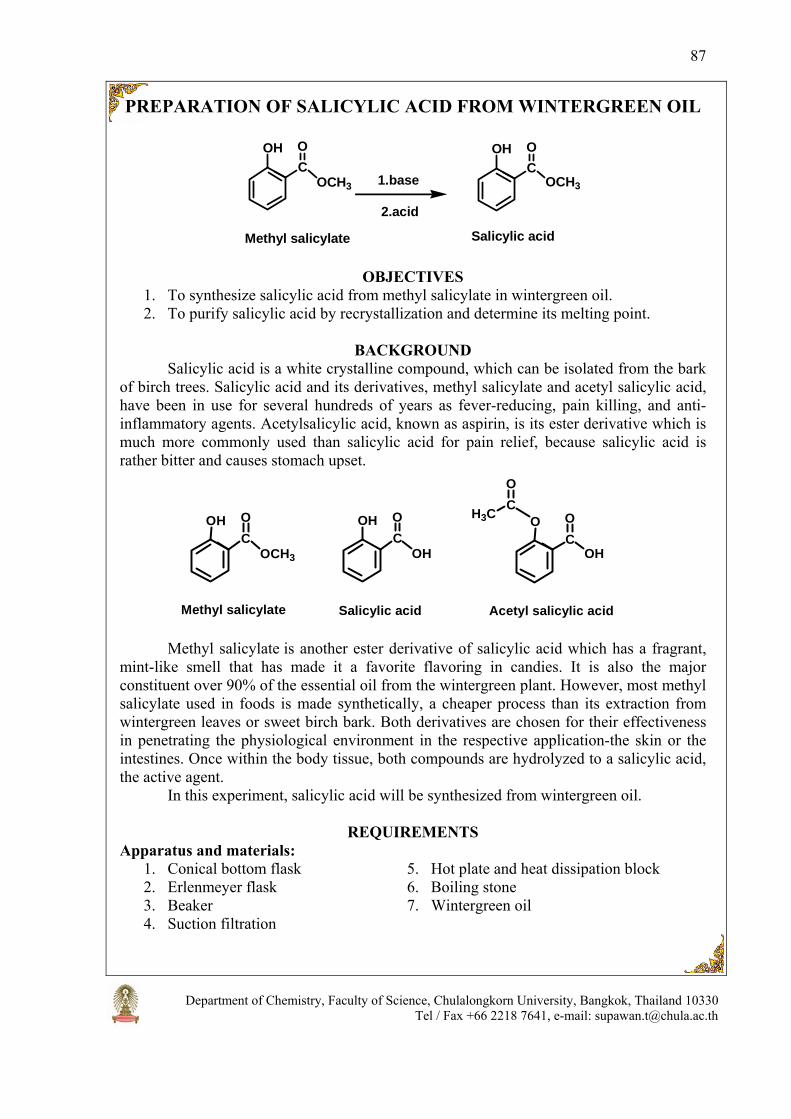
Department of Chemistry, Faculty of Science, Chulalongkorn University, Bangkok, Thailand 10330 Tel / Fax +66 2218 7641, e-mail: [email protected]
87
PREPARATION OF SALICYLIC ACID FROM WINTERGREEN OIL
COH
OCH3
OC
OH
OCH3
O
1.base
2.acid
Methyl salicylate Salicylic acid
OBJECTIVES 1. To synthesize salicylic acid from methyl salicylate in wintergreen oil. 2. To purify salicylic acid by recrystallization and determine its melting point.
BACKGROUND Salicylic acid is a white crystalline compound, which can be isolated from the bark of birch trees. Salicylic acid and its derivatives, methyl salicylate and acetyl salicylic acid, have been in use for several hundreds of years as fever-reducing, pain killing, and anti-inflammatory agents. Acetylsalicylic acid, known as aspirin, is its ester derivative which is much more commonly used than salicylic acid for pain relief, because salicylic acid is rather bitter and causes stomach upset.
COH
OCH3
OC
O
OH
O
Methyl salicylate Acetyl salicylic acid
COH
OH
O
Salicylic acid
CH3C
O
Methyl salicylate is another ester derivative of salicylic acid which has a fragrant,
mint-like smell that has made it a favorite flavoring in candies. It is also the major constituent over 90% of the essential oil from the wintergreen plant. However, most methyl salicylate used in foods is made synthetically, a cheaper process than its extraction from wintergreen leaves or sweet birch bark. Both derivatives are chosen for their effectiveness in penetrating the physiological environment in the respective application-the skin or the intestines. Once within the body tissue, both compounds are hydrolyzed to a salicylic acid, the active agent.
In this experiment, salicylic acid will be synthesized from wintergreen oil.
REQUIREMENTS Apparatus and materials:
1. Conical bottom flask 2. Erlenmeyer flask 3. Beaker 4. Suction filtration
5. Hot plate and heat dissipation block 6. Boiling stone 7. Wintergreen oil

Department of Chemistry, Faculty of Science, Chulalongkorn University, Bangkok, Thailand 10330 Tel / Fax +66 2218 7641, e-mail: [email protected]
88
Chemicals: Sodium hydroxide (20% NaOH); ferric chloride (2.5% FeCl3); dichloromethane (CH2Cl2); sulfuric acid (6M H2SO4).
PROCEDURE To carry out the reaction
1. Place 1 g (know the exact mass) of wintergreen oil and 5 mL of 20% NaOH in a 10-mL conical bottom flask.
: NaOH is corrosive. Prevent eye, skin, and clothing contact. Avoid inhaling or ingesting this compound.
2. Add a boiling stone and equip with a condenser, then gently reflux the mixture for 15 minutes.
3. After cooling to room temperature, wash with two 2-mL portions of dichloromethane using a Pasteur pipette method. (Draw a portion of the lower layer up into a pipette and expel it back carefully into the flask, through the upper layer. Do this repeatedly for a few times.)
4. Remove the lower dichloromethane layer using a Pasteur pipette method. (Squeeze the rubber bulb while immersing the Pasteur pipette into the solution until its tip touches the bottom of the flask. Carefully draw up the lower layer until the interface between the layers reaches the pipette tip. Lift out the Pasteur pipette and expel any drops of the upper layer that might be caught in the tip. Then transfer the lower layer in the pipette into another container). Transfer it into an Erlenmeyer flask for disposal later.
5. Carefully add 6M H2SO4 in approximately 0.5-mL increments to the aqueous solution in the conical bottom flask until it is just acidic with litmus paper.
: A heavy white precipitate of salicylic acid will form and remain even when the mixture is well swirling.
: Conc.H2SO4 is very corrosive and may cause serious chemical burns if it comes into contact with the skin. Wear gloves when handling this chemical. If accidentally a spill happens, immediately flood the affected area with cold water and then with 5% NaHCO3 solution.
6. Add 0.5 mL more to ensure complete precipitation of the salicylic acid. To isolate the product
7. Cool the mixture in an ice-water bath 8. Collect the precipitated crude product by suction filtration. (Assemble a filtering glass
funnel to a filtering flask and clamp. Connect the side arm of the filtering flask to the suction valve (S) of a three-way pipette bulb. Cut the filter paper to the right size and place at the bottom of the funnel. Expel air from the bulb by squeezing the air valve (A) and the bulb simultaneously. Wet the filter paper with a few drops of the solvent used and apply suction; squeeze the "suction" valve (S). Immediately transfer the suspension on to the filter. Continue applying suction by simultaneously squeezing the air valve (A) and the bulb again, then squeeze the suction valve (S) until all the liquid has been pulled through the filter. If necessary, the solid can be washed on the filter with ice-cold water. Repeat the suction process until the solid is air-dry. Release the suction by squeezing the empty valve (E)).
To purify the product 9. Recrystallize the product from water in a 25-mL Erlenmeyer flask.
: Consult the procedure for recrystallization on page 20.
Department of Chemistry, Faculty of Science, Chulalongkorn University, Bangkok, Thailand 10330 Tel / Fax +66 2218 7641, e-mail: [email protected]
89
10. After the recrystallized product has dried completely, measure its mass and calculate its theoretical and % yield.
To characterize the product and estimate its purity:
11. Determine the melting point of the product.
: Consult the procedure for the melting point determination on page 17.
: The melting point of salicylic acid is 157°C. 12. Dissolve a small amount of the product in water, add 2-3 drops of ferric chloride
solution and observe the color of solution.
CLEANUP 1. Pour the mixture of dichloromethane to the waste container for halogenated
hydrocarbon. 2. Neutralize any excess acid in the filtrate of the synthesis using 5% NaHCO3 and
flush it down the drain with copious amount of water. 3. The recrystallization filtrate can be flushed directly down the drain with copious
amount of water.
QUESTIONS 1. In the synthesis of salicylic acid from wintergreen oil, 5 mL of 20% NaOH was
used, can it be used more or less than this amount? 2. What will happen when 20% NaOH is added into the wintergreen oil and then the
mixture is refluxed? Write a balanced equation and name the product. 3. Write an equation for the synthesis of aspirin from salicylic acid.
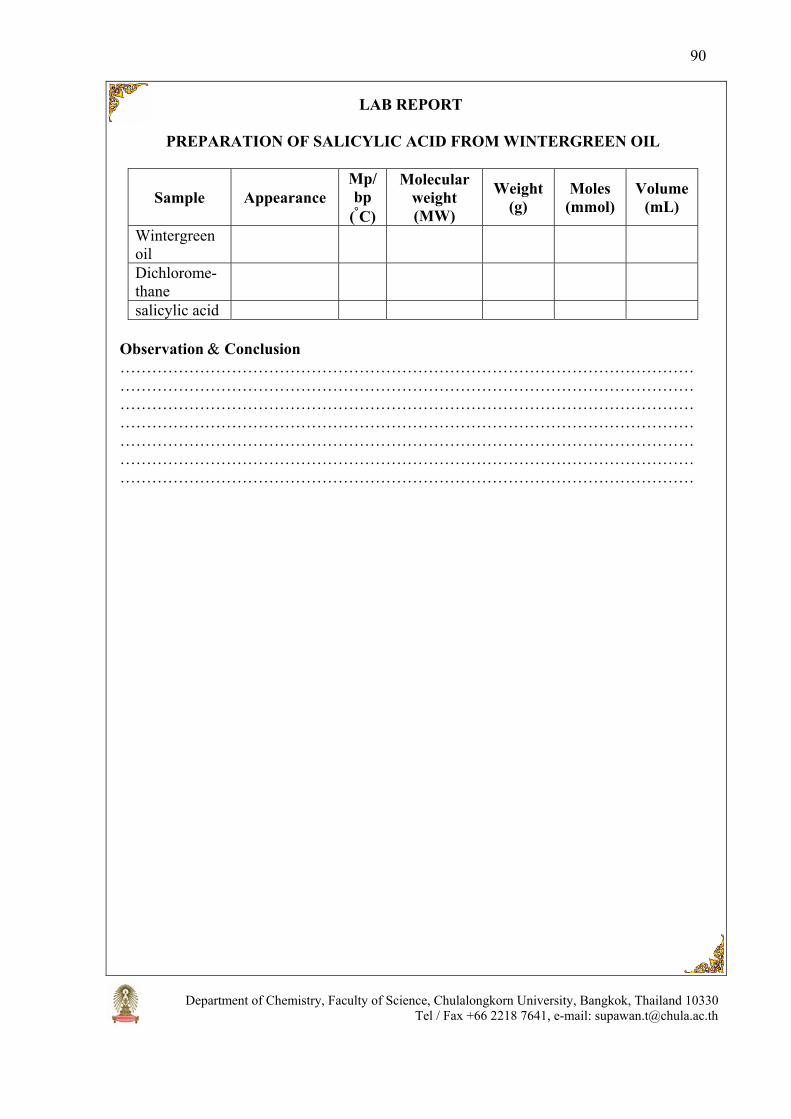
Department of Chemistry, Faculty of Science, Chulalongkorn University, Bangkok, Thailand 10330 Tel / Fax +66 2218 7641, e-mail: [email protected]
90
LAB REPORT
PREPARATION OF SALICYLIC ACID FROM WINTERGREEN OIL
Sample Appearance Mp/bp
(°C)
Molecular weight (MW)
Weight (g)
Moles (mmol)
Volume (mL)
Wintergreen oil
Dichlorome-thane
salicylic acid Observation & Conclusion ………………………………………………………………………………………………………………………………………………………………………………………………………………………………………………………………………………………………………………………………………………………………………………………………………………………………………………………………………………………………………………………………………………………………………………………………………………………………………………………………………………………………

Department of Chemistry, Faculty of Science, Chulalongkorn University, Bangkok, Thailand 10330 Tel / Fax +66 2218 7641, e-mail: [email protected]
91
ESTERIFICATION: SYNTHESIS OF METHYL p-CHLOROBENZOATE
CClO
OH CH3OH CClO
OCH3 H2O
p-Chlorobenzoic acid Methyl p-chlorobenzoate
H2SO4
OBJECTIVE 1. To synthesize methyl p-chlorobenzoate by esterification reaction
BACKGROUND
Esters are derivatives of carboxylic acids which can be prepared by four methods. However, direct esterification of a carboxylic acid with an alcohol under acidic condition, called Fischer Esterification, is the most common method. It is an equilibrium reaction which makes it impossible to obtain a 100% yield of ester by this method. To overcome this difficulty, a large excess of one of the reagents (usually the alcohol) is used along with a drying agent. Both of these tactics have the effect of shifting the equilibrium to the right and increasing the production of ester. This amount can further be increased by distilling the ester out of the mixture as it is formed (the ester is often the lowest boiling member of the mixture).
In this experiment, methyl-p-chlorobenzoate will be synthesized from p-chlorobenzoic acid and methanol.
REQUIREMENTS
Apparatus and materials: 1. Conical bottom flasks 2. Condenser 3. Pasteur pipette 4. Filtering flask
5. Suction glass funnel 6. Receiver distilling still 7. Hot plate and heat dissipation
block Chemicals: p-Chlorobenzoic acid (p-Cl-C6H4-COOH); methanol (CH3OH); sulfuric acid (conc.H2SO4); dichloromethane (CH2Cl2); sodium hydrogenbicarbonate (satd.NaHCO3); sodium sulfate (anh.Na2SO4).
PROCEDURE 1. Place 300 mg (3.2 mmol) of p-chlorobenzoic and 3 mL of methanol in 10-mL
conical bottom flask and a boiling stone in the flask.
: p-Chlorobenzoic acid is irritant. Wear gloves while handling. 2. Connect the flask with a receiver distilling still with a water-cooled condenser and
fill up the trough with methanol. Heat the mixture at reflux in heat dissipation block on a hot plate for 1 hour.
3. Remove the apparatus system from the heat and allow the mixture to cool down. 4. Add 3 mL of water, extract with 2.5 mL of dichloromethane and stir the mixture
using a Pasteur pipette method. (Draw a portion of the lower layer up into a pipette and carefully expel it back into the flask, through the upper layer. Do this repeatedly for a few times).

Department of Chemistry, Faculty of Science, Chulalongkorn University, Bangkok, Thailand 10330 Tel / Fax +66 2218 7641, e-mail: [email protected]
92
: Dichloromethane is flammable and toxic. Keep flame away and avoid breathing fumes. 5. Allow the mixture to separate completely into two distinct layers. Remove the
lower dichloromethane layer, using a Pasteur pipette method. (Squeeze the rubber bulb and lower the tip of the pipette to the bottom of the flask. Carefully draw up the lower layer until the interface between the layers reaches the pipette tip. Lift out the pipette and expel any drops of the upper layer caught in the tip. Then transfer the lower layer in the pipette into another container). Transfer it into another conical bottom flask.
6. Wash the dichloromethane layer twice with 2.5 mL of satd.NaHCO3 each. Stir the mixture using a Pasteur pipette method as described in step 4 and remove the lower layer as described in step 5.
7. Add a minute amount of anh.Na2SO4, and swirl the solution. Keep adding until some of it swirls freely, and then set aside when the solution is no longer cloudy.
8. Filter the solution using a Pasteur filter-tip pipette method (Wrap the Pasteur pipette tip with a small piece of cotton wool. Immerse the pipette into the solution until the pipette tip reaches the bottom of the flask while squeezing the rubber bulb. Draw the solution up into the pipette by releasing the rubber bulb. Take off the cotton wad and expel the solution in the pipette into the proper container).
: Be careful not to lose the cotton wool during suction. While lifting the pipette out, apply a little pressure by squeezing the bulb softly to prevent suction of unfiltered solution into the pipette.
9. Transfer the solution in the pipette into another conical bottom flask. Connect the flask with a receiver distilling still and a water-cooled condenser. Distil off the dichloromethane to obtain the solid, pale-yellow precipitate, at the bottom of the flask.
10. Further add a few drops of methanol, boil and often swirl the mixture until the clear solution is obtained. Place the flask in an ice-water bath for 5 minutes.
: The product can be observed when a drop of water reaches the solution. 11. Collect the product A by suction filtration. (Assemble a filtering glass funnel to a filtering
flask and clamp. Connect the side arm of the filtering flask to the suction valve (S) of a three-way pipette bulb. Cut the filter paper to the right size and place at the bottom of the funnel. Expel air from the bulb by squeezing the air valve (A) and the bulb simultaneously. Wet the filter paper with a few drops of the solvent used and apply suction; squeeze the "suction" valve (S). Immediately transfer the suspension on to the filter. Continue applying suction by simultaneously squeezing the air valve (A) and the bulb again, then squeeze the suction valve (S) until all the liquid has been pulled through the filter. If necessary, the solid can be washed on the filter with fresh solvent. Repeat the suction process until the solid is air-dry. Release the suction by squeezing the empty valve (E)).
12. Wash the crystals with the solvent, cool methanol/water (4:1), 0.5 mL and continue suction to air-dry.
13. Weigh the crystals and calculate its percent recovery. Determine its melting point.
: Consult the procedure for the melting point determination on page 17.
CLEANUP 1. Pour dichloromethane waste into chlorinated hydrocarbon waste container. 2. Add water to dissolve sodium sulfate until solid disappear and flush them down the
drain with copious amount of water.

Department of Chemistry, Faculty of Science, Chulalongkorn University, Bangkok, Thailand 10330 Tel / Fax +66 2218 7641, e-mail: [email protected]
93
QUESTIONS 1. Write the mechanism of this reaction. 2. Explain why the lower organic layer must be washed with satd.NaHCO3. 3. What is the solvent used for precipitating an ester?
LAB REPORT
ESTERIFICATION: SYNTHESIS OF METHYL p-CHLOROBENZOATE
Substance Appearance Mp/bp
(ºC) MW Weight
(mg) Mole
(mmol) Volume
(mL) p-Chlorobenzoic acid
Conc.sulfuric acid Methyl-p-chloro benzoic benzoate
Observation & Conclusion ………………………………………………………………………………………………………………………………………………………………………………………………………………………………………………………………………………………………………………………………………………………………………………………………………………………………………………………………………………………………………………………………………………………………………………………………
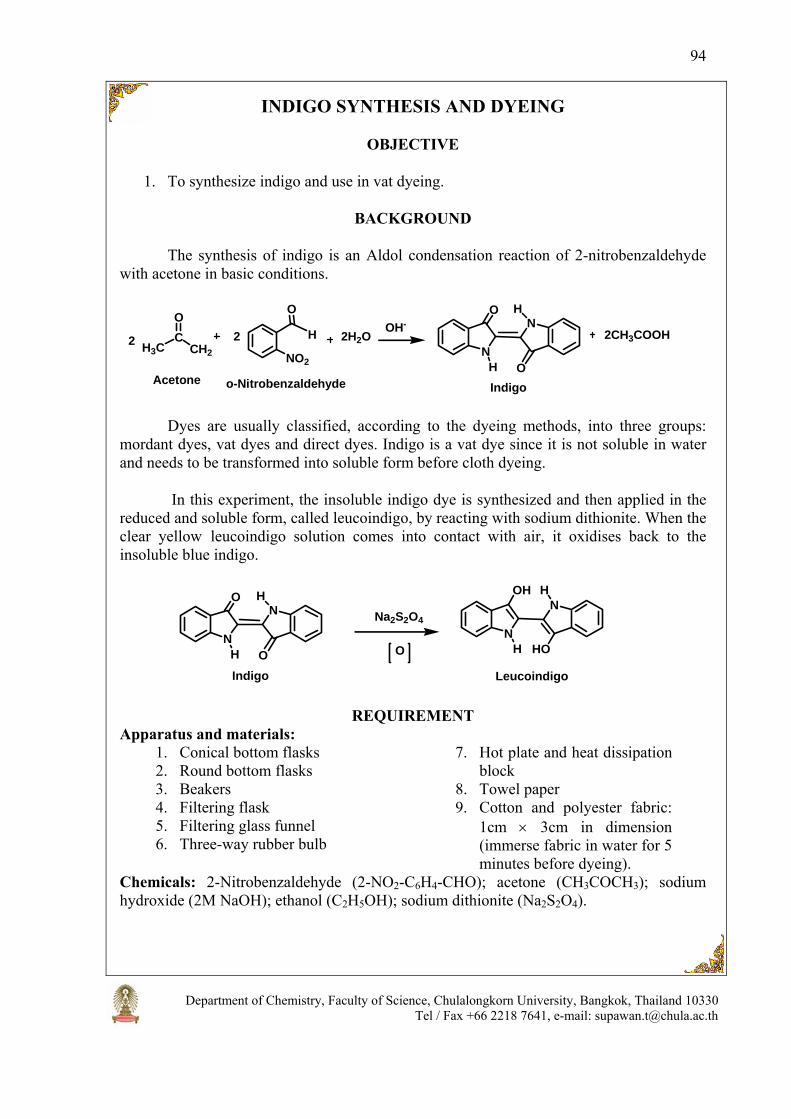
Department of Chemistry, Faculty of Science, Chulalongkorn University, Bangkok, Thailand 10330 Tel / Fax +66 2218 7641, e-mail: [email protected]
94
INDIGO SYNTHESIS AND DYEING
OBJECTIVE
1. To synthesize indigo and use in vat dyeing.
BACKGROUND
The synthesis of indigo is an Aldol condensation reaction of 2-nitrobenzaldehyde with acetone in basic conditions.
CO
H3C CH2
H
NO2
22OH-
N
ON
H
H
O
O
Acetone o-Nitrobenzaldehyde Indigo
2H2O 2CH3COOH
Dyes are usually classified, according to the dyeing methods, into three groups: mordant dyes, vat dyes and direct dyes. Indigo is a vat dye since it is not soluble in water and needs to be transformed into soluble form before cloth dyeing.
In this experiment, the insoluble indigo dye is synthesized and then applied in the reduced and soluble form, called leucoindigo, by reacting with sodium dithionite. When the clear yellow leucoindigo solution comes into contact with air, it oxidises back to the insoluble blue indigo.
N
ON
H
H
OIndigo
Na2S2O4N
OHN
H
H
HO
Leucoindigo
O
REQUIREMENT Apparatus and materials:
1. Conical bottom flasks 2. Round bottom flasks 3. Beakers 4. Filtering flask 5. Filtering glass funnel 6. Three-way rubber bulb
7. Hot plate and heat dissipation block
8. Towel paper 9. Cotton and polyester fabric:
1cm × 3cm in dimension (immerse fabric in water for 5 minutes before dyeing).
Chemicals: 2-Nitrobenzaldehyde (2-NO2-C6H4-CHO); acetone (CH3COCH3); sodium hydroxide (2M NaOH); ethanol (C2H5OH); sodium dithionite (Na2S2O4).

Department of Chemistry, Faculty of Science, Chulalongkorn University, Bangkok, Thailand 10330 Tel / Fax +66 2218 7641, e-mail: [email protected]
95
PROCEDURE PART I: Synthesis of indigo
1. Dissolve 250 mg (1.65 mmol) of 2-nitrobenzaldehyde in 5 mL of acetone in a 10-mL conical bottom flask.
2. Slowly add 1 mL of 2M NaOH in the flask.
: NaOH is corrosive. Prevent eye, skin, and clothing contact. Avoid inhaling or ingesting this compound.
: The reaction mixture will get very hot and evaporate the acetone when adding NaOH too fast.
3. Stir the mixture for a few minutes, and then collect the purple-blue precipitate by suction filtration (Assemble a filtering glass funnel to a filtering flask and clamp. Connect the side arm of the filtering flask to the suction valve (S) of a three-way pipet bulb. Cut the filter paper to the right size and place at the bottom of the funnel. Expel air from the bulb by squeezing the air valve (A) and the bulb simultaneously. Wet the filter paper with a few drops of the solvent used and apply suction; squeeze the "suction" valve (S). Immediately transfer the suspension on to the filter. Continue applying suction by simultaneously squeezing the air valve (A) and the bulb again, and then squeeze the suction valve (S) until all the liquid has been pulled through the filter. If necessary, the solid can be washed on the filter with fresh solvent. Repeat the suction process until the solid is air-dry. Release the suction by squeezing the empty valve (E)).
4. Wash the product with water until the washings are colorless, and then wash with 5 mL of ethanol and continue suction to air-dry.
5. Weigh and calculate the yield of the product.
: Indigo is not hazardous but it will stain skin and clothes. Do not touch the dye or dyed material with your fingers.
PART II: Vat dyeing of fabric
6. Mix 200 mg of indigo with 1 mL of ethanol in a 25-mL round bottom flask. 7. Add 1 mL of water and 3 mL of 2M NaOH solution. 8. Prepare a solution of the sodium dithionite (a small amount at the end of a spatula)
in 20 mL of water in a beaker. Add this solution into the mixture in round bottom flask. Put a stopper on the flask.
: Sodium dithionite powder can spontaneously ignite if it is left in moist air. Be careful not to spill the sodium dithionite and immediately close the cap to its bottle after use.
9. Gently heat the mixture up to 80°C on a heat dissipation block.
: Watch the temperature of the heat dissipation block by reading the thermometer at the block. Check the temperature of the mixture with a thermometer, if necessary, and always returning the stopper on the flask afterwards.
10. When a clear yellow solution is obtained, immerse two small pieces of cotton and polyester in the ‘vat’ and leave for 2 min.
11. Remove the cotton and polyester and put it on the towel paper for quickly absorbing the residue solution and hang them in the air to develop the color and dry.
12. Rinse the cloths with water until the washings are clear and hang them to dry.
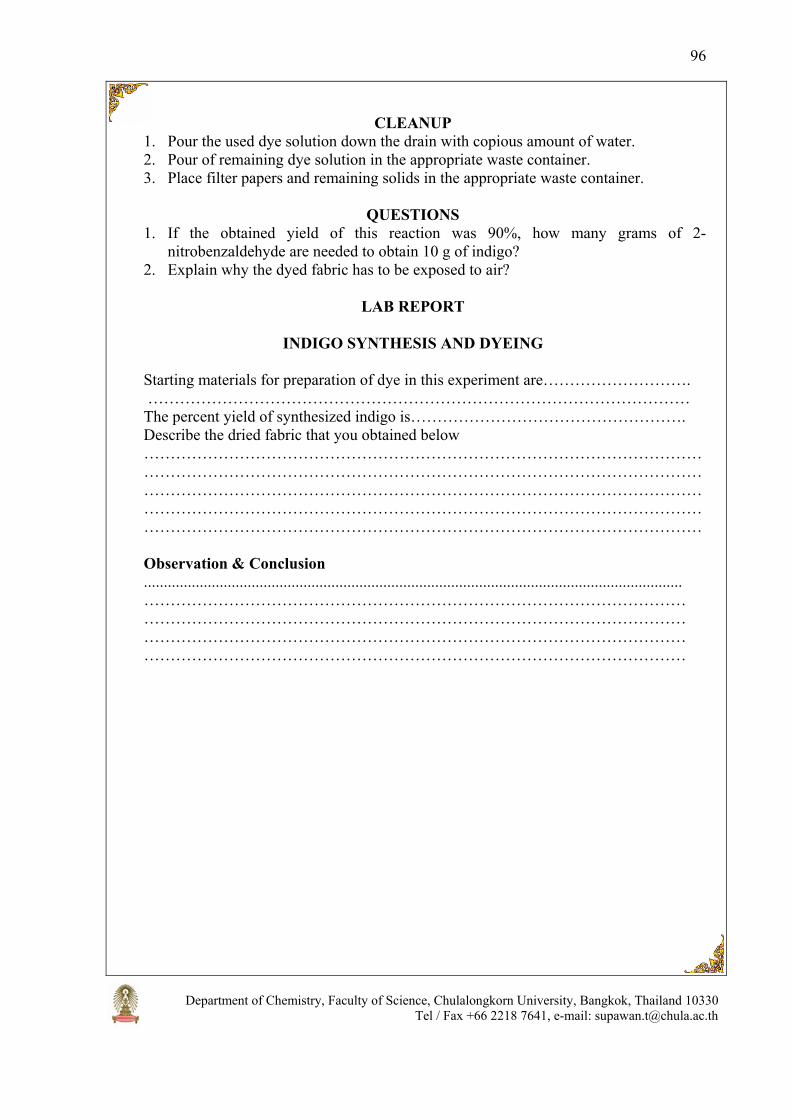
Department of Chemistry, Faculty of Science, Chulalongkorn University, Bangkok, Thailand 10330 Tel / Fax +66 2218 7641, e-mail: [email protected]
96
CLEANUP
1. Pour the used dye solution down the drain with copious amount of water. 2. Pour of remaining dye solution in the appropriate waste container. 3. Place filter papers and remaining solids in the appropriate waste container.
QUESTIONS 1. If the obtained yield of this reaction was 90%, how many grams of 2-
nitrobenzaldehyde are needed to obtain 10 g of indigo? 2. Explain why the dyed fabric has to be exposed to air?
LAB REPORT
INDIGO SYNTHESIS AND DYEING
Starting materials for preparation of dye in this experiment are………………………. ………………………………………………………………………………………… The percent yield of synthesized indigo is……………………………………………. Describe the dried fabric that you obtained below
………………………………………………………………………………………………………………………………………………………………………………………………………………………………………………………………………………………………………………………………………………………………………………………………………………………………………………………………………………… Observation & Conclusion ....................................................................................................................................... ………………………………………………………………………………………… ………………………………………………………………………………………… ………………………………………………………………………………………… …………………………………………………………………………………………

Department of Chemistry, Faculty of Science, Chulalongkorn University, Bangkok, Thailand 10330 Tel / Fax +66 2218 7641, e-mail: [email protected]
97
ALCOHOLYSIS OF FAT
CH2
CH
CH2
CH2
CH
CH2
COOR
Triglyceride Methanol Glycerol Methyl ester of fatty acid
COOR
COOR
OH
OH
OH
3CH3OH 3RCO2CH3
OBJECTIVES 1. To synthesize methyl ester of fatty acid from fat by alcoholysis reaction. 2. To identify the products by thin-layer chromatography.
BACKGROUND
Vegetable fats and oils are composed of mainly triglycerides, esters of free fatty acids and glycerol or glycerin. Alcoholysis of fats and oils, using methanol in the presence of catalyst, gives a mixture of the methyl esters of the fatty acids. This procedure is called transesterification. The product can be used as the fuel in diesel engine, known as biodiesel. In this experiment, biodiesel will be prepared from palm oil (or any available vegetable oil) and methanol. The by-product of the reaction is glycerol or glycerin, which is immiscible in the newly formed esters. The crude biodiesel product requires washing with water to remove excess alcohol, traces of alkoxide and glycerol. The products will be identified by thin-layer chromatography.
REQUIREMENTS Apparatus and materials:
1. Conical bottom flasks 2. Erlenmeyer flasks 3. Filtering glass funnel 4. Filtering flask 5. Condenser 6. Pasteur pipette
7. Hot plate and heat dissipation block
8. TLC plates 9. Palm oil or other vegetable oil 10. Miniature water pump 11. Capillary tube
Chemicals: Potassium hydroxide in absolute methanol (KOH/CH3OH 1.5% wt/v); sodium sulfate (anh.Na2SO4); hexane (C6H14); diethyl ether (C2H5OC2H5); formic acid (HCO2H); sulfuric acid (30% H2SO4).
PROCEDURE PART I: Alcoholysis of fat
1. Place 5 g of vegetable oil in 10-mL conical bottom flask with a stopper. Heat the vegetable oil to 80°C.
: Watch the temperature of the heat dissipation block by reading the thermometer at the block. Check the temperature of the oil with a thermometer, if necessary, and always returning the stopper on the flask afterwards.
2. Add 1.5 mL of 1.5% KOH. Stir the mixture for 5 minutes using a Pasteur pipette method. (Draw a portion of the lower layer up into a pipette and carefully expel it back into the flask, through the upper layer. Do this repeatedly for a few times).
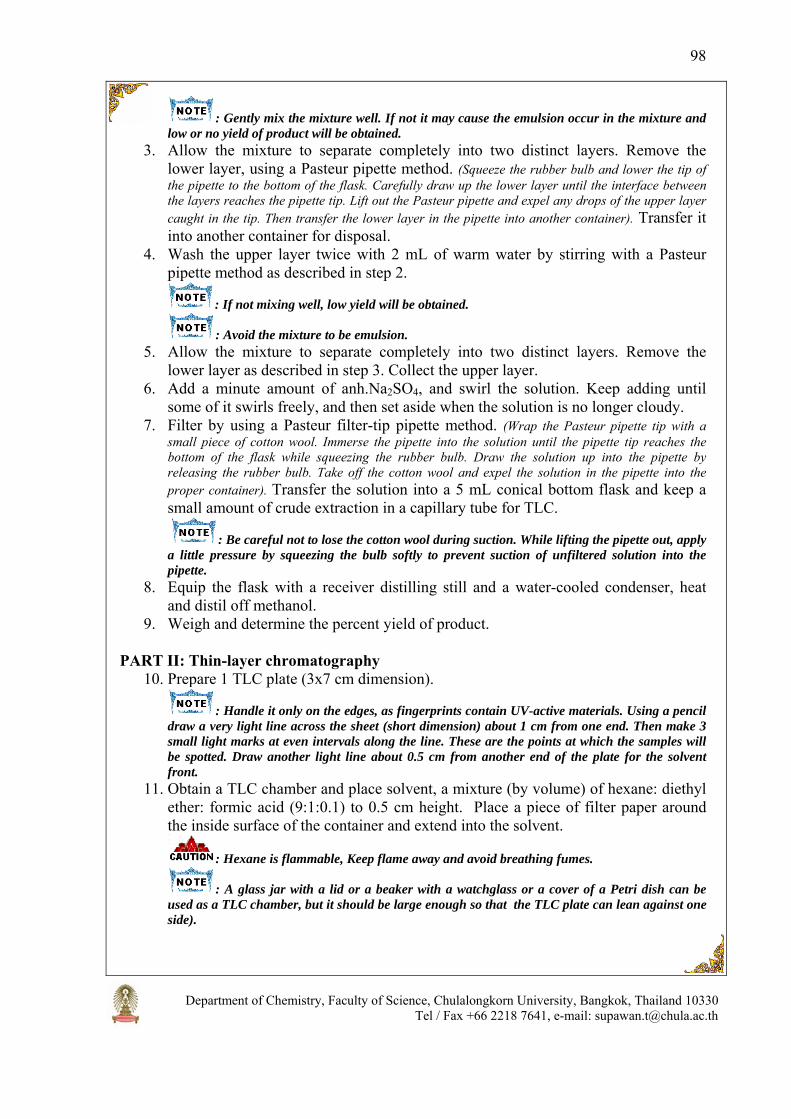
Department of Chemistry, Faculty of Science, Chulalongkorn University, Bangkok, Thailand 10330 Tel / Fax +66 2218 7641, e-mail: [email protected]
98
: Gently mix the mixture well. If not it may cause the emulsion occur in the mixture and low or no yield of product will be obtained.
3. Allow the mixture to separate completely into two distinct layers. Remove the lower layer, using a Pasteur pipette method. (Squeeze the rubber bulb and lower the tip of the pipette to the bottom of the flask. Carefully draw up the lower layer until the interface between the layers reaches the pipette tip. Lift out the Pasteur pipette and expel any drops of the upper layer caught in the tip. Then transfer the lower layer in the pipette into another container). Transfer it into another container for disposal.
4. Wash the upper layer twice with 2 mL of warm water by stirring with a Pasteur pipette method as described in step 2.
: If not mixing well, low yield will be obtained.
: Avoid the mixture to be emulsion. 5. Allow the mixture to separate completely into two distinct layers. Remove the
lower layer as described in step 3. Collect the upper layer. 6. Add a minute amount of anh.Na2SO4, and swirl the solution. Keep adding until
some of it swirls freely, and then set aside when the solution is no longer cloudy. 7. Filter by using a Pasteur filter-tip pipette method. (Wrap the Pasteur pipette tip with a
small piece of cotton wool. Immerse the pipette into the solution until the pipette tip reaches the bottom of the flask while squeezing the rubber bulb. Draw the solution up into the pipette by releasing the rubber bulb. Take off the cotton wool and expel the solution in the pipette into the proper container). Transfer the solution into a 5 mL conical bottom flask and keep a small amount of crude extraction in a capillary tube for TLC.
: Be careful not to lose the cotton wool during suction. While lifting the pipette out, apply a little pressure by squeezing the bulb softly to prevent suction of unfiltered solution into the pipette.
8. Equip the flask with a receiver distilling still and a water-cooled condenser, heat and distil off methanol.
9. Weigh and determine the percent yield of product.
PART II: Thin-layer chromatography 10. Prepare 1 TLC plate (3x7 cm dimension).
: Handle it only on the edges, as fingerprints contain UV-active materials. Using a pencil draw a very light line across the sheet (short dimension) about 1 cm from one end. Then make 3 small light marks at even intervals along the line. These are the points at which the samples will be spotted. Draw another light line about 0.5 cm from another end of the plate for the solvent front.
11. Obtain a TLC chamber and place solvent, a mixture (by volume) of hexane: diethyl ether: formic acid (9:1:0.1) to 0.5 cm height. Place a piece of filter paper around the inside surface of the container and extend into the solvent.
: Hexane is flammable, Keep flame away and avoid breathing fumes.
: A glass jar with a lid or a beaker with a watchglass or a cover of a Petri dish can be used as a TLC chamber, but it should be large enough so that the TLC plate can lean against one side).

Department of Chemistry, Faculty of Science, Chulalongkorn University, Bangkok, Thailand 10330 Tel / Fax +66 2218 7641, e-mail: [email protected]
99
12. Use clean capillary tubes, carefully spot three sample solutions at three pencil marks as shown below.
: The spots should be as small as possible in order to minimize tailing and overlapping when the TLC plate is developed. If a more intense spot is desired, let the spot dry and re-spot in the same location.
13. When the spots are dry, place the TLC plate in the developing chamber. Then gently close the chamber.
: Be sure that the bottom edge of the TLC plate is in the solvent but the spots are above the solvent, and the filter paper does not touch the chromatographic sheet.
A: Methyl ester B: Palm or vegetable oil C: Crude extraction
14. When the solvent has moved to the front line, remove the plate. Lay it on a clean surface in a fume hood or well ventilated area and allow the solvent to evaporate until the plate appears dry.
15. Then view the plate by spraying with 30% H2SO4 and heat the TLC plate on a hot plate, immediately draw a light pencil line around each spot.
: Sulfuric acid is strongly acidic. Inhalation of vapor may cause serious lung damage and corrosive to all body tissues.
16. Measure all the distances traveled by the compounds and solvent. Calculate the retention factor (Rf) for each component.
CLEANUP
1. Add water to dissolve sodium sulfate until solid disappears, flush them down the drain with copious amount of water.
2. Keep the used TLC plate in the container for disposal.
QUESTIONS 1. From TLC analysis, do you think whether the liquid is pure?
Start line
Front line of solvent
1.0 cm
0.5 cm
A B C
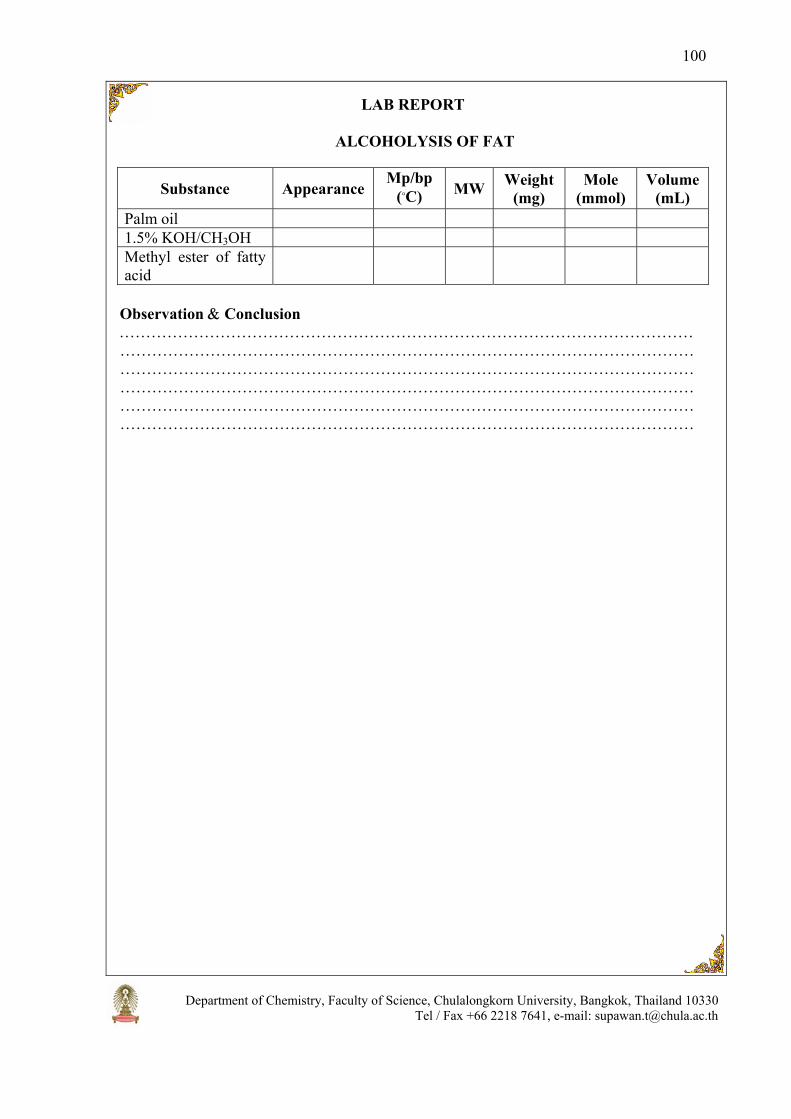
Department of Chemistry, Faculty of Science, Chulalongkorn University, Bangkok, Thailand 10330 Tel / Fax +66 2218 7641, e-mail: [email protected]
100
LAB REPORT
ALCOHOLYSIS OF FAT
Observation & Conclusion ………………………………………………………………………………………………………………………………………………………………………………………………………………………………………………………………………………………………………………………………………………………………………………………………………………………………………………………………………………………………………………………………………………………………………………………………
Substance Appearance Mp/bp
(๐C) MW Weight (mg)
Mole (mmol)
Volume (mL)
Palm oil 1.5% KOH/CH3OH Methyl ester of fatty acid

Department of Chemistry, Faculty of Science, Chulalongkorn University, Bangkok, Thailand 10330 Tel / Fax +66 2218 7641, e-mail: [email protected]
101
A GRIGNARD-LIKE ORGANIC REACTION
C
O
H
Br
Zn
satd.aq NH4ClTHF
OH
Benzaldehyde Allyl bromide 1-Phenyl-3-buten-1-ol
OBJECTIVES 1. To synthesize 1-phenyl-3-buten-1-ol with Grignard-like reaction. 2. To purify the product by distillation.
BACKGROUND The Grignard reaction involves the transformation of a carbon-containing
compound (aldehyde, ketone or ester) to an alcohol and the modification of the carbon skeleton of a molecule through the formation of a new carbon-carbon bond. The reaction usually presents several practical problems including the need for anhydrous solvents (e.g., ether), dry glassware and, in some cases, the slow reaction initiation. The generation of the Grignard reagent which requires an extremely dry atmosphere becomes the most difficulty to handle, particularly, in humid area. However, Grignard-like reaction between allyl bromide and benzaldehyde mediated by zinc metal in aqueous media can work well, like the traditional Grignard reaction, and no dry condition is any more required.
In this experiment, addition of allyl bromide to benzaldehyde and zinc in a two-phase mixture of tetrahydrofuran (THF) and saturated aqueous ammonium chloride will be performed to yield 1-phenyl-3-buten-1-ol.
REQUIREMENTS Apparatus and materials:
1. Conical bottom flasks 2. Hot plate and heat
dissipation 3. Pasteur pipettes
4. Filtering flask 5. Filtering glass funnel 6. Receiver distilling still 7. Condenser
Chemicals: Benzaldehyde (C6H5-CHO); allyl bromide (CH2=CHCH2Br); zinc powder (Zn); ammonium chloride (satd.NH4Cl); tetrahydrofuran (C4H8O); diethyl ether (C2H5OC2H5); sodium sulfate (anh.Na2SO4); ceric ammonium nitrate ((NH4)2Ce(NO3)6); Lucas reagent (conc.HCl/anh.ZnCl2).

Department of Chemistry, Faculty of Science, Chulalongkorn University, Bangkok, Thailand 10330 Tel / Fax +66 2218 7641, e-mail: [email protected]
102
PROCEDURE
1. Place 0.21 mL (2 mmol) of benzaldehyde and 2 mL of THF in a 10-mL conical bottom flask, Flask No.1, containing 156 mg (2.40 mmol) of zinc powder and 2 mL of satd.NH4Cl. Stir the mixture using a Pasteur pipette method. (Draw a portion of the lower layer up into a pipette and carefully expel it back into the flask, through the upper layer. Do this repeatedly for a few times).
: Benzaldehyde may cause mutations, Prevent eye and skin contact. Avoid inhaling or ingesting this compound.
: Ammonium chloride may cause respiratory, digestive tract, eye and skin irritation. 2. Add 0.21 mL (2.40 mmol) of allyl bromide and occasionally stir to dissolve the
mixture for 30 minutes as described in step 1.
: Allyl bromide is poison and causes burns. Avoid inhale and contact with skin.
: Put a stopper on the flask at all time when no stirring to minimize a loss of any chemicals from evaporation and a risk from inhalation of hazardous chemical vapors.
3. Add 2 mL of diethyl ether and stir again. Filter the solution through the Pasteur filtering pipette into another conical bottom flask, Flask No.2, using a Pasteur pipette for transferring the solution from Flask No.1.
: Consult the procedure for filtering using a Pasteur filtering pipette on page 14. Rinse the Pasteur filtering pipette with 2 mL of diethyl ether. 4. Allow the mixture to separate completely into two distinct layers. Remove the
lower aqueous layer, using the Pasteur pipette method. (Squeeze the rubber bulb and lower the tip of the pipette to the bottom of the flask. Carefully draw up the lower layer until the interface between the layers reaches the pipette tip. Lift out the pipette and expel any drops of the upper layer caught in the tip. Then transfer the lower layer in the pipette into another container). Transfer it into another conical bottom flask, Flask No.3. Leave the upper organic layer in Flask No.2 for a later step.
5. Wash the aqueous layer in Flask No.3 with 2 mL of diethyl ether by stirring as described in step1 and separating as described in step 5. Combine the upper organic layer in Flask No.2.
6. Wash the organic layer with 1 mL of water by stirring as described in step 1 and separating as described in step 5. Add a minute amount of anh.Na2SO4 and swirl the solution. Keep adding until some of it swirls freely and when set aside the solution is no longer cloudy.
7. Filter the solution using a Pasteur filter-tip pipette method. (Wrap the Pasteur pipette tip with a small piece of cotton wool. Immerse the pipette into the solution until the pipette tip reaches the bottom of the flask while squeezing the rubber bulb. Draw the solution up into the pipette by releasing the rubber bulb. Take off the cotton wool and expel the solution in the pipette into the proper container).
: Be careful not to lose the cotton wool during suction. While lifting the pipette out, apply a little pressure by squeezing the bulb softly to prevent suction of unfiltered solution into the pipette.

Department of Chemistry, Faculty of Science, Chulalongkorn University, Bangkok, Thailand 10330 Tel / Fax +66 2218 7641, e-mail: [email protected]
103
8. Transfer the solution in the pipette into another conical bottom flask, Flask No.4. Connect Flask No.4 with a receiver distilling still and a water-cooled condenser. Distil off the diethyl ether at 40๐C to obtain the liquid at the bottom of the flask.
9. Weigh the residual liquid and calculate its percent recovery. 10. Test the obtained liquid with Lucas reagent and ceric ammonium nitrate. Observe
the results and record the observations.
CLEANUP 1. Pour the precipitate from testing into an appropriate waste container. 2. Pour the aqueous layer from the extraction down the drain with copious amount of
water. 3. Add water to dissolve Na2SO4 until solid disappear and flush them down the drain
with copious amount of water.
QUESTIONS 1. Change the starting carbonyl compound to the following compounds, write the
structures of the products that will be obtained a. Benzophenone b. 4-Chlorobenzaldehyde c. 4-Hydroxybenzaldehyde
LAB REPORT
A GRIGNARD-LIKE ORGANIC REACTION
Compound Appearance Mp/bp
(°C) MW Weight
(mg) Mol
(mmol) Volume
(mL) Benzaldehyde Allyl bromide Zinc Satd.NH4Cl THF 1-Phenyl-3-butene-1-ol
Observation & Conclusion ………………………………………………………………………………………………………………………………………………………………………………………………………………………………………………………………………………………………………………………………………………………………………………………………………………………………………………………………………………………………

Department of Chemistry, Faculty of Science, Chulalongkorn University, Bangkok, Thailand 10330 Tel / Fax +66 2218 7641, e-mail: [email protected]
104
DIELS-ALDER REACTION
O
O
O
Anthracene Maleic anhydride
HH[4+2]
9,10-Dihydroanthracene-9,10- α,β-succinic anhydride
OO
O
OBJECTIVES 1. To synthesize 9,10-dihydroanthracene-9,10-α,β-succinic anhydride by Diels-Alder
reaction. 2. To practice the experimental techniques on reflux, recrystallization, melting point
determination and thin-layer chromatography.
BACKGROUND The Diels-Alder reaction combines a diene (a molecule with two alternating double
bonds) and a dienophile (an alkene) to make rings. The three double bonds in the two starting materials are converted into two new single bonds and one new double bond leading to the formation of a six-membered ring.
12
34
12
3
4
new bond
new bond
Diene
Dienophile
When the diene contains an electron donating group or the dienophile contains an electron-withdrawing group, the reaction will work well. Therefore this reaction is very useful for the preparation of a wide variety of six-membered ring compounds.
In this experiment, the reaction between anthracene and maleic anhydride will be carried out by refluxing at temperature 185-190 °C. The product will be purified by crystallization and identified by thin-layer chromatography.
REQUIREMENTS
Apparatus and materials: 1. Conical bottom flask 2. Condenser 3. Filtering flask 4. Filtering glass funnel 5. TLC plates 6. Three-way pipette rubber bulb
7. Hot plate and heat dissipation block
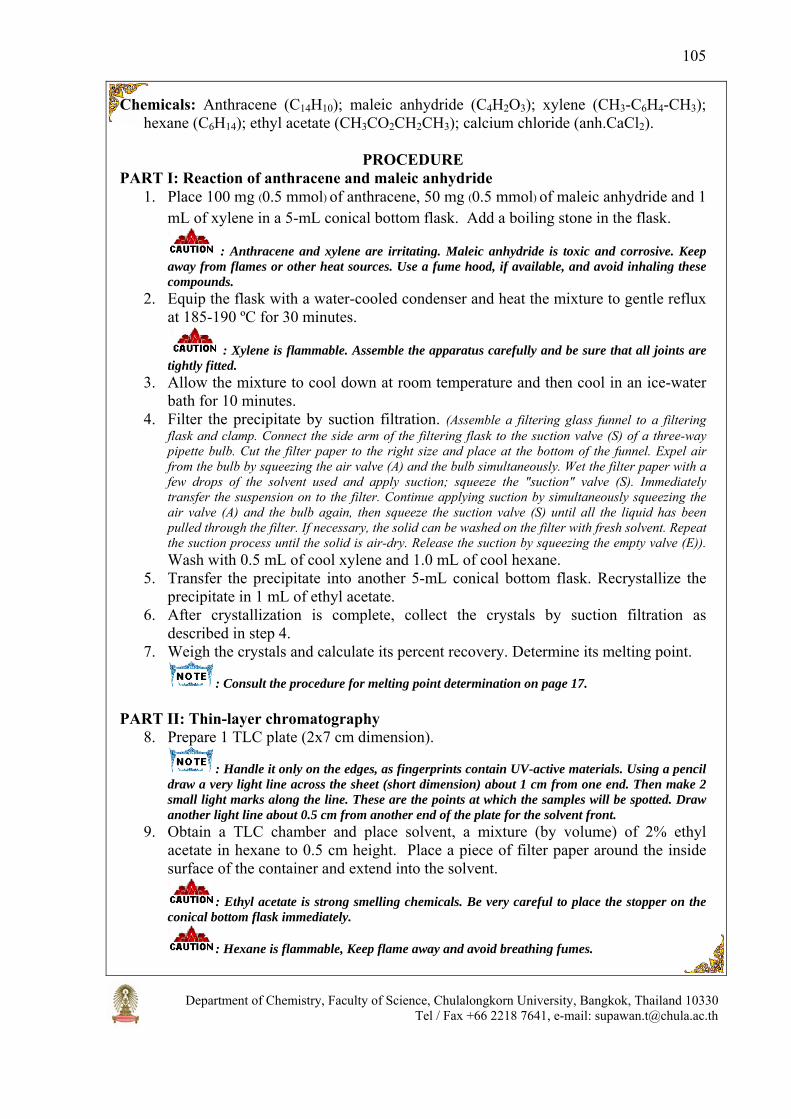
Department of Chemistry, Faculty of Science, Chulalongkorn University, Bangkok, Thailand 10330 Tel / Fax +66 2218 7641, e-mail: [email protected]
105
Chemicals: Anthracene (C14H10); maleic anhydride (C4H2O3); xylene (CH3-C6H4-CH3); hexane (C6H14); ethyl acetate (CH3CO2CH2CH3); calcium chloride (anh.CaCl2).
PROCEDURE
PART I: Reaction of anthracene and maleic anhydride 1. Place 100 mg (0.5 mmol) of anthracene, 50 mg (0.5 mmol) of maleic anhydride and 1
mL of xylene in a 5-mL conical bottom flask. Add a boiling stone in the flask.
: Anthracene and xylene are irritating. Maleic anhydride is toxic and corrosive. Keep away from flames or other heat sources. Use a fume hood, if available, and avoid inhaling these compounds.
2. Equip the flask with a water-cooled condenser and heat the mixture to gentle reflux at 185-190 ºC for 30 minutes.
: Xylene is flammable. Assemble the apparatus carefully and be sure that all joints are tightly fitted.
3. Allow the mixture to cool down at room temperature and then cool in an ice-water bath for 10 minutes.
4. Filter the precipitate by suction filtration. (Assemble a filtering glass funnel to a filtering flask and clamp. Connect the side arm of the filtering flask to the suction valve (S) of a three-way pipette bulb. Cut the filter paper to the right size and place at the bottom of the funnel. Expel air from the bulb by squeezing the air valve (A) and the bulb simultaneously. Wet the filter paper with a few drops of the solvent used and apply suction; squeeze the "suction" valve (S). Immediately transfer the suspension on to the filter. Continue applying suction by simultaneously squeezing the air valve (A) and the bulb again, then squeeze the suction valve (S) until all the liquid has been pulled through the filter. If necessary, the solid can be washed on the filter with fresh solvent. Repeat the suction process until the solid is air-dry. Release the suction by squeezing the empty valve (E)). Wash with 0.5 mL of cool xylene and 1.0 mL of cool hexane.
5. Transfer the precipitate into another 5-mL conical bottom flask. Recrystallize the precipitate in 1 mL of ethyl acetate.
6. After crystallization is complete, collect the crystals by suction filtration as described in step 4.
7. Weigh the crystals and calculate its percent recovery. Determine its melting point.
: Consult the procedure for melting point determination on page 17.
PART II: Thin-layer chromatography 8. Prepare 1 TLC plate (2x7 cm dimension).
: Handle it only on the edges, as fingerprints contain UV-active materials. Using a pencil draw a very light line across the sheet (short dimension) about 1 cm from one end. Then make 2 small light marks along the line. These are the points at which the samples will be spotted. Draw another light line about 0.5 cm from another end of the plate for the solvent front.
9. Obtain a TLC chamber and place solvent, a mixture (by volume) of 2% ethyl acetate in hexane to 0.5 cm height. Place a piece of filter paper around the inside surface of the container and extend into the solvent.
: Ethyl acetate is strong smelling chemicals. Be very careful to place the stopper on the conical bottom flask immediately.
: Hexane is flammable, Keep flame away and avoid breathing fumes.

Department of Chemistry, Faculty of Science, Chulalongkorn University, Bangkok, Thailand 10330 Tel / Fax +66 2218 7641, e-mail: [email protected]
106
: A glass jar with a lid or a beaker with a watchglass or a cover of a Petri dish can be used as a TLC chamber, but it should be large enough so that the TLC plate can lean against one side).
10. Using clean capillary tubes, carefully spot two sample solutions at two pencil marks as shown below.
: The spots should be as small as possible in order to minimize tailing and overlapping when the TLC plate is developed. If a more intense spot is desired, let the spot dry and re-spot in the same location.
11. When the spots are dry, place the TLC plates in the developing chamber. Then gently close the chamber.
: Be sure that the bottom edge of the TLC plate is in the solvent but the spots are above the solvent, and the filter paper does not touch the chromatographic sheet.
A: 9,10-Dihydroanthracene-9,10-α,β-succinic anhydride B: Anthracene
12. When the solvent has moved to the front line, remove the plate. Lay it on a clean surface in a fume hood or well ventilated area and allow the solvent to evaporate until the plates appear dry.
13. Then view the plate under UV light and immediately draw a light pencil line around each spot.
: UV radiation is harmful to eyes. Do not look directly at the UV lamp. 14. Measure all the distances traveled by the compounds and solvent. Calculate the
retention factor (Rf) for the component.
CLEANUP 1. Pour xylene, hexane and ethyl acetate into the hydrocarbon waste container.
QUESTIONS
1. In this experiment the solvent used is xylene. Can other solvents such as toluene or ethyl acetate be used in this experiment? Explain.
2. Show product structures in the following reactions:
1.0 cm
0.5 cm
Start line
Front line of solvent
A B

Department of Chemistry, Faculty of Science, Chulalongkorn University, Bangkok, Thailand 10330 Tel / Fax +66 2218 7641, e-mail: [email protected]
107
O
O
O
O
2
2
O
C8H10
2.1
2.2
2.3
2.4
3. Show products in the following reverse Diels-Alder reactions:
OO
OCO2CH3
CO2CH3
CO2CH3
CO2CH3
3.1
3.2
3.3

Department of Chemistry, Faculty of Science, Chulalongkorn University, Bangkok, Thailand 10330 Tel / Fax +66 2218 7641, e-mail: [email protected]
108
LAB REPORT
DIELS-ALDER REACTION
Materials Color Mp/bp (°C)
MW Weight (mg)
Mole (mmol)
Rf
Anthracene Maleic anhydride Xylene Product
Observation & Conclusion ………………………………………………………………………………………………………………………………………………………………………………………………………………………………………………………………………………………………………………………………………………………………………………………………………………………………………………………………………………………………
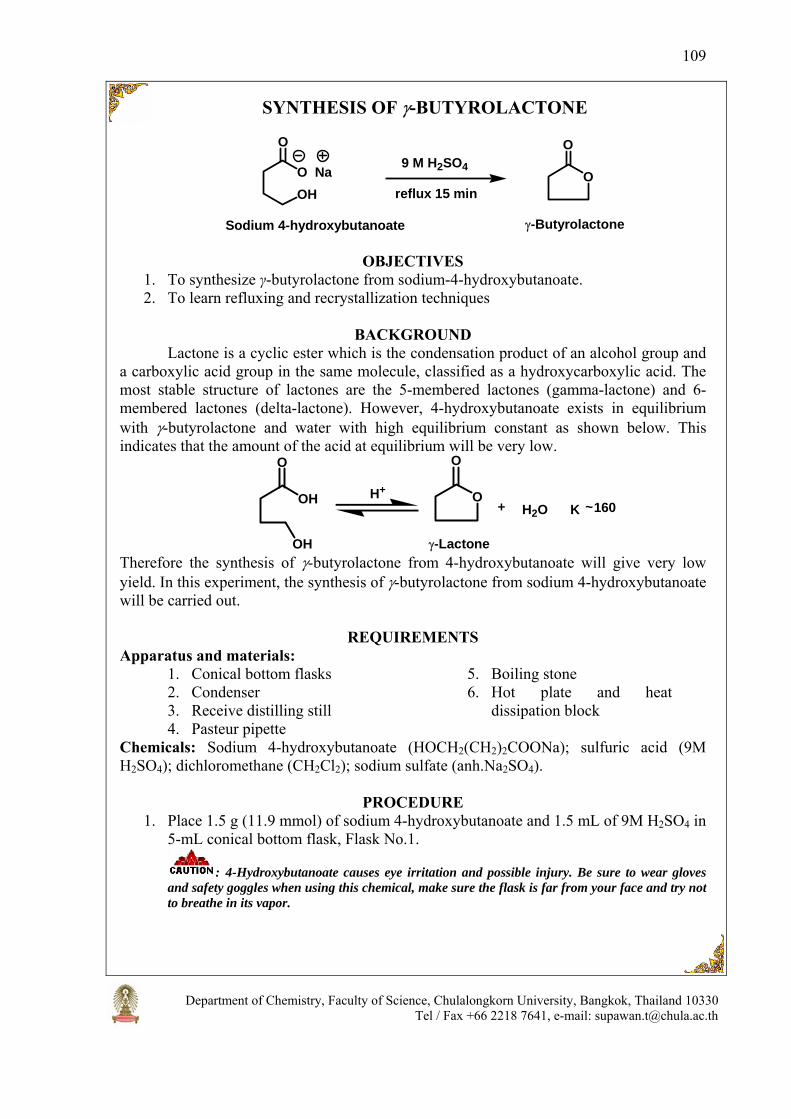
Department of Chemistry, Faculty of Science, Chulalongkorn University, Bangkok, Thailand 10330 Tel / Fax +66 2218 7641, e-mail: [email protected]
109
SYNTHESIS OF γ-BUTYROLACTONE
OHO Na
O
O
O
reflux 15 min
Sodium 4-hydroxybutanoate γ-Butyrolactone
9 M H2SO4
OBJECTIVES 1. To synthesize γ-butyrolactone from sodium-4-hydroxybutanoate. 2. To learn refluxing and recrystallization techniques
BACKGROUND Lactone is a cyclic ester which is the condensation product of an alcohol group and
a carboxylic acid group in the same molecule, classified as a hydroxycarboxylic acid. The most stable structure of lactones are the 5-membered lactones (gamma-lactone) and 6-membered lactones (delta-lactone). However, 4-hydroxybutanoate exists in equilibrium with γ-butyrolactone and water with high equilibrium constant as shown below. This indicates that the amount of the acid at equilibrium will be very low.
OH
OH
O
H+ O
O
+ H2O K ~160
γ-Lactone Therefore the synthesis of γ-butyrolactone from 4-hydroxybutanoate will give very low yield. In this experiment, the synthesis of γ-butyrolactone from sodium 4-hydroxybutanoate will be carried out.
REQUIREMENTS Apparatus and materials:
1. Conical bottom flasks 2. Condenser 3. Receive distilling still 4. Pasteur pipette
5. Boiling stone 6. Hot plate and heat
dissipation block
Chemicals: Sodium 4-hydroxybutanoate (HOCH2(CH2)2COONa); sulfuric acid (9M H2SO4); dichloromethane (CH2Cl2); sodium sulfate (anh.Na2SO4).
PROCEDURE 1. Place 1.5 g (11.9 mmol) of sodium 4-hydroxybutanoate and 1.5 mL of 9M H2SO4 in
5-mL conical bottom flask, Flask No.1.
: 4-Hydroxybutanoate causes eye irritation and possible injury. Be sure to wear gloves and safety goggles when using this chemical, make sure the flask is far from your face and try not to breathe in its vapor.

Department of Chemistry, Faculty of Science, Chulalongkorn University, Bangkok, Thailand 10330 Tel / Fax +66 2218 7641, e-mail: [email protected]
110
: Conc.H2SO4 is very corrosive and may cause serious chemical burns if it comes into contact with your skin. Wear gloves when handling this chemical. If accidentally a spill happens, immediately flood the affected area with cold water and then with 5% NaHCO3 solution.
2. Connect Flask No.1 with a receiver distilling still fitted with a water-cool condenser. Add a boiling stone and heat the mixture to gentle reflux for 15 minutes.
3. Allow the mixture to cool down. If some solid occurs, add water dropwise and swirl until the solid has dissolved.
4. Add 1.5 mL of dichloromethane and stir the mixture using the Pasteur pipette method (Draw a portion of the lower layer up into a pipette and carefully expel it back into the flask, through the upper layer. Do this repeatedly for a few times).
: If the reagents are not mixing thoroughly, the incomplete separation and the impure products will be obtained.
: Dichloromethane is flammable and toxic. Keep flame away and avoid breathing fumes. 5. Allow the mixture to separate completely into two distinct layers. Remove the
lower dichloromethane layer, using the Pasteur pipette method. (Squeeze the rubber bulb and lower the tip of the pipette to the bottom of the flask. Carefully draw up the lower layer until the interface between the layers reaches the pipette tip. Lift out the pipette and expel any drops of the upper layer caught in the tip. Then transfer the lower layer in the pipette into another container). Transfer it into another conical bottom flask, Flask No.2.
6. Repeat extraction of the upper aqueous layer in Flask No.1 with another 1.5 mL of dichloromethane as described in steps 4-5. Combine the lower dichloromethane layer in Flask No.2.
7. Add a small amount of anh.Na2SO4, and swirl the solution. Keep adding until some of it swirls freely, and then set aside when the solution is no longer cloudy.
8. Filter the solution using the Pasteur filter-tip pipette method. (Wrap the Pasteur pipette tip with a small wad of cotton wool. Immerse the pipette into the solution until the pipette tip reaches the bottom of the flask while squeezing the rubber bulb. Draw the solution up into the pipette by releasing the rubber bulb. Take off the cotton wad and expel the solution in the pipette into the proper container).
: Be careful not to lose the cotton wool during suction. While lifting the pipette out, apply a little pressure by squeezing the bulb softly to prevent suction of unfiltered solution into the pipette.
9. Transfer the solution in the pipette into another conical bottom flask, Flask No.3. Connect Flask No.3 with a receiver distilling still fitted with a water-cool condenser. Distil off the dichloromethane at 65๐C to obtain the solid at the bottom of the flask.
10. Weigh and calculate the percent yield and determine the melting point of the product.
QUESTIONS
1. Write the mechanism of the reaction of sodium 4-hydroxybutanoate to γ-butyrolactone.
2. What is the reason for not using 4-hydroxybutanoic acid as a starting material to synthesize γ-butyrolactone?
3. Is there any other method for the identification of lactone besides the determination of its melting point?

Department of Chemistry, Faculty of Science, Chulalongkorn University, Bangkok, Thailand 10330 Tel / Fax +66 2218 7641, e-mail: [email protected]
111
CLEANUP
1. Pour the aqueous layer obtained from the extraction down the drain with copious amount of water.
2. Pour dichloromethane waste into the halogenated hydrocarbon waste container. 3. Dissolve used Na2SO4 in water and flush it down the drain with copious amount of
water.
LAB REPORT
SYNTHESIS OF γ-BUTYROLACTONE
Substances Appearance Mp/bp (ºC)
Molecular weight
Mole (mmol)
Volume (mL)
Other
Sodium 4-hydroxybutanoate
9 M sulfuric acid γ-Butyrolactone
Observation & Conclusion ……………………………………………………………………………………………………………………………………………………………………………………………………………………………………………………………………………………………… ………………………………………………………………………………………………………………………………………………………………………………………………………………………………………………………………………………………………
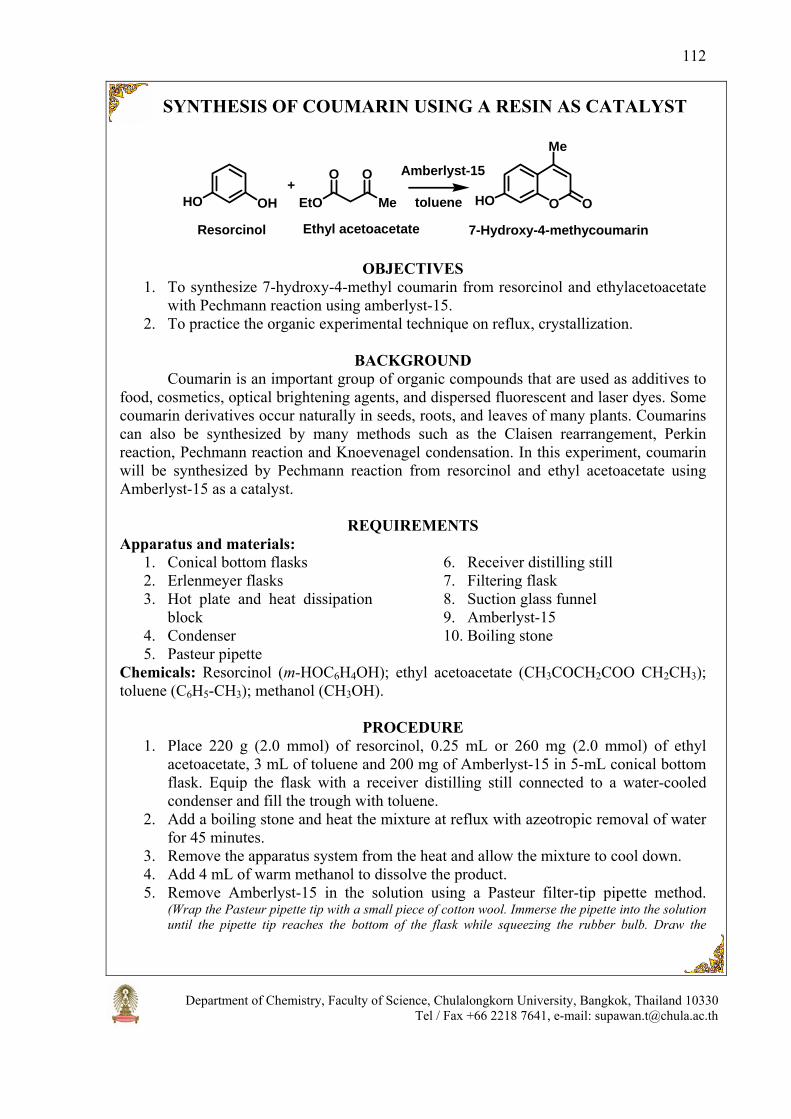
Department of Chemistry, Faculty of Science, Chulalongkorn University, Bangkok, Thailand 10330 Tel / Fax +66 2218 7641, e-mail: [email protected]
112
SYNTHESIS OF COUMARIN USING A RESIN AS CATALYST
OH EtO Me
O O+
O O
Me
Resorcinol Ethyl acetoacetate
HO
Amberlyst-15
toluene HO
7-Hydroxy-4-methycoumarin
OBJECTIVES 1. To synthesize 7-hydroxy-4-methyl coumarin from resorcinol and ethylacetoacetate
with Pechmann reaction using amberlyst-15. 2. To practice the organic experimental technique on reflux, crystallization.
BACKGROUND
Coumarin is an important group of organic compounds that are used as additives to food, cosmetics, optical brightening agents, and dispersed fluorescent and laser dyes. Some coumarin derivatives occur naturally in seeds, roots, and leaves of many plants. Coumarins can also be synthesized by many methods such as the Claisen rearrangement, Perkin reaction, Pechmann reaction and Knoevenagel condensation. In this experiment, coumarin will be synthesized by Pechmann reaction from resorcinol and ethyl acetoacetate using Amberlyst-15 as a catalyst.
REQUIREMENTS Apparatus and materials:
1. Conical bottom flasks 2. Erlenmeyer flasks 3. Hot plate and heat dissipation
block 4. Condenser 5. Pasteur pipette
6. Receiver distilling still 7. Filtering flask 8. Suction glass funnel 9. Amberlyst-15 10. Boiling stone
Chemicals: Resorcinol (m-HOC6H4OH); ethyl acetoacetate (CH3COCH2COO CH2CH3); toluene (C6H5-CH3); methanol (CH3OH).
PROCEDURE 1. Place 220 g (2.0 mmol) of resorcinol, 0.25 mL or 260 mg (2.0 mmol) of ethyl
acetoacetate, 3 mL of toluene and 200 mg of Amberlyst-15 in 5-mL conical bottom flask. Equip the flask with a receiver distilling still connected to a water-cooled condenser and fill the trough with toluene.
2. Add a boiling stone and heat the mixture at reflux with azeotropic removal of water for 45 minutes.
3. Remove the apparatus system from the heat and allow the mixture to cool down. 4. Add 4 mL of warm methanol to dissolve the product. 5. Remove Amberlyst-15 in the solution using a Pasteur filter-tip pipette method.
(Wrap the Pasteur pipette tip with a small piece of cotton wool. Immerse the pipette into the solution until the pipette tip reaches the bottom of the flask while squeezing the rubber bulb. Draw the

Department of Chemistry, Faculty of Science, Chulalongkorn University, Bangkok, Thailand 10330 Tel / Fax +66 2218 7641, e-mail: [email protected]
113
solution up into the pipette by releasing the rubber bulb. Take off the cotton wad and expel the solution in the pipette into a proper container).
: Be careful not to lose the cotton wool during suction. While lifting the pipette out, apply a little pressure by squeezing the bulb softly to prevent suction of unfiltered solution into the pipette.
6. Transfer the solution into a 10-mL conical bottom flask. Connect it with a receiver distilling still and a water-cool condenser. Distil off the methanol.
7. Crystallize the product from methanol/water in a 25-mL Erlenmeyer flask. 8. Collect the crystal by suction filtration. (Assemble a filtering glass funnel to a filtering flask
and clamp. Connect the side arm of the filtering flask to the suction valve (S) of a three-way pipette bulb. Cut the filter paper to the right size and place at the bottom of the funnel. Expel air from the bulb by squeezing the air valve (A) and the bulb simultaneously. Wet the filter paper with a few drops of the solvent used and apply suction; squeeze the "suction" valve (S). Immediately transfer the suspension on to the filter. Continue applying suction by simultaneously squeezing the air valve (A) and the bulb again, and then squeeze the suction valve (S) until all the liquid has been pulled through the filter. If necessary, the solid can be washed on the filter with fresh solvent. Repeat the suction process until the solid is air-dry. Release the suction by squeezing the empty valve (E)).
9. Weigh the crystals of product and calculate its percent recovery. Determine its melting point.
CLEANUP
1. Dispose of Amberlyst-15 in the appropriate wasted container. 2. Pour the remaining methanol in the organic waste container. 3. Pour the mixture of toluene and water waste into the chlorinated hydrocarbon
wasted container.
QUESTIONS 1. What was the purpose of adding toluene? 2. If m-N,N-dimethylaminophenol reacts with ethyl acetoacetate, what product will be
obtained? Draw the structure. 3. Draw the mechanism of the reaction in question 2.

Department of Chemistry, Faculty of Science, Chulalongkorn University, Bangkok, Thailand 10330 Tel / Fax +66 2218 7641, e-mail: [email protected]
114
LAB REPORT
SYNTHESIS OF COUMARIN USING A RESIN AS CATALYST
Reagents Appearance
Mp / bp
(οC )
Molecular weight
Weight (mg)
Mole (mmol)
Volume (mL)
Resorcinol Ethyl actoacetate Amberlyst-15 7-hydroxy-4-methylcoumarin
Observation & Conclusion ……………………………………………………………………………………………………………………………………………………………………………………………………………………………………………………………………………………………… ………………………………………………………………………………………………………………………………………………………………………………………………………………………………………………………………………………………………

Department of Chemistry, Faculty of Science, Chulalongkorn University, Bangkok, Thailand 10330 Tel / Fax +66 2218 7641, e-mail: [email protected]
115
SYNTHESIS OF CYCLIC ACETAL
OH OH
OHOH
O
O
OH
OHH2O
H+
H2O
Benzaldehyde Pentaerythritol 5,5-Bis(hydroxymethyl)-2-phenyl-1,3-dioxane
PhH
O
OBJECTIVES 1. To synthesize cyclic acetal from benzaldehyde and pentaerythritol in acid condition 2. To purify the product by crystallization
BACKGROUND
Aldehydes and ketones react with alcohols in acid condition to give acetals and ketals. Cyclic acetals or ketals are more stable towards hydrolysis than acyclic ones. Cyclic acetals or ketals are readily formed by the reaction of two molecules, an aldehyde or a ketone and a diol. The reaction produces two products, the acetal or ketal and water.
R R[H]
O
HO OHH+
OC
O H2O
Aldehydesor Ketones Ethylene glycol Acetal or Ketal
R R(H)
It is an equilibrium reaction. The equilibrium is shifted towards the acetal or ketal by using an excess of the alcohol and/or removing water as it forms. Acetal or ketal can be readily converted back to the aldehyde or ketone, respectively, by heating with aqueous acid. Therefore, the formation of acetal or ketal can be used as protecting groups for aldehydes or ketones.
In this experiment, the cyclic acetal, 5,5-bis(hydroxymethyl)-2-phenyl-1,3-dioxane will be synthesized by dehydration reaction between benzaldehyde and pentaerythritol in aqueous acid.
REQUIREMENTS Apparatus and materials:
1. Round bottom flask 2. Hot plate and heat
dissipation block 3. Pasteur pipette
4. Three-way pipette rubber bulb
5. Receiver distilling still 6. Filtering flask 7. Suction glass funnel
Chemicals: Pentaerythritol (C(CH2OH)4); benzaldehyde (C6H5-CHO); hydrochloric acid (conc.HCl); toluene (C6H5-CH3).

Department of Chemistry, Faculty of Science, Chulalongkorn University, Bangkok, Thailand 10330 Tel / Fax +66 2218 7641, e-mail: [email protected]
116
PROCEDURE 1. Place 1 g (7.34 mmol) of pentaerythritol and 10 mL of water into 25-mL conical
bottom flask.
: Pentaerythritol is irritating to eyes and respiratory system. Be sure to wear a mask to cover your nose and safety goggles when handling it, and try not to breathe in its vapor.
2. Heat the mixture gently in the heat dissipation block on a hot plate, at 35 °C. Stir with a glass rod until the solid has dissolved.
3. Add 2 drops of conc.HCl and 0.75 mL (7.34 mmol) of benzaldehyde, heat at 35 °C and occasionally stir the mixture for 1 hour using a Pasteur pipette method. (Draw a portion of the solution up into a pipette and carefully expel it back into the flask. Do this repeatedly for a few times).
: If the mixture is not thorough, the incomplete separation and the impure products will be obtained.
: Conc.HCl is very strong acid and corrosive that will burn your skin. Wear gloves at all times.
: Benzaldehyde may cause mutations, Prevent eye and skin contact. Avoid inhaling or ingesting this compound.
4. Collect the product by suction filtration (Assemble a filtering glass funnel to a filtering flask and clamp. Connect the side arm of the filtering flask to the suction valve (S) of a three-way pipette bulb. Cut the filter paper to the right size and place at the bottom of the funnel. Expel air from the bulb by squeezing the air valve (A) and the bulb simultaneously. Wet the filter paper with a few drops of the solvent used and apply suction; squeeze the "suction" valve (S). Immediately transfer the suspension on to the filter. Continue applying suction by simultaneously squeezing the air valve (A) and the bulb again, and then squeeze the suction valve (S) until all the liquid has been pulled through the filter. If necessary, the solid can be washed on the filter with fresh solvent. Repeat the suction process until the solid is air-dry. Release the suction by squeezing the empty valve (E)). Wash it with cold water. Continue suction for a few minutes to air-dry.
5. Recrystallize the product from toluene. Collect the crystals by suction filtration as described in step 4. Wash the crystals with a small amount of toluene and continue suction to air-dry. Weigh the product and calculate its percent recovery. Determine its melting point (reported melting point is 135 °C).
: Consult the procedure for melting point determination on page 17.
CLEANUP
1. Dispose of the remaining precipitate in the appropriate waste container. 2. Pour waste toluene in the hydrocarbon waste container.
QUESTIONS
1. The synthesis of cyclic acetal is a reversible reaction. If water is removed from the reaction, more products will be obtained. Why can, however, water be used as the solvent in this experiment?
2. In this experiment, monobenzal is formed as the only product. When the temperature is increased, dibenzal will be obtained. Explain why?

Department of Chemistry, Faculty of Science, Chulalongkorn University, Bangkok, Thailand 10330 Tel / Fax +66 2218 7641, e-mail: [email protected]
117
LAB REPORT
SYNTHESIS OF CYCLIC ACETAL
Materials Appearance Mp/bp(°C)
MW Weight (mg)
Mole (mmol)
Volume (mL)
Other
Pentaerythritol Benzaldehyde Conc.HCl Monobenzal Observation & Conclusion ……………………………………………………………………………………………………………………………………………………………………………………………………………………………………………………………………………………………… ………………………………………………………………………………………………………………………………………………………………………………………………………………………………………………………………………………………………
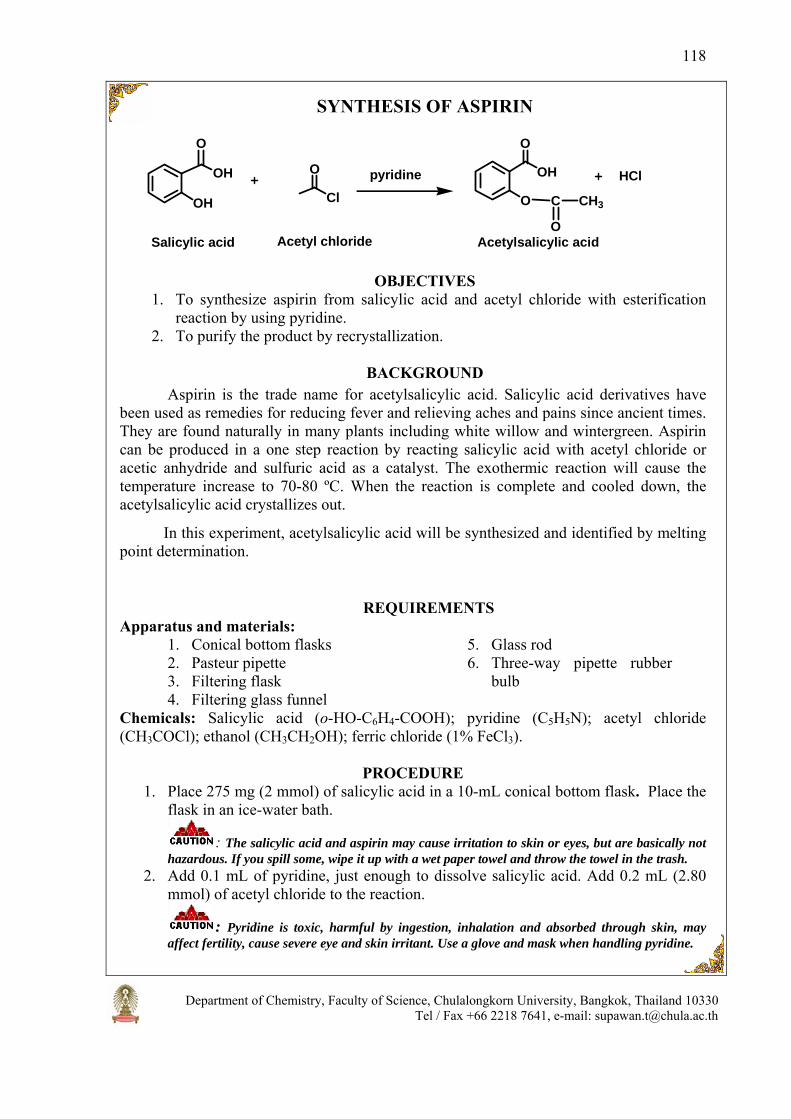
Department of Chemistry, Faculty of Science, Chulalongkorn University, Bangkok, Thailand 10330 Tel / Fax +66 2218 7641, e-mail: [email protected]
118
SYNTHESIS OF ASPIRIN
OH Cl
O
O
OH
O
OH
Salicylic acid Acetyl chloride
pyridine
O
C
O
CH3
HCl
Acetylsalicylic acid
OBJECTIVES 1. To synthesize aspirin from salicylic acid and acetyl chloride with esterification
reaction by using pyridine. 2. To purify the product by recrystallization.
BACKGROUND
Aspirin is the trade name for acetylsalicylic acid. Salicylic acid derivatives have been used as remedies for reducing fever and relieving aches and pains since ancient times. They are found naturally in many plants including white willow and wintergreen. Aspirin can be produced in a one step reaction by reacting salicylic acid with acetyl chloride or acetic anhydride and sulfuric acid as a catalyst. The exothermic reaction will cause the temperature increase to 70-80 ºC. When the reaction is complete and cooled down, the acetylsalicylic acid crystallizes out.
In this experiment, acetylsalicylic acid will be synthesized and identified by melting point determination.
REQUIREMENTS Apparatus and materials:
1. Conical bottom flasks 2. Pasteur pipette 3. Filtering flask 4. Filtering glass funnel
5. Glass rod 6. Three-way pipette rubber
bulb
Chemicals: Salicylic acid (o-HO-C6H4-COOH); pyridine (C5H5N); acetyl chloride (CH3COCl); ethanol (CH3CH2OH); ferric chloride (1% FeCl3).
PROCEDURE
1. Place 275 mg (2 mmol) of salicylic acid in a 10-mL conical bottom flask. Place the flask in an ice-water bath.
: The salicylic acid and aspirin may cause irritation to skin or eyes, but are basically not hazardous. If you spill some, wipe it up with a wet paper towel and throw the towel in the trash.
2. Add 0.1 mL of pyridine, just enough to dissolve salicylic acid. Add 0.2 mL (2.80 mmol) of acetyl chloride to the reaction.
: Pyridine is toxic, harmful by ingestion, inhalation and absorbed through skin, may affect fertility, cause severe eye and skin irritant. Use a glove and mask when handling pyridine.

Department of Chemistry, Faculty of Science, Chulalongkorn University, Bangkok, Thailand 10330 Tel / Fax +66 2218 7641, e-mail: [email protected]
119
3. Leave it in the ice-water bath for 15 minutes. Add 5 mL of cold water to the reaction mixture. Stir the mixture using a glass rod.
: If not mixing thoroughly, the impure products will be obtained. 4. Collect the product by suction filtration. (Assemble a filtering glass funnel to a filtering flask
and clamp. Connect the side arm of the filtering flask to the suction valve (S) of a three-way pipette bulb. Cut the filter paper to the right size and place at the bottom of the funnel. Expel air from the bulb by squeezing the air valve (A) and the bulb simultaneously. Wet the filter paper with a few drops of the solvent used and apply suction; squeeze the "suction" valve (S). Immediately transfer the suspension on to the filter. Continue applying suction by simultaneously squeezing the air valve (A) and the bulb again, then squeeze the suction valve (S) until all the liquid has been pulled through the filter. If necessary, the solid can be washed on the filter with fresh solvent. Repeat the suction process until the solid is air-dry. Release the suction by squeezing the empty valve (E)). Wash the isolated precipitate with cold water.
5. Crude aspirin crystals are purified by recrystallization with methanol/water.
: Consult the procedure for recrystallization on page 20.
: If no crystals formed after 5 minutes, scratch the inside of the flask with the glass rod or spatula beneath the liquid surface. Continue cooling until crystals form.
6. After crystallization is complete, collect the crystals by suction filtration as described in step 4. Wash the crystal with a minute amount of cold water and continue suction to air-dry.
7. Weigh the crystals of product and calculate its percent recovery. 8. Test for its purity with 1% FeCl3 and determine its melting point.
: Consult the procedure for melting point determination on page 17.
CLEANUP 1. Pour waste solutions from filtration down the drain with copious amount of water. 2. Dispose of an excess salicylic acid or aspirin in the proper waste containers.
QUESTIONS
1. Explain the role of pyridine in the experiment and write a balanced chemical equation for the reaction.
2. Why does aspirin have an odor like acetic acid when it is stored or kept for a long time? Write a chemical equation to explain this phenomenon. If this aspirin is tested with 1% FeCl3, what will be the result?
3. Among salicylic acid, acetylsalicylic acid and methyl salicylate, which one will react with 1% FeCl3?
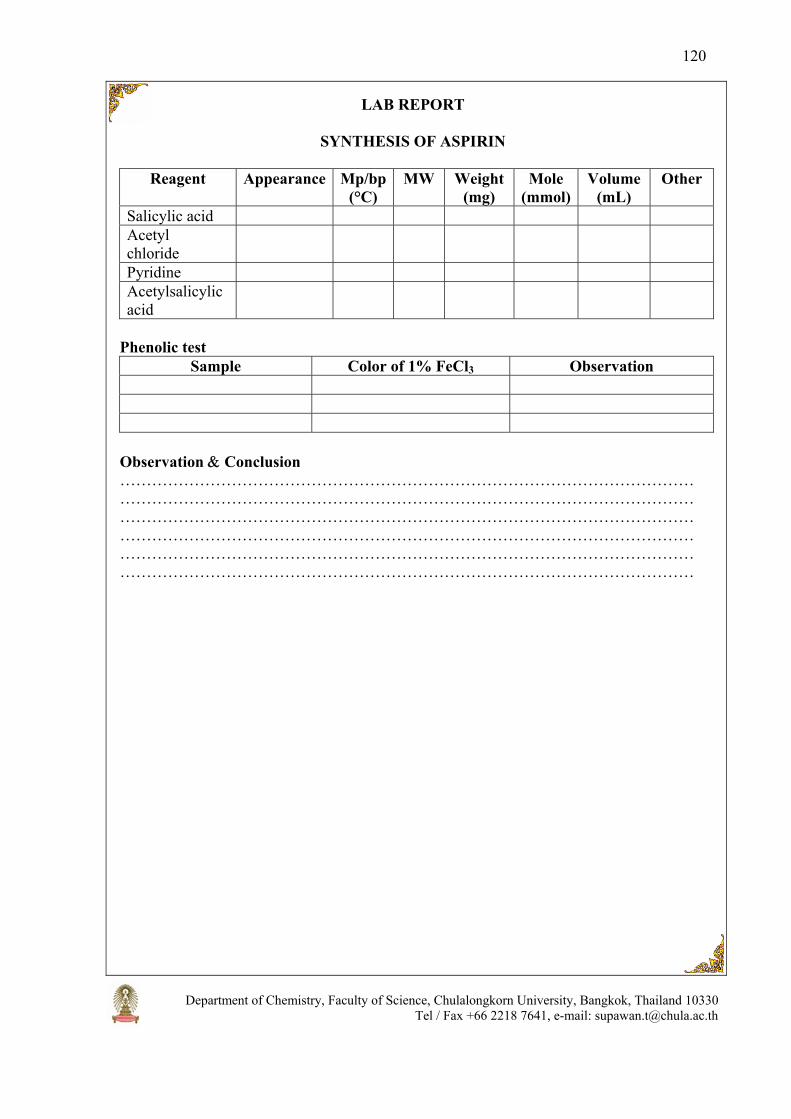
Department of Chemistry, Faculty of Science, Chulalongkorn University, Bangkok, Thailand 10330 Tel / Fax +66 2218 7641, e-mail: [email protected]
120
LAB REPORT
SYNTHESIS OF ASPIRIN Reagent Appearance Mp/bp
(°C) MW Weight
(mg) Mole
(mmol) Volume
(mL) Other
Salicylic acid Acetyl chloride
Pyridine Acetylsalicylic acid
Phenolic test
Sample Color of 1% FeCl3 Observation
Observation & Conclusion ……………………………………………………………………………………………………………………………………………………………………………………………………………………………………………………………………………………………… ………………………………………………………………………………………………………………………………………………………………………………………………………………………………………………………………………………………………

Department of Chemistry, Faculty of Science, Chulalongkorn University, Bangkok, Thailand 10330 Tel / Fax +66 2218 7641, e-mail: [email protected]
121
ALDOL CONDENSATION REACTION
C
MeO
O
H +C
O
H3C NaOH
H2OMeO
CC
H
C
H
O
p-Methoxybenzaldehyde Acetophenone p-Methoxybenzalacetophenone
OBJECTIVES 1. To synthesize p-methoxybenzalacetophenone from p-methoxybenzaldehyde and
acetophenone with Aldol condensation reaction. 2. To purify the product by crystallization.
BACKGROUND
The Aldol condensation is a reaction that involves two carbonyl compounds to be condensed together to give a new carbon-carbon bond, which is a double bond. This reaction is used extensively in organic synthesis to build large molecules from smaller ones. When an α-carbon of the first carbonyl molecule becomes attached to the carbonyl carbon of the second, a product known as the Aldol product is formed. This product can react further with base to lose water and give an α,β-unsaturated aldehyde (or ketone). However, dehydration generally occurs under slightly more vigorous conditions, such as higher temperature, compared to the condensation reaction. Thus at higher temperatures and under basic conditions, the Aldol reaction will go directly to the conjugated enone without any isolation of the Aldol intermediate. Aldol products can be formed through either acidic or basic conditions and since they are usually exothermic the reaction will be driven to completion.
In this experiment, an Aldol condensation between p-methoxybenzaldehyde and acetophenone will be performed. The crude product will then be purified by recrystallization.
REQUIREMENTS Apparatus and materials:
1. Conical bottom flasks 2. Beaker 3. Pasteur pipette 4. Filtering flask
5. Glass rod 6. Suction glass funnel 7. Three-way pipette rubber bulb
Chemicals: p-Methoxybenzaldehyde (p-CH3O-C6H4-CHO); acetophenone (CH3CO-C6H5); ethanol (95% CH3CH2OH); sodium hydroxide (60% NaOH)
PROCEDURE 1. Place 0.27 g or 0.24 mL (2 mmol) of p-methoxybenzaldehyde, 0.28 g or 0.18 mL
(2.4 mmol) of acetophenone and 0.8 mL of ethanol in 5-mL conical bottom flask. Stir the mixture well with a glass rod.
: p-Methoxybenzaldehyde may cause mutations, Prevent eye and skin contact. Avoid inhaling or ingesting this compound.

Department of Chemistry, Faculty of Science, Chulalongkorn University, Bangkok, Thailand 10330 Tel / Fax +66 2218 7641, e-mail: [email protected]
122
2. Add 0.2 mL of 60% NaOH in ethanol and stir the mixture for another 5 minutes.
: NaOH in ethanol is corrosive and particularly dangerous to the eyes. Wear goggles and avoid the contact with skin. If it comes in contact, wash the affected area with running water for at least 15 minutes.
3. Observe a color change of the mixture and a precipitate beginning to appear. Add 2 mL of cool water into the mixture. Stir well. Pour the mixture into a small beaker containing 3 mL of cold water and stir vigorously.
4. Collect the product by suction filtration. (Assemble a filtering glass funnel to a filtering flask and clamp. Connect the side arm of the filtering flask to the suction valve (S) of a three-way pipette bulb. Cut the filter paper to the right size and place at the bottom of the funnel. Expel air from the bulb by squeezing the air valve (A) and the bulb simultaneously. Wet the filter paper with a few drops of the solvent used and apply suction; squeeze the "suction" valve (S). Immediately transfer the suspension on to the filter. Continue applying suction by simultaneously squeezing the air valve (A) and the bulb again, and then squeeze the suction valve (S) until all the liquid has been pulled through the filter. If necessary, the solid can be washed on the filter with fresh solvent. Repeat the suction process until the solid is air-dry. Release the suction by squeezing the empty valve (E)).Wash the product with cool water and continue suction to air-dry.
5. Determine the melting point of the product.
: Consult the procedure for melting point determination on page 17. 6. Recrystallize the rest of the product from ethanol. Filter the crystals by suction
filtration as described in step 4. 7. Weigh the crystals of the product and determine its melting point comparing to the
previous one.
CLEANUP 1. Neutralize the aqueous filtrate with acetic acid before flushing them down the drain
with copious amount of water. 2. Pour waste ethanol into the appropriate waste container.
QUESTIONS
1. Show the mechanism of the synthesis of p-methoxybenzalacetophenone in this experiment.
2. Will there be any difference in using m-nitrobenzaldehyde as a starting material instead of p-methoxybenzaldehyde? Explain.

Department of Chemistry, Faculty of Science, Chulalongkorn University, Bangkok, Thailand 10330 Tel / Fax +66 2218 7641, e-mail: [email protected]
123
LAB REPORT
ALDOL CONDENSATION REACTION
Sample Appearance Mp/bp(°C)
MW Weight(g)
Mole (mmol)
Volume(mL)
p-Methoxy benzaldehyde
Acetophenone Ethanol Sodium hydroxide p-Methoxy benzalacetophenone
Observation & Conclusion ……………………………………………………………………………………………………………………………………………………………………………………………………………………………………………………………………………………………… ………………………………………………………………………………………………………………………………………………………………………………………………………………………………………………………………………………………………

Department of Chemistry, Faculty of Science, Chulalongkorn University, Bangkok, Thailand 10330 Tel / Fax +66 2218 7641, e-mail: [email protected]
124
OXIDATION OF BORNEOL TO CAMPHOR WITH ACTIVE MANGANESE DIOXIDE ON SILICA
OBJECTIVE
1. To oxidize an alcohol to ketone using a safer oxidizing agent and no solvent.
BACKGROUND Oxidation of alcohols is a method for the preparation of carbonyl compounds.
Primary alcohols are oxidized to yield either aldehydes or carboxylic acids depending on the oxidizing conditions. Oxidation of secondary alcohols produces ketones while tertiary alcohols cannot be oxidized without breaking carbon-carbon bonds. For example, borneol is a secondary alcohol which is easily oxidized to yield camphor. The common oxidizing agents for these oxidations include chromic acid, hypochlorous acid and potassium permanganate. However those reagents are hazardous.
In this experiment, an oxidation of borneol to camphor will be carried out using more friendly oxidizing reagent, active manganese dioxide/silica gel catalyst without solvent.
HO
oxidation
OH
REQUIRMENTS Apparatus and materials:
1. Suction flask and cold finger 2. Hot plate and heat dissipation block 3. Thermometer 4. Miniature water pump, hoses, and container for cooling water 5. Silica gel, 230-400 mesh with large surface area of 600 m2/g (0.091 g).
Chemicals: Borneol (C10H18O); Manganese dioxide (active MnO2); Ethyl acetate (CH3 COOCH2 CH3); Hexane (C6H14); diethyl ether (C4H10O).
PROCEDURE
PART I: Oxidation of borneol 1. Place 0.049 g active MnO2, 0.091 g silica gel and 0.044 g borneol in a suction flask.
: Borneol is flammable and eye, skin and respiratory irritant. MnO2 is harmful if it is inhaled or ingested. Use caution when handling and work in a hood whenever possible. Wear gloves and safety goggles.
: Crush any chunks of solid carefully with a spatula to obtain a homogeneous mixture. 2. Assemble the cold finger with water hoses connected to a miniature water pump
and place the flask in a well with a window for observation in a heat dissipation block.

Department of Chemistry, Faculty of Science, Chulalongkorn University, Bangkok, Thailand 10330 Tel / Fax +66 2218 7641, e-mail: [email protected]
125
: Ice can be added in a water container to obtain much cooler water for circulating in the cold finger.
3. Turn on the heat and hold at 165oC for 10 min. Raise the temperature to ~190oC over 5 min. and hold for 10 min.
: Camphor will sublime onto the cold finger. 4. When the reaction is complete, turn off the heat. Remove the apparatus from the
heat and allow it to cool at room temperature. 5. Carefully remove the cold finger from the suction flask gently. Scrape the crystals
onto a tare piece of weighing paper and reweigh. 6. Record the mass of camphor. Determine its melting point.
: Consult the procedure for melting point determination on page 17. 7. Collect a few crystals and dissolve in 2 drops of diethyl ether for thin-layer
chromatography.
PART II: Thin-layer chromatography 8. Prepare 1 TLC plate (2x7 cm dimension).
: Handle it only on the edges, as fingerprints contain UV-active materials. Using a pencil draw a very light line across the sheet (short dimension) about 1 cm from one end. Then make 2 small light marks along the line for spotting samples. Draw another light line about 1 cm from another end of the plate for the solvent front.
9. Obtain a TLC chamber and place solvent, a mixture of 10% ethyl acetate in hexane (by volume) to 0.5 cm height. Place a piece of filter paper around the inside surface of the container and extend into the solvent.
: Ethyl acetate is strong smelling chemicals. Be very careful to place the cover on the container immediately.
: Hexane is flammable, Keep flame away and avoid breathing its fume.
: A glass jar with a lid or a beaker with a watchglass or a cover of a Petri dish can be used as a TLC chamber, but it should be large enough so that the TLC plate can lean against one side.
10. Use clean capillary tubes, carefully spot two samples at the pencil marks as shown below.
: The spots should be as small as possible in order to minimize tailing and overlapping when the TLC plate is developed. If a more intense spot is desired, let the spot dry and re-spot in the same location.
11. When the spots are dry, place the TLC plate in the developing chamber. Then gently close the chamber.
: Be sure that the bottom edge of the TLC plate is in the solvent but the spots are above the solvent, and the filter paper does not touch the chromatographic sheet.

Department of Chemistry, Faculty of Science, Chulalongkorn University, Bangkok, Thailand 10330 Tel / Fax +66 2218 7641, e-mail: [email protected]
126
A. Borneol B. Camphor
12. When the solvent has moved to the front line, remove the plate. Lay it on a clean surface in a fume hood or well ventilated area and allow the solvent to evaporate until the plate appears dry.
13. Visualize the spots in an I2 chamber (small bottle containing a few I2 crystals). Immediately draw a light pencil line around each spot.
14. Measure all the distances traveled by the compounds and solvent. Calculate the retention factor (Rf) for each component.
15. Determine the melting point of the product.
: Consult the procedure for melting point determination on page 17.
: Borneol is 204 oC and camphor is 177 oC.
CLEANUP 1. Place the residue in the suction flask in the heavy metal waste container.
QUESTION
1. Would you expect to get the same product from the oxidation of isoborneol comparing to borneol? Explain.
Front line of solvent 0.5 cm
Start line1.0 cm A B

Department of Chemistry, Faculty of Science, Chulalongkorn University, Bangkok, Thailand 10330 Tel / Fax +66 2218 7641, e-mail: [email protected]
127
LAB REPORT
OXIDATION OF BORNEOL TO CAMPHOR WITH ACTIVE MANGANESE DIOXIDE ON SILICA
Actual mass and moles of borneol used………………..…...g………………….moles Theoretical Yield of the product……………………………g……………….…moles The actual product…………………………………………..g………………….moles % Yield of the actual product (based on Theoretical Yield) ………………………… Melting range of the actual product.......................................………………………… If the melting point is more than 3oC below the literature value of pure camphor, or the range is more than 3oC, provide an explanation………………………………….. ....................................................................................................................................... ………………………………………………………………………………………… Rf value for Borneol………………………………………………………………….. Rf value for Camphor………………………………………………………………… Based on the melting point and TLC data of the final product, comment on its purity………………………………………………………………………………………………………………………………………………………………………………………….……………………………………………………………………………………………….
Remark : Development work done by Dr. Richard W. Gurney, and modified using the apparatus from Small-Lab Kit by the undergraduates of Department of Chemistry, Faculty of Science, Chulalongkorn University under the supervisory of Dr. Margaret Kerr and Dr. Supawan Tantayanon. Dr. Richard W. Gurney, Simmons College, Department of Chemistry, 300 The Fenway, Boston, MA USA 02115-5898. E-mail: [email protected] Dr. Margaret Kerr, Worcester State College, Department of Chemistry,486 Chandler Street,Worcester, MA USA 01602. E-mail: [email protected]

Department of Chemistry, Faculty of Science, Chulalongkorn University, Bangkok, Thailand 10330 Tel / Fax +66 2218 7641, e-mail: [email protected]
128
CHAPTER V: ISOLATION OF NATURAL PRODUCTS

Department of Chemistry, Faculty of Science, Chulalongkorn University, Bangkok, Thailand 10330 Tel / Fax +66 2218 7641, e-mail: [email protected]
129
ISOLATION OF PIGMENTS FROM PLANT LEAVES
OBJECTIVE 1. To isolate pigments from plant leaves by adsorption column chromatography
technique.
BACKGROUND Activity simulates the extraction, identification, and separation of pigment in or on
plants using chromatography. Pigments present in the leaves of plants are typically classified into two types, chlorophylls and carotenoids. Carotenoids are part of a larger collection of plant-derived compounds such as carotene, xanthophylls, and lutein. Separation of pigments from plant leaves can be performed by adsorption column chromatography technique. The most common adsorbents for column chromatography are silica gel, alumina, calcium carbonate, and icing sugar.
HO
OH
Betacarotene
Lutein
Chlorophyll A Chlorophyll B
N N
NN
CH H CH3
C2H5
H
CH3
C
H
H3C
OCH
CO OCH3
H
H3CH
H2C
CO
OC20H29
MgN N
NN
CH H C
C2H5
H
CH3
C
H
H3C
OCHCO OCH3
H
H3CH
H2C
CO
OC20H29
OH
Mg
In this experiment, leaf pigments will be isolated by adsorption column
chromatography using three kinds of adsorbents sequentially packed in one column.

Department of Chemistry, Faculty of Science, Chulalongkorn University, Bangkok, Thailand 10330 Tel / Fax +66 2218 7641, e-mail: [email protected]
130
REQUIREMENTS Apparatus and materials:
1. Conical bottom flasks 2. Erlenmeyer flasks 3. Beaker 4. Filter paper 5. Mortar and pestle 6. Pasteur pipette 7. Hotplate and heat dissipation block
8. Condenser 9. Plant leaves (color leaves) 10. Icing sugar 11. Aluminum foil 12. Cotton wool 13. Sand 14. Mortar and pestle
Chemicals: Alumina (Al2O3); calcium carbonate (CaCO3); hexane (C6H4); toluene (C6H5-CH3); methanol (CH3OH); sodium sulfate (anh.Na2SO4).
PROCEDURE PART I: Pigment extraction from plant leaves
1. Wash 1 g of the plant leaves and wipe them dry. Grind them into a fine powder with a mortar and pestle.
2. Place them in a 25-mL Erlenmeyer flask containing 5 mL of a mixture of hexane: toluene: methanol (9:1:3). Stir well for 2 minutes at room temperature.
: Toluene and methanol are harmful, avoid touching and smelling it. 3. Filter the leave powder using suction filtration. (Assemble a filtering glass funnel to a
filtering flask and clamp. Connect the side arm of the filtering flask to the suction valve (S) of a three-way pipette bulb. Cut the filter paper to the right size and place at the bottom of the funnel. Expel air from the bulb by squeezing the air valve (A) and the bulb simultaneously. Wet the filter paper with a few drops of the solvent used and apply suction; squeeze the "suction" valve (S). Immediately transfer the suspension on to the filter. Continue applying suction by simultaneously squeezing the air valve (A) and the bulb again, and then squeeze the suction valve (S) until all the liquid has been pulled through the filter. If necessary, the solid can be washed on the filter with fresh solvent. Repeat the suction process until the solid is air-dry. Release the suction by squeezing the empty valve (E)).
4. Transfer the solution mixture to a 10-mL conical bottom flask, Flask No.1. Add 3 mL of water into the mixture. Stir the mixture well using a Pasteur pipette method. (Draw a portion of the lower layer up into a pipette and carefully expel it back into the flask, through the upper layer. Do this repeatedly for a few times).
: If the mixture is not mixing well, the incomplete separation and the impure products will be obtained.
5. Allow the mixture to separate completely into two distinct layers. Remove the lower aqueous layer, using a Pasteur pipette method, and transfer it into a 25-mL beaker. (Squeeze the rubber bulb and lower the tip of the pipette to the bottom of the flask. Carefully draw up the lower layer until the interface between the layers reaches the pipette tip. Lift out the Pasteur pipette from the solution while still squeezing the rubber bulb and expel any drops of the upper layer caught in the tip. Then transfer the lower layer in the pipette into another container).
6. Repeat washing the organic layer in Flask No.1 with another 3 mL of water. Combine the lower aqueous layer in a beaker for disposal.
: Wrap around the flask with aluminum foil and work quickly to prevent the extract from the light contact.

Department of Chemistry, Faculty of Science, Chulalongkorn University, Bangkok, Thailand 10330 Tel / Fax +66 2218 7641, e-mail: [email protected]
131
Add a minute amount of anh.Na2SO4 to Flask No.1 and swirl the solution. Keep adding until some of it swirls freely, and then set aside when the solution is no longer cloudy.
8. Filter the solution using a Pasteur filter-tip pipette method. (Wrap the Pasteur pipette tip with a small wad of cotton wool. Immerse the pipette into the solution until the pipette tip reaches the bottom of the flask while squeezing the rubber bulb. Lift out the Pasteur pipette from the solution while still squeezing the rubber bulb. Draw the solution up into the pipette by releasing the rubber bulb. Take off the cotton wad and expel the solution in the pipette into the proper container).
: Be careful not to lose the cotton wool during suction. While lifting the pipette out, apply a little pressure by squeezing the bulb softly to prevent suction of unfiltered solution into the pipette.
9. Transfer the solution in the pipette into another conical bottom flask, Flask No.2. Connect it with a receiver distilling still and a water-cooled condenser.
10. Distil off the mixed organic solvent to obtain the concentrated solution at the bottom of the flask. Weigh the product.
: The operation in this procedure should be done as rapidly as possible and avoid the sunlight since the product easily undergo degradation.
PART II: Preparation of a chromatographic column
11. Clamp a Pasteur pipette in a vertical position to a lab stand. 12. Push a small piece of cotton wool with a copper wire to loosely pack at the neck of
a Pasteur pipette.
: The adsorbent should weigh about 100 times of the sample weight. 13. Add a small amount of fine sand to make a small layer before adding the adsorbent. 14. Place alumina, calcium carbonate and icing sugar into the column, in a sequence,
with 1.5 cm high each. Tap the side of the column gently to produce even packing of the adsorbent in the column.
: Dry the adsorbent in the oven at 105°C and keep them in a desiccator to cool down to room temperature.
: Be careful not to breathe in the fine particles of absorbent. 15. Carefully add hexane to the top of column and gently tap the side of the column to
eliminate any air pockets that may form as the solvent travels through the column.
: Adsorbent swells and gives off heat as they take up solvent causing the occurrence of air pockets.
PART III: Separation of pigment
16. Allow solvent to drain to the level of icing sugar.
: Hexane is flammable, Keep flame away and avoid breathing fumes.
: Do not allow the solvent to drain below the level of adsorbent. 17. Carefully apply 1-2 drops of the concentrated extract of plant leaves directly to the
top of adsorbent. 18. Add a few drops of hexane and allow hexane to drain to the top of adsorbent. 19. Fill up the column with hexane.

Department of Chemistry, Faculty of Science, Chulalongkorn University, Bangkok, Thailand 10330 Tel / Fax +66 2218 7641, e-mail: [email protected]
132
20. After hexane drain to the level of icing sugar, fill up the column with the mixture of toluene and hexane (1:1, v/v).
: Toluene is harmful, avoid touching and smelling it. 21. Collect the eluted solution from the column. Observe the color of each separation
band in the column and record the results.
CLEANUP 1. Pour the aqueous solution down the drain with copious amount of water. 2. Pour the organic solvent into the hydrocarbon waste container.
QUESTIONS
1. What is the purpose of wrapping the solution container with aluminum foil? 2. Which substances will be eluted in a sequence by using the toluene and hexane
mixture? 3. What property of the separated substances is different from the substances in the
column?
LAB REPORT
ISOLATION OF PIGMENTS FROM PLANT LEAVES
Adsorbent Color of separation bands
Compound in each separation band
1. Alumina 2. Calcium carbonate 3. Icing sugar
Observation & Conclusion ……………………………………………………………………………………………………………………………………………………………………………………………………………………………………………………………………………………………… ………………………………………………………………………………………………………………………………………………………………………………………………………………………………………………………………………………………………

Department of Chemistry, Faculty of Science, Chulalongkorn University, Bangkok, Thailand 10330 Tel / Fax +66 2218 7641, e-mail: [email protected]
133
EXTRACTION OF PIGMENTS FROM TOMATO, PAPAYA AND CARROT
OBJECTIVES
1. To extract the pigments from tomato, papaya and carrot. 2. To analyze the extracts by thin layer chromatography.
BACKGROUND
Chlorophyll and carotenoid are the pigments mostly found from leaves, vegetables and fruits. Carotenoids consist of carotenes (such as α-carotenes, β-carotenes) and xanthophylls. The chemical structures are shown below.
O
HO
α-Carotenes
β-Carotenes
Xanthophyll In this experiment, the pigments from tomato, papaya and carrot will be isolated by extraction technique. The extracts will be analyzed by thin-layer chromatography.
REQUIREMENTS Apparatus and materials:
1. Conical bottom flasks 2. Beaker 3. Suction glass funnel 4. Filtering flask 5. Pasteur pipette 6. Receiver distilling still 7. Condenser 8. Beaker 9. Watch glass 10. Hot plate and heat
dissipation block
11. Filter paper 12. Capillary tube 13. TLC plate 14. Ruler and pencil 15. Tomato ketchup or ripe
tomato 16. Fresh carrot or canned
carrot 17. Ripe papaya
Chemicals: Acetone (CH3COCH3); hexane (C6H14); sodium sulfate (satd.Na2SO4).

Department of Chemistry, Faculty of Science, Chulalongkorn University, Bangkok, Thailand 10330 Tel / Fax +66 2218 7641, e-mail: [email protected]
134
PROCEDURE PART I: Extraction of tomato, papaya and carrot.
1. Cut a small portion of a ripe tomato into very small pieces or use tomato paste, about 5 g. Place them in 25-mL beaker. Add 3 mL of acetone and mix thoroughly with a spatula.
2. Remove the paste with a spatula and place it on a filter paper. Fold the filter paper and squeeze the paste further.
: Squeeze out of as much of acetone as possible. Be careful not to tear the filter paper. 3. Transfer the paste into a conical bottom flask, Flask No.1. Add 1.5 mL of hexane
and mix thoroughly with a spatula. Leave the paste in hexane with occasional stirring for a few minutes.
4. Filter the solution using a Pasteur filter-tip pipette method. (Wrap the Pasteur pipette tip with a small piece of cotton wool. Immerse the pipette into the solution until the pipette tip reaches the bottom of the flask while squeezing the rubber bulb. Draw the solution up into the pipette by releasing the rubber bulb. Lift up the Pasteur pipette from the solution while still squeezing the rubber bulb. Take off the cotton wool and expel the solution in the pipette into the proper container).
: Be careful not to lose the cotton wool during suction. While lifting the pipette out, apply a little pressure by squeezing the bulb softly to prevent suction of unfiltered solution into the pipette.
5. Transfer the solution in the pipette into another conical bottom flask, Flask No.2. 6. Repeat the extraction of the paste in Flask No.1 with 1.5 mL of hexane and combine
the hexane layers in Flask No.2.
: Hexane is flammable, Keep flame away and avoid breathing fumes. 7. Add 1 mL of water in Flask No.2 and stir the mixture using a Pasteur pipette
method. (Draw a portion of the lower layer up into a pipette and carefully expel it back into the flask through the upper layer. Do this repeatedly for a few times).
: If the mixture is not stirred well, the washing of hexane will not be thorough. 8. Allow the mixture to separate completely into two distinct layers. Remove the
lower aqueous layer, using a Pasteur pipette method. (Squeeze the rubber bulb and lower the tip of the pipette to the bottom of the flask. Carefully draw up the lower layer until the interface between the layers reaches the pipette tip. Lift out the pipette and expel any drops of the upper layer caught in the tip. Then transfer the lower layer in the pipette into another container). Transfer the lower layer into another container for later disposal.
9. Add a small amount of anh.Na2SO4, and swirl the solution. Keep adding until some of it swirls freely, and when set aside the solution is no longer cloudy.
10. Filter the solution using a Pasteur filter-tip pipette method as described in step 4. 11. Transfer the solution in the pipette into another conical bottom flask, Flask No.3.
Connect the flask with a receiver distilling still and a water-cooled condenser. Distil off the hexane to obtain the crude extract at the bottom of the flask.
12. Check the products with thin-layer chromatography. 13. Do the extraction of fresh carrots, canned carrots, and ripe papaya separately by the
same procedure as described above. PART II: Thin-layer chromatography
14. Prepare 2 TLC plates (3x7 cm dimension).

Department of Chemistry, Faculty of Science, Chulalongkorn University, Bangkok, Thailand 10330 Tel / Fax +66 2218 7641, e-mail: [email protected]
135
: Handle them only on the edges, as fingerprints contain UV-active materials. Using a pencil draw a very light line across the sheet (short dimension) about 1 cm from one end. Then make 3 small light marks at even intervals along the line for spotting the samples. Draw another light line about 0.5 cm from another end of the plate for the solvent front.
15. Obtain a TLC chamber and place solvent, a mixture (by volume) of 2% acetone in hexane to 0.5 cm height. Place a piece of filter paper around the inside surface of the container and extend into the solvent.
: Acetone and hexane is flammable, Keep flame away and avoid breathing fumes.
: A glass jar with a lid or a beaker with a watchglass or a cover of a Petri dish can be used as a TLC chamber, but it should be large enough so that the TLC plate can lean against one side.
16. Using clean capillary tubes, carefully spot six known solutions at six pencil marks as shown below.
: The spots should be as small as possible in order to minimize tailing and overlapping when the TLC plate is developed. If a more intense spot is desired, let the spot dry and re-spot in the same location.
17. When the spots are dry, place the TLC plates in the developing chamber. Then gently close the chamber.
: Be sure that the bottom edge of the TLC plate is in the solvent but the spots are above the solvent, and the filter paper does not touch the chromatographic sheet. Place two TLC plates at a time in a TLC chamber, but do not allow them come into contact to each other.
1. Tomato 2. Papaya 3. Carrot
4. Tomato 5. Tomato ketchup 6. Canned carrot
18. When the solvent has moved to the front line, remove the plates. Lay them on a clean surface in a fume hood or well ventilated area and allow the solvent to evaporate until the plates appear dry.
19. Then view the plates under UV light and immediately draw a light pencil line around each spot.
: UV radiation is harmful to eyes. Do not look directly at the UV lamp.
: Alternatively, the spots can be visualized in an I2 chamber (small bottle containing a few I2 crystals).
0.5 cm
1.0 cm 1 2 3
Start line
Front line of solvent
4 5 6

Department of Chemistry, Faculty of Science, Chulalongkorn University, Bangkok, Thailand 10330 Tel / Fax +66 2218 7641, e-mail: [email protected]
136
20. Measure all the distances traveled by the compounds and solvent. Calculate the retention factor (Rf) for each component.
CLEANUP
1. Dissolve Na2SO4 in water and flush them down the drain with copious amount of water.
2. Keep the residue in the container for disposal.
QUESTIONS 1. Why is acetone used for in this experiment? Give examples of other solvents that
can be replaced acetone? 2. Why can β-carotene and lycopene dissolve in hexane? 3. Are the pigments in tomato, papaya and carrot the same or different?
LAB REPORT
EXTRACTION OF PIGMENTS FROM TOMATO PAPAYA AND CARROT Materials Color in water layer Color in hexane layer Pigments Rf
Tomato Papaya Carrot Tomato ketchup Canned carrot
Observation & Conclusion
………………………………………………………………………………………………………………………………………………………………………………………………………………………………………………………………………………………………………………………………………………………………………………………………………………………………………………………………………………………………………………………………………………………………………………

Department of Chemistry, Faculty of Science, Chulalongkorn University, Bangkok, Thailand 10330 Tel / Fax +66 2218 7641, e-mail: [email protected]
137
EXTRACTION AND ANALYSIS OF AN ESSENTIAL OIL
OBJECTIVES 1. To isolate essential oil of clove by extraction technique. 2. To characterize the extract analyzed by thin layer chromatography.
BACKGROUND
An essential oil is a substance extracted from a plant material. It is a hydrophobic liquid containing highly volatile aromatic compounds. Essential oils are generally extracted by distillation. The essential oils which impart the distinctive aromas are complex mixtures of organic constituents, some of which being less stable, may undergo chemical alterations when subjected to high temperatures. In this case, organic solvent extraction is required to ensure no decomposition or changes have occurred which would alter the aroma and fragrance of the end-product.
CH2CH=CH
OCH3
OH
H2C
H3CCH3
CH3
CaryophylleneEugenol
Oil of clove is rich in Eugenol (4-allyl-2-methoxyphenol). Caryophyllene is also
present in relatively small amount, along with other terpenes. Clove oil is made from the buds of the flower of a tree that grows in tropical equatorial regions. It is intense oil, most commonly used to relieve dental pain and infection and to dissolve the eggs deposited by intestinal worms. Clove oil is delicious but overwhelming in both smell and taste. It is antiseptic, carminative, warm and very aromatic. It is often used as a flavoring in toothpaste, mouthwashes, and exotic foods.
In this experiment, the essential oil of clove will be isolated by distillation and extracted with dichloromethane.
REQUIREMENTS Apparatus and materials:
1. Round bottom flask 2. Conical bottom flasks 3. Receiver distilling still 4. Condenser 5. Hot plate and heat dissipation
block
6. Pasteur pipette 7. Beaker 8. Watchglass 9. TLC plate 10. Capillary tube 11. Ruler and pencil
Chemicals: Dichloromethane (CH2Cl2); sodium sulfate (anh.Na2SO4); eugenol (10% C10H12O2/ethanol); caryophyllene (10% C15H24/ethanol); toluene (C6H5-CH3); anisaldehyde reagent (CH3O-C6H4-CHO).

Department of Chemistry, Faculty of Science, Chulalongkorn University, Bangkok, Thailand 10330 Tel / Fax +66 2218 7641, e-mail: [email protected]
138
PROCEDURE
PART I: Extraction 1. Crush 1.5 g of dry cloves into very small pieces. Place them in 25-mL round bottom
flask. Add 15 mL of water and swirl well. 2. Connect the flask with a receiver distilling still and a water-cooled condenser. Distil
the solution to obtain the distillate in the trough of the still about 7 mL. 3. Transfer the distillate with a Pasteur pipette into the 10-mL conical bottom flask,
Flask No.1. Rinse the still with 2 mL of dichloromethane and transfer the dichloromethane into Flask No.1. Stir the mixture using a Pasteur pipette method. (Draw a portion of the lower layer up into a pipette and carefully expel it back into the flask, through the upper layer. Do this repeatedly for a few times).
: If the dichloromethane is not mixed well, the incomplete separation and the poor yield will be obtained.
4. Allow the mixture to separate completely into two distinct layers. Remove the lower dichloromethane layer, using a Pasteur pipette method (Squeeze the rubber bulb and lower the tip of the pipette to the bottom of the flask. Carefully draw up the lower layer until the interface between the layers reaches the pipette tip. Lift out the pipette and expel any drops of the upper layer caught in the tip. Then transfer the lower layer in the pipette into another container). Transfer it into another conical bottom flask, Flask No.2.
5. Repeat extraction of the liquid in Flask No.1 with another 2 mL of dichloromethane as described in steps 3-4. Combine the dichloromethane in Flask No.2.
6. Add a small amount of anh.Na2SO4 and swirl the solution. Keep adding until some of it swirls freely, and then set aside when the solution is no longer cloudy.
7. Filter the solution using a Pasteur filter-tip pipette method. (Wrap the Pasteur pipette tip with a small piece of cotton wool. Immerse the pipette into the solution until the pipette tip reaches the bottom of the flask while squeezing the rubber bulb. Draw the solution up into the pipette by releasing the rubber bulb. Take off the cotton wool and expel the solution in the pipette into the proper container).
: Be careful not to lose the cotton wool during suction. While lifting the pipette out, apply a little pressure by squeezing the bulb softly to prevent suction of unfiltered solution into the pipette.
8. Transfer the solution in the pipette into another conical bottom flask, Flask No.3. Connect the flask with a receiver distilling still and a water-cooled condenser. Distil off dichloromethane to obtain the product at the bottom of the flask.
9. Check the purity of products with thin-layer chromatography. PART II. Thin-layer chromatography
10. Prepare 1 TLC plate (3 x 7 cm dimension).
: Handle the TLC plate only on the edges, as fingerprints contain UV-active materials. Using a pencil draw a very light line across the sheet (short dimension) about 1 cm from one end. Then make 3 small light marks at even intervals along the line. These are the points at which the samples will be spotted. Draw another light line about 1 cm from another end of the plate for the solvent front.
11. Obtain a TLC chamber and place toluene to 0.5 cm high. Place a piece of filter paper around the inside surface of the container and extend into the solvent.

Department of Chemistry, Faculty of Science, Chulalongkorn University, Bangkok, Thailand 10330 Tel / Fax +66 2218 7641, e-mail: [email protected]
139
: A glass jar with a lid or a beaker with a watchglass or a cover of a Petri dish can be used as a TLC chamber, but it should be large enough so that the TLC plate can lean against one side.
12. Using clean capillary tubes, carefully spot three known solutions at three pencil marks as shown below.
A: Essential oil extract B: Authentic Eugenol C: Authentic Caryophyllene
: The spots should be as small as possible in order to minimize tailing and overlapping when the TLC plate is developed. If a more intense spot is desired, let the spot dry and re-spot in the same location.
13. When the spots are dry, place the TLC plate in the developing chamber. Then gently close the chamber.
: Be sure that the bottom edge of the TLC plate is in the solvent but the spots are above the solvent, and the filter paper does not touch the chromatographic sheet.
14. When the solvent has moved to the front line, remove the plate. Lay them on a clean surface in a fume hood or well ventilated area and allow the solvent to evaporate until the plate appears dry.
15. Then view the plate by spraying anisaldehyde reagent on the plate. Allow the plate to dry at 100-150°C and draw a light pencil line around each spot.
: Anisaldehyde is very hazardous in case of ingestion, skin and eye contact. 16. Measure all the distances traveled by the compounds and solvent. Calculate the
retention factor (Rf) for each component.
CLEANUP 1. Pour dichloromethane waste into chlorinated hydrocarbon waste container. 2. Add water to dissolve sodium sulfate until solid disappears, flush them down the
drain with copious amount of water. 3. Place the clove residue in the trash.
QUESTIONS
1. From TLC results, how many substances are there in the clove oil? What are they? 2. What are the uses of the clove oil?
1.0 cm
0.5 cm
A B CStart line
Front line of solvent
A B C
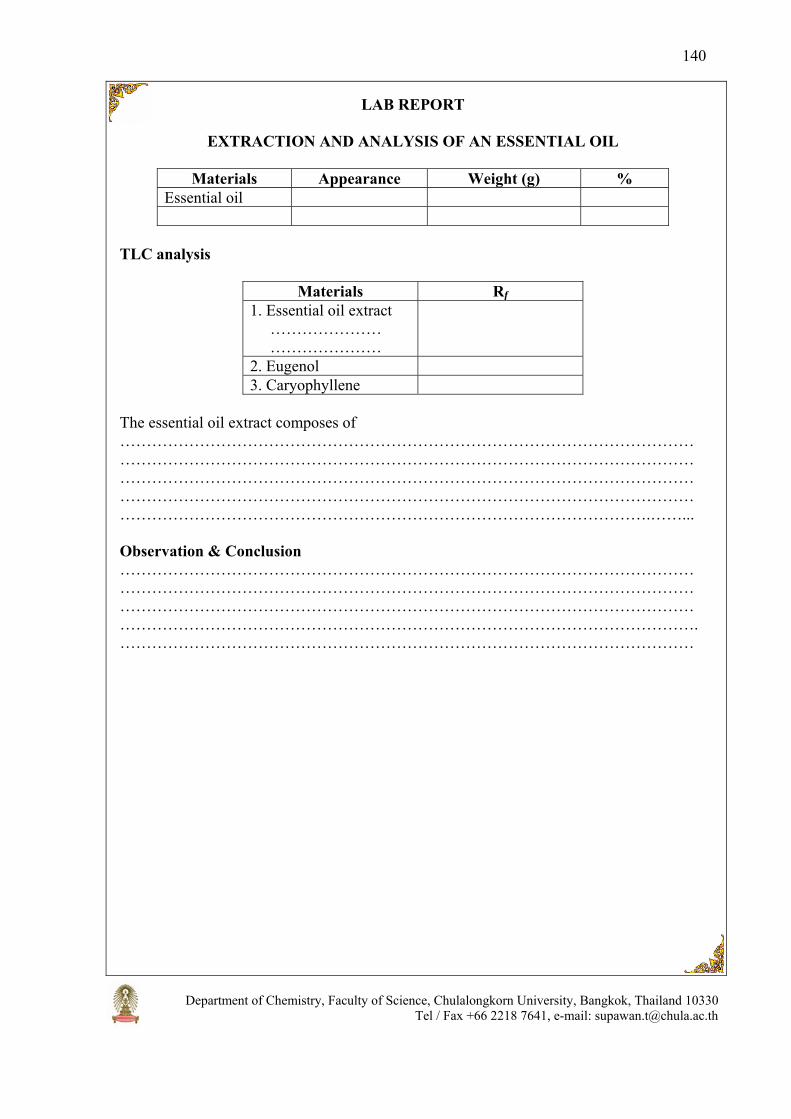
Department of Chemistry, Faculty of Science, Chulalongkorn University, Bangkok, Thailand 10330 Tel / Fax +66 2218 7641, e-mail: [email protected]
140
LAB REPORT
EXTRACTION AND ANALYSIS OF AN ESSENTIAL OIL
Materials Appearance Weight (g) % Essential oil
TLC analysis
Materials Rf 1. Essential oil extract ………………… …………………
2. Eugenol 3. Caryophyllene
The essential oil extract composes of ……………………………………………………………………………………………………………………………………………………………………………………………… ……………………………………………………………………………………………………………………………………………………………………………………………………………………………………………………………………………………….……...
Observation & Conclusion ……………………………………………………………………………………………… ……………………………………………………………………………………………… ……………………………………………………………………………………………… ………………………………………………………………………………………………. ………………………………………………………………………………………………

Department of Chemistry, Faculty of Science, Chulalongkorn University, Bangkok, Thailand 10330 Tel / Fax +66 2218 7641, e-mail: [email protected]
141
ISOLATION OF CAFFEINE FROM TEA LEAVES
OBJECTIVES 1. To isolate caffeine from tea leaves. 2. To practice many techniques such as extraction, filtration, and sublimation.
BACKGROUND
Caffeine is an alkaloid which is a class of naturally occurring compounds containing nitrogen and having the properties of an organic amine base. Caffeine is the most powerful xanthine in its ability to increase alertness, put off sleep and to increase one’s capacity for thinking. Caffeine is a vasodilator (relaxes the blood vessels) as well as a diuretic (increases urination). Caffeine does not exist alone in tea leaves. The leaves are mainly cellulose, pigments and chlorophylls, and tannins. Tannins are phenolic compounds of high molecular weight that have certain properties in common. Caffeine is found in varying quantities in many plants. Some of the better-known plant sources are coffee and cocoa beans, tea leaves, and kola nuts.
N
N
NH3CO
O
CH3
CH3
Caffeine
In this experiment, caffeine will be extracted from tea and purify it by sublimation.
REQUIREMENTS Apparatus and materials:
1. Conical bottom flasks 2. Beaker 3. Hot plate and heat dissipation
block 4. Suction flask and cold finger 5. UV lamp 6. Receiver distilling still
7. Condenser 8. Pasteur pipette 9. TLC plate 10. Stirring rod 11. Capillary tubes 12. Tea bags
Chemicals: Sodium carbonate (Na2CO3); sodium hydroxide (5% NaOH); dichloromethane (CH2Cl2); sodium sulfate (anh.Na2SO4); ethyl acetate (CH3COOCH2CH3).
PROCEDURE PART I: Extraction of caffeine
1. Weigh 2 tea bags in 50-mL beaker and record their mass. 2. Place 15 mL of water, 2 g of Na2CO3, and a boiling stone into a 25-mL round
bottom flask. Boil the solution gently in a heat dissipation block on a hot plate. 3. Pour a hot solution (from step 2) in a beaker containing 2 tea bags. Completely
immerse 2 tea bags into the solution and let them soak for 3 minutes.

Department of Chemistry, Faculty of Science, Chulalongkorn University, Bangkok, Thailand 10330 Tel / Fax +66 2218 7641, e-mail: [email protected]
142
: Occasional press the tea bags using a stirring rod. Be careful not to tear the bag open. 4. Transfer 10 mL of the solution into 10-mL conical bottom flask, Flask No.1. Add a
boiling stone. Connect the flask with a receiver distilling still fitted with a water-cooled condenser. Distil off water as much as possible.
5. Pour the rest of the solution into Flask No.1 and continue distillation until 2-3 mL of the solution is left in the flask.
6. Allow the solution to cool down at room temperature. 7. Add 3 mL of dichloromethane and gently stir the mixture using a Pasteur pipette
method. (Draw a portion of the lower layer up into a pipette and carefully expel it back into the flask, through the upper layer. Do this repeatedly for a few times).
: Gently mix the mixture. If not it may cause the emulsion occur in the mixture. 8. Allow the mixture to separate completely into two distinct layers. Remove the
lower dichloromethane layer, using a Pasteur pipette method. (Squeeze the rubber bulb and lower the tip of the pipette to the bottom of the flask. Carefully draw up the lower layer until the interface between the layers reaches the pipette tip. Lift out the Pasteur pipette from the solution while still squeezing the rubber bulb and expel any drops of the upper layer caught in the tip. Then transfer the lower layer in the pipette into another container). Transfer it into another conical bottom flask, Flask No.2.
: Be careful not to lose the cotton wool during suction. While lifting the pipette out, apply a little pressure by squeezing the bulb softly to prevent suction of unfiltered solution into the pipette.
9. Repeat the extraction of the solution in Flask No.1 with another 3 mL of dichloromethane as described in steps 7-8. Combine dichloromethane in Flask No.2.
10. Wash the dichloromethane layer in Flask No.2 with 2 mL of 5% NaOH and then 2 mL of water using a Pasteur pipette method as described in steps 7-8. Transfer dichloromethane in the pipette into another conical bottom flask, Flask No.3.
: Discard the upper aqueous layer. 11. Add a minute amount of anh.Na2SO4 and swirl the solution. Keep adding until some
of it swirls freely, and then set aside the solution is no longer cloudy. 12. Filter the solution using a Pasteur filter-tip pipette method. (Wrap the Pasteur pipette tip
with a small piece of cotton wool. Immerse the pipette into the solution until the pipette tip reaches the bottom of the flask while squeezing the rubber bulb. Draw the solution up into the pipette by releasing the rubber bulb. Lift out the Pasteur pipette from the solution while still squeezing the rubber bulb. Take off the cotton wool and expel the solution in the pipette into the proper container).
: Be careful not to lose the cotton wool during suction. While lifting the pipette out, apply a little pressure by squeezing the bulb softly to prevent suction of unfiltered solution into the pipette.
13. Transfer the solution in the pipette into another conical bottom flask, Flask No.4. Connect the flask with a receiver distilling still fitted with the water-cooled condenser. Distil off the dichloromethane to obtain the solid at the bottom of the flask.
PART II: Sublimation of product

Department of Chemistry, Faculty of Science, Chulalongkorn University, Bangkok, Thailand 10330 Tel / Fax +66 2218 7641, e-mail: [email protected]
143
14. Transfer the solid into a suction flask equipped with a cold finger. Sublime the solid by heating in a heat dissipation block on a hot plate.
15. When sublimation is complete, carefully lift out the cold finger. Scrape off the crystals, weigh and calculate its percent recovery. Determine its melting point. And check the purity of product with thin-layer chromatography in PART III.
: Consult the procedure formelting point determination on page 17. PART III: Thin-layer chromatography
16. Prepare 1 TLC plate (2 x 7 cm dimension).
: Handle it only on the edges, as fingerprints contain UV-active materials. Using a pencil draw a very light line across the sheet (short dimension) about 1 cm from one end. Then make 2 small light marks along the line for spotting the samples. Draw another light line about 0.5 cm from another end of the plate for the solvent front.
17. Obtain a TLC chamber and place solvent, ethyl acetate to 0.5 cm height. Place a piece of filter paper around the inside surface of the container and extend into the solvent.
: A glass jar with a lid or a beaker with a watchglass or a cover of a Petri dish can be used as a TLC chamber, but it should be large enough so that the TLC plate can lean against one side.
18. Using clean capillary tubes, carefully spot two samples at the two pencil marks as shown below.
A: Caffeine from tea leaves B: Standard caffeine
: The spots should be as small as possible in order to minimize tailing and overlapping when the TLC plate is developed. If a more intense spot is desired, let the spot dry and re-spot in the same location.
19. When the spots are dry, place the TLC plate in the developing chamber. Then gently close the chamber.
: Be sure that the bottom edge of the TLC plate is in the solvent but the spots are above the solvent, and the filter paper does not touch the chromatographic sheet.
20. When the solvent has moved to the front line, remove the plate. Lay it on a clean surface in a fume hood or well ventilated area and allow the solvent to evaporate until the plate appears dry.
Start line
Front line of solvent 0.5 cm
1.0 cm A B

Department of Chemistry, Faculty of Science, Chulalongkorn University, Bangkok, Thailand 10330 Tel / Fax +66 2218 7641, e-mail: [email protected]
144
21. Visualize the plate under UV light and immediately draw a light pencil line around each spot.
: UV radiation is harmful to eyes. Do not look directly at the UV lamp. 22. Measure all the distances traveled by the compounds and solvent. Calculate the
retention factor (Rf) for the component.
QUESTIONS 1. What is an alkaloid? 2. What substances do you think are present in the tea extract? 3. Explain why saturated sodium carbonate was added to the mixture of tea and water? 4. Describe the other means for making pure caffeine?
LAB REPORT
ISOLATION OF CAFFEINE FROM TEA LEAVES
Materials Appearance Mp/bp
(°C) MW Weight
(mg) % Rf
Caffeine Observation & Conclusion ………………………………………………………………………………………………………………………………………………………………………………………………………………………………………………………………………………………………………………………………………………………………………………………………………………………………………………………………………………………………………………………………………………………………………………………………

Department of Chemistry, Faculty of Science, Chulalongkorn University, Bangkok, Thailand 10330 Tel / Fax +66 2218 7641, e-mail: [email protected]
145
ISOLATION AND HYDROLYSIS OF TRIMYRISTIN FROM NUTMEG SEED
OBJECTIVES
1. To isolate trimyristin from nutmeg seed by refluxing and chromatographic technique.
2. To hydrolyse the isolated trimyristin to myristic acid under basic conditions.
BACKGROUND Natural products are naturally occurring organic compounds that are produced by
living organism. Many useful and important organic compounds may be extracted from plants. Trimyristin is another interesting compound which is a major component of Myristica fragrance on nutmeg seed. It is unusual as a naturally occurring triglyceride in that it contains exclusively myristic acid, a fatty acid.
H2C
CH
H2C
O C
O
(CH2)12CH3
O C
O CO
O(CH2)12CH3
(CH2)12CH3
Trimyristin
H2C
CH
H2C
OH
OH
OH
Glycerol Myristic acid
1) OH-
2) H3O+3CH3(CH2)12COOH
In this experiment, trimyristin will be extracted from nutmeg seed to obtain crude trimyristin which will be purified by recrystallization. Trimyristin will be further hydrolyzed with a base, known as saponification, to obtain glycerol and myristic acid. Since the melting points of trimyristin and myristic acid are very close, the purity of trimyristin will be checked by its melting point and thin layer chromatography comparing to crude extract and myristic acid.
REQUIREMENTS Apparatus and materials:
1. Conical bottom flasks 2. Round-bottom flasks 3. Pasteur pipette 4. Condenser 5. Filtering flask 6. Filtering glass funnel 7. Three-way rubber bulb 8. Filter paper 9. Rubber tubing
10. Thermometer 11. Nutmeg seed powder 12. Ruler and pencil 13. TLC plate 14. Capilary tube 15. Watch glass 16. Distillation apparatus (condenser,
distilling head, receiver adapter)
Chemicals: Dichloromethane (CH2Cl2); hexane (C6H14); acetone (CH3COCH3); sodium hydroxide (0.25M NaOH), sodium chloride (satd.NaCl), hydrochloric acid (6M HCl).

Department of Chemistry, Faculty of Science, Chulalongkorn University, Bangkok, Thailand 10330 Tel / Fax +66 2218 7641, e-mail: [email protected]
146
PROCEDURE PART I: Isolation of Trimyristin
1. Weigh about 0.5 g of finely powdered nutmeg in a 10-mL conical bottom flask, Flask No.1. Add 5 mL dichloromethane.
2. Connect the flask with a water-cooled condenser. Heat the mixture to gently reflux for 20 minutes.
: Be careful not to heat the mixture higher than 60°C. 3. Allow the mixture to cool down. Transfer the mixture into another 10-mL conical
bottom flask, Flask No.2, using a Pasteur filter-tip pipette. (Wrap the Pasteur pipette tip with a small piece of cotton wool. Immerse the pipette into the solution until the pipette tip reaches the bottom of the flask while squeezing the rubber bulb. Draw the solution up into the pipette by releasing the rubber bulb. Take off the cotton wool and expel the solution in the pipette into the proper container. Repeat this procedure until all solution has been removed).
: Be careful not to lose the cotton wool during suction. While lifting the pipette out, apply a little pressure by squeezing the bulb softly to prevent suction of unfiltered solution into the pipette.
: Minimize the transfer distance from one flask to another to avoid losing the liquid due to squirting or dripping from the pipette.
4. Connect the flask with a receiver distilling still and a water-cooled condenser. Distil off the dichloromethane until the viscous liquid is obtained in the flask.
: If a liquid condenses before reaching the collecting chamber, wrap the part of the assembly between the top of the heat dissipation block and the bottom of the collecting chamber with cotton wool, or with aluminum foil.
5. Allow the liquid to cool down at room temperature and add 3-mL of acetone. 6. Dissolve the resulting content by warming the mixture at low temperature. (Prepare
a TLC plate and apply a small amount of this solution, a crude product and keep it for developing later)
7. Allow the mixture to stand at room temperature. When crystals begin to form (crystallization is quite slow), follow by cooling the flask in an ice-water bath for another 15 minutes.
8. Collect the crystals by suction filtration (Assemble a filtering glass funnel to a filtering flask and clamp. Connect the side arm of the filtering flask to the suction valve (S) of a three-way pipette bulb. Cut the filter paper to the right size and place at the bottom of the funnel. Expel air from the bulb by squeezing the air valve (A) and the bulb simultaneously. Wet the filter paper with a few drops of the solvent used and apply suction; squeeze the "suction" valve (S). Immediately transfer the suspension on to the filter. Continue applying suction by simultaneously squeezing the air valve (A) and the bulb again, and then squeeze the suction valve (S) until all the liquid has been pulled through the filter. If necessary, the solid can be washed on the filter with fresh solvent. Repeat the suction process until the solid is air-dry. Release the suction by squeezing the empty valve (E)). Continue suction to air-dry.
9. Weigh the trimyristin and determine its melting point (reported melting point of trimyristin 55-56 °C)
: Consult the procedure for melting point determination on page 17.

Department of Chemistry, Faculty of Science, Chulalongkorn University, Bangkok, Thailand 10330 Tel / Fax +66 2218 7641, e-mail: [email protected]
147
PART II: Hydrolysis of Trimyristin 10. Place purified trimyristin (weigh accurately) and 0.25 M of NaOH in 95% ethanol
in a 10-mL conical bottom flask.
: 1.25 equiv of NaOH is required for the saponification, so calculate the volume needed to be used.
11. Add a boiling stone and equip with a water-cooled condenser, then gently reflux the mixture for 15 minutes.
: During reflux, a large amount of white solid should precipitate. 12. After cooling to room temperature, pour the mixture into a small beaker and use 5
mL of saturated NaCl solution to aid in the transfer of the mixture. 13. Mix well and do suction filtration of the white solid as described in step 8 and wash
it with cold water. 14. Dissolve the white solid in 5 mL of water and cool in an ice-water bath. Slowly
acidify the solution with 6M HCl until it is acidic by litmus paper. 15. Do suction filtration of the solid precipitates as described in step 8 and wash it with
5 mL of cold water. Continue suction for a few minutes to dry the solid. 16. Weigh and determine the melting point of pure myristic acid (reported melting
point 58-59ºC).
: Consult the procedure for melting point determination on page 17.
PART III: Thin-layer chromatography
17. Prepare a TLC plate (3x7 cm dimension).
: Handle it only on the edges, as fingerprints contain UV-active materials. Using a pencil draw a very light line across the sheet (short dimension) about 1 cm from one end. Then make 3 small light marks at even intervals along the line for spotting the samples. Draw another light line about 0.5 cm from another end of the plate for the solvent front.
18. Obtain a TLC chamber and place a solvent, dichloromethane, to 0.5 cm height. Place a piece of filter paper around the inside surface of the container and extend into the solvent.
: A glass jar with a lid or a beaker with a watchglass or a cover of a Petri dish can be used as a TLC chamber, but it should be large enough so that the TLC plate can lean against one side).
: Dichloromethane is flammable and toxic. Keep flame away and avoid breathing fumes. 19. Use clean capillary tubes, carefully spot the samples as shown below.

Department of Chemistry, Faculty of Science, Chulalongkorn University, Bangkok, Thailand 10330 Tel / Fax +66 2218 7641, e-mail: [email protected]
148
A. Authentic trimyristin B. Crude extract C. Hydrolysed trimyristin
: The spots should be as small as possible in order to minimize tailing and overlapping when the TLC plate is developed. If a more intense spot is desired, let the spot dry and re-spot in the same location.
20. After the spots are dry, place the TLC plate in the developing chamber. Then gently close the chamber.
: Be sure that the bottom edge of the TLC plate is in the solvent but the spots are above the solvent, and the filter paper does not touch the chromatographic sheet.
21. When the solvent has moved to the front line, remove the plate. Lay it on a clean surface in a fume hood or well ventilated area. Allow the solvent to evaporate until the plate appears dry.
22. Visualize the plate under UV light or alternatively in an iodine chamber (small bottle containing a few I2 crystals). Immediately draw a light pencil line around each spot.
: UV radiation is harmful to eyes. Do not look directly at the UV lamp. 23. Measure all the distances traveled by the compounds and solvent. Calculate the
retention factor (Rf) for each compound.
CLEANUP 1. Pour all aqueous solutions down the drain with copious amount of running water. 2. Place trimyristin waste in the non-halogenated organic waste container. 3. Pour the remaining dichloromethane solutions in halogenated organic waste
container.
QUESTIONS 1. Draw the flow chart of isolation of trimyristin from nutmeg seed. 2. From the TLC results
a. What are the substances in the crude extract? b. How do you know whether trimyristin is pure? Explain.
c. Was the trimyristin completely converted to myristic acid?
A B C Start line
0.5 cm
1.0 cm
Front line of solvent

Department of Chemistry, Faculty of Science, Chulalongkorn University, Bangkok, Thailand 10330 Tel / Fax +66 2218 7641, e-mail: [email protected]
149
LAB REPORT
ISOLATION AND HYDROLYSIS OF TRIMYRISTIN FROM NUTMEG SEED Nutmeg weight………………………………… g Pure trimyristin appearance.…………………….. Pure trimyristin weight………………………….g Melting point of trimyristin crystals …………………….oC Melting point of hydrolyzed product ……………….…...oC Thin-layer chromatography Distance traveled by solvent……………………....cm
Compound Distance traveled by compound (cm) Rf Authentic trimyristin Crude extract Substance from hydrolysis reaction
Observation & conclusion ………………………………………………………………………………………………………………………………………………………………………………………………………………………………………………………………………………………………………………………………………………………………………………………………………………………………………………………………………………………………………………………………………………………………………………………………

Department of Chemistry, Faculty of Science, Chulalongkorn University, Bangkok, Thailand 10330 Tel / Fax +66 2218 7641, e-mail: [email protected]
150
EXTRACTION OF LECITHIN AND CHOLESTEROL FROM EGG YOLK
OBJECTIVES
1. To isolate lecithin and cholesterol from egg yolk. 2. To identify the extracted compounds with the specific tests and thin layer
chromatography. BACKGROUND
Egg yolk contains lecithin, cholesterol, and triglyceride. Lecithin is composed of phosphoric acid ester of lipids and fatty acid, and a simple organic molecule such as choline. Lecithin is used as a food supplement, in medical uses and sometimes as an emulsifier.
H2C
CH
H2C
O C
O PO
OR
OCH2CH2N+(CH3)3
O-
OCO
R'
Lecithin
HO
CH3
H3C
H3C
CH3
Cholesterol
CH3
Cholesterol is classified as a sterol which has a carbon skeleton with four fused
rings. It is the main precursor of vitamin D and of the steroid hormones. In this experiment, lecithin and cholesterol will be isolated from egg yolk by
extraction. The extracted compounds will be identified by the melting point determination, the specific test and thin layer chromatography.
REQUIREMENTS Apparatus and materials
1. Conical bottom flasks 2. Beaker 3. Glass funnel 4. Pasteur pipette 5. Capillary tube
6. TLC plates 7. Test tube 8. Hot plate and heat dissipation block 9. Duck or hen’s eggs
Chemicals: Ethanol (CH3CH2OH); dichloromethane (CH2Cl2); chloroform (CHCl3); acetone (CH3COCH3); cadmium chloride (satd.CdCl2/ethanol); potassium hydroxide (10% KOH/ethanol); potassium dichromate (1% K2Cr2O7); acetic anhydride (CH3COOCOCH3); sulfuric acid (conc.H2SO4); anisaldehyde (p-CH3O-C6H4-CHO)

Department of Chemistry, Faculty of Science, Chulalongkorn University, Bangkok, Thailand 10330 Tel / Fax +66 2218 7641, e-mail: [email protected]
151
PROCEDURE PART I: Extraction
1. Heat an egg in boiling water for 10 minutes. Separate the egg yolk from the egg white. Pulverize the egg yolk. Weigh 5 g of pulverized egg yolk in a 50-mL beaker. Add 15 mL of dichloromethane/ethanol (1:2) mixture. Mix it well.
: Ethanol is highly volatile and flammable solvent, keep flame away and avoid breathing.
: Dichloromethane is volatile and dangerous. Avoid touching and smelling. 2. Decant the supernatant of the mixture through a loose wad of cotton wool in a glass
funnel into a 25-mL round bottom flask. Wash the precipitate with 3 mL of dichloromethane/ethanol (1:2) mixture and combine the washed solvent in the round bottom flask, Flask No.1.
3. Equip Flask No.1 with a receiver distilling still fitted with a water-cooled condenser. Add a boiling stone and distil off the solvent until nearly dry.
: Do not heat the solution to dryness to avoid it burning. 4. Remove Flask No.1 from the heat and allow the residue to stand till dryness. Add 3
mL of dichloromethane and swirl gently to dissolve the entire solid. 5. Transfer the solution from Flask No.1 into another beaker with a known weight and
containing 6 mL of acetone. Stir well to obtain lecithin, precipitated as a gummy bulk.
6. Decant the supernatant of the mixture through a loose wad of cotton wool in a glass funnel into another 25-mL round bottom flask, Flask No.2. Wash the precipitate with 0.5 mL of acetone and combine the washed acetone in Flask No.2.
7. Allow the precipitate to dry and measure the weight. Place a minute amount of precipitate into a test tube containing 5 drops of ethanol and stir the mixture gently to dissolve the entire solid. Add a drop of satd.CdCl2 to the mixture. Observe the result.
8. Distil the filtrate in Flask No.2 using a receiver distilling still fitted with a water-cooled condenser to obtain a liquid oil residue.
: Don’t do at high temperature! Be careful of burning or the solvent will boil away. 9. Add 3 mL of 10% KOH/ethanol in Flask No.2. Add a boiling stone and reflux the
mixture for 10 minutes.
10. Equip Flask No.2 with a receiver distilling still fitted with a water-cooled condenser and distil to remove ethanol.
11. After cooling to room temperature, add 5 mL of dichloromethane and stir the mixture well.
12. Filter it off using a Pasteur filter-tip pipette method (Wrap the Pasteur pipette tip with a small piece of cotton wool. Immerse the pipette into the solution until the pipette tip reaches the bottom of the flask while squeezing the rubber bulb. Draw the solution up into the pipette by releasing the rubber bulb. Lift out the Pasteur pipette from the solution while still squeezing the rubber bulb. Take off the cotton wad and expel the solution in the pipette into the proper container).
: Be careful not to lose the cotton wool during suction. While lifting the pipette out, apply a little pressure by squeezing the bulb softly to prevent suction of unfiltered solution into the pipette.

Department of Chemistry, Faculty of Science, Chulalongkorn University, Bangkok, Thailand 10330 Tel / Fax +66 2218 7641, e-mail: [email protected]
152
13. Transfer the solution in the pipette into 10-mL conical bottom flask, Flask No.3. Add 1 mL of water and mix well using a Pasteur pipette method. (Draw a portion of the lower layer up into a pipette and carefully expel it back into the flask through the upper layer. Do this repeatedly for a few times).
: If not mixing well, the incomplete separation and the impure products will be obtained. 14. Allow the mixture to separate completely into two distinct layers. Remove the
lower dichloromethane layer, using a Pasteur pipette method. (Squeeze the rubber bulb and lower the tip of the pipette to the bottom of the flask. Carefully draw up the lower layer until the interface between the layers reaches the pipette tip. Lift out the Pasteur pipette from the solution while still squeezing the rubber bulb and expel any drops of the upper layer caught in the tip. Then transfer the lower layer in the pipette into another container). Transfer it into another conical bottom flask, Flask No.4.
15. Repeat the extraction of the aqueous layer in Flask No.3 with another 1 mL of dichloromethane as described in steps 13-14. Combine two extracts.
16. Wash the dichloromethane extract with two portions of 2 mL of water and 1mL of satd.NaCl, using a Pasteur pipette method as described in steps 13-14. Discard the aqueous layers.
17. Add a minute amount of anh.Na2SO4, in Flask No.3 and swirl the solution. Keep adding until some of it swirls freely, and then set aside when the solution is no longer cloudy.
18. Filter the solution using a Pasteur filter-tip pipette method as described in step 12.
19. Transfer the solution in the pipette into another conical bottom flask, Flask No.5. Connect the flask with a receiver distilling still and a water-cooled condenser. Distil off the dichloromethane to obtain the solid at the bottom of the flask.
20. Recrystallize the product from the mixture of ethanol and water.
: Consult the procedure for recrystallization on page 20.
21. After crystallization is complete, collect the product by suction filtration. (Assemble a filtering glass funnel to a filtering flask and clamp. Connect the side arm of the filtering flask to the suction valve (S) of a three-way pipette bulb. Cut the filter paper to the right size and place at the bottom of the funnel. Expel air from the bulb by squeezing the air valve (A) and the bulb simultaneously. Wet the filter paper with a few drops of the solvent used and apply suction; squeeze the “suction” valve (S). Immediately transfer the suspension on to the filter. Continue applying suction by simultaneously squeezing the air valve (A) and the bulb again, and then squeeze the suction valve (S) until all the liquid has been pulled through the filter. If necessary, the solid can be washed on the filter with fresh solvent. Repeat the suction process until the solid is air-dry. Release the suction by squeezing the empty valve (E)).Wash the crystal with a tiny amount of cold methanol: water (1:1) and continue suction until air-dry.
22. Weigh the crystal. PART II: Specific tests
Liebermann-Burchard test 23. Place the product (a small amount at the end of spatula) in a dry test tube. Add 4-5
drops of chloroform and stir well. 24. Add 2-3 drops of acetic anhydride and stir well.

Department of Chemistry, Faculty of Science, Chulalongkorn University, Bangkok, Thailand 10330 Tel / Fax +66 2218 7641, e-mail: [email protected]
153
25. Incline the tube, and carefully add without mixing 1 drop of conc.H2SO4 down the inside of the test tube. Observe and record.
: Equipments and chemicals must be dry.
: Conc.H2SO4 is very corrosive and may cause serious chemical burns if it comes into contact with your skin. Wear gloves when handling this chemical. If accidentally a spill happens, immediately flood the affected area with cold water and then with 5% NaHCO3 solution.
Potassium dichromate test 26. Place the product (a small amount at the end of spatula) in a dry test tube. 27. Add 5 drops of acetone and stir well. 28. Add 2 drop of 1% K2Cr2O7 and one drop of conc.H2SO4 and stir well. Observe and
record.
: Do the blank test for comparison.
: Conc.H2SO4 is very corrosive and may cause serious chemical burns if it comes into contact with your skin. Wear gloves when handling this chemical. If accidentally a spill happens, immediately flood the affected area with cold water and then with 5% NaHCO3 solution.
PART III: Thin-layer chromatography 29. Prepare 1 TLC plate (2x7 cm dimension).
: Handle it only on the edges, as fingerprints contain UV-active materials. Using a pencil draw a very light line across the sheet (short dimension) about 1 cm from one end. Then make 2 small light marks along the line. These are the points at which the samples will be spotted. Draw another light line about 0.5 cm from another end of the plate for the solvent front.
30. Obtain a TLC chamber and place solvent, dichloromethane, to 0.5 cm height. Place a piece of filter paper around the inside surface of the container and extend into the solvent.
: Dichloromethane is volatile and dangerous. Avoid touching and smelling.
: A glass jar with a lid or a beaker with a watchglass or a cover of a Petri dish can be used as a TLC chamber, but it should be large enough so that the TLC plate can lean against one side).
31. Using clean capillary tubes, carefully spot two sample solutions at two pencil marks at the below.
: The spots should be as small as possible in order to minimize tailing and overlapping when the TLC plate is developed. If a more intense spot is desired, let the spot dry and re-spot in the same location.
32. When the spots are dry, place the TLC plate in the developing chamber. Then gently close the chamber.
: Be sure that the bottom edge of the TLC plate is in the solvent but the spots are above the solvent, and the filter paper does not touch the chromatographic sheet.
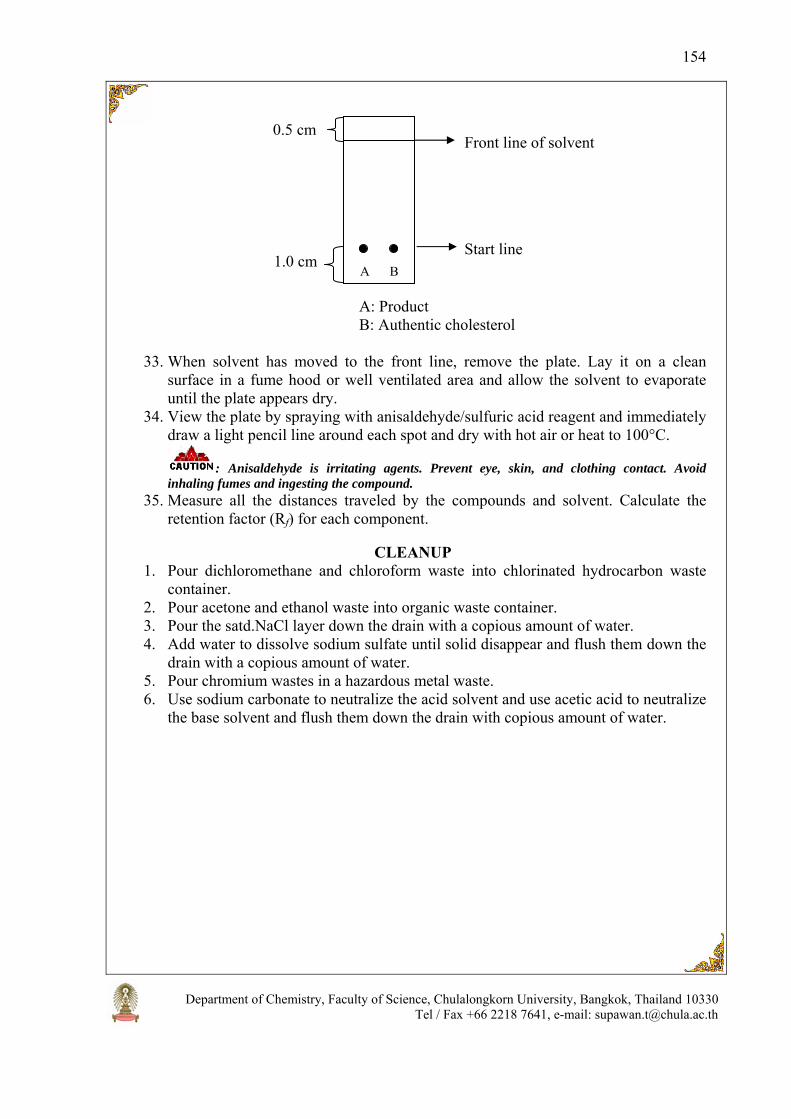
Department of Chemistry, Faculty of Science, Chulalongkorn University, Bangkok, Thailand 10330 Tel / Fax +66 2218 7641, e-mail: [email protected]
154
A: Product B: Authentic cholesterol
33. When solvent has moved to the front line, remove the plate. Lay it on a clean
surface in a fume hood or well ventilated area and allow the solvent to evaporate until the plate appears dry.
34. View the plate by spraying with anisaldehyde/sulfuric acid reagent and immediately draw a light pencil line around each spot and dry with hot air or heat to 100°C.
: Anisaldehyde is irritating agents. Prevent eye, skin, and clothing contact. Avoid inhaling fumes and ingesting the compound.
35. Measure all the distances traveled by the compounds and solvent. Calculate the retention factor (Rf) for each component.
CLEANUP
1. Pour dichloromethane and chloroform waste into chlorinated hydrocarbon waste container.
2. Pour acetone and ethanol waste into organic waste container. 3. Pour the satd.NaCl layer down the drain with a copious amount of water. 4. Add water to dissolve sodium sulfate until solid disappear and flush them down the
drain with a copious amount of water. 5. Pour chromium wastes in a hazardous metal waste. 6. Use sodium carbonate to neutralize the acid solvent and use acetic acid to neutralize
the base solvent and flush them down the drain with copious amount of water.
Start line
Front line of solvent
1.0 cm
0.5 cm
A B

Department of Chemistry, Faculty of Science, Chulalongkorn University, Bangkok, Thailand 10330 Tel / Fax +66 2218 7641, e-mail: [email protected]
155
QUESTIONS 1. Fill in the blanks with words or phrases of extraction of lecithin and cholesterol
from egg yolk diagram.
Soluble
10. Evaporate 11. C2H5OH 12. H2O
7. Evaporate 8. KOH 9. CH2Cl2
Insoluble CH2Cl2
6. C2H5OH, CdCl2
Precipitate
3. Evaporate 4. CH2Cl2 5. CH3COCH3
Insoluble
Insoluble Soluble
1. CH2Cl2-C2H5OH 2. Filtrate
Egg yolk
Triglyceride Lecithin Cholesterol

Department of Chemistry, Faculty of Science, Chulalongkorn University, Bangkok, Thailand 10330 Tel / Fax +66 2218 7641, e-mail: [email protected]
156
2. Where are carbohydrate and protein placed in the diagram? 3. How can you separate lecithin from cholesterol? 4. Why take the remaining extract to boil with KOH in ethanol, after lecithin is
separated from cholesterol? 5. Describe the test methodology to ensure that the separated mixtures are lecithin or
cholesterol.
LAB REPORT
EXTRACTION OF LECITHIN AND CHOLESTEROL FROM EGG YOLK
Type Weight
Egg(g) Lecithin(mg) Cholesterol(mg)
1. Reaction with satd.CdCl2………………………………………………… 2. Lieberman-Burchard Reaction…………………………………………… 3. K2Cr2O7/H2SO4………………………………………………………….
TLC Analysis
Reagent Distance traveled by the solvent……………….cm Distance traveled by a compound
(cm) Rf
Cholesterol (authentic) Cholesterol from egg yolk

Department of Chemistry, Faculty of Science, Chulalongkorn University, Bangkok, Thailand 10330 Tel / Fax +66 2218 7641, e-mail: [email protected]
157
REFERENCES

Department of Chemistry, Faculty of Science, Chulalongkorn University, Bangkok, Thailand 10330 Tel / Fax +66 2218 7641, e-mail: [email protected]
158
1. Ault, A., Techniques and Experiments for Organic Chemistry, 5th Ed.; Allyn and Bacon: Boston, 1987, 423-424.
2. Durst, H.D.; Gokel, G.W., Experimental Organic Chemistry, 2nd Ed., McGrawHill, Inc., New York, 1987, 31 – 44.
3. Gilbert J.C.; Martin S.F., Experimental Organic Chemistry, 3rd Ed., Harcourt Inc, Florida, 2002.
4. John, C. G., Stephen F. M., Experimental Organic Chemistry, a miniscale and microscale approach, 3rd Ed., Harcourt College, U.S.A., 2002, 69-70.
5. Joule, J.A.; Mills, K.; Smith, G.F., Heterocyclic Chemistry, 3rd Ed., Chapamn & Hall, London, 1995, 177 – 178.
6. Landgrebe, J.A., Theory and Practice in the Organic Laboratory with Microscale and Standard Scale Eperiments, 4th Ed. 1993, 142-162.
7. March, J., Advanced Organic Chemistry, 4th Ed., Wiley, New York, 1992. 8. Mohrig J.R.; Hammond C.N.; Morrill T.C.; Neckers D.C., Experimental Organic
Chemistry, 1998. 9. Mohrig. J.R.; Neckers, D.C., Laboratory Experiment in Organic Chemistry, 2rd Ed.,
D. Van Nostrand Company, 1973, 205-208. 10. Mayo, D.W.; Pike, R.M.; Butcher, S.S., Microscale Organic Laboratory, 2nd Ed,
John Willey&Sons, USA, 1989, 178-193. 11. Pasto, D.; Johnson, C.; Miller, M., Experiments and Techniques in: Organic
Chemistry, Prentice-Hall International Edition, 1992, 315-317. 12. Pavia, D.L.; Lampman, G.m.; Kriz, G.S.; Engel, R.G., Introduction to Organic
Laboratory Techniques, A Microscale Approach, 2nd Ed., Harcourt Brace & Company, Orlando, 1995, 620 – 629.
13. Roberts, R.M.; Gilbert, J.C.; Martin, S.F., Experiment Organic Chemistry: A Miniscale Approach, Saunders College Publishing, 1994, 543.
14. Rodig, R. J.; Bell, C.E.; Clark, A.K., Organic Cemistry Laboratory, Saunders College Publishing, USA, 1990, 345-351.
15. Royston, M.R.; John, C.G.; Lynn, B.R.; Alan S.W., Modern Experimental Organic Chemistry, 3rd Ed., Holt, Rinenart and Winston, 1979, 199-206.
16. Schoffstall A.M.; Gaddis B.A.; Druelinger M.L., Microscale and Miniscale Organic Chemistry Laboratory Experiments, The McGraw-Hill Companies, United States of America, 2000.
17. Wade L. G., Organic Chemistry, 6th Ed., Pearson/Prentice Hall, Upper Saddle River, New Jersey, USA, 2005.
18. William, K.L., Macroscale and Microscale Organic Experiment, 2nd Ed., D.C. health and Company, Lexington, 1994, 64 – 67.
19. Williamson, K.L., Macroscale and Microscale Organic Experimetals, D.C. Heath and Company, USA, 1989, 315-328.
20. Williamson, K.L., Macroscale and Microscale Organic Experiment, 3rd Ed, Hought ton Mifflin Company, Boston, 1999, 74.
21. Zubrick, J.W., The Organic Chem Lab Survival Manual, A student’s Guide to Techniques, 4th Ed., John Wiley & Sons, Inc., New York, 1997, 102 – 119.
22. Organic Chemistry Laboratory Handbook 1 and 2, Department of Chemistry, Faculty of Science, Prince of Songkla University, 2002.
23. Organic Chemistry Laboratory Handbook, Department of Chemistry, Faculty of Science, Chulalongkorn University, 2000.

Department of Chemistry, Faculty of Science, Chulalongkorn University, Bangkok, Thailand 10330 Tel / Fax +66 2218 7641, e-mail: [email protected]
159
24. Organic Chemistry Laboratory Handbook, Department of Chemistry, Faculty of Science, Chiang Mai University, 2000.
25. Organic Chemistry Laboratory Handbook, Department of Chemistry, Faculty of Science, Srinakharinwirot University, 2002.