Embed Size (px)
Citation preview

Simple Fund Version 2021.1
Update Installation Instructions
Last Updated: 08/07/2021
2 | P a g e
Contents
Contents .................................................................................................................................................................... 2
Part A: Important Information – Please read before proceeding ............................................................................. 3
Part B: Before Installation ......................................................................................................................................... 4
Part C: Server Requirements ..................................................................................................................................... 5
Part D: Standalone PC or Workstation Requirements .............................................................................................. 6
Parts E to G ‐ Please read before proceeding ........................................................................................................... 7
Part E: Server instructions or Standalone (v2011.0.x to 2021.x) .............................................................................. 8
Part F: Server instructions or Standalone (v12.0 – 2010.1.3) ................................................................................. 12
Part G: Workstation Instructions ............................................................................................................................ 16
Part H: How to speed up the performance of Simple Fund .................................................................................... 16
Part I: Additional Information for System Administrators ...................................................................................... 17
Part J: BGL Wiki Articles .......................................................................................................................................... 22
3 | P a g e
Part A: Important Information – Please read before proceeding
ALL USERS
WARNING: If you share your Simple Fund “People/Contacts” database with CAS, you must update CAS to 2021.1 first before updating Simple Fund to 2021.1. BACKUP and RESTORE Please ensure you are familiar with the procedure to BACKUP AND RESTORE data. A backup of your Simple Fund Database needs to be taken before proceeding with the update. Please read PART I of this instruction guide and the Simple Fund New Features Help file. FIREWALL Simple Fund and Nexus must both be added as an exception to your firewall. For more information on this please refer to article ID 215 on our BGL Wiki located at: http://wiki.bglcorp.com.au/KB:How_to_add_Nexus_as_an_exception_to_a_firewall RIGHTS and PERMISSIONS Please ensure that you have applied sufficient rights and permissions to the SFUND directory on your Server/Stand alone. Users will need to be given sufficient rights to access the Program folders from their workstations. If SFUND folder is shared ensure that you have applied sufficient sharing permissions. BGL QUERY USERS BGL Query must be updated to the latest version.
SIMPLE FUND INSTALLED ON A SERVER 1. The Simple Fund update is required to be run from the SERVER where NexusDB service is installed, with a user account having Administration Rights to the server. 2. You CANNOT run this update from a workstation connected to the server. 3. If you use a Terminal Server to access Simple Fund data which is installed on a File Server, this update must be run on the File Server 4. It is recommended that you install and run the Nexus Database Server on the same Server where the Simple Fund Database is installed for best performance. 5. If you have Multiple Simple Fund Databases running from the same server, you will require multiple Simple Fund Licenses. Please contact BGL on 1300 654 401 for an additional license and a copy of the Multi‐Database Nexus Installation Instructions.
SIMPLE FUND INSTALLED ON A STANDALONE PC
4 | P a g e
If you are running a Standalone(Single User Non Networked PC), you must run the update using an administrator user account. You cannot install this update logged onto your computer with a limited user standard user (e.g. Guest) account.
Part B: Before Installation
1. WARNING: If you share your Simple Fund “People/Contacts” database with CAS, you must update CAS to 2021.1 first before updating Simple Fund to 2021.1.
2. Please first make sure you have a full working backup of your SFUND folder before installing any update. 3. If you are running v2010.1.2 or earlier, please refer to BGL Wiki Article ID: 13413 and follow instruction prior to updating to version 2021.x. 4. Ensure you have only one copy of Simple Fund installed on the Server and Workstations. Remove any old copies of Simple Fund (which are not being used) before proceeding with this installation. If you have old copies which are kept as a backup, you will need to rename the root folder. You will also need to remove any copies of the Simple Fund DEMO as well. For detailed instructions on this please visit BGL Wiki Article ID: 347 5. It is recommended that your anti‐virus software is disabled for the installation of the update. If you cannot disable your anti‐virus software, you may need to add an exclusion to the update executable file (eg: sfdeskupdXXXX.exe). 6. This release will check your version of Nexus DB Engine. If Version is 3.04 is detected, it will automatically update Nexus to v3.11. If you have other BGL Products (CAS, Simple Invest, Simple Ledger, Query or Portal) running on the same server, please ensure you close these applications before running the update. 7. If you are on v12.0 onwards, you must have Nexus running to install this update. DO NOT stop the Nexus Service. 8. The update process requires you to stop the Data Connector. Clients will still have access to their Portal account however report request will be unavailable until the fund(s) have been updated and the Data Connector Service restarted.

5 | P a g e
Part C: Server Requirements
The Nexus Database will require a service to run on the server.
This server service can be installed on an existing server, a virtual server, or a workstation within your network that
currently acts as a server. The Server service has a very small memory footprint and has been tested to work on
the following Operating Systems.
Windows 8 & 8.1
Windows 10
Windows Server 2008 / R2 (32 Bit and 64 Bit)
Windows Server 2012 / R2 (64 Bit)
Windows Server 2016 (64 Bit) Linux NAS Server are not supported. (Eg: QNAP, Synology, WD, Netgear). Cisco VPN & Cisco AnyConnect lodgement is not compatible on AWS EC2 Server.
It is recommended that Nexus is installed in the same Server where Simple Fund is installed. For better performance, if you have more than one local disk, install Nexus and Simple Fund in separate disks. For example, you can install Nexus in C drive and have SFUND folder in D drive. Nexus cannot be installed on a mapped network drive. There should be no network redirector operating between the NexusDB and the database files. This is for both performance reasons and stability. You can of course continue to use shared paths on the workstations. Nexus needs to have exclusive access to the Database files within SFUND folder. There should be no other applications (like Dropbox) monitoring and/or backing up the files within SFUND folder. The existing folder structure will be maintained. Each fund will continue to have its own set of tables stored in separate folders. This allows your number of funds to grow without affecting performance, an important issue for clients with large numbers of funds. Documents will continue to be stored both inside the database and saved in a fund. Minimum Server Hardware requirements:
Dual Core Xeon Processor
1 GB of RAM (Additional RAM should be added for each Terminal Services user. BGL recommends an additional 256Mb RAM per user).
2 GB Hard Disk Space for each Simple Fund program plus 20‐30MB for each fund/ledger/register. So if you have 100 Funds you will require 2GB .

6 | P a g e
Part D: Standalone PC or Workstation Requirements
Simple Fund and NexusDB can also run on any Standalone Machine or a workstation connected to a server. It has been tested to work on the following Operating Systems.
Windows 8.1 (32 Bit and 64 Bit)
Windows 10 Windows Home Editions are not supported. Minimum Standalone or Workstation Hardware requirements:
PC with a Pentium IV (Pentium 4>= 1GHz or a faster processors)
2GB of physical RAM available
2GB Hard Disk Space for each BGL program plus 30MB for each fund (e.g. if you have 100 Funds you will require extra 3 GB of HD space).
For network‐based Workstations i.e. Client/Server systems the TCP/IP protocol is required or, alternatively, a protocol which supports Named Pipes.
7 | P a g e
Parts E to G ‐ Please read before proceeding
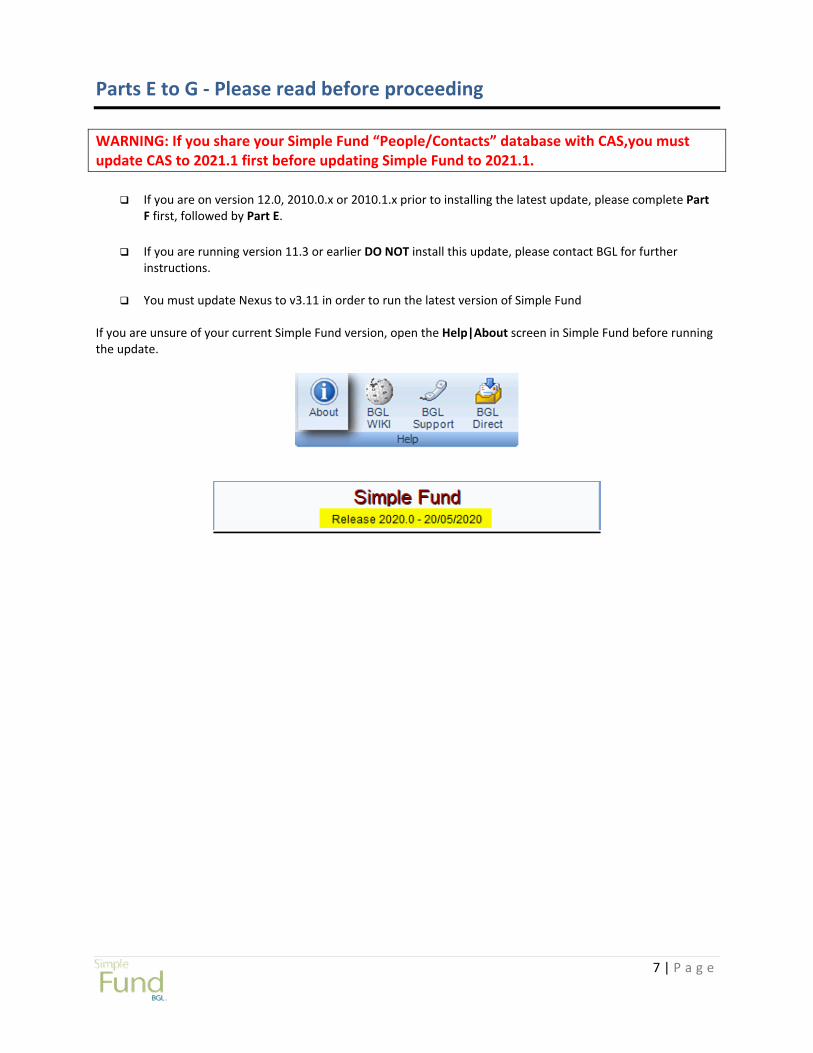
WARNING: If you share your Simple Fund “People/Contacts” database with CAS,you must update CAS to 2021.1 first before updating Simple Fund to 2021.1.
If you are on version 12.0, 2010.0.x or 2010.1.x prior to installing the latest update, please complete Part
F first, followed by Part E. If you are running version 11.3 or earlier DO NOT install this update, please contact BGL for further
instructions.
You must update Nexus to v3.11 in order to run the latest version of Simple Fund If you are unsure of your current Simple Fund version, open the Help|About screen in Simple Fund before running the update.

8 | P a g e
Part E: Server instructions or Standalone (v2011.0.x to 2021.x) This section applies if you are currently on v2011.0.x ‐ v2013.xand updating to v2021.x This process involves copying files and updating the Simple Fund database to the latest version. Your Nexus Database will be updated to v3.11 (if you are on a prior version) in order to run Simple Fund version 2021.x. The installation process requires you to go through the following steps:
1. Log on to your Server/Standalone Machine with the Administrator Username and Password 2. Log on to the BGL Client Centre website http://clients.bglcorp.com.au/
You will need your BGL Username and Password.
3. Click on Software Downloads then select the Software Updates.
4. Download the update file from the website to a TEMP directory on the Server\Standalone Machine.
5. Exit all Users from all BGL applications. Portal clients will also need to stop the Data Connector if it has been installed.
6. Make sure that you have a full backup of Simple Fund data and application.
7. Run the update file on the Server/Standalone Machine where the SFUND program is installed.
Please Note: ‐ If you use a Terminal Server to access Simple Fund data which is on a File Server, the update must be run on the File Server. ‐ Users who are currently running Windows 7or 8 will need to right‐click on the file and select “Run as Administrator”.
8. Click YES to confirm that you are running the update on the server (or click YES if Simple Fund is installed on a Standalone Machine) then click Next >>
Click NO then Next>> if you are running the update from a Workstation or from a Terminal Server when the Data is stored on a File Server.

9 | P a g e
9. Read the Software Subscription Agreement 10. Click I Agree to accept the agreement then click Next>>
11. Confirm (or select) the Simple Fund Program, Database and Shared Database Locations. Click Browse to change the locations if incorrect. Then click Next>> to continue.
The Installation will perform the several checks to determine if your nexus service is already installed to prevent multiple installations of Nexus. 12. The Simple Fund Release 2021.x program files and help files will now be installed. When files have finished
copying, click Finish and open Simple Fund. This will open the Simple Fund program.
10 | P a g e
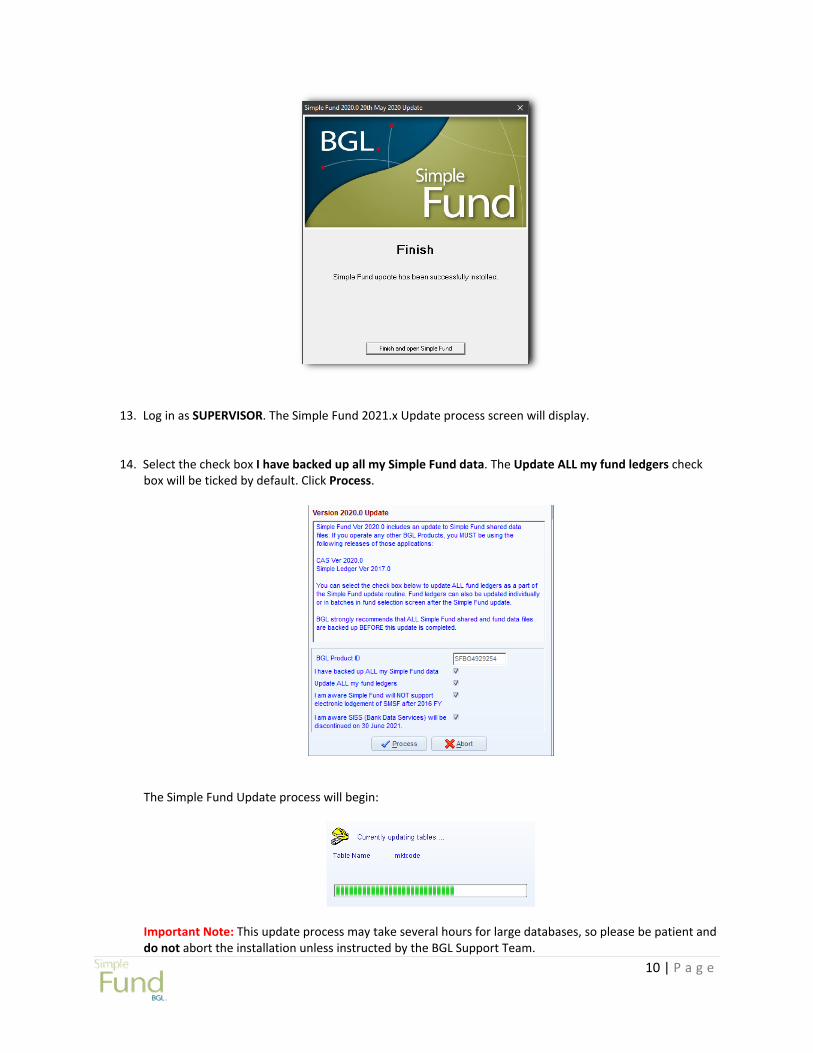
13. Log in as SUPERVISOR. The Simple Fund 2021.x Update process screen will display.
14. Select the check box I have backed up all my Simple Fund data. The Update ALL my fund ledgers check box will be ticked by default. Click Process.
The Simple Fund Update process will begin:
Important Note: This update process may take several hours for large databases, so please be patient and do not abort the installation unless instructed by the BGL Support Team.

11 | P a g e
15. If you are running Portal by BGL, you will need to restart the Data Connector service.
For Stand‐alone Machines, this completes the Simple Fund update process. For Client\Server setups continue to Part G: Workstation Instructions.
BGL QUERY USERS: BGL Query must be updated to the latest version. PORTAL USERS: Data Connector will be stopped as part of the update process. Clients will still have access to their Portal account. However, report request will be unavailable until the fund(s) have been updated and the Data Connector Service restarted.
If you experience any issues during the update process or after the update, please contact the BGL Support Team immediately on 1300 654 401.

12 | P a g e
Part F: Server instructions or Standalone (v12.0 – 2010.1.3) Updating from versions12.0 – 2010.1.3 to latest Simple Fund version 2021.x You will need to update to version 2011.0 first prior to updating to 2021.x The installation process requires you to go through the following steps:
1. Logon to your Server/Stand‐alone Machine with the Administrator Username and Password 2. Download Simple Fund version 2011.0 to a TEMP directory on the Server/Stand‐alone Machine. Click
here to download 2011.0 update.
3. Exit all Users from all BGL applications. Portal clients will also need to stop the Data Connector if it has been installed.
4. Make sure that you have a full backup of Simple Fund data and application.
5. Run thesetup2011.exe on the Server/Standalone Machine where the SFUND program is installed.
Please Note: ‐ If you use a Terminal Server to access Simple Fund data which is on a File Server, the update must be run on the File Server. ‐ Users who are currently running Windows 7 will need to right‐click on the file and select “Run as Administrator”.
6. Click YES to confirm that you are running the update on the server (or click YES if Simple Fund is installed on a Standalone Machine) then click Next >>
Click NO then Next>> if you are running the update from a Workstation or from a Terminal Server when the Data is stored on a File Server.

13 | P a g e
7. Read the Software Subscription Agreement 8. Click I Agree to accept the agreement then click Next>>
9. Confirm (or select) the Simple Fund Program, Database and Shared Database Locations. Click Browse to change the locations if incorrect. Then click Next>> to continue.
The Installation will perform the several checks to determine if your nexus service is already installed to prevent multiple installations of Nexus.
14 | P a g e
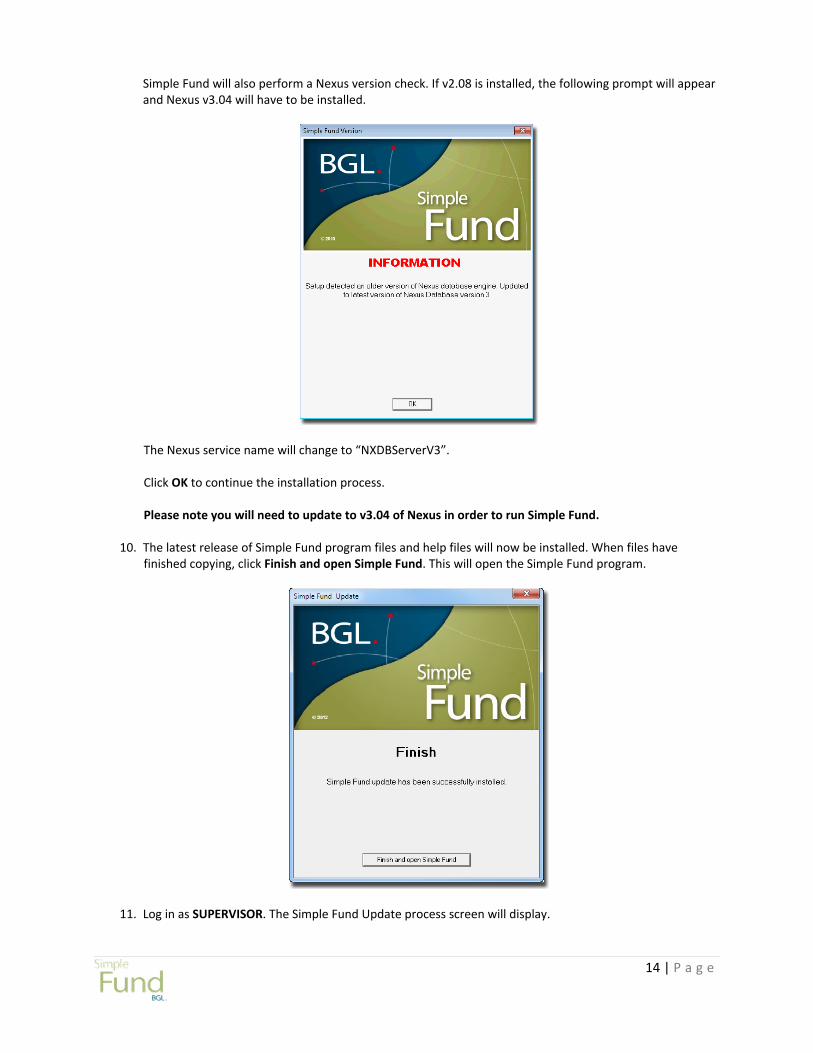
Simple Fund will also perform a Nexus version check. If v2.08 is installed, the following prompt will appear and Nexus v3.04 will have to be installed.
The Nexus service name will change to “NXDBServerV3”. Click OK to continue the installation process. Please note you will need to update to v3.04 of Nexus in order to run Simple Fund.
10. The latest release of Simple Fund program files and help files will now be installed. When files have
finished copying, click Finish and open Simple Fund. This will open the Simple Fund program.
11. Log in as SUPERVISOR. The Simple Fund Update process screen will display.
15 | P a g e
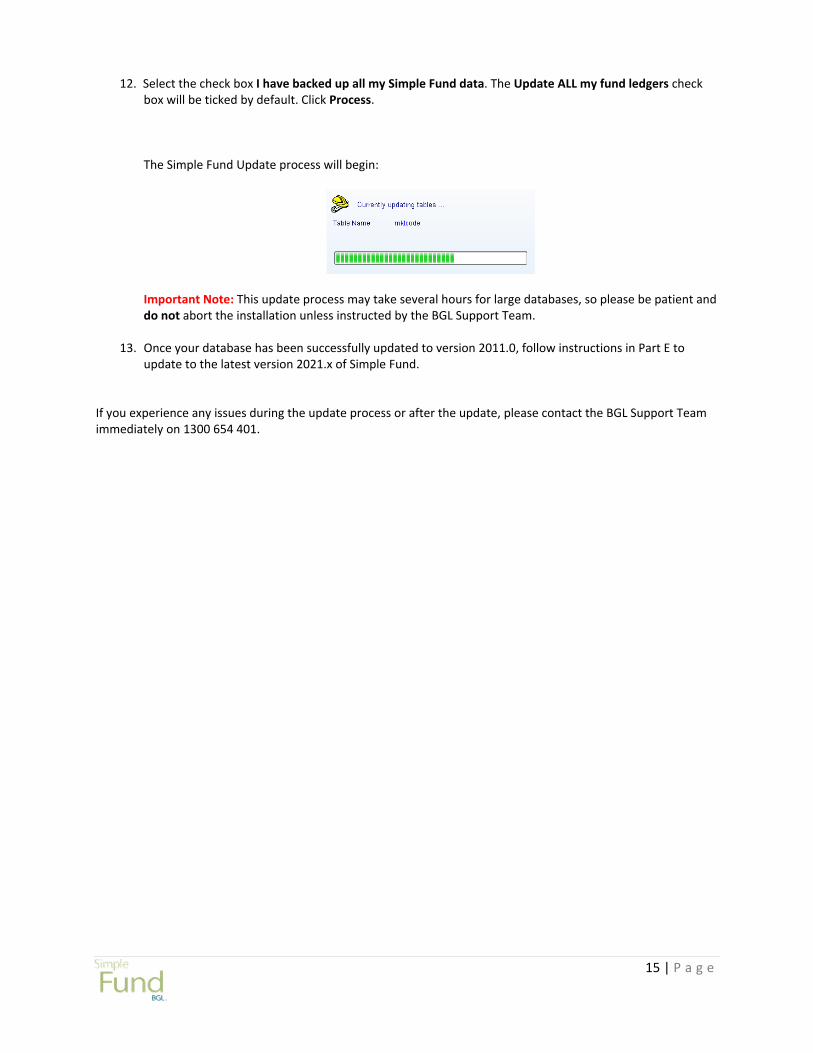
12. Select the check box I have backed up all my Simple Fund data. The Update ALL my fund ledgers check box will be ticked by default. Click Process.
The Simple Fund Update process will begin:
Important Note: This update process may take several hours for large databases, so please be patient and do not abort the installation unless instructed by the BGL Support Team.
13. Once your database has been successfully updated to version 2011.0, follow instructions in Part E to update to the latest version 2021.x of Simple Fund.
If you experience any issues during the update process or after the update, please contact the BGL Support Team immediately on 1300 654 401.

16 | P a g e
Part G: Workstation Instructions This section only needs to be completed if the workstation currently does not have access to Simple Fund and you wish to setup the workstation.
(i) Workstations which previously used Simple Fund Once you have completed the Server Installation above, you will need to check the following on your workstation before starting up Simple Fund:
‐ Ensure that Simple Fund has been set as an exception in your firewall software. Do not run the sfdeskupd2020x.exe update file on the workstation. Please note there are no requirements to run NETSET.EXE on existing workstations that were previously using Simple Fund. You will only require to run netset.exe if you wish to install the Cisco VPN Client. If you are running local executable copies of Simple Fund, please refer to Important Information for local executable Installations below.
(ii) New Workstations which have never used Simple Fund
‐ Creating a shortcut on your desktop: 1. Ensure the server is mapped on the workstation 2. Locate “sfund32.exe” in the SFUND folder. 3. Right click on “sfund32.exe” and select Send to>Desktop to create a shortcut on your desktop. 4. Double‐click to run Simple Fund for the first time.
‐ Ensure that Simple Fund has been set as an exception in your firewall software.
If you experience any issues during the installation process or after the update, please contact the BGL Support Team on 1300 654 401 immediately.
Part H: How to speed up the performance of Simple Fund Refer to FAQ 115 ‐ How to speed up the performance of Simple Fund on Terminal and File Servers on BGL Wiki for
more information.

17 | P a g e
Part I: Additional Information for System Administrators
NDBUSER User Account A user account will be added to your local Administrators group called NDBUSER. This is required for the Nexus Service to run. Please ensure this user account has the correct access rights to the SFUND folder and Nexus folder. This is very important when the product is shared from another location where nexus has not been installed. The ndbuser user account and all Simple Fund users need to be given read/write access to the product folder (sfund and caswin if sharing the database with CAS) If you use a Domain Controller, you will need to add NDBUSER to the Domain Administration Group. The NDBUSER when installed is given the following NT rights: 1. Password never expires 2. Logon Service right 3. Deny logon locally
Firewall Configuration You will need to add nxServer.Exe to the Windows Firewall exception List. If you use other Firewalls, you will need to change the configuration of your firewall if you want to access the NexusDB server from outside the server's subnet. If this is the case, you will have to configure your firewall to allow connections through it on port 16000. This is the TCP/IP port the Nexus server uses by default. In this case clients outside the server's subnet can connect to the Nexus server if they know the server's address. This is usually the external IP address of the firewall. The firewall must be configured to route IP traffic on port 16000 to the machine Nexus Server is running on. In this case no broadcast is performed but connections can be made to the server. If you want the clients to find the server behind the firewall automatically (not recommended) then you will need to make sure broadcasts make it through the firewall and the Nexus server must be configured to respond to broadcasts. So you will need to configure your firewall to pass the Nexus client's broadcasts to the server The Default installation of Nexus is to have "Respond to Broadcast?” selected. This can be changed for each of the transports settings in the nxServer.nxdbworksettings located in the ?\nexus folder or using the “NexusDB V3 Server Administration” interface as shown below.

18 | P a g e
Changing Default Port used by Nexus If you wish to change the default port which Nexus uses, this can be done by editing the file nxserver.ini located in the SFUND directory. In the file under the IP Address, add a line which has ‘PORT=*****’ where ‘*****’ is the port number you wish to use. E.g.
You will then need to do the following:
a. Open the directory in which you installed Nexus. e.g. C:\Nexus b. Run the file “NexusDB V3 Server Administration” shortcut file. This will open up your web
browser c. Under Transports, select TCP/IPv4 Transport
d. Untick Active and change the Port to the new port number and click Save Changes. e. Tick Active and click Save Changes to activate the new Port number. f. Close the web browser.
Important Information for local executable Installations If you are running a local SFUND32.EXE executable on the workstation(not recommended by BGL) then you will
need to complete the following additional steps after Installation has been completed on the Server.
After the server update process completes, you will need to copy the following two files to the workstation.
SFUND32.EXE
NXSERVER.INI
Ensure the paths in the Nxserver.ini are local to the where the NexusDB service is running from.
For example, if your Server IP is 192.168.0.65 and the Simple Fund data is located on the server in the C:\sfund folder. Your Nxserver.ini file would look like the following on the workstation
[Nexus Server] IPAddress=192.168.0.65 SFDataFolder=c:\sfund CASDataFolder=c:\sfund\database

19 | P a g e
Important Information for backups of Simple Fund after Nexus Installation
To run unattended backups for all BGL Applications
You may need to modify your backup scripts to prevent file in use error messages. In your Backup scripts you must
stop nexus service (using the command:net stop nxDBServer) then run the backup application/script.
Then restart the Nexus Service once the backup has completed using the command:net start nxDBServer
Alternatively you can use “bglzip32 1 Auto” command in your scripts to take a live backup of the Nexus Database
Files.
Important Note: The BGL backup\restore process, using bglzip32, will backup Nexus Database files only, so before
using this process you must ensure you have updated all Funds to the latest Simple Fund Release.
The following will create a backup of Simple Fund to the \\SFUND\SFBACKUP folder. This folder will then need to
be included in your own external backup systems for disaster recovery purposes. To avoid any overwrites issues is
better that the SFBACKUP folder is empty. The remainder of the files and folders in the \\SFUND folder should
then be excluded from the backup.
To add a scheduled backup The BGL backup\restore process can be run as a command line parameter so that users can schedule backups
using the Windows 'Scheduled Task' options. This is extremely useful for backing up the system after work hours,
even when users are still active in Simple Fund as it will take a live snapshot of all the Simple Fund database
folders.
The Backup\Restore component BGLZIP32.EXE has been updated with two new parameters i) the ability to turn ZIP option On or Off and ii) the option to specify the backup path User can now 'Run' the "bglzip32 1 Auto" command in the windows scheduler and the Backup process will automatically backup to the path specified in \\SFUND\NXSERVER.INI To automate you will need to add the following to your NXSERVER.INI before the bglzip32 is scheduled i) To turn the Zip check box off add the following line to Nxserver.ini BackupZIP=N If present 'N'‐ zip check box will be unticked if set to 'Y' or line not present ‐ check box will be ticked (this is the default for all clients) ii)To specify the backup path add the following line to Nxserver.ini BackupTO=?:\BACKUP Where ?is the local drive letter you wish to backup to and \BACKUP is the folder location you want to backup to. The location should be a local folder path or a UNC path with full sharing permissions setup for the ndbuser account. The path will not work with Mapped paths that are not local. If no location is specified in the NXSERVER.ini, the backup location will default to \\SFUND\SFBACKUP.

20 | P a g e
Step by Step Instructions on how to add a scheduled backup
1. Log on with Administrator rights. The Windows Scheduled Tasks option may be found in Start Menu >Program files > Accessories > System Tools > Scheduled Task 2. Double‐click Add Scheduled Task 3.Click NEXT 4.Click BROWSE. You will need to run the 'BGLZIP32.exe' file located in the SFUND folder. 5. Select how frequently you would like the backup to take place. Click NEXT. 6. This screen allows you to set the time and day you wish to initialise the backup. Click NEXT. 7. Type in the PASSWORD for the Administrator that is currently logged in then click NEXT. 8. Click FINISH. 9.From the 'Scheduled Tasks' screen, right‐click on the 'bglzip32' and go to PROPERTIES. 10. In the 'Run' command, type the command listed below in addition to directory location: For Simple Fund, type "1 Auto" "Auto" must be in the case above. Parameters are delimited by a space. Therefore the full command line for Simple Fund should then be as follows:
bglzip32 1 Auto
The backup file will be put in the back in\\SFUND\SFBACKUP 11.Click OK. The program will automatically run and copy all database and associated files to \\SFUND\SFBACKUP.
The bglzip32.exewill close after the backup has been completed.
You should then ensure the \\SFUND\SFBACKUP folder is being included in your own external backup systems for
disaster recovery purposes. The remainder of the files and folders in the \\SFUND folder should then be excluded
from the backup.
21 | P a g e
To restore data from a backup
1. If restoring data to the Simple Fund Database, this cannot be done by copying and pasting folders as you
could in previous versions of Simple Fund. This must be done using the Backup/Restore utility.
2. If you are restoring and individual fund please use the Data In/Out screen.
3. If you are using the restore function, please ensure that Simple Fund is closed before you click on the
Restore button. The Backup/Restore utility can be run from outside Simple Fund by running the
bglzip32.exe file located in the SFUND directory.
Important Information for Terminal Server/Citrix users of Simple Fund PART A 1. Always test the software you plan on deploying (via Terminal Services or Citrix) in a lab environment before
installing it on a production application server. 2. Make sure you have a backup (preferably image based) of your production application servers before installing
new programs. 3. Make sure the terminal server is in "Install Mode" before installing software. This can be accomplished by
initiating the Simple Fund install routine via "Add/Remove Programs" or by manually placing the server in "Install Mode" with the cmd prompt utility "change user /install". After the install is complete you place the server back in "execute mode" via "change user /execute".
PART B 1. Then run the workstation setup <drive>:\sfund\netsetup\Netset32.exe via "Add/Remove Programs" or by
manually placing the server in "Install Mode" with the cmd prompt utility "change user /install". After the install is complete, you need to place the server back in "execute mode" via "change user /execute".
2. If you are using Citrix MetaFrame Presentation Server XP Enterprise Edition, Presentation Server 3.0 Enterprise Edition, or Presentation Server 4.0 Enterprise Edition, use the Installation Manager to deploy your SFUND application from an Administrative Installation Point to selected servers in your firm.

22 | P a g e
Part J: BGL Wiki Articles
Visit http://wiki.bglcorp.com.au
Article ID Article Name
9648 Windows 7 User Rights
344 BGL Programs getting errors on Windows Vista
61 Move BGL software onto a new fileserver
62 Move BGL software onto a new laptop/stand‐alone PC
368 How to schedule Simple Fund, Simple Invest, Simple Ledger or CAS to automatically backup using the Windows 'Scheduled Tasks' option
352 What are the requirements for the new Nexus Database?
519 When Opening Nexus Version: Error message; nxSharedDB: The alias references a directory that does not exist.
175 Backup and Restore Errors
189 When Opening Simple Fund for the first time: Error message; nxSharedDB: The alias references a directory that does not exist.
169 Error: Nexus is already running as a service.