Embed Size (px)
Citation preview

1SuperguideS
DigitalPhotographySuperguide
Fourth Edition
The Mac User’s Guide to Digital PhotographyClick here to buy the full 196-page “Macworld Digital Photography Superguide” for only $12.95!

11
Ten years ago, my wife and I were expecting our first child. During one of our walks around town together, we debated the latest crazy technology purchase I was advocating: a digital camera. I was worried about the cost of printing photos compared with getting prints made at the local drugstore. We were both worried about image quality and, of course, the cost of the camera.
A lot has changed in my life in the intervening years—and not just the typical parent stuff. These days, my family and I live in a nearly all-digital world. The last decade has seen a complete transformation of the art of photography—but it comes at a price. Sometimes these devices and applications aren’t as easy to use as they could be. And beyond that, photography is still as much about art as it is about science.
That’s why Macworld has a dedicated Digital Photo section in print and online, to help you get the most out of your camera and your digital photo library. And that’s why we’ve created this book. Whether you’re shopping for a new camera, searching for tips on shooting better photos, trying to come to grips with a massive (and ever-growing) library of photos, or simply interested in using software tools to make your photos look their best, our team of digital photography specialists has assembled this book to provide the expert advice you need.
As for that walk my wife and I took ten years ago, we did finally decide to buy that digital camera. What pushed me over the edge? I didn’t want to have to take photos of our new baby, run them to the one-hour photo lab, and then scan them into my Mac so I could e-mail them to our far-flung families.
We made the right decision. Every photo I’ve taken since then is in my photo library on my Mac at home. I wouldn’t have it any other way.
—Jason Snell Editorial Director, Macworld
San Francisco, April 2011
Foreword
Pho
tog
raPh
by
Pete
r be
lan
ger
Click here to buy the full 196-page “Macworld Digital Photography Superguide” for only $12.95!
2
Buy a CameraChoose a Type of Camera 9From compact models to hefty DSLRs packing professional features, there’s no shortage of options when it comes to buying a digital camera.
Features to Consider 17Is it worth spending extra money for the latest camera technology? See which features help you take better photos—and which you don’t need.
Accessories 26Learn about all the accessories with which to outfit your camera.
Where to Buy Cameras and Accessories 30After educating yourself on what type of camera and accessory package you need, find out where to pick them up.
Take PhotosCamera Settings 32See how the parts of your camera work together to ensure a good shot.
Master Lighting 45Want to take great portraits and avoid gloomy party photos? The secret to these challenges lies in understanding your camera’s flash modes.
Control Depth of Field 53Compose a perfectly focused shot using these tips for creating the right depth of field.
How to Shoot Anything 57Find the simple solutions to common photo challenges.
How to Compose a Photo 69Master the artistry of arranging and framing a perfect shot.
Contents
Click here to buy the full 196-page “Macworld Digital Photography Superguide” for only $12.95!

ConTenTS
3
Manage PicturesChoose Your Application 77See what applications you can use to import and edit your images.
Import Images 82Learn the easiest ways to import images into your computer.
Sort and Organize Your iPhoto Library 87Photo libraries can get unwieldy fast. However, with basic organizational tips and tricks, you can keep your database of pictures manageable.
Tag, Map, and Label in iPhoto 97organize your pictures in detail by adding geodata, faces, and keywords.
Edit PhotosMake Basic Edits in iPhoto 104iPhoto makes it easy to quickly diagnose and fix subtle image problems. Put these tools to work for drastic improvements in your photographs.
Correct Bad Color and Lighting 111Fix coloration and lighting in your images using iPhoto’s Adjust panel.
Make Quick Edits with Preview 118Make easy crops and tweaks using Apple’s built-in image viewer.
Improve Photos Fast with Cropping 123Capture the best part of your photo by cropping it accordingly.
Share PhotosPrint Out Images 127Learn about different types of printers and find out how to troubleshoot common problems.
Display Photos Digitally 141Show off your photographs by creating a slideshow on your computer or presenting them on an iPad.
Click here to buy the full 196-page “Macworld Digital Photography Superguide” for only $12.95!

ConTenTS
4
Share Photos Online 145Display your photos on the Web to audiences near and far using Flickr, Facebook, MobileMe, SmugMug, and more.
Create Fun Projects 150Use iPhoto to create beautifully designed photo projects. Sail through the process and unlock hidden features using these tips and tricks.
iPhone PhotographyHow to Use the iPhone Camera 158Master the iPhone’s 5-megapixel camera and LeD flash.
Take Better iPhone Photos 168Use these handy tips to take stellar images with your iPhone.
Edit iPhone Images 170Tweak photos with ease using third-party apps or a desktop application.
Print iPhone Photos 173Learn the best ways to prepare your iPhone images for printing.
Download Photo Apps 175Create a panorama, desaturate, or tilt-shift images using ioS apps.
Back Up PhotosBackup Basics 179Follow these strategies to avoid destroying or losing your images.
Hardware Options 184Study the strengths and limitations of your hardware options.
Online Services 186Back up (and share) photos with friends and family using an online service.
Software Tools 189You can back up locally using any of these software applications.
Digitize Old Photos 192Don’t confine your older prints to the shoebox—scan them, or pay a service to do it for you.
Click here to buy the full 196-page “Macworld Digital Photography Superguide” for only $12.95!

5
Also from the editors of mAcworld
Superguide
iPhone and iPod Touch
UPDATED FOR iPhone ANDios
4 T H E D I T I O N
Mac GeMs240+ Software Bargains
Get more insider tips, tricks, and troubleshooting advice from Macworld’s team of experts. Our popular Superguide series offers useful insights and step-by-step instructions for the latest Mac hardware and software.
Whether you’re brand new or just want to learn a bit more, these books offer all the information you need to become a pro. Master troubleshooting
problems, discover tips and tricks about your operating system, set up a new Mac, learn about your new iPhone or iPod touch, and download great Mac applications.
Each book is available in a variety of formats. Choose from a downloadable PDF; hi-res PDF on CD; printed book; or e-book.
Go to macworld.com /superguide-offer
to order or preview any of the Superguides.
Enter the code MWREADER6
to get a discount on your next order.
Click here to buy the full 196-page “Macworld Digital Photography Superguide” for only $12.95!

66
Senior contributor Ben Long is a writer and photographer based in San Francisco and the author of Complete Digital Photography, fifth edition (Charles River Media, 2009).
Senior contributor Derrick Story teaches iPhoto on Lynda.com and runs The Digital Story (thedigitalstory.com), which features weekly podcasts and tips for photographers of all levels.
Senior contributor Jim Heid is the author of The Macintosh iLife ’09 (Peachpit Press, 2009) and runs Mac iLife (macilife.com).
Jeff Carlson is a senior editor at TidBits and the author of several books, including Photoshop Elements 9 for Mac OS X: Visual QuickStart Guide (Peachpit Press, 2009) and The iPad 2 Pocket Guide (Peachpit Press, 2011).
Senior contributor Glenn Fleishman started working with digital cameras in 1991; he is the author of Take Control of iPhone and iPod touch Networking and Security, iOS 4 edition (TidBits Publishing, 2011).
Senior contributor Joe Kissell is a senior editor at TidBits and the author of the e-book Take Control of Working with Your iPad (TidBits Publishing, 2010).
Senior contributor and troubleshooting guru Ted Landau writes the Bugs & Fixes column for Macworld and the User Friendly View column for The Mac Observer (macobserver.com).
Senior editor Chris Breen offers troubleshooting advice in Macworld.com’s Mac 911 blog and is the author of The iPhone Pocket Guide, sixth edition (Peachpit Press, 2011).
Contributors
Click here to buy the full 196-page “Macworld Digital Photography Superguide” for only $12.95!

COnTRiBUTORS
7
Frequent Macworld contributor Lex Friedman hopped on the Apple bandwagon in the early ’80s. He lives in new Jersey with his wife and three kids, and also writes at blog.lexfriedman.com.
Rick LePage is editor in chief of Photoshop Elements Techniques (photoshopelementsuser.com). He also runs the photo-printer Website Printerville (printerville.net).
Jennifer Wills is a professional photographer, designer, and cofounder of W+W Design (wplusw.com).
Lab director James Galbraith oversees Macworld’s reviews of printers and digital cameras.
Macworld contributor Beau Colburn lives in Brooklyn, new York, and posts his iPhone photos on Snap Different (snapdifferent.com).
Dave Johnson is a freelance technology writer from Seattle, focusing on digital imaging and mobile computing.
Click here to buy the full 196-page “Macworld Digital Photography Superguide” for only $12.95!

8
Buy a CameraMaybe you’re buying your first digital camera. Maybe you’re looking to upgrade to a newer, lighter, or more capable one. Either way, prices are dropping constantly, while the list of features continues to expand. But with so many choices, how do you find the right camera for you? You might be tempted to base your buying decision on looks alone. But beneath those sleek exteriors are features and capabilities that determine whether you have a camera you love or one that collects dust on a shelf.
The trick to finding your perfect match is knowing which features are most important to you before you set foot in the store. We’ll show you what to look for when comparing cameras and explain which features are truly essential—and which are just hype.
Choose a Type of Camera
Page 9
Features to Consider
Page 17
AccessoriesPage 26
Where to Buy Cameras and
AccessoriesPage 30
1Contents
Click here to buy the full 196-page “Macworld Digital Photography Superguide” for only $12.95!
BuY a CaMEraChapter 1
9
Choose a type of CameraThere are a daunting number of cameras to choose from. The first step in narrowing the field of contenders is to decide which type of camera best suits you. Most digital cameras offer a trade-off between size, flexibility, and image quality. By determining early on what your priori-ties are, you can quickly eliminate a large number of the models. These categories are listed in order from the smallest and most basic to large advanced models.
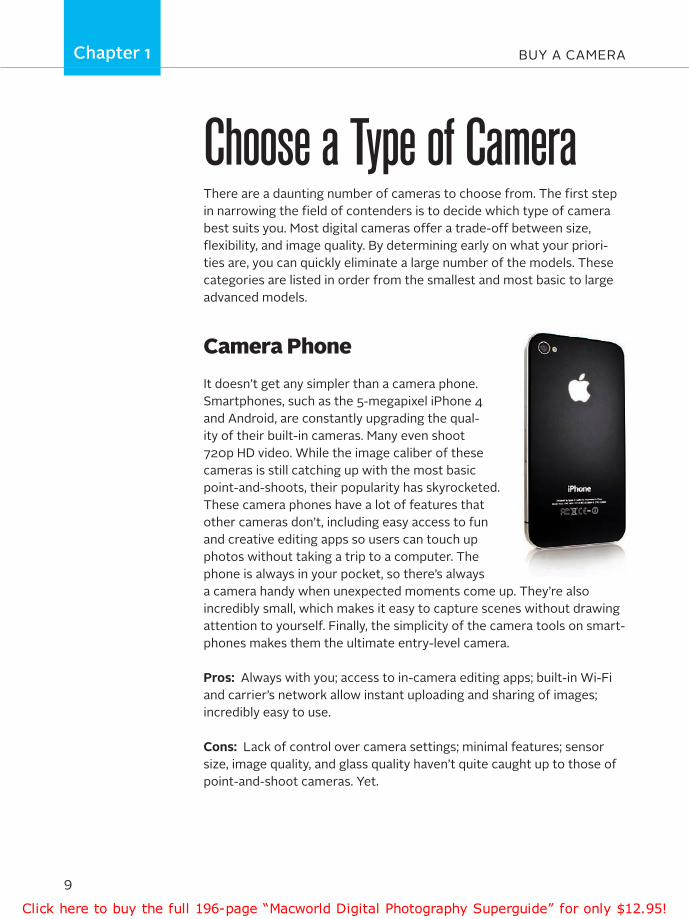
Camera PhoneIt doesn’t get any simpler than a camera phone. Smartphones, such as the 5-megapixel iPhone 4 and android, are constantly upgrading the qual-ity of their built-in cameras. Many even shoot 720p HD video. While the image caliber of these cameras is still catching up with the most basic point-and-shoots, their popularity has skyrocketed. These camera phones have a lot of features that other cameras don’t, including easy access to fun and creative editing apps so users can touch up photos without taking a trip to a computer. The phone is always in your pocket, so there’s always a camera handy when unexpected moments come up. They’re also incredibly small, which makes it easy to capture scenes without drawing attention to yourself. Finally, the simplicity of the camera tools on smart-phones makes them the ultimate entry-level camera.
Pros: always with you; access to in-camera editing apps; built-in Wi-Fi and carrier’s network allow instant uploading and sharing of images; incredibly easy to use.
Cons: Lack of control over camera settings; minimal features; sensor size, image quality, and glass quality haven’t quite caught up to those of point-and-shoot cameras. Yet.
Click here to buy the full 196-page “Macworld Digital Photography Superguide” for only $12.95!

BuY a CaMEraChapter 1
17
Features to ConsiderOnce you’ve settled on the type of camera you want, you should have narrowed your search to a more manageable number of cameras. From this point on, you can base your decision on features and performance. If your camera is hard to navigate or doesn’t have the controls you need, you probably won’t use it. Here’s a breakdown of what to look for when making your decision.
Camera Size a full-size DSLr is larger and heavier than a point-and-shoot camera, so comfort is key. a camera that fits comfortably in one person’s hand may be too large or small in someone else’s. If size and weight are a serious concern, you may want to consider a point-and-shoot. If you want more features, CILCs are only slightly larger. Keep in mind that opting for a camera that uses interchangeable lenses means you’ll probably start carrying additional lenses in your camera bag.
Megapixel Count a high megapixel rating doesn’t mean better image quality. However, it does give you more flexibility when making enlarge-ments or cropping. These days most cameras offer a resolution of at least 10 megapixels, which is overkill for most shooters. a 5-megapixel image is enough to make a sharp 8-by-10-inch print. an 8-megapixel image is enough to make a sharp 11-by-14-inch print. a 10-megapixel file can produce acceptable prints of up to 13 by 19 inches, though they may lose some detail. Images from a 13-megapixel camera look good at 13 by 19 inches and can be pushed to 16 by 24. Many DSLr cameras today exceed 13 megapixels—all the better to creatively zoom in and crop your images. Keep in mind that higher megapixel counts also produce larger files, which in turn take up more room on your hard drive.
Sensor Size Cameras with larger sensors and better lenses normally take better shots, regardless of the megapixel count. This is why DSLrs take such stunning photos. If you can’t get any hands-on time with a camera before decid-ing whether to buy it, look at the specs to see how big its sensor is.
Click here to buy the full 196-page “Macworld Digital Photography Superguide” for only $12.95!
BuY a CaMEraChapter 1
26
Accessoriesa camera body is only the first part of a proper camera kit. Once you’ve settled on a camera type and model, it’s time to accessorize. This is especially true for DSLrs and CILCs, where half the fun is buying lenses and other external gizmos and gadgets.
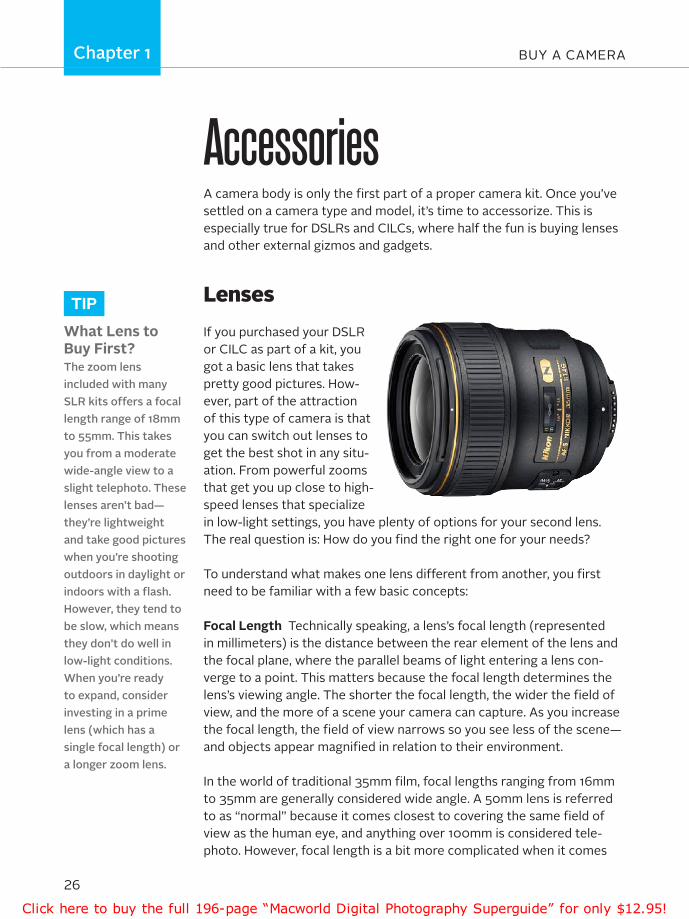
LensesIf you purchased your DSLr or CILC as part of a kit, you got a basic lens that takes pretty good pictures. How-ever, part of the attraction of this type of camera is that you can switch out lenses to get the best shot in any situ-ation. From powerful zooms that get you up close to high-speed lenses that specialize in low-light settings, you have plenty of options for your second lens. The real question is: How do you find the right one for your needs?
To understand what makes one lens different from another, you first need to be familiar with a few basic concepts:
Focal Length Technically speaking, a lens’s focal length (represented in millimeters) is the distance between the rear element of the lens and the focal plane, where the parallel beams of light entering a lens con-verge to a point. This matters because the focal length determines the lens’s viewing angle. The shorter the focal length, the wider the field of view, and the more of a scene your camera can capture. as you increase the focal length, the field of view narrows so you see less of the scene—and objects appear magnified in relation to their environment.
In the world of traditional 35mm film, focal lengths ranging from 16mm to 35mm are generally considered wide angle. a 50mm lens is referred to as “normal” because it comes closest to covering the same field of view as the human eye, and anything over 100mm is considered tele-photo. However, focal length is a bit more complicated when it comes
TIPWhat Lens to Buy First?The zoom lens included with many SLR kits offers a focal length range of 18mm to 55mm. This takes you from a moderate wide-angle view to a slight telephoto. These lenses aren’t bad—they’re lightweight and take good pictures when you’re shooting outdoors in daylight or indoors with a flash. However, they tend to be slow, which means they don’t do well in low-light conditions. When you’re ready to expand, consider investing in a prime lens (which has a single focal length) or a longer zoom lens.
Click here to buy the full 196-page “Macworld Digital Photography Superguide” for only $12.95!
BuY a CaMEraChapter 1
30
Where to Buy Cameras and AccessoriesThe best way to buy a camera is in person at a dedicated camera store, whether it’s a national chain like ritz Camera or a local mom-and-pop store. The brick-and-mortar store experience is driven by interaction—both with the equipment you’re considering and with a knowledgeable salesperson who can answer any lingering questions you have. When you go to look at a camera in person, you can check its weight and see how it fits into your hand. Is the grip in the right place? are the buttons and dials easy to reach? It’s also important to test-drive the in-camera menu system and see if it seems logical and easy to learn.
Larger retailers such as Best Buy or Target have a more limited variety of camera brands and models than a camera-only store, but you can still get hands-on time with equipment there. Typically, the sales staff at these types of stores won’t know much about the cameras beyond the basics. If you’re interested in a specific camera brand, go to its Website and do a search for official vendors in your area.
Your other choice is to shop online. The benefit of this option is that Internet vendors are usually very competitive, and you can easily see which company is offering the lowest price on a specific piece of equip-ment. Online vendors also tend to offer more variety and specialty items than a local shop would. Shoppers looking for the lowest price or the full range of products from harder-to-find brands like Olympus or Pentax might find buying online to be their best or only option.
Wherever you make your final purchase, be sure to consider adding on a protection plan. These plans usually start around $120 through a store like ritz Camera or direct from the manufacturer. Furthermore, make sure you are buying protection and not just an extended manufacturer’s warranty, which only covers defects from the factory.
TIPPlaces to BuyB&H bhphotovideo.com
Adorama adorama.com
Ritz ritzcamera.com
KEH (used cameras) keh.com
Cameta Camera cameta.com
Amazon amazon.com
Best Buy bestbuy.com
Newegg newegg.com
Photojojo (accessories) photojojo.com
Click here to buy the full 196-page “Macworld Digital Photography Superguide” for only $12.95!

31
Take PhotosThanks to the auto technology in most digital cameras, you don’t need to know anything about photography to get decent shots. You just point and shoot. But if you want to go beyond “decent” to get truly beautiful and unique shots, you’ll need to understand how your camera sees the world. That means delving into its menus and settings to make some smart choices about light, exposure, and focus.
In this chapter, we’ll walk you through the different parts of your digital camera to explain how they affect your shot and give you strategies for taking control of those settings. We’ll also help you master the most essential element in photography: lighting. Once you’ve gotten the basics down, learn how to troubleshoot challenging photo situations and experiment with unusual shots.
Camera SettingsPage 32
Master LightingPage 45
Control Depth of Field
Page 53
How to Shoot Anything
Page 57
How to Compose a
PhotoPage 69
2ConTenTs
Click here to buy the full 196-page “Macworld Digital Photography Superguide” for only $12.95!

Take phOTOsChapter 2
32
Camera settings almost all digital cameras provide auto modes that do much of the difficult photographic work for you. But as sophisticated as they are, even the best auto modes can’t get it right every time. Luckily, most cameras give you controls that go way beyond automatic modes.
how much you can change depends on the type of camera you have. all DsLR, CILC, and advanced point-and-shoot cameras have full manual controls. Typically, a dial on the top of the camera has a setting for each shooting mode: auto, program, shutter priority, aperture priority, and scene modes. Other manual settings include IsO, White Balance, and exposure Compensation.
If you’re constantly struggling to fix images that are too dark or are just not the shots you were hoping to capture, you’re probably not taking advantage of everything your digital camera offers. In this chapter we’ll take an in-depth look at your camera’s controls and show you how to use them to get great photos.
Shutter Speed shutter speed is how long your camera’s shutter is kept open to allow light to reach the sensor. This period of time is also sometimes called the exposure time. The slower the shutter speed, the longer your shutter is open, and the more light your camera can capture.
By altering shutter speed, you can control the camera’s ability to freeze motion. slow shutter speeds render moving images with lots of blur; fast shutter speeds freeze even the fastest action. slow shutter speeds also make it possible to capture low-light images without using your flash—creating a more natural look.
however, the longer the shutter remains open, the more likely you are to shake the camera and blur the shot. attaching your camera to a tripod will reduce this risk (see “slowing Down”). also, as more light hits the sensor, you run the risk of overexposing the image, which will wash out all the colors and blow out the highlights. One way to counteract this is by adjusting your camera’s aperture and IsO.
TIP
Program versus auto ModeBoth Auto and Program mode choose an aperture and shutter speed for a shot. However, in Program mode you can still manually control all other settings, including the flash and exposure compensa-tion. Program is a good place to start if you’re new to manual controls.
Click here to buy the full 196-page “Macworld Digital Photography Superguide” for only $12.95!

Take phOTOsChapter 2
45
Master Lighting Your camera flash probably has more settings than just on and off. You should know when to switch to fill flash, which is great for avoiding harsh shadows when taking pictures of people outdoors in direct sunlight. You should also know how to use red-eye reduction indoors in low light, whether you’re shooting pictures of people or of animals.
Use Natural LightBy capturing photos with ambient light, you can give scenes a greater sense of depth and a more natural appearance (see “Night Vision”). In dim settings, the on-camera flash tends to produce too much light. This obliterates the background and washes out tones in your subject.
To turn off your flash, start by cycling through your flash menu until you find the Flash Off setting. In this mode, your camera records only the ambient light in the room. steady the camera, take a picture, and review it on the LCD screen.
If your photo looks too soft—which is a nice way of saying blurry—it means that there is low light and your camera is shaking slightly during the exposure. To ensure the sharpest possible photo, use these tech-niques in low-light situations:
Steady the camera Mount the camera on a tripod, recompose, and gently press the shutter button. Remind your model, if you have one, to hold very still during the exposure. The tripod steadies the camera and eliminates the shake. You can refine this technique by using the self-timer or a remote release to trip the shutter. You press the button, the camera settles down while the self-timer counts down ten seconds, and then it’s rock steady when the shutter opens. a tripod is especially helpful when shooting buildings and landscapes in low light, since you don’t have to worry about subject movement.
Increase the ISO If you don’t have a tripod available, try increasing the IsO. Choose IsO 400 to 800 for compact cameras, or 400 to 1600 for sLRs. Why do the two types of cameras have different ranges? The internal electronics in sLRs are better suited for working in low light than the electronics in compacts. a low-light exposure at IsO 800 on a compact will
Click here to buy the full 196-page “Macworld Digital Photography Superguide” for only $12.95!

Take phOTOsChapter 2
53
Control Depth of FieldNow that you’ve mastered the basic camera settings, you can adjust them to get cool effects. One of the most popular tools for improving photographs is adjusting the depth of field. When photographers talk about the depth of field in an image, they’re referring to how much of the picture they choose to have in focus. You may think, “But don’t I want all of my image to be in focus?” Frequently you do, but sometimes you can bring more attention to your subject by reducing the depth of field in a scene, making the background soft and blurry.
By choosing how much depth of field to have in your shot, you can focus the viewer’s attention in a specific place. This makes depth-of-field control one of a photographer’s most important creative decisions. This example shows the same image shot with deep depth of field (top) and shallow depth of field (bottom).
Pick Your Depth The top image has a deeper depth of field than the lower image, where the background is out of focus.
Click here to buy the full 196-page “Macworld Digital Photography Superguide” for only $12.95!

Take phOTOsChapter 2
57
How to shoot AnythingNow you know your camera’s controls, plus basic lighting and depth-of-field techniques. It’s time to start shooting. here are a few common situations and tips on how to best photograph them. The suggested settings are just starting points, so don’t be afraid to get creative and capture something unique.
Sunsets If you find yourself somewhere with a beautiful sunset, and you’re itching to take someone’s picture in front of it, remember that the sun is still very bright. This means you’re shooting in a backlit situation, so you need to take the same steps that you would if you were shooting in front of a window. Use your camera’s fill flash to illuminate your subject. The camera will expose for the background, so the result should be a nice, even exposure.
Landscapes When you see a grand vista or vast landscape, you might assume that you need the widest angle possible to capture this breath-taking view. But the problem with wide angles is that when you zoom out, distances get stretched and details in your image get smaller. The result can be an image with no discernible subject.
Rather than trying to capture everything, remember that sometimes less is more, and your job as a photographer is to represent. Get in close, and capture just a sliver of that broad vista, or find an evocative detail in the scene and shoot that. some scenes are simply too big to fit in a photo, so go for the details, and enjoy the view while you’re there.
kids The best way to shoot kids is to get on their level. Getting down on your knees is a good option (balancing children on high surfaces, how-ever, is not recommended). Once you’re at eye level, mix it up. Go in really close and shoot with a wide angle, and then try farther away, zoomed in. Children are often on the go, so you can use some common sports photography techniques to get the fast-moving shots (see “here’s Looking at You, kids”).
crisp Motion Capturing fast-moving subjects like athletes or kids on the small LCD of a digital camera can seem nearly impossible. By the time you frame the shot and push the shutter button, you’ve already missed the action. Luckily, you can speed up your camera to keep pace.
Click here to buy the full 196-page “Macworld Digital Photography Superguide” for only $12.95!
Take phOTOsChapter 2
69
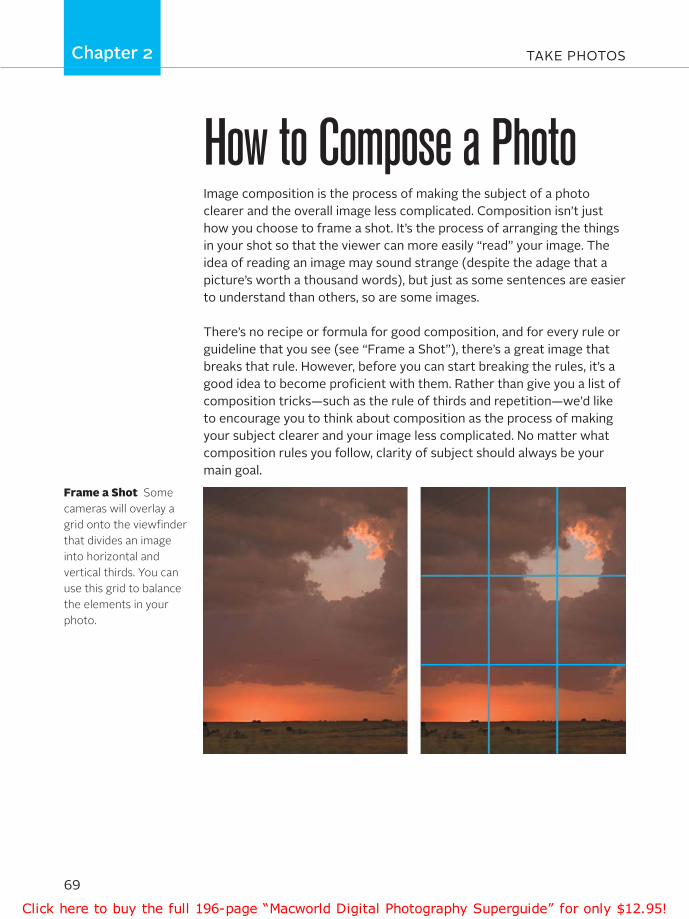
How to Compose a PhotoImage composition is the process of making the subject of a photo clearer and the overall image less complicated. Composition isn’t just how you choose to frame a shot. It’s the process of arranging the things in your shot so that the viewer can more easily “read” your image. The idea of reading an image may sound strange (despite the adage that a picture’s worth a thousand words), but just as some sentences are easier to understand than others, so are some images.
There’s no recipe or formula for good composition, and for every rule or guideline that you see (see “Frame a shot”), there’s a great image that breaks that rule. however, before you can start breaking the rules, it’s a good idea to become proficient with them. Rather than give you a list of composition tricks—such as the rule of thirds and repetition—we’d like to encourage you to think about composition as the process of making your subject clearer and your image less complicated. No matter what composition rules you follow, clarity of subject should always be your main goal.
Frame a Shot Some cameras will overlay a grid onto the viewfinder that divides an image into horizontal and vertical thirds. You can use this grid to balance the elements in your photo.
Click here to buy the full 196-page “Macworld Digital Photography Superguide” for only $12.95!

76
Manage PicturesJust like a garden, a photo library left untended can quickly become overgrown and uninviting. Unless you lay down some guidelines early on—and stick to them—you’re likely to spend just as much time searching for a photograph as you would spend polishing it.
Luckily, several applications enable you to create an efficient workflow for managing your pictures. In this section, we’ll provide an overview of these programs in addition to a how-to on importing your images; sorting, organizing, and searching through your library; and adding information like GPS data and face identification.
Choose Your Application
Page 77
Import ImagesPage 82
Sort and Organize Your iPhoto Library
Page 87
Tag, Map, and Label in iPhoto
Page 97
3
Contents
Click here to buy the full 196-page “Macworld Digital Photography Superguide” for only $12.95!
ManaGe PIctUreSChapter 3
77
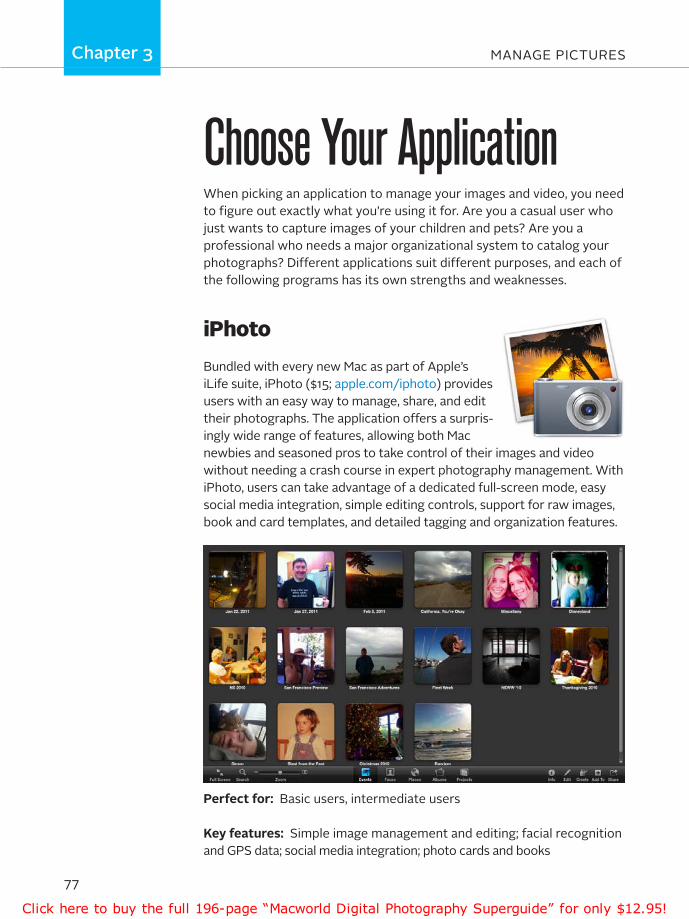
Perfect for: Basic users, intermediate users
Key features: Simple image management and editing; facial recognition and GPS data; social media integration; photo cards and books
Choose Your ApplicationWhen picking an application to manage your images and video, you need to figure out exactly what you’re using it for. are you a casual user who just wants to capture images of your children and pets? are you a professional who needs a major organizational system to catalog your photographs? Different applications suit different purposes, and each of the following programs has its own strengths and weaknesses.
iPhotoBundled with every new Mac as part of apple’s iLife suite, iPhoto ($15; apple.com/iphoto) provides users with an easy way to manage, share, and edit their photographs. the application offers a surpris-ingly wide range of features, allowing both Mac newbies and seasoned pros to take control of their images and video without needing a crash course in expert photography management. With iPhoto, users can take advantage of a dedicated full-screen mode, easy social media integration, simple editing controls, support for raw images, book and card templates, and detailed tagging and organization features.
Click here to buy the full 196-page “Macworld Digital Photography Superguide” for only $12.95!

ManaGe PIctUreSChapter 3
82
Import Imagesthe first step toward working with your images is to get them into your computer. By creating an easy-to-remember workflow, you can keep the upload process simple and focus on the photos themselves.
Build a RoutineBefore uploading anything, figure out what you actually need. Most cameras and smartphones don’t require any fancy equipment or drivers to talk with your computer; simply turn the device on and use its includ-ed USB cable to connect it to your Mac. If you want to avoid running down your camera’s battery, you can instead purchase a memory card reader, which costs anywhere from $20 to $35.
Make sure you check what kind of card your camera uses before buying an external reader: While most newer cameras use SD, there are those that use compactFlash, XD, and others. Some card readers accept several types of memory cards, but it’s always good to double-check.
Once you’ve got your hardware figured out, decide what application you’re going to use to store and edit your photos. While it’s possible to have groups of images in multiple pro-grams—say, if you’re a wedding
photographer, and you want your personal pictures in iPhoto but your professional work in aperture—make sure you’re keeping it consistent. Worst case, if you goof up, you can always import images from another program’s library, but you’ll be wasting time and energy you could have otherwise spent editing and labeling the photos themselves.
after developing a basic import solution to fit your needs, don’t forget to think about a backup solution for photos. (For more about protecting your media, see “Backup Basics” in the Back Up Photos chapter.)
Lock and Load Card readers are an easy way to offload images and other media from several devices without having to keep track of individual cords.
Click here to buy the full 196-page “Macworld Digital Photography Superguide” for only $12.95!

ManaGe PIctUreSChapter 3
87
sort and organize Your iPhoto LibraryOnce you’ve imported your images and video, it’s time to organize them. While each major photo management application has a slightly different workflow, this chapter will primarily focus on navigating and organizing using iPhoto. For editing within iPhoto, see the Edit Photos chapter. (For information on aperture, see macworld.com/6754.)
iPhoto BasicsiPhoto’s traditional single-palette view is divided up into three subsec-tions. the Source list, found along the left side, links to your library, recent photos, subscriptions, devices, albums, Web sharing, and projects. to the right, the main panel view will by default display your events, as well as any content you’re currently viewing or working on. Below that, the bottom toolbar allows you to switch into full-screen mode, search, zoom, create a slideshow, check information, edit a photo, create a project, add pictures, and share your images.
Unified Design The iPhoto window has been divided up into three subsections: the Source list, the main panel, and the bottom toolbar.
Click here to buy the full 196-page “Macworld Digital Photography Superguide” for only $12.95!

ManaGe PIctUreSChapter 3
97
tag, Map, and Label in iPhotonow that you know how to import, create, and organize photo collections, it’s time to focus on the images themselves. In iPhoto, you can categorize images using keywords, geolocation, face recognition, star ranking, and more; we’ll walk you through each of these features and hand out some great advanced tips to make the application work for you.
Become a Master OrganizerDespite iPhoto’s outward simplicity, you can do quite a lot with the application—if you know where to look. Many advanced options hide away in the confines of the iPhoto menu bar, while others can be accessed through certain key combinations. Here are just a few of the best ones.
Folder Hierarchy If you have several albums that could conceivably fit together, you can create a folder for them by going to File -> new -> Folder. Once you’ve created and named the folder, just drag and drop the albums you want organized on top of it (see “top-Level Groups”).
give It a Star to highlight your best photos, consider giving them a star rating. You can do so by highlighting an image and opening the Info pane, then selecting the number of stars you’d like to assign. Once you’ve rated everything, consider grouping them together using a smart album so you can easily show off only your best images.
Top-Level Groups You can stack and organize your albums using multiple folders.
Click here to buy the full 196-page “Macworld Digital Photography Superguide” for only $12.95!

103
Edit Photos Almost all images can benefit from some tweaking, whether it’s with a simple sharpening filter or full-fledged color correction. These minor nips and tucks can mean the difference between just another humdrum vacation photo and a frame-worthy work of art.
We’ll show you how to take on some of the most common image problems using iPhoto’s built-in editing tools. You’ll be surprised by just how easy it is to turn a bland photo into something you can be proud of. We’ll also tell you where to turn next if you’ve put iPhoto’s tools to work and still aren’t satisfied.
Make Basic Edits in iPhoto
PAGE 104
Correct Bad Color and
LightingPAGE 111
Make Quick Edits with
PreviewPAGE 118
Improve Photos Fast with Cropping
PAGE 123
4CONTENTS
Click here to buy the full 196-page “Macworld Digital Photography Superguide” for only $12.95!
EdiT PhoTos Chapter 4
104
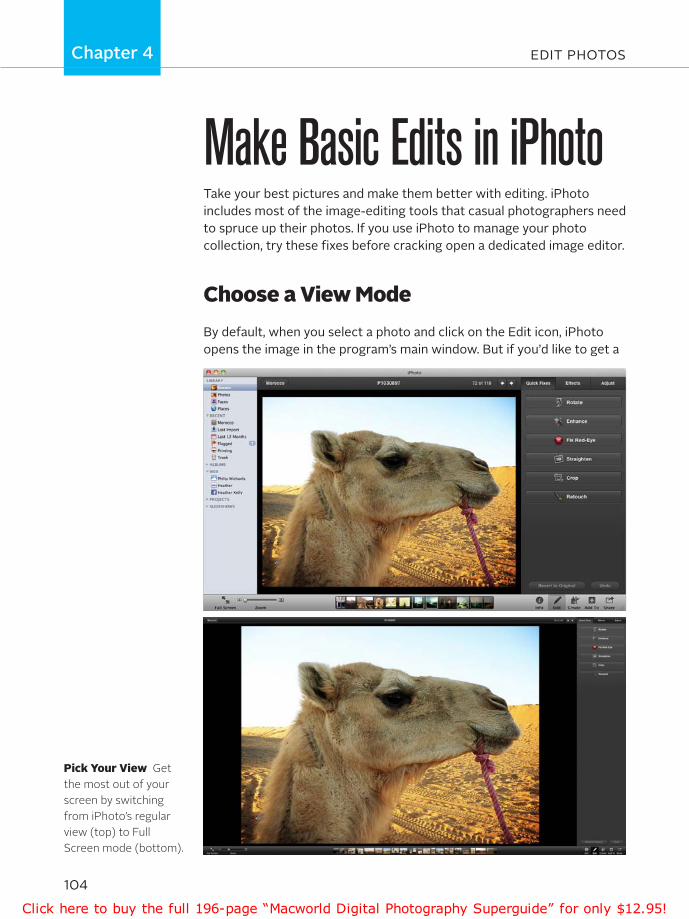
Make Basic Edits in iPhotoTake your best pictures and make them better with editing. iPhoto includes most of the image-editing tools that casual photographers need to spruce up their photos. if you use iPhoto to manage your photo collection, try these fixes before cracking open a dedicated image editor.
Choose a View ModeBy default, when you select a photo and click on the Edit icon, iPhoto opens the image in the program’s main window. But if you’d like to get a
Pick Your View Get the most out of your screen by switching from iPhoto’s regular view (top) to Full Screen mode (bottom).
Click here to buy the full 196-page “Macworld Digital Photography Superguide” for only $12.95!
EdiT PhoTos Chapter 4
111
Correct Bad Color and Lightingstraightening, cropping, sharpening, and removing red-eye are all fairly easy problems to solve. Getting good color and tones, on the other hand, can be a more challenging problem. iPhoto’s Enhance button tries to offer a one-click solution to this problem—when selected, the feature analyzes your image’s tones and makes its best guess at fixing them. But while the feature can often get you off in the right direction, it seldom solves the problem completely. You’ll usually obtain far better results by making adjustments yourself. To do that, you’ll need to turn to the Adjust palette.
Learn to Read a Histogram The key to correcting an image’s tones and color problems lies in understanding the histogram that appears at the top of the Adjust palette. The histogram is a bar chart that shows the distribution of tones in an image (see “Correct Blowouts”). Black is on the far left edge, white is on the right, and everything else is in between.
By learning to interpret what the histogram is saying, you can take much of the guesswork out of correcting bad photos and discover ways to make good photos even better. Usually, you want photos with as broad a range of tones as you can get. Likewise, if the bars in the histogram are crammed together in a narrow space, your image probably doesn’t have the resources it needs to depict subtle detail.
With a well-exposed image, the histogram’s bars will stretch across the full range of the graph. if your histogram’s bars are clumped on either the left or the right side, the image is probably underexposed (lacking good highlights) or overexposed (lacking good shadows), respectively. if the bars don’t stretch to either edge, then your image lacks contrast.
Although there’s not much you can do about clipped highlights or shadows in iPhoto—you can’t drastically improve detail where none exists—you may be able to prevent this problem from occurring in the
Click here to buy the full 196-page “Macworld Digital Photography Superguide” for only $12.95!

EdiT PhoTos Chapter 4
118
Make Quick Edits with Previewsometimes you just want to tweak an image and move on fast. At that moment, you don’t want commitment (iPhoto, Aperture, and Light-room), or a bazillion editing options (Photoshop)—you just want to brighten the picture, adjust the color, crop it, and be done. The applica-tion to do just this is already on your Mac. it’s called Preview. Beyond just opening a photo, you can adjust an image’s tonality and color, and even cut out objects within the shot. here is a quick photographer’s tour of this handy application.
Customize the InterfaceA good way to get a feel for the functions available in Preview is to customize the top toolbar. Go to View -> Customize Toolbar, and you’ll see icons for zooming, selecting, cropping, rotating, and even scaling. drag the tools you will use most often to the top toolbar so they’re ready when you need them (see “Just for You”).
Just for You Custom-ize Preview’s workspace so that the buttons you use most are always front and center.
Click here to buy the full 196-page “Macworld Digital Photography Superguide” for only $12.95!

EdiT PhoTos Chapter 4
123
Improve Photos Fast with CroppingModern image-editing programs are packed with amazing adjustment tools that provide complex algorithms for radically altering the color, tone, and even content of an image. in spite of all this amazing technol-ogy, you’ll often find that the single tool that can do the most to turn a bad image into a keeper is your crop tool.
Composition is the art of arranging the elements of your scene to help guide the viewer’s eye through your image. When you crop, the relation-ship of the elements in your scene changes, and as that relationship changes, the viewer reads your image in a different way.
Do a Basic CropMany times, you crop simply to remove extraneous parts of the image, not to perform a radical recomposition. Consider this simple snapshot portrait of two people. While the people look fine, there’s an excessive amount of headroom above them. You don’t need to see the lamps or ceiling of the building. A simple crop will tighten up the image, focus attention on the subjects, and make them fill the frame better.
on occasion, people respond to cropping out the background by saying, “But i wanted to show the room.” Most of the time, if you want a picture of a room, or statue, or building, or background element of some kind,
Headroom Cropping out the excess head-room brings the focus back onto the people in the image.
Click here to buy the full 196-page “Macworld Digital Photography Superguide” for only $12.95!
126
Share PhotosYou’ve composed, organized, labeled, and edited your pictures to perfection. Now it’s time to show off those gems to the world. Unlike traditional negatives, digital images are easy to reproduce and insert into an online gallery, a calendar or card, a slideshow, or a movie—and you can even print them out using your home printer or a professional service. After all, shouldn’t you have as much fun sharing your photos as you had taking them?
Print Out Images
Page 127
Display Photos Digitally
Page 141
Share Photos OnlinePage 145
Create Fun Projects
Page 150
5ContentS
Click here to buy the full 196-page “Macworld Digital Photography Superguide” for only $12.95!
ShAre PhotoSChapter 5
127
Print out ImagesIf you like having tangible copies of your digital files, you’ll be happy to know that modern printers and print services make the process easier than ever. In some cases, you may not even need to turn on your com-puter for the job.
If you’re looking to turn your Mac into a home printing studio or print from your iPhone or iPad on the go, here’s how to get the job done without running into any problems. If you don’t quite feel up to the challenge of doing the job yourself, we’ll supply you with some of the best online printing services and shops for photo work.
Choose a PrinterSometimes the easiest way to print out your images is to use your very own printer. Depending on the type of prints you’d like to end up with, you’ll want a specific printer for the job.
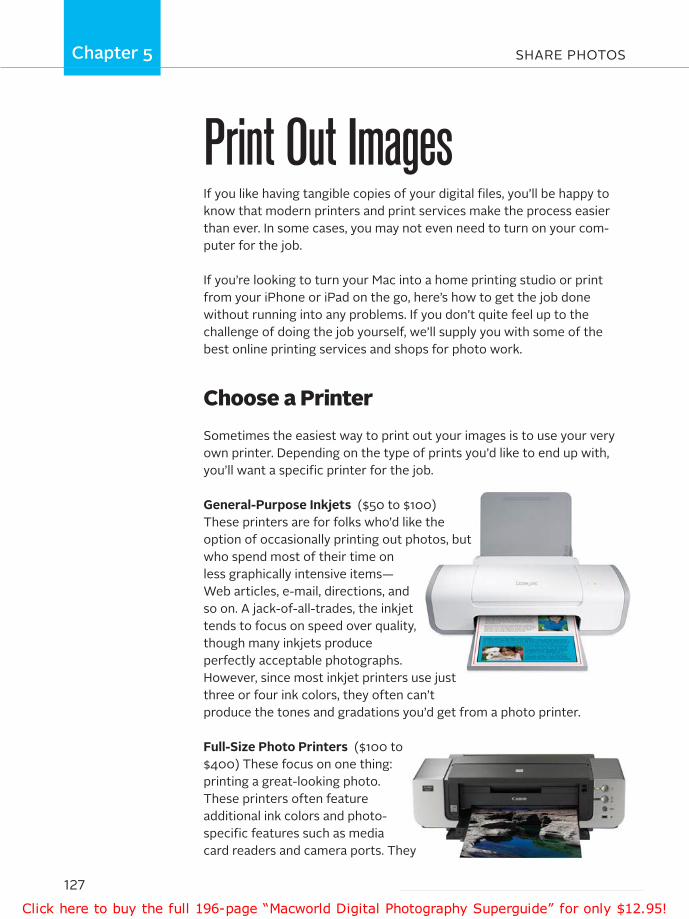
general-Purpose Inkjets ($50 to $100) these printers are for folks who’d like the option of occasionally printing out photos, but who spend most of their time on less graphically intensive items—Web articles, e-mail, directions, and so on. A jack-of-all-trades, the inkjet tends to focus on speed over quality, though many inkjets produce perfectly acceptable photographs. however, since most inkjet printers use just three or four ink colors, they often can’t produce the tones and gradations you’d get from a photo printer.
Full-Size Photo Printers ($100 to $400) these focus on one thing: printing a great-looking photo. these printers often feature additional ink colors and photo-specific features such as media card readers and camera ports. they
Click here to buy the full 196-page “Macworld Digital Photography Superguide” for only $12.95!

ShAre PhotoSChapter 5
141
Display Photos DigitallyPrints are great, but let’s be honest—there are only so many ways to display a 4-by-6-inch photo. Instead, use the array of digital devices in your home to showcase your images.
Use an iPadPhotos and slideshows look unbelievably good on the iPad’s 9.7-inch, 1024 by 768 backlit LeD display, and on top of that, it’s incredibly easy to use Apple’s device as your own portable photo viewer.
Upload Your Photos At first glance, the Photos app may look like a simple piece of software. But, like many Apple applications, it’s unex-pectedly feature rich, especially if you fill the iPad with your best photos by syncing it with iPhoto or Aperture on your host Mac.
one way to do this is to create a smart album in Aperture or iPhoto that collects all the images with four-star ratings, and then sync that smart album with the iPad. Your smart album will now appear as an album within the Photos app (see “Selected Stars”).
Selected Stars You can sync your tailored smart album by going to the iPad’s Photos tab and selecting it.
Click here to buy the full 196-page “Macworld Digital Photography Superguide” for only $12.95!

ShAre PhotoSChapter 5
145
Share Photos onlineYou’ve snapped, edited, and printed your photos—what’s left but to share them with everyone you know online? the Web provides a variety of useful tools and services for doing so, whether you’re planning on sharing them in a small group, or with the entire Internet-accessible world. And with iPhoto and Aperture integration, you can easily upload, tag, and title photos during your normal editing workflow without having to worry about Web uploaders or rewriting captions.
Sharing Optionsthanks to social sharing services, publishing your photos online is easier than ever. For Mac users, the three giants of image sharing are Mo-bileMe, Flickr, and Facebook. read on to find out each service’s strengths, limitations, and perks.
MobileMe Apple’s $99-a-year sync and sharing service offers users control over displaying and disseminating photos, in addition to e-mail, calendar, and contact support. Upload photos directly from iPhoto or Aperture or through the Web, create
private or password-protected galleries, upload movies, and showcase photos in a slideshow. iPhone and iPad users can download the MobileMe Gallery app (macworld.com/7095) for viewing their galleries and their friends’. the service is paid, but offers advanced features and secure hosting.
Flickr Yahoo’s image-sharing service offers great social interac-tion and a simple way to show off and collect pictures. Basic users can upload up to 300MB of photos a month, tag and caption them, and post in group pools. Joining Flickr Pro ($25 a
year) removes your upload cap, and the service keeps archived high-resolu-tion originals available in case you ever run into backup issues. You’ll also get page-view statistics and referring links, plus ad-free browsing.
Facebook Perhaps the most-used social network, Facebook offers an easy way to share, caption, categorize, and tag friends in photos. You can upload single images and album groupings, or add images to albums you’ve created on your
Facebook profile. tag friends to make your photos pop up on their profiles, add titles, and carry on discussions in the comments section.
Click here to buy the full 196-page “Macworld Digital Photography Superguide” for only $12.95!

ShAre PhotoSChapter 5
150
Create Fun ProjectsIndividual images are fun to print and share, but when you’re ready to think outside the frame, take advantage of the creative tools built into iPhoto or those available online. Whether it’s a book, calendar, massive work of art, comforting nightlight, or multimedia extravaganza, there have never been more ways to turn your digital masterpieces into one-of-a-kind keepsakes.
Design Books, Cards, and CalendarsYou could spend a lot of money buying calendars and greeting cards with someone else’s photos in them, but why do that when it’s so easy to use your own favorite snapshots to create truly personalized keep-sakes? thanks to iPhoto’s built-in publishing tools, you don’t have to be a professional designer to create great-looking books, calendars, and cards for just about every occasion. What’s more, the application lets you lay out your projects and order copies without ever opening your Web browser.
Using iPhoto’s Create button, on the bottom toolbar, you can easily build a book, card, or calendar. Just select the images you’d like to use and click Create. In the pop-up that results, choose your craft.
Books When you choose the Book option, you’ll be brought into the carousel, which displays previews of book themes, sorted by type. You can choose between hardcover, Softcover, and Wire-bound; hardcover books are available in Large and extra-Large, while Softcover books are available in Small, Medium, and Large. Wire-bound books are limited to just Medium and Large. Depending on the style of book, you may also be able to choose its background color. (You can change this later inside the book builder.)
You can navigate themes on the carousel by using the arrow keys on your keyboard or by clicking from theme to theme (see “ride the Carousel”). each theme has a unique design and a number of different layout schemes that fit into that design.
While this helps ensure that there’s a little something for everyone, it also means you’ll need to do a fair amount of experimenting to find the
TIP
Size It UpFor better print quality, Apple recom-mends that your photos be at least 180 dpi with a minimum 1300 by 928 resolu-tion. If your photo’s resolution is too low, you may see a yellow warning triangle when viewing your project. You can judge the final picture quality yourself by looking at the card in Full Screen mode or by previewing the full-size image as a PDF.
Click here to buy the full 196-page “Macworld Digital Photography Superguide” for only $12.95!

157
iPhone PhotographyYou don’t need to buy an expensive DSLR or lug around a point-and-shoot to capture good photos. If you have a smartphone with a built-in camera, the only camera you need may already be in your pocket. This chapter has tips on capturing the best possible images with your iPhone camera.
How to Use the iPhone Camera
Page 158
Take Better iPhone Photos
Page 168
Edit iPhone ImagesPage 170
Print iPhone PhotosPage 173
Download Photo Apps
Page 175
6
Contents
Click here to buy the full 196-page “Macworld Digital Photography Superguide” for only $12.95!

iPhone PhoTogRaPhYChapter 6
158
How to Use the iPhone CameraThe iPhone 4 has two cameras: a 5-megapixel point-and-shoot with built-in LeD flash, and a front-facing Vga-quality one for quick self- portraits and FaceTime video chats. The 4g iPod touch and iPad 2 also have two cameras, but at lesser resolutions (their back cameras are just 0.7 megapixels), and with no LeD flash. older iPhone models have only one camera on the rear of the device; older iPod touches and the first-generation iPad have no cameras at all.
Click here to buy the full 196-page “Macworld Digital Photography Superguide” for only $12.95!
iPhone PhoTogRaPhYChapter 6
168
take Better iPhone Photosnow that you know your way around the iPhone’s Photos app, you can start snapping away. These tips will help you take better photos.
Know Your Camera any camera is better than no camera, but there is a difference between generations of iPhone. If you are set on taking the best possible photos with your device, opt for the latest hardware. an iPhone 4 will take more print-friendly pictures than previous iPhones because it delivers images with a higher pixel count, and a 3gS will do better than its predecessors for the same reason. Increased pixel count will manifest itself as a slight improvement in an image’s overall sharp-ness. also, because the 3gS and iPhone 4 allow selective focus and metering, they offer more shooting flexibility. But even if you’re working with a first-generation iPhone, you can still take good shots.
If you are using an iPhone 4 or iPad 2, use the back camera. While the front-facing camera makes shooting self-portraits much easier, it also yields images of substantially lower quality than the somewhat higher-megapixel camera on the back of the phone.
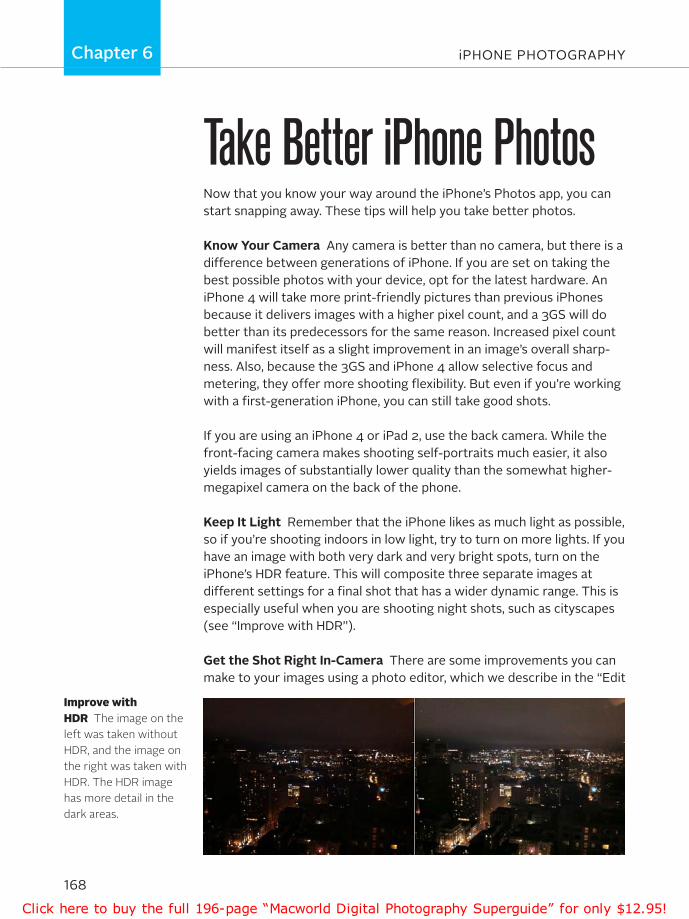
Keep It Light Remember that the iPhone likes as much light as possible, so if you’re shooting indoors in low light, try to turn on more lights. If you have an image with both very dark and very bright spots, turn on the iPhone’s hDR feature. This will composite three separate images at different settings for a final shot that has a wider dynamic range. This is especially useful when you are shooting night shots, such as cityscapes (see “Improve with hDR”).
get the Shot Right In-Camera There are some improvements you can make to your images using a photo editor, which we describe in the “edit
Improve with HDR The image on the left was taken without HDR, and the image on the right was taken with HDR. The HDR image has more detail in the dark areas.
Click here to buy the full 196-page “Macworld Digital Photography Superguide” for only $12.95!
iPhone PhoTogRaPhYChapter 6
170
edit iPhone ImagesThe iPhone’s camera is a great tool for taking spontaneous photos for sharing on sites like Facebook or Flickr, or even as actual prints on paper or in photo books. But just like photographs taken with a point-and-shoot or DSLR, these images aren’t necessarily at their best when you first capture them. a few tweaks in a photo editor can greatly improve your iPhone photos, whether you took them with a first-generation iPhone’s 2-megapixel camera or the iPhone 4’s 5-megapixel camera.
While there’s no single editing formula for producing a good photo-graph—all problem images have their own issues—you can expect to encounter a few common issues with iPhone images. (For more exten-sive editing tips, see the Edit Photos chapter.)
The Tools First, you’ll need basic image-editing software. You don’t need to splurge on an expensive editing program. If you already use iPhoto to transfer your images from your iPhone, there’s no reason not to do your editing there. It’s true that Photoshop has more image-editing power, but since iPhone images don’t have a lot of image-editing latitude, the extra power won’t buy you much.
Though these instructions focus on iPhoto, you can make the adjust-ments described in most image editors, and some you can even do in
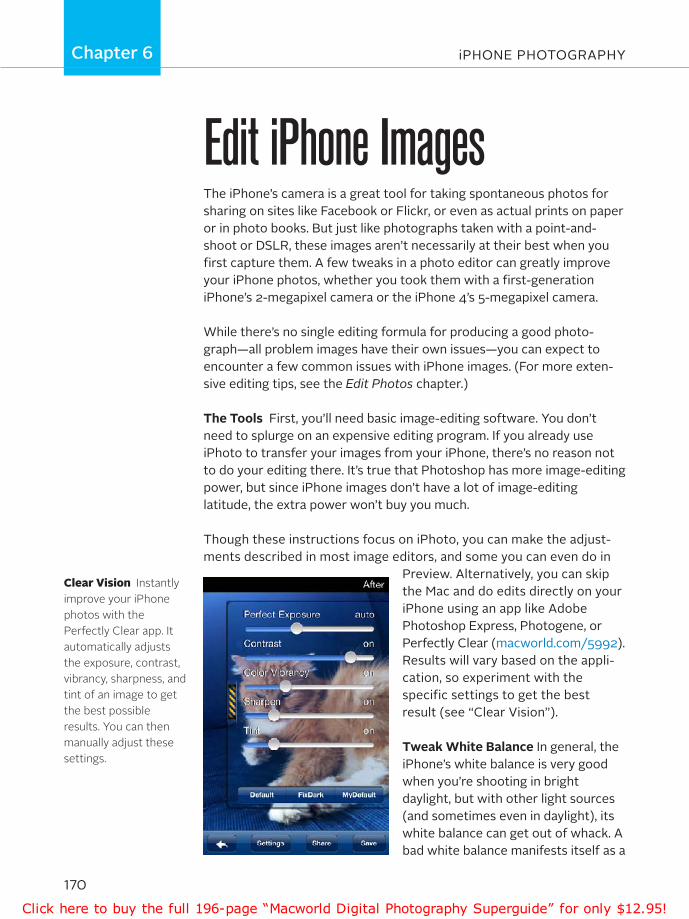
Preview. alternatively, you can skip the Mac and do edits directly on your iPhone using an app like adobe Photoshop express, Photogene, or Perfectly Clear (macworld.com/5992). Results will vary based on the appli-cation, so experiment with the specific settings to get the best result (see “Clear Vision”).
Tweak White Balance In general, the iPhone’s white balance is very good when you’re shooting in bright daylight, but with other light sources (and sometimes even in daylight), its white balance can get out of whack. a bad white balance manifests itself as a
Clear Vision Instantly improve your iPhone photos with the Perfectly Clear app. It automatically adjusts the exposure, contrast, vibrancy, sharpness, and tint of an image to get the best possible results. You can then manually adjust these settings.
Click here to buy the full 196-page “Macworld Digital Photography Superguide” for only $12.95!
iPhone PhoTogRaPhYChapter 6
173
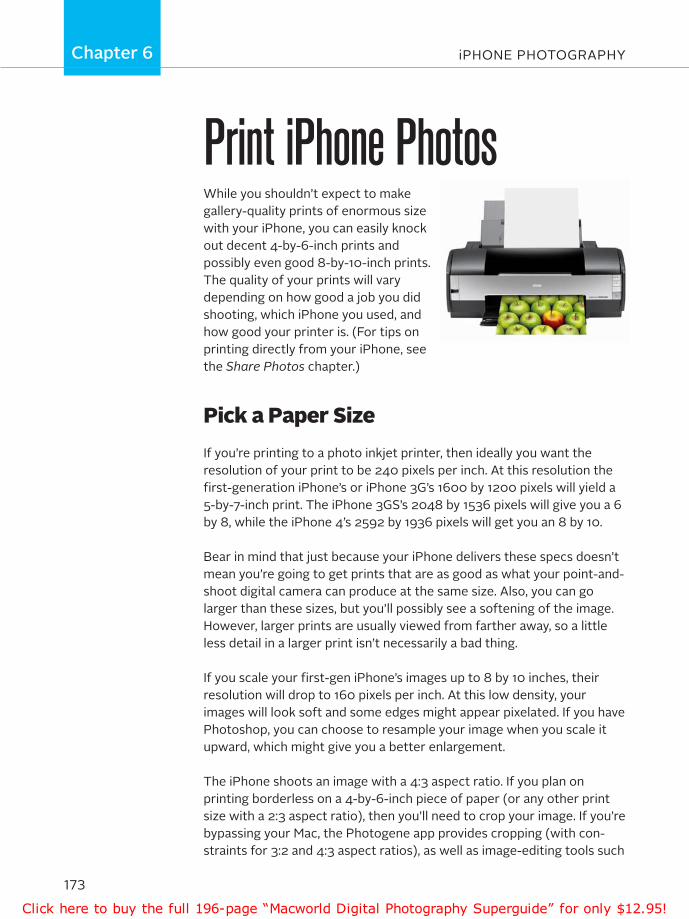
Print iPhone PhotosWhile you shouldn’t expect to make gallery-quality prints of enormous size with your iPhone, you can easily knock out decent 4-by-6-inch prints and possibly even good 8-by-10-inch prints. The quality of your prints will vary depending on how good a job you did shooting, which iPhone you used, and how good your printer is. (For tips on printing directly from your iPhone, see the Share Photos chapter.)
Pick a Paper SizeIf you’re printing to a photo inkjet printer, then ideally you want the resolution of your print to be 240 pixels per inch. at this resolution the first-generation iPhone’s or iPhone 3g’s 1600 by 1200 pixels will yield a 5-by-7-inch print. The iPhone 3gS’s 2048 by 1536 pixels will give you a 6 by 8, while the iPhone 4’s 2592 by 1936 pixels will get you an 8 by 10.
Bear in mind that just because your iPhone delivers these specs doesn’t mean you’re going to get prints that are as good as what your point-and-shoot digital camera can produce at the same size. also, you can go larger than these sizes, but you’ll possibly see a softening of the image. however, larger prints are usually viewed from farther away, so a little less detail in a larger print isn’t necessarily a bad thing.
If you scale your first-gen iPhone’s images up to 8 by 10 inches, their resolution will drop to 160 pixels per inch. at this low density, your images will look soft and some edges might appear pixelated. If you have Photoshop, you can choose to resample your image when you scale it upward, which might give you a better enlargement.
The iPhone shoots an image with a 4:3 aspect ratio. If you plan on printing borderless on a 4-by-6-inch piece of paper (or any other print size with a 2:3 aspect ratio), then you’ll need to crop your image. If you’re bypassing your Mac, the Photogene app provides cropping (with con-straints for 3:2 and 4:3 aspect ratios), as well as image-editing tools such
Click here to buy the full 196-page “Macworld Digital Photography Superguide” for only $12.95!
iPhone PhoTogRaPhYChapter 6
175
Download Photo AppsThe popularity of iPhone photography may have started with conve-nience, but it’s been amplified by the diverse collection of editing, filter, and special-effects photography apps available in the app Store. These add a higher level of creativity to the iPhone photography process.
The app Store offers an amazing number of photography apps, and developers release new ones constantly. here are a few recommenda-tions to get you started.
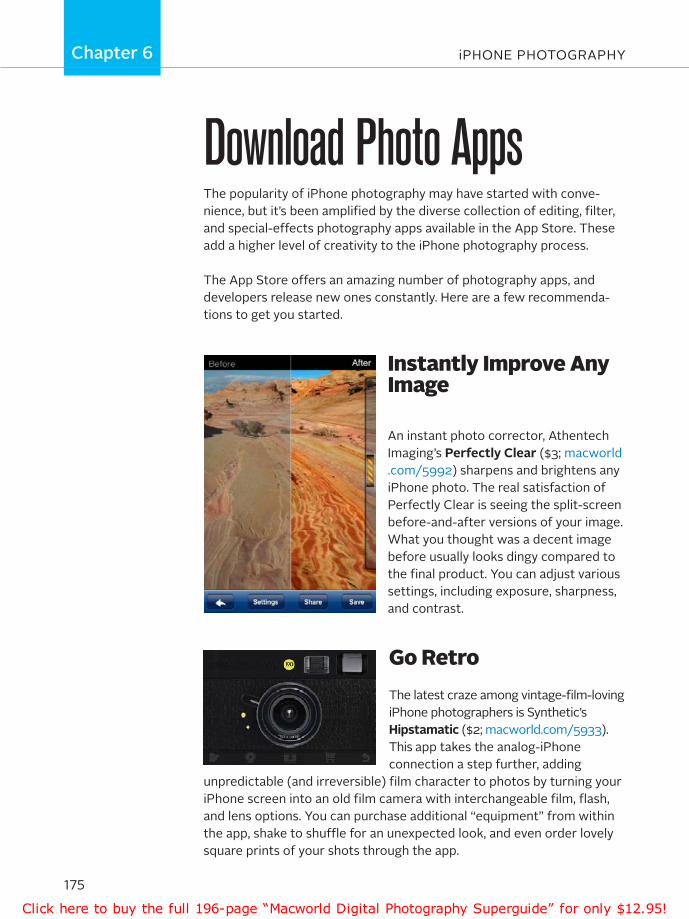
Instantly Improve Any Image
an instant photo corrector, athentech Imaging’s Perfectly Clear ($3; macworld .com/5992) sharpens and brightens any iPhone photo. The real satisfaction of Perfectly Clear is seeing the split-screen before-and-after versions of your image. What you thought was a decent image before usually looks dingy compared to the final product. You can adjust various settings, including exposure, sharpness, and contrast.
Go RetroThe latest craze among vintage-film-loving iPhone photographers is Synthetic’s Hipstamatic ($2; macworld.com/5933). This app takes the analog-iPhone connection a step further, adding
unpredictable (and irreversible) film character to photos by turning your iPhone screen into an old film camera with interchangeable film, flash, and lens options. You can purchase additional “equipment” from within the app, shake to shuffle for an unexpected look, and even order lovely square prints of your shots through the app.
Click here to buy the full 196-page “Macworld Digital Photography Superguide” for only $12.95!
178
Back Up PhotosAfter you’ve corrected, cropped, and otherwise altered your photos to your liking, it’s time to think about backing up. In this chapter, you’ll learn basic strategies for keeping your irreplaceable pictures safe and sound using both hardware and software tools, as well as get a few tips on preserving your older analog photos.
Backup BasicsPage 179
Hardware Options
Page 184
Online ServicesPage 186
Software Tools Page 189
Digitize Old Photos
Page 192
7
Contents
Click here to buy the full 196-page “Macworld Digital Photography Superguide” for only $12.95!
BAck Up photosChapter 7
179
Backup BasicsIf you’ve ever taken a digital photograph, you’ve probably heard the plaintive cry from friends and family alike: Back up those images. After all, computers—while remarkable pieces of technology—are not infal-lible. While Apple has given users some easy tools to make this process simpler, the majority of people do not regularly back up. some fail to heed the warning calls because they believe the process is too compli-cated, while others have misplaced faith in the robustness of technology.
Whether you fall into either of these categories or you’re already backing up, here are a few simple strategies for making sure your photographs stay safe, secure, and available for future viewing.
Protect Your Memory CardWhen first thinking about backing up your photos, you should always start with the prime location of the pictures themselves: your camera’s memory card. here are a few tips for protecting your images while you’re on the go, and—in case the worst happens—recovering them.
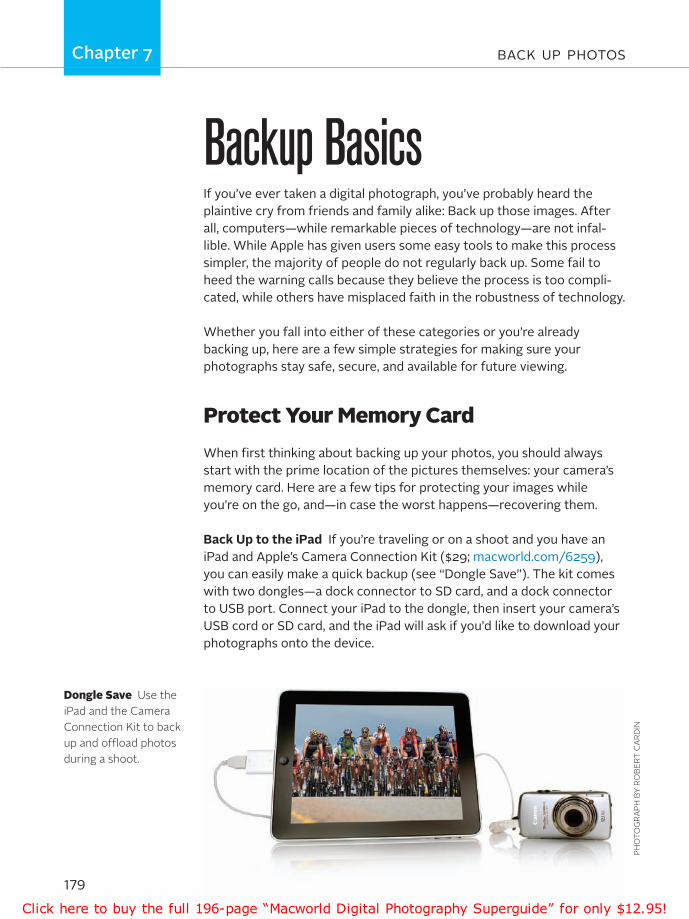
Back Up to the iPad If you’re traveling or on a shoot and you have an ipad and Apple’s camera connection kit ($29; macworld.com/6259), you can easily make a quick backup (see “Dongle save”). the kit comes with two dongles—a dock connector to sD card, and a dock connector to UsB port. connect your ipad to the dongle, then insert your camera’s UsB cord or sD card, and the ipad will ask if you’d like to download your photographs onto the device.
Dongle Save Use the iPad and the Camera Connection Kit to back up and offload photos during a shoot.
PHO
TOg
raPH
By
rOBe
rT C
arD
in
Click here to buy the full 196-page “Macworld Digital Photography Superguide” for only $12.95!

BAck Up photosChapter 7
184
Hardware optionsthe days of casually jamming a floppy disk into a slot and dragging a couple of images to that disk are gone. We now have multiple gigabytes of data to back up, and slow, low-capacity solutions are no longer an option. thankfully, there are many on- and off-site backup choices at your disposal. And don’t forget about the safety of your analog images: there are several ways to digitally import old slides, negatives, and prints, whether you choose to do it yourself or hire an outside service.
Memory Cards the first line of defense—memory cards, such as sD or compactFlash cards—are small, removable flash memory chips that you insert into a camera for direct recording of images. these cards range in storage size and can be easily swapped into and out of your camera when needed. While they’re great for your initial shoot, the storage size and relative fragility of these cards makes them less useful for any kind of permanent backup solution; they’re best used in tandem with a full array of external devices. however, if you have a bit of cash in your wallet, you can treat a normally reusable memory card like a roll of film and use it only until it reaches capacity. At that point, you can label the card and file it away.
Hard Drivesthe most obvious and simple way to back up your images is on an external hard drive (or a second internal hard drive). these drives are great for general-purpose backups because of their read/write speed, generous space, and convenience. Unfortunately, hard drives also have the shortest life span of any current digital medium, and—due to their moving parts—are prone to failures that can imperil your data. If you plan on integrating an external or internal hard drive into your backup plan, make sure you’re copying your pictures to a second location as discussed earlier in this chapter.
TIPInvest in Wi-Fi Backup To make backing up even easier, some hardware comes bundled with a Wi-Fi radio, allowing you to wirelessly transmit photos to your computer. Eye-Fi provides this option in its line of SD cards; after shooting, you can use any secured Wi-Fi network you’ve preconfigured—or any of Eye-Fi’s for-fee hotspot locations by paying a yearly fee—to upload your photos. You can set an Eye-Fi card to transfer its images to your computer, as well as to any of the 25 photo-sharing and social-networking Websites the company supports, including Facebook, MobileMe, and Flickr. (Read more about Eye-Fi at macworld.com/6199.)
Click here to buy the full 196-page “Macworld Digital Photography Superguide” for only $12.95!

BAck Up photosChapter 7
186
online servicesthanks to the Internet, you don’t have to rely solely on physical backup methods—cloud sync, photo sharing, and Wi-Fi services all provide useful additions to your plan.
Photos in the Cloudcloud-sync services—which allow you to wirelessly transfer and store your data online—have become both affordable and popular in the last few years. Most of these services are built around the idea of folder syncing: You drop whatever you’d like to copy into a specific folder on your computer, and the application will then automatically upload these files online for future access. Not only do these services provide an easily accessible duplicate copy of your file on almost any computer, but they’re especially useful for storing photo libraries.
With a service like Dropbox or sugarsync, you can store an iphoto or Aperture library in a synced folder, or copy a set of individual photos to the folder for off-site redundancy. As an added advantage, photos taken on an iphone, ipod touch (fourth-generation model), ipad 2, or trans-ferred to any ios device can be uploaded via Dropbox and sugarsync’s ios apps to your shared storage.
Dropbox (dropbox.com) offers 2GB of storage at no cost and charges $10 per month for 50GB and $20 per month for 100GB. Multiple versions of a file and deleted files aren’t counted against those totals. Dropbox backs up older versions and deleted files for 30 days; if you’re a paid user, you can enable the pack-Rat option in your preferences to keep these files forever.
SugarSync (sugarsync.com) starts you off with a 5GB free plan, though you can upgrade to one of its paid plans, which start at $5 per month for 30GB. the service retains deleted files until you take an extra step to remove them permanently.
For plain-vanilla media archiving, using a local and Internet backup can give you a feeling of security and redundancy. Macworld has recom-mended CrashPlan (crashplan.com) in two successive roundups of
Click here to buy the full 196-page “Macworld Digital Photography Superguide” for only $12.95!
BAck Up photosChapter 7
189
software toolsWith so much of our lives now stored digitally, it’s shocking how many people still avoid backing up—and not for lack of wanting to. Backing up manually can be a major hassle; thankfully, a variety of software options can ease the process.
Autobackup Software these options don’t necessarily target only your images—these applications and utilities can help back up your entire system, including your photo libraries.
Time Machine When Apple released os X Leopard, the company decided to try to help the average user deal with backup woes by introducing a new feature called time Machine. the utility—built into Apple’s os—works by copying the files on your computer to a destina-tion you designate, such as an external hard drive or a second drive inside your Mac. then, once per hour, the program runs again, updating your backup to include files that have changed since your last session.
With each hourly backup, time Machine makes what amounts to a snapshot of your entire system at that moment. If you look through the folders on your backup disk, you’ll see what appears to be a complete copy of all your files for each of numerous backup sessions. to some extent, that’s an illusion; time Machine copies only files and folders that are different from the ones in your previous backup. that way, your disk doesn’t fill up with multiple copies of files that haven’t changed.
time Machine keeps all of the day’s backups for 24 hours, but then it begins to delete older versions to save space. You can count on it to keep the first backup of any given day for an entire month. Even after a month, it preserves the first backup of each week until your disk is nearly full. only at that point does the program begin purging files from your oldest weekly backups. the net result is that you can see your files as they looked at many points in the past.
keep in mind that time Machine doesn’t work instantaneously—if you create a file and then delete it a few seconds later, time Machine won’t have time to create a backup copy of it. But that’s not really what time
Click here to buy the full 196-page “Macworld Digital Photography Superguide” for only $12.95!

BAck Up photosChapter 7
192
Digitize old PhotosYou now know the various ways you can back up your digital image collection. But what’s to be done about all those old film negatives and 4-by-6-inch prints hiding out in your closet? Even as you read this, they’re fading. By scanning old slides and negatives into your Mac, you’ll be able to stop the aging process and preserve irreplaceable photos. And once you’ve digitized your photos, you can take advantage of all the benefits digital photography affords—searching your collection with a few clicks of a mouse; sharing photos; and even using your favorites to create calendars, books, and more.
Prepare Your ImagesAlthough scanning decades’ worth of old pictures and negatives isn’t a quick process, it doesn’t have to become a second job. With an efficient workflow, you can safely scan, annotate, and catalog your old photographs.
Before you start, you’ll want to make sure you have a capable, relatively fast scanner designed for scanning images. (check out our Web page on photo scanners for some suggestions from the Macworld staff at macworld.com/7103.) Using preview, you can bypass any proprietary scanner software and scan directly into the program. to begin, just navigate to File -> Import From scanner, and select your device. You can also use third-party software such as hamrick software’s Vuescan ($40; hamrick.com), which offers controls similiar to preview’s in addition to providing support and scanning controls for more than 400 scanners.
to keep the process as efficient as possible, try to keep your pictures and preferences consistent from scan to scan. If you’re importing a group of 4-by-6-inch photos, choose an orientation, then stick with it. If you’d rather scan the pictures in their initial orientation so you won’t have to spend time rotating them, try to group all the horizontal and vertical photos together before you begin; the same advice goes for photos of varying sizes.
Click here to buy the full 196-page “Macworld Digital Photography Superguide” for only $12.95!

Nobody spends more time with Apple’s computers and software than the writers and editors at Macworld, the world’s foremost Mac authority in print and on the Web.
Every year Macworld publishes huge amounts of photo-related advice—including tips for shooting, managing, editing, and printing digital photos. We’ve collected all this infor-mation, updated it with new information on iPhoto ’11 and the latest cameras and trends, and organized it in an easy-to-follow guide.
The Digital Photography Superguide is bursting with the latest insight and advice for
every aspect of digital photography on the Mac. If you’re shopping for a new camera, you’ll find useful, up-to-date guidelines for picking the right one for your needs. Once you have a camera, this book will help you take better pic-tures with shooting tips and tricks from professional photographers.
As your photo collection grows, use this book to stay organized and to help bring out the best in your images with iPhoto ’11, Apple’s excellent photo manager and editor. We’ll show you how to take advantage of the newest features, including face recognition and GPS support. We’ve also got tips to help you print your pictures yourself, scan old negatives and slides, get the best results from an online photo service, and have fun with Web galleries and more. You’ll also learn the best ways to back up your photos so you don’t ever lose precious memories.
If you love seeing what your digital camera and Mac can do together, this is the book for you.
Click here to buy the full 196-page “Macworld Digital Photography Superguide” for only $12.95!


![Plaintiff–Appellant, SUPERGUIDE CORPORATION, SuperGuide ......[2] phrase “a search on at least said updated television programming information contained in RAM” meant any examination](https://img.dokumen.tips/doc/110x75/6017dc451b6f4813e95c6d07/plaintiffaappellant-superguide-corporation-superguide-2-phrase-aoea.jpg)