Embed Size (px)
Citation preview

Remote Work Request Gu ideTh i s gu ide i s i n tended to ass i s t emp loyee s submi t the i r remote work reques t fo rm th rough SAP .
R e v . 4 . 2 0 2 0

Table of Contents
Logging into SAP • • • • • • • • 3
Begin Your Request • • • • • • • 5
Attach Your Documents • • • • • • • • 7
Check Status of Request • • • • • • • • 14
Request Denied | Resubmit • • • • • • • • 18
2

Logg ing in to SAP
4
To log into the system:
o go to: SAP Portal
o Go to the ESS + group and click on the tile
called “Remote Work Request”.
Beg in Your Request .
6
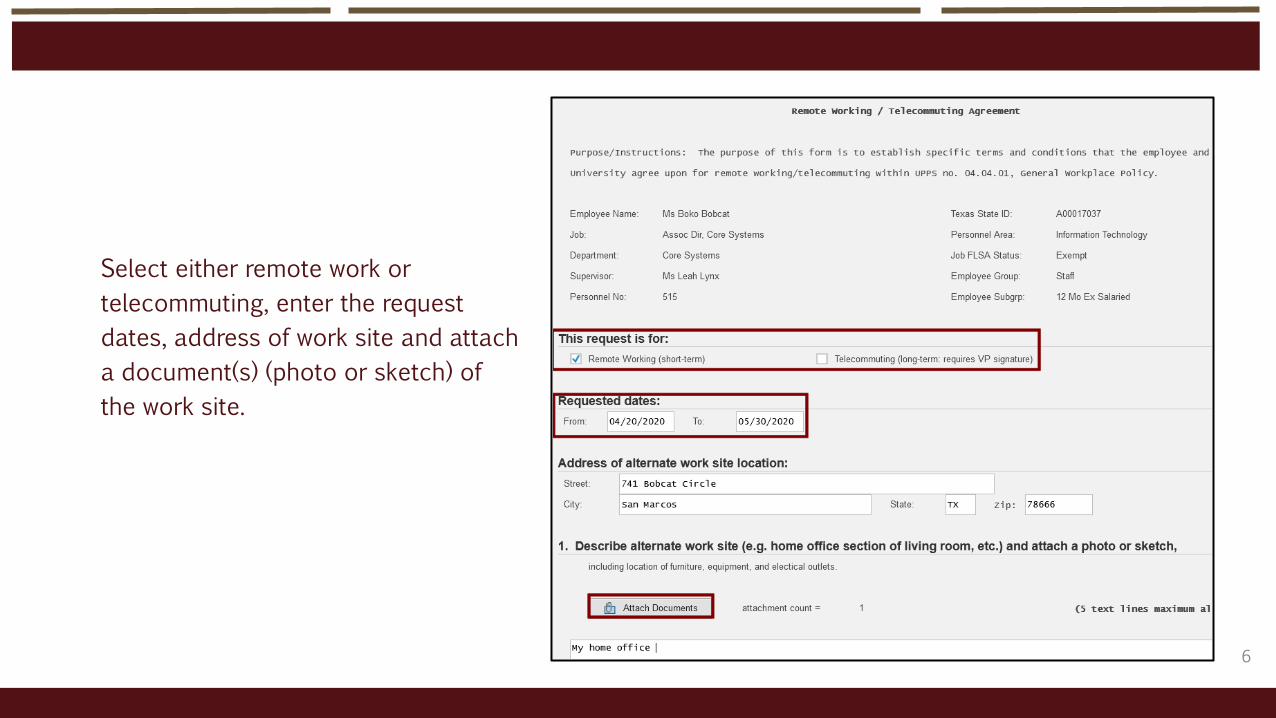
Select either remote work or
telecommuting, enter the request
dates, address of work site and attach
a document(s) (photo or sketch) of
the work site.
To at tach your document (s ) fo l low these s teps :
8
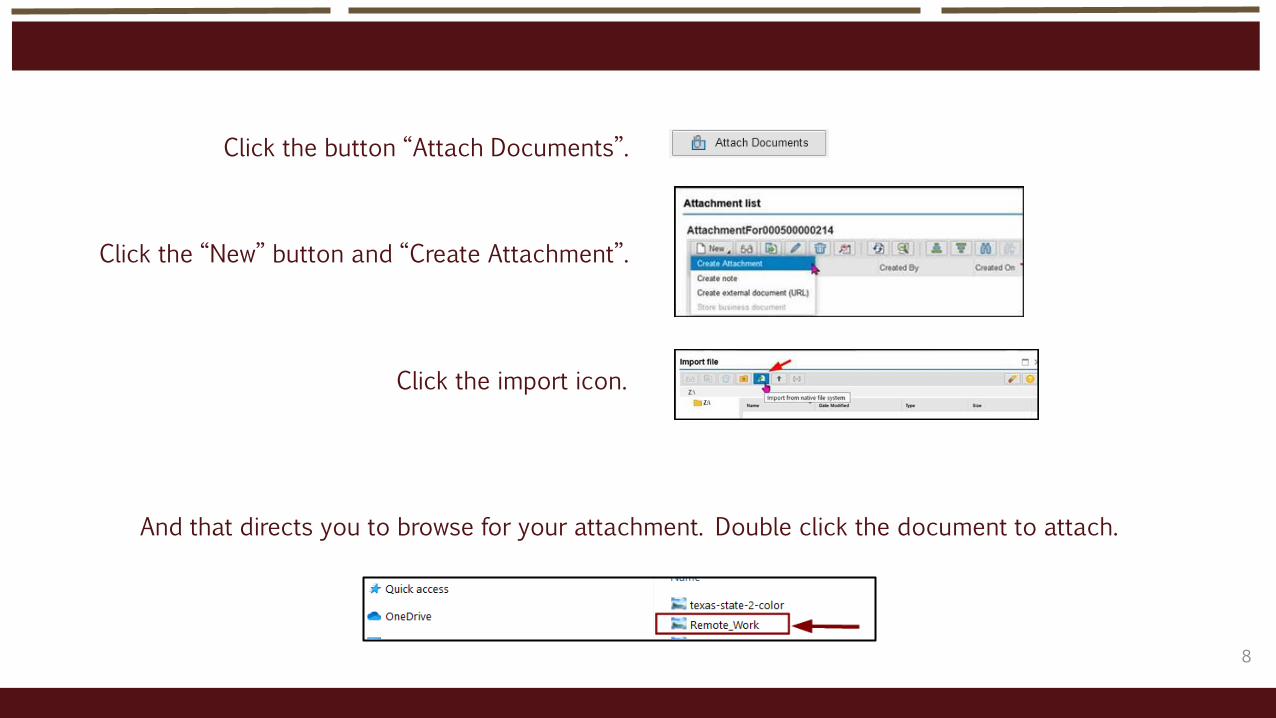
Click the button “Attach Documents”.
Click the “New” button and “Create Attachment”.
Click the import icon.
And that directs you to browse for your attachment. Double click the document to attach.
9
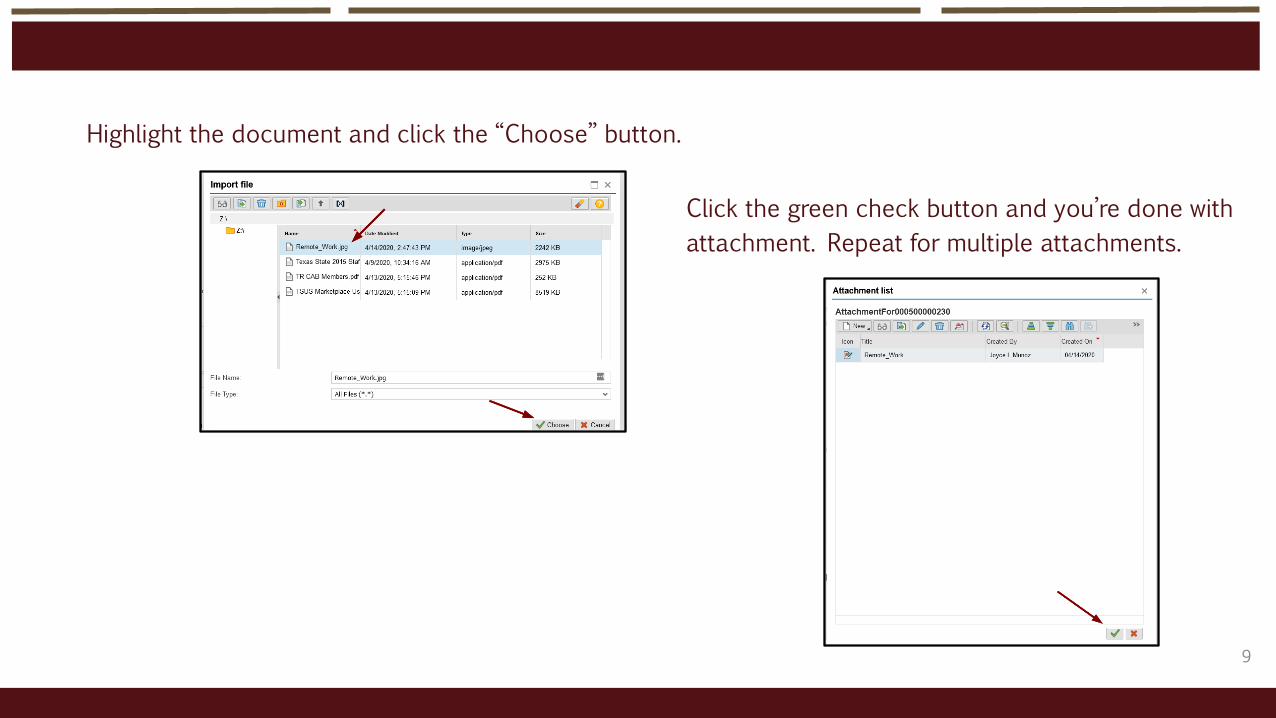
Highlight the document and click the “Choose” button.
Click the green check button and you’re done with
attachment. Repeat for multiple attachments.

10
Click the “Next Page” button to continue:
Enter the days/hours that you are requesting
to work on campus at the primary work
location and enter the days/hours that you
request to work at an alternate work site.
And enter the required information about
work assignments and if University assets will
be used at the alternate work location.
11
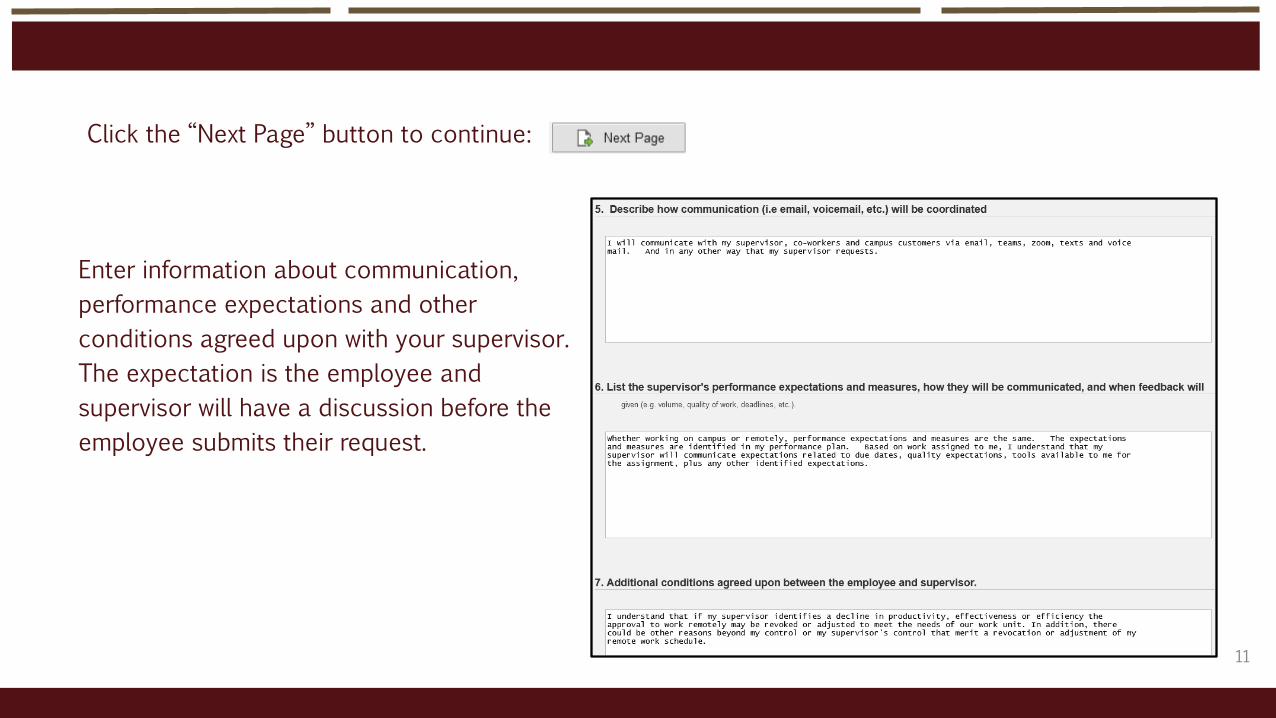
Click the “Next Page” button to continue:
Enter information about communication,
performance expectations and other
conditions agreed upon with your supervisor.
The expectation is the employee and
supervisor will have a discussion before the
employee submits their request.
12
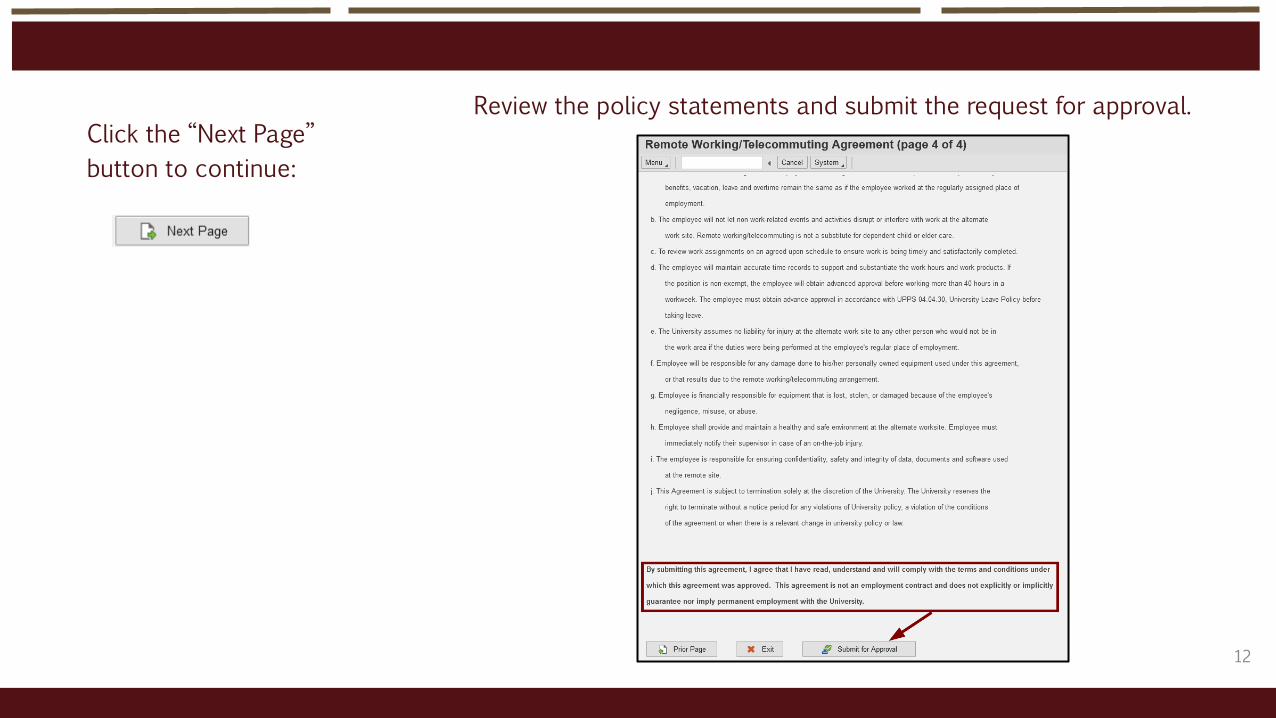
Click the “Next Page”
button to continue:
Review the policy statements and submit the request for approval.
13
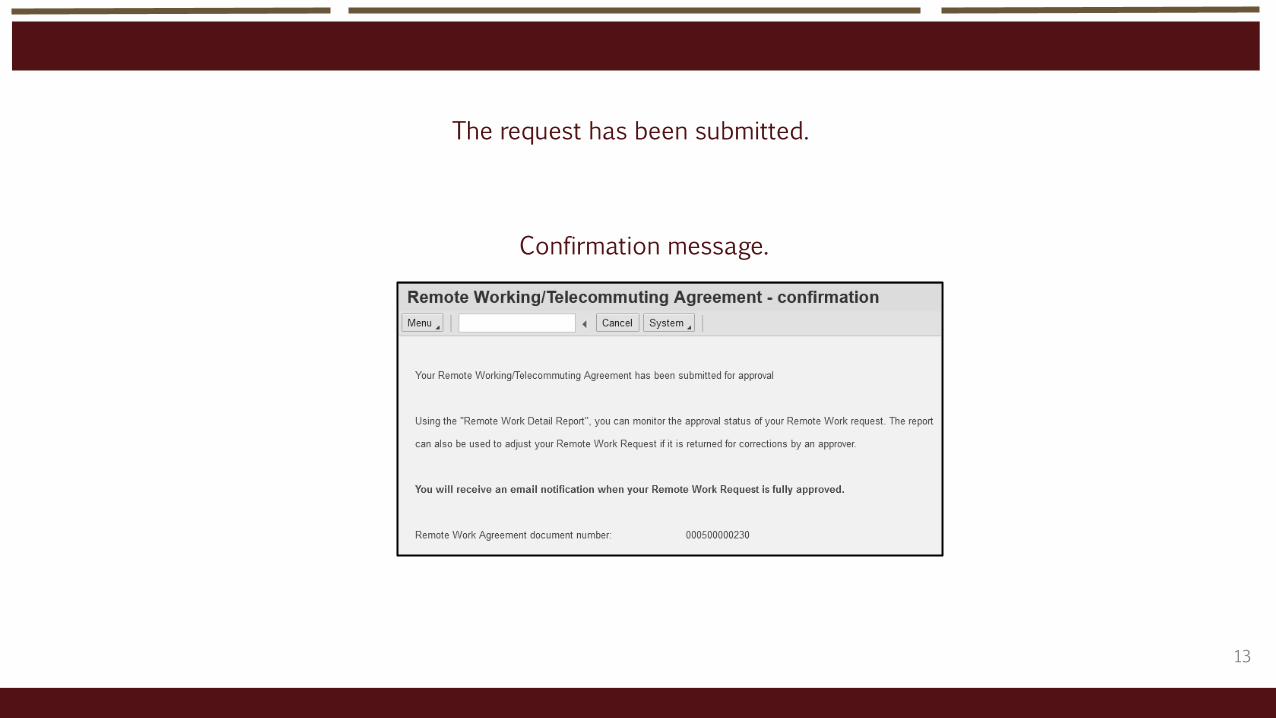
Confirmation message.
The request has been submitted.
Check Status of Request
15
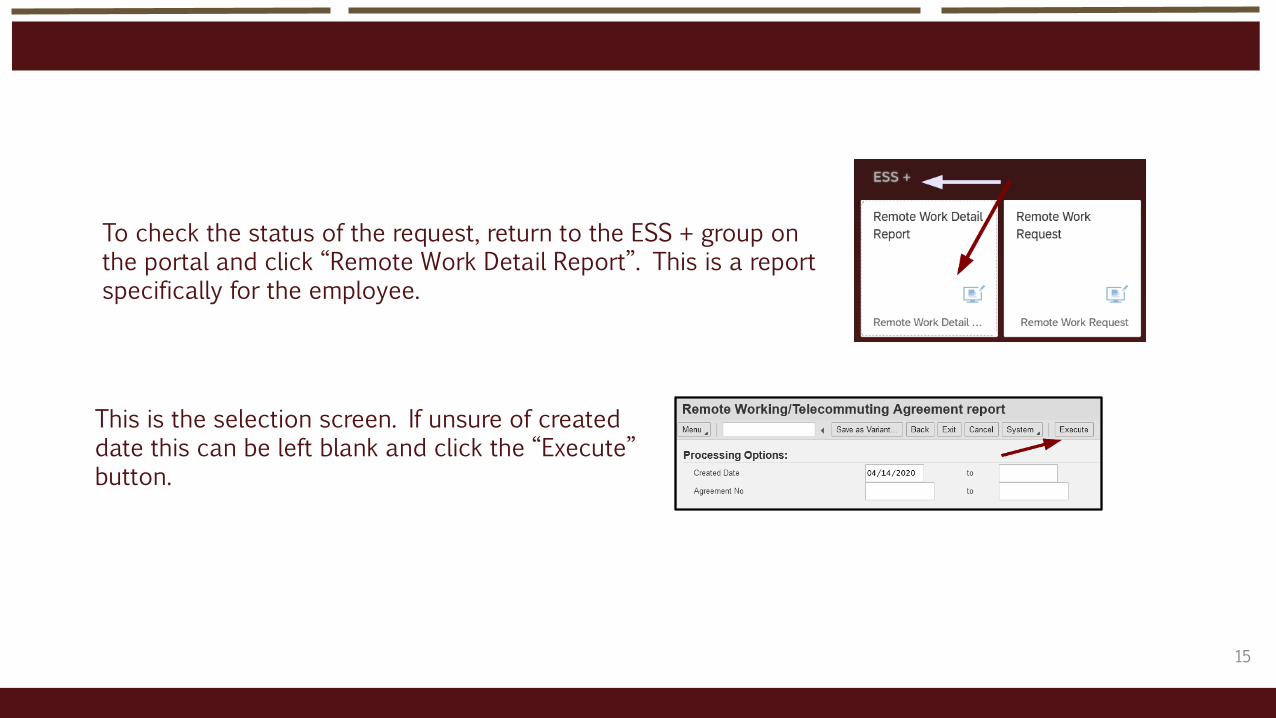
To check the status of the request, return to the ESS + group on the portal and click “Remote Work Detail Report”. This is a report specifically for the employee.
This is the selection screen. If unsure of created date this can be left blank and click the “Execute” button.

16
Results of the report.
The status is displayed, in this case, “Sent for Approval”. And the approval level indicates where in the workflow the request is currently residing. In addition, by clicking on the PDF Print, a .pdf document will be rendered for saving or printing a hard copy.
Clicking the attachments icon will display the attachments submitted with the request.
Other additional information about the request is displayed. This report can be executed at any time to check the status or view the .pdf.
17
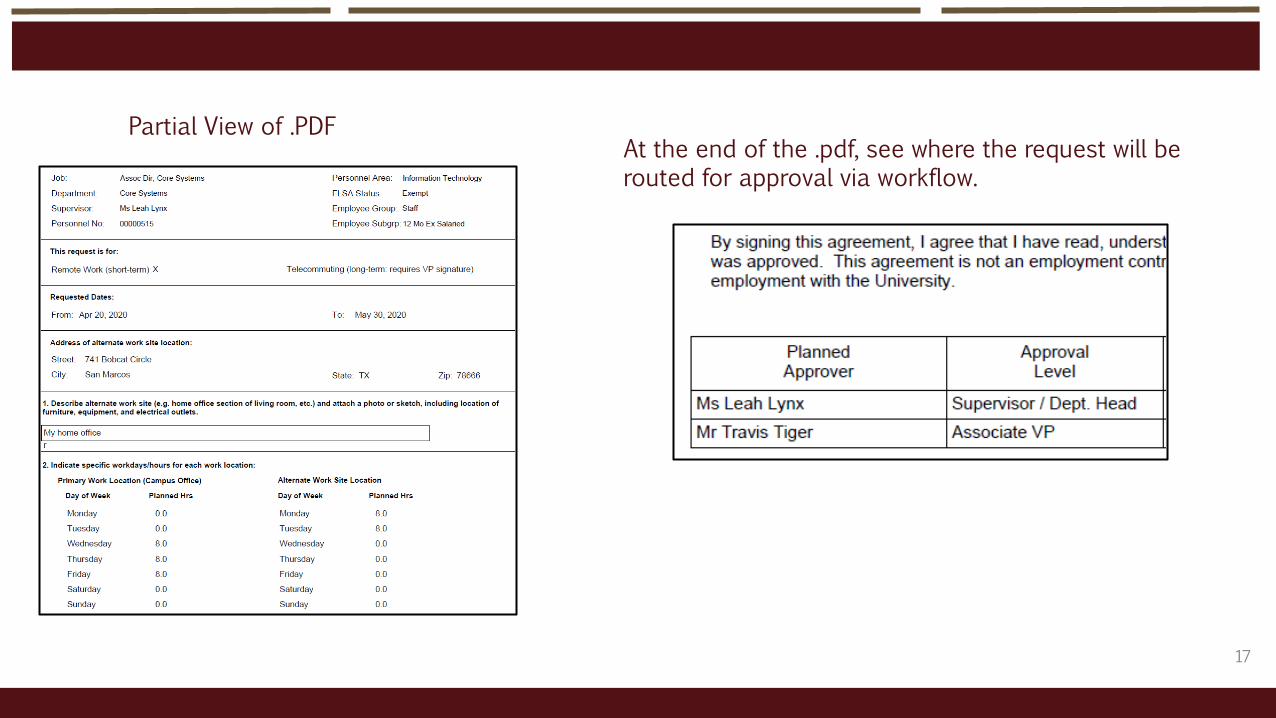
Partial View of .PDFAt the end of the .pdf, see where the request will be routed for approval via workflow.

Request Den ied | Resubmi t
19
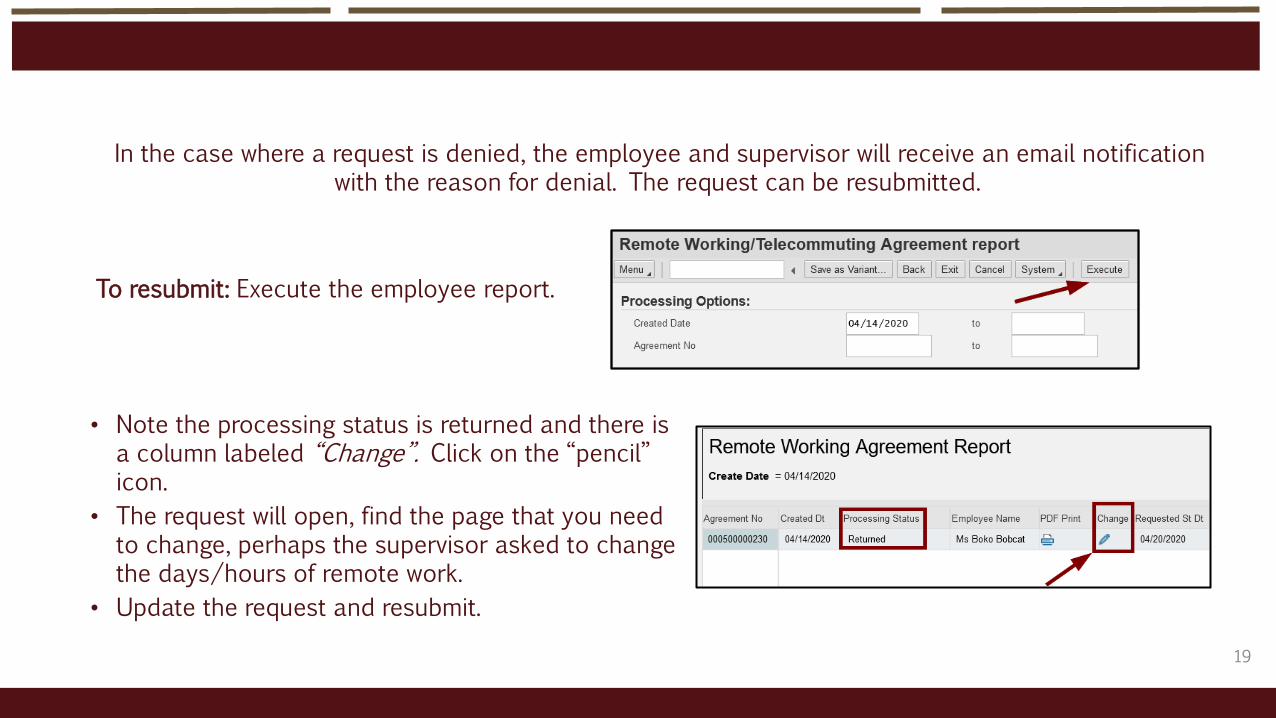
In the case where a request is denied, the employee and supervisor will receive an email notification with the reason for denial. The request can be resubmitted.
To resubmit: Execute the employee report.
• Note the processing status is returned and there is a column labeled “Change”. Click on the “pencil” icon.
• The request will open, find the page that you need to change, perhaps the supervisor asked to change the days/hours of remote work.
• Update the request and resubmit.
20
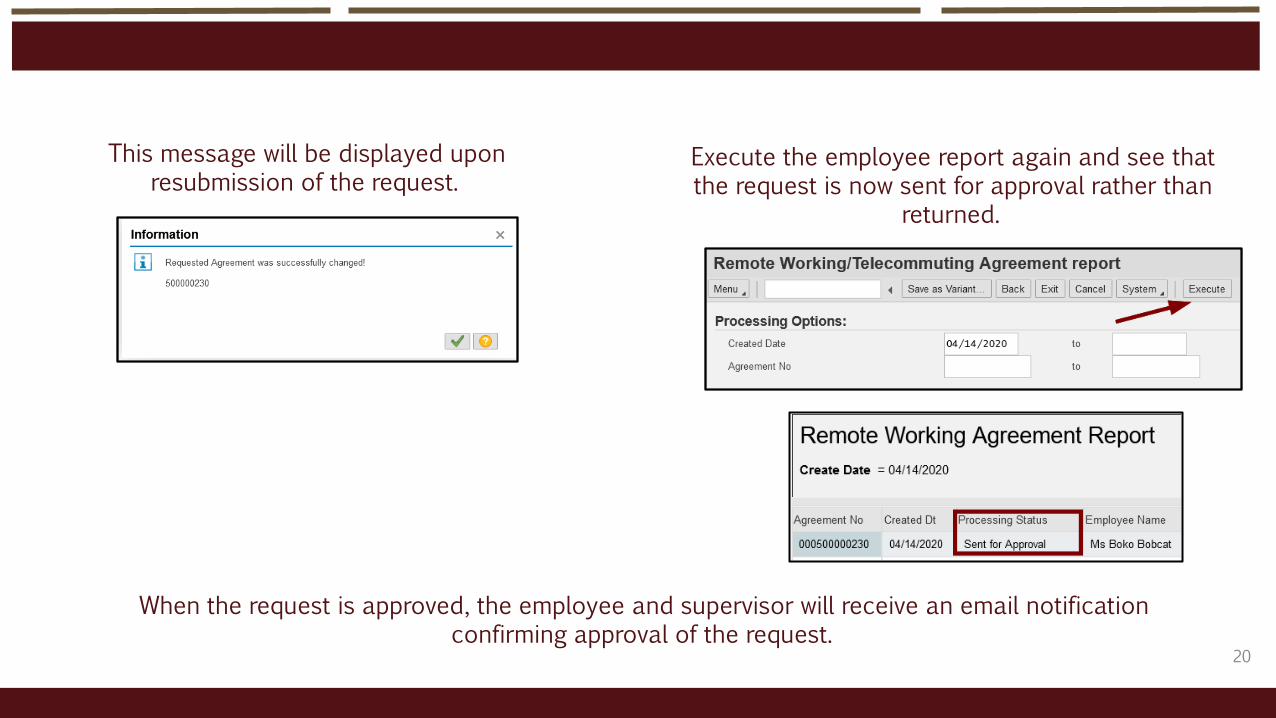
This message will be displayed upon resubmission of the request.
Execute the employee report again and see that the request is now sent for approval rather than
returned.
When the request is approved, the employee and supervisor will receive an email notification confirming approval of the request.
Th is completes the s teps in th is user gu ide .