Embed Size (px)
Citation preview

By Andrea Cabibi
www.cabibiscanaries.com
(All copyrights reserved – 2015)
REASONS FOR ARTIFICIAL INCUBATION
The artificial incubation of eggs is an extremely useful skill for the serious canary
breeder. There are many advantages to having an artificial incubator as part of your
bird room equipment. Here are some of the most common ones:
Rescuing abandoned eggs when another hen is not available to sit on them
An upcoming heat wave or cold spell that will threaten the survival of your eggs
Safe-guarding important eggs from the many unexpected things that can happen
during natural incubation
Beginning incubation on stored eggs while you are still waiting for foster hens to
become available
Starting incubation on stored eggs, so that valued pairs can recycle more quickly
An important factor to consider before beginning artificial incubation, is that all chicks
that are hatched from the incubator must go straight back to a willing hen on the day of
hatching. Otherwise you will have to hand-raise them! This means that you should
already have a plan in place on which hens you will have available when the chicks
hatch. I keep many pairs of foster canaries, whose sole purpose is to raise the offspring
of my more difficult birds. When I have eggs in the incubator, I either have the foster
mothers already sitting on dummy eggs, or I am expecting them to be ready to take the
newly hatched chicks when needed. With careful planning it is easy to artificially
incubate the eggs and then put the freshly hatched chicks directly under their future
parents. The eggs can be returned to the waiting hen just before hatching (‘at pip’ as it
is called) or just after they are completely out of their shells. I prefer to fully hatch them
out and then put the newborn chicks under the hens, as they are less likely to get
chilled, or dry out, during this strenuous time. I personally use Fife canaries as foster
parents and have found them to be such willing parents that they will take a newly
hatched chick within days of having laid their own clutch of eggs.
In this article, Part 1- The Basics, I will provide the average canary breeder with
enough information to understand the basics of incubating canary eggs and hatching

out chicks using artificial methods. In the next article, Part 2- Advanced Techniques, I
plan to provide more advanced information on artificial incubation for those breeders
that would like to take their skills to the next level. I am not going to cover the hand-
raising of newly hatched canary chicks, as this is seldom worth the effort involved for
the average breeder and few of us have the time, or resources, for such an endeavor. It
is not difficult to hand raise a newly hatched canary chick, it is just hugely time
consuming and not, in most breeder’s opinion, worth the effort involved.
In the sections below I mention specific products that I use. In no way am I suggesting
that they are the best ones available, or that I am advocating for their manufacturers. I
am simply mentioning them because I DO use them and am satisfied with them. This
may make it easier for you to make choices on equipment if I provide specific examples
of items that come recommended.
HANDLING EGGS
We cannot hope to successfully incubate eggs without first knowing how to best handle
and store the eggs before they are placed in the incubator. Listed here are methods
that have been tailored specifically for canary eggs as their management and care
differs from other larger bird species.
The freshly laid, and fertilized, canary egg is VERY delicate! The egg shell is full of
microscopic holes, or pores, that exchange gases and fluids with the environment. For
this reason, it is very important to thoroughly wash your hands before picking up any
eggs, as bacteria can be transferred through the tiny pores in the shell to the developing
embryo within. I prefer to use a small measuring spoon to pick up and transfer eggs,
rather than handle them with my fingers. The germs that the egg encounters naturally
in the nest, and from the hen’s body, are very different to the ones we carry on our
hands, and the developing embryo has little immunity to our natural bacteria.
Due to the delicate nature of the fertilized cell within the egg, try to be very careful not to
jerk or jostle the egg while you are carrying it. Don’t expose it to excessive rolling,
shaking or vibrations. Handle it very gently!

STORING EGGS
Most canary breeders remove each egg as it is freshly laid and store it on a bed of bird
seed until the clutch is complete. Once all the eggs are laid, they are returned to the
hen to ensure they all hatch on the same day. Freshly fertilized eggs should be stored
at a temperature of 55°-60°F and 70-80% relative humidity. A small wine cooler can be
used to keep them at this optimal temperature and humidity level. This is the ideal
situation where the fertilized cell (the germinal disc or blastoderm) within the egg will
stay suspended without developing and without dying. There is however, a limit to how
long the blastoderm will be able to remain suspended in this manner. Different sized
eggs remain viable for different periods of time. Canary eggs should not be stored
longer than five days before proper incubation begins, either under a hen or within an
incubator. If the eggs are stored at 55°-60°F then they should be left overnight at room
temperature before being placed inside a warm incubator. It is not essential that the
eggs are kept that cool, and many of us just store them at room temperature. However,
at 70°F the embryo development will begin, and with each passing day in storage it
becomes weaker and less likely to survive. If left at a higher storage temperature for
too long, the blastoderm dies at such an early stage of development most canary
breeders just assume the egg was infertile and do not realize that it was actually stored
incorrectly. At the lower temperature, more eggs are likely to survive the five days
needed for the hen to complete her clutch.
Millet is the preferred seed for storing eggs, as it contains fewer natural oils than the
canary seed mixes. The millet seed is less likely to adhere to the egg shells.
During the five days of storage, the eggs should be turned a half turn twice a day – once
in a clockwise direction and the other in a counter clockwise direction. Do not turn the
eggs from end to end, instead be sure to roll them sideways along their long axis. The
yolk, and fertilized cell, is suspended inside the egg from a white cord called the
‘chalaza’. This is the white stringy tissue you often see in a raw chicken egg. Turning
the eggs continuously in one direction will result in the chalaza becoming wound up like
an elastic band and breaking, causing the yolk and embryo to fall and die inside the
shell.
Different bird species have their eggs stored in different positions. Canary eggs should
be stored lying on their sides and the large blunt egg of the egg should never be pointed
in a downward direction, even during transport.
CLEANING THE EGGS
It is preferable to remove large amounts of feces, and adhered dirt, from the eggs
before storage and incubation. However, it is not entirely necessary, since dirty eggs
will often hatch under hens. The disadvantage of very dirty eggs is that they will
contaminate the incubator, and the other eggs, with bacteria. Canary eggs are
extremely fragile and break easily, so very little pressure should be applied when
attempting to clean dirty eggs. Use a dry paper towel to very gently brush the dirt
away. If it will not come off easily, leave it there! Most important, DO NOT use any
liquid to ‘spot clean’ an egg. The difference in temperature between the cleaning liquid
and the internal temperature of the egg will facilitate the movement of the fluid and
bacteria into the egg through the microscopic pores in the shell. In Part 2 of this article,
I will discuss a method to disinfect eggs, but generally it is not recommended for canary
eggs due to their small size. As long as the shell does not get wet, the dirt will stay on
the outside of the egg and not penetrate within. Ideally the canary breeder should be
providing each hen with a clean nest, clean nest liner and fresh nesting material for
every new clutch of eggs. If this is done regularly then the freshly laid eggs should
remain clean.
CHOOSING YOUR INCUBATOR
There are many varieties of incubators available and they range from $100 and up.
Based on your budget, it is always best to buy the most expensive incubator you can
afford. The more expensive models provide additional features and are more reliable in
keeping a stable temperature and humidity level.
The incubator is the enclosed unit that provides heat and humidity to the eggs. The
turner is the cradle that rotates the incubator at varying angles to automatically turn the
eggs. All incubating eggs should be turned a minimum of five times a day. The more
often they are turned the more likely the chicks will develop normally, and not have
difficulty hatching due to becoming mal-positioned inside the egg.
There are two kinds of incubators, a ‘forced air’ incubator with a fan, and a ‘still air’
incubator without a fan. Both can be used to hatch canary eggs, however the ‘forced
air’ incubators maintain more stable temperatures, since the warmed air is being
completely circulated throughout the unit. The ‘still air’ incubators only have a heating
element and there is no air movement resulting in up to a 5°F difference between the
top of the incubator and the bottom. This does not work well for bird eggs. These ‘still
air’ units also often do not come with the option for an automatic turner, so the breeder
must open and close the unit many times a day to turn the eggs. This will result in too
much of a temperature variation for the small and delicate canary eggs.
The smaller models of incubator are ideal for the average canary breeder. For some
models, the incubator unit and the automatic turner are sold separately. Some of the
very cheap incubators do not offer an automatic turning option so these should be
avoided. One of the more economical incubators suitable for canary eggs is the
‘Brinsea Octagon 20 Eco Incubator’ which is in the price range of $175 without the
turning cradle, or $250 with the automatic turning cradle included. This model can often
be found at its lowest prices on Ebay and Amazon, but the Brinsea website itself is also
competitive in price with other low offers. This incubator keeps a good stable
temperature. It does not, however, have an option for an automatic pump, so water
must be added to a trough in the bottom of the incubator to raise the humidity levels.
This works just fine, but it takes about a week to stabilize humidity levels and the trough
must be closely monitored to ensure it doesn’t dry out.

Another suitable incubator is the ‘Suro Digital R-Com 20’, which is priced in the $400
range. This incubator comes with the turning cradle and also has an optional humidity
pump that can be purchased separately. This pump allows you to set your humidity
level and the pump will maintain it through the water supply. This is a very nice
machine for the money.

In order to assess whether a specific incubator will be suitable for canary eggs, here are
some questions to ask the sales agent, or review through the manufacturer’s
specifications.
Does it have a thermostat controlled heating element so that a temperature can
be set and maintained reliably?
Is it a ‘forced air’ incubator with a fan unit – not a ‘still air’ one with no fan?
Can the temperature be adjusted, since canary eggs must incubate at a higher
temperature than chicken or quail eggs?
Does it have a water reservoir for adding water to increase humidity?
Does it have an automatic turning cradle available?
Is it able to hold and turn the very small canary eggs, as not all incubators can do
this?
The above units are ones that I have used and found fulfill the basic requirements for
canary egg incubation at a fairly reasonable price. There are other suitable models
available.
THERMOMETERS AND HYGROMETERS
Another piece of equipment that should be purchased is a good quality thermometer for
spot checking the temperature and a good hygrometer for spot checking the humidity
levels. Most incubators come with their own thermometers or digital temperature
display, however these temperature readings are not always reliable. It is standard
practice to have a good quality thermometer available for checking whether the reading
on the unit is correct at any given time. Your thermometer should cost at least $25, if
not more, to ensure quality and accuracy. When checking on the incubator
temperature, place your thermometer near the eggs to get an accurate reading of their
temperature, not the temperature near the top of the incubator.
There are two methods to monitor the humidity level. One method is to use a
hygrometer, which gives you a reading in ‘percentage of relative humidity’ (% RH), and
the other is through a wet-bulb thermometer which gives the humidity level in degrees. I
will be covering the wet bulb method in Part 2 of this article. It is suitable to acquire a

digital hygrometer from a reptile supply store. Once again, the more money you spend,
the better the accuracy. Hygrometers are usually in the $15 range and often have a
built-in thermometer. I have found the hygrometer part of the unit to be accurate, but
the thermometer is seldom sensitive enough for incubating eggs.
The Brinsea model of incubator, which I mentioned above, does not have an option to
monitor humidity levels, so a hygrometer is required. However, the Suro model of
incubator has a digital read-out that enables the unit to be set up and the separate
hygrometer is only used to spot check the accuracy of the unit’s reader.
THE HATCHER
There are two parts to the incubation process. The first part is to incubate the eggs and
this is done in an incubator up until three days before hatching. During this stage (day 1
to day 10) the eggs are kept at a specified temperature and humidity level and turned
throughout a 180 degree axis many times a day. Three days before hatching, the
turning of the eggs must stop, the temperature is dropped by 0.5°F-1.0°F. The humidity
level must also be increased to 72% RH. If you are only incubating one clutch of eggs
at a time, you can simply switch off the automatic turner three days before hatching and
re-adjust the incubator’s temperature and humidity levels. However, most of us usually
have many different clutches of eggs in the incubator at different stages of incubation,
so changes cannot be made to the unit. For this reason, the eggs must be moved into a
separate unit called the ‘hatcher’ three days before hatching.
If you want to keep the cost of the ‘hatcher’ low, then a ‘still air’ incubator can be used
for this purpose. Below is the ‘Hova-Bator Thermal Air’ incubator that will work just
fine as a hatcher and is in the $50 range.

If you can spend the extra money, you would be wise to purchase a regular ‘forced air’
incubator, such as the ‘Brinsea Octagon 20 Eco Incubator’ mentioned earlier, and
simply buy the incubator without the cradle. This puts your ‘hatcher’ in the range of
$175. You will find the ‘forced air’ hatcher much more reliable in maintaining the correct
temperature and humidity levels.
CANDLING
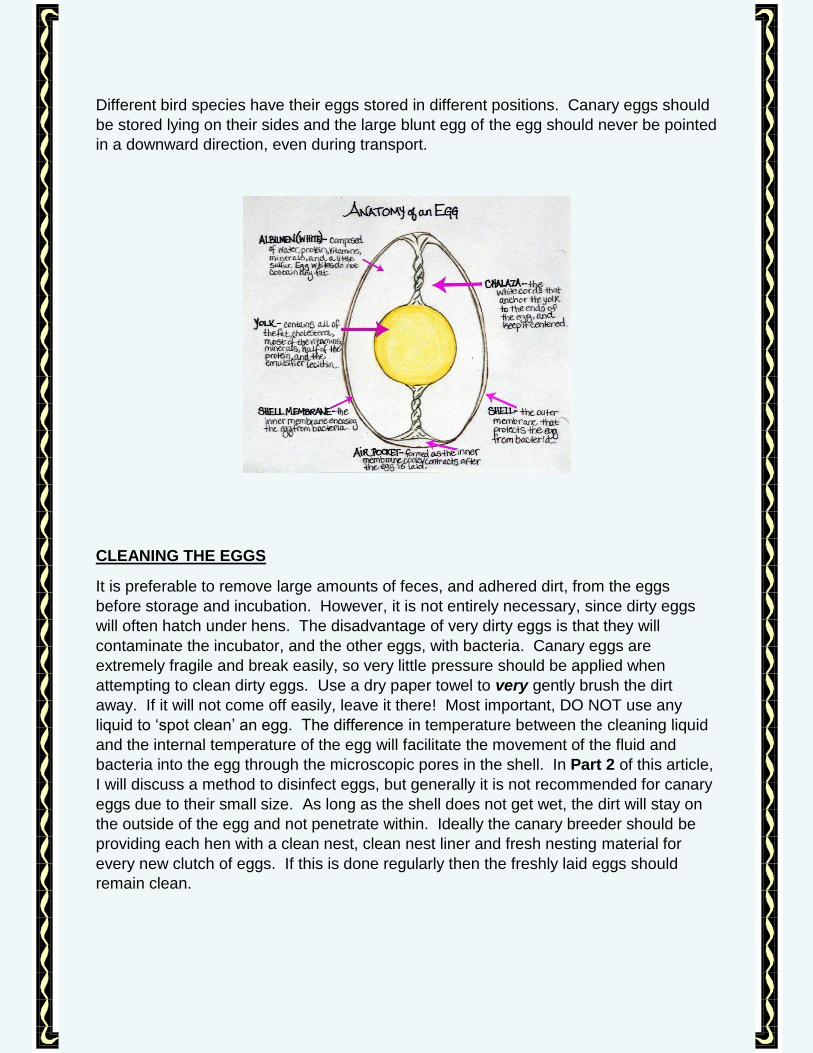
Most canary breeders already own a candler to enable them to assess the fertility of
their eggs. One of my favorite candlers is the ‘Responder Hi Intensity Fiber Optic’
candler from www.ladygouldianfinch.com for $29.95. It has a very bright light that is
‘cool’ and does not give off any heat, which is safer for the delicate embryo. It also has
a long curved fiber optic tip that enables you to candle the eggs while they are still in the
nest or in the incubator. Holding a hot light to such tiny eggs can easily kill the embryos
inside. The amount of heat generated by most flashlights make them unsuitable as
candlers.
Candling is obviously important to know whether the eggs you are attempting to
incubate are fertile or not. It is also very useful for monitoring the embryo’s
development and knowing when hatching is imminent. I generally wait until the 7th day
of incubation before checking the fertility of the eggs. More advanced candling
techniques will be covered in Part 2 of this article.
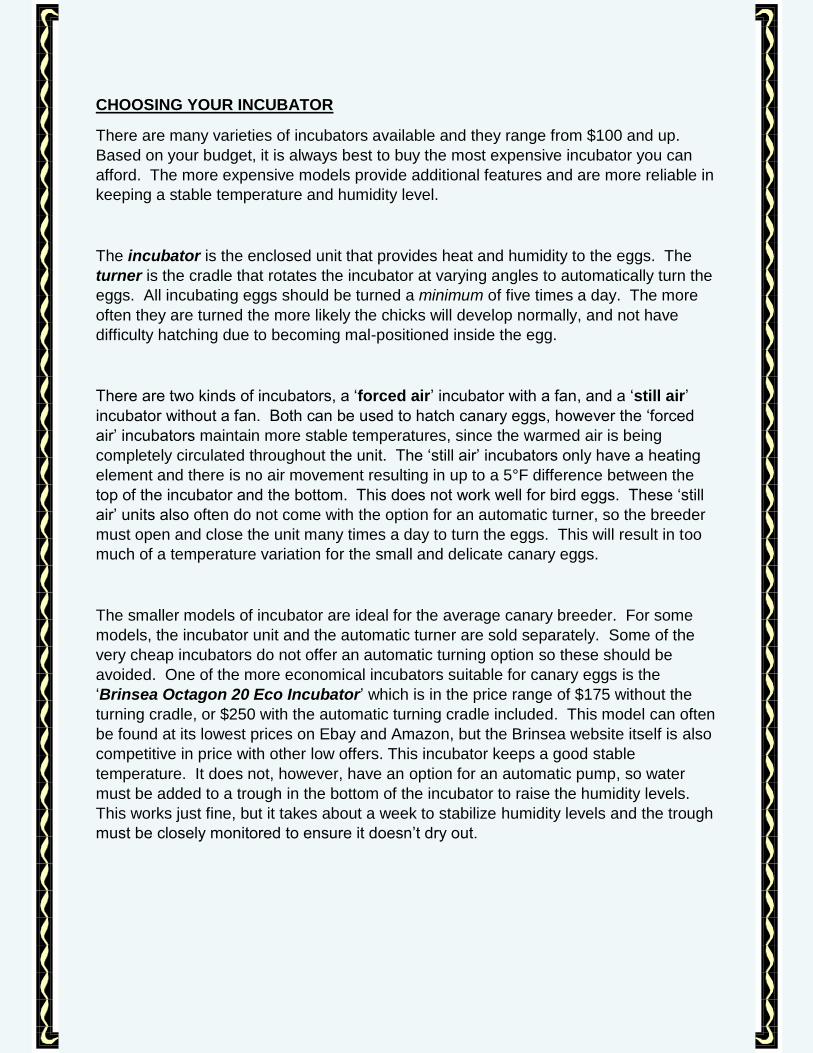
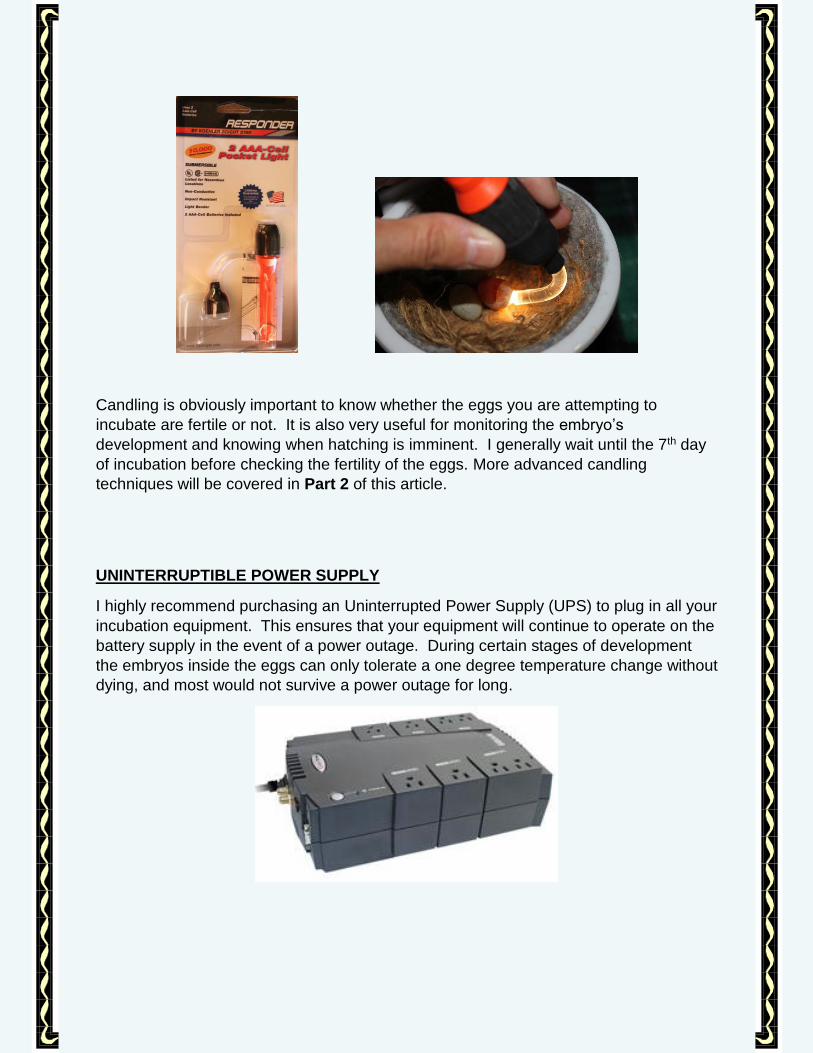
UNINTERRUPTIBLE POWER SUPPLY
I highly recommend purchasing an Uninterrupted Power Supply (UPS) to plug in all your
incubation equipment. This ensures that your equipment will continue to operate on the
battery supply in the event of a power outage. During certain stages of development
the embryos inside the eggs can only tolerate a one degree temperature change without
dying, and most would not survive a power outage for long.
SETTING UP THE INCUBATOR
Your incubator should be kept in a controlled environment where it can easily keep a
stable temperature and humidity level. Delicate electronic equipment should not be
exposed to extreme temperatures. Set up your equipment indoors and not in an outside
bird shed.
There will be power cables coming from the incubator, the incubator cradle and the
hatcher. You will be plugging them in, and unplugging them, as and when they are
each needed. I highly recommend taking a piece of masking tape and placing an
identifying label on the plug end of each cable, so that it is clear which plug belongs to
which machine. There is NOTHING more heartbreaking than accidently unplugging the
wrong machine and killing all your incubating eggs!
Your incubator should be turned on at least one week before you are going to place any
eggs inside. Ideally, turn it on at the beginning of the breeding season and don’t turn it
off again until all your birds have stopped laying for the year. This way you are able to
stabilize and adjust the temperature and humidity so there are no fluctuations once the
eggs are inside. Never place eggs inside an incubator that has just been turned on and
not yet stabilized.
The perfect incubating temperature for canary eggs is 100.0°F – 100.5°F. Most
incubators come with a pre-set temperature of 99.5°F from the manufacturer. This pre-
set temperature is ideal for chicken eggs, but NOT ideal for tiny canary eggs. You will
need to increase the factory set temperature to 100.0°F–100.5°F. Check the
temperature inside the unit twice a day to test whether the temperature showing on the
incubator thermometer is accurate. There is almost always a difference between the
reading of the incubator and your purchased thermometer. Part of the reason for this is
that the incubator reads the temperature at the top of the unit and you will be testing the
temperature at the egg level. Use your own thermometer reading to set the incubator.
Secondly, the humidity should be set to 55% relative humidity for incubating canary
eggs. If you have an incubator like the Suro Digital R-Com 20 Incubator, then you
probably have bought the optional automatic water pump and can simply press the
buttons to request 55% RH. If you have an incubator like the Brinsea Octagon 20 Eco
Incubator, you will not have that luxury and must instead figure out how much water is
needed at 100°F to maintain a humidity level of 55% RH. This incubator has a couple
of water troughs in the bottom of the unit, under the egg tray. You can half fill one of the
troughs with distilled water and turn the unit up to 100°F. Wait a couple of hours and

check the humidity level with your hygrometer. If it is too high, then reduce the water
level and maybe open the small vent at the top of the incubator. If it is too low, increase
the level of the water and maybe go on to fill the second trough with water as well. It is a
hit-and-miss process and should be carefully monitored until you have the right
temperature and the right humidity. Once again, never place any eggs inside the
incubator until it is running at the correct temperature and humidity for at least a week.
Set your incubator unit in the turning cradle and plug in the cradle. Most incubator
turning cradles will tilt the incubator at varying degrees so that the eggs get fully turned
through almost 180 degrees. Birds incubating eggs in their nests turn their eggs every
35 minutes on average.
SETTING UP THE HATCHER
The hatcher needs to be set at a temperature of 99.0°-99.5°F and a relative humidity
level of 72%. As with the incubator, the humidity level inside is increased by adding
water, either in a dish or through an automatic pump unit, depending on the model of
hatcher you have purchased.
An important factor to remember is that humidity levels increase as the water
evaporates. The more water that is exposed to the air to evaporate, the higher the
humidity. The evaporation factor of water is not dependent on HOW MUCH water is
inside the unit. It depends on how much SURFACE AREA of the water is exposed to
the warm air. In other words, a one liter container of water with a small one inch bottle-
type opening at the top will evaporate much more slowly than a 1 liter flat dish with a
large open top. To increase the humidity in your hatcher you only need a small dish of
water inside it, about the size of a baby food jar. You can adjust the humidity levels by
changing the style of the water dish from a container with a small open top to a
container with a larger open top. You don’t need to increase the amount of water, just
the size of the opening of the container. This can take quite a bit of adjusting to reach
the desired 72% RH, so turn on your hatcher and stabilize the temperature and humidity
levels at least one week before it will be needed.
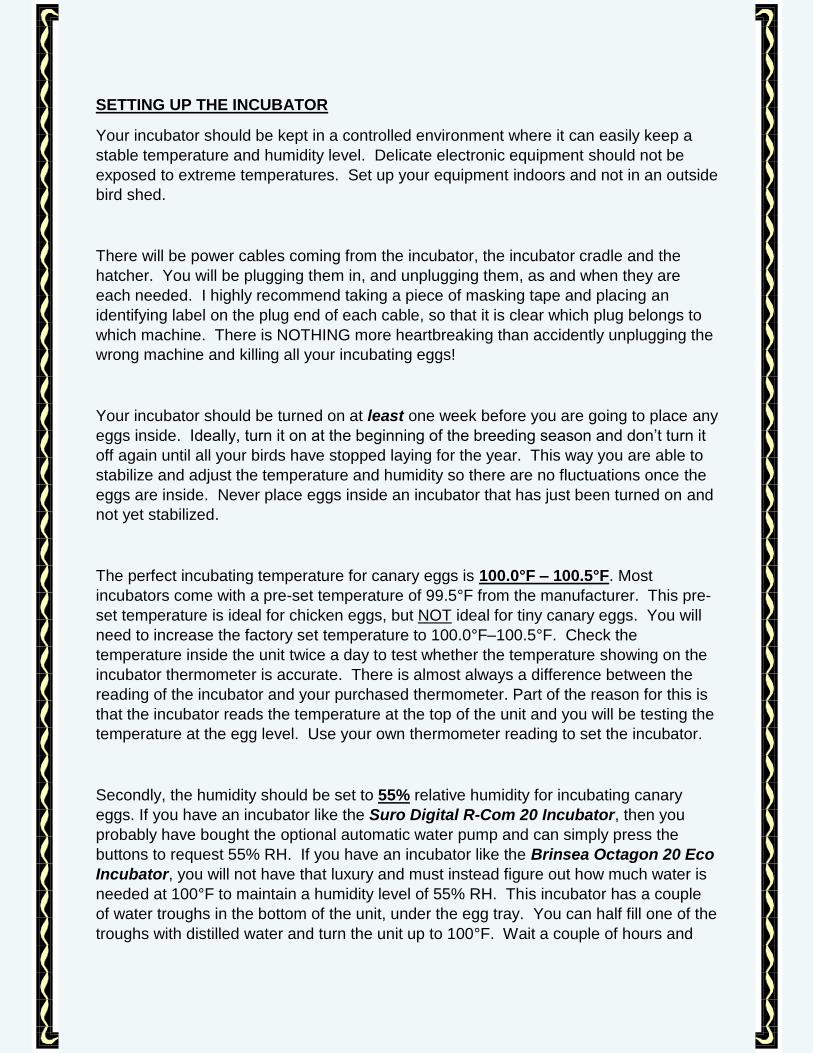
A very useful addition to the hatcher are small egg “hatching cups”. The hatching
process is messy, with broken egg shell fragments and sometimes fluids being
scattered around. This quickly contaminates your hatcher and necessitates that it be
cleaned and disinfected more frequently. I line my small plastic “hatching cups” with
trimmed pieces of plastic shelf liner to give the chicks a textured surface to grip more
easily. Each cup can then be easily cleaned and disinfected. This keeps the hatcher
clean and it requires disinfecting less often. I use the tops to 60ml syringe cases as my
“hatching cups”, but anything small and plastic will suffice.
PLACING EGGS IN THE INCUBATOR
If you have stored your eggs in a wine cooler at the recommended temperature of 55°-
60°F, then they will need to be taken out and left at room temperature overnight
BEFORE placing them inside a warm incubator. If you are like most of us, and you
have just stored the eggs at room temperature, then they can go directly into the
incubator.
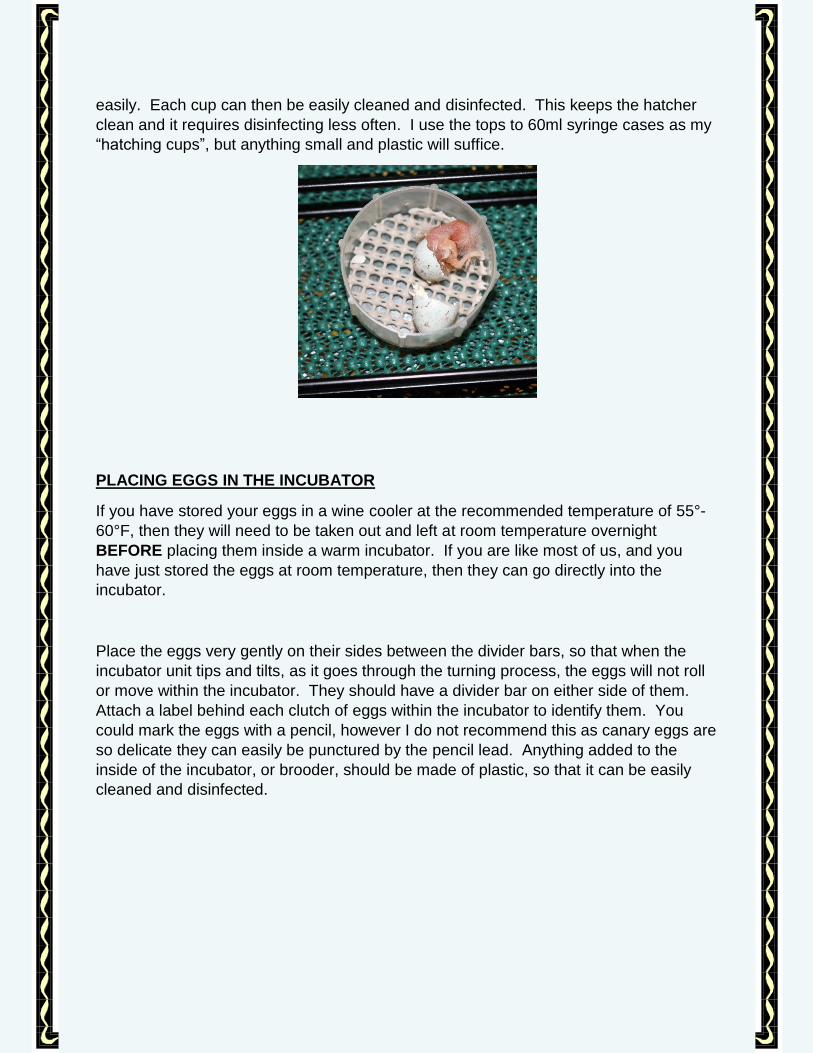
Place the eggs very gently on their sides between the divider bars, so that when the
incubator unit tips and tilts, as it goes through the turning process, the eggs will not roll
or move within the incubator. They should have a divider bar on either side of them.
Attach a label behind each clutch of eggs within the incubator to identify them. You
could mark the eggs with a pencil, however I do not recommend this as canary eggs are
so delicate they can easily be punctured by the pencil lead. Anything added to the
inside of the incubator, or brooder, should be made of plastic, so that it can be easily
cleaned and disinfected.

Try not to open the incubator any more often than necessary, as the temperature and
humidity levels will drop every time the lid is removed. Once I have placed the eggs
inside, I usually do not open it again until the 7th day of incubation. On this day I candle
the eggs to check for fertility and remove any eggs that are infertile. Then I do not
disturb the eggs again until it is time to move them into the hatcher.
At the ideal temperature and humidity, canary eggs will hatch out after 13 days of
incubation. Your eggs need to stay in the incubator for 10 days. On the 10th day of
incubation they are removed from the incubator and placed in a hatcher where the
temperature has been lowered by one degree (1°F) and set at 99°-99.5°F and the
humidity level has been increased to 72% RH. The eggs are NOT turned for the
remaining three days of incubation.
HATCHING THE EGGS
On the 10th day of incubation the eggs are removed from the incubator and placed into
small cups within the hatcher. The increased humidity within the hatcher ensures that
the membrane surrounding the chick does not dry out and become an impediment to
the hatching process. The lower temperature is to account for the additional heat
produced by the chick as it struggles to free itself from the egg. The entire process of
the canary chick ‘pipping’, or breaking a small hole through the egg shell, to hatching
should not take longer than 24 hours. Once the chick is hatched out on the 13th day, it
should be placed under a hen as soon as possible. If you have multiple eggs hatching,
wait until the last chick has emerged before placing them all under the hen, so that she
is disturbed as little as possible. This is only possible if the eggs are all due to hatch on
the same day.
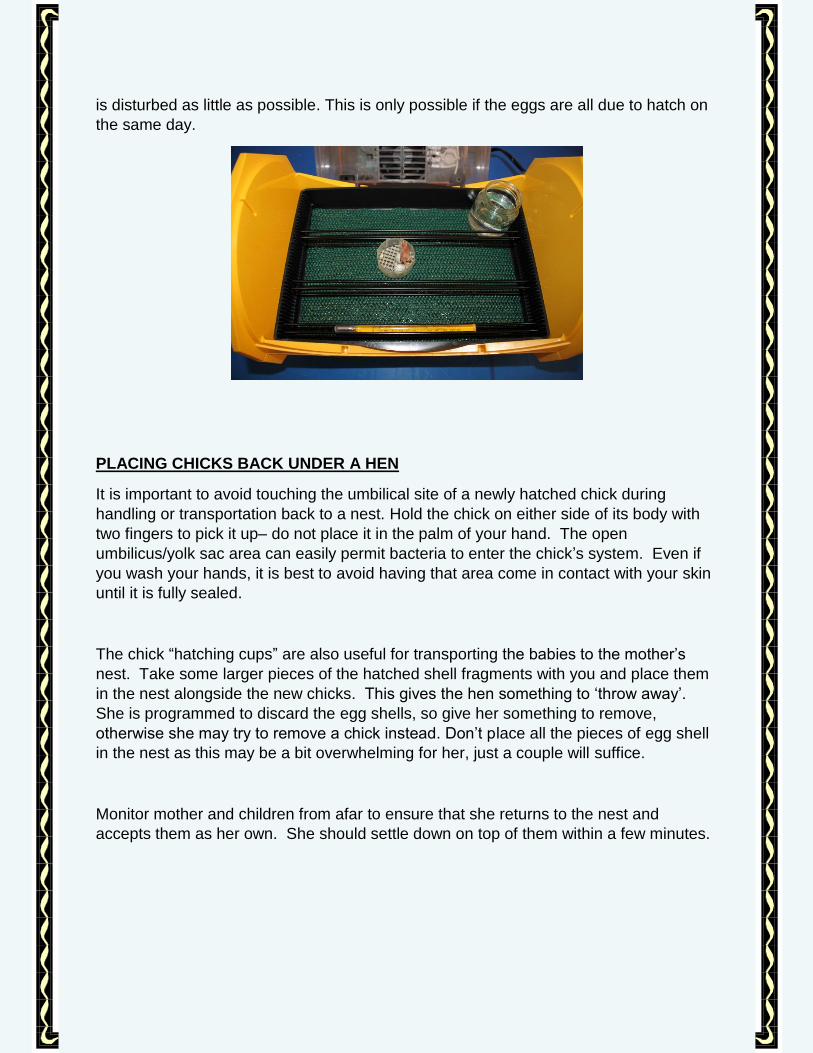
PLACING CHICKS BACK UNDER A HEN
It is important to avoid touching the umbilical site of a newly hatched chick during
handling or transportation back to a nest. Hold the chick on either side of its body with
two fingers to pick it up– do not place it in the palm of your hand. The open
umbilicus/yolk sac area can easily permit bacteria to enter the chick’s system. Even if
you wash your hands, it is best to avoid having that area come in contact with your skin
until it is fully sealed.
The chick “hatching cups” are also useful for transporting the babies to the mother’s
nest. Take some larger pieces of the hatched shell fragments with you and place them
in the nest alongside the new chicks. This gives the hen something to ‘throw away’.
She is programmed to discard the egg shells, so give her something to remove,
otherwise she may try to remove a chick instead. Don’t place all the pieces of egg shell
in the nest as this may be a bit overwhelming for her, just a couple will suffice.
Monitor mother and children from afar to ensure that she returns to the nest and
accepts them as her own. She should settle down on top of them within a few minutes.

DISINFECTING THE INCUBATOR
Incubators should only be cleaned with an appropriate disinfectant. The parts and
materials of the incubators corrode very easily if the wrong products are used. Many
common disinfectants are lethal to the developing embryos, either from the fumes or
from residue left inside the incubator. Do not use bleach in your incubator as it can be
extremely corrosive to the components and the fumes are toxic. Most incubator
manufacturers, such as Brinsea, sell products that can be safely used. Sani-cide is also
an excellent product to use inside incubators.
Your incubator should be thoroughly cleaned and disinfected as often as possible.
Obviously, you cannot do this while eggs are still in there, so it must wait until all eggs
have been removed to the hatcher. Take every opportunity to clean and disinfect the
unit each time it becomes empty and certainly at the end of the breeding season this
should occur before it is packed away for the year.
Be careful not to get the electronics of the incubator wet during cleaning.
DISINFECTING THE HATCHER
The hatcher should be treated exactly the same as the incubator and be cleaned and
disinfected whenever it is empty of hatching eggs. The hatcher will get dirty much more
quickly if hatching cups are not used. Again, do not use bleach to clean it.
Be careful to keep the electronics of the hatcher dry during cleaning.
CONCLUSION
Incubating and hatching canary eggs is not difficult, but it does need to meet some
precise parameters and careful practices due to the tiny size of these eggs and their
delicate nature. There is much to learn about artificial incubation and experience is the
best way to refine your skills. Whenever possible, practice on eggs that are NOT your
most important ones, so that you will gain the confidence and skills needed to succeed
at incubating your prize-winning canary eggs whenever it becomes necessary.

In the next installment, Part 2 – Advanced Techniques, I will be covering the following
incubation topics:
Repairing Damaged eggs
Egg Weight Loss
Calculating Fresh Egg Weight
Disinfecting Eggs
Marking Eggs
Advanced Candling Techniques
The Hatching Process
Assisted Hatching
Ideal Incubation Room Parameters
Setting Up Additional Incubators
The Egg Buddy