Embed Size (px)
Citation preview
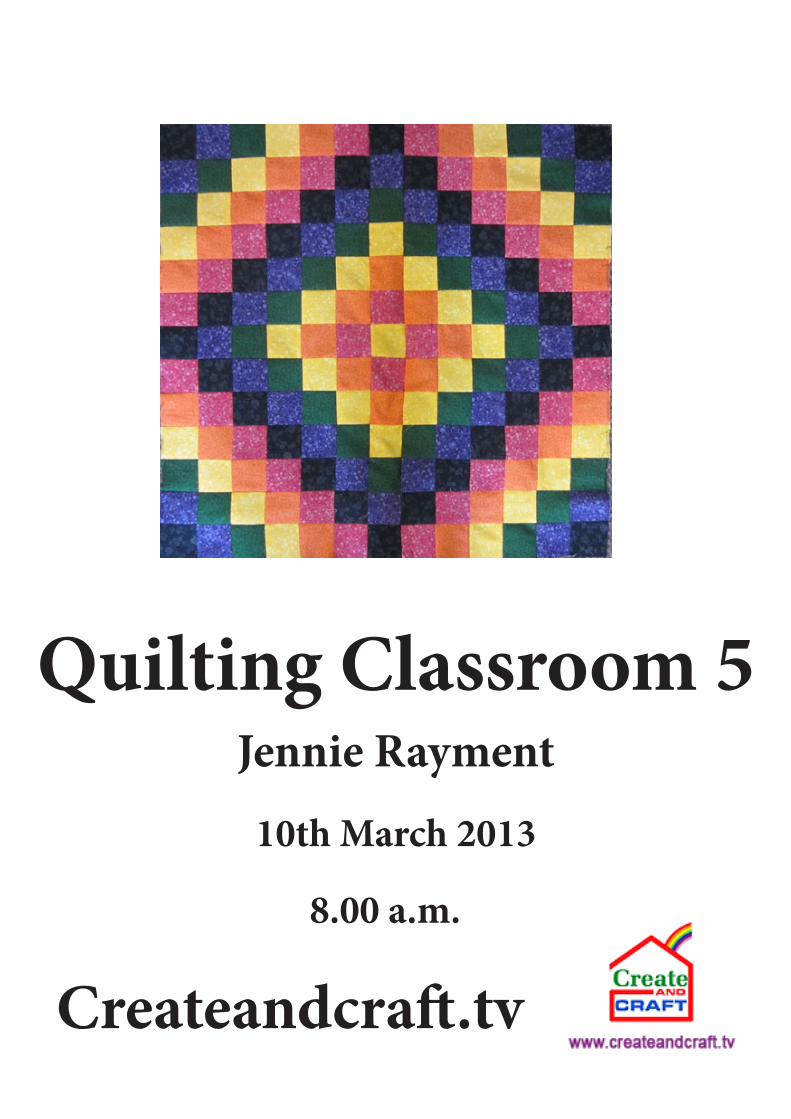
Quilting Classroom 5Jennie Rayment
10th March 2013
8.00 a.m.
Createandcraft.tv
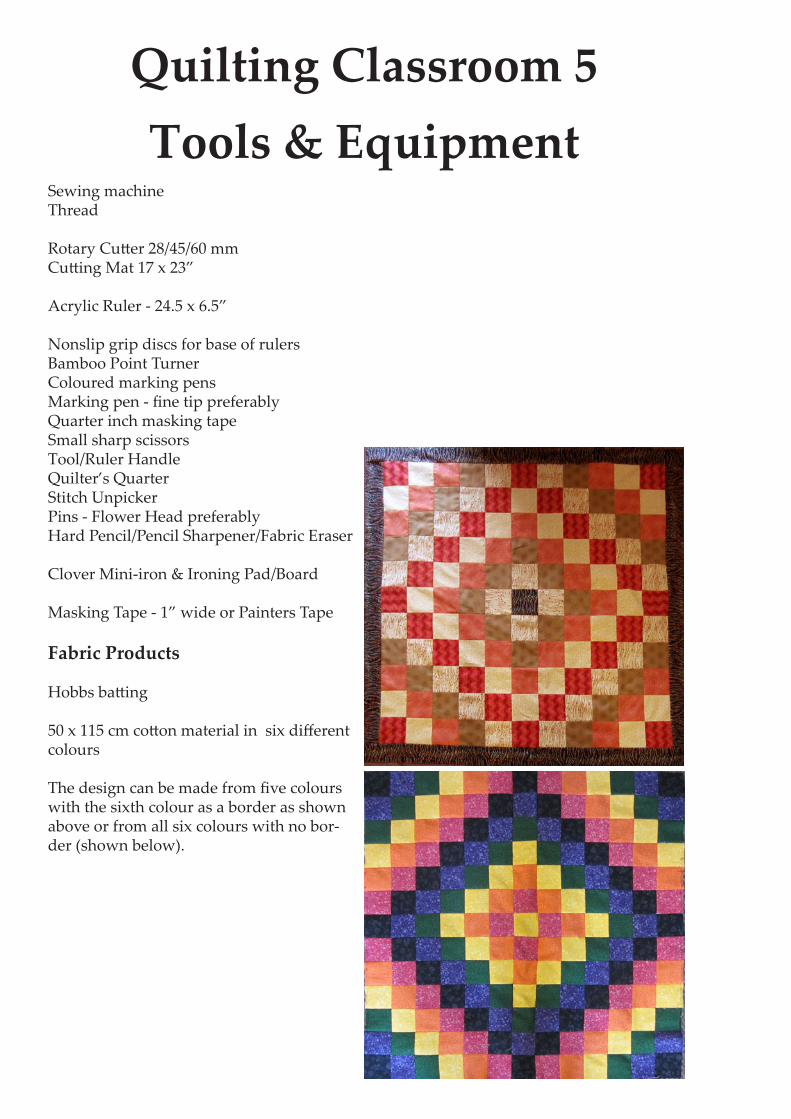
Quilting Classroom 5Tools & Equipment
Sewing machineThread
Rotary Cutter 28/45/60 mm Cutting Mat 17 x 23” Acrylic Ruler - 24.5 x 6.5” Nonslip grip discs for base of rulers Bamboo Point Turner Coloured marking pensMarking pen - fine tip preferably Quarter inch masking tape Small sharp scissors Tool/Ruler Handle Quilter’s Quarter Stitch Unpicker Pins - Flower Head preferably Hard Pencil/Pencil Sharpener/Fabric Eraser Clover Mini-iron & Ironing Pad/Board
Masking Tape - 1” wide or Painters Tape
Fabric Products
Hobbs batting
50 x 115 cm cotton material in six different colours
The design can be made from five colours with the sixth colour as a border as shown above or from all six colours with no bor-der (shown below).

Trip Round the WorldThis is a traditional patchwork design which is often made from individually cut squares but there is a faster way to create the same effect us-ing the cylinder method. The design can be cre-ated from any number of colours - six different colours are used here.
One extra square is required for the centre. Yellow has been selected.
Seam Allowance: ¼”
1. Arrange all six colours in the order that you would like them to radiate out from the Yellow centre square.
1. Cut one 4¾” strip from each colour.
2. Sew all six strips to form a striped band. Line up the selvedges at one end. Press all seams open and flat.
3. Trim the end of the striped band.
4. Cut four 4¾” strips from the trimmed end.
These four strips form the Centre sections of the complete design. Label them ‘C’ (use the 1” masking tape).
5. Fold the rest of the band in half lengthways and sew along the remaining raw edges to make a cylin-der/tube.
6. Cut six 4¾” strips from this cylinder.

7. Now you are allowed to unpick!
Lay the Centre strip flat with the colour that is going to the centre to the top. Take the first strip from the cylinder. Align the colours - Pink beside Pink, Orange beside Orange etc.. Unpick the Pink and Orange seam.
8. Open the strip and lay beside the centre one. Notice how the colours start to ascend towards the left.
Take a second cylinder section - unpick between Orange and Yellow. Lay the strip down.
9. Take next strip and undo seam between Yellow and Green. Lay down. Keep an eye on the colours - they should keep ascending up-wards to the left.
10. Take another strip and undo between Green and Purple. Lay in place.
11. Take another strip and unpick between Purple and Black. Lay in place.
12. Finally to complete the set of strips, undo the seam be-tween Pink and Black. This order of colours is the same as the Centre strip.
13. Number all the pieces 1 - 6.

14. Follow Stages 1 - 3 and make three more striped bands. Join the raw edges of each band to make a cylinder. From these cylinders cut eighteen more strips.
15. Working from the Centre strip to the right, unpick six strips in the correct order.
Follow previous steps but lay each opened strip down to the right of the centre section.
16. Finally unpick the sixth strip. Place in the correct order. Number all the pieces 1R - 6R.
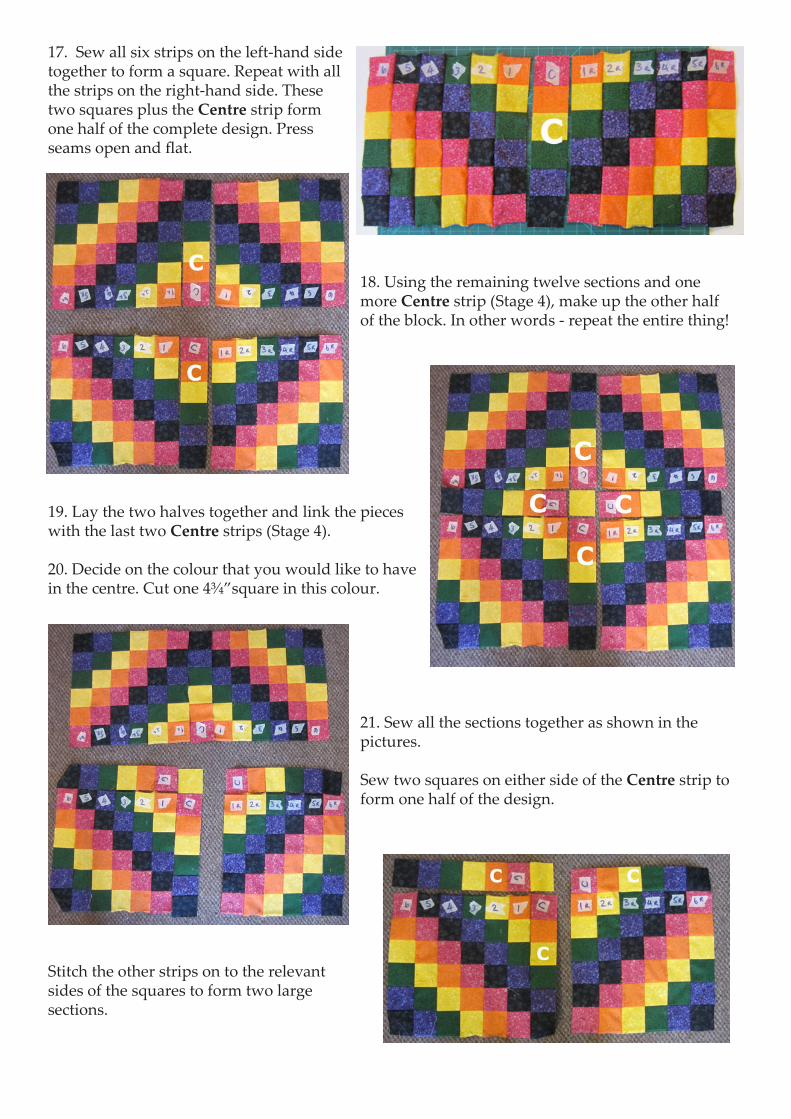
17. Sew all six strips on the left-hand side together to form a square. Repeat with all the strips on the right-hand side. These two squares plus the Centre strip form one half of the complete design. Press seams open and flat.
18. Using the remaining twelve sections and one more Centre strip (Stage 4), make up the other half of the block. In other words - repeat the entire thing!
19. Lay the two halves together and link the pieces with the last two Centre strips (Stage 4).
20. Decide on the colour that you would like to have in the centre. Cut one 4¾”square in this colour.
21. Sew all the sections together as shown in the pictures.
Sew two squares on either side of the Centre strip to form one half of the design.
Stitch the other strips on to the relevant sides of the squares to form two large sections.

22. Sew the two large section together to form the other half of the design. Join the two halves together.
Remove all labels. Press the seams well.
Congratulations - you have just done a ‘Trip Round the World’!