Embed Size (px)
Citation preview

Tony Lawrence
From: Christopher Ciz Sent: Friday, March 28, 2014 12:17 PM To: All Dlrs All Rgns - PT; All Dl rs All Rgns - SR ' ~ ,
Subject: MAZDA DEALER NOTICE - SERVICE BULLETIN RELEASE . · . ',, .. :
.. '
SERVICE BULLETIN RELEASE - 03/28/2014 ·· , ,_.,
2014 INDEX: http://www.mstore2000.com/PDF Files/index03-28-14.pdf .. . ~ The following Service Bulletin has just been issued.
- For latest MS3 postings, click here: https:/Jportai.mazd~usa.com/m173/service/esi/MazdaServiceShop
- For printable PDF files from MStore, click on the link below each TSB title: . ·, -· ' . . - . '
* If the links do not automatically take you directly to the document, 'cut and' paste the link into your internet browser address window and press enter.
UPDATED BULLETINS
05-005/14 - MULTI-MODEL (WITH SKYAC.TiV 6AT) - CHECK ENGINE LIGHT AND AUTOMATIC TRANSAXLE WARNING LIGHT ON WITH OTC P0842, P0847, P0872 AND/OR P0877 STORED IN TCM MEMORY
http://www.mstore2000.com/PDF Files/05-005-14-2902a;pdf ' . '
09-001/14 - 2014 MAZDA3 - RATTLE NOISE FROM BOTTOM OF A-PILLAR
http://www.mstore2000.com/PDF Files/09-001 ·14-2-872a.pdf ·
09-006/14- 2014 MAZDA3 - MAZDA CONNECT FUNCTIONALl.TY CONCERNS AFTER MSP_41
http://www.mstore2000.com/PDF Files/09-006:.:14-2882-b.pdf
•
•
Please distribute this information fo all parts and seniice personnel . . ·, ' ·. .i
If you no longer wish to receive Mazda bulletins, please contact the IT Administrator ~t your dealership and ask thef11 to remove your email address from under the EMDCS application.
1

. ·'·
, -
(',
. ~ ·
..... ...:.. ..
; ., ., .... ' '
-. • • -~ .I •
1 •'
: .
. ... ~
- ~ '"• •" ...... ~· ' '
' .~
,.,
,_· \ . . : ~ . .· ':· ~·
It ., . '·,.
·, <
Service Bulletin e IPR!!!!I~ Mazda North American Operations I I llliiiil6~ Irvine, CA 92618-2922
C 2014 Mazda Motor of America, Inc.
Subject: Bulletin No: 05-005/14
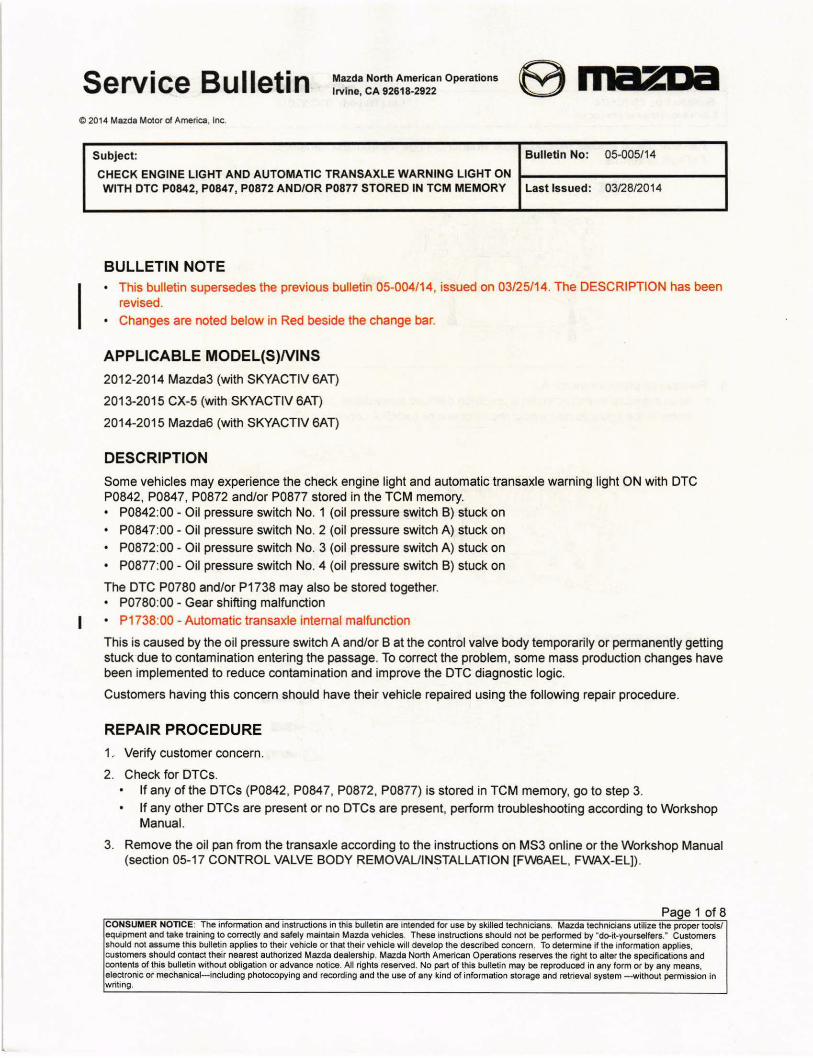
CHECK ENGINE LIGHT AND AUTOMATIC TRANSAXLE WARNING LIGHT ON WITH OTC P0842, P0847, P0872 AND/OR P0877 STORED IN TCM MEMORY Last Issued: 03/28/2014
BULLETIN NOTE • This bulletin supersedes the previous bulletin 05-004/14, issued on 03/25/14. The DESCRIPTION has been
revised.
• Changes are noted below in Red beside the change bar.
APPLICABLE MODEL{S)NINS
201 2-2014 Mazda3 (with SKYACTIV 6AT)
2013-2015 CX-5 (with SKYACTIV 6AT)
2014-2015 Mazda6 (with SKYACTIV 6AT)
DESCRIPTION
Some vehicles may experience the check engine light and automatic transaxle warning light ON with OTC P0842, P0847, P0872 and/or P0877 stored in the TCM memory. • P0842:00 - Oil pressure switch No. 1 (oil pressure switch B) stuck on
• P0847:00 - Oil pressure switch No. 2 (oil pressure switch A) stuck on
• P0872:00 - Oil pressure switch No. 3 (oil pressure switch A) stuck on
• P0877:00 - Oil pressure switch No. 4 (oil pressure switch 8) stuck on
The OTC P0780 and/or P1 738 may also be stored together. • P0780:00 - Gear shifting malfunction
• P1738:00 - Automatic transaxle internal malfunction
This is caused by the oil pressure switch A and/or B at the control valve body temporarily or permanently getting stuck due to contamination entering the passage. To correct the problem, some mass production changes have been implemented to reduce contamination and improve the OTC diagnostic logic.
Customers having this concern should have their vehicle repaired using the following repair procedure.
REPAIR PROCEDURE
1.. Verify customer concern.
2. Check for DTCs. If any of the DTCs (P0842, P0847, P0872, P0877) is stored in TCM memory, go to step 3.
If any other DTCs are present or no DTCs are present, perform troubleshooting according to Workshop Manual.
3. Remove the oil pan from the transaxle according to the instructions on MS3 online or the Workshop Manual (section 05-17 CONTROL VALVE BODY REMOVAUINSTALLATION [FW6AEL, FWAX-EL]).
Page 1 of 8 CONSUMER NOTICE: The information and instructions in this bulletin are intended for use by skilled technicians. Mazda technicians utilize the proper tools/ equipment and take training to correctly and safely maintain Mazda vehicles. These instructions should not be performed by "do-it-yourselfers. • Customers should not assume this bulletin applies to their vehicle or that their vehicle will develop the described concern. To determine if the information applies. customers should contact their nearest authorized Mazda dealership. Mazda North American Operations reserves the right to alter the specifications and contents of this bulletin without obligation or advance notice. All rights reserved. No part of this bulletin may be reproduced in any form or by any means, electronic or mechanical---including photocopying and recording and the use of any kind of information storage and retrieval system --without permission in writing.

Bulletin No: 05-005/14 Last Issued: 03/28/2014 © 2014 Mazda Motor of America, Inc.
4. Remove the oil strainer {A) and the oil strainer 0-rings (B) from the transaxle. F=Front of vehicle
5. Remove oil pressure switch A. a. At oil pressure switch A, insert a precision flathead screwdriver (B) and move it in the direction of the
arrow in the figure to disconnect the oil pressure switch A connector (C) .
2902b
b. Remove the bolts for oil pressure switch A.
Page 2 of 8

Bulletin No: 05-005/14 Last Issued: 03/28/2014 © 2014 Mazda Motor of America, Inc.
c. Detach the tab shown and remove oil pressure switch A from the control .valve body.
1. Using an appropriate tool (such as a fastener remover), push the tab (A) of oil pressure switch A.
(/-----<C:_~)
2902d
CAUTION: If the tab is broken during removal, make sure to remove the broken pieces.
:·· .. ·
2. Pull out oil pressure switch A by shaking it.
CAUTION: When removing oil pressure switch A, be careful not to damage the transaxle fluid temperature (TFT) sensor harness nearby.
Page 3 of 8

Bulletin No: 05-005/14 Last Issued: 03/28/2014 © 2014 Mazda Motor of America, Inc.
6. Remove oil pressure switch B. ..- · '· a. Insert a precision flathead screwdriver (A) and move it in the direction of the arrow as shown to discon
nect the oil pressure switch B connector.
b. Remove ~ii pressure S';Nitcl:\ 1;3. ' I '>' ~ •I
. \ .--.
··: j
2902g
7. Install new oil pressure switches A and 8 .
8. Verify that the tab of each oil pressure switch A and B is attached correctly.
9. Install the bolts for oil pressure switches A and B . . Tightening torque: 9-10 N•m {92-101 khf•cm, ·80-88 in•lbf}
2902h
Page 4 of 8

Bulletin No: 05-005/14 Last Issued: 03/28/2014 © 2014 Mazda Motor of America , Inc.
10. Connect the oil pressure switches A and B connectors.
11 . Install the oil strainer with new oil strainer 0-rings according to the instructions on MS3 online or the Workshop Manual (section 05-17 CONTROL VALVE BODY REMOVAL/INSTALLATION [FW6AEL, FWAX-EL]).
NOTE: If there is a large amount of foreign material at the bottom of the oil pan, replace the .oil strainer with a new one.
12. Install the oil pan according to the instructions on MS3 online or the Workshop Manual (section 05-17 CONTROL VALVE BODY REMOVAL/INSTALLATION [FW6AEL, FWAX-EL]) .
CAUTION: Clean any remaining silicone sealant off the contact surfaces of the transaxle case and oil pan. a. Apply a light coat of silicon sealant to the contact surfaces of the oil pan and transaxle case.
fl("- "
Page 5 of 8

Bulletin No: 05-005/14 Last Issued: 03/28/2014 © 2014 Mazda Motor of America, Inc.
b. Install the oil pan with new bolts before the applied sealant starts to -harden. · '
Tightening torque: 8-10 N•m {82-101 khf~cm, 11~88 in•lbf}
';
"""' 13. Install the removed parts.
14. Add ATF according to the instructions on MS3 online or the Workshop Mar'l'ual (section 05~17 AUTOMATIC TRANSAXLE FLUID (ATF) REPLACEMENT [FW6A-EL] ). .. '
15. Connect the negative battery cable.
16. Perform the Initial Learning Procedure. Refer to MS3 Online instructions or Workshop Manual section· 05-17.
17. Perform the Mechanii;:al System Test. Refer to MS3 Online instructions or Workshop Manual section 05-17.
18. For 2012-13 Mazda3, reprogram the TCM to the latest version by using Mazda Modular Diagnostic System (M-MDS) if the vehicle is within the following range. .
VIN Range: Jl\11 BL*~****500001 - 733727 (through September 28, 2012 production) TCM file name: PE08-21-PS1-J or older
a. Reboot the IDS to <;;lear'memory before reprogramming . ·,b. Using IDS 89.03 or later software, reprogram the PCM to the latest calibration (refer to "Calibration Infor
mation~ taole) by following the "Module Reprogramming" procedure.
NOTE:
Always update the IDS tool first, then follow on-screen instructions to download the needed calibration file for PCM reprogramming.
It is not necessary to remove any fuses or relays during PCM reprogramming when the IDS screen prompts you to do so. You may accidentally stop power to one of the PCM terminals and cause the PCM to be blanked, or you may receive error messages during the IDS reprogramming procedure. IDS shows the calibration part numbers after programming the PCM. Please be aware that PCM calibration part numbers and file names listed in any Service Bulletin may change due to future releases of IDS software, and additional revisions made to those calibrations for service related concerns. When reprogramming a PCM, IDS will always display the "latest" calibration PIN available for that vehicle. If any calibration has been revised/updated to contain new information for a new service concern/issue, it will also contain all previously released calibrations. When performing this procedure, we recommend using the "Power Supply" mode in the Battery Management System to keep the vehicle battery up to capacity. If a different charger is used, make sure it does not exceed 20 AMPS. If it exceeds 20 AMPS, it could damage the VCM.
Page 6 of 8

Bulletin No: 05-005/14 Last Issued: 03/28/2014 © 2014 Mazda Motor of America, Inc.
c. After performing the PCM reprogramming :procedµre,.verify the repair by starting the engine and making sure there are no MIL illumination or abnormal warning lights present. Verify th;;it t~e TCM file name is PE08-21-PS1-K or later. · ·
NOTE:
19. Verify repair.
If any DTCs should remain after performing DTC erase, diagnose the DTCs using MS3 online instructions or Workshop Manual section 01-02.
After PCM reprogramming , it is no longer necessary to road test the vehicle to "relearn" KAM (Keep Alive Memory).
PART(S) INFORMATION
Part Number Description Qty. Notes -
FZ01-21-2CO ..
switch A - .. ' 1 ---.. ..
FZ01-21-2JO Swtich B 1 --- :
9Y A0-10-61 ·5A Bolt! 16 ... · Replace part ·'
FZ01-21 ~031 0-ring 1 ' ·Replace part
FZ01'-21-032 0-ring 1 .·.
R,eplace_ part
FU31-19-423 - Plug ·1 Replace part . ' . .
,. .. 9956-41-400 Drain Packing 1 . Replace part
FZ01-21~500 Oil Strainer 1 ·· Replace if needed. FZ01-21-031 and FZ01-21~032 / (O-rings) are inclµded with this part.
. ·.
Page 7 of 8

,. •• 'J ...... :." ... . . . . '\
Bulletin No: 05-005/14 Last Issued: 03/28/2014 © 2014 Mazda Motor of America, Inc.
WARRANTY INFORMATION
NOTE: , " ' ·•·· ·' ..
This warranty information applies only to verified customer complaints on vehicles eligible for war-ranty r~pair. · .. • . ~ . .. This repair will be covered under the following Warranty terms:
Powertrain Limited Warranty (CX-5)
Powertrain Limited Warranty I CA PZEV Emission Warranty where applicable (2012-13 Mazda3 .. ; with 0il Pressure Switch A and B Replacement, 2014 Mazda3 and 2014-15 Mazda6.)
Federal Emission Warranty (long term) I CA PZEV Emission Warranty where applicable (2012-13 Mazda3 with Oil Pressure Switch A and B Replac.ement and TCM reprogramming)
Additional diagnostic time cannot be claimed for this repair.
·,
Oil Pressure Switch A and B Oil Pressure Switch A and B Replacement Replacement and TCM
Reprogramming (*) ..
Warranty Type .. ' A " ' ; ·,, . .. "
, ··''I
Symptom Code . 0 6X ' Dam.age Code
' ' ... . .
'. 9W .. , "
OTC P0842, P0847, P0872 or P0877
Part Number Main Cause FZ01-21-2CO
Quantity 1
Operation Number I Labor Hours: XXK43ARX / 1.8 Hrs. XXK43BRX I 2. 1 Hrs.
(*) NOTE: Reprogram the TCM to the newest version only when the TCM file name on the vehicle is PE08-
21-PS1-J or older.
,!...·
, Page 8 of 8


![Mazda3 [Brosura]](https://img.dokumen.tips/doc/110x75/55721456497959fc0b944ca1/mazda3-brosura.jpg)