Embed Size (px)
Citation preview
PagePro 1390 MF Facsimile User’s Guide
™
4558-9564-01A1800795-001B
EDNord - Istedgade 37A - 9000 Aalborg - telefon 96333500
Thank YouThank you for purchasing a PagePro 1390 MF. You have made an excellent choice. Your PagePro 1390 MF is specially designed for optimal performance in Windows environments.
TrademarksKONICA MINOLTA and the KONICA MINOLTA logo are trademarks or regis-tered trademarks of KONICA MINOLTA HOLDINGS, INC.
PagePro is a trademark or registered trademark of KONICA MINOLTA PRINTING SOLUTIONS U.S.A., INC.
All other product names are trademarks or registered trademarks of their respective holders.
Copyright NoticeCopyright © 2005 KONICA MINOLTA BUSINESS TECHNOLOGIES, INC., Marunouchi Center Building, 1-6-1 Marunouchi, Chiyoda-ku, Tokyo, 100-0005, Japan. All Rights Reserved. This document may not be copied, in whole or part, nor transferred to any other media or language, without written permission of KONICA MINOLTA BUSINESS TECHNOLOGIES, INC.
Manual NoticeKONICA MINOLTA BUSINESS TECHNOLOGIES, INC. reserves the right to make changes to this guide and to the equipment described herein without notice. Considerable effort has been made to ensure that this guide is free of inaccuracies and omissions. However, KONICA MINOLTA BUSINESS TECHNOLOGIES, INC. makes no warranty of any kind including, but not lim-ited to, any implied warranties of merchantability and fitness for a particular purpose with regard to this guide. KONICA MINOLTA BUSINESS TECHNOL-OGIES, INC. assumes no responsibility for, or liability for, errors contained in this guide or for incidental, special, or consequential damages arising out of the furnishing of this guide, or the use of this guide in operating the equip-ment, or in connection with the performance of the equipment when so oper-ated.
EDNord - Istedgade 37A - 9000 Aalborg - telefon 96333500
Contents
1 Introduction ....................................................................................................... 1Precautions 2Machine Parts 2
Front View 2Rear View 2
2 Control Panel and Configuration Menu .......................................................... 3About the Control Panel 4Configuration Menu Overview 6
3 Set up ............................................................................................................... 11Fax Mode Screen 12
About the Fax Mode Screen 12Entering Fax Mode 12
Initial Settings 13About Fax Setup 13Setting Up Fax Setup 18
4 Sending Faxes ................................................................................................. 19Basic Fax Operation 20
Contents iEDNord - Istedgade 37A - 9000 Aalborg - telefon 96333500
Loading Original Documents 21Loading the Original Document Into the ADF Input Tray 21Placing the Original Document on the Flatbed Glass 22
Adjusting Original Images 24Improving Brightness 24Improving Resolution 24
Specifying a Recipient 25Directly Entering a Fax Number 25Using a One-Touch Dial Key 25Using the Speed Dial Function 26Using the Search Function 26
Sending a Fax to Multiple Recipients 27Sending Faxes after Using the Telephone 28Sending Faxes After Checking to See whether the Recipient Answers 28Sending a Fax Again 29Sending a Fax at a Specified Time 29About the Fax Header 31
5 Receiving Faxes ..............................................................................................33Receiving Faxes Automatically 34Receiving Faxes After Using the Telephone 34Receiving Faxes With the Receiver On the Hook 35Receiving Documents Stored in the Sender's Machine (Polling RX) 35Printing Received Faxes 36
What Is the Guaranteed Imageable (Printable) Area? 36Printing at a Reduced Size 36
Adding the Sender’s Information When Printing Faxes 37
6 Programming the Phone Book .......................................................................39About the Phone Book 40One-Touch Dial 40
Programming a One-Touch Dial 40Changing/Deleting a One Touch Dial 41
Speed Dial 42Programming a Speed Dial 42Changing/Deleting a Speed Dial 43
Group Dial 44Programming a Group Dial 44Deleting a Recipient From a Group Dial 45
Deleting a Group Dial 46Editing the Phone Book From a PC 47
One-Touch Program/Edit Window 48Speed Dial Program/Edit Window 50Group Dial Program/Edit Window 52Opening/Saving Data 54
ii EDNord - Istedgade 37A - 9000 Aalborg - telefon 96333500
7 Printing Reports and Lists ............................................................................. 55About the Reports and Lists 56Checking the Transmission Result (TX Report) 56
Transmit Report 57Multi TX Report 58
Checking Lost Jobs (Lost Jobs Report) 60Checking the Activity of the Machine (Activity Log Report) 61Protocol Report 62Printing the Contents of the Memory (Memory Job List) 63Printing the Contents of the Phone Book 64
8 Troubleshooting .............................................................................................. 65Problems When Sending Faxes 66Problems When Receiving Faxes 67Error Messages on the Display 68Error Codes 70
When Sending Faxes 70When Receiving Faxes 71
9 Appendix .......................................................................................................... 73Technical Specifications 74List of Available Characters 74
iiiEDNord - Istedgade 37A - 9000 Aalborg - telefon 96333500

EDNord - Istedgade 37A - 9000 Aalborg - telefon 96333500
Introduction
EDNord - Istedgade 37A - 9000 Aalborg - telefon 96333500
Precautions2
PrecautionsThe following types of telephone lines can be connected to this machine.
PSTN (Public Switched Telephone Network)
PBX (Private Branch eXchange)
When connected to a PBX line, the PSTN access digit and pause must be dialed if you wish to connect to the PSTN line through the PBX line. The access digit differs depending on the PBX line. Check the specifications of the PBX line that you are using.
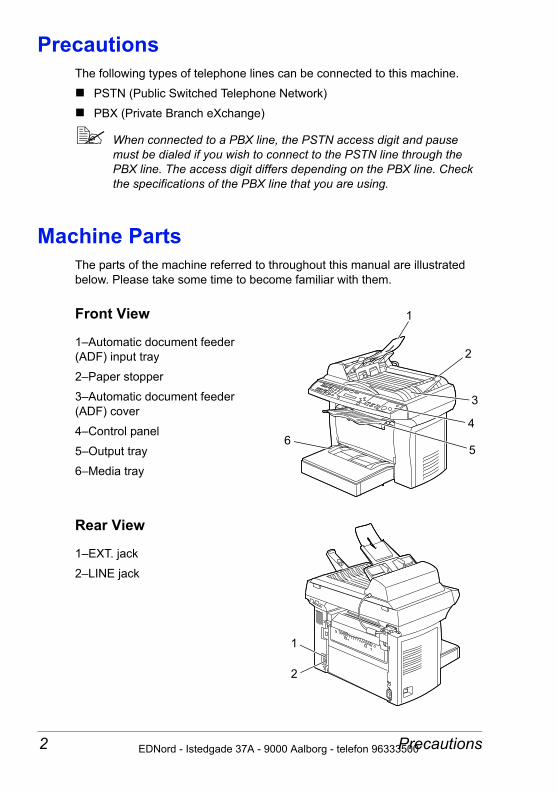
Machine PartsThe parts of the machine referred to throughout this manual are illustrated below. Please take some time to become familiar with them.
Front View
1–Automatic document feeder (ADF) input tray
2–Paper stopper
3–Automatic document feeder (ADF) cover
4–Control panel
5–Output tray
6–Media tray
Rear View
1–EXT. jack
2–LINE jack
1
2
3
4
56
1
2
EDNord - Istedgade 37A - 9000 Aalborg - telefon 96333500
Control Panel andConfiguration
Menu
EDNord - Istedgade 37A - 9000 Aalborg - telefon 96333500
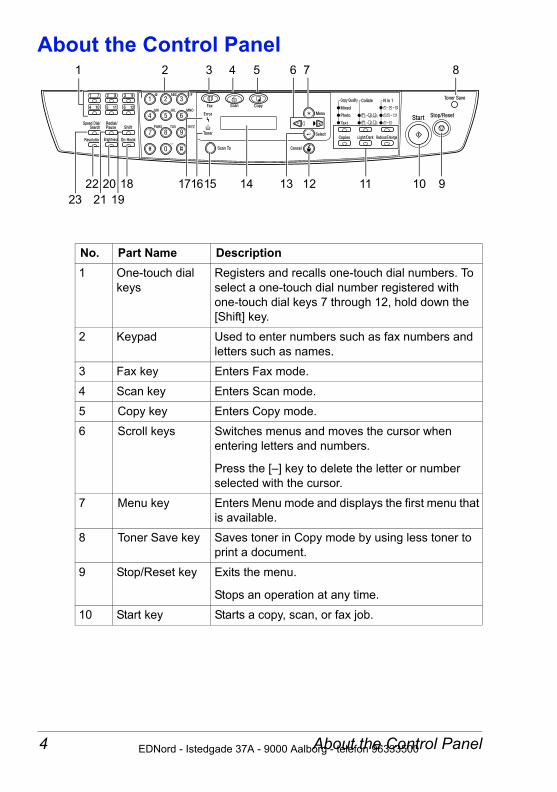
About the Control Panel
No. Part Name Description1 One-touch dial
keysRegisters and recalls one-touch dial numbers. To select a one-touch dial number registered with one-touch dial keys 7 through 12, hold down the [Shift] key.
2 Keypad Used to enter numbers such as fax numbers and letters such as names.
3 Fax key Enters Fax mode.
4 Scan key Enters Scan mode.
5 Copy key Enters Copy mode.
6 Scroll keys Switches menus and moves the cursor when entering letters and numbers.
Press the [–] key to delete the letter or number selected with the cursor.
7 Menu key Enters Menu mode and displays the first menu that is available.
8 Toner Save key Saves toner in Copy mode by using less toner to print a document.
9 Stop/Reset key Exits the menu.
Stops an operation at any time.
10 Start key Starts a copy, scan, or fax job.
1 2 3 4 5 6 7 8
910111213141516171819
2021
2223
About the Control Panel4 EDNord - Istedgade 37A - 9000 Aalborg - telefon 96333500
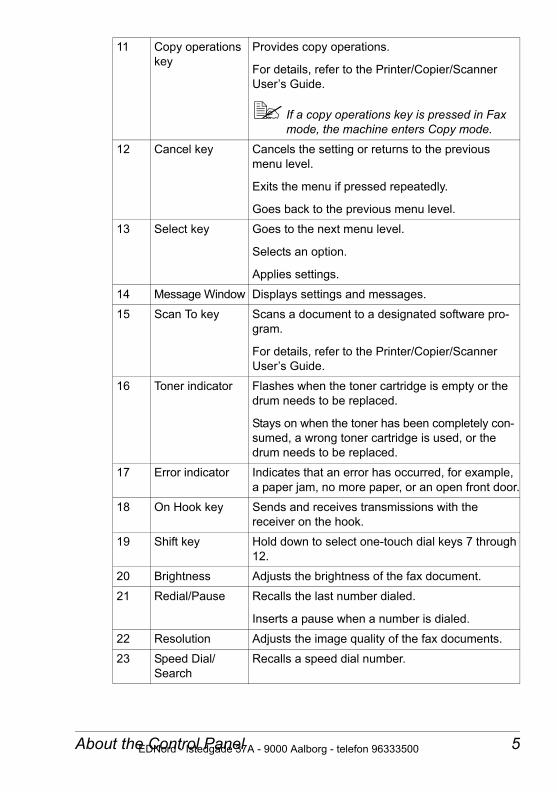
11 Copy operations key
Provides copy operations.
For details, refer to the Printer/Copier/Scanner User’s Guide.
If a copy operations key is pressed in Fax mode, the machine enters Copy mode.
12 Cancel key Cancels the setting or returns to the previous menu level.
Exits the menu if pressed repeatedly.
Goes back to the previous menu level.
13 Select key Goes to the next menu level.
Selects an option.
Applies settings.
14 Message Window Displays settings and messages.
15 Scan To key Scans a document to a designated software pro-gram.
For details, refer to the Printer/Copier/Scanner User’s Guide.
16 Toner indicator Flashes when the toner cartridge is empty or the drum needs to be replaced.
Stays on when the toner has been completely con-sumed, a wrong toner cartridge is used, or the drum needs to be replaced.
17 Error indicator Indicates that an error has occurred, for example, a paper jam, no more paper, or an open front door.
18 On Hook key Sends and receives transmissions with the receiver on the hook.
19 Shift key Hold down to select one-touch dial keys 7 through 12.
20 Brightness Adjusts the brightness of the fax document.
21 Redial/Pause Recalls the last number dialed.
Inserts a pause when a number is dialed.
22 Resolution Adjusts the image quality of the fax documents.
23 Speed Dial/Search
Recalls a speed dial number.
About the Control Panel 5EDNord - Istedgade 37A - 9000 Aalborg - telefon 96333500
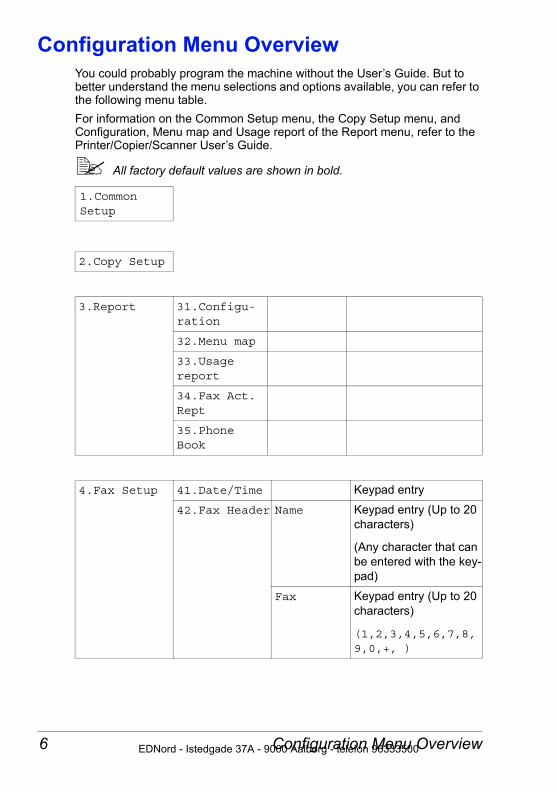
Configuration Menu OverviewYou could probably program the machine without the User’s Guide. But to better understand the menu selections and options available, you can refer to the following menu table.For information on the Common Setup menu, the Copy Setup menu, and Configuration, Menu map and Usage report of the Report menu, refer to the Printer/Copier/Scanner User’s Guide.
All factory default values are shown in bold.
1.Common Setup
2.Copy Setup
3.Report 31.Configu-ration
32.Menu map
33.Usage report
34.Fax Act. Rept
35.Phone Book
4.Fax Setup 41.Date/Time Keypad entry
42.Fax Header Name Keypad entry (Up to 20 characters)
(Any character that can be entered with the key-pad)
Fax Keypad entry (Up to 20 characters)
(1,2,3,4,5,6,7,8,9,0,+, )
Configuration Menu Overview6 EDNord - Istedgade 37A - 9000 Aalborg - telefon 96333500
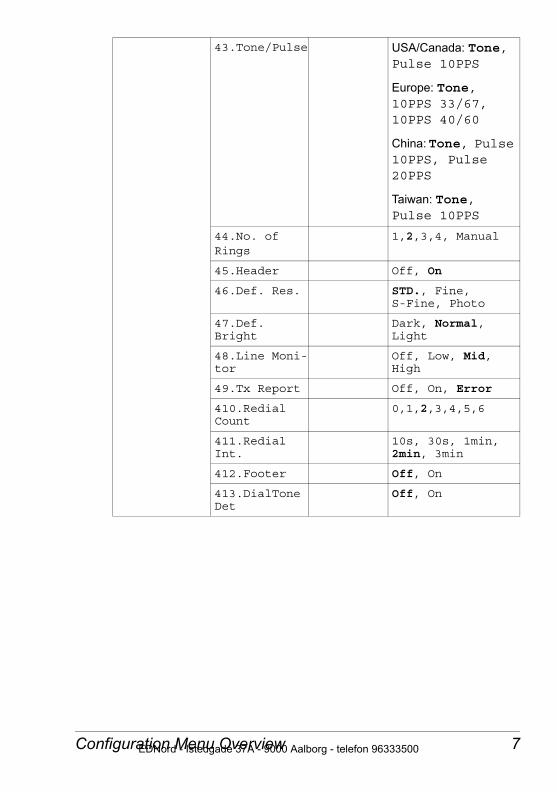
43.Tone/Pulse USA/Canada: Tone, Pulse 10PPS
Europe: Tone, 10PPS 33/67, 10PPS 40/60
China: Tone, Pulse 10PPS, Pulse 20PPS
Taiwan: Tone, Pulse 10PPS
44.No. of Rings
1,2,3,4, Manual
45.Header Off, On
46.Def. Res. STD., Fine, S-Fine, Photo
47.Def. Bright
Dark, Normal, Light
48.Line Moni-tor
Off, Low, Mid, High
49.Tx Report Off, On, Error
410.Redial Count
0,1,2,3,4,5,6
411.Redial Int.
10s, 30s, 1min, 2min, 3min
412.Footer Off, On
413.DialTone Det
Off, On
Configuration Menu Overview 7EDNord - Istedgade 37A - 9000 Aalborg - telefon 96333500
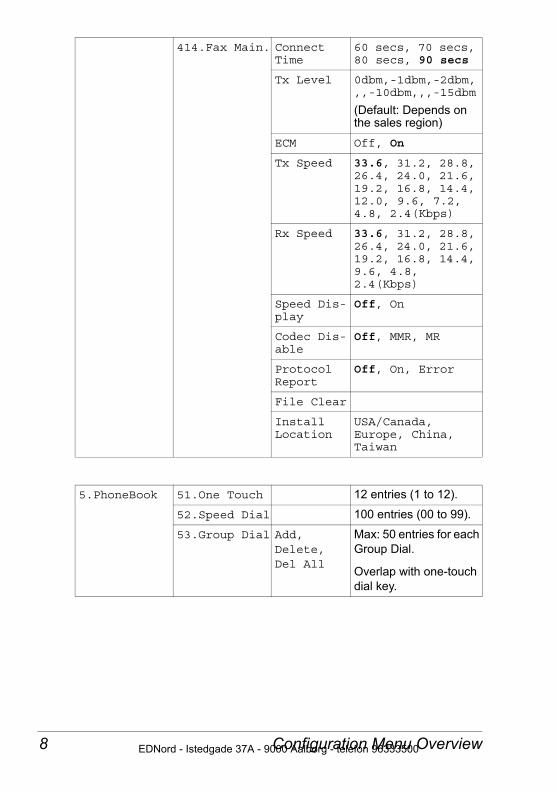
414.Fax Main. Connect Time
60 secs, 70 secs, 80 secs, 90 secs
Tx Level 0dbm,-1dbm,-2dbm,,,-10dbm,,,-15dbm
(Default: Depends on the sales region)
ECM Off, On
Tx Speed 33.6, 31.2, 28.8, 26.4, 24.0, 21.6, 19.2, 16.8, 14.4, 12.0, 9.6, 7.2, 4.8, 2.4(Kbps)
Rx Speed 33.6, 31.2, 28.8, 26.4, 24.0, 21.6, 19.2, 16.8, 14.4, 9.6, 4.8, 2.4(Kbps)
Speed Dis-play
Off, On
Codec Dis-able
Off, MMR, MR
Protocol Report
Off, On, Error
File Clear
Install Location
USA/Canada, Europe, China, Taiwan
5.PhoneBook 51.One Touch 12 entries (1 to 12).
52.Speed Dial 100 entries (00 to 99).
53.Group Dial Add, Delete, Del All
Max: 50 entries for each Group Dial.
Overlap with one-touch dial key.
Configuration Menu Overview8 EDNord - Istedgade 37A - 9000 Aalborg - telefon 96333500
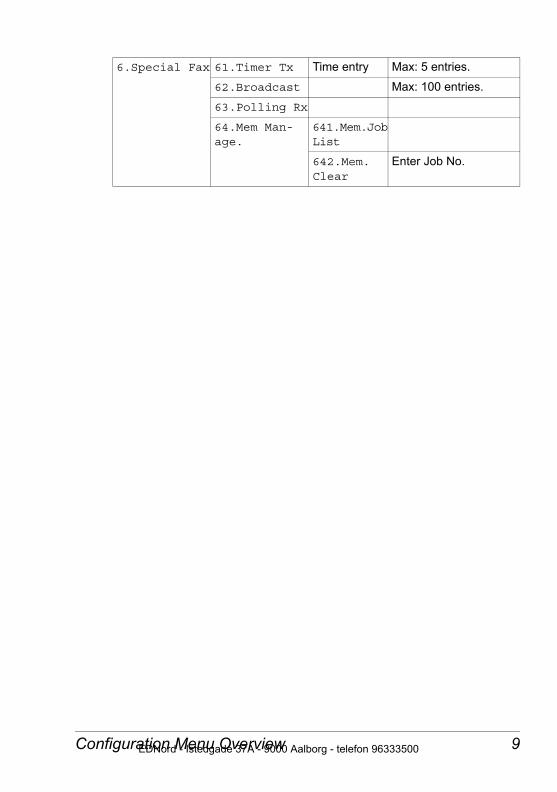
6.Special Fax 61.Timer Tx Time entry Max: 5 entries.
62.Broadcast Max: 100 entries.
63.Polling Rx
64.Mem Man-age.
641.Mem.Job List
642.Mem. Clear
Enter Job No.
Configuration Menu Overview 9EDNord - Istedgade 37A - 9000 Aalborg - telefon 96333500

EDNord - Istedgade 37A - 9000 Aalborg - telefon 96333500
Set up
EDNord - Istedgade 37A - 9000 Aalborg - telefon 96333500
Fax Mode Screen
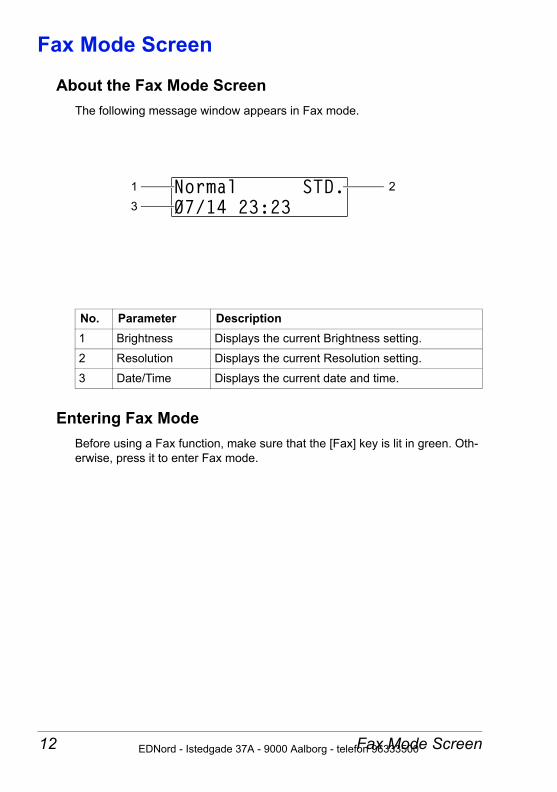
About the Fax Mode ScreenThe following message window appears in Fax mode.
Entering Fax ModeBefore using a Fax function, make sure that the [Fax] key is lit in green. Oth-erwise, press it to enter Fax mode.
No. Parameter Description1 Brightness Displays the current Brightness setting.
2 Resolution Displays the current Resolution setting.
3 Date/Time Displays the current date and time.
1 23
Fax Mode Screen12 EDNord - Istedgade 37A - 9000 Aalborg - telefon 96333500
Initial Settings
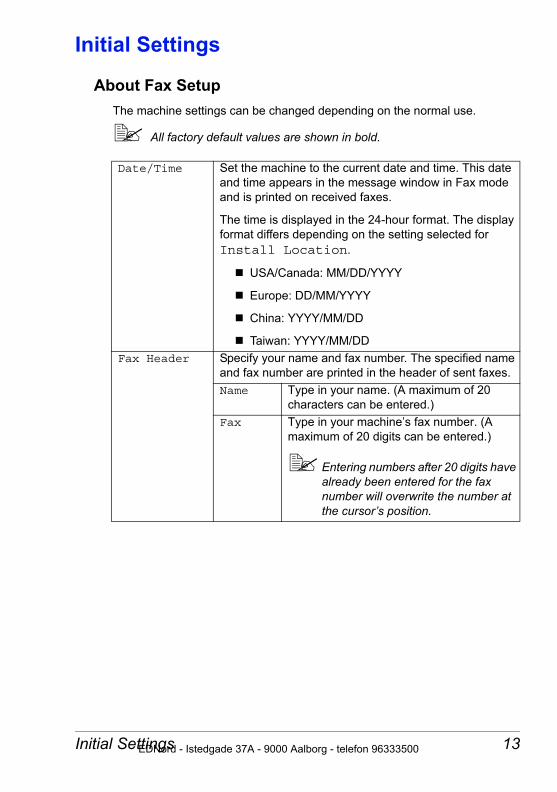
About Fax SetupThe machine settings can be changed depending on the normal use.
All factory default values are shown in bold.
Date/Time Set the machine to the current date and time. This date and time appears in the message window in Fax mode and is printed on received faxes.
The time is displayed in the 24-hour format. The display format differs depending on the setting selected for Install Location.
USA/Canada: MM/DD/YYYY
Europe: DD/MM/YYYY
China: YYYY/MM/DD
Taiwan: YYYY/MM/DDFax Header Specify your name and fax number. The specified name
and fax number are printed in the header of sent faxes.Name Type in your name. (A maximum of 20
characters can be entered.)Fax Type in your machine’s fax number. (A
maximum of 20 digits can be entered.)
Entering numbers after 20 digits have already been entered for the fax number will overwrite the number at the cursor’s position.
Initial Settings 13EDNord - Istedgade 37A - 9000 Aalborg - telefon 96333500
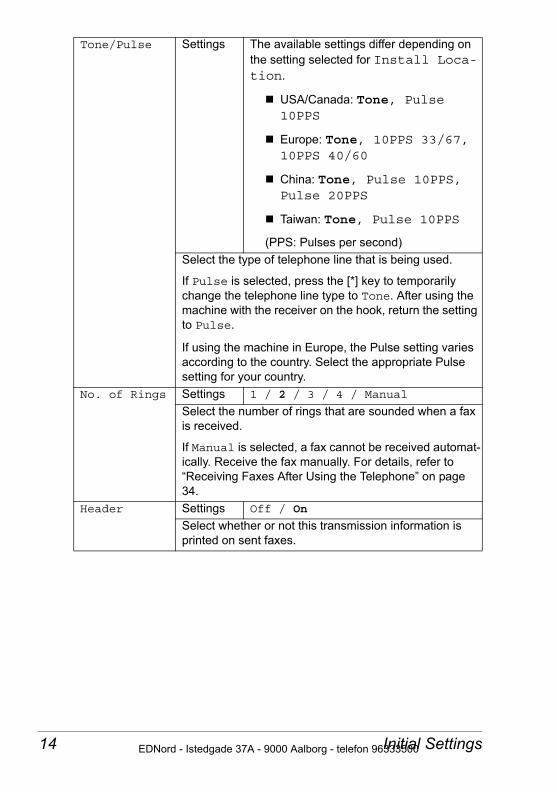
Tone/Pulse Settings The available settings differ depending on the setting selected for Install Loca-tion.
USA/Canada: Tone, Pulse 10PPS
Europe: Tone, 10PPS 33/67, 10PPS 40/60
China: Tone, Pulse 10PPS, Pulse 20PPS
Taiwan: Tone, Pulse 10PPS
(PPS: Pulses per second)Select the type of telephone line that is being used.
If Pulse is selected, press the [*] key to temporarily change the telephone line type to Tone. After using the machine with the receiver on the hook, return the setting to Pulse.
If using the machine in Europe, the Pulse setting varies according to the country. Select the appropriate Pulse setting for your country.
No. of Rings Settings 1 / 2 / 3 / 4 / Manual
Select the number of rings that are sounded when a fax is received.
If Manual is selected, a fax cannot be received automat-ically. Receive the fax manually. For details, refer to “Receiving Faxes After Using the Telephone” on page 34.
Header Settings Off / On
Select whether or not this transmission information is printed on sent faxes.
Initial Settings14 EDNord - Istedgade 37A - 9000 Aalborg - telefon 96333500
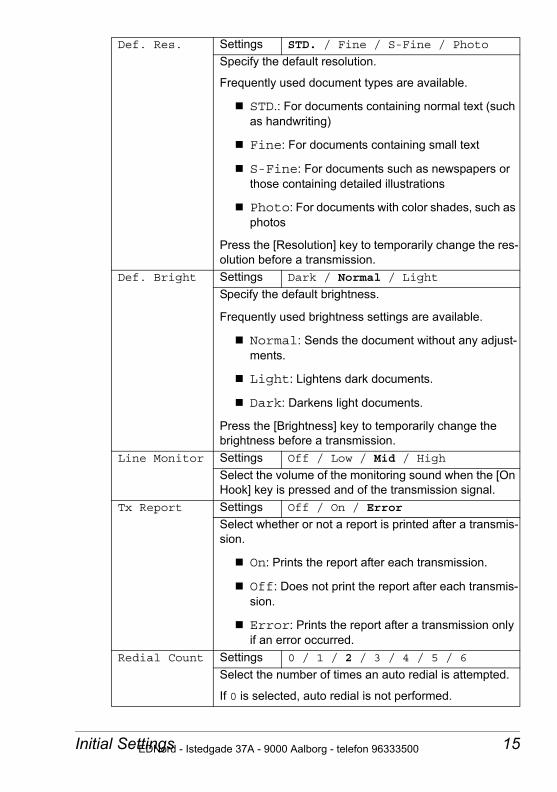
Def. Res. Settings STD. / Fine / S-Fine / Photo
Specify the default resolution.
Frequently used document types are available.
STD.: For documents containing normal text (such as handwriting)
Fine: For documents containing small text
S-Fine: For documents such as newspapers or those containing detailed illustrations
Photo: For documents with color shades, such as photos
Press the [Resolution] key to temporarily change the res-olution before a transmission.
Def. Bright Settings Dark / Normal / Light
Specify the default brightness.
Frequently used brightness settings are available.
Normal: Sends the document without any adjust-ments.
Light: Lightens dark documents.
Dark: Darkens light documents.
Press the [Brightness] key to temporarily change the brightness before a transmission.
Line Monitor Settings Off / Low / Mid / High
Select the volume of the monitoring sound when the [On Hook] key is pressed and of the transmission signal.
Tx Report Settings Off / On / Error
Select whether or not a report is printed after a transmis-sion.
On: Prints the report after each transmission.
Off: Does not print the report after each transmis-sion.
Error: Prints the report after a transmission only if an error occurred.
Redial Count Settings 0 / 1 / 2 / 3 / 4 / 5 / 6
Select the number of times an auto redial is attempted.
If 0 is selected, auto redial is not performed.
Initial Settings 15EDNord - Istedgade 37A - 9000 Aalborg - telefon 96333500
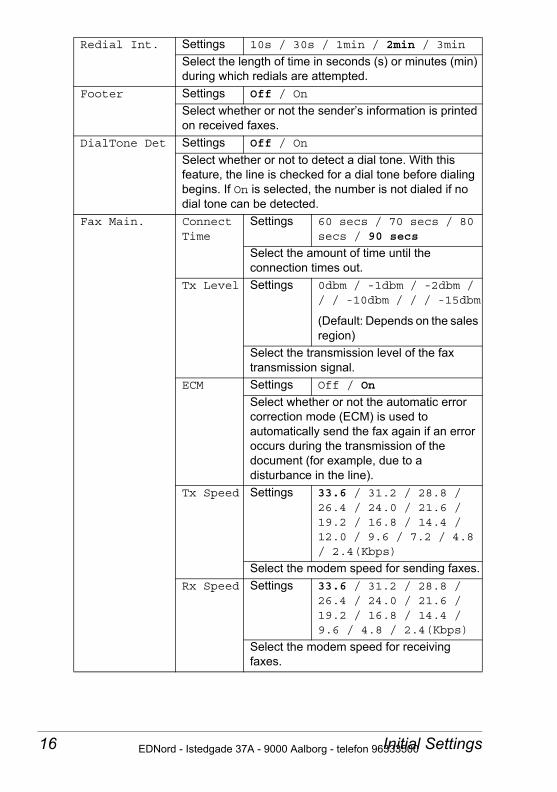
Redial Int. Settings 10s / 30s / 1min / 2min / 3min
Select the length of time in seconds (s) or minutes (min) during which redials are attempted.
Footer Settings Off / On
Select whether or not the sender’s information is printed on received faxes.
DialTone Det Settings Off / On
Select whether or not to detect a dial tone. With this feature, the line is checked for a dial tone before dialing begins. If On is selected, the number is not dialed if no dial tone can be detected.
Fax Main. Connect Time
Settings 60 secs / 70 secs / 80 secs / 90 secs
Select the amount of time until the connection times out.
Tx Level Settings 0dbm / -1dbm / -2dbm / / / -10dbm / / / -15dbm
(Default: Depends on the sales region)
Select the transmission level of the fax transmission signal.
ECM Settings Off / On
Select whether or not the automatic error correction mode (ECM) is used to automatically send the fax again if an error occurs during the transmission of the document (for example, due to a disturbance in the line).
Tx Speed Settings 33.6 / 31.2 / 28.8 / 26.4 / 24.0 / 21.6 / 19.2 / 16.8 / 14.4 / 12.0 / 9.6 / 7.2 / 4.8 / 2.4(Kbps)
Select the modem speed for sending faxes.Rx Speed Settings 33.6 / 31.2 / 28.8 /
26.4 / 24.0 / 21.6 / 19.2 / 16.8 / 14.4 / 9.6 / 4.8 / 2.4(Kbps)
Select the modem speed for receiving faxes.
Initial Settings16 EDNord - Istedgade 37A - 9000 Aalborg - telefon 96333500
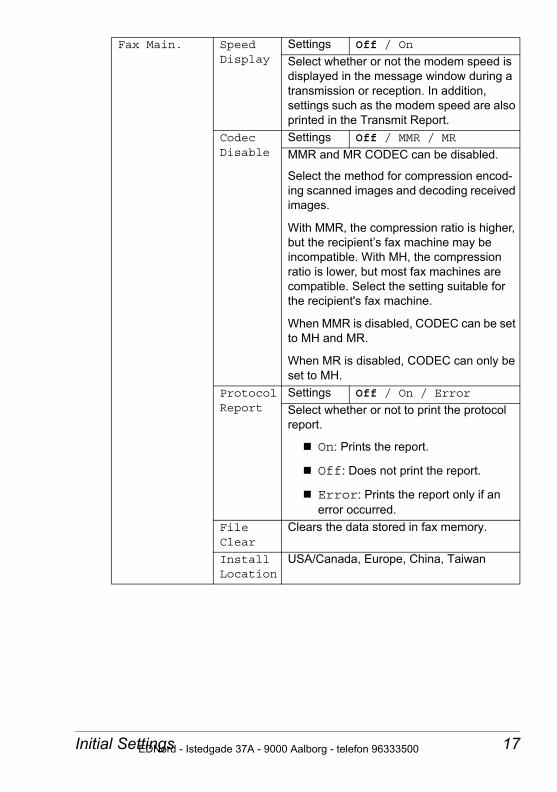
Fax Main. Speed Display
Settings Off / On
Select whether or not the modem speed is displayed in the message window during a transmission or reception. In addition, settings such as the modem speed are also printed in the Transmit Report.
Codec Disable
Settings Off / MMR / MR
MMR and MR CODEC can be disabled.
Select the method for compression encod-ing scanned images and decoding received images.
With MMR, the compression ratio is higher, but the recipient’s fax machine may be incompatible. With MH, the compression ratio is lower, but most fax machines are compatible. Select the setting suitable for the recipient's fax machine.
When MMR is disabled, CODEC can be set to MH and MR.
When MR is disabled, CODEC can only be set to MH.
Protocol Report
Settings Off / On / Error
Select whether or not to print the protocol report.
On: Prints the report.
Off: Does not print the report.
Error: Prints the report only if an error occurred.
File Clear
Clears the data stored in fax memory.
Install Location
USA/Canada, Europe, China, Taiwan
Initial Settings 17EDNord - Istedgade 37A - 9000 Aalborg - telefon 96333500

Setting Up Fax Setup1 Press the [Menu] key to enter Menu mode.
The main menu appears in the message window.
2 Press the [+] key 4 times.ORPress the [4] key.ORHold down the [+] key to navigate more quickly to Fax Setup.Fax Setup appears in the message window.
3 Press the [Select] key.
4 Press the [+] or [–] key until the desired menu appears, and then press the [Select] key.
5 Specify the necessary settings, and then press the [Select] key.
To cancel the settings, press the [Cancel] key.
When the settings are applied, “Setting OK” appears and the Fax mode screen appears again. A check mark appears beside the setting that is currently selected.To return to the Fax mode screen without applying the settings, press the [Stop/Reset] key.
Initial Settings18 EDNord - Istedgade 37A - 9000 Aalborg - telefon 96333500
Sending Faxes
EDNord - Istedgade 37A - 9000 Aalborg - telefon 96333500
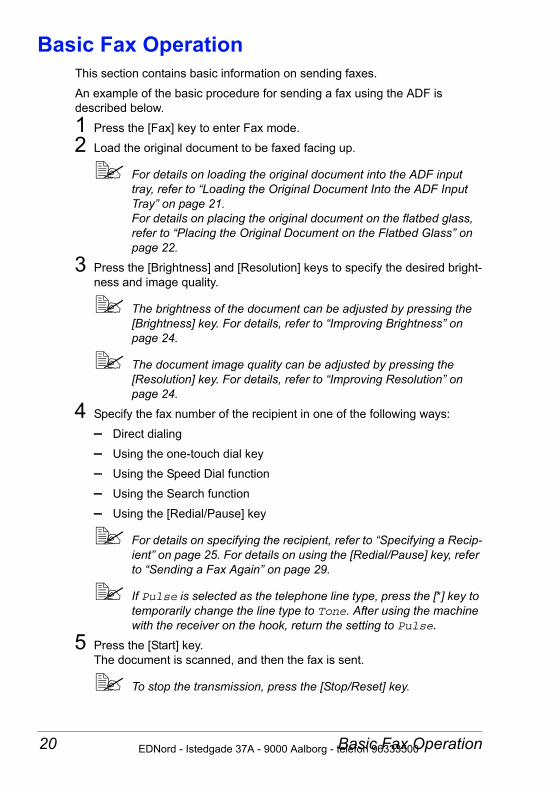
Basic Fax OperationThis section contains basic information on sending faxes.
An example of the basic procedure for sending a fax using the ADF is described below.
1 Press the [Fax] key to enter Fax mode.
2 Load the original document to be faxed facing up.
For details on loading the original document into the ADF input tray, refer to “Loading the Original Document Into the ADF Input Tray” on page 21.For details on placing the original document on the flatbed glass, refer to “Placing the Original Document on the Flatbed Glass” on page 22.
3 Press the [Brightness] and [Resolution] keys to specify the desired bright-ness and image quality.
The brightness of the document can be adjusted by pressing the [Brightness] key. For details, refer to “Improving Brightness” on page 24.
The document image quality can be adjusted by pressing the [Resolution] key. For details, refer to “Improving Resolution” on page 24.
4 Specify the fax number of the recipient in one of the following ways:
– Direct dialing
– Using the one-touch dial key
– Using the Speed Dial function
– Using the Search function
– Using the [Redial/Pause] key
For details on specifying the recipient, refer to “Specifying a Recip-ient” on page 25. For details on using the [Redial/Pause] key, refer to “Sending a Fax Again” on page 29.
If Pulse is selected as the telephone line type, press the [*] key to temporarily change the line type to Tone. After using the machine with the receiver on the hook, return the setting to Pulse.
5 Press the [Start] key.The document is scanned, and then the fax is sent.
To stop the transmission, press the [Stop/Reset] key.
Basic Fax Operation20 EDNord - Istedgade 37A - 9000 Aalborg - telefon 96333500
If the fax could not be sent (for example, because the line was busy), the Auto Redial function will try sending the transmission again. For details on the Auto Redial function, refer to “About Fax Setup” on page 13.If the fax could not be sent with the Auto Redial function, a Trans-mit Report is printed. For details, refer to “Printing Reports and Lists” on page 55.
Since a document with multiple pages is saved in the memory while it is being sent, the document is scanned at high speed. A maximum of 50 pages can be stored in the memory. (If the Resolu-tion setting “Photo” was selected, 50 pages may not be stored in the memory.) The fax will be sent when the memory becomes full. In addition, since no more than 50 pages can be sent in a single transmission, any pages that exceed that number are not sent. After the transmission is completed, another transmission opera-tion can be performed.
Loading Original Documents
Loading the Original Document Into the ADF Input TrayIf the ADF is used, original documents containing multiple pages can be auto-matically scanned.
Do not load original documents that are bound together, for example, with paper clips or staples.
Do not load more than 50 sheets; otherwise a original document mis-feed or damage to the document or machine may occur.
If the original document is not loaded correctly, it may not be fed in straight, or an original document misfeed or damage to the document may occur.
Do not open the ADF cover while documents loaded into the ADF are being scanned.
1 Make sure that there is no document on the flatbed glass.
Loading Original Documents 21EDNord - Istedgade 37A - 9000 Aalborg - telefon 96333500
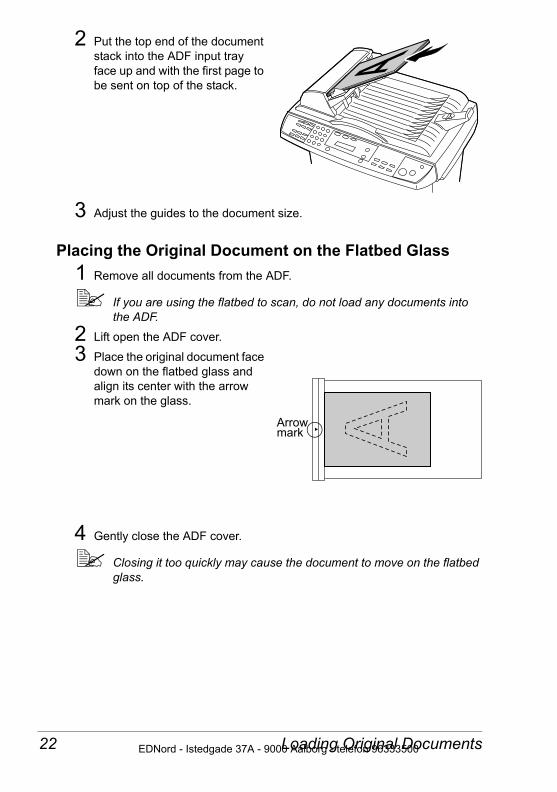
2 Put the top end of the document stack into the ADF input tray face up and with the first page to be sent on top of the stack.
3 Adjust the guides to the document size.
Placing the Original Document on the Flatbed Glass1 Remove all documents from the ADF.
If you are using the flatbed to scan, do not load any documents into the ADF.
2 Lift open the ADF cover.
3 Place the original document face down on the flatbed glass and align its center with the arrow mark on the glass.
4 Gently close the ADF cover.
Closing it too quickly may cause the document to move on the flatbed glass.
Arrowmark
Loading Original Documents22 EDNord - Istedgade 37A - 9000 Aalborg - telefon 96333500
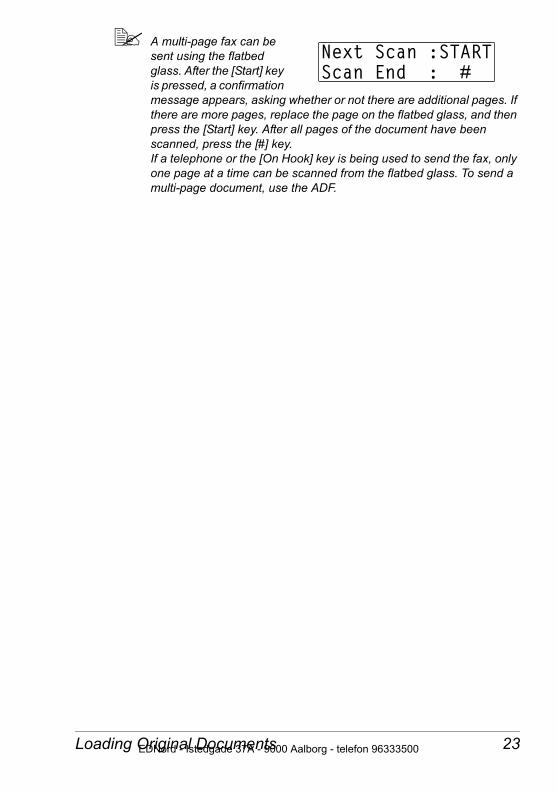
A multi-page fax can be sent using the flatbed glass. After the [Start] key is pressed, a confirmation message appears, asking whether or not there are additional pages. If there are more pages, replace the page on the flatbed glass, and then press the [Start] key. After all pages of the document have been scanned, press the [#] key.If a telephone or the [On Hook] key is being used to send the fax, only one page at a time can be scanned from the flatbed glass. To send a multi-page document, use the ADF.
Loading Original Documents 23EDNord - Istedgade 37A - 9000 Aalborg - telefon 96333500
Adjusting Original Images
Improving BrightnessIf the original document contains faint markings or dark images, you can adjust the brightness to send a fax that is easier to read.
1 Press the [Brightness] key.
2 Repeatedly press the [Brightness] key to find the desired brightness set-ting.
Each press of the [Brightness] key changes the setting between “Light” “Dark” and “Normal”.
– Normal: Sends the document without any adjustments.– Light: Lightens the document.– Dark: Darkens the document.
The specified Brightness setting returns to the default under the fol-lowing conditions.– No operation is performed for 2 minutes.– Two minutes after a fax is sent.– A different menu item is selected.The default setting is “Normal”; however, the setting can be changed as desired. For details, refer to “About Fax Setup” on page 13.
Improving ResolutionThe image quality of a document can be adjusted before it is sent as a fax.
1 Press the [Resolution] key.
2 Repeatedly press the [Resolution] key to find the desired resolution set-ting.
Each press of the [Resolution] key changes the setting between “Fine”, “S-Fine”, “Photo” and “STD.”– STD.: For documents containing normal text (such as handwriting).– Fine: For documents containing small text.– S-Fine: For documents such as newspapers or those containing
detailed illustrations.– Photo: For documents with shades of color, such as photos.
Adjusting Original Images24 EDNord - Istedgade 37A - 9000 Aalborg - telefon 96333500
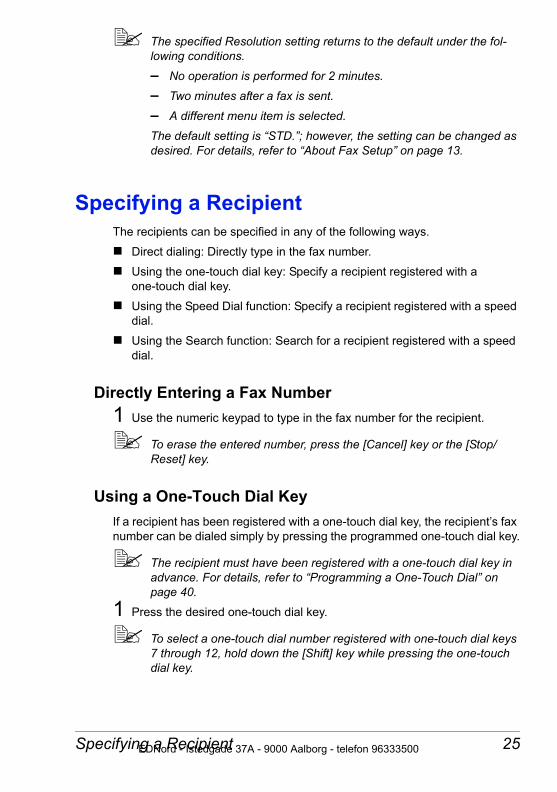
The specified Resolution setting returns to the default under the fol-lowing conditions.– No operation is performed for 2 minutes.– Two minutes after a fax is sent.– A different menu item is selected.The default setting is “STD.”; however, the setting can be changed as desired. For details, refer to “About Fax Setup” on page 13.
Specifying a RecipientThe recipients can be specified in any of the following ways.
Direct dialing: Directly type in the fax number.
Using the one-touch dial key: Specify a recipient registered with a one-touch dial key.
Using the Speed Dial function: Specify a recipient registered with a speed dial.
Using the Search function: Search for a recipient registered with a speed dial.
Directly Entering a Fax Number1 Use the numeric keypad to type in the fax number for the recipient.
To erase the entered number, press the [Cancel] key or the [Stop/Reset] key.
Using a One-Touch Dial KeyIf a recipient has been registered with a one-touch dial key, the recipient’s fax number can be dialed simply by pressing the programmed one-touch dial key.
The recipient must have been registered with a one-touch dial key in advance. For details, refer to “Programming a One-Touch Dial” on page 40.
1 Press the desired one-touch dial key.
To select a one-touch dial number registered with one-touch dial keys 7 through 12, hold down the [Shift] key while pressing the one-touch dial key.
Specifying a Recipient 25EDNord - Istedgade 37A - 9000 Aalborg - telefon 96333500
Press the one-touch dial key programmed with the group dial recipi-ents to send a fax to multiple recipients.
If an incorrect recipient is selected, press the [Cancel] key or the [Stop/Reset] key
Using the Speed Dial FunctionIf a recipient has been registered with a speed dial number, the recipient’s fax number can be dialed simply by pressing a speed dial number key.
The recipient must have been registered with a speed dial in advance. For details, refer to “Programming a Speed Dial” on page 42.
1 Press the [Speed Dial/Search] key.
2 Use the keypad to enter the 2-digit speed dial number programmed with the desired recipient.
The recipient name and fax number appear in the message window.
If an incorrect recipient is selected, press the [Cancel] key or the [Stop/Reset] key.
Using the Search FunctionIf a recipient is registered with a speed dial number, the fax number of the recipient can be found by using the first letter of the recipient’s name.
The recipient must have been registered with a speed dial in advance. For details, refer to “Programming a Speed Dial” on page 42.
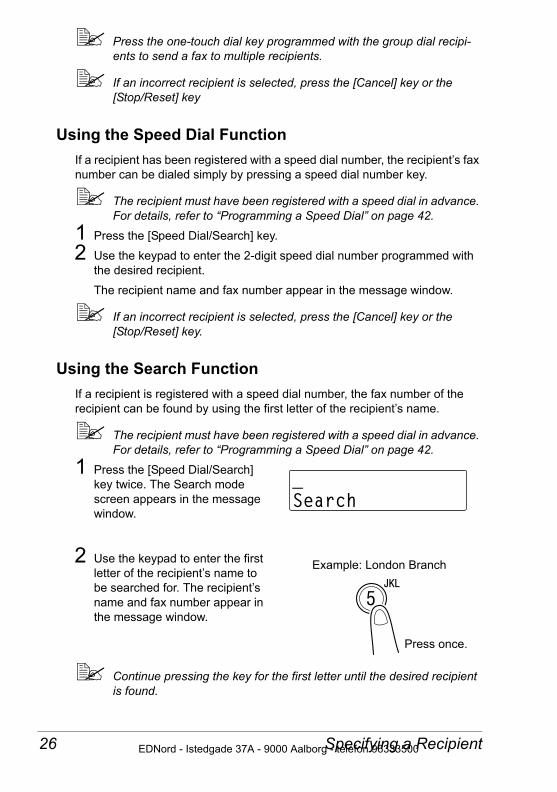
1 Press the [Speed Dial/Search] key twice. The Search mode screen appears in the message window.
2 Use the keypad to enter the first letter of the recipient’s name to be searched for. The recipient’s name and fax number appear in the message window.
Continue pressing the key for the first letter until the desired recipient is found.
Press once.
Example: London Branch
Specifying a Recipient26 EDNord - Istedgade 37A - 9000 Aalborg - telefon 96333500
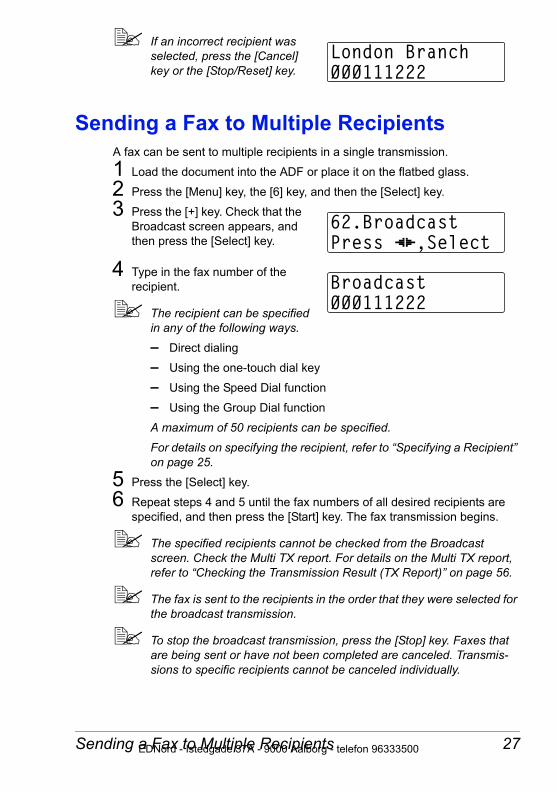
If an incorrect recipient was selected, press the [Cancel] key or the [Stop/Reset] key.
Sending a Fax to Multiple RecipientsA fax can be sent to multiple recipients in a single transmission.
1 Load the document into the ADF or place it on the flatbed glass.
2 Press the [Menu] key, the [6] key, and then the [Select] key.
3 Press the [+] key. Check that the Broadcast screen appears, and then press the [Select] key.
4 Type in the fax number of the recipient.
The recipient can be specified in any of the following ways.– Direct dialing
– Using the one-touch dial key
– Using the Speed Dial function
– Using the Group Dial function
A maximum of 50 recipients can be specified.For details on specifying the recipient, refer to “Specifying a Recipient” on page 25.
5 Press the [Select] key.
6 Repeat steps 4 and 5 until the fax numbers of all desired recipients are specified, and then press the [Start] key. The fax transmission begins.
The specified recipients cannot be checked from the Broadcast screen. Check the Multi TX report. For details on the Multi TX report, refer to “Checking the Transmission Result (TX Report)” on page 56.
The fax is sent to the recipients in the order that they were selected for the broadcast transmission.
To stop the broadcast transmission, press the [Stop] key. Faxes that are being sent or have not been completed are canceled. Transmis-sions to specific recipients cannot be canceled individually.
Sending a Fax to Multiple Recipients 27EDNord - Istedgade 37A - 9000 Aalborg - telefon 96333500
Sending Faxes after Using the TelephoneA fax can be sent after finishing a conversation using a telephone connected to this machine.
1 Load the document into the ADF or place it on the flatbed glass.
2 Pick up the telephone receiver.
3 Type in the fax number of the recipient.
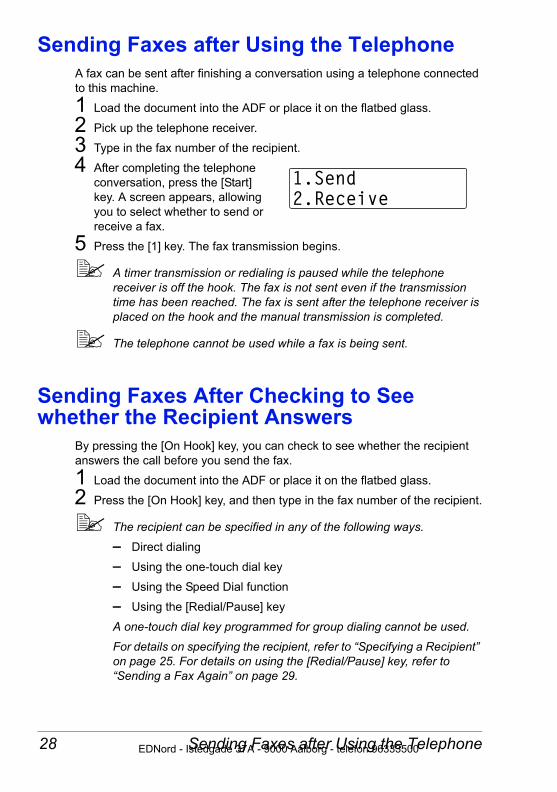
4 After completing the telephone conversation, press the [Start] key. A screen appears, allowing you to select whether to send or receive a fax.
5 Press the [1] key. The fax transmission begins.
A timer transmission or redialing is paused while the telephone receiver is off the hook. The fax is not sent even if the transmission time has been reached. The fax is sent after the telephone receiver is placed on the hook and the manual transmission is completed.
The telephone cannot be used while a fax is being sent.
Sending Faxes After Checking to See whether the Recipient Answers
By pressing the [On Hook] key, you can check to see whether the recipient answers the call before you send the fax.
1 Load the document into the ADF or place it on the flatbed glass.
2 Press the [On Hook] key, and then type in the fax number of the recipient.
The recipient can be specified in any of the following ways.– Direct dialing
– Using the one-touch dial key
– Using the Speed Dial function
– Using the [Redial/Pause] key
A one-touch dial key programmed for group dialing cannot be used.For details on specifying the recipient, refer to “Specifying a Recipient” on page 25. For details on using the [Redial/Pause] key, refer to “Sending a Fax Again” on page 29.
Sending Faxes after Using the Telephone28 EDNord - Istedgade 37A - 9000 Aalborg - telefon 96333500
If Pulse is selected as the telephone line type, press the [*] key to temporarily change the line type to Tone. After using the machine with the receiver on the hook, return the setting to Pulse.
3 Check to see whether the recipient answers the call, and then press the [Start] key. The fax transmission begins.
To cancel the on-hook, press the [On Hook] key again or press the [Stop/Reset] key. The Fax mode screen appears again.
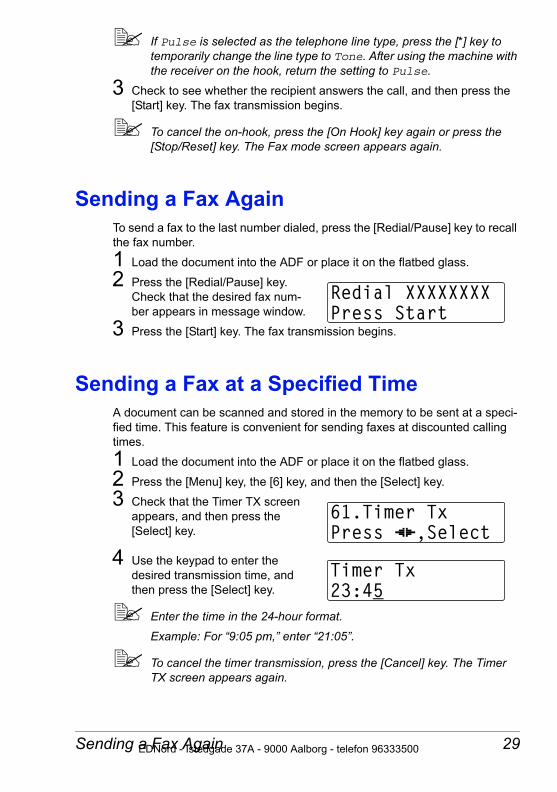
Sending a Fax AgainTo send a fax to the last number dialed, press the [Redial/Pause] key to recall the fax number.
1 Load the document into the ADF or place it on the flatbed glass.
2 Press the [Redial/Pause] key. Check that the desired fax num-ber appears in message window.
3 Press the [Start] key. The fax transmission begins.
Sending a Fax at a Specified TimeA document can be scanned and stored in the memory to be sent at a speci-fied time. This feature is convenient for sending faxes at discounted calling times.
1 Load the document into the ADF or place it on the flatbed glass.
2 Press the [Menu] key, the [6] key, and then the [Select] key.
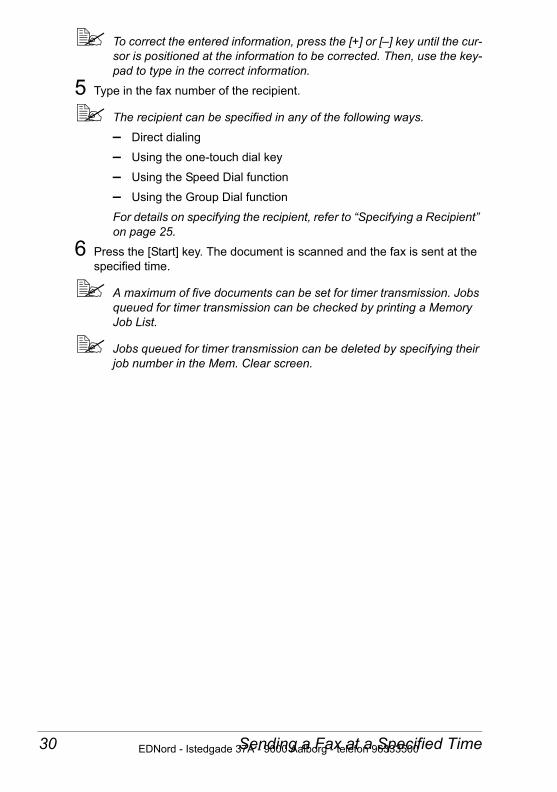
3 Check that the Timer TX screen appears, and then press the [Select] key.
4 Use the keypad to enter the desired transmission time, and then press the [Select] key.
Enter the time in the 24-hour format.Example: For “9:05 pm,” enter “21:05”.
To cancel the timer transmission, press the [Cancel] key. The Timer TX screen appears again.
Sending a Fax Again 29EDNord - Istedgade 37A - 9000 Aalborg - telefon 96333500
To correct the entered information, press the [+] or [–] key until the cur-sor is positioned at the information to be corrected. Then, use the key-pad to type in the correct information.
5 Type in the fax number of the recipient.
The recipient can be specified in any of the following ways.– Direct dialing
– Using the one-touch dial key
– Using the Speed Dial function
– Using the Group Dial function
For details on specifying the recipient, refer to “Specifying a Recipient” on page 25.
6 Press the [Start] key. The document is scanned and the fax is sent at the specified time.
A maximum of five documents can be set for timer transmission. Jobs queued for timer transmission can be checked by printing a Memory Job List.
Jobs queued for timer transmission can be deleted by specifying their job number in the Mem. Clear screen.
Sending a Fax at a Specified Time30 EDNord - Istedgade 37A - 9000 Aalborg - telefon 96333500
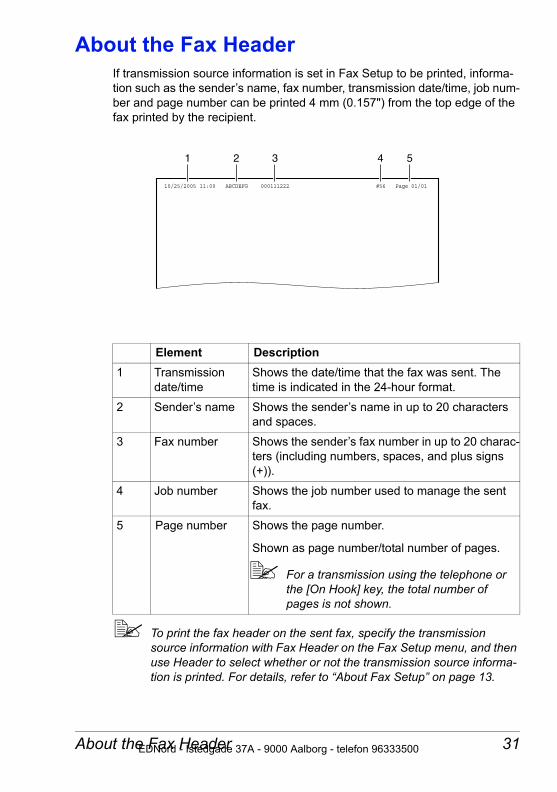
About the Fax HeaderIf transmission source information is set in Fax Setup to be printed, informa-tion such as the sender’s name, fax number, transmission date/time, job num-ber and page number can be printed 4 mm (0.157") from the top edge of the fax printed by the recipient.
To print the fax header on the sent fax, specify the transmission source information with Fax Header on the Fax Setup menu, and then use Header to select whether or not the transmission source informa-tion is printed. For details, refer to “About Fax Setup” on page 13.
Element Description1 Transmission
date/timeShows the date/time that the fax was sent. The time is indicated in the 24-hour format.
2 Sender’s name Shows the sender’s name in up to 20 characters and spaces.
3 Fax number Shows the sender’s fax number in up to 20 charac-ters (including numbers, spaces, and plus signs (+)).
4 Job number Shows the job number used to manage the sent fax.
5 Page number Shows the page number.
Shown as page number/total number of pages.
For a transmission using the telephone or the [On Hook] key, the total number of pages is not shown.
1 2 3 4 5
About the Fax Header 31EDNord - Istedgade 37A - 9000 Aalborg - telefon 96333500

EDNord - Istedgade 37A - 9000 Aalborg - telefon 96333500
Receiving Faxes
EDNord - Istedgade 37A - 9000 Aalborg - telefon 96333500
Receiving Faxes AutomaticallyIf the No. of Rings parameter on the Fax Setup menu is set to automatically receive faxes, no special operation is needed in order to receive the fax. Reception begins after the specified number of rings.
If the No. of Rings parameter on the Fax Setup menu is set “Manual”, the fax is not received automatically. For details, refer to “About Fax Setup” on page 13.
Receiving Faxes After Using the TelephoneConnect a telephone to this machine to receive a fax after finishing a tele-phone conversation.
1 When the telephone rings, pick up the telephone receiver.
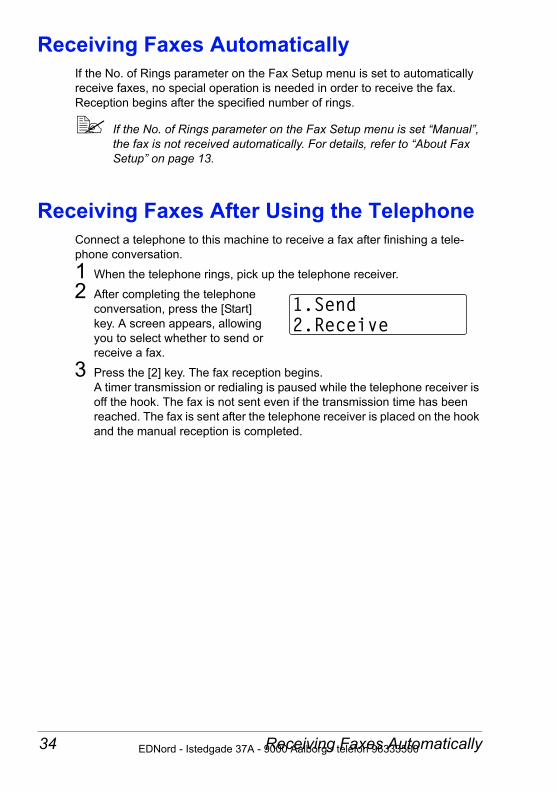
2 After completing the telephone conversation, press the [Start] key. A screen appears, allowing you to select whether to send or receive a fax.
3 Press the [2] key. The fax reception begins.A timer transmission or redialing is paused while the telephone receiver is off the hook. The fax is not sent even if the transmission time has been reached. The fax is sent after the telephone receiver is placed on the hook and the manual reception is completed.
Receiving Faxes Automatically34 EDNord - Istedgade 37A - 9000 Aalborg - telefon 96333500
Receiving Faxes With the Receiver On the Hook
A fax can be received after the call is checked without a telephone con-nected.
1 When the telephone rings, press the [On Hook] key.
To receive a fax with voice guidance (for example, with a fax informa-tion service), press the [On Hook] key, and then type in the sender’s fax number.
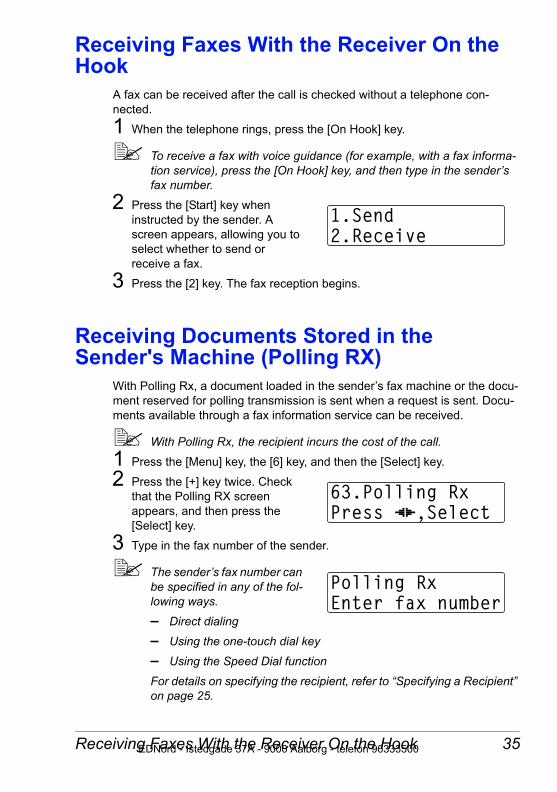
2 Press the [Start] key when instructed by the sender. A screen appears, allowing you to select whether to send or receive a fax.
3 Press the [2] key. The fax reception begins.
Receiving Documents Stored in the Sender's Machine (Polling RX)
With Polling Rx, a document loaded in the sender’s fax machine or the docu-ment reserved for polling transmission is sent when a request is sent. Docu-ments available through a fax information service can be received.
With Polling Rx, the recipient incurs the cost of the call.1 Press the [Menu] key, the [6] key, and then the [Select] key.
2 Press the [+] key twice. Check that the Polling RX screen appears, and then press the [Select] key.
3 Type in the fax number of the sender.
The sender’s fax number can be specified in any of the fol-lowing ways.– Direct dialing– Using the one-touch dial key– Using the Speed Dial functionFor details on specifying the recipient, refer to “Specifying a Recipient” on page 25.
Receiving Faxes With the Receiver On the Hook 35EDNord - Istedgade 37A - 9000 Aalborg - telefon 96333500
4 Press the [Start] key. Dialing begins, and then the fax is received.
Printing Received Faxes
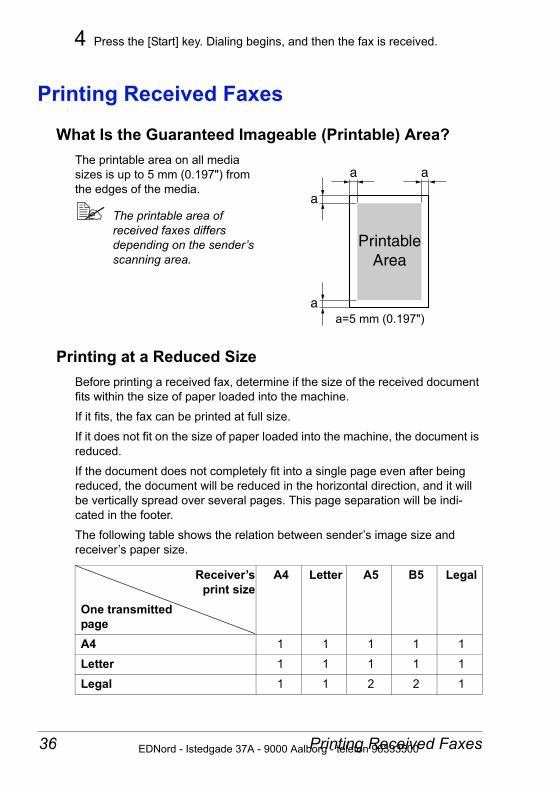
What Is the Guaranteed Imageable (Printable) Area?The printable area on all media sizes is up to 5 mm (0.197") from the edges of the media.
The printable area of received faxes differs depending on the sender’s scanning area.
Printing at a Reduced SizeBefore printing a received fax, determine if the size of the received document fits within the size of paper loaded into the machine.
If it fits, the fax can be printed at full size.
If it does not fit on the size of paper loaded into the machine, the document is reduced.
If the document does not completely fit into a single page even after being reduced, the document will be reduced in the horizontal direction, and it will be vertically spread over several pages. This page separation will be indi-cated in the footer.
The following table shows the relation between sender’s image size and receiver’s paper size.
Receiver’sprint size
One transmitted page
A4 Letter A5 B5 Legal
A4 1 1 1 1 1
Letter 1 1 1 1 1
Legal 1 1 2 2 1
PrintableArea
a
a
a a
a=5 mm (0.197")
Printing Received Faxes36 EDNord - Istedgade 37A - 9000 Aalborg - telefon 96333500
Adding the Sender’s Information When Printing Faxes
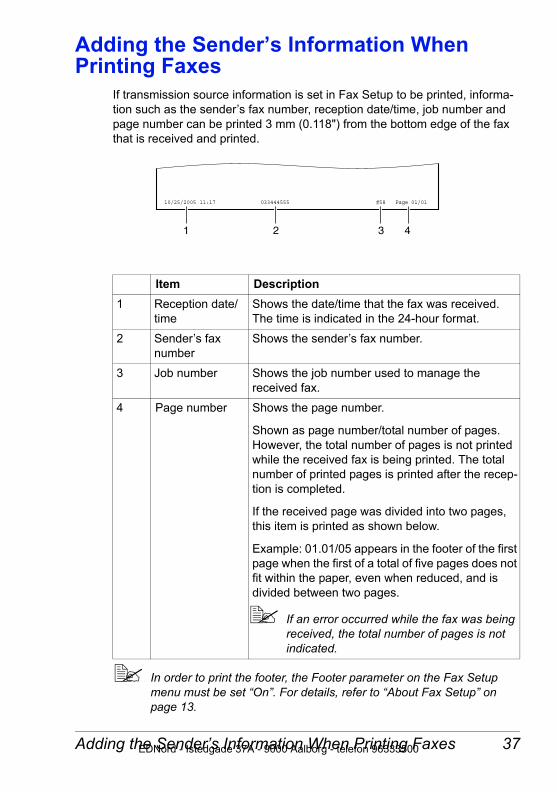
If transmission source information is set in Fax Setup to be printed, informa-tion such as the sender’s fax number, reception date/time, job number and page number can be printed 3 mm (0.118") from the bottom edge of the fax that is received and printed.
In order to print the footer, the Footer parameter on the Fax Setup menu must be set “On”. For details, refer to “About Fax Setup” on page 13.
Item Description1 Reception date/
timeShows the date/time that the fax was received. The time is indicated in the 24-hour format.
2 Sender’s fax number
Shows the sender’s fax number.
3 Job number Shows the job number used to manage the received fax.
4 Page number Shows the page number.
Shown as page number/total number of pages. However, the total number of pages is not printed while the received fax is being printed. The total number of printed pages is printed after the recep-tion is completed.
If the received page was divided into two pages, this item is printed as shown below.
Example: 01.01/05 appears in the footer of the first page when the first of a total of five pages does not fit within the paper, even when reduced, and is divided between two pages.
If an error occurred while the fax was being received, the total number of pages is not indicated.
1 2 43
Adding the Sender’s Information When Printing Faxes 37EDNord - Istedgade 37A - 9000 Aalborg - telefon 96333500
If the Media tray is not loaded with paper when a fax is received, but loaded with paper after reception, the footer may not be printed even if the Footer parameter on the Fax Setup menu is set to “On”. Therefore, be sure to always load sufficient paper into the Media tray.
Adding the Sender’s Information When Printing Faxes38 EDNord - Istedgade 37A - 9000 Aalborg - telefon 96333500

Programming thePhone Book
EDNord - Istedgade 37A - 9000 Aalborg - telefon 96333500
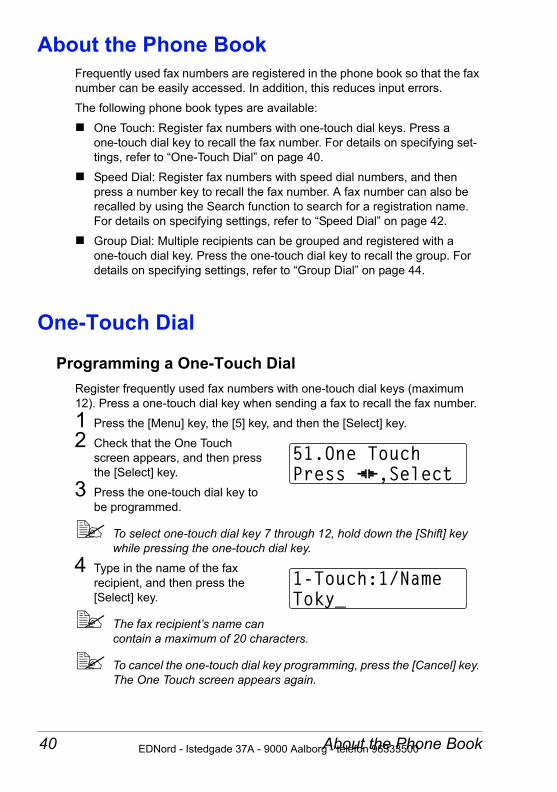
About the Phone BookFrequently used fax numbers are registered in the phone book so that the fax number can be easily accessed. In addition, this reduces input errors.
The following phone book types are available:
One Touch: Register fax numbers with one-touch dial keys. Press a one-touch dial key to recall the fax number. For details on specifying set-tings, refer to “One-Touch Dial” on page 40.
Speed Dial: Register fax numbers with speed dial numbers, and then press a number key to recall the fax number. A fax number can also be recalled by using the Search function to search for a registration name. For details on specifying settings, refer to “Speed Dial” on page 42.
Group Dial: Multiple recipients can be grouped and registered with a one-touch dial key. Press the one-touch dial key to recall the group. For details on specifying settings, refer to “Group Dial” on page 44.
One-Touch Dial
Programming a One-Touch DialRegister frequently used fax numbers with one-touch dial keys (maximum 12). Press a one-touch dial key when sending a fax to recall the fax number.
1 Press the [Menu] key, the [5] key, and then the [Select] key.
2 Check that the One Touch screen appears, and then press the [Select] key.
3 Press the one-touch dial key to be programmed.
To select one-touch dial key 7 through 12, hold down the [Shift] key while pressing the one-touch dial key.
4 Type in the name of the fax recipient, and then press the [Select] key.
The fax recipient’s name can contain a maximum of 20 characters.
To cancel the one-touch dial key programming, press the [Cancel] key. The One Touch screen appears again.
About the Phone Book40 EDNord - Istedgade 37A - 9000 Aalborg - telefon 96333500
To correct the entered information, press the [+] or [–] key until the cur-sor is positioned at the information to be corrected. Then, press the [–] key to delete a character.
A one-touch dial key can be programmed without specifying a fax recipient’s name. If this one-touch dial key is pressed when sending a fax, the fax number is displayed.
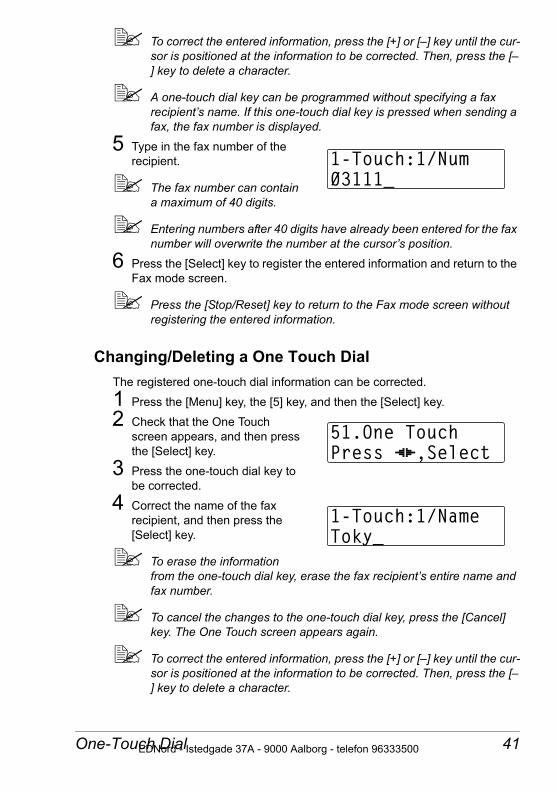
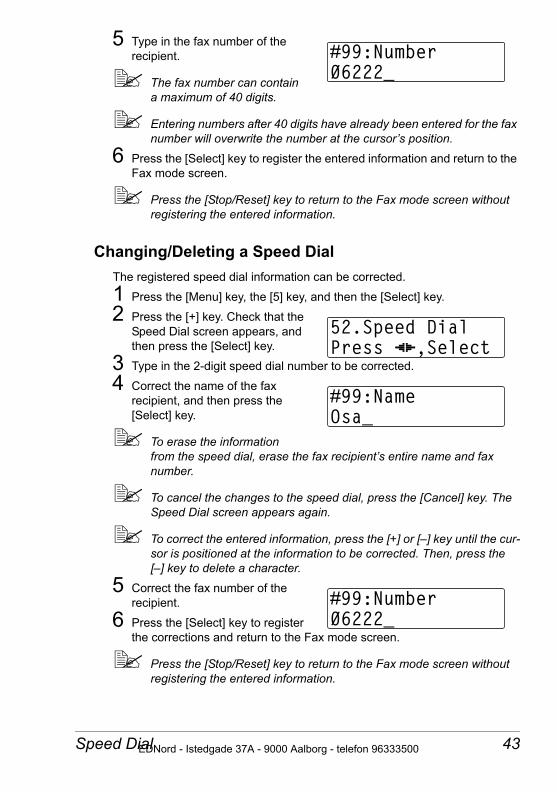
5 Type in the fax number of the recipient.
The fax number can contain a maximum of 40 digits.
Entering numbers after 40 digits have already been entered for the fax number will overwrite the number at the cursor’s position.
6 Press the [Select] key to register the entered information and return to the Fax mode screen.
Press the [Stop/Reset] key to return to the Fax mode screen without registering the entered information.
Changing/Deleting a One Touch DialThe registered one-touch dial information can be corrected.
1 Press the [Menu] key, the [5] key, and then the [Select] key.
2 Check that the One Touch screen appears, and then press the [Select] key.
3 Press the one-touch dial key to be corrected.
4 Correct the name of the fax recipient, and then press the [Select] key.
To erase the information from the one-touch dial key, erase the fax recipient’s entire name and fax number.
To cancel the changes to the one-touch dial key, press the [Cancel] key. The One Touch screen appears again.
To correct the entered information, press the [+] or [–] key until the cur-sor is positioned at the information to be corrected. Then, press the [–] key to delete a character.
One-Touch Dial 41EDNord - Istedgade 37A - 9000 Aalborg - telefon 96333500
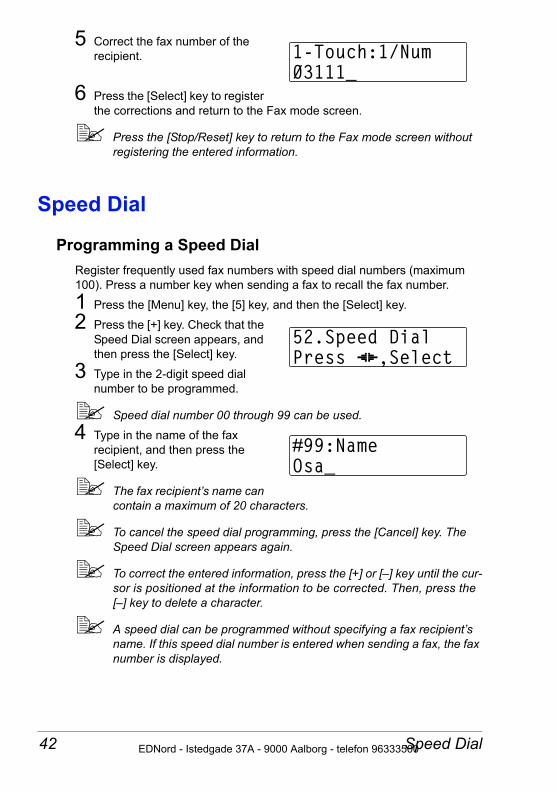
5 Correct the fax number of the recipient.
6 Press the [Select] key to register the corrections and return to the Fax mode screen.
Press the [Stop/Reset] key to return to the Fax mode screen without registering the entered information.
Speed Dial
Programming a Speed DialRegister frequently used fax numbers with speed dial numbers (maximum 100). Press a number key when sending a fax to recall the fax number.
1 Press the [Menu] key, the [5] key, and then the [Select] key.
2 Press the [+] key. Check that the Speed Dial screen appears, and then press the [Select] key.
3 Type in the 2-digit speed dial number to be programmed.
Speed dial number 00 through 99 can be used.4 Type in the name of the fax
recipient, and then press the [Select] key.
The fax recipient’s name can contain a maximum of 20 characters.
To cancel the speed dial programming, press the [Cancel] key. The Speed Dial screen appears again.
To correct the entered information, press the [+] or [–] key until the cur-sor is positioned at the information to be corrected. Then, press the [–] key to delete a character.
A speed dial can be programmed without specifying a fax recipient’s name. If this speed dial number is entered when sending a fax, the fax number is displayed.
Speed Dial42 EDNord - Istedgade 37A - 9000 Aalborg - telefon 96333500
5 Type in the fax number of the recipient.
The fax number can contain a maximum of 40 digits.
Entering numbers after 40 digits have already been entered for the fax number will overwrite the number at the cursor’s position.
6 Press the [Select] key to register the entered information and return to the Fax mode screen.
Press the [Stop/Reset] key to return to the Fax mode screen without registering the entered information.
Changing/Deleting a Speed DialThe registered speed dial information can be corrected.
1 Press the [Menu] key, the [5] key, and then the [Select] key.
2 Press the [+] key. Check that the Speed Dial screen appears, and then press the [Select] key.
3 Type in the 2-digit speed dial number to be corrected.
4 Correct the name of the fax recipient, and then press the [Select] key.
To erase the information from the speed dial, erase the fax recipient’s entire name and fax number.
To cancel the changes to the speed dial, press the [Cancel] key. The Speed Dial screen appears again.
To correct the entered information, press the [+] or [–] key until the cur-sor is positioned at the information to be corrected. Then, press the[–] key to delete a character.
5 Correct the fax number of the recipient.
6 Press the [Select] key to register the corrections and return to the Fax mode screen.
Press the [Stop/Reset] key to return to the Fax mode screen without registering the entered information.
Speed Dial 43EDNord - Istedgade 37A - 9000 Aalborg - telefon 96333500
Group Dial
Programming a Group DialRegister multiple frequently used fax numbers (maximum 50) together with one-touch dial keys (maximum 6). Press a one-touch dial key when sending a fax to recall the fax numbers.
Follow the procedure described below to create a new group dial or add a recipient to an existing group dial.
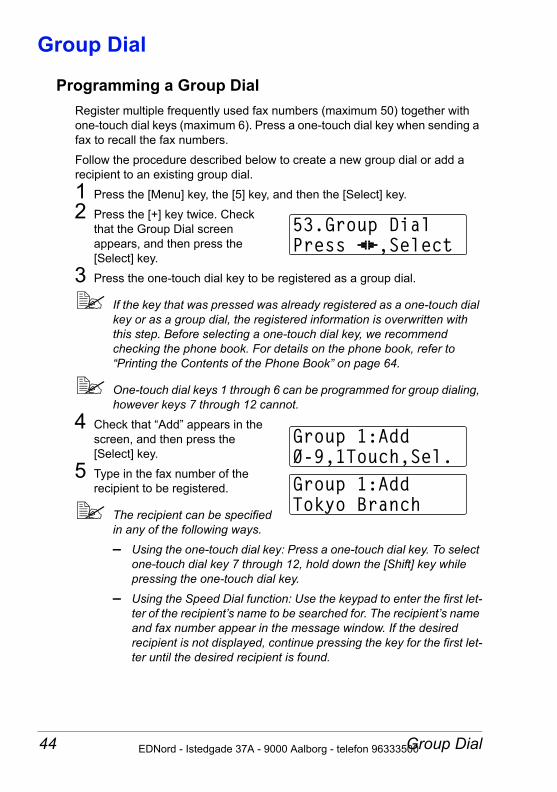
1 Press the [Menu] key, the [5] key, and then the [Select] key.
2 Press the [+] key twice. Check that the Group Dial screen appears, and then press the [Select] key.
3 Press the one-touch dial key to be registered as a group dial.
If the key that was pressed was already registered as a one-touch dial key or as a group dial, the registered information is overwritten with this step. Before selecting a one-touch dial key, we recommend checking the phone book. For details on the phone book, refer to “Printing the Contents of the Phone Book” on page 64.
One-touch dial keys 1 through 6 can be programmed for group dialing, however keys 7 through 12 cannot.
4 Check that “Add” appears in the screen, and then press the [Select] key.
5 Type in the fax number of the recipient to be registered.
The recipient can be specified in any of the following ways. – Using the one-touch dial key: Press a one-touch dial key. To select
one-touch dial key 7 through 12, hold down the [Shift] key while pressing the one-touch dial key.
– Using the Speed Dial function: Use the keypad to enter the first let-ter of the recipient’s name to be searched for. The recipient’s name and fax number appear in the message window. If the desired recipient is not displayed, continue pressing the key for the first let-ter until the desired recipient is found.
Group Dial44 EDNord - Istedgade 37A - 9000 Aalborg - telefon 96333500
In order to program a group dial, the fax recipient’s number must be registered as a one-touch dial key or a speed dial. For details on pro-gramming one-touch dial keys, refer to “One-Touch Dial” on page 40. For details on programming speed dial numbers, refer to “Speed Dial” on page 42.
To cancel the group dial programming, press the [Cancel] key. The previous screen appears again. Press the [Stop/Reset] key to return to the Fax mode screen.
6 Press the [Select] key to register the entered information. To register another recipient, repeat steps 5 and 6.
7 To finish the registration, press the [Cancel] or [Stop/Reset] key to return to the Fax mode screen.
To check the group dial information, press the one-touch dial key in the Fax mode screen where the group dial is registered. Press the [+] and [–] keys to check the information.In addition, the fax phone book can be printed to be checked. For details on the fax phone book, refer to “Printing the Contents of the Phone Book” on page 64.
The most recently registered group dial number is added at the end. The order of the group dials cannot be changed.
The fax is sent to the recipients in the order that they were selected for the group dial.
A group dial cannot be registered with a different group dial.
Deleting a Recipient From a Group DialOne or more recipients can be deleted from an existing group dial.
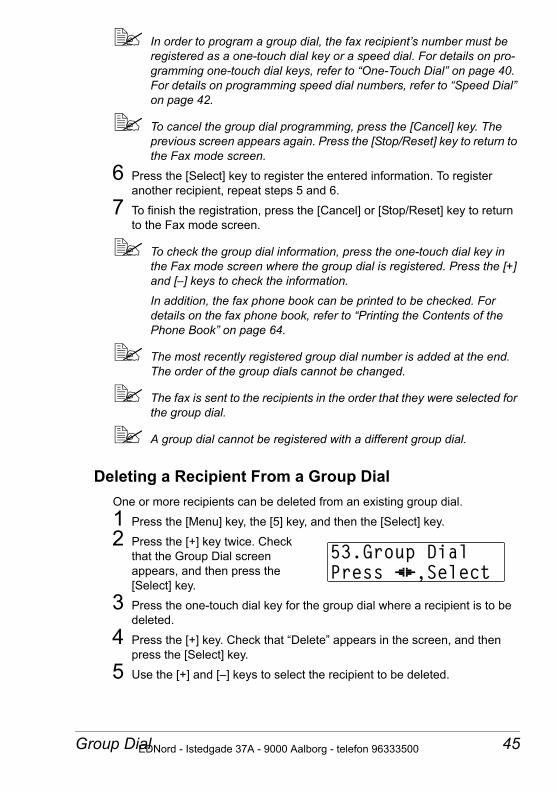
1 Press the [Menu] key, the [5] key, and then the [Select] key.
2 Press the [+] key twice. Check that the Group Dial screen appears, and then press the [Select] key.
3 Press the one-touch dial key for the group dial where a recipient is to be deleted.
4 Press the [+] key. Check that “Delete” appears in the screen, and then press the [Select] key.
5 Use the [+] and [–] keys to select the recipient to be deleted.
Group Dial 45EDNord - Istedgade 37A - 9000 Aalborg - telefon 96333500
To quit deleting a recipient, press the [Cancel] key. The previous screen appears again. Press the [Stop/Reset] key to return to the Fax mode screen.
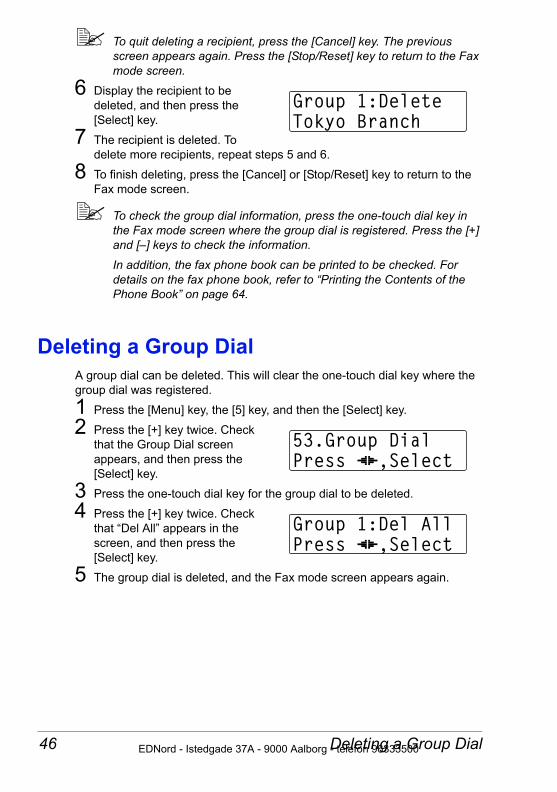
6 Display the recipient to be deleted, and then press the [Select] key.
7 The recipient is deleted. To delete more recipients, repeat steps 5 and 6.
8 To finish deleting, press the [Cancel] or [Stop/Reset] key to return to the Fax mode screen.
To check the group dial information, press the one-touch dial key in the Fax mode screen where the group dial is registered. Press the [+] and [–] keys to check the information.In addition, the fax phone book can be printed to be checked. For details on the fax phone book, refer to “Printing the Contents of the Phone Book” on page 64.
Deleting a Group DialA group dial can be deleted. This will clear the one-touch dial key where the group dial was registered.
1 Press the [Menu] key, the [5] key, and then the [Select] key.
2 Press the [+] key twice. Check that the Group Dial screen appears, and then press the [Select] key.
3 Press the one-touch dial key for the group dial to be deleted.
4 Press the [+] key twice. Check that “Del All” appears in the screen, and then press the [Select] key.
5 The group dial is deleted, and the Fax mode screen appears again.
Deleting a Group Dial46 EDNord - Istedgade 37A - 9000 Aalborg - telefon 96333500
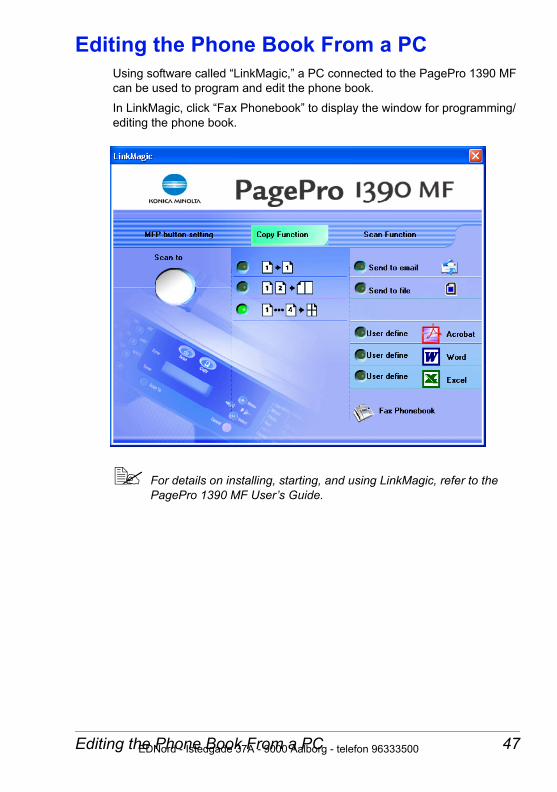
Editing the Phone Book From a PCUsing software called “LinkMagic,” a PC connected to the PagePro 1390 MF can be used to program and edit the phone book.
In LinkMagic, click “Fax Phonebook” to display the window for programming/editing the phone book.
For details on installing, starting, and using LinkMagic, refer to the PagePro 1390 MF User’s Guide.
Editing the Phone Book From a PC 47EDNord - Istedgade 37A - 9000 Aalborg - telefon 96333500
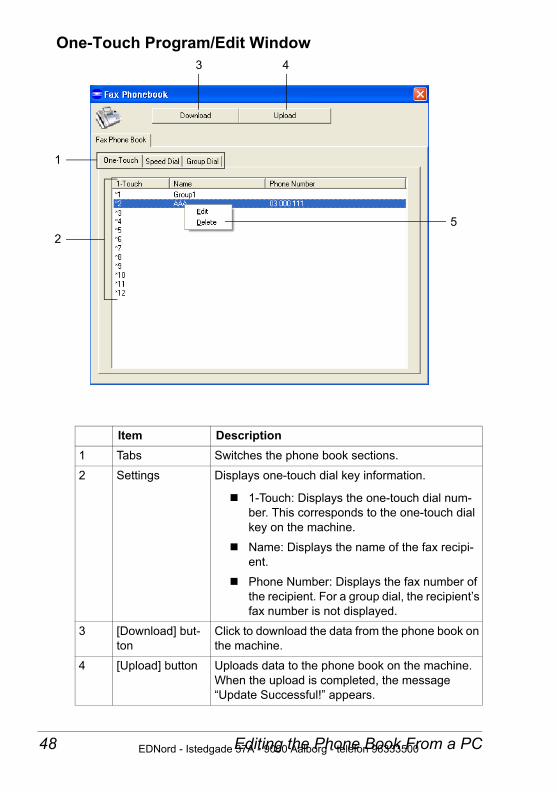
One-Touch Program/Edit Window
Item Description1 Tabs Switches the phone book sections.
2 Settings Displays one-touch dial key information.
1-Touch: Displays the one-touch dial num-ber. This corresponds to the one-touch dial key on the machine.
Name: Displays the name of the fax recipi-ent.
Phone Number: Displays the fax number of the recipient. For a group dial, the recipient’s fax number is not displayed.
3 [Download] but-ton
Click to download the data from the phone book on the machine.
4 [Upload] button Uploads data to the phone book on the machine. When the upload is completed, the message “Update Successful!” appears.
1
2
3 4
5
Editing the Phone Book From a PC48 EDNord - Istedgade 37A - 9000 Aalborg - telefon 96333500
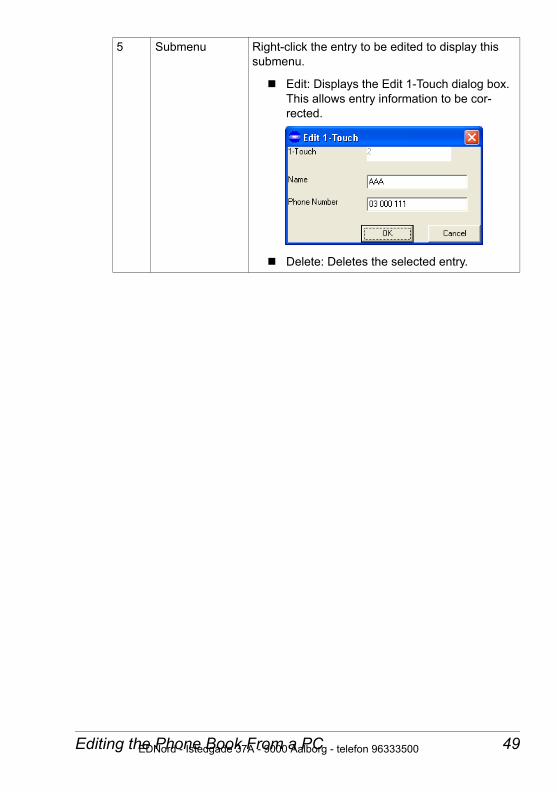
5 Submenu Right-click the entry to be edited to display this submenu.
Edit: Displays the Edit 1-Touch dialog box. This allows entry information to be cor-rected.
Delete: Deletes the selected entry.
Editing the Phone Book From a PC 49EDNord - Istedgade 37A - 9000 Aalborg - telefon 96333500
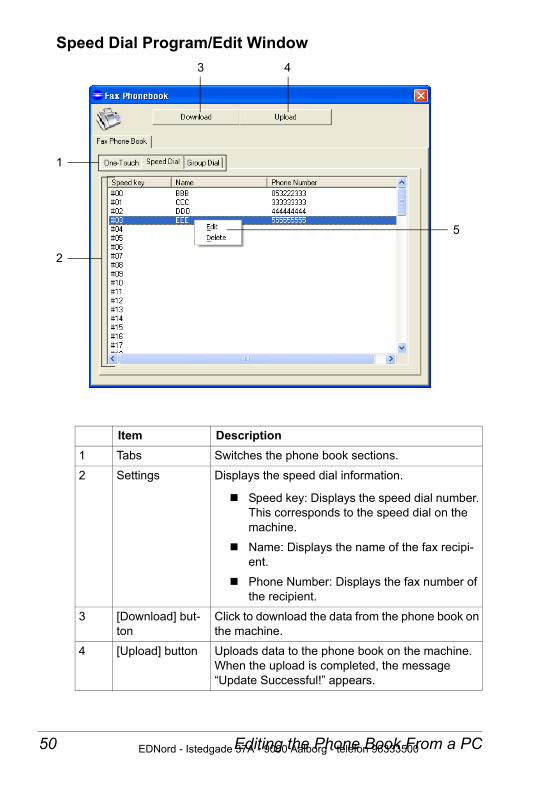
Speed Dial Program/Edit Window
Item Description1 Tabs Switches the phone book sections.
2 Settings Displays the speed dial information.
Speed key: Displays the speed dial number. This corresponds to the speed dial on the machine.
Name: Displays the name of the fax recipi-ent.
Phone Number: Displays the fax number of the recipient.
3 [Download] but-ton
Click to download the data from the phone book on the machine.
4 [Upload] button Uploads data to the phone book on the machine. When the upload is completed, the message “Update Successful!” appears.
1
2
3 4
5
Editing the Phone Book From a PC50 EDNord - Istedgade 37A - 9000 Aalborg - telefon 96333500
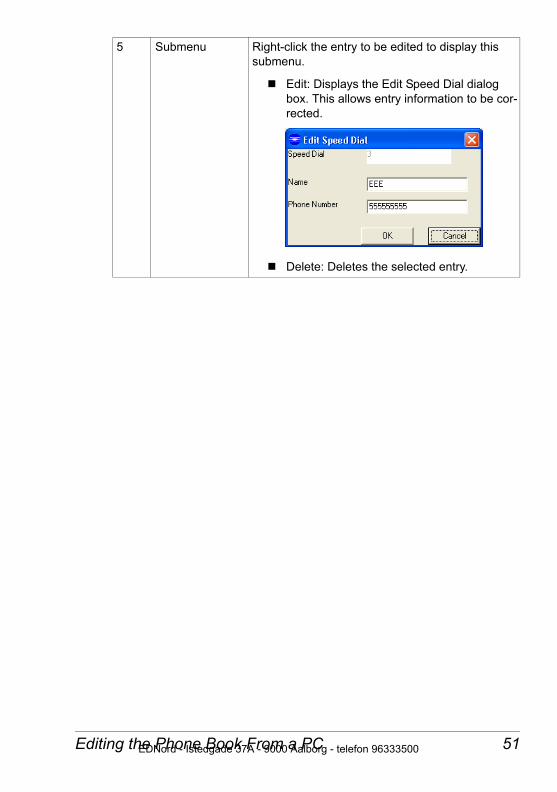
5 Submenu Right-click the entry to be edited to display this submenu.
Edit: Displays the Edit Speed Dial dialog box. This allows entry information to be cor-rected.
Delete: Deletes the selected entry.
Editing the Phone Book From a PC 51EDNord - Istedgade 37A - 9000 Aalborg - telefon 96333500
Group Dial Program/Edit Window
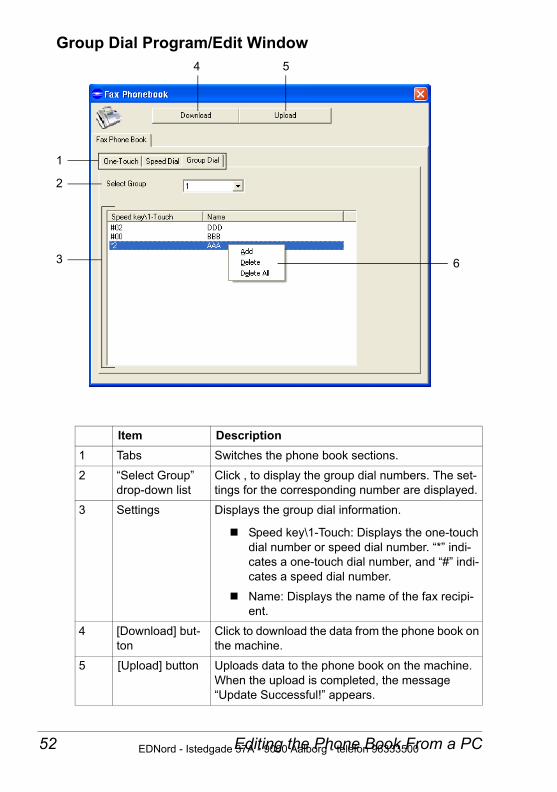
Item Description1 Tabs Switches the phone book sections.
2 “Select Group” drop-down list
Click , to display the group dial numbers. The set-tings for the corresponding number are displayed.
3 Settings Displays the group dial information.
Speed key\1-Touch: Displays the one-touch dial number or speed dial number. “*” indi-cates a one-touch dial number, and “#” indi-cates a speed dial number.
Name: Displays the name of the fax recipi-ent.
4 [Download] but-ton
Click to download the data from the phone book on the machine.
5 [Upload] button Uploads data to the phone book on the machine. When the upload is completed, the message “Update Successful!” appears.
1
3
4 5
6
2
Editing the Phone Book From a PC52 EDNord - Istedgade 37A - 9000 Aalborg - telefon 96333500
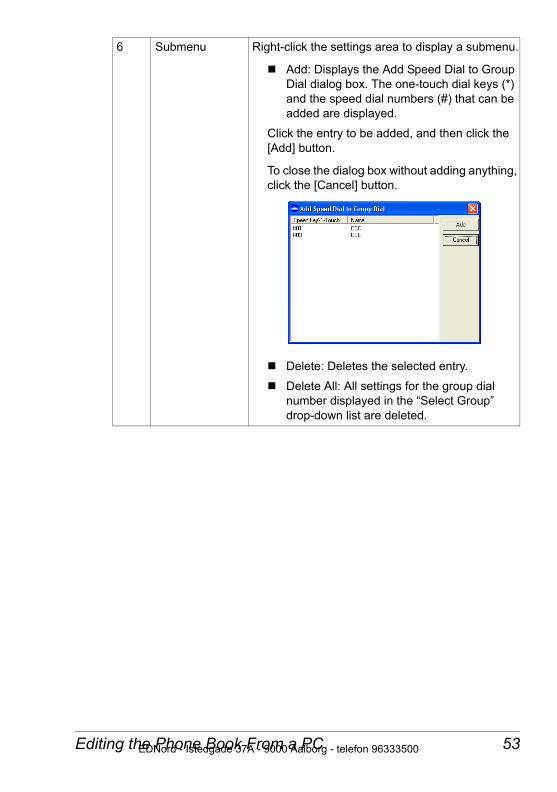
6 Submenu Right-click the settings area to display a submenu.
Add: Displays the Add Speed Dial to Group Dial dialog box. The one-touch dial keys (*) and the speed dial numbers (#) that can be added are displayed.
Click the entry to be added, and then click the [Add] button.
To close the dialog box without adding anything, click the [Cancel] button.
Delete: Deletes the selected entry.
Delete All: All settings for the group dial number displayed in the “Select Group” drop-down list are deleted.
Editing the Phone Book From a PC 53EDNord - Istedgade 37A - 9000 Aalborg - telefon 96333500
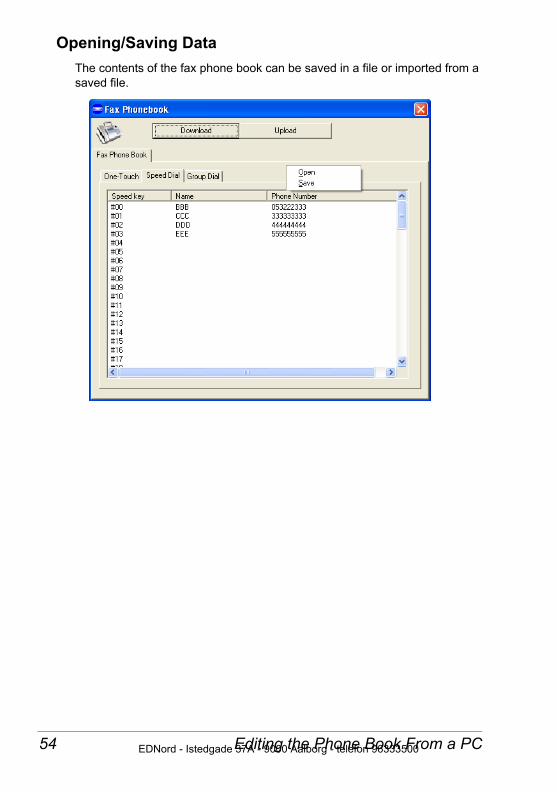
Opening/Saving DataThe contents of the fax phone book can be saved in a file or imported from a saved file.
Editing the Phone Book From a PC54 EDNord - Istedgade 37A - 9000 Aalborg - telefon 96333500
Printing Reportsand Lists
EDNord - Istedgade 37A - 9000 Aalborg - telefon 96333500
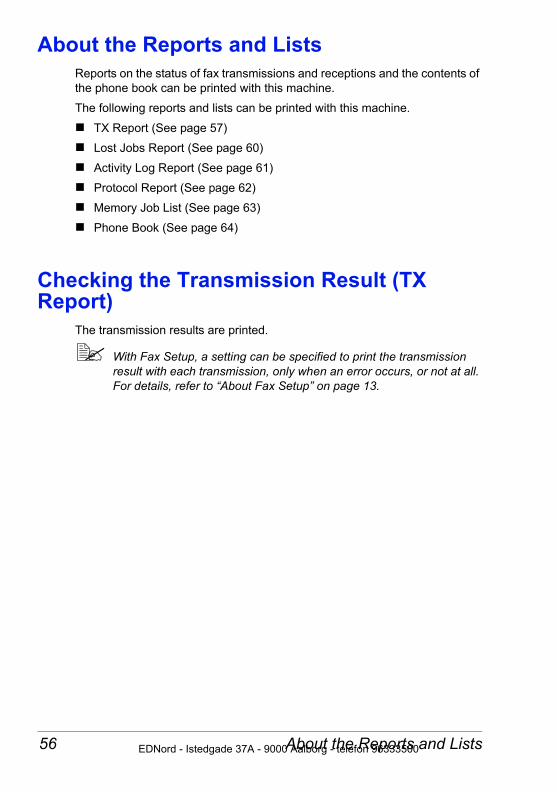
About the Reports and ListsReports on the status of fax transmissions and receptions and the contents of the phone book can be printed with this machine.
The following reports and lists can be printed with this machine.
TX Report (See page 57)
Lost Jobs Report (See page 60)
Activity Log Report (See page 61)
Protocol Report (See page 62)
Memory Job List (See page 63)
Phone Book (See page 64)
Checking the Transmission Result (TX Report)
The transmission results are printed.
With Fax Setup, a setting can be specified to print the transmission result with each transmission, only when an error occurs, or not at all. For details, refer to “About Fax Setup” on page 13.
About the Reports and Lists56 EDNord - Istedgade 37A - 9000 Aalborg - telefon 96333500
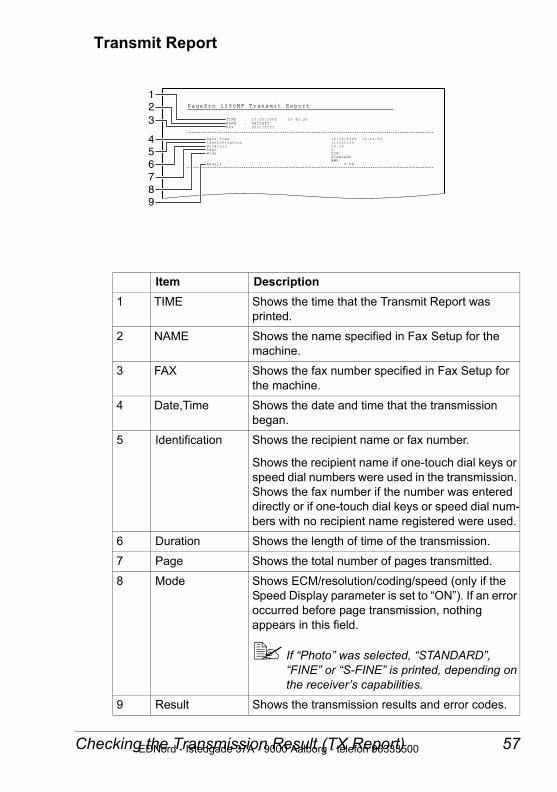
Transmit Report
Item Description1 TIME Shows the time that the Transmit Report was
printed.
2 NAME Shows the name specified in Fax Setup for the machine.
3 FAX Shows the fax number specified in Fax Setup for the machine.
4 Date,Time Shows the date and time that the transmission began.
5 Identification Shows the recipient name or fax number.
Shows the recipient name if one-touch dial keys or speed dial numbers were used in the transmission. Shows the fax number if the number was entered directly or if one-touch dial keys or speed dial num-bers with no recipient name registered were used.
6 Duration Shows the length of time of the transmission.
7 Page Shows the total number of pages transmitted.
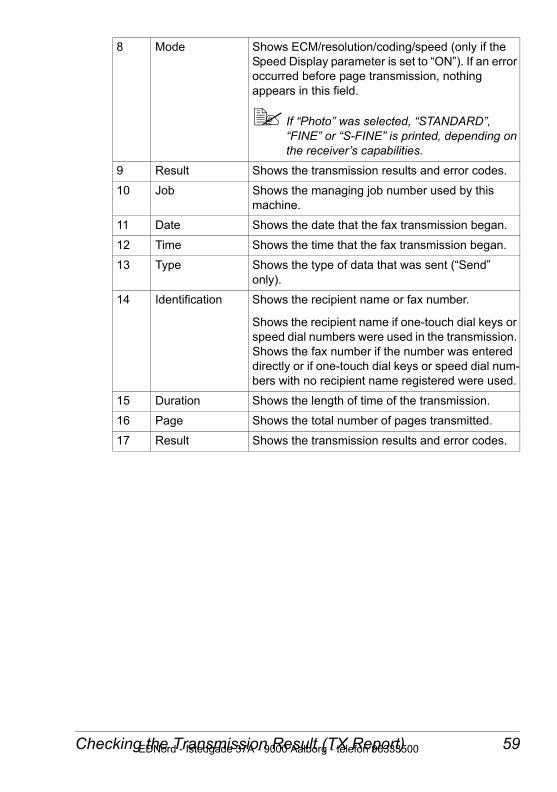
8 Mode Shows ECM/resolution/coding/speed (only if the Speed Display parameter is set to “ON”). If an error occurred before page transmission, nothing appears in this field.
If “Photo” was selected, “STANDARD”, “FINE” or “S-FINE” is printed, depending on the receiver’s capabilities.
9 Result Shows the transmission results and error codes.
123
456789
Checking the Transmission Result (TX Report) 57EDNord - Istedgade 37A - 9000 Aalborg - telefon 96333500
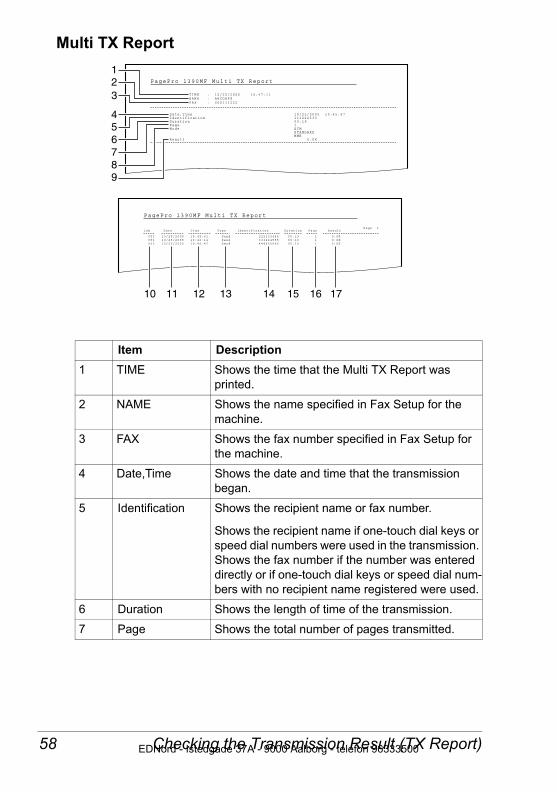
Multi TX Report
Item Description1 TIME Shows the time that the Multi TX Report was
printed.
2 NAME Shows the name specified in Fax Setup for the machine.
3 FAX Shows the fax number specified in Fax Setup for the machine.
4 Date,Time Shows the date and time that the transmission began.
5 Identification Shows the recipient name or fax number.
Shows the recipient name if one-touch dial keys or speed dial numbers were used in the transmission. Shows the fax number if the number was entered directly or if one-touch dial keys or speed dial num-bers with no recipient name registered were used.
6 Duration Shows the length of time of the transmission.
7 Page Shows the total number of pages transmitted.
123
456789
10 11 12 13 14 15 16 17
Checking the Transmission Result (TX Report)58 EDNord - Istedgade 37A - 9000 Aalborg - telefon 96333500
8 Mode Shows ECM/resolution/coding/speed (only if the Speed Display parameter is set to “ON”). If an error occurred before page transmission, nothing appears in this field.
If “Photo” was selected, “STANDARD”, “FINE” or “S-FINE” is printed, depending on the receiver’s capabilities.
9 Result Shows the transmission results and error codes.
10 Job Shows the managing job number used by this machine.
11 Date Shows the date that the fax transmission began.
12 Time Shows the time that the fax transmission began.
13 Type Shows the type of data that was sent (“Send” only).
14 Identification Shows the recipient name or fax number.
Shows the recipient name if one-touch dial keys or speed dial numbers were used in the transmission. Shows the fax number if the number was entered directly or if one-touch dial keys or speed dial num-bers with no recipient name registered were used.
15 Duration Shows the length of time of the transmission.
16 Page Shows the total number of pages transmitted.
17 Result Shows the transmission results and error codes.
Checking the Transmission Result (TX Report) 59EDNord - Istedgade 37A - 9000 Aalborg - telefon 96333500
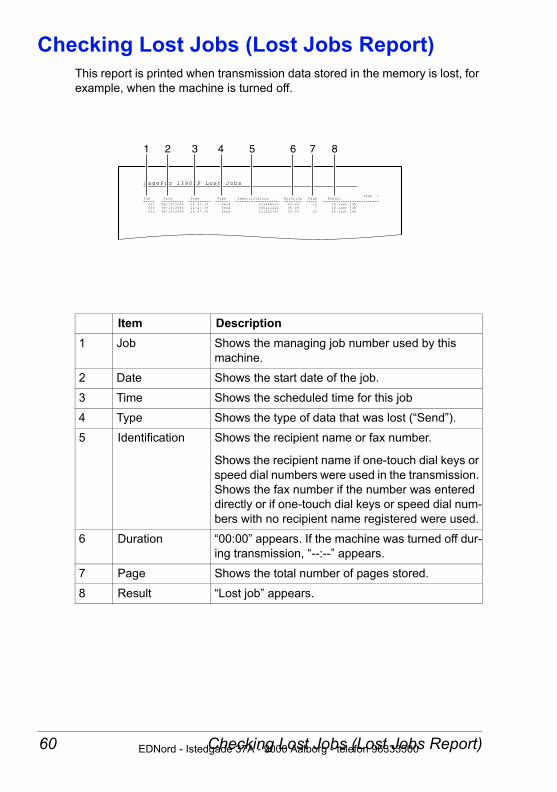
Checking Lost Jobs (Lost Jobs Report)This report is printed when transmission data stored in the memory is lost, for example, when the machine is turned off.
Item Description1 Job Shows the managing job number used by this
machine.
2 Date Shows the start date of the job.
3 Time Shows the scheduled time for this job
4 Type Shows the type of data that was lost (“Send”).
5 Identification Shows the recipient name or fax number.
Shows the recipient name if one-touch dial keys or speed dial numbers were used in the transmission. Shows the fax number if the number was entered directly or if one-touch dial keys or speed dial num-bers with no recipient name registered were used.
6 Duration “00:00” appears. If the machine was turned off dur-ing transmission, “--:--” appears.
7 Page Shows the total number of pages stored.
8 Result “Lost job” appears.
1 2 3 4 5 6 7 8
Checking Lost Jobs (Lost Jobs Report)60 EDNord - Istedgade 37A - 9000 Aalborg - telefon 96333500
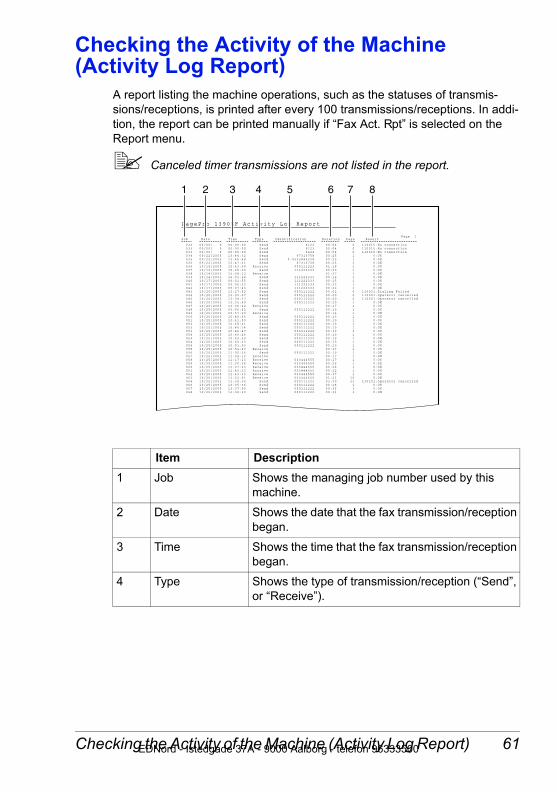
Checking the Activity of the Machine (Activity Log Report)
A report listing the machine operations, such as the statuses of transmis-sions/receptions, is printed after every 100 transmissions/receptions. In addi-tion, the report can be printed manually if “Fax Act. Rpt” is selected on the Report menu.
Canceled timer transmissions are not listed in the report.
Item Description1 Job Shows the managing job number used by this
machine.
2 Date Shows the date that the fax transmission/reception began.
3 Time Shows the time that the fax transmission/reception began.
4 Type Shows the type of transmission/reception (“Send”, or “Receive”).
1 2 3 4 5 6 7 8
Checking the Activity of the Machine (Activity Log Report) 61EDNord - Istedgade 37A - 9000 Aalborg - telefon 96333500
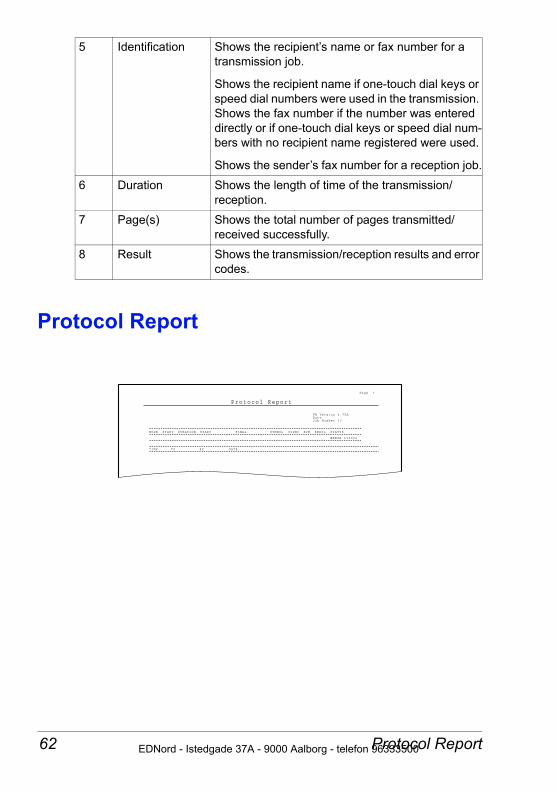
Protocol Report
5 Identification Shows the recipient’s name or fax number for a transmission job.
Shows the recipient name if one-touch dial keys or speed dial numbers were used in the transmission. Shows the fax number if the number was entered directly or if one-touch dial keys or speed dial num-bers with no recipient name registered were used.
Shows the sender’s fax number for a reception job.
6 Duration Shows the length of time of the transmission/reception.
7 Page(s) Shows the total number of pages transmitted/received successfully.
8 Result Shows the transmission/reception results and error codes.
Protocol Report62 EDNord - Istedgade 37A - 9000 Aalborg - telefon 96333500
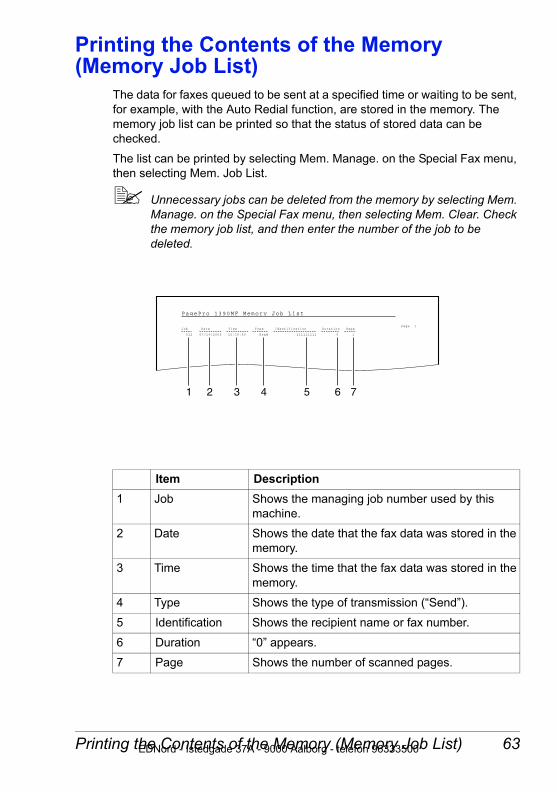
Printing the Contents of the Memory (Memory Job List)
The data for faxes queued to be sent at a specified time or waiting to be sent, for example, with the Auto Redial function, are stored in the memory. The memory job list can be printed so that the status of stored data can be checked.
The list can be printed by selecting Mem. Manage. on the Special Fax menu, then selecting Mem. Job List.
Unnecessary jobs can be deleted from the memory by selecting Mem. Manage. on the Special Fax menu, then selecting Mem. Clear. Check the memory job list, and then enter the number of the job to be deleted.
Item Description1 Job Shows the managing job number used by this
machine.
2 Date Shows the date that the fax data was stored in the memory.
3 Time Shows the time that the fax data was stored in the memory.
4 Type Shows the type of transmission (“Send”).
5 Identification Shows the recipient name or fax number.
6 Duration “0” appears.
7 Page Shows the number of scanned pages.
Job
012
P a gePro 1390MF Memory Job List
Date
07/19/2005
Time
15:30:00
Duration
0
Page 1Type
Send
Page
1
Identification
111111111
1 2 3 4 5 6 7
Printing the Contents of the Memory (Memory Job List) 63EDNord - Istedgade 37A - 9000 Aalborg - telefon 96333500
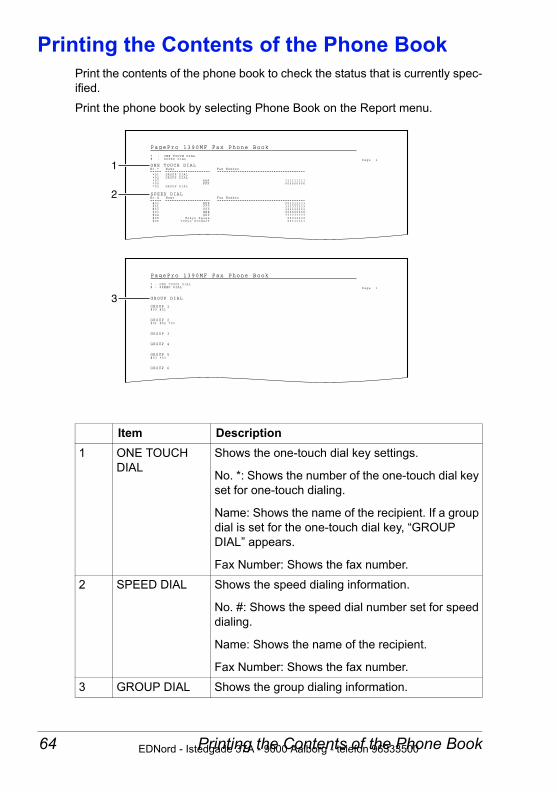
Printing the Contents of the Phone BookPrint the contents of the phone book to check the status that is currently spec-ified.
Print the phone book by selecting Phone Book on the Report menu.
Item Description1 ONE TOUCH
DIALShows the one-touch dial key settings.
No. *: Shows the number of the one-touch dial key set for one-touch dialing.
Name: Shows the name of the recipient. If a group dial is set for the one-touch dial key, “GROUP DIAL” appears.
Fax Number: Shows the fax number.
2 SPEED DIAL Shows the speed dialing information.
No. #: Shows the speed dial number set for speed dialing.
Name: Shows the name of the recipient.
Fax Number: Shows the fax number.
3 GROUP DIAL Shows the group dialing information.
3
1
2
Printing the Contents of the Phone Book64 EDNord - Istedgade 37A - 9000 Aalborg - telefon 96333500
Troubleshooting
EDNord - Istedgade 37A - 9000 Aalborg - telefon 96333500
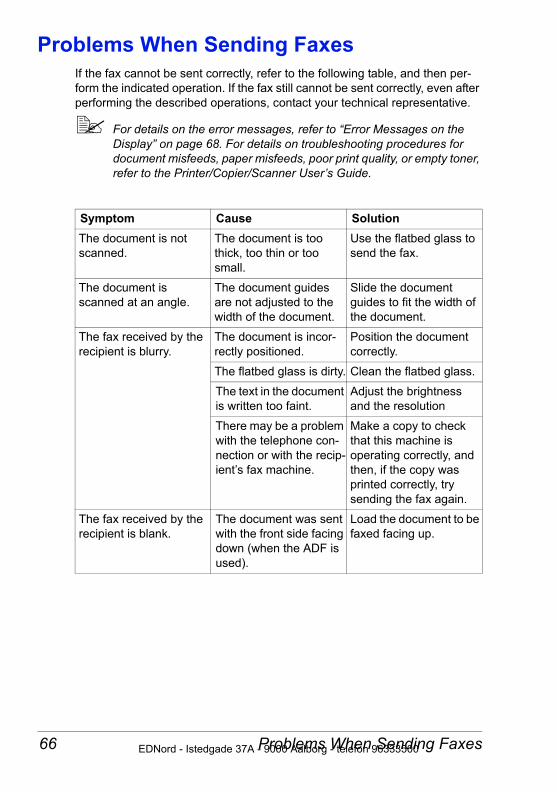
Problems When Sending FaxesIf the fax cannot be sent correctly, refer to the following table, and then per-form the indicated operation. If the fax still cannot be sent correctly, even after performing the described operations, contact your technical representative.
For details on the error messages, refer to “Error Messages on the Display” on page 68. For details on troubleshooting procedures for document misfeeds, paper misfeeds, poor print quality, or empty toner, refer to the Printer/Copier/Scanner User’s Guide.
Symptom Cause SolutionThe document is not scanned.
The document is too thick, too thin or too small.
Use the flatbed glass to send the fax.
The document is scanned at an angle.
The document guides are not adjusted to the width of the document.
Slide the document guides to fit the width of the document.
The fax received by the recipient is blurry.
The document is incor-rectly positioned.
Position the document correctly.
The flatbed glass is dirty. Clean the flatbed glass.
The text in the document is written too faint.
Adjust the brightness and the resolution
There may be a problem with the telephone con-nection or with the recip-ient’s fax machine.
Make a copy to check that this machine is operating correctly, and then, if the copy was printed correctly, try sending the fax again.
The fax received by the recipient is blank.
The document was sent with the front side facing down (when the ADF is used).
Load the document to be faxed facing up.
Problems When Sending Faxes66 EDNord - Istedgade 37A - 9000 Aalborg - telefon 96333500
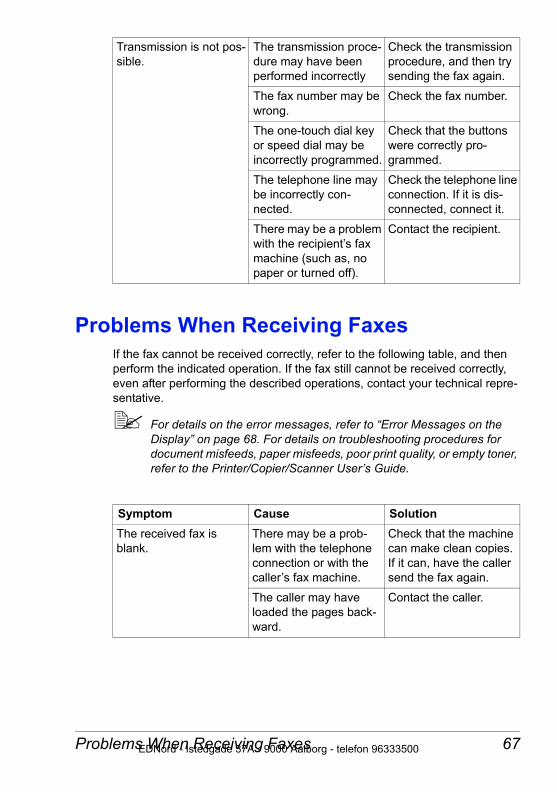
Problems When Receiving FaxesIf the fax cannot be received correctly, refer to the following table, and then perform the indicated operation. If the fax still cannot be received correctly, even after performing the described operations, contact your technical repre-sentative.
For details on the error messages, refer to “Error Messages on the Display” on page 68. For details on troubleshooting procedures for document misfeeds, paper misfeeds, poor print quality, or empty toner, refer to the Printer/Copier/Scanner User’s Guide.
Transmission is not pos-sible.
The transmission proce-dure may have been performed incorrectly
Check the transmission procedure, and then try sending the fax again.
The fax number may be wrong.
Check the fax number.
The one-touch dial key or speed dial may be incorrectly programmed.
Check that the buttons were correctly pro-grammed.
The telephone line may be incorrectly con-nected.
Check the telephone line connection. If it is dis-connected, connect it.
There may be a problem with the recipient’s fax machine (such as, no paper or turned off).
Contact the recipient.
Symptom Cause SolutionThe received fax is blank.
There may be a prob-lem with the telephone connection or with the caller’s fax machine.
Check that the machine can make clean copies. If it can, have the caller send the fax again.
The caller may have loaded the pages back-ward.
Contact the caller.
Problems When Receiving Faxes 67EDNord - Istedgade 37A - 9000 Aalborg - telefon 96333500
Error Messages on the Display
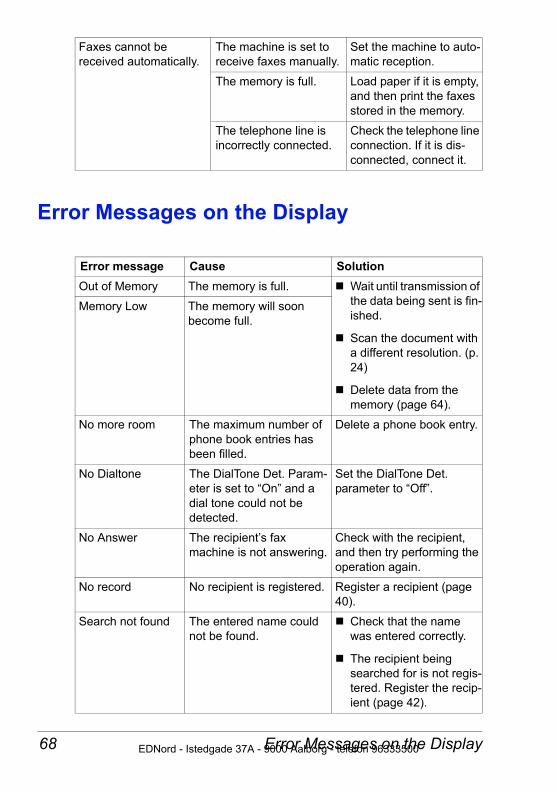
Faxes cannot be received automatically.
The machine is set to receive faxes manually.
Set the machine to auto-matic reception.
The memory is full. Load paper if it is empty, and then print the faxes stored in the memory.
The telephone line is incorrectly connected.
Check the telephone line connection. If it is dis-connected, connect it.
Error message Cause SolutionOut of Memory The memory is full. Wait until transmission of
the data being sent is fin-ished.
Scan the document with a different resolution. (p. 24)
Delete data from the memory (page 64).
Memory Low The memory will soon become full.
No more room The maximum number of phone book entries has been filled.
Delete a phone book entry.
No Dialtone The DialTone Det. Param-eter is set to “On” and a dial tone could not be detected.
Set the DialTone Det. parameter to “Off”.
No Answer The recipient’s fax machine is not answering.
Check with the recipient, and then try performing the operation again.
No record No recipient is registered. Register a recipient (page 40).
Search not found The entered name could not be found.
Check that the name was entered correctly.
The recipient being searched for is not regis-tered. Register the recip-ient (page 42).
Error Messages on the Display68 EDNord - Istedgade 37A - 9000 Aalborg - telefon 96333500
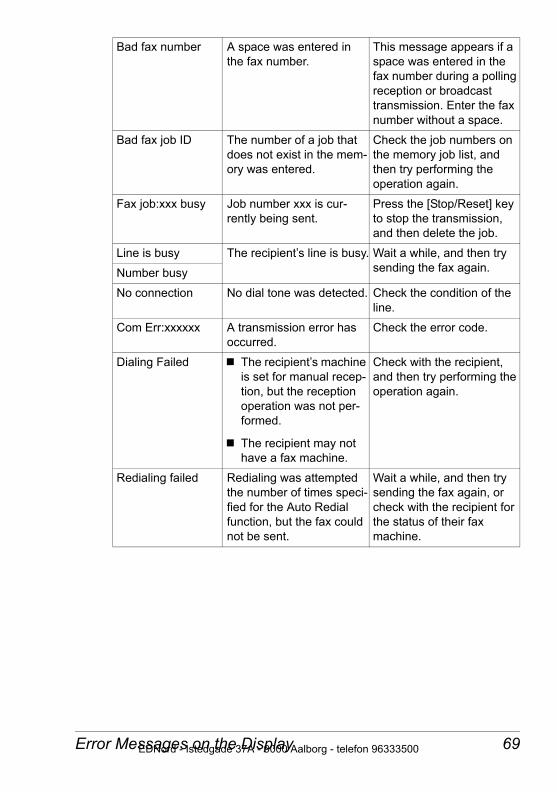
Bad fax number A space was entered in the fax number.
This message appears if a space was entered in the fax number during a polling reception or broadcast transmission. Enter the fax number without a space.
Bad fax job ID The number of a job that does not exist in the mem-ory was entered.
Check the job numbers on the memory job list, and then try performing the operation again.
Fax job:xxx busy Job number xxx is cur-rently being sent.
Press the [Stop/Reset] key to stop the transmission, and then delete the job.
Line is busy The recipient’s line is busy. Wait a while, and then try sending the fax again.Number busy
No connection No dial tone was detected. Check the condition of the line.
Com Err:xxxxxx A transmission error has occurred.
Check the error code.
Dialing Failed The recipient’s machine is set for manual recep-tion, but the reception operation was not per-formed.
The recipient may not have a fax machine.
Check with the recipient, and then try performing the operation again.
Redialing failed Redialing was attempted the number of times speci-fied for the Auto Redial function, but the fax could not be sent.
Wait a while, and then try sending the fax again, or check with the recipient for the status of their fax machine.
Error Messages on the Display 69EDNord - Istedgade 37A - 9000 Aalborg - telefon 96333500
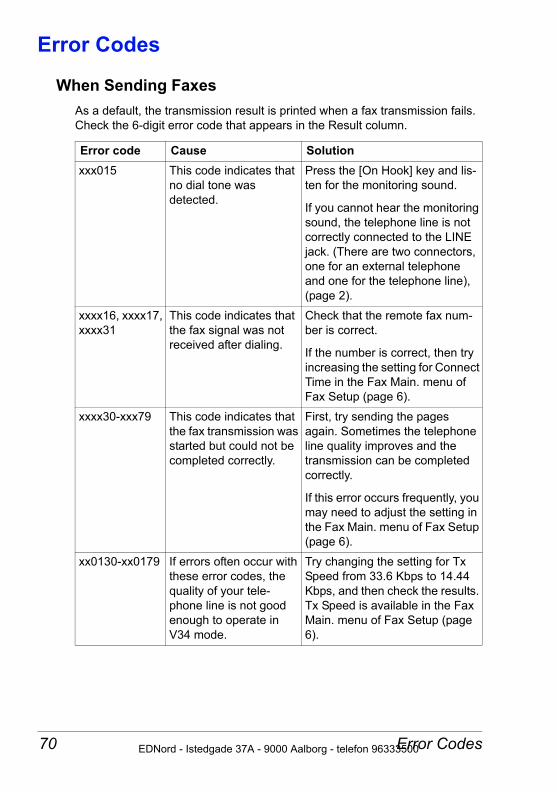
Error Codes
When Sending FaxesAs a default, the transmission result is printed when a fax transmission fails. Check the 6-digit error code that appears in the Result column.
Error code Cause Solutionxxx015 This code indicates that
no dial tone was detected.
Press the [On Hook] key and lis-ten for the monitoring sound.
If you cannot hear the monitoring sound, the telephone line is not correctly connected to the LINE jack. (There are two connectors, one for an external telephone and one for the telephone line), (page 2).
xxxx16, xxxx17, xxxx31
This code indicates that the fax signal was not received after dialing.
Check that the remote fax num-ber is correct.
If the number is correct, then try increasing the setting for Connect Time in the Fax Main. menu of Fax Setup (page 6).
xxxx30-xxx79 This code indicates that the fax transmission was started but could not be completed correctly.
First, try sending the pages again. Sometimes the telephone line quality improves and the transmission can be completed correctly.
If this error occurs frequently, you may need to adjust the setting in the Fax Main. menu of Fax Setup (page 6).
xx0130-xx0179 If errors often occur with these error codes, the quality of your tele-phone line is not good enough to operate in V34 mode.
Try changing the setting for Tx Speed from 33.6 Kbps to 14.44 Kbps, and then check the results. Tx Speed is available in the Fax Main. menu of Fax Setup (page 6).
Error Codes70 EDNord - Istedgade 37A - 9000 Aalborg - telefon 96333500
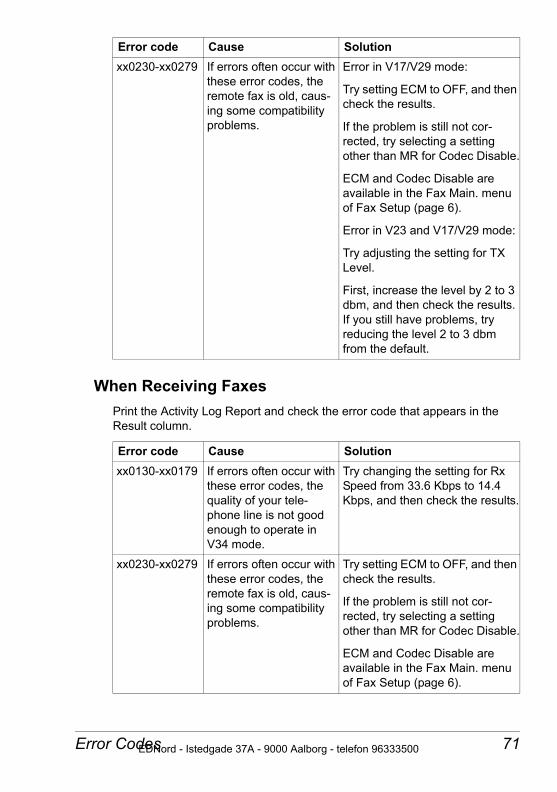
When Receiving FaxesPrint the Activity Log Report and check the error code that appears in the Result column.
xx0230-xx0279 If errors often occur with these error codes, the remote fax is old, caus-ing some compatibility problems.
Error in V17/V29 mode:
Try setting ECM to OFF, and then check the results.
If the problem is still not cor-rected, try selecting a setting other than MR for Codec Disable.
ECM and Codec Disable are available in the Fax Main. menu of Fax Setup (page 6).
Error in V23 and V17/V29 mode:
Try adjusting the setting for TX Level.
First, increase the level by 2 to 3 dbm, and then check the results. If you still have problems, try reducing the level 2 to 3 dbm from the default.
Error code Cause Solutionxx0130-xx0179 If errors often occur with
these error codes, the quality of your tele-phone line is not good enough to operate in V34 mode.
Try changing the setting for Rx Speed from 33.6 Kbps to 14.4 Kbps, and then check the results.
xx0230-xx0279 If errors often occur with these error codes, the remote fax is old, caus-ing some compatibility problems.
Try setting ECM to OFF, and then check the results.
If the problem is still not cor-rected, try selecting a setting other than MR for Codec Disable.
ECM and Codec Disable are available in the Fax Main. menu of Fax Setup (page 6).
Error code Cause Solution
Error Codes 71EDNord - Istedgade 37A - 9000 Aalborg - telefon 96333500

EDNord - Istedgade 37A - 9000 Aalborg - telefon 96333500

AAppendix
EDNord - Istedgade 37A - 9000 Aalborg - telefon 96333500
Technical Specifications74
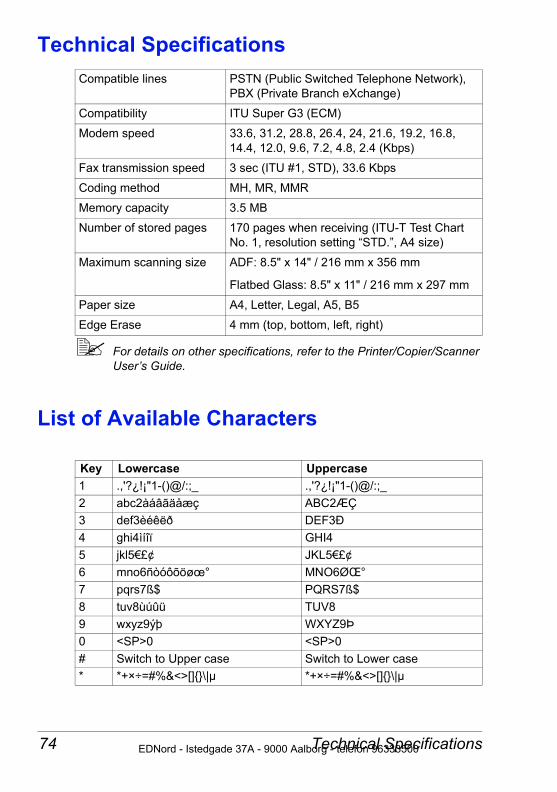
Technical Specifications
For details on other specifications, refer to the Printer/Copier/Scanner User’s Guide.
List of Available Characters
Compatible lines PSTN (Public Switched Telephone Network), PBX (Private Branch eXchange)
Compatibility ITU Super G3 (ECM)
Modem speed 33.6, 31.2, 28.8, 26.4, 24, 21.6, 19.2, 16.8, 14.4, 12.0, 9.6, 7.2, 4.8, 2.4 (Kbps)
Fax transmission speed 3 sec (ITU #1, STD), 33.6 Kbps
Coding method MH, MR, MMR
Memory capacity 3.5 MB
Number of stored pages 170 pages when receiving (ITU-T Test Chart No. 1, resolution setting “STD.”, A4 size)
Maximum scanning size ADF: 8.5" x 14" / 216 mm x 356 mm
Flatbed Glass: 8.5" x 11" / 216 mm x 297 mm
Paper size A4, Letter, Legal, A5, B5
Edge Erase 4 mm (top, bottom, left, right)
Key Lowercase Uppercase1 .,'?¿!¡"1-()@/:;_ .,'?¿!¡"1-()@/:;_2 abc2àáâãäåæç ABC2ÆÇ3 def3èéêëð DEF3Ð4 ghi4ìíîï GHI45 jkl5€£¢ JKL5€£¢6 mno6ñòóôõöøœ° MNO6ØŒ°7 pqrs7ß$ PQRS7ß$8 tuv8ùúûü TUV89 wxyz9ýþ WXYZ9Þ0 <SP>0 <SP>0# Switch to Upper case Switch to Lower case* *+×÷=#%&<>[]{}\|µ *+×÷=#%&<>[]{}\|µ
EDNord - Istedgade 37A - 9000 Aalborg - telefon 96333500

Index
AActivity log report 61ADF 2
Loading original documents 21
BBrightness 24Broadcast 27
CCharacters 74Control panel 2, 4
DDirect dialing 25
Index EDNord - Istedgade 37A - 9000 A
EError messages 68
FFax mode
Entering fax mode 12Fax mode screen 12
Fax setupAbout fax setup 13Setting up 18
Flatbed glassPlacing a original document 22
Footer 37
GGroup dial
Deleting 46Deleting a recipient 45LinkMagic 52
75alborg - telefon 96333500
Programming 44, 52
HHeader 31
IImageable area 36
KKeypad 4
LLinkMagic 47
Group dial 52Importing/exporting data 54One-touch dial 48Speed dial 50
Lists 56Lost jobs report 60
MMemory job list 63Menu overview 6Multi TX report 58Multiple recipients 27
OOn hook
Receiving faxes 35Sending faxes 28
One-touch dialChanging 41Deleting 41LinkMagic 48Programming 40, 48
One-touch dial key 4Specifying a recipient 25
76 EDNord - Istedgade 37A -
PParts 2Phone Book 40
Editing from a PC 47Group dial 44One-touch dial 40Printing 64Speed dial 42
Polling RX 35Protocol report 62
RReceiving faxes
After using telephone 34Automatic reception 34On hook 35Polling RX 35
Redial 29Reduced size 36Reports 56
Activity log report 61Lost jobs 60Multi TX report 58Protocol report 62Transmission result 56, 58Transmit report 56TX report 56
Resolution 24
SSearch function 26Sender’s information 37Sending faxes
After using telephone 28Basic fax operation 20On hook 28Redial 29Timer TX 29
Specifications 74Specifying a recipient
Broadcast 27Direct dialing 25Multiple recipients 27One-touch dial key 25
Index 9000 Aalborg - telefon 96333500
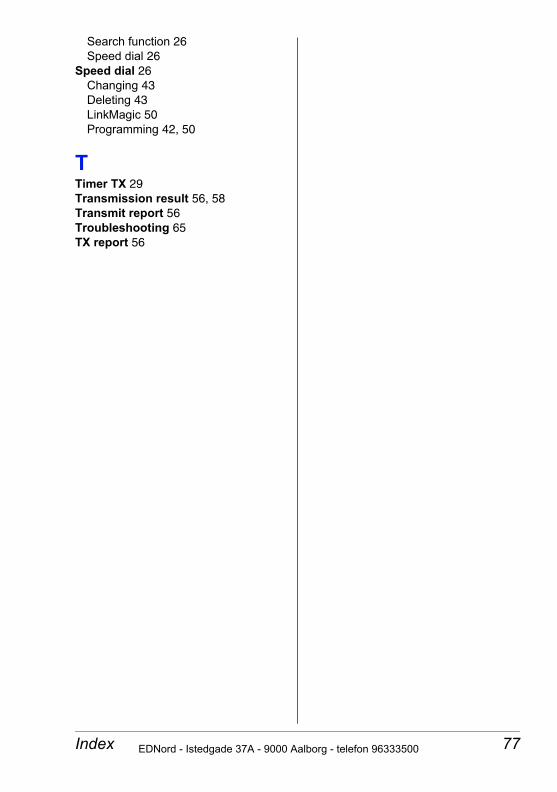
Search function 26Speed dial 26
Speed dial 26Changing 43Deleting 43LinkMagic 50Programming 42, 50
TTimer TX 29Transmission result 56, 58Transmit report 56Troubleshooting 65TX report 56
Index EDNord - Istedgade 37A - 9000 A
77alborg - telefon 96333500
EDNord - Istedgade 37A -
9000 Aalborg - telefon 96333500