Embed Size (px)
Citation preview
Ozone User Guide
OZONE
The Digital Zone System

Oz
2 About this Guide
• • • •••
• • • •••
ABOUT THIS GUIDE
This User Guide is a reference for the Ozone filter made for Adobe Photoshop,
Photoshop Elements and Apple Aperture. You can read from start to finish or
jump around as you please. This guide is available as an Adobe Acrobat file or
as integrated On-Line help.
CopyrightNo part of this document may be reproduced or transmitted in any form or by
any means, electronic or mechanical, including photocopying and recording,
for any purpose without the express written consent of Digital Film Tools.
Copyright © Digital Film Tools, LLC. 2009. All Rights Reserved
July 15, 2009
About UsDigital Film Tools brings together the unbeatable combination of superior
software designers, motion picture visual effects veterans, video editors and
photographers. Add three Emmy Awards and experience in creating visual
effects for hundreds of feature films, commercials and television shows and you
have a recipe for success. The understanding of photography, film and video
editing, and in particular visual effects, allows us to design productive and
highly specialized software. Software that is useful as well as easy to use. Our
products stand up to the rigors of production and are the culmination of many
years of experience.
Our philosophy is to bring our visual effects tools and techniques to the
masses. What was once found only in expensive high-end packages or existed
as proprietary in-house tools, is now available to photographers, artists,
designers, and video/film editors. Did I mention affordable? Our software
doesn't cost an arm and a leg and won't break the bank.
one User Guide

•
About this Guide 3
• • • •••
On-Line Help
NavigationPrevious / NextClick on the Previous or Next icons to navigate through the help topics.
Show NavigationIf you don’t see the Table of Contents displayed on the left side of the screen,
click on the Show Navigation icon at the top left of the screen.
BooksClick on a closed book to expand the topic.
Ozone User Guide • • •••

Oz
4 About this Guide
• • • •••
• • • •••
SearchClick the Search tab, type in some text and click Go to find what you are looking
for.
Blue TextIf you place your cursor over any text that is highlighted blue, it will turn into a hand. Click on the blue, hyperlinked text and it will navigate you to that portion of the manual.
PrintClick on the Print icon to print the currently displayed topic.
one User Guide

•
Installation 5
• • • •••
INSTALLATION
Adobe Photoshop and Photoshop Elements1 Download Ozone at www.digitalfilmtools.com
2 Double-click on the file that was downloaded and run through the installation process.
3 When prompted, select your Adobe/Photoshop/Plug-Ins folder as the installation location.
Note: If you are running Adobe Photoshop Elements, you may need to change the installation folder to the Adobe/Photoshop Elements/Plug-Ins folder.
4 Start Photoshop and load an image.
5 From the Filter pull-down menu, select Ozone v2.5 from the Digital Film Tools filter group.
A dialog box pops up when you run Ozone.
6 If you purchased the software, select Activate Ozone and follow the instructions.
or
7 Select Request Trial Activation (Internet Required) and click Next to receive a fully functioning version of Ozone for the specified trial period. At the end of the trial period, Ozone reverts to a limited demo mode.
or
8 Select Run in Demo Mode and click Finish.
Note: In Demo Mode, a watermark is superimposed over the image.
Ozone User Guide • • •••

Oz
6 Installation
• • • •••
• • • •••
Apple Aperture1 Download Ozone at www.digitalfilmtools.com
2 Double-click on the file that was downloaded and run through the installation process.
The default installation location is the /Library/Application
Support/Aperture/Plug-ins folder.
3 Start Aperture and load an image.
4 From the Images pull-down menu, select Edit With>DFT Ozone.
A dialog box pops up when you run Ozone.
5 If you purchased the software, select Activate Ozone and follow the instructions.
or
6 Select Request Trial Activation (Internet Required) and click Next to receive a fully functioning version of Ozone for the specified trial period. At the end of the trial period, Ozone reverts to a limited demo mode.
or
7 Select Run in Demo Mode and click Finish.
Note: In Demo Mode, a watermark is superimposed over the image.
one User Guide

•
Uninstalling 7
• • • •••
UNINSTALLING
Windows1 Click the Windows Start Menu
2 Select Programs > Digital Film Tools > Ozone Version > Uninstall Ozone
Macintosh
Adobe Photoshop1 Go to /Applications/Digital Film Tools
2 Remove the Ozone v2.5 Photoshop folder
3 Go to /Applications/Adobe Photoshop (version)/Plug-Ins
4 Remove DFT Ozone v2.5
Apple Aperture1 Go to /Macintosh HD/Library/Application Support/Aperture/Plug-Ins
2 Remove Ozone.ApertureExport
Ozone User Guide • • •••
Oz
8 Activating, Deactivating and Transferring
• • • •••
• • • •••
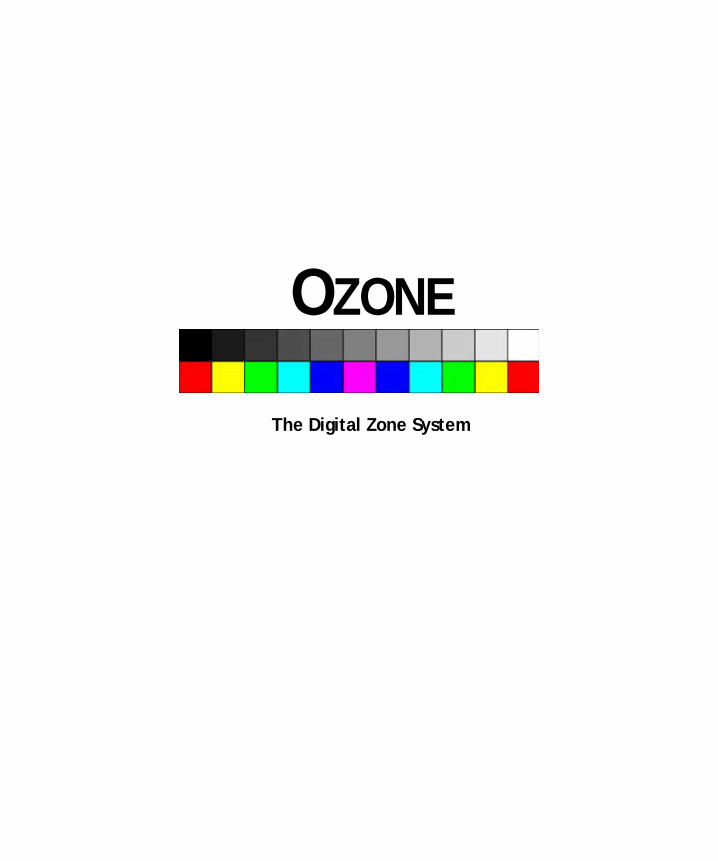
ACTIVATING, DEACTIVATING AND TRANSFERRING LICENSES
Activation Options
Internet Activate (Recommended)Activates Ozone over the Internet.
Request License from Self-Service WebsiteIf you do not have an Internet Connection on the computer where you want to
run Ozone, use this option. The self-service website will generate a license file
which you can then transfer to the desired computer.
Telephone ActivationAllows you to activate Ozone when you do not have access to the Internet at all.
Install a License FileLoads a license file obtained from the self-service website or received by email.
Note: If you experience an error when using Internet Activate, it is because you or your company uses a proxy server to access the Internet and/or your firewall is blocking our program’s access to the Internet. For proxy server users, select Advanced Options and enter the appropriate proxy server settings. For firewall users, open your firewall software and allow our software to access the Internet.
Deactivation OptionsOnce Ozone has been activated, you can access the Deactivation Options by
selecting the License menu.
Internet Deactivate (Recommended)Deactivates Ozone over the Internet and is only available if you initially
activated over the Internet. Use this method to return your Product Code back
to the activation server. You will then be able to use your Product Code to
activate Ozone on another computer.
one User Guide
•
Activating, Deactivating and Transferring Licenses 9
• • • •••
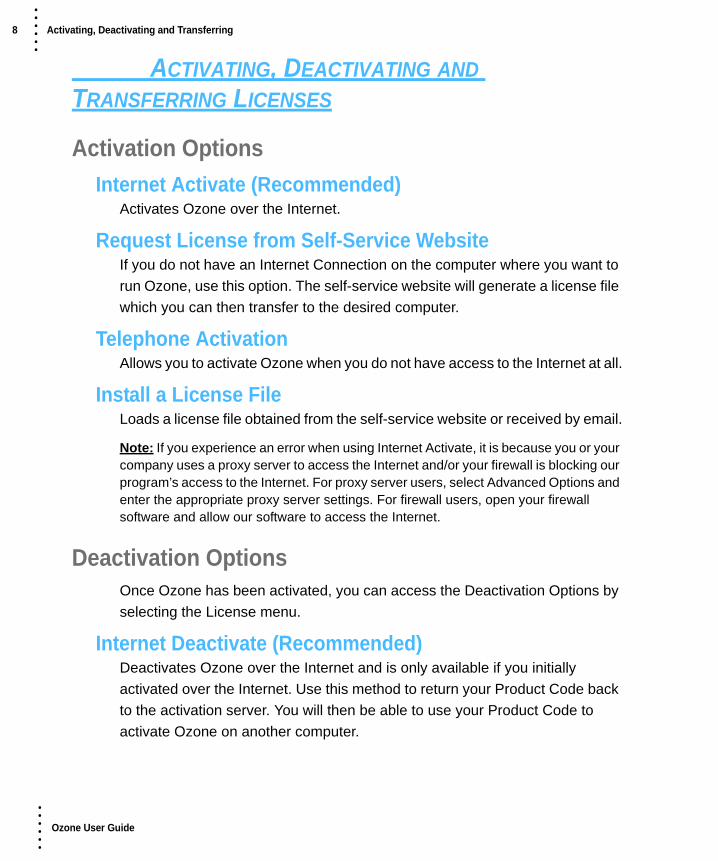
Remove LicensePermanently removes the Ozone license from your computer. You will no
longer be able to activate Ozone using the Product Code or license file that you
originally activated with. Only use this option if instructed by customer support.
Note: Do not use Remove License to move the license to another computer.
To deactivate Ozone:
1 Select License from the Help menu.
2 Choose Internet Deactivate (Recommended) and click Next.
License TransferYour Product Code allows you to run Ozone on one computer at a time.
However, you may transfer the license by deactivating on one computer and
activating on another.
Internet Deactivate / Internet Activate is the preferred method of license
transfer between computers, but is only available if you initially activated over
the Internet and currently have Internet access. If you do not have Internet
access, you will need to contact customer support to assist you in transferring
the license.
To transfer a license:
1 Select License from the Help menu.
2 Choose Internet Deactivate (Recommended) and click Next.
Ozone is now deactivated.
3 On the target computer, select Activate Ozone and follow the instructions.
Ozone will then activate on the new computer.
Ozone User Guide • • •••

Oz
10 Ozone - Introduction
• • • •••
• • • •••
OZONE - INTRODUCTION
The Zone SystemWhat is the Zone System? The Zone System is considered one of the major
advancements in the history of photography. The Zone System was developed
by Ansel Adams and Fred Archer in the 1940’s as a method of manipulating
exposure and development of film, and how to vary that exposure to get the
results you want.
The world around us contains an infinite palette of colors, tones and brightness.
To photographically reproduce this vast range of brightness, Adams took the
spectrum of print values from black to white and divided them into 11 discrete
zones. Each zone is twice as bright as the previous zone, proceeding from
black towards white. Pure black was defined as Zone 0, Zone 5 as middle gray
and pure white as Zone 10.
When photographing images using the zone system, you would expose to
maintain shadow detail, then vary development time to place highlights in the
zones of your choosing. This method allowed Ansel Adams to produce
beautiful images with a dynamic range normally not possible.
DescriptionOzone is a unique filter that allows photographers, designers and artists to
manipulate the color of an image with incredible flexibility and accuracy.
We like to call our Ozone filter, “The Digital Zone System”. All you need to do
is provide the photograph, we provide the digital darkroom. Of course, we
prefer that your image is exposed properly and that you capture as much image
information as possible.
Zone 0 Zone 1 Zone 2 Zone 3 Zone 4 Zone 5 Zone 6 Zone 7 Zone 8 Zone 9 Zone 10
one User Guide

•
Ozone - Introduction 11
• • • •••
Using proprietary image slicing algorithms, we divide your image into 11
discrete zones based on brightness, hue, saturation, red, green, blue, cyan,
magenta or yellow values.
Once divided, the color values of each zone can be independently adjusted
until you’ve painted a new picture. All zones can be adjusted and viewed in
context and you don’t have to commit to the adjustments until all zones are
corrected.
Go to the Tutorial on page 12 to see how the filter works.
Zone 0 Zone 1 Zone 2 Zone 3 Zone 4 Zone 5 Zone 6 Zone 7 Zone 8 Zone 9 Zone 10
Before After
Photos © THINKSTOCK LLC--WWW.THINKSTOCK.COM
Ozone User Guide • • •••

Oz
12 Tutorial
• • • •••
• • • •••
TUTORIAL
1 Apply the Ozone filter to an image.
The Ozone user interface opens.
2 Click on the Zone button in the View group to display the image’s zones.
The Viewer shows the selected zone as a black and white image. Wherever
there is white, the image can be altered.
3 In the Zone group, click on the various zones to see what image values are located in each zone.
The values shown as white in the selected zone are the portions of the image
that will be modified when using the Zone sliders. As the values drop-off to
black, so does the strength of whatever adjustments you’ll make. Although the
zone’s Position and Range parameters are preset according to the Digital Zone
system, they can be changed if you want.
The Position value pinpoints the values to be used in the selected zone. For
instance, if the zones are created using Luminance, a high Position value
shows the brightest image values as white values in the zone. A low Position
value shows the darkest image values as white values in the zone. The Range
value increases or decreases the range of values in the selected zone.
4 Change the View selector to Output.
The Viewer now shows the full color image. When viewing the full color image,
you are always looking at the result of all zone color corrections.
Your adjustments occur on a zone by zone basis, meaning whatever Zone has
been selected is the zone that will be adjusted.
5 To modify your image, adjust any combination of the Hue, Saturation, Brightness, Contrast, Gamma, Red, Green, Blue and Temperature sliders for each zone.
All zones can be adjusted and viewed in context and you don’t have to commit
to the adjustments until all zones are corrected.
6 Click the Done button to apply the filter to your image.
one User Guide

•
Ozone - Overview 13
• • • •••
OZONE - OVERVIEW
User InterfaceOzone is comprised of 2 main components: the Viewer and Parameter window.
ViewerThe Viewer is where images are viewed, edited and manipulated.
ParametersThe Parameters window is shown displaying the current filter’s parameters.
Adjusting the parameters will update and change the image in the Viewer.
Viewer
Parameters
Ozone User Guide • • •••

Oz
14 Ozone - Overview
• • • •••
• • • •••
WindowsThe Ozone interface contains multiple windows. Windows can be closed or torn
off to be floating windows. The upper right portion of the window has two icons:
a Minimize/Maximize and a Close icon.
Opening and closing windows:
• Click the Minimize/Maximize icon to make the window a floating window.
• A floating window can be re-docked by clicking the Minimize/Maximize icon.
• Click the Close icon to close a window.
• Once a window has been closed, it can be reopened by selecting it using the Windows icon.
Note: The Photoshop Macintosh version does not support floating or moving windows at this time.
SashesBy clicking and dragging the sashes, dividing lines between areas of the
screen, you can customize the Ozone interface.
Minimize/Maximize Close
one User Guide

•
Ozone - Overview 15
• • • •••
Tool TipsHovering the cursor over an icon or filter thumbnail will display its function in the
Status Bar located at the lower left corner of the interface.
ViewerThe Viewer is where images are viewed, edited and manipulated.
1:1Makes the image in the Viewer a 1:1 zoom ratio and shows the actual pixels of
the image. The 1:1 setting accurately represents what the filter will look like
when applied to the full size image.
Note: A large Viewer size with 1:1 selected will create longer processing times when adjusting parameters.
Ozone User Guide • • •••

Oz
16 Ozone - Overview
• • • •••
• • • •••
Zoom InZooms the image in.
Zoom LevelDisplays the zoom level as a percentage.
Zoom OutZooms the image out.
Zoom to FitFits the entire image inside the Viewer. The Fit mode yields the quickest
interaction when editing parameters.
Zoom RegionSelect the Zoom Region icon and drag select a square region in the Viewer to
zoom in on that area.
PanTo pan the image, click and drag in the Viewer.
Note: Panning is only available when a portion of the image is cut off by the Viewer window.
See the Viewer Keyboard Shortcuts on page 20 for more zooming and
panning options.
one User Guide

•
Ozone - Overview 17
• • • •••
Side-by-Side ComparisonCompares the before and after image side by side in the Viewer.
Ozone User Guide • • •••

Oz
18 Ozone - Overview
• • • •••
• • • •••
Vertical Split ComparisonCompares the before and after image using a Vertical Split. Move your cursor
into the image area over the split line and when the cursor changes to a double-
arrow, click and drag to move the split line. Depending on the adjustments that
are made, the split line may not be obvious, so green arrows on the outside of
the image help you find it.
one User Guide
•
Ozone - Overview 19
• • • •••
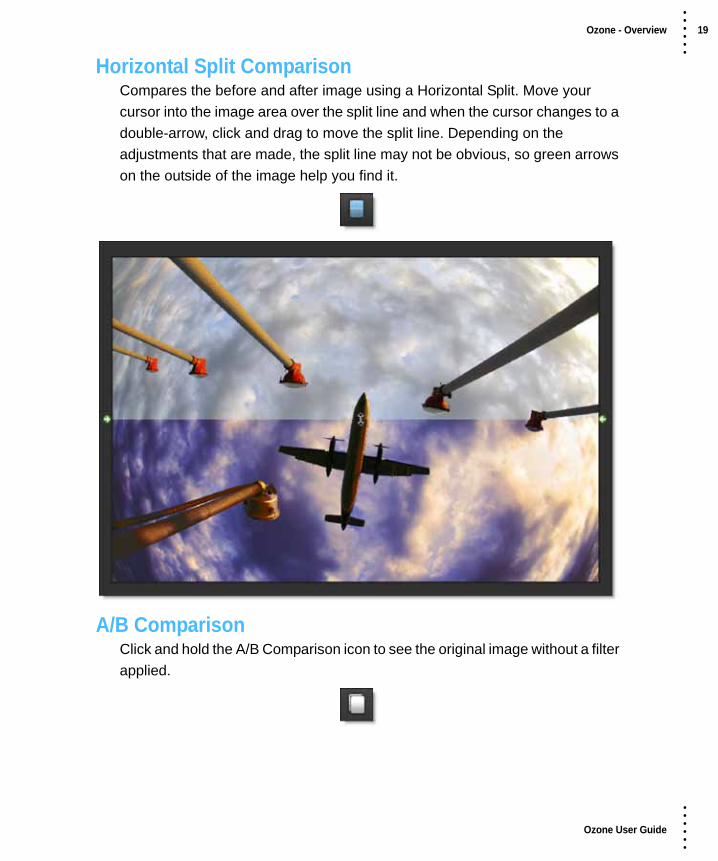
Horizontal Split ComparisonCompares the before and after image using a Horizontal Split. Move your
cursor into the image area over the split line and when the cursor changes to a
double-arrow, click and drag to move the split line. Depending on the
adjustments that are made, the split line may not be obvious, so green arrows
on the outside of the image help you find it.
A/B ComparisonClick and hold the A/B Comparison icon to see the original image without a filter
applied.
Ozone User Guide • • •••

Oz
20 Ozone - Overview
• • • •••
• • • •••
Viewer Keyboard Shortcuts
Shortcut Action
Click and drag in the Viewer Pans the image
Space Bar-drag Pans the image
I Key Zooms the image in
O Key Zooms the image out
Scroll wheel over image Zooms the image in and out
Middle-mouse double click Fits the image to the window
F Fits the image to the window
H Sets the Viewer to a 1:1 pixel ratio
one User Guide

•
Ozone - Overview 21
• • • •••
ParametersThe Parameters window displays the Ozone’s parameters. Adjusting the parameters will update and change the image in the Viewer.
Slider controls can be adjusted in the following ways:
• Clicking and dragging the slider.
• Clicking on the number to the right of the slider, typing in the desired value and hitting enter.
Ozone User Guide • • •••
Oz
22 Ozone - Overview
• • • •••
• • • •••
• Hover the cursor over a slider and use the mouse scroll wheel to make the adjustment. Scrolling up raises the value while scrolling down lowers it.
Pop-up menus can be adjusted in the following ways:
• Click on the pop-up menu and make a selection.
• Hover the cursor over a pop-up menu and use the mouse scroll wheel to change the selection.
Miscellaneous ButtonsAcross the top of the Ozone Viewer, there are a few miscellaneous buttons.
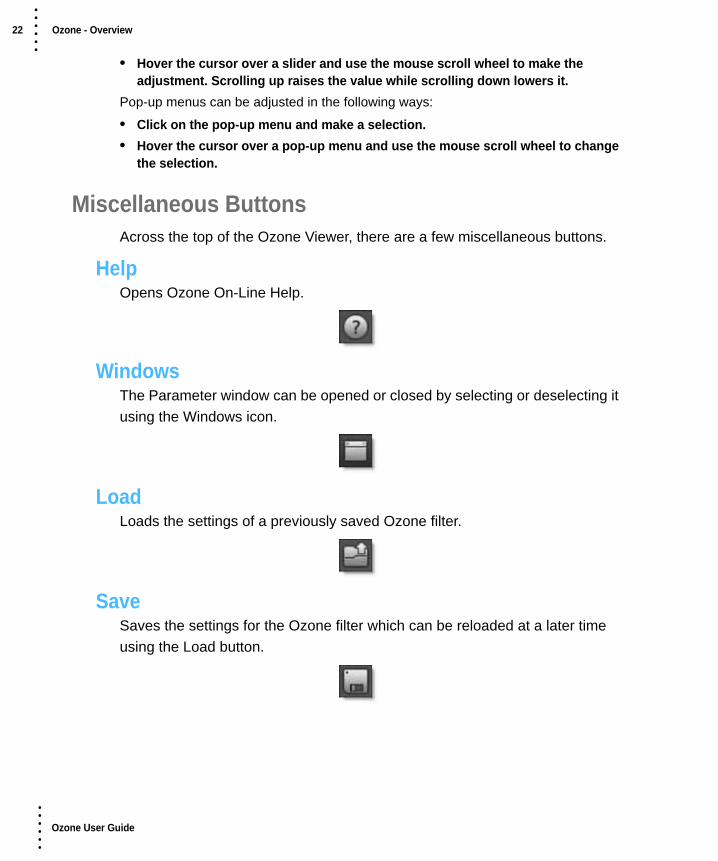
HelpOpens Ozone On-Line Help.
WindowsThe Parameter window can be opened or closed by selecting or deselecting it
using the Windows icon.
LoadLoads the settings of a previously saved Ozone filter.
SaveSaves the settings for the Ozone filter which can be reloaded at a later time
using the Load button.
one User Guide
•
Ozone - Overview 23
• • • •••
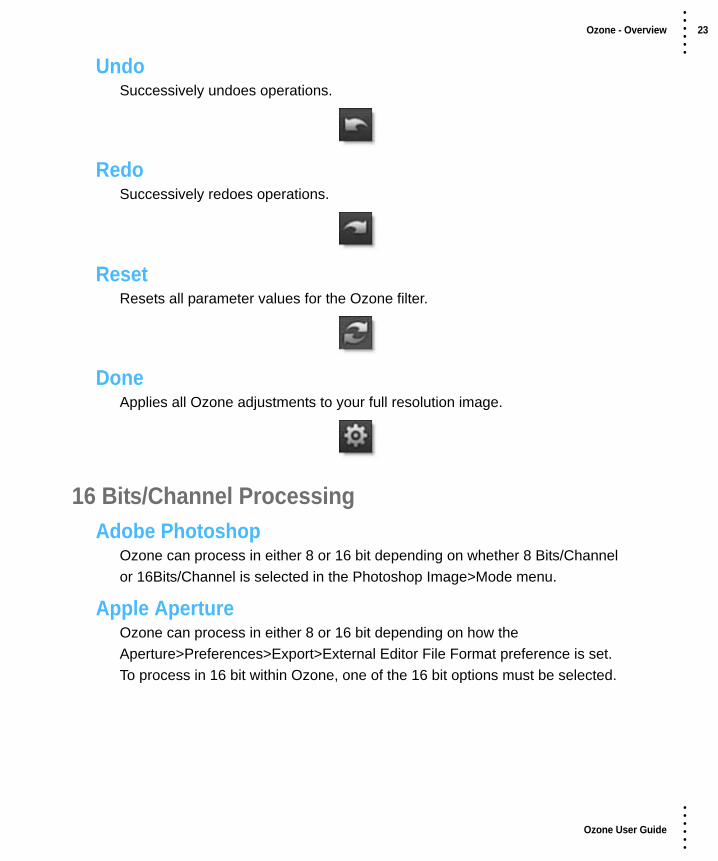
UndoSuccessively undoes operations.
RedoSuccessively redoes operations.
ResetResets all parameter values for the Ozone filter.
DoneApplies all Ozone adjustments to your full resolution image.
16 Bits/Channel Processing
Adobe PhotoshopOzone can process in either 8 or 16 bit depending on whether 8 Bits/Channel
or 16Bits/Channel is selected in the Photoshop Image>Mode menu.
Apple ApertureOzone can process in either 8 or 16 bit depending on how the
Aperture>Preferences>Export>External Editor File Format preference is set.
To process in 16 bit within Ozone, one of the 16 bit options must be selected.
Ozone User Guide • • •••

Oz
24 Ozone Parameters
• • • •••
• • • •••
OZONE PARAMETERS
View Chooses what is displayed in the Viewer.
OutputThe Viewer displays the full color image. When viewing the full color image, you
are always looking at the result of all zone color corrections.
OriginalThe Viewer displays the original, un-filtered image
ZoneThe Viewer displays the selected zone as a black and white image. Wherever
there is white, the image can be altered.
ZoneSelects one of the 11 zones to be viewed or adjusted. Once you click in the
Zone selector, you can use the left and right arrow keys to cycle through the
zones.
Extract OnThe Extract On pop-up menu allows you to specify the image values to be used
for dividing the image into the 11 individual zones.
LuminanceZones are created using the image’s luminance values.
HueZones are created using the image’s hue. When adjusting the Position
parameter, you are selecting different hues.
SaturationZones are created using the image’s saturation values.
one User Guide

•
Ozone Parameters 25
• • • •••
AverageZones are created based on the average of the image’s RGB values.
RedZones are created using the image’s red values.
GreenZones are created using the image’s green values.
BlueZones are created using the image’s blue values.
Alpha/Layer MaskZones are created using the image’s alpha values. For Photoshop, the Layer
Mask, if present, is used.
Note: The Alpha/Layer Mask choice does nothing in Aperture.
CyanZones are created using the image’s cyan values.
MagentaZones are created using the image’s magenta values.
YellowZones are created using the image’s yellow values.
Zone AdjustmentsWhen using Luminance as the Extract On method for slicing up the image, the
Position and Range sliders are preset so that each zone is twice as bright as
the previous zone, proceeding from black towards white. Pure black is defined
as Zone 0, Zone 5 as middle gray and pure white as Zone 10.
Ozone User Guide • • •••

Oz
26 Ozone Parameters
• • • •••
• • • •••
Look at how this image of the airplane is represented using the Digital Zone
System:
You can look at the individual zones in the Viewer, which is helpful in
determining the portions of the image you are going to adjust, by setting the
View to Zone and clicking on the various zones in the Zone group. Alternatively,
at the bottom of the Parameter window is a small image thumbnail of the
selected zone.
The values shown as white in the selected zone are the areas of the image that
will be modified by the color adjustments.
PositionThe Position value pinpoints the color values to be used in the selected zone.
This value has been preset according to the Digital Zone System, but can be
changed if you choose. If the zones are created using Luminance, a high
Position value shows the brightest image values as white values in the zone. A
low Position value shows the darkest image values as white values in the zone.
Zone 0 Zone 1 Zone 2 Zone 3 Zone 4 Zone 5 Zone 6 Zone 7 Zone 8 Zone 9 Zone 10
one User Guide

•
Ozone Parameters 27
• • • •••
RangeThe Range value increases or decreases the range of values in the selected
zone. This value has been preset according to the Digital Zone System, but can
be changed if you want.
HueRotates the hue of the zone.
SaturationAdjusts the saturation of the zone. Positive values saturate, negative values
desaturate.
BrightnessAdjusts the brightness of the zone. Positive values brighten, negative values
darken.
ContrastAdjusts the contrast of the zone. Positive values increase contrast, negative
values decrease contrast.
Gamma Adjusts the gamma of the zone. The gamma adjustment leaves the white and
black points the same and only modifies the values in-between. Positive values
darken the midtones, negative values lighten the midtones.
RedAdds or subtracts red from the zone.
GreenAdds or subtracts green from the zone.
BlueAdds or subtracts blue from the zone.
TemperatureSets the color temperature of the zone. Dragging the slider to the right makes
the image cooler (bluer) and dragging the slider to the left makes the image
warmer (redder).
Ozone User Guide • • •••

Oz
28 Ozone Parameters
• • • •••
• • • •••
Zone ThumbnailAt the bottom of the Parameter window is a thumbnail of the selected zone to
help you see which areas of the image will be adjusted.
one User Guide


![User Guide...User. {{]}]} {}]}](https://img.dokumen.tips/doc/110x75/60918ca14327954d24291644/-user-guide-user-.jpg)