Embed Size (px)
Citation preview

OpenSRS Email Service Mail Administration Center
User's GuideJanuary 16, 2014

Table of ContentsOverview.............................................................................................5
Logging in to the MAC........................................................................5Using the MAC...................................................................................5The navigation pane...........................................................................6Administrator levels...........................................................................7Settings............................................................................................8Setting the current domain..................................................................9Searching in the MAC.........................................................................9
Using filters to find a domain or user ...........................................9Using the Jump box....................................................................9Using wildcard characters in searches.........................................10
Managing Spam...............................................................................11Spam header, spam folder, and spam tag............................................11Default settings...............................................................................12Logging out of the MAC.....................................................................12
Managing users..................................................................................13
Creating users.................................................................................13Viewing users..................................................................................21Modifying a user..............................................................................23
Modifying user settings..................................................................24Viewing user history......................................................................24Enabling or disabling services for a user...........................................25Adding allow and block lists............................................................25Adding mailbox-level spam settings.................................................26Setting autorespond for a user........................................................27Suspending a user.........................................................................27
Reinstating a user....................................................................29Deleting user accounts...................................................................29Restoring user accounts.................................................................30Restoring deleted mail...................................................................30Restoring deleted Address Book contacts..........................................31
Reindexing user accounts..................................................................31Releasing spam messages.................................................................32User statistics and snapshots.............................................................32
Managing workgroups..........................................................................33
Viewing workgroups.........................................................................33Creating a new workgroup.................................................................34Modifying a workgroup......................................................................34
Adding users to a workgroup...........................................................34Assigning a workgroup administrator................................................35Removing users from a workgroup...................................................35Deleting workgroups......................................................................35
2

Managing domains..............................................................................36
Creating a new domain.....................................................................36Viewing domains..............................................................................40Modifying an existing domain.............................................................40Assigning a brand to a domain...........................................................41Adding and Removing Domain Aliases.................................................42Setting domain-level allow and block sender lists..................................43Setting the FilterMX Host...................................................................44Setting domain-level spam handling...................................................44Setting spam delivery options for Filter accounts..................................44Setting the default language for a domain...........................................45Setting the default time zone for a domain..........................................46Setting mailbox limits.......................................................................46Sending out domain bulletins.............................................................47Assigning a domain administrator.......................................................48Disabling a domain...........................................................................49Deleting domains.............................................................................50Restoring a domain..........................................................................51Domain statistics and snapshots.........................................................51Domain snapshot data fields..............................................................53
Managing company information............................................................55
Setting company default preferences..................................................55Setting the default brand for a company..............................................59Setting company-level allow and block lists..........................................59Creating allow and block lists.............................................................59Setting company-level spam handling.................................................60Setting spam delivery options for Filter accounts..................................60
Default setting.........................................................................61Setting global mailbox limits..............................................................61Sending out company bulletins...........................................................62Managing company contacts..............................................................63Company statistics and snapshots......................................................64Company snapshot data fields............................................................65Managing administrators...................................................................68
Branding............................................................................................69
Creating a new brand.......................................................................69Customizing a brand.........................................................................69The Branding tool.............................................................................71Login Page......................................................................................71Basic Configuration...........................................................................72Changing fonts and colors in Webmail.................................................73Preset Brands..................................................................................73Simple Branding...............................................................................73Advanced Branding (Advertisements)..................................................75Deleting a Brand..............................................................................77
3

Tools.................................................................................................78
Bulk Actions....................................................................................78Migrate...........................................................................................79
Troubleshooting..................................................................................82
Login tokens....................................................................................82Creating login tokens ...............................................................82
Creating login tokens with a URL........................................................83Options........................................................................................83
Security..........................................................................................84How to use the login token................................................................85Login tokens and password change.....................................................85Sample URL.....................................................................................85Logging a user out...........................................................................85
Revisions and Updates.........................................................................87
4

OverviewThe Mail Administration Center (MAC) is the Web-based interface for administrating email accounts in the OpenSRS Email Service. This includes company information, domain information, workgroups, mailboxes, and othertypes of accounts. You can use the MAC to perform common administrative tasks for email, such as creating, deleting, and modifying users, and resetting passwords.
Logging in to the MACTo log in to the MAC
1. Use your browser to navigate to the MAC: https://admin.<cluster>.hostedemail.com
2. Enter your administrator email address and password.
3. Click OK.
When specifying the MAC address,you must include the cluster; currently, OpenSRS uses two clusters: A and B. If you do not know what cluster you are on, contact your Account Manager.
Using the MACWhenever you log in to the MAC, the start page appears.
This page varies somewhat depending on your administrator level. For more information, see "Administrator levels".
Regardless of your administrator level, every page in the MAC displays the following:
Navigation pane—This is how you reach the different items that you administrate, for example, users, workgroups, and domains. See “The navigation pane”.
Administrator login—This displays your administrator email address. This is the address you use to log in.
5

Note: The MAC has a five minute time-out. If your session is idle for longer than five minutes, the MAC prompts you to re-authenticate. You can then resume your session.
The navigation paneThe navigation pane is your starting point for all the tasks that you perform with the MAC. The available items in the navigation pane depend on your level of administrative authority. For example, the Company link does not appear if you are a domain-level administrator. (For more information, see "Administrator levels".) If you are a company-level administrator, the highestadministration level available, the navigation pane includes the following sections:
Users—Use the links in this section to administrate user accounts. For more information, see "Managing users."
Domains—Your company contains one or more domains, and each domain contains workgroups and user accounts. Use the links in this section to view and update domain information. For more information, see "Managing domains."
Company—Use this link to update your company information. For moreinformation, see "Managing company information."Note: It is important to keep your company contact information current so that you can receive prompt access to Support and receive service interruption and maintenance activity notices, and other services.
6

Tools—Use the links in this section to create, modify, or delete multiple users, and to download mail from remote servers into existing email accounts.
Settings—Use this link to configure the appearance of the MAC itself, for example, to set the number of domains or users that you want to display on a page. For more information, see "Settings".
Logout—This link logs you out of the MAC. For more information, see "Logging out of the MAC".
Administrator levelsAdministrative (or Admin) levels, are set at the user level when the user account is created or when it is modified using the Edit User screen. The default Admin level is none.
There available levels of administrative privilege are:
Mail—Manages mailboxes within the domain for which they are administrators. Typical tasks may be changing passwords, setting forwarding, adding or removing aliases, and setting auto responders.
Workgroup—Creates, deletes, and manages mailboxes within any workgroups for which they are administrators.
Domain—Performs all functions of a workgroup administrator. In addition, they can add/remove workgroups and workgroup administrators as well as manage and brand their domain.
Company—Performs all functions of a domain administrator in all domains within their company, and can edit their company informationand suspend users. They can also add or remove domains and create and assign administrators, including Company mail, Company read only, Company token only, and Company view admins.
Company_mail—Can view everything that a company administrator can, but can only edit mailbox settings. They cannot create or delete mailboxes or edit domain settings.
Company_mail2 Similar to company_mail administrator, but cannot change passwords or generate login tokens.
Company_ro (read only)—Can view everything that a company administrator can, but does not have the ability to make changes.
Company_token_only—Can generate SSO tokens for users in any domains in their company. This is their only responsibility; they cannotview or change settings for domains or users.
Company_view—Can view all domains in the company, and can makenon-billable changes to mailboxes and domains, but does not have theability to create or delete mailboxes or domains.
7

SettingsThe Settings page allows you to control the way in which data is displayed in the MAC.
Entries Per Page—From the drop-down list, choose the number of entries per page that you want to display on search pages. The defaultis 25.
Pages Per Request—From the drop-down list, choose the number of results that will be fetched at a time during a search. A smaller number means more data loads during pagination when large numbersof results are present (mostly for large domains). A larger number means more data to page without reloading, but will cause the browser to use more memory. The default is 500.
Filtering Keeps Selection—If this feature is enabled. filtering determines which items are displayed in the results list, and any items that were previously selected remain selected (even though they mightnot be displayed in the list). For example, suppose you enable this feature and then select three users that you want to delete. You then use the filters to locate and select a specific user. Although the three previously selected users are not displayed in the resulting list, they are still selected. If you look at the Delete Selected button, you can see (4) which indicates the number of items marked for deletion.
When you click Delete Selected, all four of the selected users are deleted.
If you go through the same selection process as described above, but Filtering Keeps Selection is not enabled, when you refresh the display,the previously selected items are deselected and therefore are not included in the number of items to be deleted.
Language—From the drop-down list, choose the default language. Currently, the only available language is English.
Logging—Choose whether events are logged. If you check this box, everything is logged.
Initial Domain—If you have multiple domains, you can specify which one you want to display when you log in to the MAC.
8

Setting the current domainYour company may have one domain, or it may have many. Whenever you work with workgroups or users, the MAC displays the workgroups and users that belong to only one domain - the current domain. To view the workgroups and users in another domain, you must first change the setting of the current domain.
To set the current domain
1. In the navigation pane, under your company name, click Domains.The Domains page appears. This page lists all of the domains in your company. You can also locate a specific domain by searching for it. See "Searching in the MAC".
2. Click the domain that you want to set as the current domain.You can now work with the users and workgroups in this domain.
Alternatively, enter your search criteria in the Jump box at the top of the page, and press the Enter key. You can specify an exact match or you can use wildcards. For more information, see "Searching in the MAC".
Searching in the MACWhen you view the Users, or Domains pages, you see a complete list of all the user accounts or domains in your company. Instead of scanning the list to find what you want, you may want to narrow your search to a subset or a single entry. To narrow you search you can use the filters at the top of the page, or you can use the Jump box.
Using filters to find a domain or user On the Domains or Users page, you can use filters to search for domains or users that meet specific criteria.
To search for a domain or user
1. In the navigation pane, click Domains or click Users.
2. In the text field at the top of the page, enter your search criteria. You can use * and ? wildcards to represent part of the name.
3. Optionally, click one or more of the associated checkboxes to narrow your search. You can select the domain or user type, and for users, you can also choose the workgroup to which the user belongs.
4. Click Refresh.
Using the Jump boxThe Jump box, which is found at the top left corner of every page, is a way to quickly find the domain or user that you want. Simply enter your search criteria in the Jump box and press Enter.
9

If you specify the complete domain or user name and a match is found, the searched for domain or user is displayed. If you use wildcard characters in your search, you will see a list of all of the domains or users that match your criteria.
Using wildcard characters in searchesWhen performing a search, you can specify an exact match or you can use the * and ? wildcards. The * wildcard matches 0 or more characters while the? wildcard matches exactly one character. Both the Jump box and the Searchfield support the use of wildcard characters, and you can use wildcards multiple times in the same search.
Here are some examples of wildcard searches:
Search for Finds
foo.com Domain named foo.com.
[email protected] User account [email protected].
*foo.com All domains ending in foo.com.
*[email protected] users in the domain foo.com whose account name ends with bar.
bar* All domains beginning with bar.
10

Search for Finds
bar*@foo.com All users in the domain foo.com whose account names begin with bar.
*bar* All domains containing bar.
*bar*@foo.comAll users in the domain foo.com whose account names contain bar.
a*1All occurrences that start with a and end with 1, for example a1, area51.
c*bobAll occurrences that start with c and end with bob, for example, cbob, carlbobson.
*bob*12*All occurrences that contains bob and 12 in that order, for example bob12, bobby512, hobbit123.
a???bobAll occurrences that start with a followed by any 2 characters, followed by bob, for example, allbob, a11bob,artbob.
Managing SpamDepending on your administrator level, you can configure settings for the handling of spam at the user, domain, and company levels. You can also choose the aggressiveness level for the spam filtering. Choosing a level otherthan Normal causes the filtering engine to be more aggressive in labeling mail as spam; however, it may also result in more false positives. In addition, the branding tool allows you to choose whether to allow end users to change the spam aggressiveness level.
Webmail recognizes the spam settings according to the level at which they are set. The settings are used in the following order:
1. Company settings are applied to all users of all domains.2. Domain settings are applied to all users of the domain in preference of
any company settings.3. User settings are applied to the user in preference of any domain or
company settings.
Spam header, spam folder, and spam tagWebmail allows you to control how spam flows to your users by using spam headers, spam tags, and spam folders.
Spam Header—Adds the specified text to the header of spam email.
11

Spam Tag—Appends a tag to the subject of each email identified as spam.
Spam Folder—Selects the folder to which spam will be delivered.
These features can be used to deliver spam to a Spam folder.
ConsiderationsQuotas—Items in the Spam folder do not count against a mailbox’s quota; however, spam that is delivered to the Inbox, or any folder other than the system Spam folder, does count against quota.
Sending Spam Tagged Messages—The tag is not automatically removed when a message is marked as Not Spam. Users may inadvertently reply or forward spam tagged messages.
Filter Improvement—Messages that are marked as Spam or Not Spam are used by the server to improve the spam detection filters. Downloading spam to a client bypasses this.
Spam Folder System Cleanup—Messages in the Spam folder that are older than thirty days are automatically deleted.
Default settingsWhen you create new mailbox users, the initial settings are taken from the default values that are specified at the domain level; these settings can be changed for specific mailboxes.
Likewise, new domains are initially created using the defaults that are set at the company level, but you can override these settings for a specific domain.
The way that settings are applied to new users depends on whether they are default settings or inherited settings.
See alsoCreating a new domainSetting company preferences
Logging out of the MACYou should log out of the MAC whenever you are finished working with it or when you leave your workstation. For security reasons, the MAC logs you outautomatically after five minutes of idle session time.
To log out of the MAC, in the navigation pane, click Logout.
12

Managing usersAdministrators can perform these tasks for users:
Create a new user View users Modify a user Delete a user Restore a user Restore deleted email Upload multiple users Migrate mail into existing user accounts
To perform any domain, workgroup, or user task, you must set the current domain to the domain within which you want to work. See “Setting the current domain”.
Creating usersThe MAC allows you to create the following types of users:
Mailbox—Regular mailbox. Forward—Automatically forwards mail to another specified mailbox.
Mail cannot be sent from a forward-only user account nor is mail stored in a forward-only account.
Filter—Stops spam messages but allows non-spam message to flow through to a target account.
You can also use the bulk action option to create multiple users at once.
Note: The maximum allowed message size is 35 MB; however, email attachments are MIME encoded, which increases the file size. We recommendthat you advise your customers to send email attachments that are no larger than 25 MB. The maximum message size is not configurable per user, domain, or company. Users who want to share large files should take advantage of the File Storage feature in Webmail.
13

Creating a new userTo create a new user
1. In the navigation pane, under the domain name, click Add User.The Create User page appears:
2. Complete the following fields, as applicable. Depending on the type of user that you are creating, you may not see all of these fields. Note: All fields are disabled until you enter complete the User field andpress Enter.
Field Obligation Explanation
Basic Settings
Type Required From the drop-down list, choose the type of user account that you are creating: Mailbox, Forward, or Filter.
Note: This drop-down list is not accessible until
14
Field Obligation Explanation
you complete the User field.
If you choose a different Type from the drop-down list, the fields that are displayed change accordingly, and the billing rate for the account also changes.
User Required Enter a name for the new user, and then press theEnter key.
The name can be up to 64 characters including the letters a to z, numbers 0 to 9, and the underscore, period, and hyphen symbols (diacritics and special characters are not allowed). The first character must be alphanumeric; underscores or hyphens cannotbe used as the first character, periods cannot be used as the first or last character, and two consecutive periods cannot be used.
Password Recommended Create a password for the new user. Can be up to 54 characters including the letters a to z, numbers 0 to 9, and the following special characters: ~ ! @ $ % ^ & * ( ) - _ = + / \ ] [{ } : ; > < , . ‘ | ?
We recommend that you create a password that isat least eight characters and contains a mix of uppercase, lowercase, numbers, and symbols.
Workgroup Optional From the drop-down list, choose the workgroup to which the user will belong.
Aliases Optional Enter the alternative names for this mailbox. Messages that are sent to an alias are delivered as if they were sent to the actual mailbox. Addresses must be separated by a carriage return.
Admin - This section is not displayed for forward accounts.
Admin Role Optional From the drop-down list, choose the user’s level of responsibility: company_ro, company_view, company_mail, company_mail2, company_token_only, domain, mail, workgroup, or none. If you don't want to give this user any administrative responsibility, leave this field set to none. For more information, see "Administrator levels".
15

Field Obligation Explanation
Domains Optional This field appears if you selected domain or mail in the Admin Role field.
Enter the names of the domains that the useris allowed to administer. Be sure to enter each one on a separate line.
When the user logs into their account, if they are allowed to administer more than one domain, they will see a drop-down list of the domains at the top of the navigation pane. This allows them to switch domains without having to log out of one domain and then log in to another one.
Sending & Receiving
Delivery Required For mailbox accounts, choose whether incoming mail is delivered to the local mailbox, forwarded to another address, or both.
Note: This field is not editable for Filter or Forward accounts.
Autoresponder Optional When this box is checked, the autorespond feature is enabled.
SMTP limit Not editable The maximum number of messages that a user can send in a 24 hour period.
Quota (MB) Required for regular mailbox accounts
Specify the maximum storage size for the mailbox. The default setting is taken from thedomain level. For more information, see "Creating a new domain". This setting is only displayed for regular mailbox accounts.
Services – Receive, IMAP4, POP3, Send, Webmail, Webmail Send
Required The services fields that are displayed depend on the type of user account that you are creating. For example, if you are creating a Forward account, the only service that you will see is Receive. The available services are:
• Receive—Whether the user can receive email.
• IMAP4—Whether the user can connect with an IMAP4 client.
16

Field Obligation Explanation
• POP3—Whether the user can connect witha POP3 client.
• Send—Whether the user can send email.
• Webmail—Whether the user can receive mail through Webmail.
• Webmail Send—Whether the user can send mail through Webmail.
For each of the available services, use the drop-down lists to set one of the following options:
• enabled—The service is available to this user. This is the default.
• disabled—The service is not available to this user.
• suspended—The service is not currently available to the user, and canonly be re-enabled by an administratorat a level equal to or higher than the one who suspended the user account.The most common reason that an account to be suspended is an AUP violation for exceeding the spam threshold that was set by the service provider. When an account is suspended, although it is not available to the user, the account continues to be billed. For more information, see "Suspending an account"
Note: The default settings are inherited from the domain, but you can change any of the settings for individual users. For more information, see "Creating a new domain".
Forwarding - This section is not displayed for filter accounts.
Reply-To Optional Replies to forwarded messages are automatically addressed to the specified address.
Subject Prefix Optional Enter a tag that will be prepended to the Subject line of forwarded email messages.
Restricted Optional When this box is checked, any mail sent from
17

Field Obligation Explanation
a user that is not listed in the Forwarding text box is rejected.
Recipients Optional Enter the email addresses to which you want the forwarded email to be sent. Enter the full email addresses ; put each one on a separate line, separated by a carriage return.
When someone sends a message to a user that has Forwarding enabled, everyone in the list gets the message. If a Reply-To address is specified, when any of those recipients reply to the forwarded message, the reply messageis addressed to the specified reply-to user. This feature is useful for mailing lists so that replies are addressed to the list instead of thesender.
Autoresponder
Interval Optional Enter the number of days before the same recipient will receive the auto-response message again.
End Date Optional Enter the last day/time when the auto-response message is in effect. The required format is YYYY-MM-DD.
Text Optional The text of the message that is sent when auto-responder is enabled.
Spam Settings
Spam Header Optional Enter the text that you want to be added to the header of spam messages. The format must begin with a capital letter, but can be followed by anything, for example, X-Spam: Spam detected.
Spam Tag Optional If defined, the specified tag is prepended to the Subject line of all spam messages.
Spam Folder Optional All spam will be delivered to the specified folder. The default is Spam.filter delivery.
Spam Level Optional Choose the aggressiveness level for spam filtering. Choosing a level other than Normal causes the filtering engine to be more aggressive in labelling mail as spam;
18

Field Obligation Explanation
however, it may also result in more false positives. If you don't specify a spam blocking level, the account uses the domain, company,or global setting.
Filter Delivery Required for Filter accounts
From the drop-down list, choose the way in which you want to handle spam messages.
blank (not set)—Use the filter delivery option set at the Domain level.
passthrough—Messages that have been identified as spam by OpenSRS servers are delivered to your servers, and those servers can then deliver the spam messages to the user's folders.
quarantine—Spam messages are quarantined by the OpenSRS email filters and are not delivered to your servers.
Reject Spam Optional If this box is checked, all incoming messages that are deemed to be spam are rejected rather than being quarantined or tagged.
Allow Optional Enter the domains and email addresses that are considered to be safe for this user. When messages are received from any of the addresses on this list, they are always delivered to the user's Inbox.
Make sure that each entry is on a separate line, separated by a carriage return. You can add up to 1000 entries in this list, and you can use up to five wildcards in any given entry. For more information on wildcards, see"Using_wildcard_characters".
Note: Addresses that are in the user's Personal Address Book (PAB) are considered to be in the allow list for that user by default, even though the PAB entries are not displayed here in the MAC allow list.
Block Optional Enter the domains and email addresses that you want to add to the block list for this user.When messages are received from any of the addresses on this list, they are always considered to be spam. Make sure that each
19

Field Obligation Explanation
entry is on a separate line, separated by a carriage return. You can add up to 1000 entries in the list, and you can use up to five wildcards in any given entry. For more information on wildcards, see "Using_wildcard_characters".
Important: If an address that is in the end user's Personal Address Book (PAB) is added to the block list, that address will always be blocked, that is, the MAC block list takes precedence over the Personal Address Book.
Webmail & Metadata
Brand Optional The brand that you select determines the lookand feel of the user’s Webmail interface. Choose a brand from the drop-down list only if you want the user account to use a brand other than the domain brand.
Note: If you use this field to assign the domain brand to each user, and then you change the domain brand, it will not be reflected at the user level because the user's brand setting overrides the domain's brand setting.
Language Required From the drop-down list, choose the languagein which the mailbox will be displayed when the owner initially logs in to their account. The user can change the language at the mailbox level if they want to view their mailbox in another language.
The default setting is taken from the domain level. For more information, see "Creating a new domain".
Timezone Required From the drop-down list, choose the timezonethat the mailbox will use. The user can change the timezone setting at the mailbox level if they want to use another timezone.
The default setting is taken from the domain level. For more information, see "Creating a new domain".
Max Optional The maximum number of groups and contacts
20

Field Obligation Explanation
Addressbook that the user can store in their address book. This setting cannot be edited.
Name Optional Enter the user's first and last name.
Title Optional Enter the user's title. This field can be in UTF-8 for multi-language support.
Phone Optional Enter the user's phone number.
Fax Optional Enter the user's fax number.
3. Click Create or Create & Repeat. If you click Create & Repeat, the new user is created, and the Create User window remains open so that youcan create another user.
Viewing usersYou can view the users in a specific domain or workgroup.
Viewing the users in a domainTo view the users in a domain
1. Set the current domain to the domain whose users you want to view. For more information, see “Setting the current domain”.
2. In the navigation pane, under the domain name, click Users.
The Users page lists all of the users in the current domain. You can click on any column heading to reorder the users based on that column.
By default, all user types are displayed, but you can choose to view only certain types. Click in the Type area at the top of the page and remove the checkmarks from one or more of the Type boxes. For example, if you want to see only regular mailbox users, ensure that only Mailbox is checked, and then click Filter.
The Target column displays additional information for users who have forwards and aliases. For users who have an alias, this column displaysthe name of the alias using the format '= name@domain'. For users who have forwards defined, this column displays either 'name@domain' if the user account forwards to only one address, or 'xrecipients' if it forwards to multiple addresses, where x stands for the number of forwards.
3. Optionally, to search for specific users, enter search criteria in the User field at the top of the page, and then click Refresh. You can enter the exact name of the user you are looking for and you can use wildcards. For more information on wildcards, see
21

"Using_wildcard_characters". Remove the checkmarks from one or more of the Type checkboxes if you don't want to view all types of users.
3. Click a user to view the associated properties. For an explanation of most of the displayed fields, see "Creating a newuser". When you view user details, the following sections and fields arealso displayed.
Field Explanation
Basic Settings
Status
Indicates the current status of the account:
• active—Account is available and all applicable services are enabled.
• suspended—Some part of the account has been suspended, usually the ability to send messages. This is likely because they are suspected of sending a lot of spam messages.
• smtplimit—Account has reached the available SMTP limit and cannot send messages until the time shown in the Sending Availability chart.
• quota—Account has reached the available quota limit. They cannot receive or store messages untilthey delete messages and/or files to free up storage space.
Notes
Notes Enter any notes or comments about the user account.
Tools & Status
Rename User Click this link to change the user name.
Caution: If you rename a user, all of the history that is associated with that user is deleted and cannot be accessed by the email restore tool or the PAB (address book) restore tool. The renamed user account begins accumulating history (backups) starting from the date that you rename the user, and email and PAB information can be restored only from this new history.
Validate Password Click this link to confirm a known password. The validatepassword dialog appears. Complete the password field and click Validate. A message appears that tells you whether the password you entered is correct.
Logout User Click this link to terminate all of the user's active IMAP and POP sessions.
22

Field Explanation
Migrations Click this link to view the migration jobs submitted by this user.
Reindex Click this link to regenerate the mailbox index file.
Generate Token Click this link to generate a temporary login token for the user. Tokens can be used in place of a password.
For more information, see “Creating login tokens”
Last Login The last time that the user logged in.
Quota The number of Megabytes that the user is currently using and the current number of messages the user has in their account.Note: Messages in the Spam folder are not included in this total.
Addressbook The total number of contacts and groups that the user has in their address book.
Free Passes The number of messages that have been identified as spam or that may contain viruses that the user is allowed to send in a 24 hour period, as well as the number that the user has sent.
Sending Availability The maximum number of messages that the user can send at each of the specified times. This information is particularly useful if the user wants to send a large batchof messages and needs to know how soon and how many messages they will be allowed to send.
Modifying a userYou can perform the following actions to modify a user:
Modify user settings View user history Enable or disable services for a user Add allow and block lists Configuring spam handling Set autorespond for a user Suspend a user Delete a user account Restore a user account Restore deleted mail Restore contacts
23

Modifying user settingsTo modify a user
1. Locate the user that you want to edit.For more information, see “Searching in the MAC”
2. Click the user name.The User page opens, displaying the Settings tab. You can click on thetabs at the top of the page to view additional fields.
3. Modify the applicable user detail fields. For an explanation of these fields, see "Creating a new user" and “Viewing users”.
4. Click Update.
Caution: If you rename a user, all of the history that is associated with that user is deleted and cannot be accessed by the restore email tool or the restore contacts tool. The renamed user account begins accumulating history(backups) starting from the date that you rename the user, and email and contacts information can be restored only from this new history.
Viewing user historyEvery time that an action is performed on a user account, an entry is made on the History tab noting the date and time that the action occurred, who initiated the action (the requester), the application used (for example, the
24
MAC, OMA, or the end user's account), and a brief explanation of the action.
To view the user's history
1. Locate the user that you want to view.For more information, see “Searching in the MAC”
2. Click the user name, and then click the History tab.
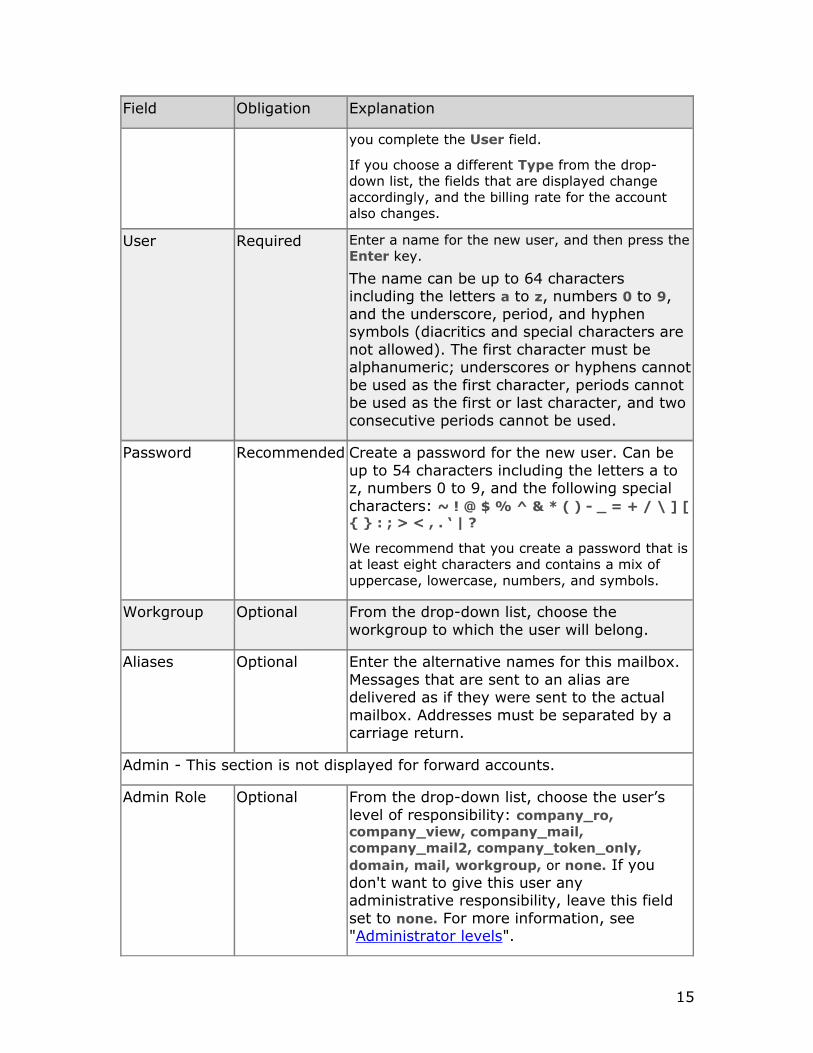
Enabling or disabling services for a userDepending on the type of user account, the services that can be enabled or disabled are:
• Receive—Whether the user can receive email.
• IMAP4—Whether the user can connect with an IMAP4 client.
• POP3—Whether the user can connect with a POP3 client.
• Send—Whether the user can send email.
• Webmail—Whether the user can receive mail through Webmail.
• Webmail Send—Whether the user can send mail through Webmail.
To enable or disable a service for a user
1. Locate the user that you want to edit.For more information, see “Searching in the MAC”.
2. Click the user name.
3. In the Sending & Receiving section, use the drop-down lists to set the services to one of the following options:
enabled—The service is available to the user.
disabled—The service is disabled for the user.
suspended—The service is not available to the user, and can only be re-enabled by an administrator at a level equal to or higher than the one who suspended the service.
Note: The services that you see depend on the user account type.
4. Optionally, to enable additional storage space, in the Quota field, specify the new amount of space you want to allocate to the user.
5. Click Update.
Adding allow and block listsYou can choose to approve or block specific email addresses or domains for each user.
Refer to “Allow and Block lists” for an explanation of these lists, the various levels, and their hierarchy.
25
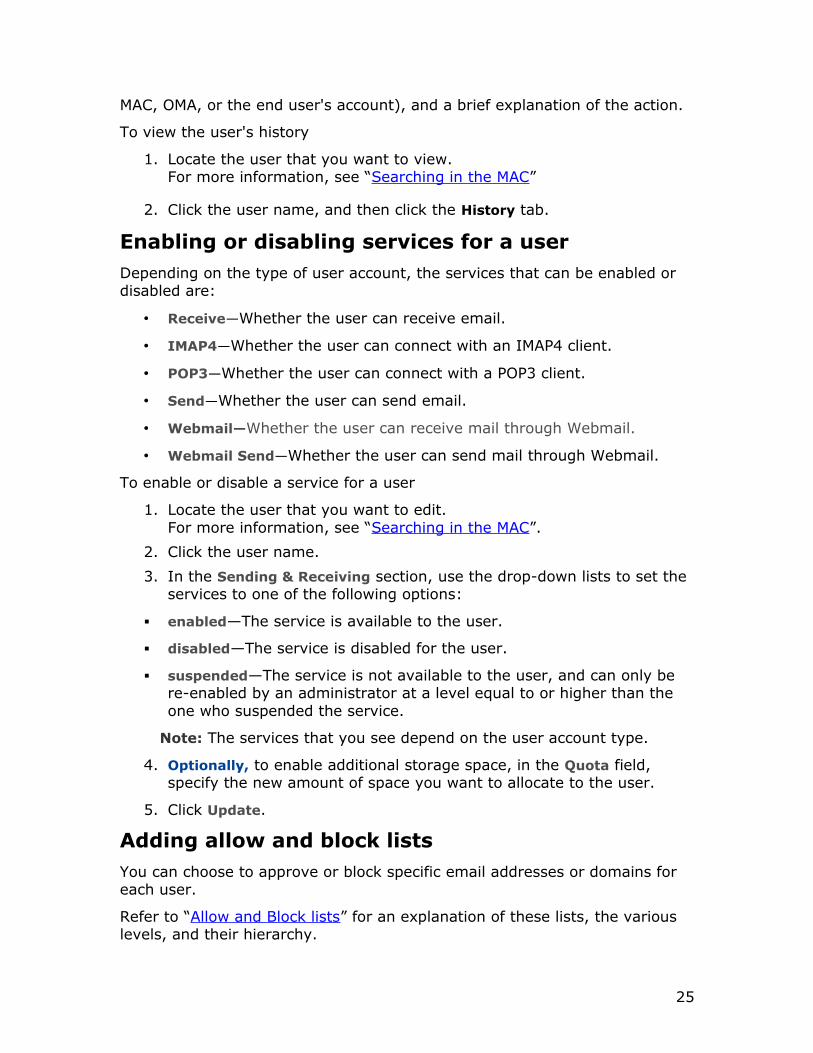
When adding addresses and domains to the allow and block lists, you can add up to 1000 entries in each allow and block list, and you can use up to five wildcards in any given entry. For example, the entry r*.al*.*car*@*foo.com is acceptable, but *r*.al*.*car*@*foo.com is not acceptable because it uses more than five wildcards.
Addresses must be separated by a carriage return.
Domains require an asterisk in the following format: *@domain.ext
To add address or domains to the allow or block list
1. Locate the user that you want to edit.For more information, see “Searching in the MAC”.
2. Click the user name.
3. In the Spam Settings section, add the addresses or domains to the appropriate text box: Allow or Block. Be sure to enter each address ona separate line.
4. Click Update.
Note: Addresses that are in the user’s Personal Address Book (PAB) are considered to be in the Allow list for that user by default, even though the PAB entries are not displayed in the MAC's allow list. If a PAB entry is added to the Block list, the address will always be blocked, that is, the MAC's block list takes precedence over the Personal Address Book.
Adding mailbox-level spam settingsYou can configure the way in which a user account handles spam, including rejecting all email marked as spam. Any user-level settings take precedence over domain and company-level settings.
To set spam handling for a user
1. Locate the user that you want to edit. For more information, see “Searching in the MAC”.
2. Click the user name.
3. In the Spam Settings section, in the Allow text box, enter the sender addresses whose email will always be accepted and delivered without filtering. Enter one address per line.
4. In the Block text field, enter a list of sender addresses whose email should never be accepted for delivery. Enter one address per line.
5. Optionally, click to put a checkmark next to Reject Spam to prevent spam messages from being delivered at all.
6. For Filter accounts only, from the Filter Delivery drop-down list, choose the way in which you want to handle spam messages.
Use Domain Setting—Use the filteronly delivery option set at the domain level.
26

passthrough—Messages that have been identified as spam by OpenSRS servers are delivered to your servers, and those servers can then deliver the spam messages to the user's folders.
quarantine—Spam messages are quarantined by the OpenSRS email filters and are not delivered to your servers.
7. In the Spam Header field, enter the text that you want to be added to the header of spam messages. The format must begin with a capital letter but can be followed by anything, for example, X-Spam: Spam detected.
8. In the Spam Tag field, type the tag you want appended to the Subject line of all spam messages.
9. In the Spam Folder field, type the name of the folder to which you want all spam messages to be delivered.
10.From the Spam Level drop-down list, choose the level of aggressiveness for spam filtering. Choosing a level other than Normal causes the filtering engine to be more aggressive in labeling mail as spam. If you don't choose a blocking level, the user account uses the domain, company, or global default.
11.Click Update.
Setting autorespond for a userThe Autoresponder feature sends an automatic response to incoming messages for a mailbox.
To set Autoresponder
1. Locate the user that you want to edit. For more information, see “Searching in the MAC”.
2. Click the user name.
3. In the Autoresponder section, enter the text of the auto-response message in the Text field.
4. Optionally, In the Interval field, enter the number of days before the same recipient will receive the auto-response message again. If not specified, the interval defaults to one day.
5. Optionally, In the End Date field, enter the last day/time when the auto-response message is in effect. The required format is YYYY-MM-DD. If not specified, the Autoresponder never expires.
6. Click Update.
Suspending a userThe most common reason that you might want to suspend a user is because they are suspected of sending a lot of spam messages. You can suspend one or more services in order to achieve the suspended state appropriate to your business needs. The services that you see depend on the type of user
27

account. For example, the only service option that you see for Forward accounts is Receive Email.
Note: Suspended users remain billable.
To suspend user services
1. Locate the user whose services you want to suspend. For more information, see “Searching n the MAC”.
2. Click the user name.
3. In the Sending & Receiving section, click the appropriate radio buttonsto suspend one or more services. See the table below for the implications of suspending each service.
4. Click Update.
Service Suspended Result
Receive The user can access their existing mail through an email client, email messages can be composed and sent, but no further mail will be received.
IMAP4 Connection to the user account with an IMAP4 clientis denied.
POP3 Connection to the user account with a POP3 client isdenied.
Send The user can access their existing mail through an email client, incoming email messages will be downloaded, but no mail can be sent.
Webmail Account login to the Webmail client is denied.
Webmail Send The user can receive mail via Webmail but cannot send mail through Webmail.
User suspended by spam filterThe OpenSRS spam filter monitors both inbound and outbound messages. Outbound messages may also be identified as spam by their recipients. If thenumber of messages that are identified as spam exceeds the threshold set bythe service provider within a 24 hour period, the user is automatically suspended for AUP Violation.
When a user is suspended for AUP Violation, the user can no longer send mailvia Webmail or SMTP, though they can still receive and view their mail. An email is sent to the Abuse contact for the company that owns the mailbox, along with copies of up to three of the suspected messages; the messages are sent in an attachment labeled evidence.txt. The Abuse contact can then
28

decide whether to reinstate the user. For information on reinstating users, see “Reinstating a user” below.
Note: Suspended users cannot be deleted.
If the evidence samples indicate that the account was indeed sending out spam, but the end user has no knowledge of sending those mails, it is likely that the user's password was compromised. This may be because they used an easy to guess password or they replied to one or more phishing emails, ortheir computer may have a virus.
We recommend that you offer an Anti-Virus package to the user, if one is available, and that you immediately change the password for the account.
We also recommend that you strongly advise the user to change the passwords for any other online accounts (banking, Facebook, and so on) thatused the same password as their email account.
Reinstating a userTo reinstate a user
1. Locate the user that you want to reinstate. For more information, see “Searching n the MAC”.
2. Click the user name.
3. In the Sending & Receiving section, from the affected services drop-down lists, choose enabled.
4. Click Update.
Deleting user accountsYou can follow this procedure to delete any type of user account, whether it is a mailbox account, a filter account, forward-only account, and so on.
Note: Deleted accounts can be restored for up to 30 days.
To delete user accounts
1. In the navigation pane, under the domain name, click Users.
2. Click the checkbox next to each of the users that you want to delete.The number on the Delete Selected button changes to reflect the number of users that you selected.See “Searching in the MAC” for information on using filters to find specific users.
3. Click Delete Selected.A confirmation dialog lists the users that will be deleted and asks you to confirm the deletion.Important: Be sure to review this list carefully especially if you used the filters to narrow your search for these users. If Filtering Keeps Selection is enabled (in Settings) there could be previously selected users that are included in this list of users that will be deleted. For
29

more information, see “Settings”.
4. Click Delete.
Restoring user accountsIf a user account that has been deleted for 30 days or less, you can restore it. If the user does is not listed on the Deleted Users tab, it cannot be restored.
You can restore a user account to its original name only if that name has not been reissued during the period in which the account was deleted.
If the name has been reused, the MAC offers a suggestion for a new name for the user in the Restore As field.
A user account can be restored to any new name that is available.
To restore user accounts
1. In the navigation pane, under the domain name, click Deleted Users.If a user does not appear in the Deleted Users list, the account cannot be restored.
2. You can narrow your search by entering part or all of the name of the user you want to restore in the User field at the top of the page. You can use wildcard characters to represent to represent part of the name. By default, all user types are displayed, but you can choose to view only certain types. Click in the Type area at the top of the page and remove the checkmarks from one or more of the Type boxes. For example, if you want to see only regular mailbox users, ensure that only Mailbox is checked.
3. Click the checkboxes next to the users that you want to restore.The number on the Restore Selected button changes to reflect the number of users that you selected.
4. Verify that the Restore As field displays the correct user name. If you want to restore the user and rename it, enter the new name in this text field.
5. Click Restore Selected.
Restoring deleted mailMail that has been deleted for 14 days or less can be restored to the user's account.
Note: Email messages must have existed in the account long enough for a backup to have been done in order for them to be restored.
To restore deleted mail
1. In the navigation pane, under the domain name, click Users.
2. Click the user name whose mail you want to restore.
30

3. Click the Restore Email tab.
4. From the Folder drop-down list, choose the folder that contains the mail you want to restore, and then click Search. Deleted folders appear at the bottom of the list, under a dividing line.
5. Click the checkbox beside each of the messages that you want to restore.
6. From the drop-down list, choose the folder that contains the mail you want to restore, and then click Restore Selected.
Alternatively, click Restore All to restore all of the messages in the selected folder.
Restoring deleted Address Book contactsDeleted Address Book contacts can be restored if they were deleted within the last 14 days.
Additionally, the contacts must have existed in the user account long enough for a backup to have been done (16 to 24 hours).
To restore deleted address book contacts
1. In the navigation pane, under the domain name, click Users.
2. Click the user name whose address book you want to restore.
3. Click the Restore Contacts tab.
4. Click the checkbox beside each of the contacts that you want to restore or click the checkbox at the top of the list to select all displayed entries.
5. Click Restore.
Reindexing user accountsIf a customer reports that some of their mail messages are suddenly disappearing and you can't discover the cause, you can try regenerating the mailbox index file. Although rare, if the problem was caused by a corrupted index file, reindexing will fix the problem.
Note: This feature is only available to Company and Company Mail administrator levels.
Before reindexing the mailbox, you should check to see if the messages can be restored (using the restore email tool). If the messages are not available to be restored, then you can try reindexing.
Important: You should only do this if you have ruled out all other causes as reindexing will log off the user if they were logged in, and their mailbox will be unavailable for several minutes.
To reindex a mailbox
1. In the navigation pane, under the domain name, click Users.
31

2. Click the user name whose mailbox you want to reindex.
3. In the Tools & Status section, click Reindex.
Releasing spam messagesSpam messages are quarantined by the OpenSRS email filters. Occasionally, a legitimate email will be tagged as spam. You can release one or more emailmessages from quarantine and the messages will be moved to the user's Inbox.
Note: Users who use POP3 to access their messages do not have access to their Spam folder. Releasing mail into their Inbox will cause their email clientto download the message via POP3.
To release spam messages
1. In the navigation pane, under the domain name, click Users.
2. Click the user name whose spam messages you want to release.
3. Click the Release Spam tab.
4. Click the checkbox for each of the messages that you want to release. You can click the checkbox at the top of the list to select all displayed entries.
5. Click Release.
User statistics and snapshotsUsage statistics are summaries of account usage and are displayed as graphs. Statistics are available can be viewed as a summary in graphical format, or as detailed snapshots in CSV format.
To view statistics
1. In the navigation pane, under the domain name, click Users.
2. Click a user, and then click the Stats tab.
3. From the Interval drop-down list choose the time period for which you want to view statistics: day, week, or month.
4. From the Graph Type drop-down list choose the type of data that you want to view:
• Logins—POP3, IMAP4, and Webmail.
• Message Bytes—Inbound and relayed email, in KBs.
• Message Counts—Normal deliveries, spam deliveries, autoresponses, forwards, destination recipients, and outbound messages.
• Storage—Storage used, in MBs.
32

Managing workgroupsWorkgroups are useful for organizing users into categories. Since each workgroup can have its own administrator, you can delegate workgroup-leveladministration tasks by assigning an administrator to a workgroup.
Workgroup administrators can perform these tasks:
Create a new workgroup Modify a workgroup Delete a workgroup
Viewing workgroupsThe Workgroup page displays a list of all the workgroups in a domain. You can click on any column heading to reorder the workgroups based on that column.
To view workgroups
1. Set the current domain to the domain whose workgroups you want to view. For more information, see “Setting the current domain”.
2. In the navigation pane, under the domain name, click Workgroups.The Domain page appears displaying the Workgroups tab:
This page lists the workgroups in this domain, along with the number of users and the number of mailbox, forward, and filter accounts that are in
33

each workgroup. This page is your starting point for performing workgroup-level administrative tasks.
Creating a new workgroupEvery new domain automatically includes one default workgroup called staff. You can create additional workgroups for any domain.
To create a workgroup
1. Set the current domain. For more information, see "Setting the currentdomain".
2. In the navigation pane, under the domain name, click Add Workgroup.The Create Workgroup page appears.
3. In the Workgroup field, enter a name for the new workgroup, and then click Create.The new workgroup appears in the list of existing workgroups.
Modifying a workgroupYou can perform these tasks on any existing workgroup:
Add users to a workgroup Assign a workgroup administrator Remove users from a workgroup Delete a workgroup
Note: You cannot rename an existing workgroup.
Adding users to a workgroupTo add a user to a workgroup
1. Locate the user that you want to add to a workgroup. For more information, see “Searching in the MAC”.
2. Click the user name.
3. In the Basic Settings section, from the Workgroup drop-down list, select the workgroup to which you want this user to belong.
4. Click Update.
34

Assigning a workgroup administratorTo assign an administrator to a workgroup
1. Locate the user that you want to administer the workgroup. (For more information, see “Searching in the MAC”.)
2. Click the user name.
3. In the Basic Settings section, in the Workgroup field, verify that this user is a member of the workgroup to be administrated.
4. In the Admin section, from the Admin Role drop-down list, choose Workgroup.
5. Click Update.
Removing users from a workgroupThere are two ways to remove a user from a workgroup:
Assign the user to a different workgroup. For more information, see “Adding users to a workgroup”.
Delete the user from the system.For more information, see “Deleting a user”.
Deleting workgroupsYou can delete any workgroup except the domain's default workgroup. When the domain is first created, the default workgroup is set to staff.
We recommend that you move all of the users out of the workgroup before you delete the workgroup.
To delete a workgroup
1. Set the domain to the one whose workgroups you want to delete. (For more information, see “Setting the current domain”).
2. In the navigation pane, click Workgroups.The Workgroups page appears.
3. Click the checkbox next to each of the workgroups that you want to delete; only the workgroups with checkmarks will be deleted.The number on the Delete Selected button changes to reflect the number of workgroups that you selected.
4. Click Delete Selected.A dialog box appears that asks you to confirm that you want to delete the selected workgroups.
5. Optionally, in the Delete Workgroups dialog, click the checkbox to select the Cascade option, which deletes any users that are in the workgroup. If you don't select this option, and there are users in the workgroup, the delete operation will fail.
6. Click Delete.
35

Managing domainsDomain administrators can perform these tasks:
Create a new domain View a domain Modify an existing domain Disable (or re-enable) a domain Delete a domain Restore a deleted domain
Creating a new domainTo create a new domain
1. In the navigation pane, click Add Domain.The Create Domain page appears.
2. Complete the following fields, as applicable. Note: All fields are greyed out until you enter complete the Domain field and press the Enter key.
36

Field Explanation
Basic Settings
Domain Specify the name of the new domain. This field is mandatory. The domain name can be up to 160 characters.
Stats Mailout Enter the addresses to which you want to send daily snapshots of account usage. Separate each address with a comma.
FilterMX The MX Host address is the target mailserver to which filtered spam and virus-free email will be delivered. This can be either a hostname or IP address, and it must include the inbound port thataccepts connections (usually port 25). For example, mail.mymailserver.com:25.
User Limit Enter the maximum number of accounts of any type (regular mailbox, forward, and filter) that canbe created in the domain.
Alias Limit Enter the maximum number of aliases that can be created in the domain.
Aliases Enter any domain aliases. Be sure to enter each domain alias on a separate line.
Note: You must set a Domain Aliases’ DNS record.Consult the DNS Configuration Guide for information on setting DNS records.
Webmail Domain Alias When this box is checked, mailbox users will be able to use domain aliases in the From field of outgoing messages.
Defaults For New Users
Language From the drop-down list, choose the default language for this domain. This language automatically applies to new mailboxes created in this domain, unless you specify a different language for a particular mailbox. This field is optional.
Timezone From the drop-down list, choose the default time zone for this domain. This time zone automaticallyapplies to new mailboxes created in this domain, unless you specify a different time zone for a particular mailbox. This field is optional.
37

Field Explanation
Quota (MB) Enter the default maximum size (in Megabytes) for new user accounts that are created.
Max Quota (MB) The maximum (in Megabytes) that can be assigned to any user account.
Services – Receive, IMAP4, POP3, Send, Webmail, Webmail Send
The default settings for new users in this domain for various services. The services are:
• Receive—Whether the user can receive email.
• IMAP4—Whether the user can connect with an IMAP4 client.
• POP3—Whether the user can connect with a POP3 client.
• Send—Whether the user can send email.
• Webmail—Whether the user can receive mail through Webmail.
• Webmail Send—Whether the user can send mail through Webmail.
For each of the available services, click a radio button to set the service to one of the following options:
• enabled—The service is available.
• disabled—The service is not available.
• suspended—The service is not currently available , and can only be re-enabled by an administrator at a level equal to or higher than the one who suspended the user.The most common reason for suspension is an AUP violation for exceeding the spam threshold that was set by the service provider.
Note: The default settings are inherited from the company settings, but you can change any of the settings for individual domains.
Inheritable For Users
Brand From the drop-down list, choose the brand that will apply to the new domain. This field defaults tothe Company brand. Changing the selection changes the branding for new domains. For information on brands, see "Branding".
Password Encoding From the drop-down list choose the type of
38

Field Explanation
encryption that you want to use to encode user passwords. If this value is not set at the domain level, the value is inherited from the level above, that is, the domain uses the company value.
Note: Only company admins are allowed to change this setting; other admin levels can view the setting but cannot change it.
Spam Folder Specify the name of the folder to which all spam messages will be delivered. The default is Spam.
Spam Level From the drop-down list, choose the level of aggressiveness for spam filtering. Choosing a level other than Normal causes the filtering engine to be more aggressive in labeling mail as spam.
Spam Tag Specify the tag that is appended to the Subject lineof all spam messages.
Spam Header Specify the tag that will be assigned to the headerof spam messages. The format must begin with a capital letter but can be followed by anything, for example, X-Spam: Spam detected. This must be set to an email header valid format.
SMTP Limit The maximum number of messages that a user can send in a 24 hour period.
Filter Delivery From the drop-down list, choose the way in which you want spam messages to be handled by the OpenSRS email filters:
passthrough—Allow spam messages to be delivered to the Reseller’s designated mailserver.
quarantine—Do not deliver spam messages to the Reseller’s server.
Spam Settings
Allow Enter the email addresses and domains whose messages will never be marked as spam.
You can add up to 1000 entries. Addresses must be separated by a carriage return.
Block Enter the email addresses and domains from which you do not want to receive email.
39

Field Explanation
You can add up to 1000 entries. Addresses must be separated by a carriage return.
3. Click Create.
Viewing domainsThe Company Domains tab displays a summary of your company’s domains.
To view domains
1. In the navigation pane, under your company name, click Domains.A page appears that lists all of the domains in your company, along with the following information for each domain:
Type—The account type (mailbox, forward, filteronly, or alias).
Status—Whether the domain is currently active or suspended.
Total—Number of users in the domain, or the name of the only user in the domain.
Mailbox—Number of mailbox accounts in the domain.
Forward—Number of email forwards defined in the domain.
Filter—Number of filter-only accounts in the domain.
Alias—Number of aliases defined in the domain.
You can click on any column heading to reorder the domains based on that column.
2. Click a domain to view and modify its properties. For more information, see Modifying an existing domain.
Alternatively, enter the domain name in the Jump box in the top left corner and then press Enter to display the domain.
Modifying an existing domainTo modify a domain
1. Navigate to the domain that you want to modify. See “Viewing domains”.The Domain page opens, displaying the Settings tab. You can click on the tabs at the top of the page to view additional fields.
40

2. Modify the applicable domain detail fields. For an explanation of these fields, see "Creating a new domain".
3. Click Update.
On this page, you can perform the following tasks:
Assign a brand to a domain Add or modify domain aliases Create or modify Allow and Block lists Set the FilterMX Host Set domain-level spam handling Set the default language and time zone for a domain Enable, disable, or suspend domain services Set or modify mailbox limits Create bulletins Disable or delete a domain Restore a deleted domain
Domains contain workgroups and users that you manage separately. For more information, see “Managing workgroups” and “Managing users.”
Assigning a brand to a domainA brand consists of a logo and a set of colors that give the Webmail interface its look and feel. The brand setting does not affect the MAC interface.
To assign a brand to a domain
1. Navigate to the domain to which you want to assign a brand. See “Viewing domains”.
2. In the Inheritable For Users section, from the Brand drop-down
41

list, choose the brand that you want to apply to this domain.
3. Click Update.
For information on creating brands, see "Creating a new brand".
Adding and Removing Domain AliasesA domain alias is an alternate name for a domain.
Note: Domain admins and higher can enable Webmail domain alias support, but only company admins and higher can create domain aliases.
Every domain alias requires its own unique DNS configuration in order to receive mail. There is no separate process for setting the DNS records for a domain alias; for DNS purposes, it is simply another domain. Once you have created your domain aliases, please refer to the Domain Manager Guide and follow the instructions for setting the DNS for a domain in the Live environment.
If you also enable alias support for user accounts, your users will be able to use these domain aliases in the From field of outgoing messages. For example, suppose you have a domain called example.com and a user whose account name is [email protected]. If you create an alias for that user called [email protected], the user can choose to send mail from either [email protected] or [email protected]. If you then create a domain alias for example.com and you call it aliasexample.com, the user will be able to choose from four From addresses when they compose a message: [email protected], [email protected], [email protected], and [email protected].
To create a domain alias
1. Navigate to the domain to which you want to add one or more aliases. See “Viewing domains”.
2. In the Aliases text box, enter the aliases. Be sure to enter each alias on a separate line, separated by a carriage return.
3. Optionally, click to select the checkbox beside Webmail Domain Alias. When this box is checked, users can use the actual and the alias addresses to send and receive mail.
4. Click Update.
To remove domain aliases
1. Navigate to the domain whose aliases you want to remove. See “Viewing domains”.
2. Delete the alias names from the Aliases text box.
3. Click Update.
42
Setting domain-level allow and block sender listsYou can approve or block emails from specific email addresses or domains byadding them to the Allow or the Block list. Lists are maintained at four levels:global, company, domain, and account/user.
The list hierarchy is:
1. Account/user allow list
2. Account/user block list
3. Domain allow list
4. Domain block list
5. Company allow list
6. Company block list
7. Global allow list
8. Global block list
9. PAB—Addresses that are in the end user’s Personal Address Book (PAB) are considered, by default, to be in the Allow list for that user.
Note: The global list is set and maintained by OpenSRS and used primarily inemergency situations, such as an attack, to ensure that the entire system is protected. Under normal operating parameters, the global lists are usually empty.
Company, domain, and account/user lists can be set and maintained using the MAC. Account/users lists can also be accessed by the end-user in the Webmail interface.
Creating Allow and Block ListsWhen adding addresses and domains to the Allow and Block lists, you can add up to 1000 entries in each list, and you can use up to five wildcards in any given entry. For example, the entry r*.al*.*car*@*foo.com is acceptable, but *r*.al*.*car*@*foo.com is not acceptable because it uses more than five wildcards.
Each address must be on a separate line, separated by a carriage return.
Note: To add all addresses in a domain, be sure to use an asterisk in the following format: *@domain.tld.
To add senders to the Allow or Block list
1. Navigate to the domain for which you want to create an allow or block list. See “Viewing domains”.
2. Add the addresses or domains to the appropriate list box: Allow or Block.Each address must be entered on a separate line.
43

3. Click Update.
Setting the FilterMX HostThe Email Exchange (MX) record is the line within the DNS zone file that directs email messages to the appropriate email server. It tells the rest of theworld where a mailbox is located. In this case, the FilterMX host is the destination for mail that passes through Filter type mailboxes.
To set the FilterMX host
1. Navigate to the domain for which you want to set the FilterMX host. See “Viewing domains”.
2. In the FilterMX field, type the host.
3. Click Update.
Note: OpenSRS Email Service sends your filtered mail from a block of IP addresses. We recommend that you add these IP addresses to your white list. For more information, see the DNS Configuration Guide.
Setting domain-level spam handlingDomain-level spam settings take precedence over any company settings and are applied to all mailboxes in the domain if no mailbox-level spam settings exist.
To set the default spam handling for a domain
1. Navigate to the domain whose spam handling you want to edit. See “Viewing domains”.
2. In the Inheritable For Users section, in the Spam Tag field, enter the tag that you want to append to the Subject line of all spam messages.
3. In the Spam Header field, enter the tag that will be assigned to the header of spam messages.
4. In the Spam Folder field, enter the name of the folder to which you want all spam messages to be delivered.
5. From the Spam Level drop-down list, choose the aggressiveness level for the spam filtering. Choosing a level other than Normal causes the filtering engine to be more aggressive in labelling mail as spam; however, it may also result in more false positives.
6. Click Update.
Setting spam delivery options for Filter accountsPrior to May 27, 2010, the default for Filter accounts was to not deliver spammessages to end user folders. The spam was caught and quarantined by the OpenSRS email filters and not delivered to your servers. End users only saw
44
the spam messages if they logged on to the OpenSRS Spam Portal to view and release the spam messages. If you want this process to continue, you can set the Filter Delivery option in the MAC to quarantine.
If you want your users to be able to see their spam messages without havingto log in elsewhere, you can set the Filter Delivery option in the MAC to passthrough. When this option is set to passthrough, messages that have been identified by our filters as spam are delivered to your servers, and your servers can then deliver the spam messages to the end users’ folders.
You can also specify a Spam Header tag that our filters will add to the spam message headers so that your system will know that the messages have already been identified as spam. If you have existing spam detection that is adding a header to spam messages, we recommend that you enter the same header in the Spam Header field so that OpenSRS spam detection will replicate the behavior of your current system. This way your mail system willbe able to direct all the spam messages into the correct end user folder usingexisting filtering mechanisms.
Note: The Filter Delivery setting can be changed at the domain or company level. The domain level setting takes precedence, unless the domain level setting not specified, in which case, the Filter accounts inherit the setting from the Company level.
To specify the spam delivery method for Filter accounts
1. Navigate to the domain that you want to edit. See “Viewing domains”.
2. In the Inheritable For Users section, from the Filter Delivery drop-down list, choose the way in which you want spam messages to be handled by the OpenSRS email filters:
blank (use company setting)—Use the Filter Delivery option setat the Company level.
quarantine—Do not deliver spam messages to the Reseller’s server.
passthrough—Allow spam messages to be delivered to the Reseller’s designated mail filtering server.
4. Optionally, in the Spam Header field, specify the tag that will be assigned to the header of spam messages. The format must begin witha capital letter but can be followed by anything, for example, X-Spam: Spam detected.
5. Click Update.
Setting the default language for a domainA domain’s default language setting automatically applies to any mailboxes created within that domain, unless you specify a different language for a particular mailbox. Any company- or domain-level administrator can change the default language setting for a domain.
45

To set the default language
1. Navigate to the domain whose default language you want to change. See “Viewing domains”.
2. In the Defaults For New Users section, from the Language drop-down list, select the default language for this domain.
3. Click Update.
Setting the default time zone for a domainThe default time zone setting automatically applies to any mailboxes created within that domain, unless you specify a different time zone for a particular mailbox. Any company- or domain-level administrator can change the defaulttime zone setting for a domain.
To set the default language
1. Navigate to the domain whose default time zone you want to change. See “Viewing domains”.
2. In the Defaults For New Users section, from the Timezone drop-down lists, select the default time zone for this domain.
3. Click Update.
Setting mailbox limitsCompany administrators are allowed to specify the maximum number of mailboxes that can be created for each domain. Even if you have set a default mailbox limit for all the domains within your company, you can still change the limits for particular domains.
Note: Domain administrators can see this limit, but they cannot change it.
Once set, the limit cannot be exceeded. If you are restoring an account that would result in more mailboxes than allowed; you will get an error message and the restore will not proceed. In this case, you would have to increase thelimit and then retry the restore.
To set mailbox limits
1. Navigate to the domain whose mailbox limit you want to change. See “Viewing domains”.
2. In the Basic Settings section, enter the maximum values that you want to apply, by default, for each of these account types:
User Limit—The maximum number of mailboxes per domain that can be created.
Alias Limit—The maximum number of domain aliases per domain that can be created.
3. Click Update.
46

Sending out domain bulletinsYou can create and send out broadcast messages or bulletins to specific users or to all mailboxes in a domain. You can send simple plain text messages or you can send messages that support HTML and attachments.
If you want to add HTML content, you must put this line in the header: Content-Type: text/html; charset="ISO-8859-1. This tells email clients to display the content as HTML.
To send a bulletin
1. Navigate to the domain for which you want to create a bulletin. See “Viewing domains”.
2. Click the Bulletins tab.
3. Click Add Bulletin. The Add Bulletin window appears.
4. Optionally, in the Bulletin field. enter a name for the bulletin. The default is a system-assigned number.
5. From the Mode drop-down list, choose the way in which you want the bulletin to be delivered:
47

auto—Automatically deliver the bulletin to every account that currently exists and to new accounts when they are created.
manual—Send the bulletin to every account that currently exists.
6. In the Message Headers section enter the email address from which you want the bulletin to be sent, and enter a Subject for your bulletin.You can add other header information as well, for example:
Return-Path: [email protected]
From: "Example.com Announcement" <[email protected]>
Subject: Announcing New Service Enhancements
Date: Thu, 10 Oct 2013 12:30:00 -0500
MIME-Version: 1.0
Content-Type: text/html; charset="ISO-8859-1"
Reply-To: [email protected]
7. In the Message Body section, enter the body of your message. You can add HTML content, mime-encoded image information, and text.
8. Click Create.Bulletins that you defined as auto are sent automatically; manual bulletins are not sent until you decide to post them.
9. Optionally, to preview the message before sending it, click the checkbox next to the bulletin to select it, and then click Post Selected Enter your own email address in the Post To field, and then click Post. You can then view the bulletin in your Inbox.
To post manual bulletins
1. Select the bulletins that you want to send, and then click Post Selected.
2. Do one of the following:
To send the bulletin to every account in the domain, ensure thatthere is an asterisk (*) in the Post To field.
To send the bulletin to specific accounts, enter the individual email addresses in the Post To field, separated by commas.
3. Click Post.
Note: Bulletins are only delivered locally, and any forwarding settings are ignored; therefore, accounts that are set to forward only will not see the bulletin.
Assigning a domain administratorTo assign an administrator to a domain
1. Locate the user that you want to administer the domain. (For more
48

information, see “Viewing users”.)
2. In the Admin section, from the Admin Role drop-down list, choose Domain.
3. In the Domains text box, enter the names of the domains that the user is allowed to administer. Be sure to enter each one on a separate line.
4. Click Update.
When the user logs in, if they are allowed to administer more than one domain, they will see a drop-down list of the domains at the top of the navigation pane . This allows them to switch from one domain to another without having to log out of one domain and then log in to another one.
Disabling a domainCompany administrators can disable and re-enable domains (unless the domain has been disabled by a super admin). If this feature has been disabled by a higher level admin, you will not be able to change the setting ofthis option.
Warning: When you disable a domain, the mailboxes under that domain will no longer function.
To disable a domain
1. Navigate to the domain that you want to disable. See “Viewing domains”.
2. In the Basic Settings section, click box beside Disabled. The checkmark indicates that the domain is disabled.
3. Click Update.
49

To re-enable a domain
1. Navigate to the domain that you want to re-enable. See “Viewing domains”.
2. In the Basic Settings section, click the checkbox beside Disabled. The checkmark disappears to indicate that the domain is no longer disabled.
3. Click Update.
Deleting domainsCompany administrators can delete any of the domains in a company. When you delete a domain, all of the workgroups and mailboxes in the domain are deleted as well.
To delete domains
1. In the navigation pane, under your company name, click Domains.
2. Click the checkbox next to each of the domains that you want to delete.The number on the Delete Selected button changes to reflect the number of domains that you selected.
3. Click Delete Selected.A confirmation dialog appears that lists the domains that will be deleted and asks you to confirm the deletion.Important: Be sure to review this list carefully especially if you used the filters to narrow your search for these domains. If Filtering Keeps Selection is enabled (in Settings) there could be previously selected domains that are included in this list of domains that will be deleted. For more information, see “Settings”.
4. Optionally, click the checkbox to select the Cascade option to delete any users that are in the selected domains. If you don't select this option, you need to delete the users before you delete the associated domains otherwise the delete operation will fail. If you don't select the Cascade option and some of the domains you are trying to delete contain users and others don't, only the empty domains will be deleted; the others will return an error message.
5. Click Delete to confirm the deletion.
50

Restoring a domainCompany administrators can restore any domains that have been deleted within the last 30 days.
To restore a domain
1. In the navigation pane, under your company name, click Deleted Domains.
2. Click the checkbox beside each of the domains that you want to restore.The number on the Restore Selected button changes to reflect the number of domains that you selected.You can use the filters to search for specific domains. Enter all or part of the name in the Domain field at the top of the page. You can use wildcard characters to represent part of the name. Click Filter to view the domains that match your search criteria. For more information, see “Searching in the MAC”.
3. Click Restore Selected.
Once you restore a deleted domain, you can then restore any or all of the users under that domain. As long as you didn’t delete the mail before you deleted the user, the mail that was in the user account at the time it was deleted still exists and will be restored when you restore the user.
If you deleted the mail before you deleted the user, you can still restore the deleted mail after you restore the user. For information on restoring users, see “Restoring user accounts”.
Domain statistics and snapshotsUsage statistics are summaries of account usage and are displayed as graphs. Statistics are available at the company, domain, and user levels, andcan be viewed as a summary in graphical format, or as detailed snapshots in CSV format.
Snapshots provide very detailed information about every user in a domain or company for a specific time period, for example, the account type, the quota size, the number of times the account was accessed, and the number of messages currently in the account. Snapshots are available at the Company and Domain levels. Snapshots can be downloaded in CSV format or emailed daily to one or more email addresses.
To view statistics
1. Navigate to the domain whose stats you want to view, and then click the Stats tab.
2. From the Interval drop-down list choose the time period that you wantto view: day, week, or month.
3. From the Graph Type drop-down list choose the type of data that you
51

want to view:
Users—Mailboxes, forward only/mailing list, filter only, and alias.
Logins—POP3, IMAP4, and Webmail.
Message Bytes—Inbound and relayed email, in KBs.
Message Counts—Normal deliveries, spam deliveries, autoresponses, forwards, destination recipients, and outbound messages.
Storage—Storage used in MBs.
To view snapshots
1. Navigate to the domain for which you want to view snapshots, and then click the Stats tab.
2. From the Download CSV data drop-down list, choose the period that you want to view from the Daily Snapshots, Weekly Snapshots, or Monthly Snapshots section.The data is downloaded to a CSV file. For an explanation of each of thefields in the CSV file, see “Domain snapshot data fields”.
3. To have daily domain snapshots emailed to one or more addresses, click the Settings tab, and in the Basic Settings section, enter the addresses in the Stats Mailout text field (separate each address with acomma), and then click Update.
Note: We do not recommend daily snapshots for large domains as the snapshot file may exceed the message size allowed by many SMTP servers.
Notes on snapshots Daily snapshots are generated for the previous day; daily snapshots
expire after 31 days. Weekly snapshots are generated each Monday for the previous week;
weekly snapshots expire after 1 year. Monthly snapshots are generated on the 1st of the month for the
previous month; monthly snapshots never expire. Weekly and monthly snapshots have an extra column called days that
indicates how many days are in the period. Weekly and monthly snapshots contain per-day averages for usage-
based statistics (number of messages received). To get the total for the week or month, simply multiply the per day average by the number of days in the period.
For some values, the weekly and monthly snapshots just contain the last state of the mailbox (for example, if a mailbox was forwarded on the 30th, the monthly snapshot will show it in a forwarding state).
52

Domain snapshot data fieldsThe fields in the snapshot CSV files are as follows:
Field Description
username The username/email address of the account. If the name is in brackets ( ), the user has been deleted.
datapoints The number of days in the snapshot period (this field is only present in week or month snapshots).
account_type The account type (mailbox, forward, filteronly, or alias)
last_pop3 When the last POP3 access occurred.
last_imap4 When the last IMAP4 access occurred.
last_webmail When the last Webmail access occurred.
last_smtpin When the last piece of email was received.
last_smtprelay When the last piece of email was sent.
createtime When the account was created.
deletetime When the account was deleted.
quotasize The maximum size of the user's quota (bytes).
size The current size of the user's quota (bytes).
count The current number of messages the user has.
fonly A value of 1 indicates the account does not have local delivery.
forward A comma-separated list of addresses the account forwards to.
autoresponder A value of 1 indicates that the account has an autoresponder enabled, otherwise empty.
pop3_f POP3 service: 1=enabled; 0=not enabled; negative number = suspended/administratively disabled
imap4_f MAP4 service: 1=enabled; 0=not enabled; negative number = suspended/administratively disabled
webmail_f Webmail service: 1=enabled; 0=not enabled; negative number = suspended/administratively disabled
smtpin_f Inbound mail service: 1=enabled; 0=not enabled; negative number = suspended/administratively disabled
smtprelay_f Outbound mail (relay) service: 1=enabled; 0=not enabled; negative number = suspended/administratively disabled
workgroup The ID of the workgroup to which the user belongs.
in_size The size of inbound mail delivered to the user (bytes).
out_size The size of mail sent by the user (bytes).
53

Field Description
in_ham The number of non-spam messages delivered to the user.
in_spam The number of spam messages delivered to the user.
autorespond_count The number of times autoresponse messages were sent.
forward_count The number of messages forwarded via forwarding settings.
out_rcpt_count The number of destination recipients to which the user sent mail.
out_msg_count The number of messages sent from the user.
pop3 The number of times the account was accessed via pop3.
imap4 The number of times the account was accessed via imap4.
webmail The number of times the account was accessed via Webmail.
denied The number of times mail was deferred due to account maintenance.
auth_password The number of successful authentications where a password wasused.
auth_session The number of successful authentications where a login token was used.
storenum The mailstore number the user is on.
out_blocked The number of messages the user attempted to send but that were blocked for containing spam or virus.
54

Managing company informationThis section explains how to view and update your company’s information and statistics, and how to send out company-wide bulletins.
Setting company default preferencesThe default preferences for your company are applied whenever you create new domains and mailboxes within the company. If you want to change any of these settings for specific domains or mailboxes, you can override them atthe domain or mailbox level.
To set company default preferences
1. In the navigation panel, click the company name. The Company page opens, displaying the Settings tab. You can click on the tabs at the top of the page to view additional fields.
2. Complete the fields as outlined in the following table:
Field Explanation
Basic Settings
Company You cannot edit your company name.
Stats Mailout Enter the email addresses to which you want to have daily Company snapshots sent. If you want tospecify more than one address, separate each address with a comma.
Disabled When a company is disabled, the domains under that company will not function.
Created The date that your company was created in the MAC.
OpenSRS User The unique identifier for your company.
Notes
Notes Enter any text you want related to the company.
Defaults For New Domains
Language From the drop-down list, choose the language that will be used in the Webmail interface, by default.
Note: This setting does not affect the MAC interface.
Timezone From the drop-down list, choose the default time
55

Field Explanation
zone that will be used for messages and calendar entries in the Webmail interface.
Quota (MB) Enter the default maximum size (in Megabytes) for new mailboxes that are created.
Max Quota (MB) The maximum (in Megabytes) that can be assignedto any mailbox.
User Limit Enter the maximum number of accounts of any type (regular mailbox, forward, and filter) that can be created.
Alias Limit Enter the maximum number of aliases that can becreated in a domain.
Services – Receive, IMAP4, POP3, Send, Webmail, Webmail Send
The default settings for new domains for various services. The services are:
• Receive—Whether the domain can receive email.
• IMAP4—Whether the domain can connect with an IMAP4 client.
• POP3—Whether the domain can connect with a POP3 client.
• Send—Whether the domain can send email.
• Webmail—Whether the domain can receive mail through Webmail.
• Webmail Send—Whether the domain can send mail through Webmail.
For each of the available services, click a radio button to set the service to one of the following options:
• enabled—The service is available.
• disabled—The service is not available.
• suspended—The service is not currently available , and can only be re-enabled by an administrator at a level equal to or higher than the one who suspended the user.The most common reason for suspension is an AUP violation for exceeding the spam threshold that was set by the service provider.
56
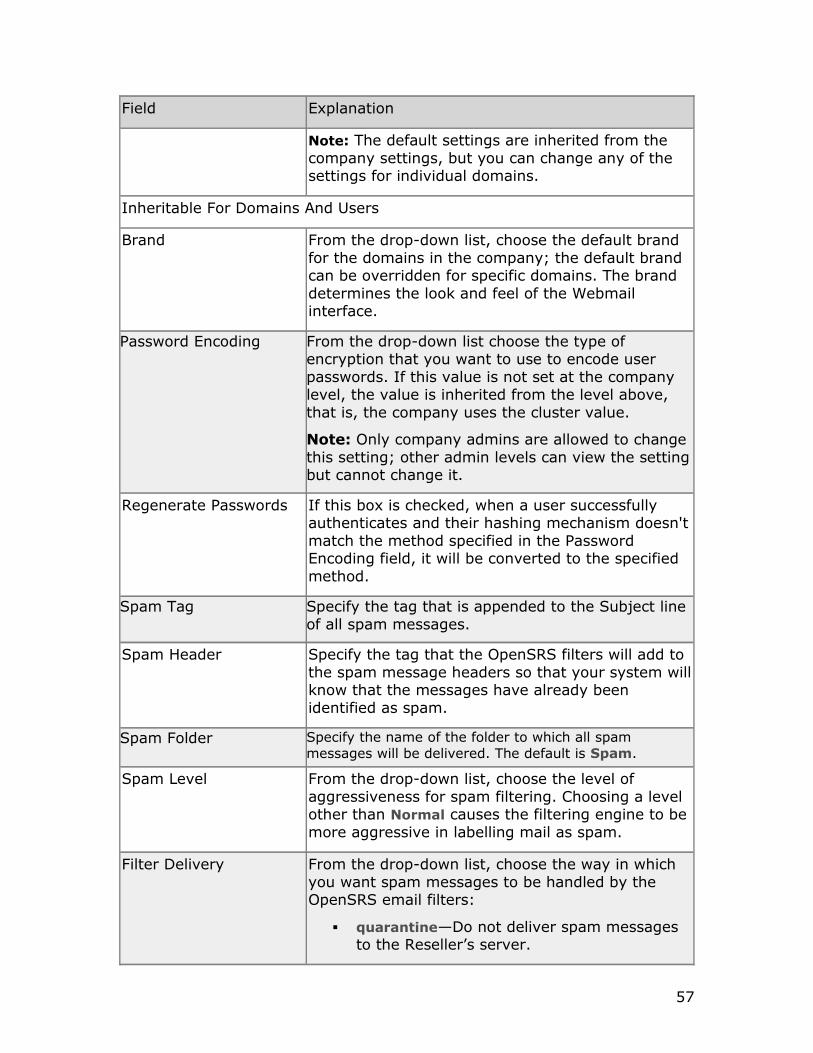
Field Explanation
Note: The default settings are inherited from the company settings, but you can change any of the settings for individual domains.
Inheritable For Domains And Users
Brand From the drop-down list, choose the default brand for the domains in the company; the default brand can be overridden for specific domains. The brand determines the look and feel of the Webmail interface.
Password Encoding From the drop-down list choose the type of encryption that you want to use to encode user passwords. If this value is not set at the company level, the value is inherited from the level above, that is, the company uses the cluster value.
Note: Only company admins are allowed to change this setting; other admin levels can view the settingbut cannot change it.
Regenerate Passwords If this box is checked, when a user successfully authenticates and their hashing mechanism doesn'tmatch the method specified in the Password Encoding field, it will be converted to the specified method.
Spam Tag Specify the tag that is appended to the Subject line of all spam messages.
Spam Header Specify the tag that the OpenSRS filters will add to the spam message headers so that your system willknow that the messages have already been identified as spam.
Spam Folder Specify the name of the folder to which all spam messages will be delivered. The default is Spam.
Spam Level From the drop-down list, choose the level of aggressiveness for spam filtering. Choosing a level other than Normal causes the filtering engine to bemore aggressive in labelling mail as spam.
Filter Delivery From the drop-down list, choose the way in which you want spam messages to be handled by the OpenSRS email filters:
quarantine—Do not deliver spam messages to the Reseller’s server.
57
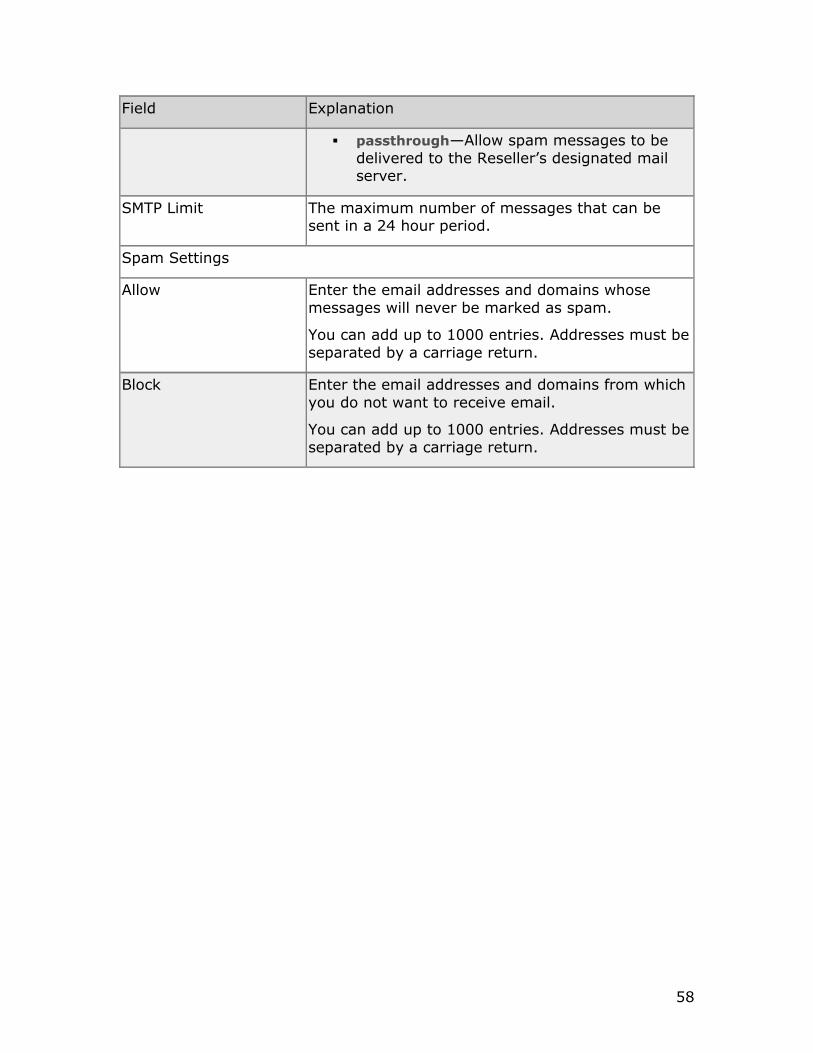
Field Explanation
passthrough—Allow spam messages to be delivered to the Reseller’s designated mail server.
SMTP Limit The maximum number of messages that can be sent in a 24 hour period.
Spam Settings
Allow Enter the email addresses and domains whose messages will never be marked as spam.
You can add up to 1000 entries. Addresses must beseparated by a carriage return.
Block Enter the email addresses and domains from which you do not want to receive email.
You can add up to 1000 entries. Addresses must beseparated by a carriage return.
58
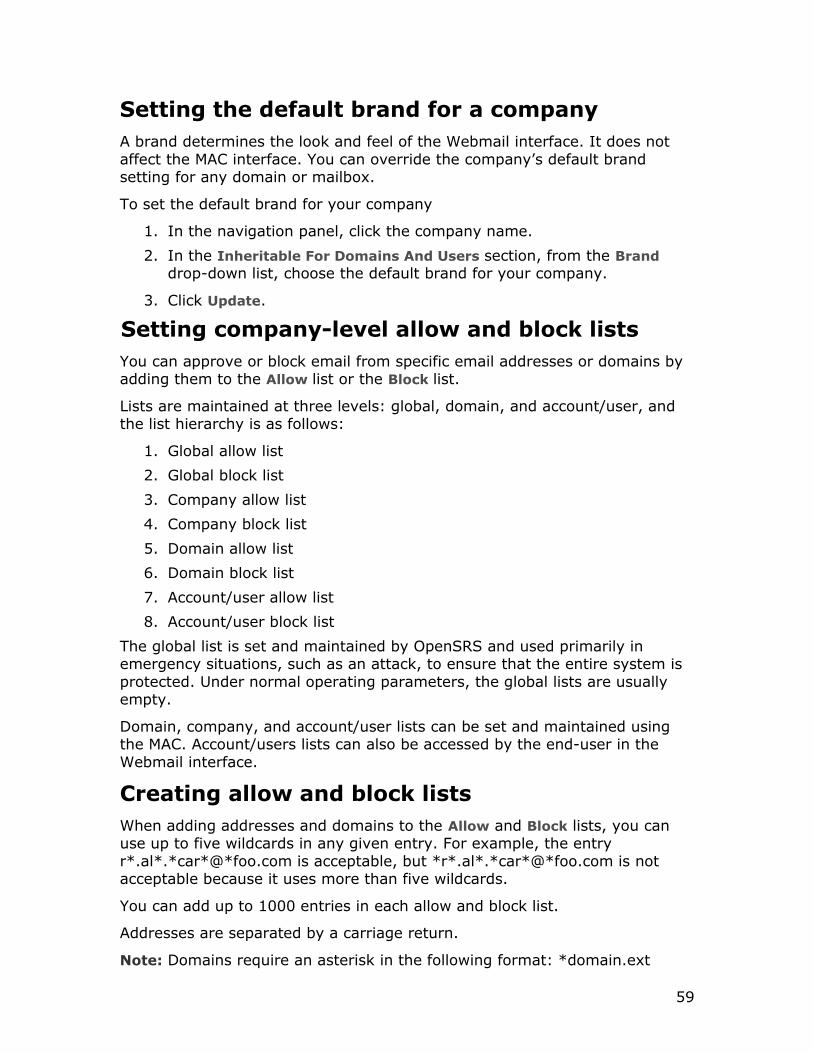
Setting the default brand for a companyA brand determines the look and feel of the Webmail interface. It does not affect the MAC interface. You can override the company’s default brand setting for any domain or mailbox.
To set the default brand for your company
1. In the navigation panel, click the company name.
2. In the Inheritable For Domains And Users section, from the Brand drop-down list, choose the default brand for your company.
3. Click Update.
Setting company-level allow and block listsYou can approve or block email from specific email addresses or domains by adding them to the Allow list or the Block list.
Lists are maintained at three levels: global, domain, and account/user, and the list hierarchy is as follows:
1. Global allow list
2. Global block list
3. Company allow list
4. Company block list
5. Domain allow list
6. Domain block list
7. Account/user allow list
8. Account/user block list
The global list is set and maintained by OpenSRS and used primarily in emergency situations, such as an attack, to ensure that the entire system is protected. Under normal operating parameters, the global lists are usually empty.
Domain, company, and account/user lists can be set and maintained using the MAC. Account/users lists can also be accessed by the end-user in the Webmail interface.
Creating allow and block listsWhen adding addresses and domains to the Allow and Block lists, you can use up to five wildcards in any given entry. For example, the entry r*.al*.*car*@*foo.com is acceptable, but *r*.al*.*car*@*foo.com is not acceptable because it uses more than five wildcards.
You can add up to 1000 entries in each allow and block list.
Addresses are separated by a carriage return.
Note: Domains require an asterisk in the following format: *domain.ext
59

To add senders to the allow or block list
1. In the navigation pane, click your company name.
2. Add the email addresses or domain names to the appropriate text box:Allow or Block. Enter each name on a separate line.
3. Click Update.
Setting company-level spam handlingCompany level settings for spam handling are applied to domains and mailboxes within the domains only if there are no existing domain- or mailbox-level settings.
To set company-level default spam handling
1. In the navigation pane, click your company name.
2. In the Spam Tag field, type the tag that you want appended to the Subject line of all spam messages.
3. In the Spam Header field, enter the tag that will be assigned to the header of spam messages.
4. In the Spam Folder field, type the name of the folder to which you want all spam delivered.
5. From the Spam Level drop-down list, choose the aggressiveness level for the spam filtering.Choosing a level other than Normal causes the filtering engine to be more aggressive in labeling mail as spam; however, it may also result in more false positives.
6. Click Update.
Setting spam delivery options for Filter accountsPrior to May 27, 2010, the default for Filter accounts was to not deliver spamto end user folders. The spam was caught and quarantined by the OpenSRS email filters and not delivered to your servers. End users only saw the messages that were designated as spam if they logged on to the OpenSRS Spam Portal to view and release the spam messages. The Filter Delivery option allows you to determine whether to stop and quarantine spam in this manner or to deliver it to your users’ folders.
If you want your users to be able to see their spam messages without havingto log in elsewhere, you can set the Filter Delivery option in the MAC to passthrough. When this option is set to passthrough, messages that have been identified as spam by our filters are delivered to your servers. Your servers can then deliver the spam messages to the users’ folders.
You can also specify a Spam Header tag that our filters will add to the spam message headers so that your system will know that the messages have already been identified as spam. If you have existing spam detection that is
60

adding a header to spam messages, we recommend that you enter the same header in the Spam Header field so that OpenSRS spam detection will replicate the behavior of your current system. This way your mail system willbe able to direct all the spam messages into the correct end user folder usingexisting filtering mechanisms.
Default settingIf you have one or more Filter accounts that were created prior to May 27, 2010, the default setting for Filter Delivery is quarantine. Spam will continueto be quarantined by the OpenSRS email filters.
If you did not have any filteronly accounts prior to May 27, 2010, or if you became a Reseller after May 27, 2010, the default setting for Filter Delivery is passthrough. Spam messages will be identified as spam by the OpenSRS email filters and then they will be delivered to your servers.
Note: The Filter Delivery setting can be changed at the Domain or Company level, and the Domain level setting takes precedence over the Company setting.
To specify the spam delivery method for Filter accounts
1. In the navigation pane, click your company name.
2. From the Filter Delivery drop-down list, choose the way in which you want spam messages to be handled by the OpenSRS email filters.
quarantine—Do not deliver spam messages to the Reseller’s server.
passthrough—Allow spam messages to be delivered to the Reseller’s designated mail filtering server.
3. Optionally, in the Spam Header field, specify the tag that will be assigned to the header of spam messages. The format must begin witha capital letter but can be followed by anything, for example, X-Spam: Spam detected.
4. Click Update.
Setting global mailbox limitsYou can specify the maximum number of mailboxes that can be created for each domain. When you set the mailbox limit at the company level, this value applies to all new domains within that company; however, you can change the limit for particular domains. The domain administrator will be able to see this limit, but cannot change it.
Once set, the limit cannot be exceeded, even by restoring an account that would result in more mailboxes than allowed; in that case, you would get an error message and the restore would not proceed. You would have to increase the limit and then retry the restore.
61

To set mailbox limits
1. In the navigation pane, click your company name.
2. In the Defaults For New Domains section, enter the maximum values that you want to apply to all domains in the company:
User Limit—The maximum number of accounts of any type (regular mailbox, forward, and filter) that can be created for each domain.
Alias Limit—The maximum number of domain aliases that can be created for each domain.
3. Click Update.
Sending out company bulletinsYou can create and send out broadcast messages or bulletins to specific users or to all users in a company. You can send simple plain text messages or you can send messages that support HTML and attachments.
If you want to add HTML content, you must put this line in the header: Content-Type: text/html; charset="ISO-8859-1. This tells email clients to display the content as HTML.
Note: You must be a company administrator to send a company bulletin.
To send a bulletin
1. In the navigation panel, click your company name, and then click the Bulletins tab.
2. Click Add Bulletin.
3. Optionally, in the Bulletin field. enter a name for the bulletin. The default is a system-assigned number.
4. From the Mode drop-down list, choose the way in which you want the bulletin to be delivered:
auto—Automatically deliver the bulletin to every account that currently exists and to new accounts when they are created.
manual—Send the bulletin to every account that currently exists.
5. In the Message Headers section enter the email address from which you want the bulletin to be sent, and enter a Subject for your bulletin.You can add other header information as well, for example:
Return-Path: [email protected]
From: "Example.com Announcement" <[email protected]>
Subject: Announcing New Service Enhancements
Date: Thu, 10 Oct 2013 12:30:00 -0500
MIME-Version: 1.0
62

Content-Type: text/html; charset="ISO-8859-1"
Reply-To: [email protected]
6. In the Message Body section, enter the body of your message. You can add HTML content, mime-encoded image information, and/or text.
7. Click Create.Bulletins that you defined as auto are sent automatically; manual bulletins are not sent until you post them.
8. Optionally, to preview the message before sending it, click the checkbox next to the bulletin to select it, and then click Post Selected Enter your own email address in the Post To field, and then click Post. You can then view the bulletin in your Inbox.
To post manual bulletins
1. Select the bulletins that you want to send, and then click Post Selected.
2. Do one of the following:
To send the bulletin to every user in the company, ensure that there is an asterisk (*) in the Post To field.
To send the bulletin to specific accounts, enter the individual email addresses in the Post To field, separated by commas.
Click Post.
Note: Bulletins are only delivered locally, and any forwarding settings are ignored; therefore, accounts that are set to forward only will not see the bulletin.
Managing company contactsOn the Contacts tab you can add, modify, or delete contacts and specify the type of communications that they will receive. You can designate more than one contact of each type.
To add a contact
1. In the navigation panel, click the company name, and then click the Contacts tab.
2. Complete the text fields. The Email field is mandatory; the Name and Phone fields are optional.
3. Click one or more checkboxes to select the type of communications that the contact will receive:
Abuse—Notifications about suspected virus or spam violations.
Business—General business related messages such as marketing communications.
Technical—Notifications about technical issues such as
63

maintenance windows.
4. Click the plus sign (+) to add another contact, or click Save to save the information.
To modify or delete contacts
1. In the navigation panel, click the company name, and then click the Contacts tab.
2. Make any required changes to the contacts, or click the minus sign (-) to delete the contact.
3. Click Save to save the changes.
Company statistics and snapshotsUsage statistics are summaries of account usage and are displayed as graphs. Statistics are available at the company, domain, and user levels, andcan be viewed as a summary in graphical format, or as detailed snapshots in CSV format.
Snapshots provide very detailed information about every mailbox in a domainor company for a specific time period, for example, the account type, the quota size, the number of times the account was accessed, and the number of messages currently in the account. Snapshots are available at the Company and Domain levels. Snapshots can be downloaded in CSV format oremailed daily to one or more email addresses.
To view statistics
1. In the navigation pane, click your company name, and then click the Stats tab.
2. From the Interval drop-down list choose the time period for which youwant to view statistics: day, week, or month.
3. From the Graph Type drop-down list choose the type of data that you want to view:
Users (available for Domains and Companies only)—Mailboxes, forward only/mailing list, filter only, and alias.
Logins—POP3, IMAP4, and Webmail.
Message Bytes—Inbound and relayed email, in KBs.
Message Counts—Normal deliveries, spam deliveries, autoresponses, forwards, destination recipients, and outbound messages.
Storage—Storage used in MBs.
To download snapshots
1. In the navigation pane, click your company name, and then click the Stats tab.
64
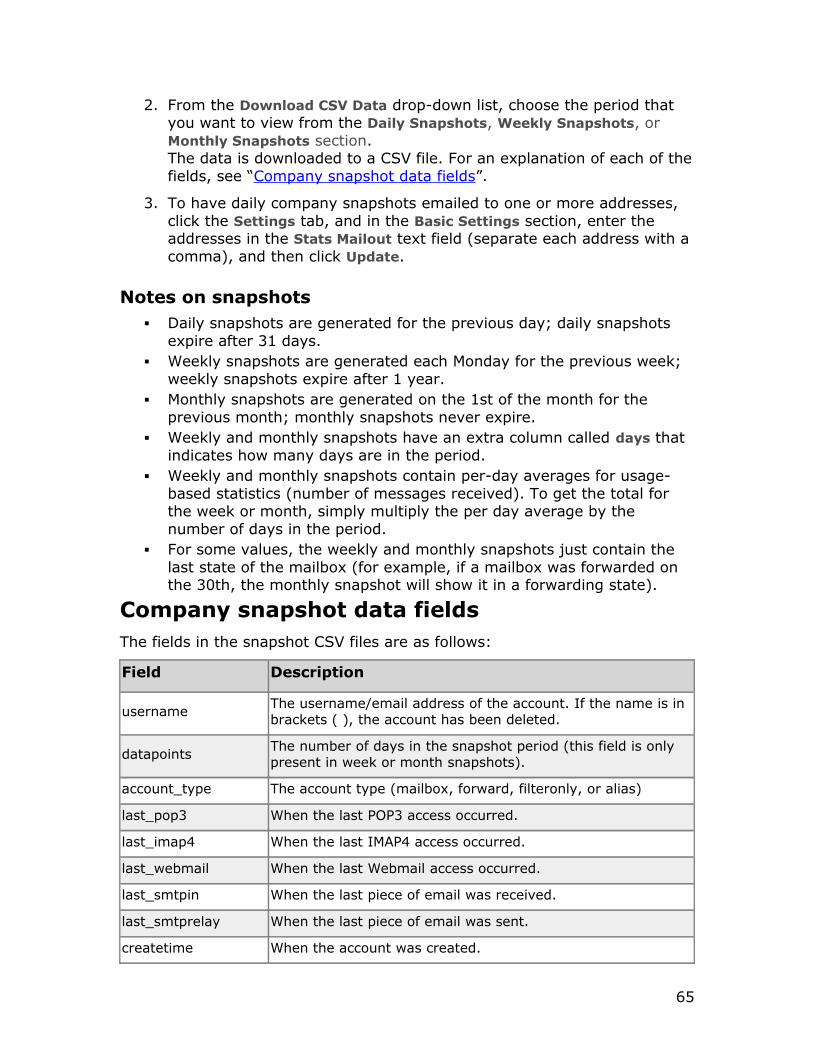
2. From the Download CSV Data drop-down list, choose the period that you want to view from the Daily Snapshots, Weekly Snapshots, or Monthly Snapshots section.The data is downloaded to a CSV file. For an explanation of each of thefields, see “Company snapshot data fields”.
3. To have daily company snapshots emailed to one or more addresses, click the Settings tab, and in the Basic Settings section, enter the addresses in the Stats Mailout text field (separate each address with acomma), and then click Update.
Notes on snapshots Daily snapshots are generated for the previous day; daily snapshots
expire after 31 days. Weekly snapshots are generated each Monday for the previous week;
weekly snapshots expire after 1 year. Monthly snapshots are generated on the 1st of the month for the
previous month; monthly snapshots never expire. Weekly and monthly snapshots have an extra column called days that
indicates how many days are in the period. Weekly and monthly snapshots contain per-day averages for usage-
based statistics (number of messages received). To get the total for the week or month, simply multiply the per day average by the number of days in the period.
For some values, the weekly and monthly snapshots just contain the last state of the mailbox (for example, if a mailbox was forwarded on the 30th, the monthly snapshot will show it in a forwarding state).
Company snapshot data fieldsThe fields in the snapshot CSV files are as follows:
Field Description
usernameThe username/email address of the account. If the name is in brackets ( ), the account has been deleted.
datapointsThe number of days in the snapshot period (this field is only present in week or month snapshots).
account_type The account type (mailbox, forward, filteronly, or alias)
last_pop3 When the last POP3 access occurred.
last_imap4 When the last IMAP4 access occurred.
last_webmail When the last Webmail access occurred.
last_smtpin When the last piece of email was received.
last_smtprelay When the last piece of email was sent.
createtime When the account was created.
65

Field Description
deletetime When the account was deleted.
quotasize The maximum size of the user's quota (bytes).
size The current size of the user's quota (bytes).
count The current number of messages the user has.
fonlyA value of 1 indicates the account does not have local delivery.
forward A comma-separated list of addresses the account forwards to.
autoresponder A value of 1 indicates that the account has an autoresponder enabled, otherwise empty.
pop3_fPOP3 service: 1=enabled; 0=not enabled; negative number = suspended/administratively disabled
imap4_fIMAP4 service: 1=enabled; 0=not enabled; negative number = suspended/administratively disabled
webmail_fWebmail service: 1=enabled; 0=not enabled; negative number = suspended/administratively disabled
smtpin_fInbound mail service: 1=enabled; 0=not enabled; negative number = suspended/administratively disabled
smtprelay_fOutbound mail (relay) service: 1=enabled; 0=not enabled; -1=administratively disabled
workgroup The ID of the workgroup to which the account belongs.
in_size The size of inbound mail delivered to the account (bytes).
out_size The size of mail sent by the account (bytes).
in_ham The number of non-spam messages delivered to the account.
in_spam The number of spam messages delivered to the account.
autorespond_count The number of times autoresponse messages were sent.
forward_count The number of messages forwarded via forwarding settings.
out_rcpt_countThe number of destination recipients to which the account sent mail.
out_msg_count The number of messages sent from the account.
pop3 The number of times the account was accessed via pop3.
imap4 The number of times the account was accessed via imap4.
webmail The number of times the account was accessed via Webmail.
denied The number of times mail was deferred due to account
66

Field Description
maintenance.
auth_password The number of successful authentications where a password was used.
auth_session The number of successful authentications where a login token was used.
67

Managing administratorsTo view all of the users in your company that have admin privileges, in the navigation pane, under your company name, click Admins. On the Admins tab, you can see a list of all of the users in your company that have admin privileges.
Note: This feature is only available to Company admins.
You can use the filters at the top of the page to narrow your search based onthe user name and/or the type of administrators that you want to see. You can enter all or part of the user name in the text box and you can use the asterisk (*) wildcard character to represent part of the name or the question mark (?) to represent a single character. Click the appropriate checkboxes to select the admin types (company, company_view, domain, mail, and/or workgroup), and then click Refresh. You don't have to enter anything in the text box; however, you must select at least one of the admin types in order to see any results.
In the resulting list, the User column displays the user names that match your search criteria, the Type column shows the type of administrator that each one is, and the Target column shows the area of responsibility that the admin controls. For example if the user has domain admin privileges, the Type column will show domain and the Target column will show the name of the domain that this user can administer. If the user has workgroup admin privileges, the Type column will show workgroup and the Target column will show the domain to which the workgroup belongs followed by the name of the workgroup, for instance, example.com/staff indicates that the user has workgroup administrator privileges for the workgroup called staff in the domain called example.com.
You can click on any of the users in the list to go to the page where you can manage that user.
You can also delete admin accounts from the Admins tab.
Warning: If you delete an admin from the Admins tab, you delete the entireuser account, not just the admin privileges. If you want to remove only the user's admin privileges, click the user name to view it, and then change the Admin Role setting to none.
To delete administrators
1. Click to select the users. The number on the Delete Selected button changes to reflect the number of users that you selected.
2. Click Delete Selected.A confirmation dialog appears that asks you to confirm the deletion.
3. Click Delete to confirm the deletion.
68

BrandingBranding is the process of changing the look and feel of the Webmail interface to visually represent your company. Branding may include adding proprietary logos, changing type face, adding company colors, and inserting ads or dynamic content.
Brands are created in the MAC’s Brands page. There are three distinct phasesin managing a brand:
1. Creating the brand. For more information, see “Creating a New Brand”.
2. Designing or customizing the brand. For more information, see “Customizing a Brand”.
3. Assigning the brand to a domain. For more information, see “Assigning a brand to a domain”.
As well as the default brand, we offer four preset brands that provide simple branding for those customers who do not want to define their own color scheme.
Note: The branding tool works only on the following browsers: Internet Explorer, and Firefox.
Creating a new brandWhen you create a new brand, it is always based on the default brand. Once you create the brand, you can display and customize it to achieve your desired look.
To create a new brand
1. In the navigation pane, click Add Brand.
2. Type a name for the brand in the Brand field.
3. Click Create.Your newly created brand appears in the Brand list.
You can also create a new brand based on any of your existing brands. For more information, see “Customizing a Brand”.
Customizing a brandCustomizing a brand involves making changes to new or existing brands.
To customize a brand:
1. In the navigation pane, click Brands. You can click on any column heading to reorder the brands based on that column.
2. Click the brand that you want to customize.The Editing brand window appears.
69
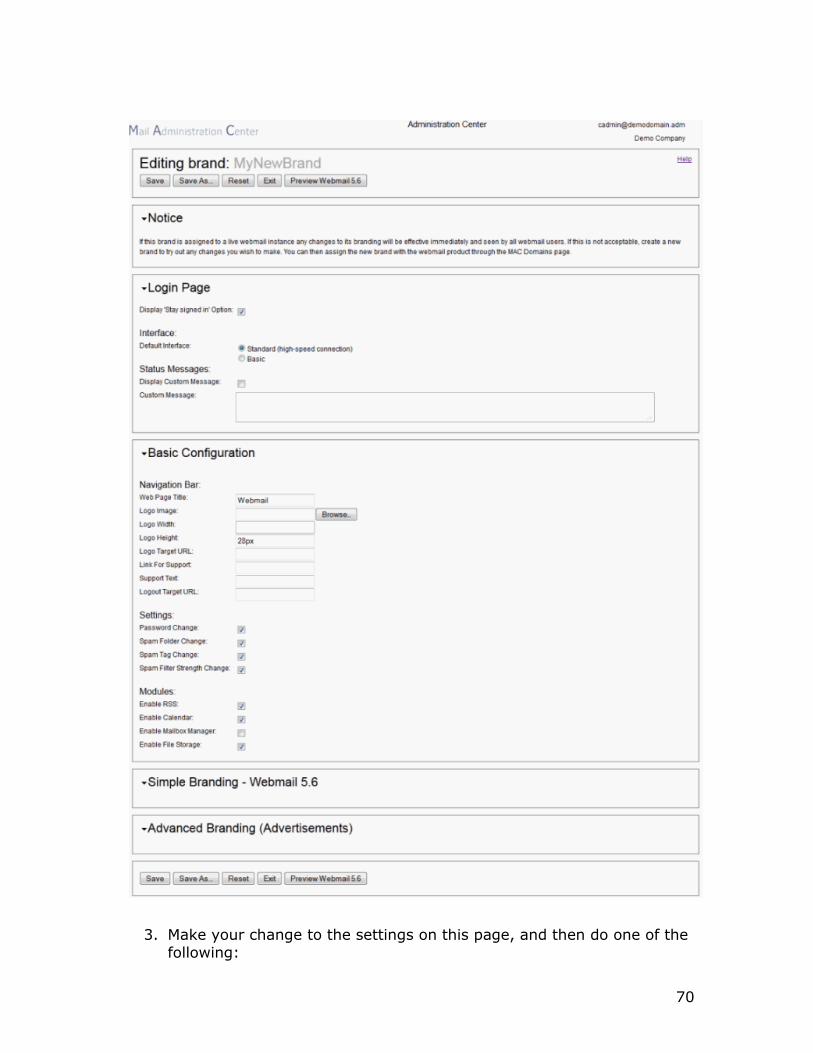
3. Make your change to the settings on this page, and then do one of the following:
70

To save your changes to the existing brand, click Save .
To save the settings as a new brand, click Save As, enter a name for the new brand, and then click OK.
For an explanation of each of the editable brand settings, see “The Branding Tool”.
Note: The Branding Tool does not automatically refresh and load the new brand. You need to click Exit to return to the Manage Brands page and then refresh the page in order to see new brand in the Brand list.
The Branding toolThere are five sections in the branding tool:
Login Page—Set the default Webmail interface. Basic Configuration—Change the support text and links. Preset Brands—Choose color schemes to use as your simple branding
or as a starting point for creating a brand. Simple Branding—Change color schemes and display fonts. Advanced Branding (Advertisements)—Add clickable images and
frames with custom content.
Login PageThe Login Page section determines what your users see on the Webmail loginpage.
Interface Display Preview Option—When checked, users can preview the
upcoming Webmail release (if available).
Default Interface—Choose the default Webmail interface for your end users. Select Basic to load HTML Webmail or Standard to load Ajax Webmail.
Status Messages Display Custom Message—When checked, the custom message is
displayed on your end users’ login page.
Custom Message—The text of the message that you want to display onthe end users’ login page.
71

Basic ConfigurationClick the Preview button to view the Basic Configuration branding .
Navigation BarThe following can be configured in this section:
Web Page Title—The title that appears in the browser’s title bar. Maximum 35 characters. The title defaults to Webmail.
Logo Image—The local path to an image (.gif, .jpg, or .png) of your Webmail logo. The recommended maximum height of the image file is 100px.
Note: Any image you specify here appears on the Webmail login page and in the Webmail header. You can choose not to specify any image file.
Logo Width—If no value is entered, the uploaded image file is read and the actual image width is used.
Logo Height—The logo height default is 28px.The uploaded image file is then read and the actual image height is used to populate this field. You can then adjust the height to add padding or accommodate larger ads in the header.
Note: The value in the Logo Height field overrides any value in the Header Ad Height field.
Logo Target URL—If you want your Webmail logo to be clickable, provide an absolute path starting with http://.
Link for Support—The link appears as a text link in the Webmail header beside the Help (?) icon. The link format is an absolute path starting with http://.
Support Text—The text for your link for Support can be up to 35 characters.
Logout Target URL—When the user clicks Logout, they are directed to the URL specified here. The format is an absolute path starting with http://.
Settings Password Change—When checked, users are allowed to change their
password through the Password tab in the Webmail General Settings.Note: Do not enable this option if your domain uses SSO. See “SSO” for information about this option.
Spam Folder Change—When checked, users are allowed to change the folder for spam messages through the Spam Settings page in Webmail.
72

Spam Tag Change—When checked, users are allowed to change the tag for spam messages through the Spam Settings page in Webmail.
Spam Filter Strength Change—When checked, users are allowed to change the aggressiveness level for spam filtering through the Spam Settings page in Webmail.
Modules Enable RSS—When checked, users can view and add RSS Feeds.
Enable Calendar—When checked, users can create, edit, and view calendar events.
Enable Mailbox Manager—When checked, Domain Administrators can create and edit mailbox accounts by using the Admin option under the Settings heading in the Webmail interface. By default, this option is not enabled.
Enable File Storage—When checked, users can view and edit File Storage in the Webmail interface to store and share files.
Note: By default, File Storage is enabled in the default brand, but is not enabled in brands that were created prior to May 26, 2010.
Changing fonts and colors in WebmailThe Preset Brands and Simple Branding sections allow you to make changes that will be seen in the main work areas of Webmail. Any Simple Branding changes are immediately seen in the section’s preview image.
Four preset brands are available in addition to the default brand. You can choose to use one of these brands or use it as a starting point for your customization.
Preset BrandsThere are four preset brands including the default. They can be applied as is or customized using any of the available options.
When you select one of the preset brands, you can preview it in the Simple Branding section.
Note: Once you save a preset brand, you cannot return to the default brand. You must create a new brand.
Simple BrandingThis section allows you to make changes to the font and colors used throughout Webmail. As you make changes to each element, you can see a preview of the effect at the bottom of the section. You can select one of the preset brands listed at the top of the section, and you can make additional font and color changes to customize your Webmail interface.
73

To change the font
1. Click the Font Family drop-down list and choose the font you want to use.
2. Select a size from the Base Font Size drop-down list, and then click Save.The Base Font Size affects the entire interface by applying a predetermined, proportionally scaled font group to the various interface labels and text elements.
To change any of the colors in Webmail
1. Type the name, CSS, RGB, or hexadecimal value of the color in the relevant color field. If you do not know the value to enter, or you wantto browse for a color, click the color button beside the field.
2. Click outside the field to see the new color reflected in the preview image.
3. Click Save.
You can change colors for the following Webmail elements:
• Header—The background color of the header appearing behind any logo or ads you may have inserted.
Top Nav Default—The background color of the navigation tabs.
Top Nav Selected—The background color of the selected navigation tab.
Side Bar Default—The background color of the side bar.
Side Bar Selected—The background color of the item selected in the side bar.
Tab Content—The background color of tabbed content and confirmation dialog boxes.
Warning—The background color of warning messages.
Disabled Default—The background color of disabled options.
Column Default—The default background of column headings.
Column Selected—The background color of a selected column heading.
Calendar Current—The background color of the current day, week, andmonth in the calendar.
Calendar Selected—The background color of the selected day, week, and month in the calendar.
Text TopNav—The color of the text in the navigation tabs.
Text Logout—The text color of the Logout, user name, Settings, and Help labels.
Text Default—The default text color.
74

Text Heading—The text color for column headings.
Text Disabled—The text color for disabled options.
Text Link—The text color for links
Login Background—The background color for the login page.
Advanced Branding (Advertisements)This section of the branding tool allows you to insert images and other content in the header, sidebar, and footer of Webmail.
The ad option allows you to insert a clickable image.
The custom/frame option allows you to choose what kind of content you wantto present within Webmail.
Before you beginDo not select Frame Tag from an Ad drop-down and then source an image file. Sourcing an image file causes many browsers to auto-generate an HTML body with extra padding to wrap around the image. This is not desirable.
Webmail and any ads need to be served from the same protocol. Mixing pagecontent, using HTTP and HTTPS, in a browser results in the end-user receiving display error messages.
HeaderFor branding purposes, the header is the area that appears above the toolbar: the Check Mail and New buttons, the Welcome Message, and the Support, Help and Logout links.
The header can be branded with a logo image and ad, or you can choose to have your ad content occupy the entire header.
Layout—The option selected from this drop-down determines the settings required to configure the header.
Logo—None. The logo is configured in the Basic Configuration section and requires no further configuration.
Header Ad—Path to file source or image source and target URL. Logo & Header Ad—Path to Frame source or image source and target
URL, as well as positioning elements. Custom Header—Path to file source.
The branding tool allows you to configure the following fields:
Height The header height is automatically calculated from the image. You can manually change the height but you should not exceed 100 px.
Layout This drop-down sets the layout you want in the header.
75
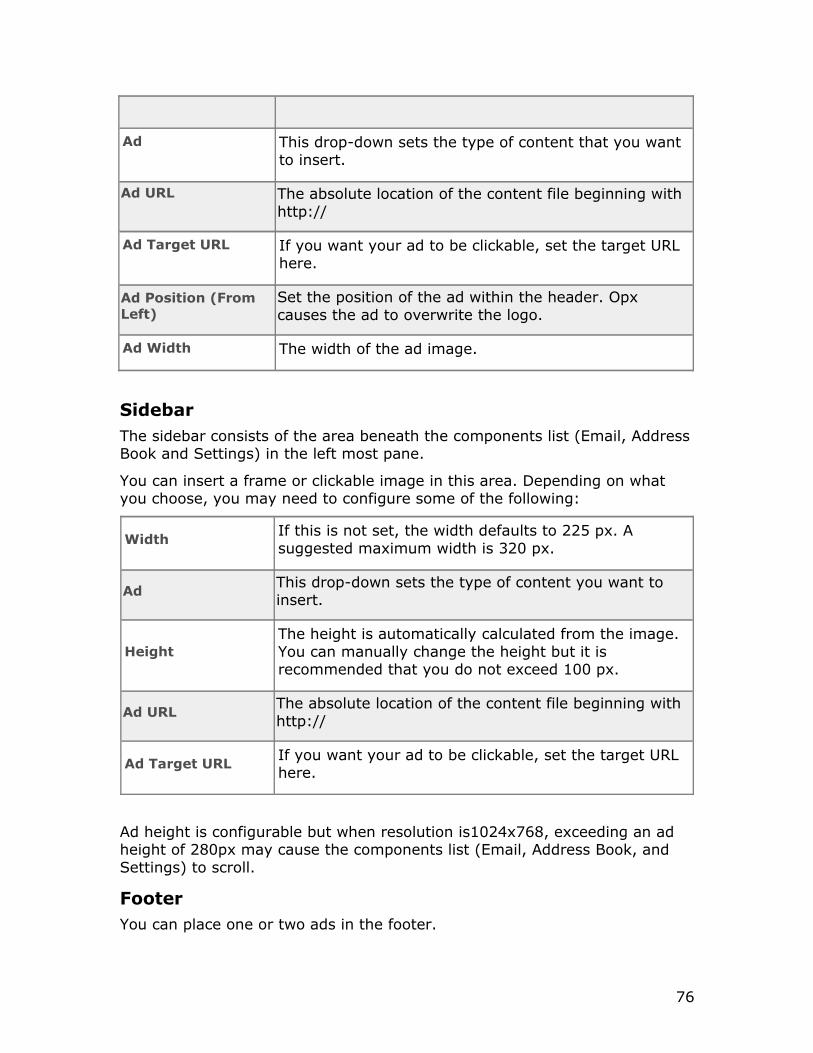
Ad This drop-down sets the type of content that you want to insert.
Ad URL The absolute location of the content file beginning with http://
Ad Target URL If you want your ad to be clickable, set the target URL here.
Ad Position (From Left)
Set the position of the ad within the header. Opx causes the ad to overwrite the logo.
Ad Width The width of the ad image.
SidebarThe sidebar consists of the area beneath the components list (Email, AddressBook and Settings) in the left most pane.
You can insert a frame or clickable image in this area. Depending on what you choose, you may need to configure some of the following:
WidthIf this is not set, the width defaults to 225 px. A suggested maximum width is 320 px.
AdThis drop-down sets the type of content you want to insert.
HeightThe height is automatically calculated from the image. You can manually change the height but it is recommended that you do not exceed 100 px.
Ad URLThe absolute location of the content file beginning with http://
Ad Target URLIf you want your ad to be clickable, set the target URL here.
Ad height is configurable but when resolution is1024x768, exceeding an ad height of 280px may cause the components list (Email, Address Book, and Settings) to scroll.
FooterYou can place one or two ads in the footer.
76
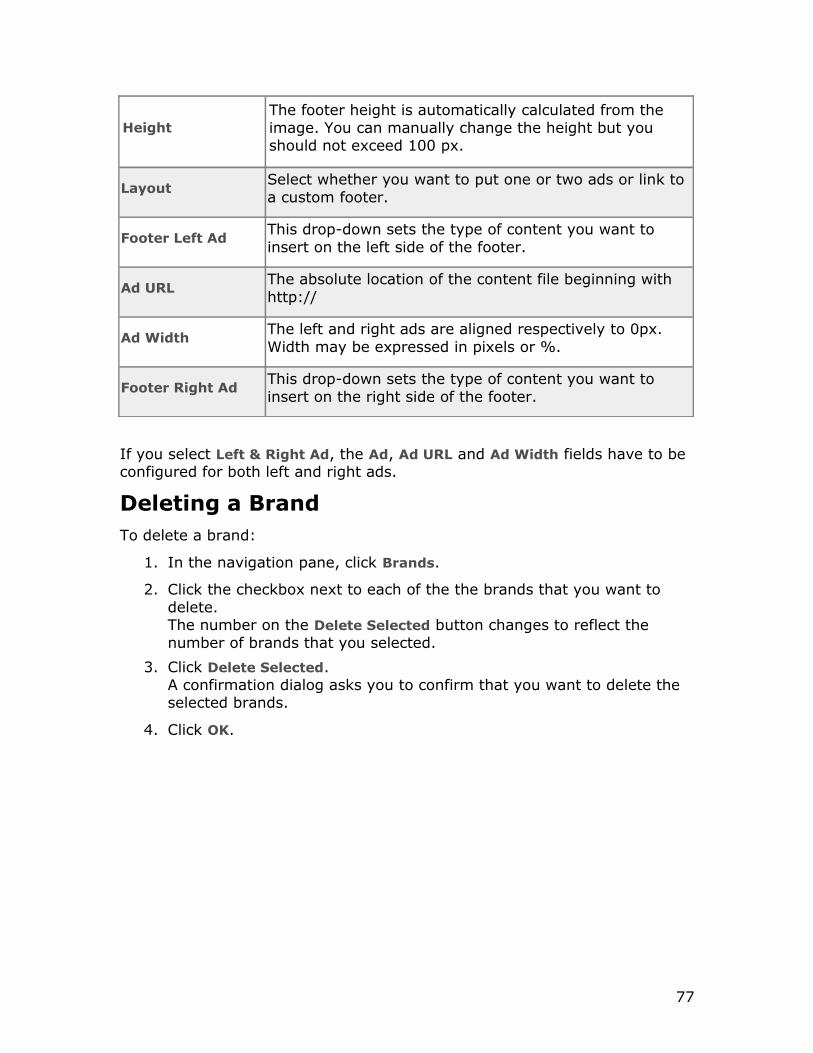
HeightThe footer height is automatically calculated from the image. You can manually change the height but you should not exceed 100 px.
LayoutSelect whether you want to put one or two ads or link to a custom footer.
Footer Left AdThis drop-down sets the type of content you want to insert on the left side of the footer.
Ad URLThe absolute location of the content file beginning with http://
Ad WidthThe left and right ads are aligned respectively to 0px. Width may be expressed in pixels or %.
Footer Right AdThis drop-down sets the type of content you want to insert on the right side of the footer.
If you select Left & Right Ad, the Ad, Ad URL and Ad Width fields have to be configured for both left and right ads.
Deleting a BrandTo delete a brand:
1. In the navigation pane, click Brands.
2. Click the checkbox next to each of the the brands that you want to delete.The number on the Delete Selected button changes to reflect the number of brands that you selected.
3. Click Delete Selected.A confirmation dialog asks you to confirm that you want to delete the selected brands.
4. Click OK.
77

Tools
Bulk ActionsThe Bulk Action tool allows you to create, modify, or delete multiple users.
To generate a bulk action job
1. In the navigation pane, under Tools, click Bulk Action.
2. From the drop-down box, choose the type of bulk action that you wantto perform: Add, Delete, or Modify.
3. Enter the account information in the text area. To help you to enter the data in the correct format, the required syntax for the data is displayed
4. Click Process.
LimitationsAny account-specific information such as allow and block lists must still be added via the Users section.
Data RequirementsSyntax: One line per account. [ ] indicates an optional field:
Account type Syntax
Mailbox [email protected],mailbox,[password],[T/F (reject spam)],[name],workgroup,[forward_email1:forward_email2...],[alias1:alias2...]
Filter [email protected],filter,[password],[T/F (reject spam)],[name],workgroup,null,[alias1:alias2...]
Forward [email protected],forward,[password],null,[name],workgroup,forward_email1[:forward_email2...],[alias1:alias2...]
Mailing List [email protected],mlist,null,null,null,null,null,workgroup,member_email1[,member_email2...]
Alias [email protected],alias,null,null,null,null,null,workgroup,alias_target_email
Definitions
Data type Explanation
[email protected] Email address you want to create.
78

Data type Explanation
mailbox_type The type of mailbox that you want to create: mailbox,forward, or filter.
password The initial password that you will share with the user. Canbe prefixed with {MD5} or {CRYPT} if already encrypted.
T/F (reject spam) If you want the user to not have a quarantine, and instead just have their spam rejected, enter T.
name The user’s first and last name.
workgroup If you want to have groups of users, and be able to createdomain administrators for those subgroups, organize yourusers into workgroups (this generally applies to large corporate customers).
forward_email, alias target email, etc.
Based on the mailbox type, assign a corresponding email address. For example, if it is a forward, where is it forwarding to? If it is an alias, what is the real account name? If it is a mailing list, who are its members?
[email protected],mailbox,fredpass123,F,Freddie,Jones,staff,
[email protected],mailbox,secret123,F,T,Franz,Kafka,staff,[email protected]
[email protected],mailbox,pass123,T,Spam,Bouncer,staff,
[email protected],filter,luggage1234,F,Normal,Filteronly,staff,
[email protected],mailbox,porsche,T,NoSpam,Filteronly,staff,
[email protected],forward,,,,staff,[email protected]
[email protected],mailbox,secret123,F,Burt
Bacharat,staff,,[email protected]:[email protected]
[email protected],alias,,,,,staff,[email protected]
[email protected],alias,,,,,staff,[email protected]
MigrateThe Migrate tool can be used by Company admins and Domain admins to download mail from remote servers into existing email accounts. It preservessubfolders and keeps the original dates of the email messages. If a message already exists in the destination account, it does not duplicate it.
Migrate can be used for IMAP4, IMAP4S, POP3 and POP3S; however, for
79

POP3 accounts, only mail that is in the Inbox is migrated.
We recommend that you migrate no more than 500 mailboxes at a time; if you need to migrate more than 500, you should do it in multiple batches.
To bulk migrate mail
1. In the navigation pane, under Tools, click Migrate.
2. Click the New Migration tab.
3. Complete the following fields, as applicable.
Field Explanation
Job Name Enter a unique job name. If this field is left blank, a system-generated numeric name will be used.
Protocol From the drop-down list, choose the mail retrieval protocol that will be used to migrate the user messages.
If you choose auto, the system will migrate the Inbox via POP3, and other folders via IMAP4. If you have POP users, you should choose auto.
The INBOX will migrate more quickly with IMAP4 than POP3, so we recommend that you submit the POP3 users in one job using auto and submit the other usersin another job using IMAP4.
Server The hostname or ip address from which you are migrating mail.
Ports The ports to which you will be connecting.
For auto, the ports are POP3, POP3s, IMAP4, and IMAP4s. Set this value to 0 to disable the protocol; for the others, just use a single port.
Skip Specify any folders that you want to ignore while migrating. Enter each one on a separate line.
Note: This field is optional, and doesn't apply to POP3 users as folders are not migrated from POP3.
Translate A list of the source and destination folder names, if they are not the same.
Put each corresponding pair on a separate line, and separate the source and the destination names by commas (source folder,destination folder). If your folder names contain commas, use something else as a deliminator such as a colon.
Users A list of source and destination users and
80

Field Explanation
passwords.
Use the fomat username,password[,local_username]
• username—The source username.
• password—The source user's password.
• local_username—The destination username. If not provided, "username" will be used.
If the usernames contain commas, use something else as a deliminator.
4. Click Migrate.You can click the Results tab to view the migration process as it happens. Color coding allows you to see each account as it is processed and see whether the migration was successful. You do not have to stay on this page while the migration is running.
Advanced MigrationsYou can migrate multiple destination accounts into a single local account; however, you must do each migration in a different batch. This allows you to consolidate mail from two or more accounts into a single local account.
Viewing Migration ResultsTo view information about migrations
1. In the navigation pane, under Tools, click Migrate.
2. Click the History tab to display a list of all the migration jobs that havecompleted and, if applicable, the migration that is currently underway.
3. Click the job that you want to view to see in more detail.The job is displayed in the Results tab. You can see the accounts that were migrated, their status, the amount of data that was transferred, and the number and total size of the email messages that were migrated for each account.
4. To view the migration details for a particular account, click the accountname. (Accounts that were not successfully migrated display error in the State column. )A pop-up window appears that displays the details for that account, including the names of the folders and number and size of the messages that were migrated to each folder.To save or print this information, click Download Log at the bottom of the pop-up window. To close the pop-up window, click the X in the upper left corner.
81

Troubleshooting
Login tokensLogin tokens can be used to allow your support staff to log in to end-user mailboxes without knowing the password, so that they can diagnose POP3, IMAP4, Webmail, and SMTP problems.
There are two ways that you can create a login token:
From the Edit User page. By using a MAC URL with the proper credentials and the user's email
address.
Creating login tokens To create a login token
1. Locate the user that you want to view. For more information, see “Searching in the MAC”.
2. Click the user name.
3. On the Settings page, expand the Tools & Status section, and click Generate Token.The Generate Token dialog appears.
4. From the Type drop-down list, choose a session type:
• Normal session—Used to access IMAP, POP, SMTP, and Web Mail via a standard login process; valid until the duration of the token expires.
• Normal session with Admin—Used to access IMAP, POP, SMTP, and also Webmail, where a domain administrator gets access to the Domain Manager Admin tab.
• SSO session—Used to create a standard login token for a single sign-on login request, bypassing the login page; becomes invalid after it is used once.
• SSO session with Admin—Used to create a token that allows a mailboxset as a domain administrator to be logged using single sign-on methodology with access to the Domain Manager Admin tab.
• Admin-only session—Sign on as administrator.
5. In the Token field, enter the token that you want to use. The token behaves like a password. If this value is not submitted, a random token is generated.
6. In the Reason field, enter the reason that you need to create a token. We recommend that you enter a problem ticket number, if available.
7. In the Token Duration drop-down list, choose the number of hours for which the token is valid: 1, 2, 4, 8, or 24 hours.
82

8. Click Generate Token.
9. Click the generated link to open Webmail in a new tab, or use the logintoken that you specified to authenticate to POP3 or IMAP4.
If the token cannot be created, you might see one of the following error messages:
Error message Meaning
error: user does not exist Non-existing or incorrect user account
error: permission denied Domain not under control of reseller
error: failed to save token Admin email address or password incorrect
Validate PasswordIf a user is not sure whether they have the correct password, you can use this field to validate the password.
To verify the user's password, click Validate Password, enter what the user thinks is their password, and then click Validate. A message appears that letsyou know whether the password is correct or incorrect.
Creating login tokens with a URLThe login token can be created by a MAC URL with proper credentials and theemail address of the user for whom you are creating the token.
The format of the MAC URL is:
https://admin.<cluster>.hostedemail.com/tools/[email protected]&pass=adminpassword&[email protected]
OptionsThere are two optional parameters you can use:
life locale
lifeYou can add
&life=seconds
to the end of the URL to indicate the number of seconds for which the token is valid. If not specified, the default expiry time of 24 hours (86400 seconds) is applied.
The maximum life is 31 days (744 hours or 2678400), and any larger value will be capped at 2678400 seconds.
83

Example:
wget -q -O -"https://admin.<cluster>.hostedemail.com/tools/[email protected]&pass=PASSWORD&[email protected]&life=7200"
returns:
success: token generated<br>
token: [9c31fee7d811695f59f1e3c313642cf3]<br>
expires: [1202349940]<br>
localeYou can add
&locale=<option>
where option is one of:
da (Danish) de (German) el (Greek) en (English) es (Spanish) fr (French) it (Italian) nl (Dutch) no (Norwegian) pt_BR (Brazilian Portuguese) sv (Swedish)
Example:
wget -q -O -"https://admin.<cluster>.hostedemail.com/tools/[email protected]&pass=PASSWORD&locale=de&[email protected]&life=7200"
returns:
success: token generated<br>
token: [9c31fee7d811695f59f1e3c313642cf3]<br>
SecurityLogin token creation works for Mail, Domain, and Company Administrators.
Mail Administrators are the recommended creators, as they have the minimum privileges required for the task.
84

How to use the login tokenWherever a password would normally be entered, the token can be used instead (that is, to load the Webmail main UI by passing the token for the password field.)
Login tokens can be used for Webmail, POP3, IMAP4 and SMTP logins.
The only service for which they will not work is SMTP AUTH, as it performs itsown encrypted password comparisons.
Login tokens and password changeImplementing login tokens is not compatible with the Password Change option.
See “Basic Configuration” for instructions on how to make sure you turn off the option to allow your end users to change their passwords in Webmail.
Sample URLThe following example sends the user to Standard AJAX Webmail if their browser is supported by the AJAX interface (otherwise, you get the Basic interface, if it is supported).
By using mail.<your_domain>.<tld>, the user is brought to your branded login page when they log out.
https://mail.<your_domain>.<tld>/mail?type=a&domainID=<your_domain>.<tld>&user=<username>%40<your_domain>.<tld>&pass=9c31fee7d811695f59f1e3c313642cf3
Note: The '@' sign must be encoded as %40 or else it won't work.
The following optional parameters can also be included:
• logout_redirect=URL‒Sets the logout redirection
• direct=1‒Suppresses the logo on login
Note: The logout_redirect parameter can only be used in conjunction with the direct parameter. Otherwise, the URL could be hijacked to direct an end user to another location instead. Logout redirects can be configured via branding as well, without this limitation.
Logging a user outWith POP3, you can only have a single connection to the server, and if one is active, then you can't establish another POP3 or IMAP4 connection. If an email client fails to properly close the POP3 connection, the user will be unable to reconnect or use Webmail. To solve this issue, simply log the user out.
To log the user out
1. Locate the user that you want to log out. For more information, see
85

“Searching in the MAC”.
2. Click the user name.
3. On the Settings page, expand the Tools & Status section, and click Logout User.A confirmation dialog appears.
4. Click Logout.
86

Revisions and Updates
January 16, 2014
• The MAC interface has been streamlined and condensed.
• The bulk migration tool has been simplified, making it easier to perform and manage migrations.
• Search filtering and sorting options allow you to view customized data more easily.
• The Bulk Create and Bulk Delete functions have been moved to a new Bulk Actions section. The new Bulk Modify option allows you to change the attributes of multiple accounts at once.
• Restoring email and contacts has been improved.
• Status messages now include more details and options.
• New users, and any users who change their password via the Administration Center or Webmail, now have their passwords hashed with BCRYPT-6 instead of MD5. There is no change to existing users.
September, 2013• The migration page has been simplified.
• Search filtering and sorting has been improved.
• The interface has been streamlined and condensed.
• There is a new Bulk Action section where you can apply changes to multiple accounts at once. The Bulk Create and Bulk Delete functions have been moved to this section.
June 11, 2013
• Company admins can choose the type of encryption that they want to use to encode user passwords. This value can be set at the domain or company level.
April 9, 2013
• Added company_mail2 administrator level. This role is similar to company_mail administrator, but cannot change passwords or generate login tokens.
November 6, 2012
• Company and Company Mail administrators can now reindex user mailboxes.
September 20, 2012• The maximum life for a token is now 31 days (744 hours).
87

• You can now add up to 1000 entries in the user, domain, and companysafe and block lists.
September 13, 2012• Added a list of error messages that might be displayed if a login token
cannot be created.
June 7, 2012
• Added company mail, company read only, and company_token_only administrator levels. Company mail can view and edit non-billable mailbox settings. Company read only can view everything a company admin can but cannot make changes. Company token only can generate SSO tokens for users in any domains in their company.
May 3, 2012
• Added company view administrator level, which is similar to the company administrator role except that the role cannot create or delete domains or mailboxes.
March 27, 2012
• Company admins can now click Admins under Company in the navigation pane to view a list of all of the admins in the company and their attributes.
November 25, 2012
• Added additional examples to the Bulk Migrate section.
November 1, 2011 Updated the guide to reflect the MAC's new tabbed-style interface that
improves navigation.
June 7, 2011 The 30 day summary report has been removed from the Statistics
page.
October 28, 2010 The maximum allowed message size is now 35 MB. You can now assign a brand at the account level that is different from
the brand assigned at the domain level. Three new languages have been added to the list of available
languages for mailboxes: Danish, Swedish, and Norwegian.
May 27, 2010 The new Filteronly Spam Delivery option allows you to determine how
spam messages are handled for filteronly accounts. If set to Quarantine, spam messages are not delivered to your servers and
88

users have to log in to the OpenSRS Spam Portal to view them; if set to Pass Through, spam messages are delivered to your servers, which can then deliver them to the end users’ folders.
The Welcome message feature for domains has been deprecated since you can use Bulletins to perform the same task. Any existing welcomemessages have been automatically converted into sticky bulletins.
May 6, 2010 In the Basic Configuration section of the Branding tool , you can now
enable (or disable) the File Storage feature in Webmail. File Storage allows users to store up to 2000 files in up to 100 folders and to share those files.
April 27, 2010 The catchall feature has been deprecated. If you already have a
catchall defined, it will continue to work and you can edit the setting ; however, catchall cannot be enabled for new domains. In addition, if you disable catchall for a domain, you cannot re-enable it.
April 13, 2010 By default, inbound and outbound messaging is enabled for all
Filteronly accounts. Domain and Company administrators can disable outbound messaging for individual accounts by deselecting the option SMTP Relay for Filteronly Mailboxes.
You can enable Webmail Domain Alias support for accounts so that your users will be able to use domain aliases in the From field of outgoing messages.
POP3S and IMAP4S are now supported for migrations.
February 8, 2010 If the number of suspected outgoing spam messages from a single
account exceeds the threshold set by the service provider within a 24 hour period, the account is automatically suspended for AUP Violation.
An email is sent to the Abuse contact along with copies of up to three of the suspected messages, and the Abuse contact can then decide whether to reinstate the account.
December 3, 2009 The Bulk Create feature now includes a checkbox called Create
domains as needed. When this box checked, if you are trying to createan account for a domain that does not already exist, the domain will be created (provided the domain is available). If the domain is not available, the job will complete; however, that particular account will not be created.
The Bulk Migrate feature allows migrations to be resumed or viewed historically .
89

You can now download weekly and monthly snapshots on the Statistics page.
On the Edit Domain page, you can click Show provisioning history to view all of the changes made to the domain.
October 1, 2009 You can specify the maximum number of mailboxes that can be
created for each domain. Company admins can disable and re-enable domains (unless the
domain has been disabled by a super admin). Company admins can upload mail from remote servers into existing
email accounts by using the Bulk Migrate feature. Bulk Load renamed to Bulk Create to better reflect its function. Two new fields have been added to the usage statistics:
auth_password and auth_token. These fields allow you to compare how many people are using SSO logins and how many are using regular password logins.
August 27, 2009 The Spam Settings feature, which allows users to choose the folder
where they want spam messages delivered, and to define the tag that is added to spam messages, has been moved into Webmail and is visible to all users by default. In the Basic Configuration section of theBranding tool, you can disable this feature so that the Spam Settings page is hidden.
April 21, 2009 You can now restore address book contacts that have been deleted
within the last 14 days. You can validate passwords for users. In the branding tool, you can choose whether to enable the Calendar
and RSS Feeds components for users. For the Preview period, you can choose whether to allow users to view the upcoming version or Webmail.
March 26, 2009 You can now change the spam aggressiveness level at the Company,
Domain, and User level. Choosing a level other than Normal causes the filtering engine to be more aggressive in labelling mail as spam; however, it may also result in more false positives.
You can now create and send out broadcast messages or bulletins to all mailboxes in a company or domain.
SSO tokens can be used to allow your support staff to log in to end-user mailboxes without knowing the password, so that they can diagnose POP3, IMAP, Webmail, and SMTP problems.
90

December 11, 2008 The Default Interface option has been moved from the Basic
Configuration section to the Login Page section. When restoring deleted accounts, you can narrow your search by
entering part or all of the name of the mailbox you want to restore in the text field. You can also choose the number of results you want to see on each page. See “Restoring an account”.
September 24, 2008 “Statistics” has been updated to reflect recent improvements to stats
engines.
July 25, 2008 The Basic Configuration section of the Branding tool has been slightly
modified. The Default Interface option has been changed to radio buttons, offering the Standard and Basic options. This is in place of theprevious Default Interface checkbox.
Sidebar ad width is no longer fixed and can be set along with other ad attributes: see “Sidebar”.
Tucows Email Service is now OpenSRS Mail Service.
July 23, 2008 The following information has been added:
“Managing Spam”. “Setting company-level spam handling”. “Setting domain-level spam handling”. There has also been descriptive additions to the Usage Statistics
chapter. The following information has been updated:
“Creating a new domain”. “Creating a new mailbox account”. Reject Spam has become “Adding mailbox-level spam settings”.
May 14, 2008 The “Sample URL” for “How to Use the SSO Token” has been updated
to accommodate the new Advanced Branding. The string /webmail/driver?nimlet=login has been replaced with
/mail?
May 7, 2008 Branding has been improved and redesigned. You can now apply
Advanced Branding features to Basic Webmail. See “Branding”.
May 6, 2008 “Updating your individual contact information” expanded to reflect
91
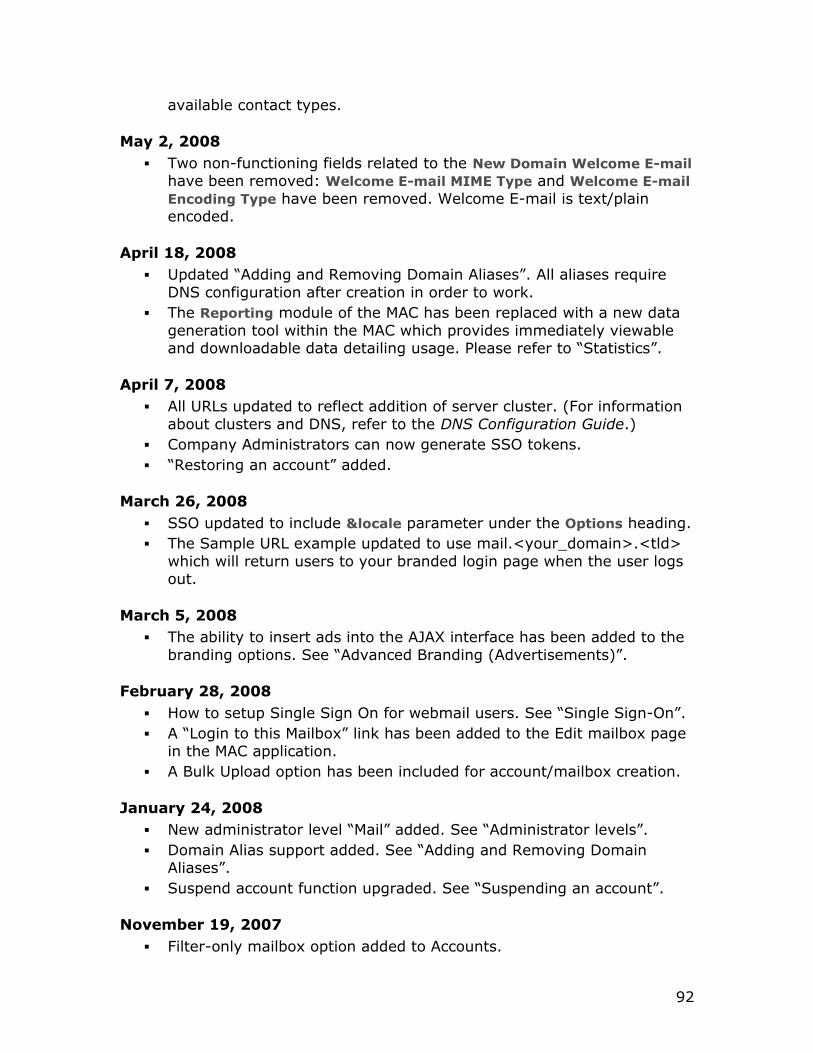
available contact types.
May 2, 2008 Two non-functioning fields related to the New Domain Welcome E-mail
have been removed: Welcome E-mail MIME Type and Welcome E-mailEncoding Type have been removed. Welcome E-mail is text/plain encoded.
April 18, 2008 Updated “Adding and Removing Domain Aliases”. All aliases require
DNS configuration after creation in order to work. The Reporting module of the MAC has been replaced with a new data
generation tool within the MAC which provides immediately viewable and downloadable data detailing usage. Please refer to “Statistics”.
April 7, 2008 All URLs updated to reflect addition of server cluster. (For information
about clusters and DNS, refer to the DNS Configuration Guide.) Company Administrators can now generate SSO tokens. “Restoring an account” added.
March 26, 2008 SSO updated to include &locale parameter under the Options heading. The Sample URL example updated to use mail.<your_domain>.<tld>
which will return users to your branded login page when the user logs out.
March 5, 2008 The ability to insert ads into the AJAX interface has been added to the
branding options. See “Advanced Branding (Advertisements)”.
February 28, 2008 How to setup Single Sign On for webmail users. See “Single Sign-On”. A “Login to this Mailbox” link has been added to the Edit mailbox page
in the MAC application. A Bulk Upload option has been included for account/mailbox creation.
January 24, 2008 New administrator level “Mail” added. See “Administrator levels”. Domain Alias support added. See “Adding and Removing Domain
Aliases”. Suspend account function upgraded. See “Suspending an account”.
November 19, 2007 Filter-only mailbox option added to Accounts.
92

October 25, 2007 Safe and Blocked Sender List support added to:
Account/Mailbox level; see “Adding Safe Sender and Block Sender lists”.
Domain level; see “Creating Safe Sender and Block Sender Lists”.
Reject Spam service added at the account level; see “Adding mailbox-level spam settings”.
August 3, 2007 Reporting changed to reflect updated report names.
93


![January 22, 2008 IA-07-026 [NOTE: HOME ADDRESS · 2012-11-30 · January 22, 2008 IA-07-026 Mr. Luis Fernandez [NOTE: HOME ADDRESS DELETED UNDER 10 CFR 2.390(a)] SUBJECT: CONFIRMATORY](https://img.dokumen.tips/doc/110x75/5f4afaac6db7a92a0974f22d/january-22-2008-ia-07-026-note-home-address-2012-11-30-january-22-2008-ia-07-026.jpg)

![[Text deleted] - sshl.ucsd.edu](https://img.dokumen.tips/doc/110x75/616a69a411a7b741a3523856/text-deleted-sshlucsdedu.jpg)


![[Text deleted]](https://img.dokumen.tips/doc/110x75/61d054833e41477b8537a7c5/text-deleted.jpg)