Embed Size (px)
Citation preview
GET
TIN
G S
TART
EDN
OEL
LE H
ALTE
R B
RALE
TTE
+ PA
NTY
PAGE 1
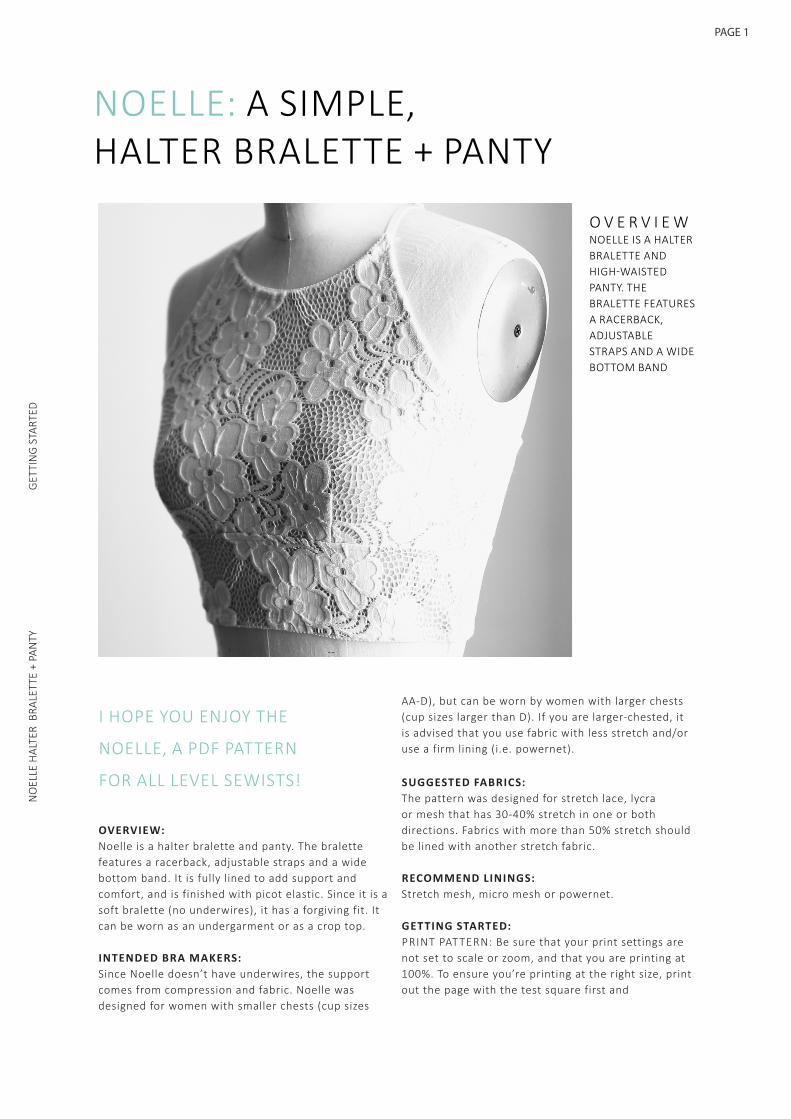
OVERVIEW: Noelle is a halter bralette and panty. The bralette features a racerback, adjustable straps and a wide bottom band. It is fully lined to add support and comfort, and is finished with picot elastic. Since it is a soft bralette (no underwires), it has a forgiving fit. It can be worn as an undergarment or as a crop top.
INTENDED BRA MAKERS: Since Noelle doesn’t have underwires, the support comes from compression and fabric. Noelle was designed for women with smaller chests (cup sizes
AA-D), but can be worn by women with larger chests (cup sizes larger than D). If you are larger-chested, it is advised that you use fabric with less stretch and/or use a firm lining (i.e. powernet).
SUGGESTED FABRICS: The pattern was designed for stretch lace, lycra or mesh that has 30-40% stretch in one or both directions. Fabrics with more than 50% stretch should be lined with another stretch fabric.
RECOMMEND LININGS: Stretch mesh, micro mesh or powernet.
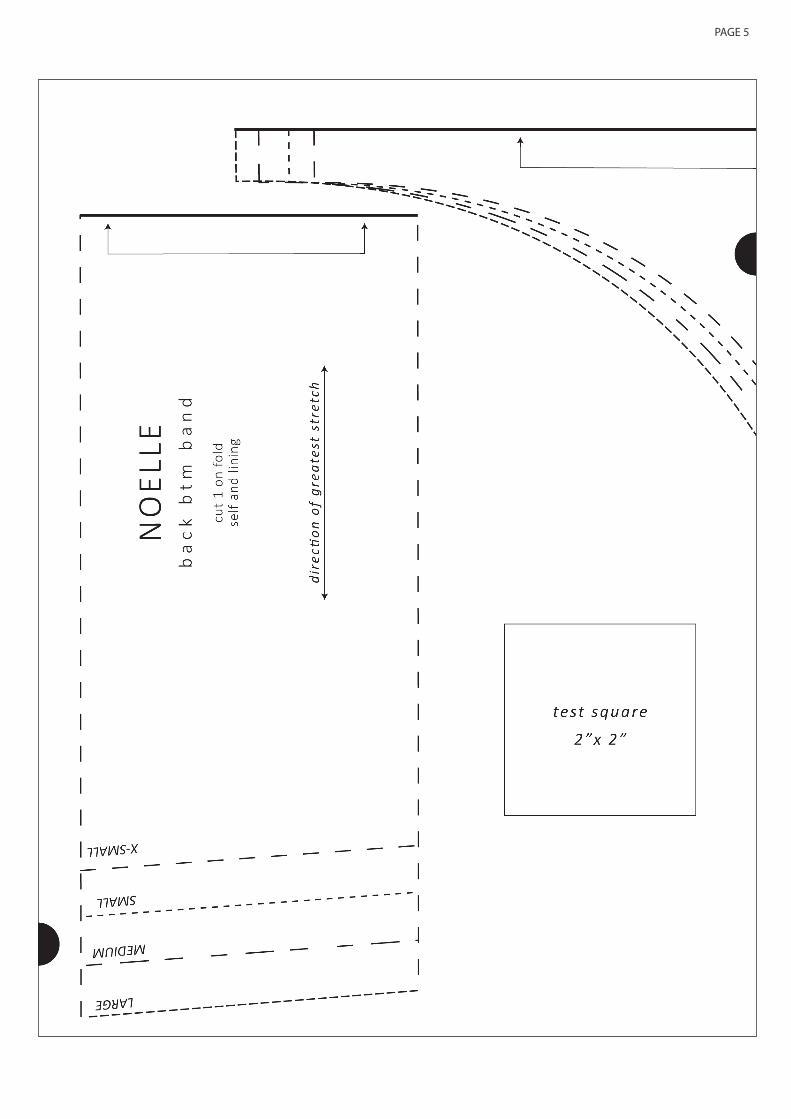
GETTING STARTED: PRINT PATTERN: Be sure that your print settings are not set to scale or zoom, and that you are printing at 100%. To ensure you’re printing at the right size, print out the page with the test square first and
I HOPE YOU ENJOY THE
NOELLE, A PDF PATTERN
FOR ALL LEVEL SEWISTS!
O V E R V I E W NOELLE IS A HALTER BRALETTE AND HIGH-WAISTED PANTY. THE BRALETTE FEATURES A RACERBACK, ADJUSTABLE STRAPS AND A WIDE BOTTOM BAND
NOELLE: A SIMPLE,HALTER BRALETTE + PANTY

PAGE 2
measure to ensurethat it is the specified dimensions.
If it doesn’t, you will need to adjust your printer or your computer settings.
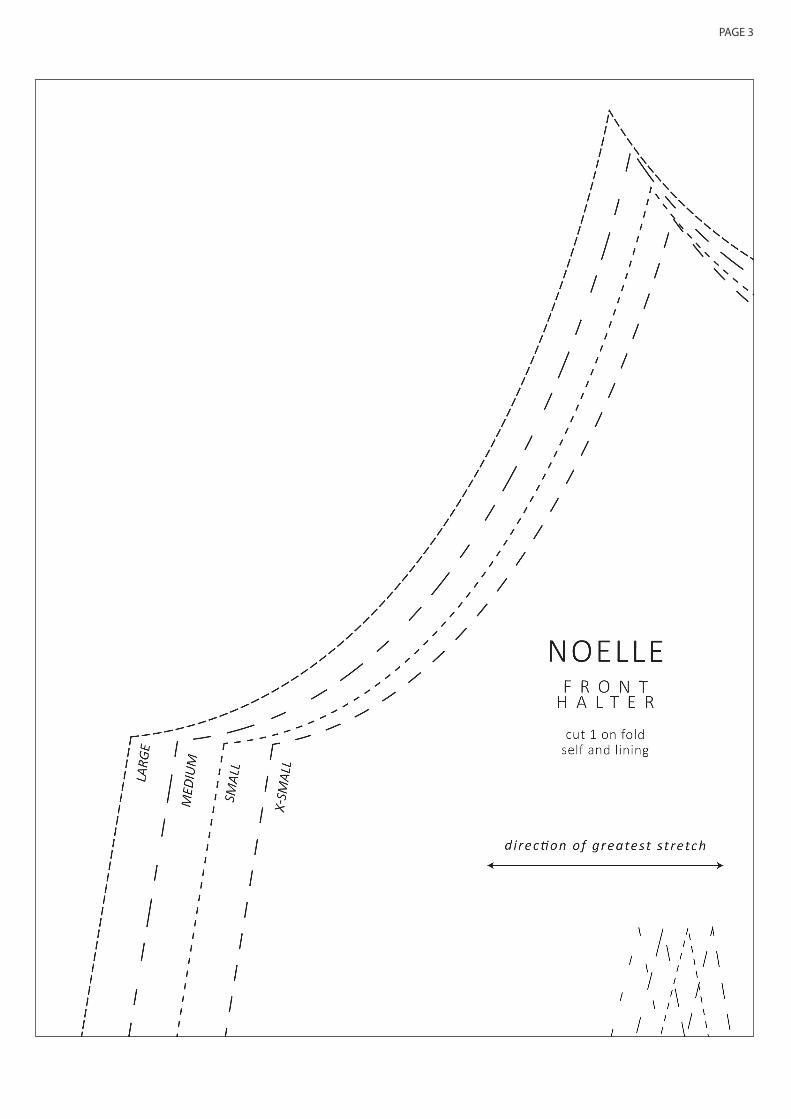
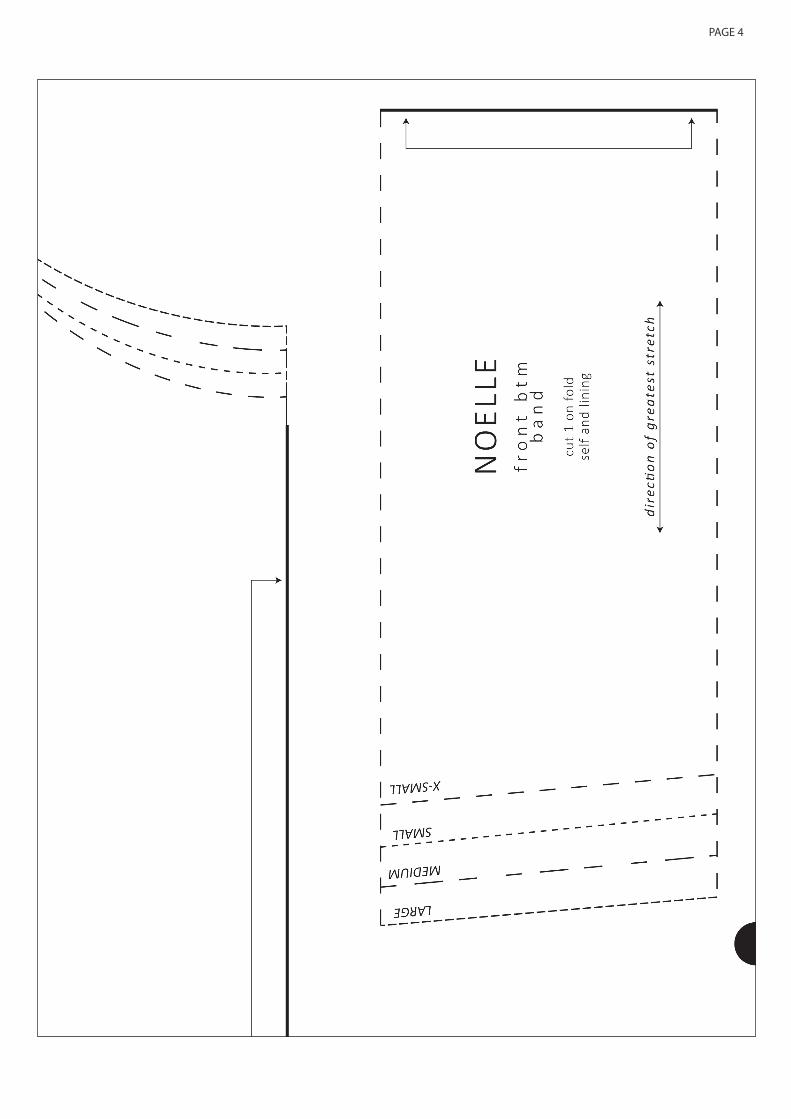
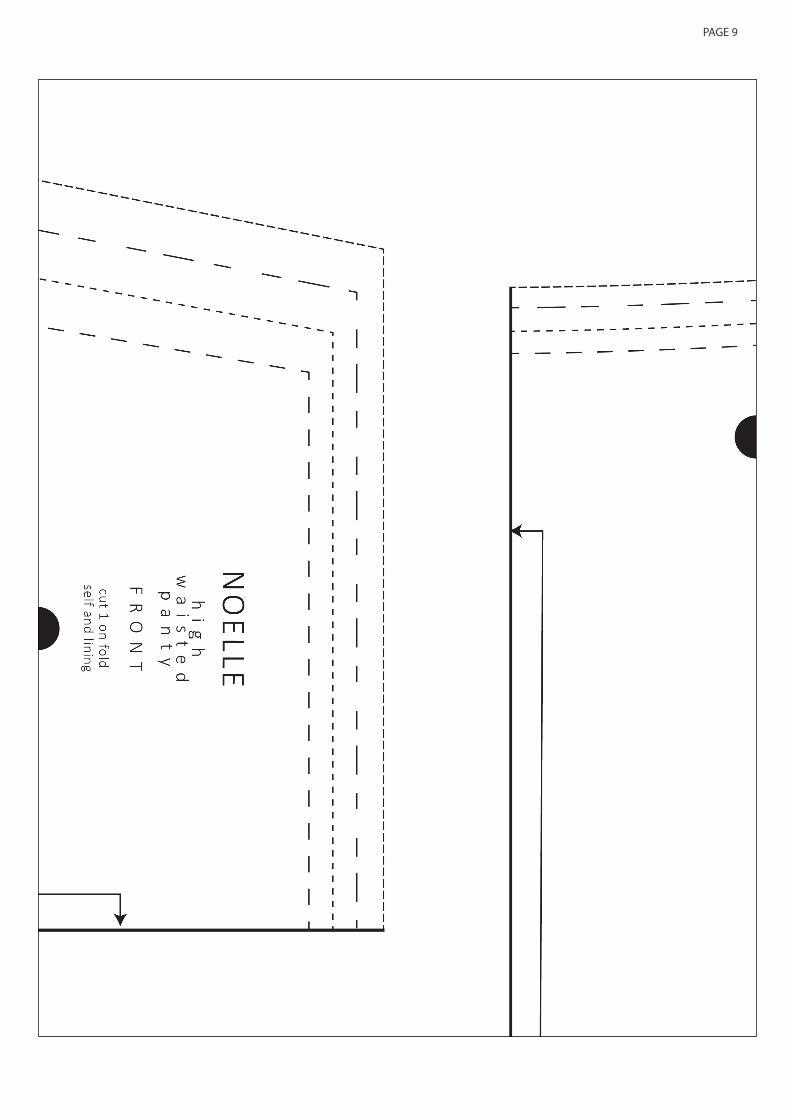
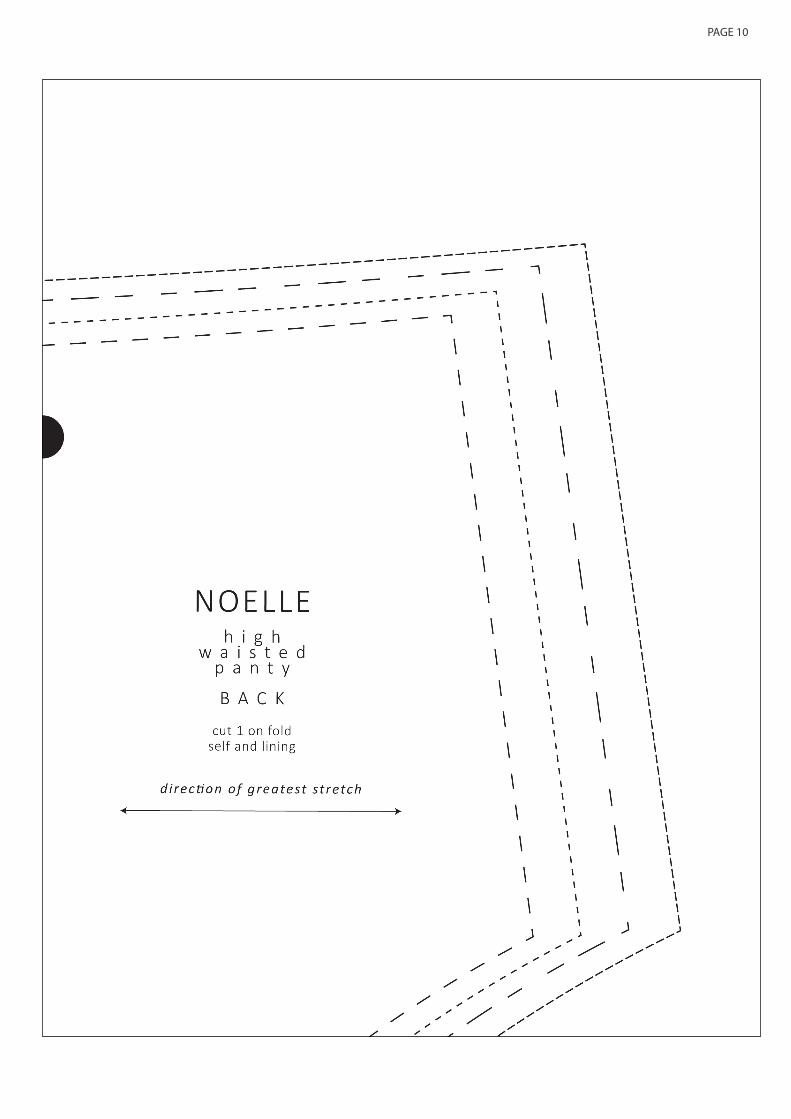
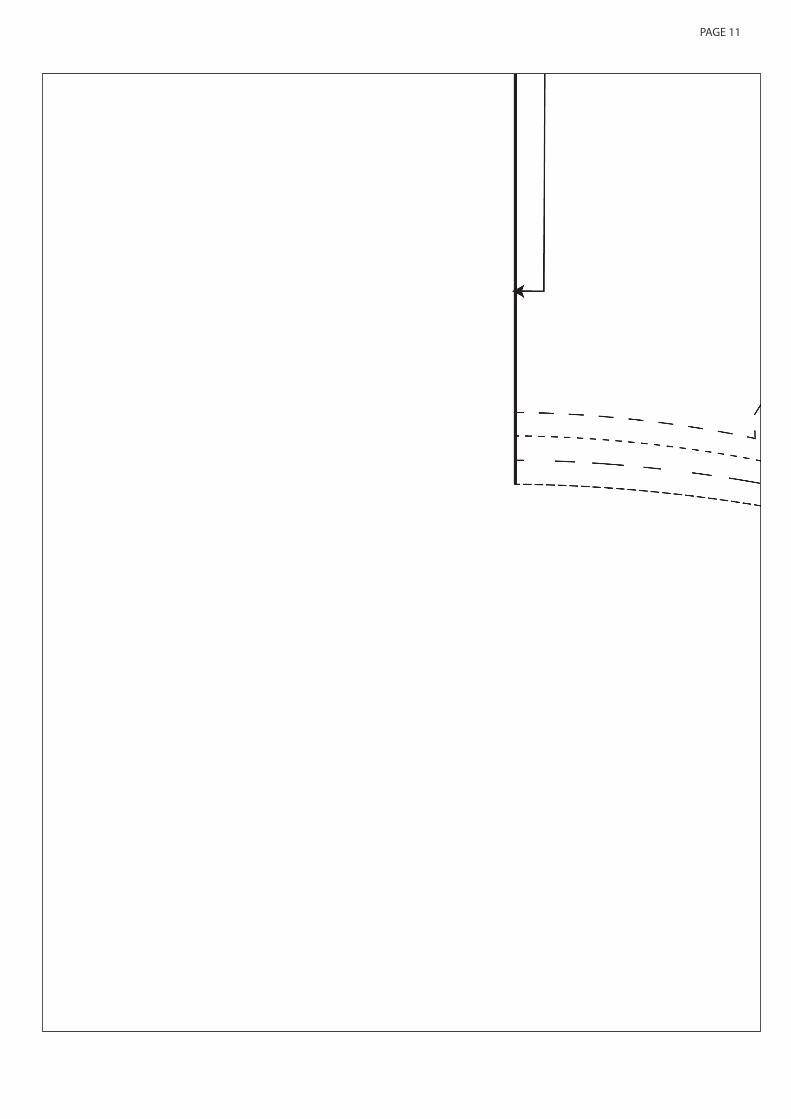
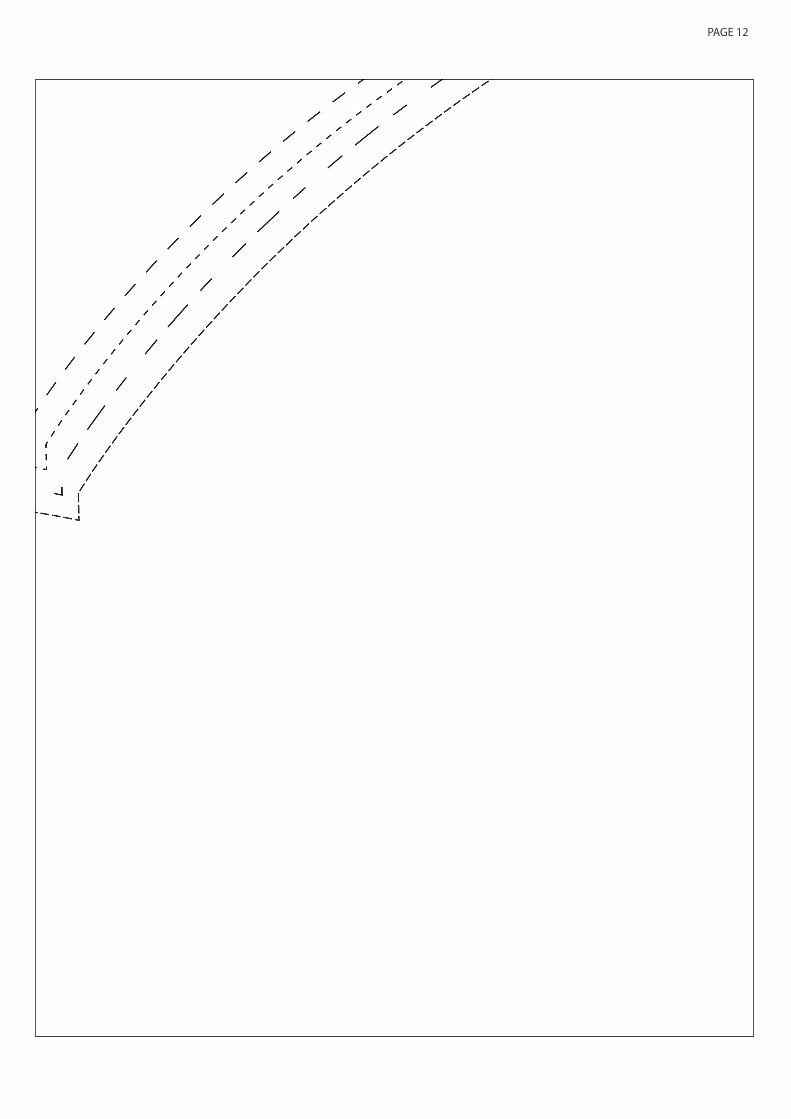
FIND YOUR SIZE: Determine your size using the size chart diagram. If you are between sizes, then size DOWN.
SEAM ALLOWANCES: All seam allowances are 1/4” SUPPLIES: -1/2 YD Stretch Lace-1/2 YD Mesh, Micro Mesh or Powernet-2.5 YD picot plush elastic 3/8″ wide-2.5 YD picot plush elastic 1/2″ wide-1 ring 5/8″ wide-cotton jersey (for crotch lining)Sewing machine with a zigzag stitchStretch/Ballpoint needle size 11, 12 or 14Polyester thread
B R A L E T T E
x-smal l smal l medium large
ful l bust 28.5-30.5 in72.5-77.5 cm
30.5-32.5 in77.5-82.5 cm
32.5-34.5 in82.5-87.5 cm
34.5-36.5 in87.5-92.5 cm
P A N T Y
x-smal l smal l medium large
natural waist 23-25 in58.5-63.5 cm
25-27 in63.5-68.5 cm
27-29 in68.5-73.5 cm
29-31 in73.5-78.5 cm
high waist 26-28 in66-71 cm
28-30 in71-76 cm
30-32 in76-81 cm
32-34 in81-86 cm
hip 32-34 in81.25-86.5 cm
34-36 in86.5-91.5 cm
36-38 in91.5 - 96.5 cm
38-40 in96.5-101.5 cm
PAGE 3
PAGE 4
PAGE 5
PAGE 6
PAGE 7
PAGE 8
PAGE 9
PAGE 10
PAGE 11
PAGE 12
SEW
ING
NO
ELLE
BRA
LETT
E +
PAN
TY
READY TO START SEWING?LET’S GO!BRA
STEP 1: With right sides together, sew bust darts by folding dart in half and pinning in place along dart legs. Sew from bottom edge to dart point. At dart point, sew off fabric and leave a long thread tail. Tie in a knot to secure. Be sure not to pull the knot tight against the fabric as it will cause puckering.
STEP 2: With right sides together, sew front halter (bodice) to racerback at side seam using a straight stitch. Sew front bottom band to back bottom band at side seam as well using a straight stitch. If using a fabric that doesn’t fray (i.e. stretch mesh or stretch lace), you can leave seam allowances raw. You can also serge seam allowances if you have a serger.
STEP 3: Attach elastic at neckline and underarm. It doesn’t matter which order you attach, but I prefer sewing at neckline first, then underarm.• With right side of fabric facing up, place 3/8” elastic on top so that it extends past fabric’s edge 1/8”. The
picot edge should face inward (towards the fabric) and the plush side should face up. • Sew along the picot edge with a zigzag stitch. Stitch width and length will vary from machine to machine,
but a good rule of thumb is stitch width should not exceed half the width of the elastic. Try to stitch as close as possible to picot without going off the edge.
• After you’ve sewn the first pass, flip elastic to the wrong side and sew the edge opposite the one you just sewed using a zigzag stitch.
Elastic comes in different widths, quality and amounts of stretch. Some calculate the amount to pull (i.e. re-ducing the length by 15%), but most of the time, I set elastic flat, meaning I do not pull elastic while sewing.
STEP 4: Sew bodice (front halter + racerback) to bottom band using a short zigzag stitch. Stitch width and length will vary according to machine. To finish seam allowance:• Push seam allowances down• With wrong side of bra facing out, cover seam allowances with 3/8” picot/plush elastic and sew using a
wide zigzag • Overlap elastic ½” at ends and trim close to stitching
STEP 5: Attach ½” elastic at bottom band the same way as it was done in step 3.
STEP 6: Loop ring around top racer back. Fold back and secure by sewing back and forth using a short straight stitch (approximately 2mm stitch length).
PAGE 13
STEP 7: Make and attach straps: • Cut two strips of strap elastic, each 15” long.• Feed one end of strap up through the bottom of one slider, then over the center bar and down through the
other side. It should look like a belt buckle, with one short end and one long end.• Fold the short side down and secure by sewing back and forth using a short straight stitch (approximately
2mm stitch length). Trim close to stitching. • Loop through ring at top racer back.• Weave long side up and over center bar of the slider just like in step 2.• Overlap strap and strap point ½” and secure by sewing back and forth using a short straight stitch (approx-
imately 2 mm stitch length). To prevent straps from shifting during sewing, use a temporary spray adhesive such as Odif ’s.
UNDIE
STEP 1: Sew front panty, back panty and crotch lining together at crotch seam. Front and back panty should be right sides together, and wrong side of crotch lining should face right side of back panty. Use a straight stitch. After sewing, push crotch lining forward. You can either leave front edge raw or finish with a serge/serger.
STEP 2: With right sides together, sew front and back panty at side seams using a straight stitch.
STEP 3: Attach elastic at leg opening and waist using same method in step 2 of bra. secure.
That’s it! Don’t forget to post your Noelle to Instagram!
#bramakingwithmadalynne
@mmadalynne
I can’t wait to see what you made!
PAGE 14