Embed Size (px)
Citation preview
Project Number: JR1 9999
Mote: A Musical Adventure Game
A Major Qualifying Project Report:
submitted to the Faculty
of the
WORCESTER POLYTECHNIC INSTITUTE
in partial fulfillment of the requirements for the
Degree of Bachelor of Science
by
Joseph Cotnoir, Daniel Corfman, Graham Pentheny, Steven Foley, and Kevin Nolan
Date: April 29, 2010
Approved:
Professor Joshua Rosenstock, Major Advisor

2
Table of Contents Abstract: .............................................................................................................................. 7
1 Introduction ................................................................................................................ 8
1.1 Team Roles ........................................................................................................... 9
2 Conceptual Designs ................................................................................................... 11
2.1 Improvisational Music Game ............................................................................. 11
2.2 Existing Games in the Genre .............................................................................. 12
2.3 Game Conceptualization .................................................................................... 13
2.4 Concept Art ........................................................................................................ 16
3 Technical Design....................................................................................................... 23
3.1 Graphics Engine .................................................................................................. 23
3.1.1 Design .......................................................................................................... 24
3.1.2 Implementation .......................................................................................... 30
3.1.3 Results ......................................................................................................... 32
3.1.4 Optimizations and Tweaking....................................................................... 33
3.1.5 Conclusions ................................................................................................. 40
3.2 Level Editor ......................................................................................................... 42
3.3 Lua ...................................................................................................................... 45
3.3.2 Scripting ...................................................................................................... 45

3
3.3.3 Lua Conclusions ........................................................................................... 49
3.4 State Machine .................................................................................................... 50
3.5 Menu System ...................................................................................................... 51
3.6 Physics ................................................................................................................ 52
3.6.1 Terrain ......................................................................................................... 53
3.6.2 Entities ........................................................................................................ 55
3.6.3 CollisionHandler .......................................................................................... 58
3.6.4 Collisions ..................................................................................................... 62
3.7 Sound Engine ...................................................................................................... 64
3.8 Particle System ................................................................................................... 66
4 Artistic Designs .......................................................................................................... 69
4.1 Character Design ................................................................................................ 70
4.1.1 Characters ....................................................................................................... 71
4.2 World Tiles .......................................................................................................... 75
4.3 Interface Considerations .................................................................................... 77
4.4 Music Design ...................................................................................................... 82
4.5 Sound Effects ...................................................................................................... 85
4.5.1 Voices .......................................................................................................... 85
4.5.2 Environment Sounds ................................................................................... 86

4
4.6 Dialogue .............................................................................................................. 87
4.7 Level Design ........................................................................................................ 88
5 Postmortem ................................................................................................................... 91
5.1 Concept Design ....................................................................................................... 91
5.2 Scope and Team Composition ................................................................................ 91
5.3 Write From The Beginning ...................................................................................... 92
5.4 Layers and Tiles ....................................................................................................... 92
6 Conclusion ................................................................................................................. 94
Appendix A: Early Design Document ................................................................................ 95
1. Quick Intro ................................................................................................................... 98
2. Vision Statement .......................................................................................................... 98
4.1 Five Minutes of Gameplay ........................................................................................ 99
4. Gameplay Elements ................................................................................................... 101
5.1. Music Bars, not Health Bars ........................................................................... 101
5.2. Rock These Riffs ............................................................................................... 101
5.3. Why Am I Here? ................................................................................................ 101
5.4. Musicopedia ...................................................................................................... 102
5.5. The Music Is In The Pit, Not On The Stage ................................................... 102
5.6. Notes Of Sand In A Box Of Music ................................................................... 103

5
5.7. You Can't Kill the Metal .................................................................................. 103
5.8. I Can’t Stop This Feelin’ .................................................................................. 103
5.9. You Are Not Alone ............................................................................................ 104
5.10. A Branching Path ............................................................................................ 104
5.11. Woooooooo Shinies! ...................................................................................... 105
Revision History ............................................................................................................ 106
Appendix B: Technical Design Document ....................................................................... 108
Coding Standards ........................................................................................................... 110
Purpose ....................................................................................................................... 110
UML Diagrams ............................................................................................................ 110
Code File Comments ................................................................................................... 110
Camel Case .................................................................................................................. 111
Opening Method Brackets ......................................................................................... 111
Comments ................................................................................................................... 111
Unit Tests .................................................................................................................... 113
Memory Management ............................................................................................... 113
File Design Standards ..................................................................................................... 114
Level Files .................................................................................................................... 114
Sprite & Sprite Sheet Image Format .......................................................................... 115

6
Graphics System ............................................................................................................. 116
Utilities ............................................................................................................................ 116
Input Handling ................................................................................................................ 117
Sounds ............................................................................................................................ 117
Game Structure and Utilities ......................................................................................... 118
Physics ............................................................................................................................ 119
Networking ..................................................................................................................... 120
Appendix C: Summary of Research into Similar Games ................................................. 121
Appendix D: Mary Yovina's Animations .......................................................................... 124
7
Abstract:
The Mote development team consisted of five individuals--three programmers
and two artists--and intended to make a video game for the iPhone that could be a
casual game involving the improvisation of music. The team designed and created two
levels of an adventure game called Mote, in which a player explores a dream world as an
anthropomorphic whole note named Mote. Mote plays music for other characters and
influences their emotions to solve in-game problems. Both levels featured full voice
acting, music, custom animations, and original scenery, as well as a custom scripting
engine, custom physics and graphics engines, a custom sound engine, and a complete
level editor. While the achievements were incredible, testing showed that the game-
play mechanics could be expanded.

8
1 Introduction
Through a series of impressive milestones of programming and artistic
expression, Mote bounded onto the iPhone platform, giving players access to a
completely hand-made musical adventure. The game engine, built from scratch, was an
incredible achievement for the programmers involved. And while the casual gamer may
not notice the complete engine, they could easily notice the artistic design for both
visual and audio.
Mote's dream-world draws a player into a universe where music solves problems
by changing listeners’ moods. The titular character must journey through a scenic forest
and an imposing pirate ship in order to discover subconscious memories of music theory
knowledge. To do so, he will have to interact with other dream element characters, also
called "motes." This is done by playing a simple eight-note riff through a piano-like
interface. The eight note riff will summon a song that will then affect the mood of the
character that the player is interacting with. This response can cause characters to open
doors, smash walls, or otherwise remove an obstacle in Mote's way. This simple
gameplay targeted Mote to the casual player, and made our game feel friendly and
entertaining to any player.
Mote also demonstrates potential for the future of game design. During the
course of the project, robust graphics, sound, and physics systems were devised that
could be used to power future projects. In addition, the level editor and the simple

9
format used to create art assets through Adobe Photoshop can empower future artists
to build upon Mote or create an equally interesting iPhone game of their own.
1.1 Team Roles
The development team for Mote originally consisted of two artists and three
developers. The art team consisted of Joe Cotnoir and Daniel “DC” Corfman. Joe
created the main menu music, concept art, sound effects, and provided some voice
acting and recording. Credited voice actors and instrumentalists include Dan Cotnoir,
Eugene Sanzi and Benjamin Provost. DC created the environment art, designed puzzles,
and helped with the artistic direction. Midway through the development of the game
Mary Yovina was added to assist Joe and DC with asset creation. Mary created
character animations and contributed to the art direction through her character style.
The technical development team consisted of Steven Foley, Kevin Nolan and
Graham Pentheny. All three developers contributed to the game engine design as well
as the initial engine features. As the project progressed, Steve specialized in the level
editor, level-loading, and collisions code. Kevin focused on audio and game scripting in
collaboration with DC. Graham committed to the graphics engine, performing extensive
analysis as his Computer Science portion of the project.
The project was completed under the advisement of Professor Joshua
Rosenstock of the Interactive Media and Game Development (IMGD) department.
Computer Science professor and IMGD department head Professor Mark Claypool also

10
advised Graham during his graphics optimization work. Special thanks are also given to
Professor Brian Moriarty of the IMGD department for his feedback on initial game
designs.

11
2 Conceptual Designs
2.1 Improvisational Music Game
Mote initially started with the three simple words "Improvisational Music
Game." Designed from the ground up, the brainstorming began with the understanding
that the user would create their own music or play along with the game at some point.
Mote's original concept allowed a player to generate their own spontaneous
content. The game, when complete, would allow users to create something musical as
they progressed. User progress would be measured on complexity and originality of
musical elements , or at least creativity would play a role in advancing something within
the game. This element of design was modified and applied to the musical system
through a menu in which the player interacts with in-game characters with music
abilities.
Of course, Mote had to contain musical elements. Our idea was to give users
some instantaneous control over some instrument that controlled melody, harmony,
rhythm, or timbre. In the end, we gave users control of a small melodic line through an
instrument that can be played at will, satisfying the musical portion of this game. Music
is also used as a reward of sorts--by playing written songs, the iPod would play back a
complex, slightly longer version of the song played.
Our personal target was to create a casual game rather than a purely musical
toy--a fun application for anyone with a direct goal and set of rules rather than just a
content creation system. This would allow us to create a given set of rules and balance
12
them. While simply a challenge element, it would also add replay value. If we had
decided to make a toy, Mote may have simply ended up as a tiny piano on the iPhone
screen. With a game's framework, Mote was able to give a purpose to improvisation
rather than just handing a player an instrument and wishing them the best of luck.
The iPhone platform gave us the ultimate tool for the casual, portable game.
With nothing but a touch screen and a pocket-sized frame, our concepts were focused
on the player who doesn't often play games, but would be able to play for
approximately ten minutes at a time. With no complicated buttons to explain, we were
able to label everything press-able within the game and explain it clearly.
2.2 Existing Games in the Genre
When developing the initial Mote concepts, it was important for the team to
consider existing games that took steps toward creating an improvisational music
experience. We didn't want to tread on too-familiar ground with our game, and just as
importantly, we needed inspiration.
Between the music games, the iPhone games, and the assorted other video
games that we looked at, a few distinct patterns emerged. We immediately noticed
elements of smooth, seamless, and almost rhythmic gameplay in the fun games. You
could play one and go from one screen to another with no effort or waiting. Our focus
on fun revealed that interaction between two players or a player and a character made
for the best experiences. We also applauded games that tied music deeply into their

13
gameplay--whether it be through tapping along with rhythms or simply more energetic
music when large foes appear. And in some games, the character design was enough to
draw a player to the game by itself--all early concepts of Mote involved clear character
design from this point on.
Some games contained elements that we found unsatisfactory, as well. Several
iPhone games that we looked at feature interfaces where you would block the UI or
important gameplay elements with your finger during normal use of the touch screen.
Certain games were just toys--musical tools that had no purpose other than to create
tunes and save them. We wanted to have victory conditions in Mote, and so these
concepts were brushed to the side. Other games had issues with such things as
uninteresting or downright punishing challenge levels. One game had a tutorial
character that would insult you if you weren't playing up to par--this was certainly
something we wanted to avoid.
2.3 Game Conceptualization
Our initial goal was to make a 2D game for the iPhone that needed to have
something to do with music. Another goal we had was to release and sell what we make
on the App Store, Apple’s software distribution platform for the iPhone. Our five-person
team of two artists and three programmers also needed to be able to handle the
amount of work needed to be done for whatever concept we came up with.
14
Our development plan was to come up with a concept in A-Term, create a
playable level by the end of B-Term, then use C-Term for generating more level, testing,
and polish.
The design phase for Mote went less than smoothly. In the beginning, our
designs were too complex or completely non-functional. One of our earliest ideas
involved a game where you didn’t even have to look at the screen and just tapped on
the device according to some audio cues, the idea being that it would be a game people
could play while walking down the street and not quite paying attention to the game.
We quickly decided that the player would be far too busy walking and would be far too
disengaged from what was going on in the game and moved on. We would much rather
have a game that was both interesting and engaging for the player than one they would
be absentmindedly tapping on.
Another scrapped idea involved using elements of music theory to battle
enemies in musical combat. The idea of an action game wasn’t entirely unwelcome, but
the use of music theory as a core game mechanic in the way it was presented was too
complex for a casual game.
One of our later ideas, and the one closest to what we ended up with, involved
having the player create music according to a given style. The game would grade the
player on how well they adhered to that style. This idea, while interesting, would have
been a nightmare to implement on the tech side. The only way this could have been
practical would have been to tell the players explicitly what is “good” and “bad”, which

15
is a rather odd thing to do for this concept since it is supposed to take advantage of
music being so subjective.
We settled on a casual adventure game. Fun, as defined for our game, comes
from the interactions the player has with the characters and environment, the quality of
art and the art style, and the solving of puzzles with music to progress through the
environment. We decided that we wanted something more accessible to a casual games
audience. A goal we had at this point was to release our game on the App Store. Making
a casual game was the best bet we had at having a successful game for the casual games
market on the App Store.
Our design vision statement became this: “Mote is a musical adventure game in
which the player uses music to alter the emotions of game characters and solve puzzles.
The player has a selection of musical riffs that he/she has gathered while playing. These
riffs are played to other characters in the game to change their emotional state and
produce a desirable outcome to a situation.” It would accomplish our goals of designing
a lighthearted casual game with a musical element.
Our vision was (and is) solid. "Mote" is based off of Loom
(http://www.mobygames.com/game/loom); this old Infocom adventure game proved
that such a game could succeed. We had our game concept, first level design, and art
asset list for the first level at the beginning of B-Term as well as just enough time and
manpower to do so (minus a 2D animator.)

16
2.4 Concept Art
Mote's art style is best described as a lush, soft dream, inhabited by simple
characters with basic standards While our world would be more free-form in terms of
the world tiles, our Motes had to be simple personifications of stereotypes.
Conceptually, this brought forth the perfect image of a colored dreamscape: there's an
emphasis on important, yet slightly unusual items, odd but real locations, and floating
characters that could change on a whim and not even care.
The concept of a character in Mote's world came from the idea that a whole
note would be playable as the hero. Mote and his friends are round spheres of dream-
like energy that are roughly in the shape of whole notes, and through colors, facial
expressions, shapes, and accessories, they represent both human and musical
stereotypes. Characters, simply entitled "motes," consist almost entirely of their central
body cloud and a lighter "halo" cloud surrounding them. To make them appear more
ethereal, it was essential to blur Mote and keep his non-accessory features soft.
Motes also carry around accessories that help define their personalities.
Originally, this was simply little rotating miniature motes that surrounded them.

17
Fig. 2.1: A very early concept shot of Mote by Daniel Corfman.
Here we see an older vision of Mote that shows a red version of our main
character. In this version, the miniature colored pieces around Mote rotated and
summoned attacks along with the beats of background music playing. Their colors
defined their personal attacks and personalities. The red one above is using a powerful
attack, and the black mote is evil.
Fig. 2.2: Another very early concept shot of Mote by Daniel Corfman with a more aggressive tone.
Here we see Mote charging an electrical attack. Attacking and combat were
eliminated from the game as concepts to keep the gameplay light and friendly.

18
Fig. 2.3: An early idea of an interface, and our color palette of choice.
Early in development, these colors were the only definitions of characters.
19
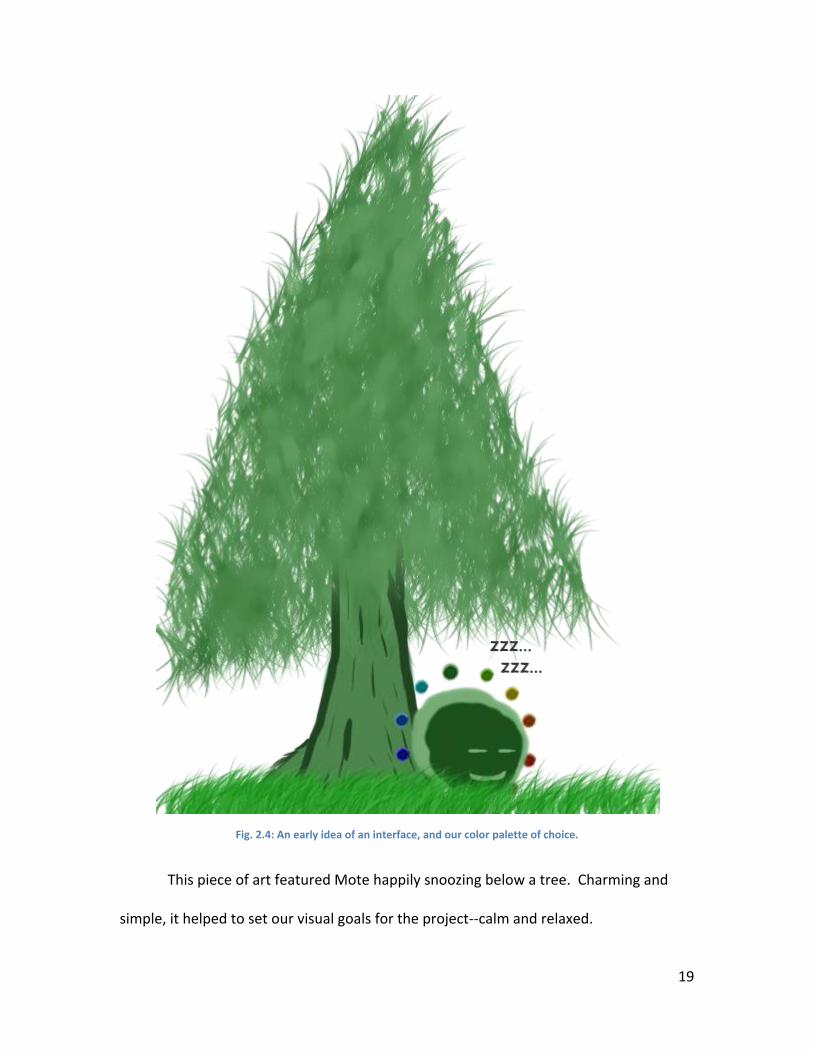
Fig. 2.4: An early idea of an interface, and our color palette of choice.
This piece of art featured Mote happily snoozing below a tree. Charming and
simple, it helped to set our visual goals for the project--calm and relaxed.

20
Colors and orbs were simply not enough to personify our characters, so we
resorted to giving our characters accessories to define them more. Accessories were
simply articles of real world items that helped show a character's purpose or interests.
Hats, hands, and even parrots were used to give Mote's characters life and energy.
While the following concept art didn't quite capture the fuzzy and blurry style
achieved earlier, it did keep to the simple "orb with features" that captured the
character essence without too much fine detail. It also helped define exactly what each
character would be wearing.
Fig. 2.5The MetalHead
Note the helmet, the fiery glow, and the "rock on" pose with his hands and face.
Clearly, this fellow represents anger.

21
Fig. 2.6: "Babby" the Baby
A charming little baby mote that goes by the name "Babby." One of the
concepts was that a younger mote had a larger halo and a smaller body, and with time,
the halo formed into more of the body. We tried to create the cutest character ever.
Fig. 2.7: The Sleepy Guy
This is a sleeping character whose only purpose is to be woken up in some
manner. He is clearly a character based on the need to complete a puzzle.

22
Fig. 2.8: The Emo Kid
This depressing-looking lad is based on the "emo" fad. He may look depressing
compared to the other characters, but in truth, he provides comic relief.

23
3 Technical Design
For the most part, the technical portion of the game was written from scratch; the only
third party library used was the LUA interpreter. The graphics engine and audio code
were written using only OpenGL and OpenAL respectively. To create and load levels, a
custom level editing tool was written in Java. The physics of the game is calculated by
checking for collisions between basic geometric shapes.
3.1 Graphics Engine
The iPhone platform offers many new possibilities for user-input and control
schemes; however, it also holds many performance limitations. Early in the
development of Mote we realized that the iPhone’s graphics chip created a sizeable
restriction to the complexity of the scenes in Mote. With this in mind, it was vital to
streamline the graphics pipeline as much as possible. In studying the graphics systems
of popular iPhone game engines, we determined that they were designed to be used in
a wide scope of types of graphics systems, thereby limiting their overall performance.
We decided that the most efficient and the most academically challengingapproach
would be to create a custom graphics engine.

24
3.1.1 Design
The graphics system for Mote was designed to be flexible, simple, and scalable.
Mote was designed to have a two-dimensional, three-quarters view graphics style,
similar to classic role-playing and adventure games like The Legend of Zelda: A Link to
the Past (©Nintendo 1992, http://www.nintendo.co.jp/n02/shvc/zl/index.html) .
Fig. 3.1: Screenshot from The Legend of Zelda: A Link to the Past (© Nintendo 1992):
an inspiration for the artistic style of Mote.
This style was accomplished through a combination of artistic style and game engine
design. Perspective and lighting are “baked into” the textures. In other words, like a
painting, the illusion of perspective is created through the game art, not through
25
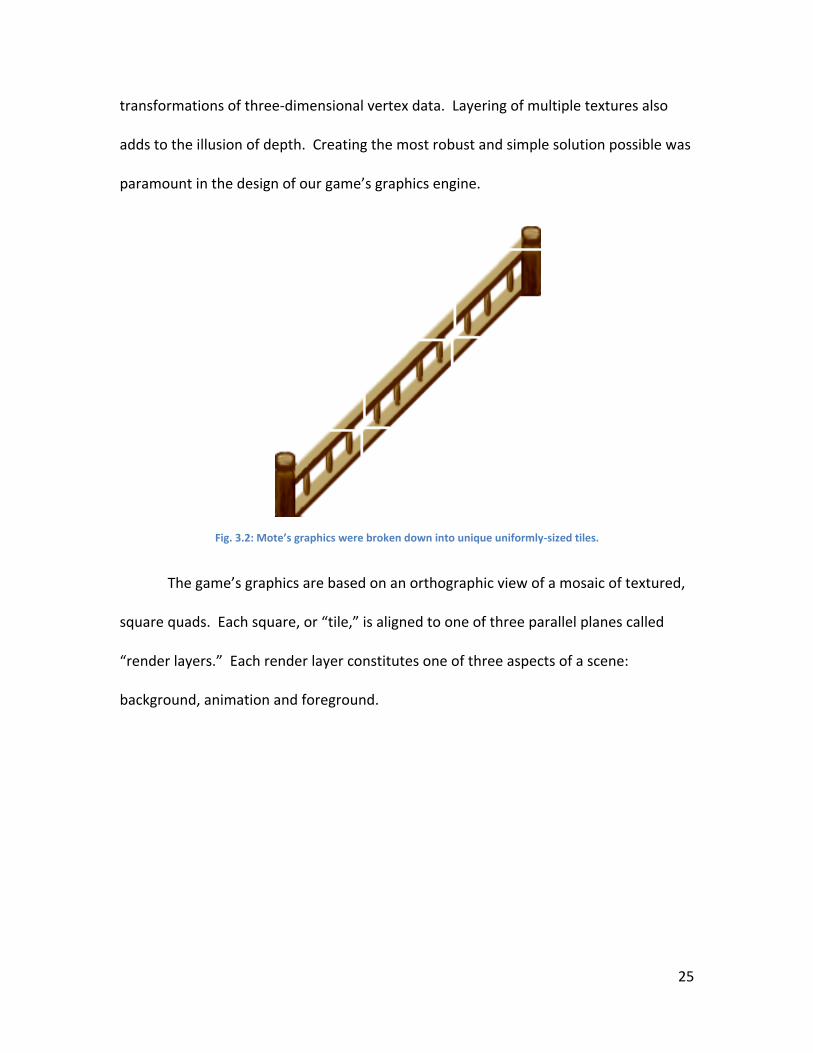
transformations of three-dimensional vertex data. Layering of multiple textures also
adds to the illusion of depth. Creating the most robust and simple solution possible was
paramount in the design of our game’s graphics engine.
Fig. 3.2: Mote’s graphics were broken down into unique uniformly-sized tiles.
The game’s graphics are based on an orthographic view of a mosaic of textured,
square quads. Each square, or “tile,” is aligned to one of three parallel planes called
“render layers.” Each render layer constitutes one of three aspects of a scene:
background, animation and foreground.

26
Fig. 3.3: A Sample Scene Composed of the Three Render Layers
The background layer is farthest from the camera, providing a backdrop for player and
non-player character avatars. The background layer is comprised of terrain tiles (grass,
wood floor, water, etc.), as well as tiles that the player should be able to walk over
(stairs, walkways, etc.).
Fig. 3.4: The Background Sprite Layer for a Sample Scene

27
The animation layer, between the background layer and camera, is constituted of tiles
that hold player and NPC avatar animations. These tiles can be moved around the
scene via player input or the game’s scripting system.
Fig. 3.5: Animation Layer for a Sample Scene
Finally, the foreground layer is the closest layer to the camera, containing sprites that
the avatars can walk behind.
28
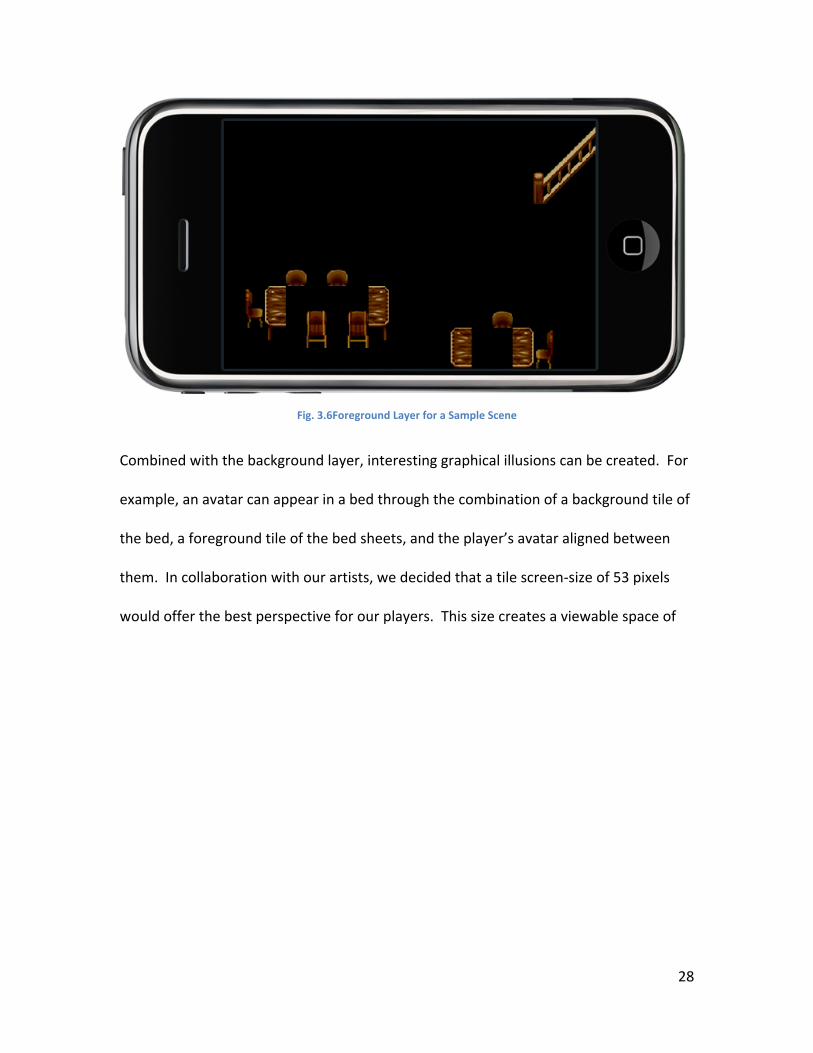
Fig. 3.6Foreground Layer for a Sample Scene
Combined with the background layer, interesting graphical illusions can be created. For
example, an avatar can appear in a bed through the combination of a background tile of
the bed, a foreground tile of the bed sheets, and the player’s avatar aligned between
them. In collaboration with our artists, we decided that a tile screen-size of 53 pixels
would offer the best perspective for our players. This size creates a viewable space of

29
approximately 6x9 tiles on the iPhone’s 480x320 pixel screen.
We decided to use OpenGL ES 1.1 (http://www.khronos.org/opengles/) to
render our graphics for a few reasons. OpenGL and DirectX are the industry standards
for real-time computer graphics, and as aspiring game developers we wanted to gain as
much experience as possible with industry standard tools. Secondly, using OpenGL is
the most resource efficient method for rendering graphics for our game. Because
OpenGL is implemented through the graphics hardware, it is vastly more efficient than a
software-based renderer. The choice of using OpenGL ES 1.1 instead of OpenGL ES 2.0
was driven primarily by accessibility concerns. While OpenGL ES 2.0's programmable
pipeline is more flexible than 1.1's fixed pipeline, it was only supported on the iPhone

30
3GS. Apple’s Core Graphics libraries provide a simple wrapper for OpenGL API calls,
however as an academic exercise, we chose to not use Core Graphics.
3.1.2 Implementation
The simplicity of the graphics engine design allowed for an exceedingly
uncomplicated implementation. Mote's design and graphics style called for a small set
of core functionality in the graphics engine. The engine needed to be able to display
sprites, and set their positions in real-time. Animations were necessary for the player
and non-player characters. Finally, sprites need to be layered on each other to create
render layers.
Sprites were implemented through a square of two textured polygons. To
prevent the same texture from being uploaded to graphics memory multiple times, a

31
SpriteTextureManager class was created. This manager implements the singleton
design pattern, and maintains a map of texture file names to their OpenGL ID numbers.
The Sprite class gets the OpenGL ID from the SpriteTextureManager upon instantiation,
as well as keeps track of the position of the Sprite. Each Sprite is added to a
RenderLayer object.
Both the Sprite and RenderLayer objects implement the "Renderable" interface.
This interface defines objects that can be rendered directly to the screen through the
"render" method. Every frame, the update loop calls the render method on each of the
render layers. The render layers implementation of the render method iterates through
the sprites contained within the layer and calls each of the Sprite's render methods.
Each RenderLayer is assigned to a specific Z index, which is translated into a translation
along the Z axis. Because OpenGL allows for multiple transform matrices to be
multiplied together and finally applied to the vertices, the RenderLayers translate the
sprites they contain.
-(void) renderWithTimeSinceLastFrame: (float) time {
glPushMatrix();
//translate everything
glTranslatef(0.0, 0.0, self.zOffset);
//render all the sprites
for (int count=0; count<[sprites count]; count++)
{
Sprite* sp = [[sprites objectAtIndex: count]
renderWithTimeSinceLastFrame:time];

32
}
glPopMatrix();
}
Animations are implemented as a subclass of the Sprite class. Animated sprites
change the texture value assigned to them after a specified interval. An animation loop
can be specified as a set of frames in the animation. For example, a four-frame
animation can play, and then loop for the last two frames.
3.1.3 Results
Overall, the graphics engine is the simplest solution possible while offering our
artists as much flexibility as possible. The simplicity of the design helped tremendously
in diagnosing and fixing bugs in the system. Despite the streamlined nature of the
graphics engine, our game averaged about 15 frames per second rendering a typical
gameplay scene. Because of this, optimization of the graphics engine became the focus
of Graham's Computer Science MQP.

33
3.1.4 Optimizations and Tweaking
Fig 3.7: Sample Scene Used for framerate benchmarking, created to showcase the effects of the optomizations
made
Fig. 3.8: Framerate (Y-axis) vs Time (X-axis) for the sample scene before modifications
0
10
20
30
40
50
60
70
1
11
21
31
41
51
61
71
81
91
10
1
11
1
12
1
13
1
14
1
15
1
16
1
17
1
18
1
Framerate
34
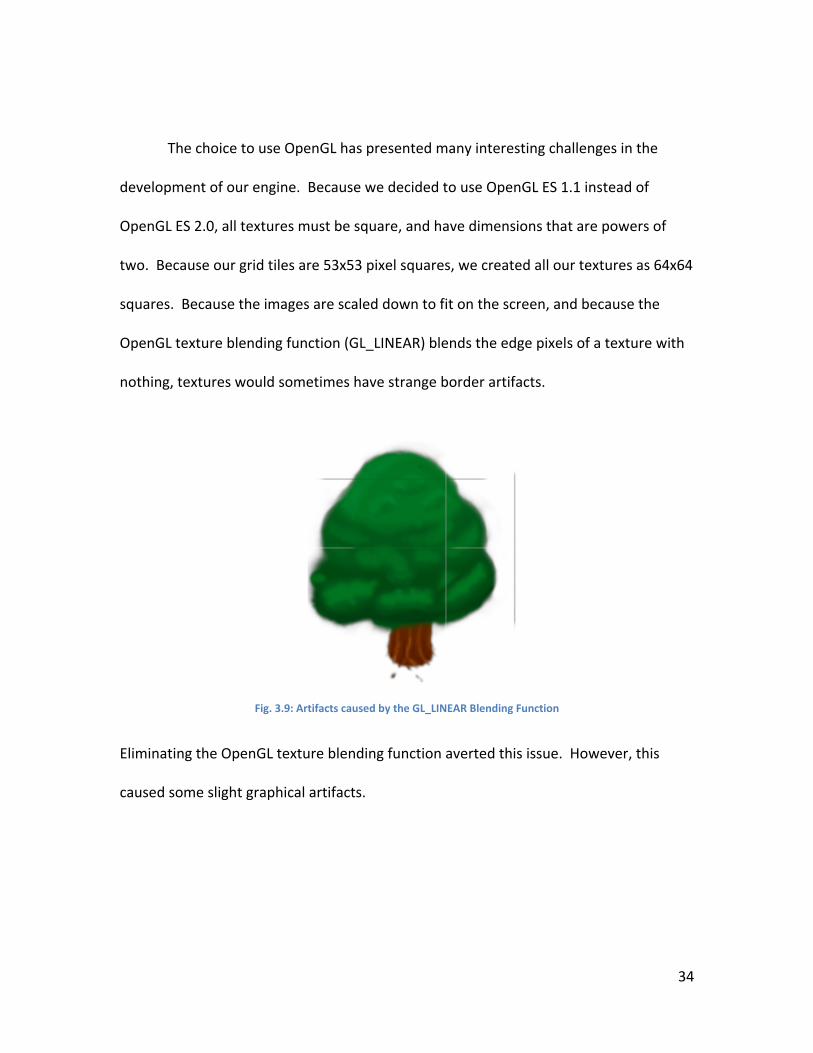
The choice to use OpenGL has presented many interesting challenges in the
development of our engine. Because we decided to use OpenGL ES 1.1 instead of
OpenGL ES 2.0, all textures must be square, and have dimensions that are powers of
two. Because our grid tiles are 53x53 pixel squares, we created all our textures as 64x64
squares. Because the images are scaled down to fit on the screen, and because the
OpenGL texture blending function (GL_LINEAR) blends the edge pixels of a texture with
nothing, textures would sometimes have strange border artifacts.
Fig. 3.9: Artifacts caused by the GL_LINEAR Blending Function
Eliminating the OpenGL texture blending function averted this issue. However, this
caused some slight graphical artifacts.

35
Fig 3.10: Results of using GL_NEAREST, note the rough edges

36
This graphical issue can be completely resolved while maintaining the blending
function's benefits by using sprite sheets. Sprite sheets are a single image with multiple
sprites on them, as opposed to separate images per sprite. Sprite sheets allow for the
border pixel of each sprite to be blended with the tile that would presumably be next to
it, thus removing the edge artifacts described. Originally sprite sheets were considered
in the hopes of streamlining animations, however because textures must be square and
have dimensions that are powers of two, (as a requirement of OpenGL ES 1.1) much of
the sheets were blank space. This caveat ended up making sprite sheets less efficient
than using separate images therefore we abandoned the idea. We originally planned on
having animation metadata in a separate file for each animation, but since animations
are controlled via the level scripting, this became unnecessary and bulky.

37
In analyzing the sprites used throughout one of our levels, we noticed that many
sprites were identical to one another with some slight variations, and some were mostly
transparent with a small portion of the sprite being used. This is extremely apparent on
objects at an angle to the grid of the level, such as stairs. As a result, we concluded that
halving the size of the textures for a level (from 64x64 pixels to 32x32 pixels) would
dramatically increase the number of textures that were reused throughout the level. By
changing the tile size, we maintained the number of unique textures per level while
reducing the size of each texture by 75%. This change also, however, increased the
number of vertices and polygons in a typical scene by approximately 300%.
Fig. 3.11: Framerate (Y-axis) vs Time (X-axis) for the same scene using both 64 and 32 pixel tiles
This combined change resulted in approximately a 50% decrease in framerate compared
with the original implementation. This was very surprising to us considering the
significant amount of texture memory savings. We have concluded that the overhead
0
10
20
30
40
50
60
70
80
1
10
19
28
37
46
55
64
73
82
91
10
0
10
9
11
8
12
7
13
6
14
5
15
4
16
3
17
2
18
1
19
0
19
9

38
for texturing each polygon, regardless of the size, is the bottleneck in high-polygon
scenes.
Fig. 3.12: The same banister represented as 6 unique 64x64 pixel tiles (left) and 7 unique 32x32 pixel tiles (right)
Another optimization that we attempted was changing from pre-defined
polygonal geometry to point sprites. We hypothesized that this would cut down
significantly on the amount of vertex memory necessary. We also thought that because
point sprites are viewed the same from any perspective, it would eliminate the need for
much of the vertex transformations necessary to display a scene and thus give huge
performance benefits. Quite counter-intuitively this added complexity to the graphics
pipeline. Because the OpenGL implementation converts point sprites into two polygons
centered on the point's vertex, using point sprites caused roughly an 80% performance
hit versus our original implementation.

39
Fig. 3.13Framerate (Y-axis) vs Time (X-axis) for the same scene using both point sprites and explicit polygons
Finally, in an attempt to reduce the overhead associated with the increase in
vertices, we tried using Vertex Buffer Objects, or VBO's. Vertex Buffer Objects maintain
vertex information in high-speed graphics memory, removing the need to upload all
vertex data every frame. Apple highly suggests the use of VBO's for high-performance
graphics systems on the iPhone. We found that VBO's do not have any significant
measureable impact on the framerate of the graphics engine. We believe this is
because the iPhone uses shared graphics memory. Our theory is that uploading vertices
to graphics memory is similar to the C "memcpy" function, which would not have a
significant overhead considering the amount of vertex data being copied.
0
10
20
30
40
50
60
70
80
1
14
27
40
53
66
79
92
10
5
11
8
13
1
14
4
15
7
17
0
18
3
19
6
32px polygons
32px point sprites

40
3.1.5 Conclusions
Overall our implementation was limited by the performance of the iPhone’s
graphics chip. Benchmarking our optimizations and changes showed that despite
following Apple’s best-practices for intense graphics applications, the iPhone can’t
render more than about two-hundred polygons at 30 frames per second reliably. This
value is obviously dependant on the model and generation of iPhone/iPod Touch. For
our benchmarking data we used a first generation iPhone 3G as it gave us a nice middle-
of-the-road benchmark for plausible usage.
An optimization that was not implemented due to timeframe issues was the
ability to flip and rotate textures. In observing the textures used for the benchmark
level, we concluded that many could be created by a combination of horizontal or
vertical flips and rotations of another sprite. This would cut down on the total number
of sprites loaded into texture memory and thus theoretically improve framerate.
Fig. 3.14:
Original Image Horizontal Flip Rotate 90 deg CCW Rotate 90 deg CCW, Horizontal Flip
Mote’s graphics style and level design ended up demanding more from the
iPhone’s graphics capabilities than it could handle. While our graphics engine was
created with efficiency and scalability in mind, the number of textured polygons
required for a scene in Mote was more than could be rendered by the iPhone at 30 or

41
more frames per second. The levels in Mote were designed to be moderately large and
complex, which strained and tested the performance of the graphics engine. Levels
designed with fewer entities and smaller scope would have maintained a reasonable
frame-rate, however they would have required a modification to the gameplay and
scale of Mote.

42
3.2 Level Editor
In order to create the game’s levels in an expedient manner, the team decided to
create a custom level editing tool. The original idea was to have the data for each level
stored in its own bitmap image file. At first, this seemed like a good idea; everything in a
level, such as collision walls and texture tiles, is aligned to a grid, which matches up
perfectly with an image. The colors of each pixel in the image file would represent
something in that level’s cell, such as background texture, foreground texture, texture
orientation, collision wall shape, or NPC entity ID. However, we quickly realized that
making any sort of complex level would be an extremely tedious process for the artist
making it; editing a bitmap image on a color-by-color basis without any sort of visual aid
would take far too long. For this reason, we decided to write our own custom level
editor to create levels specifically for our game, Mote.
The Level Editor was written in Java using Eclipse. The entire process to create a
simple program to lay tiles in a map and save the data to a file took about three days.
The interface was minimal and not user-friendly, but it got the job done. The main
functionality of the Level Editor was to place background textures, foreground textures,
and collision walls in a grid that would be loaded by the game. In addition to this
functionality, the Level Editor could also do bulk movement of tiles, copy/paste, and
texture groups. These functions were added in to help the artist speed up productivity.

43
Fig. 3.15: A screenshot of the level editor in action, showing the first level.
The grid in the middle shows what the level will look like in the game. On the
right there is a series of check boxes that display and hide the different layers of the
level: foreground tiles, background tiles, and collision walls. Underneath that is the list
of all textures that appear in the level. To place them in the grid, simply click on a
texture to select it, and then click on a cell in the grid to change that tile to the selected
texture. The tabs above the list of textures show what tool is currently selected. Above
the level grid are the tool bar buttons for (from left to right): new level, open level, save
current level, change level settings and import textures.
The program saves one main file in LEV format (custom to the Level Editor),
which contains metadata such as width, height, texture size, and number of textures.
44
There is also an LVD (level data) file which contains the actual level data, the position of
every background texture, foreground texture, and collision wall shape. The game then
reads these files and reconstructs the level exactly as it appeared in the level editor.
Although it wasn’t perfect, using the Level Editor saved valuable time, compared
to the artist editing the color data of an image file on a pixel-by-pixel basis. It also gave
the artist a visual representation of the level so they could see it before it was imported
to the game.

45
3.3 Lua
Our game uses a scripting library called Lua (http://www.lua.org) for our levels.
Lua is a widely used software library that is very useful for level design and event
scripting. Lua also can be used for any part of a game that needs to be rapidly
prototyped and changed without long compile times. It also integrates quite well with
C, which makes it convenient to call C functions from within a Lua script.
Lua sped up and simplified our level creation and improved encapsulation of
how a level actually works. The Lua file does not deal with anything outside of the level
itself, which would be significantly more difficult if the levels were made in Objective C
like the rest of the game. A system of C functions "hook" into the Lua file and allow the
script to operate without directly interacting with the game engine. This allows us to
limit the amount of control that the Lua script has over the game proper, while allowing
it to control all of the parts of the level that it needs to.
3.3.2 Scripting
The Lua scripts that Mote used changed over the course of the project. At first,
the scripts were written chronologically according to when in the level each puzzle
would be completed, with only one method for the game to communicate actions to the
script. This structure made it difficult to do much with event scripting, as there was no
way for the game to inform the script that an event had happened. One implication of
this was that we had no real event-based code at this point; we only had timers that

46
simulated events through careful control of when things happened. This structure was
not usable or extensible enough for our purposes, so we changed it into an event-based
framework as soon as we realized how much the system limited us. The event system
will be described in more detail elsewhere.
After events were implemented, the script was split into two basic parts:
initialization and event-driven behaviors. The event-driven behaviors were the things
that happened as a result of events in the game. The initialization was the various
things that had to be done to start the level. For example, the following is taken from
the initialization of the first level:
--Create the npcs, give them animations.
metal_id = createMote("metalheadIdle%d", 3, 5, 1);
babby_id = createMote("babyIdle%d", 9, 5, 1);
sleepy_id = createMote("sleepGuySnore%d", 4, 5, 2);
emo_id = createMote("emoIdle%d", 6, 5, 1);
guard_id = createMote("guardIdle%d", 6, 5, 2);
mcsickle_id = createMote("malletIdle%d", 6, 5, 1);
The first line is a Lua comment. The six statements create each mote that exists in the
first level and assigns its unique id number to the correct variable. The arguments to
createMote are, in order: filename, number of frames, animation speed, frame offset.
The filename is the name of the file that the animation is from, formatted to include a
number for a frame number. The number of frames is the total number of frames in the
animation, and the animation speed is how many frames per second the animation runs
at. The frame offset is the frame that the animation should start at, in case there is a
part of the animation that should be skipped during loops. We found that this set of

47
parameters provided all the power that the script needed when creating a mote. Later
in the script we set each mote’s dialogue:
--Set everyone's dialogue
dialogue(metal_id, "Argh. Need some music.\n It's too
quiet.");
dialogue(babby_id, "Agoogoo.\n Agoogoo.");
dialogue(sleepy_id, "Zzzzzzzzzzzzz. Why yes\n I'll
have a chili dog.");
dialogue(emo_id, "My darkened gaze reflects the\n
gossamer wings of the raven. |I wrote that poem
myself.");
dialogue(mcsickle_id, "I... uh... aint moving. Nope.\n
No motivation.");
dialogue(guard_id, "NONE SHALL PASS.");
The dialogue function takes in a mote’s id number and a formatted string for dialogue,
and sets the specified mote’s starting dialogue.
Within the event-driven behaviors part of the script, we have a few methods
that can show how we made the scripts. Calls similar to this one were used frequently:
playAnimation(metal_id, "metalheadIdle%d", 1, 3, 5, 0,
0, NO_EVENT);
This call plays an animation, using the following arguments: mote id, filename, start
frame, end frame, animation speed, frame offset, loop offset, and event identifier.
Mote id is the identifier for the mote that is to be animated. Filename is the filename of
the animation to play. Start and end frames are the frames that the animation should
start and end at, in case we need to only loop through a short section of the animation.
Animation speed is how many frames per second the animation runs at. Frame offset

48
and loop offset are the frame numbers to start the animation at the first time and each
later time, respectively. Event identifier is the identifier for the event that happens
when this animation finishes. Another method that shows the general pattern that our
script follows is moveMote:
moveMote(metal_id, 9.5, -31.25, 0.1,
METAL_HIT_BRICK_WALL);
This method moves a mote to a position, and uses the following arguments: mote id, x
position, y position, speed, event identifier. Mote id is the identifier of a particular mote
to move. X and Y positions specify where to move the mote. Speed is the speed at
which to move the mote. The player’s mote moves at 0.05, making this movement of
0.1 very fast. Event identifier, as before, is the name of an event to execute once the
mote reaches its destination.

49
3.3.3 Lua Conclusions
Mote successfully utilized Lua. We were able to spend much less time on our
scripting engine than we initially planned on due to not having to write a script parser
from scratch. It took some time to figure out how to get Lua to work on the iPod, but
using Lua still took far less time than writing an engine would have. The iPod
development environment doesn’t have native support for scripting languages, so we
had to compile the Lua source code into our project and bundle our script files with our
other resources. Lua was most likely the best solution for our need to script the levels
rather than hard-code them. Our scripts grew very rapidly, as did the hooks that they
used. While using Lua helped speed up our development of levels, we could have
avoided many of the headaches it caused if we spent more time designing exactly what
our scripts needed to do before we started implementing.
50
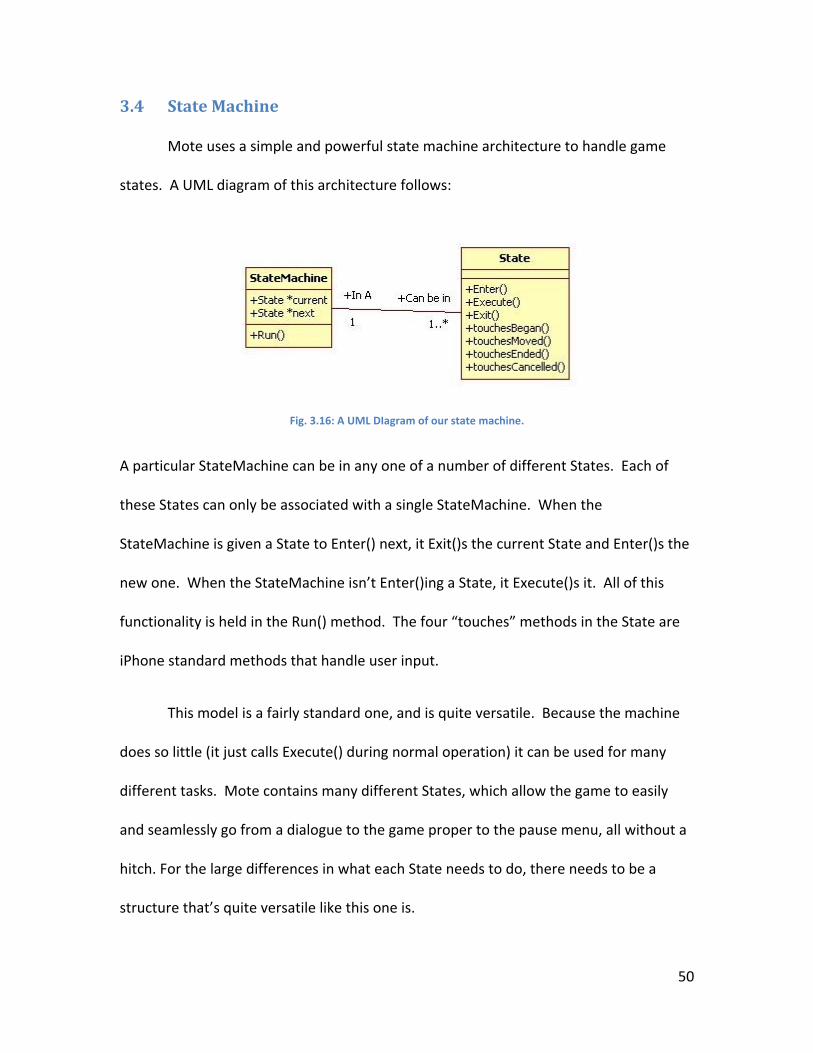
3.4 State Machine
Mote uses a simple and powerful state machine architecture to handle game
states. A UML diagram of this architecture follows:
Fig. 3.16: A UML DIagram of our state machine.
A particular StateMachine can be in any one of a number of different States. Each of
these States can only be associated with a single StateMachine. When the
StateMachine is given a State to Enter() next, it Exit()s the current State and Enter()s the
new one. When the StateMachine isn’t Enter()ing a State, it Execute()s it. All of this
functionality is held in the Run() method. The four “touches” methods in the State are
iPhone standard methods that handle user input.
This model is a fairly standard one, and is quite versatile. Because the machine
does so little (it just calls Execute() during normal operation) it can be used for many
different tasks. Mote contains many different States, which allow the game to easily
and seamlessly go from a dialogue to the game proper to the pause menu, all without a
hitch. For the large differences in what each State needs to do, there needs to be a
structure that’s quite versatile like this one is.

51
3.5 Menu System
The menu system that we use is actually quite simple:
Fig. 3.17: A UML DIagram of our Menu System
If a menu is needed in the game, its Menu Object is initialized. When the player
touches the screen, the game asks the Menu if that touch was on a particular
MenuButton. When a button is touched, it executes its ExecuteAction method, which
completes the button's assigned task. This system is quite versatile, and it allows
buttons to be moved during the game if needed. It also can be extended quite easily, as
the system is fairly light. Due to this structure’s minimal interface with the game, there
are very few things that need to be implemented to extend this structure. The Menu
only requires the implementation of three methods and the inclusion of an array to be
extended. The MenuButton requires 3 methods and the position and size fields to be
extended.
This system has a few weaknesses that were not anticipated when it was
implemented. The largest one is the large amount of simple work to add a new menu.
52
Each Menu and MenuButton is its own class, so a menu with 3 options on it requires 4
new classes to create. This is more time-consuming than it needs to be. It would have
been a better idea to use a simpler structure for buttons than a full class. A C-style
struct would have been simpler, though it would require buttons to have an identifier as
well as position and size.
3.6 Physics
The collision system of Mote is made up of terrain and entities. The terrain is the
static part of the level that does not move, through which entities cannot pass. Entities
are the dynamic part of the level, thus they do move. In the case of Mote, the only
entities are the player's mote, and the NPC motes.
To calculate potential collisions and how to handle them the task must be
delegated out to a third class, a CollisionHandler, which contains the information about
all the physics of the game. Not only does this help maintain modularity and
extensibility of the game, but it prevents cyclic dependencies--a sort of recursive
reference within header files. An entity should not have information about the terrain,
and vice-versa, because that would give too much responsibility to that particular class.
World objects (entities and terrain) should only be concerned with their own behavior
and information (movement, geometric shape), and let an external class handle
interaction between them.

53
3.6.1 Terrain
The terrain of Mote is a grid of rectangular-shaped cells that spans the entire
level, referred to as a "LevelGrid". Each cell in the grid is the same size, which makes it
quick to check which cell contains a particular point in the world space. Assuming the
LevelGrid originates at point R, given the cell dimensions W and H for width and height,
to find the cell that contains the point p, use the following equations:
Fig 3.18: truncate(n) simply drops all numbers after the decimal point. So truncate(15.943) returns 15.
...where cx is the grid column, and cy is the grid row, assuming the indexing of the
columns and rows starts at 0. Therefore, using a grid with cells of width and height of 64
starting at the origin (0, 0), to find the cell that contains point (345, 890) simply
substitute the numbers into the equation:
So the cell [5, 13] contains the point (345, 890). This is important to speeding up
collision, because it can quickly filter out any cells that it knows cannot possibly be
colliding with an entity.
Every cell in the grid has one CollisionShape associated with it. A CollisionShape has one

54
of six values:
0 (Empty)
1 (Square, Full)
2 (Top right corner triangle)
3 (Top left corner triangle)
4 (Bottom right corner triangle)
5 (Bottom left corner triangle)
Fig. 3.19: White space is empty, gray is solid terrain
The entirety of the terrain is made up of these simple geometric shapes, aligned to their
respective cells. Putting together combinations of squares and triangles will form a
crude collision map for the world that relates to and is representative of the graphics on
the screen.

55
Fig. 3.20: The blue circle represents the player mote
The world of Mote is not involved enough to warrant a more complicated terrain
system, so this system is acceptable and accurate.
3.6.2 Entities
The entities of Mote are the mote characters themselves. There are two types of
motes: the player mote and the NPC (non playable character) motes. The two behave in
the same manner with respect to movement and collision, but there are some key
differences that require two separate classes to represent them. The CollisionHandler
represents all entities as circles.

56
All motes have a current position p, and a target position t that they walk toward
at some speed s. They also have a boolean data field w that indicates whether or not the
mote is currently walking. When a mote is told to walk to a position, w gets set to true,
and t is updated to that position. Once the mote reaches its target, w is set to false so
that it stops moving. The speed value s is represented in world coordinates per second,
to maintain frame independence. In psuedo code, the movement function looks like
this:
function moteMove ()
if w then
distance := distanceBetweenPoints(p, t)
amount_to_move := s * numSecondsSinceLastFrame()
if distance < amount_to_move then
p := t
w := false
else
p.x += (t.x - p.x) * amount_to_move/distance
p.y += (t.y - p.y) * amount_to_move/distance
end
end
end
The player mote keeps to this movement system, but also has an extra field for

57
touch input. It has an input point i that is represented in screen coordinates, as well as
another boolean field d that indicates whether or not the player is currently touching
the screen. When the game controller registers a touch, it sets i to the point touched,
and d to true. When the touch is released, it sets d to false. In psuedo code, the player
mote's touch functions looks like this:
function onTouch (touchPos)
i := touchPos
d := true
end
function onTouchRelease ()
d := false
end
And the updated move function for the player mote looks like this:
function playerMove ()
if d then
t := convertScreenToWorld(i)
# remember that i is in screen coordinates
# and t is in world coordinates
w := true

58
end
moteMove()
end
NPC motes do not behave and differently from how the player mote behaves in
terms of movement and collision. The major difference is that NPC motes initiate
movement in response to events, whereas the player mote responds to touch input.
NPC motes have additional data fields for current dialog text and event objects to be
called when certain things happen, but other than that they are the same as a generic
mote entity.
3.6.3 CollisionHandler
Collision detection is handled by a class called CollisionHandler. The
CollisionHandler has all the information about the entities and terrain in the level. The
reason for outsourcing this responsibility to an external class is that entities and terrain
should not reference each other. Doing so would break modularity (each class must do
one thing, do it well, and not have to unnecessarily depend on other classes), and it is
actually impossible for the Mote class and the LevelGrid class to reference each other,
because it would cause a cyclic dependency.
A cyclic dependency is when two class files (in this case it would be Mote.h and
LevelGrid.h) attempt to import each other. Both classes depend on each other, and thus
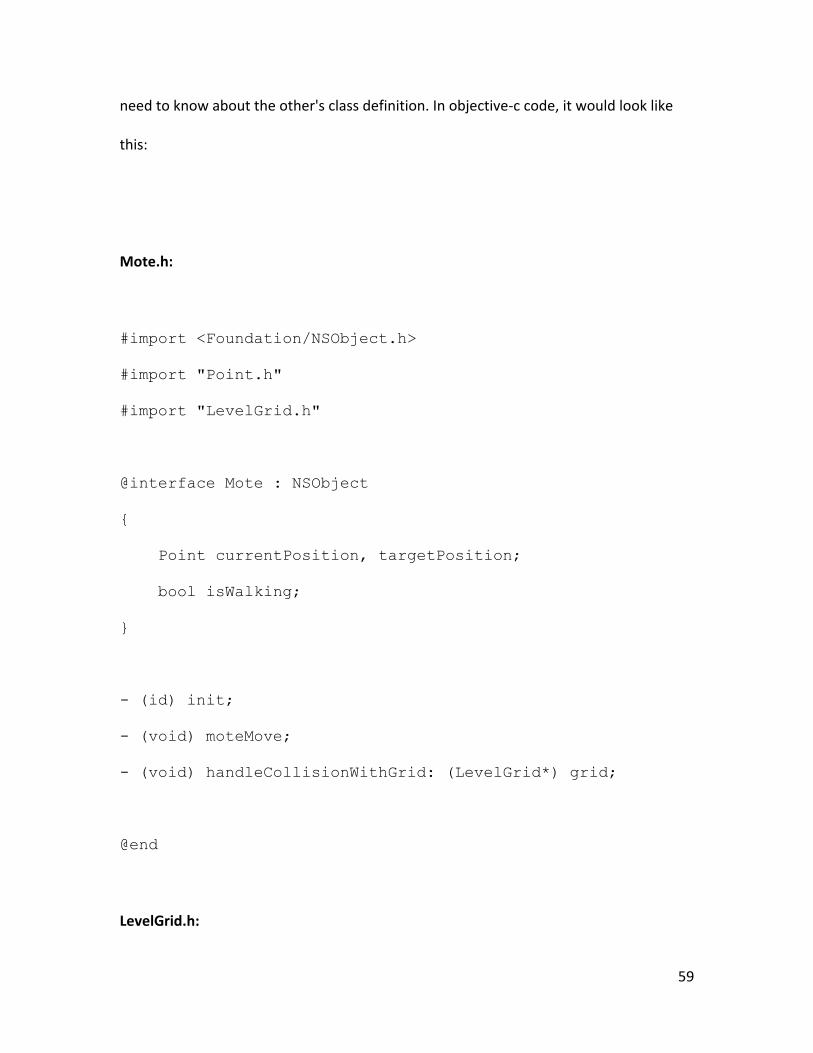
59
need to know about the other's class definition. In objective-c code, it would look like
this:
Mote.h:
#import <Foundation/NSObject.h>
#import "Point.h"
#import "LevelGrid.h"
@interface Mote : NSObject
{
Point currentPosition, targetPosition;
bool isWalking;
}
- (id) init;
- (void) moteMove;
- (void) handleCollisionWithGrid: (LevelGrid*) grid;
@end
LevelGrid.h:

60
#import <Foundation/NSObject.h>
#import "GridCell.h"
#import "Mote.h"
@interface LevelGrid : NSObject
{
int gridWidth, gridHeight;
GridCell*** cellMatrix; // two dimensional array of
cells
}
- (id) initFromLevelFile: (NSString*) fname;
- (GridCell*) getCellAt: (Point) p;
- (void) handleCollisionWithMote: (Mote*) entity;
In this example, Mote.h is attempting to import the code from LevelGrid.h, but
at the same time, LevelGrid.h is attempting to import the code from Mote.h. Luckily, the
compiler can detect a cyclic dependency such as this and stop the linker from going into
an infinite loop, but it will still cause an error because there is no proper way to build it.
For this reason, the CollisionHandler takes care of all interactions between
entities and terrain. Neither the Mote class nor the LevelGrid class know about the

61
CollisionHandler class, they only know about their own tasks and properties. The
CollisionHandler is controlled by the GameController, and is invoked every frame when
collision detection is needed:
Fig. 3.21: UML diagram of relationship between classes
The GameController object depends on all three of the other classes:
CollisionHandler, Mote, and LevelGrid. CollisionHandler depends on the physics objects:

62
Mote and LevelGrid. The physics objects do not depend on anything but themselves,
which is how it should be.
3.6.4 Collisions
There are two types of collisions in the game: mote-mote and mote-terrain. All
motes are circles, and terrain is made up of squares and right triangles, so there are only
3 possible combinations of geometric shapes to calculate collision between: circle-circle,
circle-square, and circle-triangle. Collision checking between these basic shapes is
simple and fast, thus takes minimal CPU resources.
Collision detection between two motes is the simplest. To check if two circles are
overlapping, compare the distance between their centers. If the distance is less than the
sum of their radii, then they are overlapping.
When the CollisionHandler detects a collision between the player mote and an
NPC mote, it places the player mote away from the center of the NPC mote by an
amount equal to the sum of their radii. This will place it just on the border of their

63
circles, so that they are no longer overlapping.
When the CollisionHandler checks for collision between the player mote and
terrain, it only checks against the grid cells that the mote is occupying. Because the cells
are aligned to a grid, and are all of equal size, it can quickly filter out any unimportant
terrain cells that it knows cannot possibly be colliding with the mote. Using the
equations above to check what cell contains a world coordinate point, the collision
handler can quickly find the four cells that it needs to check:
Because the mote entity is the same size as a grid cell, the CollisionHandler can
simply check what cells contain the four corners of the bounding box of the mote's
circle, and only check for collisions against those cells. Theoretically, the LevelGrid could
be of infinite size, and it would not affect performance, because CollisionHandler will
always only focus on four cells at a time.
64
3.7 Sound Engine
Our sound engine uses the OpenAL audio library with some functions to pare
down unnecessary functionality. OpenAL is a very large and versatile library, and most
of that versatility is not needed for our game. The sound engine we used comes mainly
from a tutorial on 71 Squared, a blog about iPhone development. We added some
functionality that we needed that was missing from this tutorial, but we stayed pretty
close to it in the end. (http://videos.71squared.com/6440991).
Our sound engine is split into two basic parts: a sound playing engine and a
music playing engine. The main difference is that the sound playing engine is better
optimized for playing short clips, like sound effects, whereas the music playing engine is
designed to handle longer clips, like ambient music. The basic structure of the sound
engine is as follows: The SoundEngine contains a list of sound sources to play sounds
from. The iPhone can handle up to 32 separate sounds playing simultaneously, so our
structure allowed for 32 sound sources. The SoundEngine also contains a list of all of
the currently loaded sounds for quick reference. To play a sound, the game gives the
SoundEngine the name of the sound to be played and the SoundEngine assigns that
sound a sound source. The sound plays once and then stops, unless certain flags are
set. If the sound name given isn’t registered with the SoundEngine yet (because it
hasn’t been loaded in yet, for example) then the engine doesn’t play any sound or
assign it a source.

65
Music works slightly differently. The music to be played must still be registered
with the engine, but the whole clip is not loaded at once. The iPhone’s CoreAudio
framework provides support for streaming music, which is idea for large sound files like
ambient music. Once loaded, the SoundEngine can play a single track of music at a
time. By using streaming audio, we avoid using much memory at once, which is very
important for such a memory-limited system.
For format, we decided to use Apple’s core audio format, or .caf. This format is
ideal for working with the iPhone, and requires no processor-intensive decompression
or other related problems while still allowing a number of compression schemes, should
they be desired. We went through several iterations of sound file use before settling on
.caf. We first tried to use .mp3, as this format has a very high compression ratio without
losing too much quality. We found quickly that in order to use .mp3 files, we would
have to use a very complicated decompression technique that would take up more
processor time than we had. In addition, decreasing the size of the music file does not
decrease the amount of memory it uses, as the file has to be decompressed to be read.
To save ourselves the additional hassle of creating a decompression algorithm that
would most likely be too costly to implement and give little benefit, we decided to
forego compression entirely and use the uncompressed .caf file as our standard audio
file. We used this format to improve efficiency and to leave open the option of
compression in case we needed the extra space at a later date.

66
Mote’s audio engine succeeded at creating a powerful framework that was
limited enough to be easy to code, while retaining all the power that the game required.
The use of separate schemes for playing short and long clips especially helped improve
the efficiency and memory use of the engine. We really didn’t require much in the way
of functionality, but the engine was able to ably handle the variance that we gave it.
One fact that would probably have helped the engine had we known it beforehand is
that compressing sounds doesn’t affect the memory footprint of a sound. Far too much
time was spent on figuring out a decompression algorithm before we realized this.
Were we to recreate this type of sound engine, we wouldn’t spend so much time on
trying to reduce the size of the sounds; rather, we would spend our time improving the
efficiency of the engine in other places, like in sound source allocation, or sound loading.
3.8 Particle System
Particle systems are an efficient, easy way to create interesting visual effects.
Many abstract shapes can be easily simulated through particle systems. For example
water, fire, smoke, stars, and other plasma-like effects can be easily created with a
particle system. Particle systems simulate the interaction of various infinitesimally small
particles, represented as single points in 3d space. The particle system then renders
point sprites at each of these points through OpenGL. The size, color, and transparency
of the point sprites can be modified over time to create interesting effects.

67
For Mote, we wanted a particle system to simulate the smoky look of the mote
characters. We also wanted a system that had the flexibility to perform an array of
visual effects. For our system we wanted particles to appear in semi-random positions
behind the character, with a semi-random size and transparency.
Fig. 3.22: The particle effect creates a smoky trail behind the mote character
These particles would be altered through a series of frames by changing their positions,
sizes and transparency through separate functions. With a combination of these
alterations, a fairly convincing smoke effect is created.
In designing the particle system of Mote, we observed the systems of pre-
existing iPhone engines. We decided that, while it would be interesting to create a
particle system on our own, it would not be particularly innovative, academically
interesting, nor challenging. We chose to modify the system created by the developers
at 71squared.com (71Squared, 2009, http://www.71squared.com/2009/05/iphone-

68
game-programming-tutorial-8-particle-emitter/) to meet our needs. This system was
proven to be a fast and reliable system designed for the iPhone, which offered exactly
what we needed. It uses point sprites and stores the color, size, and position
information for each particle in Vertex Buffer Objects for maximum efficiency. The
system is also written in C, which we have found tends to be a bit faster than Objective-
C. This saved us a measurable amount of time, which we spent towards polishing other
aspects of the game. This aspect of the game engine taught us that we shouldn’t always
re-invent the wheel. Sometimes finding a proven solution to a common problem is
better than attempting to solve it for the sake of solving it.

69
4 Artistic Designs
During the development phase, our intention was to make a game that could be
sold on the App Store. We wanted Mote to both look attractive and like a casual game
to attract those that typically use the App Store. Friendly appearances, soft edges, and
bright colors are all aspects of this art style. The game’s visuals are all based around the
characters, which all resemble little dressed-up puffballs. When introducing our
animator during C-Term, the words, “Like Kirby, but softer”, were used to describe how
the characters should look.
The characters and scenery in Mote are the product of an art student’s dream.
The environments which the player explores are designed to be plausible enough for the
player to know how to correctly interpret them and know how they work, but like
dreams, they also have some unusual aspects. In the second level for example, the boat
that the player visits is an incredibly short walk from the bar. In the first level, there’s a
baby, without any apparent mother or father, playing in a field. Also in the first level,
The Metalhead is capable of busting down a brick wall, a feat not so easily done in
reality.
Our first concern when creating the art style for Mote was the size of the iPhone
screen. Every pixel given to the device will be rendered. However, it would be hard to
see anything particularly small or intricate. A 480x320 screen cannot display very much
detail. As a result, objects are simple in design and color.

70
4.1 Character Design
We have a grey mote template that all our characters start with. Then each
character is shaded with one of our twelve colors (fig 4.1 below), and then given an
appropriate prop. Basing every character on this template simplified our character
design and animation process.
Fig 4.1: An assortment of characters showing our character color variety.
Another advantage to using a template for characters is their consistent round
shapes are easily identifiable against level backgrounds. The addition of colors and
accessories allowed all of the variation between characters we’d ever need and still

71
didn’t deviate from the general appearance of the characters enough for them to be
mistaken for scenery.
4.1.1 Characters
The approach we took to creating all of our characters was somewhat chaotic, as
is perhaps appropriate for dream-based characters. Some characters were designed
around the puzzles they’re associated with. Some other, more important characters
were designed before their puzzles and occasionally persist through multiple puzzles.
The latter ended up being appropriately more interesting.
Mote: The Protagonist
Mote is the manifestation of Moe (the sleeping student) within his own dream.
Moe is a music student who has fallen asleep in class. The goal of the game is to
discover representations of musical concepts within the dream in hopes that Moe will
be able to learn enough for his final.
Aside from the backstory, the characters Moe and Mote aren’t fleshed out at all.
This is similar to the Zelda and Half Life series of games in that the main character is
mostly undefined. By not emphasizing any particular characteristics of the main

72
character, we allow the player’s imagination to fill in the gaps however they wish. He is
the only grey entity in the game, so there’s no question that this is the player character.
The Metalhead
The Metalhead is an example of a character that was created for a puzzle. His
was also the first puzzle created for the game and was used as an example to
demonstrate our intentions for using music style as our puzzle mechanic. While he
might be very simple for a character, he’s our best example of what we intend with our
puzzles.
The Metalhead has no backstory to speak of. His sole purpose is to be the first
puzzle the player completes. He represents the metal riff (he also gives it to the player)
and this riff is also used to solve his puzzle. He demonstrates that metal is used to
enrage or escalate the emotions and interactions of others.
73
The Dread Pirate Soggy Rumpot: A Plot Character
Soggy is an example of a character who was developed before his puzzle. The
concept for him was an absurdity that struck one of us suddenly: Several classifying
accessories of a pirate are a peg leg, pirate hat, parrot, hook, eyepatch, and beard. So
obviously the ultimate pirate would have two eyepatches, two peg legs, two hooks, two
parrots, a beard, and a pirate hat. Unfortunately, putting all of that in to one tiny
character sprite would effectively cover the mote template (it would also look
ridiculous), so we settled for one hook, one eyepatch, and the hat. A parrot exists, but
appears with a different character.
The backstory for Soggy is that he is (or was) in search of the legendary Pirate
Shanty and would not stop for anything until the shanty was found. He’s been through
quite a bit and has a number of stories to tell (unfortunately, many stories that were
thought up weren’t drafted because they weren’t quite appropriate for the tone of our
game.)
The first puzzle created for Soggy was actually less of a puzzle and more of a
story choice. When the puzzle was first created, we assumed that the player would have
four riffs by this point: The first two, Classical and Metal. Then two new ones, Jazz and
Rap. Playing any one of these riffs would elicit a response from Soggy that would
indicate what the riff meant to him. For some of the riffs, if played twice, they would

74
advance the story in a certain direction. Classical, for example, would inspire Soggy to
abandon his pirating ways and undergo more intellectual pursuits. Metal would inspire
Soggy to start a barfight and this would eventually get the both of you thrown out of the
bar. While the story content was neat, the scope of the project wouldn’t extend far
enough to really see the results of this sort of decision. Also, the level that this was
designed for was seriously lacking puzzle content so this interaction was replaced with
the crowded bar/barfight puzzle that’s in the game now.
C-Note: The Player’s Guide
C-Note doesn’t actually have a puzzle associated with him. He comes from a
number of puns. A c-note is a slang term for a 100 dollar bill, on which is Ben Franklin.
Then there’s the more obvious c-note as a musical note.
C-Note’s function in the game is to instruct the player on how to play the game.
He also gives the player hints when appropriate. When creating the function of this
character, we compared him to the Legend of Zelda: Ocarina of Time
(http://www.zelda.com/universe/game/ocarinatime/) character, Navi, who would try to
get the player’s attention by saying in an incredibly high-pitched voice, “hey, listen!” We

75
parodied this character by having C-Note say in a Barry White low tone, “hey, uh,
listen.”
4.2 World Tiles
Mote levels are constructed with square 53 by 53 pixel tiles. Having tiles of this
size gave us a number of tiles displayed on the screen (9x6) that we were comfortable
with. Due to technical constraints with images that are not squares, the tiles
themselves are 64 pixels wide and tall, and are simply resized by the game engine.
When choosing a tile size, our initial thought was to make the world tiles and
character sprites the same size, and that’s eventually what we worked with. However in
retrospect, planning out the environment with smaller tiles, such as 32 square pixel
tiles, would have allowed for much more flexibility for roughly the same amount of
memory used.
Specifying what layers we would need for the levels was another important
topic. What we decided on early on is that we would have a layer of background tiles
and a layer of foreground tiles which would be arranged together using our level editor.
Background tiles appear to be behind characters in the level and foreground tiles appear
in front of characters. Having just these two layers suited us fine for the first level, but
when we tried more complex areas like the bar in the second level, we began to see the
limitations of only two layers. Unfortunately by the time the second level was being
assembled it was too late to make such a low-level change in how levels are structured.
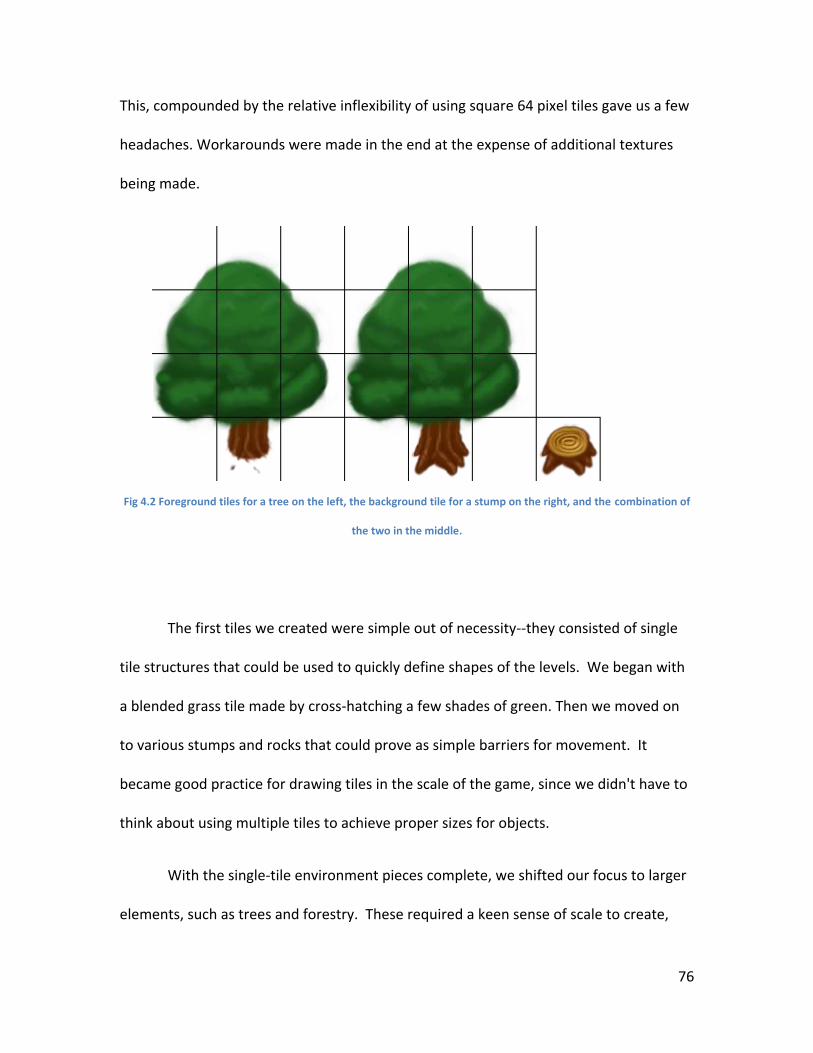
76
This, compounded by the relative inflexibility of using square 64 pixel tiles gave us a few
headaches. Workarounds were made in the end at the expense of additional textures
being made.
Fig 4.2 Foreground tiles for a tree on the left, the background tile for a stump on the right, and the combination of
the two in the middle.
The first tiles we created were simple out of necessity--they consisted of single
tile structures that could be used to quickly define shapes of the levels. We began with
a blended grass tile made by cross-hatching a few shades of green. Then we moved on
to various stumps and rocks that could prove as simple barriers for movement. It
became good practice for drawing tiles in the scale of the game, since we didn't have to
think about using multiple tiles to achieve proper sizes for objects.
With the single-tile environment pieces complete, we shifted our focus to larger
elements, such as trees and forestry. These required a keen sense of scale to create,

77
but more importantly, required knowledge and planning of layers (an aspect of level
structure that ended up being particularly restrictive.) A certain structure might require
certain tiles to remain on separate layers; in the example of the tree, we wanted Mote
to travel behind the branches but not be able to cross the stump. Therefore, we created
foreground tiles that would essentially fit over background tiles that could be used on
their own. Fig 4.2 shows how this effect works--we can place the stump separately, or
attach the whole top of the tree to it.
Once a number of these larger objects were created, work resumed on more
complex tiles that had to blend together. This included pits and rivers, as well as railings
and other objects that could be reused and repeated over long areas.
When all of the tiles in the levels were completed, we divided them into 64 by 64
pixel tiles through Adobe Photoshop and imported them into Mote using the level
editor.
4.3 Interface Considerations
Just as the artistic considerations focused on simplicity for the casual user, each
interface was designed with the most minimal, understandable features in mind. After
setting a few goals and standards for keeping the touch screen clear and readable, the
menus became simple maps that were traceable and simple to understand.

78
The first interface seen in the game is the title screen. We originally planned for
four options: the ability to start a new game, an options menu, and an awards screen
that presented you with prizes won through the game.
Fig. 4.3: The early title screen for Mote with all options intact. Note the dark edges and blur, as if Moe was drifting
to sleep in class.
The idea was to combine fantasy with reality--the buttons would appear dreamy
and cartoony amidst a sleepy, realistic background. This would give the player the idea
that they would be leaving the waking world behind and slipping into a cartoon dream.
This also enabled us to create large, simple buttons with symbolic labels.
As development continued, we realized that there was no need for the options
menu, and awards were simply out of the question. The initial realistic view also
clashed too much to fit with our graphical style, so the screen was redesigned.

79
Fig. 4.4: The new title screen. It has a button for credits now and has a more appropriate style.
This new screen has graphics corresponding more with the graphics within the
game without being too familiar. The button is less defined, but more stylistic.
Considering there is only one button, it was not much of a sacrifice.
The in-game interface is a tad different. Rather than use text, the interaction
buttons were all symbolic of their functions. You can progress through pages of text,
cancel the interaction with a character, or bring up the keyboard interface. When not
interacting with a non-player entity, the pause button simply sits in the lower right-hand
corner of the screen, and can bring up a menu that lets you quit the game.

80
Fig. 4.5: The musical note lets you play a song , and the arrow lets you scroll through text. Tap the X in the corner
to cancel.
We wanted to save screen space, so icons are the best possible choice for
buttons on this screen. It was essential to show all details of the grounds and
environment for the character, and text is space-consuming.
From this screen, you can enter the music interface. Here, you have a keyboard
with the option to insert notes and rests. A book sits at the top of the screen to show
you available riffs. There is a clear back button, and simple-to-recognize note names
and rests.

81
Fig. 4.6: On the book are printed riffs--once you unlock a musical style, the riff appears on a musical staff with a G-
clef.
The idea here was to simulate a simple keyboard and add a rest key. The rest
would provide a way to add musical variety to the eight-note riffs. In addition, the eight
spots fill up with motes as notes are played, so a player knows how many notes they've
played thus far. If the notes form a riff, the menu immediately closes and the player is
brought back to the main screen, with the riff playing to the characters. If the notes
don't form a riff, the played notes reset and the player can try to form a new riff.
Many of the major, important buttons have pressed states--when your finger
touches the button, it "impresses" itself so you know it's reacting to your push. This is
important, as a touch screen cannot give a user proper feedback to tell if they're
pressing the right thing.
Fig. 4.7: An unpressed button, and how it is impressed when touched by a player's finger.
82
Upon early testing, the icons were rather difficult to understand, and the riffs
within the book were difficult to read. Instructional text has been added as a sort of
tutorial, and the riffs were thusly enlarged slightly.
Unfortunately, not all of the interface options were integrated into the final
game. The main missing element was a formal "text box" that would have provided a
transparent background for the text. This would make the text more organized and
much easier to read--however, it may have been impossible to implement due to the
three-tiered graphics engine. In addition to this, the riff page was intended to be
interactive, and by touching a riff, it would enlarge for easier viewing. Again, this was a
bit too technically complicated, and we had other priorities at the moment.
We attempted to include as many user conveniences to allow casual players to
learn how to play Mote quickly and easily. If the game contained a complicated
interface, our goal of a casual game would be lost.
4.4 Music Design
Music was required to be an essential part of Mote--after all, it had been labeled
as a "musical adventure game"--and through various means, the musical designs are the
end result both sampled and recorded work.
Some of the most important musical assets that had to be created were the riffs
that the player could play. These riffs had some special properties to them--because the

83
interface could only play one octave in a major scale, it was rather difficult to compose
in certain styles. Metal, in particular, presented a unique challenge. Our solution was to
write the song in A minor (the relative minor of C) to create an angrier tone. The other
songs--the classical tune and the pirate shanty--were simple to write in C major and
sounded fine. Rap only used one tone and a drumbeat, and therefore only used one
note and rests to play.
These songs, along with the ambient sounds used in the forest and pirate ship
levels, were created in Ableton Live, a sampling and recording program. While the
metal riff was recorded by one of our team members, the other songs were created
from samples and loops from Ableton's library.
The title screen music, recorded separately with a guitar and auxiliary
percussion, were composed late within the project's life. The goal was to create
something simple, catchy, and short. A player would be able to catch the gist of the
music from their short stay on the title screen, but would hear a slightly more complex
and interesting arrangement as time went on. Rather than Ableton, this piece of music
was recorded, equalized, and mixed entirely in Sonar 9, which was available in the home
recording studio at which they were recorded.
The song consisted of two guitars and layered percussion that built up tension
over time. A tambourine, cowbell, and shaker provided the rhythms to build on the two
acoustic guitar parts that were overdubbed to create depth. Before the end of the song,

84
the mixed percussion and alternating guitar patterns created a complex beat that, while
interesting, could be distinctly heard in the style of even the intro.

85
4.5 Sound Effects
Music was not the only audible entity within Mote. In order to complete the
environment and expand the characters, voice acting and sound effects became an
integral part of the game design.
4.5.1 Voices
Using Sonar 9 and one SM-58 vocal microphone, voice acting for every character
in the game was recorded. This decision came about due to the availability of the
equipment and the personal touch of effort it would show within Mote. Approximately
thirty lines of male voices were recorded for the project by six people, and modified
within Sonar 9 and Audacity.
In order to keep voice acting non-essential, yet fun and entertaining, Mote's
voice-overs feature "gobbledygook" sounds that represent the voice of the character.
While you can understand and read the text within the game, the voice acting is actually
comprised of nonsense words and syllables spoken in a character's voice. The baby cries
nonsense, for example, and the MetalHead spouts angry curses in a haunting tone.
Other times, the nonsense forms crude words or attempts to mimic their vocal pattern
even more closely. The obese mote wheezes and gasps for air, and nearly passes gas.
The pirates "yar har" and "yo ho" in their own unique personalities, too. If a player
listens carefully enough to the hot-tub dwelling pirate, he or she will hear the voice
actor mumble, "Hey, baby!"

86
4.5.2 Environment Sounds
Unfortunately, many of the environmental sound effects came from altering
royalty-free sound effects obtained on various websites. Nevertheless, they were
modified to great effect. A rushing river became deeper, but less turbulent through
some pitch modifications through Audacity. The sounds of doors were lightened to give
a bit less of a slamming feel as well.
Originally, Foley artistry was going to be utilized to provide accurate and original
sound effects, but a few snafus made this impossible. The main issue with recording
many of these sounds was that the recording studio could not be moved. It was not
near any sort of running water to create a river sound, and wasn't near a doorway
either. While rushing water was eventually recorded, it consisted of a recording of
water being poured between porcelain cups--the only material available at the time.
Not only did it sound awkward, it couldn't loop well either. Many of the microphones
used were also much more suited to picking up the human voice or an instrument
rather than an environmental effect. Sonar 9 was also much better suited for
instruments and vocals, and did not modify recorded sounds well. Audacity could
handle the effects better, but couldn't record at a decent quality rate needed for Foley
artistry.
Some sounds used to customize the musical elements of the game were never
used within the final version. In early development stages of Mote, players had the
option of choosing their instrument to play on the musical interface. Therefore, drum

87
rolls, tom rolls, bass drum hits, guitar scales, and bass scales were all recorded.
Unfortunately, this fun feature was removed in the interest of time.
4.6 Dialogue
The colorful cast of Mote would be next to nothing without dialogue--even with
their entertaining sound effects and animations, they need to progress the story enough
to push the player forward. The dialogue had to fulfill a threefold purpose: develop the
world around the player, teach the player how to solve puzzles, and to entertain the
player.
Perhaps most obviously, the dialogue had to sincerely represent the non-player
characters and the world around them. Mote's dream world is filled with wacky
characters found only in dreamscapes, and therefore had to have a lighthearted and
representative pattern of speech for characters. The MetalHead screams and shouts
angry slang and loves to get riled up, while the Emo Kid speaks in a poetic and faux-
mysterious shroud of words. Such stereotypes would be painful to listen to in a real-
world setting, but in a dream, they become symbols of emotions or experiences.
Perhaps C-Note has the most evocative dialogue in the game--he speaks in a mash-up of
old colloquialisms and street slang of the current age. Only in a person's wildest dreams
could they hear something so bizarre. Fitting, then, that he welcomes you into the
dream.

88
However, all dialogue has to instruct the player on their goals, if nothing else.
Without dialogue, much of our gameplay would be absent entirely. A player could not
hope to know to excite an overweight, hammer-toting Mote without talking to him and
realizing he has no energy. Other text serves as an explanation of a barrier. The gruff
guard tells you that "None shall pass.", for example. And there is barely a better way to
explain the acquisition of a new riff than to have a non-player character explain it to
you.
And finally, the dialogue had to keep the player moving. Along with the
gorgeous animations and scenery, amusing dialogue should keep the player moving.
They will learn that the further points in the game will be subject to the same silliness
that exists already. C-Note's insane dialect might leave players in stitches, but they
might have an even better reaction to the appearance of the pirate who bathes in a hot
tub in level two. Good writing is addictive, and if the players respond well to the
dialogue, it becomes a reward for playing.
4.7 Level Design
Our first level is a series of rooms arranged vertically. One puzzle needed to be
completed in each room in order to progress to the next. The first level needed to be
simple; having the rooms follow a consistent path and requiring one puzzle solve per
room helped give us that simplicity.

89
The first level was created as a collection of puzzles that were then linked
together. The puzzles that were put in the level were originally created as a group.
These puzzles were then written out by our level designer who also linked the puzzles
together and sometimes modified them slightly so they could fit. Occasionally,
additional characters were added to help pull the level together.
The first level begins with the player's guide, C-Note, introducing the player to
the world and basic controls. In this room, aside from scenery, is the Metalhead
character, and a cracked brick wall. The only intractable entity right then is the
Metalhead. The only option present is to play the Classical Riff to the Metalhead. Doing
so provides the player with the Metal Riff. The next course of action is to play the Metal
Riff to the Metalhead. This enrages the Metalhead, who then charges through the brick
wall, allowing the player to progress. The remainder of the puzzles in the first level can
all be deduced or easily solved through trial-and-error.
Each puzzle in the first level is designed to either demonstrate the purpose of a
riff, or to hint at possible branching later on. The first puzzle shows that the Metal Riff
enrages. It's not until the second level that much branching actually happens.
The second level begins in a bar. The player must interact with The Dread Pirate
Soggy Rumpot and play both the Metal Riff and Classical Riff at different times in order
to move through and the crowded bar. On exiting, Soggy brings the player to the ship
and from there the branching happens. There are four different crewmember puzzles to
complete before the level is won; except for one of them which supplies the player with

90
the Rap Riff, they can all be completed in any order. The puzzles at this point are still on
the easy side. The second level is meant to introduce the player to more complex puzzle
styles (two kinds of mazes) and progression structures (the freedom to pick which
puzzle to do next.)
91
5 Postmortem
5.1 Concept Design
Early on, our team was divided on what sort of game to make. This in itself isn’t
inherently bad, as differing viewpoints often give a game a nice touch of variety.
However our team lacked an official producer or game designer to say what ideas stay
or go. We didn’t finalize our concept until three of us had a meeting during Fall Break.
5.2 Scope and Team Composition
Our team consisted of three programmers (one of whom is a musician), one
visual artist and level designer, and one writer and sound effects artist. Our team also
did not have a dedicated producer until the very end of the project. Given our plans, the
size of our team, and the amount of time we had to contribute, it’s understandable that
our game is not as long as we originally hoped.
Our original plan called for a number of things that were both within and outside
of the specialties of our team and did not have a realistic timeframe given the number
of people we had. Seven levels all containing their own unique tileset, at least five
unique characters for each level with a number of animations, interesting and
challenging puzzles, and a story to link everything together are just a few things we had
planned. In order to make seven levels in fourteen weeks (B and C-Terms) we would
have needed at least two tile artists, two character animators, one sound effects artist,
one composer, one writer, one game designer, and a producer to coordinate them. All

92
of them would need to be dedicated to their own roles and not split between two tasks
or three tasks as was the case with our artists.
5.3 Write From The Beginning
We had a story for our game from the very beginning. Our writer wasn’t involved
in the story until relatively late and the story suffered because of it.
5.4 Layers and Tiles
The decision to make our character sprites, level tiles, and collision walls 64 x 64
pixels in size was made somewhat prematurely. So too was the decision to have only
one foreground and one background layer for tiles. Our first level was simple enough for
the inflexibility of each to go almost unnoticed. Once the bar and boat for the second
level were being planned out, it became apparent how inflexible the standards we had
decided on were.
For future projects of similar world design, the characters should be twice the
size of world tiles, with the option of having character sprites extend above its own tile.
Also there should be at least two background and foreground layers.
With additional layers, the bar could have had a more varied appearance:
cutlery, flatware, and containers on tables and counters, objects on the walls, and more
flexible chair placement, just to name a few.

93
Had we been using 32 pixel tiles with 64 pixel characters, we would have much
more flexibility with level designs with not much more use of resources.

94
6 Conclusion
Mote accomplished more in its development than it will as a finished product.
The custom engine for the graphics, sound, and physics is one of just five in existence. If
released to the world, the Mote engine could help revolutionize the iPhone
development community. Our artistic vision was also strong enough to be portfolio-
worthy, and I would not be surprised if Mote or his friends showed up in another form
in a later project.
A few drawbacks held Mote back, unfortunately. Recent Terms of Service
information from the application store state that external coding, such as Lua, are not
permissible within development license terms. There were a few minor programming
issues as well, and a few artistic assets were never incorporated into the final version of
the game. However, these setbacks do not hold back our development process, as
Mote is still playable and can be tested further.
If Mote were to be continued in a further project, the new team could continue
to create assets and possibly improve the gameplay. Our goal of creating an
improvisational music game weren't quite fulfilled, but we did create a musical
adventure with potential.

95
Appendix A: Early Design Document Mote
DC Doc Version 3.4

96
Contents Quick Intro ........................................................................................................................................ 98
Vision Statement ............................................................................................................................ 98
Five Minutes of Gameplay .......................................................................................................... 99
Gameplay Elements ................................................................................................................... 101
5.1. Music Bars, not Health Bars ........................................................................................... 101
5.2. Rock These Riffs .................................................................................................................... 101
5.3. Why Am I Here? ..................................................................................................................... 101
5.4. Musicopedia ............................................................................................................................ 102
5.5. The Music Is In The Pit, Not On The Stage .............................................................. 102
5.6. Notes Of Sand In A Box Of Music .................................................................................. 103
5.7. You Can't Kill the Metal ..................................................................................................... 103
5.8. I Can’t Stop This Feelin’ ..................................................................................................... 103
5.9. You Are Not Alone ................................................................................................................ 104
5.10. A Branching Path ............................................................................................................... 104
5.11. Woooooooo Shinies! ........................................................................................................ 105
Revision History ................................................................................................................................... 106
Recent Changes 11/03/2009

97
Stop… Grammar time
Minor grammatical changes

98
1. Quick Intro Mote is a musical adventure game that takes place in a sleeping music student's dream. The player will navigate a surreal landscape and interact with those who dwell within the student’s dream. Mote will use a studio-written engine and will be compatible with any iPod Touch or iPhone.
2. Vision Statement This is a puzzle game in which the player alters the emotions of those he meets in order to progress through the game. This game requires the player to use music to solve puzzles. Players will progress though a surreal world with a number of obstacles and a flowing aesthetic. The players will play music to solve puzzles. The solves will usually involve affecting the emotions of NPCs with the music. The music used to do this will be very short and based on a wide variety of distinct musical styles. Among them are Classical, Jazz, Rock, and Pirate Shanty.

99
3. Quick and Dirty Feature List
Music influences a variety of things in the environment including the color of the background and the moods of the NPCs.
Knowledge of Music Theory is not necessary.
Easily accessible references will be provided for all gameplay elements.
The background music and environment will change dramatically from one level to the next.
The player is free to do whatever he wants without permanent consequences.
Optional multiplayer allows people to see others’ progress in the game.
Certain achievements within the game will be viewable by other players and will trigger contextual bonus content.
4.1 Five Minutes of Gameplay You move your finger in a line. Mote moves in that direction. The background music is calm and cheerful. In the background of the scene, more lights pulse along with the background music.
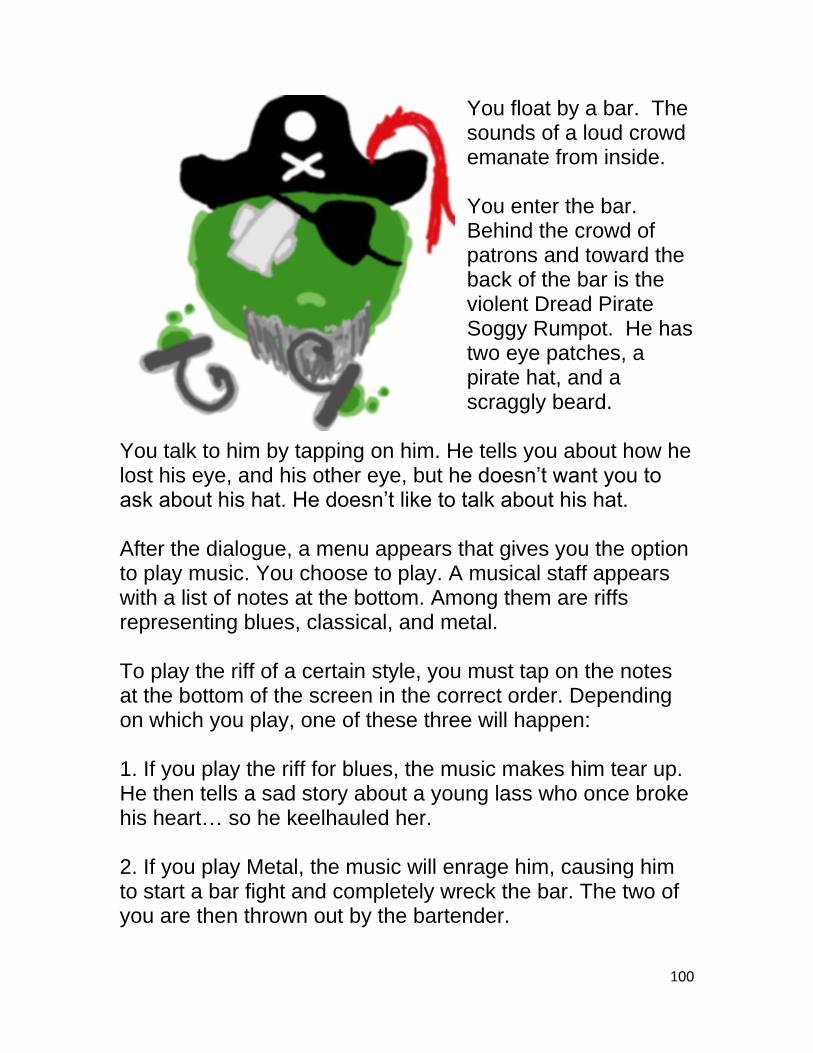
100
You float by a bar. The sounds of a loud crowd emanate from inside. You enter the bar. Behind the crowd of patrons and toward the back of the bar is the violent Dread Pirate Soggy Rumpot. He has two eye patches, a pirate hat, and a scraggly beard.
You talk to him by tapping on him. He tells you about how he lost his eye, and his other eye, but he doesn’t want you to ask about his hat. He doesn’t like to talk about his hat. After the dialogue, a menu appears that gives you the option to play music. You choose to play. A musical staff appears with a list of notes at the bottom. Among them are riffs representing blues, classical, and metal. To play the riff of a certain style, you must tap on the notes at the bottom of the screen in the correct order. Depending on which you play, one of these three will happen: 1. If you play the riff for blues, the music makes him tear up. He then tells a sad story about a young lass who once broke his heart… so he keelhauled her. 2. If you play Metal, the music will enrage him, causing him to start a bar fight and completely wreck the bar. The two of you are then thrown out by the bartender.

101
3. Playing Classical will inspire him to abandon piracy and violence and seek more intellectual pursuits. He’ll leave the bar to study on his boat. After Soggy leaves the bar, however that happens, he will let you on his boat. On the boat, Soggy is eager to set sail, but his crew is a bunch of lazy landlubbers. Your next task is to motivate them to get the ship ready to sail.
4. Gameplay Elements
5.1. Music Bars, not Health Bars There won't be hit points in this game; no character statistics either. It's all based on what the player does and what the player character can do.
5.2. Rock These Riffs You will have a number of eight beat “riffs” to play. The riff played is what determines the effect on the person you’re interacting with. There will be a number of riffs throughout the game that the player can collect and discover through fulfilling goals and experimentation. The Musicopedia keeps track of the riffs the player has discovered.
5.3. Why Am I Here?
The player, as Mote, must collect musical concepts as physical items, which are at the end of each level. As Mote
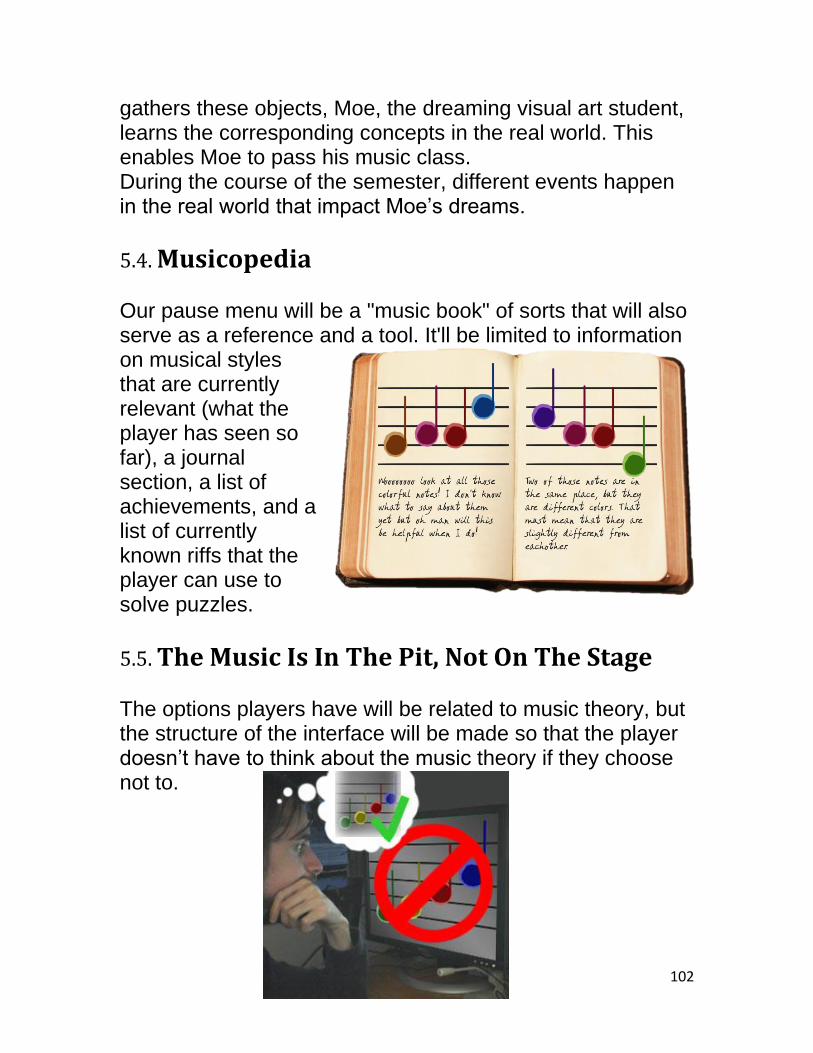
102
gathers these objects, Moe, the dreaming visual art student, learns the corresponding concepts in the real world. This enables Moe to pass his music class. During the course of the semester, different events happen in the real world that impact Moe’s dreams.
5.4. Musicopedia Our pause menu will be a "music book" of sorts that will also serve as a reference and a tool. It'll be limited to information on musical styles that are currently relevant (what the player has seen so far), a journal section, a list of achievements, and a list of currently known riffs that the player can use to solve puzzles.
5.5. The Music Is In The Pit, Not On The Stage The options players have will be related to music theory, but the structure of the interface will be made so that the player doesn’t have to think about the music theory if they choose not to.

103
5.6. Notes Of Sand In A Box Of Music The player will have a set number of musical styles to choose from. When the player plays a riff, a short premade accompaniment will play that fits that style. What determines the outcome of playing music is the riff which was played. The Musicopedia keeps track of the riffs the player has discovered and knows what can be played. Some unnecessary puzzles and achievements can be gained by playing riffs or notes that don’t ever appear in the book.
5.7. You Can't Kill the Metal Dying isn't fun, so we're not going to have that here. The worst that can happen is the player gets knocked out of an area and needs to start that puzzle segment over.
5.8. I Can’t Stop This Feelin’ The riff being played will affect the NPCs and the environment. For example, if the player plays loud metal, you will scare small children. If you play dance music, you will inspire people to dance.

104
5.9. You Are Not Alone This game will have a very minor multiplayer component. You can play through the game by yourself or you can choose to see people near you. If you choose to see people near you, your game will synchronize with theirs and they will appear in the game as ghosts. Seeing the other person doesn’t actually influence gameplay. The multiplayer connection itself will be over Bluetooth, so anyone else you see in the game will probably be in the same room.
5.10. A Branching Path There’s more to the game’s progression than just the path to the end of the level. There are side paths (which are optional) that challenge the player in a new way and allow the player to further augment Mote’s collection of riffs and achievements. Although these paths all lead to some reward, none of them are explicitly necessary to solve the puzzles which lead to the end of each level.

105
5.11. Woooooooo Shinies!
Anything and everything will have some sort of visual and/or audible feedback. If the player does a good thing, bright colors and a clear sound relevant to the action will help indicate that the puzzle was solved. If the puzzle is not solved, something amusing still happens and the player is alerted in some way that the path is
not open. Achievements were mentioned achievements a number of times earlier in this document. We're going to have a bunch of them. Some of them the player can achieve multiple times. One example of an achievement is playing part of a famous song, like the first bit of Beethoven's Ode to Joy. A speed run of a level could be another. Anything notable (or not-notable) will have an achievement associated with it. These achievements will be viewable by others and will contribute towards your music class grade (D to A+.)

106
Revision History 0.8 – Doc created 9/14/09 1.2 – Second draft 9/21/09
o Rearranged sections o Put TOC on it’s own page o Minor wording changes o IMAGES IMAGES IMAGES EVERYWHERE!!! o Augmented “Wooo Shinies!” section o Added 5m of gameplay section (no images yet) D:
2.0 – Third Draft 9/21/09 o Revised Quick Intro o Revised Vision Statement o Dispersed Music In The Pit section o Augmented Quick an Dirty Feature List o Renamed and Split “The Beat of Battle” o Added “Musicopedia” o Added Title Page
2.4 – Old Mote Final Draft o Changed wording of “battles” to “music battle” o Revised “Quick Intro” o Augmented “Quick n’ Dirty Feature List” o Added “You Are Not Alone” o Added “Rock These Riffs” o Added “A Branching Path” o Added section numbers o Added page numbers o Added version number and author o Achievements now less “meta” o Added images to multiple sections
2.8 – New Concept o Rewrote most sections
3.0 – New Mote 1 Final Draft o Many grammatical clarifications o Updated Floating Through a Dream o Minor Image changes.

107
3.4 – Another new concept~ o Updated Feature List o Augmented Floating Through a Dream section o Changed most sections o Added more sections

108
Appendix B: Technical Design Document
Document Version 1.5
Technical Design
Joseph Cotnoir, Kevin Nolan, Steve Foley

109
Table of Contents
CODING STANDARDS ......................................................................................................................... 110 PURPOSE .............................................................................................................................................................. 110 UML DIAGRAMS ................................................................................................................................................. 110 CODE FILE COMMENTS ...................................................................................................................................... 110 CAMEL CASE ........................................................................................................................................................ 111 OPENING METHOD BRACKETS ......................................................................................................................... 111 COMMENTS .......................................................................................................................................................... 111 UNIT TESTS ......................................................................................................................................................... 113 MEMORY MANAGEMENT .................................................................................................................................. 113
FILE DESIGN STANDARDS ................................................................................................................ 114 LEVEL FILES ........................................................................................................................................................ 114 SPRITE & SPRITE SHEET IMAGE FORMAT ...................................................................................................... 115
GRAPHICS SYSTEM ............................................................................................................................. 116
UTILITIES............................................................................................................................................... 116
INPUT HANDLING ............................................................................................................................... 117
SOUNDS .................................................................................................................................................. 117
GAME STRUCTURE AND UTILITIES .............................................................................................. 118
PHYSICS .................................................................................................................................................. 119
NETWORKING ...................................................................................................................................... 120

110
Coding Standards
Purpose
The purpose of coding standards is to facilitate the interpretation, debugging
and adaptation of code between multiple developers. Having concrete pre-
determined coding style rules promotes consistency and clarity throughout the
project.
UML Diagrams
Every aspect of the system will be constructed in both class and package
diagrams before the systems will be constructed. These diagrams will facilitate the
understanding of the system as a whole, as well as reveal potential design flaws
early in the development process.
Code File Comments
All classes will have their own header (.h) and implementation (.m) files.
Each file will have a comment in the beginning of the file (xcode generates most of
this automatically) which will contain the name of the file, the author, and the date
created.
Example:
// // Timer.h // iPhoneMusicGame // // Created by Graham Pentheny on 9/9/09. // Copyright 2009 Worcester Polytechnic Institute. All rights reserved. //

111
Camel Case
All variable and method names will use “camel case.” Names start with a
lowercase letter. If the name has more than one word, (for example “the unit grid”)
the first letter of each subsequent word will be uppercase (e.g. “theUnitGrid” or
“getTheUnitGrid()”). Names with underscores or hyphens will not be used in this
project.
Opening Method Brackets
All opening code block curly brackets will be on the line immediately
following the code block definition.
For example:
for (int i = 0; i < timesToLoop; i++) { //code here… }
Comments
Code comments are essential to creating extensible, maintainable systems.
Proper commenting style and will be stressed in this project.
We will be using a JavaDoc-style commenting scheme, as it is well known by
each of the developers, and is a proven method for describing the behavior of a class
or method. Class and method comments (those that precede and describe a specific
method or class) will be placed in the .h header file only, whereas inline comments
with the purpose of clarifying implementation details will be placed in the .m file
along with the code they describe.

112
All classes will have a comment that precedes the “@interface” declaration,
begins with a slash and two asterisks, and describes the purpose and role of the
class. It will also contain an “@author” declaration preceding the name of the
creator of the class. Additional information describing the role of the class or the
part of the engine it is provided for will be added at the designer’s discretion. For
example:
/** * Timer handles timing specific actions and events. * * @author Graham Pentheny */ @interface Timer : NSObject {...
Method comments will be formatted in an identical fashion to the class
comments, although they will have some added notation to describe the behavior of
that class. If a class takes parameters, each will be described in the method
comment. Each parameter will have an “@param” statement, followed by the
parameter name, followed by a short description of the parameter. If the method
returns a value, it will be described after a “@return” tag.
/** * Adds two vectors and returns the result. * * @author Graham Pentheny * * @param vector1 One of the two vectors being added together * @param vector2 The other of the two vectors being added * together * @return a pointer to a vector containing the sum of the two * vectors. */ + (Vector3f *)addVector:(Vector3f *)vector1 withVector:(Vector3f *) vector2;

113
Unit Tests
A strict unit testing regiment will aid greatly in distinguishing between
design flaws and implementation bugs. Unit tests will be created for every class
implemented in the system. They will follow the standard Objective-C style unit test
template. Wherever possible, we will strive for 100% code coverage.
Memory Management
Memory management is important in creating a stable and responsive
application on the iPhone. The limited resources of the iPhone amplify the need to
eliminate memory leaks and use memory as efficiently as possible. We will tend to
use more time-intensive algorithms in place of more space-intensive ones, as
excessive memory usage is a common reason for application crashes on the iPhone.
Apple's suggested strategies for memory management will be adhered to as
closely as possible. All instance variables in both classes and methods will be
released at the end of their scope or set to auto-release. The -(void)dealloc method
will be implemented for all custom classes, releasing all instance variables of that
class.

114
File Design Standards
Level Files
Every level in the game will be stored as a grid of cells (a terrain map), with
each cell holding information about the terrain that occupies it. The information that
the cell holds will be:
Whether or not an NPC starts the level in this cell, and the NPC ID (what NPC it is)
The Tile ID. For example: o The player start position o Doors o Triggers
Holes Warp Zones Cut-scene activation
o Things that can be interacted with Switches/levers
Whether or not the cell can be occupied by the player The foreground texture for that cell
o Will appear in front of the player if the player is north of it. Each cell in the grid translates to an area of 53x53 pixels in game. Thus, if the
level grid is 24x24 cells, the actual level will be 1272x1272 pixels (24 cells * 53
pixels/cell = 1272 pixels).
There will be three “render layers” for a level. Each “render layer” will
contain textures that are to be overlaid upon the previous levels. The bottom layer
will be the background texture. This layer will only contain static sprites and
images. The second layer will contain all NPC’s and player avatars. All sprites in
this level will be animated. The third and final layer will contain static foreground
sprites that may be overlaid on any NPC’s or player avatars.
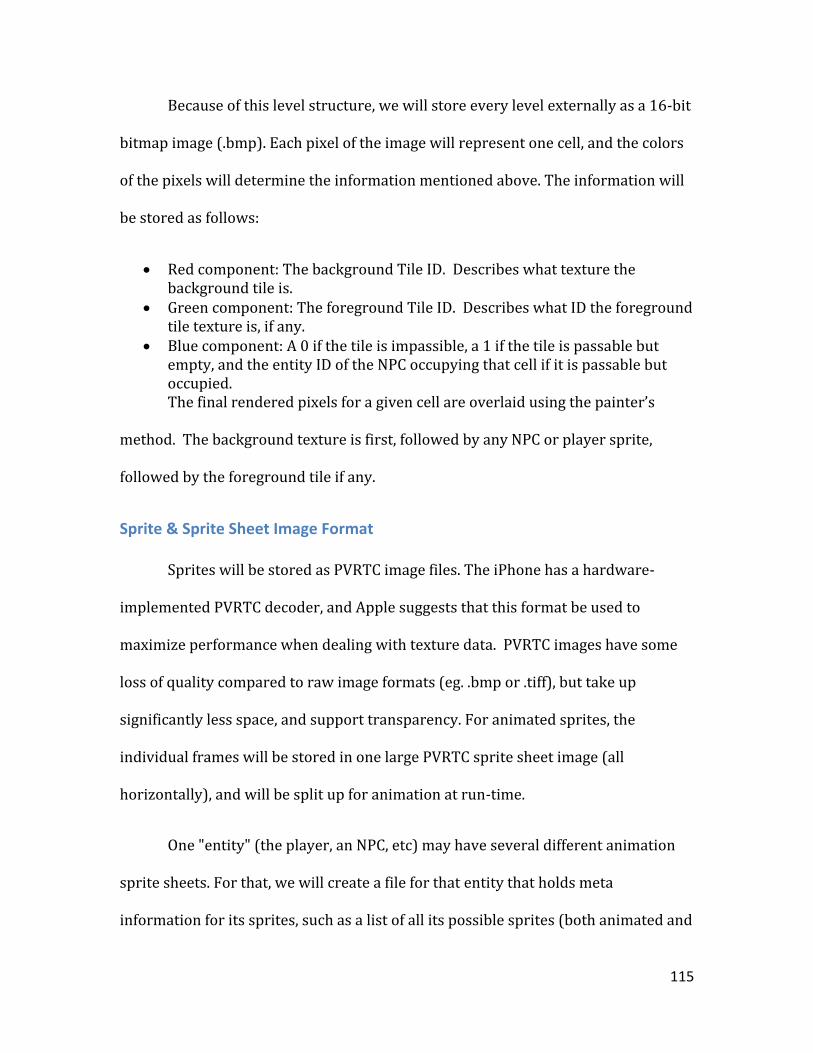
115
Because of this level structure, we will store every level externally as a 16-bit
bitmap image (.bmp). Each pixel of the image will represent one cell, and the colors
of the pixels will determine the information mentioned above. The information will
be stored as follows:
Red component: The background Tile ID. Describes what texture the background tile is.
Green component: The foreground Tile ID. Describes what ID the foreground tile texture is, if any.
Blue component: A 0 if the tile is impassible, a 1 if the tile is passable but empty, and the entity ID of the NPC occupying that cell if it is passable but occupied.
The final rendered pixels for a given cell are overlaid using the painter’s
method. The background texture is first, followed by any NPC or player sprite,
followed by the foreground tile if any.
Sprite & Sprite Sheet Image Format
Sprites will be stored as PVRTC image files. The iPhone has a hardware-
implemented PVRTC decoder, and Apple suggests that this format be used to
maximize performance when dealing with texture data. PVRTC images have some
loss of quality compared to raw image formats (eg. .bmp or .tiff), but take up
significantly less space, and support transparency. For animated sprites, the
individual frames will be stored in one large PVRTC sprite sheet image (all
horizontally), and will be split up for animation at run-time.
One "entity" (the player, an NPC, etc) may have several different animation
sprite sheets. For that, we will create a file for that entity that holds meta
information for its sprites, such as a list of all its possible sprites (both animated and
116
non), the width and height of its different sprites, the sprite origins (offset from the
upper-left corner), and the speed of its animation. This is also advantageous if the
data for a sprite needs to change: the entire project does not need to be re-compiled,
only the entity file needs to be modified.
Graphics System
The game will feature a two-dimensional “three quarters” top-down view,
similar to the Pokémon series’ view perspective. The implementation will consist of
a camera looking directly at a series of parallel quads with textures (the "cells"
mentioned above). The view vector of the camera will be perpendicular to the
quads, and thus be the opposite of their normal vectors. The perspective projection
will be orthogonal and the illusion of depth will be “baked-into” the art assets.
The game world will be divided into an evenly spaced grid. Each element of
the world, and its art asset, will comprise a discrete and complete number of grid
squares. The player may move their character in the standard north, south, east,
and west directions, as well as diagonally northeast, northwest, southeast and
southwest.
Utilities
This section of the engine will contain data structures that are not built into
Cocoa. We will need structures that do the following in our code:
A structure to hold a level in memory once it has been loaded

117
A structure to hold saved progress and record it when the player exits the game
A structure to hold NPC’s within the game, including their animations and reactions
A structure that stores the direction of the player's movement to be processed by the physics engine.
A structure that holds the modifications to the player's sprite that the player makes.
Input Handling
The input handling system will translate user inputs (swipes, pinches, taps,
etc…) into game events and actions. Dynamic registration and management of input
callback methods will be supported.
Menu navigation will be done with just taps, with the possibility of a few long
tables that must be scrolled through.
While in the game, movement will be done by swiping in the direction of
movement, so we will need to determine which direction the swipe went in, and
approximate that to a direction of movement. We will have an object that stores the
direction of movement to be read by other sections of the engine.
Sounds
Sounds and music will be a key element in our game. Accurate and precise
sound playback will create a usable and responsive music system. The player will
play music to other characters in the game to influence their actions in ways that are
beneficial to the player. The player will choose a musical genre to play from a set of
genres the player's avatar has accumulated. Each genre will have one or more

118
"lead" instruments associated with it. For example, the metal genre will have a
guitar as the "lead" instrument. A simple interface for playing musical notes will
appear. The player will play a specific series of 8 notes, called a “riff”. If the riff
played corresponds to a musical genre, that genre is played along with an
accompanying animation.
Each genre will have one or more tracks that will embody the player's lead
instrument. These will be pre-composed and pre-recorded tracks which will be
played back through the iPhone's built-in hardware-decoded ima4 playback. Per
recommendation by the Apple iPhone development documentation, the musical
tracks will use the ima4 codec to minimize the amount of CPU required for playback.
Game Structure and Utilities
We will have a class for the player, and a class for NPC’s. The player class will
contain everything that is needed in a save game file, to facilitate ease of storage.
This includes the level the player is currently on, the player's position in the level,
the types of music the player can play, and the achievements that the player
currently has. The player class will need to be able to handle player movement,
although the physics engine will handle locomotion. The player class will also hold
information about how the player looks, so the player can customize how they look.
The NPC’s will need to have their animations, an identifier that describes
which NPC it is, and a link to any sounds that they make when interacted with. They

119
also need to be able to tell the game what they are doing when they interact with the
level.
Physics
Physics in the game will be minimal. There will be collision detection
between the player and the terrain, but it will not involve force or momentum or
anything like that; it will simply not allow a player to enter an occupied or restricted
cell. There may be some virtual "elasticity" between two entities (similar to collision
between two characters in Super Smash Brothers) so they cannot occupy the same
space.
The level's grid structure will make collision detection very simple and fast to
process. Because the terrain is divided into cells (which are either "able to be
occupied" or "not able to be occupied"), the system only needs to determine if the
player is able to occupy the cell they are trying to move into. Not only does this cut
down processing time significantly, but it also makes level design much simpler.
There may be a particle system in the game for actions that happen as a
result of the player playing music, and those particle effects would follow the laws of
physics. Again, however, it would be very minimal, and probably not encompass
more than gravity and a force toward a particular object.

120
Networking
The iPhone facilitates ad-hoc Bluetooth networking, as well as traditional
Wifi networking. We will incorporate a minor multi-player aspect. Players will be
able to play “with” nearby players. The nearby player positions will be viewable as
“ghosts” of their avatars. This component will use the iPhone and iPod Touch’s ad-
hoc Bluetooth networking feature.
All objects and actions will be serialized in a proprietary format that will be
decoded and translated into events and messages by the other device.

121
Appendix C: Summary of Research into Similar Games
World of Tunes: World of Tunes shows a distinctive style, but doesn't offer much in
terms of gameplay. It has a lot of character and maintains a fun atmosphere.
http://global.com2us.com/game/wot
Rock Band Unplugged: To play, you tap notes in time with the music and switch
between instruments to balance them out. While there's barely any interaction other
than that, the "multiple instruments" gimmick" was something to look at.
http://www.rockband.com/games/unplugged
Meteos: Launch pieces by matching them to destroy planets. Music and players change
every level. When pieces are launched, music snippets are played. As the pile of pieces
builds up, the music gets more frantic and urgent.
http://planetmeteos.com/
Final Fantasy XII: Combat is done on the main map, and when combat starts, the main
world doesn't stop.
http://www.finalfantasyxii.com/
Shadow of the Colossus: Music starts out foreboding , but becomes triumphant as you
attack each boss that appears.
http://us.playstation.com/ps2/games/shadow_of_the_colossus/ogs/
Osu: A rhythm game where you tap the screen in time with buttons and music. Finger
gets in the way a lot. Failure causes the on-screen guide to yell at you.
http://osu.ppy.sh/p/iphone
E.V.E. Online: In battles, people usually orbit each other. This could potentially be
synced to beats within our game.
http://www.eveonline.com/

122
Music Piano Reading: Tries to teach music, but ultimately fails. It is a quiz with no
teaching involved.
http://itunes.apple.com/us/app/piano-music-reading-free/id317541102?mt=8
Achievement Unlocked: A game about getting achievements. Getting achievements is
typically good, but most of the ones in this game are meaningless and wastes of time.
Having achievements that grant new abilities is good, but the new abilities should be
nonessential.
http://www.kongregate.com/games/ArmorGames/upgrade-complete
Music Catch 2: Catch music notes in time with music. Collecting stuff is fun, but it
should do more than just give a high score.
http://www.kongregate.com/games/Reflexive/music-catch-2
Synthpond: Nodes in a pond generate waves, which are translated into sound.
Synthpond uses a spatial sequencer instead of a play head. Round nodes generate
waves to a beat and square ones generate waves when hit by round node waves. Uses
spatial sound, so music directional. This is not a game. The interface is pretty cool.
Most music made with this toy sounds good.
http://apps.stfj.net/synthPond/
WiiMusic: "Improv Mode" lets you make your own music. Since it uses WiiMotes, it
doesn't feel like actually playing an instrument.
http://www.wiimusic.com/
PyroSand: No goal or win condition, just play around with pixilated sand.
http://fallingsandgame.com/sand/pyro.html
DJ Mix Tour: This game is a DDR clone, but provides a context for random button
tapping. Instead of just buttons on a line, a player would scratch discs and mess with

123
the middle bar. It makes players feel more like DJs.
http://itunes.apple.com/us/app/dj-mix-tour/id317796239?mt=8
Boxed In: You guide a character by touching the screen, but it doesn't matter where
your finger is. This helps prevent a thumb from blocking the screen.
http://www.boxedingame.com/
Rhythm Fireworks: This is another DDR clone, but you need to have your line be the
right color to actually get the note right. It combines visual and sonic aesthetics.
http://www.kongregate.com/games/Coolio_Niato/rhythm-fireworks

124
Appendix D: Mary Yovina's Animations
Mote:
Babby the Baby:
The Bandit:
Emo Kid:
The Guard:
Lost Pirate:
Mr. Hammer
Pirates:

125
Sleepy Guy:
Captain Soggy Rumpot:
The Metalhead
Other Assorted Animations

126
Uncut Animations
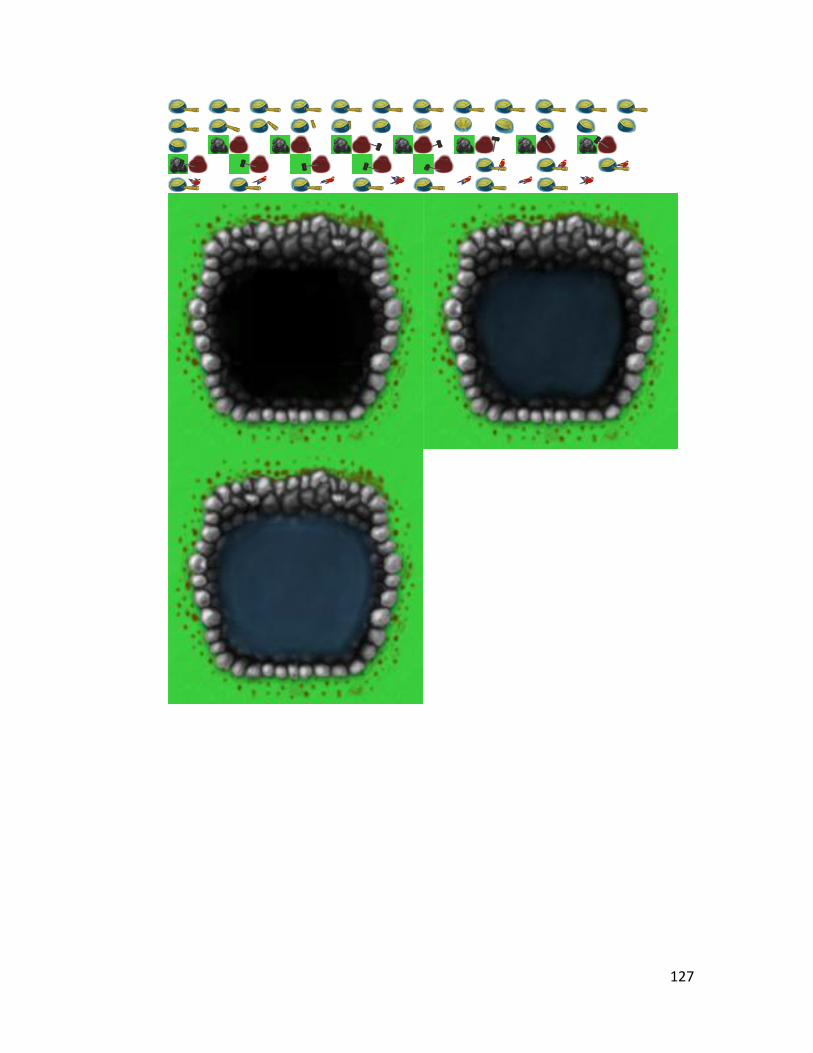
127