Embed Size (px)
Citation preview
monitor event-trace (EXEC)
CF-356Cisco IOS Configuration Fundamentals Command Reference
January 2011
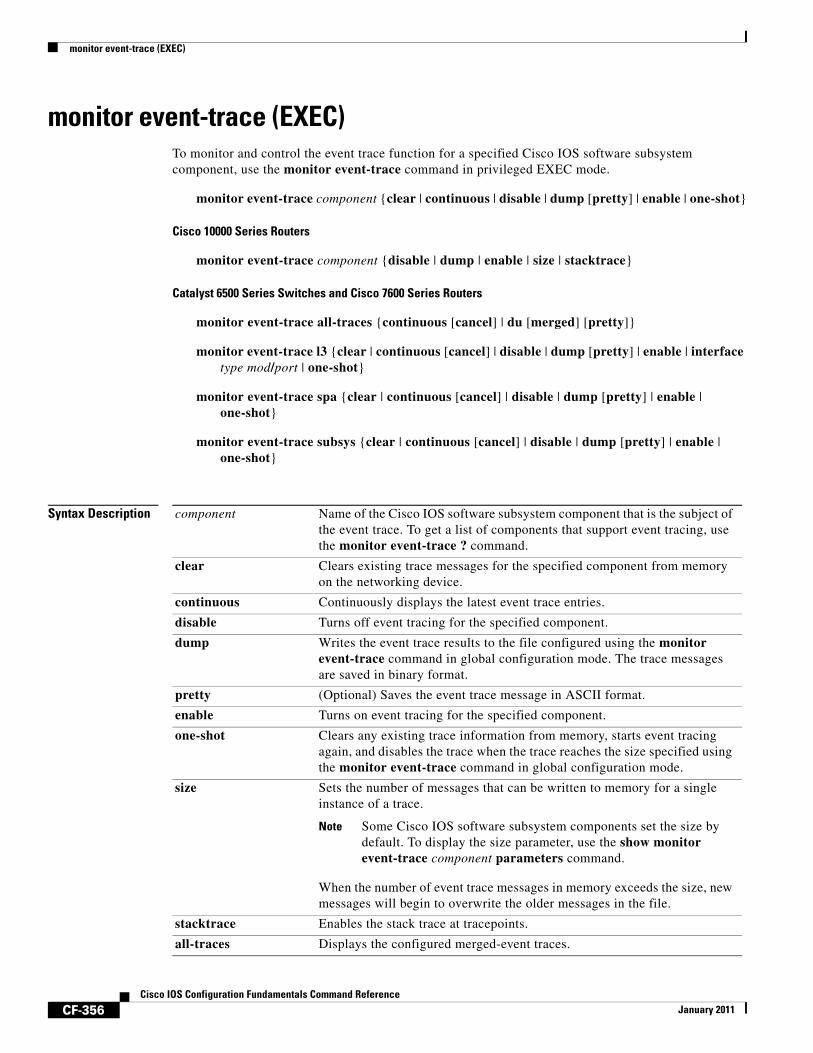
monitor event-trace (EXEC)To monitor and control the event trace function for a specified Cisco IOS software subsystem component, use the monitor event-trace command in privileged EXEC mode.
monitor event-trace component {clear | continuous | disable | dump [pretty] | enable | one-shot}
Cisco 10000 Series Routers
monitor event-trace component {disable | dump | enable | size | stacktrace}
Catalyst 6500 Series Switches and Cisco 7600 Series Routers
monitor event-trace all-traces {continuous [cancel] | du [merged] [pretty]}
monitor event-trace l3 {clear | continuous [cancel] | disable | dump [pretty] | enable | interface type mod/port | one-shot}
monitor event-trace spa {clear | continuous [cancel] | disable | dump [pretty] | enable | one-shot}
monitor event-trace subsys {clear | continuous [cancel] | disable | dump [pretty] | enable | one-shot}
Syntax Description component Name of the Cisco IOS software subsystem component that is the subject of the event trace. To get a list of components that support event tracing, use the monitor event-trace ? command.
clear Clears existing trace messages for the specified component from memory on the networking device.
continuous Continuously displays the latest event trace entries.
disable Turns off event tracing for the specified component.
dump Writes the event trace results to the file configured using the monitor event-trace command in global configuration mode. The trace messages are saved in binary format.
pretty (Optional) Saves the event trace message in ASCII format.
enable Turns on event tracing for the specified component.
one-shot Clears any existing trace information from memory, starts event tracing again, and disables the trace when the trace reaches the size specified using the monitor event-trace command in global configuration mode.
size Sets the number of messages that can be written to memory for a single instance of a trace.
Note Some Cisco IOS software subsystem components set the size by default. To display the size parameter, use the show monitor event-trace component parameters command.
When the number of event trace messages in memory exceeds the size, new messages will begin to overwrite the older messages in the file.
stacktrace Enables the stack trace at tracepoints.
all-traces Displays the configured merged-event traces.
monitor event-trace (EXEC)
CF-357Cisco IOS Configuration Fundamentals Command Reference
January 2011
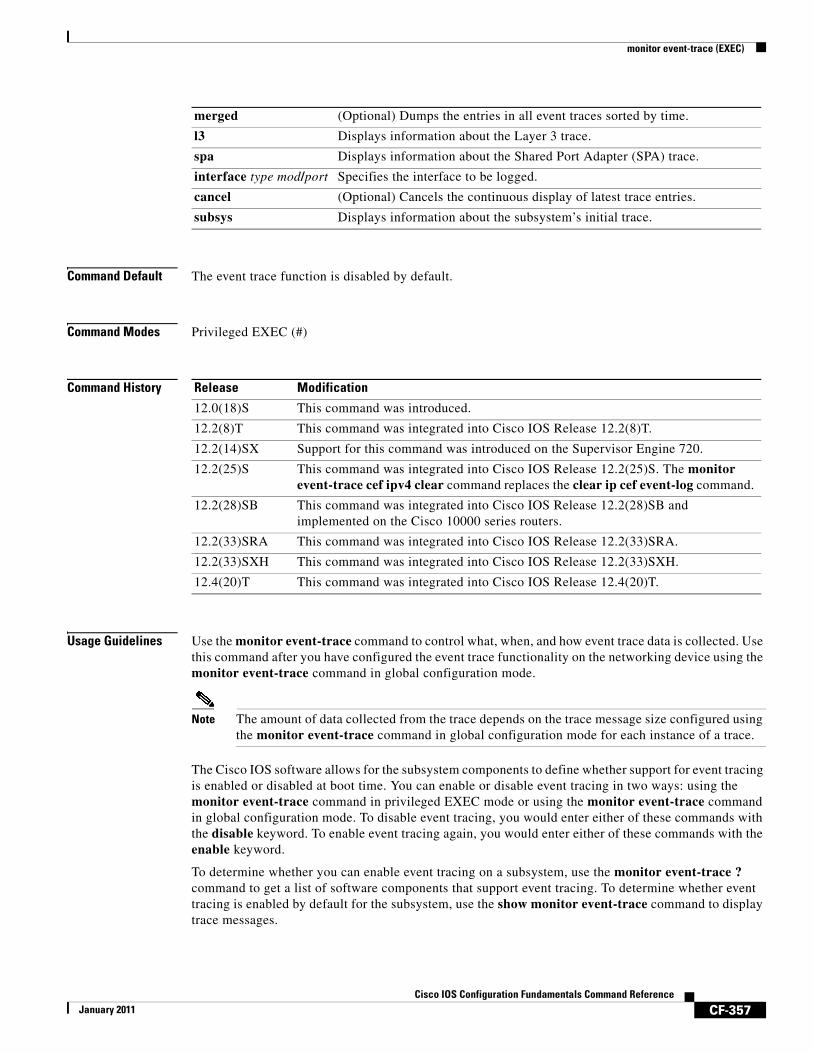
Command Default The event trace function is disabled by default.
Command Modes Privileged EXEC (#)
Command History
Usage Guidelines Use the monitor event-trace command to control what, when, and how event trace data is collected. Use this command after you have configured the event trace functionality on the networking device using the monitor event-trace command in global configuration mode.
Note The amount of data collected from the trace depends on the trace message size configured using the monitor event-trace command in global configuration mode for each instance of a trace.
The Cisco IOS software allows for the subsystem components to define whether support for event tracing is enabled or disabled at boot time. You can enable or disable event tracing in two ways: using the monitor event-trace command in privileged EXEC mode or using the monitor event-trace command in global configuration mode. To disable event tracing, you would enter either of these commands with the disable keyword. To enable event tracing again, you would enter either of these commands with the enable keyword.
To determine whether you can enable event tracing on a subsystem, use the monitor event-trace ? command to get a list of software components that support event tracing. To determine whether event tracing is enabled by default for the subsystem, use the show monitor event-trace command to display trace messages.
merged (Optional) Dumps the entries in all event traces sorted by time.
l3 Displays information about the Layer 3 trace.
spa Displays information about the Shared Port Adapter (SPA) trace.
interface type mod/port Specifies the interface to be logged.
cancel (Optional) Cancels the continuous display of latest trace entries.
subsys Displays information about the subsystem’s initial trace.
Release Modification
12.0(18)S This command was introduced.
12.2(8)T This command was integrated into Cisco IOS Release 12.2(8)T.
12.2(14)SX Support for this command was introduced on the Supervisor Engine 720.
12.2(25)S This command was integrated into Cisco IOS Release 12.2(25)S. The monitor event-trace cef ipv4 clear command replaces the clear ip cef event-log command.
12.2(28)SB This command was integrated into Cisco IOS Release 12.2(28)SB and implemented on the Cisco 10000 series routers.
12.2(33)SRA This command was integrated into Cisco IOS Release 12.2(33)SRA.
12.2(33)SXH This command was integrated into Cisco IOS Release 12.2(33)SXH.
12.4(20)T This command was integrated into Cisco IOS Release 12.4(20)T.
monitor event-trace (EXEC)
CF-358Cisco IOS Configuration Fundamentals Command Reference
January 2011
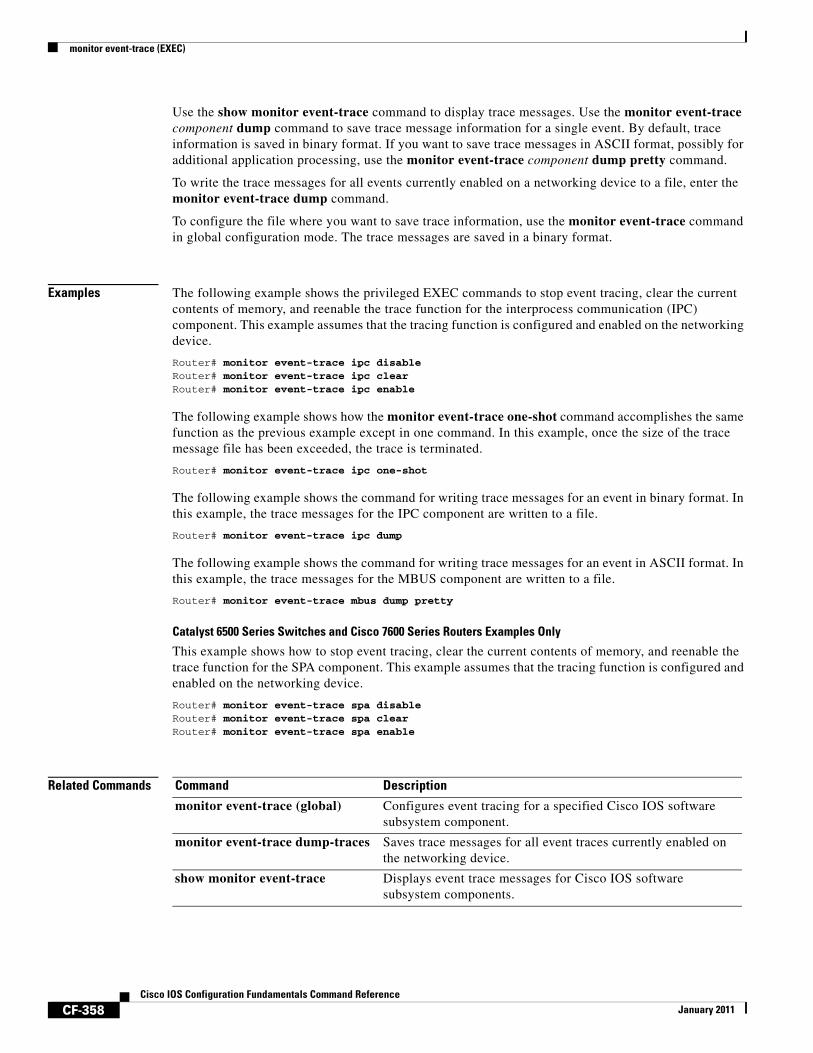
Use the show monitor event-trace command to display trace messages. Use the monitor event-trace component dump command to save trace message information for a single event. By default, trace information is saved in binary format. If you want to save trace messages in ASCII format, possibly for additional application processing, use the monitor event-trace component dump pretty command.
To write the trace messages for all events currently enabled on a networking device to a file, enter the monitor event-trace dump command.
To configure the file where you want to save trace information, use the monitor event-trace command in global configuration mode. The trace messages are saved in a binary format.
Examples The following example shows the privileged EXEC commands to stop event tracing, clear the current contents of memory, and reenable the trace function for the interprocess communication (IPC) component. This example assumes that the tracing function is configured and enabled on the networking device.
Router# monitor event-trace ipc disable Router# monitor event-trace ipc clear Router# monitor event-trace ipc enable
The following example shows how the monitor event-trace one-shot command accomplishes the same function as the previous example except in one command. In this example, once the size of the trace message file has been exceeded, the trace is terminated.
Router# monitor event-trace ipc one-shot
The following example shows the command for writing trace messages for an event in binary format. In this example, the trace messages for the IPC component are written to a file.
Router# monitor event-trace ipc dump
The following example shows the command for writing trace messages for an event in ASCII format. In this example, the trace messages for the MBUS component are written to a file.
Router# monitor event-trace mbus dump pretty
Catalyst 6500 Series Switches and Cisco 7600 Series Routers Examples Only
This example shows how to stop event tracing, clear the current contents of memory, and reenable the trace function for the SPA component. This example assumes that the tracing function is configured and enabled on the networking device.
Router# monitor event-trace spa disable Router# monitor event-trace spa clear Router# monitor event-trace spa enable
Related Commands Command Description
monitor event-trace (global) Configures event tracing for a specified Cisco IOS software subsystem component.
monitor event-trace dump-traces Saves trace messages for all event traces currently enabled on the networking device.
show monitor event-trace Displays event trace messages for Cisco IOS software subsystem components.
monitor event-trace (global)
CF-359Cisco IOS Configuration Fundamentals Command Reference
January 2011
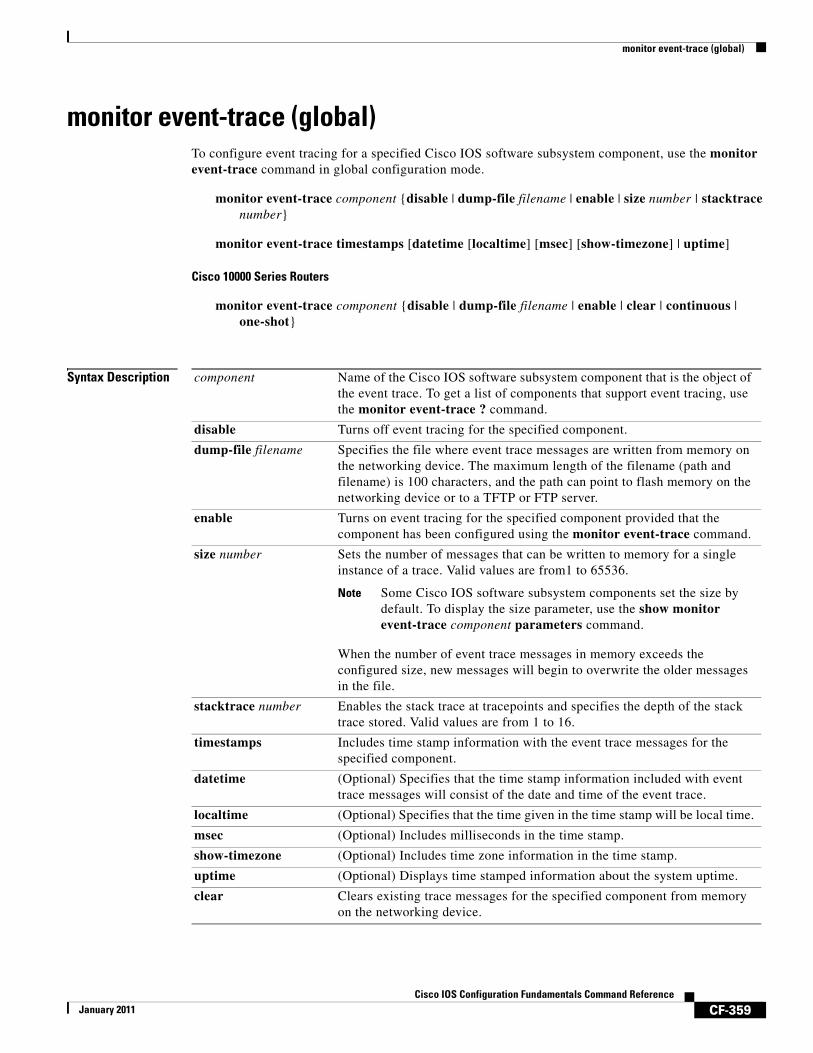
monitor event-trace (global)To configure event tracing for a specified Cisco IOS software subsystem component, use the monitor event-trace command in global configuration mode.
monitor event-trace component {disable | dump-file filename | enable | size number | stacktrace number}
monitor event-trace timestamps [datetime [localtime] [msec] [show-timezone] | uptime]
Cisco 10000 Series Routers
monitor event-trace component {disable | dump-file filename | enable | clear | continuous | one-shot}
Syntax Description component Name of the Cisco IOS software subsystem component that is the object of the event trace. To get a list of components that support event tracing, use the monitor event-trace ? command.
disable Turns off event tracing for the specified component.
dump-file filename Specifies the file where event trace messages are written from memory on the networking device. The maximum length of the filename (path and filename) is 100 characters, and the path can point to flash memory on the networking device or to a TFTP or FTP server.
enable Turns on event tracing for the specified component provided that the component has been configured using the monitor event-trace command.
size number Sets the number of messages that can be written to memory for a single instance of a trace. Valid values are from1 to 65536.
Note Some Cisco IOS software subsystem components set the size by default. To display the size parameter, use the show monitor event-trace component parameters command.
When the number of event trace messages in memory exceeds the configured size, new messages will begin to overwrite the older messages in the file.
stacktrace number Enables the stack trace at tracepoints and specifies the depth of the stack trace stored. Valid values are from 1 to 16.
timestamps Includes time stamp information with the event trace messages for the specified component.
datetime (Optional) Specifies that the time stamp information included with event trace messages will consist of the date and time of the event trace.
localtime (Optional) Specifies that the time given in the time stamp will be local time.
msec (Optional) Includes milliseconds in the time stamp.
show-timezone (Optional) Includes time zone information in the time stamp.
uptime (Optional) Displays time stamped information about the system uptime.
clear Clears existing trace messages for the specified component from memory on the networking device.
monitor event-trace (global)
CF-360Cisco IOS Configuration Fundamentals Command Reference
January 2011
Command Default Event tracing is enabled or disabled depending on the software component.
Command Modes Global configuration (config)
Command History
Usage Guidelines Use the monitor event-trace command to enable or disable event tracing and to configure event trace parameters for Cisco IOS software subsystem components.
Note Event tracing is intended for use as a software diagnostic tool and should be configured only under the direction of a Technical Assistance Center (TAC) representative. In Cisco IOS software images that do not provide subsystem support for the event trace function, the monitor event-trace command is not available.
The Cisco IOS software allows the subsystem components to define whether support for event tracing is enabled or disabled by default. The command interface for event tracing allows you to change the default two ways: using the monitor event-trace command in privileged EXEC mode or using the monitor event-trace command in global configuration mode.
Additionally, default settings do not show up in the configuration file. If the subsystem software enables event tracing by default, the monitor event-trace component enable command will not show up in the configuration file of the networking device; however, disabling event tracing that has been enabled by default by the subsystem will create a command entry in the configuration file.
Note The amount of data collected from the trace depends on the trace message size configured using the monitor event-trace command for each instance of a trace.
To determine whether you can enable event tracing on a subsystem, use the monitor event-trace ? command to get a list of software components that support event tracing.
continuous Continuously displays the latest event trace entries.
one-shot Clears any existing trace information from memory, starts event tracing again, and disables the trace when the trace reaches the size specified using the monitor event-trace command.
Release Modification
12.0(18)S This command was introduced.
12.2(8)T This command was integrated into Cisco IOS Release 12.2(8)T.
12.2(14)SX This command was integrated into Cisco IOS Release 12.2(14)SX and implemented on the Supervisor Engine 720.
12.2(25)S This command was integrated into Cisco IOS Release 12.2(25)S.
12.2(28)SB This command was integrated into Cisco IOS Release 12.2(28)SB and implemented on the Cisco 10000 series routers.
12.2(33)SRA This command was integrated into Cisco IOS Release 12.2(33)SRA.
12.4(20)T This command was integrated into Cisco IOS Release 12.4(20)T.
monitor event-trace (global)
CF-361Cisco IOS Configuration Fundamentals Command Reference
January 2011
To determine whether event tracing is enabled by default for the subsystem, use the show monitor event-trace command to display trace messages.
To specify the trace call stack at tracepoints, you must first clear the trace buffer.
Examples The following example shows how to enable event tracing for the interprocess communication (IPC) subsystem component in Cisco IOS software and configure the size to 4096 messages. The trace messages file is set to ipc-dump in slot0 (flash memory).
configure terminal!monitor event-trace ipc enablemonitor event-trace ipc dump-file slot0:ipc-dump monitor event-trace ipc size 4096
When you select Cisco Express Forwarding as the component for which to enable event tracing, you can use the following additional arguments and keywords: monitor event-trace cef [events | interface | ipv6 | ipv4][all]. The following example shows how to enable event tracing for IPv4 or IPv6 events of the Cisco Express Forwarding component in Cisco IOS software:
configure terminal!monitor event-trace cef ipv4 enable
configure terminal!monitor event-trace cef ipv6 enableexit
The following example shows what happens when you try to enable event tracing for a component (in this case, adjacency events) when it is already enabled: configure terminal!monitor event-trace adjacency enable
%EVENT_TRACE-6-ENABLE: Trace already enabled.
Related Commands Command Description
monitor event-trace (EXEC) Controls the event trace function for a specified Cisco IOS software subsystem component.
monitor event-trace dump-traces Saves trace messages for all event traces currently enabled on the networking device.
show monitor event-trace Displays event trace messages for Cisco IOS software subsystem components.

monitor event-trace dump-traces
CF-362Cisco IOS Configuration Fundamentals Command Reference
January 2011
monitor event-trace dump-traces To save trace messages for all event traces currently enabled on the networking device, use the monitor event-trace dump-traces command in privileged EXEC mode.
monitor event-trace dump-traces [pretty]
Syntax Description
Command Modes Privileged EXEC
Command History
Usage Guidelines Use the monitor event-trace dump-traces command to save trace message information for all event traces currently enabled on a networking device. By default, trace information is saved in binary format. If you want to save trace messages in ASCII format, possibly for additional application processing, use the monitor event-trace dump-traces pretty command.
To write the trace messages for an individual trace event to a file, enter the monitor event-trace (EXEC) command.
To configure the file where you want to save messages, use the monitor event-trace (global) command.
Examples The following example shows how to save the trace messages in binary format for all event traces enabled on the networking device.
monitor event-trace dump-traces
The following example shows how to save the trace messages in ASCII format for all event traces enabled on the networking device.
monitor event-trace dump-traces pretty
Related Commands
pretty (Optional) Saves the event trace message in ASCII format.
Release Modification
12.0(18)S This command was introduced.
12.2(8)T This command was integrated into Cisco IOS Release 12.2(8)T.
Command Description
monitor event-trace (EXEC)
Controls event trace function for a specified Cisco IOS software subsystem component.
monitor event-trace (global)
Configures event tracing for a specified Cisco IOS software subsystem component.
show monitor event-trace
Displays event trace messages for Cisco IOS software subsystem components.
monitor event-trace gdoi (global)
CF-363Cisco IOS Configuration Fundamentals Command Reference
January 2011
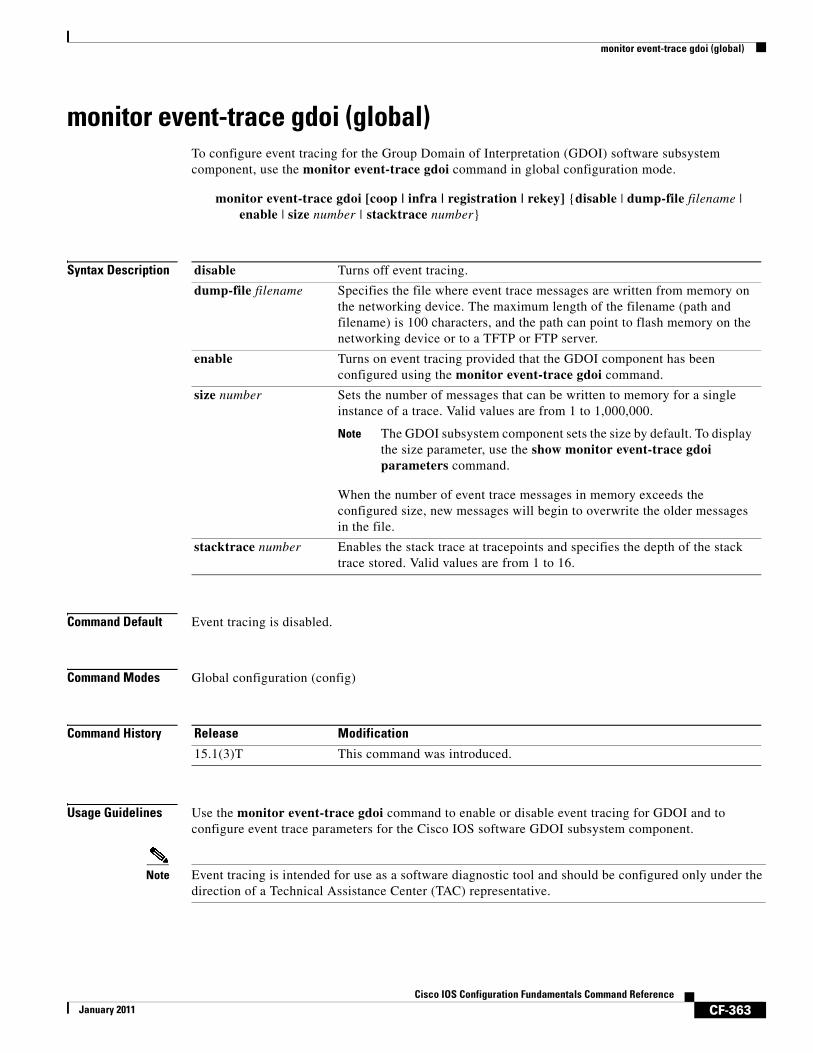
monitor event-trace gdoi (global)To configure event tracing for the Group Domain of Interpretation (GDOI) software subsystem component, use the monitor event-trace gdoi command in global configuration mode.
monitor event-trace gdoi [coop | infra | registration | rekey] {disable | dump-file filename | enable | size number | stacktrace number}
Syntax Description
Command Default Event tracing is disabled.
Command Modes Global configuration (config)
Command History
Usage Guidelines Use the monitor event-trace gdoi command to enable or disable event tracing for GDOI and to configure event trace parameters for the Cisco IOS software GDOI subsystem component.
Note Event tracing is intended for use as a software diagnostic tool and should be configured only under the direction of a Technical Assistance Center (TAC) representative.
disable Turns off event tracing.
dump-file filename Specifies the file where event trace messages are written from memory on the networking device. The maximum length of the filename (path and filename) is 100 characters, and the path can point to flash memory on the networking device or to a TFTP or FTP server.
enable Turns on event tracing provided that the GDOI component has been configured using the monitor event-trace gdoi command.
size number Sets the number of messages that can be written to memory for a single instance of a trace. Valid values are from 1 to 1,000,000.
Note The GDOI subsystem component sets the size by default. To display the size parameter, use the show monitor event-trace gdoi parameters command.
When the number of event trace messages in memory exceeds the configured size, new messages will begin to overwrite the older messages in the file.
stacktrace number Enables the stack trace at tracepoints and specifies the depth of the stack trace stored. Valid values are from 1 to 16.
Release Modification
15.1(3)T This command was introduced.

monitor event-trace gdoi (global)
CF-364Cisco IOS Configuration Fundamentals Command Reference
January 2011
Additionally, default settings do not show up in the configuration file. If the subsystem software enables event tracing by default, the monitor event-trace component enable command will not show up in the configuration file of the networking device; however, disabling event tracing that has been enabled by default by the subsystem will create a command entry in the configuration file.
Note The amount of data collected from the trace depends on the trace message size configured using the monitor event-trace gdoi command for each instance of a trace.
To determine whether event tracing is enabled by default for the subsystem, use the show monitor event-trace gdoi command to display trace messages.
To specify the trace call stack at tracepoints, you must first clear the trace buffer.
Examples The following example shows how to enable event tracing for GDOI subsystem component in Cisco IOS software and configure the size to 4096 messages. The trace messages file is set to gdoi-dump in slot0 (flash memory).
configure terminal!monitor event-trace gdoi enablemonitor event-trace gdoi dump-file slot0:gdoi-dump monitor event-trace gdoi size 4096
Related Commands Command Description
show monitor event-trace gdoi Displays event trace messages for Cisco IOS software subsystem components.
monitor pcm-tracer capture-destination
CF-365Cisco IOS Configuration Fundamentals Command Reference
January 2011
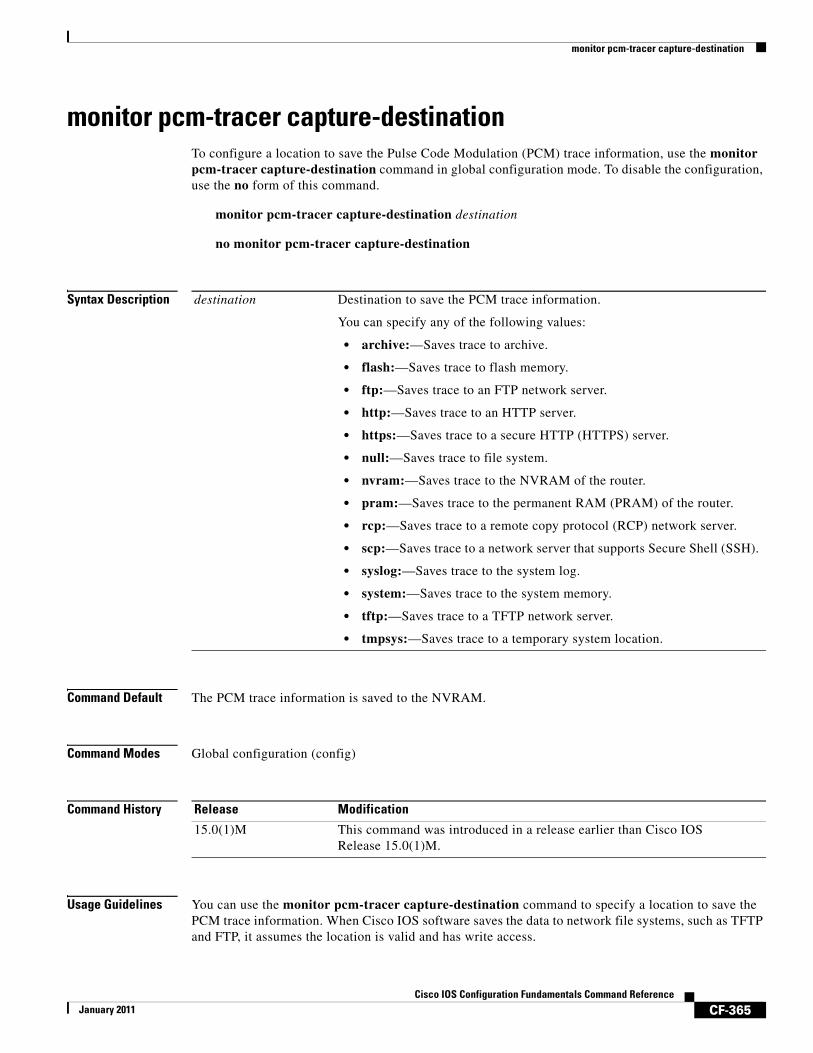
monitor pcm-tracer capture-destinationTo configure a location to save the Pulse Code Modulation (PCM) trace information, use the monitor pcm-tracer capture-destination command in global configuration mode. To disable the configuration, use the no form of this command.
monitor pcm-tracer capture-destination destination
no monitor pcm-tracer capture-destination
Syntax Description
Command Default The PCM trace information is saved to the NVRAM.
Command Modes Global configuration (config)
Command History
Usage Guidelines You can use the monitor pcm-tracer capture-destination command to specify a location to save the PCM trace information. When Cisco IOS software saves the data to network file systems, such as TFTP and FTP, it assumes the location is valid and has write access.
destination Destination to save the PCM trace information.
You can specify any of the following values:
• archive:—Saves trace to archive.
• flash:—Saves trace to flash memory.
• ftp:—Saves trace to an FTP network server.
• http:—Saves trace to an HTTP server.
• https:—Saves trace to a secure HTTP (HTTPS) server.
• null:—Saves trace to file system.
• nvram:—Saves trace to the NVRAM of the router.
• pram:—Saves trace to the permanent RAM (PRAM) of the router.
• rcp:—Saves trace to a remote copy protocol (RCP) network server.
• scp:—Saves trace to a network server that supports Secure Shell (SSH).
• syslog:—Saves trace to the system log.
• system:—Saves trace to the system memory.
• tftp:—Saves trace to a TFTP network server.
• tmpsys:—Saves trace to a temporary system location.
Release Modification
15.0(1)M This command was introduced in a release earlier than Cisco IOS Release 15.0(1)M.

monitor pcm-tracer capture-destination
CF-366Cisco IOS Configuration Fundamentals Command Reference
January 2011
After the PCM capture is complete, the router automatically copies the captured contents to the specified location. The filename format at the destination location is as follows:
<Configured name>_tx_<DS0 slot>_<DS0 unit>_<DS0 channel>—For TX<Configured name>_rx_<DS0 slot>_<DS0 unit>_<DS0 channel>—For RX
You can identify the dial feature card (DFC) channel from where the PCM is traced using the filename format.
Consider the following example:
Router(config)# monitor pcm-tracer capture-destination tftp: ://223.255.254.254/benzeer/cap/cap_data
In this example, two files are created for the data corresponding to each DS0s, one for each direction (transmitter and receiver). When the debug pcmtracer command is enabled, the trace data is copied into the following files:
• cap_data_tx_6_1_22 and cap_data_rx_6_1_22—This corresponds to the traffic flowing through DS0 6/1:22.
• cap_data_tx_6_1_22 and cap_data_rx_6_1_22—cap_data_tx_6_1_22 is the data in the transmit direction (from the DFC to the system backplane) and cap_data_rx_6_1_22 is the data in the receiver direction (to the DFC from the system backplane).
Examples The following example shows how to configure a router to save the PCM trace information to a flash drive:
Router# configure terminalRouter(config)# monitor pcm-tracer capture-destination flash:
Related Commands Command Description
debug pcmtracer Enables debugging for PCM tracing.
monitor pcm-tracer Monitors and controls the PCM trace function.
monitor pcm-tracer delayed-start
CF-367Cisco IOS Configuration Fundamentals Command Reference
January 2011
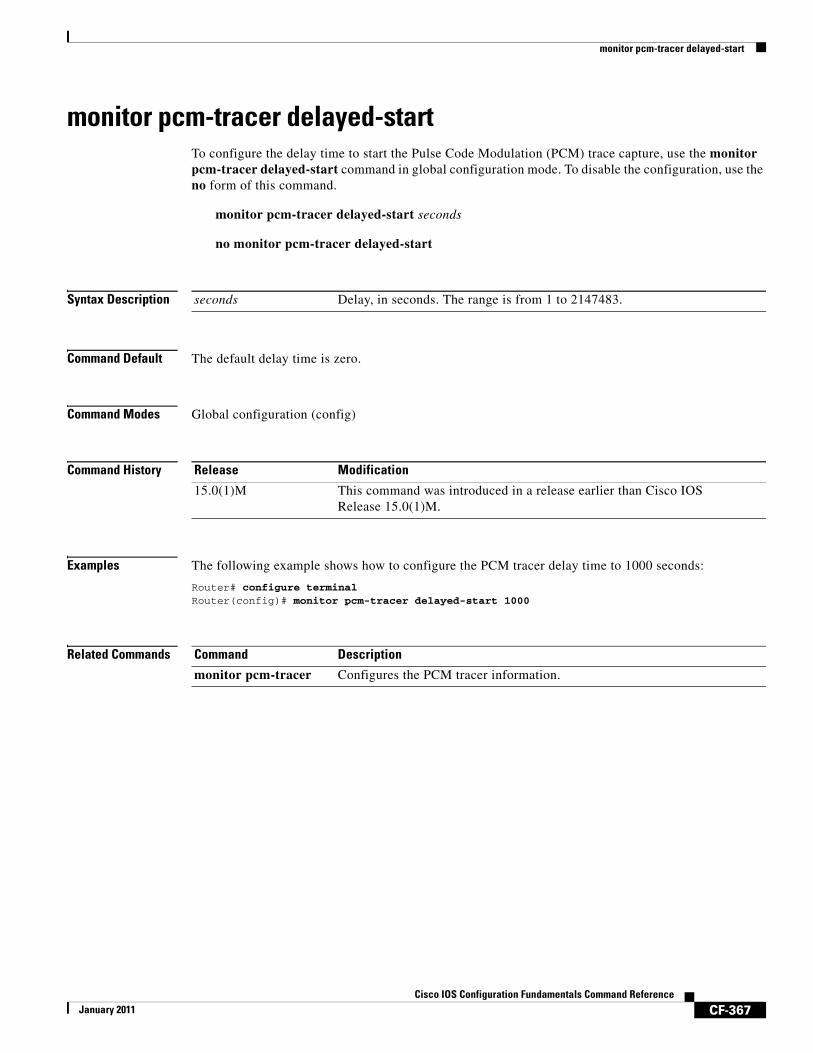
monitor pcm-tracer delayed-startTo configure the delay time to start the Pulse Code Modulation (PCM) trace capture, use the monitor pcm-tracer delayed-start command in global configuration mode. To disable the configuration, use the no form of this command.
monitor pcm-tracer delayed-start seconds
no monitor pcm-tracer delayed-start
Syntax Description
Command Default The default delay time is zero.
Command Modes Global configuration (config)
Command History
Examples The following example shows how to configure the PCM tracer delay time to 1000 seconds:
Router# configure terminalRouter(config)# monitor pcm-tracer delayed-start 1000
Related Commands
seconds Delay, in seconds. The range is from 1 to 2147483.
Release Modification
15.0(1)M This command was introduced in a release earlier than Cisco IOS Release 15.0(1)M.
Command Description
monitor pcm-tracer Configures the PCM tracer information.

monitor pcm-tracer profile
CF-368Cisco IOS Configuration Fundamentals Command Reference
January 2011
monitor pcm-tracer profileTo create Pulse Code Modulation (PCM) capture profiles, use the monitor pcm-tracer profile command in global configuration mode. To disable the configuration, use the no form of this command.
monitor pcm-tracer profile profile-number
no monitor pcm-tracer profile profile-number
Syntax Description
Command Default PCM capture profiles are disabled.
Command Modes Global configuration (config)
Command History
Usage Guidelines You must create at least one user profile under the channels that need to be traced. You can create the following profile operations:
• Create a user profile identified by a profile number.
• Add one or more profiles. A user profile consists of capture groups in which the channels that are to be traced are specified.
• Configure one or more capture groups under a profile.
Examples The following example shows how to create a PCM capture profile with profile number 1:
Router# configure terminalRouter(config)# monitor pcm-tracer profile 1
Related Commands
profile-number Profile number. The range is from 1 to 10.
Release Modification
15.0(1)M This command was introduced in a release earlier than Cisco IOS Release 15.0(1)M.
Command Description
monitor pcm-tracer Configures the PCM tracer information.

monitor permit-list
CF-369Cisco IOS Configuration Fundamentals Command Reference
January 2011
monitor permit-list To configure a destination port permit list or add to an existing destination port permit list, use the monitor permit-list command in global configuration mode. To delete from or clear an existing destination port permit list, use the no form of this command.
Activate monitoring
monitor permit-list
no monitor permit-list
Activate monitoring on one port
monitor permit-list destination interface interface-type slot/port
no monitor permit-list destination interface interface-type slot/port
Activate monitoring on one range of ports
monitor permit-list destination interface interface-type slot/port-last-port
no monitor permit-list destination interface interface-type slot/port-last-port
Activate monitoring on two or more ranges of ports
monitor permit-list destination interface interface-type slot/port-last-port , [port-last-port ]
no monitor permit-list destination interface interface-type slot/port-last-port , [port-last-port ]
Syntax Description
Defaults Disabled
Command Modes Global configuration
destination Specifies a destination port.
interface interface-type Specifies the interface type; valid values are ethernet, fastethernet, gigabitethernet, or tengigabitethernet.
slot The slot that the interface module is installed in.
port Specifies a single port on an interface module, or the first port on an interface module used in a range of ports.
last-port (Optional) Specifies the port on an interface module used as the last port in a range of ports.
, (Optional) Separates each instance of a port, or range of ports, that are monitored. See the Usage Guidelines and the Examples for more information.
monitor permit-list
CF-370Cisco IOS Configuration Fundamentals Command Reference
January 2011
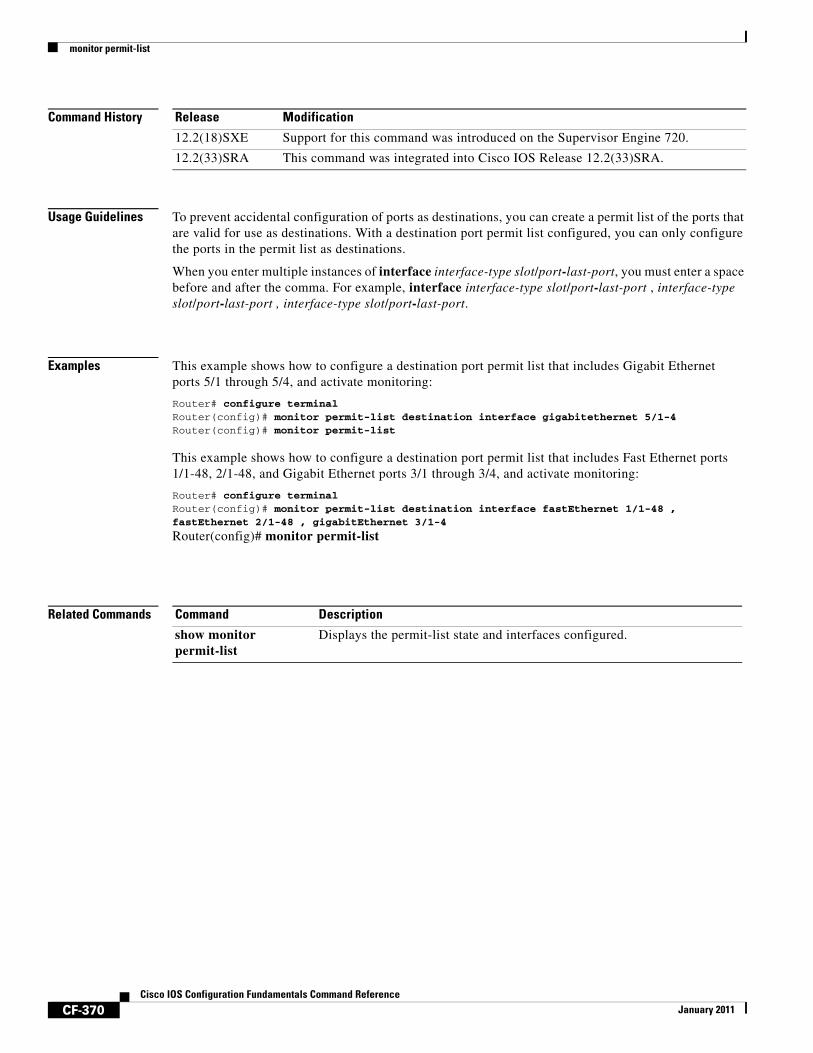
Command History
Usage Guidelines To prevent accidental configuration of ports as destinations, you can create a permit list of the ports that are valid for use as destinations. With a destination port permit list configured, you can only configure the ports in the permit list as destinations.
When you enter multiple instances of interface interface-type slot/port-last-port, you must enter a space before and after the comma. For example, interface interface-type slot/port-last-port , interface-type slot/port-last-port , interface-type slot/port-last-port.
Examples This example shows how to configure a destination port permit list that includes Gigabit Ethernet ports 5/1 through 5/4, and activate monitoring:
Router# configure terminal Router(config)# monitor permit-list destination interface gigabitethernet 5/1-4Router(config)# monitor permit-list
This example shows how to configure a destination port permit list that includes Fast Ethernet ports 1/1-48, 2/1-48, and Gigabit Ethernet ports 3/1 through 3/4, and activate monitoring:
Router# configure terminal Router(config)# monitor permit-list destination interface fastEthernet 1/1-48 , fastEthernet 2/1-48 , gigabitEthernet 3/1-4
Router(config)# monitor permit-list
Related Commands
Release Modification
12.2(18)SXE Support for this command was introduced on the Supervisor Engine 720.
12.2(33)SRA This command was integrated into Cisco IOS Release 12.2(33)SRA.
Command Description
show monitor permit-list
Displays the permit-list state and interfaces configured.

monitor session egress replication-mode
CF-371Cisco IOS Configuration Fundamentals Command Reference
January 2011
monitor session egress replication-mode To switch the egress-span mode from the default mode (either centralized or distributed depending on your Cisco IOS software release), use the monitor session egress replication-mode command in global configuration mode. To return to the default mode, use the no form of the command.
Cisco IOS Release 12.2(33)SXH2a and Later Releases
monitor session egress replication-mode centralized
no monitor session egress replication-mode centralized
Cisco IOS Release 12.2(33)SXH, SXH1, and SXH2
monitor session egress replication-mode distributed
no monitor session egress replication-mode distributed
Syntax Description
Command Default Cisco IOS Releases 12.2(33)SXH2a and later releases: Centralized mode
Cisco IOS Releases 12.2(33)SXH, SXH1, and SXH2: Distributed mode
Command Modes Global configuration (config)
Command History
Usage Guidelines
Note Prior to Cisco IOS Release 12.2(33)SXH and the introduction of this feature, the operating mode was centralized and could not be changed.
Centralized egress span monitoring redirects traffic to the supervisor engine for egress monitoring.
centralized In Cisco IOS Release 12.2(33)SXH2a and later releases: Specifies centralized egress span monitoring as the default mode.
distributed In Cisco IOS Release 12.2(33)SXH, SXH1, and SXH2: Specifies distributed egress span monitoring as the default mode.
Release Modification
12.2(33)SXH This command was introduced.
12.2(33)SXH2a The command was changed as follows:
• The default mode was changed from distributed mode to centralized mode.
• The centralized keyword was removed and the distributed keyword was added.

monitor session egress replication-mode
CF-372Cisco IOS Configuration Fundamentals Command Reference
January 2011
Distributed egress span monitoring is performed in the ingress module. Distributed replication for Switched Port Analyzer (SPAN), Remote SPAN (RSPAN), and Encapsulated RSPAN (ERSPAN) increases the total throughput at the span destination.
Note Distributed egress span (DES) mode is applied to ASIC-based sessions only.
Examples Cisco IOS Release 12.2(33)SXH, SXH1, and SXH2
The following example shows how to switch the egress-span mode from the distributed default to centralized mode:
Router(config)# monitor session egress replication-mode centralized
The following example shows how to switch the egress-span mode from centralized back to distributed mode:
Router(config)# no monitor session egress replication-mode centralized
Cisco IOS Release 12.2(33)SXH2a and Later Releases
The following example shows how to switch the egress-span mode from the centralized default to distributed mode:
Router(config)# monitor session egress replication-mode distributed
The following example shows how to switch the egress-span mode from distributed back to centralized mode:
Router(config)# no monitor session egress replication-mode distributed
Related Commands Command Description
show monitor session Displays the operational mode and configured mode of the session and module session capabilities.
monitor session type
CF-373Cisco IOS Configuration Fundamentals Command Reference
January 2011
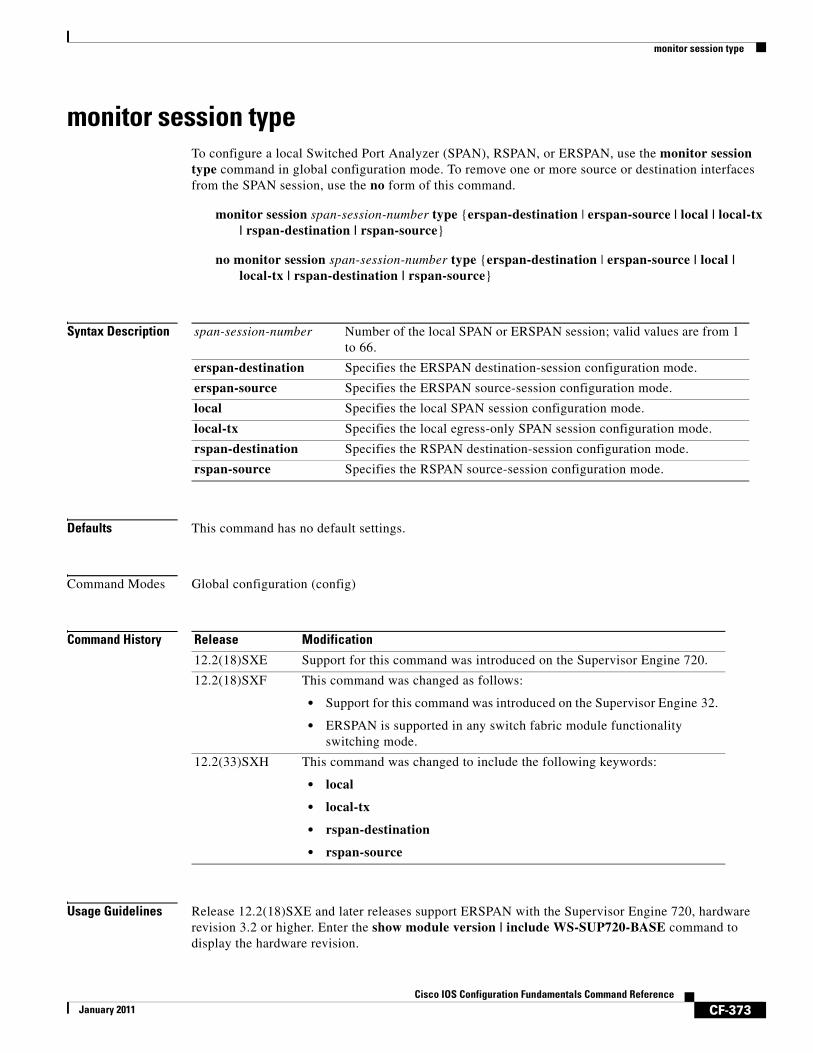
monitor session type To configure a local Switched Port Analyzer (SPAN), RSPAN, or ERSPAN, use the monitor session type command in global configuration mode. To remove one or more source or destination interfaces from the SPAN session, use the no form of this command.
monitor session span-session-number type {erspan-destination | erspan-source | local | local-tx | rspan-destination | rspan-source}
no monitor session span-session-number type {erspan-destination | erspan-source | local | local-tx | rspan-destination | rspan-source}
Syntax Description
Defaults This command has no default settings.
Command Modes Global configuration (config)
Command History
Usage Guidelines Release 12.2(18)SXE and later releases support ERSPAN with the Supervisor Engine 720, hardware revision 3.2 or higher. Enter the show module version | include WS-SUP720-BASE command to display the hardware revision.
span-session-number Number of the local SPAN or ERSPAN session; valid values are from 1 to 66.
erspan-destination Specifies the ERSPAN destination-session configuration mode.
erspan-source Specifies the ERSPAN source-session configuration mode.
local Specifies the local SPAN session configuration mode.
local-tx Specifies the local egress-only SPAN session configuration mode.
rspan-destination Specifies the RSPAN destination-session configuration mode.
rspan-source Specifies the RSPAN source-session configuration mode.
Release Modification
12.2(18)SXE Support for this command was introduced on the Supervisor Engine 720.
12.2(18)SXF This command was changed as follows:
• Support for this command was introduced on the Supervisor Engine 32.
• ERSPAN is supported in any switch fabric module functionality switching mode.
12.2(33)SXH This command was changed to include the following keywords:
• local
• local-tx
• rspan-destination
• rspan-source

monitor session type
CF-374Cisco IOS Configuration Fundamentals Command Reference
January 2011
ERSPAN traffic is GRE-encapsulated SPAN traffic that can only be processed by an ERSPAN destination session.
This command is not supported on Catalyst 6500 series switches that are configured with a Supervisor Engine 2.
All ERSPAN source sessions on a switch must use the same source IP address. You enter the origin ip address command to configure the IP address for the ERSPAN source sessions.
All ERSPAN destination sessions on a switch must use the same IP address. You enter the ip address command to configure the IP address for the ERSPAN destination sessions. If the ERSPAN destination IP address is not a Supervisor Engine 720 (for example, it is a network sniffer), the traffic arrives with the GRE and RSPAN headers/encapsulation intact.
The ERSPAN source session destination IP address, which must be configured on an interface on the destination switch, is the source of traffic that an ERSPAN destination session sends to the destination ports. You configure the same address in both the source and destination sessions with the ip address command.
The ERSPAN ID differentiates the ERSPAN traffic arriving at the same destination IP address from different ERSPAN source sessions.
The local ERSPAN session limits are as follows:
• Total sessions—66
• Source sessions—2 (ingress or egress or both)
• Destination sessions—23
The monitor session type command creates a new ERSPAN session or allows you to enter the ERSPAN session configuration mode. ERSPAN uses separate source and destination sessions. You configure the source and destination sessions on different switches. The ERSPAN session configuration mode prompts are as follows:
• Router(config-mon-erspan-src)—Indicates the ERSPAN source session configuration mode.
• Router(config-mon-erspan-src-dst)—Indicates the ERSPAN source session destination configuration mode.
• Router(config-mon-erspan-dst)—Indicates the ERSPAN destination session configuration mode.
• Router(config-mon-erspan-dst-src)—Indicates the ERSPAN destination session source configuration mode
Table 35 lists the ERSPAN destination session configuration mode syntaxes.
Table 35 ERSPAN Destination Session Configuration Mode Syntaxes
Syntax Description
Global Configuration Mode
monitor session erspan-destination-session-number | rspan-destination-session-number type erspan-destination | erspan-destination
Enters ERSPAN or RSPAN destination session configuration mode and changes the prompt to the following:
Router(config-mon-erspan-dst)#
Router(config-mon-rspan-dst)#
Destination Session Configuration Mode
description session-description (Optional) Describes the ERSPAN or RSPAN destination session.

monitor session type
CF-375Cisco IOS Configuration Fundamentals Command Reference
January 2011
Table 36 lists the ERSPAN source session configuration mode syntaxes.
shutdown (Optional) (Default) Inactivates the ERSPAN destination session.
no shutdown Activates the ERSPAN destination session.
destination {single-interface | interface-list | interface-range | mixed-interface-list}
Associates the ERSPAN destination session number with the destination ports.
source Enters ERSPAN destination session source configuration mode and changes the prompt to the following:
Router(config-mon-erspan-dst-src)#
Destination Session Source Configuration Mode
ip address ip-address [force] Configures the ERSPAN flow destination IP address, which must also be configured on an interface on the destination switch and be entered in the ERSPAN destination session configuration.
erspan-id erspan-flow-id Configures the ID number used by the destination and destination sessions to identify the ERSPAN traffic.
vrf vrf-name (Optional) Configures the VRF name of the packets in the ERSPAN traffic.
Table 35 ERSPAN Destination Session Configuration Mode Syntaxes
Syntax Description
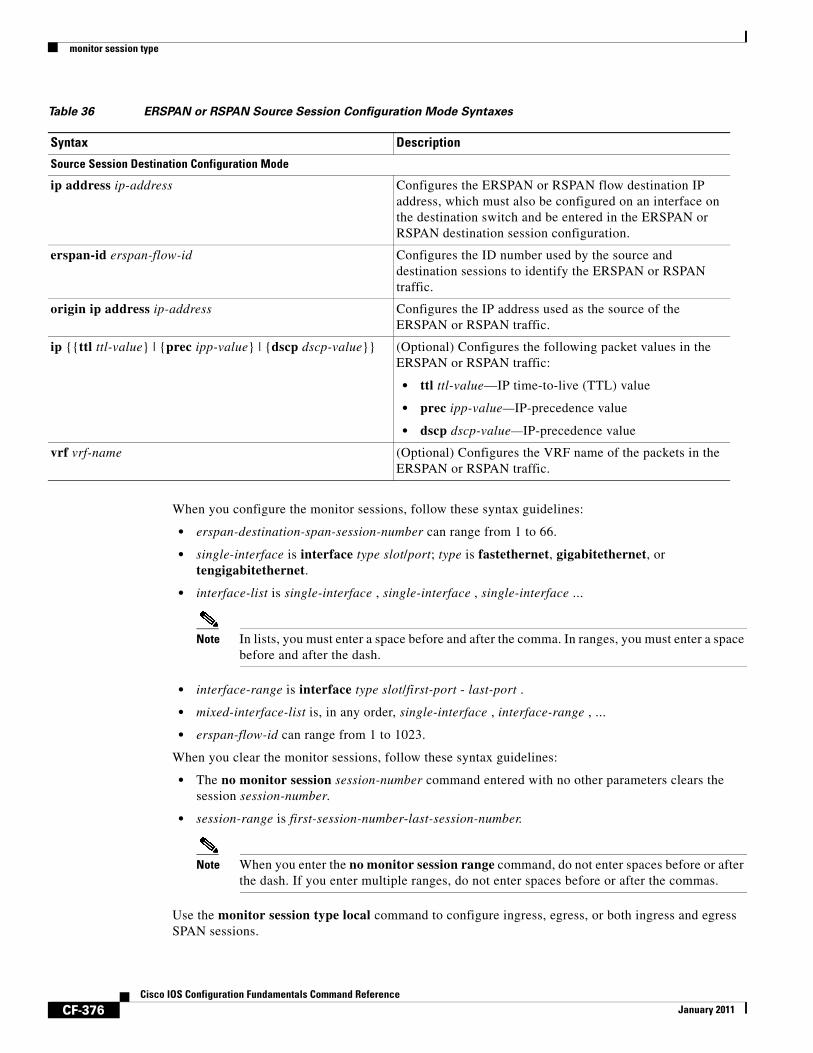
Table 36 ERSPAN or RSPAN Source Session Configuration Mode Syntaxes
Syntax Description
Global Configuration Mode
monitor session erspan-source-session-number type erspan-source | rspan-source
Enters ERSPAN or RSPAN source session configuration mode and changes the prompt as appropriate to the following:
Router(config-mon-erspan-src)#
Router(config-mon-rspan-src)#
Source Session Configuration Mode
description session-description (Optional) Describes the ERSPAN or RSPAN source session.
shutdown (Optional) (Default) Inactivates the ERSPAN or RSPAN source session.
no shutdown Activates the ERSPAN or RSPAN source session.
source {{single-interface | interface-list | interface-range | mixed-interface-list | single-vlan | vlan-list | vlan-range | mixed-vlan-list} [rx | tx | both]}
Associates the ERSPAN or RSPAN source session number with the source ports or VLANs, and selects the traffic direction to be monitored.
filter {single-vlan | vlan-list | vlan-range | mixed-vlan-list} (Optional) Configures source VLAN filtering when the ERSPAN or RSPAN source is a trunk port.
description session-description (Optional) Describes the ERSPAN or RSPAN source session.
monitor session type
CF-376Cisco IOS Configuration Fundamentals Command Reference
January 2011
When you configure the monitor sessions, follow these syntax guidelines:
• erspan-destination-span-session-number can range from 1 to 66.
• single-interface is interface type slot/port; type is fastethernet, gigabitethernet, or tengigabitethernet.
• interface-list is single-interface , single-interface , single-interface ...
Note In lists, you must enter a space before and after the comma. In ranges, you must enter a space before and after the dash.
• interface-range is interface type slot/first-port - last-port .
• mixed-interface-list is, in any order, single-interface , interface-range , ...
• erspan-flow-id can range from 1 to 1023.
When you clear the monitor sessions, follow these syntax guidelines:
• The no monitor session session-number command entered with no other parameters clears the session session-number.
• session-range is first-session-number-last-session-number.
Note When you enter the no monitor session range command, do not enter spaces before or after the dash. If you enter multiple ranges, do not enter spaces before or after the commas.
Use the monitor session type local command to configure ingress, egress, or both ingress and egress SPAN sessions.
Source Session Destination Configuration Mode
ip address ip-address Configures the ERSPAN or RSPAN flow destination IP address, which must also be configured on an interface on the destination switch and be entered in the ERSPAN or RSPAN destination session configuration.
erspan-id erspan-flow-id Configures the ID number used by the source and destination sessions to identify the ERSPAN or RSPAN traffic.
origin ip address ip-address Configures the IP address used as the source of the ERSPAN or RSPAN traffic.
ip {{ttl ttl-value} | {prec ipp-value} | {dscp dscp-value}} (Optional) Configures the following packet values in the ERSPAN or RSPAN traffic:
• ttl ttl-value—IP time-to-live (TTL) value
• prec ipp-value—IP-precedence value
• dscp dscp-value—IP-precedence value
vrf vrf-name (Optional) Configures the VRF name of the packets in the ERSPAN or RSPAN traffic.
Table 36 ERSPAN or RSPAN Source Session Configuration Mode Syntaxes
Syntax Description
monitor session type
CF-377Cisco IOS Configuration Fundamentals Command Reference
January 2011
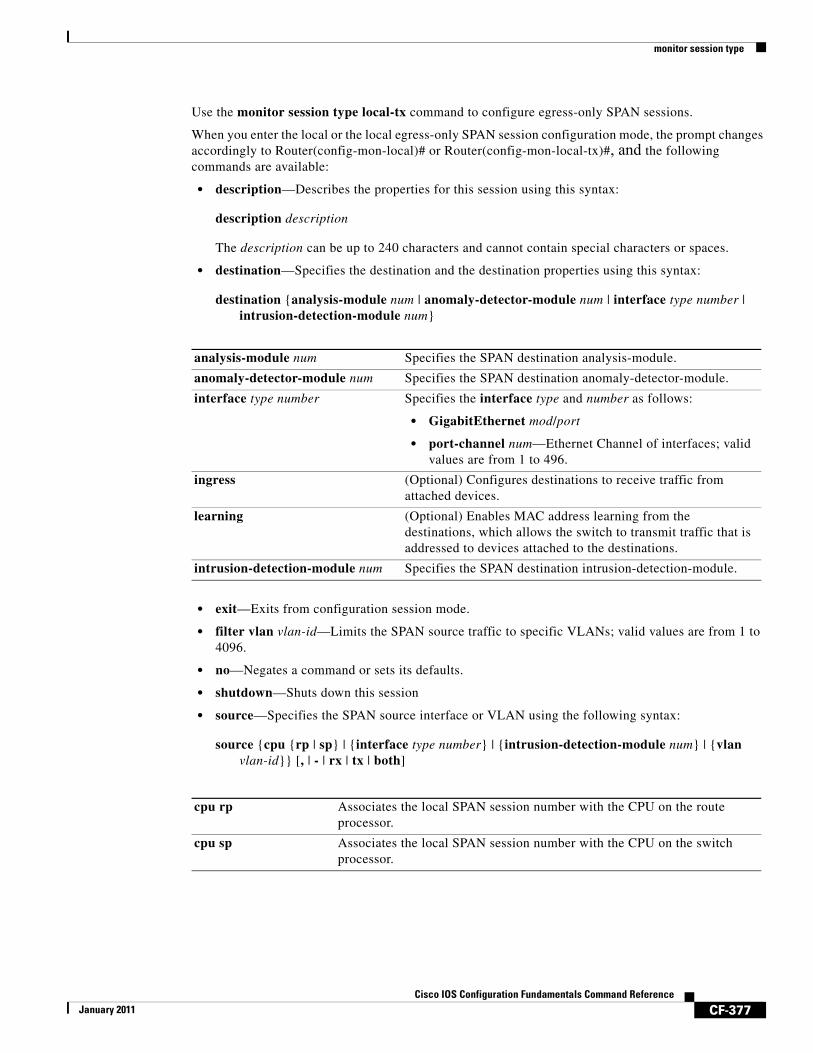
Use the monitor session type local-tx command to configure egress-only SPAN sessions.
When you enter the local or the local egress-only SPAN session configuration mode, the prompt changes accordingly to Router(config-mon-local)# or Router(config-mon-local-tx)#, and the following commands are available:
• description—Describes the properties for this session using this syntax:
description description
The description can be up to 240 characters and cannot contain special characters or spaces.
• destination—Specifies the destination and the destination properties using this syntax:
destination {analysis-module num | anomaly-detector-module num | interface type number | intrusion-detection-module num}
• exit—Exits from configuration session mode.
• filter vlan vlan-id—Limits the SPAN source traffic to specific VLANs; valid values are from 1 to 4096.
• no—Negates a command or sets its defaults.
• shutdown—Shuts down this session
• source—Specifies the SPAN source interface or VLAN using the following syntax:
source {cpu {rp | sp} | {interface type number} | {intrusion-detection-module num} | {vlan vlan-id}} [, | - | rx | tx | both]
analysis-module num Specifies the SPAN destination analysis-module.
anomaly-detector-module num Specifies the SPAN destination anomaly-detector-module.
interface type number Specifies the interface type and number as follows:
• GigabitEthernet mod/port
• port-channel num—Ethernet Channel of interfaces; valid values are from 1 to 496.
ingress (Optional) Configures destinations to receive traffic from attached devices.
learning (Optional) Enables MAC address learning from the destinations, which allows the switch to transmit traffic that is addressed to devices attached to the destinations.
intrusion-detection-module num Specifies the SPAN destination intrusion-detection-module.
cpu rp Associates the local SPAN session number with the CPU on the route processor.
cpu sp Associates the local SPAN session number with the CPU on the switch processor.
monitor session type
CF-378Cisco IOS Configuration Fundamentals Command Reference
January 2011
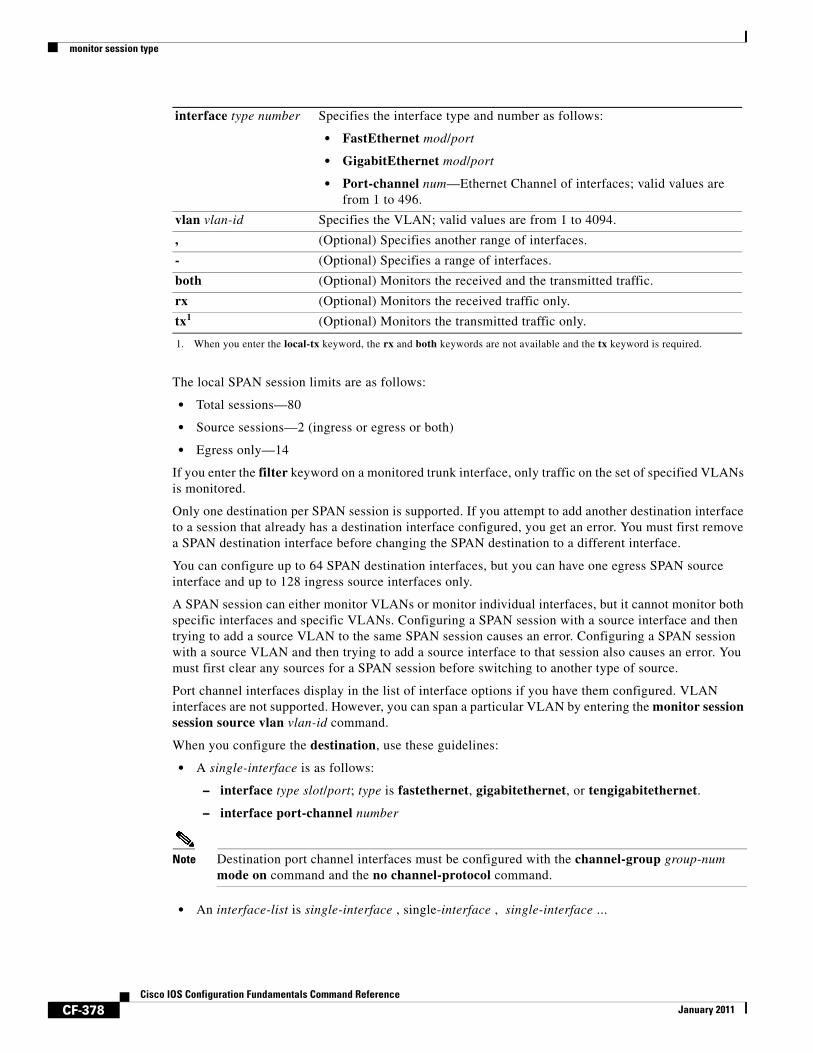
The local SPAN session limits are as follows:
• Total sessions—80
• Source sessions—2 (ingress or egress or both)
• Egress only—14
If you enter the filter keyword on a monitored trunk interface, only traffic on the set of specified VLANs is monitored.
Only one destination per SPAN session is supported. If you attempt to add another destination interface to a session that already has a destination interface configured, you get an error. You must first remove a SPAN destination interface before changing the SPAN destination to a different interface.
You can configure up to 64 SPAN destination interfaces, but you can have one egress SPAN source interface and up to 128 ingress source interfaces only.
A SPAN session can either monitor VLANs or monitor individual interfaces, but it cannot monitor both specific interfaces and specific VLANs. Configuring a SPAN session with a source interface and then trying to add a source VLAN to the same SPAN session causes an error. Configuring a SPAN session with a source VLAN and then trying to add a source interface to that session also causes an error. You must first clear any sources for a SPAN session before switching to another type of source.
Port channel interfaces display in the list of interface options if you have them configured. VLAN interfaces are not supported. However, you can span a particular VLAN by entering the monitor session session source vlan vlan-id command.
When you configure the destination, use these guidelines:
• A single-interface is as follows:
– interface type slot/port; type is fastethernet, gigabitethernet, or tengigabitethernet.
– interface port-channel number
Note Destination port channel interfaces must be configured with the channel-group group-num mode on command and the no channel-protocol command.
• An interface-list is single-interface , single-interface , single-interface ...
interface type number Specifies the interface type and number as follows:
• FastEthernet mod/port
• GigabitEthernet mod/port
• Port-channel num—Ethernet Channel of interfaces; valid values are from 1 to 496.
vlan vlan-id Specifies the VLAN; valid values are from 1 to 4094.
, (Optional) Specifies another range of interfaces.
- (Optional) Specifies a range of interfaces.
both (Optional) Monitors the received and the transmitted traffic.
rx (Optional) Monitors the received traffic only.
tx1 (Optional) Monitors the transmitted traffic only.
1. When you enter the local-tx keyword, the rx and both keywords are not available and the tx keyword is required.
monitor session type
CF-379Cisco IOS Configuration Fundamentals Command Reference
January 2011
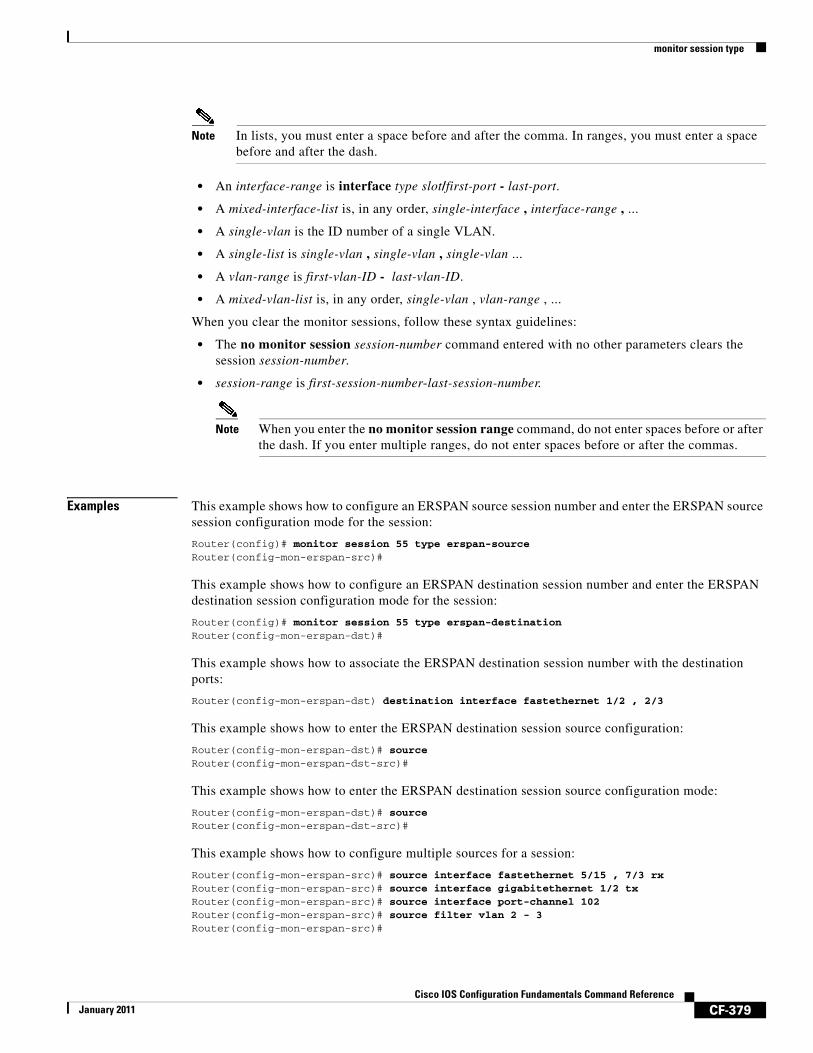
Note In lists, you must enter a space before and after the comma. In ranges, you must enter a space before and after the dash.
• An interface-range is interface type slot/first-port - last-port.
• A mixed-interface-list is, in any order, single-interface , interface-range , ...
• A single-vlan is the ID number of a single VLAN.
• A single-list is single-vlan , single-vlan , single-vlan ...
• A vlan-range is first-vlan-ID - last-vlan-ID.
• A mixed-vlan-list is, in any order, single-vlan , vlan-range , ...
When you clear the monitor sessions, follow these syntax guidelines:
• The no monitor session session-number command entered with no other parameters clears the session session-number.
• session-range is first-session-number-last-session-number.
Note When you enter the no monitor session range command, do not enter spaces before or after the dash. If you enter multiple ranges, do not enter spaces before or after the commas.
Examples This example shows how to configure an ERSPAN source session number and enter the ERSPAN source session configuration mode for the session:
Router(config)# monitor session 55 type erspan-source Router(config-mon-erspan-src)#
This example shows how to configure an ERSPAN destination session number and enter the ERSPAN destination session configuration mode for the session:
Router(config)# monitor session 55 type erspan-destination Router(config-mon-erspan-dst)#
This example shows how to associate the ERSPAN destination session number with the destination ports:
Router(config-mon-erspan-dst) destination interface fastethernet 1/2 , 2/3
This example shows how to enter the ERSPAN destination session source configuration:
Router(config-mon-erspan-dst)# sourceRouter(config-mon-erspan-dst-src)#
This example shows how to enter the ERSPAN destination session source configuration mode:
Router(config-mon-erspan-dst)# sourceRouter(config-mon-erspan-dst-src)#
This example shows how to configure multiple sources for a session:
Router(config-mon-erspan-src)# source interface fastethernet 5/15 , 7/3 rxRouter(config-mon-erspan-src)# source interface gigabitethernet 1/2 tx Router(config-mon-erspan-src)# source interface port-channel 102 Router(config-mon-erspan-src)# source filter vlan 2 - 3Router(config-mon-erspan-src)#

monitor session type
CF-380Cisco IOS Configuration Fundamentals Command Reference
January 2011
This example shows how to enter the ERSPAN source session destination configuration mode:
Router(config-mon-erspan-src)# destinationRouter(config-mon-erspan-src-dst)#
This example shows how to configure the ID number that is used by the source and destination sessions to identify the ERSPAN traffic:
Router(config-mon-erspan-src-dst)# erspan-id 1005Router(config-mon-erspan-src-dst)#
This example shows how to configure session 1 to monitor ingress traffic from Gigabit Ethernet port 1/1 and configure Gigabit Ethernet port 1/2 as the destination:
Router(config)# monitor session 1 type local Router(config-mon-local)# source interface gigabitethernet 1/1 rx Router(config-mon-local)# destination interface gigabitethernet 1/2
This example shows how to configure session 1 to monitor egress-only traffic from Gigabit Ethernet port 5/1 and configure Gigabit Ethernet port 5/2 as the destination:
Router(config)# monitor session 1 type local-tx Router(config-mon-local)# source interface gigabitethernet 5/1 rx Router(config-mon-local)# destination interface gigabitethernet 5/2
This example shows how to remove an interface from a session:
Router(config)# no monitor session 1 type local-tx
Related Commands Command Description
monitor session type Creates an ERSPAN source session number or enters the ERSPAN session configuration mode for the session.
show monitor session Displays information about the ERSPAN, SPAN, and RSPAN sessions.
mop device-code
CF-381Cisco IOS Configuration Fundamentals Command Reference
January 2011
mop device-codeTo identify the type of device sending Maintenance Operation Protocol (MOP) System Identification (sysid) messages and request program messages, use the mop device-code command in global configuration mode. To set the identity to the default value, use the no form of this command.
mop device-code {cisco | ds200}
no mop device-code {cisco | ds200}
Syntax Description
Defaults Cisco device code
Command Modes Global configuration
Command History
Usage Guidelines The sysid messages and request program messages use the identity information indicated by this command.
Examples The following example identifies a DECserver 200 device as sending MOP sysid and request program messages:
mop device-code ds200
Related Commands
cisco Denotes a Cisco device code. This is the default.
ds200 Denotes a DECserver 200 device code.
Release Modification
10.0 This command was introduced.
12.2(33)SRA This command was integrated into Cisco IOS Release 12.2(33)SRA.
Command Description
mop sysid Enables an interface to send out periodic MOP system identification messages.

mop retransmit-timer
CF-382Cisco IOS Configuration Fundamentals Command Reference
January 2011
mop retransmit-timerTo configure the length of time that the Cisco IOS software waits before resending boot requests to a Maintenance Operation Protocol (MOP) server, use the mop retransmit-timer command in global configuration mode. To reinstate the default value, use the no form of this command.
mop retransmit-timer seconds
no mop retransmit-timer
Syntax Description
Defaults 4 seconds
Command Modes Global configuration
Command History
Usage Guidelines By default, when the software sends a request that requires a response from a MOP boot server and the server does not respond, the message is re-sent after 4 seconds. If the MOP boot server and router are separated by a slow serial link, it might take longer than 4 seconds for the software to receive a response to its message. Therefore, you might want to configure the software to wait longer than 4 seconds before resending the message if you are using such a link.
Examples In the following example, if the MOP boot server does not respond within 10 seconds after the router sends a message, the server will resend the message:
mop retransmit-timer 10
Related Commands
seconds Sets the length of time (in seconds) that the software waits before resending a message. The value is a number from 1 to 20.
Release Modification
10.0 This command was introduced.
12.2(33)SRA This command was integrated into Cisco IOS Release 12.2(33)SRA.
Command Description
mop device-code Identifies the type of device sending MOP sysid messages and requests program messages.
mop enabled Enables an interface to support the MOP.

mop retries
CF-383Cisco IOS Configuration Fundamentals Command Reference
January 2011
mop retriesTo configure the number of times the Cisco IOS software will resend boot requests to a Maintenance Operation Protocol (MOP) server, use the mop retries command in global configuration mode. To reinstate the default value, use the no form of this command.
mop retries count
no mop retries
Syntax Description
Defaults 8 times
Command Modes Global configuration
Command History
Examples In the following example, the software will attempt to resend a message to an unresponsive host 11 times before declaring a failure:
Router(config)# mop retries 11
Related Commands
count Indicates the number of times the software will resend a MOP boot request. The value is a number from 3 to 24. The default is 8.
Release Modification
10.0 This command was introduced.
12.2(33)SRA This command was integrated into Cisco IOS Release 12.2(33)SRA.
Command Description
mop device-code Identifies the type of device sending MOP sysid messages and requests program messages.
mop enabled Enables an interface to support the MOP server.
mop retransmit-timer Configures the length of time that the Cisco IOS software waits before resending boot requests to a MOP server.

more
CF-384Cisco IOS Configuration Fundamentals Command Reference
January 2011
moreTo display the contents of a file, use the more command in EXEC mode.
more [/ascii | /binary | /ebcdic] url
Syntax Description
Defaults The command displays the conent of a file in its native format. Optional formats include ascii, binary, and ebcdic.
Command Modes EXEC
Command History
Usage Guidelines The more system:running-config command displays the same output as the show running-config command. The more nvram:startup-config command is recommended as a replacement for the show startup-config command and the show configuration command.
You can use this command to display configuration files, as follows:
• The more nvram:startup-config command displays the startup configuration file contained in NVRAM or specified by the CONFIG_FILE environment variable. The Cisco IOS software informs you whether the displayed configuration is a complete configuration or a distilled version. A distilled configuration is one that does not contain access lists.
• The more system:running-config command displays the running configuration.
These commands show the version number of the software used when you last changed the configuration file.
You can also display the contents of files on remote systems using the more command. For example, you could display a saved running configuration file on an FTP server using more ftp://username:password@ftp-host1/mydirectory/7200-basic-running-config. See the description of the copy command for more information on file-system prefixes available in the Cisco IOS CLI.
Options for filtering and redirecting the output of this command are available by appending a pipe character (|). See the Related Commands table for a list of more <url> command extensions.
/ascii (Optional) Displays a binary file in ASCII format.
/binary (Optional) Displays a file in hex/text format.
/ebcdic (Optional) Displays a binary file in EBCDIC format.
url The URL of the file to display. A URL in the CLI consists of a file-system prefix (such as system: or nvram:), an optional path (such as a folder name), and the name of a file.
Release Modification
11.3 AA This command was introduced.
12.2(33)SRA This command was integrated into Cisco IOS Release 12.2(33)SRA.
more
CF-385Cisco IOS Configuration Fundamentals Command Reference
January 2011
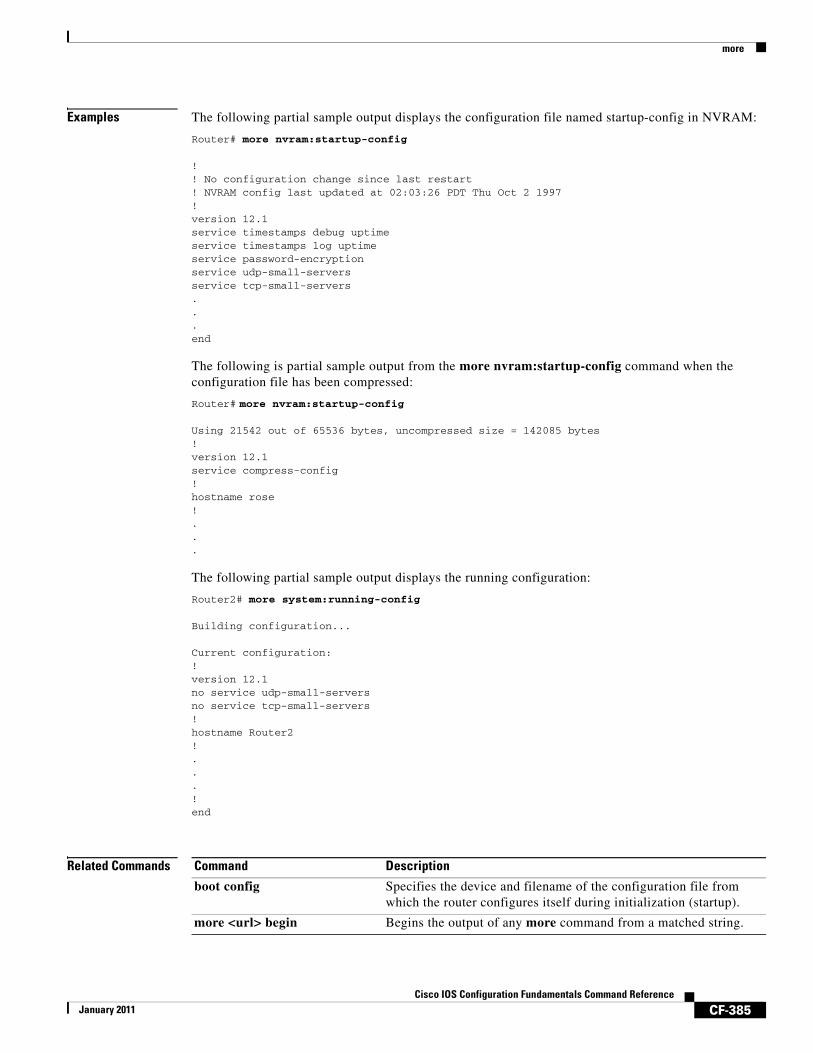
Examples The following partial sample output displays the configuration file named startup-config in NVRAM:
Router# more nvram:startup-config
!! No configuration change since last restart! NVRAM config last updated at 02:03:26 PDT Thu Oct 2 1997!version 12.1service timestamps debug uptimeservice timestamps log uptimeservice password-encryptionservice udp-small-serversservice tcp-small-servers...end
The following is partial sample output from the more nvram:startup-config command when the configuration file has been compressed:
Router# more nvram:startup-config
Using 21542 out of 65536 bytes, uncompressed size = 142085 bytes!version 12.1 service compress-config!hostname rose!...
The following partial sample output displays the running configuration:
Router2# more system:running-config
Building configuration...
Current configuration:!version 12.1no service udp-small-serversno service tcp-small-servers!hostname Router2!...!end
Related Commands Command Description
boot config Specifies the device and filename of the configuration file from which the router configures itself during initialization (startup).
more <url> begin Begins the output of any more command from a matched string.

more
CF-386Cisco IOS Configuration Fundamentals Command Reference
January 2011
more <url> exclude Filters the output of any more command to exclude a matched string.
more <url> include Filters the output of any more command to display only the lines that match the specified string.
service compress-config Compresses startup configuration files.
show bootvar Displays the contents of the BOOT environment variable, the name of the configuration file pointed to by the CONFIG_FILE environment variable, the contents of the BOOTLDR environment variable, and the configuration register setting.
Command Description
more <url> begin
CF-387Cisco IOS Configuration Fundamentals Command Reference
January 2011
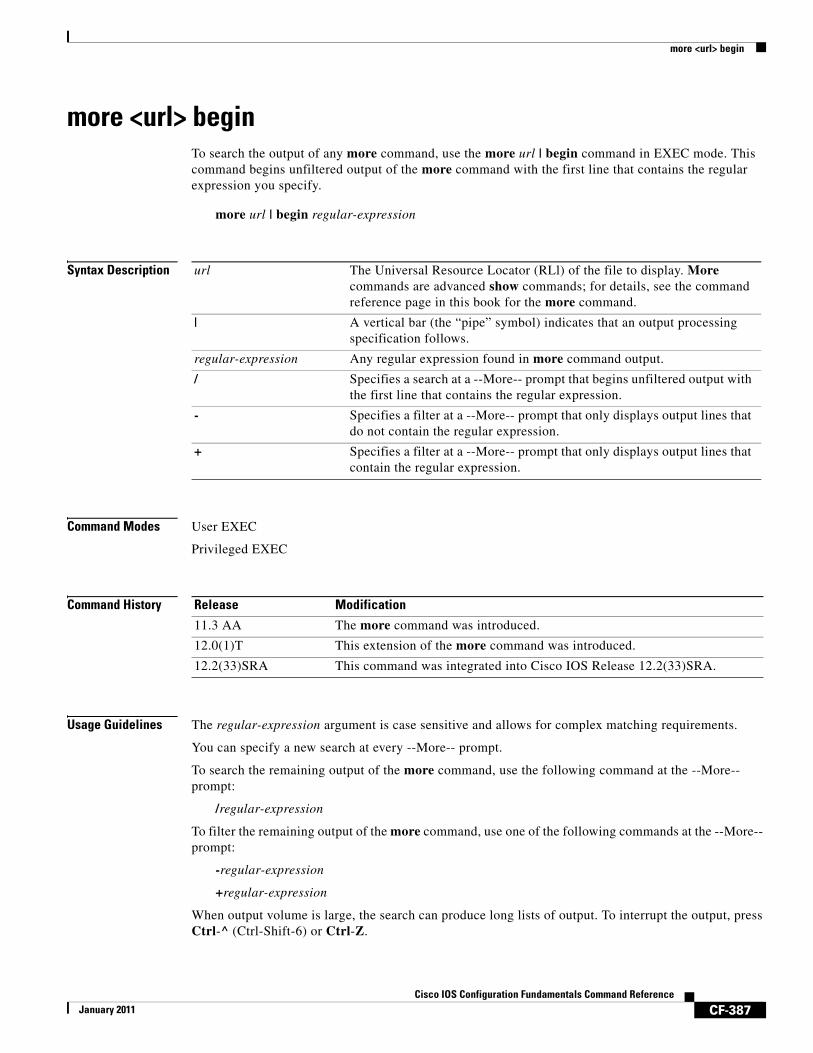
more <url> beginTo search the output of any more command, use the more url | begin command in EXEC mode. This command begins unfiltered output of the more command with the first line that contains the regular expression you specify.
more url | begin regular-expression
Syntax Description
Command Modes User EXEC
Privileged EXEC
Command History
Usage Guidelines The regular-expression argument is case sensitive and allows for complex matching requirements.
You can specify a new search at every --More-- prompt.
To search the remaining output of the more command, use the following command at the --More-- prompt:
/regular-expression
To filter the remaining output of the more command, use one of the following commands at the --More-- prompt:
-regular-expression
+regular-expression
When output volume is large, the search can produce long lists of output. To interrupt the output, press Ctrl-^ (Ctrl-Shift-6) or Ctrl-Z.
url The Universal Resource Locator (RLl) of the file to display. More commands are advanced show commands; for details, see the command reference page in this book for the more command.
| A vertical bar (the “pipe” symbol) indicates that an output processing specification follows.
regular-expression Any regular expression found in more command output.
/ Specifies a search at a --More-- prompt that begins unfiltered output with the first line that contains the regular expression.
- Specifies a filter at a --More-- prompt that only displays output lines that do not contain the regular expression.
+ Specifies a filter at a --More-- prompt that only displays output lines that contain the regular expression.
Release Modification
11.3 AA The more command was introduced.
12.0(1)T This extension of the more command was introduced.
12.2(33)SRA This command was integrated into Cisco IOS Release 12.2(33)SRA.
more <url> begin
CF-388Cisco IOS Configuration Fundamentals Command Reference
January 2011
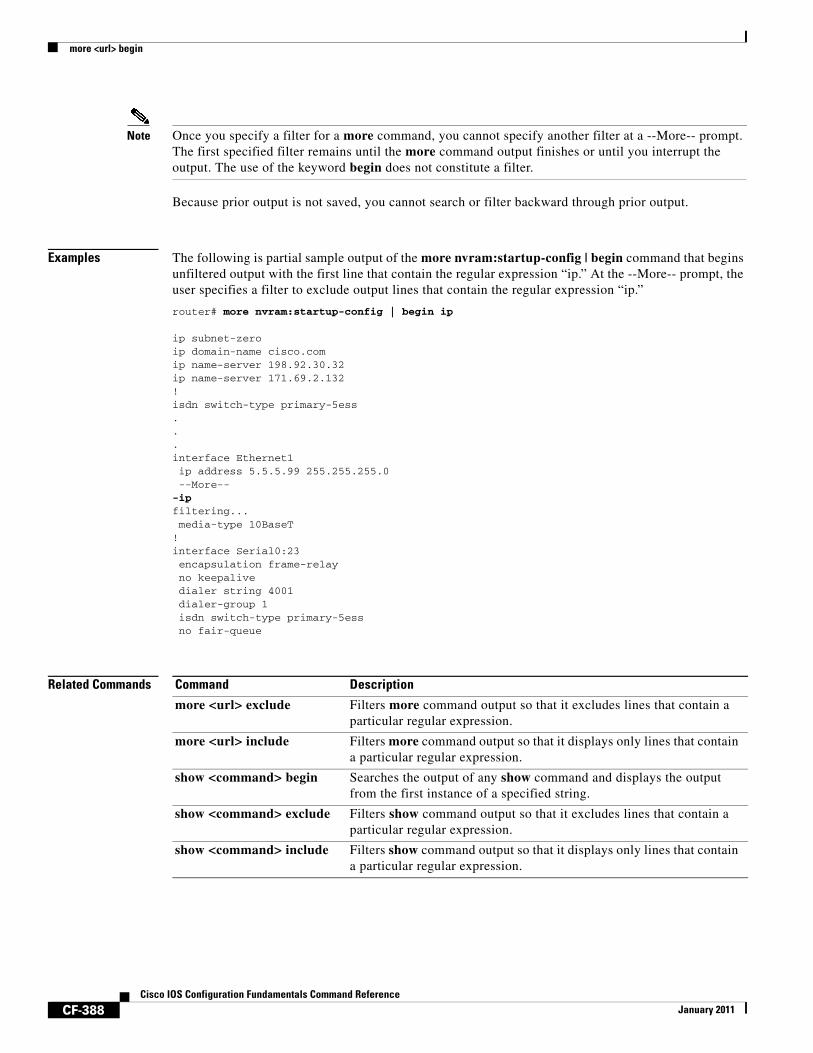
Note Once you specify a filter for a more command, you cannot specify another filter at a --More-- prompt. The first specified filter remains until the more command output finishes or until you interrupt the output. The use of the keyword begin does not constitute a filter.
Because prior output is not saved, you cannot search or filter backward through prior output.
Examples The following is partial sample output of the more nvram:startup-config | begin command that begins unfiltered output with the first line that contain the regular expression “ip.” At the --More-- prompt, the user specifies a filter to exclude output lines that contain the regular expression “ip.”
router# more nvram:startup-config | begin ip
ip subnet-zeroip domain-name cisco.comip name-server 198.92.30.32ip name-server 171.69.2.132!isdn switch-type primary-5ess...interface Ethernet1ip address 5.5.5.99 255.255.255.0--More--
-ipfiltering...media-type 10BaseT
!interface Serial0:23encapsulation frame-relayno keepalivedialer string 4001dialer-group 1isdn switch-type primary-5essno fair-queue
Related Commands Command Description
more <url> exclude Filters more command output so that it excludes lines that contain a particular regular expression.
more <url> include Filters more command output so that it displays only lines that contain a particular regular expression.
show <command> begin Searches the output of any show command and displays the output from the first instance of a specified string.
show <command> exclude Filters show command output so that it excludes lines that contain a particular regular expression.
show <command> include Filters show command output so that it displays only lines that contain a particular regular expression.
more <url> exclude
CF-389Cisco IOS Configuration Fundamentals Command Reference
January 2011
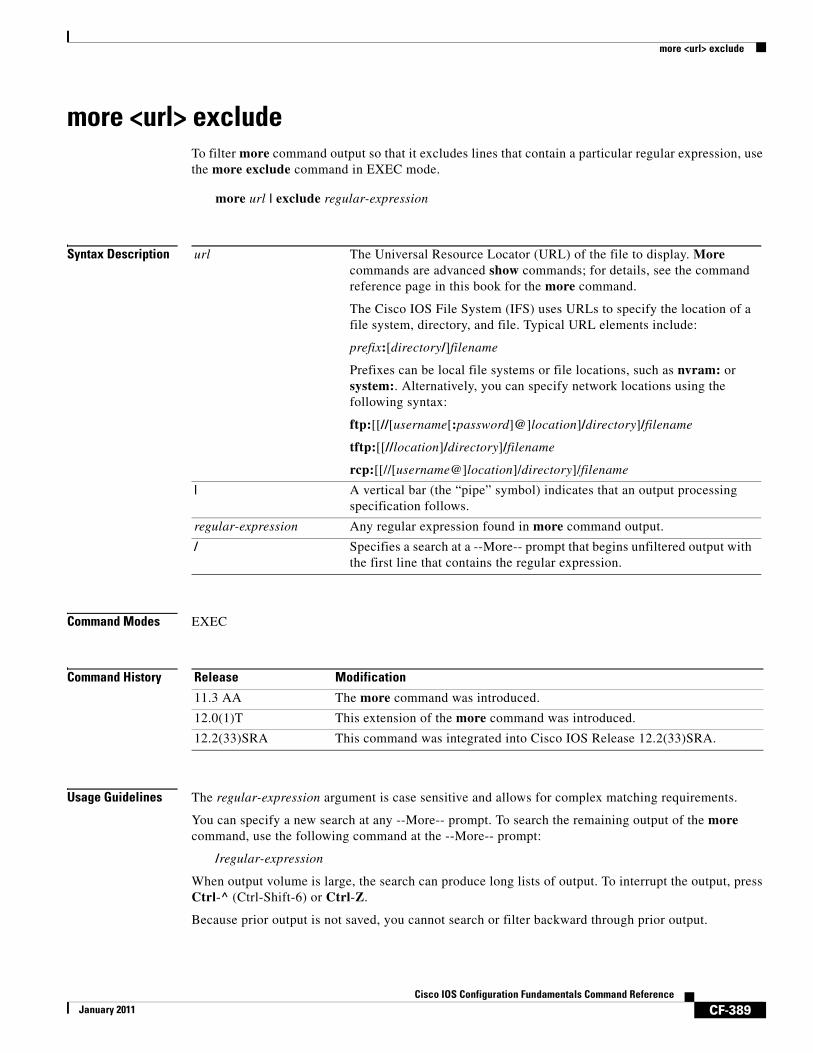
more <url> excludeTo filter more command output so that it excludes lines that contain a particular regular expression, use the more exclude command in EXEC mode.
more url | exclude regular-expression
Syntax Description
Command Modes EXEC
Command History
Usage Guidelines The regular-expression argument is case sensitive and allows for complex matching requirements.
You can specify a new search at any --More-- prompt. To search the remaining output of the more command, use the following command at the --More-- prompt:
/regular-expression
When output volume is large, the search can produce long lists of output. To interrupt the output, press Ctrl-^ (Ctrl-Shift-6) or Ctrl-Z.
Because prior output is not saved, you cannot search or filter backward through prior output.
url The Universal Resource Locator (URL) of the file to display. More commands are advanced show commands; for details, see the command reference page in this book for the more command.
The Cisco IOS File System (IFS) uses URLs to specify the location of a file system, directory, and file. Typical URL elements include:
prefix:[directory/]filename
Prefixes can be local file systems or file locations, such as nvram: or system:. Alternatively, you can specify network locations using the following syntax:
ftp:[[//[username[:password]@]location]/directory]/filename
tftp:[[//location]/directory]/filename
rcp:[[//[username@]location]/directory]/filename
| A vertical bar (the “pipe” symbol) indicates that an output processing specification follows.
regular-expression Any regular expression found in more command output.
/ Specifies a search at a --More-- prompt that begins unfiltered output with the first line that contains the regular expression.
Release Modification
11.3 AA The more command was introduced.
12.0(1)T This extension of the more command was introduced.
12.2(33)SRA This command was integrated into Cisco IOS Release 12.2(33)SRA.

more <url> exclude
CF-390Cisco IOS Configuration Fundamentals Command Reference
January 2011
Examples The following is partial sample output of the more nvram:startup-config | exclude command. The use of | exclude service in the command specifies a filter that excludes lines that contain the regular expression “service.” At the --More-- prompt, the user searches for the regular expression “Dialer1,” which continues filtered output with the first line that contains “Dialer1.”
router# more nvram:startup-config | exclude service!version 12.0!hostname router!boot system flashno logging buffered!ip subnet-zeroip domain-name cisco.com...--More--/Dialer1filtering...interface Dialer1no ip addressno ip directed-broadcastdialer in-bandno cdp enable
Related Commands Command Description
more <url> begin Begins unfiltered output of the more command with the first line that contains the regular expression you specify.
more <url> include Filters more command output so that it displays only lines that contain a particular regular expression.
show <command> begin
Searches the output of any show command and displays the output from the first instance of a specified string.
show <command> exclude
Filters show command output so that it excludes lines that contain a particular regular expression.
show <command> include
Filters show command output so that it displays only lines that contain a particular regular expression.
more <url> include
CF-391Cisco IOS Configuration Fundamentals Command Reference
January 2011
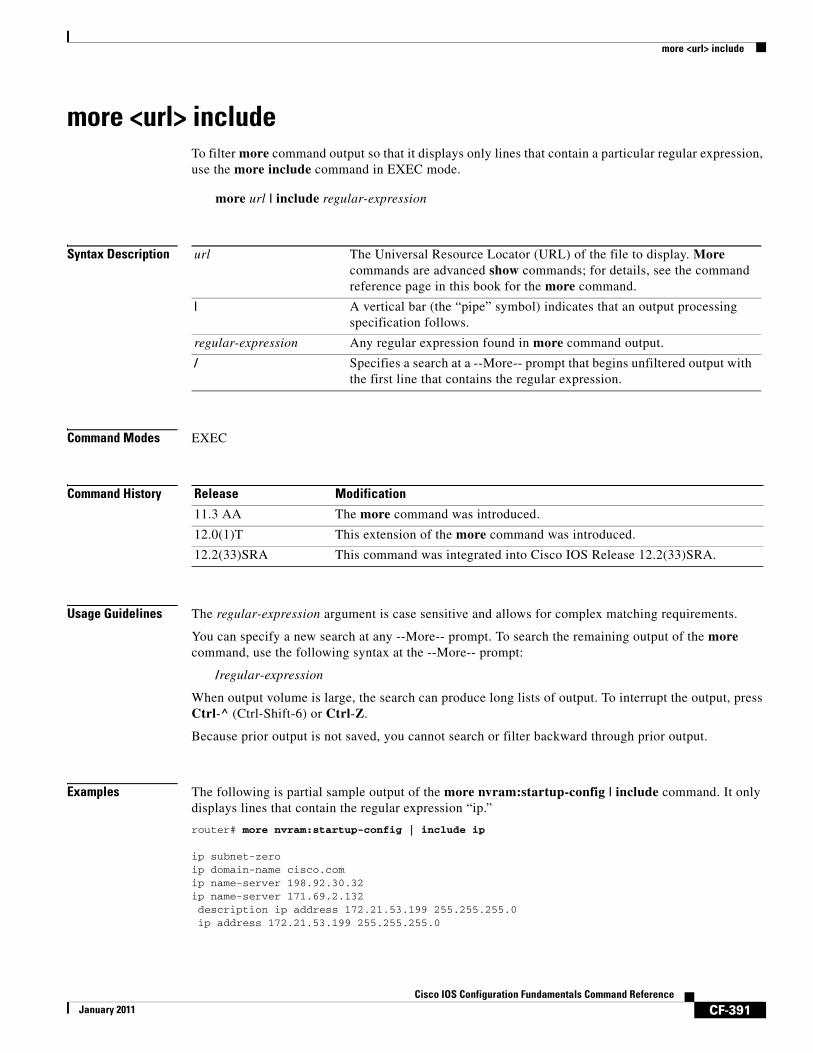
more <url> includeTo filter more command output so that it displays only lines that contain a particular regular expression, use the more include command in EXEC mode.
more url | include regular-expression
Syntax Description
Command Modes EXEC
Command History
Usage Guidelines The regular-expression argument is case sensitive and allows for complex matching requirements.
You can specify a new search at any --More-- prompt. To search the remaining output of the more command, use the following syntax at the --More-- prompt:
/regular-expression
When output volume is large, the search can produce long lists of output. To interrupt the output, press Ctrl-^ (Ctrl-Shift-6) or Ctrl-Z.
Because prior output is not saved, you cannot search or filter backward through prior output.
Examples The following is partial sample output of the more nvram:startup-config | include command. It only displays lines that contain the regular expression “ip.”
router# more nvram:startup-config | include ip
ip subnet-zeroip domain-name cisco.comip name-server 198.92.30.32ip name-server 171.69.2.132description ip address 172.21.53.199 255.255.255.0ip address 172.21.53.199 255.255.255.0
url The Universal Resource Locator (URL) of the file to display. More commands are advanced show commands; for details, see the command reference page in this book for the more command.
| A vertical bar (the “pipe” symbol) indicates that an output processing specification follows.
regular-expression Any regular expression found in more command output.
/ Specifies a search at a --More-- prompt that begins unfiltered output with the first line that contains the regular expression.
Release Modification
11.3 AA The more command was introduced.
12.0(1)T This extension of the more command was introduced.
12.2(33)SRA This command was integrated into Cisco IOS Release 12.2(33)SRA.

more <url> include
CF-392Cisco IOS Configuration Fundamentals Command Reference
January 2011
Related Commands Command Description
more <url> begin Begins unfiltered output of the more command with the first line that contains the regular expression you specify.
more <url> exclude Filters more command output so that it excludes lines that contain a particular regular expression.
show <command> begin Searches the output of any show command and displays the output from the first instance of a specified string.
show <command> exclude Filters show command output so that it excludes lines that contain a particular regular expression.
show <command> include Filters show command output so that it displays only lines that contain a particular regular expression.
more flh:logfile
CF-393Cisco IOS Configuration Fundamentals Command Reference
January 2011
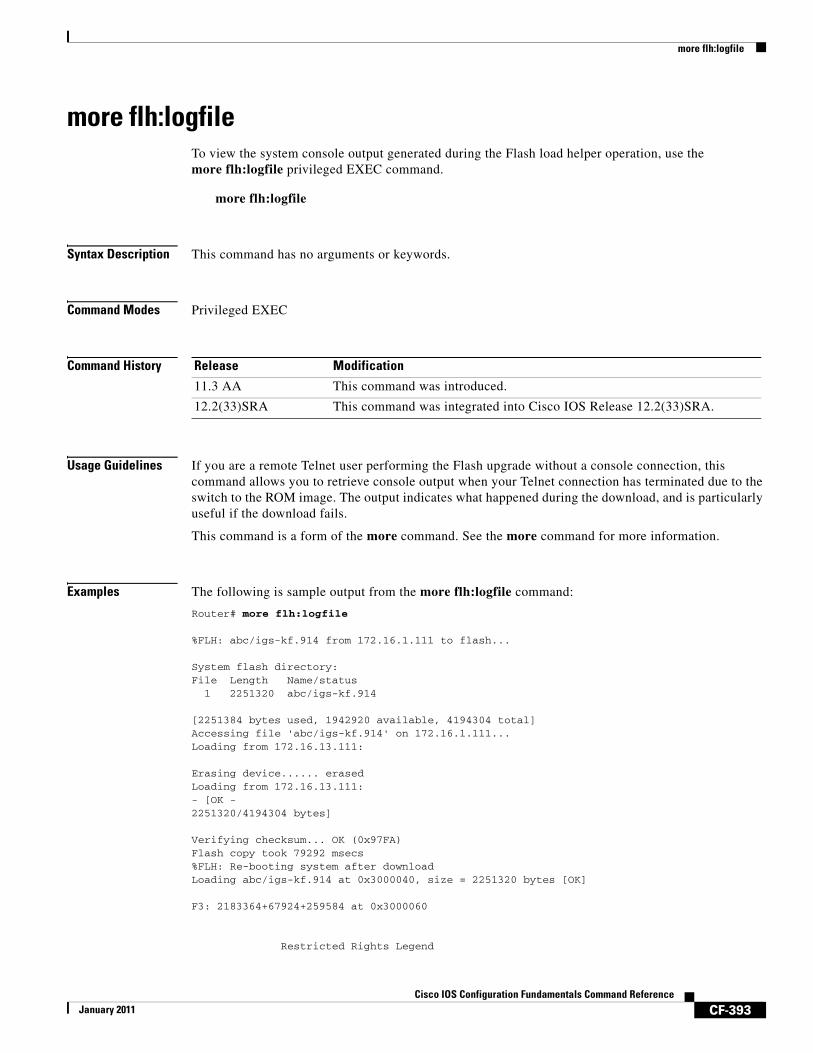
more flh:logfileTo view the system console output generated during the Flash load helper operation, use the more flh:logfile privileged EXEC command.
more flh:logfile
Syntax Description This command has no arguments or keywords.
Command Modes Privileged EXEC
Command History
Usage Guidelines If you are a remote Telnet user performing the Flash upgrade without a console connection, this command allows you to retrieve console output when your Telnet connection has terminated due to the switch to the ROM image. The output indicates what happened during the download, and is particularly useful if the download fails.
This command is a form of the more command. See the more command for more information.
Examples The following is sample output from the more flh:logfile command:
Router# more flh:logfile
%FLH: abc/igs-kf.914 from 172.16.1.111 to flash...
System flash directory:File Length Name/status
1 2251320 abc/igs-kf.914
[2251384 bytes used, 1942920 available, 4194304 total]Accessing file 'abc/igs-kf.914' on 172.16.1.111...Loading from 172.16.13.111:
Erasing device...... erasedLoading from 172.16.13.111: - [OK - 2251320/4194304 bytes]
Verifying checksum... OK (0x97FA)Flash copy took 79292 msecs%FLH: Re-booting system after downloadLoading abc/igs-kf.914 at 0x3000040, size = 2251320 bytes [OK]
F3: 2183364+67924+259584 at 0x3000060
Restricted Rights Legend
Release Modification
11.3 AA This command was introduced.
12.2(33)SRA This command was integrated into Cisco IOS Release 12.2(33)SRA.

more flh:logfile
CF-394Cisco IOS Configuration Fundamentals Command Reference
January 2011
Use, duplication, or disclosure by the Government issubject to restrictions as set forth in subparagraph(c) of the Commercial Computer Software - RestrictedRights clause at FAR sec. 52.227-19 and subparagraph(c) (1) (ii) of the Rights in Technical Data and ComputerSoftware clause at DFARS sec. 252.227-7013.
cisco Systems, Inc. 170 West Tasman Drive San Jose, California 95134
Cisco Internetwork Operating System SoftwareCisco IOS (tm) GS Software (GS7), Version 11.0Copyright (c) 1986-1995 by cisco Systems, Inc.Compiled Tue 06-Dec-94 14:01 by smithImage text-base: 0x00001000, data-base: 0x005A9C94
cisco 2500 (68030) processor (revision 0x00) with 4092K/2048K bytes of memory.Processor board serial number 00000000DDN X.25 software, Version 2.0, NET2 and BFE compliant.ISDN software, Version 1.0.Bridging software.Enterprise software set supported. (0x0)1 Ethernet/IEEE 802.3 interface.2 Serial network interfaces. --More--
1 ISDN Basic Rate interface.32K bytes of non-volatile configuration memory.
4096K bytes of processor board System flash (Read ONLY)
Related Commands Command Description
more Displays a file.

motd-banner
CF-395Cisco IOS Configuration Fundamentals Command Reference
January 2011
motd-bannerTo enable the display of message-of-the-day (MOTD) banners on the specified line or lines, use the motd-banner command in line configuration mode. To suppress the MOTD banners on the specified line or lines, use the no form of this command.
motd-banner
no motd-banner
Syntax Description This command has no arguments or keywords.
Defaults Enabled on all lines.
Command Modes Line configuration
Command History
Usage Guidelines This command determines whether the router will display the MOTD banner when an EXEC session is created on the specified line or lines. The MOTD banner is defined with the banner motd global configuration command. By default, the MOTD banner is enabled on all lines. Disable the MOTD banner on specific lines using the no motd-banner line configuration command.
The MOTD banners can also be disabled by the no exec-banner line configuration command, which disables both MOTD banners and EXEC banners on a line. If the no exec-banner command is configured on a line, the MOTD banner will be disabled regardless of whether the motd-banner command is enabled or disabled. Table 37 summarizes the effects of the exec-banner command and the motd-banner command.
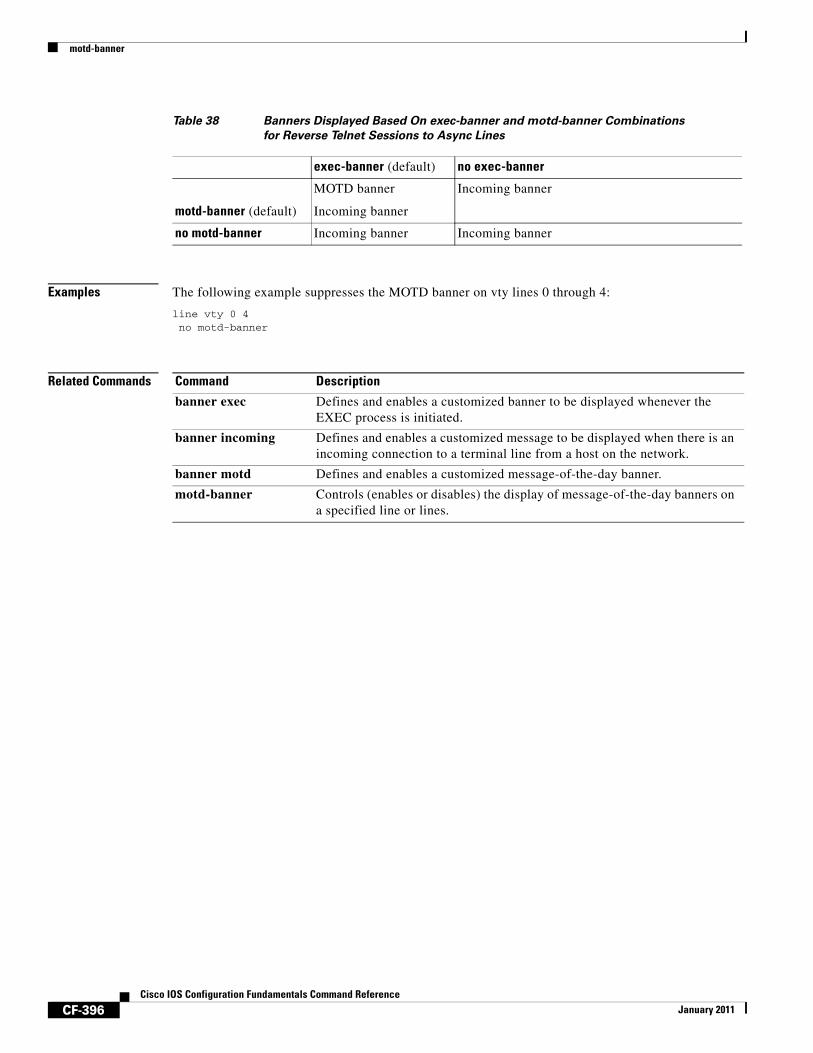
For reverse Telnet connections, the EXEC banner is never displayed. Instead, the incoming banner is displayed. The MOTD banner is displayed by default, but it is disabled if either the no exec-banner command or no motd-banner command is configured. Table 38 summarizes the effects of the exec-banner command and the motd-banner command for reverse Telnet connections.
Release Modification
11.1 This command was introduced.
12.2(33)SRA This command was integrated into Cisco IOS Release 12.2(33)SRA.
Table 37 Banners Displayed Based On exec-banner and motd-banner Combinations
exec-banner (default) no exec-banner
motd-banner (default)
MOTD banner
EXEC banner
None
no motd-banner EXEC banner None
motd-banner
CF-396Cisco IOS Configuration Fundamentals Command Reference
January 2011
Examples The following example suppresses the MOTD banner on vty lines 0 through 4:
line vty 0 4no motd-banner
Related Commands
Table 38 Banners Displayed Based On exec-banner and motd-banner Combinations
for Reverse Telnet Sessions to Async Lines
exec-banner (default) no exec-banner
motd-banner (default)
MOTD banner
Incoming banner
Incoming banner
no motd-banner Incoming banner Incoming banner
Command Description
banner exec Defines and enables a customized banner to be displayed whenever the EXEC process is initiated.
banner incoming Defines and enables a customized message to be displayed when there is an incoming connection to a terminal line from a host on the network.
banner motd Defines and enables a customized message-of-the-day banner.
motd-banner Controls (enables or disables) the display of message-of-the-day banners on a specified line or lines.
name-connection
CF-397Cisco IOS Configuration Fundamentals Command Reference
January 2011
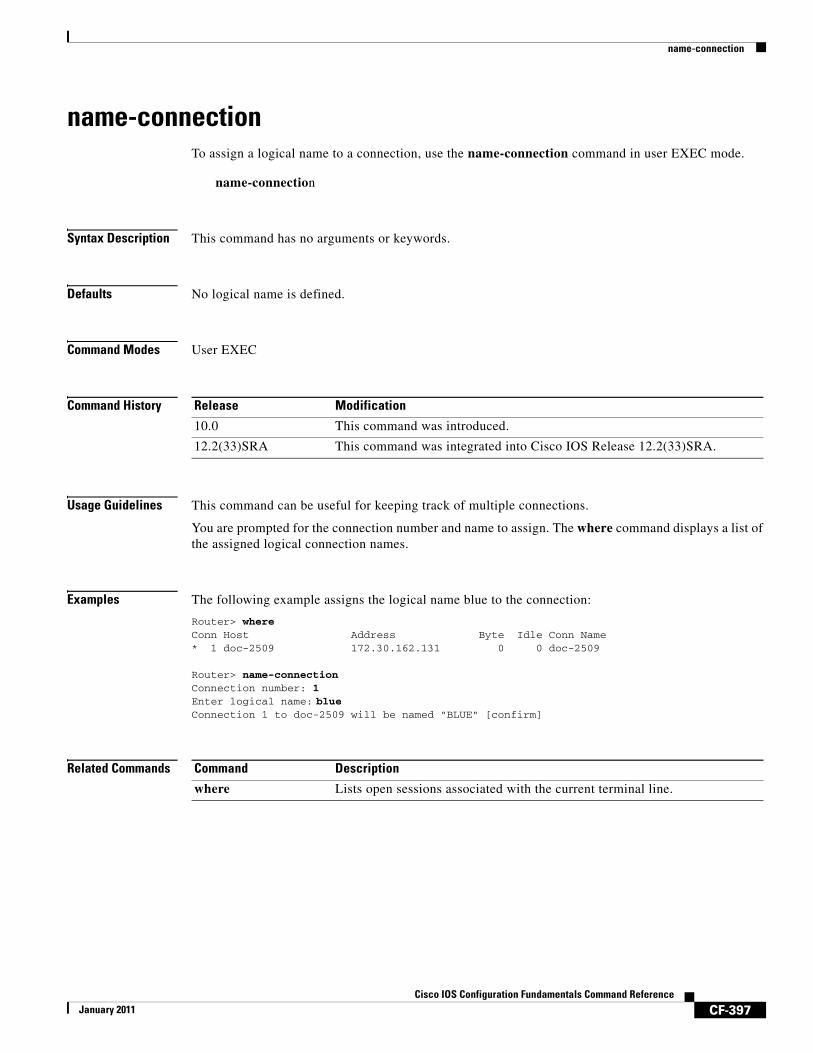
name-connectionTo assign a logical name to a connection, use the name-connection command in user EXEC mode.
name-connection
Syntax Description This command has no arguments or keywords.
Defaults No logical name is defined.
Command Modes User EXEC
Command History
Usage Guidelines This command can be useful for keeping track of multiple connections.
You are prompted for the connection number and name to assign. The where command displays a list of the assigned logical connection names.
Examples The following example assigns the logical name blue to the connection:
Router> whereConn Host Address Byte Idle Conn Name* 1 doc-2509 172.30.162.131 0 0 doc-2509
Router> name-connectionConnection number: 1Enter logical name: blueConnection 1 to doc-2509 will be named "BLUE" [confirm]
Related Commands
Release Modification
10.0 This command was introduced.
12.2(33)SRA This command was integrated into Cisco IOS Release 12.2(33)SRA.
Command Description
where Lists open sessions associated with the current terminal line.
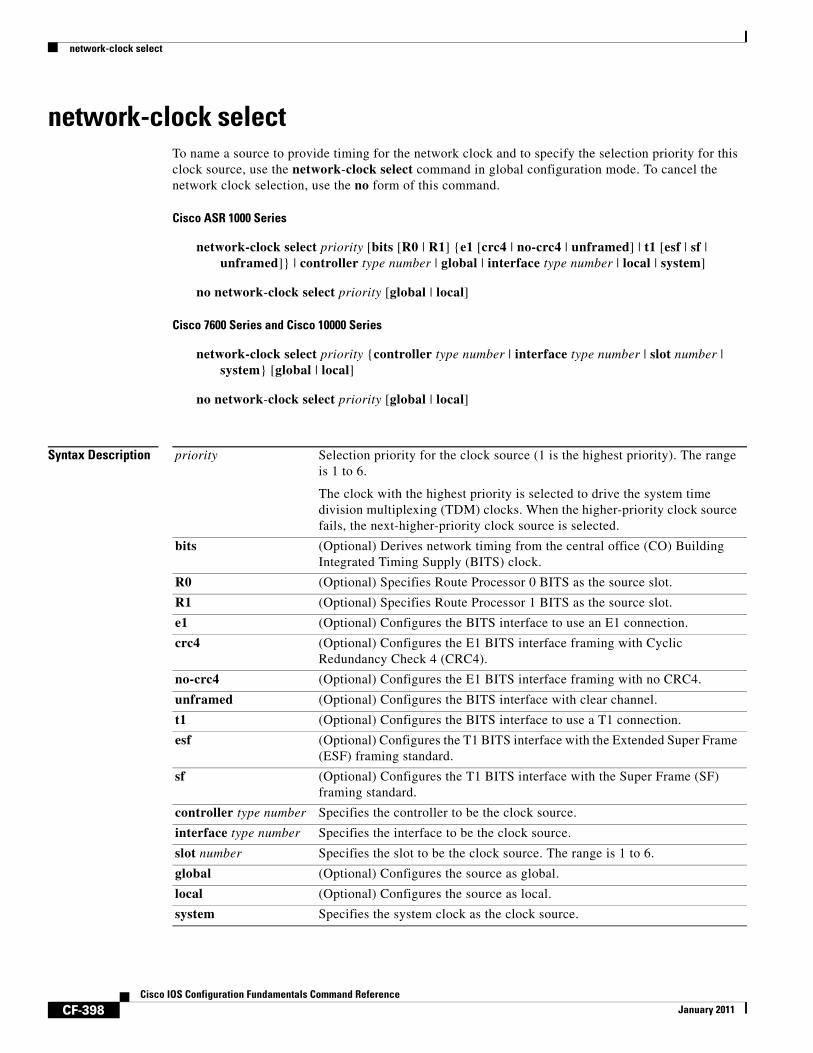
network-clock select
CF-398Cisco IOS Configuration Fundamentals Command Reference
January 2011
network-clock selectTo name a source to provide timing for the network clock and to specify the selection priority for this clock source, use the network-clock select command in global configuration mode. To cancel the network clock selection, use the no form of this command.
Cisco ASR 1000 Series
network-clock select priority [bits [R0 | R1] {e1 [crc4 | no-crc4 | unframed] | t1 [esf | sf | unframed]} | controller type number | global | interface type number | local | system]
no network-clock select priority [global | local]
Cisco 7600 Series and Cisco 10000 Series
network-clock select priority {controller type number | interface type number | slot number | system} [global | local]
no network-clock select priority [global | local]
Syntax Description priority Selection priority for the clock source (1 is the highest priority). The range is 1 to 6.
The clock with the highest priority is selected to drive the system time division multiplexing (TDM) clocks. When the higher-priority clock source fails, the next-higher-priority clock source is selected.
bits (Optional) Derives network timing from the central office (CO) Building Integrated Timing Supply (BITS) clock.
R0 (Optional) Specifies Route Processor 0 BITS as the source slot.
R1 (Optional) Specifies Route Processor 1 BITS as the source slot.
e1 (Optional) Configures the BITS interface to use an E1 connection.
crc4 (Optional) Configures the E1 BITS interface framing with Cyclic Redundancy Check 4 (CRC4).
no-crc4 (Optional) Configures the E1 BITS interface framing with no CRC4.
unframed (Optional) Configures the BITS interface with clear channel.
t1 (Optional) Configures the BITS interface to use a T1 connection.
esf (Optional) Configures the T1 BITS interface with the Extended Super Frame (ESF) framing standard.
sf (Optional) Configures the T1 BITS interface with the Super Frame (SF) framing standard.
controller type number Specifies the controller to be the clock source.
interface type number Specifies the interface to be the clock source.
slot number Specifies the slot to be the clock source. The range is 1 to 6.
global (Optional) Configures the source as global.
local (Optional) Configures the source as local.
system Specifies the system clock as the clock source.

network-clock select
CF-399Cisco IOS Configuration Fundamentals Command Reference
January 2011
Command Default The router uses the system clock (also called free-running mode).
Note Because default clock values are derived from an external source, they can fall outside the configurable range.
Command Modes Global configuration (config)
Command History
Usage Guidelines When an active clock source fails, the system chooses the next-lower-priority clock source that is specified by this command. When a higher-priority clock source becomes available, the system automatically reselects it.
You can specify up to five clock priorities. The highest-priority active interface in the router supplies the primary reference source to all other interfaces that require network clock synchronization services.
For timing sources, the Route Processor can receive timing information through its BITS interface or through a TDM-based Shared Port Adapter (SPA). For some telecommunications deployments, BITS clocking is required to provide global clocking synchronization of network equipment in the end-to-end data path. A BITS clock can be supplied to the network clock module using a T1 or E1 connection.
If a controller is specified in the clock source hierarchy, you must configure that controller for line timing (by using the appropriate clock source line command for the controller). Any controller that is not currently acting as the clock source will automatically operate in loop timing mode. Both controllers can be given different clock source priority values. For more information, see the Cisco IOS Interface and Hardware Component Command Reference.
Note To minimize backplane clock shifts, the no network-clock select command does not take effect until you return to EXEC mode by entering exit or end. This process minimizes the number of times that clock sources are configured.
Use the show network-clocks command to display clock priorities that are configured on the router.
Examples The following example shows how to configure the network clock as revertive and assign clock sources to two priorities:
Router> enableRouter# configure terminalRouter(config)# network-clock revertiveRouter(config)# network-clock select 1 bits R0 e1Router(config)# network-clock select 2 interface GigabitEthernet 0/0/1
Release Modification
Cisco IOS XE Release 2.1
This command was introduced in a release earlier than Cisco IOS Release 2.1.
15.0(1)S This command was integrated into a release earlier than Cisco IOS Release 15.0(1)S.

network-clock select
CF-400Cisco IOS Configuration Fundamentals Command Reference
January 2011
Related Commands Command Description
network-clock-participate Configures a network module to participate in network clocking.
network-clock-switch Configures the switch delay time to the next-priority network clock source when the current network clock source fails or a higher-priority clock source is up and available.
show network-clocks Displays the network clock configuration and current primary clock source.
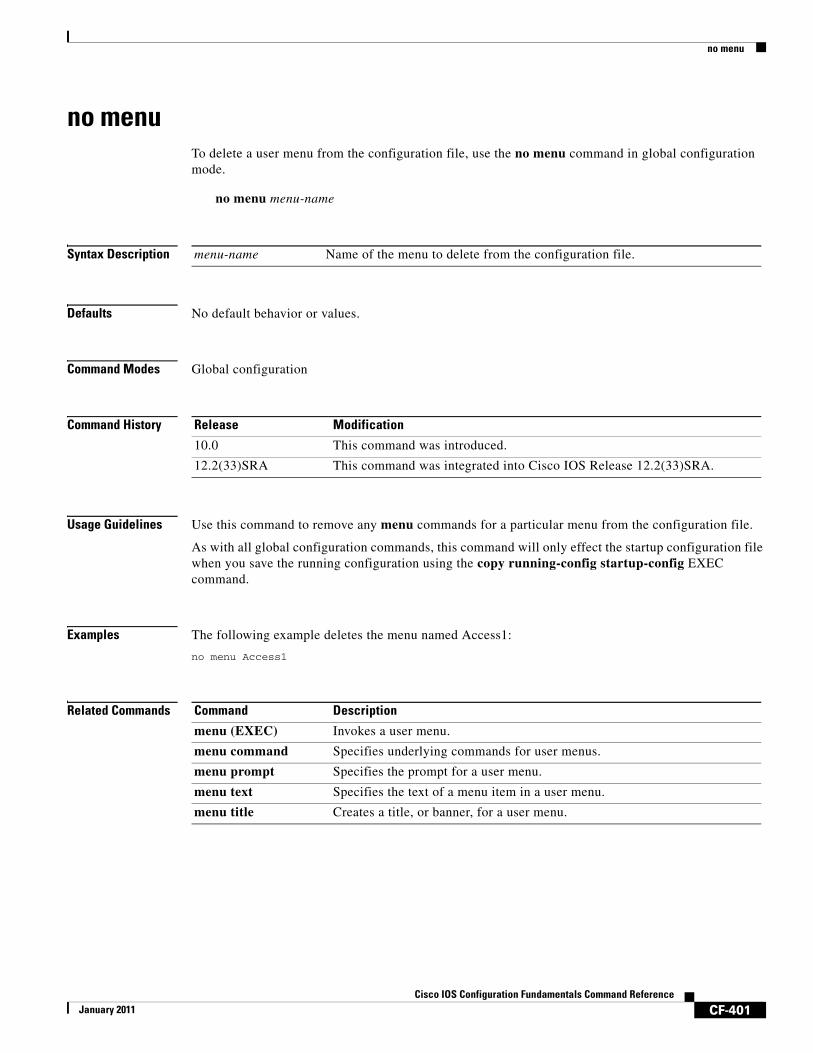
no menu
CF-401Cisco IOS Configuration Fundamentals Command Reference
January 2011
no menuTo delete a user menu from the configuration file, use the no menu command in global configuration mode.
no menu menu-name
Syntax Description
Defaults No default behavior or values.
Command Modes Global configuration
Command History
Usage Guidelines Use this command to remove any menu commands for a particular menu from the configuration file.
As with all global configuration commands, this command will only effect the startup configuration file when you save the running configuration using the copy running-config startup-config EXEC command.
Examples The following example deletes the menu named Access1:
no menu Access1
Related Commands
menu-name Name of the menu to delete from the configuration file.
Release Modification
10.0 This command was introduced.
12.2(33)SRA This command was integrated into Cisco IOS Release 12.2(33)SRA.
Command Description
menu (EXEC) Invokes a user menu.
menu command Specifies underlying commands for user menus.
menu prompt Specifies the prompt for a user menu.
menu text Specifies the text of a menu item in a user menu.
menu title Creates a title, or banner, for a user menu.

notify
CF-402Cisco IOS Configuration Fundamentals Command Reference
January 2011
notifyTo enable terminal notification about pending output from other Telnet connections, use the notify command in line configuration mode. To disable notifications, use the no form of this command.
notify
no notify
Syntax Description This command has no arguments or keywords.
Defaults Disabled
Command Modes Line configuration
Command History
Usage Guidelines This command sets a line to inform a user that has multiple, concurrent Telnet connections when output is pending on a connection other than the current one.
Examples In the following example, notification of pending output from connections is enabled on virtual terminal lines 0 to 4:
Router(config)# line vty 0 4Router(config-line)# notify
Related Commands
Release Modification
10.0 This command was introduced.
12.2(33)SRA This command was integrated into Cisco IOS Release 12.2(33)SRA.
Command Description
terminal notify Configures a line to inform a user that has multiple, concurrent Telnet connections when output is pending on a connection other than the current one.

notify syslog
CF-403Cisco IOS Configuration Fundamentals Command Reference
January 2011
notify syslogTo enable the sending of notifications of configuration changes to a remote system message logging (syslog), use the notify syslog command in configuration change logger configuration mode. To disable the sending of notifications of configuration changes to the syslog, use the no form of this command.
notify syslog [contenttype {plaintext | xml}]
no notify syslog [contenttype {plaintext | xml}]
Syntax Description
Command Default Notifications are not sent to the syslog.
Command Modes Configuration change logger configuration (config-archive-log-config)
Command History
Usage Guidelines Enable the notify syslog command if you use the syslog to monitor your router. Syslog monitoring prevents the need to gather configuration log information manually.
Examples The following example shows how to enable the router to send notifications (in XML format) to the syslog:
Router# configure terminal!Router(config)# archiveRouter(config-archive)# log configRouter(config-archive-log-config)# notify syslog contenttype xmlRouter(config-archive-log-config)# end
contenttype (Optional) Allows you to choose a format for the configuration change messages that are sent via syslog.
plaintext (Optional) Specifies that the configuration change messages are sent as plain text.
xml (Optional) Specifies that the configuration change messages are sent in XML format.
Release Modification
12.3(4)T This command was introduced.
12.2(25)S This command was integrated into Cisco IOS Release 12.2(25)S.
12.2(27)SBC This command was integrated into Cisco IOS Release 12.2(27)SBC.
12.2(33)SRA The contenttype, plaintext, and xml keywords were added.
12.2(33)SB This command was integrated into Cisco IOS Release 12.2(33)SB and implemented on the Cisco 10000 series.

notify syslog
CF-404Cisco IOS Configuration Fundamentals Command Reference
January 2011
Related Commands Command Description
archive Enters archive configuration mode.
hidekeys Suppresses the display of password information in configuration log files.
log config Enters configuration change logger configuration mode.
logging enable Enables the logging of configuration changes.
logging size Specifies the maximum number of entries retained in the configuration log.
show archive log config Displays entries from the configuration log.

padding
CF-405Cisco IOS Configuration Fundamentals Command Reference
January 2011
padding To set the padding on a specific output character, use the padding command in line configuration mode. To remove padding for the specified output character, use the no form of this command.
padding ascii-number count
no padding ascii-number
Syntax Description
Defaults No padding
Command Modes Line configuration
Command History
Usage Guidelines Use this command when the attached device is an old terminal that requires padding after certain characters (such as ones that scrolled or moved the carriage). See the “ASCII Character Set and Hex Values” appendix for a list of ASCII characters.
Examples In the following example, the Return (decimal character 13) is padded with 25 NULL bytes on the console line:
Router(config)# line console Router(config-line)# padding 13 25
Related Commands
ascii-number ACII decimal representation of the character.
count Number of NULL bytes sent after the specified character, up to 255 padding characters in length.
Release Modification
10.0 This command was introduced.
12.2(33)SRA This command was integrated into Cisco IOS Release 12.2(33)SRA.
Command Description
terminal padding Changes the character padding on a specific output character for the current session.

parity
CF-406Cisco IOS Configuration Fundamentals Command Reference
January 2011
parity To define generation of a parity bit, use the parity command in line configuration mode. To specify no parity, use the no form of this command.
parity {none | even | odd | space | mark}
no parity
Syntax Description
Defaults No parity.
Command Modes Line configuration
Command History
Usage Guidelines Communication protocols provided by devices such as terminals and modems sometimes require a specific parity bit setting. Refer to the documentation for your device to determine required parity settings.
If you use this command to set parity on Cisco AS5350 and Cisco AS5400 NextPort lines, do not also set parity by means of S-register settings in a modemcap. (A modemcap is a series of parameter settings that are sent to your modem to configure it to interact with a Cisco device in a specified way. Cisco IOS software defines modemcaps that have been found to properly initialize most modems so that they function properly with Cisco routers and access servers.)
Examples In the following example, even parity is configured for line 34:
Router(config)# line 34Router(config-line)# parity even
none No parity. This is the default.
even Even parity.
odd Odd parity.
space Space parity.
mark Mark parity.
Release Modification
10.0 This command was introduced.
12.4 This command was modified to enable parity setting on Cisco AS5350 and Cisco AS5400 NextPort lines.
12.2(33)SRA This command was integrated into Cisco IOS Release 12.2(33)SRA.

parity
CF-407Cisco IOS Configuration Fundamentals Command Reference
January 2011
Related Commands Command Description
terminal parity Defines the generation of the parity bit for the current for the current session and line.

parser cache
CF-408Cisco IOS Configuration Fundamentals Command Reference
January 2011
parser cacheTo reenable the Cisco IOS software parser cache after disabling it, use the parser cache command in global configuration mode. To disable the parser cache, use the no form of this command.
parser cache
no parser cache
Syntax Description This command has no arguments or keywords.
Defaults Parser cache is enabled by default.
Command Modes Global configuration
Command History
Usage Guidelines The Parser Cache feature optimizes the parsing (translation and execution) of Cisco IOS software configuration command lines by remembering how to parse recently encountered command lines, decreasing the time required to process large configuration files.
The parser cache is enabled by default. However, if you wish to disable the parser cache, you may do so using the no parser cache command in global configuration mode. To reenable the parser cache after it has been disabled, use the parser cache command.
When the no parser cache is issued, the command line appears in the running configuration file. However, if the parser cache is reenabled, no command line appears in the running configuration file.
Examples In the following example, the Cisco IOS software Parser Cache feature is disabled:
Router(config)# no parser cache
Related Commands
Release Modification
12.1(5)T This command was introduced.
12.2(33)SRA This command was integrated into Cisco IOS Release 12.2(33)SRA.
Command Description
clear parser cache Clears the parse cache entries and hit/miss statistics stored for the Parser Cache feature.
show parser statistics Displays statistics about the last configuration file parsed and the status of the Parser Cache feature.

parser command serializer
CF-409Cisco IOS Configuration Fundamentals Command Reference
January 2011
parser command serializerTo enable configuration access only to the users holding a configuration lock and to prevent other clients from accessing the running configuration, use the parser command serializer command in global configuration mode. To disable this configuration, use the no form of this command.
parser command serializer
no parser command serializer
Syntax Description This command has no arguments or keywords.
Command Default Access is granted only to the user holding the lock.
Command Modes Global configuration (config)
Command History
Usage Guidelines The Parser Concurrency and Locking Improvements feature ensures that exclusive access is granted only to a requested process and prevents other users from concurrently accessing the Cisco IOS configuration. That is, it prevents simultaneous execution of two or more commands. Use the parser command serializer command to configure the Parser Concurrency and Locking Improvements feature.
Examples The following example shows how to configure the Parser Concurrency and Locking Improvements feature:
Router# configure terminalRouter(config)# parser command serializer
Related Commands
Release Modification
12.2(33)SRE This command was introduced.
Command Description
configuration mode exclusive
Enables single-user (exclusive) access functionality for the Cisco IOS CLI.
configure terminal lock
Locks the running configuration into exclusive configuration mode for the duration of your configuration session.
test parser session-lock
Tests the behavior of the Parser Concurrency and Locking Improvements feature.
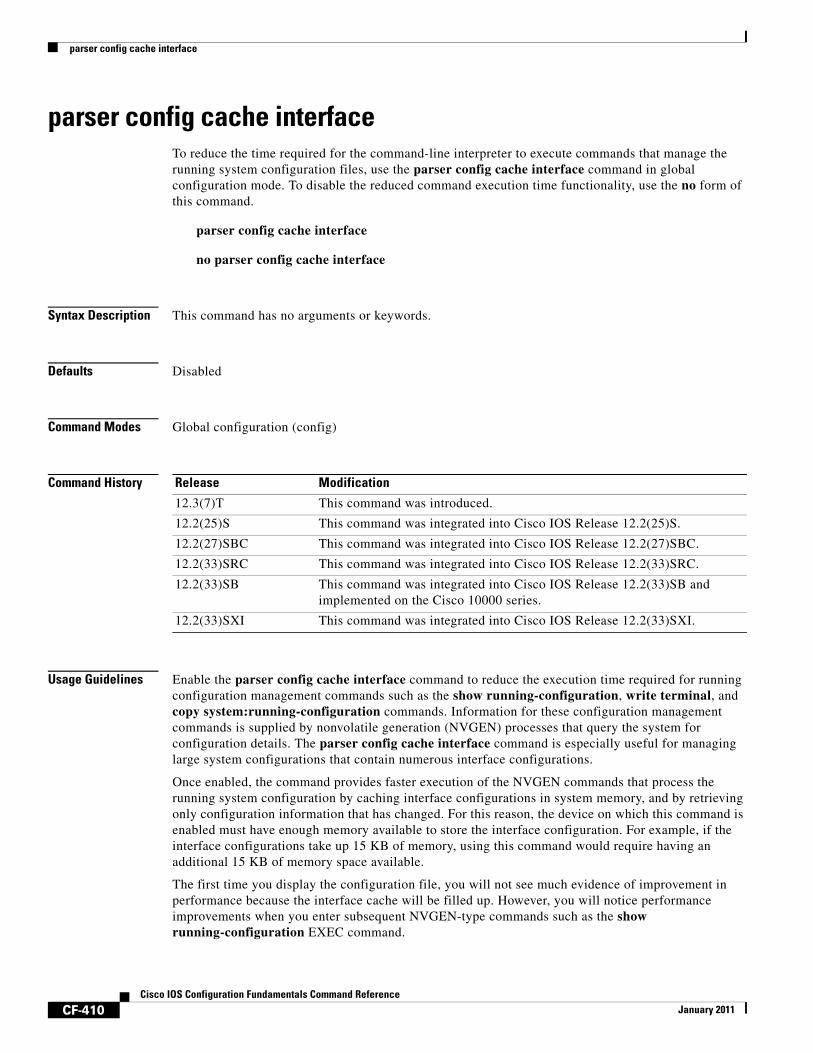
parser config cache interface
CF-410Cisco IOS Configuration Fundamentals Command Reference
January 2011
parser config cache interfaceTo reduce the time required for the command-line interpreter to execute commands that manage the running system configuration files, use the parser config cache interface command in global configuration mode. To disable the reduced command execution time functionality, use the no form of this command.
parser config cache interface
no parser config cache interface
Syntax Description This command has no arguments or keywords.
Defaults Disabled
Command Modes Global configuration (config)
Command History
Usage Guidelines Enable the parser config cache interface command to reduce the execution time required for running configuration management commands such as the show running-configuration, write terminal, and copy system:running-configuration commands. Information for these configuration management commands is supplied by nonvolatile generation (NVGEN) processes that query the system for configuration details. The parser config cache interface command is especially useful for managing large system configurations that contain numerous interface configurations.
Once enabled, the command provides faster execution of the NVGEN commands that process the running system configuration by caching interface configurations in system memory, and by retrieving only configuration information that has changed. For this reason, the device on which this command is enabled must have enough memory available to store the interface configuration. For example, if the interface configurations take up 15 KB of memory, using this command would require having an additional 15 KB of memory space available.
The first time you display the configuration file, you will not see much evidence of improvement in performance because the interface cache will be filled up. However, you will notice performance improvements when you enter subsequent NVGEN-type commands such as the show running-configuration EXEC command.
Release Modification
12.3(7)T This command was introduced.
12.2(25)S This command was integrated into Cisco IOS Release 12.2(25)S.
12.2(27)SBC This command was integrated into Cisco IOS Release 12.2(27)SBC.
12.2(33)SRC This command was integrated into Cisco IOS Release 12.2(33)SRC.
12.2(33)SB This command was integrated into Cisco IOS Release 12.2(33)SB and implemented on the Cisco 10000 series.
12.2(33)SXI This command was integrated into Cisco IOS Release 12.2(33)SXI.

parser config cache interface
CF-411Cisco IOS Configuration Fundamentals Command Reference
January 2011
Each time the interface configuration is changed, the interface cache is flushed. Entering an NVGEN-type command after modifying the interface configuration will once again not show any performance improvement until the next NVGEN-type command is entered.
Examples The following example shows how to enable the functionality for reducing the time required for the command-line interpreter to execute commands that manage the running system configuration files:
Router(config)# parser config cache interface
Related Commands Command Description
copy system:running-configuration
Copies the running configuration to another destination.
show running-configuration Displays the configuration currently running on the terminal.
write terminal Displays the configuration currently running on the terminal.

parser config partition
CF-412Cisco IOS Configuration Fundamentals Command Reference
January 2011
parser config partitionTo enable configuration partitioning, use the parser config partition command. To disable the partitioning of the running configuration, use the no form of this command.
parser config partition
no parser config partition
Syntax Description No arguments or keywords.
Command Default This command is enabled by default.
Command Modes Global configuration (config)
Command History
Usage Guidelines This command controls (enables or disables) the Configuration Partitioning feature.
Note This command is not related to disk partitions or disk partitioning.
To display the list of commands that make up the current running configuration for a specific part (“partition”) of the system’s global running configuration, use the show running-config partition command in privileged Exec mode.
The Configuration Partitioning feature uses a small amount of system resources. The no parser config partition command allows you to disable this feature if the feature is not needed on your system.
Note Only the no form of this command will appear in configuration files. To determine if config partitioning is supported on your system and whether it is enabled, use the show running-config parser ? command.
Examples The following example shows how to disable partitioning of the system running configuration:
Router> enableRouter# config t Enter configuration commands, one per line. End with CNTL/Z.
Release Modification
12.2(33)SRB This command was introduced as part of the Configuration Partitioning feature.
12.2(33)SB This command was integrated into Cisco IOS Release 12.2(33)SB and implemented on the Cisco 10000 series.
12.2(33)SXI This command was integrated into Cisco IOS Release 12.2(33)SXI.

parser config partition
CF-413Cisco IOS Configuration Fundamentals Command Reference
January 2011
Router(config)# no parser config partitionSystem configured
Related Commands Command Description
show running-config partition Displays the list of commands that make up the current running configuration for a specific part of the system’s global running configuration. When used with the ? CLI help keyword, can also be used to determine the availability and status of the Configuration Partitioning feature.
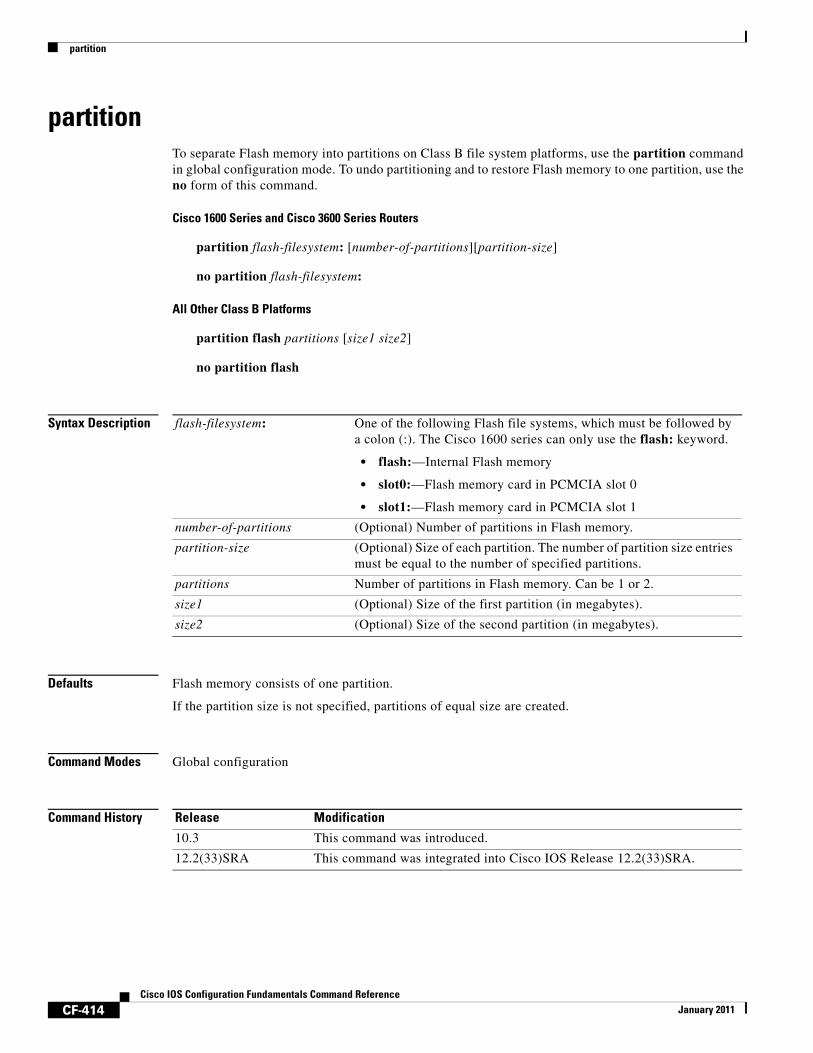
partition
CF-414Cisco IOS Configuration Fundamentals Command Reference
January 2011
partitionTo separate Flash memory into partitions on Class B file system platforms, use the partition command in global configuration mode. To undo partitioning and to restore Flash memory to one partition, use the no form of this command.
Cisco 1600 Series and Cisco 3600 Series Routers
partition flash-filesystem: [number-of-partitions][partition-size]
no partition flash-filesystem:
All Other Class B Platforms
partition flash partitions [size1 size2]
no partition flash
Syntax Description
Defaults Flash memory consists of one partition.
If the partition size is not specified, partitions of equal size are created.
Command Modes Global configuration
Command History
flash-filesystem: One of the following Flash file systems, which must be followed by a colon (:). The Cisco 1600 series can only use the flash: keyword.
• flash:—Internal Flash memory
• slot0:—Flash memory card in PCMCIA slot 0
• slot1:—Flash memory card in PCMCIA slot 1
number-of-partitions (Optional) Number of partitions in Flash memory.
partition-size (Optional) Size of each partition. The number of partition size entries must be equal to the number of specified partitions.
partitions Number of partitions in Flash memory. Can be 1 or 2.
size1 (Optional) Size of the first partition (in megabytes).
size2 (Optional) Size of the second partition (in megabytes).
Release Modification
10.3 This command was introduced.
12.2(33)SRA This command was integrated into Cisco IOS Release 12.2(33)SRA.

partition
CF-415Cisco IOS Configuration Fundamentals Command Reference
January 2011
Usage Guidelines For the Cisco 1600 series and Cisco 3600 series routers, to undo partitioning, use the partition flash-filesystem:1 or no partition flash-filesystem: command. For other Class B platforms, use either the partition flash 1 or no partition flash command. If there are files in a partition other than the first, you must use the erase flash-filesystem:partition-number command to erase the partition before reverting to a single partition.
When creating two partitions, you must not truncate a file or cause a file to spill over into the second partition.
Examples The following example creates two partitions of 4 MB each in Flash memory:
Router(config)# partition flash 2 4 4
The following example divides the Flash memory card in slot 0 into two partitions, each 8 MB in size on a Cisco 3600 series router:
Router(config)# partition slot0: 2 8 8
The following example creates four partitions of equal size in the card on a Cisco 1600 series router:
Router(config)# partition flash: 4
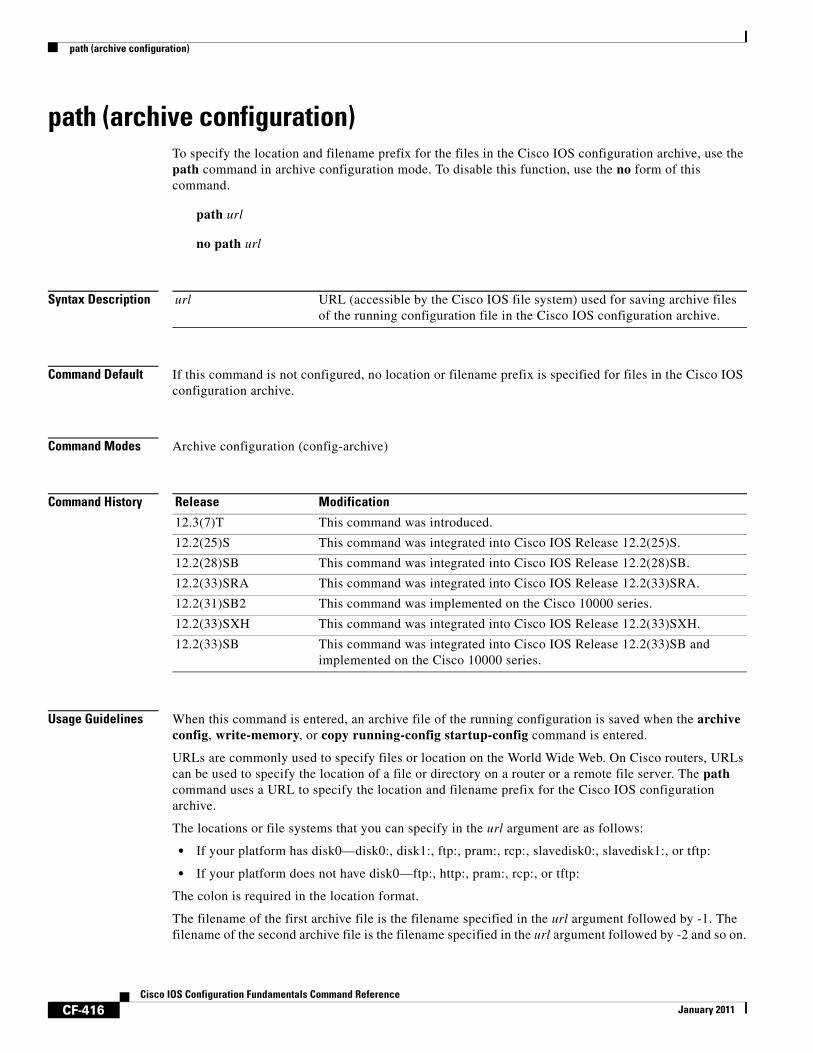
path (archive configuration)
CF-416Cisco IOS Configuration Fundamentals Command Reference
January 2011
path (archive configuration)To specify the location and filename prefix for the files in the Cisco IOS configuration archive, use the path command in archive configuration mode. To disable this function, use the no form of this command.
path url
no path url
Syntax Description
Command Default If this command is not configured, no location or filename prefix is specified for files in the Cisco IOS configuration archive.
Command Modes Archive configuration (config-archive)
Command History
Usage Guidelines When this command is entered, an archive file of the running configuration is saved when the archive config, write-memory, or copy running-config startup-config command is entered.
URLs are commonly used to specify files or location on the World Wide Web. On Cisco routers, URLs can be used to specify the location of a file or directory on a router or a remote file server. The path command uses a URL to specify the location and filename prefix for the Cisco IOS configuration archive.
The locations or file systems that you can specify in the url argument are as follows:
• If your platform has disk0—disk0:, disk1:, ftp:, pram:, rcp:, slavedisk0:, slavedisk1:, or tftp:
• If your platform does not have disk0—ftp:, http:, pram:, rcp:, or tftp:
The colon is required in the location format.
The filename of the first archive file is the filename specified in the url argument followed by -1. The filename of the second archive file is the filename specified in the url argument followed by -2 and so on.
url URL (accessible by the Cisco IOS file system) used for saving archive files of the running configuration file in the Cisco IOS configuration archive.
Release Modification
12.3(7)T This command was introduced.
12.2(25)S This command was integrated into Cisco IOS Release 12.2(25)S.
12.2(28)SB This command was integrated into Cisco IOS Release 12.2(28)SB.
12.2(33)SRA This command was integrated into Cisco IOS Release 12.2(33)SRA.
12.2(31)SB2 This command was implemented on the Cisco 10000 series.
12.2(33)SXH This command was integrated into Cisco IOS Release 12.2(33)SXH.
12.2(33)SB This command was integrated into Cisco IOS Release 12.2(33)SB and implemented on the Cisco 10000 series.

path (archive configuration)
CF-417Cisco IOS Configuration Fundamentals Command Reference
January 2011
Because some file systems are incapable of storing the date and time that a file was written, the filename of the archive file can contain the date, time, and router hostname. To include the router hostname in the archive file filename, enter the characters $h (for example, disk0:$h). To include the date and time in the archive file filename, enter the characters $t.
When a configuration archive operation is attempted on a local file system, the file system is tested to determine if it is writable and if it has sufficient space to save an archive file. If the file system is read-only or if there is not enough space to save an archive file, an error message is displayed.
If you specify the tftp: file server as the location with the path command, you need to create the configuration file on the TFTP file server and change the file’s privileges before the archive config command works properly.
Examples The following example of the path command shows how to specify the hostname, date, and time as the filename prefix for which to save archive files of the running configuration. In this example, the time-period command is also configured to automatically save an archive file of the running configuration every 20 minutes.
configure terminal!archive path disk0:$h$ttime-period 20end
The following is sample output from the show archive command illustrating the format of the resulting configuration archive filenames.
Router# show archive
There are currently 3 archive configurations saved.The next archive file will be named routerJan-16-01:12:23.019-4Archive # Name 0 1 disk0:routerJan-16-00:12:23.019-1 2 disk0:routerJan-16-00:32:23.019-2 3 disk0:routerJan-16-00:52:23.019-3 <- Most Recent 4 5 6 7 8 9 10 11 12 13 14
Cisco IOS Configuration Archive on the TFTP File Server
The following example shows how to use the path command to specify the TFTP file server, address 10.48.71.226, as the archive configuration location and router-cfg as the configuration filename. First you create the configuration file on the TFTP server and change the file’s privileges, then you can save the configuration file to the configuration archive.
The following example shows the commands to use to create the file and change the file’s privileges on the TFTP server (UNIX commands):
> touch router-cfg-1

path (archive configuration)
CF-418Cisco IOS Configuration Fundamentals Command Reference
January 2011
> chmod 777 router-cfg-1
The following example show how to create the configuration archive, save the running configuration to the archive, and display the files in the archive:
configure terminal !archive path tftp://10.48.71.226/router-cfgexit
exit!archive config
Router# show archive
The next archive file will be named tftp://10.48.71.226/router-cfg-2 Archive # Name 0 1 tftp://10.48.71.226/router-cfg-1 <- Most Recent 2 3 4 5 6 7 8 9 10 11 12 13 14
The following is sample output from the show archive command if you did not create the configuration file on the TFTP server before attempting to archive the current running configuration file:
configure terminal !archive path tftp://10.48.71.226/router-cfgexit
exit
archive config
Router# show archive
The next archive file will be named tftp://10.48.71.226/router-cfg-1 Archive # Name 0 1 2 3 4 5 6 7 8 9 10 11 12
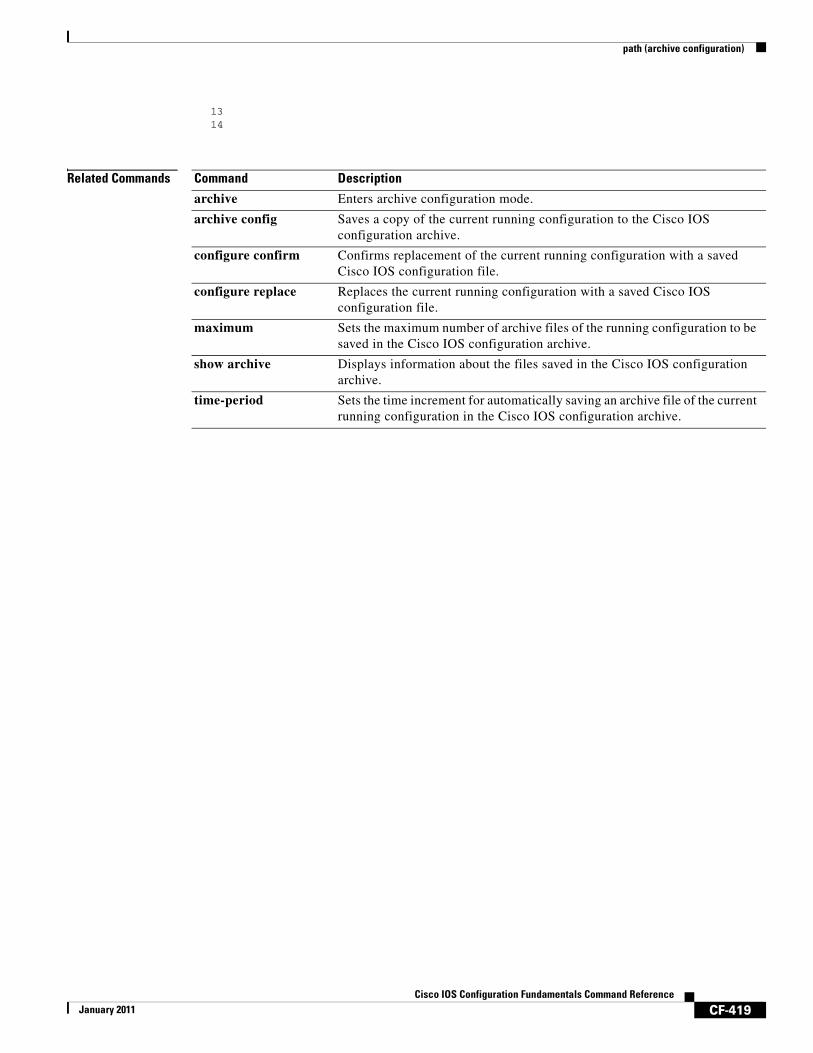
path (archive configuration)
CF-419Cisco IOS Configuration Fundamentals Command Reference
January 2011
13 14
Related Commands Command Description
archive Enters archive configuration mode.
archive config Saves a copy of the current running configuration to the Cisco IOS configuration archive.
configure confirm Confirms replacement of the current running configuration with a saved Cisco IOS configuration file.
configure replace Replaces the current running configuration with a saved Cisco IOS configuration file.
maximum Sets the maximum number of archive files of the running configuration to be saved in the Cisco IOS configuration archive.
show archive Displays information about the files saved in the Cisco IOS configuration archive.
time-period Sets the time increment for automatically saving an archive file of the current running configuration in the Cisco IOS configuration archive.

periodic
CF-420Cisco IOS Configuration Fundamentals Command Reference
January 2011
periodic To specify a recurring (weekly) time range for functions that support the time-range feature, use the periodic command in time-range configuration mode. To remove the time limitation, use the no form of this command.
periodic days-of-the-week hh:mm to [days-of-the-week] hh:mm
no periodic days-of-the-week hh:mm to [days-of-the-week] hh:mm
Syntax Description
Defaults No recurring time range is defined.
Command Modes Time-range configuration (config-time-range)
Command History
Usage Guidelines For Cisco IOS Release 12.2(11)T, IP and Internetwork Packet Exchange (IPX) extended access lists are the only functions that can use time ranges. For further information on using these functions, refer to the Cisco IOS IP Configuration Guide and the Cisco IOS AppleTalk and Novell IPX Configuration Guide.
days-of-the-week The first occurrence of this argument is the starting day or day of the week that the associated time range is in effect. The second occurrence is the ending day or day of the week the associated statement is in effect.
This argument can be any single day or combinations of days: Monday, Tuesday, Wednesday, Thursday, Friday, Saturday, and Sunday. Other possible values are:
• daily—Monday through Sunday
• weekdays—Monday through Friday
• weekend—Saturday and Sunday
If the ending days of the week are the same as the starting days of the week, they can be omitted.
hh:mm The first occurrence of this argument is the starting hours:minutes that the associated time range is in effect. The second occurrence is the ending hours:minutes the associated statement is in effect.
The hours:minutes are expressed in a 24-hour clock. For example, 8:00 is 8:00 a.m. and 20:00 is 8:00 p.m.
to Entry of the to keyword is required to complete the range “from start-time to end-time.”
Release Modification
12.0(1)T This command was introduced.
12.2(33)SRA This command was integrated into Cisco IOS Release 12.2(33)SRA.
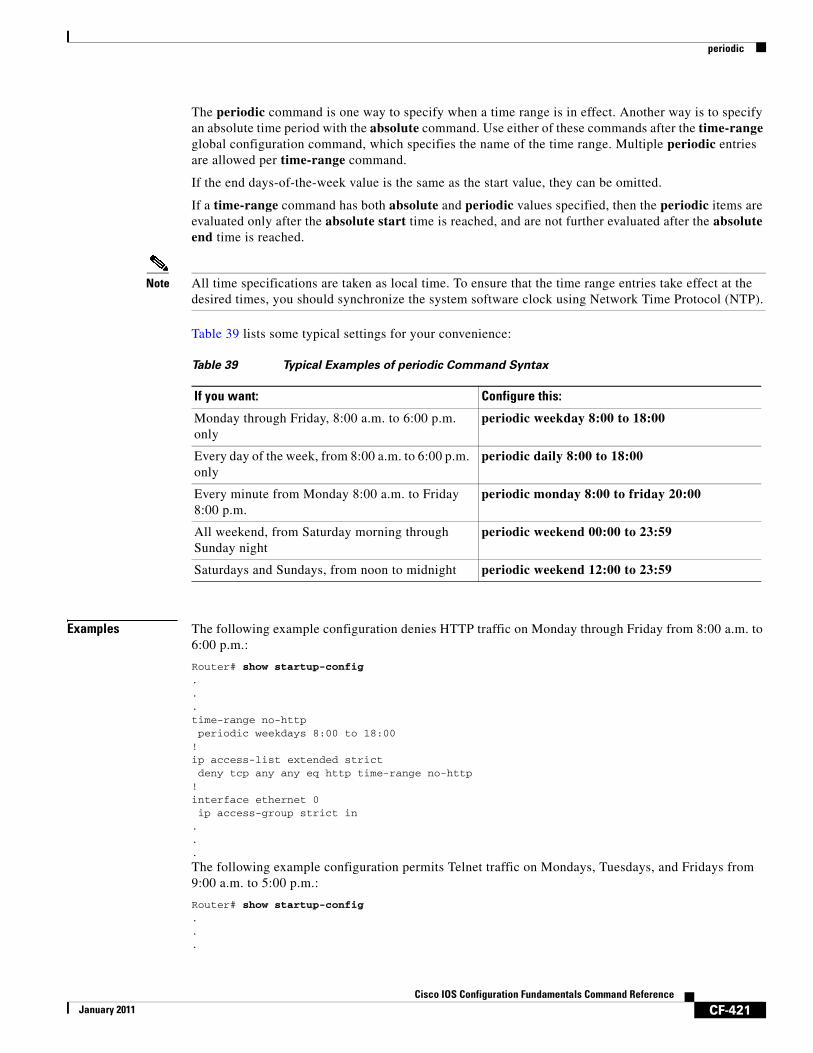
periodic
CF-421Cisco IOS Configuration Fundamentals Command Reference
January 2011
The periodic command is one way to specify when a time range is in effect. Another way is to specify an absolute time period with the absolute command. Use either of these commands after the time-range global configuration command, which specifies the name of the time range. Multiple periodic entries are allowed per time-range command.
If the end days-of-the-week value is the same as the start value, they can be omitted.
If a time-range command has both absolute and periodic values specified, then the periodic items are evaluated only after the absolute start time is reached, and are not further evaluated after the absolute end time is reached.
Note All time specifications are taken as local time. To ensure that the time range entries take effect at the desired times, you should synchronize the system software clock using Network Time Protocol (NTP).
Table 39 lists some typical settings for your convenience:
Examples The following example configuration denies HTTP traffic on Monday through Friday from 8:00 a.m. to 6:00 p.m.:
Router# show startup-config ...time-range no-httpperiodic weekdays 8:00 to 18:00
!ip access-list extended strictdeny tcp any any eq http time-range no-http
!interface ethernet 0ip access-group strict in
.
.
.
The following example configuration permits Telnet traffic on Mondays, Tuesdays, and Fridays from 9:00 a.m. to 5:00 p.m.:
Router# show startup-config ...
Table 39 Typical Examples of periodic Command Syntax
If you want: Configure this:
Monday through Friday, 8:00 a.m. to 6:00 p.m. only
periodic weekday 8:00 to 18:00
Every day of the week, from 8:00 a.m. to 6:00 p.m. only
periodic daily 8:00 to 18:00
Every minute from Monday 8:00 a.m. to Friday 8:00 p.m.
periodic monday 8:00 to friday 20:00
All weekend, from Saturday morning through Sunday night
periodic weekend 00:00 to 23:59
Saturdays and Sundays, from noon to midnight periodic weekend 12:00 to 23:59
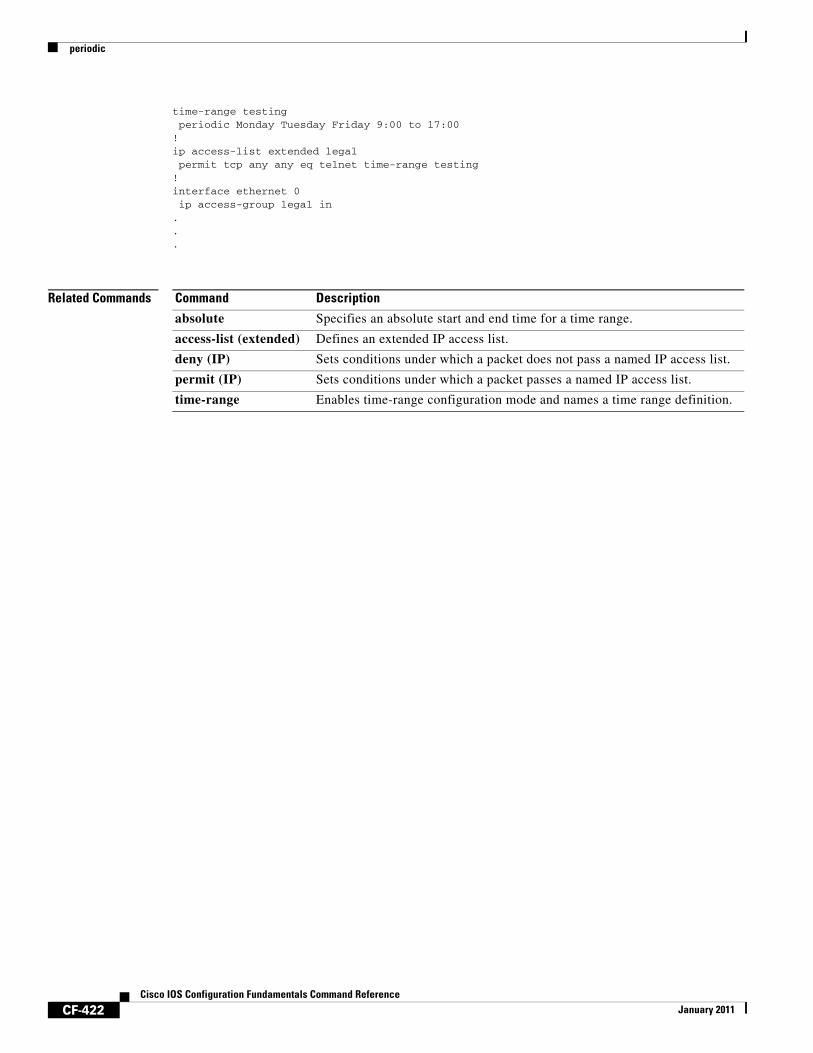
periodic
CF-422Cisco IOS Configuration Fundamentals Command Reference
January 2011
time-range testingperiodic Monday Tuesday Friday 9:00 to 17:00
!ip access-list extended legalpermit tcp any any eq telnet time-range testing
!interface ethernet 0ip access-group legal in
.
.
.
Related Commands Command Description
absolute Specifies an absolute start and end time for a time range.
access-list (extended) Defines an extended IP access list.
deny (IP) Sets conditions under which a packet does not pass a named IP access list.
permit (IP) Sets conditions under which a packet passes a named IP access list.
time-range Enables time-range configuration mode and names a time range definition.

ping
CF-423Cisco IOS Configuration Fundamentals Command Reference
January 2011
pingTo diagnose basic network connectivity on AppleTalk, ATM, Connectionless Network Service (CLNS), DECnet, IP, Novell IPX, or source-route bridging (SRB) networks, use the ping command in user EXEC or privileged EXEC mode.
ping [[protocol [tag] {host-name | system-address}]
Syntax Description
Command Default This command has no default values.
Command Modes User EXEC (>)Privileged EXEC (#)
Command History
protocol (Optional) Protocol keyword, either appletalk, atm, clns, decnet, ipx, or srb. If a protocol is not specified, a basic ping will be sent using IP (IPv4). For extended options for ping over IP, see the documentation for the ping ip command.
The ping atm interface atm, ping ip, ping ipv6, ping sna, and ping vrf commands are documented separately.
tag (Optional) Specifies a tag encapsulated IP (tagIP) ping.
host-name Hostname of the system to ping. If a host-name or system-address is not specified at the command line, it will be required in the ping system dialog.
system-address Address of the system to ping. If a host-name or system-address is not specified at the command line, it will be required in the ping system dialog.
Release Modification
10.0 This command was introduced.
12.0(7)T The ping sna command was introduced.
12.1(12c)E The ping vrf command was introduced.
12.2(2)T Support for the IPv6 protocol was added.
12.2(13)T The atm protocol keyword was added.
The following keywords were removed because the Apollo Domain, Banyan VINES, and XNS protocols are no longer supported in Cisco IOS software:
• apollo
• vines
• xns
12.2(28)SB This command was integrated into Cisco IOS Release 12.2(28)SB.
12.2(25)SG This command was integrated into Cisco IOS Release 12.2(25)SG.
12.2(33)SRA This command was integrated into Cisco IOS Release 12.2(33)SRA.
12.2(33)SXH This command was integrated into Cisco IOS Release 12.2(33)SXH.

ping
CF-424Cisco IOS Configuration Fundamentals Command Reference
January 2011
Usage Guidelines The ping command sends an echo request packet to an address then waits for a reply. Ping output can help you evaluate path-to-host reliability, delays over the path, and whether the host can be reached or is functioning. For example, the ping clns command sends International Organization for Standardization (ISO) CLNS echo packets to test the reachability of a remote router over a connectionless Open System Interconnection (OSI) network.
If you enter the ping command without any keywords or argument values, an interactive system dialog prompts you for the additional syntax appropriate to the protocol you specify. (See the “Examples” section.)
To exit the interactive ping dialog before responding to all the prompts, type the escape sequence. The default escape sequence is Ctrl-^, X (Simultaneously press and release the Ctrl, Shift, and 6 keys and then press the X key). The escape sequence will vary depending on your line configuration. For example, another commonly used escape sequence is Ctrl-c.
Table 40 describes the test characters sent by the ping facility.
Note Not all protocols require hosts to support pings. For some protocols, the pings are Cisco defined and can be answered only by another Cisco router.
The availability of protocol keywords depends on what protocols are enabled on your system.
Issuing the ping command in user EXEC mode will generally offer fewer syntax options than issuing the ping command in privileged EXEC mode.
Examples After you enter the ping command in privileged EXEC mode, the system prompts you for a protocol keyword. The default protocol is IP.
If you enter a hostname or address on the same line as the ping command, the default action is taken as appropriate for the protocol type of that name or address.
The following example is sample dialog from the ping command using default values. The specific dialog varies somewhat from protocol to protocol.
Router# ping
Protocol [ip]:
Table 40 ping Test Characters
Character Description
! Each exclamation point indicates receipt of a reply.
. Each period indicates that the network server timed out while waiting for a reply.
U A destination unreachable error protocol data unit (PDU) was received.
C A congestion experienced packet was received.
I User interrupted test.
M A destination unreachable error protocol data unit (PDU) was received (Type 3) MTU required but DF bit set (code 4) with the “Next-Hop MTU” set to a non-zero value. If the “Next-hop MTU“ is zero then ‘U’ is printed.
? Unknown packet type.
& Packet lifetime exceeded.

ping
CF-425Cisco IOS Configuration Fundamentals Command Reference
January 2011
Target IP address: 192.168.7.27
Repeat count [5]:Datagram size [100]:Timeout in seconds [2]:Extended commands [n]:Sweep range of sizes [n]:Type escape sequence to abort.Sending 5, 100-byte ICMP Echos to 192.168.7.27, timeout is 2 seconds:!!!!!Success rate is 100 percent, round-trip min/avg/max = 1/2/4 ms
Table 41 describes the significant fields shown in the display.
The following example verifies connectivity to the neighboring ATM device for the ATM permanent virtual circuit (PVC) with the virtual path identifier (VPI)/virtual channel identifier (VCI) value 0/16:
Router# ping
Protocol [ip]:atm ATM Interface:atm1/0 VPI value [0]:
Table 41 ping Field Descriptions for IP
Field Description
Protocol [ip]: Prompt for a supported protocol. Default: ip.
Target IP address: Prompt for the IP address or hostname of the destination node you plan to ping. If you have specified a supported protocol other than IP, enter an appropriate address for that protocol here. Default: none.
Repeat count [5]: Number of ping packets that will be sent to the destination address. Default: 5.
Datagram size [100]: Size of the ping packet (in bytes). Default: 100 bytes.
Timeout in seconds [2]: Timeout interval. Default: 2 (seconds).
Extended commands [n]: Specifies whether a series of additional commands appears.
Sweep range of sizes [n]: Allows you to vary the sizes of the echo packets being sent. This capability is useful for determining the minimum sizes of the maximum transmission units (MTUs) configured on the nodes along the path to the destination address. Packet fragmentation contributing to performance problems can then be reduced.
!!!!! Each exclamation point (!) indicates receipt of a reply. A period (.) indicates that the network server timed out while waiting for a reply. Other characters may appear in the ping output display, depending on the protocol type.
Success rate is 100 percent Percentage of packets successfully echoed back to the router. Anything less than 80 percent is usually considered problematic.
round-trip min/avg/max = 1/2/4 ms Round-trip travel time intervals for the protocol echo packets, including minimum/average/maximum (in milliseconds).

ping
CF-426Cisco IOS Configuration Fundamentals Command Reference
January 2011
VCI value [1]:16 Loopback - End(0), Segment(1) [0]:1 Repeat Count [5]:Timeout [2]:Type escape sequence to abort. Sending 5, 53-byte segment OAM echoes, timeout is 2 seconds:!!!!! Success rate is 100 percent (5/5), round-trip min/avg/max = 1/1/1 ms
Table 42 describes the default ping fields shown in the display.
Related Commands
Table 42 ping Field Descriptions for ATM
Field Description
Protocol [ip]: Prompt for a supported protocol. Default: ip.
ATM Interface: Prompt for the ATM interface.
VPI value [0]: Prompt for the virtual path identifier. Default: 0.
VCI value [1]: Prompt for the virtual channel identifier. Default:1.
Loopback - End(0), Segment(1) [0]: Prompt to specify end loopback, which verifies end-to-end PVC integrity, or segment loopback, which verifies PVC integrity to the neighboring ATM device. Default: segment loopback.
Repeat Count [5]: Number of ping packets that will be sent to the destination address. Default: 5.
Timeout [2]: Timeout interval. Default: 2 (seconds).
!!!!! Each exclamation point (!) indicates receipt of a reply. A period (.) indicates that the network server timed out while waiting for a reply. Other characters may appear in the ping output display, depending on the protocol type.
Success rate is 100 percent Percentage of packets successfully echoed back to the router. Anything less than 80 percent is usually considered problematic.
round-trip min/avg/max = 1/1/1 ms Round-trip travel time intervals for the protocol echo packets, including minimum/average/maximum (in milliseconds).
Command Description
ping atm interface atm Tests the connectivity of a specific PVC.
ping ip Tests network connectivity on IP networks.
ping ipv6 Tests the connection to a remote host on the network using IPv6.
ping sna Tests network integrity and timing characteristics over an SNA Switching network.
ping vrf Tests the connection in the context of a specific VPN (VRF).
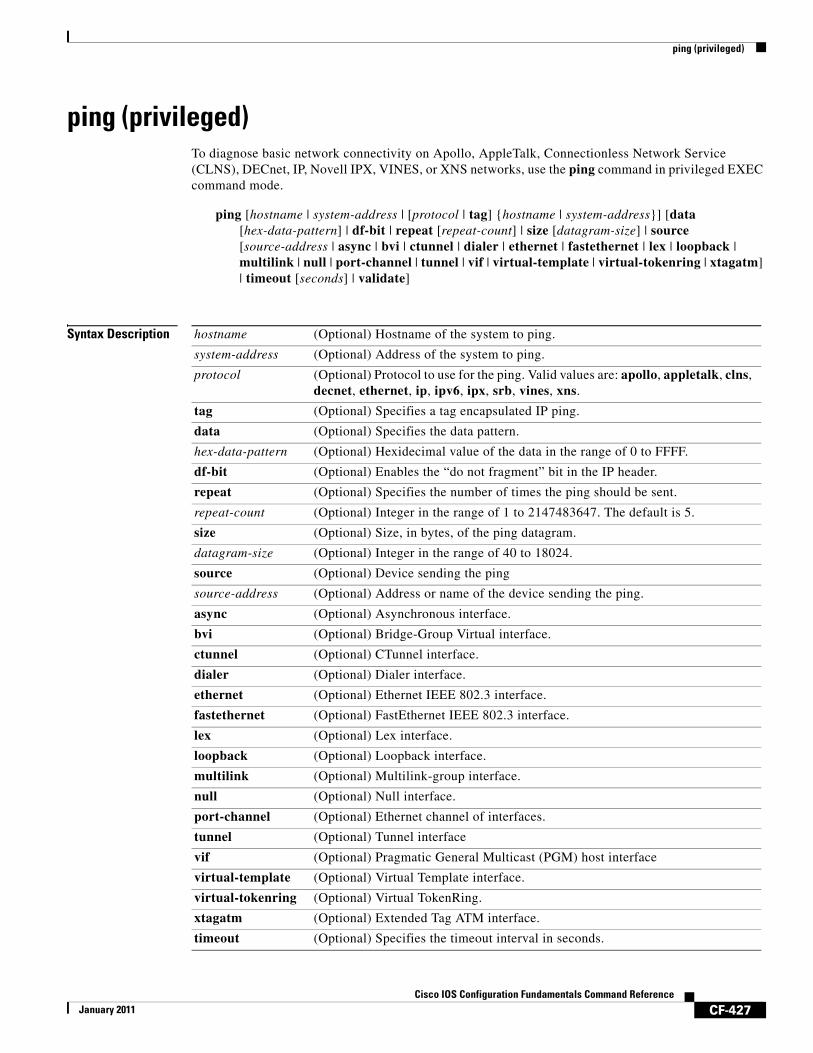
ping (privileged)
CF-427Cisco IOS Configuration Fundamentals Command Reference
January 2011
ping (privileged)To diagnose basic network connectivity on Apollo, AppleTalk, Connectionless Network Service (CLNS), DECnet, IP, Novell IPX, VINES, or XNS networks, use the ping command in privileged EXEC command mode.
ping [hostname | system-address | [protocol | tag] {hostname | system-address}] [data [hex-data-pattern] | df-bit | repeat [repeat-count] | size [datagram-size] | source [source-address | async | bvi | ctunnel | dialer | ethernet | fastethernet | lex | loopback | multilink | null | port-channel | tunnel | vif | virtual-template | virtual-tokenring | xtagatm] | timeout [seconds] | validate]
Syntax Description hostname (Optional) Hostname of the system to ping.
system-address (Optional) Address of the system to ping.
protocol (Optional) Protocol to use for the ping. Valid values are: apollo, appletalk, clns, decnet, ethernet, ip, ipv6, ipx, srb, vines, xns.
tag (Optional) Specifies a tag encapsulated IP ping.
data (Optional) Specifies the data pattern.
hex-data-pattern (Optional) Hexidecimal value of the data in the range of 0 to FFFF.
df-bit (Optional) Enables the “do not fragment” bit in the IP header.
repeat (Optional) Specifies the number of times the ping should be sent.
repeat-count (Optional) Integer in the range of 1 to 2147483647. The default is 5.
size (Optional) Size, in bytes, of the ping datagram.
datagram-size (Optional) Integer in the range of 40 to 18024.
source (Optional) Device sending the ping
source-address (Optional) Address or name of the device sending the ping.
async (Optional) Asynchronous interface.
bvi (Optional) Bridge-Group Virtual interface.
ctunnel (Optional) CTunnel interface.
dialer (Optional) Dialer interface.
ethernet (Optional) Ethernet IEEE 802.3 interface.
fastethernet (Optional) FastEthernet IEEE 802.3 interface.
lex (Optional) Lex interface.
loopback (Optional) Loopback interface.
multilink (Optional) Multilink-group interface.
null (Optional) Null interface.
port-channel (Optional) Ethernet channel of interfaces.
tunnel (Optional) Tunnel interface
vif (Optional) Pragmatic General Multicast (PGM) host interface
virtual-template (Optional) Virtual Template interface.
virtual-tokenring (Optional) Virtual TokenRing.
xtagatm (Optional) Extended Tag ATM interface.
timeout (Optional) Specifies the timeout interval in seconds.

ping (privileged)
CF-428Cisco IOS Configuration Fundamentals Command Reference
January 2011
Command Default A ping operation is not performed.
Command Modes Privileged EXEC
Command History
Usage Guidelines The ping (packet internet groper) command tests the reachability of a remote router over a connectionless Open System Interconnection (OSI) network. The command sends ISO CLNS echo packets to an address and waits for a reply. Ping output can help you evaluate path-to-host reliability, delays over the path, and whether the host can be reached or is functioning.
When you type the ping command, you are prompted to enter options before the ping command executes. The characters in brackets ([]) indicate default values. When you want to use a default value, press Enter on your keyboard.
If you enter a hostname or system address when you enter the ping command, the default action is taken for the protocol type of that hostname or system address.
The optional data, df-bit, repeat, size, source, timeout, and validate keywords can be used to prevent extended ping command output. You can use as many of these keywords as you need, and you can use them in any order after the hostname or system-address arguments.
When you enter the ethernet protocol option, you will be prompted to enter MAC address and maintenance domain in addition to the information common across protocols.
To terminate a ping session before it completes, type the escape sequence (Ctrl-^ X) by simultaneously pressing and releasing the Ctrl, Shift, and 6 keys and then pressing the X key.
Note Not all protocols require hosts to support pings. For some protocols, the pings are defined by Cisco and answered only by a Cisco router.
Table 43 describes the test characters that the ping operation uses.ng
seconds (Optional) Integer in the range of 0 to 3600. The default is 2.
validate (Optional) Validates the reply data.
Release Modification
10.0 This command was introduced.
12.0 The following keywords were added in Cisco IOS Release 12.0: data, df-bit, repeat, size, source, timeout, validate.
12.2(33)SRA The ethernet option for protocol was added in Cisco IOS Release 12.2(33)SRA.
Table 43 ping Command Response Characters and Their Meanings
Character Description
! Receipt of a reply.
. Network server timed out while waiting for a reply.
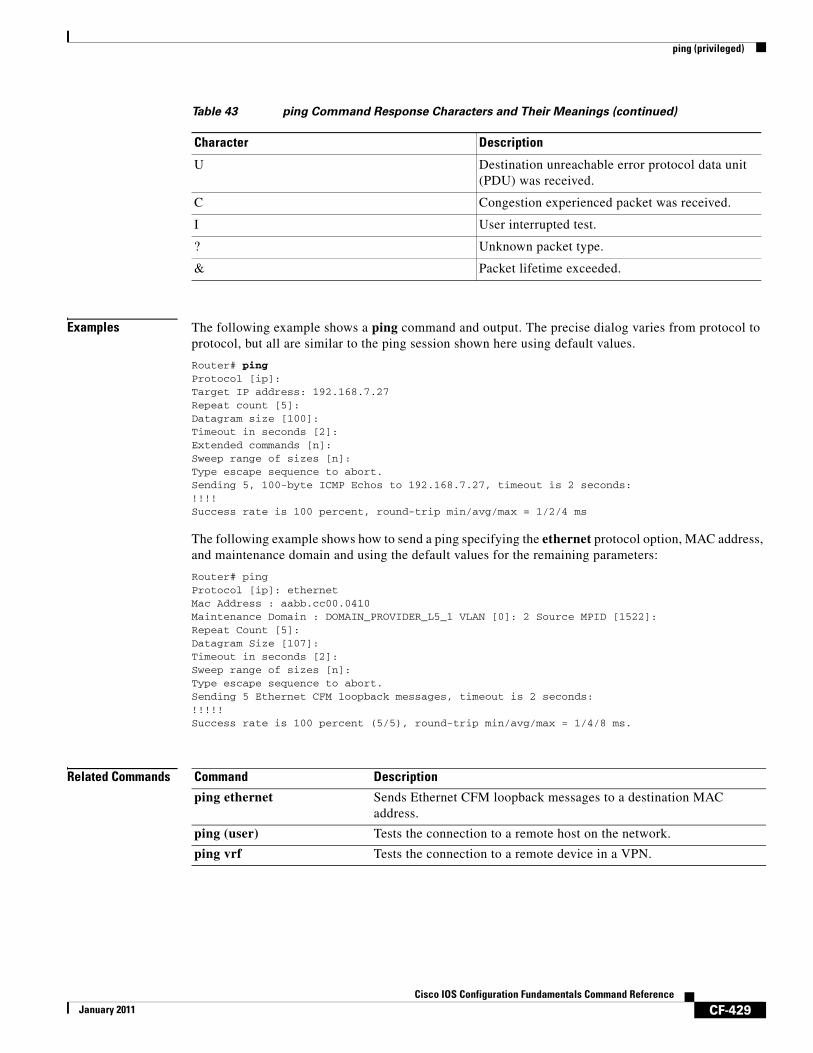
ping (privileged)
CF-429Cisco IOS Configuration Fundamentals Command Reference
January 2011
Examples The following example shows a ping command and output. The precise dialog varies from protocol to protocol, but all are similar to the ping session shown here using default values.
Router# pingProtocol [ip]:Target IP address: 192.168.7.27Repeat count [5]:Datagram size [100]:Timeout in seconds [2]:Extended commands [n]:Sweep range of sizes [n]:Type escape sequence to abort.Sending 5, 100-byte ICMP Echos to 192.168.7.27, timeout is 2 seconds:!!!!Success rate is 100 percent, round-trip min/avg/max = 1/2/4 ms
The following example shows how to send a ping specifying the ethernet protocol option, MAC address, and maintenance domain and using the default values for the remaining parameters:
Router# pingProtocol [ip]: ethernetMac Address : aabb.cc00.0410Maintenance Domain : DOMAIN_PROVIDER_L5_1 VLAN [0]: 2 Source MPID [1522]:Repeat Count [5]:Datagram Size [107]:Timeout in seconds [2]:Sweep range of sizes [n]:Type escape sequence to abort.Sending 5 Ethernet CFM loopback messages, timeout is 2 seconds:!!!!!Success rate is 100 percent (5/5), round-trip min/avg/max = 1/4/8 ms.
Related Commands
U Destination unreachable error protocol data unit (PDU) was received.
C Congestion experienced packet was received.
I User interrupted test.
? Unknown packet type.
& Packet lifetime exceeded.
Table 43 ping Command Response Characters and Their Meanings (continued)
Character Description
Command Description
ping ethernet Sends Ethernet CFM loopback messages to a destination MAC address.
ping (user) Tests the connection to a remote host on the network.
ping vrf Tests the connection to a remote device in a VPN.

ping ip
CF-430Cisco IOS Configuration Fundamentals Command Reference
January 2011
ping ipTo test network connectivity on IP networks, use the ping ip command in privileged EXEC mode.
ping ip {host-name | ip-address} [data [hex-data-pattern] | df-bit | repeat [repeat-count] | size [datagram-size] [source {source-address | source-interface} ] [timeout seconds] [validate] [verbose]
Syntax Description host-name Host name of the system to ping.
system-address Address of the system to ping.
data hex-data-pattern (Optional) Specifies the data pattern. Range is from 0 to FFFF.
df-bit (Optional) Enables the “do-not-fragment” bit in the IP header.
repeat repeat-count (Optional) Specifies the number of pings sent. The range is from 1 to 2147483647. The default is 5.
size (Optional) Specifies the datagram size. Datagram size is the number of bytes in each ping.
datagram-size (Optional) Range is from 40 to 18024.
source (Optional) Specifies the source address or source interface.
source-address (Optional) IP address to use as the source in the ping packets.
source-interface (Optional) Name of the interface from which the ping should be sent, and the Interface ID (slot/port/number). Interface name keywords include the following:
• async (Asynchronous Interface)
• bvi (Bridge-Group Virtual Interface)
• ctunnel
• dialer
• ethernet
• fastEthernet
• lex
• loopback
• multilink (Multilink-group interface)
• null
• port-channel (Ethernet channel of interfaces)
• tunnel
• vif (PGM Multicast Host interface)
• virtual-template
• virtual-tokenring
• xtagatm (Extended Tag ATM interface)
The availability of these keywords depends on your system hardware.
timeout seconds (Optional) Specifies the timeout interval in seconds. The default is 2 seconds. Range is from 0 to 3600.
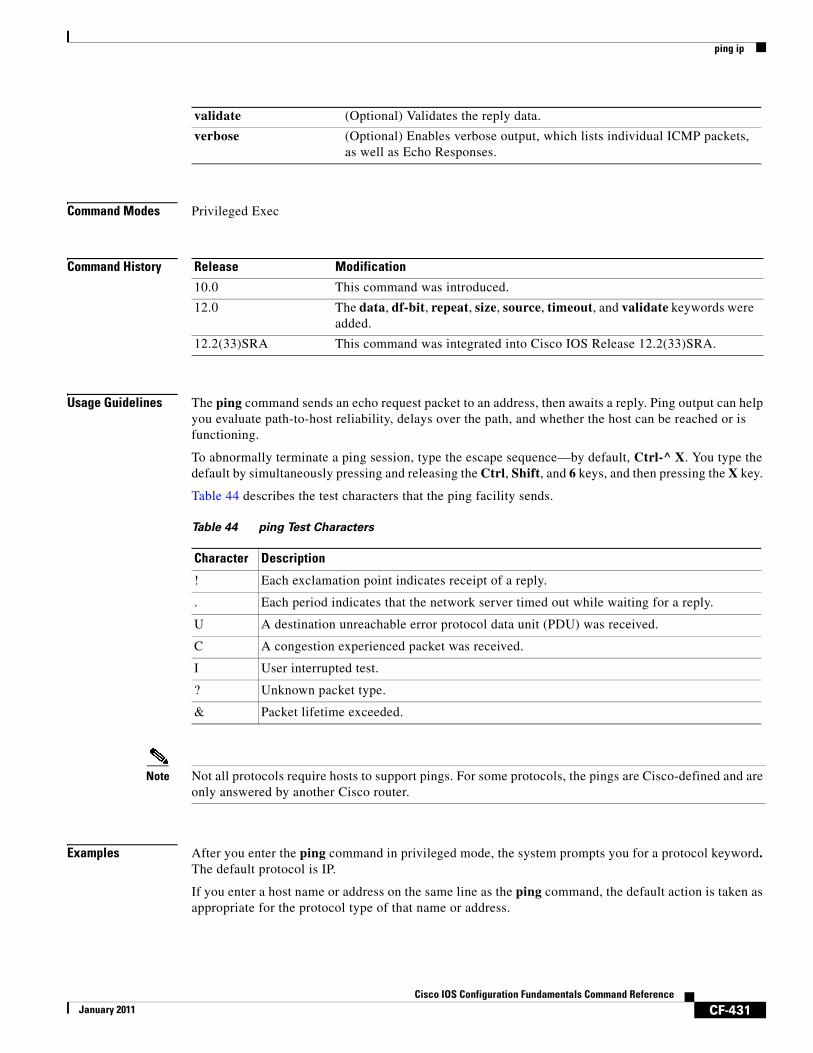
ping ip
CF-431Cisco IOS Configuration Fundamentals Command Reference
January 2011
Command Modes Privileged Exec
Command History
Usage Guidelines The ping command sends an echo request packet to an address, then awaits a reply. Ping output can help you evaluate path-to-host reliability, delays over the path, and whether the host can be reached or is functioning.
To abnormally terminate a ping session, type the escape sequence—by default, Ctrl-^ X. You type the default by simultaneously pressing and releasing the Ctrl, Shift, and 6 keys, and then pressing the X key.
Table 44 describes the test characters that the ping facility sends.
Note Not all protocols require hosts to support pings. For some protocols, the pings are Cisco-defined and are only answered by another Cisco router.
Examples After you enter the ping command in privileged mode, the system prompts you for a protocol keyword. The default protocol is IP.
If you enter a host name or address on the same line as the ping command, the default action is taken as appropriate for the protocol type of that name or address.
validate (Optional) Validates the reply data.
verbose (Optional) Enables verbose output, which lists individual ICMP packets, as well as Echo Responses.
Release Modification
10.0 This command was introduced.
12.0 The data, df-bit, repeat, size, source, timeout, and validate keywords were added.
12.2(33)SRA This command was integrated into Cisco IOS Release 12.2(33)SRA.
Table 44 ping Test Characters
Character Description
! Each exclamation point indicates receipt of a reply.
. Each period indicates that the network server timed out while waiting for a reply.
U A destination unreachable error protocol data unit (PDU) was received.
C A congestion experienced packet was received.
I User interrupted test.
? Unknown packet type.
& Packet lifetime exceeded.

ping ip
CF-432Cisco IOS Configuration Fundamentals Command Reference
January 2011
The optional data, df-bit, repeat, size, source, timeout, and validate keywords can be used to avoid extended ping command output. You can use as many of these keywords as you need, and you can use them in any order after the host-name or system-address arguments.
Although the precise dialog varies somewhat from protocol to protocol, all are similar to the ping session using default values shown in the following output:
Router# ping
Protocol [ip]:Target IP address: 192.168.7.27Repeat count [5]:Datagram size [100]:Timeout in seconds [2]:Extended commands [n]:Sweep range of sizes [n]:Type escape sequence to abort.Sending 5, 100-byte ICMP Echos to 192.168.7.27, timeout is 2 seconds:!!!!!Success rate is 100 percent, round-trip min/avg/max = 1/2/4 ms
Table 45 describes the default ping fields shown in the display.
Table 45 ping Field Descriptions
Field Description
Protocol [ip]: Prompts for a supported protocol. The default is IP.
Target IP address: Prompts for the IP address or host name of the destination node you plan to ping. If you have specified a supported protocol other than IP, enter an appropriate address for that protocol here. The default is none.
Repeat count [5]: Prompts for the number of ping packets that will be sent to the destination address. The default is 5 packets.
Datagram size [100]: Prompts for the size of the ping packet (in bytes). The default is 100 bytes.
Timeout in seconds [2]: Prompts for the timeout interval. The default is 2 seconds.
Extended commands [n]: Specifies whether a series of additional commands appears.
Sweep range of sizes [n]: Allows you to vary the sizes of the echo packets being sent. This capability is useful for determining the minimum sizes of the MTUs configured on the nodes along the path to the destination address. Packet fragmentation contributing to performance problems can then be reduced.
!!!!! Each exclamation point (!) indicates receipt of a reply. A period (.) indicates that the network server timed out while waiting for a reply. Other characters may appear in the ping output display, depending on the protocol type.
Success rate is 100 percent Indicates the percentage of packets successfully echoed back to the router. Anything less than 80 percent is usually considered problematic.
round-trip min/avg/max = 1/2/4 ms
Indicates the round-trip travel time intervals for the protocol echo packets, including minimum/average/maximum (in milliseconds).

ping ip
CF-433Cisco IOS Configuration Fundamentals Command Reference
January 2011
Related Commands Command Description
ping ipv6 Tests the connection to a remote host on the network using IPv6.
ping vrf Tests the connection in the context of a specific VPN (VRF).

ping srb
CF-434Cisco IOS Configuration Fundamentals Command Reference
January 2011
ping srbTo test network connectivity for Source Route Bridging (SRB) networks, use the ping srb command in privileged EXEC mode.
ping srb name
Syntax Description
Command Modes Privileged EXEC (#)
Command History
Examples The following example shows how to ping the target host of IP address 192.0.2.1:
Router# ping srb 192.0.2.1
Related Commands
name Destination IP address or hostname.
Release Modification
15.0(1)M This command was introduced in a release earlier than Cisco IOS Release 15.0(1)M.
12.2(33)SRE This command was integrated into a release earlier than Cisco IOS Release 12.2(33)SRE.
12.2(33)SXI This command was integrated into a release earlier than Cisco IOS Release 12.2(33)SXI.
Cisco IOS XE Release 2.1
This command was integrated into Cisco IOS XE Release 2.1 and implemented on the Cisco ASR 1000 Series Aggregation Services Routers.
Command Description
ping ip Tests network connectivity on IP networks.

ping vrf
CF-435Cisco IOS Configuration Fundamentals Command Reference
January 2011
ping vrfTo test a connection in the context of a specific VPN connection, use the ping vrf command in user EXEC or privileged EXEC mode.
ping vrf vrf-name [tag] [connection] target-address [connection-options]
Syntax Description
Command Default The default connection type for ping is IPv4.
Command Modes User EXECPrivileged EXEC
Command History
Usage Guidelines A VPN routing/forwarding (VRF) instance is used to identify a VPN. To check if a configured VRF is working, you can use the ping vrf command.
When attempting to ping from a provider edge (PE) router to a customer edge (CE) router, or from a PE router to PE router, the standard ping command will not usually work. The ping vrf command allows you to ping the IP addresses of LAN interfaces on CE routers.
If you are on a PE router, be sure to indicate the specific VRF (VPN) name, as shown in the “Examples” section.
If all required information is not provided at the command line, the system will enter the interactive dialog (extended mode) for ping.
vrf-name The name of the VPN (VRF context).
tag (Optional) Specifies a tag encapsulated IP (tagIP) ping.
connection (Optional) Connection options include atm, clns, decnet, ip, ipv6, ipx, sna, or srb. The default is ip.
target-address The destination ID for the ping operation. Usually, this is the IPv4 address of the host. For example, the target for an IPv4 ping in a VRF context would be the IPv4 address or domain name of the target host. The target for an IPv6 ping in a VRF context would be the IPv6 prefix or domain name of the target host.
• If the target address is not specified, the CLI will enter the interactive dialog for ping.
connection-options (Optional) Each connection type may have its own set of connection options. For example, connection options for IPv4 include source, df-bit, and timeout. See the appropriate ping command documentation for details.
Release Modification
12.1(12c)E, 12.2 This command was introduced.
12.2(33)SRA This command was integrated into Cisco IOS Release 12.2(33)SRA.
12.2(33)SXH This command was integrated into Cisco IOS Release 12.2(33)SXH.

ping vrf
CF-436Cisco IOS Configuration Fundamentals Command Reference
January 2011
Examples In the following example, the target host in the domain 209.165.201.1 is pinged (using IP/ICMP) in the context of the “Customer_A” VPN connection.
Router# ping vrf Customer_A 209.165.201.1
Type escape sequence to abort.Sending 5, 100-byte ICMP Echos to 209.165.201.1, timeout is 2 seconds:!!!!!Success rate is 100 percent (5/5), round-trip min/avg/max = 176/264/576 ms
Pressing the Enter key before providing all of the required options will begin the interactive dialog for ping. In the following example, the interactive dialog is started after the “ip” protocol is specified, but no address is given:
Router# ping vrf Customer_B ip
Target IP address: 209.165.200.225Repeat count [5]: Datagram size [100]: Timeout in seconds [2]: Extended commands [n]: y Source address or interface: Type of service [0]: Set DF bit in IP header? [no]: Validate reply data? [no]: Data pattern [0xABCD]: Loose, Strict, Record, Timestamp, Verbose[none]: Record Number of hops [ 9 ]: Loose, Strict, Record, Timestamp, Verbose[RV]: Sweep range of sizes [n]: Type escape sequence to abort.Sending 5, 100-byte ICMP Echos to 209.165.200.225, timeout is 2 seconds:Packet has IP options: Total option bytes= 39, padded length=40 Record route: <*> (0.0.0.0) (0.0.0.0) (0.0.0.0) (0.0.0.0) (0.0.0.0) (0.0.0.0) (0.0.0.0) (0.0.0.0) (0.0.0.0)...
Success rate is 100 percent (5/5), round-trip min/avg/max = 4/4/4 ms
The following example shows the various options for IP in the ping vrf command:
Router# show parser dump exec | include ping vrf
1 ping vrf <string>1 ping vrf <string> ip <string> 1 ping vrf <string> ip (interactive) 1 ping vrf <string> ip <string> 1 ping vrf <string> ip <string> source <address> 1 ping vrf <string> ip <string> source <interface> 1 ping vrf <string> ip <string> repeat <1-2147483647> 1 ping vrf <string> ip <string> size Number 1 ping vrf <string> ip <string> df-bit 1 ping vrf <string> ip <string> validate 1 ping vrf <string> ip <string> data <0-65535> 1 ping vrf <string> ip <string> timeout <0-3600>

ping vrf
CF-437Cisco IOS Configuration Fundamentals Command Reference
January 2011
1 ping vrf <string> ip <string> verbose 1 ping vrf <string> ip <string> data <0-65535> 1 ping vrf <string> ip <string> timeout <0-3600> 1 ping vrf <string> tag 1 ping vrf <string> atm 1 ping vrf <string> ipv6 1 ping vrf <string> appletalk 1 ping vrf <string> decnet 1 ping vrf <string> clns 1 ping vrf <string> ipx 1 ping vrf <string> sna 1 ping vrf <string> srb
Related Commands Command Description
ping Diagnoses basic network connectivity to a specific host.
ping atm interface atm Tests the connectivity of a specific PVC.
ping ip Tests the connection to a remote host on the network using IPv4.
ping ipv6 Tests the connection to a remote host on the network using IPv6.
ping sna Tests network integrity and timing characteristics over an SNA Switching network.

platform shell
CF-438Cisco IOS Configuration Fundamentals Command Reference
January 2011
platform shellTo grant shell access and enter shell access grant configuration mode, use the platform shell command in global configuration mode. To disable this function, use the no form of this command.
platform shell
no platform shell
Syntax Description This command has no arguments or keywords.
Command Default This command is disabled.
Command Modes Global configuration (config)
Command History
Usage Guidelines This command should be entered before using the request platform software system shell command.
Examples The following example shows how to grant shell access:
Router(config)# platform shellRouter(config)#
Related Commands
Release Modification
12.2(33)XNC This command was introduced.
Command Description
request platform software system shell
Requests platform shelll access.

power enable
CF-439Cisco IOS Configuration Fundamentals Command Reference
January 2011
power enable To turn on power for the modules, use the power enable command in global configuration mode. To power down a module, use the no form of this command.
power enable module slot
no power enable module slot
Syntax Description
Defaults Enabled
Command Modes Global configuration
Command History
Usage Guidelines When you enter the no power enable module slot command to power down a module, the module’s configuration is not saved.
When you enter the no power enable module slot command to power down an empty slot, the configuration is saved.
The slot argument designates the module number. Valid values for slot depend on the chassis that is used. For example, if you have a 13-slot chassis, valid values for the module number are from 1 to 13.
Examples This example shows how to turn on the power for a module that was previously powered down:
Router(config)# power enable module 5Router(config)#
This example shows how to power down a module:
Router(config)# no power enable module 5Router(config)#
Related Commands
module slot Specifies a module slot number; see the “Usage Guidelines” section for valid values.
Release Modification
12.2(14)SX Support for this command was introduced on the Supervisor Engine 720.
12.2(17d)SXB Support for this command on the Supervisor Engine 2 was extended to Release 12.2(17d)SXB.
12.2(18)SXD This command was changed to allow you to disable power to empty slots.
12.2(33)SRA This command was integrated into Cisco IOS Release 12.2(33)SRA.
Command Description
show power Displays information about the power status.

power redundancy-mode
CF-440Cisco IOS Configuration Fundamentals Command Reference
January 2011
power redundancy-modeTo set the power-supply redundancy mode, use the power redundancy-mode command in global configuration mode.
power redundancy-mode {combined | redundant}
Syntax Description
Defaults redundant
Command Modes Global configuration
Command History
Examples This example shows how to set the power supplies to the no-redundancy mode:
Router(config)# power redundancy-mode combinedRouter(config)#
This example shows how to set the power supplies to the redundancy mode:
Router(config)# power redundancy-mode redundantRouter(config)#
Related Commands
combined Specifies no redundancy (combine power-supply outputs).
redundant Specifies redundancy (either power supply can operate the system).
Release Modification
12.2(14)SX Support for this command was introduced on the Supervisor Engine 720.
12.2(17d)SXB Support for this command on the Supervisor Engine 2 was extended to Release 12.2(17d)SXB.
12.2(33)SRA This command was integrated into Cisco IOS Release 12.2(33)SRA.
Command Description
show power Displays information about the power status.
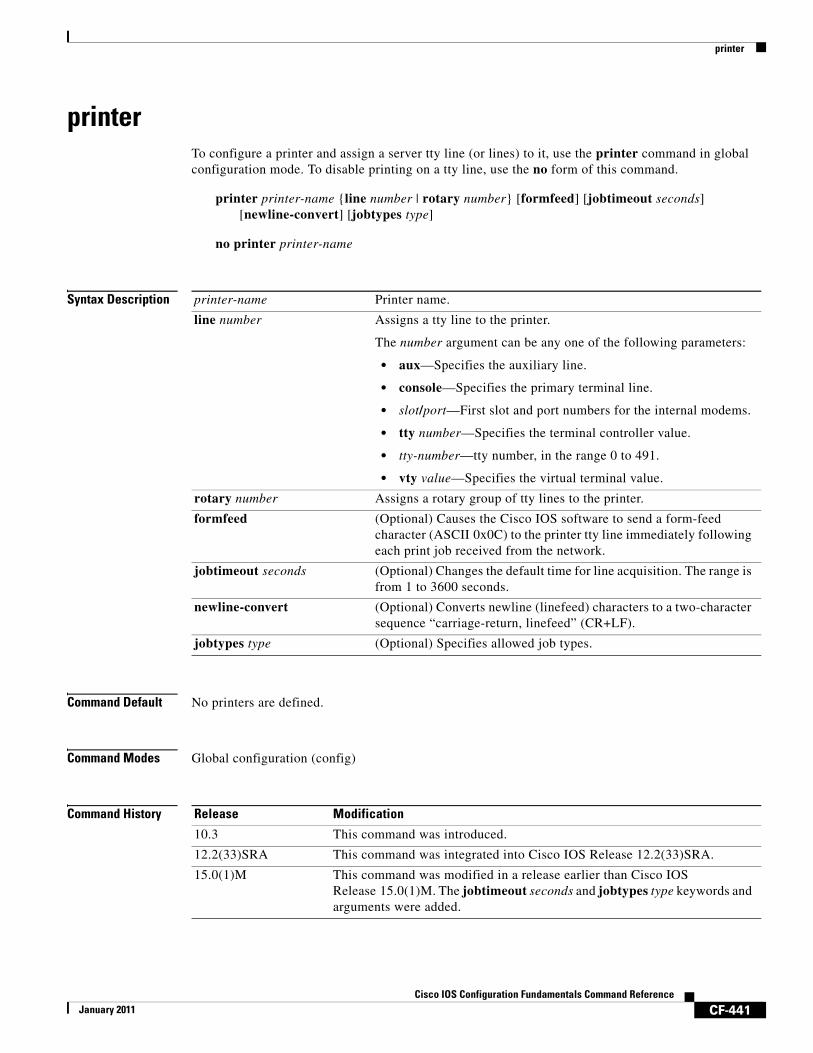
printer
CF-441Cisco IOS Configuration Fundamentals Command Reference
January 2011
printerTo configure a printer and assign a server tty line (or lines) to it, use the printer command in global configuration mode. To disable printing on a tty line, use the no form of this command.
printer printer-name {line number | rotary number} [formfeed] [jobtimeout seconds] [newline-convert] [jobtypes type]
no printer printer-name
Syntax Description
Command Default No printers are defined.
Command Modes Global configuration (config)
Command History
printer-name Printer name.
line number Assigns a tty line to the printer.
The number argument can be any one of the following parameters:
• aux—Specifies the auxiliary line.
• console—Specifies the primary terminal line.
• slot/port—First slot and port numbers for the internal modems.
• tty number—Specifies the terminal controller value.
• tty-number—tty number, in the range 0 to 491.
• vty value—Specifies the virtual terminal value.
rotary number Assigns a rotary group of tty lines to the printer.
formfeed (Optional) Causes the Cisco IOS software to send a form-feed character (ASCII 0x0C) to the printer tty line immediately following each print job received from the network.
jobtimeout seconds (Optional) Changes the default time for line acquisition. The range is from 1 to 3600 seconds.
newline-convert (Optional) Converts newline (linefeed) characters to a two-character sequence “carriage-return, linefeed” (CR+LF).
jobtypes type (Optional) Specifies allowed job types.
Release Modification
10.3 This command was introduced.
12.2(33)SRA This command was integrated into Cisco IOS Release 12.2(33)SRA.
15.0(1)M This command was modified in a release earlier than Cisco IOS Release 15.0(1)M. The jobtimeout seconds and jobtypes type keywords and arguments were added.

printer
CF-442Cisco IOS Configuration Fundamentals Command Reference
January 2011
Usage Guidelines This command enables you to configure a printer for operations and assign either a single tty line or a group of tty lines to it. To make multiple printers available through the same printer name, specify the number of a rotary group.
In addition to configuring the printer with the printer command, you must modify the file /etc/printcap on your UNIX system to include the definition of the remote printer in the Cisco IOS software. Refer to the Cisco IOS Configuration Fundamentals Configuration Guide for additional information.
Use the optional newline-convert keyword in UNIX environments that cannot handle single-character line terminators. This converts newline characters to a carriage-return, linefeed sequence. Use the formfeed keyword when using the line printer daemon (lpd) protocol to print and your system is unable to separate individual output jobs with a form feed (page eject). You can enter the newline-convert and formfeed keywords together and in any order.
Examples The following example shows how to configure a printer named printer1 and to assign the output to tty line 4:
Router# configure terminalRouter(config)# printer printer1 line 4
Related Commands Command Description
clear line Returns a terminal line to idle state.

private
CF-443Cisco IOS Configuration Fundamentals Command Reference
January 2011
privateTo save user EXEC command changes between terminal sessions, use the private command in line configuration mode. To restore the default condition, use the no form of this command.
private
no private
Syntax Description This command has no arguments or keywords.
Defaults User-set configuration options are cleared with the exit EXEC command or when the interval set with the exec-timeout line configuration command has passed.
Command Modes Line configuration
Command History
Usage Guidelines This command ensures that the terminal parameters set by the user remain in effect between terminal sessions. This behavior is desirable for terminals in private offices.
Examples In the following example, line 15 (in this example, vty 1) is configured to keep all user-supplied settings at system restarts:
Router(config)# line 15Router(config-line)# private
Related Commands
Release Modification
10.0 This command was introduced.
12.2(33)SRA This command was integrated into Cisco IOS Release 12.2(33)SRA.
Command Description
exec-timeout Sets the interval that the EXEC command interpreter waits until user input is detected.
exit Exits any configuration mode, or closes an active terminal session and terminates the EXEC.

privilege
CF-444Cisco IOS Configuration Fundamentals Command Reference
January 2011
privilegeTo configure a new privilege level for users and associate commands with that privilege level, use the privilege command in global configuration mode. To reset the privilege level of the specified command or commands to the default and remove the privilege level configuration from the running configuration file, use the no form of this command.
Note As of Cisco IOS Releases 12.3(6) and 12.3(6)T, the no form of the privilege command and the reset keyword perform the same functions.
privilege mode [all] {level level | reset} command-string
no privilege mode [all] {level level | reset} command-string
Syntax Description
Defaults User EXEC mode commands are privilege level 1.
Privileged EXEC mode and configuration mode commands are privilege level 15.
Command Modes Global configuration
mode Configuration mode for the specified command. See Table 46 in the “Usage Guidelines” section for a list of options for this argument.
all (Optional) Changes the privilege level for all the suboptions to the same level.
level level Specifies the privilege level you are configuring for the specified command or commands. The level argument must be a number from 0 to 15.
reset Resets the privilege level of the specified command or commands to the default and removes the privilege level configuration from the running configuration file.
Note For Cisco IOS software releases earlier than Release 12.3(6) and Release 12.3(6)T, you use the no form of this command to reset the privilege level to the default. The default form of this command will still appear in the configuration file. To completely remove a privilege configuration, use the reset keyword.
command-string Command associated with the specified privilege level. If the all keyword is used, specifies the command and subcommands associated with the privilege level.
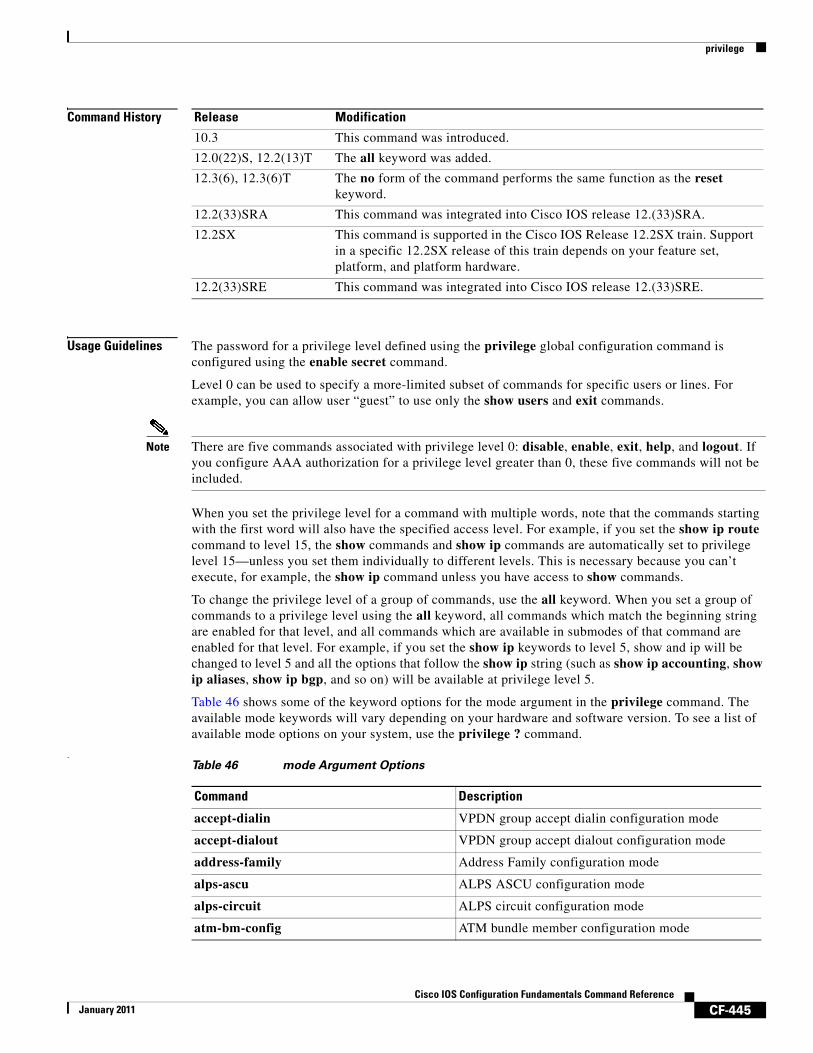
privilege
CF-445Cisco IOS Configuration Fundamentals Command Reference
January 2011
Command History
Usage Guidelines The password for a privilege level defined using the privilege global configuration command is configured using the enable secret command.
Level 0 can be used to specify a more-limited subset of commands for specific users or lines. For example, you can allow user “guest” to use only the show users and exit commands.
Note There are five commands associated with privilege level 0: disable, enable, exit, help, and logout. If you configure AAA authorization for a privilege level greater than 0, these five commands will not be included.
When you set the privilege level for a command with multiple words, note that the commands starting with the first word will also have the specified access level. For example, if you set the show ip route command to level 15, the show commands and show ip commands are automatically set to privilege level 15—unless you set them individually to different levels. This is necessary because you can’t execute, for example, the show ip command unless you have access to show commands.
To change the privilege level of a group of commands, use the all keyword. When you set a group of commands to a privilege level using the all keyword, all commands which match the beginning string are enabled for that level, and all commands which are available in submodes of that command are enabled for that level. For example, if you set the show ip keywords to level 5, show and ip will be changed to level 5 and all the options that follow the show ip string (such as show ip accounting, show ip aliases, show ip bgp, and so on) will be available at privilege level 5.
Table 46 shows some of the keyword options for the mode argument in the privilege command. The available mode keywords will vary depending on your hardware and software version. To see a list of available mode options on your system, use the privilege ? command.
.
Release Modification
10.3 This command was introduced.
12.0(22)S, 12.2(13)T The all keyword was added.
12.3(6), 12.3(6)T The no form of the command performs the same function as the reset keyword.
12.2(33)SRA This command was integrated into Cisco IOS release 12.(33)SRA.
12.2SX This command is supported in the Cisco IOS Release 12.2SX train. Support in a specific 12.2SX release of this train depends on your feature set, platform, and platform hardware.
12.2(33)SRE This command was integrated into Cisco IOS release 12.(33)SRE.
Table 46 mode Argument Options
Command Description
accept-dialin VPDN group accept dialin configuration mode
accept-dialout VPDN group accept dialout configuration mode
address-family Address Family configuration mode
alps-ascu ALPS ASCU configuration mode
alps-circuit ALPS circuit configuration mode
atm-bm-config ATM bundle member configuration mode

privilege
CF-446Cisco IOS Configuration Fundamentals Command Reference
January 2011
atm-bundle-config ATM bundle configuration mode
atm-vc-config ATM virtual circuit configuration mode
atmsig_e164_table_mode ATMSIG E164 Table
cascustom Channel-associated signalling (cas) custom configuration mode
config-rtr-http RTR HTTP raw request Configuration
configure Global configuration mode
controller Controller configuration mode
crypto-map Crypto map config mode
crypto-transform Crypto transform config modeCrypto transform configuration mode
dhcp DHCP pool configuration mode
dspfarm DSP farm configuration mode
exec Exec mode
flow-cache Flow aggregation cache configuration mode
gateway Gateway configuration mode
interface Interface configuration mode
interface-dlci Frame Relay DLCI configuration mode
ipenacl IP named extended access-list configuration mode
ipsnacl IP named simple access-list configuration mode
ip-vrf Configure IP VRF parameters
lane ATM Lan Emulation Lecs Configuration Table
line Line configuration mode
map-class Map class configuration mode
map-list Map list configuration mode
mpoa-client MPOA Client
mpoa-server MPOA Server
null-interface Null interface configuration mode
preaut AAA Preauth definitions
request-dialin VPDN group request dialin configuration mode
request-dialout VPDN group request dialout configuration mode
route-map Route map configuration mode
router Router configuration mode
rsvp_policy_local
rtr RTR Entry Configuration
sg-radius RADIUS server group definition
sg-tacacs+ TACACS+ server group
Table 46 mode Argument Options (continued)
Command Description

privilege
CF-447Cisco IOS Configuration Fundamentals Command Reference
January 2011
Examples The following example shows how to set the configure command to privilege level 14 and establish SecretPswd14 as the password users must enter to use level 14 commands:
privilege exec level 14 configureenable secret level 14 SecretPswd14
The following example shows how to set the show and ip keywords to level 5. The suboptions coming under ip will also be allowed to users with privilege level 5 access:
Router(config)# privilege exec all level 5 show ip
The following two examples demonstate the difference in behavior between the no form of the command and the use of the reset keyword when using Cisco IOS software releases earlier than Releases 12.3(6) and Release 12.3(6)T.
Note As of Cisco IOS Releases 12.3(6) and 12.3(6)T, the no form of the privilege command and the reset keyword perform the same functions.
! show currently configured privilege commandsRouter# show running-config | include priv privilege configure all level 3 interfaceprivilege exec level 3 configure terminalprivilege exec level 3 configure
Router# configure terminal Enter configuration commands, one per line. End with CNTL/Z.Router(config)# no privilege exec level 3 configure terminalRouter(config)# end! show currently configured privilege commandsRouter# show running-config | include privprivilege configure all level 3 interfaceprivilege exec level 15 configure terminalprivilege exec level 15 configure
sip-ua SIP UA configuration mode
subscriber-policy Subscriber policy configuration mode
tcl Tcl mode
tdm-conn TDM connection configuration mode
template Template configuration mode
translation-rule Translation Rule configuration mode
vc-class VC class configuration mode
voiceclass Voice Class configuration mode
voiceport Voice configuration mode
voipdialpeer Dial Peer configuration mode
vpdn-group VPDN group configuration mode
Table 46 mode Argument Options (continued)
Command Description

privilege
CF-448Cisco IOS Configuration Fundamentals Command Reference
January 2011
Note that in the show running-config output above, the privilege command for “configure terminal” still appears, but now has the default privilege level assigned.
To remove a previously configured privilege command entirely from the configuration, use the reset keyword, as shown in the following example:
! show currently configured privilege commandsRouter# show running-config | include priv privilege configure all level 3 interfaceprivilege exec level 3 configure terminalprivilege exec level 3 configure
Router# configure terminal Enter configuration commands, one per line. End with CNTL/Z.Router(config)# privilege exec reset configure terminal Router(config)#Router# show running-config | include priv privilege configure all level 3 interfaceRouter#
Related Commands Command Description
enable password Sets a local password to control access to various privilege levels.
enable secret Specifies an additional layer of security over the enable password command.
privilege level Sets the default privilege level for a line.

process cpu statistics limit entry-percentage
CF-449Cisco IOS Configuration Fundamentals Command Reference
January 2011
process cpu statistics limit entry-percentageTo set the process entry limit and the size of the history table for CPU utilization statistics, use the process cpu statistics limit entry-percentage command in global configuration mode. To disable CPU utilization statistics, use the no form of this command.
process cpu statistics limit entry-percentage number [size seconds]
no process cpu statistics limit entry-percentage
Syntax Description
Command Default size seconds: 600 seconds
Command Modes Global configuration
Command History
Usage Guidelines Use the process cpu statistics limit entry-percentage command to set the entry limit and size of CPU utilization statistics.
Examples The following example shows how to set an entry limit at 40 percent and a size of 300 seconds:
configure terminal!process cpu statistics limit entry-percentage 40 size 300end
Related Commands
number Integer from 1 to 100 that indicates the percentage of CPU utilization that a process must use to become part of the history table.
size seconds (Optional) Changes the duration of time in seconds for which CPU statistics are stored in the history table. Valid values are 5 to 86400. The default is 600.
Release Modification
12.0(26)S This command was introduced.
12.3(4)T This command was integrated into Cisco IOS Release 12.3(4)T.
12.2(25)S This command was integrated into Cisco IOS Release 12.2(25)S.
Command Description
process cpu threshold type Defines CPU usage thresholds that, when crossed, cause a CPU threshold notification.
snmp-server enable traps cpu Enables CPU threshold violations traps.
snmp-server host Specifies the recipient of SNMP notifications.

process cpu threshold type
CF-450Cisco IOS Configuration Fundamentals Command Reference
January 2011
process cpu threshold typeTo set CPU thresholding notification types and values, use the process cpu threshold type command in global configuration mode. To disable CPU thresholding notifications, use the no form of this command.
process cpu threshold type {total | process | interrupt} rising percentage interval seconds [falling fall-percentage interval seconds]
no process cpu threshold type {total | process | interrupt}
Syntax Description
Command Default CPU thresholding notifications are disabled.
Command Modes Global configuration
Command History
Usage Guidelines This command defines CPU usage thresholds that, when crossed, cause a CPU thresholding notification. When this command is enabled, Cisco IOS software polls the system at the configured interval. Notification occurs in two situations:
• When a configured CPU usage threshold is exceeded (rising percentage)
• When CPU usage falls below the configured threshold (falling fall-percentage)
total Sets the CPU threshold type to total CPU utilization.
process Sets the CPU threshold type to CPU process utilization.
interrupt Sets the CPU threshold type to CPU interrupt utilization.
rising percentage The percentage (1 to 100) of CPU resources that, when exceeded for the configured interval, triggers a CPU thresholding notification.
interval seconds The duration of the CPU threshold violation, in seconds (5 to 86400), that must be met to trigger a CPU thresholding notification.
falling fall-percentage (Optional) The percentage (1 to 100) of CPU resources that, when usage falls below this level for the configured interval, triggers a CPU thresholding notification.
• This value must be equal to or less than the rising percentage value.
• If not specified, the falling fall-percentage value is set to the same value as the rising percentage value.
Release Modification
12.0(26)S This command was introduced.
12.3(4)T This command was integrated into Cisco IOS Release 12.3(4)T.
12.2(25)S This command was integrated into Cisco IOS Release 12.2(25)S.
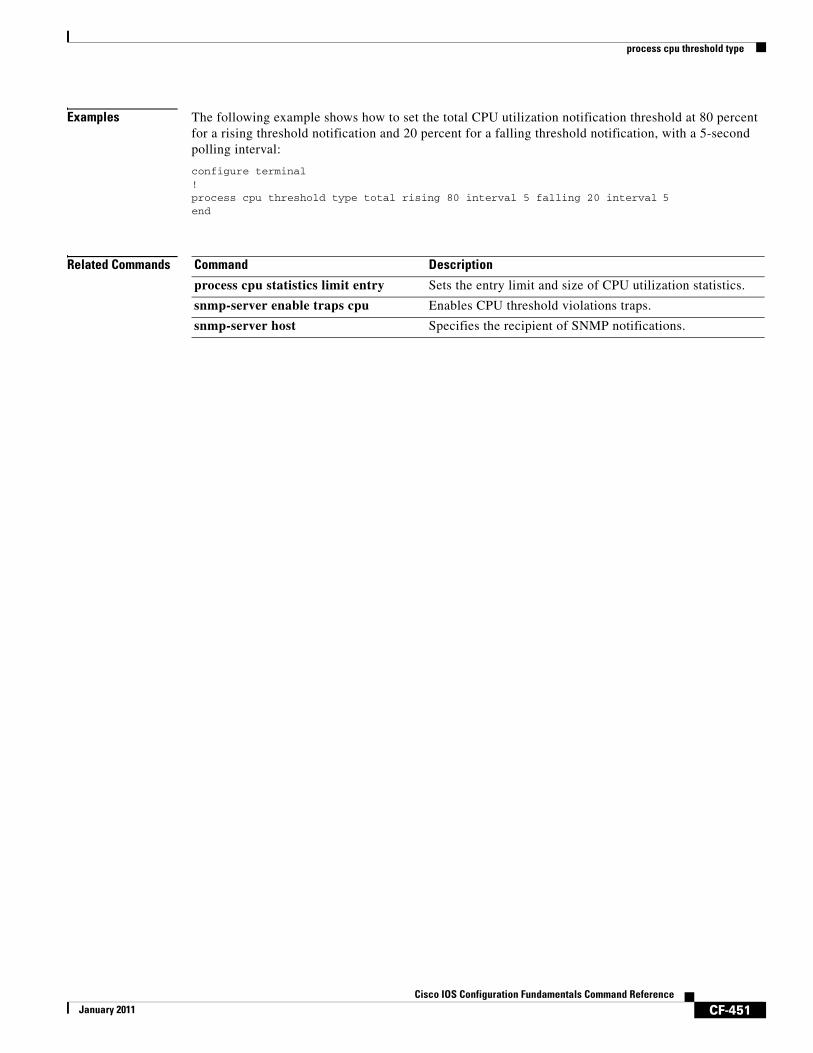
process cpu threshold type
CF-451Cisco IOS Configuration Fundamentals Command Reference
January 2011
Examples The following example shows how to set the total CPU utilization notification threshold at 80 percent for a rising threshold notification and 20 percent for a falling threshold notification, with a 5-second polling interval:
configure terminal!process cpu threshold type total rising 80 interval 5 falling 20 interval 5end
Related Commands Command Description
process cpu statistics limit entry Sets the entry limit and size of CPU utilization statistics.
snmp-server enable traps cpu Enables CPU threshold violations traps.
snmp-server host Specifies the recipient of SNMP notifications.

process-max-time
CF-452Cisco IOS Configuration Fundamentals Command Reference
January 2011
process-max-time To configure the amount of time after which a process should voluntarily yield to another process, use the process-max-time command in global configuration mode. To reset this value to the system default, use the no form of this command.
process-max-time milliseconds
no process-max-time milliseconds
Syntax Description
Defaults The default maximum process time is 200 milliseconds.
Command Modes Global configuration
Command History
Usage Guidelines Lowering the maximum time a process can run is useful in some circumstances to ensure equitable division of CPU time among different tasks.
Only use this command if recommended to do so by the Cisco Technical Assistance Center (TAC).
Examples The following example limits the duration that a process will run to 100 milliseconds:
Router(config)# process-max-time 100
milliseconds Maximum duration (in milliseconds) that a process can run before suspension. The range is from 20to 200 milliseconds.
Release Modification
12.1 This command was introduced.
12.2(33)SRA This command was integrated into Cisco IOS Release 12.2(33)SRA.

prompt
CF-453Cisco IOS Configuration Fundamentals Command Reference
January 2011
promptTo customize the CLI prompt, use the prompt command in global configuration mode. To revert to the default prompt, use the no form of this command.
prompt string
no prompt [string]
Syntax Description
Defaults The default prompt is either Router or the name defined with the hostname global configuration command, followed by an angle bracket (>) for user EXEC mode or a pound sign (#) for privileged EXEC mode.
Command Modes Global configuration
Command History
Usage Guidelines You can include customized variables when specifying the prompt. All prompt variables are preceded by a percent sign (%). Table 47 lists the available prompt variables.
Issuing the prompt %h command has the same effect as issuing the no prompt command.
string Text that will be displayed on screen as the CLI prompt, including any desired prompt variables.
Release Modification
10.3 This command was introduced.
12.2(33)SRA This command was integrated into Cisco IOS Release 12.2(33)SRA.
Table 47 Custom Prompt Variables
Prompt Variable Interpretation
%h Host name. This is either Router or the name defined with the hostname global configuration command.
%n Physical terminal line (tty) number of the EXEC user.
%p Prompt character itself. It is either an angle bracket (>) for user EXEC mode or a pound sign (#) for privileged EXEC mode.
%s Space.
%t Tab.
%% Percent sign (%)

prompt
CF-454Cisco IOS Configuration Fundamentals Command Reference
January 2011
Examples The following example changes the EXEC prompt to include the tty number, followed by the name and a space:
Router(config)# prompt TTY%n@%h%s%p
The following are examples of user and privileged EXEC prompts that result from the previous command:
TTY17@Router1 > enableTTY17@Router1 #
Related Commands Command Description
hostname Specifies or modifies the host name for the network server.

prompt config
CF-455Cisco IOS Configuration Fundamentals Command Reference
January 2011
prompt configTo configure the system’s prompt for configuration mode, use the prompt config command in global configuration mode. To disable the configuration, use the no form of this command.
prompt config hostname-length number
no prompt [config]
Syntax Description
Command Default The system's prompt is not configured for configuration mode.
Command Modes Global configuration (config)
Command History
Examples This example shows how to configure the system’s prompt for configuration mode:
Router(config)# prompt config hostname-length 4
Related Commands
hostname-length Sets the length of the hostname in the configuration prompt.
number Maximum length of the hostname. The range is from 0 to 80.
Release Modification
15.0(1)M This command was introduced in a release earlier than Cisco IOS Release 15.0(1)M.
Command Description
prompt Customizes the CLI prompt.

pwd
CF-456Cisco IOS Configuration Fundamentals Command Reference
January 2011
pwd To show the current setting of the cd command, use the pwd command in EXEC mode.
pwd
Syntax Description This command has no arguments or keywords.
Command Modes User EXEC
Priviledged EXEC
Command History
Usage Guidelines Use the pwd command to show which directory or file system is specified as the default by the cd command. For all EXEC commands that have an optional filesystem argument, the system uses the file system specified by the cd command when you omit the optional filesystem argument.
For example, the dir command contains an optional filesystem argument and displays a list of files on a particular file system. When you omit this filesystem argument, the system shows a list of the files on the file system specified by the cd command.
Examples The following example shows that the present working file system specified by the cd command is slot 0:
Router> pwdslot0:/
The following example uses the cd command to change the present file system to slot 1 and then uses the pwd command to display that present working file system:
Router> cd slot1: Router> pwd slot1:/
Related Commands
Release Modification
11.0 This command was introduced.
12.2(33)SRA This command was integrated into Cisco IOS Release 12.2(33)SRA.
Command Description
cd Changes the default directory or file system.
dir Displays a list of files on a file system.