Embed Size (px)
DESCRIPTION
Guia de Instalacion del modulo x6240
Citation preview

Sun Microsystems, Inc.www.sun.com
Submit comments about this document by clicking the Feedback[+] link at: http://docs.sun.com
Sun Blade™ X6240Server Module Installation Guide
Part No. 820-3968-11, Rev. AAugust 2009

PleaseRecycle
Copyright © 2009 Sun Microsystems, Inc., 4150 Network Circle, Santa Clara, California 95054, U.S.A. All rights reserved.
Sun Microsystems, Inc. has intellectual property rights relating to technology embodied in the product that is described in this document. Inparticular, and without limitation, these intellectual property rights may include one or more of the U.S. patents listed athttp://www.sun.com/patents and one or more additional patents or pending patent applications in the U.S. and in other countries.
Parts of the product may be derived from Berkeley BSD systems, licensed from the University of California. UNIX is a registered trademark inthe U.S. and in other countries, exclusively licensed through X/Open Company, Ltd.
Sun, Sun Microsystems, the Sun logo, Java, Solaris, OpenSolaris, Sun Blade, docs.sun.com, Sun Fire and the Solaris logo are trademarks orregistered trademarks of Sun Microsystems, Inc., or its subsidiaries, in the U.S. and other countries.
Microsoft is a trademark or registered trademark of Microsoft Corporation or its subsidiaries in the United States and Other countries. Windowsis a trademark or registered trademark of Microsoft Corporation or its subsidiaries in the United States and Other countries. The Adobe. logo isa registered trademark of Adobe Systems, Incorporated.
Use of any spare or replacement CPUs is limited to repair or one-for-one replacement of CPUs in products exported in compliance with U.S.export laws. Use of CPUs as product upgrades unless authorized by the U.S. Government is strictly prohibited.
DOCUMENTATION IS PROVIDED “AS IS” AND ALL EXPRESS OR IMPLIED CONDITIONS, REPRESENTATIONS AND WARRANTIES,INCLUDING ANY IMPLIED WARRANTY OF MERCHANTABILITY, FITNESS FOR A PARTICULAR PURPOSE OR NON-INFRINGEMENT,ARE DISCLAIMED, EXCEPT TO THE EXTENT THAT SUCH DISCLAIMERS ARE HELD TO BE LEGALLY INVALID.
Copyright © 2009 Sun Microsystems, Inc., 4150 Network Circle, Santa Clara, California 95054, Etats-Unis. Tous droits réservés.
Sun Microsystems, Inc. détient les droits de propriété intellectuels relatifs à la technologie incorporée dans le produit qui est décrit dans cedocument. En particulier, et ce sans limitation, ces droits de propriété intellectuelle peuvent inclure un ou plus des brevets américains listés àl’adresse http://www.sun.com/patents et un ou les brevets supplémentaires ou les applications de brevet en attente aux Etats - Unis et dans lesautres pays.
Des parties de ce produit pourront être dérivées des systèmes Berkeley BSD licenciés par l’Université de Californie. UNIX est une marquedéposée aux Etats-Unis et dans d’autres pays et licenciée exclusivement par X/Open Company, Ltd.
Sun, Sun Microsystems, le logo Sun, Java, Solaris, OpenSolaris, Sun Blade, docs.sun.com, Sun Fire et le logo Solaris sont des marques defabrique ou des marques déposée de Sun Microsystems, Inc., ou ses filiales, aux Etats-Unis et autres pays.
Microsoft sont est marques de fabrique ou des marques déposées de Microsoft Corporation ou de sa filiale aux Etats-Unis et dans d’autres pays.Windows est une marque de fabrique ou une marques déposée de Microsoft Corporation ou de sa filiale aux Etats-Unis et dans d’autres pays.Le logo Adobe est une marque déposée de Adobe Systems, Incorporated.
L’utilisation de pieces detachees ou d’unites centrales de remplacement est limitee aux reparations ou a l’echange standard d’unites centralespour les produits exportes, conformement a la legislation americaine en matiere d’exportation. Sauf autorisation par les autorites des Etats-Unis, l’utilisation d’unites centrales pour proceder a des mises a jour de produits est rigoureusement interdite.
LA DOCUMENTATION EST FOURNIE “EN L’ETAT” ET TOUTES AUTRES CONDITIONS, DECLARATIONS ET GARANTIES EXPRESSESOU TACITES SONT FORMELLEMENT EXCLUES, DANS LA MESURE AUTORISEE PAR LA LOI APPLICABLE, Y COMPRIS NOTAMMENTTOUTE GARANTIE IMPLICITE RELATIVE A LA QUALITE MARCHANDE, A L’APTITUDE A UNE UTILISATION PARTICULIERE OU AL’ABSENCE DE CONTREFACON.

Contents
Preface vii
1. Setting Up the Server Hardware 1
Terms Used in This Guide 1
Installation Overview 2
Inserting the Server Module 3
▼ To Insert the Server Module 3
Powering On and Powering Off the Server Module 5
▼ To Apply Standby Power for Initial Service Processor Configuration 5
▼ To Power on Main Power for All Server Module Components 5
▼ To Shut Down Main Power Mode 7
Using a Dongle Cable for Testing 8
▼ To Use a Dongle Cable for Testing 8
2. Setting Up the Server Software 11
Integrated Lights Out Manager 11
What Is a Service Processor? 12
About the Preconfigured Administrator Account 12
ILOM Connection Overview 13
Connecting to the Server Module ILOM 13
iii

Option 1: Connecting to ILOM Through the Chassis Serial Connector 14
▼ To Connect to ILOM Through the Chassis Serial Connector 14
Option 2: Connecting to ILOM Through a Dongle Cable 18
▼ To Connect to ILOM Using a Dongle Cable 19
Option 3: Connecting to ILOM Through the Ethernet Port 19
Logging In and Out of ILOM 20
▼ To Log In and Out of the ILOM CLI 20
▼ To Log In and Out of the ILOM Web GUI 20
Configuring the ILOM IP Address 23
▼ To View the ILOM IP Address 23
▼ To Configure the ILOM IP Address Using BIOS Setup Utility 23
▼ To Configure the ILOM IP Address Using DHCP 25
▼ To Configure the ILOM IP Address Using the CLI 26
Setting Up Platform Operating System and Driver Software 29
3. Configuring the Preinstalled Solaris 10 Operating System 31
Before You Begin 32
Installation Worksheet 32
Configuring the Preinstalled Solaris 10 Operating System 36
▼ To Configure the Preinstalled Solaris 10 OS 36
▼ (Optional) To Redirect the Console Output to the Video Port 38
Configuring X6240 Server Module RAID Drives 39
RAID Drive Overview 39
RAID Drive Options 40
Mirroring the Preinstalled Solaris Operating System With LSI RAID 40
▼ To Create a Mirror Image of the Preinstalled Solaris OS 41
Creating a RAID Set to Incorporate a Preinstalled OS Using the Sun StorageTekREM Card 42
▼ To Incorporate a Preinstalled Solaris OS Using the Sun StorageTekREM Card 42
iv Sun Blade X6240 Server Module Installation Guide • August 2009

Solaris 10 Operating System User Information 43
Solaris 10 User Documentation 44
Solaris 10 OS Training 44
Using the Solaris Installation Program 44
Sun Java Enterprise System 44
Sun Studio 11 45
Reinstalling the Solaris Operating System 45
Downloading the Solaris Operating System 45
4. Configuring the Preinstalled OpenSolaris Operating System 47
Before You Begin 48
Installation Worksheet 48
Configuring the Preinstalled OpenSolaris Operating System 52
▼ To Configure the Preinstalled OpenSolaris OS 52
▼ (Optional) To Redirect the Console Output to the Video Port 54
▼ To Modify the GRUB Menu to Auto Boot 54
Getting Started With the OpenSolaris Operating System 55
Configuring X6240 Server Module RAID Drives 56
RAID Drive Overview 56
RAID Drive Options 57
Mirroring the Preinstalled OpenSolaris Operating System With LSI RAID 57
▼ To Create a Mirror Image of the Preinstalled OpenSolaris OS 58
Creating a RAID Set to Incorporate a Preinstalled OS Using the Sun StorageTekREM Card 59
▼ To Incorporate a Preinstalled OpenSolaris OS Using the Sun StorageTekREM Card 59
OpenSolaris Operating System User Information 61
OpenSolaris OS User Documentation 61
OpenSolaris OS Training 61
Using the OpenSolaris Operating System Installation Program 61
Contents v

Reinstalling the OpenSolaris Operating System 62
Downloading the OpenSolaris Operating System 62
Index 63
vi Sun Blade X6240 Server Module Installation Guide • August 2009

Preface
This Sun Blade X6240 Server Module Installation Guide contains procedures forinstalling the server module in a chassis, connecting to the service processor, andconfiguring either the preinstalled Solaris™ Operating System, or OpenSolaris™Operating System.
Using UNIX CommandsThis document might not contain information about basic UNIX® commands andprocedures such as shutting down the system, booting the system, and configuringdevices. Refer to the following for this information:
■ Software documentation that you received with your system
■ Solaris™ Operating System documentation, which is at:
http://docs.sun.com
vii

Shell Prompts
Typographic Conventions
Related DocumentationThe documents listed in the following table are available online at:
http://docs.sun.com
At that site, search for the Sun Blade™ X6240 Server Module.
Shell Prompt
C shell machine-name%
C shell superuser machine-name#
Bourne shell and Korn shell $
Bourne shell and Korn shell superuser #
Typeface*
* The settings on your browser might differ from these settings.
Meaning Examples
AaBbCc123 The names of commands, files,and directories; on-screencomputer output
Edit your.login file.Use ls -a to list all files.% You have mail.
AaBbCc123 What you type, when contrastedwith on-screen computer output
% su
Password:
AaBbCc123 Book titles, new words or terms,words to be emphasized.Replace command-line variableswith real names or values.
Read Chapter 6 in the User’s Guide.These are called class options.You must be superuser to do this.To delete a file, type rm filename.
viii Sun Blade X6240 Server Module Installation Guide • August 2009

Title Content Part Number Format
Sun Blade X6240 ServerModule Product Notes
Late-breaking informationabout the server module.
820-3972 PDFHTML
Sun Blade X6240 ServerModule Getting Started Guide
Basic installation informationfor setting up the servermodule.
820-3975 PDFPrint
Sun Blade X6240 ServerModule Installation Guide
Detailed installationinformation for setting up theserver module.
820-3968 PDFHTMLPrint option
Sun Blade X6240 ServerModule Operating SystemInstallation Guide
Installation instructions forthe Solaris and Linuxoperating systems.
820-3969 PDFHTML
Sun Blade X6240 ServerModule Windows OperatingSystem Installation Guide
Installation instructions forthe Windows Serveroperating system.
820-3970 PDFHTML
Sun Blade X6240 ServerModule Service Manual
Information and proceduresfor maintaining andupgrading the server module.
820-3971 PDFHTML
x64 Servers Utilities ReferenceManual
Information for usingapplications and utilitiescommon to x64 servers andserver modules.
820-1120 PDFHTML
Sun Integrated Lights OutManager 2.0 User’s Guide
ILOM features and tasks thatare common to servers andserver modules that supportILOM.
820-1188 PDFHTML
Sun Integrated Lights OutManager Supplement for SunBlade X6240 Server Module
ILOM information that isspecific to the server module.
820-3974 PDFHTML
Sun Blade X6240 ServerModule Safety and ComplianceManual
Hardware safety andcompliance information forthe server module.
820-4411 PDF
Important Safety Informationfor Sun Hardware Systems
Multilingual hardware safetyand compliance informationfor all Sun hardware systems.
816-7190 Print
Preface ix

Support, and Training
Product UpdatesFor product updates that you can download for the Sun Blade X6240 server module,please visit the following web site:
http://www.sun.com/download/
Find the Hardware Drivers section and click x64 Servers & Workstations. The SunBlade X6240 server module site contains updates for firmware and drivers, as well asCD-ROM .iso images.
Third-Party Web SitesSun is not responsible for the availability of third-party web sites mentioned in thisdocument. Sun does not endorse and is not responsible or liable for any content,advertising, products, or other materials that are available on or through such sites orresources. Sun will not be responsible or liable for any actual or alleged damage orloss caused by or in connection with the use of or reliance on any such content,goods, or services that are available on or through such sites or resources.
Sun Function URL
Support http://www.sun.com/support/
Training http://www.sun.com/training/
x Sun Blade X6240 Server Module Installation Guide • August 2009

Sun Welcomes Your CommentsSun is interested in improving its documentation and welcomes your comments andsuggestions. You can submit your comments by going to:
http://www.sun.com/hwdocs/feedback
Please include the title and part number of your document with your feedback:
Sun Blade X6240 Server Module Installation Guide, part number 820-3968-11
Preface xi

xii Sun Blade X6240 Server Module Installation Guide • August 2009

CHAPTER 1
Setting Up the Server Hardware
This chapter describes how to insert the Sun Blade X6240 server module into thechassis, how to power on and power off the server module, and how to connect thedongle cable to the server module.
This chapter contains the following topics:
■ “Terms Used in This Guide” on page 1
■ “Inserting the Server Module” on page 3
■ “Powering On and Powering Off the Server Module” on page 5
■ “Using a Dongle Cable for Testing” on page 8
Terms Used in This GuideNote the following terms used in this book:
■ The term server module refers to the blade or blade server hardware.
■ The term chassis refers to the modular system hardware.
■ The term Integrated Lights Out Manager (ILOM) refers to the built-in systemmanagement software that enables the monitoring and managing of installedcomponents in the chassis and server module.
■ The term service processor (SP) refers to the hardware portion of the ILOM. The SPis capable of functioning independently of the server operating system as well asin power off situations.
■ The term chassis management module (CMM) refers to the chassis-level ILOM.
1

Installation OverviewAfter unpacking your server module, perform the following tasks:
1. Insert the server module into the chassis.
See “Inserting the Server Module” on page 3.
2. Connect all cables, peripherals, and power cords to the chassis.
See the installation guide for your chassis.
3. Power on the server module.
See “Powering On and Powering Off the Server Module” on page 5.
4. Connect to the server module through the service processor on the chassismanagement module or through the service processor on the server module itself.
This book assumes that the service processor software on the chassis, called theCMM ILOM, is already configured. See Chapter 2, “Setting Up the ServerSoftware” on page 11 of this guide.
5. Configure either the preinstalled Solaris or OpenSolaris Operating System, orinstall a supported operating system of your choice.
Refer to “Configuring the Preinstalled Solaris 10 Operating System” on page 36 or“Configuring the Preinstalled OpenSolaris Operating System” on page 52. Seealso the Sun Blade X6240 Server Module Operating System Installation Guide (820-3969).
6. Customize your server, as needed.
For more information, see the Sun ILOM documentation:
■ Sun Integrated Lights Out Manager 2.0 User’s Guide (820-1188)
■ Sun Integrated Lights Out Manager (ILOM) Supplement for Sun Blade X6240 ServerModule (820-3974)
■ Addendum to the Sun Integrated Lights Out Manager 2.0 User’s Guide (820-4198)
2 Sun Blade X6240 Server Module Installation Guide • August 2009

Inserting the Server Module
Caution – Before handling components, attach an electrostatic discharge (ESD)wrist strap to bare metal on the chassis. Both the front and back of the chassis havegrounded locations. The system’s printed circuit boards and hard disk drives containcomponents that are extremely sensitive to static electricity.
▼ To Insert the Server Module1. Locate the desired server module slot in the chassis.
2. (Optional) Remove the slot filler panel, if applicable.
Pull the lever out and eject the filler panel.
Note – Other filler panels should remain in any unused slots as they ensure thechassis complies with FCC limits on electromagnetic interference (EMI).
3. Position the server module vertically so that the ejectors are on the right andextended outwardly.
The following illustrations show the server module being inserted into the SunBlade 6000 Modular System; your chassis might differ. See box 1 in FIGURE 1-1.
Chapter 1 Setting Up the Server Hardware 3

FIGURE 1-1 Inserting the Server Module Into the Chassis
4. Push the server module into the slot until the server module stops.
See Box 2 in FIGURE 1-1.
5. Rotate the ejectors down until they snap into place.
The server module is now flush with the chassis and the ejectors are locked. SeeBoxes 3 and 4 in FIGURE 1-1.
4 Sun Blade X6240 Server Module Installation Guide • August 2009

Powering On and Powering Off theServer ModuleYou have to apply only standby power to the server module at this point so that youcan perform initial configuration of the service processor (SP). Procedures forpowering on to main power mode and for shutting down from main power modeare also included in this section.
▼ To Apply Standby Power for Initial ServiceProcessor ConfigurationUse this procedure to apply standby power to the service processor (SP) before initialconfiguration.
1. Connect grounded AC power cords to the AC power connectors on the backpanel of the chassis and to grounded AC power outlets. For details, see yourchassis documentation.
In standby power mode, the blue (Ready to Remove) LED is illuminated,indicating that the SP is working. See FIGURE 1-2 for the LED location.
Note – At this point, standby power is supplied only to the service processor andpower supply fans.
2. Continue with initial software setup tasks, as described in Chapter 2 of thisguide.
▼ To Power on Main Power for All Server ModuleComponents1. Verify that standby power is on.
In standby power mode, the blue (Ready to Remove) LED is illuminated. SeeFIGURE 1-2.
Chapter 1 Setting Up the Server Hardware 5

2. Use a pointed object or stylus to press and release the recessed Power button onthe server module front panel.
When main power is applied to all server module components, the green PowerLED above the Power button lights and remains lit.
FIGURE 1-2 Sun Blade X6240 Server Module Front Panel
Legend
1 White LED–Locate
2 Blue LED–Ready to Remove
3 Amber LED–Service Action Required
4 Green LED–Power
5 Power button/standby
6 Non-Maskable Interrupt (NMI) button (Service only)
7 Universal Connector Port (UCP), used for dongle cable
8 Green LED–Disk OK
9 Amber LED–Disk Service Action Required
10 Blue LED–Disk Ready to Remove
1
2
3
4
5
6
7
8
9
10
6 Sun Blade X6240 Server Module Installation Guide • August 2009

▼ To Shut Down Main Power ModeTo power off the server module from main power mode, use one of the followingtwo methods:
■ Graceful shutdown. Use a ballpoint pen or other stylus to press and release thePower button on the front panel. This causes Advanced Configuration and PowerInterface (ACPI) enabled operating systems to perform an orderly shutdown ofthe operating system. Servers not running ACPI-enabled operating systems willshut down to standby power mode immediately.
■ Emergency shutdown. Press and hold the Power button for four seconds to forcemain power off and to enter standby power mode.
When main power is off, the blue (Ready to Remove) LED on the front panel willbe illuminated, indicating that the server module is in standby power mode.
Note – To power off the server module completely, you must disconnect the ACpower cords from the back panel of the chassis. This will remove power from all theblades in the chassis.
Chapter 1 Setting Up the Server Hardware 7

Using a Dongle Cable for TestingYour chassis ships with a dongle cable. The dongle enables you to plug devicesdirectly into the front of the server module for testing.
Caution – The dongle cable should be used only for configuration and servicepurposes. It should be disconnected from the server module when the configurationor servicing operation is completed.
If you have a dongle cable connected to a server module, it must be removed beforeclosing the door of a rack cabinet. The dongle cable may be damaged if it is notremoved before the cabinet door is closed.
▼ To Use a Dongle Cable for Testing1. Insert the dongle cable into the universal connector port (UCP) on the server
module front panel. See FIGURE 1-3.
2. Connect device to the dongle cable connections, as appropriate.
8 Sun Blade X6240 Server Module Installation Guide • August 2009

FIGURE 1-3 Dongle Cable Connections
Legend
Connector Status
1 Dual USB 2.0 connectors Used
2 Serial port connector Used
3 VGA video connector Used
32
1
Chapter 1 Setting Up the Server Hardware 9

10 Sun Blade X6240 Server Module Installation Guide • August 2009

CHAPTER 2
Setting Up the Server Software
This chapter describes how to configure and access the Sun™ Integrated Lights OutManager software, and how to set up the platform operating system and driversoftware.
This chapter contains these topics:
■ “Integrated Lights Out Manager” on page 11
■ “What Is a Service Processor?” on page 12
■ “About the Preconfigured Administrator Account” on page 12
■ “ILOM Connection Overview” on page 13
■ “Connecting to the Server Module ILOM” on page 13
■ “Configuring the ILOM IP Address” on page 23
■ “Setting Up Platform Operating System and Driver Software” on page 29
Integrated Lights Out ManagerSun Integrated Lights Out Manager (ILOM) is built-in system management softwarethat enables you to control your system. Using ILOM, you can monitor and managethe components installed in your chassis and server modules, configure networkinformation, view and edit hardware configurations, monitor vital systeminformation, and manage user accounts.
You can access ILOM through several interfaces, such as the web browser interface,command-line interface (CLI), SNMP interface, as well as the IPMI interface.
11

Note – This chapter describes how to access ILOM through the command-lineinterface and web browsers. For other methods, see the Sun Integrated Lights OutManager 2.0 User’s Guide (820-1188).
What Is a Service Processor?A service processor (SP) is a component, located on the server module’smotherboard, that operates independently of the other hardware in the system. TheSP has its own IP address and MAC address and is capable of operating regardlessof the state of the other system hardware. In a server module, the service processorcan operate whether the server module is fully operational, powered down, orsomewhere in between.
The chassis management module (CMM) and every server module in the chassis hasits own service processor.
Note the following terms used in this book:
■ The term chassis management module (CMM) refers to the hardware module on thechassis.
■ The CMM ILOM refers to the ILOM software on the CMM.
■ The server module SP (service processor) refers to the server module’s SPhardware.
■ The server module ILOM refers to the ILOM software on the server module SP.
Note that other server modules might have different service processors.
About the Preconfigured Administrator AccountThe server module ILOM is shipped with a preconfigured Administrator account:
User name: root
Password: changeme
The preconfigured Administrator account, known as root, cannot be deleted orchanged, other than changing its password. This account offers built-inadministrative privileges (read and write access) to all service processor features andcommands.
12 Sun Blade X6240 Server Module Installation Guide • August 2009

Note – The CMM ILOM is shipped with an identical preconfigured Administratoraccount, with user name root and the default password set to changeme.
ILOM Connection OverviewFIGURE 2-1 shows the connections to the server module ILOM.
FIGURE 2-1 ILOM Connection Options
Connecting to the Server Module ILOMBefore you continue installing the server module, you must ensure that you canconnect to ILOM.
You can connect to the server module ILOM using one of several methods listed nextand described in the corresponding sections.
ChassisCMM ILOM
Serial Connector
Net 0
Server Modules
ILOM
Dongle Cable
CLI or WebGUI
CLI only
CLI only
Ethernet Switch
Chapter 2 Setting Up the Server Software 13

Note – Option 1 and option 2 enable you to connect to ILOM without knowingILOM’s IP address. These options provide access to ILOM’s command-line interface(CLI) only. Option 3 requires you to know ILOM’s IP address, but supports CLI andweb GUI access. Most users configure ILOM’s IP address, then connect to it usingOption 3.
Instructions for configuring ILOM’s IP address are in “Configuring the ILOM IPAddress” on page 23.
■ Option 1. Use the serial connector on the chassis to connect to the CMM ILOM.Then use the CMM ILOM to navigate to the server module ILOM. See “Option 1:Connecting to ILOM Through the Chassis Serial Connector” on page 14.
■ Option 2. Use a dongle cable to establish a serial connection directly to the servermodule ILOM. See “Option 2: Connecting to ILOM Through a Dongle Cable” onpage 18.
■ Option 3. Connect through the Ethernet. This connection supports both CLI andweb GUI access. See “Option 3: Connecting to ILOM Through the Ethernet Port”on page 19.
The following sections describe each of these methods.
Option 1: Connecting to ILOM Through theChassis Serial ConnectorThe chassis serial connector connects to the CMM ILOM, which provides acommand to connect to the server module ILOM.
▼ To Connect to ILOM Through the Chassis SerialConnectorYou can access the CMM ILOM at any time by connecting a terminal or a PCrunning terminal emulation software to the RJ-45 serial port on the chassis. TheCMM ILOM’s command-line interface (CLI) enables you to connect to the servermodule ILOM.
Before completing this connection, the server module must be installed in thechassis.
1. Verify that your terminal, laptop, or terminal server is operational.
14 Sun Blade X6240 Server Module Installation Guide • August 2009

2. Configure the terminal device or the terminal emulation software to use thefollowing settings:
■ 8N1: eight data bits, no parity, one stop bit
■ 9600 baud (default, can be set to any standard rate up to 57600)
■ Disable hardware flow control (CTS/RTS)
3. Connect a serial cable from the serial port on the chassis to a terminal device.
Refer to the chassis documentation for the location of the serial port.
Note – The serial port requires the following pin assignments. Note that these arethe same as the serial cable connector for the Sun Advanced Lights Out Manager(ALOM) or Remote System Control (RSC). See TABLE 2-1.
4. Press Enter on the terminal device.
This establishes the connection between the terminal device and the CMM ILOM.
Note – If you connect a terminal or emulator to the serial port before it has beenpowered up or during its power up sequence, you will see bootup messages.
When the system has booted, the CMM ILOM displays its login prompt:
SUNCMMnnnnnnnnnn login:
The first string in the prompt is the default host name. It consists of the prefixSUNCMM and the CMM ILOM’s MAC address. The MAC address for each serviceprocessor is unique.
TABLE 2-1 Serial Management Port Pinouts
Pin Signal Description
1 Request To Send (RTS)
2 Data Terminal Ready (DTR)
3 Transmit Data (TXD)
4 Ground
5 Ground
6 Receive Data (RXD)
7 Data Carrier Detect (DCD)
8 Clear To Send (CTS)
Chapter 2 Setting Up the Server Software 15

5. Log in to the CLI:
a. Type the default user name, root.
b. Type the default password, changeme.
Once you have successfully logged in, the CMM ILOM displays its defaultcommand prompt:
->
You are now connected to the CMM ILOM CLI.
6. Navigate to the server module ILOM by typing this command:
-> cd /CH/BLn/SP/cli
Where n is 0 through 9 for server modules 0 through 9 respectively.
7. Type the command start.
A prompt appears.
8. Type y to continue or n to cancel.
If you typed y, the server module ILOM prompts for its password.
Note – The CMM ILOM logs on to the server module ILOM using the user name inthe user target under /CH/BLn/SP/cli (where n is the server module number).
9. When prompted, type the password.
The default password is changeme.
The server module ILOM prompt appears. You are now connected to the servermodule ILOM.
16 Sun Blade X6240 Server Module Installation Guide • August 2009

10. Type exit when you are done.
The server module ILOM exits and the CMM CLI prompt appears.
The following display shows an example of the login screen.
-> cd /CH/BL2/SP/cli/CH/BL2/SP/cli
-> startAre you sure you want to start /CH/BL2/SP/cli (y/n)? yPassword: Type the password to the server module ILOM.
Sun(TM) Integrated Lights Out Manager
Version 2.0.3.9
Copyright 2008 Sun Microsystems, Inc. All rights reserved.Use is subject to license terms.
Warning: password is set to factory default.
-> exit Type this command to exit the server module ILOM and return to theCMM ILOM.Connection to 10.6.153.33 closed.
Chapter 2 Setting Up the Server Software 17

Option 2: Connecting to ILOM Through a DongleCableYou can use the dongle cable to connect a terminal directly to the server moduleILOM. FIGURE 2-2 shows a dongle cable connected to a server module.
Caution – The dongle cable should be used only for configuration and servicepurposes. It should be disconnected from the server module when the configurationor servicing operation is completed.
If you have a dongle cable connected to a server module, it must be removed beforeclosing the door of a rack cabinet. The dongle cable may be damaged if it is notremoved before the cabinet door is closed.
FIGURE 2-2 Dongle Cable
32
1
18 Sun Blade X6240 Server Module Installation Guide • August 2009

Legend
▼ To Connect to ILOM Using a Dongle Cable1. Connect a dongle cable to the server module.
2. Connect a terminal or terminal emulator to the RJ-45 connector (labeled as 2 inthe figure) on the dongle cable.
The ILOM login prompt appears.
3. Type the user name and password when prompted.
The default user name is root and the default password is changeme.
The server module ILOM prompt appears.
4. When you are done, exit ILOM by typing:
-> exit
Option 3: Connecting to ILOM Through theEthernet PortThe chassis Ethernet ports provide the most robust method of connecting to ILOM.This connection supports both the CLI and the web GUI.
You can connect to ILOM through either the RJ-45 NET MGT 0 Ethernet port or thecorresponding network express module (NEM) port.
Before you can use the Ethernet connection, you must know ILOM’s IP address.
Note – To configure the ILOM IP address, see “Configuring the ILOM IP Address”on page 23.
Connector Status
1 Dual USB connectors Used
2 Serial port connector Used
3 VGA video connector Used
Chapter 2 Setting Up the Server Software 19

Logging In and Out of ILOMYou can use either the ILOM command-line interface (CLI) or web GUI to accessILOM.
▼ To Log In and Out of the ILOM CLIILOM supports Secure Shell (SSH) access to the CLI over the Ethernet.
1. Start an SSH client.
2. To log in to ILOM CLI, type:
$ ssh root@ipaddress
Where ipaddress is the IP address of the server SP.
3. Type your password when prompted.
The default user name is root, and the default password is changeme.
For example:
4. To log out of ILOM, type exit.
▼ To Log In and Out of the ILOM Web GUI1. To log in to the ILOM web GUI, type the IP address of the ILOM service
processor into your web browser.
The ILOM login screen appears.
$ ssh [email protected]@192.168.25.25's password:Sun Integrated Lights Out ManagerVersion 2.0.3.9Copyright 2008 Sun Microsystems, Inc. All rights reserved.Warning: password is set to factory default.->
20 Sun Blade X6240 Server Module Installation Guide • August 2009

FIGURE 2-3 Web GUI ILOM Login Screen
2. Type your user name and password.
When you first try to access the web GUI, it prompts you to type the default username and password. The default user name and password are:
■ Default user name – root
■ Default password – changeme
The default user name and password are in lowercase characters.
3. Click Log In.
The web GUI appears.
4. To log out of the web GUI, click the Log Out button at the top right of the webGUI.
The ILOM log out screen appears.
Caution – Do not use the Log Out button in your web browser to log out from theILOM web GUI.
Chapter 2 Setting Up the Server Software 21

FIGURE 2-4 ILOM Log Out Screen
22 Sun Blade X6240 Server Module Installation Guide • August 2009

Configuring the ILOM IP AddressThis section describes how to view and set the ILOM IP address. It includes thefollowing sections:
■ “To View the ILOM IP Address” on page 23
■ “To Configure the ILOM IP Address Using BIOS Setup Utility” on page 23
■ “To Configure the ILOM IP Address Using DHCP” on page 25
■ “To Configure the ILOM IP Address Using the CLI” on page 26
▼ To View the ILOM IP Address1. Log in to the ILOM CLI using any of the methods described in “Connecting to
the Server Module ILOM” on page 13.
To use the Ethernet SSH connection, you must already know the IP address.
2. Type these commands from the root directory.
a. To see all the IP address-related information, type:
-> show /SP/network
b. To see only the IP address, type:
-> show /SP/network/ipaddress
▼ To Configure the ILOM IP Address Using BIOS SetupUtilityThe BIOS Setup Utility enables you to set the ILOM IP address. You can configurethe IP address manually (static) or use DHCP to configure it.
1. Verify the following:
■ Your DHCP server is configured to accept new media access control (MAC)addresses.
■ Your DHCP server is connected to either the corresponding NEM port or theRJ-45 NET MGT Ethernet port.
2. Start the BIOS Setup Utility.
a. Boot the system.
b. Watch the boot messages. You will see a message that says you can press F2to enter BIOS setup.
Chapter 2 Setting Up the Server Software 23
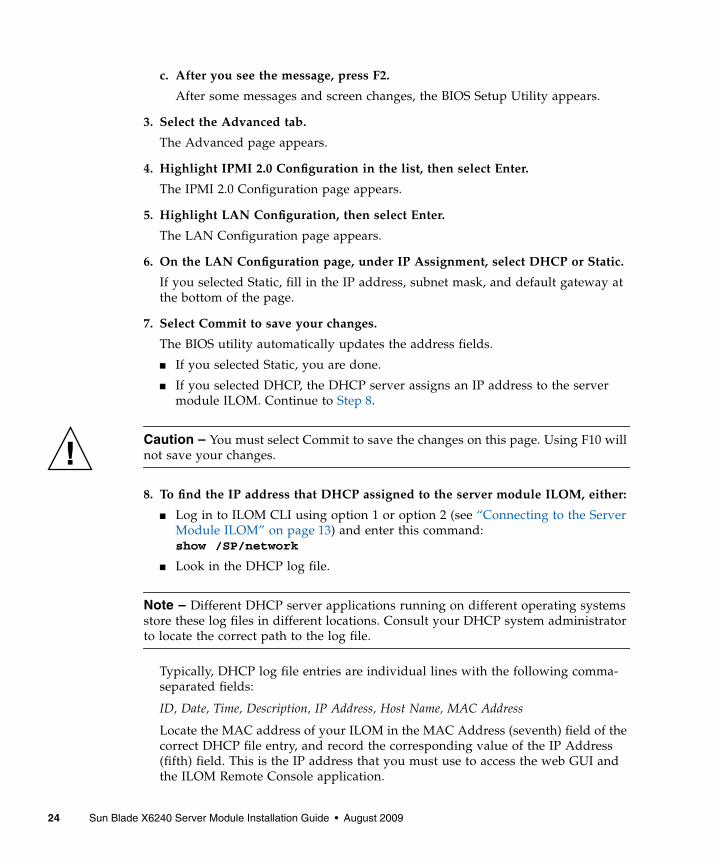
c. After you see the message, press F2.
After some messages and screen changes, the BIOS Setup Utility appears.
3. Select the Advanced tab.
The Advanced page appears.
4. Highlight IPMI 2.0 Configuration in the list, then select Enter.
The IPMI 2.0 Configuration page appears.
5. Highlight LAN Configuration, then select Enter.
The LAN Configuration page appears.
6. On the LAN Configuration page, under IP Assignment, select DHCP or Static.
If you selected Static, fill in the IP address, subnet mask, and default gateway atthe bottom of the page.
7. Select Commit to save your changes.
The BIOS utility automatically updates the address fields.
■ If you selected Static, you are done.
■ If you selected DHCP, the DHCP server assigns an IP address to the servermodule ILOM. Continue to Step 8.
Caution – You must select Commit to save the changes on this page. Using F10 willnot save your changes.
8. To find the IP address that DHCP assigned to the server module ILOM, either:
■ Log in to ILOM CLI using option 1 or option 2 (see “Connecting to the ServerModule ILOM” on page 13) and enter this command:show /SP/network
■ Look in the DHCP log file.
Note – Different DHCP server applications running on different operating systemsstore these log files in different locations. Consult your DHCP system administratorto locate the correct path to the log file.
Typically, DHCP log file entries are individual lines with the following comma-separated fields:
ID, Date, Time, Description, IP Address, Host Name, MAC Address
Locate the MAC address of your ILOM in the MAC Address (seventh) field of thecorrect DHCP file entry, and record the corresponding value of the IP Address(fifth) field. This is the IP address that you must use to access the web GUI andthe ILOM Remote Console application.
24 Sun Blade X6240 Server Module Installation Guide • August 2009

▼ To Configure the ILOM IP Address Using DHCPThis procedure uses DHCP to assign ILOM an IP address.
1. Verify that your DHCP server is configured to accept new media access control(MAC) addresses.
2. Obtain the server module ILOM MAC address from one of the followinglocations:
MAC addresses are 12-digit hexadecimal strings in the format xx:xx:xx:xx:xx:xxwhere x represents a single hexadecimal letter (0–9, A–F, a–f). Write down theaddress for future reference.
■ The server module has a serial port to which you can attach a terminal device.If you log into ILOM and type the command show /SP/network, ILOMdisplays the current MAC address. See “Option 2: Connecting to ILOMThrough a Dongle Cable” on page 18.
■ The CMM has a serial port to which you can attach a terminal device. If youlog into the CMM ILOM and type the command show/CH/BLn/SP/network, the CMM ILOM displays the current MAC address.See “Option 3: Connecting to ILOM Through the Ethernet Port” on page 19.
■ The Customer Information Sheet shipped with your server module lists theMAC address.
■ You can get the MAC address from the system BIOS Setup screen. ChooseAdvanced - IPMI 2.0 Configuration - Set LAN Configuration - MAC address.
3. Connect an Ethernet cable to the network express module (NEM) portcorresponding to the server module.
Refer to your chassis documentation for the location of the NEM port.
Note – DHCP requires a connection to the server module through the NEM beforeDHCP can assign an IP address to the server module ILOM.
DHCP cannot automatically assign an address to the server module ILOM if it isonly connected to the RJ-45 NET MGT Ethernet port.
4. Reset the server module ILOM.
a. Log in to the server module ILOM. See “Option 1: Connecting to ILOMThrough the Chassis Serial Connector” on page 14 or “Option 3: Connecting toILOM Through the Ethernet Port” on page 19.
Chapter 2 Setting Up the Server Software 25

b. Type the reset command:
-> reset /SP
DHCP automatically assigns ILOM an IP address when the server modulerestarts.
5. Find the IP address that DHCP assigned to the server module ILOM.
See Step 8 in “To Configure the ILOM IP Address Using BIOS Setup Utility” onpage 23.
▼ To Configure the ILOM IP Address Using the CLIThis procedure describes how to manually configure the ILOM IP address using theCLI.
1. Connect to the server module ILOM using one of the following methods:
■ Connect to the server module ILOM using the chassis serial connector asdescribed in “Option 1: Connecting to ILOM Through the Chassis SerialConnector” on page 14.
■ Connect to the server module ILOM using a dongle cable as described in“Option 2: Connecting to ILOM Through a Dongle Cable” on page 18.
■ Connect to the server module ILOM using SSH as described in “Option 3:Connecting to ILOM Through the Ethernet Port” on page 19.
2. To see the IP address, type show /SP/network/ipaddress.
The last string, /ipaddress is optional.
3. To navigate to /SP/network, type:
-> cd /SP/network
-> show /SP/network/ipaddress
/SP/network Targets:
Properties: ipaddress = 10.6.153.148
Commands: show
->
26 Sun Blade X6240 Server Module Installation Guide • August 2009

4. Do one of the following:
■ To configure a static Ethernet configuration, type the following commands:
-> set pendingipdiscovery=static
-> set pendingipaddress=xxx.xxx.xx.xx
-> set pendingipnetmask=yyy.yyy.yyy.y
-> set pendingipgateway=zzz.zzz.zz.zzz
-> set commitpending=true
where xxx.xxx.xx.xx, yyy.yyy.yyy.y and zzz.zzz.zz.zzz are the IP address, netmask,and gateway for your ILOM and network configuration. To determine theseaddresses, see your system administrator.
■ To configure a dynamic Ethernet configuration, type the following commands:
-> set pendingipdiscovery=dhcp
-> set commitpending=true
5. To log out of ILOM, type:
-> exit
If you connected to the server module ILOM through the CMM ILOM, you willbe returned to the CMM ILOM.
If you connected to ILOM using SSH, you will be disconnected automaticallybecause you logged in under a different IP address. If it is taking a long time to bedisconnected, you can force a disconnect by typing ~. in the SSH window.
The following display shows a typical session where the user looks at static settings,configures them to be dynamic, then looks at the new settings.
Chapter 2 Setting Up the Server Software 27

-> cd /SP/network
-> show
/SP/network Targets:
Properties: commitpending = (Cannot show property) ipaddress = 10.6.42.42 ipdiscovery = static ipgateway = 10.6.42.1 ipnetmask = 255.255.255.0 macaddress = 00:14:4F:3A:26:74 pendingipaddress = 10.6.42.42 pendingipdiscovery = static pendingipgateway = 10.6.42.1 pendingipnetmask = 255.255.255.0
Commands: cd set show
-> set pendingipdiscovery=dhcpSet 'pendingipdiscovery' to 'dhcp'
-> set commitpending=trueSet 'commitpending' to 'true' if you logged in using SSH, you will be
disconnected here.
-> show
/SP/network Targets:
Properties: commitpending = (Cannot show property) ipaddress = 10.6.42.191 ipdiscovery = dhcp ipgateway = 10.6.42.1 ipnetmask = 255.255.255.0 macaddress = 00:14:4F:3A:26:74 pendingipaddress = 10.6.42.191 pendingipdiscovery = dhcp pendingipgateway = 10.6.42.1 pendingipnetmask = 255.255.255.0
Commands: cd set show
28 Sun Blade X6240 Server Module Installation Guide • August 2009

Setting Up Platform Operating Systemand Driver SoftwareAfter configuring the server module ILOM network settings, you can configure thepreinstalled Solaris 10 or OpenSolaris 2009.06 Operating System, or install asupported Windows or Linux operating system and drivers.
■ If you want to use the preinstalled Solaris 10 Operating System, refer to“Configuring the Preinstalled Solaris 10 Operating System” on page 31.
■ If you want to use the preinstalled OpenSolaris 2009.06 Operating System, refer to“Configuring the Preinstalled OpenSolaris Operating System” on page 47.
■ For details about installing a supported Linux or Solaris OS and the requireddrivers, refer to Sun Blade X6240 Server Module Operating System Installation Guide(820-3969).
■ For details about installing a supported Windows OS and the required drivers,refer to Sun Blade X6240 Server Module Windows Operating System Installation Guide(820-3970).
■ For additional OS considerations specific to this server, also refer to the Sun BladeX6240 Server Module Product Notes (820-3972).
Chapter 2 Setting Up the Server Software 29

30 Sun Blade X6240 Server Module Installation Guide • August 2009

CHAPTER 3
Configuring the PreinstalledSolaris 10 Operating System
This chapter explains the steps for configuring the Solaris™ 10 Operating System(OS) that has been preinstalled on your server, if ordered. The preinstalled version isSolaris 10 5/08 or later.
Note – Unlike with SPARC® systems, you will not see the output of the preinstalledSolaris 10 image through a monitor when you power on the server. You will see theBIOS power-on self-test (POST) and other boot information output. The server shipswith its console redirected to the serial port. You can choose an option to send theoutput to VGA (video port). For more information, see “(Optional) To Redirect theConsole Output to the Video Port” on page 38.
This chapter includes the following topics:
■ “Before You Begin” on page 32
■ “Configuring the Preinstalled Solaris 10 Operating System” on page 36
■ “Configuring X6240 Server Module RAID Drives” on page 39
■ “Mirroring the Preinstalled Solaris Operating System With LSI RAID” on page 40
■ “Solaris 10 Operating System User Information” on page 43
■ “Using the Solaris Installation Program” on page 44
■ “Reinstalling the Solaris Operating System” on page 45
31

Before You BeginBefore you begin configuring the preinstalled Solaris 10 OS, do the following:
■ Perform initial configuration of the server’s ILOM and determine the server’snetwork settings, as described in “Connecting to the Server Module ILOM” onpage 13.
■ Gather the information that you will need for the configuration, as listed in“Installation Worksheet” on page 32. Note that default values are indicated by anasterisk (*).
Tip – To find the server module, PCI Express Module, and SP MAC addresses, seethe Customer Information Sheet included with the system box or the server, PCI EM,and SP MAC addresses printed on their respective labels.
Installation WorksheetUse the worksheet in TABLE 3-1 to gather the information that you need to configurethe preinstalled Solaris 10 OS. You only need to collect the information that appliesto your application of the system.
32 Sun Blade X6240 Server Module Installation Guide • August 2009

TABLE 3-1 Worksheet for Solaris 10 Configuration
Information for Installation Description or ExampleYour Answers:Defaults (*)
Language Select from the list of available languages for theSolaris 10 software.
English*
Locale Select your geographic region from the list ofavailable locales.
Terminal Select the type of terminal that you are using fromthe list of available terminal types.
Network connection Is the system connected to a network? • Networked• Non-networked*
DHCP Can the system use Dynamic Host ConfigurationProtocol (DHCP) to configure its networkinterfaces?
• Yes• No*
If you are notusing DHCP,note the networkaddress:
IP address If you are not using DHCP, supply the IP addressfor the system.Example: 129.200.9.1
Subnet If you are not using DHCP, is the system part of asubnet?If yes, what is the netmask of the subnet?Example: 255.255.0.0
255.255.0.0*
IPv6 Do you want to enable IPv6 on this machine? • Yes• No*
Host name A host name that you choose for the system.
Kerberos Do you want to configure Kerberos security on thismachine?If yes, gather the following information:
Default realm:Administration server:
First KDC:(Optional) Additional KDCs:
• Yes• No*
Chapter 3 Configuring the Preinstalled Solaris 10 Operating System 33

Name service Name service If applicable, which name service should thissystem use?
• NIS+• NIS• DNS• LDAP• None*
Domain name Provide the name of the domain in which thesystem resides.
NIS+ and NIS Do you want to specify a name server, or let theinstallation program find one?
• Specify One• Find One*
DNS Provide IP addresses for the DNS server. You mustenter at least one IP address, but you can enter upto three addresses.
You can also enter a list of domains to search whena DNS query is made.
Search domain:Search domain:Search domain:
LDAP Provide the following information about yourLDAP profile:
Profile name:Profile server:
If you specify a proxy credential level in yourLDAP profile, gather the following information:
Proxy-bind distinguished name:Proxy-bind password:
TABLE 3-1 Worksheet for Solaris 10 Configuration (Continued)
Information for Installation Description or ExampleYour Answers:Defaults (*)
34 Sun Blade X6240 Server Module Installation Guide • August 2009
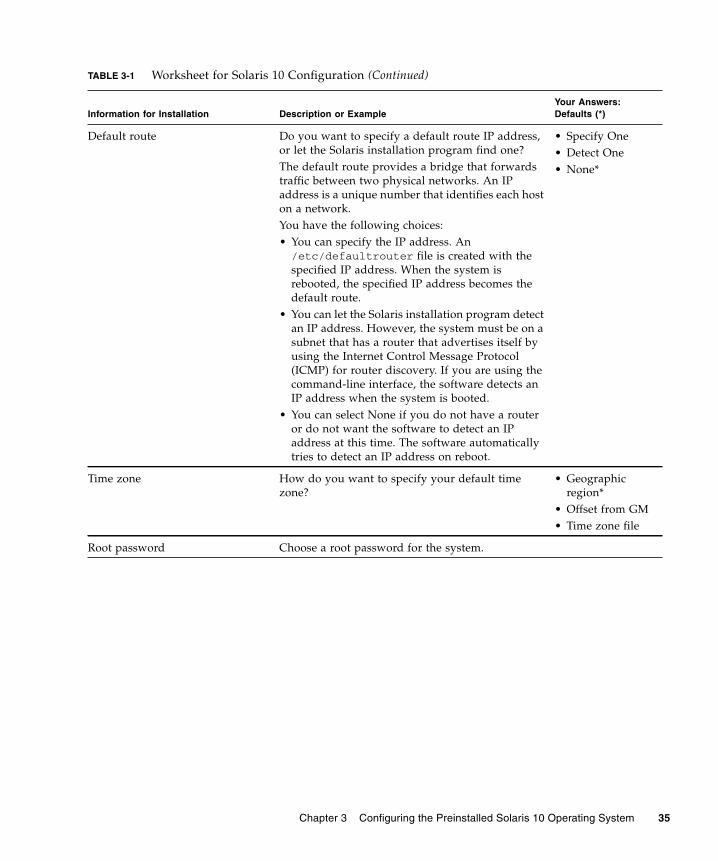
Default route Do you want to specify a default route IP address,or let the Solaris installation program find one?The default route provides a bridge that forwardstraffic between two physical networks. An IPaddress is a unique number that identifies each hoston a network.You have the following choices:• You can specify the IP address. An/etc/defaultrouter file is created with thespecified IP address. When the system isrebooted, the specified IP address becomes thedefault route.
• You can let the Solaris installation program detectan IP address. However, the system must be on asubnet that has a router that advertises itself byusing the Internet Control Message Protocol(ICMP) for router discovery. If you are using thecommand-line interface, the software detects anIP address when the system is booted.
• You can select None if you do not have a routeror do not want the software to detect an IPaddress at this time. The software automaticallytries to detect an IP address on reboot.
• Specify One• Detect One• None*
Time zone How do you want to specify your default timezone?
• Geographicregion*
• Offset from GM• Time zone file
Root password Choose a root password for the system.
TABLE 3-1 Worksheet for Solaris 10 Configuration (Continued)
Information for Installation Description or ExampleYour Answers:Defaults (*)
Chapter 3 Configuring the Preinstalled Solaris 10 Operating System 35

Configuring the Preinstalled Solaris 10Operating System
Note – Before you perform this procedure, you need to set up the service processor.If you have not done so, see Chapter 2.
Use the information that you gathered in “Installation Worksheet” on page 32 as youperform the configuration.
After configuring the server module ILOM, you can configure the preinstalledSolaris 10 Operating System (OS) by using the service processor to connect to thesystem console.
▼ To Configure the Preinstalled Solaris 10 OSYou can connect to the service processor using a serial terminal, or the Ethernet, asdescribed in “Connecting to the Server Module ILOM” on page 13.
If you connect to the service processor using a serial terminal, you can use one of thefollowing options:
■ To capture the serial port output, on a client running Solaris OS, type:$tip -9600 /dev/ttya
■ On a client running the Windows OS, start a program such as Hyperterminal.
■ On a client running the Linux OS, start a program such as Minicom, a text-basedserial communication program that is included in the Linux distributions. Formore information, see the man pages included in the Linux distribution.
1. Connect and log in to the service processor using one of the methods describedin “Connecting to the Server Module ILOM” on page 13.
The server module ILOM CLI prompt appears:
->
36 Sun Blade X6240 Server Module Installation Guide • August 2009

2. Verify that the communication properties of the service processor are set to thedefaults. For example:
3. If the speed is anything other than 9600, change it by using the command:
-> set /SP/serial/host pendingspeed=9600 commitpending=true
4. Start the serial console mode by entering the following:
-> start /SP/console
Only accounts with Administrator privileges are enabled to configure the SP.
5. When the prompt appears, type y:
Are you sure you want to start /SP/console (y/n)? y
6. Power on main power to the server module by using a pointed object or stylusto press the recessed Power button on the front panel.
POST messages appear on your screen as the OS boots up.
7. Follow the Solaris 10 preinstallation on-screen prompts.
8. Use the information gathered in “Installation Worksheet” on page 32 to help youenter the system and network information as you are prompted.
The screens that are displayed will vary, depending on the method that you chosefor assigning network information to the server (DHCP or static IP address).
After you have entered the system configuration information, the servercompletes the boot process and displays the Solaris login prompt.
-> show /SP/serial/host/SP/serial/host Targets:
Properties: commitpending = (Cannot show property) pendingspeed = 9600 speed = 9600
Commands:cdshow
Chapter 3 Configuring the Preinstalled Solaris 10 Operating System 37

▼ (Optional) To Redirect the Console Output to theVideo PortThe server module’s console is automatically directed to the serial port. GRUB, theopen source boot loader, is the default boot loader in the Solaris OS for x86-based orx64-based systems. The boot loader is the first software program that runs after youpower on a system.
1. Use a cable to connect the serial port of the host server (either through thechassis SER MGT port or through a dongle cable’s serial port) to the video portof the client system.
2. From the GRUB menu, you have the option of displaying the installationprocess to a VGA connection (video port) as shown here:
*******************************************************************
* Solaris 10 5/08 s10x_u5wos_10 X86 - Serial Port (ttya) *
* Solaris 10 5/08 s10x_u5wos_10 X86 - Graphics Adapter *
* Solaris failsafe *
* *
* *
* *
* *
* *
*******************************************************************
3. To display output to the video port, choose the following option:
Solaris 10 5/08 s10x_u5wos_10 X86 - Graphics Adapter
38 Sun Blade X6240 Server Module Installation Guide • August 2009

Configuring X6240 Server Module RAIDDrivesAfter you configure the Solaris OS, you might need to configure the RAID drives.
RAID Drive OverviewThe Sun Blade X6240 server module has two optional RAID expansion module(REM) cards. You can access RAID configuration through the REM card BIOS. Toaccess the LSI REM card BIOS, press CTRL-C during the system boot. To access theSun StorageTek REM card BIOS, press CTRL-A during the system boot.
The server module has the preinstalled OS on hard disk drive 0 (HDD0). When theSolaris OS installation is complete, the option to upgrade your single-disk OS to amirrored RAID solution is available.
The configuration procedure is different for each supported REM card. For example,a Sun StorageTek REM card has many more options for RAID configuration thandoes an LSI REM card. Configure the RAID depending on your needs as shown inTABLE 3-3.
Note – Configuring RAID for the Sun Blade X6240 server module is optional. Bydefault the Solaris preinstalled image is configured in a non-RAID configuration. Ifanything other than a basic mirror RAID is required, it is recommended to performa fresh installation of the Solaris Operating System (or other OS) in the desired RAIDconfiguration.
TABLE 3-2 Sun Blade X6240 REM cards
REM cards Press for BIOS
Sun StorageTek CTRL-A
LSI 3081E CTRL-C
Chapter 3 Configuring the Preinstalled Solaris 10 Operating System 39

RAID Drive OptionsTABLE 3-3 shows the RAID drive options.
TABLE 3-3 RAID Drive Options
Mirroring the Preinstalled SolarisOperating System With LSI RAIDThe Solaris OS supports hardware RAID and cannot be installed on an existing arrayif one has been created. Refer to the Sun Blade X6240 Server Module OS InstallationGuide (820-3969) or a REM card product guide.
REM Card Drives Supported RAID Configurations Supported Drive Usage
Sun StorageTek Seagate 73GB SASFujitsu 73GB SASSeagate 146GB SASFujitsu 146GB SASHitachi 146GB SASFujitsu 200GB SATA
Volume – 1 disk
RAID 0 – stripe – 2 disk minimum No redundancy
RAID 1 – mirror – 2 disk minimum 50%
RAID 1E – 3 drive minimum 50%
RAID 5 – 3 drive minimum 67–94%
RAID 5EE – 4 drive minimum 50–88%
RAID 50 – 6 drive minimum 67–94%
RAID 6 – 4 drive minimum 50–88%
RAID 60 – 8 drive minimum 50–88%
Spanned Volume – 2 drive minimum 100%
RAID Volume – 4 drive minimum 50-100%
LSI 3081E Seagate 73GB SASFujitsu 73GB SASSeagate 146GB SASFujitsu 146GB SASHitachi 146GB SASFujitsu 200GB SATA
IM (Integrated Mirror array) – 2 diskminimum, plus up to 2 hot spare disks.
Data on Primary diskmight be merged.
IME (Integrated Mirror Enhanced array) –3 to 8 disks including up to 2 hot spares.
All data will be deletedduring creation.
IS (Integrated Striping array) – 2 to 8disks.
All data will be deletedduring creation.
40 Sun Blade X6240 Server Module Installation Guide • August 2009

If you choose the preinstalled Solaris OS and want to make the OS part of a RAIDset, and if you are using the LSI REM card only, perform the following procedure toupdate the preinstalled Solaris OS to a mirrored RAID set. As noted in TABLE 3-3,only Integrated Mirror (IM) allows data on the primary hard disk drive (HDD) to bepreserved or merged into an array of disks.
This procedure describes how to create a mirror image of the OS before or after theSolaris installation. The server module has two hard disk drives: HDD0 (with theOS) and HDD1 (which is blank).
▼ To Create a Mirror Image of the PreinstalledSolaris OSTo create a mirror image of the Solaris OS on HDD1:
1. Power on your server module.
2. Press CTRL-C to access the LSI RAID Configuration Utility.
3. Select the REM card, then press Enter.
4. Choose RAID Properties.
5. Create an Integrated Mirror (IM) for the required disk configuration.
6. Select the hard disks to be used. Use the right arrow to move the cursor to theRAID column, and press the Space bar to include disks into RAID.
7. Because HDD0 contains data, select merge or delete:
■ Choose M to merge data and start a sync operation.
■ Choose D to erase the Solaris PreInstall.
8. Press C to create the RAID and start the sync operation.
9. Click Exit to save the configuration and close the menu.
10. Press Esc to exit the Configuration Utility.
11. Reboot the Solaris OS.
Chapter 3 Configuring the Preinstalled Solaris 10 Operating System 41

Creating a RAID Set to Incorporate aPreinstalled OS Using the SunStorageTek REM CardThe Sun StorageTek REM card enables you to choose from many RAIDconfigurations. How you configure your system depends on your systemrequirements and the available hard disk drives in the system.
This procedure describes how to mirror the preinstalled Solaris OS. This is the betteroption, and all remaining disks (should there be more than 2) are incorporated into aDATA RAID set using the available options as shown in TABLE 3-3.
You will need the Sun Blade X6240 Server Module Tools & Drivers CD (707-0257).
▼ To Incorporate a Preinstalled Solaris OS Usingthe Sun StorageTek REM CardFollow these steps to mirror your configured Solaris OS:
1. Using your Solaris server, log in and start Xserver.
This graphical user interface is required for StorageTek Software Management.
2. Make a new directory on your Solaris server, type:
mkdir /StorMan
3. Insert the supplied Tools & Drivers CD, and copy the StorMan.dss application,located in the /mount-point/RAIDmgmt/StorageTEK/Solaris directory, tothe new directory you created on your Solaris server, for example, /StorMan.
4. Change the permissions of the new directory and StorMan application, bytyping:
chmod 777 StormMan.dss
5. Type the following command to install the application:
pkgadd -d StorMan.dss
6. Choose to install all components when prompted.
42 Sun Blade X6240 Server Module Installation Guide • August 2009

7. To run the application, type the following:
sh /usr/StorMan/StorMan.sh
A split screen appears.
8. Click the screen to activate the Managed Systems List.
9. Double-click the local machine.
The local machine can be identified by the IP Address of the Primary ENETconnection.
A prompt appears.
10. At the prompt, log in as root, using the OS password that was assigned duringSolaris installation.
11. Click the SUN STK RAID Controller.
All attached hard disk drives on Enclosure 0 and 1 appear.
Tip – HDD0 (OS) should be Enclosure 0 Logical Volume 1.
12. To mirror the OS, right-click Logical Device 1 and choose Expand or ChangeLogical Device.
13. Choose the appropriate RAID option (in this example, RAID 1 for Mirror).
14. Choose a disk to mirror the OS with, from the physical disk list.
Select the hard disk drive that best fits your needs.
15. After you select the HDD, click Next, and then view the configurationsummary.
16. Click Apply to start the mirroring process.
You can also click Schedule to perform the mirroring process at a later time.
17. In the confirmation screen, click Confirm to start the mirroring process.
The OS begins to mirror. Mirroring may take several hours, depending on theamount of data and the HDD size.
Solaris 10 Operating System UserInformationThis section provides pointers to information about the Solaris 10 Operating System.
Chapter 3 Configuring the Preinstalled Solaris 10 Operating System 43

Solaris 10 User DocumentationYou can access the various collections of the Solaris 10 OS user documentation at:
http://docs.sun.com/app/docs/prod/solaris.10
Solaris 10 OS TrainingSun provides flexible training options that accommodate your personal scheduleand learning style. The training options include instructor-led, web-based online,CD-ROM, and Live Virtual Class. For Solaris 10 Training and Certification options ata glance, go to:
http://www.sun.com/training/catalog/solaris10.html
Using the Solaris Installation ProgramThe documentation listed in this section provides instructions for using the Solarisinstallation program and is available at the following web site:
http://docs.sun.com/
Follow the instructions for x86-based systems, not SPARC-based systems. For moreinformation, see the Solaris 10 Release and Installation Collection for the version ofthe Solaris 10 Operating System you have installed. This documentation is availableat:
http://docs.sun.com/app/docs/prod/solaris.10
After you configure the preinstalled Solaris OS, the Solaris installation programreboots the system and prompts you to log in. The system displays the message ofthe day, indicating the preloaded software that comes with your system:
■ Sun Java™ Enterprise System (Java ES)
■ Sun Studio™ 11
Sun Java Enterprise SystemSun Java Enterprise System (Java ES) is a set of software components that provideservices needed to support enterprise-strength applications distributed across anetwork or Internet environment.
44 Sun Blade X6240 Server Module Installation Guide • August 2009

Sun Studio 11Sun Studio 11 includes high-performance, optimizing C, C++, and Fortran compilersfor the Solaris OS on SPARC and x86/x64 platforms. It also includes command-linetools and a NetBeans-based Integrated Development Environment (IDE) forapplication performance analysis and debugging of mixed source languageapplications. The tools offer multi-platform support, compatible with gcc, VisualC++, C99, OpenMP, and Fortran 2003.
Reinstalling the Solaris OperatingSystemIf you want to reinstall the Solaris OS or to install a different version of the SolarisOS, you can install the OS in one of several ways, including by using DVD andnetwork (using the Jumpstart Enterprise Toolkit [JET]).
For step-by-step procedures, see the Solaris 10 Installation Guide: Basic Installations(820-0176). See also the Sun Blade X6240 Server Module Operating System InstallationGuide (820-3969).
Downloading the Solaris OperatingSystemIf you need to reinstall software, you can download the software from the followingsites:
■ To download the Solaris 10 operating system, go to:
http://www.sun.com/software/solaris/get.jsp
■ To download patches, go to:
http://sunsolve.sun.com/pub-cgi/show.pl?target=home
Chapter 3 Configuring the Preinstalled Solaris 10 Operating System 45

46 Sun Blade X6240 Server Module Installation Guide • August 2009

CHAPTER 4
Configuring the PreinstalledOpenSolaris Operating System
This chapter explains the steps for configuring the OpenSolaris Operating System(OS) that has been preinstalled on your server, if ordered. The preinstalled version isOpenSolaris 2009.06 or later.
Note – Unlike with SPARC® systems, you will not see the output of the preinstalledOpenSolaris image through a monitor when you power on the server. You will seethe BIOS power-on self-test (POST) and other boot information output. The serverships with its console redirected to the serial port. You can choose an option to sendthe output to VGA (video port). For more information, see “(Optional) To Redirectthe Console Output to the Video Port” on page 54.
This chapter includes the following topics:
■ “Before You Begin” on page 48
■ “Configuring the Preinstalled OpenSolaris Operating System” on page 52
■ “Configuring X6240 Server Module RAID Drives” on page 56
■ “Mirroring the Preinstalled OpenSolaris Operating System With LSI RAID” onpage 57
■ “OpenSolaris Operating System User Information” on page 61
■ “Using the OpenSolaris Operating System Installation Program” on page 61
■ “Reinstalling the OpenSolaris Operating System” on page 62
47

Before You BeginBefore you begin configuring the preinstalled OpenSolaris OS, do the following:
■ Perform initial configuration of the server’s ILOM and determine the server’snetwork settings, as described in “Connecting to the Server Module ILOM” onpage 13.
■ Gather the information that you will need for the configuration, as listed in“Installation Worksheet” on page 48. Note that default values are indicated by anasterisk (*).
Tip – To find the server module, PCI Express Module, and SP MAC addresses, seethe Customer Information Sheet included with the system box or the server, PCI EM,and SP MAC addresses printed on their respective labels.
Installation WorksheetUse the worksheet in TABLE 4-1 to gather the information that you need to configurethe preinstalled OpenSolaris OS. You only need to collect the information thatapplies to your application of the system.
48 Sun Blade X6240 Server Module Installation Guide • August 2009

TABLE 4-1 Worksheet for OpenSolaris Configuration
Information for Installation Description or ExampleYour Answers:Defaults (*)
Language Select from the list of available languages for theOpenSolaris software.
English*
Locale Select your geographic region from the list ofavailable locales.
Terminal Select the type of terminal that you are using fromthe list of available terminal types.
Network connection Is the system connected to a network? • Networked• Non-networked*
DHCP Can the system use Dynamic Host ConfigurationProtocol (DHCP) to configure its networkinterfaces?
• Yes• No*
If you are notusing DHCP,note the networkaddress:
IP address If you are not using DHCP, supply the IP addressfor the system.Example: 129.200.9.1
Subnet If you are not using DHCP, is the system part of asubnet?If yes, what is the netmask of the subnet?Example: 255.255.0.0
255.255.0.0*
IPv6 Do you want to enable IPv6 on this machine? • Yes• No*
Host name A host name that you choose for the system.
Kerberos Do you want to configure Kerberos security on thismachine?If yes, gather the following information:
Default realm:Administration server:
First KDC:(Optional) Additional KDCs:
• Yes• No*
Chapter 4 Configuring the Preinstalled OpenSolaris Operating System 49

Name service Name service If applicable, which name service should thissystem use?
• NIS+• NIS• DNS• LDAP• None*
Domain name Provide the name of the domain in which thesystem resides.
NIS+ and NIS Do you want to specify a name server, or let theinstallation program find one?
• Specify One• Find One*
DNS Provide IP addresses for the DNS server. You mustenter at least one IP address, but you can enter upto three addresses.
You can also enter a list of domains to search whena DNS query is made.
Search domain:Search domain:Search domain:
LDAP Provide the following information about yourLDAP profile:
Profile name:Profile server:
If you specify a proxy credential level in yourLDAP profile, gather the following information:
Proxy-bind distinguished name:Proxy-bind password:
TABLE 4-1 Worksheet for OpenSolaris Configuration (Continued)
Information for Installation Description or ExampleYour Answers:Defaults (*)
50 Sun Blade X6240 Server Module Installation Guide • August 2009

Default route Do you want to specify a default route IP address,or let the OpenSolaris installation program findone?The default route provides a bridge that forwardstraffic between two physical networks. An IPaddress is a unique number that identifies each hoston a network.You have the following choices:• You can specify the IP address. An/etc/defaultrouter file is created with thespecified IP address. When the system isrebooted, the specified IP address becomes thedefault route.
• You can let the OpenSolaris installation programdetect an IP address. However, the system mustbe on a subnet that has a router that advertisesitself by using the Internet Control MessageProtocol (ICMP) for router discovery. If you areusing the command-line interface, the softwaredetects an IP address when the system is booted.
• You can select None if you do not have a routeror do not want the software to detect an IPaddress at this time. The software automaticallytries to detect an IP address on reboot.
• Specify One• Detect One• None*
Time zone How do you want to specify your default timezone?
• Geographicregion*
• Offset from GM• Time zone file
Root password Choose a root password for the system.
TABLE 4-1 Worksheet for OpenSolaris Configuration (Continued)
Information for Installation Description or ExampleYour Answers:Defaults (*)
Chapter 4 Configuring the Preinstalled OpenSolaris Operating System 51

Configuring the PreinstalledOpenSolaris Operating System
Note – Before you perform this procedure, you need to set up the service processor.For instructions on setting up the service processor, see Chapter 2.
Use the information that you gathered in “Installation Worksheet” on page 48 as youperform the configuration.
After configuring the server module ILOM, you can configure the preinstalledOpenSolaris Operating System (OS) by using the service processor to connect to thesystem console.
▼ To Configure the Preinstalled OpenSolaris OSYou can connect to the service processor using a serial terminal, or the Ethernet, asdescribed in “Connecting to the Server Module ILOM” on page 13.
If you connect to the service processor using a serial terminal, you can use one of thefollowing options:
■ To capture the serial port output, on a client running OpenSolaris OS, type:$tip -9600 /dev/ttya
■ On a client running the Windows OS, start a program such as Hyperterminal.
■ On a client running the Linux OS, start a program such as Minicom, a text-basedserial communication program that is included in the Linux distributions. Formore information, see the man pages included in the Linux distribution.
1. Connect and log in to the service processor using one of the methods describedin “Connecting to the Server Module ILOM” on page 13.
The server module ILOM CLI prompt appears:
->
52 Sun Blade X6240 Server Module Installation Guide • August 2009

2. Verify that the communication properties of the service processor are set to thedefaults. For example:
3. If the speed is anything other than 9600, change it by using the command:
-> set /SP/serial/host pendingspeed=9600 commitpending=true
4. Start the serial console mode by entering the following:
-> start /SP/console
Note – Only accounts with Administrator privileges are enabled to configure the SP.
5. When the prompt appears, type y:
Are you sure you want to start /SP/console (y/n)? y
6. Power on main power to the server module by using a pointed object or stylusto press the recessed Power button on the front panel.
POST messages appear on your screen as the OS boots up.
7. Follow the OpenSolaris preinstallation on-screen prompts.
8. Use the information gathered in “Installation Worksheet” on page 48 to help youenter the system and network information as you are prompted.
The screens that are displayed will vary, depending on the method that you chosefor assigning network information to the server (DHCP or static IP address).
After you have entered the system configuration information, the server completesthe boot process and displays the OpenSolaris login prompt.
-> show /SP/serial/host/SP/serial/host Targets:
Properties: commitpending = (Cannot show property) pendingspeed = 9600 speed = 9600
Commands:cdshow
Chapter 4 Configuring the Preinstalled OpenSolaris Operating System 53

▼ (Optional) To Redirect the Console Output to theVideo PortThe server module’s console is automatically directed to the serial port. GRUB, theopen source boot loader, is the default boot loader in the OpenSolaris OS for x86-based or x64-based systems. The boot loader is the first software program that runsafter you power on a system.
1. Use a cable to connect the serial port of the host server (either through thechassis SER MGT port or through a dongle cable’s serial port) to the video portof the client system.
2. From the GRUB menu, you have the option of displaying the installationprocess to a VGA connection (video port) as shown here:
3. To display output to the video port, choose the following option:
OpenSolaris 2009.06 - Graphics Adapter
▼ To Modify the GRUB Menu to Auto BootThe GRUB menu on the preinstalled image has been configured for an infinitetimeout so that you can choose the console output on power-up. However, you canmodify this setting so that your system boots automatically.
● To modify the GRUB menu to auto boot, edit the/rpool/boot/grub/menu.1st file as follows:
54 Sun Blade X6240 Server Module Installation Guide • August 2009

a. Change the -1 value on the timeout line to reflect the duration you wantthe menu to be presented.
For example, for a 10-second delay, set the -1 on the timeout line to 10.
b. Add a line that specifies the defaults boot entry.
For example, to specify the first entry, set the defaults to 10.
Getting Started With the OpenSolarisOperating SystemFor information on getting started with OpenSolaris, click the Start Here icon on theOpenSolaris Desktop.
Chapter 4 Configuring the Preinstalled OpenSolaris Operating System 55

Configuring X6240 Server Module RAIDDrivesAfter you configure the OpenSolaris OS, you might need to configure the RAIDdrives.
RAID Drive OverviewThe Sun Blade X6240 server module has two optional RAID expansion module(REM) cards. You can access RAID configuration through the REM card BIOS. Toaccess the LSI REM card BIOS, press CTRL-C during the system boot. To access theSun StorageTek REM card BIOS, press CTRL-A during the system boot.
The server module has the preinstalled OS on hard disk drive 0 (HDD0). When theOpenSolaris OS installation is complete, the option to upgrade your single-disk OSto a mirrored RAID solution is available.
The configuration procedure is different for each supported REM card. For example,a Sun StorageTek REM card has many more options for RAID configuration thandoes an LSI REM card. Configure the RAID depending on your needs as shown inTABLE 4-3.
Note – Configuring RAID for the Sun Blade X6240 server module is optional. Bydefault the OpenSolaris preinstalled image is configured in a non-RAIDconfiguration. If anything other than a basic mirror RAID is required, it isrecommended to perform a fresh install of the OpenSolaris Operating System (orother OS) in the desired RAID configuration.
TABLE 4-2 Sun Blade X6240 REM cards
REM cards Press for BIOS
Sun StorageTek CTRL-A
LSI 3081E CTRL-C
56 Sun Blade X6240 Server Module Installation Guide • August 2009

RAID Drive OptionsTABLE 4-3 shows the RAID drive options.
TABLE 4-3 RAID Drive Options
Mirroring the Preinstalled OpenSolarisOperating System With LSI RAIDThe OpenSolaris OS supports hardware RAID and cannot be installed on an existingarray if one has been created. Refer to the Sun Blade X6240 Server Module OSInstallation Guide (820-3969) or a REM card product guide.
REM Card Drives Supported RAID Configurations Supported Drive Usage
Sun StorageTek Seagate 73GB SASFujitsu 73GB SASSeagate 146GB SASFujitsu 146GB SASHitachi 146GB SASFujitsu 200GB SATA
Volume – 1 disk
RAID 0 – stripe – 2 disk minimum No redundancy
RAID 1 – mirror – 2 disk minimum 50%
RAID 1E – 3 drive minimum 50%
RAID 5 – 3 drive minimum 67–94%
RAID 5EE – 4 drive minimum 50–88%
RAID 50 – 6 drive minimum 67–94%
RAID 6 – 4 drive minimum 50–88%
RAID 60 – 8 drive minimum 50–88%
Spanned Volume – 2 drive minimum 100%
RAID Volume – 4 drive minimum 50-100%
LSI 3081E Seagate 73GB SASFujitsu 73GB SASSeagate 146GB SASFujitsu 146GB SASHitachi 146GB SASFujitsu 200GB SATA
IM (Integrated Mirror array) – 2 diskminimum, plus up to 2 hot spare disks.
Data on Primary diskmight be merged.
IME (Integrated Mirror Enhanced array) –3 to 8 disks including up to 2 hot spares.
All data will be deletedduring creation.
IS (Integrated Striping array) – 2 to 8disks.
All data will be deletedduring creation.
Chapter 4 Configuring the Preinstalled OpenSolaris Operating System 57

If you choose the preinstalled OpenSolaris OS and want to make the OS part of aRAID set, and if you are using the LSI REM card only, perform the followingprocedure to update the preinstalled OpenSolaris OS to a mirrored RAID set. Asnoted in TABLE 4-3, only Integrated Mirror (IM) allows data on the primary hard diskdrive (HDD) to be preserved or merged into an array of disks.
This procedure describes how to create a mirror image of the OS before or after theOpenSolaris installation. The server module has two hard disk drives: HDD0 (withthe OS) and HDD1 (which is blank).
▼ To Create a Mirror Image of the PreinstalledOpenSolaris OSTo create a mirror image of the OpenSolaris OS on HDD1:
1. Power on your server module.
2. Press CTRL-C to access the LSI RAID Configuration Utility.
3. Select the REM card, then press Enter.
4. Choose RAID Properties.
5. Create an Integrated Mirror (IM) for the required disk configuration.
6. Select the hard disks to be used. Use the right arrow to move the cursor to theRAID column, and press the Space bar to include disks into RAID.
7. Because HDD0 contains data, select merge or delete:
■ Choose M to merge data and start a sync operation.
■ Choose D to erase the OpenSolaris PreInstall.
8. Press C to create the RAID and start the sync operation.
9. Click Exit to save the configuration and close the menu.
10. Press Esc to exit the Configuration Utility.
11. Reboot the OpenSolaris OS.
58 Sun Blade X6240 Server Module Installation Guide • August 2009

Creating a RAID Set to Incorporate aPreinstalled OS Using the SunStorageTek REM CardThe Sun StorageTek REM card enables you to choose from many RAIDconfigurations. How you configure your system depends on your systemrequirements and the available hard disk drives in the system.
This procedure describes how to mirror the preinstalled OpenSolaris OS. This is thebetter option, and all remaining disks (should there be more than 2) are incorporatedinto a DATA RAID set using the available options as shown in TABLE 4-3.
You will need the Sun Blade X6240 Server Module Tools & Drivers CD (707-0257).
▼ To Incorporate a Preinstalled OpenSolaris OSUsing the Sun StorageTek REM CardFollow these steps to mirror your configured OpenSolaris OS:
1. Using your OpenSolaris server, log in and start Xserver.
This graphical user interface is required for StorageTek Software Management.
2. Make a new directory on your OpenSolaris server, type:
mkdir /StorMan
3. Insert the supplied Tools & Drivers CD, and copy the StorMan.dss application,located in the /mount-point/RAIDmgmt/StorageTEK/Solaris directory, tothe new directory you created on your OpenSolaris server, for example,/StorMan.
4. Change the permissions of the new directory and StorMan application, bytyping:
chmod 777 StormMan.dss
5. Type the following command to install the application:
pkgadd -d StorMan.dss
6. Choose to install all components when prompted.
Chapter 4 Configuring the Preinstalled OpenSolaris Operating System 59

7. To run the application, type the following:
sh /usr/StorMan/StorMan.sh
A split screen appears.
8. Click the screen to activate the Managed Systems List.
9. Double-click the local machine.
The local machine can be identified by the IP Address of the Primary ENETconnection.
A prompt appears.
10. At the prompt, log in as root, using the OS password that was assigned duringOpenSolaris installation.
11. Click the SUN STK RAID Controller.
All attached hard disk drives on Enclosure 0 and 1 appear.
Tip – HDD0 (OS) should be Enclosure 0 Logical Volume 1.
12. To mirror the OS, right-click Logical Device 1 and choose Expand or ChangeLogical Device.
13. Choose the appropriate RAID option (in this example, RAID 1 for Mirror).
14. Choose a disk to mirror the OS with, from the physical disk list.
Select the hard disk drive that best fits your needs.
15. After you select the HDD, click Next, and then view the configurationsummary.
16. Click Apply to start the mirroring process.
You can also click Schedule to perform the mirroring process at a later time.
17. In the confirmation screen, click Confirm to start the mirroring process.
The OS begins to mirror. Mirroring may take several hours, depending on theamount of data and the HDD size.
60 Sun Blade X6240 Server Module Installation Guide • August 2009

OpenSolaris Operating System UserInformationThis section provides pointers to information about the OpenSolaris OperatingSystem.
OpenSolaris OS User DocumentationYou can access OpenSolaris OS user documentation at:
http://opensolaris.org/os/documentation
OpenSolaris OS TrainingFor OpenSolaris training options, go to:
http://www.opensolaris.com/learn/subscriptions/
Using the OpenSolaris Operating SystemInstallation ProgramInstructions for using the OpenSolaris installation program are available at thefollowing web site:
http://dlc.sun.com/osol/docs/content/2009.06/getstart/index.html
After you configure the preinstalled OpenSolaris OS, the OpenSolaris installationprogram reboots the system and prompts you to log in.
Chapter 4 Configuring the Preinstalled OpenSolaris Operating System 61

Reinstalling the OpenSolaris OperatingSystemIf you want to reinstall the OpenSolaris OS or to install a different version of theOpenSolaris OS, refer to the Getting Started With OpenSolaris 2009.06 at:
http://dlc.sun.com/osol/docs/content/2009.06/getstart/
Downloading the OpenSolarisOperating SystemYou can download software for the OpenSolaris OS from the following sites:
■ To download the OpenSolaris OS, go to:
http://opensolaris.org/os/TryOpenSolaris/
■ To download support repository updates (SRUs), which contain the latest releasedbug fixes for the OpenSolaris OS, go to:
http://sunsolve.sun.com/show.do?target=opensolaris
62 Sun Blade X6240 Server Module Installation Guide • August 2009

Index
Cchassis management module (CMM) ILOM, 12chassis management module see CMMchassis, defined, 1CMM, defined, 1command line interface (CLI)
SSH log in, 20SSH log out, 20
Ddefault root password, 20dongle cable, 8driver updates, xDynamic Host Control Protocol (DHCP), 25
Eemergency shutdown, 7
Ffirmware updates, x
Ggraceful shutdown, 7GRUB menu, 38, 54
modifying to auto boot system, 54
Hhardware RAID, 40, 57
Iinstallation overview, 1
Integrated Lights Out Manager (ILOM)defined, 1introduction, 11serial connection, 14SSH log in, 20SSH log out, 20
IP addressconfiguring through BIOS Setup utility, 23configuring through DHCP, 25
Llog in
CLI and SSH, 20log out
CLI and SSH, 20LSI REM card, 39, 56
MMAC address, 15, 25
server module, 32, 48SP, 32, 48
mirrored RAID, 39, 56
OOpenSolaris Operating System
configuring, 52getting started, 55installation prerequisites, 48reinstalling the OS, 62training, 61user documentation, 61using the installation program, 61
63

OpenSolaris OSdownloading, 62
operating systemspreinstalled OS
configuring OpenSolaris OS, 47configuring Solaris OS, 31
OS installation, references, 29overview of OS installation, 2
Ppassword, root, 20PCI EM MAC address, 32, 48power
powering off, 7powering on standby power, 5
preconfigured ILOM Administrator account, 12product updates, x
RRAID, 39, 56RAID Expansion Module (REM), 39, 56root password, 20
SSecure Shell (SSH)
CLI log in, 20CLI log out, 20
serial port connector, 9, 19server module
connecting through the SP IP address, 36, 52front panel, 6ILOM, 12inserting, 3redirecting console to video, 38, 54
server module defined, 1server module ILOM
connecting through chassis serial connector, 14connecting through dongle cable, 18connecting through the Ethernet port, 19
service processor (SP)defined, 1MAC Address, 32, 48
shutting down power, 7Solaris 10 Operating System
configuring the preinstalled OS, 31downloading the OS, 45
prerequisites, 32, 48training, 44user documentation, 44
standby power, applying, 5Sun StorageTek REM card, 39, 42, 56, 59
Tterms defined, 1, 11, 12testing using a dongle cable, 8
UUSB device connection, 9, 19
Vvideo port redirection, 38, 54
64 Sun Blade X6240 Server Module Installation Guide • August 2009