Embed Size (px)
DESCRIPTION
Here's a small preview of the London Cyclist Handbook available from http://www.londoncyclist.co.uk/london-cyclist-handbook/ The Handbook is a complete guide to life in the cycle lane. It helps you get started with cycling and then takes you through to the big league - joining longer rides and getting the most out of your bike.
Citation preview

Getting started 1
If you want to deter thieves, then you’ll need one expensive primary lock (recommend: D-Lock) followed up with a secondary, less expensive lock of a different type. This is important because thieves normally don’t carry the tools to disable two different types of locks. Used correctly, this will allow you to secure your front and back wheel to your frame, and the object you are locking to.
Use two different locks
My cycling techniques are much improved since having a two hour one-on-one session with a cycle instructor. I feel so much safer now and am armed with a bunch of techniques that help me assert my position on the road and stay out of trouble. Find a session near you and give it a try – you’ll thank me for it!
Learn to ride assertively
You wouldn’t think a simple glance behind you would be enough to get drivers to notice you and give you more space. However, you would be surprised. These days in heavy traffic I glance behind me every 10-15 seconds.
Power of a glance
Whilst puncture proof tyres may help reduce the number of punctures, inevitably one day you will get one. Be prepared by picking up some glue-less puncture patches, a basic repair kit and a portable bike pump.
Fear no punctures
Before your first day of cycling to work, take a practise run to figure out your route on the weekend. It takes time to familiarise yourself with the route. Use CycleStreets.net for help in finding more of the pleasant cycle routes that are away from main roads.
Have a practise ride
Always lock your bike through the frame, through the wheel and through the object you are securing it to. Don’t lock your bike to a post that it can be lifted over. Lock your bike somewhere busy. Never leave your bike unlocked. Don’t place the lock too near the ground as it will be easier to leverage for attack. Remove all accessories.
Rules of bike locking
I spent my first couple of years cycling without a floor pump. Little did I know all this time I was riding without properly inflated tyres. A floor pump with a pressure gage helps you pump up tyres quickly and get them to the required pressure. This prevents punctures and improves dramatically your performance.
Get a floor pump
If you want a speedy start then gear down as you reach the traffic lights. Once the lights turn green you’ll be able to pedal faster and move up the gears once more.
Gear down at traffic lights
8 things I wish someone had told me when I first started
1 2 3 4
5
7 8
6
Getting started 1
“In 5 years in London, I’ve never had a bike stolen”
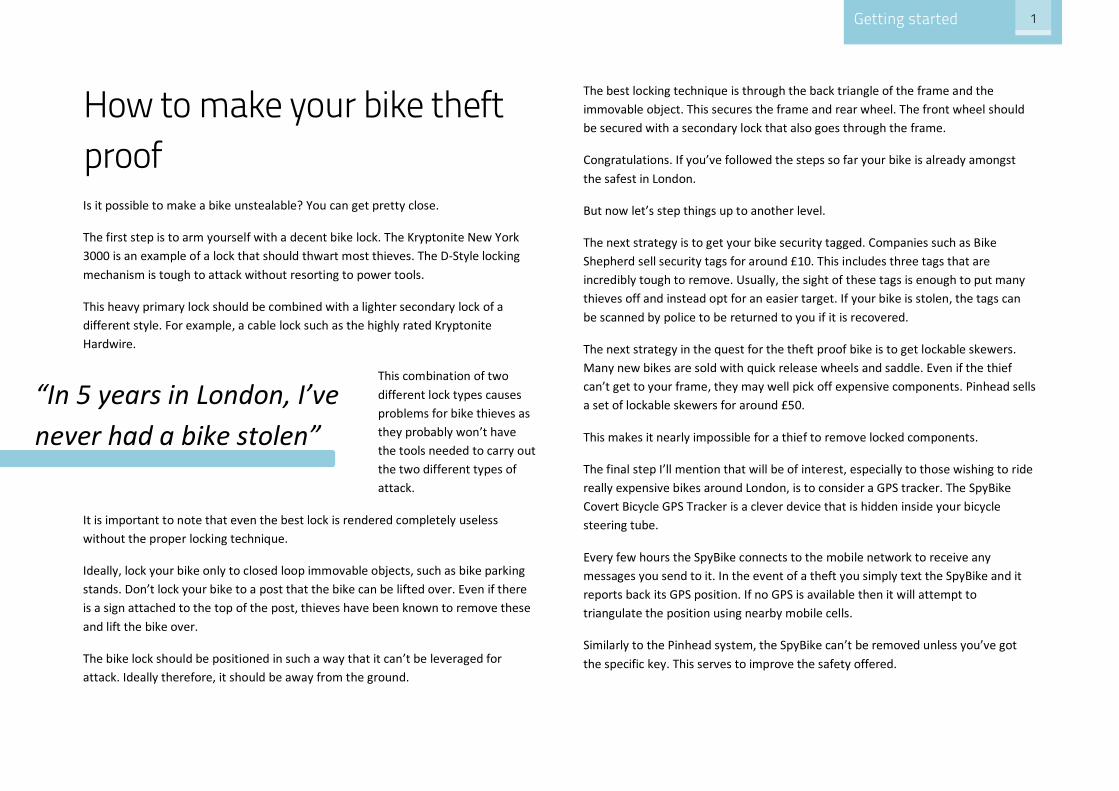
How to make your bike theft proof Is it possible to make a bike unstealable? You can get pretty close.
The first step is to arm yourself with a decent bike lock. The Kryptonite New York 3000 is an example of a lock that should thwart most thieves. The D-Style locking mechanism is tough to attack without resorting to power tools.
This heavy primary lock should be combined with a lighter secondary lock of a different style. For example, a cable lock such as the highly rated Kryptonite Hardwire.
This combination of two different lock types causes problems for bike thieves as they probably won’t have the tools needed to carry out the two different types of attack.
It is important to note that even the best lock is rendered completely useless without the proper locking technique.
Ideally, lock your bike only to closed loop immovable objects, such as bike parking stands. Don’t lock your bike to a post that the bike can be lifted over. Even if there is a sign attached to the top of the post, thieves have been known to remove these and lift the bike over.
The bike lock should be positioned in such a way that it can’t be leveraged for attack. Ideally therefore, it should be away from the ground.
The best locking technique is through the back triangle of the frame and the immovable object. This secures the frame and rear wheel. The front wheel should be secured with a secondary lock that also goes through the frame.
Congratulations. If you’ve followed the steps so far your bike is already amongst the safest in London.
But now let’s step things up to another level.
The next strategy is to get your bike security tagged. Companies such as Bike Shepherd sell security tags for around £10. This includes three tags that are incredibly tough to remove. Usually, the sight of these tags is enough to put many thieves off and instead opt for an easier target. If your bike is stolen, the tags can be scanned by police to be returned to you if it is recovered.
The next strategy in the quest for the theft proof bike is to get lockable skewers. Many new bikes are sold with quick release wheels and saddle. Even if the thief can’t get to your frame, they may well pick off expensive components. Pinhead sells a set of lockable skewers for around £50.
This makes it nearly impossible for a thief to remove locked components.
The final step I’ll mention that will be of interest, especially to those wishing to ride really expensive bikes around London, is to consider a GPS tracker. The SpyBike Covert Bicycle GPS Tracker is a clever device that is hidden inside your bicycle steering tube.
Every few hours the SpyBike connects to the mobile network to receive any messages you send to it. In the event of a theft you simply text the SpyBike and it reports back its GPS position. If no GPS is available then it will attempt to triangulate the position using nearby mobile cells.
Similarly to the Pinhead system, the SpyBike can’t be removed unless you’ve got the specific key. This serves to improve the safety offered.

Getting started 1
Bike theft is a problem in London but one that can be tackled by taking the correct precautions. Simply ask someone who’s had a bike stolen how they secured it. Many will say through the front wheel.
Whilst you may feel a little out of pocket in the beginning after spending money on so many security devices, and they are a pain to carry around, it will pay off in the long run.
Finally, consider investment in bicycle insurance or check what kind of coverage you get under your home contents insurance. We cover this more in The Urban Cyclist section.
Note that old steel fences outside buildings in London often are not the best for security. These can often be broken as they are much weaker than your bike lock.
Love London 2
Love London 2
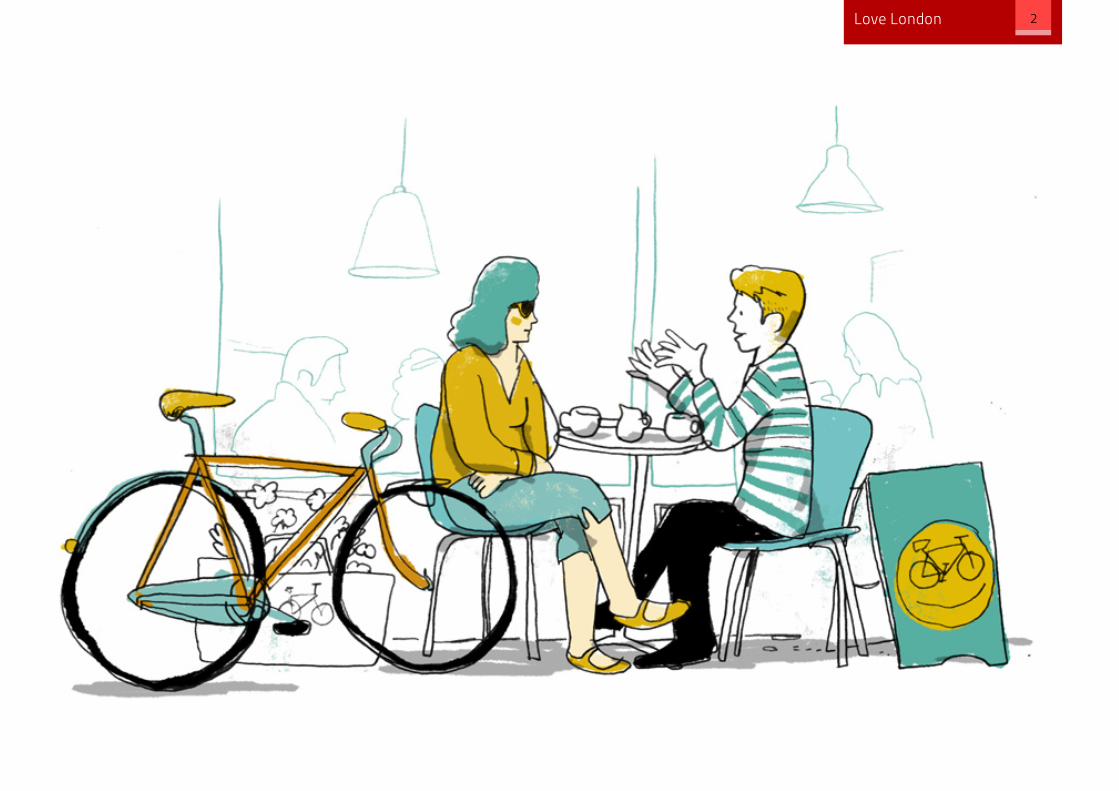
London’s bicycle collectives – giving you that warm fuzzy feeling If there’s one thing about London’s cycling community that gives you that warm fuzzy feeling inside, aside from when someone stops to help a fellow cyclist with a puncture, it is London’s bicycle collectives. I use that term to describe quite a broad group of organisations. From volunteer run organisations, to co-operatives and even profitable organisations who none the less give back much to the local community.
What is the advantage of using the organisations I list here? The workshops are great for giving you the space, tools and advice you need to maintain your bike yourself. The co-op shops provide an alternative bike shop style that many will appreciate for its independent advice and community driven approach.
56a Bikeroom
The 56a Bikeroom is open from Wednesday to Saturday. They describe themselves as a space for “Do-It-Yourself repairs run solely by volunteers.” Beyond the usual tool provision and advice from bicycle enthusiasts, there’s also second hand bike parts to help with your repair project. 56a Bikeroom is always on the lookout for more volunteers to donate their time to the project. 56a.org.uk/bikeworkshop.html
London Bike Kitchen
This amazing new workshop by Jenni is inspired by similar projects available in California. The idea is to create a space where people can come to repair their bikes with a helping hand from an expert where needed. The London Bike Kitchen also has a range of events that will teach you everything from the basic maintenance, to
preparing your bike for a long distance cycle tour. Using the space is charged at £10 per hour which gives you access to a bike stand, all the tools and all the coffee you could possible need and a bike wash. Check the website for the latest opening times. www.lbk.org.uk
Brixton Cycles
This is a shop run as a workers co-operative. The bike mad workforce will provide impartial advice, repairs and help with buying a new bike or accessories. The shop also runs cheap bicycle maintenance classes and has a range of skateboards on sale. I just wish they were a little nearer to where I live! brixtoncycles.co.uk
Bikeworks
Bikeworks is an award winning social cycling enterprise. They are located in Hammersmith & Fulham, Bethnal Green and Ladbroke Grove. Bikeworks initially worked on recycling old bicycles and giving them away to good causes, or selling them at affordable prices. They have since expanded and cover a much wider range of activities. Including bicycle maintenance courses, bicycle hire near the Olympic grounds and cycle tours. They also provide repair services. Whether you are looking for a cheap bike to get you started or somewhere to learn about maintaining your bike yourself, then they are worth keeping in mind. bikeworks.org.uk
ReCycling
If you are on the lookout of an affordable second hand bike, then make sure you checkout ReCycling. They offer a very friendly service and also help support the local community. re-cycling.co.uk
Cycletastic
Located in Kilburn this community project aims to help people maintain their own bikes. cycletastic.org.uk
Love London 2
London’s free bicycle maintenance classes I’ve always felt that while learning the ins and outs of bicycle maintenance is perfectly possible with a book or iPhone app (hint hint Bike Doctor), there’s no substitute for actually learning from a person face to face. This is a far better use of your time, as you’ll learn more quickly, and you’ll also have a chance to get any questions you have answered.
However, with this being the wonderful city of London, maintenance classes can be costly. Even for the very basic, I’ve seen prices upwards of £85 for 2-3 hour sessions. Fortunately, there are plenty of free courses out there to help you get a grasp of the basics. Whilst a lot of people will read this, hear about the classes, think “great, I must do that!” and then never do anything, I don’t believe you are one of them. It’s really worth doing, especially as a puncture repair in a bike shop can cost £15 a time.
The basic maintenance class that I attended a couple of years ago, was funded by Westminster City Council and run by Cycle Confident. They run free courses for residents of Westminster and Newham.
Generally your best bet for finding a free maintenance class in your area is to approach either the council or your local cycling campaign group. Where I lived previously in Camden, I had the option of taking part in the Camden Cycling Campaigns free classes, as well as free bike check-up’s provided by Dr. Bike.
Here’s a list of some of the free bicycle maintenance classes available:
• Wandsworth Council Bicycle Maintenance Class • Lewisham Bicycle Maintenance Course • Waltham Forest Basic Maintenance Course
• Dr Bike Kensington & Chelsea • Tower Hamlets Wheelers – Run by volunteers, this session gives you a
chance to bring in your bike and work on any repairs getting free advice if you get stuck.
• Hackney Cyclists Workshop – Diagnose problems with your bike and then get stuck in to the repairs with the help from the professionals on hand. It’s free to use but donations are always welcomed.
• Islington Cycle Action Group – an open workshop which runs on the fourth Wednesday of every month.
• Cycle Training UK – this co-operative runs many of the maintenance sessions in London. They are usually not free but heavily subsidised so can cost as little as £5.
Evans Cycles also run many free maintenance classes. These cover punctures, brake adjustments, gear adjustments and cleaning your bike. The Evans Cycles website has more details evanscycles.com/servicing/free-bike-maintenance-classes.
You should also check in with your local bike shop and see if they offer any courses. A particular service that I like from Lunar Cycles in Kentish Town, is the option to watch a mechanic as they perform the repair so that in future you have a better idea of how you can complete it yourself.

Love London 2
Interview with Jemma Leahy of Help My Chain Came Off Jemma has been providing insights and chuckles since the day she started cycling in London and blogging at http://helpmychaincameoff.blogspot.co.uk/. I decided to catch-up with her about her commuting experiences in London.
What is the biggest thing you'd miss if someone banned you from cycling in London tomorrow?
The freedom to come and go as I want. Cycling allows me to travel on my own terms to my destination without having to rely on train timetables, wait for the next bus to arrive or change my journey because of underground line closures. I’m quite impatient so my life would be a lot more stressful if I had to rely on TFL’s time rather than my own!
Did you have any big "aha" moments since you started cycling?
I’m content in my ignorance of the mechanics of the bicycle, as I believe that this knowledge is not a pre-requisite needed for cycling. However, after many bouts of stubbornness, I finally gave in and fixed my own puncture. Forty-five minutes of using a bit of muscle mixed in with some frustration, I scrubbed the dirt off my hands and admired my handiwork. An inflated tyre never looked and felt so good! But saying that, I think I get as much joy seeing my bike all fixed being wheeled out of the bike shop!
What do you think stops more of your friends taking up cycling in London?
Fear and lack of confidence. I think that some of my friends have the perception that every junction in London is like Elephant & Castle, whereas actually you can get around much of London on quiet back roads. I was scared for a while when I started, but the more I cycled, the more I grew in confidence. Now I see it as no
more of a challenge than fighting the commuters on the Northern Line at peak time!
Is there any item of cycling kit you couldn't live without?
I couldn’t live without my trusty Bobbin Straw pannier! It is undoubtedly the best item for commuting to work as it’s big enough to fit my lunch box, book, food shopping and coat, all in a waterproof twee material. Sometimes when it’s raining on my ride home, I wish I could hide in there myself!
Do you have a favourite bike shop that you always rely on?
Nothing beats the service you get from a local bike shop and Two Wheels Good is top on my list! They demonstrate two things I rate highly in a bike shop – affordability and the speed of service. Plus, they sell bicycle bells in the shape of burgers! What more can you wish for?
Do you have any favourite places to cycle to in London?
London has so many amazing cycle routes, but for me, the best ride is along the Regents Canal. This is as urban as it gets, without the cars and vans to get in your way. As a cyclist, the only thing you have to worry about is not cycling into the canal and what snack to get from Broadway market on a Saturday.
Looking ahead, any big cycling dreams?
I think I am living my cycling dream right now, which is being able to cycle freely every day and get to A to B on my own terms. It doesn’t matter what bicycle I ride or how much money it costs, because cycling for me is about simplicity. However, I have always wanted to go on a cycling tour of the Netherlands – maybe next year!
A thank you to Jemma for taking part in the interview.

Gear Guide 3
What shoes should you wear? From SPD’s to flipflops, there’s a pretty wide range of shoes you can choose to cycle in. It can be a little confusing to know what is the most suitable for you.
For those looking for efficiency, there is really nothing that surpasses the power of clipless pedals. Which, despite their naming, mean you have to clip in. If the idea of being attached to your pedals is a scary one, note that it’s actually a lot less precarious than you might believe. Are you going to fall over a couple of times as you first get used to them? Definitely. Have a few practise runs somewhere safe.
Riding clipless is far more efficient because you also pull on the backstroke of your pedal. This becomes especially apparent when going uphill. Also, clipless shoes are designed to capture more of the power as you push down on the pedal, as they offer a wider platform onto which you exert pressure.
As for the shoes, for seriously long distance rides and races there’s no beating road cycling shoes for their lightweight efficiency. However, they make a fairly lousy choice for an urban cyclist who needs to walk around in them as the cleats stick out of the shoe. In this category, the Louis Garneau Revo shoes are highly recommended.
Mountain bike shoes are a far better option. These use the SPD pattern and are recessed allowing you to walk more comfortably. There are also a number of touring shoes and sandals that use the SPD recessed cleats that make a great option for the city cyclist.
There are also shoes from companies such as DZR shoes that mean you don’t have to compromise fashion to get performance.
An alternative option for those looking to get better performance and make that final hill climb on the way home easier, without changing your footwear, then you
can buy toe straps to add to your pedals. The ones by Power Grips are highly recommended.
Despite the convenience of pedal straps, there is a major drawback for city cyclists. In an accident, clipless pedals are designed to unclip where as you remain attached to the pedal straps. It is generally accepted that you are safer to unclip rather than remained tangled with your bike in an accident.
There are also in between options. For example, DHB sells a cycling shoe that is designed to boost performance without needing to clip in or change your pedals.
There are also pedals that have two different systems. However, in practise it can be tough to make sure the pedal is span the right way around when you want to clip in.
Most lower priced new bikes will tend to come with plastic pedals. It’s not a bad idea to add more sturdy pedals in to your upgrade list. If you don’t want to bother with the hassle of clipping in and out, then the mountain bike style flat pedal is considered to be a great option. This provides a wider platform for your foot to push down upon giving you better performance.

Bike maintenance 4
Bicycle maintenance tends to evoke intense emotions from cyclists. You have the people out there who love to tinker with their bikes themselves and to figure out how to repair things. They live for that great feeling when you manage to repair the bike yourself.
Then you have those that find it time-consuming, frustrating and very fiddly. They are more likely to head to the nearest bike shop when problems arise.
Whichever way you look at it, it’s clear that everyone can benefit from learning a little about bike maintenance. In this section I’ve aimed to unravel some of its mysteries and take you though some of the most common repairs.
More important however than knowing how to perform advanced repairs, is learning the basics to the on going maintenance you need to perform. Essentially, that means keeping your bike clean and lubricated.
Even the least “Do It Yourself” minded can perform basic repairs such as fixing punctures, replacing brake pads and stopping most bike squeaks.
There’s a real pleasure pleasure in a bike that runs smoothly. When you pull the brake levers and the bike comes to a controlled stop. When you change gears and it smoothly shifts. When you are on a quiet road and all you can hear is the satisfying click of the wheels turning.
My bike certainly isn’t always that way. I’ll fall behind on maintenance and it’ll slip down my todo list. We are only human after all and procrastinating on a todo list is the one thing we all manage to do. However, in the past 12 months I’ve come a
long way picking up some great advice on maintenance and making it easy for myself. Whether that’s a method of quickly fixing a puncture when I just want to get moving again or a tip I heard in a bike shop to make cleaning my bike a lot quicker. It’s all great advice that I often wish I’d heard earlier on.
Whether you are one of the 70% of readers who know how to repair a puncture or the 30% who’ve got no idea, you’ll find the advice here invaluable. You may not feel quite ready to get your hands dirty yet but at least you’ll know how to spot when something goes wrong with your bike and how to communicate the problem with a bike shop, making sure you are not ripped off.
Let’s get started.
Lazy cyclists guide to bicycle maintenance
Bike maintenance 4
Setting up your bike Glance around you as you cycle in London and you’ll notice many people using odd bike setups. Giveaway signs are when someone is riding with their legs wide apart as their saddle height isn’t correctly adjusted.
A couple of my friends who only ride a bike once or twice a year, prefer this setup as they like being near the ground which makes them feel safer. That’s fair enough. However, for more frequent cyclists, it’s worth taking the time to correctly setup your bike.
The benefits start with efficiency and end in living pain free in your knees, neck and back.
You can take bike setup to a very high level. Experts charge around £100 for a full bike setup where they measure every single inch of your body (nearly) and then tweak your bike, sometimes making only millimetres in micro adjustments. Those who’ve gone for a full bike setup service swear by it – but it certainly isn’t for everyone.
For those of us not riding to such a high level or wishing to spend £100, there are some things we can do at home to get most of the benefits. Here I’ll share some rules of thumb and while things will vary depending on your riding style, they are a really good starting point.
Frame size
The first step is to buy the correct size frame. This is where life is much easier if you buy your bike in a shop rather than online. The shop assistant should be able to offer advice on the correct size. Plus, you’ll quickly be able to tell after a test ride if things feel right.
Bikes vary in their design so the frame size for one bike doesn’t automatically translate to the next. Generally speaking for a road bike, a shorter rider (5’3” to
5’6”) will need a 53 to 54cm top tube. Taller riders ( 6’ to 6’4”) will need the 56 to 58cm top tubes.
If you are really split between two sizes it’s better to buy a size down rather than a size up. You can always raise the saddle height on a slightly smaller frame but with a larger frame, you are stuck.
Adjusting saddle height
One of the most important measurements is your inside leg. To get this you’ll need a tape measure and a friend. You should be dressed in the typical clothes and shoes you use to cycle daily. Then, hold a level or small book up in your crotch and measure from there to the top of your sole at your heel. Make a note of this figure as it will be important when buying a bike.
You then multiply this figure by 109% to discover what the distance between the top of your saddle and your pedal should be. Make sure the pedal is at full extension in line with the seat tube. Be prepared to adjust from here to 15mm to either side depending on how it feels most comfortable to you.
The general rule is that when your leg is fully stretched out on the pedal, your knee should be only slightly bent. Also, when your foot is on the ground you should be reaching the ground by your toes.
Adjusting your handlebars and brakes
When you reach down to the handlebars you should feel comfortable without too much of a pull on your back. If it doesn’t feel quite right you can raise the handlebars slightly. Remember to make small adjustments at a time and then test them out on your next two or three bike rides. After a few tests you should be able to tell whether things feel better or worse.
It’s important to also have easy reach to your brakes and gears. When you are riding in urban environments where you’ll need to use your brakes often, you should have a couple of fingers resting on the levers at all times. Therefore, your

Bike maintenance 4
hand needs to feel comfortable in this position. Otherwise, you’ll notice your hands getting tired.
Pulling the level on the furthest corner is generally the most efficient way to brake so use that when making adjustments.
Generally, it should also form a straight line from the arm and hand as you reach the lever.
All brake levers have a reach adjustment screw. Some are tiny and require an Allen key to adjust and others can be adjusted easily by hand.
Ideally, when the lever is pulled half way, your brakes should be fully engaged.
Using a plumb line
Another way to check things are setup correctly on a road bike is to use a plump line. This should be hung from the kneecap to the ground. The line should drop through the pedal spindle. If it doesn’t, then may need to move the saddle fore or aft to adjust it. Note that moving the fore and aft can adjust the angle of the seat. This can also help you adjust your cleats.
Be careful when adjusting the saddle however, as you don’t want to tip the nose forward or backwards. Whilst some time triallists and road cyclists do adjust this, for most purposes a level (flat) saddle position is best.
Making adjustments
It’s important to note that over time you may have become accustomed to the wrong position. Making adjustments at first may not feel right. Remember to persevere for a few rides before tweaking things again.
Female specific bikes
Women tend to have longer legs than men with a shorter torso. They also tend to have smaller hands, weight less and will feel more comfortable on different saddles. Hence why female specific versions of bikes exist and will in all likelihood be more comfortable.

Urban Cyclist 5
Don’t ride the bicycle away from the scene. If you want the police to follow up the report and take it seriously then riding the bike away doesn’t help.
Don’t discuss details of the accident at the time with the driver – just tell them it’s best to wait for the police.
Opening a door in your path is a criminal offense and you can prosecute the driver of the vehicle. This is also the case if it was the passenger who opened their door.
Additional tips What to do if you are ever in an accident Whilst it’s something we never want to think about, knowing what to do can make a big difference in dealing with the aftermath of an accident.
Step 1: Get yourself out of danger
If you are unable to move, then make yourself visible in any way you can.
Step 2: If injured seek medical attention.
Don’t go all British and say “I’m fine” when really you need help. Note that your symptoms may not appear immediately due to the rush of adrenaline. Point to a nearby passer-by and ask them for help. Often people will think “Someone else will get involved” and just keep walking but if you single them out, they’ll help.
Step 3: Witnesses
Try to get details of witnesses. It’s often unsure at this stage if you have damage to your bike, or perhaps will require some kind of physiotherapy and so forth. Having at least two independent witnesses, will help you vouch for what happened, in a claims court and to the police. Ideally, get their business card or other details that will help you track them down. Keep those notes and give a copy of them to the police. It has been known for police to lose copies of notes. Remember that it can take up to 12 months for your case to appear in court, and people change address and job.
Step 4: Exchange details
Exchange details. You should make a note of vehicle registration plates, make, colour and model. You should also have full insurance details as well as names and
addresses. Note that if the collision is with a pedestrian you should still get their full details. This is classed as a Road Traffic Accident and will be investigated by the police as long as you call them up to attend the scene.
Step 5: Gather evidence
Look around for CCTV cameras and make a note of these, to inform the police. Use your camera phone or ask someone to take pictures of the scene. This should be done before the vehicle and your bike is moved. Be as thorough as you can with your picture taking of the damage caused. Ideally, also grab a picture of the driver to prove that he was the driver at the time. Note that CCTV camera footage is generally deleted after 30 days, so this needs to be urgently gathered. You can apply for it under the Data Protection Act.
Step 6: Keep copies of everything
You should ask for copies of police reports, ambulance reports and also ask the police to keep in contact with you regarding any progress of the case. You should also make notes of attending officer’s names and details.
Step 7: Compensation
Bicycles need replacing and medical care may needs paying for. If medical treatment is required, then get detailed notes from the doctors to be used as evidence. Ideally, find yourself a good solicitor who has experience in bicycle accidents.
Go Big or Go Home 6
Finding other people to ride with Cycling is not just a great way to get from A to B, it’s also a great way to meet likeminded people.
Your local cycling campaign group
If you are not looking to crunch out the long distance miles, and would rather meet people and stop off at a nice café for tea and cake, then a ride organised by your local cycling campaign group could be perfect. Head over to lcc.org.uk for a list of local campaign groups.
Rides by cycling organisations
Quite a few bike shops in London also organise rides. The same goes for organisations such as second hand bike company Going Going Bike. Perhaps the largest is Evans Cycles who run a range of rides called Ride It! These vary from family rides that are around 12 mile routes to much longer rides.
Join a cycling club
Cycling clubs in London also organise rides for their members. These are not inaccessible as many people traditionally believe. Most clubs are very friendly and open to new members. They also organise rides with different ability levels. It can be a good idea to start off in the beginners group and work your way up until you find the perfect riding group. However, there’s no reason to underestimate your ability – which in a higher group will soon be improved.
To find a local cycling club you can use The British Cycling website Club Finder.
Most clubs have a website that should give you a fairly good idea of what sort of rides the members prefer.
Meetup.com
Websites such as meetup.com also host various cycling groups. This is where I met a good friend of mine, Godwyns, who I’ve since been on many bike rides with. A more recent site, CycleBuddy.com has received much praise on Guardian Bike Blog as a great way to join up with a fellow cyclist.
Forum groups
Getting active on forums such as lfgss.com is a good way of getting to know fellow cyclists. The site organises frequent rides and meetups so it’s just a case of keeping an eye out for them.
London cycling events
One of the quickest ways to get to know people is to go on some kind of gruelling challenge with them! The Dunwich Dynamo was one such challenge where there was always a chance to get chatting to fellow cyclists. Whether it’s to complain about the quality of the food or to compliment them on their big thighs. Note: I don’t really recommend complimenting random people on their big thighs.
Cycling is a really social activity, and I thoroughly recommend meeting up with fellow cyclists whom you can rely on for cycling adventures.
Go Big or Go Home 6
How to complete your first sportive Unless you are one of the Spartans from the movie 300, I’m guessing that before a big ride you’ll be feeling a little nervous. I know I certainly was before taking part in the Dunwich Dynamo. I kept thinking: Is there some kind of secret that hard core cyclists know that a little beginner like me should be aware of?
It’s certainly a big leap from a 12 mile ride to a 120 mile ride. The beautiful thing about cycling is that there isn’t really a secret. It’s not the same as running a marathon. Anyone with reasonable fitness can achieve these longer rides. I completed the 120 mile route not on an ultra-efficient high spec road bike, but on my four year old hybrid heavy workhorse with wide slow-me-down tyres. There also wasn’t an item of lycra in sight.
Admittedly, at the end of the ride I probably wasn’t the most pleasant person to talk to as I was exhausted. However, the experience had me hooked.
Whilst you can just take off on a long ride, it’s also pretty advantageous to get a little advice first.
Let’s start off on the food, because, believe me when I say, you’ll be eating monstrous amounts of it. Whilst I’m not going to dive in to hard core nutrition advice here, I would advise stocking up on some energy gels that you can consume during the ride. Ideally, whilst still riding. Frequent stopping and starting will kill your pace. You should also have easy access to your hydration, whether that be in one of those hydration backpacks, or in a bottle cage attached to your frame.
The classic energy food you’ll see many cyclists consume is a banana. Pack a couple of those. The night before a big ride, the classic meal is a big dish of pasta.
Essentially, with your food, you are looking to avoid what cyclists call bunking out. This is when your energy levels suddenly drop and you feel you can’t continue. Frequent drinking and snacking will help.
What about your bum?
This is the classic, slightly embarrassing question that cyclists will always enthusiastically answer. Just use chamois cream! Get a big load of it and rub it around the nether regions. Vaseline will also do the trick.
This is also where those lycra shorts will come in useful. The padding and material greatly increase comfort. They can be worn underneath a pair of shorts but remember not to wear underwear beneath the lycra. A classic mistake that I clearly remember reading about for the first time and being surprised.
During the ride, it’s a good idea to also shift your position in the saddle slightly. Don’t be afraid to come up on the pedals. This will relieve pressure on the nether regions. You can also shift your hands on the handlebars to vary your riding position.
To follow your route, you’ll either need turn by turn directions (called a cue sheet) or some kind of GPS device with the route loaded in there. Other rides will have a marked route.
Having a GPS device or a bike computer will help you pace yourself. At the beginning you’ll be keen to push ahead so it’s hard to tell your legs to take it easy.
This is also a good time to have a bike that actually fits you and is well maintained. Even a well maintained bike is susceptible to problems, so you should always carry a repair kit. That means a multitool, spare inner tubes, tyre levers, mini pump and puncture repair kit.
Setting up your bike for the long ride
Go Big or Go Home 6
The ideal bike for most people to ride a sportive with is a road bike. However, on the London Revolution I heard a couple of stories of people being overtaken by a Brompton. This is evidence that a sportive can be completed on most bikes.
There are a few key things you can setup on your bike to make it both comfortable and efficient for the ride.
The first big one is to use cleats. This is where you have a pair of cycling shoes that clip in to the pedals. If you’ve never ridden with cleats, then be prepared to fall over a couple of times. It’s best to get used to them somewhere where you can fall over without hurting yourself. Your local bike shop should be able to help you setup your SPD’s but it can also be done at home.
You’ll also want to attach a couple of bottle cages to your bike. This will allow you to reach down and grab a drink without taking your eyes off the road and stopping. Ideally, do this only when you are on a straight road and not heading around a corner at speed.
You’ll also want to setup your bike so that ideally, you are not carrying things on your back. A backpack can become uncomfortable on a long ride. A saddle bag is a good place to store your basic repair kit along with a small waterproof jacket.
Some people also opt for a bag on the front of the handlebars. In particular, if you are relying on a map, or turn by turn directions, then one with a clear plastic surface on the top allows you to check directions without stopping.
What if you don’t have a road bike?
There are a number of places in London that rent road bikes. Action Bikes is one of them and we’ve listed the rest in the Love London section.
Do you need to train?
If you are riding a distance of 10 to 15 miles, four or five times a week then that will be a strong base from which to complete a long ride from. Ideally, in the months running up to the event if you are riding over 100 miles then it’s a good idea to
throw in some longer rides of 25 to 30 miles. This should build up your fitness and endurance.
Riding tips
Join up: Ride behind someone or in a group and you’ll soon feel how much easier it is to cycle at speed. It is estimated you gain around 15-20% efficiency. If you are riding the route with a friend, then take turns to be upfront and stay close to their back wheel. Otherwise, join up with other people on the ride. You’ll find most sportive riders are really friendly and are happy to have some company, as long as you can keep up with their pace.
Keep going: Stopping and starting will kill your pace and make the ride feel longer. Aim to stop only at allocated pit stops.
Pace yourself: At the beginning you’ll be full of energy and wanting to speed off. Try to set a comfortable pace and stick to it. Using a bike computer will help.
Little and often: Drink more than you feel you need to and use the occasional energy bar or gel.
Ride carefully: There are dangers to cycling at speed. Loose gravel can send you flying off your bike. Keep an eye out for potholes, bad drivers and loose gravel. Special caution is needed around corners and be careful about how much speed you gain heading downhill.
Smooth braking: It’s better to apply slow, gradual pressure on your brakes, rather than slamming them, which may cause you to lose control. Also, on downhill sections sitting up on your bike will cause you to slow down through the wind resistance.
Gear down: As you approach a hill you should switch to a low gear. If you leave it until you are climbing you risk dropping the chain. Also vary your riding between the large front chainring and the medium one. This will place resistance on different muscles and allow you to ride for longer.
London Cyclist Handbook: This was a small sample of the London Cyclist Handbook available on http://www.londoncyclist.co.uk
Find us on: Twitter: @londoncyclist Facebook: http://www.facebook.com/londoncyclist
Copyright © Andreas Kambanis 2012 All rights reserved. No part of this publication may be reproduced, modified or copied without the express written permission of the author except for the use of brief quotations in an article about the book.
All photos are by Andreas Kambanis.
Maps are courtesy of the OpenCycleMap project.
The author does not accept any liability for any loss, damage or injury caused by errors in, or omissions from, the information given.
First published, 2012.
www.londoncyclist.co.uk


![Netex London Preview 2016 | learningCloud [EN]](https://img.dokumen.tips/doc/110x75/5879b4841a28ab6b2c8b6521/netex-london-preview-2016-learningcloud-en.jpg)


