Embed Size (px)
Citation preview

IVR Creator

IVR Creator
www.easycallnow.net 2
IVR
The IVR (Interactive Voice Response) feature allows you to automate some or all of your inbound call
handling. At its simplest, you can implement an IVR that routes calls to a specific department
selected by the caller using their telephone keypad, for example “press 1 for sales, press 2 for
support…”. A more complex example might be an automated shopping response system that guides
a caller through a specific product selection or customisation process and then collects a payment
for it. Complex solutions like this will interrogate and update your own servers using industry
standard protocols.
Building an IVR
First, select the “IVR” icon from the admin page.
The IVR builder page will be displayed. This is arranged into four separate areas.
A – This panel lists all the IVR queues you have built so far. This is where you start the creation of a
IVR Creator
www.easycallnow.net 3
new queue (via “New Queue”), Save the work you have done on an IVR “Save”, or select an existing
IVR to begin work on editing it.
B – This panel displays the flow chart that represents the IVR. This is where you can move objects
around and join them together to guide the call flow.
C – The component panel contains the objects that are available for use in the IVR panel. To add an
object onto the flow chart, you simply click on it, and drag it to the chart and drop it where you want
it.
D – The properties section displays what configuration items are available for each object on the
Chart when you click on the object to select it.
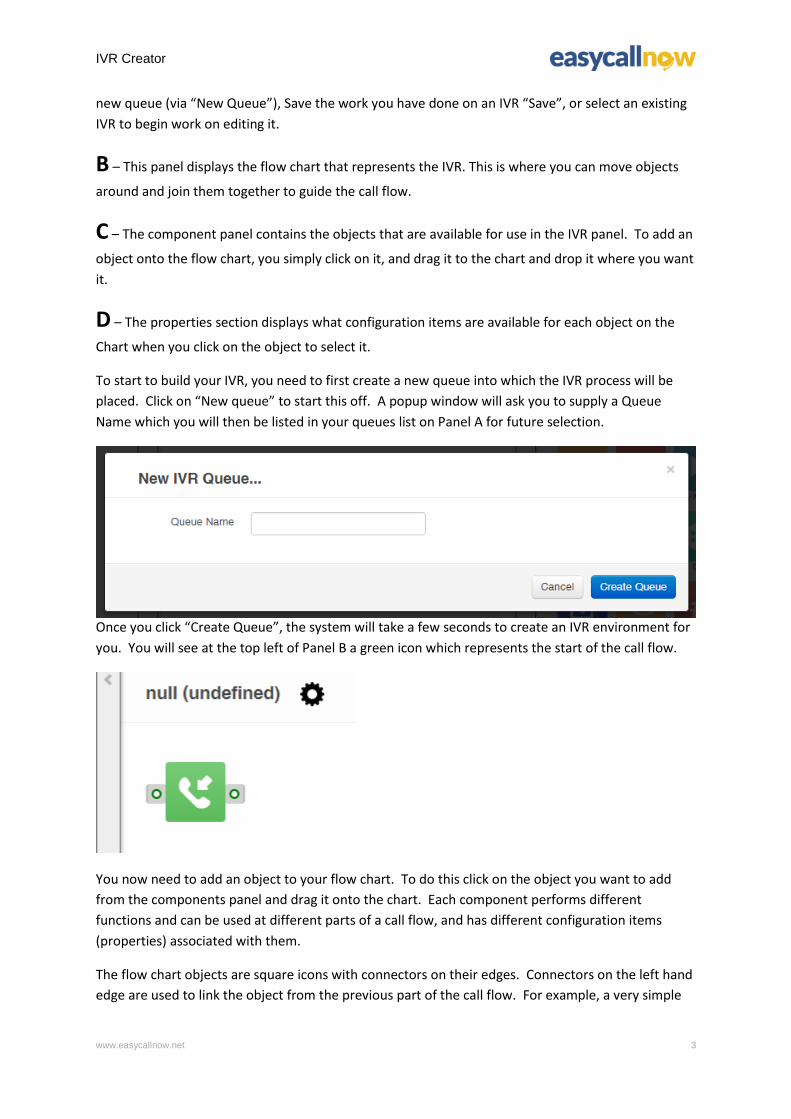
To start to build your IVR, you need to first create a new queue into which the IVR process will be
placed. Click on “New queue” to start this off. A popup window will ask you to supply a Queue
Name which you will then be listed in your queues list on Panel A for future selection.
Once you click “Create Queue”, the system will take a few seconds to create an IVR environment for
you. You will see at the top left of Panel B a green icon which represents the start of the call flow.
You now need to add an object to your flow chart. To do this click on the object you want to add
from the components panel and drag it onto the chart. Each component performs different
functions and can be used at different parts of a call flow, and has different configuration items
(properties) associated with them.
The flow chart objects are square icons with connectors on their edges. Connectors on the left hand
edge are used to link the object from the previous part of the call flow. For example, a very simple
IVR Creator
www.easycallnow.net 4
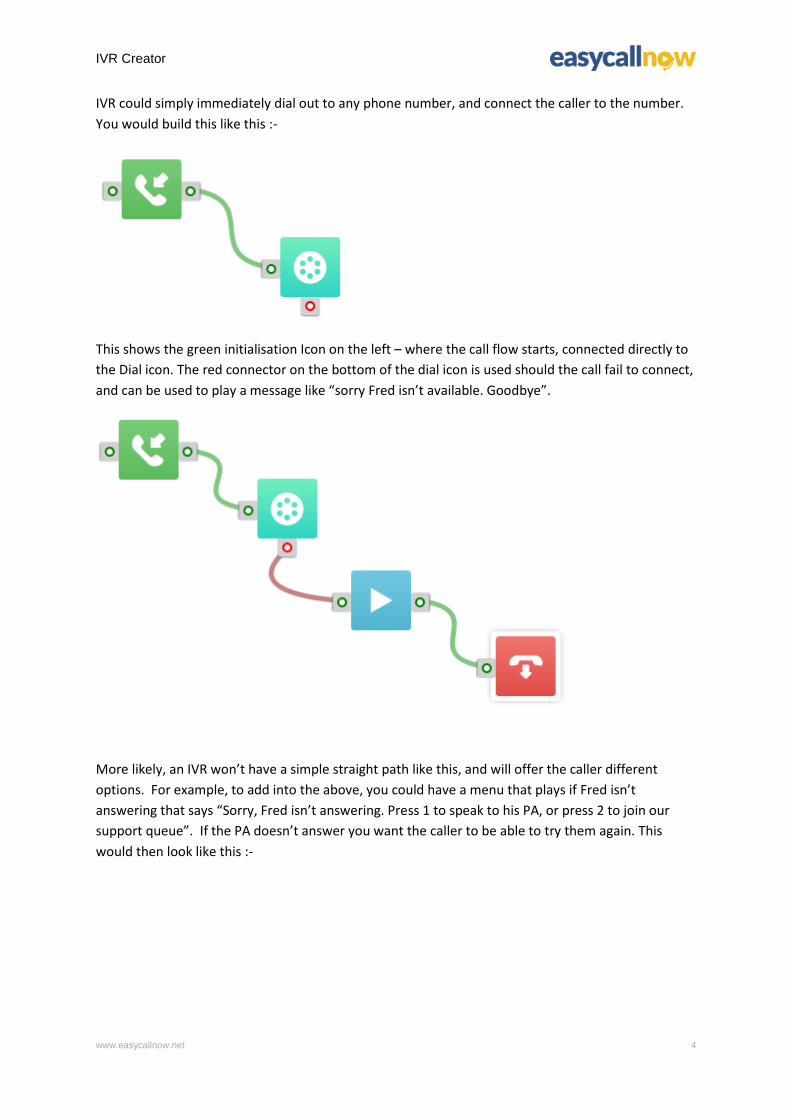
IVR could simply immediately dial out to any phone number, and connect the caller to the number.
You would build this like this :-
This shows the green initialisation Icon on the left – where the call flow starts, connected directly to
the Dial icon. The red connector on the bottom of the dial icon is used should the call fail to connect,
and can be used to play a message like “sorry Fred isn’t available. Goodbye”.
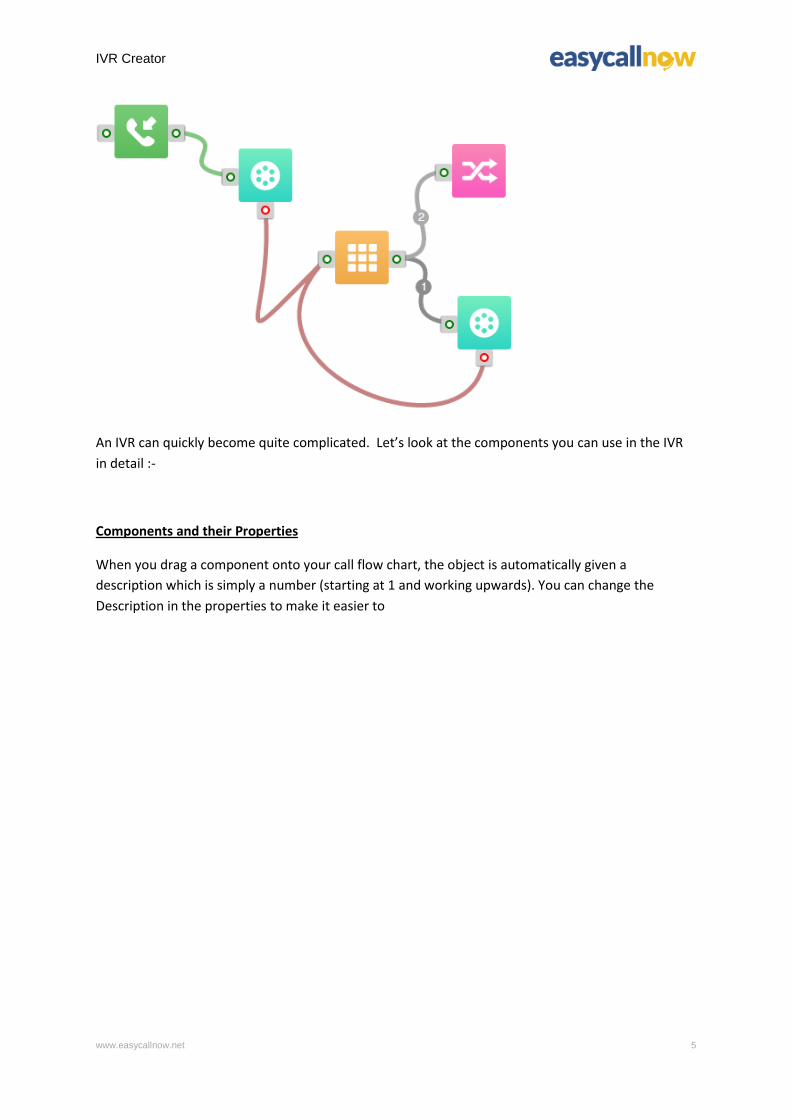
More likely, an IVR won’t have a simple straight path like this, and will offer the caller different
options. For example, to add into the above, you could have a menu that plays if Fred isn’t
answering that says “Sorry, Fred isn’t answering. Press 1 to speak to his PA, or press 2 to join our
support queue”. If the PA doesn’t answer you want the caller to be able to try them again. This
would then look like this :-
IVR Creator
www.easycallnow.net 5
An IVR can quickly become quite complicated. Let’s look at the components you can use in the IVR
in detail :-
Components and their Properties
When you drag a component onto your call flow chart, the object is automatically given a
description which is simply a number (starting at 1 and working upwards). You can change the
Description in the properties to make it easier to
IVR Creator
www.easycallnow.net 6
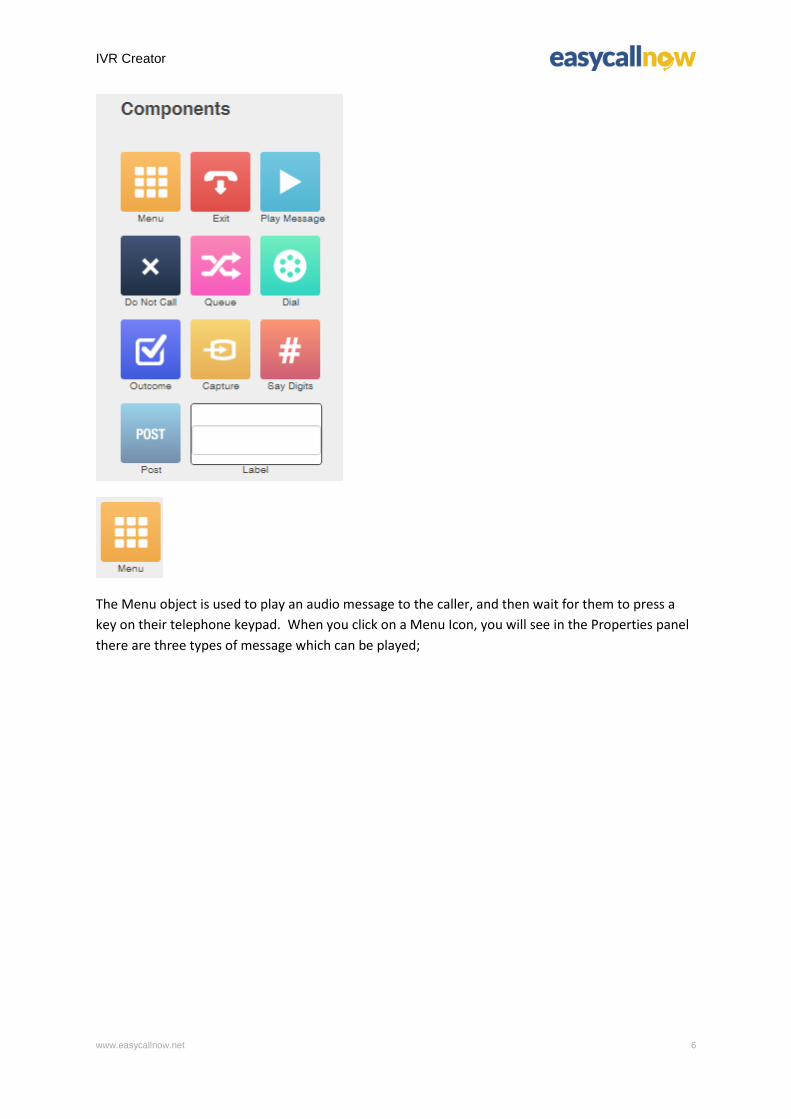
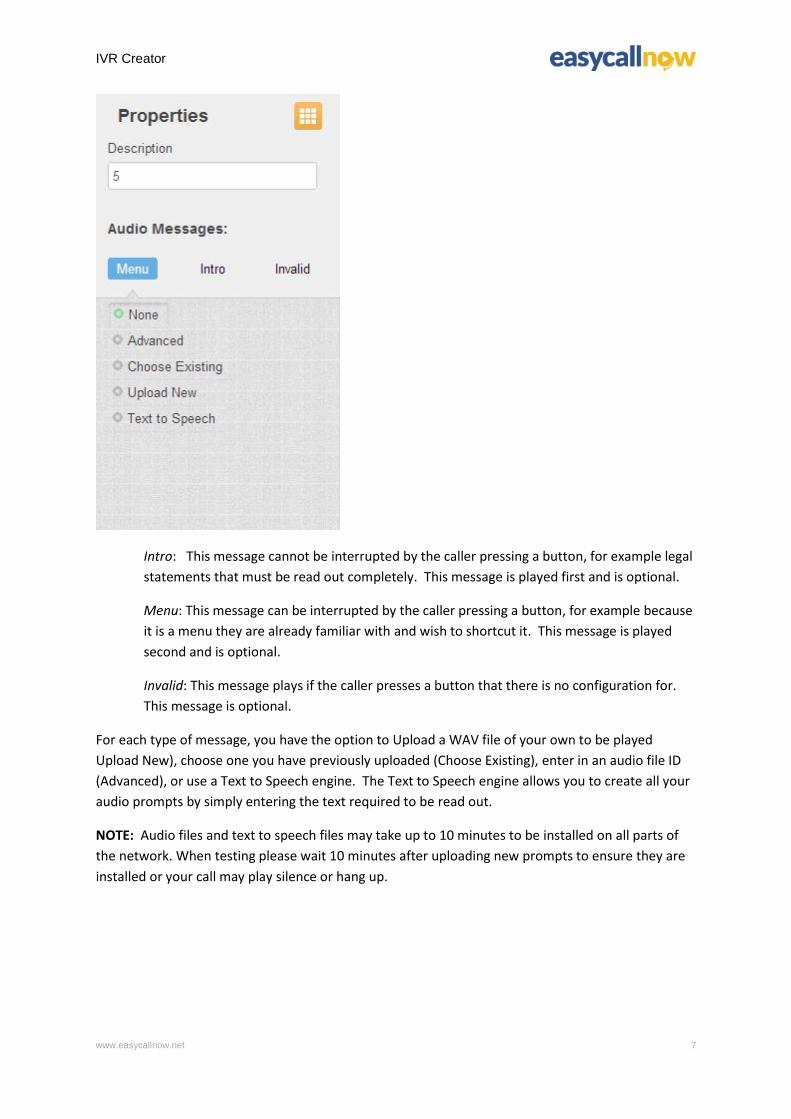
The Menu object is used to play an audio message to the caller, and then wait for them to press a
key on their telephone keypad. When you click on a Menu Icon, you will see in the Properties panel
there are three types of message which can be played;
IVR Creator
www.easycallnow.net 7
Intro: This message cannot be interrupted by the caller pressing a button, for example legal
statements that must be read out completely. This message is played first and is optional.
Menu: This message can be interrupted by the caller pressing a button, for example because
it is a menu they are already familiar with and wish to shortcut it. This message is played
second and is optional.
Invalid: This message plays if the caller presses a button that there is no configuration for.
This message is optional.
For each type of message, you have the option to Upload a WAV file of your own to be played
Upload New), choose one you have previously uploaded (Choose Existing), enter in an audio file ID
(Advanced), or use a Text to Speech engine. The Text to Speech engine allows you to create all your
audio prompts by simply entering the text required to be read out.
NOTE: Audio files and text to speech files may take up to 10 minutes to be installed on all parts of
the network. When testing please wait 10 minutes after uploading new prompts to ensure they are
installed or your call may play silence or hang up.

IVR Creator
www.easycallnow.net 8
The Exit object is simply used to hangup the call and terminate the IVR process.
The Play Message object plays an audio file to the caller before moving onto the next object in the
call flow chart. The selection of the audio message is as for the `Menu` Object.
The Do Not Call object automates the removal of the caller’s phone number from any automated
Outbound queue that uses the DDI of this IVR as its caller ID. For example, if you had an Outbound
dialling queue which is placing calls using the phone number 08459876543, and you selected this
same number for the inbound number of the IVR, then the Do Not Call function would remove the
caller’s phone number from that outbound queue. It will *only* be removed from an Outbound
queue which uses this caller ID.
NOTE: The Do Not Call object hangs up the call and ends the IVR, and so any message you want to
play to the caller to confirm their number is being removed must be played before this object.
The Queue object transfers the call into an Inbound queue you have created. For example, you
might have an IVR which says “Press 1 for sales, press 2 for support”, and your support team are
agents logged into the system enabled on the `support` queue. When the caller presses ‘2’, the call
would be sent to the queue where any Welcome message set on the queue would be played
followed by holding music etc. as you have setup on the queue. The IVR script ends at this point, but
the call continues.

IVR Creator
www.easycallnow.net 9
The Dial object dials a phone number you enter into the “Number” parameter in the properties
panel, and if the dial is answered the caller into the IVR is transferred directly to the number dialled.
This object also has the option to redirect to another object on the call should the dial not get
answered.
By default, the IVR will pass through the DDI number dialled by the caller to the phone being dialled
by the IVR. The Call Option selection allows you to overwrite this default (the default being
“neither”). If you prefer to pass through the original caller’s CLI, select “forward customer CLI”. If
you prefer to pass through the Call ID of the call so that data captured within the IVR can be pulled
by an Agent script then select “Show call ID”. The agent script would need to interrogate the API
using the Call ID to obtain the relevant details.
The Outcome object sets a specific outcome code onto the call record. This would be used for
reporting purposes. For example if you automated part of your processes to fulfil payments, you
could set the Outcome of a record to flag up failures so that they can be followed up.
Advanced: This selection allows you to enter a variable name that you have set somewhere else in
the IVR. For example you can do this using the “POST” object to obtain a value from your own
servers to set this variable’s value. If you do wish to set the Outcome to your variable name, you
must also select the “VAR” line in the Basic tab to use this (the first one).
The Failure connector of the Outcome object is used if the IVR is unable to set the Outcome code
you have selected. This would only happen if you attempted to set the outcome using a variable you
have created, but that variable’s content is a non-numeric value.

IVR Creator
www.easycallnow.net 10
The Capture object is used to play an audio prompt to the caller, and then wait for them to enter a
series of keys on their telephone keypad. When you click on a Capture Icon, you will see in the
Properties panel;
Variable: This is the variable name into which the captured key presses are stored. The
system will automatically allocate a variable name. The variable name for this field should
just be the name and *not* contain a $ sign.
Input Length: This is the maximum length of the captured value. As soon as these numbers
of key presses have been captured, the call flow will continue to the next object on the
diagram. The user can enter fewer digits by entering the # symbol after the digits to move
to the next object. If the user enters a smaller number of digits than the maximum, and
doesn’t press the # key, the call flow will automatically move onto the next object after five
seconds.
Reference Audio: This is the audio prompt played to the caller before starting the capture.
The selection of the audio message is as for the `Menu` Object.
IVR Creator
www.easycallnow.net 11
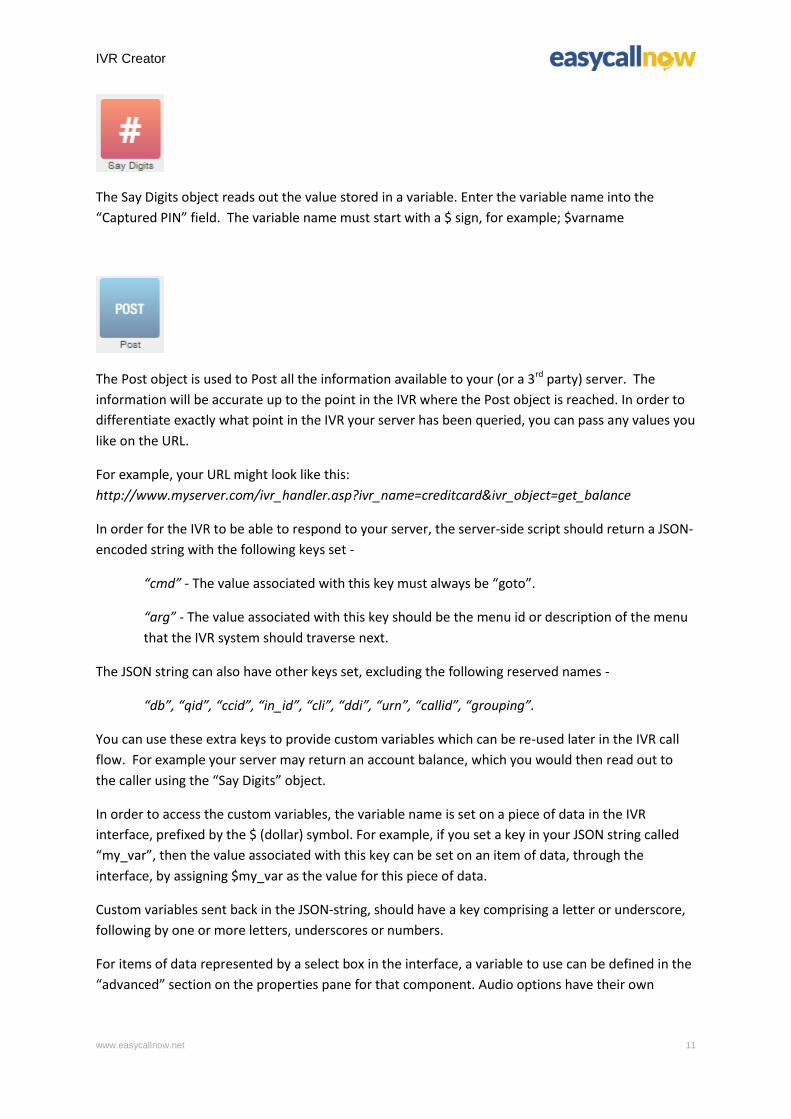
The Say Digits object reads out the value stored in a variable. Enter the variable name into the
“Captured PIN” field. The variable name must start with a $ sign, for example; $varname
The Post object is used to Post all the information available to your (or a 3rd party) server. The
information will be accurate up to the point in the IVR where the Post object is reached. In order to
differentiate exactly what point in the IVR your server has been queried, you can pass any values you
like on the URL.
For example, your URL might look like this:
http://www.myserver.com/ivr_handler.asp?ivr_name=creditcard&ivr_object=get_balance
In order for the IVR to be able to respond to your server, the server-side script should return a JSON-
encoded string with the following keys set -
“cmd” - The value associated with this key must always be “goto”.
“arg” - The value associated with this key should be the menu id or description of the menu
that the IVR system should traverse next.
The JSON string can also have other keys set, excluding the following reserved names -
“db”, “qid”, “ccid”, “in_id”, “cli”, “ddi”, “urn”, “callid”, “grouping”.
You can use these extra keys to provide custom variables which can be re-used later in the IVR call
flow. For example your server may return an account balance, which you would then read out to
the caller using the “Say Digits” object.
In order to access the custom variables, the variable name is set on a piece of data in the IVR
interface, prefixed by the $ (dollar) symbol. For example, if you set a key in your JSON string called
“my_var”, then the value associated with this key can be set on an item of data, through the
interface, by assigning $my_var as the value for this piece of data.
Custom variables sent back in the JSON-string, should have a key comprising a letter or underscore,
following by one or more letters, underscores or numbers.
For items of data represented by a select box in the interface, a variable to use can be defined in the
“advanced” section on the properties pane for that component. Audio options have their own

IVR Creator
www.easycallnow.net 12
“advanced” section where a variable can be defined. For data that is represented by a text box, that
allows a variable to be used as its value, the variable name is typed directly into the text box. The
variable MUST be prefixed by a dollar.
NOTE: The variable field for the capture command should *not* be prefixed by a dollar, as this is a
variable being created by the IVR system, not sent to it by your server.
The Label object has no IVR functionality, but you can use it to annotate your call flow chart.