Embed Size (px)
Citation preview

Raptor UniversityInstalling Raptor v6.1.6
RAPTOR TECHNOLOGIES, LLC
Instructor:
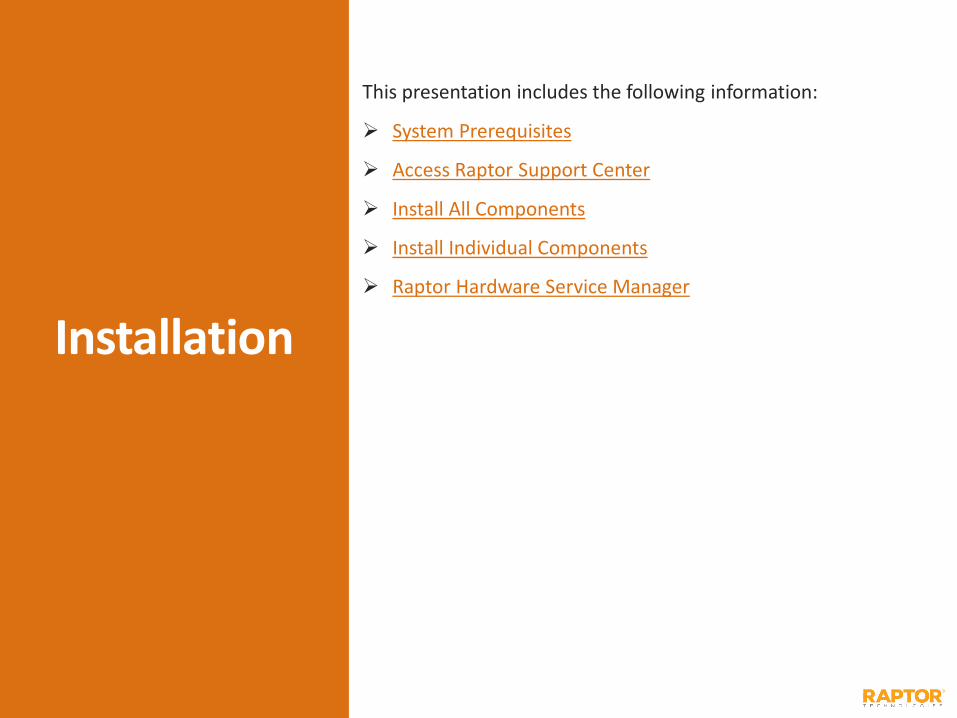
Installation
This presentation includes the following information:
System Prerequisites
Access Raptor Support Center
Install All Components
Install Individual Components
Raptor Hardware Service Manager

System PrerequisitesComputers that will be used to operate Raptor, must meet the following minimum system requirements.
Minimum System Configuration Microsoft® Windows® 10, Microsoft® Internet Explorer® 11 and Google® Chrome® Microsoft Windows 7 64-bit, Microsoft Internet Explorer 10 and 11, and Google Chrome Microsoft Windows 7 32-bit, Google Chrome Microsoft .NET Framework 4.5 Dual-Core or better CPU 4 GB of RAM or higher 200 MB Disk Space
Recommended System Configuration(In addition to minimum configuration) Quad-Core CPU or better 8 GB of RAM or higher Two USB 2.0 ports (one for Scanner and one for Printer) High-speed internet connection (direct Ethernet connection recommended)
Drivers (printing/scan IDs) Acuant Scanner Drivers 3M Scanner Drivers DYMO Printer Drivers
Optional Components (scan 1D and/or 2D barcodes, capture photos)
Raptor Barcode Reader
Raptor Capture Cam

Access Raptor Support CenterWarning:If you are using a version of Raptor vSoft that was installed prior to May 2017 (version 10.12.03.13 or earlier), you must manually uninstall all vSoft components before proceeding. Refer to the next slide Uninstall Raptor vSoft.1. Open a web browser and enter the following URL: https://apps.raptortech.com2. Enter the Username and Password
provided to you, and then click Log in to Raptor.3. In the navigation menu, select Support and then
click Getting Started.If this is your first time installing Raptor, proceed to the next slide.
To install the Raptor Hardware Service or any individual components, proceed to the specific slide for the component to be installed (.NET and Acuant Scanner Drivers, 3M Scanner Drivers, DYMO Printer Drivers).

Uninstall Raptor vSoft (If Installed)If you have a version of Raptor vSoft that was installed prior to May 2017 (version 10.12.03.13 or earlier), you must manually uninstall all vSoft components (Vsoft Client Service, DYMO Label v.x, scanner drivers and CSSN SDK v10.xx.xx programs) before proceeding. 1. On the Windows desktop, click Start and type uninstall into the search programs and files, click
the search icon and then select Programs and Features.2. On the Program and Features window, double-click Raptor Technologies vSoft Client Service and
click Yes on the Uninstall dialog. When the uninstall process is complete, click OK to close the dialog.
3. Double-click DYMO Label v.x and click Yes on the Uninstall dialog. When the uninstall process is complete, click OK to close the dialog.
4. Double-click CSSN SDK Version 10.xx.xx and click Yes on the Uninstall dialog. When the uninstall process is complete, click OK to close the dialog.
5. Double-click the ScanShell 800 DX scanner driver and click Yes on the Uninstall dialog. When the uninstall process is complete, click OK to close the dialog.
6. Restart Windows.
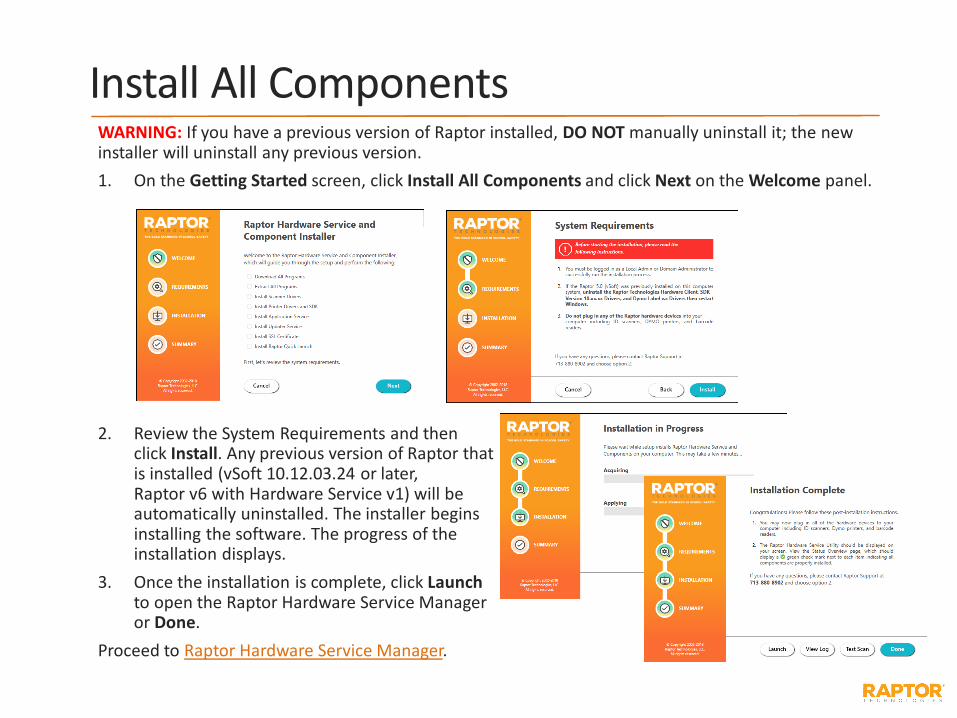
Install All ComponentsWARNING: If you have a previous version of Raptor installed, DO NOT manually uninstall it; the new installer will uninstall any previous version.1. On the Getting Started screen, click Install All Components and click Next on the Welcome panel.
2. Review the System Requirements and then click Install. Any previous version of Raptor thatis installed (vSoft 10.12.03.24 or later, Raptor v6 with Hardware Service v1) will be automatically uninstalled. The installer begins installing the software. The progress of the installation displays.
3. Once the installation is complete, click Launchto open the Raptor Hardware Service Manager or Done.
Proceed to Raptor Hardware Service Manager.

Install .NET and Acuant Scanner DriversInstall .NET Framework 4.5On the Getting Started screen, click Advanced Install Options and select Install .NET Framework 4.5.The system checks the version of .NET installed, and upgrades to 4.5 if necessary. Otherwise, a dialog displays indicating the version is already installed. Click Close to exit the dialog.
Install Acuant Scanner Drivers1. On the Getting Started screen, click Advanced Install Options and select Install Acuant Scanner
Drivers. The sdk_setup_<version number>.exe file is downloaded to your computer.
2. Double-click the sdk_setup_<version number>.exefile to launch the Acuant SDK wizard.
3. On the Welcome panel, click Next.4. Read the License Agreement,
select I accept the terms of the license agreement and then click Next.

Install Acuant Scanner Drivers, cont.5. Accept the default folder or click Change to select another
location where the setup files will be installed, and then click Next.
6. Select the ScanShell 800DX check box and click Next.
7. On the Ready to Install panel, click Install.8. On the InstallShield Wizard Complete
panel, click Finish.

Install 3M Scanner Drivers1. On the Getting Started screen, click Advanced Install Options and select Install 3M Scanner
Drivers.2. On the Version Info panel, click Next. The 3M Scanner
drivers will install.
3. On the Installation Complete panel, click Finish.

Install DYMO Printer Drivers1. On the Getting Started screen, click Advanced Install Options and select Install DYMO Printer Drivers. 2. Select the language version to be installed and click OK. 3. On the Welcome panel, click Next.
4. Read the License Agreement and then click I Agree to continue.
5. Accept the default Express Installation type and then click Next.
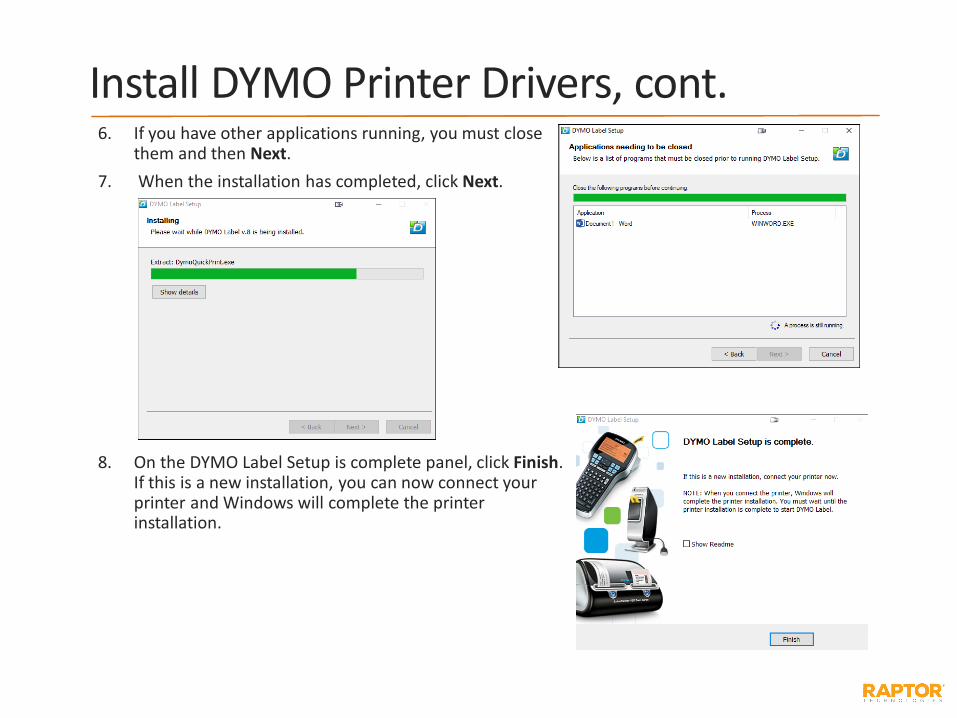
Install DYMO Printer Drivers, cont.6. If you have other applications running, you must close
them and then Next.7. When the installation has completed, click Next.
8. On the DYMO Label Setup is complete panel, click Finish. If this is a new installation, you can now connect your printer and Windows will complete the printer installation.

Install Raptor Hardware Service1. On the Getting Started screen, click Install Hardware Service.2. On the User Account Control dialog box, click Yes. Any previous version of Raptor that
is installed (vSoft or Raptor v6 with Hardware Service v1) will be automatically uninstalled.
Upon completion, you can launch the Raptor Hardware Service Manager by clicking Launch on the Installation Complete panel, or you can manually open it from the system tray by right-clicking the Raptor icon and selecting Open Hardware Service.
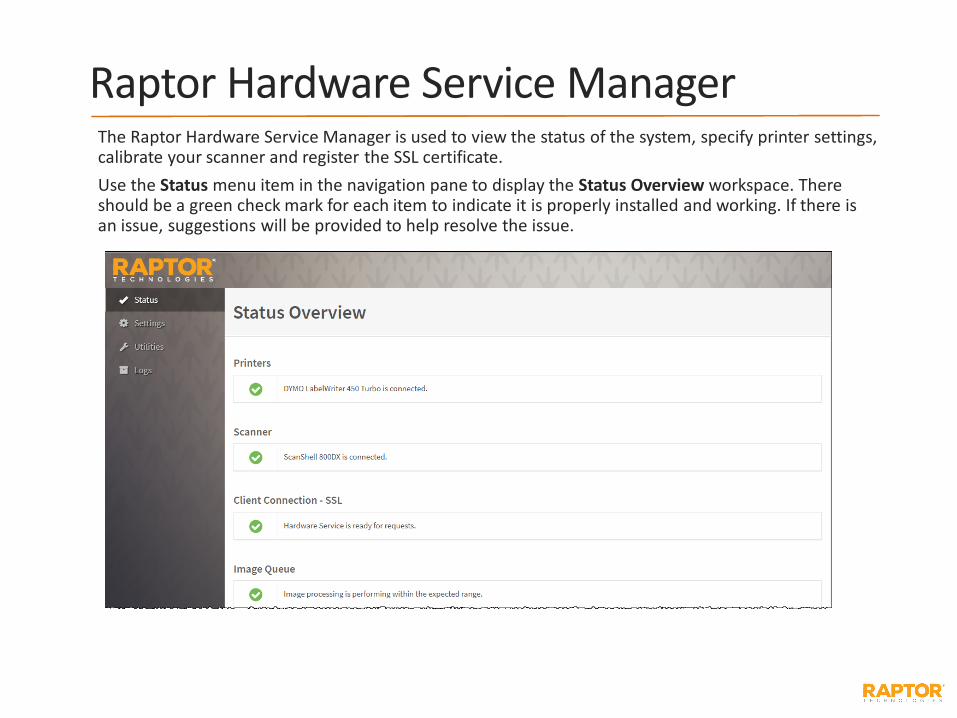
Raptor Hardware Service ManagerThe Raptor Hardware Service Manager is used to view the status of the system, specify printer settings, calibrate your scanner and register the SSL certificate.Use the Status menu item in the navigation pane to display the Status Overview workspace. There should be a green check mark for each item to indicate it is properly installed and working. If there is an issue, suggestions will be provided to help resolve the issue.

Printer SettingsPrinter MappingClick Settings in the navigation pane and use the Printers tab to specify the device to be used for printing badges, the default number of copies to print, and whether an Expiring Badge is to be used.For each Type of badge, click the u icon in the Action column and select the Printer, number of Copiesto print, and whether to use an Expiring Badge (Yes or No). Click the j icon to save your settings.If you want to print a test badge, click the z icon.
Printer SettingsUse the adjustment bars in the lower portion of the workspace to adjust the printer brightness and contrast settings.
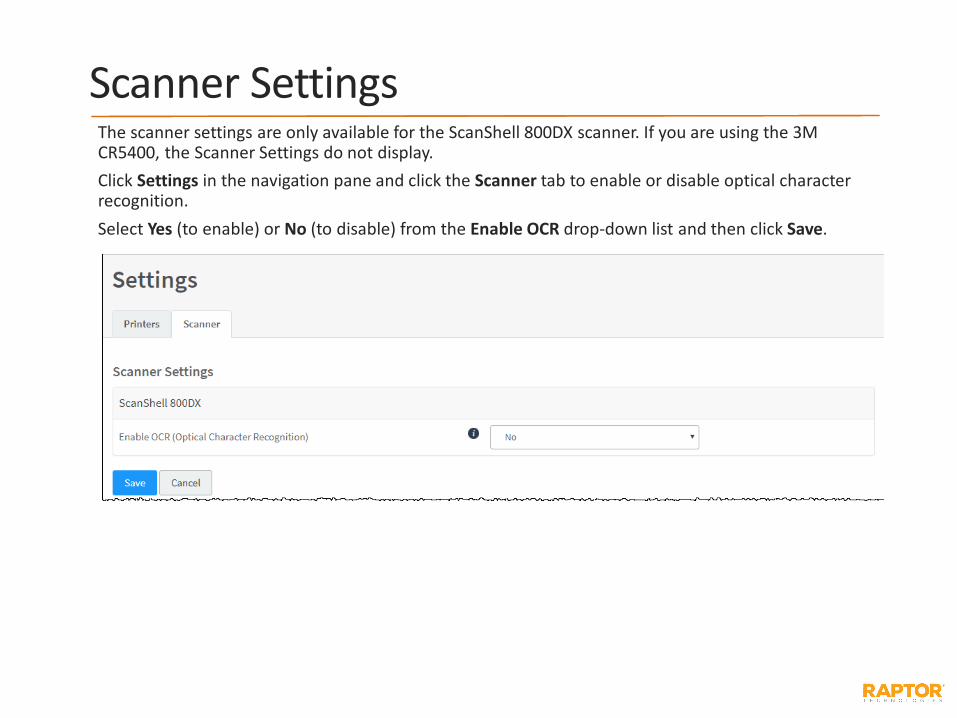
Scanner SettingsThe scanner settings are only available for the ScanShell 800DX scanner. If you are using the 3M CR5400, the Scanner Settings do not display.Click Settings in the navigation pane and click the Scanner tab to enable or disable optical character recognition.Select Yes (to enable) or No (to disable) from the Enable OCR drop-down list and then click Save.

Calibrate Scanner and Test ScanYou should always calibrate your scanner and perform a test scan after the software is installed. Use the Scanner tab on the Utilities workspace to calibrate and test your scanner.Note: Calibration is not required for the 3M CR5400 scanner.Select Utilities in the navigation menu, insert the calibration paper into the scanner and click Calibrate. A Scanner Calibrated message displays.You can also test the scanner from this workspace. Insert an ID card into the scanner and click Test Scan. The results of the last scan display in the lower pane.

Register SSL CertificateIf you installed the components individually, you must register the SSL Certificate to be able to allow communication between the browser and Hardware Service. 1. Select Utilities in the navigation menu and then click the Network tab.2. Click Register SSL Certificate.

View Printer/Scanner LogsUse the Logs menu item in the navigation pane to view the logs for the hardware service, printer and scanner events. It logs when the Hardware Service starts up or shuts down, when updates are available and applied, when the web service and image queue service start, and any errors encountered along with information related to the printers and scanners.

Contact Us
Raptor Technologies SupportEmail: [email protected]
Call: 877-7RAPTOR (877-772-7867) Option #2
Version: October 26, 2018