Embed Size (px)
Citation preview
1
Installing an Open Source Router in a VM
PART 1 VYOS
Vyatta was once an open source router before the company was acquired by Brocade. A fork of Vyatta,
VyOS is a Linux based, basic Router. We are going to run the VyOS router in its own virtual machine (VM)
and use it to communicate across VMs. The first question is, can we run VyOS in a Virtual Machine?
Yes we can. Download the .iso for your machine:
Save it to a directory on your desktop.
Fire up your VirtualBox
2
Select New. Name it VyOs_Router. Here are some parameters to use in the setup (most are default):
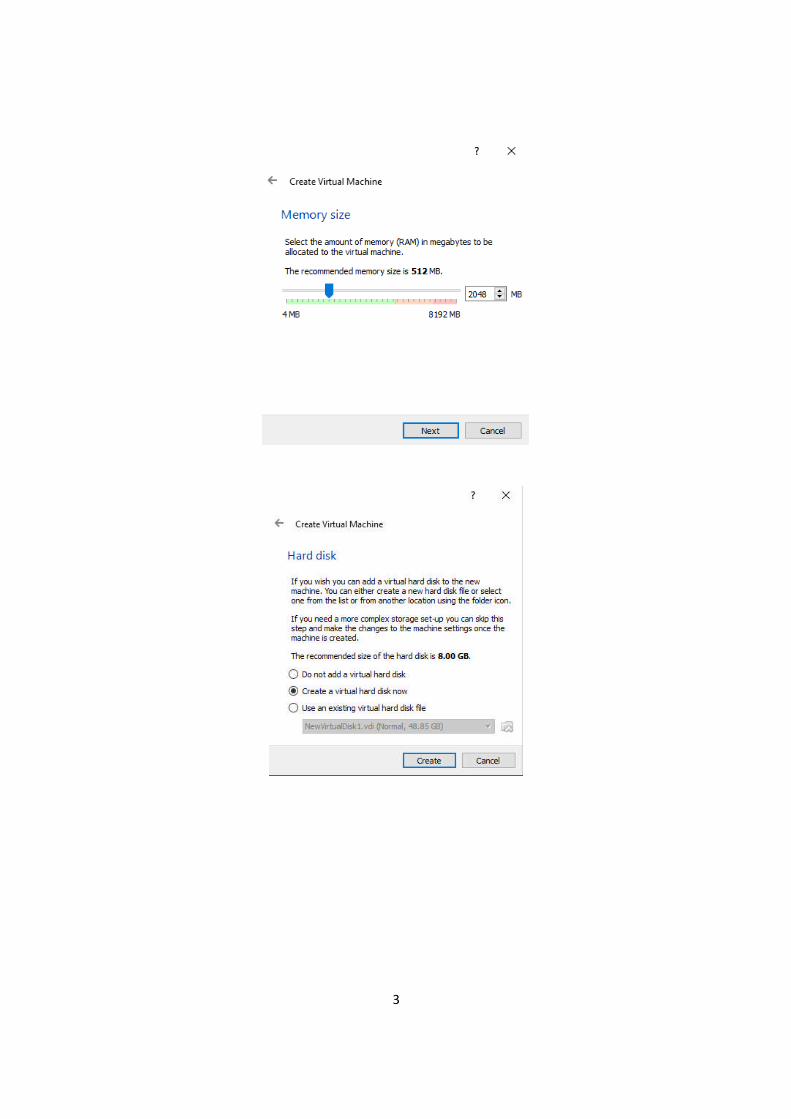
3
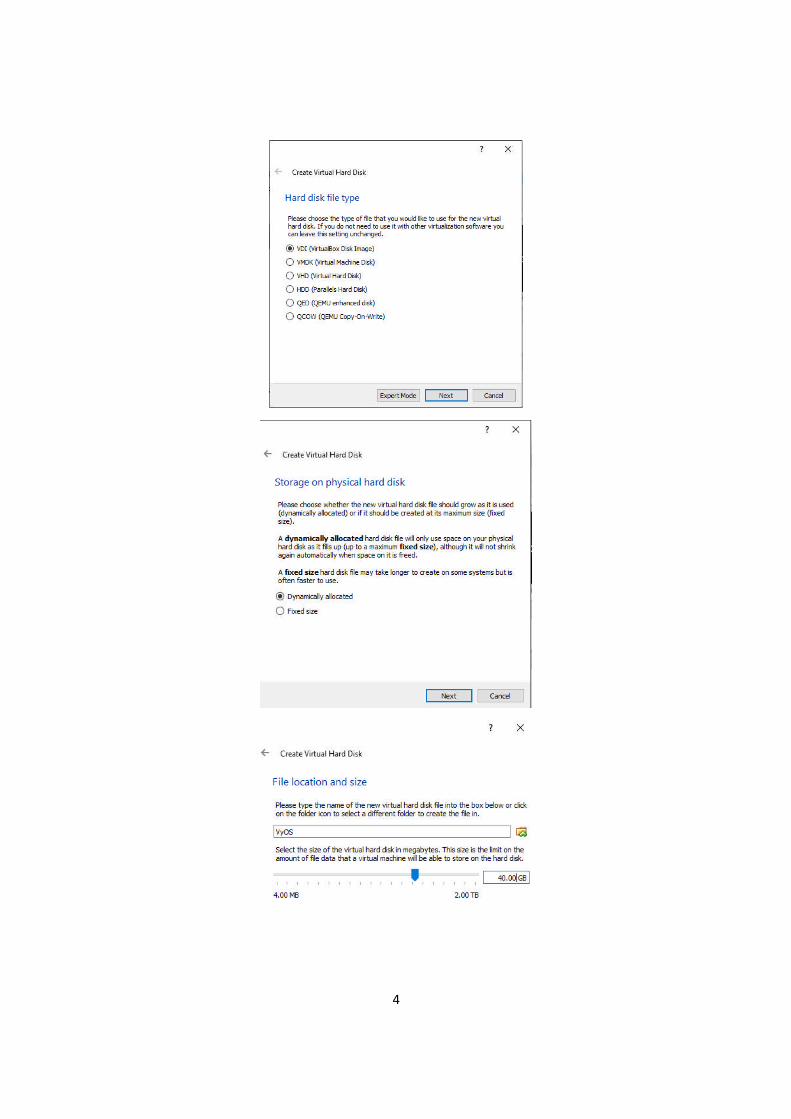
4
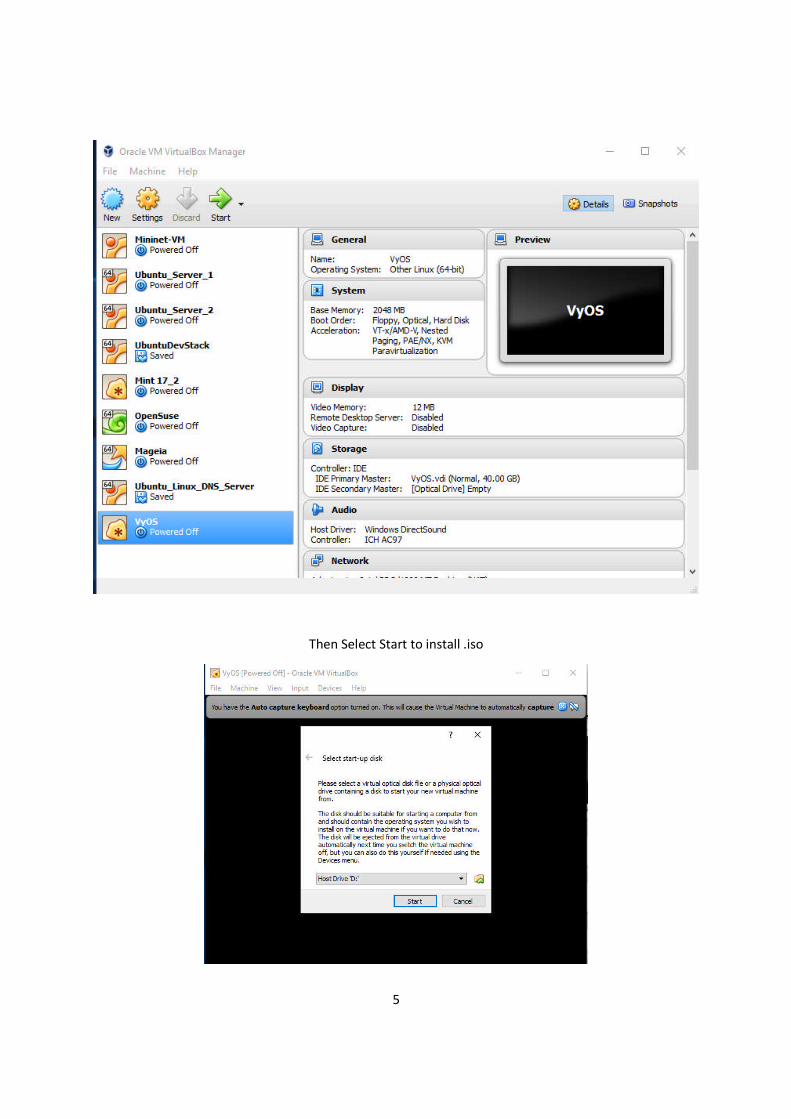
5
Then Select Start to install .iso

6

7
Select ENTER to boot
Log in is: vyos and PW is vyos
That takes you to the $ prompt. VyOS is now loaded and ready for install.
At the $ Type “Install Image”
Then select all the defaults (But pick Yes on “Destroy all data on /dev/sda”
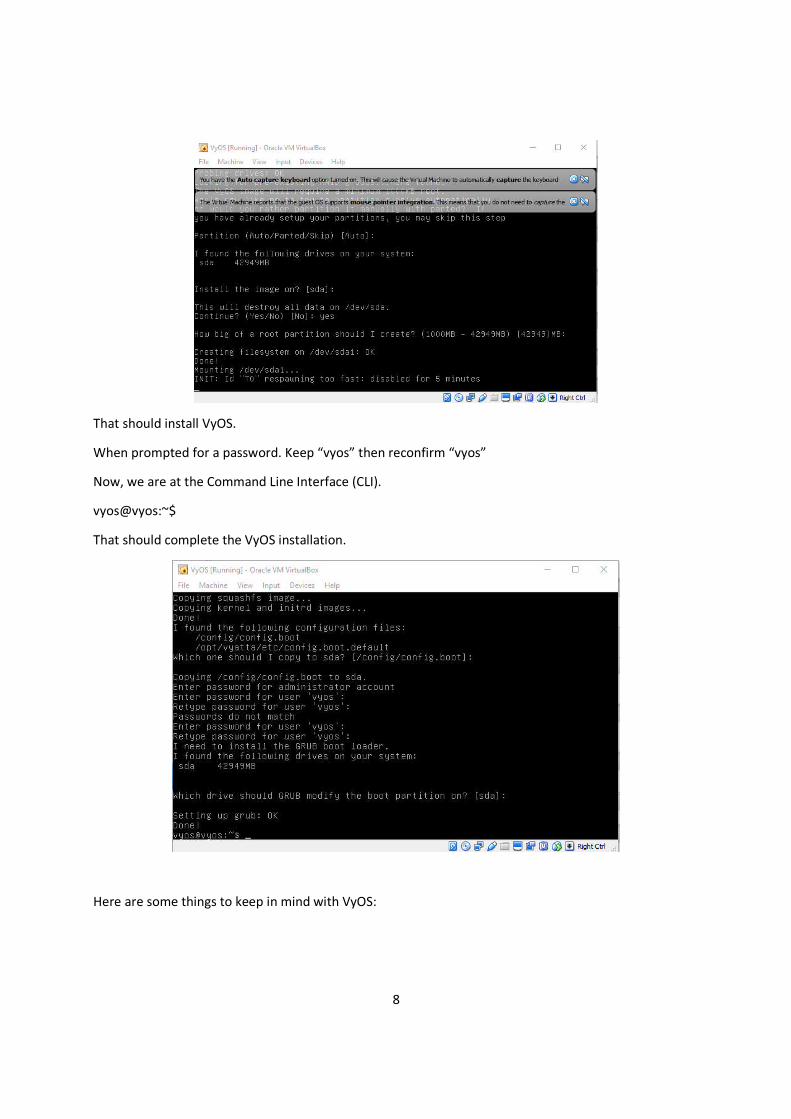
8
That should install VyOS.
When prompted for a password. Keep “vyos” then reconfirm “vyos”
Now, we are at the Command Line Interface (CLI).
vyos@vyos:~$
That should complete the VyOS installation.
Here are some things to keep in mind with VyOS:
9
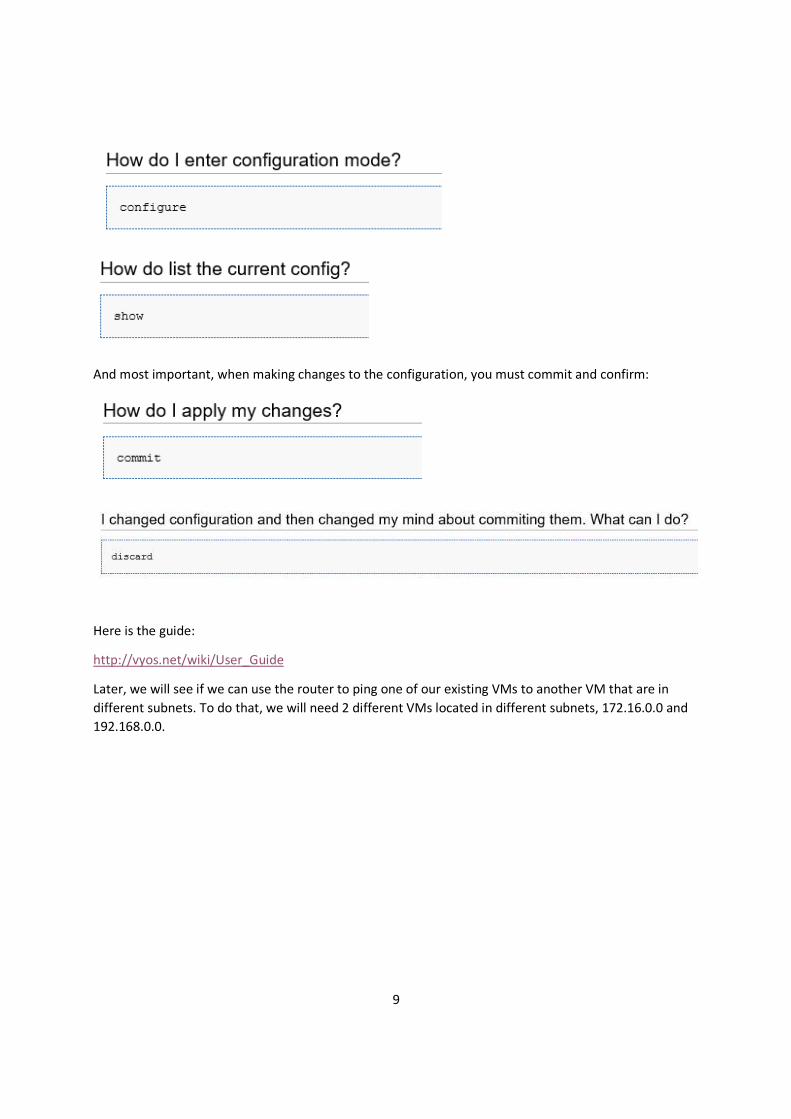
And most important, when making changes to the configuration, you must commit and confirm:
Here is the guide:
http://vyos.net/wiki/User_Guide
Later, we will see if we can use the router to ping one of our existing VMs to another VM that are in
different subnets. To do that, we will need 2 different VMs located in different subnets, 172.16.0.0 and
192.168.0.0.
10
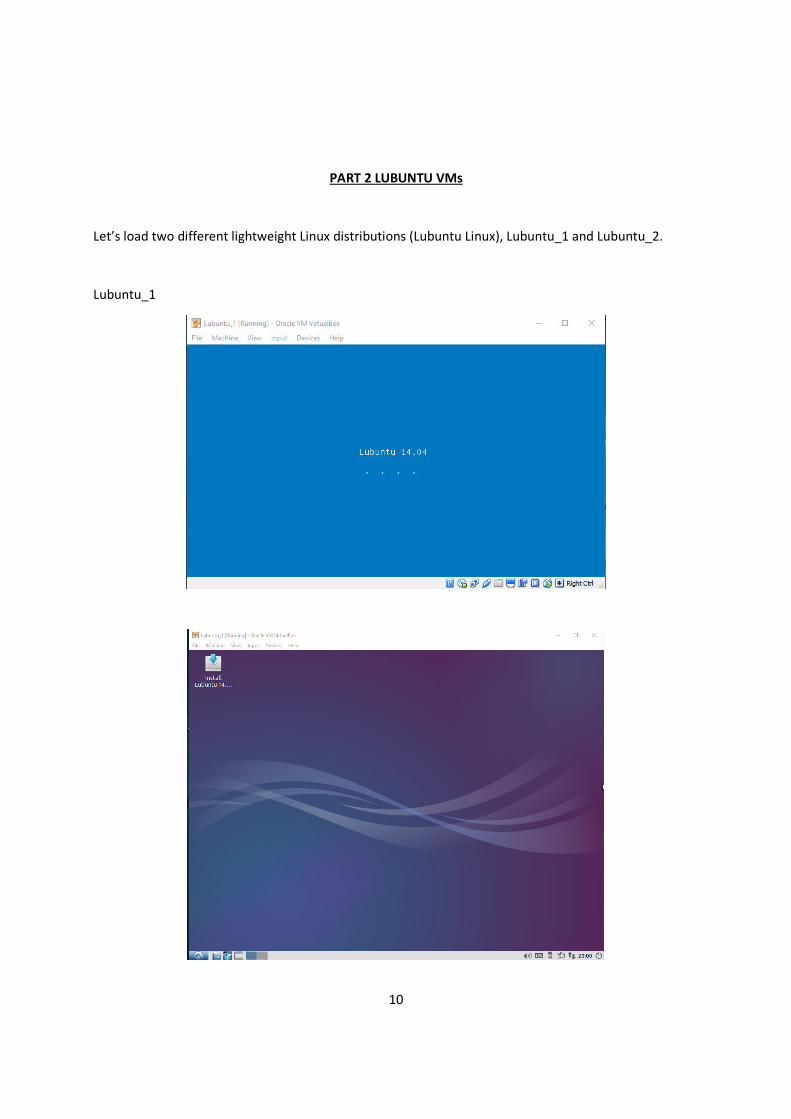
PART 2 LUBUNTU VMs
Let’s load two different lightweight Linux distributions (Lubuntu Linux), Lubuntu_1 and Lubuntu_2.
Lubuntu_1
11
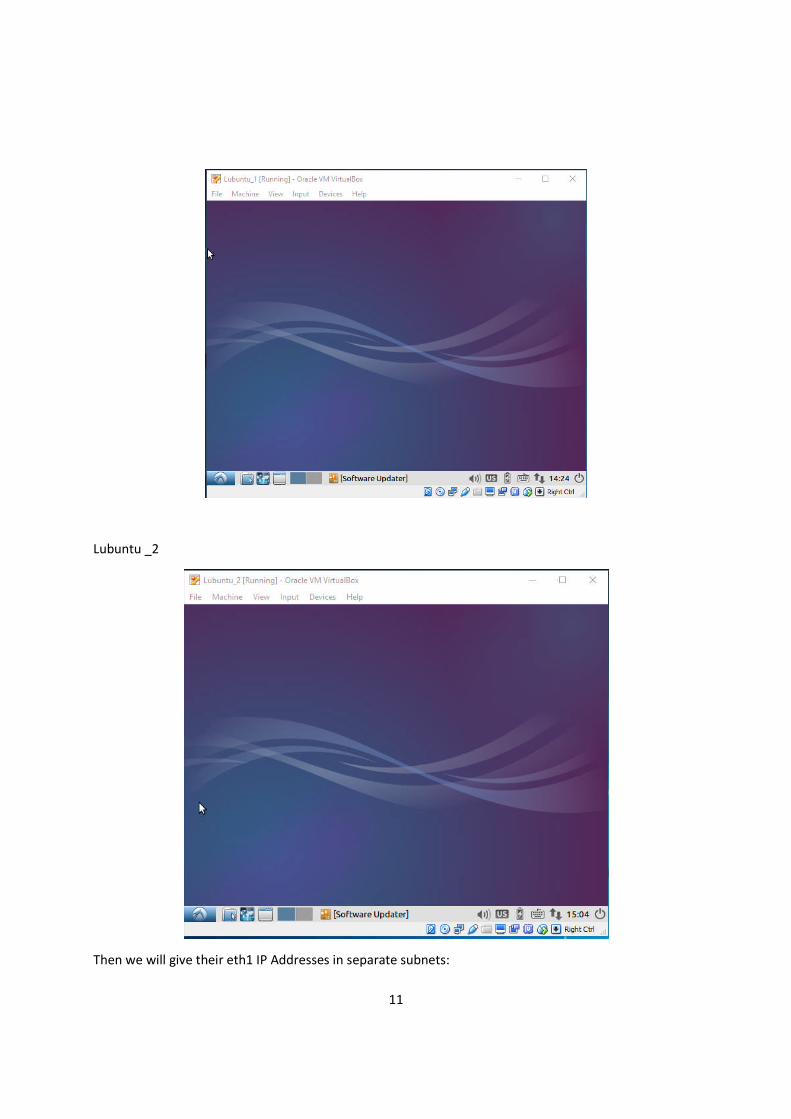
Lubuntu _2
Then we will give their eth1 IP Addresses in separate subnets:
12
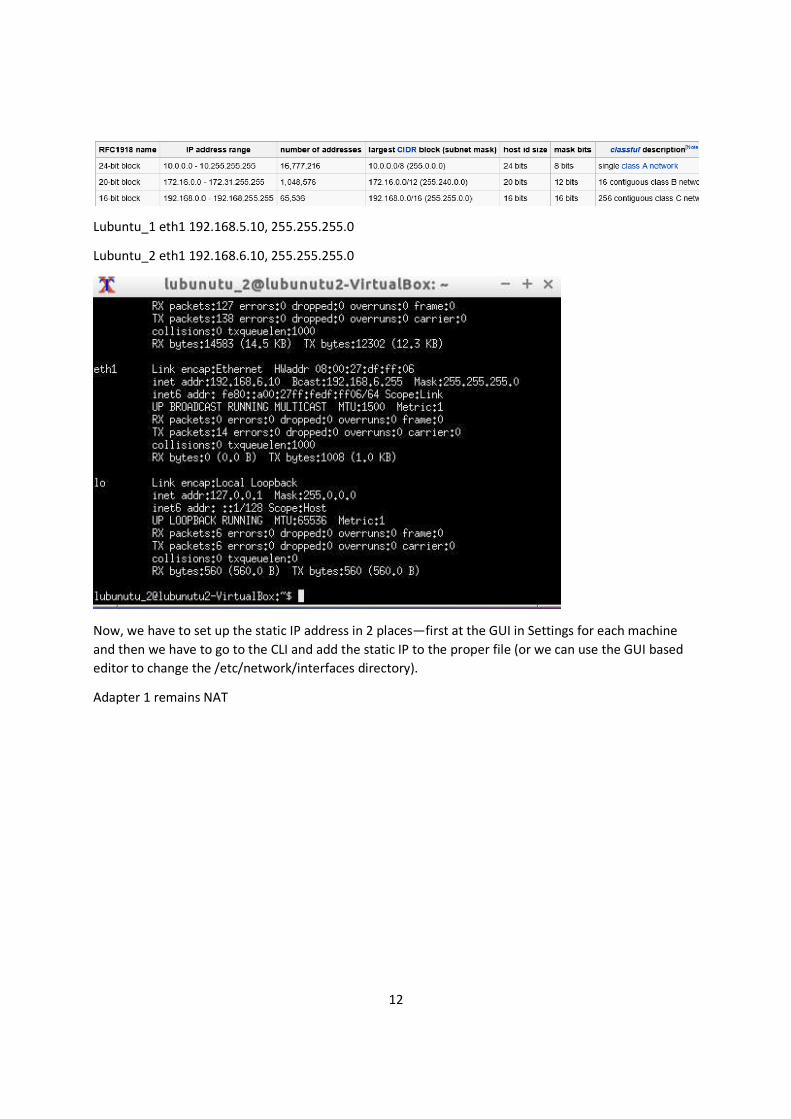
Lubuntu_1 eth1 192.168.5.10, 255.255.255.0
Lubuntu_2 eth1 192.168.6.10, 255.255.255.0
Now, we have to set up the static IP address in 2 places—first at the GUI in Settings for each machine
and then we have to go to the CLI and add the static IP to the proper file (or we can use the GUI based
editor to change the /etc/network/interfaces directory).
Adapter 1 remains NAT
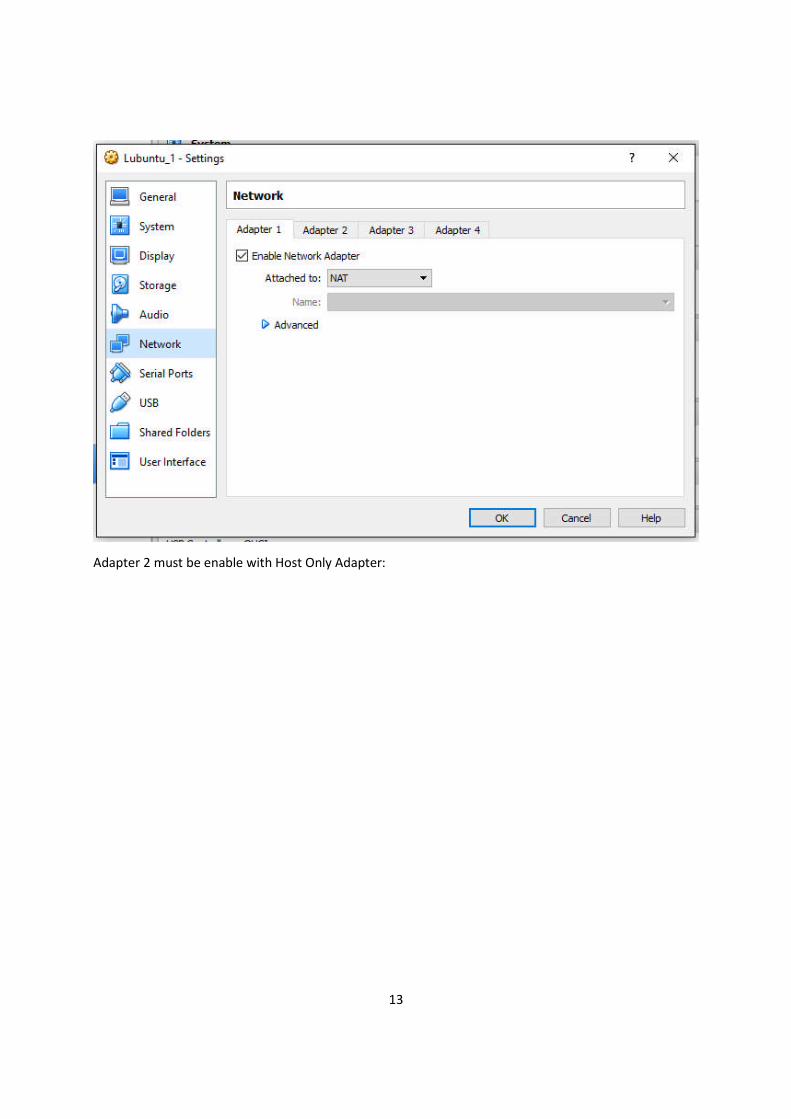
13
Adapter 2 must be enable with Host Only Adapter:
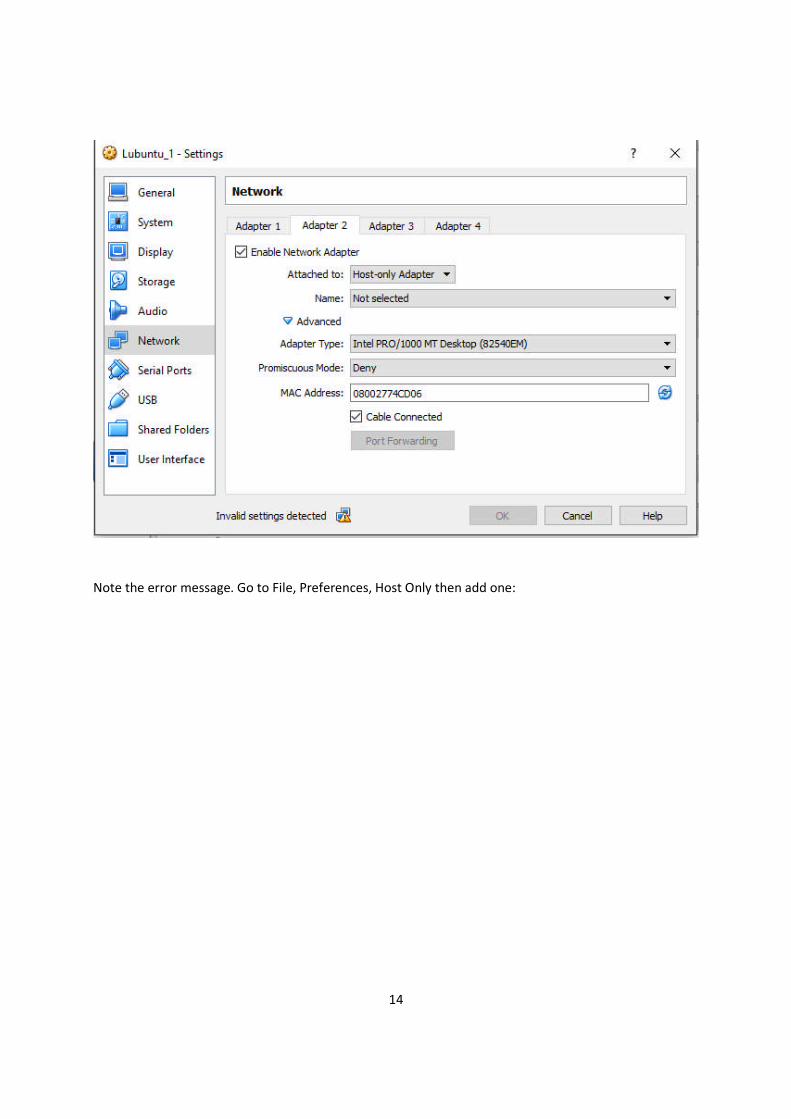
14
Note the error message. Go to File, Preferences, Host Only then add one:
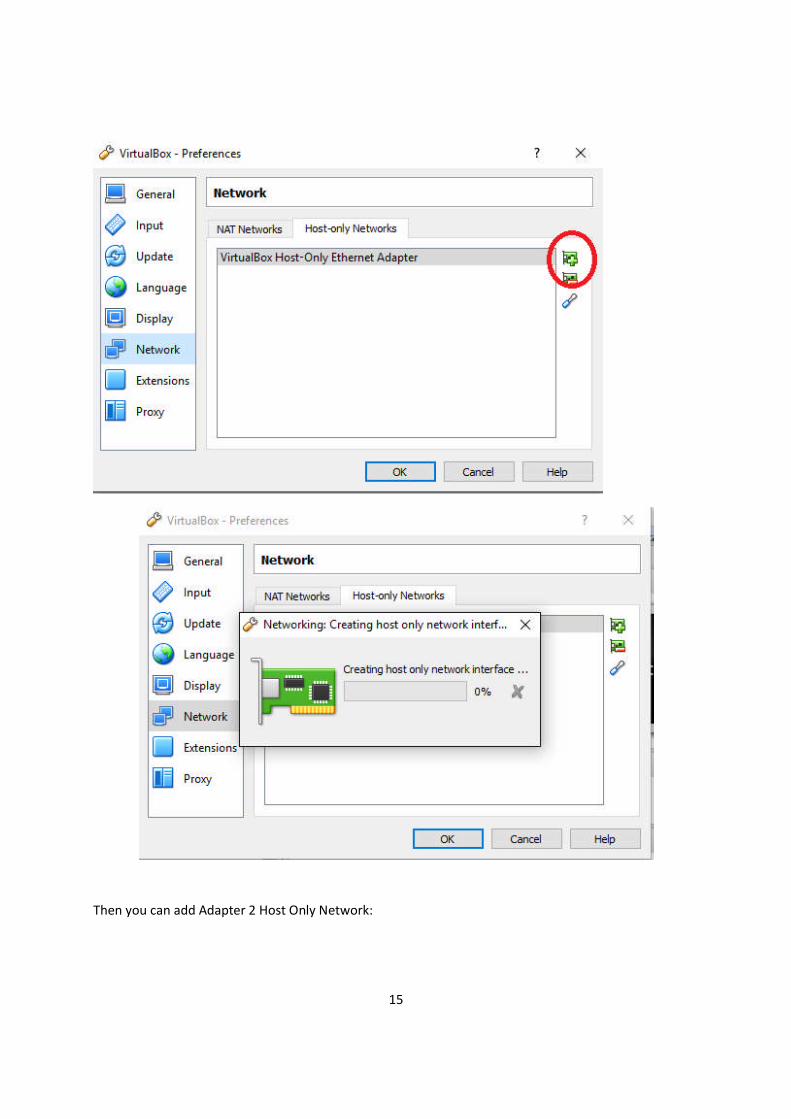
15
Then you can add Adapter 2 Host Only Network:
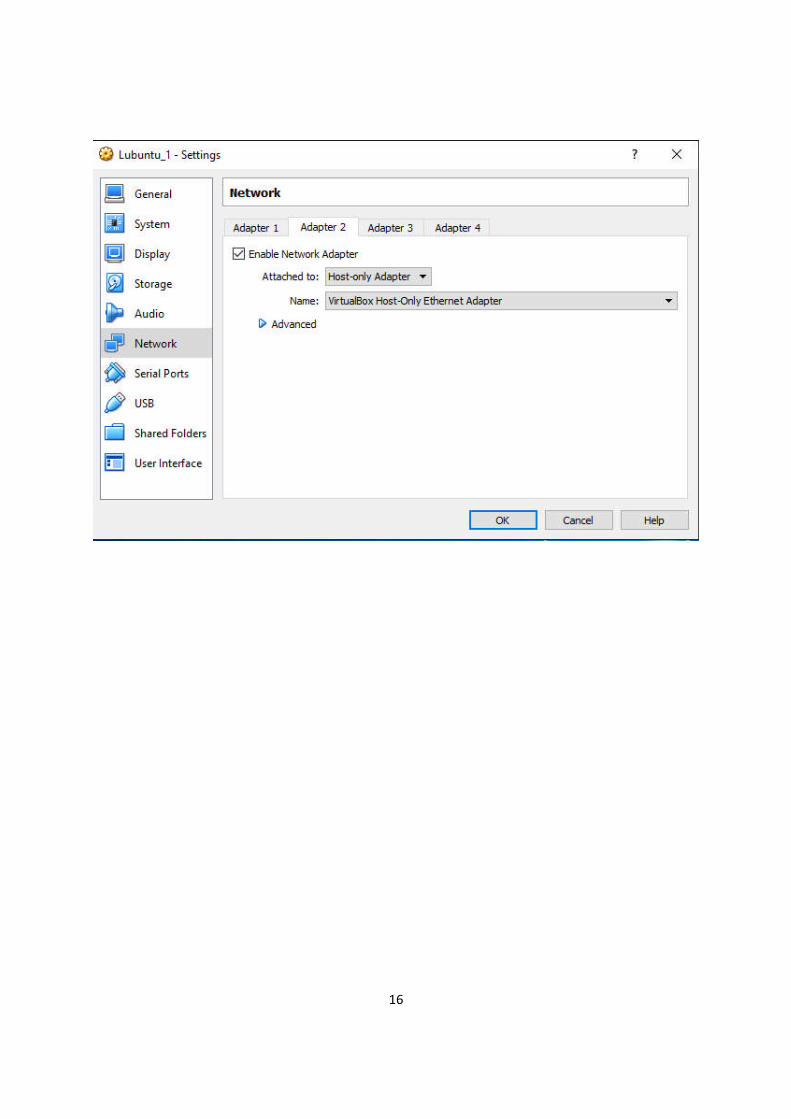
16
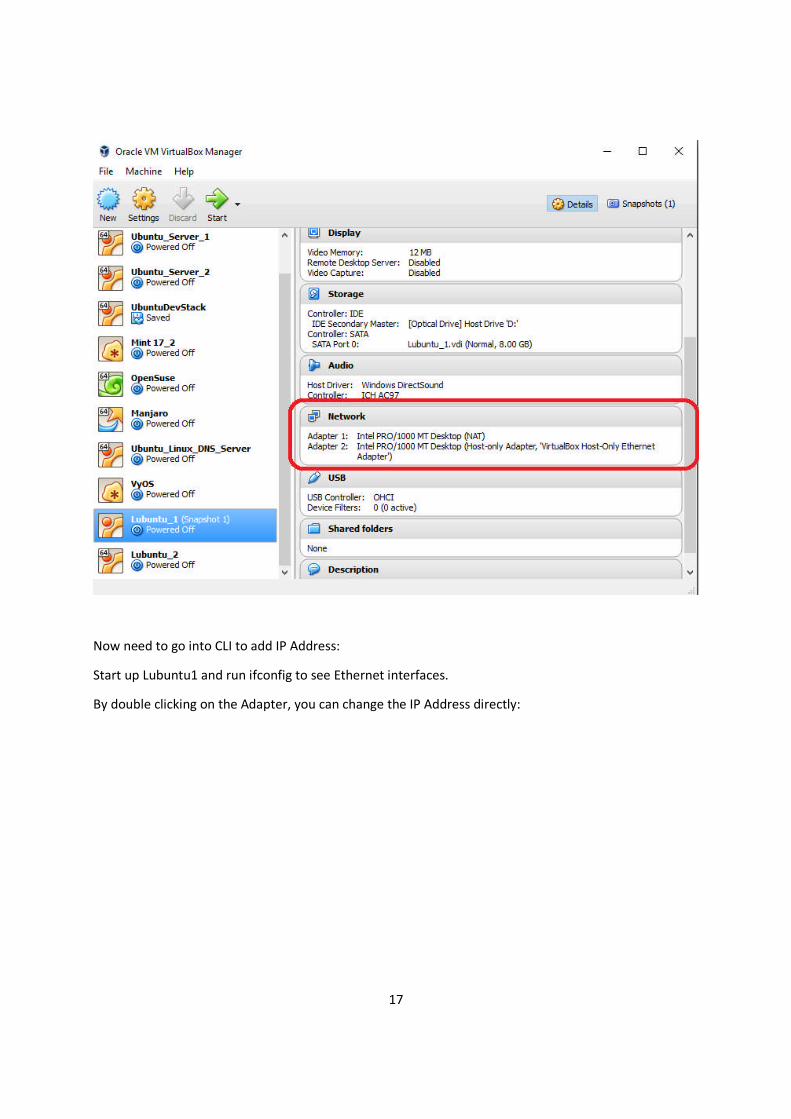
17
Now need to go into CLI to add IP Address:
Start up Lubuntu1 and run ifconfig to see Ethernet interfaces.
By double clicking on the Adapter, you can change the IP Address directly:
18
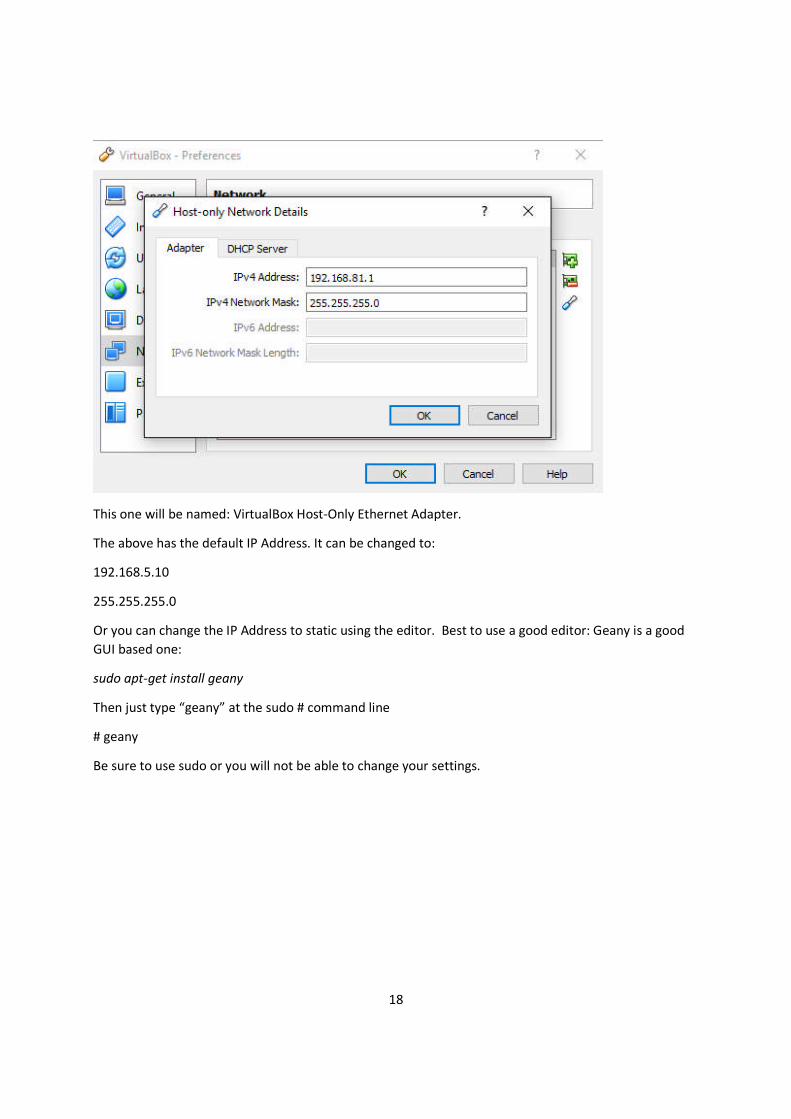
This one will be named: VirtualBox Host-Only Ethernet Adapter.
The above has the default IP Address. It can be changed to:
192.168.5.10
255.255.255.0
Or you can change the IP Address to static using the editor. Best to use a good editor: Geany is a good
GUI based one:
sudo apt-get install geany
Then just type “geany” at the sudo # command line
# geany
Be sure to use sudo or you will not be able to change your settings.
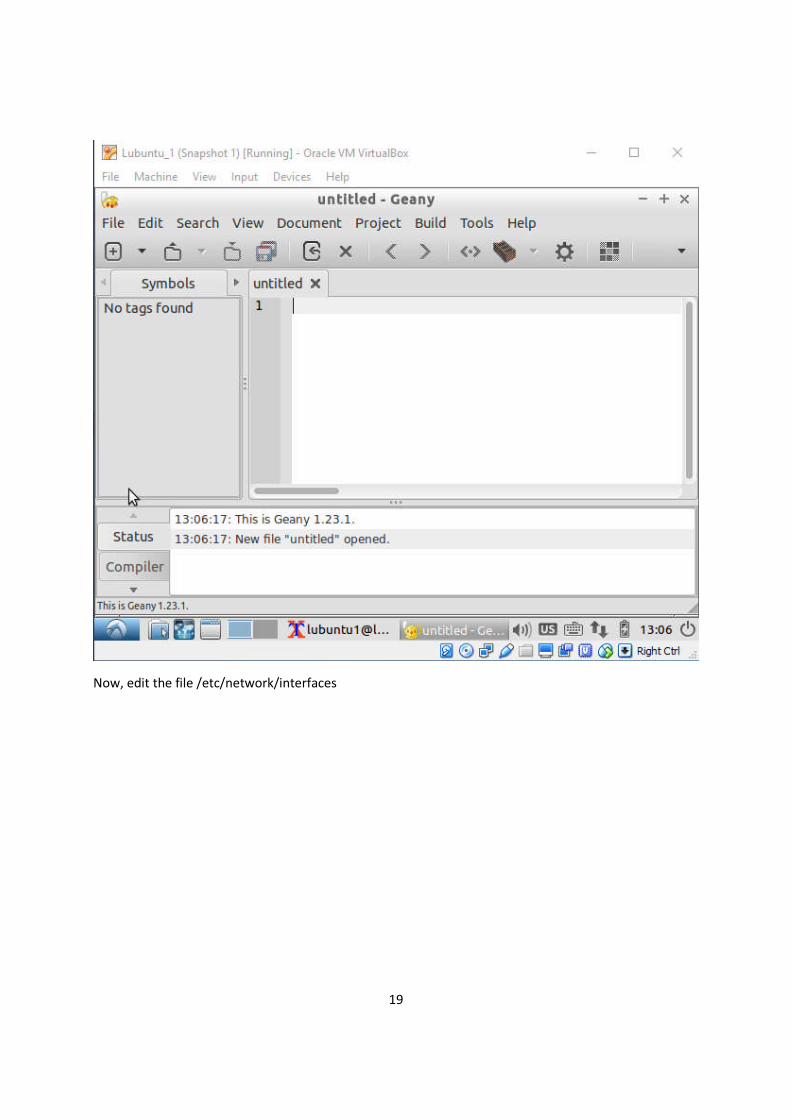
19
Now, edit the file /etc/network/interfaces
20
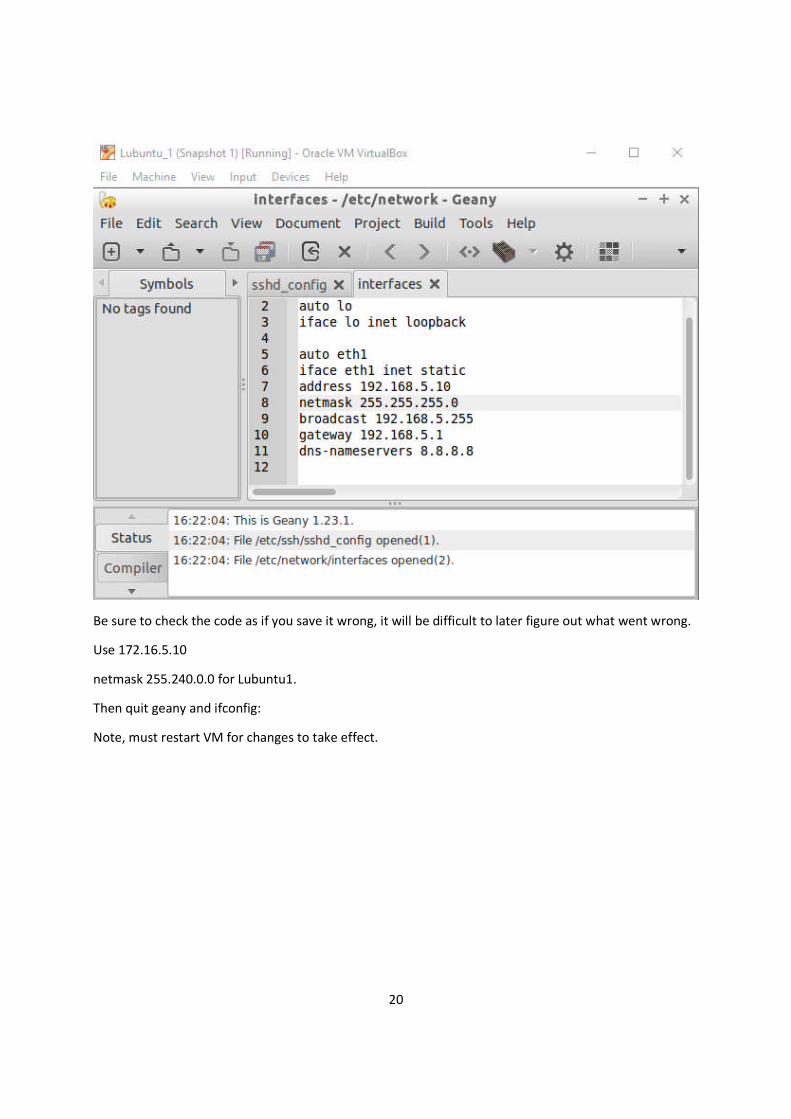
Be sure to check the code as if you save it wrong, it will be difficult to later figure out what went wrong.
Use 172.16.5.10
netmask 255.240.0.0 for Lubuntu1.
Then quit geany and ifconfig:
Note, must restart VM for changes to take effect.
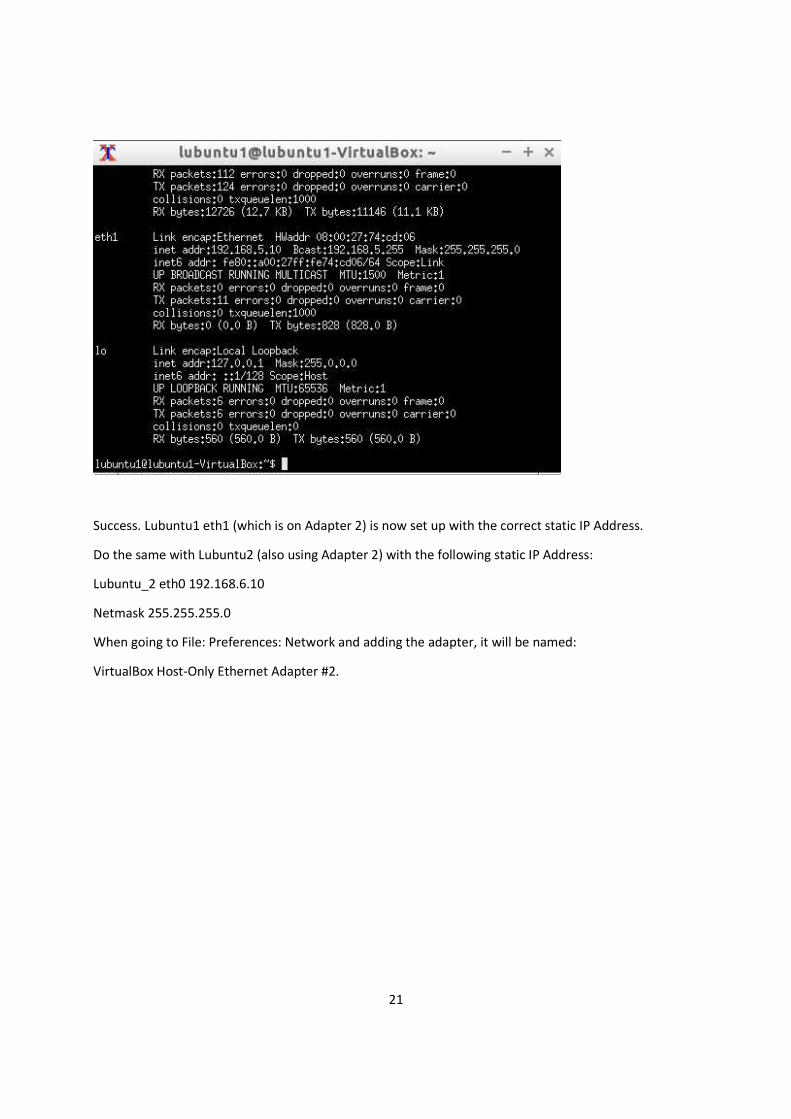
21
Success. Lubuntu1 eth1 (which is on Adapter 2) is now set up with the correct static IP Address.
Do the same with Lubuntu2 (also using Adapter 2) with the following static IP Address:
Lubuntu_2 eth0 192.168.6.10
Netmask 255.255.255.0
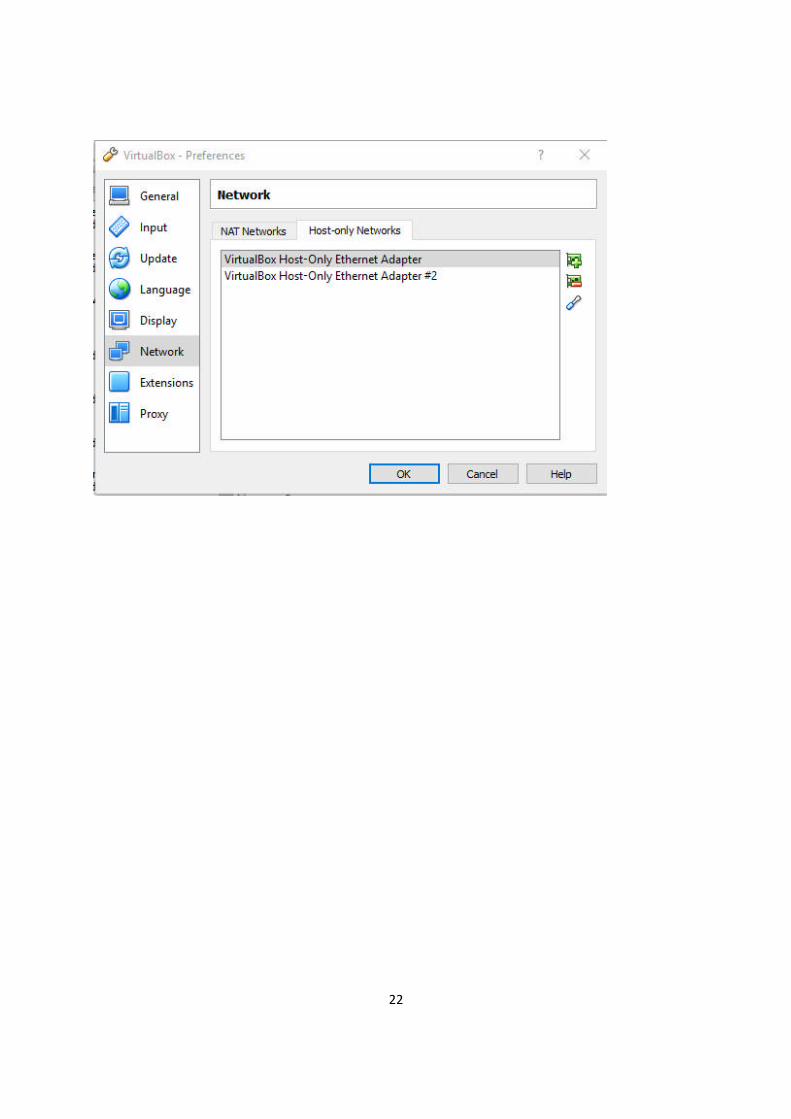
When going to File: Preferences: Network and adding the adapter, it will be named:
VirtualBox Host-Only Ethernet Adapter #2.
22

23

24
Then, from outside Virtualbox, try to ping 192.168.5.10.
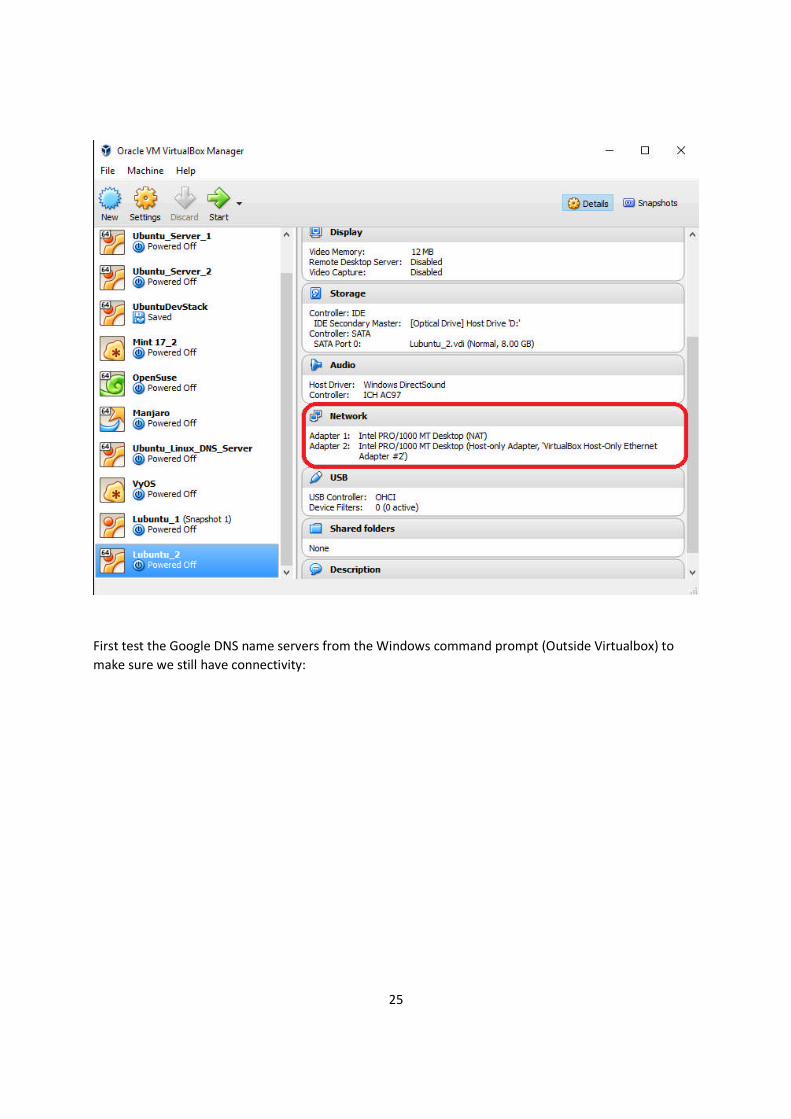
Success. No need for VyOS! Let’s set it up our Router in a VM anyway (below). Let’s check Lubuntu_2
configuration. We can see our Adapter 2 is set up.
25
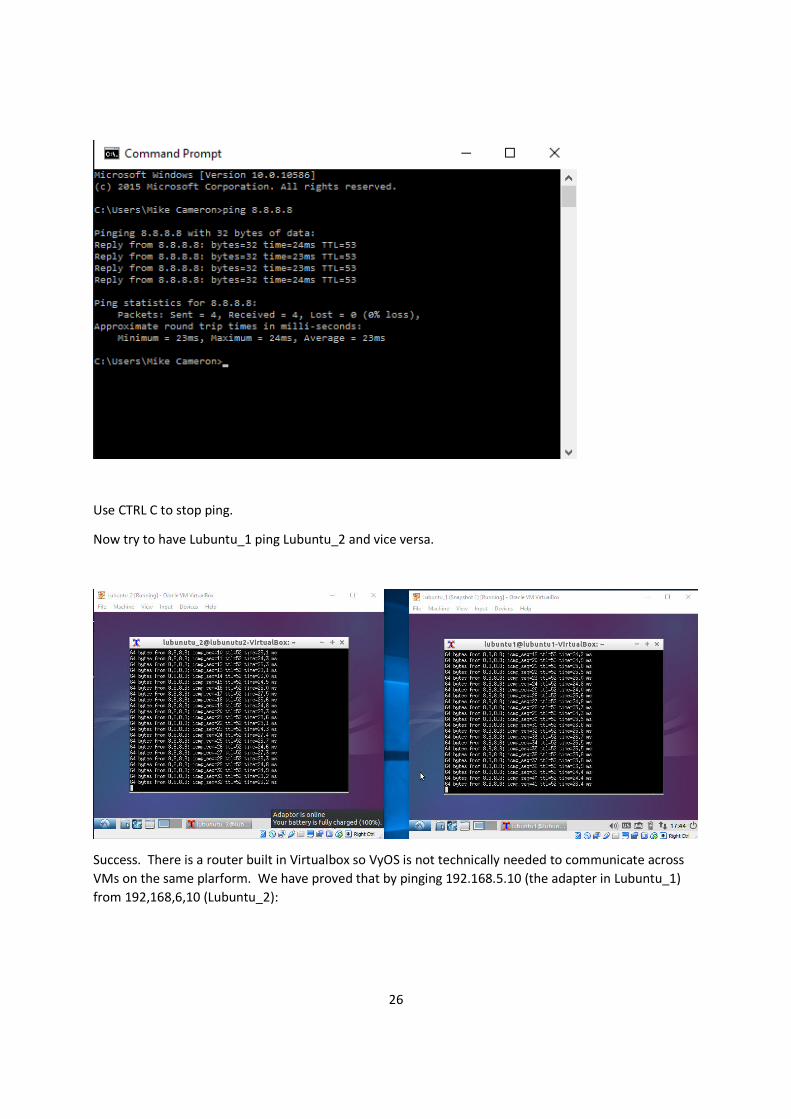
First test the Google DNS name servers from the Windows command prompt (Outside Virtualbox) to
make sure we still have connectivity:
26
Use CTRL C to stop ping.
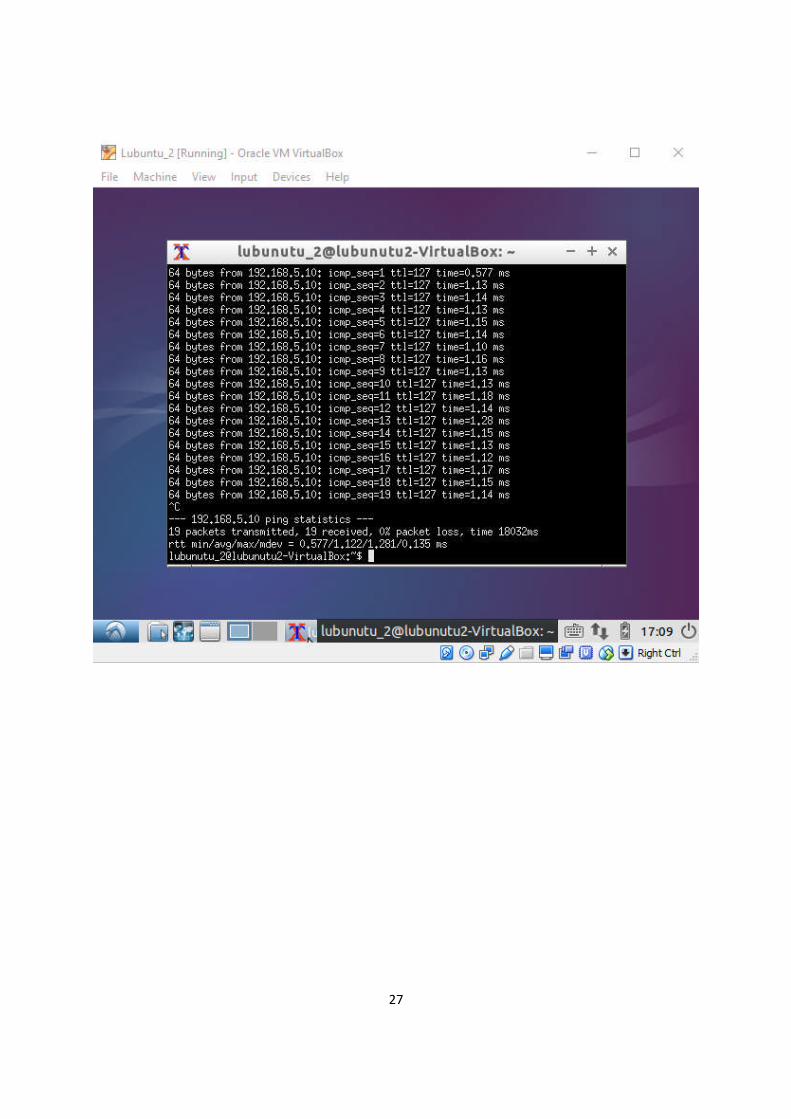
Now try to have Lubuntu_1 ping Lubuntu_2 and vice versa.
Success. There is a router built in Virtualbox so VyOS is not technically needed to communicate across
VMs on the same plarform. We have proved that by pinging 192.168.5.10 (the adapter in Lubuntu_1)
from 192,168,6,10 (Lubuntu_2):
27

28
PART 3 SSH
Note, an attempt was made to SSH into the other VM Lubuntu2 but the connection was refused. So
now, let’s open the port:
First, a portscan can be done using nmap:
sudo apt-get install nmap
then run the program with nmap with the IP Address of the machine you want scanned:
As can be seen, port 22 is closed.
Here is how to unblock port 22.
29
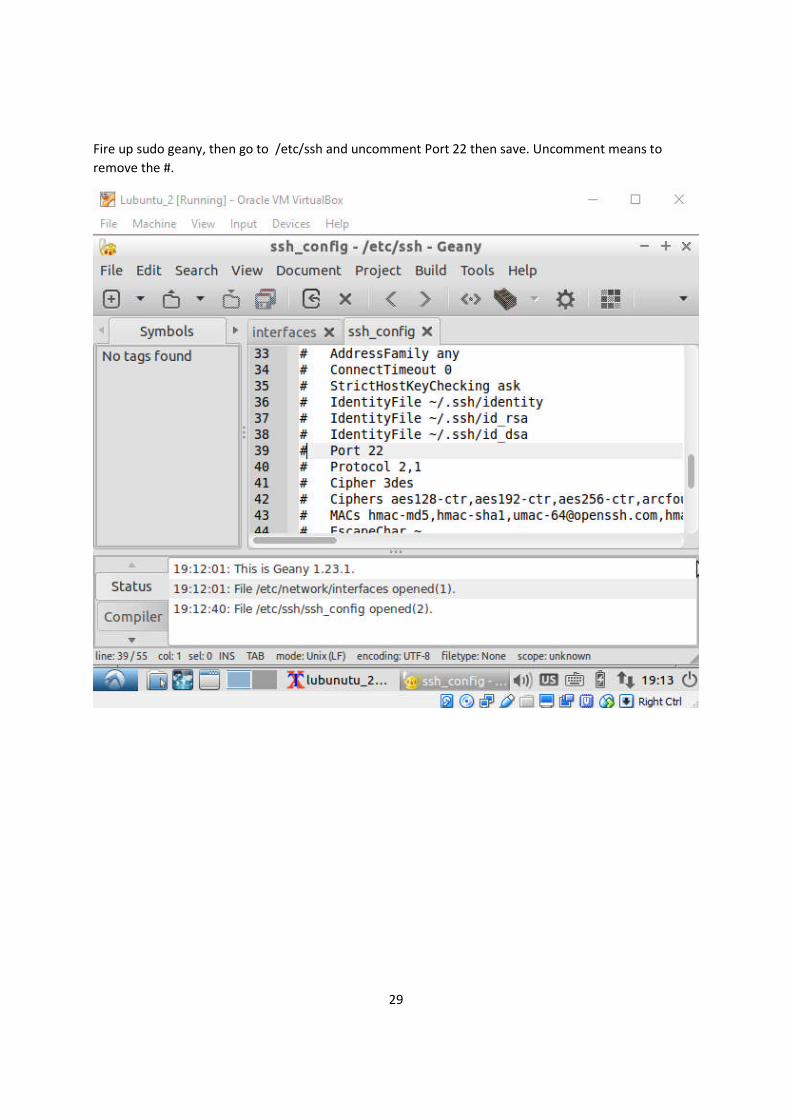
Fire up sudo geany, then go to /etc/ssh and uncomment Port 22 then save. Uncomment means to
remove the #.
30
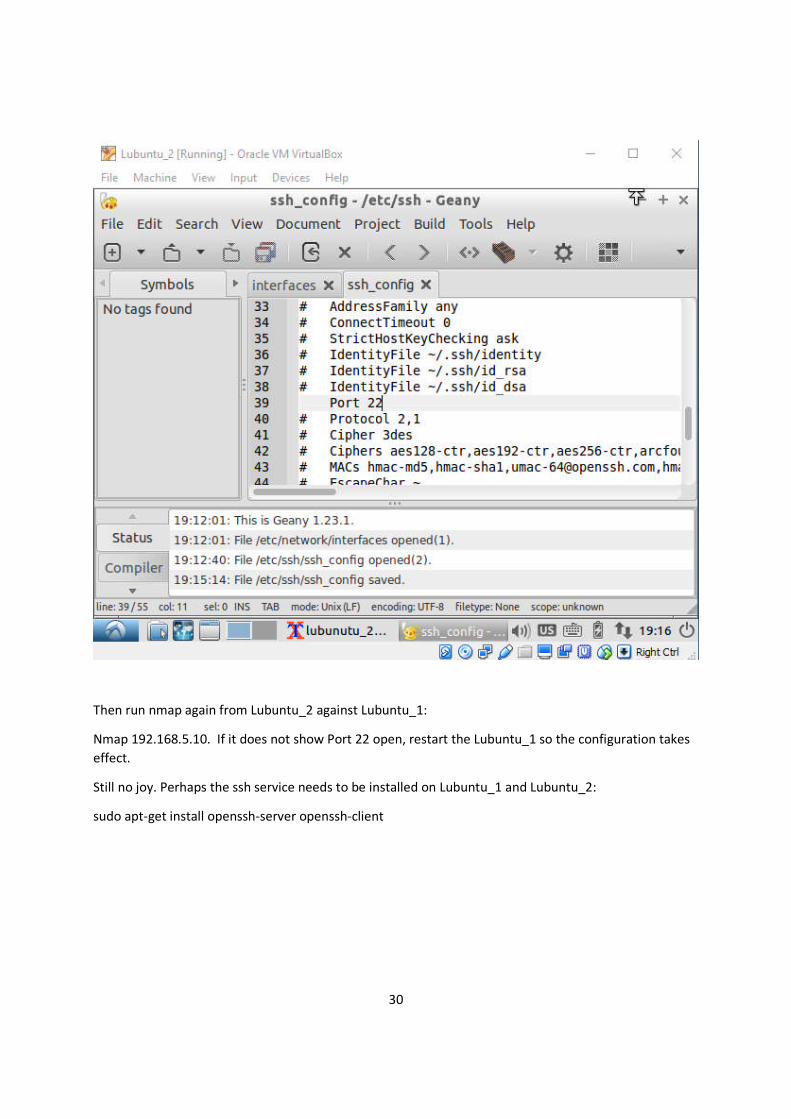
Then run nmap again from Lubuntu_2 against Lubuntu_1:
Nmap 192.168.5.10. If it does not show Port 22 open, restart the Lubuntu_1 so the configuration takes
effect.
Still no joy. Perhaps the ssh service needs to be installed on Lubuntu_1 and Lubuntu_2:
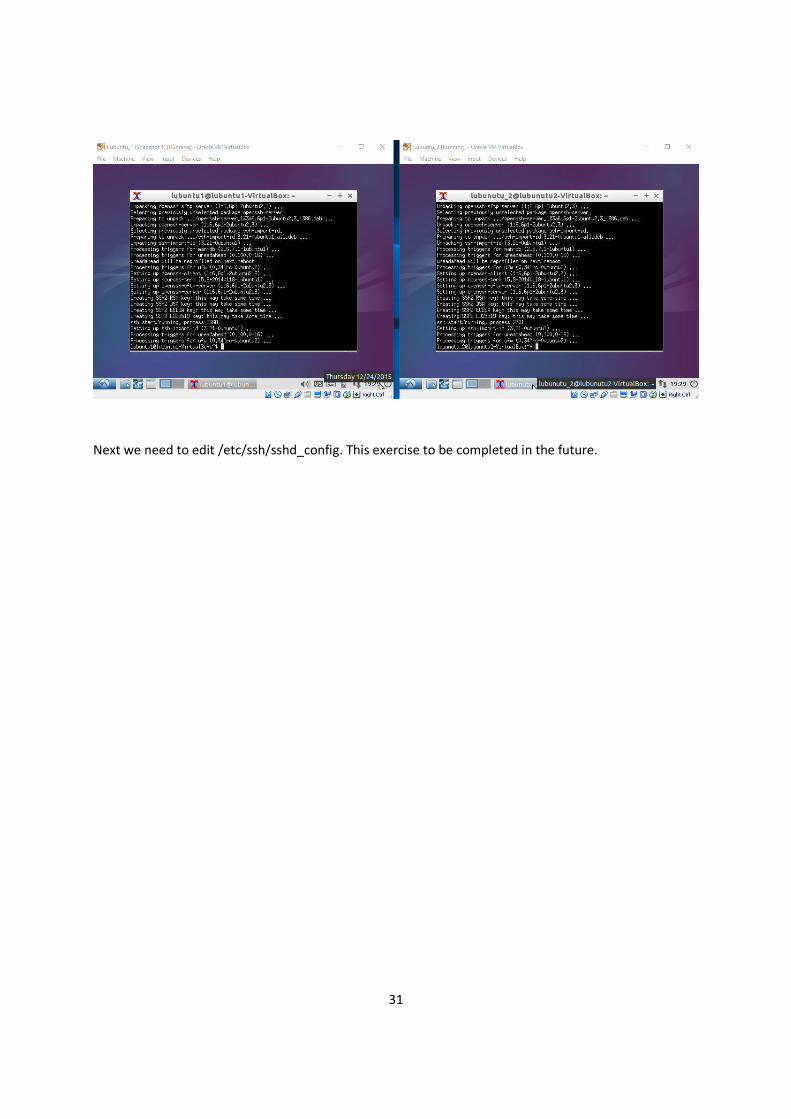
sudo apt-get install openssh-server openssh-client
31
Next we need to edit /etc/ssh/sshd_config. This exercise to be completed in the future.
32
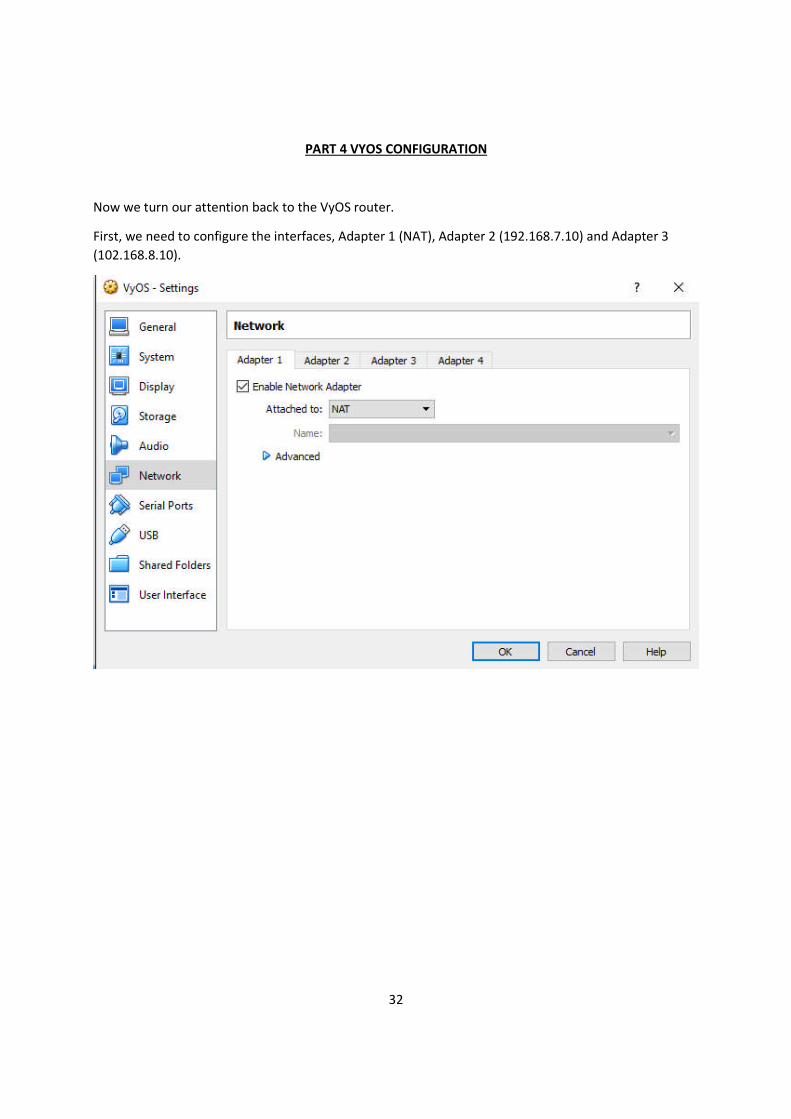
PART 4 VYOS CONFIGURATION
Now we turn our attention back to the VyOS router.
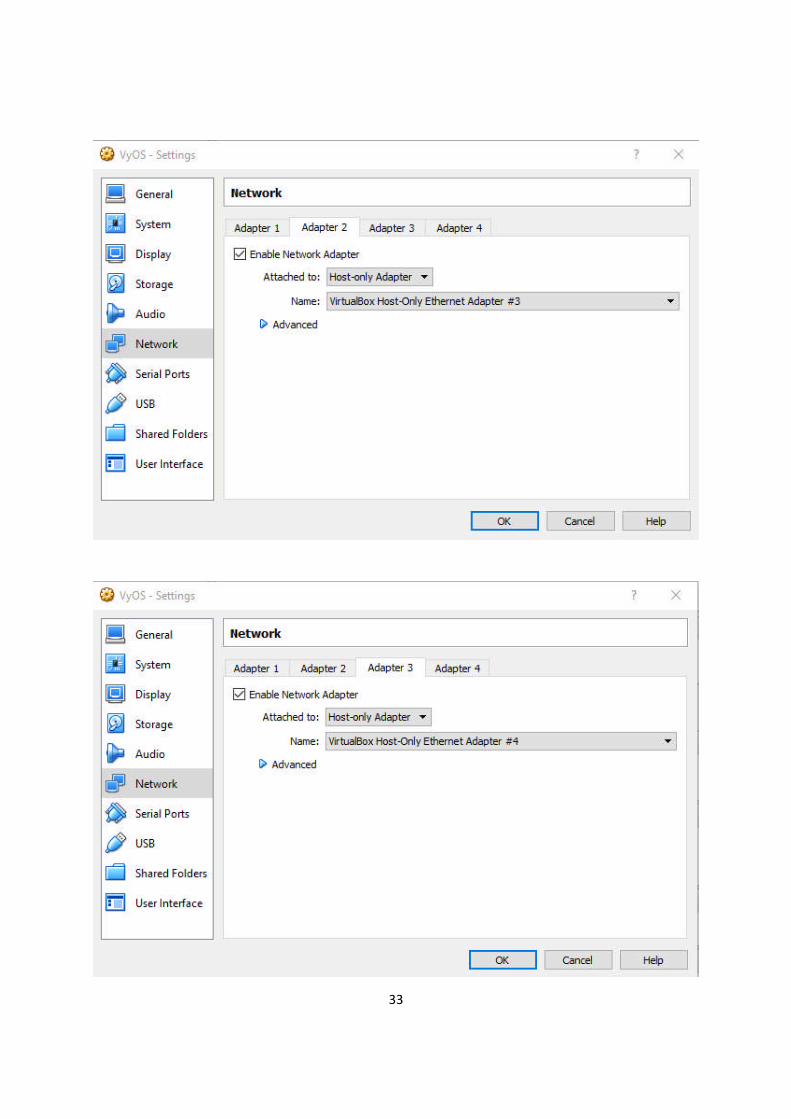
First, we need to configure the interfaces, Adapter 1 (NAT), Adapter 2 (192.168.7.10) and Adapter 3
(102.168.8.10).
33
34
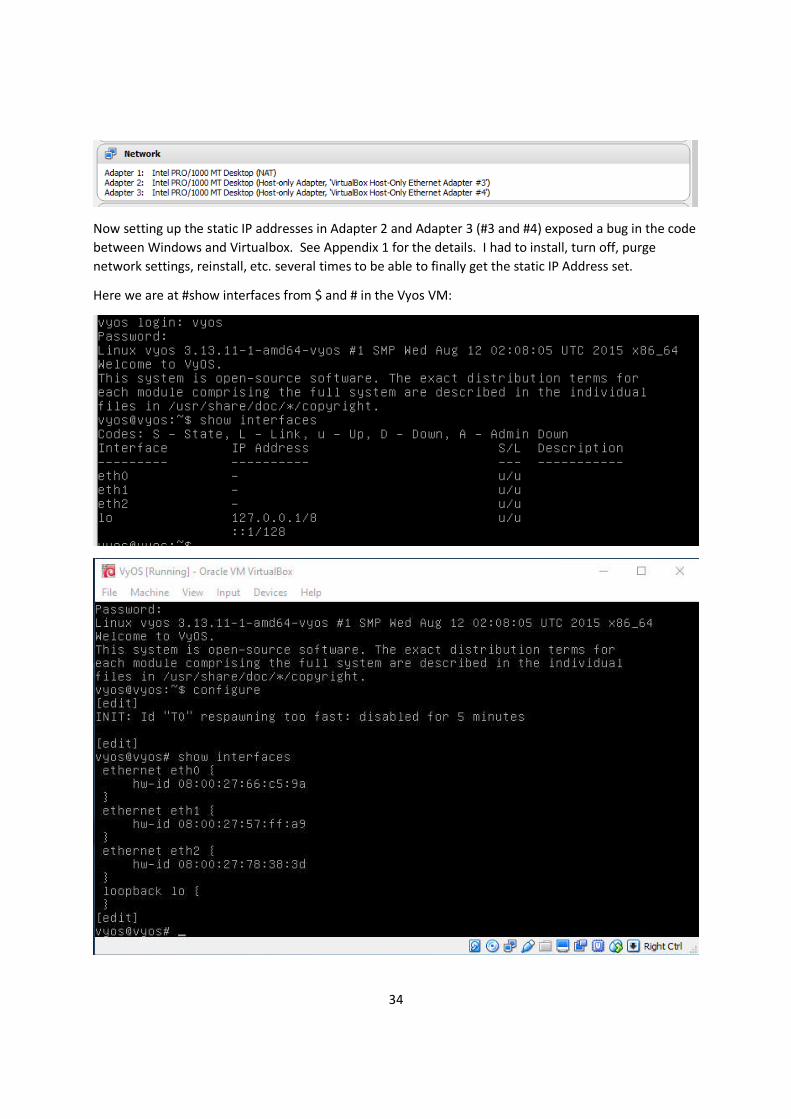
Now setting up the static IP addresses in Adapter 2 and Adapter 3 (#3 and #4) exposed a bug in the code
between Windows and Virtualbox. See Appendix 1 for the details. I had to install, turn off, purge
network settings, reinstall, etc. several times to be able to finally get the static IP Address set.
Here we are at #show interfaces from $ and # in the Vyos VM:
35
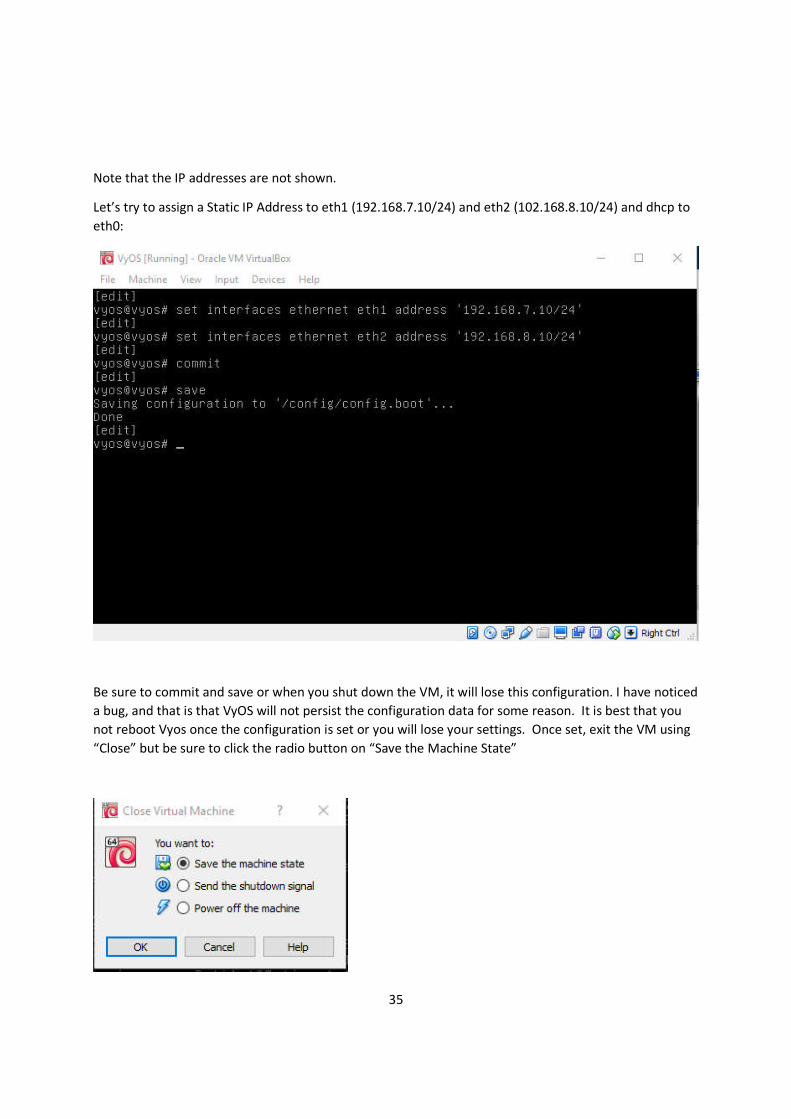
Note that the IP addresses are not shown.
Let’s try to assign a Static IP Address to eth1 (192.168.7.10/24) and eth2 (102.168.8.10/24) and dhcp to
eth0:
Be sure to commit and save or when you shut down the VM, it will lose this configuration. I have noticed
a bug, and that is that VyOS will not persist the configuration data for some reason. It is best that you
not reboot Vyos once the configuration is set or you will lose your settings. Once set, exit the VM using
“Close” but be sure to click the radio button on “Save the Machine State”

36
We can also set the interfaces at the root #
# set interface ethernet eth0 address 'dhcp’
# set interface ethernet eth1 address '192.168.7.10/24’
# set interface ethernet eth2 address '192.168.8.10/24’
We can also configure from here:
sudo nano /config/config.boot
Let’s use the nano editor to add the interface information
37
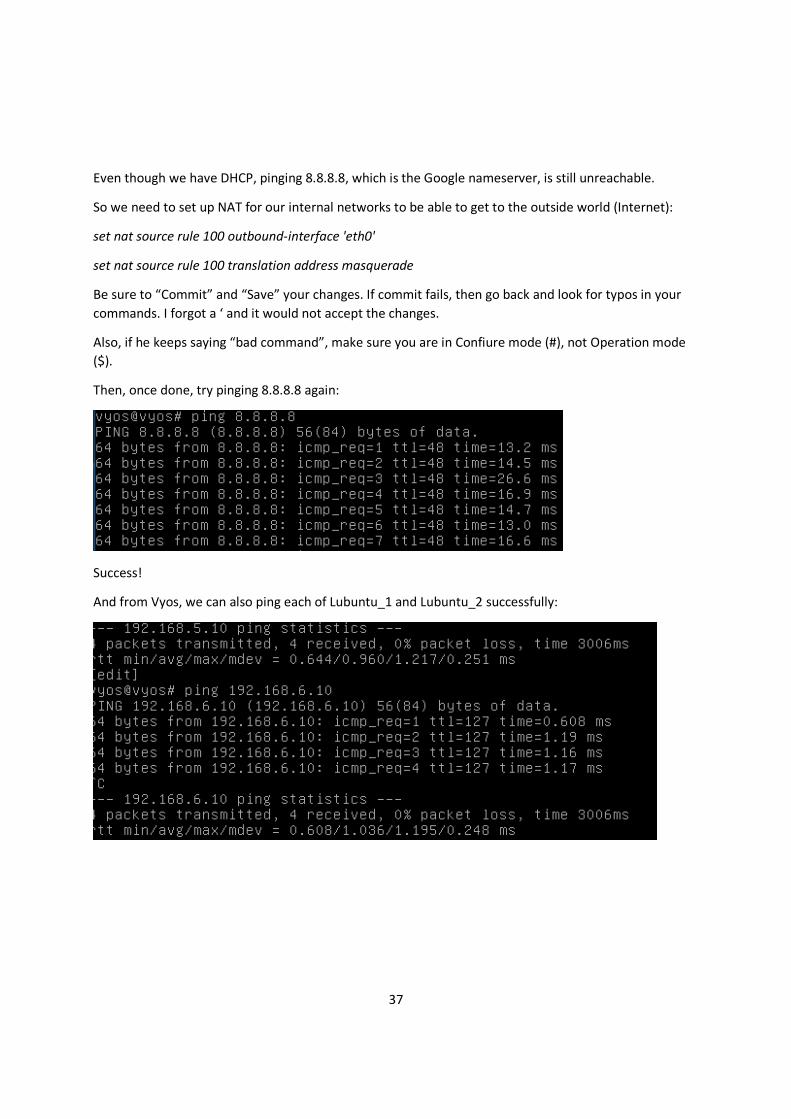
Even though we have DHCP, pinging 8.8.8.8, which is the Google nameserver, is still unreachable.
So we need to set up NAT for our internal networks to be able to get to the outside world (Internet):
set nat source rule 100 outbound-interface 'eth0'
set nat source rule 100 translation address masquerade
Be sure to “Commit” and “Save” your changes. If commit fails, then go back and look for typos in your
commands. I forgot a ‘ and it would not accept the changes.
Also, if he keeps saying “bad command”, make sure you are in Confiure mode (#), not Operation mode
($).
Then, once done, try pinging 8.8.8.8 again:
Success!
And from Vyos, we can also ping each of Lubuntu_1 and Lubuntu_2 successfully:

38
APPENDIX 1
Trying to add Network adaptors to be run by VyOS runs you into a bug that apparently is based on a
conflict in the code between MS Windows as the Guest OS and Virtualbox:
https://www.virtualbox.org/ticket/8796
Tried to save Static IP:
But seems to ignore that IP address and instead assigns from apparently DHCP:
One work around is to configure the 2 new Network Adapters at the Windows Command Line. I was
unable to find the file in Windows to make these changes.
39
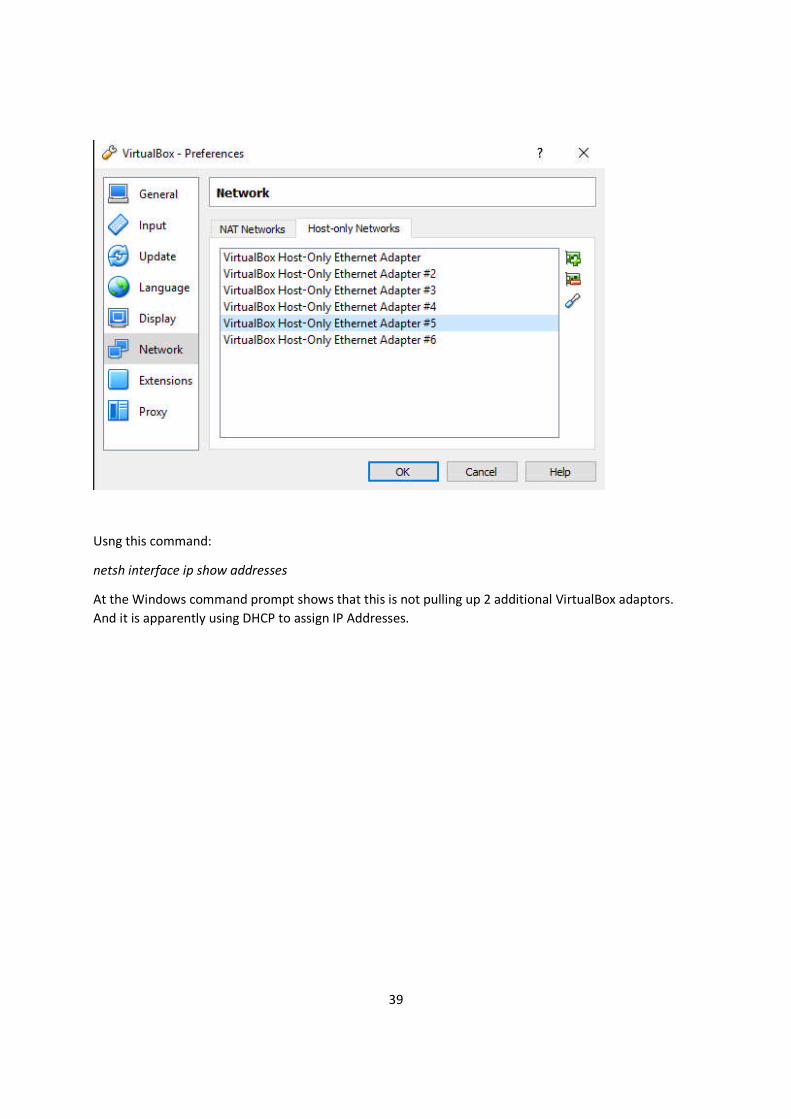
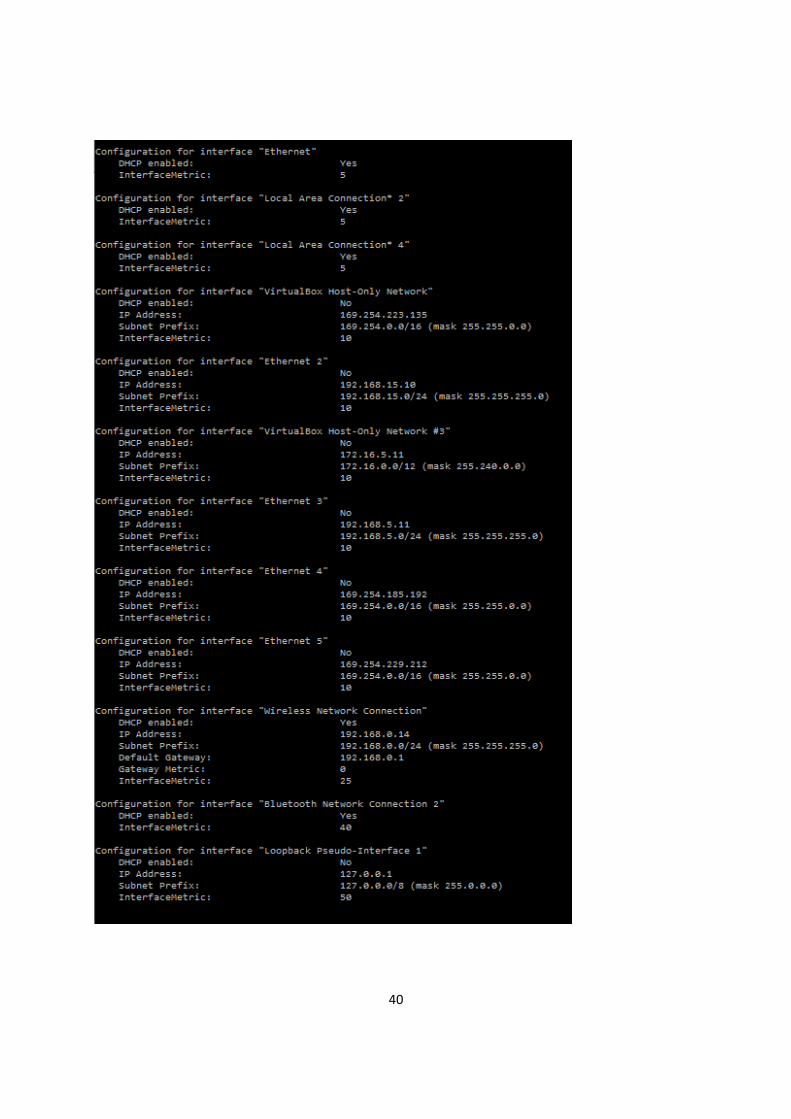
Usng this command:
netsh interface ip show addresses
At the Windows command prompt shows that this is not pulling up 2 additional VirtualBox adaptors.
And it is apparently using DHCP to assign IP Addresses.
40

41
So first go into windows as administrator:
Open your Windows start menu, search for the notepad application and then right click the notepad
icon. Step 2. Choose “Run as administrator” and then, while inside notepad, browse to folder
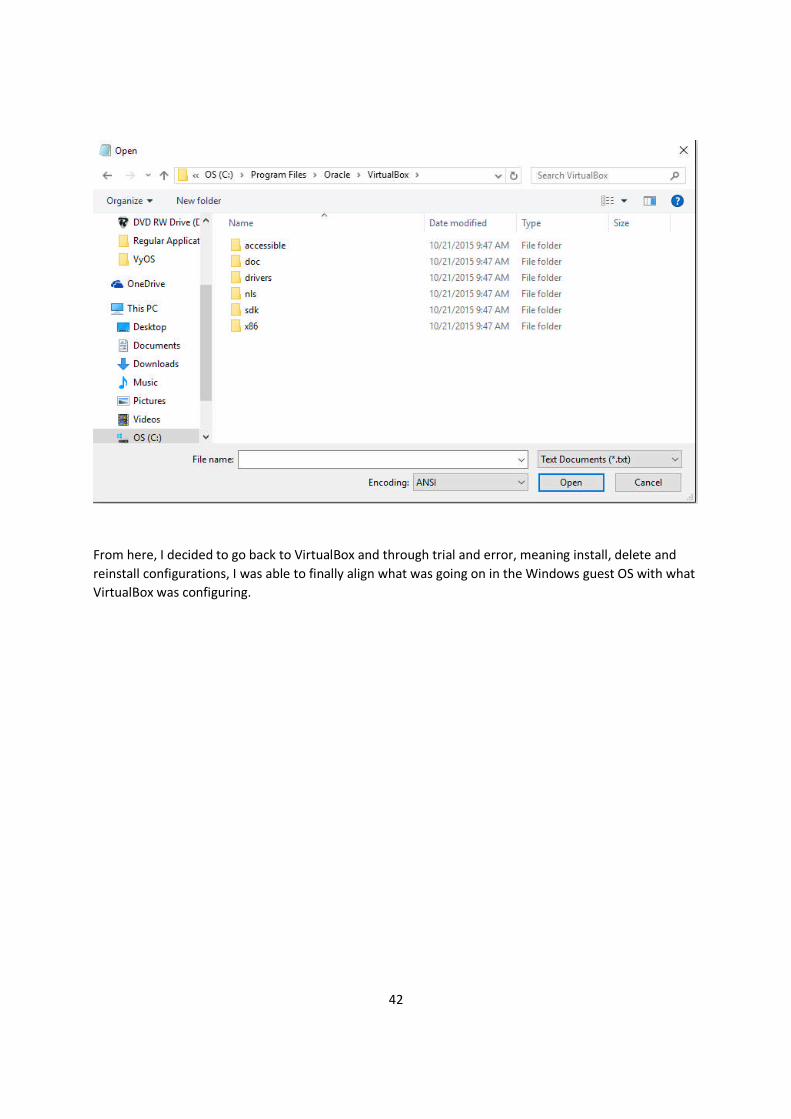
(c:\Program Files\Oracle\VirtualBox>) that contains the file to edit.
42
From here, I decided to go back to VirtualBox and through trial and error, meaning install, delete and
reinstall configurations, I was able to finally align what was going on in the Windows guest OS with what
VirtualBox was configuring.