Embed Size (px)
Citation preview
Installation Guide for Cisco Unity in a Unified Messaging Configuration (Without Failover)Release 8.x (With Microsoft Exchange) Revised February 2010
Americas HeadquartersCisco Systems, Inc.170 West Tasman DriveSan Jose, CA 95134-1706 USAhttp://www.cisco.comTel: 408 526-4000
800 553-NETS (6387)Fax: 408 527-0883
Text Part Number: OL-21709-01

THE SPECIFICATIONS AND INFORMATION REGARDING THE PRODUCTS IN THIS MANUAL ARE SUBJECT TO CHANGE WITHOUT NOTICE. ALL STATEMENTS, INFORMATION, AND RECOMMENDATIONS IN THIS MANUAL ARE BELIEVED TO BE ACCURATE BUT ARE PRESENTED WITHOUT WARRANTY OF ANY KIND, EXPRESS OR IMPLIED. USERS MUST TAKE FULL RESPONSIBILITY FOR THEIR APPLICATION OF ANY PRODUCTS.
THE SOFTWARE LICENSE AND LIMITED WARRANTY FOR THE ACCOMPANYING PRODUCT ARE SET FORTH IN THE INFORMATION PACKET THAT SHIPPED WITH THE PRODUCT AND ARE INCORPORATED HEREIN BY THIS REFERENCE. IF YOU ARE UNABLE TO LOCATE THE SOFTWARE LICENSE OR LIMITED WARRANTY, CONTACT YOUR CISCO REPRESENTATIVE FOR A COPY.
The Cisco implementation of TCP header compression is an adaptation of a program developed by the University of California, Berkeley (UCB) as part of UCB’s public domain version of the UNIX operating system. All rights reserved. Copyright © 1981, Regents of the University of California.
NOTWITHSTANDING ANY OTHER WARRANTY HEREIN, ALL DOCUMENT FILES AND SOFTWARE OF THESE SUPPLIERS ARE PROVIDED “AS IS” WITH ALL FAULTS. CISCO AND THE ABOVE-NAMED SUPPLIERS DISCLAIM ALL WARRANTIES, EXPRESSED OR IMPLIED, INCLUDING, WITHOUT LIMITATION, THOSE OF MERCHANTABILITY, FITNESS FOR A PARTICULAR PURPOSE AND NONINFRINGEMENT OR ARISING FROM A COURSE OF DEALING, USAGE, OR TRADE PRACTICE.
IN NO EVENT SHALL CISCO OR ITS SUPPLIERS BE LIABLE FOR ANY INDIRECT, SPECIAL, CONSEQUENTIAL, OR INCIDENTAL DAMAGES, INCLUDING, WITHOUT LIMITATION, LOST PROFITS OR LOSS OR DAMAGE TO DATA ARISING OUT OF THE USE OR INABILITY TO USE THIS MANUAL, EVEN IF CISCO OR ITS SUPPLIERS HAVE BEEN ADVISED OF THE POSSIBILITY OF SUCH DAMAGES.
CCDE, CCENT, CCSI, Cisco Eos, Cisco Explorer, Cisco HealthPresence, Cisco IronPort, the Cisco logo, Cisco Nurse Connect, Cisco Pulse, Cisco SensorBase, Cisco StackPower, Cisco StadiumVision, Cisco TelePresence, Cisco TrustSec, Cisco Unified Computing System, Cisco WebEx, DCE, Flip Channels, Flip for Good, Flip Mino, Flipshare (Design), Flip Ultra, Flip Video, Flip Video (Design), Instant Broadband, and Welcome to the Human Network are trademarks; Changing the Way We Work, Live, Play, and Learn, Cisco Capital, Cisco Capital (Design), Cisco:Financed (Stylized), Cisco Store, Flip Gift Card, and One Million Acts of Green are service marks; and Access Registrar, Aironet, AllTouch, AsyncOS, Bringing the Meeting To You, Catalyst, CCDA, CCDP, CCIE, CCIP, CCNA, CCNP, CCSP, CCVP, Cisco, the Cisco Certified Internetwork Expert logo, Cisco IOS, Cisco Lumin, Cisco Nexus, Cisco Press, Cisco Systems, Cisco Systems Capital, the Cisco Systems logo, Cisco Unity, Collaboration Without Limitation, Continuum, EtherFast, EtherSwitch, Event Center, Explorer, Follow Me Browsing, GainMaker, iLYNX, IOS, iPhone, IronPort, the IronPort logo, Laser Link, LightStream, Linksys, MeetingPlace, MeetingPlace Chime Sound, MGX, Networkers, Networking Academy, PCNow, PIX, PowerKEY, PowerPanels, PowerTV, PowerTV (Design), PowerVu, Prisma, ProConnect, ROSA, SenderBase, SMARTnet, Spectrum Expert, StackWise, WebEx, and the WebEx logo are registered trademarks of Cisco and/or its affiliates in the United States and certain other countries.
All other trademarks mentioned in this document or website are the property of their respective owners. The use of the word partner does not imply a partnership relationship between Cisco and any other company. (1002R)
Any Internet Protocol (IP) addresses and phone numbers used in this document are not intended to be actual addresses and phone numbers. Any examples, command display output, network topology diagrams, and other figures included in the document are shown for illustrative purposes only. Any use of actual IP addresses or phone numbers in illustrative content is unintentional and coincidental.
Installation Guide for Cisco Unity Release 8.x in a Unified Messaging Configuration (With Microsoft Exchange and Without Failover) © 2010 Cisco Systems, Inc. All rights reserved.

Installation Guide for Cisco Unity Release 8.x in a UnOL-21709-01
C O N T E N T S
Preface vii
Audience and Use vii
Documentation Conventions vii
Cisco Unity Documentation xi
Obtaining Documentation and Submitting a Service Request xi
C H A P T E R 1 Overview of Mandatory Tasks for Installing Cisco Unity 8.x 1-1
Part 1: Installing and Configuring the Cisco Unity 8.x Server 1-1
Part 2: Installing and Configuring a Cisco Unity 8.x Voice-Recognition Server 1-3
Part 3: Populating the Cisco Unity 8.x System with Subscriber and Call Management Data 1-3
Part 4: Setting Up Cisco Unity 8.x Networking Options (If Applicable) 1-5
Part 5: Customizing the Cisco Unity 8.x Conversation 1-5
Part 6: Backing Up Cisco Unity 8.x 1-6
Part 7: Training for Cisco Unity 8.x 1-6
C H A P T E R 2 Preparing for the Cisco Unity 8.x Installation 2-1
Gathering Documentation and Tools for the Cisco Unity 8.x Installation 2-1
Downloading Software for the Cisco Unity 8.x Installation 2-2
Cisco Unity 8.x Software 2-3
IBM ServerGuide Software (Only for IBM Servers and MCS Servers Manufactured by IBM) 2-3
Updated PIMG Firmware 2-3
Latest Microsoft Service Packs and Cisco Unity Server Updates Wizard 2-4
Determining the Locations for Files on the Cisco Unity 8.x Server 2-4
Locations for Files on a Platform Overlay 1 or Overlay 2 Server 2-5
Locations for Files on a Platform Overlay 3 Server in Which Drives Are Smaller than 300 GB 2-5
Locations for Files on a Platform Overlay 3 Server in Which Drives Are Larger than 300 GB 2-6
C H A P T E R 3 Setting Up the Hardware for the Cisco Unity 8.x System 3-1
Setting Up the Cisco Unity 8.x Server and Attaching Peripheral Devices 3-1
C H A P T E R 4 Installing the Operating System on the Cisco Unity 8.x Server 4-1
Considerations for Installing Windows on the Cisco Unity 8.x Server 4-2
Configuring the RAID Arrays on the Cisco Unity 8.x Server (Selected Installations) 4-2
iiiified Messaging Configuration (With Microsoft Exchange and Without Failover)
Contents
Installing Windows Server 2003 on the Cisco Unity 8.x Server by Using the Cisco Unity Platform Configuration Discs 4-3
Installing Windows Server 2003 on the Cisco Unity 8.x Server by Using a Retail Windows Server 2003 Disc 4-5
Creating the Partitions on the Cisco Unity 8.x Server 4-6
Adding 3GB and Userva Switches to the Boot.ini File on the Cisco Unity 8.x Server 4-7
C H A P T E R 5 Customizing the Cisco Unity 8.x Platform 5-1
Configuring a Dual NIC in the Cisco Unity 8.x Server 5-2
Installing the NIC-Configuration Utility on the Cisco Unity 8.x Server 5-2
Configuring a Dual NIC on the Cisco Unity 8.x Server 5-4
Obtaining Cisco Unity 8.x License Files 5-4
Determining the Partner Exchange Server for Cisco Unity 8.x 5-6
Installing Cisco Unity 8.x Prerequisites 5-6
Setting the SQL Server 2005 Express or MSDE 2000 System Administrator Password for Cisco Unity 8.x 5-9
Changing Folder Settings in Windows Explorer for Cisco Unity 8.x 5-11
Installing Microsoft Updates and Cisco Security Agent for Cisco Unity on the 8.x Server 5-11
Installing Antivirus Software on the Cisco Unity 8.x Server (Optional) 5-12
Connecting the Cisco Unity 8.x Server to the Network 5-12
Configuring TCP/IP Properties for the Cisco Unity 8.x Server 5-13
Verifying the IP Address and the Network Connection for the Cisco Unity 8.x Server 5-13
Adding the Cisco Unity 8.x Server to an Existing Domain 5-14
Disabling Antivirus Services on the Cisco Unity 8.x Server 5-14
Verifying Network Prerequisites for the Cisco Unity 8.x Server 5-15
C H A P T E R 6 Extending the Active Directory Schema for Cisco Unity 8.x 6-1
Extending the Active Directory Schema for Cisco Unity 8.x 6-1
Creating Organizational Units and a Mailbox Store for Cisco Unity 8.x 6-2
C H A P T E R 7 Creating Accounts for the Cisco Unity 8.x Installation and Granting Permissions 7-1
About the Accounts Required for the Cisco Unity 8.x Installation 7-1
The Account Used to Install Cisco Unity 8.x 7-2
The Account Used to Access the Cisco Unity Administrator in 8.x 7-2
The Accounts That Cisco Unity 8.x Services Log On As 7-2
Creating the Accounts Required for the Cisco Unity 8.x Installation 7-2
Adding the Cisco Unity 8.x Administration Account to the Local Administrators Group 7-4
ivInstallation Guide for Cisco Unity Release 8.x in a Unified Messaging Configuration (With Microsoft Exchange and Without Failover)
OL-21709-01
Contents
Granting Permissions for Cisco Unity 8.x with the Permissions Wizard 7-4
Delegating Exchange Administrative Control for Cisco Unity 8.x 7-5
C H A P T E R 8 Installing and Configuring Cisco Unity 8.x Software 8-1
Installing and Configuring Cisco Unity 8.x Software 8-2
Starting the Cisco Unity System Setup Assistant and Installing Cisco Unity 8.x Software 8-2
Installing Cisco Unity 8.x License Files 8-4
Configuring Cisco Unity 8.x Services 8-4
Configuring Cisco Unity 8.x for the Message Store 8-5
Setting New Default Passwords for Cisco Unity 8.x 8-7
Integrating the Phone System with Cisco Unity 8.x 8-7
Testing the Phone System Integration with Cisco Unity 8.x 8-7
Configuring Internet Explorer to Display the Cisco Unity Administrator Correctly in 8.x 8-8
Securing the Cisco Unity 8.x Example Administrator Account Against Toll Fraud 8-9
Moving the Data Store Databases and Transaction Logs for Cisco Unity 8.x 8-10
Excluding Selected Directories from Virus Scanning for Cisco Unity 8.x 8-14
Installing the Latest Microsoft Service Packs and Updates on the Cisco Unity 8.x Server 8-15
Re-enabling Antivirus Services on the Cisco Unity 8.x Server 8-15
Securing the Cisco Unity 8.x Software and the Cisco Unity Server 8-16
C H A P T E R 9 Installing Optional Software on the Cisco Unity 8.x Server 9-1
Installing Monitoring Software on the Cisco Unity 8.x Server 9-1
Installing RSA SecurID on the Cisco Unity 8.x Server 9-2
Installing Other Optional Software on the Cisco Unity 8.x Server 9-2
C H A P T E R 10 Setting Up Authentication for the Cisco Unity Administrator in 8.x 10-1
Determining the Authentication Method to Use for the Cisco Unity Administrator in 8.x 10-1
Authentication Methods Available for the Cisco Unity Administrator in 8.x 10-2
How Integrated Windows Authentication Works with the Cisco Unity Administrator in 8.x 10-3
How Anonymous Authentication Works with the Cisco Unity Administrator in 8.x 10-4
Configuring IIS So That the Cisco Unity Administrator and Status Monitor Use Anonymous Authentication in 8.x 10-5
A P P E N D I X A Exiting and Starting the Cisco Unity 8.x Software and Server A-1
Exiting the Cisco Unity 8.x Software A-1
Shutting Down or Restarting the Cisco Unity 8.x Server A-2
Starting the Cisco Unity 8.x Software A-3
vInstallation Guide for Cisco Unity Release 8.x in a Unified Messaging Configuration (With Microsoft Exchange and Without Failover)
OL-21709-01
Contents
A P P E N D I X B Installing and Configuring a Cisco Unity 8.x Voice-Recognition Server B-1
Installing Software on the Cisco Unity 8.x Voice Recognition Server B-1
Configuring Cisco Unity 8.x Voice-Recognition Software B-2
IN D E X
viInstallation Guide for Cisco Unity Release 8.x in a Unified Messaging Configuration (With Microsoft Exchange and Without Failover)
OL-21709-01

Preface
This preface contains the following sections:
• Audience and Use, page vii
• Documentation Conventions, page vii
• Cisco Unity Documentation, page xi
• Obtaining Documentation and Submitting a Service Request, page xi
Audience and UseThe Installation Guide for Cisco Unity is intended for installers of a Cisco Unity system. You need a working knowledge of Microsoft Exchange and Microsoft Windows 2003.
Documentation ConventionsTable 1 Cisco Unity installation guide Conventions
Convention Description
boldfaced text Boldfaced text is used for:
• Key and button names. (Example: Click OK.)
• Information that you enter. (Example: Enter Administrator in the User Name box.)
< >
(angle brackets)
Angle brackets are used around parameters for which you supply a value. (Example: In the Command Prompt window, enter ping <IP address>.)
-
(hyphen)
Hyphens separate keys that must be pressed simultaneously. (Example: Press Ctrl-Alt-Delete.)
>
(right angle bracket)
A right angle bracket is used to separate selections that you make:
• On menus. (Example: On the Windows Start menu, click Settings > Control Panel > Phone and Modem Options.)
• In the navigation bar of the Cisco Unity Administrator. (Example: Go to the System > Configuration > Settings page.)
viiInstallation Guide for Cisco Unity Release 8.x in a Unified Messaging Configuration (With Microsoft Exchange and Without Failover)
OL-21709-01
Preface
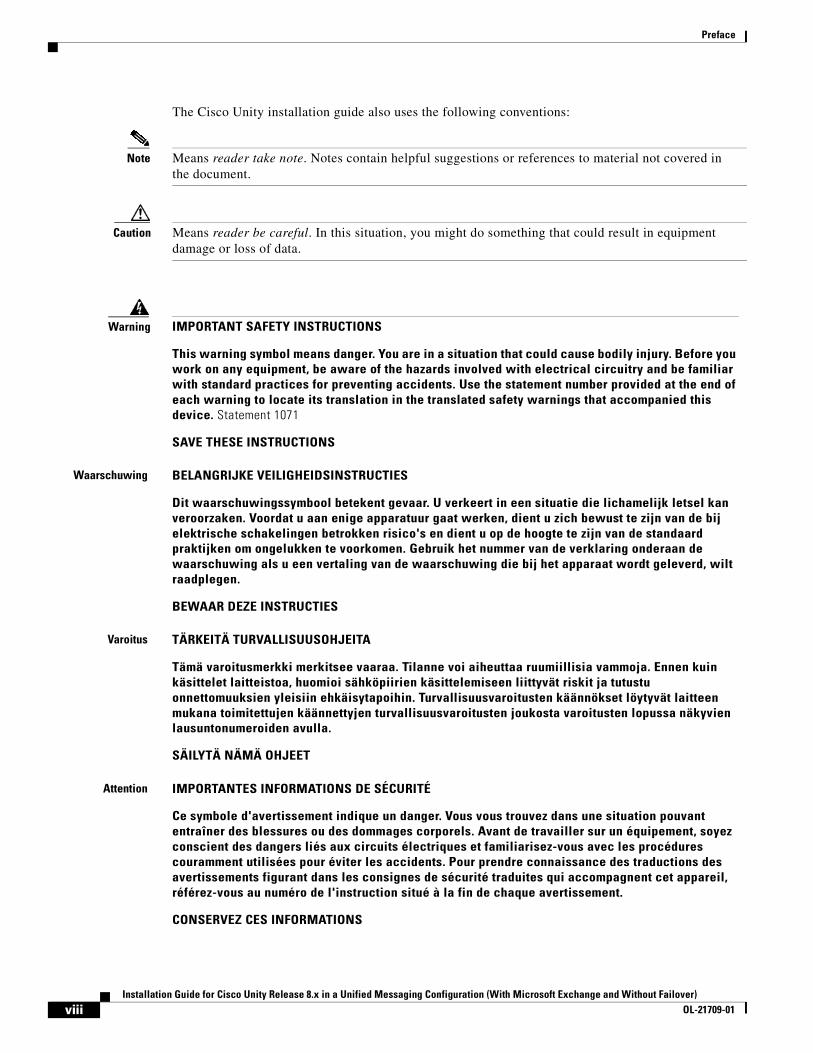
The Cisco Unity installation guide also uses the following conventions:
Note Means reader take note. Notes contain helpful suggestions or references to material not covered in the document.
Caution Means reader be careful. In this situation, you might do something that could result in equipment damage or loss of data.
Warning IMPORTANT SAFETY INSTRUCTIONS
This warning symbol means danger. You are in a situation that could cause bodily injury. Before you work on any equipment, be aware of the hazards involved with electrical circuitry and be familiar with standard practices for preventing accidents. Use the statement number provided at the end of each warning to locate its translation in the translated safety warnings that accompanied this device. Statement 1071
SAVE THESE INSTRUCTIONS
Waarschuwing BELANGRIJKE VEILIGHEIDSINSTRUCTIES
Dit waarschuwingssymbool betekent gevaar. U verkeert in een situatie die lichamelijk letsel kan veroorzaken. Voordat u aan enige apparatuur gaat werken, dient u zich bewust te zijn van de bij elektrische schakelingen betrokken risico's en dient u op de hoogte te zijn van de standaard praktijken om ongelukken te voorkomen. Gebruik het nummer van de verklaring onderaan de waarschuwing als u een vertaling van de waarschuwing die bij het apparaat wordt geleverd, wilt raadplegen.
BEWAAR DEZE INSTRUCTIES
Varoitus TÄRKEITÄ TURVALLISUUSOHJEITA
Tämä varoitusmerkki merkitsee vaaraa. Tilanne voi aiheuttaa ruumiillisia vammoja. Ennen kuin käsittelet laitteistoa, huomioi sähköpiirien käsittelemiseen liittyvät riskit ja tutustu onnettomuuksien yleisiin ehkäisytapoihin. Turvallisuusvaroitusten käännökset löytyvät laitteen mukana toimitettujen käännettyjen turvallisuusvaroitusten joukosta varoitusten lopussa näkyvien lausuntonumeroiden avulla.
SÄILYTÄ NÄMÄ OHJEET
Attention IMPORTANTES INFORMATIONS DE SÉCURITÉ
Ce symbole d'avertissement indique un danger. Vous vous trouvez dans une situation pouvant entraîner des blessures ou des dommages corporels. Avant de travailler sur un équipement, soyez conscient des dangers liés aux circuits électriques et familiarisez-vous avec les procédures couramment utilisées pour éviter les accidents. Pour prendre connaissance des traductions des avertissements figurant dans les consignes de sécurité traduites qui accompagnent cet appareil, référez-vous au numéro de l'instruction situé à la fin de chaque avertissement.
CONSERVEZ CES INFORMATIONS
viiiInstallation Guide for Cisco Unity Release 8.x in a Unified Messaging Configuration (With Microsoft Exchange and Without Failover)
OL-21709-01

Preface
Warnung WICHTIGE SICHERHEITSHINWEISE
Dieses Warnsymbol bedeutet Gefahr. Sie befinden sich in einer Situation, die zu Verletzungen führen kann. Machen Sie sich vor der Arbeit mit Geräten mit den Gefahren elektrischer Schaltungen und den üblichen Verfahren zur Vorbeugung vor Unfällen vertraut. Suchen Sie mit der am Ende jeder Warnung angegebenen Anweisungsnummer nach der jeweiligen Übersetzung in den übersetzten Sicherheitshinweisen, die zusammen mit diesem Gerät ausgeliefert wurden.
BEWAHREN SIE DIESE HINWEISE GUT AUF.
Avvertenza IMPORTANTI ISTRUZIONI SULLA SICUREZZA
Questo simbolo di avvertenza indica un pericolo. La situazione potrebbe causare infortuni alle persone. Prima di intervenire su qualsiasi apparecchiatura, occorre essere al corrente dei pericoli relativi ai circuiti elettrici e conoscere le procedure standard per la prevenzione di incidenti. Utilizzare il numero di istruzione presente alla fine di ciascuna avvertenza per individuare le traduzioni delle avvertenze riportate in questo documento.
CONSERVARE QUESTE ISTRUZIONI
Advarsel VIKTIGE SIKKERHETSINSTRUKSJONER
Dette advarselssymbolet betyr fare. Du er i en situasjon som kan føre til skade på person. Før du begynner å arbeide med noe av utstyret, må du være oppmerksom på farene forbundet med elektriske kretser, og kjenne til standardprosedyrer for å forhindre ulykker. Bruk nummeret i slutten av hver advarsel for å finne oversettelsen i de oversatte sikkerhetsadvarslene som fulgte med denne enheten.
TA VARE PÅ DISSE INSTRUKSJONENE
Aviso INSTRUÇÕES IMPORTANTES DE SEGURANÇA
Este símbolo de aviso significa perigo. Você está em uma situação que poderá ser causadora de lesões corporais. Antes de iniciar a utilização de qualquer equipamento, tenha conhecimento dos perigos envolvidos no manuseio de circuitos elétricos e familiarize-se com as práticas habituais de prevenção de acidentes. Utilize o número da instrução fornecido ao final de cada aviso para localizar sua tradução nos avisos de segurança traduzidos que acompanham este dispositivo.
GUARDE ESTAS INSTRUÇÕES
¡Advertencia! INSTRUCCIONES IMPORTANTES DE SEGURIDAD
Este símbolo de aviso indica peligro. Existe riesgo para su integridad física. Antes de manipular cualquier equipo, considere los riesgos de la corriente eléctrica y familiarícese con los procedimientos estándar de prevención de accidentes. Al final de cada advertencia encontrará el número que le ayudará a encontrar el texto traducido en el apartado de traducciones que acompaña a este dispositivo.
GUARDE ESTAS INSTRUCCIONES
ixInstallation Guide for Cisco Unity Release 8.x in a Unified Messaging Configuration (With Microsoft Exchange and Without Failover)
OL-21709-01

Preface
Varning! VIKTIGA SÄKERHETSANVISNINGAR
Denna varningssignal signalerar fara. Du befinner dig i en situation som kan leda till personskada. Innan du utför arbete på någon utrustning måste du vara medveten om farorna med elkretsar och känna till vanliga förfaranden för att förebygga olyckor. Använd det nummer som finns i slutet av varje varning för att hitta dess översättning i de översatta säkerhetsvarningar som medföljer denna anordning.
SPARA DESSA ANVISNINGAR
xInstallation Guide for Cisco Unity Release 8.x in a Unified Messaging Configuration (With Microsoft Exchange and Without Failover)
OL-21709-01

Preface
Cisco Unity DocumentationFor descriptions and URLs of Cisco Unity documentation on Cisco.com, see the Documentation Guide for Cisco Unity. The document is shipped with Cisco Unity and is available at http://www.cisco.com/en/US/docs/voice_ip_comm/unity/8x/documentation/guide/8xcudg.html.
Obtaining Documentation and Submitting a Service RequestFor information on obtaining documentation, submitting a service request, and gathering additional information, see the monthly What’s New in Cisco Product Documentation, which also lists all new and revised Cisco technical documentation, at:
http://www.cisco.com/en/US/docs/general/whatsnew/whatsnew.html
Subscribe to the What’s New in Cisco Product Documentation as a Really Simple Syndication (RSS) feed and set content to be delivered directly to your desktop using a reader application. The RSS feeds are a free service and Cisco currently supports RSS Version 2.0.
xiInstallation Guide for Cisco Unity Release 8.x in a Unified Messaging Configuration (With Microsoft Exchange and Without Failover)
OL-21709-01

Preface
xiiInstallation Guide for Cisco Unity Release 8.x in a Unified Messaging Configuration (With Microsoft Exchange and Without Failover)
OL-21709-01

Installation Guide for Cisco Unity Release 8.x in a Unified Messaging ConfiguratiOL-21709-01
C H A P T E R 1
Overview of Mandatory Tasks for Installing Cisco Unity 8.xNote If you are upgrading Cisco Unity, refer instead to the Reconfiguration and Upgrade Guide for Cisco Unity for upgrade instructions.
Use the following high-level task list to install the Cisco Unity system correctly. The tasks reference detailed instructions in the Installation Guide for Cisco Unity, and in other Cisco Unity documentation as noted. Follow the documentation for a successful installation.
The task list leads you through the complete installation of the Cisco Unity system—from installing and configuring the Cisco Unity server; to populating the Cisco Unity system with subscriber and call management data; to setting up optional features, such as networking; to backing up Cisco Unity.
Note Cisco assumes that the Microsoft Exchange environment is already set up and working before the Cisco Unity system is installed.
The list is divided into seven parts. Some of the tasks apply only to specific situations, and are noted as such. If a task does not apply to your situation, skip it.
Part 1: Installing and Configuring the Cisco Unity 8.x ServerThe tasks in Part 1 reference chapters in the Installation Guide for Cisco Unity, unless otherwise noted.
1. Confirm that you are using the correct version of the Installation Guide for Cisco Unity for your configuration. This version of the guide is for Cisco Unity 8.x and later Unified Messaging with Exchange (without Cisco Unity failover). For a list of configurations and applicable installation guides, see the document Use the Installation Guide That Matches the Cisco Unity 8.x Configuration at http://www.cisco.com/en/US/docs/voice_ip_comm/unity/8x/correct_ig/8xcuigcrct.html.
2. Verify the following requirements:
a. System requirements for the Cisco Unity system. See System Requirements for Cisco Unity at http://www.cisco.com/en/US/docs/voice_ip_comm/unity/8x/requirements/8xcusysreq.html.
1-1on (With Microsoft Exchange and Without Failover)
Chapter 1 Overview of Mandatory Tasks for Installing Cisco Unity 8.xPart 1: Installing and Configuring the Cisco Unity 8.x Server
b. Requirements for integrating the phone system(s). See the “Requirements” section of the applicable Cisco Unity integration guide(s) at http://www.cisco.com/en/US/products/sw/voicesw/ps2237/products_installation_and_configuration_guides_list.html.
c. If the system is using Cisco Unity Bridge Networking: Requirements for the Bridge. See the applicable version of System Requirements, and Supported Hardware and Software for Cisco Unity Bridge at http://www.cisco.com/en/US/products/sw/voicesw/ps2237/prod_installation_guides_list.html.
d. If the system is using any Cisco Unity networking option (including the Bridge): Requirements for the networking option. See Networking Options Requirements for Cisco Unity at http://www.cisco.com/en/US/products/sw/voicesw/ps2237/prod_installation_guides_list.html.
3. Gather the documentation and tools for the installation, download the latest Cisco Unity Server Updates wizard and other software, and determine the drive locations for application, log, and database files that you will need later in the installation. See Chapter 2, “Preparing for the Cisco Unity 8.x Installation.”
4. Set up or program the phone system(s) and extensions to enable the integration(s) with Cisco Unity. See the “Programming the <Name> Phone System” section of the applicable Cisco Unity integration guide(s) at http://www.cisco.com/en/US/products/sw/voicesw/ps2237/products_installation_and_configuration_guides_list.html.
5. Set up the server, and attach peripheral devices, if applicable. See Chapter 3, “Setting Up the Hardware for the Cisco Unity 8.x System.”
6. Configure the RAID arrays, if applicable, install Windows Server 2003, and create the partitions, if applicable. See Chapter 4, “Installing the Operating System on the Cisco Unity 8.x Server.”
7. Obtain Cisco Unity license files, and use the Cisco Unity System Setup Assistant to configure the operating system and install required software components. Then set up the server in the Windows networking environment. See Chapter 5, “Customizing the Cisco Unity 8.x Platform.”
8. Extend the Active Directory schema for Cisco Unity. Optionally, create Active Directory organizational units for users and distribution lists, and a mailbox store. See Chapter 6, “Extending the Active Directory Schema for Cisco Unity 8.x.”
9. Create the accounts required for the Cisco Unity installation, and grant permissions. See Chapter 7, “Creating Accounts for the Cisco Unity 8.x Installation and Granting Permissions.”
10. Use the Cisco Unity System Setup Assistant to install and configure Cisco Unity software. You also secure the Example Administrator account against toll fraud, and move SQL Server, SQL Server Express, or MSDE database files and transaction logs, if applicable. See Chapter 8, “Installing and Configuring Cisco Unity 8.x Software.”
11. Decide whether to use SSL to encrypt data and credentials for Cisco Unity web and client applications. If so, install the Microsoft Certificate Services component, if applicable, then configure Internet Information Services Manager to require the Cisco Personal Communications Assistant, Cisco Unity Administrator, and Status Monitor to use SSL. See the “Using SSL to Secure Client/Server Connections” chapter of the Security Guide for Cisco Unity at http://www.cisco.com/en/US/docs/voice_ip_comm/unity/8x/security/guide/8xcusecx.html.
12. Install any optional software. See Chapter 9, “Installing Optional Software on the Cisco Unity 8.x Server.”
Caution Do not install Microsoft Outlook on the Cisco Unity server, or Cisco Unity may not notify subscribers of new messages.
1-2Installation Guide for Cisco Unity Release 8.x in a Unified Messaging Configuration (With Microsoft Exchange and Without Failover)
OL-21709-01
Chapter 1 Overview of Mandatory Tasks for Installing Cisco Unity 8.xPart 2: Installing and Configuring a Cisco Unity 8.x Voice-Recognition Server
13. Determine the authentication method that you want to use for the Cisco Unity Administrator web application, and configure IIS, as applicable. See Chapter 10, “Setting Up Authentication for the Cisco Unity Administrator in 8.x.”
14. Store all of the software that was shipped with Cisco Unity together in a location that is safe and can be readily accessed. You may need the discs later to upgrade or to otherwise modify the Cisco Unity system, or Cisco TAC may require you to access them during a service call.
Part 2: Installing and Configuring a Cisco Unity 8.x Voice-Recognition Server
15. Install and configure a voice-recognition server, if applicable. See Appendix B, “Installing and Configuring a Cisco Unity 8.x Voice-Recognition Server.”
Part 3: Populating the Cisco Unity 8.x System with Subscriber and Call Management Data
You do most of the tasks in Part 3 by using the Cisco Unity Administrator. (For information on logging on to the Cisco Unity Administrator and on using it, see the “Accessing and Using the Cisco Unity Administrator” chapter of the System Administration Guide for Cisco Unity.)
The tasks reference chapters in the System Administration Guide for Cisco Unity that contain detailed information; the guide is available at http://www.cisco.com/en/US/docs/voice_ip_comm/unity/8x/administration/guide/8xcusagx.html.
16. Define system schedules:
a. Identify standard business hours.
b. Identify closed and weekend hours.
c. Create custom schedules, if necessary.
d. Identify holidays.
See the “Creating and Modifying Schedules” and “Identifying Days as Holidays” sections in the “Call Management Overview” chapter.
17. Set up phone, GUI, and TTS languages (including TTY, if applicable). See the “Managing Languages” chapter.
18. Set up third-party fax, if applicable.
19. Create a call management plan. See the “Creating and Implementing a Call Management Plan” section in the “Call Management Overview” chapter.
20. Prepare to create regular subscriber accounts. See the “Issues to Consider Before Creating Regular Subscriber Accounts” section in the “Managing Subscriber Accounts” chapter.
a. Confirm that you have the necessary permissions for creating subscriber accounts and that Cisco Unity is configured properly to work with the message store.
b. Confirm that you have the applicable licenses.
c. Determine password and account lockout policy for Cisco Unity phone access.
d. Determine logon, password, and account lockout policy for Cisco Unity web access.
1-3Installation Guide for Cisco Unity Release 8.x in a Unified Messaging Configuration (With Microsoft Exchange and Without Failover)
OL-21709-01
Chapter 1 Overview of Mandatory Tasks for Installing Cisco Unity 8.xPart 3: Populating the Cisco Unity 8.x System with Subscriber and Call Management Data
e. Decide whether to set up enhanced phone security.
f. Review, change, and create classes of service.
g. Create restriction tables, and assign them to the appropriate class(es) of service.
h. Create public distribution lists.
i. Review, create, and modify subscriber templates. Secure phone passwords, and, as applicable, secure Windows domain account passwords.
j. As needed, change the locale ID of the MAPI profile for the Cisco Unity server.
21. Set up the Cisco Unity Hospitality and property management system integration, if applicable. See the “Hospitality and Property Management System Integration” documentation at http://www.cisco.com/en/US/products/sw/voicesw/ps2237/prod_maintenance_guides_list.html.
22. Test the system configuration:
a. Add a single subscriber (see the “Managing Subscriber Accounts” chapter).
b. Use the phone to log on to Cisco Unity as the test subscriber, record a name, and set a phone password. Hang up.
c. Call Cisco Unity and log on as the test subscriber again to confirm that the password, greeting, and conversation specified for the subscriber are working properly. Confirm that the subscriber inherited the correct class of service by testing any applicable features by phone.
d. Log on to the Cisco Personal Communications Assistant (PCA) as the test subscriber. If you gave the test subscriber the required class of service rights, test to see if you can browse from the Cisco PCA Welcome page to the Cisco Unity Assistant. If you gave the test subscriber the required class of service rights, test to see if you can browse to the Cisco Unity Inbox.
e. Make corrections to the system configuration as necessary.
23. Create subscriber accounts. See the “Managing Subscriber Accounts” chapter.
24. Hide users in the Exchange address book, if applicable. See the “Issues to Consider After Creating Subscriber Accounts” section in the “Managing Subscriber Accounts” chapter.
25. Modify individual subscriber accounts as needed. See the “Modifying Subscriber Accounts” section in the “Managing Subscriber Accounts” chapter.
26. Add individual subscribers to public distribution lists, as needed. (For example, assign subscribers to screen those messages left in Cisco Unity that are not associated with a specific recipient, such as those left to the Unaddressed Messages distribution list or for the Opening Greeting call handler.) See the “About Message Handling” section in the “Messaging and Default Accounts Overview” chapter.
27. Implement, then test the call management plan you created in Task 19.:
a. Create call handlers. See the “Managing Call Handlers” chapter.
b. Specify directory handler settings. See the “Managing Directory Handlers” chapter.
c. Create interview handlers. See the “Managing Interview Handlers” chapter.
d. Set up call routing. See the “Creating and Modifying Call Routing Rules” section in the “Call Management Overview” chapter.
28. As applicable, set up subscriber phones to access Cisco Unity, and set up Cisco Unity features that subscribers will use, such as Cisco Unity ViewMail for Microsoft Outlook, text-message notifications, Mobile Message Access for BlackBerry, and Message Monitor. See the “Setting Up Subscriber Workstations” chapter.
1-4Installation Guide for Cisco Unity Release 8.x in a Unified Messaging Configuration (With Microsoft Exchange and Without Failover)
OL-21709-01

Chapter 1 Overview of Mandatory Tasks for Installing Cisco Unity 8.xPart 4: Setting Up Cisco Unity 8.x Networking Options (If Applicable)
Part 4: Setting Up Cisco Unity 8.x Networking Options (If Applicable)
29. If the system is using Digital Networking: Set up Digital Networking. See the “Digital Networking” chapter of the Networking Guide for Cisco Unity at http://www.cisco.com/en/US/docs/voice_ip_comm/unity/8x/networking/guide/8xcunetx.html.
30. If you are connecting the Cisco Unity server or Digital Network to a Cisco Unity Connection server or site: Set up Cisco Unity Connection Networking. See the “Setting Up Networking Between Cisco Unity and Cisco Unity Connection Servers” chapter of the Networking Guide for Cisco Unity Connection at http://www.cisco.com/en/US/docs/voice_ip_comm/connection/8x/networking/guide/8xcucnetx.html.
31. If the system is using Internet Subscribers: Set up Internet subscribers. See the “Internet Subscribers” chapter of the Networking Guide for Cisco Unity at http://www.cisco.com/en/US/docs/voice_ip_comm/connection/8x/networking/guide/8xcucnetx.html.
32. If the system is using AMIS Networking: Set up AMIS Networking. See the “AMIS Networking” chapter of the Networking Guide for Cisco Unity at http://www.cisco.com/en/US/docs/voice_ip_comm/connection/8x/networking/guide/8xcucnetx.html.
33. If the system is using VPIM Networking: Set up VPIM Networking. See the “VPIM Networking” chapter of the Networking Guide for Cisco Unity at http://www.cisco.com/en/US/docs/voice_ip_comm/connection/8x/networking/guide/8xcucnetx.html.
34. If the system is using Bridge Networking: Install the Cisco Unity Bridge server. See the “Overview of Mandatory Tasks for Installing the Cisco Unity Bridge” chapter of the applicable Installation Guide for Cisco Unity Bridge at http://www.cisco.com/en/US/products/sw/voicesw/ps2237/prod_installation_guides_list.html.
35. If the system is using Bridge Networking: Set up Cisco Unity and the Bridge for networking. See the “Setting Up Cisco Unity and the Bridge for Networking” chapter of the applicable Networking Guide for Cisco Unity Bridge at http://www.cisco.com/en/US/products/sw/voicesw/ps2237/products_feature_guides_list.html.
Part 5: Customizing the Cisco Unity 8.x Conversation36. When callers access Cisco Unity by phone, they hear a set of prerecorded instructions and options
known as the Cisco Unity conversation (also know as the TUI, or telephone user interface). You can customize the conversations that subscribers and unidentified callers hear in several ways.
For example, you may want to change how Cisco Unity handles messages that are interrupted by disconnected calls, specify that Cisco Unity prompts subscribers to record first and then address when they send messages, offer “Easy” Sign-In and system transfers, or specify that Cisco Unity plays additional caller information when subscribers play messages.
You may also want to set up the Cisco Unity Greetings Administrator or the Cisco Unity Broadcast Message Administrator for system administrators to use.
1-5Installation Guide for Cisco Unity Release 8.x in a Unified Messaging Configuration (With Microsoft Exchange and Without Failover)
OL-21709-01
Chapter 1 Overview of Mandatory Tasks for Installing Cisco Unity 8.xPart 6: Backing Up Cisco Unity 8.x
See the “Cisco Unity Conversation Overview” chapter of the System Administration Guide for Cisco Unity at http://www.cisco.com/en/US/docs/voice_ip_comm/unity/8x/administration/guide/8xcusagx.html for details on these and other conversation customizations.
Part 6: Backing Up Cisco Unity 8.x37. Back up Cisco Unity. See the “About Backing Up a Cisco Unity System” chapter of the
Maintenance Guide for Cisco Unity at http://www.cisco.com/en/US/docs/voice_ip_comm/unity/8x/maintenance/guide/8xcumgx.html.
Part 7: Training for Cisco Unity 8.x38. Train subscribers, operators, and support desk personnel to use Cisco Unity. See the “Subscriber
Orientation” chapter of the System Administration Guide for Cisco Unity at http://www.cisco.com/en/US/docs/voice_ip_comm/unity/8x/administration/guide/8xcusagx.html.
1-6Installation Guide for Cisco Unity Release 8.x in a Unified Messaging Configuration (With Microsoft Exchange and Without Failover)
OL-21709-01

Installation Guide for Cisco Unity Release 8.x in a Unified Messaging ConfiguratiOL-21709-01
C H A P T E R 2
Preparing for the Cisco Unity 8.x InstallationIn this chapter, you do the following tasks in the order listed:
1. Gather the documentation and tools needed for the installation. See the “Gathering Documentation and Tools for the Cisco Unity 8.x Installation” section on page 2-1.
2. Download the software needed for the installation. See the “Downloading Software for the Cisco Unity 8.x Installation” section on page 2-2.
3. Determine and record the file locations for application, log, and database files on the Cisco Unity system. See the “Determining the Locations for Files on the Cisco Unity 8.x Server” section on page 2-4.
When you are finished with this chapter, return to Chapter 1, “Overview of Mandatory Tasks for Installing Cisco Unity 8.x” to continue installing the Cisco Unity system correctly:
Note The tasks in the list reference detailed instructions in the Installation Guide for Cisco Unity and in other Cisco Unity documentation. Follow the documentation for a successful installation.
Gathering Documentation and Tools for the Cisco Unity 8.x Installation
You need the following items during the installation and configuration of the Cisco Unity system:
• Access to the following Cisco Unity documentation.
– Release notes for the applicable version of Cisco Unity.
– Release notes for the applicable version of Cisco Security Agent for Cisco Unity, if applicable.
– The correct version of the Installation Guide for Cisco Unity for your configuration. (See the document Use the Installation Guide That Matches the Cisco Unity 8.x Configuration at http://www.cisco.com/en/US/docs/voice_ip_comm/unity/8x/correct_ig/8xcuigcrct.html.)
– The current version of Software Installed by the Cisco Unity Server Updates Wizard.
– Specifications for the server on which you are installing Cisco Unity. (See the Cisco Unity Supported Platforms List at http://www.cisco.com/en/US/products/sw/voicesw/ps2237/products_data_sheets_list.html.)
– The Cisco Unity integration guide(s) for your phone system(s).
2-1on (With Microsoft Exchange and Without Failover)

Chapter 2 Preparing for the Cisco Unity 8.x InstallationDownloading Software for the Cisco Unity 8.x Installation
– If you are integrating Cisco Unity with Cisco Unified Communications Manager, release notes for the applicable version of the Cisco Unity-CM TSP.
– The System Administration Guide for Cisco Unity.
– If you are setting up Cisco Unity Digital Networking, AMIS or VPIM networking, Internet subscribers, or trusted Internet subscribers (for secure messaging), the Networking Guide for Cisco Unity.
– If you are setting up AMIS, Bridge, or VPIM Networking, release notes for the applicable version of the Cisco Unity Voice Connector for Microsoft Exchange.
– If you are setting up Bridge Networking, release notes for the applicable version of the Cisco Unity Bridge, the Installation Guide for Cisco Unity Bridge, and the Networking Guide for Cisco Unity Bridge.
Cisco Unity documentation is available at http://www.cisco.com/en/US/products/sw/voicesw/ps2237/tsd_products_support_series_home.html.
• Two test phones.
Downloading Software for the Cisco Unity 8.x InstallationThis section lists the software needed to install Cisco Unity. If your Cisco Unity DVDs are an earlier version than the currently shipping version, download all of the software listed in this section.
Note the following considerations:
• The downloads may total several GB. Use a computer with a high-speed Internet connection, and confirm that the computer has sufficient disk space or has access to a network drive with sufficient disk space.
• Most downloads are self-extracting executable files. When downloads are complete, extract the updates and burn DVDs that contain the extracted files. Then delete the downloaded .exe files to free disk space.
For detailed instructions on downloading software and burning DVDs, see the “Installation and Upgrade Information” section of the applicable release notes, available at http://www.cisco.com/en/US/products/sw/voicesw/ps2237/prod_release_notes_list.html.
Caution Until you have installed all of the recommended service packs and updates, and, optionally, Cisco Security Agent for Cisco Unity and antivirus software, third-party components installed on the Cisco Unity server have significant security vulnerabilities. Do not connect the Cisco Unity server to the network to install software. Instead, burn DVDs that contain the downloaded software, and install the software from the DVDs.
• The Cisco Unity documentation instructs you when to install the software you download.
Note To access the software download page, you must be logged on to Cisco.com as a registered user.
Download the following software for all installations. Even if you have Cisco Unity DVDs for the currently shipping version, we recommend that you download the software, some of which may have been released or updated after the discs were produced.
2-2Installation Guide for Cisco Unity Release 8.x in a Unified Messaging Configuration (With Microsoft Exchange and Without Failover)
OL-21709-01

Chapter 2 Preparing for the Cisco Unity 8.x InstallationDownloading Software for the Cisco Unity 8.x Installation
Cisco Unity 8.x Software
Note You cannot download the Cisco Unity Data Store disc, which is required for all installations. You also cannot download the Cisco Unity Message Store 2003 disc, which is required to install Cisco Unity in the Voice Messaging configuration using Exchange Server 2003 as the message store.
Download disc images for the currently shipping Cisco Unity version, including:
• The Cisco Unity installation disc.
• The discs for Cisco Unity languages that you want to install on the server (other that U.S. English, which is automatically installed on all systems).
• The Cisco Unity Prerequisites disc for the version of Cisco Unity that you are installing.
See the “Downloading Software for Cisco Unity <Version>” section of the applicable Release Notes for Cisco Unity at http://www.cisco.com/en/US/products/sw/voicesw/ps2237/prod_release_notes_list.html.
IBM ServerGuide Software (Only for IBM Servers and MCS Servers Manufactured by IBM)
If you will be installing software on an IBM server or on a Cisco MCS server that is manufactured by IBM, we recommend that you download the IBM ServerGuide software. IBM ServerGuide detects the server model and optional hardware devices that are installed, provides updated device drivers and, in some cases, installs the drivers automatically.
To Download the IBM ServerGuide Software
Step 1 If you are installing software on a Cisco MCS server, see the Cisco Unity Supported Platforms List to determine the corresponding IBM model number, so you know which version of IBM ServerGuide to download. The Cisco Unity Supported Platforms List is at http://www.cisco.com/en/US/products/sw/voicesw/ps2237/products_data_sheets_list.html.
If you are installing software on an IBM-branded server, determine the IBM model number.
Step 2 Browse to http://www.ibm.com/systems/management/serverguide/sub.html.
Step 3 Click IBM Service and Support Site.
Step 4 Follow the onscreen prompts to download an image of the ServerGuide Setup and Installation CD for your IBM server.
Updated PIMG FirmwareIf the phone system integration includes PIMG units, download updated PIMG firmware. For instructions on downloading updated firmware, see the “Setting up the PIMG Units” section in the applicable Cisco Unity integration guide. Integration guides are available at http://www.cisco.com/en/US/products/sw/voicesw/ps2237/products_installation_and_configuration_guides_list.html.
2-3Installation Guide for Cisco Unity Release 8.x in a Unified Messaging Configuration (With Microsoft Exchange and Without Failover)
OL-21709-01
Chapter 2 Preparing for the Cisco Unity 8.x InstallationDetermining the Locations for Files on the Cisco Unity 8.x Server
Latest Microsoft Service Packs and Cisco Unity Server Updates WizardDownload the following software:
• For the Microsoft software that you are installing on the Cisco Unity server, the latest service packs recommended for use with Cisco Unity, if later than the service packs shipped with Cisco Unity. Download the service packs, and download or print the installation instructions on the Microsoft website.
For a list of the service packs that are recommended, see the section “Recommended Service Packs—Cisco Unity Server” in System Requirements for Cisco Unity at http://www.cisco.com/en/US/docs/voice_ip_comm/unity/8x/requirements/8xcusysreq.html.
• The latest Cisco Unity Server Updates Wizard, which automatically installs the latest Microsoft updates for Windows; Exchange; and SQL Server, SQL Server Express, or MSDE that are recommended for use with Cisco Unity and, optionally, the latest version of the Cisco Security Agent for Cisco Unity.
For download instructions and for information on the Microsoft updates and the version of Cisco Security Agent for Cisco Unity that are installed by the Server Updates Wizard, see Software Installed by the Cisco Unity Server Updates Wizard at http://www.cisco.com/en/US/products/sw/voicesw/ps2237/prod_installation_guides_list.html.
Determining the Locations for Files on the Cisco Unity 8.x ServerThe platform overlay and RAID configuration of the Cisco Unity server determines the choices you make later in the Installation Guide for Cisco Unity, including:
• How you manually configure partitions if you are installing Windows using a retail Windows disc. (If you install Windows using the Cisco Unity Platform Configuration discs, partitions are configured automatically.)
• Where you choose to install applications, logs, and database files.
Using the applicable section, make note of the locations for files on the Cisco Unity server that you are installing:
• Locations for Files on a Platform Overlay 1 or Overlay 2 Server, page 2-5
• Locations for Files on a Platform Overlay 3 Server in Which Drives Are Smaller than 300 GB, page 2-5
• Locations for Files on a Platform Overlay 3 Server in Which Drives Are Larger than 300 GB, page 2-6
Following these recommendations will:
• Maximize performance, data integrity, and reliability for Cisco Unity; Microsoft Exchange; and SQL Server, SQL Server Express, or MSDE transaction logs.
• Maximize performance, data storage, and access capacity for Cisco Unity data.
For information on the platform overlay, RAID configuration, maximum number of Cisco Unity subscribers, and other specifications for the server on which you are installing Cisco Unity, see the Cisco Unity Supported Platforms List at http://www.cisco.com/en/US/products/sw/voicesw/ps2237/products_data_sheets_list.html.
The Installation Guide for Cisco Unity alerts you when to see the file locations later in the installation process.
2-4Installation Guide for Cisco Unity Release 8.x in a Unified Messaging Configuration (With Microsoft Exchange and Without Failover)
OL-21709-01

Chapter 2 Preparing for the Cisco Unity 8.x InstallationDetermining the Locations for Files on the Cisco Unity 8.x Server
Locations for Files on a Platform Overlay 1 or Overlay 2 ServerTable 2-1 lists the file locations for Cisco Unity Platform Overlay 1 servers.
Note Except for the system partition, drive C:, different letters may be used to label the partitions.
Locations for Files on a Platform Overlay 3 Server in Which Drives Are Smaller than 300 GB
Table 2-2 lists the file locations for Cisco Unity Platform Overlay 3 servers in which each drive is smaller than 300 GB.
Note Except for the system partition, drive C:, different letters may be used to label the partitions.
Table 2-1 Locations for Files on a Platform Overlay 1 or Overlay 2 Server
Partition Files
C • Operating system
• Pagefile
D • Unity Message Repository (UMR)
• Cisco Unity trace logs
Table 2-2 Locations for Files on a Platform Overlay 3 Server with Drives Smaller than 300 GB
Disk Array Partition Files
First C • Operating system
• Pagefile
• For systems up to 32 ports: SQL Server 2005 Express or MSDE 2000 program files (The default partition for SQL Server 2005 Express and MSDE 2000 program files is drive C: and cannot be changed.)
First D • Program files, including Cisco Unity and, for systems over 32 ports, SQL Server 2005 or SQL Server 2000
• SQL Server 2005, SQL Server 2000, SQL Server 2005 Express, or MSDE 2000 transaction logs
• Cisco Unity trace logs
Second E • SQL Server 2005 or SQL Server 2000 databases
• Unity Message Repository (UMR)
2-5Installation Guide for Cisco Unity Release 8.x in a Unified Messaging Configuration (With Microsoft Exchange and Without Failover)
OL-21709-01

Chapter 2 Preparing for the Cisco Unity 8.x InstallationDetermining the Locations for Files on the Cisco Unity 8.x Server
Locations for Files on a Platform Overlay 3 Server in Which Drives Are Larger than 300 GB
Revised February 10, 2010Table 2-3 lists the file locations for Cisco Unity Platform Overlay 3 servers in which each drive is larger than 300 GB.
Note Except for the system partition, drive C:, different letters may be used to label the partitions.
Table 2-3 Locations for Files on a Platform Overlay 3 Server with Drives Larger than 300 GB
Disk Array Partition Files
First C • Operating system
• Pagefile
• For systems up to 32 ports: SQL Server 2005 Express or MSDE 2000 program files (The default partition for SQL Server 2005 Express and MSDE 2000 program files is drive C: and cannot be changed.)
First D • Program files, including Cisco Unity and, for systems over 32 ports, SQL Server 2005 or SQL Server 2000
• Cisco Unity trace logs
First E • SQL Server 2005, SQL Server 2000, SQL Server 2005 Express, or MSDE 2000 transaction logs
Second F • SQL Server 2005, SQL Server 2000, SQL Server 2005 Express, or MSDE 2000 databases
• Unity Message Repository (UMR)
2-6Installation Guide for Cisco Unity Release 8.x in a Unified Messaging Configuration (With Microsoft Exchange and Without Failover)
OL-21709-01

Installation Guide for Cisco Unity Release 8.x in a Unified Messaging ConfiguratiOL-21709-01
C H A P T E R 3
Setting Up the Hardware for the Cisco Unity 8.x SystemIn this chapter, you set up the Cisco Unity server and attach peripheral devices.
When you are finished with this chapter, return to Chapter 1, “Overview of Mandatory Tasks for Installing Cisco Unity 8.x,” to continue installing the Cisco Unity system correctly.
Note The tasks in the list reference detailed instructions in the Installation Guide for Cisco Unity and in other Cisco Unity documentation. Follow the documentation for a successful installation.
Setting Up the Cisco Unity 8.x Server and Attaching Peripheral Devices
We recommend that you connect the Cisco Unity server to a dedicated uninterruptible power supply.
A Cisco Unity server purchased from Cisco is configured for a specific hardware setup. Do not add or change any hardware on the server, except to add memory, a tape drive, an external modem, or a rail kit.
To Set Up the Server and Attach Peripheral Devices
Step 1 Place the server in a dry, cool area that is free of dust. Note the following considerations, as applicable:
• Place the Cisco Unity server near a network connection.
• If the Cisco Unity system is using PIMG units to integrate with a circuit-switched phone system, place the PIMG units near the phone system and near a network connection.
Caution Do not attach the network cable to the server until you have installed the Microsoft service packs and updates recommended for use with Cisco Unity. The Installation Guide for Cisco Unity alerts you when to install the service packs and updates, and when to connect to the network later in the installation process.
Step 2 Attach any supported peripheral devices to the server. Follow the manufacturer installation and test instructions.
3-1on (With Microsoft Exchange and Without Failover)

Chapter 3 Setting Up the Hardware for the Cisco Unity 8.x SystemSetting Up the Cisco Unity 8.x Server and Attaching Peripheral Devices
3-2Installation Guide for Cisco Unity Release 8.x in a Unified Messaging Configuration (With Microsoft Exchange and Without Failover)
OL-21709-01

Installation Guide for Cisco Unity Release 8.x in a Unified Messaging ConfiguratiOL-21709-01
C H A P T E R 4
Installing the Operating System on the Cisco Unity 8.x ServerIn this chapter, you do the following tasks in the order listed:
1. Review considerations for installing Windows. See the “Considerations for Installing Windows on the Cisco Unity 8.x Server” section on page 4-2.
2. If you are installing Windows by using a retail Windows disc: Configure the RAID arrays. See the “Configuring the RAID Arrays on the Cisco Unity 8.x Server (Selected Installations)” section on page 4-2.
3. Install Windows Server 2003 by using the applicable procedure based on the considerations you reviewed in Task 1.:
• Installing Windows Server 2003 on the Cisco Unity 8.x Server by Using the Cisco Unity Platform Configuration Discs, page 4-3
• Installing Windows Server 2003 on the Cisco Unity 8.x Server by Using a Retail Windows Server 2003 Disc, page 4-5
4. If you installed Windows by using a retail Windows disc: Create the partitions according to the storage configuration requirements for the platform. See the “Creating the Partitions on the Cisco Unity 8.x Server” section on page 4-6.
If you installed Windows by using the Platform Configuration discs, partitions of the correct sizes were created automatically.
5. If the Cisco Unity server will have more than 96 ports: Add the 3GB and userva switches to the boot.ini file. See the “Adding 3GB and Userva Switches to the Boot.ini File on the Cisco Unity 8.x Server” section on page 4-7.
When you are finished with this chapter, return to Chapter 1, “Overview of Mandatory Tasks for Installing Cisco Unity 8.x,” to continue installing the Cisco Unity system correctly.
Note The tasks in the list reference detailed instructions in the Installation Guide for Cisco Unity and in other Cisco Unity documentation. Follow the documentation for a successful installation.
4-1on (With Microsoft Exchange and Without Failover)

Chapter 4 Installing the Operating System on the Cisco Unity 8.x ServerConsiderations for Installing Windows on the Cisco Unity 8.x Server
Considerations for Installing Windows on the Cisco Unity 8.x Server
Note the following considerations:
• The Cisco Unity Platform Configuration discs for all servers install the Windows Server 2003 Multilingual User Interface (MUI) as well as Windows in English. The MUI allows you to change the language of the Windows user interface to the other operating-system languages supported for use with Cisco Unity: French, German, and Japanese.
• If you install Windows by using the Cisco Unity Platform Configuration discs or an English-language retail disc, you must install the English-language version of all third-party software on the Cisco Unity server.
• The Cisco Unity Server Updates wizard, which automatically installs the latest Microsoft updates recommended for use with Cisco Unity, installs only English-language updates. You can use the Server Updates wizard to install updates only in the following cases:
– You installed Windows by using the Platform Configuration discs.
– You installed Windows by using an English-language retail disc, with or without the MUI.
If you install a non-English version of Windows, you cannot use the Server Updates wizard to install updates. We recommend that you download the updates from the Microsoft website and manually install them, or download and install them by using Windows Automatic Update. (For more information on Windows Automatic Update, see the “Support Policy for Windows Automatic Update” section in Supported Hardware and Software, and Support Policies for Cisco Unity. For a list of the updates currently recommended for use with Cisco Unity, see Software Installed by the Cisco Unity Server Updates Wizard. Both documents are available at http://www.cisco.com/en/US/products/sw/voicesw/ps2237/prod_installation_guides_list.html.)
Configuring the RAID Arrays on the Cisco Unity 8.x Server (Selected Installations)
If you are installing Windows using the Cisco Unity Platform Configuration discs, or if you do not want to configure RAID, skip this section.
Do this section only if the system is using hardware-based RAID. Software-based RAID is not supported.
To configure the arrays, you group the physical disks into logical disks and assign a RAID type to each logical disk. The server manufacturer provides a disc that contains utilities for several setup tasks, including configuring RAID arrays. Use the disc to configure the arrays when the Cisco Unity server was not purchased from Cisco.
The following software is provided by server manufacturers:
Hewlett-Packard Hewlett-Packard SmartStart disc
IBM IBM ServerGuide software, which you downloaded from the IBM website when you downloaded software for the installation as described in the “Downloading Software for the Cisco Unity 8.x Installation” section on page 2-2.
4-2Installation Guide for Cisco Unity Release 8.x in a Unified Messaging Configuration (With Microsoft Exchange and Without Failover)
OL-21709-01

Chapter 4 Installing the Operating System on the Cisco Unity 8.x ServerInstalling Windows Server 2003 on the Cisco Unity 8.x Server by Using the Cisco Unity Platform Configuration Discs
The following procedure contains only general steps. For detailed instructions on using a specific array-configuration utility, see the manufacturer documentation.
To Configure the RAID Arrays by Using the Manufacturer-Provided Utility
Step 1 Start the Cisco Unity server, and insert the manufacturer disc in the DVD drive.
Step 2 On the main menu, select the array-configuration utility.
Step 3 For each logical disk needed, group physical disks of the same make and model, and assign a RAID type.
For information on the recommended RAID configuration for the server, see the Cisco Unity Supported Platforms List at http://www.cisco.com/en/US/products/sw/voicesw/ps2237/products_data_sheets_list.html.
Step 4 Follow the manufacturer instructions to complete the configuration.
Installing Windows Server 2003 on the Cisco Unity 8.x Server by Using the Cisco Unity Platform Configuration Discs
A Cisco Unity server purchased from Cisco ships with Platform Configuration discs that contain a utility to install Windows Server 2003 by restoring an image that is customized for the platform. The image includes the Windows Server 2003 components, subcomponents, and service packs that were required by the version of Cisco Unity that was shipping at the time that the Platform Configuration discs were created.
Installing Windows Server 2003 by using the Cisco Unity Platform Configuration discs reduces the Cisco Unity system installation time and ensures that the required operating system and components, drivers, and service packs are installed and configured correctly. In addition, the partitions are automatically set up.
Caution Do not attach the network cable to the server until you have installed the Microsoft service packs and updates recommended for use with Cisco Unity. The Installation Guide for Cisco Unity alerts you when to install the service packs and updates, and when to connect to the network later in the installation process.
To Install Windows Server 2003 by Using the Cisco Platform Configuration Disc (Selected Servers Only)
Step 1 Remove any devices that are connected to a USB port on the server.
Caution If you leave USB devices plugged into the server during Windows configuration, the devices may be interpreted as storage devices. As a result, Windows will not create hard-disk partitions that are required by Cisco Unity Setup, and Setup will fail.
Step 2 Start the server, and insert the Cisco Unity Platform Configuration disc in the DVD drive.
Step 3 Restart the server.
Step 4 If you are using a server manufactured by Hewlett-Packard, skip to Step 5.
4-3Installation Guide for Cisco Unity Release 8.x in a Unified Messaging Configuration (With Microsoft Exchange and Without Failover)
OL-21709-01
Chapter 4 Installing the Operating System on the Cisco Unity 8.x ServerInstalling Windows Server 2003 on the Cisco Unity 8.x Server by Using the Cisco Unity Platform Configuration Discs
If you are using a server manufactured by IBM and the following message appears:
“The ServeRAID firmware and BIOS installed on your system must be upgraded or downgraded to be compatible with the RAID drivers on the Cisco Platform Configuration disc. For information on upgrading or downgrading, see the Cisco Technical Note Upgrading or Downgrading ServeRAID Firmware and BIOS on IBM Servers on Cisco.com.”
do the procedures in the tech note RAID-Controller Firmware and RAID BIOS on IBM Servers Upgrade or Downgrade Procedure at http://www.cisco.com/en/US/products/ps6509/tsd_products_support_install_and_upgrade_technotes_list.html. Then return to Step 2 of this procedure.
Step 5 If you are using a server manufactured by IBM, skip to Step 6.
If you are using a server manufactured by Hewlett-Packard, choose a language for the operating system and the locale.
The remaining Windows Server 2003 installation screens will be in English, but when the Windows installation is complete, the Windows user interface will display in the language you selected.
Step 6 Follow the on-screen prompts until you are prompted to choose a licensing mode.
Step 7 Click Per Server, and click Next.
Step 8 Enter a name for the server (netBIOS name). Use only alphabetical characters A to Z and a to z, numerical characters 0 to 9, and hyphens (-). We recommend that you assign a name with 15 or fewer characters.
Caution Using other characters in the server name is not supported by DNS.
If there is more than one Cisco Unity server in an Active Directory forest, give each Cisco Unity server a name that is unique in the first 14 characters, or Cisco Unity will have problems communicating with the Active Directory accounts that it creates. For example, the following names would cause communication problems: CiscoUnitySrvr1 and CiscoUnitySrvr2.
Step 9 Click Next.
Step 10 Enter and confirm a password for the Administrator account.
Caution If you are using a server manufactured by Hewlett-Packard and you chose a language other than English in Step 5, note that until Windows installation has finished, the keyboard layout is the English-language QWERTY keyboard layout, not the standard keyboard layout for the language you chose.
Step 11 Click Next.
Step 12 Follow the on-screen prompts until the Workgroup or Computer Domain page appears.
Step 13 Click No, This Computer Is Not on a Network, or Is on a Network without a Domain.
Step 14 Optionally, specify a different name for the workgroup.
Step 15 Click Next.
Step 16 If you are using a server manufactured by Hewlett-Packard, skip to Step 17.
If you are using a server manufactured by IBM, choose a language for the operating system and the locale.
Step 17 Restart the server.
4-4Installation Guide for Cisco Unity Release 8.x in a Unified Messaging Configuration (With Microsoft Exchange and Without Failover)
OL-21709-01

Chapter 4 Installing the Operating System on the Cisco Unity 8.x ServerInstalling Windows Server 2003 on the Cisco Unity 8.x Server by Using a Retail Windows Server 2003 Disc
Step 18 Wait until the Platform Configuration disc has finished running configuration scripts and automatically restarting the server. (There may be multiple automatic restarts.)
Installing Windows Server 2003 on the Cisco Unity 8.x Server by Using a Retail Windows Server 2003 Disc
The server manufacturer provides a disc that contains utilities for several setup tasks, including guiding the installation of Windows 2003 Server from a retail disc. Always use the manufacturer’s guided system-setup utility to install Windows Server 2003. This ensures that the operating system and the drivers are installed and configured correctly.
Caution When installing Windows Server 2003, do not install Universal Description, Discovery, and Integration (UDDI) Services, or the Cisco Unity System Setup Assistant will fail later in the installation process.
The following software is provided by server manufacturers:
Caution Do not attach the network cable to the server until you have installed the Microsoft service packs and updates recommended for use with Cisco Unity. The Installation Guide for Cisco Unity alerts you when to install the service packs and updates, and when to connect to the network later in the installation process.
To Install Windows Server 2003 by Using the Manufacturer’s Guided System-Setup Utility and a Retail Windows 2003 Disc
Step 1 Start the Cisco Unity server, and insert the manufacturer disc in the DVD drive.
Step 2 Follow the on-screen prompts to install Windows Server 2003 from a retail disc.
You may be prompted to configure the RAID arrays. Note the following considerations:
• If the arrays have already been configured, do not change the configuration.
• If the arrays have not been configured, follow the prompts to configure them. See the manufacturer documentation.
Step 3 When applicable, make the following choices:
• Specify a partition size of 24 GB for the operating system.
• If you are installing Windows Server 2003 on the same partition where an operating system is already installed, select and delete that partition.
Hewlett-Packard Hewlett-Packard SmartStart
IBM IBM ServerGuide, which you downloaded from the IBM website when you downloaded software for the installation as described in the “Downloading Software for the Cisco Unity 8.x Installation” section on page 2-2.
4-5Installation Guide for Cisco Unity Release 8.x in a Unified Messaging Configuration (With Microsoft Exchange and Without Failover)
OL-21709-01

Chapter 4 Installing the Operating System on the Cisco Unity 8.x ServerCreating the Partitions on the Cisco Unity 8.x Server
• Format the operating system partition by using the NTFS file system.
• For regional settings, select a locale in the Your Locale (Location) list. The locale you select must match one of the system-prompts languages that you will install for Cisco Unity. Note that Cisco Unity Setup always installs the English (United States) system prompts.
For a list of supported system-prompts languages, see the “Available Languages for Cisco Unity Components” section of System Requirements for Cisco Unity at http://www.cisco.com/en/US/docs/voice_ip_comm/unity/8x/requirements/8xcusysreq.html.
Caution If the locale you specify when you install Windows Server 2003 does not match any of the installed Cisco Unity system-prompts languages, Cisco Unity will log errors in the event log and may stop taking calls. The locale you select here must match the Cisco Unity system-prompt language exactly. For example, if you choose English (United Kingdom) for locale, you must also choose English (United Kingdom) as one of the Cisco Unity system-prompts languages. Installing the system prompts for English (Australia) will not work.
• For the licensing mode, choose Per Server.
• When you enter a name (netBIOS name) for the Cisco Unity server:
– If there is more than one Cisco Unity server in an Active Directory forest, give each Cisco Unity server a name that is unique in the first 14 characters, or Cisco Unity will have problems communicating with the Active Directory accounts that it creates. For example, the following names would cause communication problems: CiscoUnitySrvr1 and CiscoUnitySrvr2.
– Use only alphabetical characters A to Z and a to z, numerical characters 0 to 9, and hyphens (-).
Caution Using other characters in the server name is not supported by DNS.
• Do not join a domain. Instead, specify a workgroup. The Installation Guide for Cisco Unity alerts you when to connect to the network and when to join a domain later in the installation process.
Creating the Partitions on the Cisco Unity 8.x Server
Note If the Cisco Unity server was purchased from Cisco, skip this section. When you installed Windows using the Cisco Unity Platform Configuration discs shipped with the server, the partitions were created automatically.
Do the following procedure to create the partitions that you identified in the “Determining the Locations for Files on the Cisco Unity 8.x Server” section on page 2-4.
To Create the Partitions
Step 1 Log on to Windows as a member of the Administrators group.
Step 2 On the Windows Start menu, click Programs > Administrative Tools > Computer Management.
4-6Installation Guide for Cisco Unity Release 8.x in a Unified Messaging Configuration (With Microsoft Exchange and Without Failover)
OL-21709-01

Chapter 4 Installing the Operating System on the Cisco Unity 8.x ServerAdding 3GB and Userva Switches to the Boot.ini File on the Cisco Unity 8.x Server
Step 3 In the console tree under Storage, click Disk Management.
Step 4 Right-click the first available unallocated region of the first available logical disk, and click New Partition.
Typically, you will need to create one more partition than the number of logical disks available. After you install the operating system, the first 24 GB of the first logical disk is used for the system partition, and is given the drive letter C. You create the first extended partition by using the remaining space on the first logical disk. When you create subsequent partitions, you use the entire logical disk.
Step 5 On the New Partition Wizard welcome screen, click Next.
Step 6 Click Extended Partition, and click Next. (Do not click Primary Partition.)
Step 7 Specify to use the remaining disk space, and click Next.
Step 8 Verify the settings, and click Finish.
Step 9 In the Disk Management utility, right-click the new partition, and click New Logical Drive.
Step 10 On the Create Partition Wizard welcome screen, click Next.
Step 11 Click Logical Drive, and click Next.
Step 12 Specify to use the maximum disk space, and click Next.
Step 13 Assign a drive letter, and click Next.
Step 14 Specify the NTFS file system format, and click Next.
Step 15 Verify the settings, and click Finish.
Step 16 Repeat Step 4 through Step 15 for each partition that you have to create.
Adding 3GB and Userva Switches to the Boot.ini File on the Cisco Unity 8.x Server
If the Cisco Unity server will be configured for more than 96 voice messaging ports, do the following procedure.
To Add 3GB and Userva Switches to the Boot.ini File
Step 1 Open the c:\boot.ini file in a text editor.
Step 2 Add /3GB /userva=2800 to the line that includes WINDOWS="Microsoft Windows 2003 Server". For example:
multi(0)disk(0)rdisk(0)partition(1)\WINDOWS="Windows Server 2003, Standard" /fastdetect /NoExecute=OptOut /3GB /userva=2800
Step 3 Restart the server.
4-7Installation Guide for Cisco Unity Release 8.x in a Unified Messaging Configuration (With Microsoft Exchange and Without Failover)
OL-21709-01

Chapter 4 Installing the Operating System on the Cisco Unity 8.x ServerAdding 3GB and Userva Switches to the Boot.ini File on the Cisco Unity 8.x Server
4-8Installation Guide for Cisco Unity Release 8.x in a Unified Messaging Configuration (With Microsoft Exchange and Without Failover)
OL-21709-01
Installation Guide for Cisco Unity Release 8.x in a Unified Messaging ConfiguratiOL-21709-01
C H A P T E R 5
Customizing the Cisco Unity 8.x PlatformRevised February 10, 2010In this chapter, you do the following tasks in the order listed:
1. If the Cisco Unity server contains a dual NIC: Configure the dual NIC or verify the configuration. See the “Configuring a Dual NIC in the Cisco Unity 8.x Server” section on page 5-2.
2. Complete registration information on Cisco.com to obtain the applicable license files. See the “Obtaining Cisco Unity 8.x License Files” section on page 5-4.
3. Determine the Exchange server that Cisco Unity will connect with, known as the partner Exchange server. See the “Determining the Partner Exchange Server for Cisco Unity 8.x” section on page 5-6.
4. Use the Cisco Unity System Setup Assistant to install required Windows components, database, and required service packs. See the “Installing Cisco Unity 8.x Prerequisites” section on page 5-6.
5. If the system is using SQL Server 2005 Express or MSDE 2000: Set the SQL Server Express or MSDE system administrator password. See the “Setting the SQL Server 2005 Express or MSDE 2000 System Administrator Password for Cisco Unity 8.x” section on page 5-9.
6. Change folder settings in Windows Explorer so that all files and folders are visible during Cisco Unity troubleshooting, if applicable. See the “Changing Folder Settings in Windows Explorer for Cisco Unity 8.x” section on page 5-11.
7. Run the Cisco Unity Server Updates wizard to install Microsoft security updates and, optionally, Cisco Security Agent for Cisco Unity. See the “Installing Microsoft Updates and Cisco Security Agent for Cisco Unity on the 8.x Server” section on page 5-11.
Caution Do not install the latest service packs that are recommended for use with Cisco Unity yet. Any service packs qualified for use with the current version of Cisco Unity after the current version was released have not been tested with Cisco Unity Setup and may cause Setup to fail.
8. Optional: Install antivirus software. See the “Installing Antivirus Software on the Cisco Unity 8.x Server (Optional)” section on page 5-12.
9. Connect the Cisco Unity server to the network. See the “Connecting the Cisco Unity 8.x Server to the Network” section on page 5-12.
10. Configure TCP/IP properties. See the “Configuring TCP/IP Properties for the Cisco Unity 8.x Server” section on page 5-13.
11. Confirm that the server has a valid IP address and is connected to the network. See the “Verifying the IP Address and the Network Connection for the Cisco Unity 8.x Server” section on page 5-13.
12. Add the Cisco Unity server to an existing domain. See the “Adding the Cisco Unity 8.x Server to an Existing Domain” section on page 5-14.
5-1on (With Microsoft Exchange and Without Failover)
Chapter 5 Customizing the Cisco Unity 8.x PlatformConfiguring a Dual NIC in the Cisco Unity 8.x Server
13. If antivirus software or Cisco Security Agent for Cisco Unity is installed on the Cisco Unity server: Disable antivirus services. See the “Disabling Antivirus Services on the Cisco Unity 8.x Server” section on page 5-14.
14. Check network prerequisites. See the “Verifying Network Prerequisites for the Cisco Unity 8.x Server” section on page 5-15.
When you are finished with this chapter, return to Chapter 1, “Overview of Mandatory Tasks for Installing Cisco Unity 8.x” to continue installing the Cisco Unity system.
Note The tasks in the list reference detailed instructions in the Installation Guide for Cisco Unity and in other Cisco Unity documentation. Follow the documentation for a successful installation.
Configuring a Dual NIC in the Cisco Unity 8.x Server
Note If the Cisco Unity server does not contain a dual NIC, skip this section.
We recommend that a dual NIC be configured in adapter fault tolerant mode (AFT) or network fault tolerant (NFT) mode. One NIC is designated as the primary and the other NIC as the secondary for active-passive fault tolerance. In this configuration, the primary (active) NIC handles 100 percent of the traffic. Only in the event that the primary NIC becomes unavailable does the secondary NIC then become active and handle 100 percent of the traffic.
Alternatively, if you do not want to configure AFT or NFT, or do not have a second LAN port available, the following configurations are supported, though not recommended:
• Disable TCP/IP for the second NIC, which allows you to re-enable the second NIC remotely if the first NIC fails. (Use the Network and Dial-up Connections Control Panel to disable TCP/IP for the second NIC.)
• Disable the second NIC in the BIOS. (On some Cisco Unity servers, the second NIC is disabled in the BIOS by default.)
Caution Not plugging a network cable into the second NIC is not sufficient. You must either disable TCP/IP for the second NIC or disable the second NIC in the BIOS, or Cisco Unity may not work properly.
If you installed Windows by using the Cisco Unity Platform Configuration discs, skip to the “Configuring a Dual NIC on the Cisco Unity 8.x Server” section on page 5-4. (The NIC-configuration utility was installed automatically.)
If you installed Windows by using a retail Windows disc, you need to install the NIC-configuration utility before you can configure the dual NIC. Do the applicable procedures in the following two sections, “Installing the NIC-Configuration Utility on the Cisco Unity 8.x Server” and “Configuring a Dual NIC on the Cisco Unity 8.x Server.”
Installing the NIC-Configuration Utility on the Cisco Unity 8.x Server
Note If you installed Windows by using the Cisco Unity Platform Configuration discs, skip this section.
5-2Installation Guide for Cisco Unity Release 8.x in a Unified Messaging Configuration (With Microsoft Exchange and Without Failover)
OL-21709-01

Chapter 5 Customizing the Cisco Unity 8.x PlatformConfiguring a Dual NIC in the Cisco Unity 8.x Server
Do the applicable procedure in this section, depending on whether the Cisco Unity server was manufactured by Hewlett-Packard or IBM and, for IBM, depending on whether you have an Intel or a Broadcom installation disc (the disc corresponds with the brand of NIC installed in the server):
• To Install the Hewlett-Packard NIC-Configuration Utility, page 5-3
• To Install the IBM NIC-Configuration Utility by Using a Broadcom Disc, page 5-3
• To Install the IBM NIC-Configuration Utility by Using an Intel Disc, page 5-3
(Cisco-branded servers that have a model number ending in “H” were manufactured by Hewlett-Packard. Cisco-branded servers that have a model number ending in “I” were manufactured by IBM.)
Note The following procedures are intended for the software shipped with the Cisco Unity servers that were shipping at the time this document was published. Procedures for older or newer servers may differ.
To Install the Hewlett-Packard NIC-Configuration Utility
Step 1 Insert the Hewlett-Packard SmartStart disc in the DVD drive.
Step 2 Browse to the directory Compaq\Csp\Nt, and double-click Setup.exe.
Step 3 In the right pane of the HP Remote Deployment utility, select and delete all items except HP ProLiant Network Configuration Utility <version> for Windows 2003.
Step 4 Click Install.
Step 5 Follow the on-screen prompts to complete the installation.
To Install the IBM NIC-Configuration Utility by Using a Broadcom Disc
Step 1 Insert the Broadcom NetXtreme Gigabit Ethernet Software disc in the DVD drive.
If the installation program does not appear automatically, browse to the root of the CD, and double-click Launch.exe.
Step 2 In the installation program, click Management Programs.
Step 3 Follow the on-screen prompts until you are prompted to select the applications to install.
Step 4 Check the Control Suite and BASP check boxes.
Step 5 Follow the on-screen prompts to complete the installation.
To Install the IBM NIC-Configuration Utility by Using an Intel Disc
Step 1 Insert the Intel Ethernet Software disc in the DVD drive.
If the installation program does not appear automatically, browse to the root of the CD, and double-click Autorun.exe.
Step 2 Follow the on-screen prompts to complete the installation.
5-3Installation Guide for Cisco Unity Release 8.x in a Unified Messaging Configuration (With Microsoft Exchange and Without Failover)
OL-21709-01

Chapter 5 Customizing the Cisco Unity 8.x PlatformObtaining Cisco Unity 8.x License Files
Configuring a Dual NIC on the Cisco Unity 8.x Server
To Configure a Dual NIC in the Cisco Unity Server
Step 1 Start the NIC-configuration utility:
a. On the Windows Start menu, click Settings > Control Panel.
b. Choose the applicable option, depending on the server model and NIC brand:
Step 2 Configure the dual NIC—or verify the configuration—so that the following conditions are met:
• Both NICs are connected to the same network segment (in other words, both are connected to the same Layer 3 subnet and the same Layer 2 Ethernet broadcast domain).
• Both share the same IP address.
• Both are set up for AFT or for NFT. See the NIC-configuration utility Help.
Step 3 Write down the MAC address that now applies to both NICs. You will need it when you obtain license files in the “Obtaining Cisco Unity 8.x License Files” section on page 5-4.
Step 4 Restart the Cisco Unity server for any changes to take effect.
Obtaining Cisco Unity 8.x License FilesLicense files, which enable the features purchased by the customer, are required for installing Cisco Unity software, for some upgrades, and for adding or changing licensed features. You obtain the license files by completing registration information on Cisco.com.
Shortly after registration, Cisco emails the license files. The email from Cisco contains instructions on how to save and store the files. The Cisco Unity installation guide later provides specific instructions on the use of the license files. (For more information on licensing, see the white paper Licensing for Cisco Unity at http://www.cisco.com/en/US/products/sw/voicesw/ps2237/prod_white_papers_list.html.)
The following information is required during registration:
• The MAC address (physical address) for the network interface card (NIC) in the Cisco Unity server.
• The product authorization key (PAK), which is included with the Cisco Unity DVDs.
If the server contains a dual NIC and you configured it for fault tolerance by using the procedure in the “Configuring a Dual NIC in the Cisco Unity 8.x Server” section on page 5-2, you already have the MAC address. Skip to the “To Register and Obtain the License Files” procedure on page 5-5.
If the server contains one NIC or if the server contains a dual NIC that you did not configure for fault tolerance, do the following two procedures in the order listed.
Hewlett-Packard or Cisco MCS server with model number ending in “H”
Click HP Network.
IBM or Cisco MCS server with model number ending in “I”
• For a Broadcom dual NIC, click Broadcom Control Suite 2.
• For an Intel dual NIC, click Intel(R) PROSet Wired.
5-4Installation Guide for Cisco Unity Release 8.x in a Unified Messaging Configuration (With Microsoft Exchange and Without Failover)
OL-21709-01

Chapter 5 Customizing the Cisco Unity 8.x PlatformObtaining Cisco Unity 8.x License Files
To Get the MAC Address of the Cisco Unity Server When the Server Contains One NIC or an Unteamed Dual NIC
Step 1 On the server on which Cisco Unity will be installed, on the Windows Start menu, click Programs > Accessories > Command Prompt.
Step 2 In the Command Prompt window, enter ipconfig /all, and press Enter.
Step 3 Write down the value of Physical Address, excluding the hyphens, or save it to a file that you can access during online registration. (For example, if the physical address is 00-A1-B2-C3-D4-E5, record 00A1B2C3D4E5.)
If the server contains a dual NIC, two values will appear. Write down the value for the NIC that you will use to connect the Cisco Unity server to the network.
Step 4 Close the Command Prompt window.
To Register and Obtain the License Files
Step 1 Browse to the registration website at http://www.cisco.com/go/license (URL is case sensitive).
You must be a registered user on Cisco.com to obtain license files.
Step 2 Enter the PAK or software serial number, and click Submit.
Step 3 Follow the on-screen prompts.
Step 4 Shortly after registration, you will receive an email with the Cisco Unity license files.
If license files are lost, it can take up to one business day to get another copy.
If you do not receive the license files within 1 hour or to get another copy of a license file, call the Cisco Technical Assistance Center (TAC) and ask for the Licensing Team:
Or open a service request using the TAC Service Request Tool at http://tools.cisco.com/ServiceRequestTool/create/DefineProblem.do.
You will need to provide information to verify Cisco Unity ownership—for example, the purchase order number or the PAK, which is included with Cisco Unity DVDs.
Note Cisco Unity software comes with a default license file that has a minimal number of settings. The license file allows installation of a Cisco Unity demonstration system. For information and instructions on installing a demonstration system, see the “Cisco Unity Demonstration System” section of the Cisco Unity release notes.
In the U.S. 800 553-2447
Outside the U.S.
For your local Cisco TAC phone number, see the Cisco Worldwide Contacts page at http://www.cisco.com/en/US/support/tsd_cisco_worldwide_contacts.html.
5-5Installation Guide for Cisco Unity Release 8.x in a Unified Messaging Configuration (With Microsoft Exchange and Without Failover)
OL-21709-01

Chapter 5 Customizing the Cisco Unity 8.x PlatformDetermining the Partner Exchange Server for Cisco Unity 8.x
Determining the Partner Exchange Server for Cisco Unity 8.xWhen you run the Cisco Unity System Setup Assistant to install prerequisites, you will be prompted to select an Exchange server for Cisco Unity to connect with. The server is known as the partner Exchange server, or the partner server. You determine now which server you will use as the partner server, based on the following information:
• When all Cisco Unity subscriber mailboxes will be homed on the same Exchange server, use that server as the partner server.
• When Cisco Unity subscriber mailboxes will be homed on more than one Exchange server, consider the following general guidelines for deciding which server to use as the partner server:
– All voice messages from outside callers pass through the partner server on their way to user mailboxes. Use an Exchange server based on its ability to handle the additional traffic.
– When Exchange 2003 is configured for active/active or active/passive clustering, use either an Exchange server outside the cluster or the Exchange virtual server in the cluster. (When you run the Message Store Configuration wizard later in the installation, the wizard lists only these Exchange servers.)
– When Exchange 2007 clustering is configured, use either an Exchange server outside the cluster or a cluster mailserver. (When you run the Message Store Configuration wizard later in the installation, the wizard lists only these Exchange servers.)
• When Cisco Unity subscriber mailboxes will be homed in Exchange 2007 and in Exchange 2003, choose a partner server based on the considerations already mentioned as well as the roles installed on the server and ease of access to Exchange 2007 servers:
– To be used as the partner Exchange server, an Exchange 2007 server must have the Mailbox server role installed.
– If you choose an Exchange 2007 server, when you run the Cisco Unity Message Store Configuration wizard later in the installation process, the wizard creates scripts that must be run either on the partner Exchange 2007 server or on another Exchange 2007 server on which Exchange Management Shell is installed. (The scripts create Exchange mailboxes that Cisco Unity cannot create directly in Exchange 2007.) By default, scripts cannot be run remotely, so you may need to be at an Exchange 2007 server to run them. If physical access to the Exchange servers is restricted, you can choose an Exchange 2003 server as the partner Exchange server, and Cisco Unity can create the accounts automatically.
You specify the partner server later in the installation process.
Installing Cisco Unity 8.x PrerequisitesThe Cisco Unity System Setup Assistant helps customize the platform for Cisco Unity by checking for and installing SQL Server, Windows components, Microsoft service packs, and other software required by Cisco Unity. (For a detailed list, see Components and Software Installed by the Cisco Unity Platform Configuration Discs and the Cisco Unity System Setup Assistant at http://www.cisco.com/en/US/docs/voice_ip_comm/unity/pcd/cupcd.html.)
Caution For limitations on running the Cisco Unity System Setup Assistant by using Windows Terminal Services, see the “Windows Terminal Services” section of the “Limitations and Restrictions” section of the applicable Cisco Unity release notes at http://www.cisco.com/en/US/products/sw/voicesw/ps2237/prod_release_notes_list.html.
5-6Installation Guide for Cisco Unity Release 8.x in a Unified Messaging Configuration (With Microsoft Exchange and Without Failover)
OL-21709-01

Chapter 5 Customizing the Cisco Unity 8.x PlatformInstalling Cisco Unity 8.x Prerequisites
To Install Cisco Unity Prerequisites
Step 1 Log on to Windows by using an account that is a member of the local Administrators group.
Step 2 If Cisco Unity DVD 1, the Cisco Unity Prerequisites DVD, or the Cisco Unity Data Store DVD is located on a network share, authenticate on the other server before you continue. For example, start Windows Explorer, browse to the network share, and, when prompted, enter the username and password for an Active Directory account that has access to that location.
Step 3 If Internet Explorer Enhanced Security is enabled on the Cisco Unity server, add the network share as a local intranet site in Internet Explorer.
Step 4 In the root directory of Cisco Unity DVD 1, double-click Setup.exe.
Step 5 If prompted, double-click the language of your choice to continue the installation.
Step 6 Verify that Software Prerequisites is selected, and click Run Task.
Step 7 On the Choose Your Configuration page, set the following fields:
Step 8 Click Next. The assistant lists the applicable prerequisites and indicates whether or not they are met.
Step 9 Follow the prompts to install any missing components until you are prompted to install the data store.
If a Microsoft AutoMenu window appears when the assistant is installing an application, close the window and allow the assistant to continue.
Note The documented installation sequence allows you to install as much software on the Cisco Unity server as possible before connecting the server to the corporate network. However, the last prerequisite test, for a valid Active Directory domain controller, will fail until you make the Cisco Unity server a member server in an existing domain, later in the installation process.
Step 10 If you are using a Data Store 2005 disk, skip to Step 12.
If you are using a Data Store 2000 disk and installing MSDE, skip to Step 12.
If you are using a Data Store 2000 disk and installing SQL Server 2000, do the following steps to install it in the location you made note of in the “Determining the Locations for Files on the Cisco Unity 8.x Server” section on page 2-4:
a. In the Welcome dialog box, click Next.
b. In the Computer Name dialog box, click Next to accept the default setting Local Computer.
<x> Ports to Be Installed
Enter the number of voice ports that you are connecting with the Cisco Unity server.
The assistant uses the information to determine whether the system requires SQL Server, SQL Server Express, or MSDE. For systems with more than 32 ports, SQL Server is required. Otherwise, SQL Server Express or MSDE is required.
This Server Is a Primary or Secondary Server in a Failover Pair
Confirm that the This Server Is a Primary or Secondary Server in a Failover Pair check box is unchecked.
Choose the Exchange Version and the Location of the Partner Exchange Server
Choose the Exchange version and configuration that you decided on in the “Determining the Partner Exchange Server for Cisco Unity 8.x” section on page 5-6.
5-7Installation Guide for Cisco Unity Release 8.x in a Unified Messaging Configuration (With Microsoft Exchange and Without Failover)
OL-21709-01

Chapter 5 Customizing the Cisco Unity 8.x PlatformInstalling Cisco Unity 8.x Prerequisites
c. In the Installation Selection dialog box, click Next to accept the default setting Create a New Instance of SQL Server, or Install Client Tools.
d. Follow the on-screen prompts until the CD Key dialog box appears.
e. Enter the key for Cisco Unity Data Store 2000 from the sticker located on the CD sleeve, and click Next.
f. In the Installation Definition dialog box, click Next to accept the default setting Server and Client Tools.
g. In the Instance Name dialog box, check the Default check box.
h. Click Next.
i. In the Setup Type dialog box, click Typical.
j. Under Destination Folder, next to Program Files, click Browse and specify the location for binaries that you made note of in the “Determining the Locations for Files on the Cisco Unity 8.x Server” section on page 2-4.
k. Under Destination Folder, next to Data Files, click Browse and specify the location for databases that you made note of in the “Determining the Locations for Files on the Cisco Unity 8.x Server” section on page 2-4.
l. Click Next.
m. At the top of the Services Accounts dialog box, click Use the Same Account for Each Service.
n. Under Service Settings, click Use the Local System Account.
o. Click Next.
p. In the Authentication Mode dialog box, we recommend that you click Windows Authentication Mode.
If you click Mixed Mode—which is supported but is less secure—under Add Password for the SA Login, enter and confirm a password for the SQL Server system administrator logon.
q. Click Next.
r. In the Start Copying Files dialog box, click Next.
s. In the Choose Licensing Mode dialog box, click Processor License For, and specify the number of processors in the Cisco Unity server.
t. Click Continue.
u. If you are prompted about shutdown tasks before continuing with the installation, click Next.
v. Click Finish.
w. Continue with Step 11.
Step 11 Install the SQL Server 2000 service pack:
a. On the Welcome screen, click Next.
b. Follow the on-screen prompts until you are prompted to choose the authentication mode.
c. Choose Windows authentication, and click Next.
d. If the SA Password Warning dialog box appears, enter and confirm the password, and click Next.
e. Follow the on-screen prompts to continue.
f. If you are prompted about shutdown tasks before continuing with the installation, click Next.
g. Click Finish to begin installing components.
5-8Installation Guide for Cisco Unity Release 8.x in a Unified Messaging Configuration (With Microsoft Exchange and Without Failover)
OL-21709-01
Chapter 5 Customizing the Cisco Unity 8.x PlatformSetting the SQL Server 2005 Express or MSDE 2000 System Administrator Password for Cisco Unity 8.x
h. When the Setup message appears, click OK.
i. Click Finish to restart the server.
j. Continue with Step 12.
Step 12 Follow the on-screen prompts to finish installing prerequisites.
Step 13 When the Cisco Unity System Setup Assistant has completed, click Finish.
Setting the SQL Server 2005 Express or MSDE 2000 System Administrator Password for Cisco Unity 8.x
Note If the system is not using SQL Server 2005 Express or MSDE 2000, skip this section.
If the Cisco Unity System Setup Assistant installs:
• SQL Server 2005 Express, SQL Server Management Studio is installed automatically.
• MSDE 2000, SQL Server Enterprise Manager cannot be installed automatically. You install Enterprise Manager administration software so that you can change the MSDE 2000 system administrator (sa) password and so Cisco TAC can access the Cisco Unity MSDE databases during troubleshooting.
By default, the SQL Server 2005 Express or MSDE 2000 system administrator password is blank. For security reasons, we highly recommend that you set a non-blank sa password.
If SQL Server 2005 Express is installed, do the “To Set the Sa Password for SQL Server 2005 Express” procedure on page 5-9.
If MSDE 2000 is installed, do the following two procedures.
• To Install Enterprise Manager for MSDE 2000, page 5-10
• To Set the Sa Password for MSDE 2000, page 5-10
To Set the Sa Password for SQL Server 2005 Express
Step 1 On the Windows Start menu, click Programs > Microsoft SQL Server 2005 > SQL Server Management Studio.
Step 2 In the Connect to Server dialog box:
• For Server Type, choose Database Engine.
• For Server Name, choose the name of this Cisco Unity server.
• For Authentication, choose Windows Authentication.
Step 3 Click Connect.
Step 4 In the left pane of SQL Server Management Studio, expand Security.
Step 5 Click Logins.
Step 6 In the right pane, right-click Sa, and click Properties.
5-9Installation Guide for Cisco Unity Release 8.x in a Unified Messaging Configuration (With Microsoft Exchange and Without Failover)
OL-21709-01
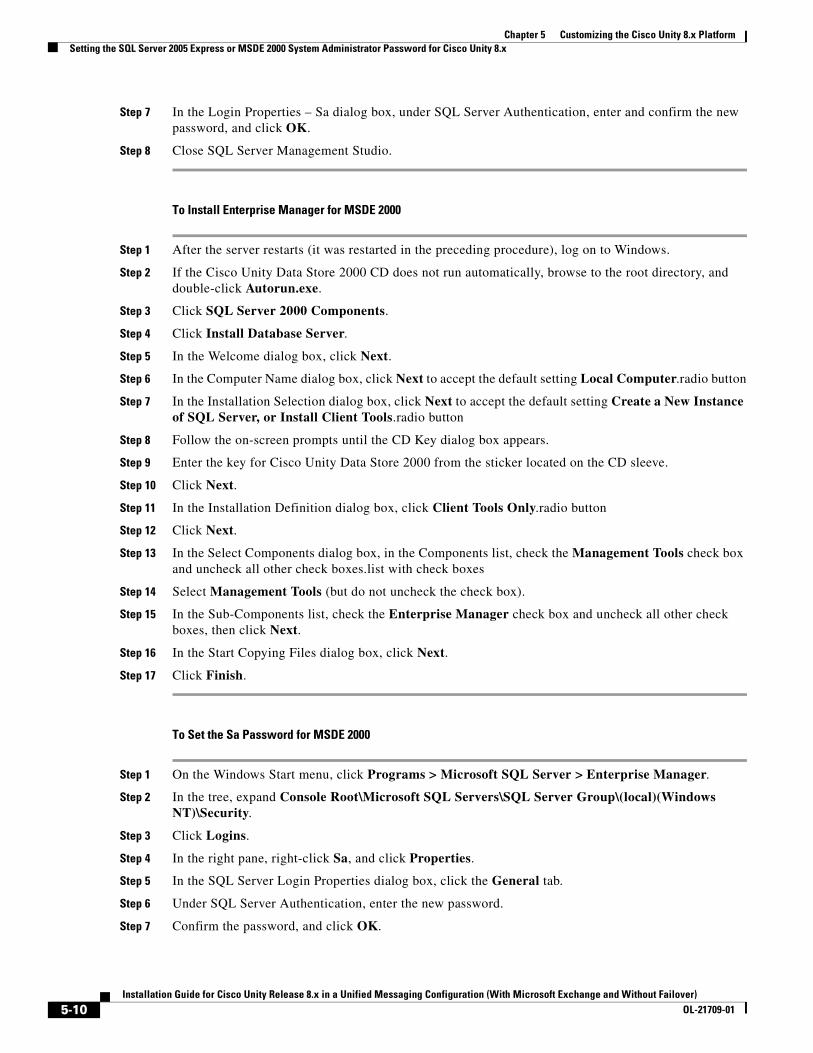
Chapter 5 Customizing the Cisco Unity 8.x PlatformSetting the SQL Server 2005 Express or MSDE 2000 System Administrator Password for Cisco Unity 8.x
Step 7 In the Login Properties – Sa dialog box, under SQL Server Authentication, enter and confirm the new password, and click OK.
Step 8 Close SQL Server Management Studio.
To Install Enterprise Manager for MSDE 2000
Step 1 After the server restarts (it was restarted in the preceding procedure), log on to Windows.
Step 2 If the Cisco Unity Data Store 2000 CD does not run automatically, browse to the root directory, and double-click Autorun.exe.
Step 3 Click SQL Server 2000 Components.
Step 4 Click Install Database Server.
Step 5 In the Welcome dialog box, click Next.
Step 6 In the Computer Name dialog box, click Next to accept the default setting Local Computer.radio button
Step 7 In the Installation Selection dialog box, click Next to accept the default setting Create a New Instance of SQL Server, or Install Client Tools.radio button
Step 8 Follow the on-screen prompts until the CD Key dialog box appears.
Step 9 Enter the key for Cisco Unity Data Store 2000 from the sticker located on the CD sleeve.
Step 10 Click Next.
Step 11 In the Installation Definition dialog box, click Client Tools Only.radio button
Step 12 Click Next.
Step 13 In the Select Components dialog box, in the Components list, check the Management Tools check box and uncheck all other check boxes.list with check boxes
Step 14 Select Management Tools (but do not uncheck the check box).
Step 15 In the Sub-Components list, check the Enterprise Manager check box and uncheck all other check boxes, then click Next.
Step 16 In the Start Copying Files dialog box, click Next.
Step 17 Click Finish.
To Set the Sa Password for MSDE 2000
Step 1 On the Windows Start menu, click Programs > Microsoft SQL Server > Enterprise Manager.
Step 2 In the tree, expand Console Root\Microsoft SQL Servers\SQL Server Group\(local)(Windows NT)\Security.
Step 3 Click Logins.
Step 4 In the right pane, right-click Sa, and click Properties.
Step 5 In the SQL Server Login Properties dialog box, click the General tab.
Step 6 Under SQL Server Authentication, enter the new password.
Step 7 Confirm the password, and click OK.
5-10Installation Guide for Cisco Unity Release 8.x in a Unified Messaging Configuration (With Microsoft Exchange and Without Failover)
OL-21709-01

Chapter 5 Customizing the Cisco Unity 8.x PlatformChanging Folder Settings in Windows Explorer for Cisco Unity 8.x
Step 8 Close Enterprise Manager.
Changing Folder Settings in Windows Explorer for Cisco Unity 8.x
Note If you installed Windows by using the Platform Configuration discs that are shipped with a Cisco Unity server purchased from Cisco, all files and folders are already visible in Windows Explorer. You can skip this section.
You change folder settings so that all files and folders—including system files—are visible in Windows Explorer during Cisco Unity troubleshooting.
Note If you do not do the following procedure now, Cisco TAC may ask you to do it later.
To Change Folder Settings in Windows Explorer
Step 1 On the Windows desktop, double-click My Computer.
Step 2 On the Tools menu, click Folder Options.
Step 3 Click the View tab.
Step 4 Click Show Hidden Files and Folders.
Step 5 Uncheck the Hide File Extensions for Known File Types check box.
Step 6 Uncheck the Hide Protected Operating System Files check box, and click Yes to confirm.
Step 7 Click Apply.
Step 8 Click Like Current Folder, and click Yes to confirm.
Step 9 Click OK.
Installing Microsoft Updates and Cisco Security Agent for Cisco Unity on the 8.x Server
You run the Cisco Unity Server Updates wizard that you downloaded in the “Downloading Software for the Cisco Unity 8.x Installation” section on page 2-2 to install the Microsoft updates that apply to Cisco Unity and, optionally, to install Cisco Security Agent for Cisco Unity.
Exchange software is not installed, so you cannot install Exchange service packs and updates yet. The Installation Guide for Cisco Unity alerts you when to do those installations later in the installation process.
5-11Installation Guide for Cisco Unity Release 8.x in a Unified Messaging Configuration (With Microsoft Exchange and Without Failover)
OL-21709-01

Chapter 5 Customizing the Cisco Unity 8.x PlatformInstalling Antivirus Software on the Cisco Unity 8.x Server (Optional)
To Install Microsoft Updates and, Optionally, Cisco Security Agent for Cisco Unity
Step 1 Insert in the drive the disc that you burned with the latest version of the Cisco Unity Server Updates Wizard.
Step 2 Run ServerUpdatesWizard.exe.
Step 3 Follow the on-screen prompts to complete the installation of Microsoft updates and, optionally, Cisco Security Agent for Cisco Unity.
Note If you are accessing the server by using Remote Desktop or a VNC client, and you are installing Cisco Security Agent for Cisco Unity, the Remote Desktop or VNC session will be disconnected when Cisco Security Agent for Cisco Unity restarts the network interface. If the session does not reconnect automatically, reconnect manually to finish the Server Updates wizard.
Step 4 Restart the Cisco Unity server.
Installing Antivirus Software on the Cisco Unity 8.x Server (Optional)
For information on supported antivirus software, see Supported Hardware and Software, and Support Policies for Cisco Unity at http://www.cisco.com/en/US/docs/voice_ip_comm/unity/8x/support/8xcusupp.html.
Follow the manufacturer instructions to install the antivirus software.
The installation guide alerts you when to exclude selected directories from virus scanning.
Note that scanning individual Exchange mailboxes can affect the performance of Cisco Unity.
Caution Do not configure antivirus software to block WAV attachments, or voice messages will be stripped of their recordings.
Connecting the Cisco Unity 8.x Server to the NetworkTo Connect the Cisco Unity Server to the Network
Attach the network cable(s) to the Cisco Unity server.
If the server contains a dual NIC, ensure that you connect the cable to the primary NIC, if you configured the dual NIC for AFT or NFT, or to the NIC that is enabled.
5-12Installation Guide for Cisco Unity Release 8.x in a Unified Messaging Configuration (With Microsoft Exchange and Without Failover)
OL-21709-01

Chapter 5 Customizing the Cisco Unity 8.x PlatformConfiguring TCP/IP Properties for the Cisco Unity 8.x Server
Configuring TCP/IP Properties for the Cisco Unity 8.x ServerThe Cisco Unity server must have an IP address and must also have the IP address of a DNS server. Do the procedure in this section to specify IP addresses for the servers.
When choosing an IP address for a Cisco Unity server, note the following considerations:
• Do not choose an address accessible from the Internet. Doing so can expose the Cisco Unity server to unwanted intrusion from the Internet, even when the server is hardened.
• For detailed requirements for separating the Cisco Unity server from other servers on the network by a firewall, see the System Requirements for Cisco Unity at http://www.cisco.com/en/US/docs/voice_ip_comm/unity/8x/requirements/8xcusysreq.html.
To Configure TCP/IP Properties
Step 1 On the Windows Start menu, click Settings > Control Panel > Network and Dial-Up Connections > Local Area Connection.
Step 2 Click Properties.
Step 3 In the Components Checked Are Used by This Connection list, check the Internet Protocol (TCP/IP) check box.
Step 4 Click Internet Protocol (TCP/IP) (but do not uncheck the check box), and click Properties.
Step 5 Enter IP addresses for the Cisco Unity server and for the preferred and alternate DNS servers (for more information, see Windows Help).
Step 6 Click OK
Step 7 Restart the server.
Verifying the IP Address and the Network Connection for the Cisco Unity 8.x Server
To Verify the IP Address and the Network Connection
Step 1 On the Windows Start menu, click Programs > Accessories > Command Prompt.
Step 2 In the Command Prompt window, enter ipconfig /all, and press Enter.
Step 3 Verify the IP address of the Cisco Unity server.
Step 4 Find the IP address of a router or server on the same network segment as the Cisco Unity server.
If no routers or servers are listed, either you did not specify a default gateway when you assigned an IP address in the “Configuring TCP/IP Properties for the Cisco Unity 8.x Server” section on page 5-13, or the Cisco Unity server is not connected to the network.
5-13Installation Guide for Cisco Unity Release 8.x in a Unified Messaging Configuration (With Microsoft Exchange and Without Failover)
OL-21709-01
Chapter 5 Customizing the Cisco Unity 8.x PlatformAdding the Cisco Unity 8.x Server to an Existing Domain
Step 5 Ping the router or other server whose IP address you found in Step 4. In the Command Prompt window, enter ping <IP address>, and press Enter.
If the device sends a reply, the Cisco Unity server has a valid IP address.
If the device does not reply, there may be a variety of causes. Some of the most common problems include:
• The assigned IP address conflicts with the IP address of another computer on the network.
• The subnet mask is incorrect.
Verify the network settings. If needed, troubleshoot any problem as you would a network connectivity problem.
Adding the Cisco Unity 8.x Server to an Existing DomainThe Cisco Unity server must be a member server in an existing domain. Cisco Unity interactions with the message store do not allow the server to be in a workgroup. Add the Cisco Unity server to an existing domain by doing the following procedure.
We recommend that you add the Cisco Unity server to the same domain as the Exchange server that homes the Cisco Unity subscribers.
To Add the Cisco Unity Server to an Existing Domain
Step 1 Log on to the Cisco Unity server by using an account that is a member of the local Administrators group.
Step 2 On the Windows Start menu, click Settings > Control Panel > System.
Step 3 Click the Network Identification tab.
Step 4 Click Properties.
Step 5 In the Identification Changes dialog box, click Domain, and enter the name of the domain that you want to join.
Step 6 Click OK.
Step 7 In the Domain Username and Password dialog box, enter the name and password of an account that has permission to add computers to the domain.
Step 8 Click OK three times.
Step 9 Click Yes to restart the server.
Disabling Antivirus Services on the Cisco Unity 8.x Server
Note If the system is not using antivirus software, skip this section.
5-14Installation Guide for Cisco Unity Release 8.x in a Unified Messaging Configuration (With Microsoft Exchange and Without Failover)
OL-21709-01

Chapter 5 Customizing the Cisco Unity 8.x PlatformVerifying Network Prerequisites for the Cisco Unity 8.x Server
You disable antivirus services on the server so that they do not slow down the installation of software or cause the installations to fail. The Cisco Unity installation guide alerts you when to re-enable the services after all of the installation procedures that can be affected are complete.
To Disable and Stop Antivirus Services
Step 1 See the antivirus software documentation to determine the names of the antivirus services.
Step 2 On the Windows Start menu, click Programs > Administrative Tools > Services.
Step 3 Disable and stop each antivirus service:
a. In the right pane, double-click the service.
b. On the General tab, in the Startup Type list, click Disabled. This prevents the service from starting when you restart the server.
c. Click Stop to stop the service immediately.
d. Click OK to close the Properties dialog box.
Step 4 When the services have been disabled, close the Services MMC.
Verifying Network Prerequisites for the Cisco Unity 8.x ServerWith the Cisco Unity server now connected to the network, you can verify network prerequisites, for example, the presence of an Active Directory domain controller and global catalog server.
To Check Network Prerequisites
Step 1 Log on to Windows by using an Active Directory domain account.
Step 2 If Cisco Unity DVD 1, the Cisco Unity Prerequisites DVD, or the Cisco Unity Data Store DVD is located on a network share, and if you have not already authenticated on the other server, do so before you continue. For example, start Windows Explorer, browse to the network share, and, when prompted, enter the username and password for an Active Directory account that has access to that location.
Step 3 If Internet Explorer Enhanced Security is enabled on the Cisco Unity server, add the network share as a local intranet site in Internet Explorer.
Step 4 In the root directory of Cisco Unity DVD 1, double-click Setup.exe.
Step 5 If prompted, double-click the language of your choice to continue the installation.
Step 6 Verify that Network Prerequisites is selected, and click Run Task.
Step 7 Follow the on-screen prompts to complete the verification.
5-15Installation Guide for Cisco Unity Release 8.x in a Unified Messaging Configuration (With Microsoft Exchange and Without Failover)
OL-21709-01

Chapter 5 Customizing the Cisco Unity 8.x PlatformVerifying Network Prerequisites for the Cisco Unity 8.x Server
5-16Installation Guide for Cisco Unity Release 8.x in a Unified Messaging Configuration (With Microsoft Exchange and Without Failover)
OL-21709-01

Installation Guide for Cisco Unity Release 8.x in a Unified Messaging ConfiguratiOL-21709-01
C H A P T E R 6
Extending the Active Directory Schema for Cisco Unity 8.xIn this chapter, you do the following tasks in the order listed:
1. Extend the Active Directory schema for Cisco Unity. See the “Extending the Active Directory Schema for Cisco Unity 8.x” section on page 6-1.
2. Create Active Directory organizational units for users and distribution lists, and a mailbox store, if applicable. See the “Creating Organizational Units and a Mailbox Store for Cisco Unity 8.x” section on page 6-2.
When you are finished with this chapter, return to Chapter 1, “Overview of Mandatory Tasks for Installing Cisco Unity 8.x” to continue installing the Cisco Unity system.
Note The tasks in the list reference detailed instructions in the Installation Guide for Cisco Unity and in other Cisco Unity documentation. Follow the documentation for a successful installation.
Extending the Active Directory Schema for Cisco Unity 8.xSeveral changes need to be made to the Active Directory schema for Cisco Unity to work properly.To see the changes that the schema update program makes, browse to the directory Schema\LdifScripts on Cisco Unity DVD 1, and view the file Avdirmonex2k.ldf.
Changes to the Active Directory schema may take 15 minutes or more to replicate throughout the forest. The changes must finish replicating before you can install Cisco Unity.
To Extend the Active Directory Schema for Cisco Unity
Step 1 Confirm that all domain controllers are on line. (The Active Directory schema extensions replicate only when all domain controllers are on line.)
Step 2 On the computer that has the schema master role (typically the first DC/GC in the forest), log on to Windows as a user who is a member of the Schema Admins group.
Step 3 On Cisco Unity DVD 1, browse to the directory ADSchemaSetup, and double-click ADSchemaSetup.exe.
Step 4 In the Active Directory Schema Setup dialog box, check the Exchange Directory Monitor check box.
6-1on (With Microsoft Exchange and Without Failover)
Chapter 6 Extending the Active Directory Schema for Cisco Unity 8.xCreating Organizational Units and a Mailbox Store for Cisco Unity 8.x
Step 5 If you plan to use VPIM Networking or Cisco Unity Bridge Networking, check the applicable check boxes.
Step 6 Click OK.
Step 7 When the schema has been extended, Ldif.log and Ldif.err files are saved to the desktop. View the contents of the files to confirm that extending the schema completed successfully.
Creating Organizational Units and a Mailbox Store for Cisco Unity 8.x
Users and distribution lists are created in locations that you specify. If you want users and distribution lists to be created in custom organizational units (OUs), create the OUs now. Both OUs need to be in the same domain, but they do not need to be in the same domain as the Cisco Unity server. For information on creating OUs, see Active Directory Users and Computers Help.
You also have the option to create a custom mailbox store as the default for subscribers that are added through the Cisco Unity Administrator or that are imported from a CSV file. For information on creating a custom mailbox store, see Exchange Help. (Later in the installation process, you configure Cisco Unity to use the mailbox store.)
You must use the same custom OUs and mailbox stores for the primary and secondary Cisco Unity servers.
6-2Installation Guide for Cisco Unity Release 8.x in a Unified Messaging Configuration (With Microsoft Exchange and Without Failover)
OL-21709-01
Installation Guide for Cisco Unity Release 8.x in a Unified Messaging ConfiguratiOL-21709-01
C H A P T E R 7
Creating Accounts for the Cisco Unity 8.x Installation and Granting PermissionsIn this chapter, you do the following tasks in the order listed:
1. Familiarize yourself with the domain accounts you will create in Task 2. See the “About the Accounts Required for the Cisco Unity 8.x Installation” section on page 7-1.
2. Create the applicable domain accounts that are needed to install Cisco Unity. See the “Creating the Accounts Required for the Cisco Unity 8.x Installation” section on page 7-2.
3. If you created a Cisco Unity administration account in Task 2.: Add the account to the local Administrators group. See the “Adding the Cisco Unity 8.x Administration Account to the Local Administrators Group” section on page 7-4.
4. Grant permissions for the accounts that you created in Task 2. See the “Granting Permissions for Cisco Unity 8.x with the Permissions Wizard” section on page 7-4.
5. Delegate Exchange administrative control. See the “Delegating Exchange Administrative Control for Cisco Unity 8.x” section on page 7-5.
When you are finished with this chapter, return to Chapter 1, “Overview of Mandatory Tasks for Installing Cisco Unity 8.x” to continue installing the Cisco Unity system.
Note The tasks in the list reference detailed instructions in the Installation Guide for Cisco Unity and in other Cisco Unity documentation. Follow the documentation for a successful installation.
About the Accounts Required for the Cisco Unity 8.x InstallationThis section describes the following domain accounts that are needed for the Cisco Unity installation:
• The Account Used to Install Cisco Unity 8.x, page 7-2
• The Account Used to Access the Cisco Unity Administrator in 8.x, page 7-2
• The Accounts That Cisco Unity 8.x Services Log On As, page 7-2
Note The same accounts are required for installing a new Cisco Unity 8.x system and for upgrading from previous versions of Cisco Unity.
7-1on (With Microsoft Exchange and Without Failover)

Chapter 7 Creating Accounts for the Cisco Unity 8.x Installation and Granting PermissionsCreating the Accounts Required for the Cisco Unity 8.x Installation
The Account Used to Install Cisco Unity 8.xDuring installation, Cisco Unity creates a number of Cisco Unity objects in Active Directory and in Exchange, so the account with which you log on to Windows to install Cisco Unity must have permission to perform the necessary operations.
If you are installing more than one Cisco Unity server in a site, we recommend that you use the same account to install Cisco Unity software on all of the servers.
The Account Used to Access the Cisco Unity Administrator in 8.xWhen you install Cisco Unity, you are prompted to choose the Active Directory domain account that you want to use to access the Cisco Unity Administrator (the website used to perform most administration tasks). During installation, the account is automatically associated with a Cisco Unity subscriber whose class of service allows access to Cisco Unity Administrator. (Later you can create additional Cisco Unity subscribers who also can access the Cisco Unity Administrator.)
By default, the Cisco Unity administration account is the installation account. If you prefer to use an account other than the installation account to be the first Cisco Unity administration account, create an additional domain account for that purpose.
The Cisco Unity administration account must be a member of the local Administrators group. A procedure later in this chapter explains how to add the account to that group.
The Accounts That Cisco Unity 8.x Services Log On AsDuring Cisco Unity installation, you are prompted to choose three domain accounts that Cisco Unity services log on as:
• The account that Cisco Unity directory services log on as. These services keep subscriber data in the directory synchronized with subscriber data in the Cisco Unity SQL Server database.
• The account that Cisco Unity message store services log on as. These services allow subscribers to send and receive voice messages by using the telephone user interface.
• The account that local services log on as. By default, local Cisco Unity services log on as the Local System account. We recommend that you not change this.
The permissions required by the directory services account conflict with the permissions required by the message store services account, so you must create separate accounts for the two types of services.
If you are installing more than one Cisco Unity server in a site, we recommend that you use one account for directory services on all servers and another account for message store services on all servers.
Creating the Accounts Required for the Cisco Unity 8.x Installation
The procedure in this section requires Active Directory Users and Computers (ADUC). If ADUC is not installed on the Cisco Unity server, do one of the following:
• Install ADUC on the Cisco Unity server. For information, see Windows Help.
7-2Installation Guide for Cisco Unity Release 8.x in a Unified Messaging Configuration (With Microsoft Exchange and Without Failover)
OL-21709-01

Chapter 7 Creating Accounts for the Cisco Unity 8.x Installation and Granting PermissionsCreating the Accounts Required for the Cisco Unity 8.x Installation
• In the domain that includes the Cisco Unity server, go to a computer (for example, a domain controller) on which Active Directory Users and Computers is already installed.
To Create Domain Accounts for Cisco Unity Installation, Administration, and Services
Step 1 On a server where Active Directory Users and Computers is installed, log on to Windows by using an account that is a member of the Domain Admins group.
Step 2 On the Windows Start menu, click Programs > Microsoft Exchange > Active Directory Users and Computers or click Programs > Administrative Tools > Active Directory Users and Computers.
Step 3 In the left pane, expand the domain, right-click Users or the organizational unit where you want to create the installation account, and click New > User.
Step 4 Follow the on-screen prompts to create the installation account. Creating an Exchange mailbox is optional.
Caution To improve security for these accounts, we recommend that you specify a password that: - Is at least eight characters long. - Includes at least one character from at least three of the following: upper-case letters, lower-case letters, numbers, and special characters (~ ! @ # $ % ^ * ’ ” , . : ; ? - _ ( ) [ ] { } + = / \ |). - Does not consecutively repeat any character more than three times. - Does not match the account name, either forward or backward. - Does not include Cisco or Unity in any combination of upper- or lower-case characters.
We suggest that you use the following names for the accounts:
Step 5 Repeat Step 3 and Step 4 to create the Cisco Unity administration account, the directory services account, and the message store services account.
Ensure that for the accounts that Cisco Unity services log on as, the password will never expire. If the password expires, Cisco Unity will stop working the next time the server is restarted.
Step 6 Close Active Directory Users and Computers.
Installation UnityInstall
Administration UnityAdmin
Account that Cisco Unity directory services log on as (directory services account)
UnityDirSvc
Account that Cisco Unity message store services log on as (message store services account)
UnityMsgStoreSvc
7-3Installation Guide for Cisco Unity Release 8.x in a Unified Messaging Configuration (With Microsoft Exchange and Without Failover)
OL-21709-01
Chapter 7 Creating Accounts for the Cisco Unity 8.x Installation and Granting PermissionsAdding the Cisco Unity 8.x Administration Account to the Local Administrators Group
Adding the Cisco Unity 8.x Administration Account to the Local Administrators Group
Note If you did not create a Cisco Unity administration account in the “Creating the Accounts Required for the Cisco Unity 8.x Installation” section on page 7-2, skip this section.
Add the Cisco Unity administration account to the local Administrators group.
To Add the Cisco Unity Administration Account to the Local Administrators Group
Step 1 On the Cisco Unity server, on the Windows Start menu, click Programs > Administrative Tools > Computer Management.
Step 2 In the left pane of the Computer Management MMC, expand System Tools > Local Users and Groups.
Step 3 In the left pane, click Groups.
Step 4 In the right pane, double-click Administrators.
Step 5 In the Administrators Properties dialog box, click Add.
Step 6 In the Select Users or Groups dialog box, in the Look In list, click the name of the domain to which the Cisco Unity server belongs.
Step 7 In the top list, double-click the name of the Cisco Unity administration account. The name appears in the bottom list.
Step 8 Click OK to close the Select Users or Groups dialog box.
Step 9 Click OK to close the Administrators Properties dialog box.
Step 10 Close the Computer Management MMC.
Granting Permissions for Cisco Unity 8.x with the Permissions Wizard
The Cisco Unity Permissions wizard is frequently updated between Cisco Unity releases. We recommend that you download and run the latest version of the Permissions wizard that is applicable to your version of Cisco Unity. The Permissions wizard is available at http://www.ciscounitytools.com/Applications/Unity/PermissionsWizard/Unity50/PW50.html.
For information on granting permissions with the Permissions wizard, see the Permissions wizard Help file PWHelp_<language>.htm that is included with the version of the Permissions wizard that you are using.
Caution If you are running the Permissions Wizard by using Windows Terminal Services (WTS), the PWDiag.Log file will be deleted at the end of the WTS session. To save it, you must copy it to another location before you end the session.
7-4Installation Guide for Cisco Unity Release 8.x in a Unified Messaging Configuration (With Microsoft Exchange and Without Failover)
OL-21709-01

Chapter 7 Creating Accounts for the Cisco Unity 8.x Installation and Granting PermissionsDelegating Exchange Administrative Control for Cisco Unity 8.x
For a complete list of the permissions granted by the Permissions wizard, see the Permissions wizard Help file PWHelpPermissionsSet_<language>.htm.
Delegating Exchange Administrative Control for Cisco Unity 8.xThe Cisco Unity Permissions wizard cannot delegate Exchange administrative control, so you must delegate control manually. For information on delegating control, see the Permissions wizard help file PWHelpExchange_<language>.htm.
7-5Installation Guide for Cisco Unity Release 8.x in a Unified Messaging Configuration (With Microsoft Exchange and Without Failover)
OL-21709-01

Chapter 7 Creating Accounts for the Cisco Unity 8.x Installation and Granting PermissionsDelegating Exchange Administrative Control for Cisco Unity 8.x
7-6Installation Guide for Cisco Unity Release 8.x in a Unified Messaging Configuration (With Microsoft Exchange and Without Failover)
OL-21709-01

Installation Guide for Cisco Unity Release 8.x in a Unified Messaging ConfiguratiOL-21709-01
C H A P T E R 8
Installing and Configuring Cisco Unity 8.x SoftwareIn this chapter, you do the following tasks in the order listed:
1. Use the Cisco Unity System Setup Assistant to install and configure Cisco Unity. See the “Installing and Configuring Cisco Unity 8.x Software” section on page 8-2.
2. Test the phone system integration. See the “Testing the Phone System Integration with Cisco Unity 8.x” section on page 8-7.
3. Configure Internet Explorer. See the “Configuring Internet Explorer to Display the Cisco Unity Administrator Correctly in 8.x” section on page 8-8.
4. Secure the Example Administrator account against toll fraud. See the “Securing the Cisco Unity 8.x Example Administrator Account Against Toll Fraud” section on page 8-9.
5. Move SQL Server, SQL Server Express, or MSDE databases and transaction logs. See the “Moving the Data Store Databases and Transaction Logs for Cisco Unity 8.x” section on page 8-10.
6. If antivirus software is installed on the Cisco Unity server: Exclude selected directories from scanning. See the “Excluding Selected Directories from Virus Scanning for Cisco Unity 8.x” section on page 8-14.
7. Install the latest Microsoft service packs qualified for use with Cisco Unity, if any. In addition, run the latest Cisco Unity Server Updates wizard to install the latest updates recommended for use with Cisco Unity. See the “Installing the Latest Microsoft Service Packs and Updates on the Cisco Unity 8.x Server” section on page 8-15.
8. If antivirus software is installed on the Cisco Unity server: Re-enable antivirus services for Cisco Unity. See the “Re-enabling Antivirus Services on the Cisco Unity 8.x Server” section on page 8-15.
9. Secure Cisco Unity and the Cisco Unity server. See the “Securing the Cisco Unity 8.x Software and the Cisco Unity Server” section on page 8-16.
When you are finished with this chapter, return to Chapter 1, “Overview of Mandatory Tasks for Installing Cisco Unity 8.x” to continue installing the Cisco Unity system.
Note The tasks in the list reference detailed instructions in the Installation Guide for Cisco Unity and in other Cisco Unity documentation. Follow the documentation for a successful installation.
8-1on (With Microsoft Exchange and Without Failover)

Chapter 8 Installing and Configuring Cisco Unity 8.x SoftwareInstalling and Configuring Cisco Unity 8.x Software
Installing and Configuring Cisco Unity 8.x SoftwareTo install and configure Cisco Unity software, you use the Cisco Unity System Setup Assistant to run seven programs in a specific order. The programs:
• Check the system and install the Cisco Unity software.
• Install the Cisco Unity licenses.
• Configure the Cisco Unity services.
• Configure Cisco Unity for the message store.
• Set new default passwords for the Default Administrator and the Default Subscriber templates
• Integrate Cisco Unity with the phone system.
Do the following six subsections in the order listed.
Starting the Cisco Unity System Setup Assistant and Installing Cisco Unity 8.x Software
From the Cisco Unity System Setup Assistant, you run the Cisco Unity Setup program first to install Cisco Unity. The Setup program checks the system, then installs the Cisco Unity software.
Caution For limitations on running the Cisco Unity System Setup Assistant by using Windows Terminal Services, see the “Windows Terminal Services” section of the “Limitations and Restrictions” section of the applicable Cisco Unity release notes at http://www.cisco.com/en/US/products/sw/voicesw/ps2237/prod_release_notes_list.html.
Caution Do not install features for which the system is not licensed, or Cisco Unity will shut down.
To Start the Assistant and Install the Cisco Unity Software
Step 1 Log on to Windows by using the Cisco Unity installation account.
Caution If you have not already done so, disable antivirus services on the server, if applicable. Otherwise, the installation may fail.
Step 2 If Cisco Unity DVD 1 is located on a network share, authenticate on the other server before you continue. For example, start Windows Explorer, browse to the network share, and, when prompted, enter the username and password for an Active Directory account that has access to that location.
Step 3 If Internet Explorer Enhanced Security is enabled on the Cisco Unity server, add the network share as a local intranet site in Internet Explorer.
Step 4 On Cisco Unity DVD 1, browse to the root directory and double-click Setup.exe.
Step 5 Click Install or Upgrade Cisco Unity Software, and click Run Task.
Step 6 Follow the on-screen prompts until the Enter Installation Locations page appears.
8-2Installation Guide for Cisco Unity Release 8.x in a Unified Messaging Configuration (With Microsoft Exchange and Without Failover)
OL-21709-01

Chapter 8 Installing and Configuring Cisco Unity 8.x SoftwareInstalling and Configuring Cisco Unity 8.x Software
Step 7 Specify locations for the Cisco Unity application, trace logs, and Unity Messaging Repository (UMR) files. Use the locations you made note of in the “Determining the Locations for Files on the Cisco Unity 8.x Server” section on page 2-4.
Step 8 Click Next.
Step 9 In the Select Features dialog box:
a. Check the Install Cisco Unity check box.
b. If the Cisco Unity license includes text to speech, check the Enable TTS check box.
If not, uncheck the Enable TTS check box.
Step 10 Click Next.
Step 11 Choose the prompt set to install. Consider the following:
• Cisco Unity should use the same audio format for prompts that the phone system uses for the media stream. Using a consistent audio format minimizes the need for transcoding from one audio format to another and minimizes the performance impact on the Cisco Unity server.
• Callers hear consistent sound quality when the prompts are in the same audio format that is used for recording messages.
• The G.711 Mu-Law audio format offers superior audio quality.
• The G.729a audio format uses less network bandwidth.
Note that choosing a system prompt set does not change the default audio format for recording messages. If necessary, you can change the audio format for recording messages after Cisco Unity is installed. For more information, see the white paper Audio Codecs and Cisco Unity (All Versions of Cisco Unity) at http://www.cisco.com/en/US/docs/voice_ip_comm/unity/white/paper/cuaudiocodecs.html.
Step 12 Click Next.
Step 13 In the Cisco Unity Languages dialog box, choose the language(s) to install, and click Next.
If you installed Windows by using the manufacturer’s guided system-setup utility and a retail Windows disc, one of the languages you choose here must match the locale you specified when you installed Windows.
Caution If the locale you specified when you installed Windows does not match any of the installed Cisco Unity system-prompt languages, Cisco Unity will log errors in the event log and may stop taking calls. The system-prompt language you choose here must exactly match the locale you selected when you installed Windows. For example, if you chose English (United Kingdom) for locale, you must also choose English (United Kingdom) as one of the Cisco Unity system-prompt languages. English (Australia) will not work.
If you installed Windows by using the Platform Configuration discs that are shipped with the Cisco Unity server, the locale is automatically set to English (United States). The Cisco Unity Setup program always installs English (United States) system prompts, so you do not need to choose it as one of the languages to install.
Note that if the system will be using text to speech (TTS) and will be using English (Australia) or English (New Zealand) for the system prompts, also install English (United States) or English (United Kingdom) for the TTS language.
Step 14 Set the system-default languages for the phone, graphical user interface (GUI), and TTS, and click Next.
For the phone (system prompts) language, choose the language that matches the locale that you specified when you installed Windows.
8-3Installation Guide for Cisco Unity Release 8.x in a Unified Messaging Configuration (With Microsoft Exchange and Without Failover)
OL-21709-01

Chapter 8 Installing and Configuring Cisco Unity 8.x SoftwareInstalling and Configuring Cisco Unity 8.x Software
Step 15 Follow the on-screen prompts, and restart the Cisco Unity server when prompted.
Installing Cisco Unity 8.x License FilesFrom the Cisco Unity System Setup Assistant, you run the Cisco Unity Install License File wizard second to install the Cisco Unity license files.
To Install the License Files
Step 1 Log on to Windows by using the Cisco Unity installation account, and the Install or Upgrade Cisco Unity Software task restarts again automatically.
Step 2 On the Install or Update License Files page, click Next.
Step 3 On the Welcome page, click Next.
Step 4 Click Add.
Step 5 Insert the Cisco Unity license file disk, if applicable.
(When Cisco Unity was registered on Cisco.com, Cisco replied with an email containing attached file(s) with license(s) for Cisco Unity features. The instructions in the email directed that the attached files be saved. For more information, see the “Obtaining Cisco Unity 8.x License Files” section on page 5-4.)
Step 6 Browse to drive A or to the location where the license file(s) have been stored.
Step 7 Double-click the license file to add it to the License Files list.
If prompted, click Yes to copy the license file to the local system.
Step 8 If you are adding more than one license file, click Add, and repeat Step 6 and Step 7 for each license file.
Step 9 Click Next.
Step 10 In the Licensed Features in the Selected License Files dialog box, confirm that the license information is correct.
Step 11 Click Next.
Step 12 Click Finish.
When the wizard is complete, the Configure the Cisco Unity Services page appears in the main window.
Configuring Cisco Unity 8.x ServicesFrom the Cisco Unity System Setup Assistant, you run the Cisco Unity Services Configuration wizard third to associate the directory, message store, and local services with accounts you specify.
To Configure Services
Step 1 On the Configure Cisco Unity Services page, click Next. (Note that you should be logged on to Windows with the Cisco Unity installation account.)
Step 2 On the Welcome page, click Next.
8-4Installation Guide for Cisco Unity Release 8.x in a Unified Messaging Configuration (With Microsoft Exchange and Without Failover)
OL-21709-01
Chapter 8 Installing and Configuring Cisco Unity 8.x SoftwareInstalling and Configuring Cisco Unity 8.x Software
Step 3 Choose the version of Exchange that is installed on the partner Exchange server that you chose in the “Determining the Partner Exchange Server for Cisco Unity 8.x” section on page 5-6.
Step 4 Click Next.
Step 5 Follow the on-screen prompts to choose the Active Directory accounts that you want Cisco Unity directory services, message store services, and local services to log on as.
When the wizard is complete, the Configure the Cisco Unity Message Store page appears in the main window.
Configuring Cisco Unity 8.x for the Message StoreFrom the Cisco Unity System Setup Assistant, you run the Cisco Unity Message Store Configuration wizard fourth to configure Cisco Unity for the message store.
To Configure Cisco Unity for the Message Store
Step 1 On the Configure the Cisco Unity System for the Message Store page, click Next. (Note that you should be logged on to Windows with the Cisco Unity installation account.)
Step 2 Confirm that Exchange is running on the partner server that you chose in the “Determining the Partner Exchange Server for Cisco Unity 8.x” section on page 5-6. If Exchange is not running, configuring the message store on the Cisco Unity server will fail.
Step 3 In the Welcome dialog box, click Next.
Step 4 Enter the password for the installation account, and click Next.
Step 5 If you did not create a Cisco Unity administration account in the “Creating the Accounts Required for the Cisco Unity 8.x Installation” section on page 7-2, skip to Step 6. When installation is complete, you will log on to the Cisco Unity Administrator by using the installation account.
If you created a Cisco Unity administration account in the “Creating the Accounts Required for the Cisco Unity 8.x Installation” section on page 7-2, specify the account:
a. Click Change.
b. In the Select User dialog box, double-click the name of the Cisco Unity administration account.
Step 6 Click Next.
Step 7 In the Select Partner Message Store dialog box, click the version of Exchange installed on the partner Exchange server, and click Next.
Step 8 Uncheck the Disable Active Directory Accounts that Are Created By Cisco Unity check box, and click Next. Then skip to Step 9.
Step 9 In the Select Mailbox Location dialog box, choose the partner Exchange server and the mailbox store in which to create new mailboxes, and click Next.
Step 10 In the Select Active Directory Containers for New Objects dialog box, choose the domain in which you want Cisco Unity to create users and distribution lists.
If you created custom organizational units for users, distribution lists, or locations, click the corresponding Change button to specify them here.
Step 11 Click Next.
Step 12 If you chose Microsoft Exchange 2003 for the partner message store in Step 7, skip to Step 21.
8-5Installation Guide for Cisco Unity Release 8.x in a Unified Messaging Configuration (With Microsoft Exchange and Without Failover)
OL-21709-01

Chapter 8 Installing and Configuring Cisco Unity 8.x SoftwareInstalling and Configuring Cisco Unity 8.x Software
If you chose Microsoft Exchange 2007, continue with Step 13.
Step 13 On the Run Scripts on the Partner Exchange 2007 Server page, do not click Next or Cancel. You will return to the Cisco Unity server to complete the wizard later in this procedure.
Step 14 Copy the file Ex2k7Script_<servername>.ps1 from the Windows desktop to one of the following locations:
• A removable disk.
• A network location that is accessible either to the partner Exchange server or to another server on which Exchange Management Shell is installed.
Step 15 Log on to a server on which Exchange Management Shell is installed using an account that has the permissions required to run a script in Exchange Management Shell.
Note You must use Exchange Management Shell, not Windows PowerShell, or the script will not complete successfully.
Step 16 Copy the script onto the local server.
Step 17 On the Windows Start menu, click Programs > Microsoft Exchange Server 2007 > Exchange Management Shell, and wait for the Help screen to appear.
Step 18 At the command prompt, enter the full path and filename of the script and press Enter.
If the script is in the current directory, enter .\<filename> to run the script.
Step 19 When the command prompt reappears, exit Exchange Management Shell, and return to the Cisco Unity server to complete the Cisco Unity Message Store Configuration wizard.
Step 20 On the Run Scripts on the Partner Exchange 2007 Server page, click Next.
Step 21 Click OK to stop Cisco Unity services.
Step 22 In the Select How Subscribers Will Be Created dialog box, set how administrators will create Cisco Unity subscriber accounts in the Cisco Unity Administrator:
Step 23 Click Next.
Step 24 By default, the account that you created for Cisco Unity directory services appears. If you want to choose a different account, click Change.
Step 25 Specify a password for the account, and click Next.
Step 26 When message store configuration is complete, click Finish.
When the wizard is complete, the Set New Default Passwords page appears in the main window.
Create New Accounts or Import Existing Accounts
Click if administrators will create subscriber accounts either by adding a new user to Exchange or by importing existing user data from Exchange.You cannot use the Cisco Unity Administrator to create subscribers whose mailboxes are homed in Exchange 2007.
Import Existing Accounts Only Click if administrators will create subscriber accounts only by importing existing user data from Exchange.
8-6Installation Guide for Cisco Unity Release 8.x in a Unified Messaging Configuration (With Microsoft Exchange and Without Failover)
OL-21709-01
Chapter 8 Installing and Configuring Cisco Unity 8.x SoftwareTesting the Phone System Integration with Cisco Unity 8.x
Setting New Default Passwords for Cisco Unity 8.xFrom the Cisco Unity System Setup Assistant, you run the Password Hardening wizard fifth to set new default passwords for the Default Administrator and the Default Subscriber templates.
To Set New Default Passwords
Step 1 On the Set Default Web and Phone Passwords page, click Next.
Step 2 Follow the on-screen prompts.
When the Password Hardening wizard finishes, the Integrate the Phone System with Cisco Unity page appears in the main window.
Integrating the Phone System with Cisco Unity 8.xFrom the Cisco Unity System Setup Assistant, you run the Cisco Unity Telephony Integration Manager (UTIM) sixth to connect Cisco Unity with the phone system.
To Integrate the Phone System with Cisco Unity
Step 1 On the Integrate the Phone System with Cisco Unity page, click Run the Cisco Unity Telephony Integration Manager. (Note that you should be logged on to Windows with the Cisco Unity installation account.)
Step 2 In the right pane of the UTIM, click Create Integration.
Step 3 See the applicable Cisco Unity integration guide for your phone system to complete the integration. (Cisco Unity integration guides are available at http://www.cisco.com/en/US/products/sw/voicesw/ps2237/products_installation_and_configuration_guides_list.html.)
When the integration is complete, the Set Up the Cisco Personal Communications Assistant to Use SSL page appears in the main window.
Testing the Phone System Integration with Cisco Unity 8.xTest the integration with the phone system. See the Cisco Unity integration guide for your phone system.
Note that you use the Cisco Unity Administrator for part of the integration test. Use the user name and password for the account that you selected to administer Cisco Unity.
8-7Installation Guide for Cisco Unity Release 8.x in a Unified Messaging Configuration (With Microsoft Exchange and Without Failover)
OL-21709-01
Chapter 8 Installing and Configuring Cisco Unity 8.x SoftwareConfiguring Internet Explorer to Display the Cisco Unity Administrator Correctly in 8.x
Configuring Internet Explorer to Display the Cisco Unity Administrator Correctly in 8.x
Note If you installed Windows Server 2003 using the Cisco Unity Platform Configuration discs, skip this section.
If you created a Cisco Unity administration account as recommended in the “About the Accounts Required for the Cisco Unity 8.x Installation” section on page 7-1, and you log on to Windows by using that account, the changes that the Windows Server 2003 service pack make to the default Internet Explorer security settings cause the Cisco Unity Administrator to display a blank page. Do the following procedure to configure Internet Explorer to display the Cisco Unity Administrator when you log on to Windows by using the administration account.
To Configure Internet Explorer to Display the Cisco Unity Administrator Correctly
Step 1 Log on to the Cisco Unity server by using the Cisco Unity administration account.
Step 2 Right click the Cisco Unity icon in the system tray, and click Launch System Admin.
Step 3 If you are prompted to provide a user name and password, click Cancel.
Step 4 On the Internet Explorer Tools menu, click Internet Options.
Step 5 Click the Security tab.
Step 6 Under Select a Web Content Zone to Specify Its Security Settings, click the Trusted Sites icon.
Step 7 Click Sites.
Step 8 In the Trusted Sites dialog box, in the Add This Website to the Zone field, enter the applicable value depending on whether the Cisco Unity Administrator is set up to use SSL:
Step 9 If the Cisco Unity Administrator is set up to use SSL, check the Require Server Verification (https:) for All Sites in This Zone check box.
If the Cisco Unity Administrator is not set up to use SSL, uncheck the Require Server Verification (https:) for All Sites in This Zone check box.
Step 10 Click Add.
Step 11 Click Close to close the Trusted Sites dialog box.
Step 12 On the Security tab, click Custom Level.
Step 13 In the Security Settings dialog box, change the value of the Reset To list to Low.
Step 14 Click Reset, and click Yes to confirm that you want to change the security settings for this zone.
Step 15 Click OK to close the Security Settings dialog box.
If the Security Settings dialog box does not close:
a. Close the dialog box by clicking the X in the upper-right corner.
Cisco Unity Administrator is set up to use SSL Enter https:\\<CiscoUnityServerName>
Cisco Unity Administrator is not set up to use SSL Enter http:\\<CiscoUnityServerName>
8-8Installation Guide for Cisco Unity Release 8.x in a Unified Messaging Configuration (With Microsoft Exchange and Without Failover)
OL-21709-01

Chapter 8 Installing and Configuring Cisco Unity 8.x SoftwareSecuring the Cisco Unity 8.x Example Administrator Account Against Toll Fraud
b. In the “not responding” message box, click End Now. (The “not responding” message box may take a few seconds to appear.)
Step 16 Restart the Cisco Unity Administrator.
Securing the Cisco Unity 8.x Example Administrator Account Against Toll Fraud
It is possible for a malicious user to dial into Cisco Unity, log on as the Example Administrator by using the default extension and password, and configure Cisco Unity to forward calls to phone numbers for which there are charges or to reconfigure greetings so an operator believes the messaging system is personally accepting collect-call charges. To help secure Cisco Unity against toll fraud, we strongly recommend that you change the phone password for the Example Administrator account after Cisco Unity is installed.
To Change the Password on the Example Administrator Account
Step 1 In the Cisco Unity Administrator, go to any Subscribers > Subscribers page.
Step 2 Click the Find icon.
Step 3 On the Find and Select Subscriber page, click Find.
Step 4 Click Example Administrator.
Step 5 In the left pane, click Phone Password.
Step 6 In the right pane, check the User Cannot Change Password check box.
Step 7 Check the Password Never Expires check box.
Step 8 Under Reset Phone Password, enter and confirm a new password by using digits 0 through 9.
We recommend that you enter a long and nontrivial password; 20 digits or more is desirable. (The minimum length of the password is set on the Subscribers > Account Policy > Phone Password Restrictions page.) In a nontrivial password:
• The digits are not all the same (for example, 9999).
• The digits are not consecutive (for example, 1234).
• The password is not the same as the extension assigned to the example account.
• The password does not spell the name of the example account, the name of the company, the name of the IT manager, or any other obvious words.
Step 9 Click the Save icon.
Step 10 Close the Cisco Unity Administrator.
8-9Installation Guide for Cisco Unity Release 8.x in a Unified Messaging Configuration (With Microsoft Exchange and Without Failover)
OL-21709-01

Chapter 8 Installing and Configuring Cisco Unity 8.x SoftwareMoving the Data Store Databases and Transaction Logs for Cisco Unity 8.x
Moving the Data Store Databases and Transaction Logs for Cisco Unity 8.x
The Cisco Unity data store includes several databases and their corresponding transaction logs. Because the Cisco Unity and Reports databases and their transaction logs are the fastest-growing data store files, you place them on the system in a location that makes optimum use of system storage capacity.
As you do the procedure in this section, if applicable, see the drive locations you made note of in the “Determining the Locations for Files on the Cisco Unity 8.x Server” section on page 2-4.
For more information on moving SQL Server, SQL Server Express, or MSDE databases and transaction logs, see Microsoft documentation.
Do the applicable procedure depending on which version of SQL Server is installed on the Cisco Unity server:
• To Move the SQL Server or SQL Server Express Databases and Transaction Logs (SQL Server 2005 or SQL Server 2005 Express Only), page 8-10
• To Move the SQL Server or MSDE Databases and Transaction Logs (SQL Server 2000 or MSDE 2000 Only), page 8-12
Note To determine which version of SQL Server is installed, see the Cisco Unity Data Store disc. If the disc is labeled “Cisco Unity Data Store 2005,” SQL Server 2005 or SQL Server 2005 Express is installed. If the disc is labeled “Cisco Unity Data Store 2000,” SQL Server 2000 or MSDE 2000 is installed.
To Move the SQL Server or SQL Server Express Databases and Transaction Logs (SQL Server 2005 or SQL Server 2005 Express Only)
Step 1 Stop Cisco Unity. (Right-click the Cisco Unity icon in the system tray, then click Stop Cisco Unity; if the Cisco Unity icon is not available, browse to the CommServer directory and double-click AvCsTrayStatus.exe.)
Step 2 Stop the Cisco Unity tray icon. Right-click the Cisco Unity icon in the system tray, then click Exit.
Step 3 Stop and disable the AvCsGateway service:
a. On the Windows Start menu, click Programs > Administrative Tools > Services.
b. In the right pane, right-click AvCsGateway, and click Properties.
c. Click Stop.
d. In the Startup Type list, click Disabled.
e. Click OK to close the Properties dialog box.
f. Close the Services MMC.
Step 4 Determine the location of the ReportDB and UnityDb databases:
a. On the Windows Start menu, click Programs > Microsoft SQL Server 2005 > SQL Server Management Studio.
b. In the Connect to Server dialog box:
– In the Server Type list, select Database Engine.
– In the Server Name list, select the name of this Cisco Unity server.
– In the Authentication list, select Windows Authentication.
8-10Installation Guide for Cisco Unity Release 8.x in a Unified Messaging Configuration (With Microsoft Exchange and Without Failover)
OL-21709-01

Chapter 8 Installing and Configuring Cisco Unity 8.x SoftwareMoving the Data Store Databases and Transaction Logs for Cisco Unity 8.x
c. Click Connect.
d. In the left pane, expand <server_name> > Databases.
e. In the left pane, right-click ReportDb, and click Properties.
f. In the left pane of the Database Properties - ReportDb dialog box, click Files.
g. In the right pane of the Database Properties - ReportDb dialog box, make note of the value in the Path column.
h. Close the Database Properties - ReportDb dialog box.
i. Repeat Step e. through Step h. to determine the location of the UnityDb database.
Step 5 Detach the ReportDb and UnityDb databases:
a. In the left pane of SQL Server Management Studio, right-click ReportDb, and click Tasks > Detach.
b. In the right pane of the Detach Database dialog box, for ReportDb, check the Drop Connections check box.
c. Click OK to detach the ReportDB database.
d. Click OK to confirm.
e. Repeat Step a. through Step d. to detach the UnityDb database.
Step 6 In Windows Explorer, create the new directories for Cisco Unity data and for transaction logs on the drive locations you made note of in the “Determining the Locations for Files on the Cisco Unity 8.x Server” section on page 2-4. Use directory names that are easy to remember, for example:
Step 7 In Windows Explorer, move UnityDb.mdf and ReportDb.mdf from the location that you determined in Step 4 to the new directory for Cisco Unity databases.
Step 8 In Windows Explorer, move ReportDb_log.ldf and UnityDb_log.ldf from the location that you determined in Step 4 to the new directory for Cisco Unity transaction logs.
Step 9 Reattach the databases:
a. In the left pane of SQL Server Management Studio, right-click Databases, and click Attach.
b. In the right pane of the Attach Databases dialog box, click Add.
c. In the Locate Database Files dialog box, browse to the new location of the ReportDb.mdf file, click the filename, and click OK.
d. In the Attach Databases dialog box, under “ReportDb Database Details,” in the ReportDb_log.LDF row, in the Current File Path column, click “...”
e. In the Locate Database Files dialog box, browse to the new location of the ReportDb_log.LDF, click the filename, and click OK.
f. Repeat Step b. through Step e. for the UnityDb database and log file.
g. In the Attach Databases dialog box, click OK.
h. Close Microsoft SQL Server Management Studio.
Step 10 Restart and re-enable the AvCsGateway service:
a. On the Windows Start menu, click Programs > Administrative Tools > Services.
UnityDb.mdf and ReportDb.mdf <Database destination drive>\<Path>\UnityData
ReportDb_log.ldf and UnityDb_log.ldf <Log file destination drive>\<Path>\UnityLogs
8-11Installation Guide for Cisco Unity Release 8.x in a Unified Messaging Configuration (With Microsoft Exchange and Without Failover)
OL-21709-01
Chapter 8 Installing and Configuring Cisco Unity 8.x SoftwareMoving the Data Store Databases and Transaction Logs for Cisco Unity 8.x
b. In the right pane, right-click AvCsGateway, and click Properties.
c. In the Startup Type list, click Automatic.
d. Click Apply.
e. Click Start.
f. When the service finishes starting, click OK to close the Properties dialog box.
g. Close the Services MMC.
Step 11 On the Windows Start menu, click Programs > Startup > AvCsTrayStatus to restart the Cisco Unity tray icon.
Step 12 When the tray icon appears in the Windows taskbar, use it to restart Cisco Unity.
To Move the SQL Server or MSDE Databases and Transaction Logs (SQL Server 2000 or MSDE 2000 Only)
Step 1 Stop Cisco Unity. (Right-click the Cisco Unity icon in the system tray, then click Stop Cisco Unity; if the Cisco Unity icon is not available, browse to the CommServer directory and double-click AvCsTrayStatus.exe.)
Step 2 Stop the Cisco Unity tray icon. Right-click the Cisco Unity icon in the system tray, then click Exit.
Step 3 Stop and disable the AvCsGateway service:
a. On the Windows Start menu, click Programs > Administrative Tools > Services.
b. In the right pane, right-click AvCsGateway, and click Properties.
c. Click Stop.
d. In the Startup Type list, click Disabled.
e. Click OK to close the Properties dialog box.
f. Close the Services MMC.
Step 4 Detach the ReportDB and UnityDb databases:
a. On the Windows Start menu, click Programs > Microsoft SQL Server > Enterprise Manager.
b. In the left pane, expand Microsoft SQL Servers > SQL Server Group > (local) (Windows NT) > Databases.
c. Right-click ReportDb, and click All Tasks > Detach Database.
d. If the OK button is unavailable, click Clear, and click OK to confirm that you want to clear connections.
e. Click OK to detach the ReportDB database.
f. Click OK to confirm.
g. Repeat Step c. through Step f. to detach the UnityDb database.
Step 5 Close SQL Server Enterprise Manager.
8-12Installation Guide for Cisco Unity Release 8.x in a Unified Messaging Configuration (With Microsoft Exchange and Without Failover)
OL-21709-01
Chapter 8 Installing and Configuring Cisco Unity 8.x SoftwareMoving the Data Store Databases and Transaction Logs for Cisco Unity 8.x
Step 6 In Windows Explorer, create the new directories for Cisco Unity data and for transaction logs on the drive locations you made note of in the “Determining the Locations for Files on the Cisco Unity 8.x Server” section on page 2-4. Use directory names that are easy to remember, for example:
Step 7 In Windows Explorer, move UnityDb.mdf and ReportDb.mdf from Program Files\Microsoft SQL Server\MSSQL\Data to the new directory for Cisco Unity databases.
Step 8 In Windows Explorer, move ReportDb_log.ldf and UnityDb_log.ldf from Program Files\Microsoft SQL Server\MSSQL\Data to the new directory for Cisco Unity transaction logs.
Step 9 Using OSQL, reattach the databases:
Caution If you put the databases and the transaction log in separate locations, as recommended for most systems, you must use OSQL to reattach the databases because SQL Server Enterprise Manager does not support attaching a database when the corresponding log file is not in the same directory.
a. On the Windows Start menu, click Run.
b. Run cmd.
c. Start OSQL by entering OSQL -E on the command line.
Caution Use -E, not -e.
d. Enter use master and press Enter.
e. Enter go and press Enter.
f. Enter EXEC sp_attach_db 'UnityDb', '<Database destination drive>\<New database directory path>\UnityDb.mdf', '<Log file destination drive>\<New log file directory path>\UnityDb_log.ldf' and press Enter.
g. Enter go and press Enter.
If you specified an invalid path or file name, an error message appears in the command window. Re-run Step f. and Step g. with the correct information.
UnityDb.mdf and ReportDb.mdf <Database destination drive>\<Path>\UnityData
ReportDb_log.ldf and UnityDb_log.ldf <Log file destination drive>\<Path>\UnityLogs
8-13Installation Guide for Cisco Unity Release 8.x in a Unified Messaging Configuration (With Microsoft Exchange and Without Failover)
OL-21709-01

Chapter 8 Installing and Configuring Cisco Unity 8.x SoftwareExcluding Selected Directories from Virus Scanning for Cisco Unity 8.x
h. Enter EXEC sp_attach_db 'ReportDb', '<Database destination drive>\<New database directory path>\ReportDb.mdf', '<Log file destination drive>\<New log file directory path>\ReportDb_log.ldf' and press Enter.
i. Enter go and press Enter.
If you specified an invalid path or file name, an error message appears in the command window. Re-run Step h. and Step i. with the correct information.
Step 10 Enter exit and press Enter to close OSQL.
Step 11 On the Windows Start menu, click Programs > Startup > AvCsTrayStatus to restart the Cisco Unity tray icon.
Step 12 When the tray icon appears in the Windows taskbar, use it to restart Cisco Unity.
Excluding Selected Directories from Virus Scanning for Cisco Unity 8.x
Note If antivirus software is not installed on the Cisco Unity server, skip this section.
You exclude selected directories from scanning to improve Cisco Unity performance and reliability.
To Exclude Selected Directories from Virus Scanning
Step 1 See the antivirus software Help for instructions on excluding directories from scanning.
Step 2 Exclude the following directories from virus scanning:
• The directory in which Cisco Unity is installed (Commserver by default), and all subdirectories.
• When the Unity Message Repository (UMR) is stored on a partition other than the partition that contains Cisco Unity program files, the directory that contains the UMR (Commserver by default).
• The directory that contains the files UnityDB.mdf and UnityDb_log.ldf.
• The directory specified in the Temp system variable for the message store services account. (To find this directory, log on as the message store services account. Open a command-prompt window, and run the set temp command.)
• Directories and files recommended by Microsoft in Knowledge Base article 309422, Guidelines for Choosing Antivirus Software to Run on the Computers That Are Running SQL Server.
• When Exchange Server 2003 is installed on the Cisco Unity server:
– When the Cisco Unity Voice Connector is installed on the Cisco Unity server, the directory where the Cisco Unity Voice Gateway is installed (Voicegateway by default), and all subdirectories.
8-14Installation Guide for Cisco Unity Release 8.x in a Unified Messaging Configuration (With Microsoft Exchange and Without Failover)
OL-21709-01

Chapter 8 Installing and Configuring Cisco Unity 8.x SoftwareInstalling the Latest Microsoft Service Packs and Updates on the Cisco Unity 8.x Server
– Directories and files recommended by Microsoft in Knowledge Base article 823166, Overview of Exchange Server 2003 and Antivirus Software.
Note that scanning individual Exchange mailboxes can affect the performance of Cisco Unity.
Caution Do not configure antivirus software to block WAV attachments, or voice messages will be stripped of their recordings.
Installing the Latest Microsoft Service Packs and Updates on the Cisco Unity 8.x Server
You install the latest Microsoft service packs that has been qualified for use with Cisco Unity, if any, as well as the corresponding updates, to enhance the security of the Cisco Unity server. Do the following procedures.
To Install the Latest Microsoft Service Packs, If Any
• Follow the instructions that you printed or downloaded when you downloaded the service pack.
To Install the Latest Microsoft Updates Recommended for Use with Cisco Unity
• Follow the instructions in Software Installed by the Cisco Unity Server Updates Wizard.
Re-enabling Antivirus Services on the Cisco Unity 8.x Server
Note If antivirus software is not installed on the Cisco Unity server, skip this section.
You re-enable antivirus services now that you have completed all of the software installations that could have been affected if the services were running.
To Re-enable and Start Antivirus Services
Step 1 See the antivirus software documentation to determine the names of the antivirus services.
Step 2 On the Windows Start menu, click Programs > Administrative Tools > Services.
Step 3 Re-enable and start each antivirus service:
a. In the right pane, double-click the service.
8-15Installation Guide for Cisco Unity Release 8.x in a Unified Messaging Configuration (With Microsoft Exchange and Without Failover)
OL-21709-01

Chapter 8 Installing and Configuring Cisco Unity 8.x SoftwareSecuring the Cisco Unity 8.x Software and the Cisco Unity Server
b. On the General tab, in the Startup Type list, click Automatic to re-enable the service.
c. Click Start to start the service.
d. Click OK to close the Properties dialog box.
Step 4 When the services have been re-enabled, close the Services MMC.
Securing the Cisco Unity 8.x Software and the Cisco Unity Server
We strongly recommend that you secure the Cisco Unity software and the Cisco Unity server. See the Security Guide for Cisco Unity at http://www.cisco.com/en/US/docs/voice_ip_comm/unity/8x/security/guide/8xcusecx.html.
8-16Installation Guide for Cisco Unity Release 8.x in a Unified Messaging Configuration (With Microsoft Exchange and Without Failover)
OL-21709-01
Installation Guide for Cisco Unity Release 8.x in a Unified Messaging ConfiguratiOL-21709-01
C H A P T E R 9
Installing Optional Software on the Cisco Unity 8.x ServerIn this chapter, you do the following tasks in the order listed:
1. Install monitoring software, if applicable. See the “Installing Monitoring Software on the Cisco Unity 8.x Server” section on page 9-1.
2. Install RSA SecurID, if applicable. See the “Installing RSA SecurID on the Cisco Unity 8.x Server” section on page 9-2.
3. Install other optional software, if applicable. See the “Installing Other Optional Software on the Cisco Unity 8.x Server” section on page 9-2.
Caution Do not install Outlook on the Cisco Unity server, or Cisco Unity may not notify subscribers of new messages.
When you are finished with this chapter, return to Chapter 1, “Overview of Mandatory Tasks for Installing Cisco Unity 8.x” to continue installing the Cisco Unity system.
Note The tasks in the list reference detailed instructions in the Installation Guide for Cisco Unity and in other Cisco Unity documentation. Follow the documentation for a successful installation.
Installing Monitoring Software on the Cisco Unity 8.x ServerFollow the manufacturer instructions to install supported monitoring software.
Install only the monitoring agent on the Cisco Unity server. Do not install the full monitoring application.
Caution If you install the full application—which is the default installation option for several of the monitoring applications we have tested—Cisco Unity will not function properly.
For information on supported software, see Supported Hardware and Software, and Support Policies for Cisco Unity at http://www.cisco.com/en/US/docs/voice_ip_comm/unity/8x/support/8xcusupp.html.
9-1on (With Microsoft Exchange and Without Failover)

Chapter 9 Installing Optional Software on the Cisco Unity 8.x ServerInstalling RSA SecurID on the Cisco Unity 8.x Server
Installing RSA SecurID on the Cisco Unity 8.x ServerFor supported versions of RSA SecurID, see Supported Hardware and Software, and Support Policies for Cisco Unity at http://www.cisco.com/en/US/docs/voice_ip_comm/unity/8x/support/8xcusupp.html.
Follow the manufacturer instructions to install RSA SecurID.
The “Overview of Mandatory Tasks for Installing Cisco Unity 8.x” alerts you when to configure RSA SecurID later in the installation process.
Installing Other Optional Software on the Cisco Unity 8.x ServerFor information on supported software, see Supported Hardware and Software, and Support Policies for Cisco Unity at http://www.cisco.com/en/US/docs/voice_ip_comm/unity/8x/support/8xcusupp.html.
Follow the manufacturer instructions to install other optional software.
Caution Do not install Outlook on the Cisco Unity server, or Cisco Unity may not notify subscribers of new messages.
9-2Installation Guide for Cisco Unity Release 8.x in a Unified Messaging Configuration (With Microsoft Exchange and Without Failover)
OL-21709-01

Installation Guide for Cisco Unity Release 8.x in a Unified Messaging ConfiguratiOL-21709-01
C H A P T E R 10
Setting Up Authentication for the Cisco Unity Administrator in 8.xIn this chapter, you do the following tasks in the order listed:
1. Determine the authentication method that you want to use for the Cisco Unity Administrator. See the “Determining the Authentication Method to Use for the Cisco Unity Administrator in 8.x” section on page 10-1.
2. Configure IIS so that the Cisco Unity Administrator and Status Monitor use the Anonymous authentication method, if applicable. See the “Configuring IIS So That the Cisco Unity Administrator and Status Monitor Use Anonymous Authentication in 8.x” section on page 10-5.
When you are finished with this chapter, return to Chapter 1, “Overview of Mandatory Tasks for Installing Cisco Unity 8.x” to continue installing the Cisco Unity system.
Note The tasks in the list reference detailed instructions in the Installation Guide for Cisco Unity and in other Cisco Unity documentation. Follow the documentation for a successful installation.
Determining the Authentication Method to Use for the Cisco Unity Administrator in 8.x
The Cisco Unity Administrator is the website used to do most administration tasks, including: determining system schedules, specifying settings for individual subscribers (or for a group of subscribers by using a subscriber template), and implementing a call management plan.
To access the Cisco Unity Administrator, Cisco Unity requires that the identity of the administrator is authenticated by a name and password. You can choose which IIS authentication method that you want to use for the Cisco Unity Administrator. (Note that the authentication method you choose also applies to the Cisco Unity Status Monitor.)
Note Until a Cisco Unity subscriber account is created for the purpose of administering Cisco Unity, you must use the Windows credentials associated with the administration account that was selected when Cisco Unity was installed to log on to the Cisco Unity Administrator.
The following three subsections discuss the available authentication methods and how they work:
• Authentication Methods Available for the Cisco Unity Administrator in 8.x, page 10-2
10-1on (With Microsoft Exchange and Without Failover)

Chapter 10 Setting Up Authentication for the Cisco Unity Administrator in 8.xDetermining the Authentication Method to Use for the Cisco Unity Administrator in 8.x
• How Integrated Windows Authentication Works with the Cisco Unity Administrator in 8.x, page 10-3
• How Anonymous Authentication Works with the Cisco Unity Administrator in 8.x, page 10-4
Authentication Methods Available for the Cisco Unity Administrator in 8.xBy default, IIS is configured so that the Cisco Unity Administrator uses the Integrated Windows authentication method (formerly called NTLM or Windows NT Challenge/Response authentication) to authenticate the user name and password. If you prefer, you can configure IIS so that the Cisco Unity Administrator uses the Anonymous authentication method instead.
To determine which authentication method to use, first discuss it with the network administrator to confirm that the method you choose aligns with the existing authentication scheme in the organization and addresses security concerns for the site. In addition, consider the advantages and disadvantages of using each authentication method with the Cisco Unity Administrator, as shown in Table 10-1 and Table 10-2.
See the Microsoft website for general information on the strengths and weaknesses of using either Integrated Windows or Anonymous authentication.
Table 10-1 lists the advantages and disadvantages of using Integrated Windows authentication with the Cisco Unity Administrator.
Table 10-1 Using Integrated Windows Authentication with the Cisco Unity Administrator
Advantages Disadvantages
• User credentials are not sent across the network. Instead, Internet Explorer and Windows use a challenge/response mechanism to authenticate the user.
• By default, IIS is already set up so that the Cisco Unity Administrator uses the Integrated Windows authentication method.
• Windows cannot validate the identity of a user when the user is logged on to an untrusted domain. To solve this problem, configure each subscriber browser to prompt for a user name and password so that subscribers can enter the applicable credentials for the domain that the Cisco Unity server is in. Alternatively, you can establish trusts across domains.
• When subscribers log on to the Cisco Unity Administrator from another domain, they are prompted to re-enter their credentials each time that they want to use the phone as a recording and playback device for the Media Master.
10-2Installation Guide for Cisco Unity Release 8.x in a Unified Messaging Configuration (With Microsoft Exchange and Without Failover)
OL-21709-01
Chapter 10 Setting Up Authentication for the Cisco Unity Administrator in 8.xDetermining the Authentication Method to Use for the Cisco Unity Administrator in 8.x
Table 10-2 lists the advantages and disadvantages of using Anonymous authentication with the Cisco Unity Administrator.
How Integrated Windows Authentication Works with the Cisco Unity Administrator in 8.x
When IIS is configured so that the Cisco Unity Administrator uses Integrated Windows authentication, Cisco Unity does not authenticate the subscriber. Instead, the identity of the user is verified by Windows.
1. A Cisco Unity subscriber starts Internet Explorer and attempts to browse to the Cisco Unity Administrator website.
2. Internet Explorer tries to get the home page for the Cisco Unity Administrator from IIS.
3. IIS indicates that it cannot authenticate the user.
4. When Internet Explorer is configured to prompt for a user name and password, it displays a dialog box and waits for the subscriber to enter the Windows domain account credentials. Once the subscriber enters the credentials, Internet Explorer tries to get the Cisco Unity Administrator web page again, but this time, it sends IIS an encrypted message regarding the Windows domain account based on the credentials that the subscriber entered in the dialog box.
When Internet Explorer is not configured to prompt for a user name and password, Internet Explorer tries to get the Cisco Unity Administrator web page again, but this time, it sends IIS an encrypted message regarding the Windows domain account based on the credentials that the subscriber entered to log on to Windows.
In both scenarios, the user password—or any representation of the password—is not sent across the network because authentication relies on Windows challenge/response.
5. If Windows can confirm the identity of the Windows domain user, then IIS sends the user and domain name to Cisco Unity, and the process continues with Step 6.
If Windows cannot validate the identity of the Windows domain user (as would be the case if the subscriber logged on to an untrusted domain), Internet Explorer prompts the subscriber for a user name and password. Once again, the credentials are not sent across the network; instead, Internet Explorer sends IIS an encrypted message regarding the Windows domain account based on the credentials that were entered in the dialog box. If Windows still cannot authenticate the user, Internet Explorer displays a message indicating that access to the website is denied because the domain account is unknown.
Table 10-2 Using Anonymous Authentication with the Cisco Unity Administrator
Advantages Disadvantages
• When subscribers log on to the Cisco Unity Administrator from another domain, they can enter the applicable credentials on the Cisco Unity Log On page for the domain that the Cisco Unity server is in. Thus, you do not need to configure each subscriber browser to prompt for a user name and password, nor do you need to establish trusts across domains.
• When subscribers log on to the Cisco Unity Administrator from another domain, they are not prompted to re-enter their credentials each time that they want to use the phone as a recording and playback device for the Media Master.
• When a subscriber enters Windows domain account credentials on the Cisco Unity Log On page, the credentials are sent across the network in clear text. To solve this problem, set up Cisco Unity to use SSL.
• By default, IIS is not set up so that the Cisco Unity Administrator uses the Anonymous authentication method. You must configure it.
10-3Installation Guide for Cisco Unity Release 8.x in a Unified Messaging Configuration (With Microsoft Exchange and Without Failover)
OL-21709-01

Chapter 10 Setting Up Authentication for the Cisco Unity Administrator in 8.xDetermining the Authentication Method to Use for the Cisco Unity Administrator in 8.x
6. Cisco Unity checks to see that there is a subscriber account associated with the Windows domain account used to authenticate the subscriber and that the subscriber account has COS rights to access the Cisco Unity Administrator.
7. If a subscriber account exists and it has the proper COS rights, Cisco Unity presents the first page of the Cisco Unity Administrator website, which is displayed in the browser.
If the subscriber account does not exist or does not have the proper COS rights, Cisco Unity presents a web page that indicates that the subscriber does not have permission to view the Cisco Unity Administrator website.
How Anonymous Authentication Works with the Cisco Unity Administrator in 8.x
When IIS is configured so that the Cisco Unity Administrator uses Anonymous authentication, Cisco Unity authenticates the credentials that subscribers enter on the Cisco Unity Log On page.
1. A Cisco Unity subscriber starts Internet Explorer and attempts to browse to the Cisco Unity Administrator website.
2. Internet Explorer tries to get the home page for the Cisco Unity Administrator from IIS.
3. IIS allows access to Cisco Unity based on the privileges for the IUSR_[computer name] account. (This is the anonymous account that IIS uses for Anonymous authentication by default.)
4. Cisco Unity presents the Cisco Unity Log On page, which is displayed in the browser.
5. The Log On page prompts subscribers to enter their Windows domain account credentials, as shown in Table 10-3.
6. Internet Explorer sends the credentials—in clear text—to Cisco Unity. (To solve this security problem, set up Cisco Unity to use SSL.)
7. Cisco Unity requests authentication of the credentials from Windows.
8. If Cisco Unity can authenticate the Windows credentials, Cisco Unity then confirms that there is a subscriber account associated with the Windows domain account used to authenticate the subscriber and that the subscriber account has COS rights to access the Cisco Unity Administrator. The process continues with Step 9.
If the credentials cannot be authenticated, Cisco Unity presents a web page that indicates that the subscriber does not have permission to view the Cisco Unity Administrator website.
Table 10-3 Cisco Unity Log On Page for Windows Credentials
Field Name Description
User Name Subscribers must enter the alias for the Windows domain account that is associated with their Cisco Unity subscriber account. (For example, they can enter tcampbell or they can enter the full path, tcampbell@<domain name>.)
If subscribers enter the full path for their alias, they do not need to complete the Domain field.
Password Subscribers must enter the password for their Windows domain account.
Domain Subscribers must enter the name of the domain in which their Windows domain account resides, unless they entered a full path for their alias in the User Name field. If that is the case, subscribers can leave the field blank.
10-4Installation Guide for Cisco Unity Release 8.x in a Unified Messaging Configuration (With Microsoft Exchange and Without Failover)
OL-21709-01

Chapter 10 Setting Up Authentication for the Cisco Unity Administrator in 8.xConfiguring IIS So That the Cisco Unity Administrator and Status Monitor Use Anonymous Authentication in 8.x
9. If the subscriber account exists and it has the proper COS rights, Cisco Unity presents the first page of the Cisco Unity Administrator website, which is displayed in the browser.
If the subscriber account does not exist or does not have the proper COS rights, Cisco Unity presents a web page, which indicates that the subscriber does not have permission to view the Cisco Unity Administrator website.
Configuring IIS So That the Cisco Unity Administrator and Status Monitor Use Anonymous Authentication in 8.x
Note If you decided that the Cisco Unity Administrator will use the Integrated Windows authentication method, skip this section.
Do the following procedure.
To Configure IIS So That the Cisco Unity Administrator and Status Monitor Use Anonymous Authentication
Step 1 On the Windows Start menu, click Administrative Tools > Internet Information Services (IIS) Manager.
Step 2 In the left pane, right-click Application Pools, and click Properties.
Step 3 In the Application Pools Properties dialog box, click the Identity tab.
Step 4 In the Predefined list, click Local System.
Step 5 Click OK to close the Application Pools Properties dialog box.
Step 6 In the IIS Manager message box, click Yes to confirm that you want to run this application pool as Local System.
Step 7 In the left pane of Internet Information Services (IIS) Manager, expand Web Sites > Default Web Site.
Step 8 Right-click SAWeb, and click Properties.
Step 9 In the SaWeb Properties dialog box, click the Directory Security tab.
Step 10 In the Authentication and Access Control section, click Edit.
Step 11 In the Authentication Methods dialog box, check the Enable Anonymous Access check box.
Step 12 Uncheck the Integrated Windows Authentication check box.
Step 13 Click OK to close the Authentication Methods dialog box.
Step 14 Click OK to close the SaWeb Properties dialog box.
Step 15 Repeat Step 8 through Step 14 for the following virtual directories:
• Status
• StatusXml
• Web
Step 16 In the left pane, click StatusXml.
Step 17 In the right pane, right-click AvXml.dll, and click Properties.
Step 18 In the AvXml.dll Properties dialog box, click the File Security tab.
10-5Installation Guide for Cisco Unity Release 8.x in a Unified Messaging Configuration (With Microsoft Exchange and Without Failover)
OL-21709-01

Chapter 10 Setting Up Authentication for the Cisco Unity Administrator in 8.xConfiguring IIS So That the Cisco Unity Administrator and Status Monitor Use Anonymous Authentication in 8.x
Step 19 In the Authentication and Access Control section, click Edit.
Step 20 In the Authentication Methods dialog box, check the Enable Anonymous Access check box.
Step 21 Uncheck the Integrated Windows Authentication check box.
Step 22 Click OK to close the Authentication Methods dialog box.
Step 23 Click OK to close the AvXml.dll Properties dialog box.
Step 24 Close Internet Information Services (IIS) Manager.
10-6Installation Guide for Cisco Unity Release 8.x in a Unified Messaging Configuration (With Microsoft Exchange and Without Failover)
OL-21709-01
Installation Guide for Cisco Unity Release 8.x in a Unified Messaging Configuration (WiOL-21709-01
A
P P E N D I X A Exiting and Starting the Cisco Unity 8.x Software and ServerThis appendix contains the following sections:
• Exiting the Cisco Unity 8.x Software, page A-1
• Shutting Down or Restarting the Cisco Unity 8.x Server, page A-2
• Starting the Cisco Unity 8.x Software, page A-3
Exiting the Cisco Unity 8.x SoftwareThis section contains two procedures for exiting the Cisco Unity software: from the Cisco Unity server and from another computer.
Caution Do not use Kill av*.* to exit the Cisco Unity software. Kill av*.* does not stop all Cisco Unity services. Do not stop AvCsMgr by using the Services window or the Component Services window as a method to exit the Cisco Unity software. Stopping the AvCsMgr does not stop all Cisco Unity services and may cause unexpected results.
To Exit the Cisco Unity Software from the Cisco Unity Server
Step 1 If the system uses the automated attendant, route all calls to the operator.
Step 2 On the Cisco Unity server, log on to Windows by using either the Cisco Unity administration account or another Active Directory domain account.
Step 3 Right-click the Cisco Unity icon in the status area of the taskbar.
(If the Cisco Unity icon is not in the taskbar, browse to the CommServer directory, and double-click AvCsTrayStatus.exe.)
Step 4 Click Stop Cisco Unity.
Step 5 Click OK to confirm that you want to exit the Cisco Unity software. Cisco Unity stops running when all calls are finished, and an “X” appears in the Cisco Unity icon.
Step 6 Press Ctrl-Alt-Delete, then lock or log off of Windows to prevent access by unauthorized users.
A-1th Microsoft Exchange and Without Failover)
Appendix A Exiting and Starting the Cisco Unity 8.x Software and ServerShutting Down or Restarting the Cisco Unity 8.x Server
To Exit the Cisco Unity Software from Another Computer
Step 1 If the system uses the automated attendant, route all calls to the operator.
Step 2 If the Cisco Unity Status Monitor does not use Integrated Windows authentication, skip to Step 3.
When the Cisco Unity Status Monitor uses Integrated Windows authentication, do the following substeps to access the Status Monitor:
a. Log on to Windows by using either the Cisco Unity administration account or an appropriate Windows domain account.
b. Start Internet Explorer, and go to http://<Cisco Unity server name>/status.
c. If Internet Explorer prompts you for a user name and password, enter the user name, password, and domain for the administration account or the Active Directory account.
d. Skip to Step 5.
Step 3 When the Cisco Unity Status Monitor uses Anonymous authentication, do the following substeps to access the Status Monitor:
a. Log on to Windows by using any Active Directory account that has the right to log on locally.
b. Start Internet Explorer, and go to http://<Cisco Unity server name>/status.
Step 4 On the Cisco Unity Log On page, enter the user name, password, and domain for the Cisco Unity administration account or Active Directory account, and click Log On.
Step 5 In the Cisco Unity Status Monitor, under Shutting Down Cisco Unity, choose a method:
• Cisco Unity stops running after all calls are finished.
• Cisco Unity interrupts calls in progress with a voice message, disconnects all calls, then stops running.
Step 6 Click Shut Down.
Shutting Down or Restarting the Cisco Unity 8.x Server
Note Restarting the Cisco Unity server may result in delayed message notification and message waiting indication until MAPI logon to all subscriber mailboxes has been completed. Depending on the size of the subscriber database, it could take several hours to complete the MAPI logon.
If the Cisco Unity system is set up for failover, note the following considerations before shutting down or restarting the Cisco Unity server:
• When both servers are running and the active server is shut down, the inactive server becomes active.
• When neither server is running, the first server started becomes the active server.
• When the secondary server is active and configured for automatic failback, and the primary server is also running, the secondary server attempts failback on the failback schedule.
A-2Installation Guide for Cisco Unity Release 8.x in a Unified Messaging Configuration (With Microsoft Exchange and Without Failover)
OL-21709-01
Appendix A Exiting and Starting the Cisco Unity 8.x Software and ServerStarting the Cisco Unity 8.x Software
To Shut Down or Restart the Cisco Unity Server
Step 1 Exit the Cisco Unity software, if it is running, by using one of the procedures in the “Exiting the Cisco Unity 8.x Software” section on page A-1.
Step 2 On the Windows Start menu, click Shut Down.
Step 3 Click Shut Down or Restart. During a restart, the Cisco Unity software starts automatically.
When Cisco Unity starts successfully, three tones play and a check mark appears in the Cisco Unity icon in the status area of the taskbar.
When Cisco Unity does not start successfully, two tones play and an “X” appears in the Cisco Unity icon in the status area of the taskbar.
Starting the Cisco Unity 8.x SoftwareThis section contains two procedures for starting the Cisco Unity software: from the Cisco Unity server and from another computer.
Cisco Unity is a Windows service that is configured to start automatically when you turn on or restart the server. Do one of the procedures in this section only if you exited the Cisco Unity software and did not restart the server.
Before you start the Cisco Unity software, Exchange must be running on the partner Exchange server, which may be the Cisco Unity server, depending on your configuration.
If Exchange stops for any reason while Cisco Unity is running, Cisco Unity will continue to take messages.
To Start the Cisco Unity Software from the Cisco Unity Server
Step 1 On the Cisco Unity server, log on to Windows by using either the Cisco Unity administration account or another Active Directory domain account.
Step 2 Right-click the Cisco Unity icon in the status area of the taskbar.
(If the Cisco Unity icon is not in the taskbar, browse to the CommServer directory, and double-click AvCsTrayStatus.exe.)
Step 3 Click Start Cisco Unity.
When Cisco Unity starts successfully, three tones play and a check mark appears in the Cisco Unity icon.
When Cisco Unity does not start successfully, two tones play and an “X” appears in the Cisco Unity icon.
Step 4 Press Ctrl-Alt-Delete, then lock or log off of Windows to prevent access by unauthorized users.
Step 5 If the system uses the automated attendant and you routed calls to the operator before you exited the Cisco Unity software, reroute calls to Cisco Unity.
To Start the Cisco Unity Software from Another Computer
Step 1 If the Cisco Unity Status Monitor does not use Integrated Windows authentication, skip to Step 2.
A-3Installation Guide for Cisco Unity Release 8.x in a Unified Messaging Configuration (With Microsoft Exchange and Without Failover)
OL-21709-01

Appendix A Exiting and Starting the Cisco Unity 8.x Software and ServerStarting the Cisco Unity 8.x Software
When the Cisco Unity Status Monitor uses Integrated Windows authentication, do the following substeps to access the Status Monitor:
a. Log on to Windows by using either the Cisco Unity administration account or another Active Directory domain account.
b. Start Internet Explorer, and go to http://<Cisco Unity server name>/status.
c. If Internet Explorer prompts you for a user name and password, enter the user name, password, and domain for the Cisco Unity administration account or another Active Directory account.
d. Skip to Step 4.
Step 2 When the Cisco Unity Status Monitor uses Anonymous authentication, do the following substeps to access the Status Monitor:
a. Log on to Windows by using any domain account that has the right to log on locally.
b. Start Internet Explorer, and go to http://<Cisco Unity server name>/status.
Step 3 On the Cisco Unity Log On page, enter the user name, password, and domain for the Cisco Unity administration account or another Active Directory account, and click Log On.
Step 4 In the Cisco Unity Status Monitor, click the System Status icon (the first icon), at the top of the page.
Step 5 Click Start.
Step 6 If the system uses the automated attendant and you routed calls to the operator before you exited the Cisco Unity software, reroute calls to Cisco Unity.
A-4Installation Guide for Cisco Unity Release 8.x in a Unified Messaging Configuration (With Microsoft Exchange and Without Failover)
OL-21709-01
Installation Guide for Cisco Unity Release 8.x in a Unified Messaging Configuration (WiOL-21709-01
A
P P E N D I X B Installing and Configuring a Cisco Unity 8.x Voice-Recognition ServerUse the following task list to install and configure voice-recognition software on the voice-recognition server.
This appendix assumes that the Cisco Unity license includes voice recognition and that you are installing and configuring a voice-recognition server for a new Cisco Unity system. If you are adding a voice-recognition server to an existing Cisco Unity system, see the “Adding Voice Recognition” section in the “Adding Features to the Cisco Unity 8.x System” chapter in the Reconfiguration and Upgrade Guide for Cisco Unity at http://www.cisco.com/en/US/docs/voice_ip_comm/unity/8x/upgrade/guide/8xcurugx.html.
1. Place the voice-recognition server in a dry, cool area that is free of dust and that is near a network connection.
2. Attach the network cable(s) to the voice-recognition server.
If the server contains a dual NIC, ensure that you connect the cable to the primary NIC, if you configured the dual NIC for AFT or NFT, or to the NIC that is enabled.
3. Install software on the voice-recognition server. See the “Installing Software on the Cisco Unity 8.x Voice Recognition Server” section on page B-1
4. Configure the voice recognition software. See the “Configuring Cisco Unity 8.x Voice-Recognition Software” section on page B-2.
Installing Software on the Cisco Unity 8.x Voice Recognition Server
To Install Software on the Voice Recognition Server
Step 1 Insert the installation CD into the tray and restart the server, so the server boots from the CD.
Step 2 If another operating system is already installed on the voice-recognition server, an error message displays. Choose the options to overwrite the existing file system.
The installation application performs hard disk, BIOS, and RAID checks, and updates the system configuration if required. Updates may require that the system reboot again.
Step 3 On the Set Password page, enter passwords for the root user and for the cuadmin user:
• The root user account is used for console access.
B-1th Microsoft Exchange and Without Failover)
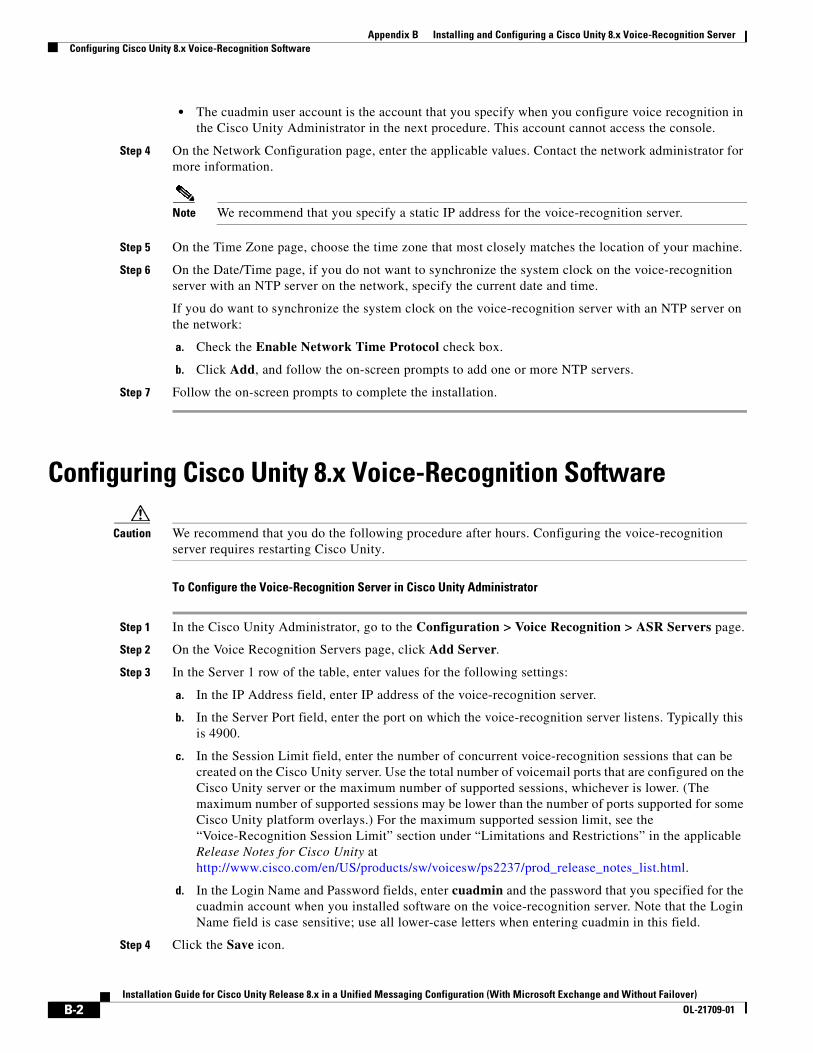
Appendix B Installing and Configuring a Cisco Unity 8.x Voice-Recognition ServerConfiguring Cisco Unity 8.x Voice-Recognition Software
• The cuadmin user account is the account that you specify when you configure voice recognition in the Cisco Unity Administrator in the next procedure. This account cannot access the console.
Step 4 On the Network Configuration page, enter the applicable values. Contact the network administrator for more information.
Note We recommend that you specify a static IP address for the voice-recognition server.
Step 5 On the Time Zone page, choose the time zone that most closely matches the location of your machine.
Step 6 On the Date/Time page, if you do not want to synchronize the system clock on the voice-recognition server with an NTP server on the network, specify the current date and time.
If you do want to synchronize the system clock on the voice-recognition server with an NTP server on the network:
a. Check the Enable Network Time Protocol check box.
b. Click Add, and follow the on-screen prompts to add one or more NTP servers.
Step 7 Follow the on-screen prompts to complete the installation.
Configuring Cisco Unity 8.x Voice-Recognition Software
Caution We recommend that you do the following procedure after hours. Configuring the voice-recognition server requires restarting Cisco Unity.
To Configure the Voice-Recognition Server in Cisco Unity Administrator
Step 1 In the Cisco Unity Administrator, go to the Configuration > Voice Recognition > ASR Servers page.
Step 2 On the Voice Recognition Servers page, click Add Server.
Step 3 In the Server 1 row of the table, enter values for the following settings:
a. In the IP Address field, enter IP address of the voice-recognition server.
b. In the Server Port field, enter the port on which the voice-recognition server listens. Typically this is 4900.
c. In the Session Limit field, enter the number of concurrent voice-recognition sessions that can be created on the Cisco Unity server. Use the total number of voicemail ports that are configured on the Cisco Unity server or the maximum number of supported sessions, whichever is lower. (The maximum number of supported sessions may be lower than the number of ports supported for some Cisco Unity platform overlays.) For the maximum supported session limit, see the “Voice-Recognition Session Limit” section under “Limitations and Restrictions” in the applicable Release Notes for Cisco Unity at http://www.cisco.com/en/US/products/sw/voicesw/ps2237/prod_release_notes_list.html.
d. In the Login Name and Password fields, enter cuadmin and the password that you specified for the cuadmin account when you installed software on the voice-recognition server. Note that the Login Name field is case sensitive; use all lower-case letters when entering cuadmin in this field.
Step 4 Click the Save icon.
B-2Installation Guide for Cisco Unity Release 8.x in a Unified Messaging Configuration (With Microsoft Exchange and Without Failover)
OL-21709-01

Appendix B Installing and Configuring a Cisco Unity 8.x Voice-Recognition ServerConfiguring Cisco Unity 8.x Voice-Recognition Software
Note Cisco Unity does not support configuring more than one voice-recognition server.
Step 5 Restart the Cisco Unity server:
a. Right-click the Cisco Unity icon in the status area of the taskbar.
(If the Cisco Unity icon is not in the taskbar, browse to the CommServer directory, and double-click AvCsTrayStatus.exe.)
b. Click Stop Cisco Unity.
c. Click OK to confirm that you want to exit the Cisco Unity software. Cisco Unity stops running when all calls are finished, and an "X" appears in the Cisco Unity icon.
d. Right click the Cisco Unity icon (or AvCsTrayStatus.exe) again and click Start Cisco Unity.
Cisco Unity will take up to 15 minutes to transfer information to the voice-recognition server. Until this process is complete, name recognition will not function.
B-3Installation Guide for Cisco Unity Release 8.x in a Unified Messaging Configuration (With Microsoft Exchange and Without Failover)
OL-21709-01

Appendix B Installing and Configuring a Cisco Unity 8.x Voice-Recognition ServerConfiguring Cisco Unity 8.x Voice-Recognition Software
B-4Installation Guide for Cisco Unity Release 8.x in a Unified Messaging Configuration (With Microsoft Exchange and Without Failover)
OL-21709-01
Installation Guide for Cisco Unity Release 8.x in a Unified Messaging ConfiguratiOL-21709-01
I N D E X
Numerics
3GB switch, adding to boot.ini for more than 96 ports 4-7
A
accounts
administration 7-2
creating for the Cisco Unity installation 7-2
directory services 7-2
granting permissions for 7-4
installation 7-2
local services 7-2
message store services 7-2
required for the Cisco Unity installation 7-1
setting Exchange permissions for 7-5
Active Directory
extending schema for Cisco Unity 6-1
installing on Cisco Unity server 5-14
adding
administration account to an admins group 7-4
Cisco Unity server to existing domain 5-14
administration account
adding to an admins group 7-4
creating 7-2
description 7-2
Anonymous authentication
advantages and disadvantages of 10-2
how it works with Cisco Unity Administrator 10-4
using with Cisco Unity Administrator 10-2
antivirus software
disabling services 5-15
installing 5-12
re-enabling services 8-15
assigning IP address 5-13
attaching peripheral devices to Cisco Unity server 3-1
authentication, methods available for Cisco Unity Administrator 10-2
B
boot.ini, adding switches for more than 96 ports 4-7
browser, installing 5-6
C
challenge/response authentication 10-2
changing folder settings in Windows Explorer 5-11
Cisco Security Agent for Cisco Unity
downloading latest in Server Updates wizard 2-4
Cisco Unity
downloading software for installation 2-2
exiting software A-1
installing and configuring 8-2
installing software 8-2
registering software 5-4
restarting server A-2
shutting down server A-2
starting software A-3
Cisco Unity Administrator
authentication methods available 10-2
description 10-1
Cisco Unity Install License File wizard, running 8-4
Cisco Unity Message Store Configuration wizard, running 8-5
Cisco Unity server
adding to existing domain 5-14
IN-1on (With Microsoft Exchange and Without Failover)
Index
attaching peripheral devices to 3-1
installing Active Directory 5-14
physical location of 3-1
securing 8-16
Cisco Unity Services Configuration wizard, running 8-4
Cisco Unity System Setup Assistant 5-6
configuring Cisco Unity for message store 8-5
configuring services 8-4
description 8-2
installing Cisco Unity software 8-2
installing license files 8-4
integrating phone system with Cisco Unity 8-7
setting default passwords 8-7
Cisco Unity Telephony Integration Manager, running 8-7
configuring
Cisco Unity for message store 8-5
Cisco Unity services 8-4
Cisco Unity software 8-2
dual NIC in Cisco Unity server 5-2
IIS so Cisco Unity Administrator and Status Monitor use Anonymous authentication 10-5
RAID arrays 4-2
TCP/IP properties 5-13
connecting
peripheral devices to Cisco Unity server 3-1
conventions, documentation -vii
creating
accounts for the Cisco Unity installation 7-2
organizational units and mailbox store 6-2
partitions 4-6
D
databases, SQL Server or SQL Server Express, moving 8-10
demonstration system, default license file for 5-5
directory services account
creating 7-2
description 7-2
IN-2Installation Guide for Cisco Unity Release 8.x in a Unified Messagi
granting permissions with Cisco Unity Permissions wizard 7-4
disabling antivirus services 5-15
documentation
audience and use -vii
conventions -vii
required for the Cisco Unity installation 2-1
domain
accounts required for the Cisco Unity installation 7-1
adding Cisco Unity server to existing 5-14
downloading
firmware for PBXLink boxes or PIMG units 2-3
software for installation 2-2
drive locations for files, determining 2-4
dual NIC, configuring 5-2
E
Example Administrator account, securing against toll fraud 8-9
Exchange
determining the partner server 5-6
excluding selected directories from virus scanning 8-14
exiting Cisco Unity software A-1
extending Active Directory schema for Cisco Unity 6-1
F
files, drive locations for 2-4
firmware, downloading for PBXLink boxes or PIMG units 2-3
folder settings, changing in Windows Explorer 5-11
G
granting permissions with Cisco Unity Permissions wizard 7-4
ng Configuration (With Microsoft Exchange and Without Failover)OL-21709-01

Index
H
hardening Cisco Unity server 8-16
I
IIS, configuring so Cisco Unity Administrator and Status Monitor use Anonymous authentication 10-5
installation
accounts required for 7-1
overview of mandatory tasks 1-1
required documentation for 2-1
installation account
creating 7-2
description 7-2
granting permissions with Cisco Unity Permissions wizard 7-4
installing
Active Directory on Cisco Unity server 5-14
administration software for MSDE 2000 5-9
antivirus software 5-12
browser 5-6
Cisco Unity software 8-2
license files 8-4
monitoring software 9-1
NIC-configuration utility 5-3
optional software 9-2
RSA SecurID 9-2
service packs and updates 5-6
SQL Server 5-6
SQL Server Express 5-6
updates for Windows, Internet Explorer, and SQL Server or SQL Server Express 5-11
Windows components 5-6
Windows Server 2003 using a retail disc 4-5
Windows Server 2003 using the PCD 4-3
Integrated Windows authentication
advantages and disadvantages of 10-2
how it works with Cisco Unity Administrator 10-3
using with Cisco Unity Administrator 10-2
Installation Guide for Cisco Unity Release 8.x in a Unified Messaging CoOL-21709-01
integrating phone system with Cisco Unity 8-7
IP address
assigning 5-13
verifying 5-13
L
license files
default for Cisco Unity demonstration system 5-5
getting a replacement copy 5-5
installing 8-4
obtaining 5-4
local services account 7-2
logs, SQL Server or SQL Server Express, moving 8-10
M
MAC address of Cisco Unity server 5-4
mailbox store, creating 6-2
message store, configuring Cisco Unity for 8-5
message store services account
creating 7-2
description 7-2
granting permissions with Cisco Unity Permissions wizard 7-4
Microsoft updates, installing 5-11
monitoring software, installing 9-1
moving SQL Server or SQL Server Express databases and transaction logs 8-10
MSDE 2000
installing administration software for 5-9
N
network
securing Cisco Unity server 8-16
verifying connection 5-13
network interface card. See NIC 5-2
NIC
IN-3nfiguration (With Microsoft Exchange and Without Failover)

Index
configuration utility, installing 5-3
configuring dual 5-2
NTLM authentication 10-2
O
obtaining license files 5-4
optional software, installing 9-2
organizational units, creating 6-2
P
PAK, location of 5-4
partitions, creating 4-6
partner Exchange server, determining 5-6
Password Hardening wizard, running 8-7
passwords
changing for the Example Administrator account 8-9
setting default 8-7
setting sa for SQL Server Express 5-9
PBXLink boxes, downloading firmware 2-3
peripheral devices, attaching 3-1
permissions
granting with Cisco Unity Permissions wizard 7-4
manually setting Exchange 7-5
Permissions wizard, running 7-4
phone system
integrating with Cisco Unity and testing integration 8-7
PIMG units
connecting phone system to 3-1
downloading firmware 2-3
product authorization key, location of 5-4
R
RAID arrays, configuring 4-2
re-enabling antivirus services 8-15
registering Cisco Unity software 5-4
IN-4Installation Guide for Cisco Unity Release 8.x in a Unified Messagi
restarting Cisco Unity server A-2
RSA SecurID, installing 9-2
S
sa password, setting for SQL Server Express 5-9
schema, extending Active Directory for Cisco Unity 6-1
securing
Cisco Unity and the Cisco Unity server 8-16
Example Administrator account against toll fraud 8-9
servers
restarting A-2
shutting down A-2
Server Updates wizard
downloading latest 2-4
Server Updates wizard, running 5-11
service packs
downloading latest 2-4
installing 5-6
services, configuring Cisco Unity 8-4
setting
Exchange permissions, manually 7-5
permissions with Cisco Unity Permissions wizard 7-4
sa password for SQL Server Express 5-9
Setup program, Cisco Unity 8-2
shutting down Cisco Unity server A-2
software
downloading for installation 2-2
exiting Cisco Unity A-1
installing Cisco Unity 8-2
installing optional 9-2
registering Cisco Unity 5-4
starting Cisco Unity A-3
SQL Server
installing 5-6
moving databases and transaction logs 8-10
SQL Server 2000
installing Enterprise Manager for MSDE 2000 5-9
ng Configuration (With Microsoft Exchange and Without Failover)OL-21709-01

Index
SQL Server Express
installing 5-6
moving databases and transaction logs 8-10
setting sa password 5-9
starting Cisco Unity software A-3
T
TCP/IP properties, configuring 5-13
toll fraud, preventing 8-9
transaction logs, moving SQL Server or SQL Server Express 8-10
U
UDDI Services, do not install 4-5
updates, installing Windows, Internet Explorer, and SQL Server or SQL Server Express 5-11
userva switch, adding to boot.ini for more than 96 ports 4-7
utilities, Windows Server 2003 installation, on disc from server manufacturer 4-5
UTIM. See Cisco Unity Telephony Integration Manager
V
verifying IP address and network connection 5-13
virus scanning
disabling services 5-15
excluding selected directories 8-14
re-enabling services 8-15
W
Windows components, installing 5-6
Windows Explorer, changing folder settings in 5-11
Windows Server 2003
installing using a retail disc 4-5
installing using the PCD 4-3
UDDI Services, do not install 4-5
Installation Guide for Cisco Unity Release 8.x in a Unified Messaging CoOL-21709-01
IN-5nfiguration (With Microsoft Exchange and Without Failover)

Index
IN-6Installation Guide for Cisco Unity Release 8.x in a Unified Messagi
ng Configuration (With Microsoft Exchange and Without Failover)OL-21709-01