Embed Size (px)
Citation preview

Infor Operating Service InstallationGuide
Release 2021-x

Copyright © 2021 Infor
Important Notices
The material contained in this publication (including any supplementary information) constitutes andcontains confidential and proprietary information of Infor.
By gaining access to the attached, you acknowledge and agree that the material (including anymodification, translation or adaptation of the material) and all copyright, trade secrets and all otherright, title and interest therein, are the sole property of Infor and that you shall not gain right, title orinterest in the material (including any modification, translation or adaptation of the material) by virtueof your review thereof other than the non-exclusive right to use the material solely in connection withand the furtherance of your license and use of software made available to your company from Inforpursuant to a separate agreement, the terms of which separate agreement shall govern your use ofthis material and all supplemental related materials ("Purpose").
In addition, by accessing the enclosed material, you acknowledge and agree that you are required tomaintain such material in strict confidence and that your use of such material is limited to the Purposedescribed above. Although Infor has taken due care to ensure that the material included in this publicationis accurate and complete, Infor cannot warrant that the information contained in this publication iscomplete, does not contain typographical or other errors, or will meet your specific requirements. Assuch, Infor does not assume and hereby disclaims all liability, consequential or otherwise, for any lossor damage to any person or entity which is caused by or relates to errors or omissions in this publication(including any supplementary information), whether such errors or omissions result from negligence,accident or any other cause.
Without limitation, U.S. export control laws and other applicable export and import laws govern youruse of this material and you will neither export or re-export, directly or indirectly, this material nor anyrelated materials or supplemental information in violation of such laws, or use such materials for anypurpose prohibited by such laws.
Trademark Acknowledgements
The word and design marks set forth herein are trademarks and/or registered trademarks of Infor and/orrelated affiliates and subsidiaries. All rights reserved. All other company, product, trade or servicenames referenced may be registered trademarks or trademarks of their respective owners.
Publication Information
Release: Infor Operating Service 2021-xPublication Date: August 3, 2021Document code: inforos_2021-x_inforosig__en-us

Contents
About this guide.................................................................................................................................8
Contacting Infor.................................................................................................................................9
Chapter 1: Overview.........................................................................................................................10
Chapter 2: Infor OS prerequisites...................................................................................................11
Server prerequisites........................................................................................................................11
Database server requirements.....................................................................................................11
Database collation.......................................................................................................................12
Full Text Search SQL server prerequisites...................................................................................12
Federation Server requirements..................................................................................................12
Infor OS server requirements.......................................................................................................13
Checking the PATH variable.........................................................................................................14
Setting the JAVA_HOME path......................................................................................................14
Service Account requirements.....................................................................................................14
Minimum hardware recommendations.........................................................................................15
Checking the server prerequisites...............................................................................................15
Client prerequisites..........................................................................................................................16
Supported operating systems......................................................................................................16
Supported browsers.....................................................................................................................16
Screen resolution.........................................................................................................................17
Mobile Applications......................................................................................................................17
Chapter 3: Installing Infor OS..........................................................................................................18
Obtaining the Infor OS installer.......................................................................................................18
Before you start...............................................................................................................................18
Installation.......................................................................................................................................19
Chapter 4: Post-installation/Configuration.....................................................................................25
AD FS configuration........................................................................................................................25
Infor Operating Service Installation Guide | 3
Contents

Completing claims-based authentication configuration................................................................25
AD FS server configuration..........................................................................................................27
Grid property update when Infor OS server and AD FS server in different domains...................28
STS configuration............................................................................................................................28
Setting up trust between Infor STS and ADFS 3.0......................................................................29
Setting up trust between Infor STS and ADFS 4.0......................................................................31
Setting up trust between Infor STS and ADFS 5.0......................................................................32
Configuring ADFS as the identity provider in Infor STS..................................................................34
Installation completed......................................................................................................................34
Chapter 5: Additional configuration................................................................................................36
Importing the Infor ION message listener........................................................................................36
Advanced Scalability of ION............................................................................................................36
Importing the IDM document flow....................................................................................................37
Chapter 6: Uninstalling Infor OS.....................................................................................................38
Uninstalling Infor OS components...................................................................................................38
Appendix A: Upgrade instructions.................................................................................................39
Before you start...............................................................................................................................39
Recommended upgrade path......................................................................................................39
Checking Elastic Search cluster health........................................................................................40
Stopping the ION API service before an upgrade........................................................................41
Switching to AWS Corretto JDK...................................................................................................41
Upgrading Infor OS with Corretto JDK.........................................................................................42
Updating the Corretto JDK in Infor OS.........................................................................................43
Checking the server prerequisites...............................................................................................43
Applying a service pack to Infor OS 12.0.0.....................................................................................44
Updating the Grid to AWS Corretto JDK.........................................................................................45
Rerunning the Grid PowerShell script.............................................................................................46
Renewing the Grid client certificates and OAuth keys.................................................................46
Updating the Elastic Search YML file..............................................................................................47
Restarting the Infor Ming.le Search Service................................................................................48
Checking Elastic Search functionality..............................................................................................48
Appendix B: Adding a node to your Infor OS farm........................................................................49
Updating the Elastic Search YML file..............................................................................................51
Restarting the Infor Ming.le Search Service................................................................................51
Infor Operating Service Installation Guide | 4
Contents
Appendix C: Installing the latest ION Registry content................................................................53
Appendix D: Certification preparation............................................................................................54
Appendix E: Enabling HTTP support for IFS Services..................................................................55
Appendix F: Stopping and starting Infor OS..................................................................................56
Appendix G: Running Infor BI with Infor OS 12.0..........................................................................57
Appendix H: Installing in Advance Mode.......................................................................................58
Appendix I: Configuring SSL...........................................................................................................61
Appendix J: SQL Server Always On Availability Group (AOAG)..................................................62
Prerequisites...................................................................................................................................62
Recommendations..........................................................................................................................62
Appendix K: Custom user accounts...............................................................................................64
Installing with custom user accounts...............................................................................................64
Installing the custom user account...............................................................................................64
Modifying custom user accounts.....................................................................................................65
Upgrading with custom user accounts............................................................................................65
Appendix L: Upgrading Infor OS with Infor STS as identity provider..........................................66
Before you start...............................................................................................................................66
Prerequisites...................................................................................................................................66
Migrating to Infor STS......................................................................................................................66
Post-installation steps..................................................................................................................67
Configuring Infor applications as service providers in Infor STS.....................................................67
Setting up trust between Infor STS and ADFS................................................................................68
Assumptions................................................................................................................................68
Prerequisites................................................................................................................................68
Configuring ADFS as the identity provider in Infor STS...............................................................69
Appendix M: Upgrading Infor OS to 12.0.30 with Infor STS as identity provider –
multi-node..........................................................................................................................................72
Before you start...............................................................................................................................72
Multi-node upgrade when using Infor STS as the identity provider.................................................72
Multi-node upgrade when using ADFS as the identity provider and later migrating to Infor
STS.................................................................................................................................................72
Appendix N: Elastic Search.............................................................................................................74
Infor Operating Service Installation Guide | 5
Contents

Elastic Search troubleshooting........................................................................................................74
Elastic Search is missing or not installed correctly after an installation.......................................74
Incorrect Elastic Search Alias......................................................................................................75
Elastic Search templates are missing..........................................................................................75
Log troubleshooting.........................................................................................................................76
Verifying search success for newly-indexed documents..............................................................76
Verifying Add Application success...............................................................................................76
Verifying Add Repository success................................................................................................77
Verifying Document Indexing success.........................................................................................77
Correcting outdated repository definitions...................................................................................78
Error codes......................................................................................................................................78
Configuration errors.....................................................................................................................78
Indexing errors.............................................................................................................................81
Search errors...............................................................................................................................81
Common errors............................................................................................................................83
Appendix O: Troubleshooting.........................................................................................................87
ION and ION API errors occur in a fresh installation when using an existing database..................87
ION issue resolution.....................................................................................................................87
ION API issue resolution..............................................................................................................88
Updating iOS device certificates if Infor OS mobile applications are not accessible.......................88
Redis rollback..................................................................................................................................88
Appendix P: OneView search indexes............................................................................................90
Migration documentation.................................................................................................................90
Setup............................................................................................................................................90
Happy path...................................................................................................................................90
Migration troubleshooting.............................................................................................................92
Migration......................................................................................................................................95
Migration toggles..........................................................................................................................95
OneView general functionality.........................................................................................................97
Indexes creation procedure..........................................................................................................97
Indexing new objects....................................................................................................................98
OneView purge............................................................................................................................98
Error troubleshooting...................................................................................................................99
General information/tips...............................................................................................................99
Infor Operating Service Installation Guide | 6
Contents

Appendix Q: Downloading the CER certificate file from the ADFS server................................101
Infor Operating Service Installation Guide | 7
Contents

About this guide
This guide describes the installation process of the Infor Operating Service in accordance with the InforBest Practice approach, which when followed ensures that you set up a stable, easily maintainable,and supportable Infor OS. If you need to install differently, you may need to reference one or more ofthe appendixes in this guide or contact Infor Consulting Services for assistance.
This guide also includes instructions on applying Infor OS upgrades and updating ION Registry content.
Caution: This document is intended for a clean installation of Infor OS 12.0. This document is notintended to migrate an existing instance of Infor Ming.le™ 11.1.x, ION 11.1.x, or IDM 11.1.x to InforOS 12.0. If you have a requirement to upgrade your current instance of Infor Ming.le 11.1.x, ION11.1.x, or IDM 11.1.x to Infor OS 12.0, please contact Infor Consulting Services.
The Infor recommendations in this guide are based on what Infor tests and certifies during the releaseprocess. These recommendations are, in turn, the foundation for the Infor Best Practice for installingInfor OS. While alternatives to these recommendations are likely possible, Infor cannot guarantee toprovide support for any issues that may arise if these recommendations are not followed. Customersmay be asked to reproduce an issue by using the stated Infor recommendations to validate the problemand to allow Infor to be able to reproduce the issue.
The Infor best practice for installations requires at least three servers to ensure high reliability of InforOS. The only exception to this rule is Infor OS Lite, which can only be deployed on a single server.Failure to follow this requirement by installing on fewer than three servers may result in loss of datashould a primary server failure occur. If this happens, all Infor Ming.le, ION OneView, and ION APIdata indexed by Elastic will be lost.
By not following the recommended best practices, you assume the risk of any potential data loss. Inforwill not assume any responsibility for the data loss, and we will not be able to provide support on theprocess of data recovery.
Intended audience
This guide is for professional services or system administrators who install and configure the system.
Locating product documents
You can find the documents in the product documentation section of the Infor Support Portal, asdescribed in "Contacting Infor."
Infor Operating Service Installation Guide | 8
About this guide

Contacting InforIf you have questions about Infor products, go to Infor Concierge at https://concierge.infor.com/ andcreate a support incident.
The latest documentation is available from docs.infor.com or from the Infor Support Portal. To accessdocumentation on the Infor Support Portal, select Search > Browse Documentation. We recommendthat you check this portal periodically for updated documentation.
If you have comments about Infor documentation, contact [email protected].
Infor Operating Service Installation Guide | 9
About this guide

Chapter 1: Overview
Infor OS is a collection of Infor applications, databases, and services that work together to enable aset of integrated features provided by those products.
Infor Operating Service Installation Guide | 10
Overview

Chapter 2: Infor OS prerequisites
Server prerequisitesThis section describes the server requirements for Infor OS.
The requirements listed here are the same for Infor OS Lite. Infor OS Lite supports the use of only oneInfor OS server.
Infor recommends the use of a dedicated database and security federation server for the installationof Infor OS. Microsoft SQL Server Enterprise and Standard versions have been tested and certifiedfor use. In addition, Microsoft SQL Server Datacenter can also be used with no effect to functionality.The hardware requirements and installation instructions for these servers are out of the scope of thisdocument.
Caution: The only supported operating system language for the Infor OS and ADFS servers is English(EN). Additional languages may be used at the customer's discretion with the understanding thatthere has not been any testing or certification done by Infor Quality Assurance.
Database server requirementsInfor OS recommends that you use a dedicated database server with:
• Microsoft SQL Server 2019• Microsoft SQL Server 2017•
Infor OS can be installed on a SQL Server Always On Availability Group. For details, see SQL ServerAlways On Availability Group (AOAG) on page 62.
Note: Except where explicitly specified, Infor OS communication does not support encrypted/SSLconnections.
Caution: The operating system of the SQL Server can be any operating system supported byMicrosoft; however, the SQL user used for the Infor OS must have a default language of English (EN).
Infor Operating Service Installation Guide | 11
Infor OS prerequisites

Database collationRequired SQL collation for Infor OS databases:
Whether you are using an existing SQL server installation or installing a new one, the Infor OS hasspecific requirements for its databases. The collation must be configured for:
• Case-insensitive (CI)• Accent-sensitive (AS)
Any case-insensitive (CI) collation for the SQL instance is supported; however, we recommend using:SQL_Latin1_General_CP1_CI_AS
This is the default SQL server collation, set during the default installation, and as long as you do notchange it your installation will be compliant with this requirement.
For an existing installation, you can run the sp_helpsort command in a query window to confirm thecurrent collation. Infor OS does not have any specific requirements for Kana-sensitive and Width-sensitivecollations.
Database userThe Infor OS installation must be done with a user who has an SQL Server login with dbcreatorpermission and where the SQL Server stores both the username and a hash of the password in themaster database and uses internal authentication methods to verify login attempts.
Full Text Search SQL server prerequisitesFull-Text and Semantic Extractions for Search under Database Engine Services must be selectedto be able to use the full text search in IDM.
Federation Server requirementsInfor OS recommends that you use a dedicated federation server with AD FS, with the AD FS servicerunning at the time of Infor OS installation.
Note: Infor OS works only with Microsoft Active Directory. It cannot connect to any other generic LDAPproviders.
Caution: Make sure that the AD FS server you are planning to integrate to does not have an existingInfor Tech Stack 11.x installation on it. Failure to observe this recommendation will cause your existinginstallation to become nonoperational.
Infor Operating Service Installation Guide | 12
Infor OS prerequisites

Infor OS server requirementsThis table specifies the software and frameworks required for each server that is used to install theInfor OS.
Note: Infor OS does not support installation on a Domain Controller.
Supported versionsProduct
• Windows 2019• Windows Server 2016 Standard and Datacenter
Operating system
IIS 10.0.xWeb server
• Server roles• Web Server (IIS)
• Server features• ASP .Net 4.6• HTTP Activation
• Role services• Health and Diagnostics
• Logging tools• Tracing
• Security• Basic Authentication• Windows Authentication
• Common HTTP Features• Static Content
Server roles/features
• .NET Framework 4.8• ASP.NET MVC 4
Frameworks
• AWS Corretto 8 JDK 1.8.0_282
Note: The Infor OS Installer allows for newer versions of Corretto to beused; however, they may not be certified for use.
Java environment
A PFX or P12 SSL certificate with a valid private key password that hasbeen generated with 2048 bits encryption key and SHA-2 encryption algo-rithm.
Note: The domain name of the certificate must match the domain nameof the host or the external alias of the Infor OS that you are installing.
Certificate
Infor OS requires that IPv4 is enabled.Internet Protocol
Infor Operating Service Installation Guide | 13
Infor OS prerequisites

Checking the PATH variableThe PATH variable must be set to the bin folder file path where the AWS Corretto was installed beforeInfor OS can be installed.
On the server where Infor OS is to be installed:
1 Open the Control Panel and go to System and Security > System.
2 Click Advanced System Settings.
3 On the popup, click Environment Variables.4 Find PATH in the list and click it.
5 Click New.
6 Input the JDK file path to the bin folder.
For example: c:\program files\Amazon Corretto[newjdkversion]\bin
7 Click OK to save the information.
Setting the JAVA_HOME pathThe JAVA_HOME environment variable must be set to the AWS Corretto 8 installation path. To checkthat this is set correctly:
1 Go to the Control Panel and click System and Security.
2 Click Advanced System Settings.
3 On the popup, click Environment Variables.
4 Find JAVA_HOME in the list, and check that the value is set to the location where AWS Correttowas installed.
5 If the value is incorrect, input the JDK file path.
For example: c:\program files\Amazon Corretto[newjdkversion]
6 Click OK to save the information.
Service Account requirementsWhen installing Infor OS with default accounts, NT SERVICE\ALL SERVICES must be granted the"Log on as a service" role on the Infor OS server. It is a default setting in Windows, but it may berevoked on your system.
This requirement is waived if you are installing Infor OS with custom user accounts.
Infor Operating Service Installation Guide | 14
Infor OS prerequisites

Minimum hardware recommendationsThe Infor OS server requires these hardware specifications, at a minimum:
• 4 CPU cores• 32 GB RAM• System drive: Follow Microsoft recommendations for Windows.
As the customer, you are responsible for checking the appropriate Microsoft documentation todetermine this number.
• Infor OS drive: 25 GB
This drive is where Infor OS software will be installed.
• Infor OS data/content drive: 300 GB is the minimum recommendation.
This drive is where Infor OS data and user-entered data will be stored. For example: IDM documents,collaboration attachments, and search indexes
• Networked storage solutions are recommended for all deployments and are also mandatoryfor High Availability/multiple-host deployments.
• Local drive storage is feasible for single-host deployments such as test systems andnon-scalable/non-High Availability deployments.
Note: A sizing exercise should be performed to estimate your organization's storage requirementsbased on factors such as transaction volume, the number of documents stored per day, data retentionperiod, and so on.Note: The use of multiple Network Interface Cards (NIC) is not supported.
Migration limitationsAn environment that you are migrating from 11.1.x cannot be scaled or expanded by adding additionalservers. If you have previously used only one server for your 11.1.x installation, your must remain onthat single server.
New installations and deployments are not subject to this limitation.
Checking the server prerequisitesYou use the prerequisites tool to check if the server where Infor OS is to be installed meets all thenecessary prerequisites. You access the prerequisites tool by completing these steps:
1 Go to the Tools folder inside the Infor OS Installer ISO.2 Extract the InforOSPreRequisiteTool.zip folder.3 Open the command prompt as an administrator.4 Change the path where the Pre-requisite jar file is available in the extracted folder.5 Run the command: java -jar com.infor.xiplatform.prerequisitetool-1.0.0.jar
Once the tool is running, enter the server details checked by the prerequisite tool.
Infor Operating Service Installation Guide | 15
Infor OS prerequisites

To check the server parameters:
1 Click Browse to select where Infor OS is to be installed. For example: C:\Program Files
2 For the DB Host name, enter the host name or IP address of the Fully Qualified Domain Name(FQDN) of the SQL server.
3 Provide the port where your MS SQL server instance is running.
Note: You can leave this field blank if the database uses an instance.
4 Provide the instance or schema where your MS SQL server instance is running.
Note: You can leave this field blank if the database uses a port.
5 Provide the username of the SQL server user who has the SQL server dbcreator role.
6 Enter the password of the SQL server user.
7 Enter the Host Name of the FQDN of the ADFS server.
8 Enter the username of the ADFS administrator account.
9 Enter the ADFS administrator’s password.
10 Click Browse to select the SSL Certificate File.
Note: The certificate file must be type PFX.
11 Enter the password for the certificate.
12 Click Run. The tool compares the server to the prerequisites and generates a report of the results.Make sure that the server meets the minimum requirements before proceeding to install Infor OS.
Client prerequisitesThis section describes the software requirements for clients of the Infor OS.
Supported operating systemsInfor OS recommends that you use one of these operating systems:
• Windows 10• Mac OS 10.10• Mac OS 10.11
Supported browsersInfor OS recommends that users use these browsers:
• Chrome for Windows and Mac OS• Safari 13.x and 14.x for Mac OS only
Infor Operating Service Installation Guide | 16
Infor OS prerequisites

• Microsoft Edge• Microsoft Edge Chromium
Screen resolutionThe Infor Ming.le shell supports responsive design and will adjust to fit the content on different devicesdepending on these resolution widths:
• Desktop – 1280px and up
Recommended desktop resolution: 1280 x 1024
• Tablet - between 768px and 1279px• Mobile - between 320px and 767pxNote: Not all features are supported on tablet and mobile devices.
Mobile ApplicationsThis table lists the Infor OS Mobile applications and their availability by mobile application operatingsystem:
AndroidiOSApplication name
AvailableAvailableInfor Ming.le
AvailableAvailableIDM
AvailableNot availableION Alarms
AvailableNot availableION OneView
AvailableAvailableBI Dashboards
Note: Before using Infor OS Mobile applications, Infor recommends using trusted certificates for yourinstallation. If mobile applications are not accessible, see "Updating iOS device certificates if Infor OSmobile applications are not accessible."
Infor Operating Service Installation Guide | 17
Infor OS prerequisites

Chapter 3: Installing Infor OS
Caution: This document does not refer to any steps regarding user access control. Depending onyour server's individual configuration, you may be prompted to confirm that you are running certainprograms and installations.
Obtaining the Infor OS installerFrom the Infor Product Download Center on the Infor Support Portal, obtain the Infor OS ISO image.
Before you begin the installation, burn the image file to a DVD disk, expand the ISO image file to alocal disk, or mount it to a virtual drive by using an optical media emulation tool.
Note: If you plan to copy the file to your local disk, do not copy and run it from the desktop. Make surethat you place it in a folder that is accessible by all users.
The Infor OS installation package contains the setup.exe file.
Before you startInfor OS is a foundation component of the Infor products deployed. Infor OS provides key functionalareas of security, mobile access, integration, and document storage for both intranet and internet usersacross an enterprise. Infor OS is scalable and configurable to provide high availability if properly plannedprocesses are followed. It is recommended that careful consideration be given to the planning andinstallation of Infor OS to support the effective use of these features in a site. If you require assistanceor review of this, please contact your Infor Consulting or Infor Partner organization to assist you.
Prior to installation, be sure to review the release notes and obtain the most recent installation guidefrom the Infor Support Portal.
Make sure that your operating system is up to date, including any reboots that may occur duringoperating system updates.
Make sure you have these things before you start the installation:
Infor Operating Service Installation Guide | 18
Installing Infor OS

• A PFX or P12 SSL certificate with a valid private key password that has been generated with a2048-bit encryption key and SHA-2 encryption algorithm.Note: The domain name of the certificate must match the domain name of the host you are installing.
• Administrative access to the server or servers where you are installing the Infor OS• A Microsoft SQL Server instance installed and configured• An AD FS service installed and configured• A Federation Metadata XML file
Download the federation metadata file as an XML file from your Federation Server and copy thisXML file to your Infor OS Server. This XML file is required for the Infor OS Installer on theSAMLConfiguration screen – SAML Metadata file option.
For AD FS, the XML file can be downloaded from this location: https://{FederationServer}/FederationMetadata/2007-06/FederationMetadata.xml
Note: Internet Explorer will open this XML file without giving you the option to download it. Werecommend the use of Google Chrome as this XML file will then be downloaded by default.
• Make sure that any usernames or passwords that are used in the installation contain only thesecharacters: a-z A-Z 0-9 ! # $ ~ @ ^ & * ( ) - _ + [ ] { | : / . > < =
• Make sure that the hostname or alias used contains only lowercase letters• Disable Windows Firewall and any antivirus software that is running; they can be turned on after
Infor OS has been installed and configured• Make sure the installing user is a domain account• A CER certificate file from the ADFS server
To get the certificate, see Downloading the CER certificate file from the ADFS server on page 101.
InstallationThe Infor OS installer provides default values for a standard installation, and in this document thesevalues are shown as examples. These values are recommended to simplify your installation and toassist you should you need to contact Infor for support.
Also, before you begin this installation, see the Infor Document Management Installation ReferenceGuide and review the "Installation" chapter for details about selecting your IDM edition/content repository.
For information on installing Infor OS in Advance Mode, see Installing in Advance Mode on page 58.
To install Infor OS:
1 Right-click the setup.exe file and click Run as Administrator.Note: If you are prompted to download and install ASP.NET MVC 4, an internet connection isrequired.
2 On the Welcome to the Infor OS installation wizard screen, click Next.3 On the Minimum Hardware Requirements screen, carefully read the message and select I
have checked and understood the requirements and I am ready to proceedbefore clicking Next to continue with the installation. If you select I am not ready to proceedat this time and click Next, the installation process is canceled.
Infor Operating Service Installation Guide | 19
Installing Infor OS
4 On the Choose Destination Location screen:
a Select a Destination Folder where the product is to be installed. We recommend you to installin <drive>:\Program Files\Infor\OS.
b Select the JDK Install path.c Click Next.
Note: The installer verifies the JDK version.
5 On the Farm Database Configuration screen:
a Select SQL Server.b In the DB Server field, provide the Host Name of Fully Qualified Domain Name (FQDN) of the
SQL Server.c Provide the Port or Instance where your MS SQL Server instance is running. The default port
is 1433. See the caution statement in Federation Server requirements on page 12 for possibleconflicts with the default port.
d Provide the Username and Password of the SQL Server user who has the SQL Serverdbcreator role.
e Click Validate to verify whether the server connection and credential details provided are valid.f When the validation is successful, click OK on the Connection Succeeded confirmation dialog.
Select Create New Farm and enter a farm name.
The Infor OS farm is a collection of Infor applications, databases, and services that worktogether to enable a set of integrated features provided by those products.
Note: The farm name cannot contain spaces or dashes.
6 On the SAML Configuration screen:
a Select ADFS.b Select the Identity Provider Type.c Enter the Identity Provider Display Name. This is the name assigned to the Identity Provider
(IdP) during the installation and configuration of AD FS and is used to identify the IdP withinthe domain.
Note: To use Infor STS as an identity provider, select Infor STS from the options, andcontinue with the installation. After the completion of the installation, refer to the post-installationof Infor OS with Infor STS section to complete the installation using Infor STS.
d Select the SAML Metadata File by clicking Browse and navigating to theFederationMetadata.xml file previously downloaded in Before you start on page 18.
e Click Browse to add the ADFS Certificate previously downloaded in Before you start on page18.
Note: The certificate file must be a .CER file.
f Click Next.
7 On the Web User Interface Configuration screen, provide:
User Interface IIS Configurationa Select Create New Site. Enter a name for the site. This is used to identify the site of the Infor
OS user interface in IIS. The default name is InforPlatformUI.b Enter the SSL Port. The default port is 443.
Infor Operating Service Installation Guide | 20
Installing Infor OS

c Enter the External Alias. The Alias Port is pre-populated with the SSL Port value and canbe edited if needed. If you are not using an external alias and an alias port, these values canbe set to the domain name and default port number.
Note: If you are installing a multi-node farm, the External Alias and Alias Port should matchwhat has been configured in your load balancer.
Root URL Configuration
This is the URL to access the web user interface of the Infor OS.
Certificate for Front End Web UI and Infor OS
Provide the SSL Certificate File and SSL Password. The certificate must be type PFX.
User Interface Grid Configurationa Provide the Infor OS Router Port. The default port is 9543.b The External Alias value is pre-populated with the External Alias value that is entered in on
the User Interface IIS Configuration screen, and the Alias Port is pre-populated with theInfor OS Router Port value. These values can be edited if needed. If you are not using anexternal alias and an alias port, these values can be set to the domain name and default portnumber.
Note: If you are installing a multi-node farm, the Infor OS External Alias and Alias Port shouldmatch what has been configured in your load balancer.
c Click Next. The installer validates the certificate, password, and ports provided.
8 On the Backend Service Information screen, provide:
Backend IIS Configurationa Select Create New Site. Enter a name for the site. This is used to identify the site of the Infor
OS backend in IIS. The default name is InforPlatformBackend.b Enter the SSL Port. The default port is 1443.c The External Alias value is pre-populated with the External Alias value that is entered in on
the User Interface IIS Configuration screen. The Alias Port is pre-populated with the SSLPort value. These values can be edited if needed. If you are not using an external alias andan alias port, these values can be set to the domain name and default port number.
Note: If you are installing a multi-node farm, the External Alias and Alias Port should matchwhat has been configured in your load balancer.
d Provide the SSL Certificate File and Password. The certificate must be type PFX. The samecertificate that was selected in User Interface IIS Configuration is selected by default.
Backend Grid Configurationa Provide the Host Router HTTPS Port. The default port is 29090.b Provide the Host Router HTTP Port. The default port is 29091.c Provide the Bootstrap Port. The default port is 29092.d Optionally, if you are installing a multi-node farm, provide the Host Router Alias. The Host
Router Alias value is pre-populated with the External Alias value that is entered in on theUser Interface IIS Configuration screen, and the Alias Port is pre-populated with theBootstrap Port value. These values can be edited if needed.
Note: The Host Router Alias and Alias Port should match what has been configured in yourload balancer.
e Click Next.
Infor Operating Service Installation Guide | 21
Installing Infor OS

9 On the Micro Service UI Router Configuration screen:
Note: This screen is displayed only if Infor STS is selected on theSAML Configuration screen inStep 6.
a Enter the Router Port. The default is 9553.b The Router Alias value is pre-populated with the External Alias value that is entered in on
the User Interface IIS Configuration screen, and the Alias Port is pre-populated with theRouter Port value. These values can be edited if needed. If you are not using an externalalias and an alias port, these values can be set to the domain name and default port number.
Note: If you are installing a multi-node farm, the External Alias and Alias Port must matchwhat has been configured in your load balancer.
c Click Next.
10 On the IDM Configuration screen, provide:
IDM Configurationa Select Content Repository Type – Infor.b Click Next.
11 On the User and Service accounts screen, keep the check box cleared and click Next.Note: To install with custom user accounts, see to Custom user accounts on page 64.
12 On the Infor OS Engine Details screen, provide:
Infor Ming.le Informationa Select the Content Folder. The default folder is <Drive>:\Infor\OS\Folders\Content
.b Select the Graph database Folder. The default folder is <Drive>:\Infor\OS\Folders\
Content\GraphDB.c Enter the IFS Timer Service Port. The default port is 555.
IDM Configuration
Select the IDM Root Folder. The default folder is <Drive>:\Infor\OS\Folders\Content\IDMFiles.
The root folder for the folder structure is where files are stored. This folder is used from both theIDM Resource Server and the IDM Control Center.
Ming.le & ION Integrationa Enter the IFS Attribute Service User. The default user is the currently logged-in user.
b Enter the above user’s Password.c Click Next.Note: If a UNC path is used as the Base Folder, the folder must be created before you start theinstallation.
13 Elastic Search is used to enable searching for data throughout Infor OS. The hard drive spacerequirements calculated here are the space used to hold all Infor OS content. On the EnterpriseSearch Configuration screen, provide:
Elastic Search sizinga Enter the planned number of users in Concurrent User for Infor OS.b Click Calculate.
Infor Operating Service Installation Guide | 22
Installing Infor OS
Note: When Advanced is enabled, the hard drive space for each component becomes editable,and custom values can be used if needed.
Enterprise Search Configuration
The Elastic Search Alias value is pre-populated with the External Alias value that is entered onthe Backend Service Configuration screen. If you are not using an external alias, this can be setto the domain name.
Enterprise Search Directory
Select a path to store the Elastic Search content.
Caution: The Enterprise Search directory must be on a local drive.
Note: The installer checks that the selected content drive has enough space for the sizingconfiguration:
• If the total free disk space on the content drive is greater than or equal to the required diskspace, the installer continues as normal.
• If the total free disk space on the content drive is from 80% to 99% of that required disk space,the installer displays a warning stating that disk space may run out on the selected drive locationand the installation can continue.
• If the total free disk space on the content drive is less than 80% of the required disk space,the installer displays an error stating that there is not enough free disk space on the selectedcontent drive and the installation will not continue.
14 On the IONAPI Gateway Details screen, provide:
IONAPI Gateway Configuration - This configuration is required for ION API.
a Enter the Gateway Port. The default port is 7443.b The External Alias value is pre-populated with the External Alias value that is entered in on
the User Interface IIS Configuration screen, and the Alias Port is pre-populated with theGateway Port value. These values can be edited if needed. If you are not using an externalalias and an alias port, these values can be set to the domain name and default port number.
Note: If you are installing a multi-node farm, the External Alias and Alias Port should matchwhat has been configured in your load balancer.
c Select the Certificate Path and Certificate Password. The certificate must be type PFX. Thesame certificate that was selected in User Interface IIS Configuration is selected by default.
d Click Next.
15 The Feature Installation Summary screen displays the list of the features that are to be installed.Review and click Next.
16 On the Ready to Install Infor OS screen, click Install.
If there are errors during the installation, check these logs to troubleshoot the error:
• The Success and Failure log files are created by the Installer. These log files consist of theconsolidated list of features and tasks that are executed from the perspective of the Grid. If anythingfails, it is logged into the failure.log. Successful tasks are logged into the success.log.
• The CustomUtils is the log for Microsoft Component changes such as the web.config update andbootstrap, and so on. The AD FS URL is retrieved from the IFSServices when the service is upand running.
• The installer log is in this path:
Infor Operating Service Installation Guide | 23
Installing Infor OS

<ProgramDataFolder>\Infor\OS\Installer\<InforOS_Installer_YYYYMMDD_HHMMSS>.log
• The component-related log files are in this path:
<ProgramDataFolder>\Infor\OS\<component_name>.log.0
• The ION Installer log file:
<ProgramDataFolder>\Infor\ION\installlog\<ION-Installer- YYYYMMDD_HHMMSS>.log
• The Grid installer log file:
<INSTALLATION DIRECTORY>\InforTechStackGrid\log\installation_YYYYMMDD-HHMMSSMMM.log
• The EnterpriseSearch log file:
<INSTALLATION DIRECTORY>\EnterpriseSearch\${sys:es.logs.base_path}${sys:file.separator}${sys:es.logs.cluster_name}.log
• The ION API Gateway log file:
<ProgramDataFolder>\Infor\IONGateway\ionapi.log
If the installation is canceled, the Infor installation directory that is created during the installation mustbe removed manually.
When the installation is complete, continue with the post-installation tasks.
Infor Operating Service Installation Guide | 24
Installing Infor OS

Chapter 4: Post-installation/Configuration
AD FS configurationThis section describes the post-installation steps required if AD FS is used as the identity provider. Ifyou select STS on the SAML configuration screen, skip this section.
Completing claims-based authentication configurationAs the Infor OS installation is executed in a claims-based authentication mode, you must complete theconfiguration of the claims-based authentication on the Federation Server. Use the Infor OS managerto download a PowerShell script that creates an Attribute Store in AD FS. Also, download PowerShellscripts to create Relying Party Trusts to enable single sign-on for Infor OS applications.
On the Infor OS Server:
1 Open Infor OS Manager by right-clicking the desktop icon and select Run as Administrator.a Provide the Database Server. In the Database Server field provide the Host Name of Fully
Qualified Domain Name (FQDN) of the SQL Server.b Select the Database Type. The default type is SQL Server.c Provide the Port for the SQL Server.
Note: You can leave this field blank if the database uses an instance.
d Provide the instance or schema for the SQL server.
Note: You can leave this field blank if the database uses a port.
e Select the Authentication Mode. The default mode is SQL Server Authentication.f Provide the database system administrator's User Login.g Provide the database system administrator's Password.h Click the check mark icon to validate credentials and query what Infor OS farms are available.i When the validation is successful, select the Infor OS Farm.j Click Continue.
2 Select Identity Providers.
An identity provider is created during the installation. Click the download icon and specify thedownload path for the AD FS and IFS base configuration PowerShell script associated with thisidentity provider.
For downloading the Identity Provider powershell scripts, these options are available:
Infor Operating Service Installation Guide | 25
Post-installation/Configuration

• Option 1 – The downloaded ps1 file has a username and password.Note: This option has the Infor Ming.le database username and password in plain text in thePowerShell script and in the Infor OS data store within ADFS after the script is run.
• Option 2 – The connection string uses IWA. This is the most secure option. The Infor Ming.ledatabase username and password are not displayed in plain text in the PowerShell script andin the Infor OS data store within ADFS.
• Option 3 – The ps1 is downloaded without a password. The user must update the ps1 with avalid SQL password.Note: The password of the Infor Ming.le database must be added in the script for it to runafter it is downloaded. Once added, the password is stored in plain text. The database usernameand password are also displayed in plain text in the Infor OS data store within ADFS after thescript is run.
Note: Save this file in a location where it can be moved to your AD FS server.
3 Select Applications.
A relying party trust must be set up for the following applications to enable SSO. Click the downloadicon and specify the download path for each application:
a XIPORTALb INFORSTSc Grid-XiPlatform
Note: Save these files in a location where they can be moved to your AD FS server. These filesare named with the following variables: infor_{farm name}_{environment variable}_{file name}_{file action}.ps1
AD FS and IFS Base Configuration PowerShell script preparationAfter downloading the AD FS and IFS Base Configuration PowerShell script from the Identity Providerstab in OS Manager, preparation may be needed before the scripts can be run on the ADFS serverdepending on the option that is selected when downloading the file.
Option 1
No preparation is needed. The PowerShell script can be run as is.
Option 2
The service account used to run the ADFS Service needs the appropriate permissions to the SQLserver for this script to run successfully.
• To check which service account that is running the ADFS service:1 Go to the ADFS server.2 Open the Windows Services application.3 Find Active Directory Federation Services in the list.4 Find the account running the service in the Log On As column.
• If a different account is needed to be used for running the ADFS Service, complete these steps:1 Access the ADFS server.
Infor Operating Service Installation Guide | 26
Post-installation/Configuration

2 Open the Windows Services application.3 Find Active Directory Federation Services in the list and right click it.4 Go to the Log On tab.5 Click Browse and select a new user.6 Complete the Password and Confirm Password fields.7 Restart the Active Directory Federation Services.
• To give the account the necessary permissions:1 On the SQL server, give the account used for the ADFS Service the db.datareader and
db.datawriter role.2 After the permission have been given, you must give an additional Grant permission for the
GetCreateApiKeys stored procedure. To do this, access the database and run these SQLscripts:
• USE [MASTER] GO IF NOT EXISTS (SELECT name FROM [master].[sys].[syslogins] WHERE NAME = '<domain\username>') BEGIN CREATE LOGIN [<domain\username>] FROM WINDOWS WITH DEFAULT_DATABASE=[master], DEFAULT_LANGUAGE=[us_english] END• GO USE [<MINGLEDBNAME>] GO IF NOT EXISTS (SELECT * FROM sys.database_principals WHERE name = '<domain\username>') BEGIN CREATE USER [<domain\username>] FOR LOGIN [<domain\username>] WITH DEFAULT_SCHEMA=[dbo]; END exec sp_addrolemember 'db_datareader', [<domain\username>]; exec sp_addrolemember 'db_datawriter', [<domain\username>]; GRANT EXECUTE ON OBJECT::GetCreateApiKeys TO [<domain\username>]; GO
Option 3
The database password must be added to the PowerShell script before it can be run. Update the valuefor Password in $connect_string.
AD FS server configurationOn the Federation Server, configure AD FS:
1 Open Windows PowerShell as an administrator.
2 Run the Set-ExecutionPolicy Unrestricted command and confirm the Execution Policychange by typing Y. Press Enter.
Infor Operating Service Installation Guide | 27
Post-installation/Configuration

3 Run the PowerShell scripts previously downloaded for:
a ADFS and IFS base configurationb RPT XIPORTALc RPT INFORSTSd RPT Grid-XiPlatform
Caution: Permanently delete all copies of the ADFS and IFS base configuration PowerShellscript from the ADFS server and the server where it was originally downloaded if option 1 oroption 3 was used when downloading it from OS Manager. The deletion of these files is criticalto avoid any security-related issues. Infor assumes no responsibility for any security breachesif these files are not deleted.
4 Configure Forms Authentication:
a Open ADFS Management and click Authentication Methods.b Click Edit in the Primary Authentication section.c Select Forms Authentication for Extranet and Intranet, deselect Windows Authentication
for Intranet, and click Apply.
Grid property update when Infor OS server and AD FS serverin different domainsIn the case that the Infor OS server and AD FS server are in different domains, the grid.cookie.samesiteproperty must be updated. If the Infor OS server and the AD FS server are in the same domain, skipthese steps.
1 Open the Grid Administration user interface.
2 Navigate to Configuration > > Grid Properties, and search for the grid.cookie.samesite property.
3 Change the value from Lax to None.
4 Click Save.
5 Restart the Grid.
a Navigate to the [grid_root_installation_path]\bin folder.b Run StopAllHosts.cmd.c Run StartAllHosts.cmd.
STS configurationInfor Security Token Service (Infor STS) facilitates and provides standards-based single sign-on (SSO)services to users of Infor business applications when federated with an identity provider such asMicrosoft Active Directory Federation Services (AD FS).
Infor Operating Service Installation Guide | 28
Post-installation/Configuration

This section describes the post-installation steps required if STS is used as the identity provider. If youselect AD FS on the SAML configuration screen, skip this section.
Caution: Infor M3 does not support Infor STS.
Caution: The STS Administration user interface cannot be open in the same browser as the InforOS portal or grid. Make sure to use a different browser if the portal or grid is accessed at the sametime as the STS Administration user interface.
Setting up trust between Infor STS and ADFS 3.0
Assumptions• Infor OS is installed successfully without any errors.• On the SAML configuration screen during installation, you selected Infor STS from the radio
button option.
PrerequisitesThese are the prerequisites for setting up trust between Infor STS and ADFS:
• Download and save the ADFS metadata, acting as identity provider for the Infor STS.
Sample ADFS metadata URL:
https://<ADFS HOSTNAME>/Federationmetadata/2007-06/Federationmetadata.xml
• Download the Infor STS SAML SP metadata information and save it.
https://<XIPORTALHOSTNAME>:9553/inforsts/rest/metadata/00000000000000000000000000000000/saml/sp
Example:
https://inforos.mingledev.infor.com:9553/inforsts/rest/metadata/00000000000000000000000000000000/saml/sp
This can also be done from the Infor STS administration user interface, which is downloaded toyour desktop if you select Infor STS by completing these steps:
Note: The Tenant ID for the Infor STS default tenant is always set as00000000000000000000000000000000.
Downloading the Infor STS SAML metadata1 Launch the STS administration user interface from the desktop shortcut on the Infor machine.
2 Edit the default Infor tenant.
Infor Operating Service Installation Guide | 29
Post-installation/Configuration

3 Navigate to settings from the left menu options.
4 Select the Download Federated Metadata tab and click Download SAML SP Metadata XML.
Note: The Tenant ID for the Infor STS default tenant is always set as00000000000000000000000000000000.
Configuring Infor STS as the Relying Party Trust in ADFS 3.01 Log in to the ADFS server.
2 Launch the ADFS management console.
3 Click the Add Relying Party trusts link in the Actions section (right-hand side).
The Add Relying Party Trust Wizard is displayed.
4 Click Start.5 Select the Import data about the relying party from a file option and click Browse.
6 Select the metadata file downloaded by accessing the Infor STS metadata URL in Prerequisiteson page 29, and click Open.
7 Type Infor STS as the Display Name and click Next.
8 Select the I do not want to configure multifactor authentication option and Next.9 Select the Permit all users to access this relying party option.
10 Verify all the parameters and click Next.11 Deselect the check box for Configure claims for this application and click Close.
Adding claim rules to the Infor STS RPT in ADFS 3.01 Launch the ADFS management console.
2 Expand the Trust Relationships folder and click Relying Party Trusts.
3 Right-click Infor STS created in the previous tasks and select Edit Claim Rules.
4 Click ADD rule, and select Send LDAP attributes as claims as the claim rule template.
5 Click Next, and type STS claims as the claim rule name.
6 Select Active Directory as the Attribute Store.
7 From the mapping of the LDAP attributes, map the User-Principal-Name attribute to Name ID inthe outgoing claim type.
8 Click OK and then Finish to save the claim rules.
Infor Operating Service Installation Guide | 30
Post-installation/Configuration

Setting up trust between Infor STS and ADFS 4.0
AssumptionsInfor OS is installed successfully without any errors.
PrerequisitesThese are the prerequisites for setting up trust between Infor STS and ADFS 4.0:
• Download and save the ADFS metadata, acting as identity provider for the Infor STS.
Sample ADFS metadata URL:
https://<ADFS HOSTNAME>/Federationmetadata/2007-06/Federationmetadata.xml
• Download the Infor STS SAML SP metadata information and save it.
https://<XIPORTALHOSTNAME>:9553/inforsts/rest/metadata/00000000000000000000000000000000/saml/sp
Example:
https://inforos.mingledev.infor.com:9553/inforsts/rest/metadata/00000000000000000000000000000000/saml/sp
This can be done from the Infor STS administration user interface, which is downloaded to yourdesktop if you select Infor STS.
Note: The Tenant ID for the Infor STS default tenant is always set as00000000000000000000000000000000.
Downloading the Infor STS SAML metadata1 Launch the STS administration user interface from the desktop shortcut on the Infor machine.
2 Edit the default Infor tenant.
3 Navigate to settings from the left menu options.
4 Select the Download Federated Metadata tab and click Download SAML SP Metadata XML.
Note: The Tenant ID for the Infor STS default tenant is always set as00000000000000000000000000000000.
Configuring Infor STS as the Relying Party Trust in ADFS 4.01 Log in to the ADFS server.
2 Launch the ADFS management console.
3 Click the Add Relying Party trusts link in the Actions section (right-hand side).
Infor Operating Service Installation Guide | 31
Post-installation/Configuration
The Add Relying Party Trust Wizard is displayed.
4 From the Welcome screen, select Claims Aware and click Start.5 Select the Import data about the relying party from a file option and click Browse.
6 Select the metadata file downloaded by accessing the Infor STS metadata URL in Prerequisiteson page 29, click Open, and click Next.
7 Type Infor STS as the Display Name and click Next.
8 On the Access Control Policy screen, select Permit Everyone and click Next.9 Verify all the parameters and click Next.10 Deselect the check box for Configure claims for this application and click Close.
Adding claim rules to the Infor STS RPT in ADFS 4.01 Launch the ADFS management console.
2 Click the Relying Party Trusts folder from the list of connections on the left-hand panel.
3 Right-click Infor STS created in the previous tasks and select Edit Claim Issuance Policy.
4 Click ADD rule, and select Send LDAP attributes as claims as the claim rule template.
5 Click Next, and type STS claims as the claim rule name.
6 Select Active Directory as the Attribute Store.
7 From the mapping of the LDAP attributes, map the User-Principal-Name attribute to Name ID inthe outgoing claim type.
8 Click OK and then Finish to save the claim rules.
Setting up trust between Infor STS and ADFS 5.0
Assumptions• Infor OS is installed successfully without any errors.• On the SAML configuration screen during installation, you selected Infor STS from the radio button
option.
PrerequisitesThese are the prerequisites for setting up trust between Infor STS and ADFS:
• Download and save the ADFS metadata, acting as identity provider for the Infor STS.
Sample ADFS metadata URL:
https://<ADFS HOSTNAME>/Federationmetadata/2007-06/Federationmetadata.xml
Infor Operating Service Installation Guide | 32
Post-installation/Configuration

• Download the Infor STS SAML SP metadata information and save it.
https://<XIPORTALHOSTNAME>:9553/inforsts/rest/metadata/00000000000000000000000000000000/saml/sp
Example:
https://inforos.mingledev.infor.com:9553/inforsts/rest/metadata/00000000000000000000000000000000/saml/sp
This can also be done from the Infor STS administration user interface, which is downloaded to yourdesktop if you select Infor STS by completing the steps in Downloading the Infor STS SAML metadataon page 33.
Note: The Tenant ID for the Infor STS default tenant is always set as00000000000000000000000000000000.
Downloading the Infor STS SAML metadata1 Launch the STS administration user interface from the desktop shortcut on the Infor machine.
2 Edit the default Infor tenant.
3 Navigate to settings from the left menu options.
4 Select the Download Federated Metadata tab and click Download SAML SP Metadata XML.
Note: The Tenant ID for the Infor STS default tenant is always set as00000000000000000000000000000000.
Configuring Infor STS as the Relying Party Trust in ADFS 5.01 Log in to the ADFS server.
2 Launch the ADFS management console.
3 Click the Add Relying Party trusts link in the Actions section (right-hand side).
The Add Relying Party Trust Wizard is displayed.
4 Confirm that Claims aware is selected and click Start.5 Select the Import data about the relying party from a file option and click Browse.
6 Select the metadata file downloaded by accessing the Infor STS metadata URL in Prerequisiteson page 32, and click Open.
7 Type Infor STS as the Display Name and click Next.
8 On the Choose Access Control Policy screen, select Permit Everyone and click Next.9 On the Ready to Add Trust screen, verify all the parameters and click Next.10 Deselect the check box for Open the Edit Claims rule dialog for this relying party trust when
the wizard closes and click Close.
Infor Operating Service Installation Guide | 33
Post-installation/Configuration

Adding claim rules to the Infor STS RPT in ADFS 5.01 Launch the ADFS management console.
2 Click Relying Party Trusts.
3 Right-click Infor STS created in the previous tasks and select Edit Claim Issuance Policy.
4 Click ADD rule, and select Send LDAP attributes as claims as the claim rule template.
5 Click Next, and type STS claims as the claim rule name.
6 Select Active Directory as the Attribute Store.
7 From the mapping of the LDAP attributes, map the User-Principal-Name attribute to Name ID inthe outgoing claim type.
8 Click OK and then Finish to save the claim rules.
Configuring ADFS as the identity provider in Infor STS1 Launch the Infor STS administration user interface by using the shortcut on the desktop from the
Infor OS installed machine.
2 Click IDP Connections of the tenant from the summary screen.
3 Click the “+” button to add a new IDP connection.
4 Type ADFS for the Display Name.
5 Click the Import from a file option and browse to the metadata file downloaded from ADFS in theprevious tasks.
The Entity ID, SSO and SLO endpoints, and signing certificates of the ADFS information are nowimported into Infor STS.
The Signature Algorithm is SHA-256 by default and is unchanged.
6 The Assertion Identity Key is set to Name ID. Select UPN from the IFS user lookup field drop-downlist.
7 Click Save at the top of the page to save the configuration.
Installation completedThe Infor OS is now installed and configured.
Access your Infor Ming.le portal by clicking the portal icon on the server desktop or by accessing thehttps://{Hostname or alias}:{UI Port}/Infor URL from a browser in any client connectedto the same network as the Infor OS server.
You can access your Grid Management pages by clicking the Grid icon on the server desktop or byaccessing the https://{Hostname/alias}:{Infor OS Router Port} URL from a browser inany client connected to the same network as the Infor OS server.
Infor Operating Service Installation Guide | 34
Post-installation/Configuration

If you are installing a multi-node farm, continue your installation by completing the steps in Adding anode to your Infor OS farm on page 49.
Infor Operating Service Installation Guide | 35
Post-installation/Configuration

Chapter 5: Additional configuration
Importing the Infor ION message listenerThis message listener is listening to all sync BODs that go through ION, and those BODs are used togenerate the social objects, graph information, and updates made on tasks, alerts, and ION notifications.
To set up the Infor ION Message Listener for Infor Ming.le:
1 Log into the Infor OS portal and switch to ION Desk in the app switcher.
2 Select Menu > Connect > Message Listeners.
3 Click Import.4 Browse to the <InforMingleInstall> directory, for example, C:\Program Files\Infor\
OS, and select MingleION-BODListener.xml.
Caution: This message listener xml file would have been updated with the database details ofInfor Ming.le in this specific installation. Do not copy this file from other installations. After themessage listener is successfully imported, the new message listener named "MingleListener" isadded to the list with an inactive status.
5 Verify the details of the message listener by clicking MingleListener.6 Provide the database username and password in the Credentials section.
7 Click Test to validate your configuration. The test result should be successful.
8 Click Save.
9 Click Activate.
10 Close the ION Desk by closing the browser.
Advanced Scalability of IONThe ION component of Infor OS offers an advanced scalability mode that you can use to provide greaterflexibility and control of server resources in a high-workload environment. Running the ION Gridenablement tool activates the advanced mode and enables a number of new nodes within the IONGrid deployment, as well as adding a new resource consumption menu option to the ION Desk. Seethe Infor Operating Service Administration Guide for details, or contact Infor Services for assistancewith configuring and balancing your Infor OS resources.
Infor Operating Service Installation Guide | 36
Additional configuration

Importing the IDM document flowThe IDM document flow establishes a connection point with ION and enables message publishingbetween IDM and ION. You must import the IDM document flow for the ION platform to work with IDM.For instructions on how to import the connection point and to enable user access, see the Infor DocumentManagement Installation Reference Guide.
Infor Operating Service Installation Guide | 37
Additional configuration

Chapter 6: Uninstalling Infor OS
To completely uninstall the Infor OS, you must uninstall the Infor OS components. See the "UninstallingInfor OS components" section for details about the uninstallation process.
Uninstalling Infor OS components1 On all Infor OS servers, open the Control Panel and navigate to Programs and Features.
2 In the installed programs list, select and right-click Infor OS.
3 Select Uninstall. Depending on your server specifications and installation specifics, this may takesome time.
4 On the Welcome dialog, select Remove and confirm the removal prompted by the installer.
5 On the Infor OS Uninstallation screen, validate the Infor OS farm database details that will beuninstalled.
6 Enter the database password.
7 Click Next.When the uninstallation is complete, the database, the installation folder, the program data locatedat :\ProgramData\Infor, the content folders, and any ADFS trusts or entries will not be deleted.If required, these must be deleted manually.
Note: To uninstall multi-node installations, the primary server must be the last server to undergothe uninstallation process.
Note: If you are uninstalling Infor OS from a server from a multi-node installation and the remainingInfor OS servers are still going to be used, the Elastic Search YML must be updated on the remaininginstallations. Refer to Updating the Elastic Search YML file on page 47 for instructions on how to updatethis file.
Infor Operating Service Installation Guide | 38
Uninstalling Infor OS
Appendix A: Upgrade instructions
When upgrading Infor OS, be sure to plan for downtime as the system cannot be in use during theupgrade. It is recommended before any upgrade that you back up all data. All servers must be on thesame Infor OS version before users access the system again.
Note: If an upgrade is being done on an installation using custom user accounts, see Custom useraccounts on page 64.
Before you startMake sure that:
• Java is updated to the required level of the update. Refer to Infor OS server requirements on page13 for the required JDK version. In the case that the JDK needs to be upgraded, follow theinstructions in Upgrading Infor OS with Corretto JDK on page 42.
• MVC is updated and any reboots needed for the update have occurred• You review the release notes• You back up all Infor OS servers and related databases• You reboot all Infor OS servers• The same account used for the initial installation is used for the upgrade• All applications in Infor OS are accessible before an upgrade• There are no active user sessions before you start an upgrade• Disable any antivirus software that is running; it can be turned on after Infor OS has been upgraded• Infor OS Manager should be closed.• The server is disabled in the load balancer before installing the additional node
Recommended upgrade pathThe Infor OS versions listed below are required stops for upgrading Infor OS. For your version of InforOS, you must go to the next mandatory stop on the upgrade path. To ensure the upgrade for Infor OSgoes smoothly, follow this upgrade path:
12.0.18 > 12.0.20 > 12.0.25 > 12.0.30 > 12.0.32 > 2020-06 > 2021-06
Infor Operating Service Installation Guide | 39
Upgrade instructions

If your version of Infor OS falls below 12.0.18, you are required to upgrade to 12.0.18 before followingthe upgrade path. From your current version, you upgrade the OS sequentially along the path above.You also have the option to stop in between mandatory version upgrades. For example: 12.0.07 to12.0.27 would follow the path 12.0.7 > 12.0.18 > 12.0.20 > 12.0.25 > 12.0.27.
Note: Before upgrading to a version higher than 12.0.32, make sure that the Elastic Search datamigration is complete in version 12.0.32.Note: Before upgrading a version higher than 12.0.37, make sure that the ION OneView data migrationis complete. Refer to Migration documentation on page 90 in the OneView search indexes on page90 appendix for more information on how to check the status of the migration.
Checking Elastic Search cluster healthTo check the status the cluster health, execute the _cluster/health endpoint in the Elasticsearch Servicewith this command:
Infor OS=>IONAPI=>Infor ION API => Infor Search => “Infor Search MESSearchService” =>Documentation => GET /healthcheck => Execute
If you receive a 406 Error: Not Acceptable and 200 Success. message, see Resolving theElastic Search cluster health 404 error on page 40.
If you are on an older version of Infor OS that does not include the Infor Search API listed in thecommand above, you can access the health check by checking this URL in a browser:https://servername.com:9200/_cluster/health (change the servername.com to your serverenvironment).
If the status of the Elasticsearch Service is red, resolve the issue before proceeding with the installation.If the cluster state is yellow, you can proceed with the installation, but it is advisable to determine whythe cluster state is yellow and take appropriate measures to change it to green. This is specificallyimportant in a multi-node setup where data loss may result in certain scenarios.
Resolving the Elastic Search cluster health 404 error1 Check whether the cluster health is showing yellow in the elastic widget.
2 Check this URL: https://servername.com:9200/_cat/indices?v
This returns a display with a series of columns, including a "rep" column.
On a single node/host server setup, no entries in the rep column should have a value of 1. Theprimary shards must be there; however, on a single node/server environment, there should neverbe a replica shard setup. None of the entries under the rep column should have a value other than0.
3 Launch the Postman app.
a Change the request type from GET to PUT.b In Postman, put the https://servername.com:9200/*/_settings URL next to the
PUT.
Infor Operating Service Installation Guide | 40
Upgrade instructions

c Click the Authorization tab. Under the Type dropdown, select Basic Auth and enter thelogin/password from the dbo.ServiceConfigurationDetail table.
d Click the Body tab, change to Raw radio button, on the right hand side of the same row changethe dropdown where it says Text to JSON.
e Paste this string in the body below the radio buttons:
{"index" :{ "number_of_replicas" : 0 }}
f Click Send.
4 In a Chrome browser, check https://servername.com:9200/_cat/indices?v in a browseragain. The rep column should show 0 for all entries.
a Change the URL to https://servername.com:9200/_cluster/healthb Confirm that a normal response is shown.c Go to Homepages in the portal and refresh to see the Cluster Health widget. It should show
Status = green with a check mark.
Replicate the steps above only if you are using the same settings and only if you are using a singleserver/node installation.
Stopping the ION API service before an upgrade
Caution: There is an issue that occurs during an upgrade that corrupts the ION API service. To avoidthis, the service must be stopped manually before an upgrade.
To stop the service
1 Open the services application.
2 Find Infor ION API service in the list.
3 Stop the service.
Switching to AWS Corretto JDKStarting with Infor OS Release 12.0.37, Infor OS supports the use only for AWS Corretto JDK. If youare upgrading from an installation that uses Oracle Java JDK, this task must be performed before theupgrade to switch to AWS Corretto.
Note: In a multi-node upgrade, this task must be completed on all nodes before you proceed with theupgrade.
1 Download and install AWS Corretto. Refer to Server prerequisites on page 11 for the supportedCorretto version.
Infor Operating Service Installation Guide | 41
Upgrade instructions
2 Update the JAVA_HOME and path in the System Environment Variables with the AWS Corretto8 installation path.
To update the JAVA_HOME variable:
a Go to the Control Panel and click System and Security.b Click Advanced System Settings.c On the popup, click Environment Variables.d Find JAVA_HOME in the list and click it.e Input the JDK file path.
For example: c:\program files\Amazon Corretto[newjdkversion]
f Click OK to save the information.
To update the path variable:
a Go to the Control Panel and click System and Security.b Click Advanced System Settings.c On the popup, click Environment Variables.d Find path in the list and click it.e Input the JDK file path in the bin folder.
For example: c:\program files\Amazon Corretto[newjdkversion]\bin
f Click OK to save the information.
Upgrading Infor OS with Corretto JDKThe following procedures are necessary in order to upgrade Infor OS with an updated version of CorrettoJDK.
Setting up the updated Corretto JDK before an upgradeTo set up Corretto:
1 Download the zip file from the updated Corretto JDK.
Caution: Make sure that the zip file is downloaded. Do not download and run the MSI file, as itoverwrites the older version of Corretto and interferes with the upgrade.
2 Unzip the folder and copy every extracted file into this Corretto file path: C:\ProgramFiles\Amazon Corretto
Caution: Do not delete the existing JDK folders.
3 Complete these steps to update the PATH variable:
a Open the Control Panel and go to System and Security > System.b Click Advanced System Settings.c Click Environment Variables on the popup window.d Find and select PATH in the list. Click the entry of the current JDK file path bin folder.
Infor Operating Service Installation Guide | 42
Upgrade instructions

For example: c:\program files\Amazon Corretto[currentjdkversion]\bin
e Click Delete.f Click New. Enter the bin file path of the new JDK version.
For example: c:\program files\Amazon Corretto[newjdkversion]\bin
g Click OK to save the information.
4 Click the JAVA_HOME path and complete these steps:
a Open the Control Panel and click System and Security.b Click Advanced System Settings.c Click Environment Variables on the popup window.d Find and select JAVA_HOME from the list.e Input the JDK file path to the bin folder.
For example: c:\program files\Amazon Corretto[newjdkversion]\bin
f Click OK to save the information.
Updating the Corretto JDK in Infor OSTo update the Corretto JDK:
1 Update the JDK path on the destination screen with the new Corretto JDK path during the InforOS upgrade.
Note: This must be completed on all nodes before you continue with the next step.
2 After you finish the updates, complete these steps to update the Grid JDK :
a Navigate to the [grid_root_installation_path]\bin folder.b Run StopAllHosts.cmdc Open the command prompt.d Change the directory to grid_root_installation_path\bine Execute changejdk as an administrator and use the new file path to the new JDK as the
parameter.
For example: changejdk "c:\program files\Amazon Corretto\[newjdkversion]"
Note: You must do this on all nodes before you continue with the next step.
f Run StartAllHosts.cmd
Checking the server prerequisitesYou use the prerequisites tool to check if the server where Infor OS is to be installed meets all thenecessary prerequisites. You access the prerequisites tool by completing these steps:
1 Go to the Tools folder inside the Infor OS Installer ISO.2 Extract the InforOSPreRequisiteTool.zip folder.
Infor Operating Service Installation Guide | 43
Upgrade instructions

3 Open the command prompt as an administrator.4 Change the path where the Pre-requisite jar file is available in the extracted folder.5 Run the command: java -jar com.infor.xiplatform.prerequisitetool-1.0.0.jar
Once the tool is running, enter the server details checked by the prerequisite tool.
To check the server parameters:
1 Click Browse to select where Infor OS is to be installed. For example: C:\Program Files
2 For the DB Host name, enter the host name or IP address of the Fully Qualified Domain Name(FQDN) of the SQL server.
3 Provide the port where your MS SQL server instance is running.
Note: You can leave this field blank if the database uses an instance.
4 Provide the instance or schema where your MS SQL server instance is running.
Note: You can leave this field blank if the database uses a port.
5 Provide the username of the SQL server user who has the SQL server dbcreator role.
6 Enter the password of the SQL server user.
7 Enter the Host Name of the FQDN of the ADFS server.
8 Enter the username of the ADFS administrator account.
9 Enter the ADFS administrator’s password.
10 Click Run. The tool compares the server to the prerequisites and generates a report of the results.Make sure that the server meets the minimum requirements before proceeding to install Infor OS.
Applying a service pack to Infor OS 12.0.0Caution:
Upgrading to Infor OS version 12.0.32 can be done only from Infor OS version 12.0.30.
Note: Make sure that the update is applied to all servers. All servers in a farm must be updated beforeyou allow users to access the system.
To apply the service pack:
1 Using Windows Explorer, navigate to the folder where the new version of the Infor OS installer hasbeen downloaded.
2 Right-click the setup-exe file, and select the Run as Administrator option in the menu to startthe installer.
A popup dialog is shown to confirm that you want to upgrade Infor OS.
3 Click Yes.
4 On the InstallShield Wizard for Infor OS page, click Next.5 Accept the default Destination Folder for Infor OS. Specify the appropriate JDK Install Path. If
you are switching the JDK to use AWS Corretto 8, input the path where AWS Corretto was installed.Click Next.
Infor Operating Service Installation Guide | 44
Upgrade instructions

6 On the Farm Database Configuration page, specify the system administrator (sa) Password andclick Next.Wait for the validation to complete.
The Certificate Update screen is displayed only if the security certificates that are stored in thedatabase are expired.
7 Select the identity provider type this installation is using.
8 Provide a new SSL Certificate File and the SSL Password for the User Interface IIS, BackendIIS, and IONAPI Gateway certificates. If STS is selected as the identity provider type, provide theSSL Certificate File and SSL Password for the Microservice UI Router.
9 Click Next.10 On the Ready to Upgrade Infor OS page, click Install.11 After the installation is complete, confirm that the list of installed programs in your Control Panel
now includes Infor OS.
12 After the update is complete, you must also update the registry content. For information on howto update the registry, see Installing the latest ION Registry content on page 53.
Note: After an upgrade in a multi-node environment, ensure that these Infor Ming.le services aredisabled for all additional hosts:
• Infor Federation Services Timer Service• Infor Ming.le Cache Service• Infor Ming.le GraphDB Service• Infor Ming.le IFSBackground Service• Infor Ming.le Shredder Service
Updating the Grid to AWS Corretto JDKAfter you complete the upgrade, the JDK on which the Grid is running must be changed to the AWSCorretto JDK. This task must be completed, only if the JDK path was changed from Oracle Java JDKto AWS Corretto during the upgrade.
Note: In a multi-node upgrade, this task must be completed on all nodes.
1 Stop the Grid.
2 Change the JDK to AWS Corretto 8:
a Open the Command Prompt.b Change the directory to grid_root_installation_path\binc Execute changejdk.cmd as an administrator and use the new file with the file path to the
new JDK as the parameter. For example: changejdk.cmd "c:\program files\AmazonCorretto\[newjdkversion]"
3 Restart the Grid.
4 Check the applications in the Grid and make sure there are no errors.
5 Uninstall Oracle Java.
Infor Operating Service Installation Guide | 45
Upgrade instructions

Rerunning the Grid PowerShell scriptCaution: In Infor OS version 2020-06, there has been a change to the SAML Session Provider, andthe Grid PowerShell script must be run again on the ADFS server to maintain functionality.
Note: This is necessary only if ADFS is the identity provider being used for Infor OS. If your installationis using Infor STS, these steps can be skipped.
To rerun the Grid PowerShell script:
1 Open Infor OS Manager by right-clicking the desktop icon and select Run as Administrator.a Provide the Database Server. In the Database Server field provide the Host Name of Fully
Qualified Domain Name (FQDN) of the SQL server. If a database instance is used, add theinstance name after the FQDN of the SQL server. For example:
b Select the Database Type. The default type is [SQL Server FQDN]\[Instance]SQL Server.c Provide the Port for the SQL server.
Note: You can leave this field blank if the database uses an instance.
d Provide the instance or schema where your MS SQL server instance is running.
Note: You can leave this field blank if the database uses a port.
e Select the Authentication Mode. The default mode is SQL Server Authentication.f Provide the database system administrator's User Login.g Provide the database system administrator's Password.h Click the check mark icon to validate credentials and query what Infor OS farms are available.i When the validation is successful, select the Infor OS Farm. For example, InforOSFarm.j Click Continue.
2 Select the Applications tab
3 Click the download icon on the latest Grid entry and specify the download path for theGrid-XiPlatform application.
Note: Save these files in a location where they can be moved to your AD FS server. These filesare named with the following variables: infor_{farm name}_{environment variable}_ {file name}_{fileaction}.ps1
4 Access the ADFS server.
5 Open Windows PowerShell as an administrator.
6 Run the Set-ExecutionPolicy Unrestricted command and confirm the ExecutionPolicy change by typing Y.
7 Press Enter.8 Run the Grid-XiPlatform PowerShell script.
Renewing the Grid client certificates and OAuth keysIn version 2020-12, the Grid client certificates and the OAuth keys will expire after one year. If theseare expired, an error stating The current keys have been used for more than one yearand should be renewed is displayed in the Grid under Security > OAuth 1.0a Credentials.
Infor Operating Service Installation Guide | 46
Upgrade instructions

You must renew the Grid client certificates and OAuth keys to fix this error and restore completefunctionality.
Renewing the Grid client certificatesYou must complete this task on all Infor OS nodes.
To update the Grid client certificates in Infor OS Manager:
1 Start Infor OS Manager in advanced mode.
Note: To start the Infor OS Manager in advanced mode, see the "Enabling advanced mode features"section in the Infor Operating Service Administration Guide.
2 Select Manage Grid Applications.
3 Click Update Client Certificates.
4 Click OK.
5 Once completed, click OK on the popup.
Renewing OAuth keys
Caution: Before you renew the OAuth keys, you must first renew the Grid client certificates. SeeRenewing the Grid client certificates on page 47.
This task needs to be done only on the primary node.
To update the Grid client certificates in Infor OS Manager:
1 Start Infor OS Manager in advanced mode.
Note: To start the Infor OS Manager in advanced mode, see the "Enabling advanced mode features"section in the Infor Operating Service Administration Guide.
2 Select Manage Grid Applications.
3 Click Renew Grid OAuth Keys.
4 Click OK.
5 Once completed, click OK on the popup.
Updating the Elastic Search YML fileIf you are upgrading a multi-node environment, you must perform this task after you have upgradedall nodes on all servers.
Caution: You must complete this task after the installation to ensure that Elastic Search is functionaland to prevent any data loss.
Infor Operating Service Installation Guide | 47
Upgrade instructions

On the Infor OS server:
1 Open Infor OS Manager:
a Provide the Database Server. In theDatabase Server field, provide the Host Name of FullyQualified Domain Name (FQDN) of the SQL Server.
b Select the Database Type. The default type is SQL Server.c Provide the Port for the SQL Server.
Note: You can leave this field blank if the database uses an instance.
d Provide the instance or schema where your MS SQL server instance is running.
Note: You can leave this field blank if the database uses a port.
e Select the Authentication Mode. The default mode is SQL Server Authentication.f Provide the database system administrator's User Login.g Provide the database system administrator's Password.h Click the check mark icon to validate credentials and query what Infor OS farms are available.i When the validation is successful, select the Infor OS Farm. For example, Infor XXX Farm.j Click Continue.
2 Select Advanced Features.
3 Click Update ES YML File.
If the status bar progress stops when you are updating the YML file, an error has occurred. Exitthe progress window and check the log file to see what error has occurred.
Restarting the Infor Ming.le Search ServiceAfter the YML file is updated, you must restart the Infor Ming.le Search Service:
1 Open Windows Services.
2 Find Infor Search Service.
3 Right-click it and select Restart.
Checking Elastic Search functionalityTo see if all applications are available after the Elastic Search migration, check the Homepage IndexStatistics widget within Infor Homepages.
Infor Operating Service Installation Guide | 48
Upgrade instructions

Appendix B: Adding a node to your Infor OS farm
If you are upgrading a multi-node environment:
• Before performing the upgrade process, remove all nodes from the load balancer except the primaryserver where the upgrade is going to be performed first.
• For all subsequent nodes, add the node back to the load balancer but only after the upgrade iscompleted.Note: The installation path must be identical on all nodes. If the installation path differs, applicationsare not accessible
• Make sure that all servers have been added to the Elastic Search YML file. To see if all serversare there:1 In the folder where Infor OS is installed, go to Services/EnterpriseSearch/Config.2 Open the ElasticSearch.yml file.3 Find discovery.zen.ping.unicasts.hosts in the file and see if its value contains all
the servers.
If a server is missing, follow the steps in the "Updating the Elastic Search YML file" section.
Before you start, these requirements must be in place for this configuration to work:
• An alias• A load balancer
• The load balancer must be configured for a Sticky session• During the installation process, the load balancer is configured to point to a single host• The load balancer must pass through certificates
• Certificates that are valid for an alias and for all servers in the farm• Disable any antivirus software that is running; it can be turned on after Infor OS has been installed
and configured.
Caution: All servers that will be part of the Infor Operating Service farm are required to be in thesame domain.
Note: When you install additional hosts, ensure that these Infor Ming.le services are disabled after theinstallation of all additional hosts:• Infor Federation Services Timer Service• Infor Ming.le GraphDB Service• Infor Ming.le Shredder Service• Infor Ming.le Cache Service• Infor Ming.le IFS Background Service
If you are upgrading a multi-node environment:
Infor Operating Service Installation Guide | 49
Adding a node to your Infor OS farm

• Before performing the upgrade process, remove all nodes from the load balancer except the primaryserver where the upgrade is going to be performed first.
• For all subsequent nodes, add the node back to the load balancer only after the upgrade iscompleted.
To add a node to your Infor OS farm:
1 Right-click the setup.exe file and click Run as Administrator.2 On the Welcome to the Infor OS installation wizard screen, click Next.3 On the Choose Destination Location screen:
a Select a Destination Folder where the product is to be installed. We recommend that you toinstall in <drive>:\Program Files\Infor\OS.
b Select the JDK Install path.c Click Next.
Note: The installer verifies the JDK version.
4 On the Farm Database Configuration screen:
a Select SQL Server.b In the DB Server field, provide the Host Name of Fully Qualified Domain Name (FQDN) of the
SQL Server.c Provide the Port where your MS SQL Server instance is running. The default port is 1433.
See the caution statement in Federation Server requirements on page 12 for possible conflictswith the default port.
Note: You can leave this field blank if the database uses an instance.
d Provide the instance or schema where your MS SQL server instance is running.
Note: You can leave the field blank if the database uses a port.
e Provide the Username and Password of the SQL Server system administrator.f Click Validate to verify whether the server connection and credential details provided are valid.g When the validation is successful, click OK on the Connection Succeeded confirmation.
Select Use Existing Farm and select the farm name that was previously created.
Note: The installer uses the configuration details provided by the Infor OS farm database to addeach node.
5 On the Enterprise Search Configuration screen, provide:
Enterprise Search Directory
Select a path to store the Elastic Search content.
Caution: The Enterprise Search directory must be on a local drive.
Note: The installer checks that the selected content drive has enough space for the sizingconfiguration:
• If the total free disk space on the content drive is greater than or equal to the required diskspace, the installer continues as normal.
• If the total free disk space on the content drive is from 80% to 99% of that required disk space,the installer displays a warning stating that disk space may run out on the selected drive locationand the installation can continue.
Infor Operating Service Installation Guide | 50
Adding a node to your Infor OS farm

• If the total free disk space on the content drive is less than 80% of the required disk space,the installer displays an error stating that there is not enough free disk space on the selectedcontent drive and the installation will not continue.
6 On the Ready to Install Infor OS screen, click Install.
If you are upgrading a multi-node environment, you must complete the following "Updating theElastic Search YML file" task after you have upgraded all nodes on all servers.
Updating the Elastic Search YML fileCaution: This task must be done after the installation to ensure that the Elastic Search is functionaland to prevent any data loss.
On the Infor OS server:
1 Open Infor OS Manager:
a Select the database server. In the Database Server field, provide the host name of the FullyQualified Domain Name (FQDN) of the SQL Server.
b Select the Database Type. The default type is SQL Server.c Provide the Port for the SQL Server.
Note: You can leave this field blank if the database uses an instance.
d Provide the instance or schema where your MS SQL server instance is running.
Note: You can leave this field blank if the database uses a port.
e Select the Authentication Mode. The default mode is SQL Server Authentication.f Provide the database system administrator's User Login.g Provide the database system administrator's Password.h Click the check mark icon to validate credentials and query what Infor OS farms are available.i When the validation is successful, select the Infor OS Farm.j Click Continue.
2 Select Advanced Features.
3 Click Update ES YML File.
When you are updating the YML file, if the status bar progress stops, an error has occurred. Exitthe progress window and check the log file to see what error has occurred.
Restarting the Infor Ming.le Search ServiceAfter the YML file is updated, you must restart the Infor Ming.le Search Service:
1 Open Windows Services.
2 Find Infor Search Service.
Infor Operating Service Installation Guide | 51
Adding a node to your Infor OS farm

3 Right-click it and select Restart.
Infor Operating Service Installation Guide | 52
Adding a node to your Infor OS farm

Appendix C: Installing the latest ION Registry content
New releases of Infor ION Registry content are independent of the release schedule of the ION version.You can update your ION Registry with the latest content by downloading the zip file from the InforSupport Portal.
This is the list of knowledge base (KB) numbers with the latest ION Registry content:
• ION Registry 2.12.x – KB 1619540
To upgrade to the latest content within your current base version, download the highest patch solutionof the base version, import the file by opening the menu in ION Desk, and go to Data Catalog >Standard Object Schemas. Then, click the import icon on the Standard Object Schemas page. Seethe "Uploading a new version of a standard library" section in the Infor ION Desk User Guide.
If you want to upgrade to a different higher base version, upgrade to the 2.x.0 version of the new basefirst. Then upgrade to its highest patch solution. For example, if you want to upgrade your registrycontent from 2.10.5 to 2.12.1, you must first move to 2.12.0 and then to 2.12.1.
Note that ION 12.0 is delivered with the base version of ION Registry content 2.12.0.
Infor Operating Service Installation Guide | 53
Installing the latest ION Registry content

Appendix D: Certification preparation
The Infor OS requires a certificate that is trusted by all browsers that use Infor OS UIs. All certificatesmust be signed by a certificate authority. It is recommended that you use a recognized external certificateauthority, which will allow internal access as well as support remote access and mobile applications.An internal certificate authority can be used, but its remote access and mobile applications cannot beused.
Ensure the certificate applies to these conditions:
• A certificate signed by a certificate authority, trusted by the browsers that will access Infor OS UIs• Type: Server certificate• Cover these common names:
• If no alias is used, the hostname (fqhn) of the hostname(s) where Infor OS is installed• If an alias or loadbalancer is used, the alias or load balancer hostname(fqhn). Wildcard
certificates are supported.
For more information, see the background information on using AD CS.
If your certificate must cover more than one name and you must use subject alternative names,ensure that all names are registered as a subject alternative name.
• Ensure that the Microsoft RSA Channel Cryptographic Provider is selected and the key has a bitlength of 2048.
• Use a certificate that is SHA-2 signed. SHA-1 signing is deprecated in the industry for securityreasons.
Infor Operating Service Installation Guide | 54
Certification preparation
Appendix E: Enabling HTTP support for IFS Services
You should complete this task only if your installation includes applications that require IFS Servicesto be running on HTTP instead of HTTPS.
1 Add the HTTP Binding for the Backend Service in IIS.
a Start Internet Information Services (IIS).b Navigate to the InforPlatformBackend site.c Click Bindings.
2 Add the HTTP port and click OK.
Note: The default port is 80 but is most likely used by the default site. We recommend that youuse port 9680.
3 Log into Infor OS manager.
4 Go to System Configurations.
5 Add a URL to the TechStackIFSServiceHttpURL, using the format:
http://{Hostname or Alias}:{Port}/IFSServices/
6 Click Save.
Infor Operating Service Installation Guide | 55
Enabling HTTP support for IFS Services

Appendix F: Stopping and starting Infor OS
For stopping and starting the Grid or Grid applications, see the "Managing the Grid" section in the InforION Grid Administration Guide.
Infor Operating Service Installation Guide | 56
Stopping and starting Infor OS

Appendix G: Running Infor BI with Infor OS 12.0
The In-Context BI contextual application was part of Infor Ming.le 11.1.x. This component was packagedand configured as part of IInfor Ming.le 11.1.x. Since In-Context BI was primarily a Business Intelligence(BI)-related component, going forward it will be packaged and delivered as part of the BI solution. Asa result, the In-Context BI contextual application is not bundled as part of Infor OS 12.0. See the latestInfor BI documentation for downloading the In-Context BI component and configuring it on Infor OS12.0.
If you are planning to run Infor BI 11.x with Infor OS 12.0, see this Knowledge Base article for direction:https://www.inforxtreme.com/espublic/EN/AnswerLinkDotNet/SoHo/Solutions/SoHoViewSolution.aspx?SolutionID=1697514.
Infor Operating Service Installation Guide | 57
Running Infor BI with Infor OS 12.0

Appendix H: Installing in Advance Mode
Caution: When doing an Advanced Mode installation, make sure to use the same farm name for alldatabases. Otherwise, adding additional nodes will fail. All databases belonging to the same Infor OSinstallation are assumed to have the same farm name.
When Install Databases in Advanced Mode is selected on the Farm Database Configuration screen,the installer allows for individual configuration of ION Grid, ION, IDM, Infor Ming.le, ION API, and IONMicro Services databases:
1 Configure the ION Grid database:
a Select SQL Server.b Enter the host name of the SQL server.c Provide the port number for the SQL server where the ION Grid database is being installed.
The default is port 1433.
Note: You can leave this field blank if the database uses an instance.
d Provide the instance or schema of the SQL Server where the ION Grid database is beinginstalled. The default is port 1433.
Note: You can leave this field blank if the database uses a port.
e Enter the database name. The default is Infor_[Farm Name]_Grid.f Enter the database user name and password of the SQL Server user who has the dbcreator
role.g Click Next.
2 Provide these ION database details:
a Select SQL Server.b Enter the host name of the SQL server.c Provide the port number for the SQL server where the ION database is being installed. The
default is port 1433.
Note: You can leave this field blank if the database uses an instance.
d Provide the instance or schema of the SQL server where the ION database is being installed.The default is port 1433.
Note: You can leave this field blank if the database uses a port.
e Enter the database name. The default is Infor_[Farm Name]_ION.f Enter the database user name and password of the SQL Server user who has the dbcreator
role.g Click Next.
Infor Operating Service Installation Guide | 58
Installing in Advance Mode

3 Configure the IDM database:
a Select SQL Server.b Enter the host name of the SQL server.c Provide the port number for the SQL server where the IDM database is being installed. The
default is port 1433.
Note: You can leave this field blank if the database uses an instance.
d Provide the instance or schema of the SQL Server where the IDM database is being installed.The default is port 1433.
Note: You can leave this field blank if the database uses a port.
e Enter the database name. The default is Infor_[Farm Name]_DocMgmt.f Enter the database user name and password of the SQL Server user who has the dbcreator
role.g Click Next.
4 Provide these Infor Ming.le database details:
a Select SQL Server.b Enter the host name of the SQL server.c Provide the port number for the SQL server where the Infor Ming.le database is being installed.
The default is port 1433.
Note: You can leave this field blank if the database uses an instance.
d Provide the instance or schema of the SQL Server where the Infor Ming.le database is beinginstalled. The default is port 1433.
Note: You can leave this field blank if the database uses a port.
e Enter the Infor Ming.le database name. The default is Infor_[Farm Name]_Mingle.f Enter the registry database name. The default is Infor_[Farm Name]_Registry.g Enter the database user name and password of the SQL Server user who has the dbcreator
role.h Click Next.
5 Provide these ION API database details:
a Select SQL Server.b Enter the host name of the SQL server.c Provide the port number for the SQL server where the ION API database is being installed.
The default is port 1433.
Note: You can leave this field blank if the database uses an instance.
d Provide the instance or schema of the SQL Server where the ION API database is beinginstalled. The default is port 1433.
Note: You can leave this field blank if the database uses a port.
e Enter the database name. The default is Infor_[Farm Name]_IONAPI.f Enter the database user name and password of the SQL Server user who has the dbcreator
role.g Click Next.
6 Provide these ION Micro Services database details:
a Select SQL Server.
Infor Operating Service Installation Guide | 59
Installing in Advance Mode

b Enter the host name of the SQL server.c Provide the port number for the SQL server where the ION Micro Services database is being
installed. The default is port 1433.
Note: You can leave this field blank if the database uses an instance.
d Provide the instance or schema of the SQL Server where the ION Micro Services database isbeing installed. The default is port 1433.
Note: You can leave this field blank if the database uses a port.
e Enter the database name. The default is Infor_[Farm Name]_IONServices.f Enter the database user name and password of the SQL Server user who has the dbcreator
role.g Click Next.
7 Return to step 5 in Installation on page 19 for the rest of the steps to complete the installationprocess.
Infor Operating Service Installation Guide | 60
Installing in Advance Mode

Appendix I: Configuring SSL
If the SQL server instance is configured to allow SSL traffic:
• The Force Encryption property must be set to No.• The root/CA certificate of SQL Server must be trusted in the Java trust store of the JDK used by
the Infor OS.
Infor Operating Service Installation Guide | 61
Configuring SSL

Appendix J: SQL Server Always On Availability Group(AOAG)
Infor OS can be installed on a SQL Server Always On Availability Group (AOAG). This appendixaddresses the prerequisites, recommendations, and limitations of AOAG.
Prerequisites• Available Windows Failover Cluster (WSFC)
• 3 or more nodes are recommended; at least 2 nodes in the cluster• Same Windows OS level on all nodes• Same Windows OS patching level on all nodes• Comparable server hardware on all nodes• Witness configured (file share recommended)
• SQL Server installed on all nodes• Same SQL Server version on all nodes• Same SQL Server patch level on all nodes• SQL Server installations configured for AOAG
Recommendations• Always On Availability Group
• Availability Mode: synchronous commit (mandatory)• Failover: automatic (optional)• Readable secondary (optional)• Session time-out: 10 seconds• Created against a "dummy" database• Listener configured
• Infor OS• AOAG disabled for installations and upgrades• AOAG enabled/re-enabled after installation/upgrade
Infor Operating Service Installation Guide | 62
SQL Server Always On Availability Group (AOAG)

• Installed against the AOAG listener
A database failover happening during the installation or upgrade of Infor OS is not supported. If sucha scenario occurs, the standard recovery process must be followed.
Note: Infor does not provide any assistance or support on setting up and configuring AOAG since thisa Microsoft product. Please consult Microsoft documentation or contact Microsoft support if help isneeded on how to set up AOAG appropriately for your system.
Infor Operating Service Installation Guide | 63
SQL Server Always On Availability Group (AOAG)

Appendix K: Custom user accounts
Installing with custom user accountsBefore you begin, if you are installing using a shared content folder, make sure that all specific useraccounts have read/write access to the shared drive before the installation. If the user does not havethe necessary permissions, Infor Ming.le attachments will not work. On the shared content drive, togive a specific user account the necessary access, the user must be given full access to the UNCfolder. If a local system account is being used, when giving full access to the UNC folder, the usernamemust be given in the format: <domain name>\<computer name>$
Caution: If a UNC path is used with an installation with custom user accounts, the content foldercannot be open in Windows Explorer during the installation.
If a specific user account is being used, the user account must be an administrator of the server wherethe application is installed. If this permission is not given to the user account, the services will not run.
Installing the custom user accountWhen Install using custom user accounts is selected on the User and Service Accountspage, theinstaller allows for specific user accounts to be used to install and run the Grid, Windows Services andApp Pools, Cache Service, and Search Service on the Custom User Accounts screen.
1 To install the Grid:
a To use a custom user account for the Grid, select Specific Account from the drop-down list.b Enter the Username.c Enter the Password.
Caution: Once the Grid account type has been set, it cannot be changed unless Infor OSis reinstalled.
2 To install Windows Services and IIS App Pools:
a To use a custom user account for the Windows Services and IIS App Pools, select SpecificAccount from the drop-down list.
b Enter the Username.c Enter the Password.
3 To install the Cache Service:
Infor Operating Service Installation Guide | 64
Custom user accounts

a To use a custom user account for the Cache Service, select Specific Account from thedrop-down list.
b Enter the Username.c Enter the Password.
4 To install the Search Service:
a To use a custom user account for the Search Service, select Specific Account from thedrop-down list.
b Enter the Username.c Enter the Password.
5 Click Next.
Modifying custom user accountsTo update the custom user accounts after the installation, start the installer through the command linewith the parameter -v“CONFIGCUSTOMUSERACC=TRUE”
1 Select Modify this installation.
2 On theDestination Location screen, confirm the Installation and JDK file path.
3 On the Farm Database Configuration screen, enter the Database User password to validatedatabase access.
4 On the Custom User Accounts screen, make all necessary changes to the user account informationand click Next.Note: The Grid account type and username cannot be changed. The only way to change this isto reinstall Infor Operating Service.
5 Click Install.
Upgrading with custom user accountsWhen upgrading an Infor OS installation that is using custom user accounts, the custom user accountscreen is displayed and prompts for the passwords to be re-entered. Custom user account types orusers cannot be changed during an upgrade. If the account type or the user must be changed, it canbe done only through maintenance mode after the upgrade has been completed.
Infor Operating Service Installation Guide | 65
Custom user accounts

Appendix L: Upgrading Infor OS with Infor STS asidentity provider
Caution: Infor M3 does not support Infor STS.
Before you startMake sure to check the ERP product documentation or consult with Infor Support that all applicationsare certified to work with Infor STS.
PrerequisitesInfor OS v 12.0.30 environment installed and configured with ADFS as an identity provider.
Migrating to Infor STSCaution: When performing the migration for ADFS to STS in a multi-node environment, only theserver performing the migration needs to be enabled in the load balancer. All other servers must bedisabled.
1 Open the command prompt as an administrator.
2 Navigate to the path where the already installed Infor OS setup is available.
3 Type this command:setup.exe -v"MIGRATETOSTS=true". Make sure that there is no spacebetween v and “MIGRATETOSTS=true”.
4 Select the Modify option and click Next.5 Verify the Infor OS installation folders and JDK path are set correctly and click Next.6 On the Farm Database Configuration screen, type the Database Password and click Next.7 On the Micros Services UI Router Configuration screen:
Infor Operating Service Installation Guide | 66
Upgrading Infor OS with Infor STS as identity provider

a Enter the Router Port. The default is 9553.b The Router Alias value is pre-populated with the External Alias value that is entered on the
User Interface IIS Configuration screen, and the Alias Port is pre-populated with the RouterPort value. You can edit these values if needed. If you are not using an external alias and analias port, these values can be set to the domain name and default port number.
Note: If you are installing a multi-node farm, the External Alias andAlias Port must match whathas been configured in your load balance.
8 Click Next.9 Continue with the rest of the maintenance installer and finish the maintenance installation.
Note: To ensure that all Infor STS components are installed and running successfully, launch theGRID administration user interface from the Infor OS installation folder.
For example: C:\Program Files\Infor\OS\InforTechStackGrid\bin\AdminUI
Check that STSAdminUI, STSConfigService, and STSRuntimeService are up and running.
Verify that a shortcut to launch STSAdminUI is created on the desktop and you can access it.
Post-installation stepsAfter Infor STS is installed successfully, you must complete these post-installation tasks:
1 Configure the Infor applications as service providers in Infor STS.2 Configure ADFS as the identity provider in Infor STS.3 Set up trust between Infor STS and ADFS.
Configuring Infor applications as service providers inInfor STS1 Launch the Infor OS Manager from the shortcut on the desktop and provide the database information
to log in.
2 Click the farm name at the top left-hand panel and confirm the selected identity provider.
3 If Infor STS is not selected as the identity provider from the drop-down, select Infor STS andclick Save.
4 Launch a command prompt as administrator, type iisreset, and press Enter.
5 Click Redeploy Core SAML and select Infor STS as the Identity Provider.6 Click OK to uninstall and reinstall Core SAML with properties of Infor STS as identity provider. This
also creates a service provider connection in Infor STS for GRID.
7 After successful redeployment of Core SAML, click Save to update the Infor STS as an identityprovider for the Infor OS portal application.
8 Click the Applications option from the menu on the left pane.
9 Click the Download icon for the XIPORTAL application.
Infor Operating Service Installation Guide | 67
Upgrading Infor OS with Infor STS as identity provider

10 From the pop-up, select Infor STS for the Identity Provider and click Create SPConnection.
11 Repeat steps 8 and 9 to register the INFORSTS application as well.
12 Launch the STS administration user interface. You should see three SP connections for the Infordefault tenant.
Note: All Infor OS applications launched as part of the Infor OS portal must be reconfigured to useInfor STS as identity provider. Refer to the Infor application documentation for the application-specificconfiguration.
Setting up trust between Infor STS and ADFS
AssumptionsInfor STS is installed successfully without any errors, and Infor applications are configured as SPconnections.
PrerequisitesThese are the prerequisites for setting up trust between Infor STS and ADFS:
• Download and save the ADFS metadata, acting as identity provider for the Infor STS.
Sample ADFS metadata URL:
https://<ADFS HOSTNAME>/Federationmetadata/2007-06/Federationmetadata.xml
• Download the Infor STS SAML SP metadata information and save it.
https://<XIPORTALHOSTNAME>:9553/inforsts/rest/metadata/00000000000000000000000000000000/saml/sp
Example:
https://inforos.mingledev.infor.com:9553/inforsts/rest/metadata/00000000000000000000000000000000/saml/sp
This can also be done from the Infor STS administration user interface, which is downloaded toyour desktop if you select Infor STS by completing these steps:
Note: The Tenant ID for the Infor STS default tenant is always set as00000000000000000000000000000000.
Infor Operating Service Installation Guide | 68
Upgrading Infor OS with Infor STS as identity provider

Downloading the Infor STS SAML metadata1 Launch the STS administration user interface from the desktop shortcut on the Infor machine.
2 Edit the default Infor tenant.
3 Navigate to settings from the left menu options.
4 Select the Download Federated Metadata tab and click Download SAML SP Metadata XML.
Note: The Tenant ID for the Infor STS default tenant is always set as00000000000000000000000000000000.
Configuring ADFS as the identity provider in Infor STS1 Launch the Infor STS administration user interface by using the shortcut on the desktop from the
Infor OS installed machine.
2 Click IDP Connections for the tenant from the summary screen.
3 Click the + button to add a new IDP connection.
4 Type ADFS for the Display Name.
5 Click the Import from a file option and browse to the metadata file downloaded from ADFS in theprevious tasks.
The Entity ID, SSO and SLO endpoints, and signing certificates of the ADFS information are nowimported into Infor STS.
6 The Assertion Identity Key is set to Name ID. Select UPN from the IFS user lookup fielddrop-down list.
7 Click Save at the top of the page to save the configuration.
Configuring Infor STS as the Relying Party Trust in ADFS 3.01 Log in to the ADFS server.
2 Launch the ADFS management console.
3 Click the Add Relying Party trusts link in the Actions section (right-hand side).
The Add Relying Party Trust Wizard is displayed.
4 Click Start.5 Select the Import data about the relying party from a file option and click Browse.
6 Select the metadata file downloaded by accessing the Infor STS metadata URL in Prerequisiteson page 29, and click Open.
7 Type Infor STS as the Display Name and click Next.
8 Select the I do not want to configure multifactor authentication option and Next.9 Select the Permit all users to access this relying party option.
10 Verify all the parameters and click Next.11 Deselect the check box for Configure claims for this application and click Close.
Infor Operating Service Installation Guide | 69
Upgrading Infor OS with Infor STS as identity provider

Adding claim rules to the Infor STS RPT in ADFS 3.01 Launch the ADFS management console.
2 Expand the Trust Relationships folder and click Relying Party Trusts.
3 Right-click Infor STS created in the previous tasks and select Edit Claim Rules.
4 Click ADD rule, and select Send LDAP attributes as claims as the claim rule template.
5 Click Next, and type STS claims as the claim rule name.
6 Select Active Directory as the Attribute Store.
7 From the mapping of the LDAP attributes, map the User-Principal-Name attribute to Name ID inthe outgoing claim type.
8 Click OK and then Finish to save the claim rules.
Configuring Infor STS as the Relying Party Trust in ADFS 4.01 Log in to the ADFS server.
2 Launch the ADFS management console.
3 Click the Add Relying Party trusts link in the Actions section (right-hand side).
The Add Relying Party Trust Wizard is displayed.
4 From the Welcome screen, select Claims Aware and click Start.5 Select the Import data about the relying party from a file option and click Browse.
6 Select the metadata file downloaded by accessing the Infor STS metadata URL in Prerequisiteson page 29, click Open, and click Next.
7 Type Infor STS as the Display Name and click Next.
8 On the Access Control Policy screen, select Permit Everyone and click Next.9 Verify all the parameters and click Next.10 Deselect the check box for Configure claims for this application and click Close.
Adding claim rules to the Infor STS RPT in ADFS 4.01 Launch the ADFS management console.
2 Click the Relying Party Trusts folder from the list of connections on the left-hand panel.
3 Right-click Infor STS created in the previous tasks and select Edit Claim Issuance Policy.
4 Click ADD rule, and select Send LDAP attributes as claims as the claim rule template.
5 Click Next, and type STS claims as the claim rule name.
6 Select Active Directory as the Attribute Store.
7 From the mapping of the LDAP attributes, map the User-Principal-Name attribute to Name ID inthe outgoing claim type.
8 Click OK and then Finish to save the claim rules.
Infor Operating Service Installation Guide | 70
Upgrading Infor OS with Infor STS as identity provider
Configuring Infor STS as the Relying Party Trust in ADFS 5.01 Log in to the ADFS server.
2 Launch the ADFS management console.
3 Click the Add Relying Party trusts link in the Actions section (right-hand side).
The Add Relying Party Trust Wizard is displayed.
4 Confirm that Claims aware is selected and click Start.5 Select the Import data about the relying party from a file option and click Browse.
6 Select the metadata file downloaded by accessing the Infor STS metadata URL in Prerequisiteson page 32, and click Open.
7 Type Infor STS as the Display Name and click Next.
8 On the Choose Access Control Policy screen, select Permit Everyone and click Next.9 On the Ready to Add Trust screen, verify all the parameters and click Next.10 Deselect the check box for Open the Edit Claims rule dialog for this relying party trust when
the wizard closes and click Close.
Adding claim rules to the Infor STS RPT in ADFS 5.01 Launch the ADFS management console.
2 Click Relying Party Trusts.
3 Right-click Infor STS created in the previous tasks and select Edit Claim Issuance Policy.
4 Click ADD rule, and select Send LDAP attributes as claims as the claim rule template.
5 Click Next, and type STS claims as the claim rule name.
6 Select Active Directory as the Attribute Store.
7 From the mapping of the LDAP attributes, map the User-Principal-Name attribute to Name ID inthe outgoing claim type.
8 Click OK and then Finish to save the claim rules.
Infor Operating Service Installation Guide | 71
Upgrading Infor OS with Infor STS as identity provider
Appendix M: Upgrading Infor OS to 12.0.30 with InforSTS as identity provider – multi-node
When upgrading or migrating multi-node installations, you must complete the tasks in this section:
Before you startMake sure to check the ERP product documentation or consult with Infor Support that all applicationsare certified to work with Infor STS.
Multi-node upgrade when using Infor STS as theidentity provider1 If there are two or more nodes involved, upgrade the first node to 12.0.30 with ADFS as the identity
provider. To do so, complete the instructions in Upgrade instructions on page 39.
2 Run the installer in the maintenance mode to migrate to STS on the first node. To do so, completethe instructions in Upgrading Infor OS with Infor STS as identity provider on page 66.
3 Run the post-installation steps on the first node as described in Upgrading Infor OS with Infor STSas identity provider on page 66.
4 Upgrade all the secondary nodes directly to 12.0.30. Note that you do not run the installer inmaintenance mode on the secondary nodes.
Multi-node upgrade when using ADFS as the identityprovider and later migrating to Infor STS1 If there are two or more nodes involved, upgrade the first node to 12.0.30 with ADFS as the identity
provider. To do so, complete the instructions in Upgrade instructions on page 39.
Infor Operating Service Installation Guide | 72
Upgrading Infor OS to 12.0.30 with Infor STS as identity provider – multi-node

2 Upgrade the secondary servers to 12.0.30.
3 When you are ready to migrate to Infor STS, run the installer in the maintenance mode to migrateto STS on the first node. To do so, complete the instructions in Upgrading Infor OS with Infor STSas identity provider on page 66.
4 Run the post-installation steps on the first node, as described in Upgrading Infor OS with Infor STSas identity provider on page 66. Repeat this step again for the secondary servers. Post-installationsteps are not required to be executed on secondary servers.
Infor Operating Service Installation Guide | 73
Upgrading Infor OS to 12.0.30 with Infor STS as identity provider – multi-node

Appendix N: Elastic Search
Infor Search is a common platform that provides indexing and search capabilities for some of the InforOS components. Infor Search currently includes these Infor OS components:
• Infor Ming.le• Infor Document Management
These applications use a common set of APIs for configuring, indexing, and searching for documents.
Infor Search Service is comprised of these services.
• Infor Search Configuration Service• Infor Search Indexing Service• Infor Search Service• Infor Search Scheduler Service
Elastic Search troubleshooting
Elastic Search is missing or not installed correctly after aninstallationIf Elastic Search is missing or not installed correctly after installing Infor OS, you can complete thesesteps to reinstall it:
1 Stop the Elastic Search Service.
a Go to the Windows Services application.b Find Elastic Search in the list.c Click Stop Service.
2 Go to the folder where the Elastic Search Content folder was created.
3 Rename the folder so it does not affect the reinstallation process.
4 Start Infor OS Manager in advanced mode.
For instructions on how to start Infor OS Manager in advanced mode, see the "Enabling advancemode features" section of the Infor Operating Service Administration Guide.
Infor Operating Service Installation Guide | 74
Elastic Search

5 Go to Advanced Features.
6 Click Reconfigure Elastic Search Service.
7 Click OK.
8 Stop the Search Windows service.
9 Go back to the Elastic Search Content folder and change the name to its original name.
10 Go back to Infor OS Manager.
11 Start the Search Windows service.
12 Go to Advanced Features.
13 Click Update ES YML file.
14 Go to the Windows Services application.
15 Find ION API Service in the list.
16 Right click ION API Service and select Restart.17 Find IONAPI Metadata Indexing Service in the list.
18 Right click IONAPI Metadata Indexing Service and select Restart.
Incorrect Elastic Search AliasIf the Elastic Search Alias is incorrect or needs to be changed, you can complete these steps to updateit:
1 Start Infor OS Manager in advanced mode.
For instructions on how to start Infor OS Manager in advanced mode, see the "Enabling advancemode features" section of the Infor Operating Service Administration Guide.
2 Go to Advanced Features.
3 Click Reconfigure ES Alias URL.
4 Enter the Elastic Search Alias.
5 Click OK when finished.
Once finished, complete the steps to Reconfigure Elastic Search Service.
Elastic Search templates are missingIf the Elastic Search templates are missing from ION API, you can add them by completing these steps:
1 Start Infor OS Manager in advanced mode.
For instructions on how to start Infor OS Manager in advanced mode, see the "Enabling advancemode features" section of the Infor Operating Service Administration Guide.
2 Go to Advanced Features.
3 Click Reconfigure ES Templates.
4 Click OK when finished.
Infor Operating Service Installation Guide | 75
Elastic Search

Log troubleshootingThis section describes common errors that can happen due to misconfiguration or failures in the serviceand lists error codes logged by the application that can be used to troubleshoot issues.
Verifying search success for newly-indexed documentsTo verify the search for newly-indexed documents where a recent search has failed, launch the webbrowser development tools, navigate to the Network tab, and perform the same search that recentlyfailed.
Select the findterms response and ensure that the application and repository that the missingdocument should belong to exist within the response payload.
Perform this by looking for a searchTargets field inside the context parameter within the payload.
The value of this field shows all applications and their respective repositories searched. These arepossible problems:
• Application logical ID missing
The desired application, along with all of its repositories, was not included in the search becausethe application does not exist for the tenant. See Verifying Add Application success on page 76.It is also possible that the user performing the search does not have permission to access theapplication. In that case, confirm that the user’s security roles grant access to the desired application.
• Missing repository name
The repository either does not exist, or the user does not have the appropriate security roles tosearch the desired repository. Refer to the Document Type, Accounting Entity, and Location forsuch security concerns. See Verifying Add Repository success on page 77.
• Missing document within a repository
The desired document is not searchable because it does not exist. Verify that the document wassuccessfully indexed. See Verifying Document Indexing success on page 77.
If you successfully verify all of these scenarios, try searching for the document by its primary key (ID)or using a different set of search terms.
By default, only the top 10 best scoring documents for each application are returned to the user as asearch result.
Verifying Add Application successNavigate to the Config Service log file, search for ERROR, and locate the time when the application wasexpected to be added. If the specific error log is found, examine the contents for these possiblescenarios:
• Application already exists
Infor Operating Service Installation Guide | 76
Elastic Search

The tenant already has an existing application with the supplied logical ID, regardless of the versionnumber.
• Logical ID format validation
The logical ID of the new application must have a specific format. A valid format example islid://infor.abc.1, where the prefix lid:// is required, and followed by three separatephrases separated by dots. In the example, the three phrases are infor, abc, and 1.
Verifying Add Repository successNavigate to the Config Service log file, search for ERROR, and locate the time when the repository wasexpected to be added. If the specific error log is found, it may be the result of one of these scenarios:
• missing parameter
This indicates that a required field within the payload is missing or misspelled.
• invalid field value
This is usually because of an invalid repository version value. The version should not contain anynon-integer characters or more than one decimal point.
• logicalId format
The logical ID of the new application must have a specific format. A valid format example islid://infor.abc.1, where the prefix lid:// is required, and followed by three separatephrases separated by dots. In the example, the three phrases are infor, abc, and 1.
If none of these scenarios applies, navigate to the Config Service log file, search for pending, andlocate the time when the repository was expected to be added. If you find a match within the logs withthe log output indicating something similar to creating pending repository..., then validatethat the tenant name was inserted correctly while the repository was being added. This can be verifiedby the same log line.
INFO| Creating pending repository inventoryhold in application lid://infordevtest.1 for tenant tbbartolodev_tst
INFO| Finished creating pending repository inventoryhold in application lid://infordevtest.1 for tenant tbbartolodev_tst
Verifying Document Indexing successNavigate to the Indexer Service log file, search for ERROR, and locate the time when the documentswere expected to be indexed. If the specific error log is found, examine the contents for any of thesepossible scenarios:
• application repository not found
Infor Operating Service Installation Guide | 77
Elastic Search

The destination repository for the indexed documents does not exist, or its repository name ismisspelled. See Verifying Add Repository success on page 77.
• docId: missing
The repository's document ID is either missing entirely from the indexed document or misspelled.This is usually caused by an outdated index definition. See Correcting outdated repository definitionson page 78.
• dynamic introduction of [FIELD]
A field that is not included in the original repository's index definition was added during indexing.Repository definitions are strict, and new fields cannot be added during indexing. This is alsousually caused by an outdated index definition. See Correcting outdated repository definitions onpage 78.
If none of these scenarios applies, navigate to the Indexer Service log file, search forActivityAdviceLogger, and locate the time at when the documents were expected to be indexed.If the specific error log is found, examine the contents for this possible scenario:
• "errorMessage":"Application not found"
The application is not provisioned for the tenant, or the application's logical ID is misspelled. SeeVerifying Add Application success on page 76.
Correcting outdated repository definitionsIf the outdated repository is from Chat (with logical ID lid://infor.chat.1) or Social (with logicalID lid://infor.social.1), outdated repository definitions can typically be fixed with a tenantupdate. Otherwise, see the Data Catalog to acquire the most recent definition for the repository.
Error codesUse these lists of the error codes that can be found in the log files. The lists include a description ofeach error and the potential cause for troubleshooting issues.
Configuration errorsError DescriptionError Code
An unexpected error occurred that was not caughtin the code. This type of error is non-specific andmust be tracked down in the log file and diag-nosed according to its surrounding logs.
FAIL_UNEXPECTED_ERROR
Infor Operating Service Installation Guide | 78
Elastic Search

Error DescriptionError Code
The calling client does not have the correct per-missions to the requested endpoint.
FAIL_ACCESS_DENIED
A parameter that was expected was not presentin the request payload.
FAIL_MISSING_PARAMETER
The value supplied for the given field is in an in-valid format, for example, giving a sequence ofletters instead of an integer.
FAIL_INVALID_PARAMETER_VALUE
Caching system failed for the specific request,and a response may have been returned with adelay.
FAIL_INITIALIZE_CACHE
The data type supplied in an element’s configura-tion is not supported by Elasticsearch.
FAIL_UNSUPPORTED_DATATYPE
Elastic Search call failure due to a bad payloador non-existent objects.
FAIL_UNSUCCESSFUL_OPERATION
Elastic Search IO Failure.FAIL_CLIENT_IO
Create/Update Elasticsearch Alias Failure.FAIL_ALIASES_OPERATION
An application with the given name already existsfor the tenant. Applications cannot have identicalnames.
AS_INVALID_APPLICATION_EXISTS
The tenant cannot be deleted until all of its appli-cations have been deleted first.
AS_INVALID_TENANT_APPLICATION_DELETE
The analysis field within the indexSettings fieldduring the creation or breaking-change-updateof a repository is not of standard JSON format.
AS_INVALID_OPERATION
The threshold field within the indexSettings fieldmust have a value that is LOW, MED, or HIGH.
AS_INVALID_VALUE
The tenant to be activated is already in an activestate.
AS_INVALID_TENANT_ALREADY_ACTIVE
The spotlightConfiguration field in the new orupdated repository definition has an invalid JSONconstruction.
AS_INVALID_SPOTLIGHTCONFIGURATION
The given repository name does not exist for atenant application.
AS_NOSUCH_REPOSITORY
The provided logical ID for a given tenant appli-cation does not exist in the database.
AS_NOSUCH_TENANT_APPLICATION
This is a critical error that should never happen.The Elasticsearch index cannot be found.
AS_NOSUCH_INDEX
Infor Operating Service Installation Guide | 79
Elastic Search

Error DescriptionError Code
A critical error occurs during the process of re-indexing the data from one Elasticsearch indexto another. If the destination index is not found,this error occurs.
AS_NOSUCH_DESTINATION_INDEX
Failure occurred during the addition of defaultrepositories for a given application. The file wherean application’s default repositories are storedwas not read successfully. This most likely hap-pens during an update tenant request or a newapplication request.
AS_FAIL_DEFINITION_ZIP_READ
Failure occurred while parsing an application'sdefinition to create its inner repositories and inter-est centers, if any.
AS_FAIL_ADD_DEFINITION
An error occurred while reading from the file,which defines the tenant’s default applications.This most likely happens during the update of atenant, but generally should not happen. See theprevious error for further details.
AS_FILE_PROCESS_ERROR
A version of a given repository was not found inthe database. This is a critical error that shouldnot happen.
AS_NOSUCH_VERSION
An error may occur during the update of a tenantwhen its inner applications are attempting to becreated or updated. The registry service thatcontains the definitions to certain applicationshas failed. This is a critical error that should nothappen. See previous errors for further details.
AS_FAIL_REGISTRY_READ
A failure happens while reading from Elastic-search. This happens during a re-indexing proce-dure. This is a critical error that should not occur.
AS_INDEXMGMT_UNEXPECTED_ERROR
Each user belonging to the tenant should havea valid authorization token to pass to the serverin order to validate itself. If such a token is miss-ing, then this error occurs. This should neverhappen for legitimate users.
AS_FAIL_AUTHORIZATION
_TOKEN_NOT_PROVIDED
This is a critical error that should not occur butmay occur during the resizing of an Elasticsearchcluster.
AS_FAIL_SHARD_CONFIGURATION
Infor Operating Service Installation Guide | 80
Elastic Search

Indexing errorsError descriptionError code
The given logical ID during the indexing of docu-ments is not of an existing application. No appli-cation for the tenant has such a logical ID.
IS_MISSING_APPLICATION_LOGICAL_ID
This is a critical error that should not occur. Asof now, this may happen during the archiving ofa topic in the Infor Ming.le Chat application.
IS_MISSING_DELETE_ELEMENTS
The version specified in the indexing request isnot valid. Currently, only version 1 and 2 aresupported, version 2 being that which supportsdocument versioning.
IS_INVALID_INDEXVERSION
This is a critical error that should not occur. Asof now, this may happen during the archiving ofa topic in the Infor Ming.le Chat application.
IS_INVALID_ELEMENTS
This is a critical error that should not occur. Asof now, this may happen during the archiving ofa topic in the Infor Ming.le Chat application. Aninternal server error occurred while communicat-ing with the Elasticsearch service.
IS_FAIL_ELASTIC_INDEX_IO
Search errorsError descriptionError code
This is a critical error that should not occur. Thetenant name is missing from the search requestpayload, which should be identified by the tenan-tId field.
SS_MISSING_TENANTID
This is a critical error that should not occur. Thesearch term to search is missing from the searchrequest payload that should be identified by theterms field.
SS_MISSING_SEARCHTERM
This is a critical error that should not occur. Thespecific repositories to search for the search re-quest are missing. This should be identified bythe searchTargets field in the request payload.
SS_MISSING_SEARCHTARGET
An application that is within the domain ofsearchable applications has a missing logical ID.
SS_MISSING_LOGICALID_IN_SEARCHTAR-GET
Infor Operating Service Installation Guide | 81
Elastic Search

Error descriptionError code
An application that is within the domain ofsearchable applications has a missing query. Thisis an error that occurs during the validation ofapplications during a private search.
SS_MISSING_QUERYBODY_IN_SEARCHTAR-GET
The application logicalId field is missing fromthe search request payload.
SS_MISSING_APPLICATION_LOGI-CALID_IN_SEARCHTARGET
Each user belonging to the tenant has a uniqueuser identifier identified by the userIdentifierfield. A user’s identifier is always extracted to beincluded in each search. This error should notoccur if the user is a legitimate user identifier.
SS_MISSING_USERIDENTIFIER
This is an error that should not occur for a legiti-mate user. The bearer token, which is a securitytoken, should always be included in the searchpayload.
SS_MISSING_BEARERTOKEN
The repositoryTargets field is missing from thesearch request payload.
SS_MISSING_REPOSITORYTARGET
An application logicalId field is missing from oneof the search targets in the given request payload.
SS_MISSING_LOGICALID_IN_REPOSITORY-TARGET
An application in the search request payload hasno inner repositories specified.
SS_INVALID_EMPTY_REPOSITORYTARGET
The from field in one of the applications in thesearch request payload is invalid because thevalue is less than 0.
SS_INVALID_PARAMETER_FROM
The size field in one of the applications in thesearch request payload is invalid because thevalue is less than 0.
SS_INVALID_PARAMETER_SIZE
The version field in the search request payloadhas an invalid number. As of now, only 1 and 2are supported.
SS_INVALID_VERSION
No repositories are specified for an applicationwithin the search request payload.
SS_INVALID_EMPTY_TARGET
This is a critical error during search. A tenantmodel must be built to encompass the character-istics of each search request. If the tenant modelfails to be created, then a search cannot takeplace because the domain in which a user is al-lowed to search is unknown.
SS_NOSUCH_TENANT_MODEL
Infor Operating Service Installation Guide | 82
Elastic Search

Error descriptionError code
This is a critical error during search. The applica-tion model makes up a part of the tenant model(see the previous error), and without it MES doesnot know which applications the user is allowedto search within. The application model failed tobe built.
SS_NOSUCH_APPLICATION_MODEL
No application exists with the given applicationlogical ID for the search request payload.
SS_NOSUCH_APPLICATION
No repository exists with the given repositoryname for the search request payload.
SS_NOSUCH_REPOSITORY
This is a generic error that takes place duringsearch. This error can indicate various issues.Navigate to the search service log file and inspectthe logs surrounding where the error occurred.
SS_FAIL_UNEXPECTED_ERROR
An API call to Elasticsearch during search wasnot successful. This is an internal server errorthat should not happen.
SS_FAIL_SEARCH_RESULT
This is a generic error that takes place duringsearch. This error can indicate various issues.Navigate to the search service log file and inspectthe logs surrounding where the error occurred.
SS_FAIL_GENERAL
Common errorsError descriptionError code
An error most likely occurred during the indexingof documents when required fields are left blank.The error message indicates which documentswere left blank.
CS_MISSING_INDEX_CONTEXT
An error occurred during the creation of a repos-itory if an Elasticsearch alias name fails to beconstructed within the code.
CS_MISSING_INDEX_NAME_BUILDER
An error is shared with all services to indicatethat the tenant with the supplied tenant namewithin the concerning request payload is in aninactive state or does not exist.
CS_INVALID_TENANT
An error is shared with all services to indicatethat the supplied application logical ID within theconcerning request payload does not exist.
CS_NOSUCH_APPLICATION
Infor Operating Service Installation Guide | 83
Elastic Search

Error descriptionError code
A critical error that should never occur. The errorindicates that Elasticsearch data for a givenrepository could not be located.
CS_NOSUCH_INDEX
An error is shared with all services to indicatethat the tenant with the supplied tenant namewithin the concerning request payload does notexist.
CS_NOSUCH_TENANT
A critical error occurred indicating that a databasetable could not be found.
CS_NOSUCH_TABLE
An error occurred while performing an operationin Elasticsearch. The error message indicateswhich operation was being performed beforefailure occurred.
CS_FAIL_ELASTIC_INDEX_IO
An error most likely occurred during a search.The service failed to retrieve the list of applica-tions to which a user has access and, therefore,is allowed to search. Without this list, the searchcannot take place.
CS_FAIL_USER_APPLICATION_SITE_LIST
An error most likely occurred during a search.The service failed to retrieve the list of applica-tions to which a user has access and, therefore,is allowed to search. Without this list, the searchcannot take place.
CS_FAIL_USER_APPLICA-TION_SITE_LIST_AND_FALLBACK
An unsuccessful Elasticsearch operation oc-curred. Rather than generating an error, Elastic-search sends back the reason for an unsuccess-ful operation. MES indicates within the errormessage the reason for the failure.
CS_FAIL_INDEX_OPERATION
An unsuccessful Elasticsearch operation oc-curred. Rather than generating an error, Elastic-search sends back the reason for an unsuccess-ful operation. MES indicates within the errormessage the reason for the failure.
CS_FAIL_INDEX_OPERATION
The ies_create_date Elasticsearch field failedto be created during a creation or breaking-change-update of a repository. This field is to becontained in each indexed document to indicatethe date it was created (indexed).
CS_FAIL_ADD_CREATE_DATE
The ies_create_timestamp Elasticsearch fieldfailed to be created during a creation or breaking-change-update of a repository. This field is to becontained in each indexed document to indicatethe time it was created (indexed).
CS_FAIL_ADD_CREATE_TIMESTAMP
Infor Operating Service Installation Guide | 84
Elastic Search

Error descriptionError code
A parsing error occurred in the attempt to createthe Elasticsearch index during the creation orbreaking-change-update of a repository.
CS_FAIL_PARSE_ELASTICSEARCH_CONFIG-URATION
The ies_acct_entity Elasticsearch field failed tobe created during a creation or breaking-change-update of a repository. This field is to be con-tained in each indexed document to indicate itsaccounting entity association (security feature).
CS_FAIL_ADD_ACCT_ENTITY
The ies_acct_location Elasticsearch field failedto be created during a creation or breaking-change-update of a repository. This field is to becontained in each indexed document to indicateits location entity (security feature).
CS_FAIL_ADD_ACCT_LOCATION
The ies_acc_doctyepe Elasticsearch field failedto be created during a creation or breaking-change-update of a repository. This field is to becontained in each indexed document to indicateits document type (security feature).
CS_FAIL_ADD_ACCT_DOCTYPE
The ims_security_role Elasticsearch field failedto be created during a creation or breaking-change-update of a repository. This field is to becontained in each indexed document to indicateits security role access (security feature).
CS_FAIL_ADD_USERROLE
A failure occurred during an attempt to retrievethe authentication key necessary to communicatewith external services.
CS_FAIL_ACCESS_OAUTHKEYINFO
A failure occurred during an attempt to retrievethe security features of a specific user. Such se-curities are needed to determine which reposito-ries and documents a user has access to duringa search.
CS_FAIL_IFS_ATTRIBUTESERVICE
A critical error occurred during a search. A tenantmodel must be built to encompass the character-istics of each search request. If the tenant modelfails to be created, then a search cannot takeplace because the domain in which a user is al-lowed to search is unknown.
CS_FAIL_TENANT_MODEL
A failure occurred during an attempt to retrievethe security features of a specific user. Such se-curities are needed to determine which docu-ments a user has access to during a search.
CS_FAIL_IFS_CLAIMRULES METADATASER-VICE
Infor Operating Service Installation Guide | 85
Elastic Search

Error descriptionError code
An error occurred during the creation or breaking-change-update of a repository. This indicates thatan element within the repository definition con-tains both nested = true and facet = true. The issue is that a facet element cannot alsobe a nested element.
CS_FAIL_PARSE_FACET_NESTED
An error occurred during the creation or breaking-change-update of a repository. This indicates thatan element within the repository definition con-tains facet = true and at the same time is asecurity field. A security field is one that is namedaccountingEntity, location, or documentType.The issue is that a facet field cannot also be asecurity field.
CS_FAIL_PARSE_FACET_SECURITY
An error occurred during the creation or breaking-change-update of a repository. This error indi-cates that an element used for the primary key(document ID) is not an element existing withinthe repository definition. A primary key elementmust be made up of existing elements.
CS_FAIL_ID_FIELD_INVALID
An error occurred during the creation or breaking-change-update of a repository. This error indi-cates that the primary key (document ID) suppliedin the repository definition has an invalid format.
CS_FAIL_INVALID_DOC_ID
Infor Operating Service Installation Guide | 86
Elastic Search

Appendix O: Troubleshooting
This appendix provides troubleshooting techniques to help you complete the Infor OS installation incase of any errors or issues you may encounter during the installation.
ION and ION API errors occur in a fresh installationwhen using an existing databaseIssues can occur in ION and ION API when a fresh Infor OS installation is done with an existing InforOS database. If these issues occur, perform the steps in this section.
ION issue resolutionThe ION application stores the certificate details of the grid on which the application runs. In this specificcase, since the grid database is not carried over, the application still tries to use the older certificatesreceived from the previous installation.
Execute these update statements against the ION database to remove the link from the older grid:
1 Update 4 records for certificate.identity:
update [dbo].[ION_PROPERTY]set C_PID = 'old_certificate.identity'where ( C_PID like '%certificate.identity' and ( C_KEY = 'worker' or C_KEY = 'worker.Password' or C_KEY = 'queues' or C_KEY = 'queues.Password' ))
Infor Operating Service Installation Guide | 87
Troubleshooting
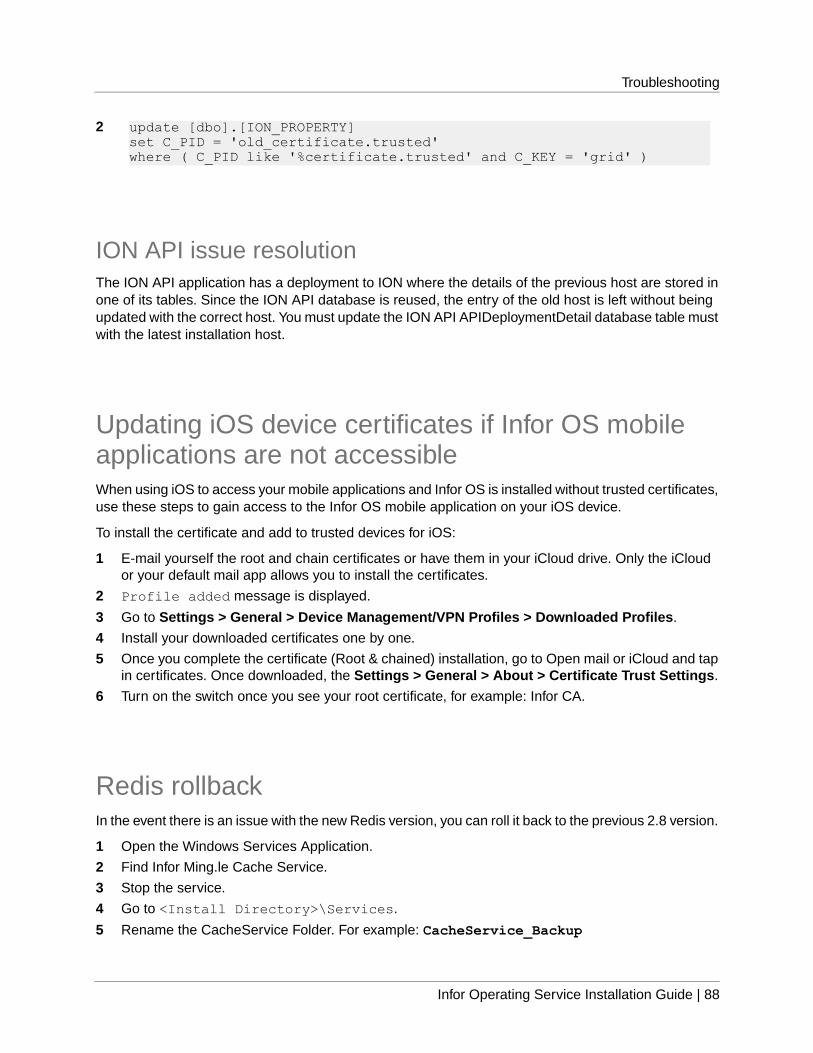
2 update [dbo].[ION_PROPERTY]set C_PID = 'old_certificate.trusted'where ( C_PID like '%certificate.trusted' and C_KEY = 'grid' )
ION API issue resolutionThe ION API application has a deployment to ION where the details of the previous host are stored inone of its tables. Since the ION API database is reused, the entry of the old host is left without beingupdated with the correct host. You must update the ION API APIDeploymentDetail database table mustwith the latest installation host.
Updating iOS device certificates if Infor OS mobileapplications are not accessibleWhen using iOS to access your mobile applications and Infor OS is installed without trusted certificates,use these steps to gain access to the Infor OS mobile application on your iOS device.
To install the certificate and add to trusted devices for iOS:
1 E-mail yourself the root and chain certificates or have them in your iCloud drive. Only the iCloudor your default mail app allows you to install the certificates.
2 Profile added message is displayed.
3 Go to Settings > General > Device Management/VPN Profiles > Downloaded Profiles.
4 Install your downloaded certificates one by one.
5 Once you complete the certificate (Root & chained) installation, go to Open mail or iCloud and tapin certificates. Once downloaded, the Settings > General > About > Certificate Trust Settings.
6 Turn on the switch once you see your root certificate, for example: Infor CA.
Redis rollbackIn the event there is an issue with the new Redis version, you can roll it back to the previous 2.8 version.
1 Open the Windows Services Application.
2 Find Infor Ming.le Cache Service.
3 Stop the service.
4 Go to <Install Directory>\Services.
5 Rename the CacheService Folder. For example: CacheService_Backup
Infor Operating Service Installation Guide | 88
Troubleshooting

6 Rename the CacheService_2.8 Folder to CacheService.
7 Go back to the Windows Services Application.
8 Find Infor Ming.le Cache Service in the list.
9 Start the service.
10 Perform an IIS reset.
11 Navigate to <Install Directory>\InforTechStackGrid\bin.
12 Run StopAllHosts.cmd.
13 Run StartAllHosts.cmd.
14 After all applications are running, log in to Infor Ming.le, and check that all applications are loading.
Infor Operating Service Installation Guide | 89
Troubleshooting

Appendix P: OneView search indexes
OneView operates with three indexes: Event, Message, and Statistics.
• Event represents all events that occur in ION, for example: a new document entered in ION, adocument mapped from type A to type B, or a document sent to a connection point.
• Message represents the object that is being manipulated in the scope of ION – the document itself,for example: a sales order, invoice, or workflow request. By transferring the message in ION, eventsare generated
• Statistics represents information about events that are obtained based on the message. This indexis used for widgets and for the statistical aggregation purposes.
For communication with the Elastic Search server, the JEST library is used: https://github.com/searchbox-io/Jest.
Migration documentationIf all properties are set properly by the installer, after start-up of the OneView node, the migrationprocess starts.
The information below explains what can occur in the meantime and how you can resolve any issues.
SetupA small customer may have only one OneView node that consists of OneViewEvent and OneViewApi.A large customer may have multiple OneViewEvent and OneViewApi nodes.
In logs of those nodes, you can observe logged information as explained below.
Happy pathThis topic describes a successful migration:
1 At the startup on the OneViewApi node, indexes for event, message, and statistics are created inElastic Search. You can then see these logs:
Infor Operating Service Installation Guide | 90
OneView search indexes
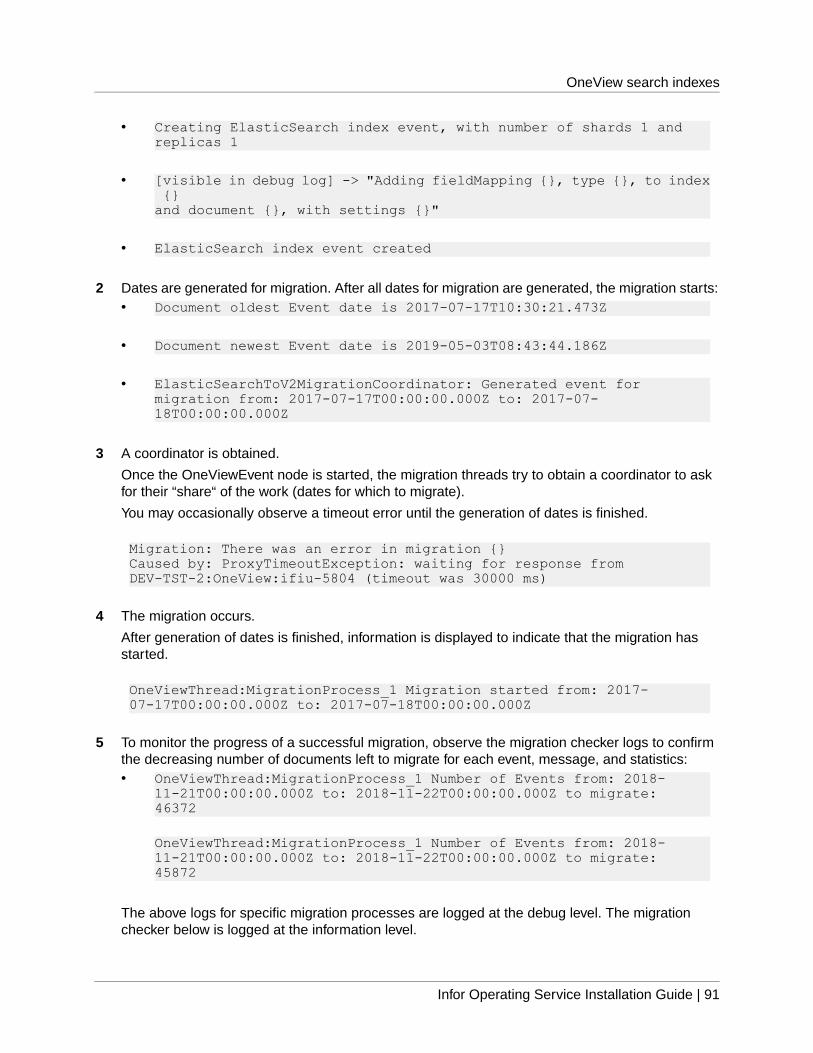
Creating ElasticSearch index event, with number of shards 1 and replicas 1
•
• [visible in debug log] -> "Adding fieldMapping {}, type {}, to index {} and document {}, with settings {}"
• ElasticSearch index event created
2 Dates are generated for migration. After all dates for migration are generated, the migration starts:• Document oldest Event date is 2017-07-17T10:30:21.473Z
• Document newest Event date is 2019-05-03T08:43:44.186Z
• ElasticSearchToV2MigrationCoordinator: Generated event for migration from: 2017-07-17T00:00:00.000Z to: 2017-07-18T00:00:00.000Z
3 A coordinator is obtained.
Once the OneViewEvent node is started, the migration threads try to obtain a coordinator to askfor their “share“ of the work (dates for which to migrate).
You may occasionally observe a timeout error until the generation of dates is finished.
Migration: There was an error in migration {}Caused by: ProxyTimeoutException: waiting for response from DEV-TST-2:OneView:ifiu-5804 (timeout was 30000 ms)
4 The migration occurs.
After generation of dates is finished, information is displayed to indicate that the migration hasstarted.
OneViewThread:MigrationProcess_1 Migration started from: 2017-07-17T00:00:00.000Z to: 2017-07-18T00:00:00.000Z
5 To monitor the progress of a successful migration, observe the migration checker logs to confirmthe decreasing number of documents left to migrate for each event, message, and statistics:• OneViewThread:MigrationProcess_1 Number of Events from: 2018-
11-21T00:00:00.000Z to: 2018-11-22T00:00:00.000Z to migrate: 46372
OneViewThread:MigrationProcess_1 Number of Events from: 2018-11-21T00:00:00.000Z to: 2018-11-22T00:00:00.000Z to migrate: 45872
The above logs for specific migration processes are logged at the debug level. The migrationchecker below is logged at the information level.
Infor Operating Service Installation Guide | 91
OneView search indexes

• MigrationChecker: Total documents to migrate is: events: 199025536, message:26916431, statistics: 657082, total: 226599049
• MigrationChecker: Total documents to migrate is: events: 198945536, message: 26776431, statistics: 657082, total: 226379049
What is most important is the total number to decrease as the migration is done in one-day ranges,and for some date range there may already be, for example, only events being migrated.
6 The migration is finished when the "to migrate" counter in the log reaches 0. The successfullyfinished migration process terminates by logging text:
"Everything was migrated, stopping checker"
Migration troubleshooting
Problem - index created incorrectly
If an index was created before the OVApi attempted to create it, it could have been created incorrectly.
"Error in creating fieldMapping {}, type {}, {}"
In such case, from the beginning, you will see the following error that occurs when OVEvent attemptsto upload documents to Elastic Search:
ERROR ModuleLoader: module IONService/OneViewApiModule failed to startcom.infor.ion.oneview.engine.common.exception.OneViewException: Error in creating fieldMapping seid, type integer, message: {"root_cause":[{"type":"illegal_argument_exception","reason":"mapper [seid] cannot be changed from type [long] to [integer]"}],"type":"illegal_argument_exception","reason":"mapper [seid] cannot be changed from type [long] to [integer]"}, path: null, reason: {"error":{"root_cause":[{"type":"illegal_argument_exception","reason":"mapper [seid] cannot be changed from type [long] to [integer]"}],"type":"illegal_argument_exception","reason":"mapper [seid] cannot be changed from type [long] to [integer]"},"status":400}at com.infor.ion.oneview.engine.search.common.domain.ElasticSearchIndexBuilder.executePutMapping(ElasticSearchIndexBuilder.java:163)at com.infor.ion.oneview.engine.search.common.domain.ElasticSearchIndexBuilder.putFieldMapping(ElasticSearchIndexBuilder.java:145)
Infor Operating Service Installation Guide | 92
OneView search indexes

Solution
1 Stop the OV node and set the binding to 0.2 Using Postman, with suitable Elastic Search credentials, delete all indexes - example query:
DELETE http://inforos1:9200/event/DELETE http://inforos1:9200/message/DELETE http://inforos1:9200/statistics/
3 Set the migration flag to a different value, for example, g 3. You can confirm which value was usedin the OV log.
Migration: Migration batch size is: 500 and sleep time 2000, flag 2
4 Set the binding correctly and start the OVApi node again. It will re-create the indexes.5 Start the OVEvent node, which re-starts the migration.
Problem - OneViewEvent note in prolonged "starting" state
OneViewEvent node is in "starting" state for a long time
In the logs, you see this information:
Coordinator is still not available, will retry in 60 secondsMigration: Migration is paused. IONCloudService/OneViewEventModuleStartupMigration: Coordinator is still not available, will retry in 60 seconds
Solution
Wait until the coordinator is obtained. This may take several minutes, based on the size of the indexesto migrate. Eventually, this message is displayed:
Migration: Coordinator obtainedMigration: Migration was resumed.
Problem - migrating not starting
The migration is not starting. You can observe in the logs errors with requesting data from thecoordinator:
Migration: Pausing migration thread OneViewThread:MigrationProcess_1 for 60 seconds and then try to get new coordinatorCoordinator obtainedMigration was resumed. OneViewThread:MigrationProcess_1There was an error in migration {}Caused by: com.lawson.grid.proxy.ProxyTimeoutException: waiting for response from i-06d66515f0e49:OneViewApi:Hso3-15548 (timeout was 30000 ms)
Infor Operating Service Installation Guide | 93
OneView search indexes

Solution
This error occurs because, at the beginning, the date ranges for which migration is to be done arebeing generated.
The migration will start. You may need to wait longer, for example, from 20 to 30 minutes, dependingon the amount of data you have.
Problem - version conflict exception
This issue is valid only for larger customers, when the migration is running with multiple threads.
For a version conflict exception, there may be a lot of errors. In the worst case, it can stop the migration,in case it is constantly recurring, because of pausing and resuming threads on and on.
Caution: The version conflict exception may occur for other reasons, as a result of other processes:updating indexed documents – normal, not migration-related occurrences might occur in logs.
This can occur in regular environments:
• HandledInAndMessageStatusProcess: Error in uploading documents in process
HandledInAndStatusQueueStep, {}com.infor.ion.oneview.engine.common.exception.OneViewException: ERROR 477 - Error in ES bulk atomic upload : [One or more of the items in the Bulk request failed, check BulkResult.getItems() for more information.
• version_conflict_engine_exception
{"type":"version_conflict_engine_exception","reason":"[message][ID:DATA-EMS-SERVER.99AE5BF48E4ADDF43C3:661797INFOROS1]: version conflict, current version [2] is different than the one provided[1]","index_uuid":"iC2g4BaxS7CFiuqVuBNPgg","shard":"16","index":"message"}]
com.infor.ion.oneview.engine.queue.process.message.MessageBatchProcessor: Error in uploading messages:
com.infor.ion.oneview.engine.common.exception.OneViewException: ERROR 477 - Error in ES bulk atomic upload : [One or more of the items in the Bulk request failed, check BulkResult.getItems() for more information.
version_conflict_engine_exception{"type":"version_conflict_engine_exception","reason":"[message][infor.gfc.gfc:gfcmtqat01_tstaccounting12345:infornid:infor:::AVOCADO:0?BOD&verb=ConfirmGFCMTQAT02_TST]: version conflict, current version [51090] is different than the one provided
Infor Operating Service Installation Guide | 94
OneView search indexes

[51089]","index_uuid":"iC2g4BaxS7CFiuqVuBNPgg","shard":"23","index":"message"}]
Solution
1 Start the migration with only one thread. You can adjust the batch size to a higher number. Themaximum is 10,000.
2 Restart the OV nodes.
MigrationBe aware of the difference between new incoming traffic and migration.
When you notice that the number of documents available in Elastic Search is increasing, it is notnecessarily an indication that migration is running successfully.
They may be new (incoming) documents being indexed in both search engines (Solr and ES).
If you observe errors in OV logs, be sure to follow the guidelines in this appendix.
The speed of OV migration differs based on incoming traffic, migration settings, and the number ofOneView nodes, if scaled up. The general numbers for an environment that is not-scaled up can be:
~ 400k docs/hour (up to 600k when light traffic)1 thread, batch 500 (minimum; default)
~ 4.5m docs/hour2 threads, batch 10,000
~ 6m docs/hour3 threads, batch 10,000 (maximum)
Migration togglesDo not set migration toggles manually unless you are certain about the consequences.
When setting the toggles (as IONService property), be sure to select the System Property check box:
• migration flag (default 2)
"oneview.migrated.flag"
• amount of migration processes (default 1, maximum 3 – do not set more than 1 unsupervised)
"oneview.migration.process.count"
• migration batch size (default 500 – maximum 10,000)
"oneview.migration.batch.size"
• migration sleep time
"oneview.migration.sleep.time"
Infor Operating Service Installation Guide | 95
OneView search indexes

• migration start and end dates (start by default is determined by the coordinator at the beginningof the migration – these are emergency toggles)• "oneview.migration.startdate"• "oneview.migration.enddate"
Simple migration toggleThis is the simple migration toggle:
• simple migration process count (default 0, maximum 3, do not set as unsupervised)
"oneview.simple.migration.process.count"
This is the toggle for starting simple migration, the process that is simpler than casual migration,to be used in case of encountering other errors, for example, timeouts when searching for a specificdate-range.
Simple migration is not migrating by using explicit date ranges. Simple migration is also capableof migrating malformed data.
When setting this value, make sure to set the normal migration process count to 0.
General toggles, set by installerThese are the general toggles, which are set by the installer:
• Elastic search on-premises toggle (default is true, do not change, by default filled by the installer)– triggers the migration process for OneView documents
ion.feature.oneview.elasticsearch.onprem
• Search domain disk space (default 250 GB if not filled by the installer)
oneview.SearchDomain.DiskSpace
• Security settings of Elastic Search:• oneview.searchengine.user• oneview.searchengine.password• oneview.isSearchDomainSecured
Solr disablement toggle• Solr disablement toggle - disables Solr
Caution: Do not use this toggle unless you are fully aware of all consequences.
Default: false. When the migration is finished, you can set to true. When the migration is finished,searches are done only on ES, but documents are still indexed (saved) in both ES and Solr. Settingthis toggle disables the usage of Solr. Do this only if you are sure that everything is migrated.
ion.feature.oneview.disable.solr
Infor Operating Service Installation Guide | 96
OneView search indexes

Replica shards toggles for larger customers• The number of replica shards (default is 0), specifies the number of replica shards for each index.
Caution: Do not change this value unless you are fully aware of all consequences.
oneview.elasticsearch.replica.shard
In release 12.0.39, the default number of replica shards for on-premises installations changed from1 to 0. Also, auto-expanding of replica shards was introduced (see below).
• Upper limit for auto-expansion of replica shards (default is 2; for scaling: 0-2).
Caution: Do not change this value unless you are fully aware of all consequences.
oneview.elasticsearch.auto.expand.replica.upper
Auto scaling of replicas (in the range of 0 to upper-limit) was introduced in 12.0.39. The auto-scalingis set only when the toggle for replica shards is not explicitly set.
So, when toggling for:
• The number of replica shards is set to a positive number ( > 0), this is how many replica shardsare created when creating an index.
• The number of replica shards is set to 0 or not set, and there is no other toggle, there will beauto_expand_replicas 0-2.
• The number of replica shards is set to 0 or not set, and the upper limit for auto-expand ofreplica shards is set, auto_expand of replicas is set in the range of 0-upperLimitFromToggle,when creating the index.
OneView general functionality
Indexes creation procedure• An index is created in the OneViewApi Grid node:
• Right after the startup of the node, after necessary components are loaded; OneView startsthe index creation procedure.
• If indexes (Event, Message, Statistics) do not exist, the create index routine creates the indexesand also the attributes as defined in com.infor.ion.oneview.model.DocumentSearchModelNew.
The routine iterates through the list of all attributes and assigns the correct type and name.
• This situation, including logs, is described in the Happy path on page 90.
• If indexes already exist, the create index routine does not overrides/re-create the indexes. Thefollowing is logged:
Infor Operating Service Installation Guide | 97
OneView search indexes

Creating ElasticSearch index event, with number of shards 5 and replicas 1
•
• Index event already exist, {"root_cause":[{"type":"index_already_exists_exception","reason":"index [event/ALvSAP3JSXmG2F7y1tIIJQ] already exists","index_uuid":"ALvSAP3JSXmG2F7y1tIIJQ","index":"event"}],"type":"index_already_exists_exception","reason":"index [event/ALvSAP3JSXmG2F7y1tIIJQ] already exists","index_uuid":"ALvSAP3JSXmG2F7y1tIIJQ","index":"event"}
• ElasticSearch index event created
• Index validation is performed in OneViewEvent node:• Check if all indexes and attributes are correctly created.• Again, all attributes are iterated and validated that the names and types are correct.
Indexing new objects• The indexing procedure of the particular indexes is initiated by consuming the corresponding input
queues containing the objects to be indexed.• Event index – populated by messages consumed from ION-BodEvent-Q-environment_name
queue
This queue is populated by ION, when any event happens.
• Message index – populated by messages consumed fromION-BodEvent-Q-environment_name-MSG queue
This queue is populated by OneView. Only an Event of a particular type ("BOD entered ION")are forwarded to this queue.
• Statistics index – populated by messages consumed fromION-BodEvent-Q-environment_name-ENR queue
This queue is populated by OneView. Events of a particular type are forwarded to this queue
• Each consumed message is processed by a corresponding processor in the specific fashion basedon the type of the message; but the general idea is the same for all of them:• Consume object from queue• Transform to the desired format
• Index
• For indexing purposes, the batching (io.searchbox.core.Bulk) is used
OneView purgeThe OneView purge functionality initiates a long running process that removes content of the objectsfrom the Elastic Search. User can specify the time range for what data should be removed.
Infor Operating Service Installation Guide | 98
OneView search indexes
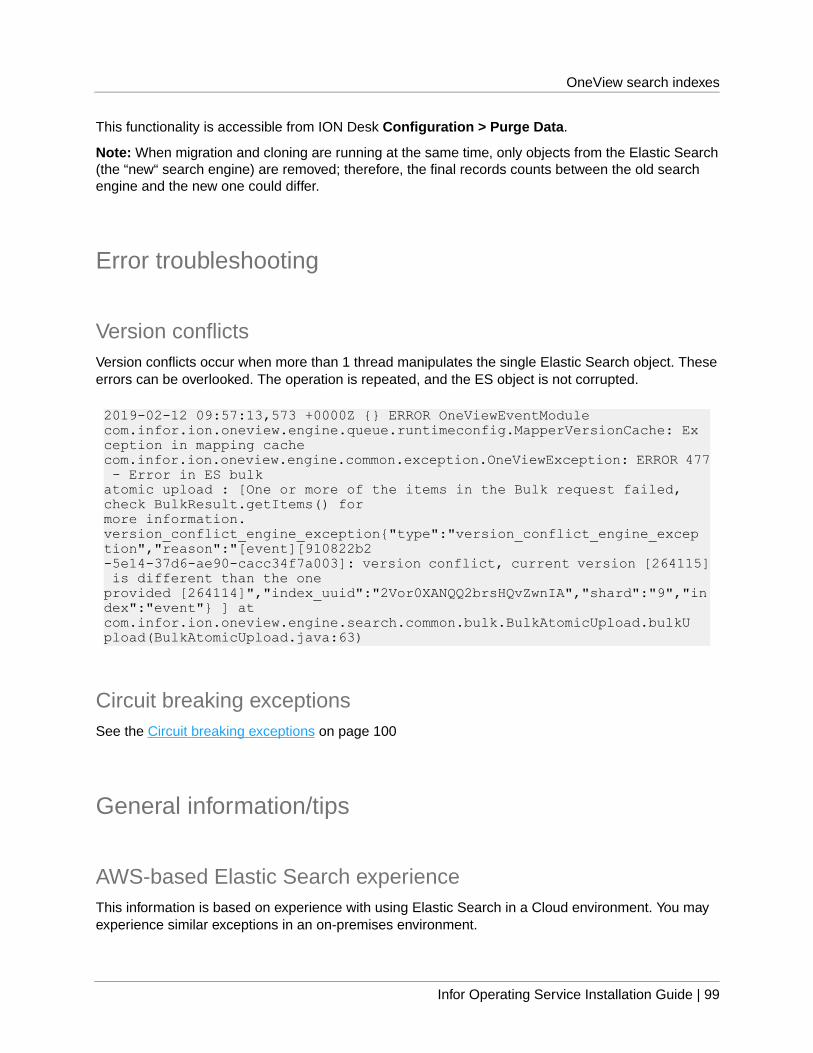
This functionality is accessible from ION Desk Configuration > Purge Data.
Note: When migration and cloning are running at the same time, only objects from the Elastic Search(the “new“ search engine) are removed; therefore, the final records counts between the old searchengine and the new one could differ.
Error troubleshooting
Version conflictsVersion conflicts occur when more than 1 thread manipulates the single Elastic Search object. Theseerrors can be overlooked. The operation is repeated, and the ES object is not corrupted.
2019-02-12 09:57:13,573 +0000Z {} ERROR OneViewEventModulecom.infor.ion.oneview.engine.queue.runtimeconfig.MapperVersionCache: Exception in mapping cachecom.infor.ion.oneview.engine.common.exception.OneViewException: ERROR 477 - Error in ES bulkatomic upload : [One or more of the items in the Bulk request failed, check BulkResult.getItems() formore information.version_conflict_engine_exception{"type":"version_conflict_engine_exception","reason":"[event][910822b2-5e14-37d6-ae90-cacc34f7a003]: version conflict, current version [264115] is different than the oneprovided [264114]","index_uuid":"2Vor0XANQQ2brsHQvZwnIA","shard":"9","index":"event"} ] atcom.infor.ion.oneview.engine.search.common.bulk.BulkAtomicUpload.bulkUpload(BulkAtomicUpload.java:63)
Circuit breaking exceptionsSee the Circuit breaking exceptions on page 100
General information/tips
AWS-based Elastic Search experienceThis information is based on experience with using Elastic Search in a Cloud environment. You mayexperience similar exceptions in an on-premises environment.
Infor Operating Service Installation Guide | 99
OneView search indexes

Circuit breaking exceptions• https://www.elastic.co/guide/en/elasticsearch/reference/current/circuit-breaker.html• Different circuit breaking errors are visible in the logs (responses from AWS) when some ES Grid
configuration issues occur:• Small free storage space: resolved by increasing the overall storage space• High (constantly above 75%) heap space consumption: resolved by adding more nodes to the
cluster to split the workload• High CPU usage: resolved by adding more nodes to the cluster to split the workload
index_create_block_exception
ES Grid does not start because there is no available memory/storage: resolved by exploring thelogs/metering and adding more nodes or storage to overcome the limitation
Infor Operating Service Installation Guide | 100
OneView search indexes

Appendix Q: Downloading the CER certificate file fromthe ADFS server
To download the CER certificate file from the ADFS server:
1 Go to the ADFS trust mex URL. For example:
https://{ADFS Federation Name}/adfs/services/trust/mex
2 Open the Certificate information popup.
In Chrome:a Click the lock icon beside the URL.b Click Certificate.
In Microsoft Edge:a Click the lock icon beside the URL.b Click the Connection is Secure option.c Click the certificate icon.
3 On the certificate popup, go to the Details tab and click the Copy to file button to start the CertificateExport wizard.
4 Click Next on the Welcome screen.
5 On the Export File Format screen, select the Base-64 encoded option and click Next.
6 On the File to Export screen, click Browse and select a location to store the certificate and providea file name. Click Save and click Next.
7 On the Completing the Certificate Export wizard, click Finish.
8 Click OK on the successful export message.
Infor Operating Service Installation Guide | 101
Downloading the CER certificate file from the ADFS server