Embed Size (px)
Citation preview
Growing VegetablesTransplants
H. C. MOHR
Cl.YDE SINGLETARY
A. L. HARRISON
D. R. PATERSO •
Texas vegetable growers can increase their income by thousands of dollars each year if they willuse better quality transplants. Healthy, stocky, disease-free transplants are essential for maximum yieldand quality of certain crops. Growing good transplants is an art, requiring special skills and knowledge.Careful attention to details is necessary.
Plant Growing StructuresMany serious problems arise from the use of
poor transplants. Poor transplants frequently resultfrom inadequate plant-growing structures.
The low-cost plastic greenhouse is superior inmany respects to hotbeds and coldframes. The temperature and ventilation can be controlled moreeasily, accurately and economically. Since growerscan work inside a plastic greenhouse, caring for transplants is easier and more convenient. See MP-341,Plasti, Greenhouses for Growing Vegetables, for details on construction.
Soil for Plant GrowingA fertile, well-drained soil that will not crust
and pack is ideal for growing vegetable plants. Amixture of one-third good top soil (clay or clay loampreferred), a third peat moss and a third perlite(horticultural grade) makes excellent plant-growing
soil. Well-rotted cow manure, leaf mold or otherwell-composted organic matter can substitute for peatmoss and perlite. Avoid the addition of a largeamount of chemical fertilizer to the soil because itmay cause severe injury to seedlings. See Table 1for rates to use.
The soil mixture may be steamed or chemicallysterilized to kill weed seeds, soil insects and diseases.Follow the directions of the manufacturer carefullywhen fumigating the soil with chemicals. However,sterilization is not necessary if clean, disease-free soilis used.
-Respectively, associate professor of horticulture; extension horticulturist-vegetables; plant pathologist in charge, Plant Disease Laboratory; associate horticulturist, Texas Agricultural Experiment Station.
Table 1. Rates to apply chemical fertilizers to greenhouse soilnuxtures.
Recommendedrate for soilanalysis in
Ib./acre
200400600800
1,0001,200
-or -Level tablepoons/bu. of - or soil required
~
Il~~
22~
3
Oz. required/50 sq. ft. of bed
4.59.0
13.518.022.527.0
Selecting the Seed
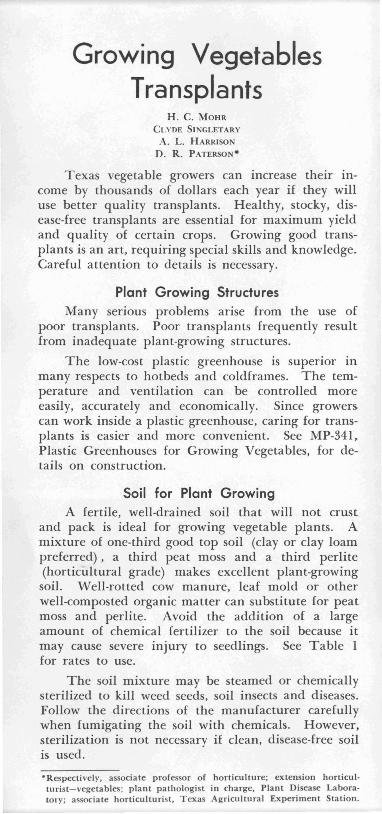
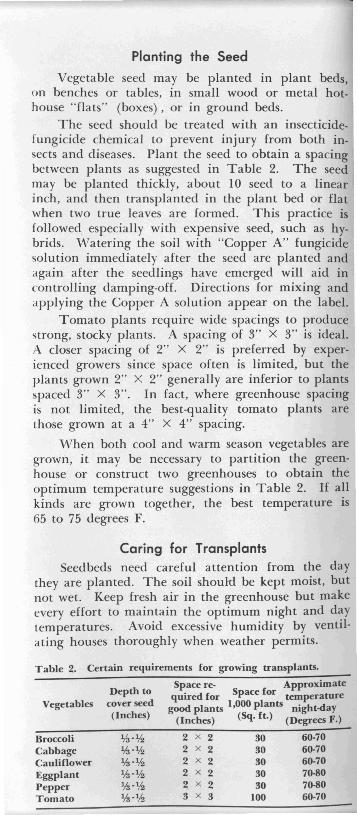
The yield from transplants cannot be any betterthan the inherent potential of the seed. Purchasethe best seed available. The cheapest seed may bethe most expensive when considering final yield.Be sure to use the recommended variety for yourarea.
An ideal tomato plant. Note the size of the stem.
Planting the Seed
Vegetable seed may be planted in plant beds,on benches or tables, in small wood or metal hothouse "flats" (boxes), or in ground beds.
The seed should be treated with an insecticidefungicide chemical to prevent injury from both insects and diseases. Plant the seed to obtain a spacingbetween plants as suggested in Table 2. The seedmay be planted thickly, about 10 seed to a linearinch, and then transplanted in the plant bed or flatwhen two true leaves are formed. This practice isfollowed especially with expensive seed, such as hybrids. ''''atering the soil with "Copper A" fungicide'iolution immediately after the seed are planted andagain after the seedlings have emerged will aid incontrolling damping-off. Directions for mixing andapplying the Copper A solution appear on the label.
Tomato plants require wide spacings to producelitrong, stocky plants. A spacing of 3" X 3" is ideal.A closer spacing of 2" X 2" is preferred by experienced growers since space often is limited, but theplants grown 2" X 2" generally are inferior to plantsspaced 3" X 3". In fact, where greenhouse spacingis not limited, the best-quality tomato plants arethose grown at a 4" X 4" spacing.
''''hen both cool and warm season vegetables aregrown, it may be necessary to partition the greenhouse or construct two greenhouses to obtain theoptimum temperature suggestions in Table 2. If allkinds are grown together, the best temperature is65 to 75 degrees F.
Caring for TransplantsSeedbeds need careful attention from the day
they are planted. The soil shoukl be kept moist, butnot wet. Keep fresh air in the greenhouse but makeevery effort to maintain the optimum night and daytemperatures. Avoid excessive humidity by ventilating houses thoroughly when weather permits.
Table 2. Certain requirements for growing transplants.
Space re- ApproximateDepth to quired for Space for temperature
Vegetables cover seed good plants 1,000 plants night-day(Inches) (Inches) (Sq. ft.) (Degrees F.)
BroccoliCabbageCauliflowerEggplantPepperTomato
%-%%-%%-%%-%%-Y:!%-%
2 x 2 30 60-702 x 2 30 60-702 x 2 30 60-702 x 2 30 70~0
2 x 2 30 70-803 x 3 100 60-70
Observe the plants closely for insects. See L-255,Texas Guide for Controlling Insects on VegetableCrops.
Hardening TransplantsTender, fast-growing plants must be hardened
before field setting to withstand the shock of transplanting and the adverse weather conditions such aslow and high temperatures and drying winds. Approximately a week to 10 days before field setting,the growth of the plants should be slowed down by(I) gradually reducing the water, (2) lowering thetemperature and (3) root pruning by "blocking" theplants with a knife. Avoid letting the plants _dryout suddenly with severe wilting. Temperaturesshould be kept at 50 degrees F. or higher.
Removing Plants From the Plant BedRemove plants from the plant bed with as many
roots intact as possible. Soak the plant bed beforepulling the plants. The plants should be graded andselected as they are pulled. Select only the bestplants for field transplanting. At least a third moreplants than the required amount should be producedso that inferior plants may be discarded.
Transplants that are not grown in pots or plantbands should be blocked about I week prior to fieldsetting. The blocking process consists of runninga sharp knife through the soil of the flat betweenthe rows of plants lengthwise, and then crosswise.This confines the roots to a block of soil which canbe removed with the plant at time of field setting,resulting in less transplanting shock than when barerooted plants are set. Transplants grown in pots orbands generally are planted by hand but can be setin the field with certain types of mechanical transplanters.
Watermelon, Cantaloupe and CucumberTransplants
Plant containers are required for growing cucurbit transplants since the roots cannot be brokenor bruised when planting in the field without heavymortality.
PLANT CONTAINERS: Peat pots have been usedwith th~ greatest success for growing watermelon,cantaloupe and cucumber plants. Peat pots are"planted" with the seedling and decompose readilyfollowing transplanting. The square, 3-inch pots arepreferred.
POTTING SOIL: A mixture of rich top soil andwell-rotted manure, leaf mold or peat moss makesgood potti g soil, or a mixture of one-third clay soil,one-third peat moss and one-third perlite will givegood results in growing cucurbit plants. Sterilizingthe soil with chemicals or steam heat is advisable.
SEEDI G: fter the peat pots are filled to within1 inch of the top with potting soil, three to fourtreated seeds should be scattered, not bunched, intoeach pot. Obtain seed free of anthracnose 9-iseaseand treated with a seed protectant. The seed shouldbe covered with Y2 inch of soil mixture followed bya layer of ~ inch of coarse builder's sand. The surface layer of sand will dry out more readily thansoil, which reduces the post-emergence damping-offdisease problem. ',\Tatering is easier when the potsare not filled completely. Keep the surface sandmoist until seedlings emerge. Less frequent wateringwill be needed thereafter and in the morning only.The pots may be placed on ground beds, but benchesare preferred. Fitting the pots close together willprevent rapid evaporation from the sides of the pots.
TEMPERATURE: vVatermelon, cantaloupe and cucumber seed germinate readily and grow well at 80and 90 degrees F. A special effort should be madeto keep the temperature in the greenhouse below 100degrees F.
INSECT CONTROL: D·ust or spray young plantsweekly to protect them from insects. A few daysof protection in the field can be obtained by dustingor spraying the plants immediately before they areremoved from the plant bed.
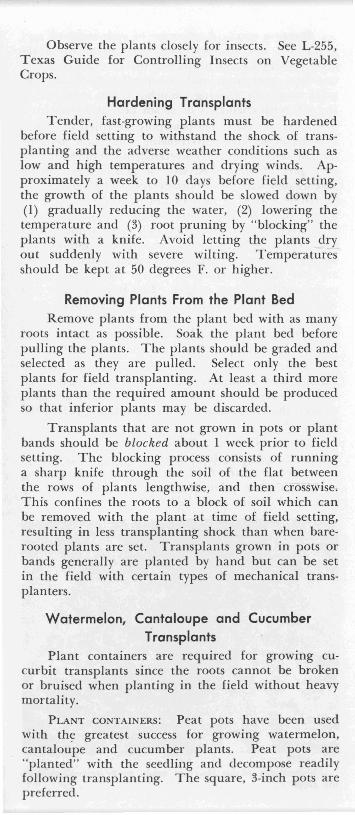
Waternlelon plants that are ready to be transplanted inthe field.
FIELD TRANSPLANTING: Transplants generally areready for planting in the field about 3 to 4 weehafter seeding. Water the pots thoroughly and handIt:"the plants carefully to avoid injury to the roots. Atleast I inch of soil should cover the peat pots whenthey are planted in the field. (If the top of the potextends above the soil surface, it will serve as a wickand dry out the soil in the pot.) When the fieldsoil is dry, it may be necessary to pour I cup of wateraround each transplant. Do not delay transplantingmore than 4 weeks. Older plants give poor results.
Sweet Potato Transplants
Sweet potato transplants are grown from selected sweet potato roots. Growers should try toobtain "seed" stock from reliable sweet potato "seed"producers.
Research has shown that highest yields comefrom early planting. Open field beds and coldframe~
are not suitable for producing ea'rly slips. Since goodsweet potato "seed" are expensive, growers shouldobtain maximum slip production from each root.Plastic greenhouses are preferred by experiencedgrowers for growing sweet potato plants over otherstructures.
PLANT BED: A greenhouse bench is preferredto a ground bed since more uniform temperature canbe maintained. However, a ground bed is satisfactory if soil-heating cable is used to get needed heatbelow bedded potatoes.
TREATING SWEET POTATO ROOTS: About 10 bushebof sweet potato roots are required to produce planbfor planting I acre. The roots are treated by soakingin a borax solution (6 pounds of borax dissolvedin 6 gallons of hot water, added to 24 gallons of coldwater) for 10 minutes.
BEDDING THE ROOTS: Bed the roots in clean soilor sand. Coarse river sand has been satisfactory forgrowing sweet potato plants. Cover the roots withabout 2 inches of the clean soil or sand. Maintaina soil temperature of 80 degrees F. until the planbbegin to come up. The air temperature should beas near 75 degrees F. as possible, until the planbare ready to be set into the field.
Keep the soil or sand moist from the time theroots are bedded until the plants are ready to bepulled.
When the plants are ready to be pulled from thebed, hold one hand against the sailor sand and u, ethe other to pull the plant from the sweet potato root.
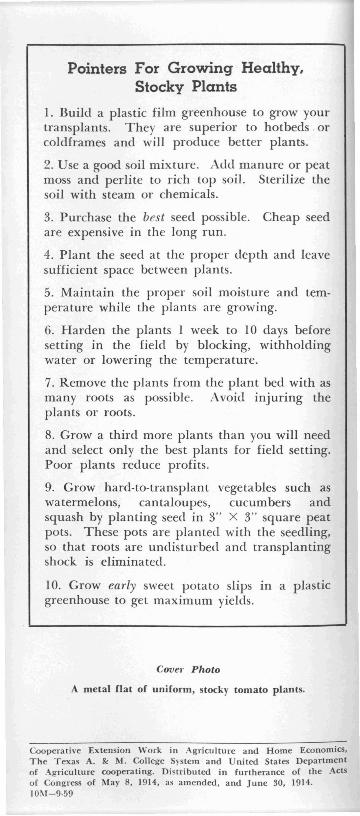
Pointers For Growing Healthy,Stocky Plants
1. Build a plastic film greenhouse to grow yourtransplants. They are superior to hotbeds. orcoldframes and will produce better plants.
2. Use a good soil mixture. Add manure or peatmoss and perlite to rich top soil. Sterilize thesoil with steam or chemicals.
3. Purchase the best seed possible. Cheap seedare expensive in the long run.
4. Plant the seed at the proper depth and leavesufficient space between plants.
5. Maintain the proper soil moisture and temperature while the plants are growing.
6. Harden the plants 1 week to 10 days beforesetting in the field by blocking, withholdingwater or lowering the temperature.
7. Remove the plants from the plant bed with asmany roots as possible. Avoid injuring theplants or roots.
8. Grow a third more plants than you will needand select only the best plants for field setting.Poor plants reduce profits.
9. Grow hard-to-transplant vegetables such aswatermelons, cantaloupes, cucumbers andsquash by planting seed in 3" X 3" square peatpots. These pots are planted with the seedling,so that roots are undisturbed and transplantingshock is elimina ted.
10. Grow early s,·veet potato slips in a plasticgreenhouse to get maximum yields.
Cove1' Photo
A metal flat of uniform, stocky tomato plants.
Coopel'ative Extension Work in AgriCUlture and Home Economics,The Texa~ A. & M. College System and United States Departmentof Agriculture cooperating. Distributed in furtherance of the Actsof Congress of May 8, 1914, as amended, and June 30, 1914.10~I-9-59


![Beginner's Guide to Growing Heirloom Vegetables [Excerpt]](https://img.dokumen.tips/doc/110x75/577cd1901a28ab9e7894bf41/beginners-guide-to-growing-heirloom-vegetables-excerpt.jpg)