Embed Size (px)
Citation preview

Grinder Tool Rest Jig by Bruce D. Wedlock
Introduction The many articles on sharpening chisels and plane irons always include some discussion of the
desirable bevel angle of the blade. For chisels, it ranges from 20° for paring chisels to 25° for bench chisels to 30° or even 35° for mortise chisels. But how does one accurately set the grinder tool rest to achieve the desired angle? And how might the curvature of the hollow grind come in to play? Years of trial and error finally prompted my development of a simple jig to quickly set the grinder tool rest to a specific bevel angle in an accurate and repeatable manner. The detailed analysis involves substantial geometry and trigonometry. Anyone interested this information can request Hollow Ground Geometry by e-mail to [email protected].
Jig Construction The bevel angle for a hollow grind is defined in Figure 1. This is the angle at which the honing stone is
normally applied to the hollow ground blade.
Figure 1 – Definition of Bevel Angle
The tool rest jig is shown in operation in Figure 2. The curved portion is firmly held against the grinding wheel and the flat portion is held against the tool rest while it is tightened. This sets the tool rest relative to the wheel to produce the desired hollow-ground bevel angle.
Figure 2 –Jig Setting the Tool Rest

Grinding Accurate Bevels Page 2 November 2008
To begin construction you need the diameter of your grinding wheel. If your wheel is new, you can assume its nominal diameter; if it’s been substantially used, you should remove it and measure its actual diameter. The jig’s angular accuracy depends on having a correct fit to the wheel diameter.
In addition to the desired bevel angle, corrections are required to account for wheel diameter, chisel thickness and chisel taper angle. For typical bench chisels with a taper, the tool rest should be set one degree greater than desired bevel angle. For plane blades and chisels with no taper the tool rest should be set two degrees greater than the desired bevel angle. For blades that do not meet these approximate thicknesses or tapers, graphs are included in Hollow Ground Geometry to determine the necessary angle corrections.
Next, obtain a piece of ½-inch MDF with dimensions shown in Figure 3. Draw a line one inch below the top edge. From the midpoint of this line, use a protractor to draw a second line at the desired bevel angle plus 91º as shown. This includes the 1º adjustment for a typical bench chisel. For plane blades, draw the angle at the desired bevel angle plus 2º.
Figure 3 – Layout of Tool Rest Jig for Bench Chisel
With a compass set to the wheel radius, place the compass at the midpoint of the 1" line and strike an arc on the second line. Now place the compass at the intersection of this arc and second line and draw an arc intersecting the original line as shown in Figure 3. This completes the layout.
Carefully rip the jig along the 1" line, leaving the line just visible. Band saw the arc close to the layout, leaving some material, and carefully sand to the arc. Test the arc on your grinding wheel to check for a snug fit as you sand it. You may need to trim the length of the jig to fit your grinder’s wheel guard. You can make small adjustment to the arc’s fit by holding it against the grinding wheel and turning the wheel by hand. Finally, mark the bevel angle on the jig. You are now ready to set your tool rest as shown in Figure 2.
Honing Once the bevel is hollow ground on a blade, you will need to go through the honing grits to finish the
edge. While practice will make you adept at freehand honing, many find an inexpensive guide will do a better job. There are many honing guides available, and some come with angle-setting jigs. But what you really want is your honing guide set for the bevel angle ground on your blade. A setting jig may not match
Grinding Accurate Bevels Page 3 November 2008
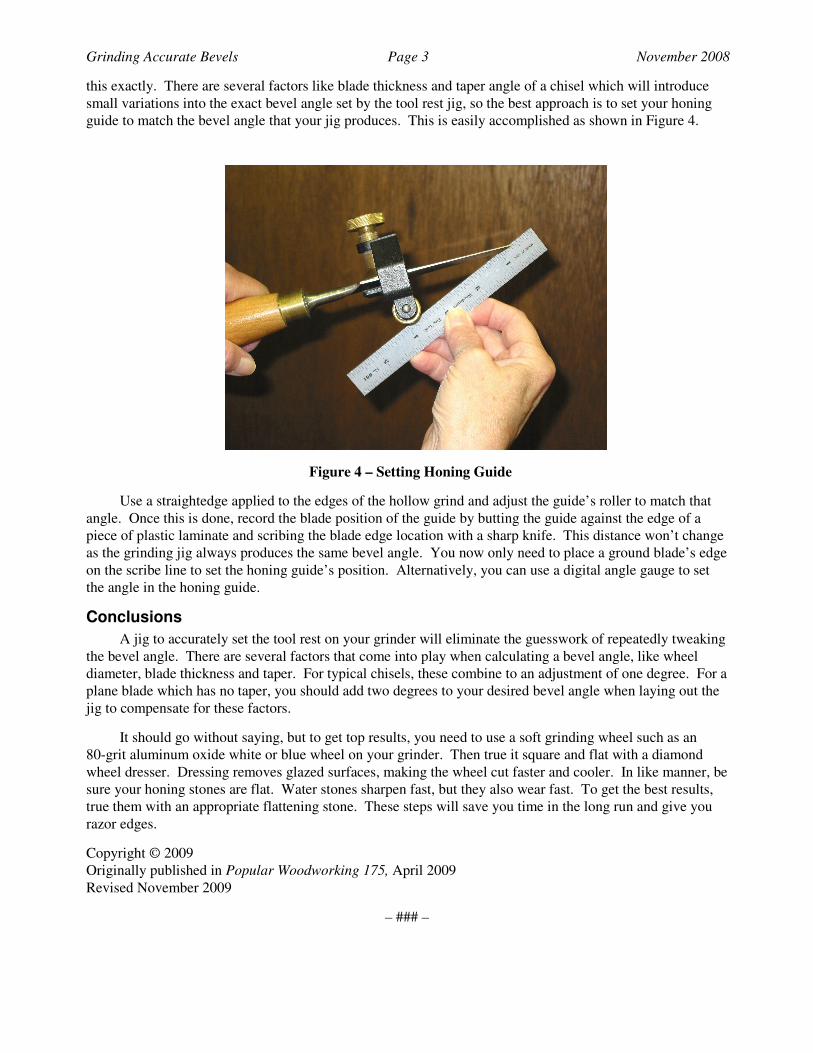
this exactly. There are several factors like blade thickness and taper angle of a chisel which will introduce small variations into the exact bevel angle set by the tool rest jig, so the best approach is to set your honing guide to match the bevel angle that your jig produces. This is easily accomplished as shown in Figure 4.
Figure 4 – Setting Honing Guide
Use a straightedge applied to the edges of the hollow grind and adjust the guide’s roller to match that angle. Once this is done, record the blade position of the guide by butting the guide against the edge of a piece of plastic laminate and scribing the blade edge location with a sharp knife. This distance won’t change as the grinding jig always produces the same bevel angle. You now only need to place a ground blade’s edge on the scribe line to set the honing guide’s position. Alternatively, you can use a digital angle gauge to set the angle in the honing guide.
Conclusions A jig to accurately set the tool rest on your grinder will eliminate the guesswork of repeatedly tweaking
the bevel angle. There are several factors that come into play when calculating a bevel angle, like wheel diameter, blade thickness and taper. For typical chisels, these combine to an adjustment of one degree. For a plane blade which has no taper, you should add two degrees to your desired bevel angle when laying out the jig to compensate for these factors.
It should go without saying, but to get top results, you need to use a soft grinding wheel such as an 80-grit aluminum oxide white or blue wheel on your grinder. Then true it square and flat with a diamond wheel dresser. Dressing removes glazed surfaces, making the wheel cut faster and cooler. In like manner, be sure your honing stones are flat. Water stones sharpen fast, but they also wear fast. To get the best results, true them with an appropriate flattening stone. These steps will save you time in the long run and give you razor edges.
Copyright © 2009 Originally published in Popular Woodworking 175, April 2009 Revised November 2009
– ### –