Embed Size (px)
Citation preview

Gretl Function Package Guide
Allin CottrellDepartment of Economics
Wake Forest University
Riccardo (Jack) LucchettiDipartimento di Scienze Economiche e Sociali
Università Politecnica delle Marche
May, 2018

Permission is granted to copy, distribute and/or modify this document under the terms of theGNU Free Documentation License, Version 1.1 or any later version published by the Free SoftwareFoundation (see http://www.gnu.org/licenses/fdl.html).

Contents
1 Introduction 1
1.1 The purpose of function packages . . . . . . . . . . . . . . . . . . . . . . . . . . . . . . . . 1
1.2 The form of function packages . . . . . . . . . . . . . . . . . . . . . . . . . . . . . . . . . . 1
1.3 Using this document . . . . . . . . . . . . . . . . . . . . . . . . . . . . . . . . . . . . . . . . . 2
2 For package users 3
2.1 The two package browsers . . . . . . . . . . . . . . . . . . . . . . . . . . . . . . . . . . . . . 3
2.2 Acquiring a package . . . . . . . . . . . . . . . . . . . . . . . . . . . . . . . . . . . . . . . . . 3
2.3 Using function packages: the basics . . . . . . . . . . . . . . . . . . . . . . . . . . . . . . . 7
2.4 Some finer points . . . . . . . . . . . . . . . . . . . . . . . . . . . . . . . . . . . . . . . . . . . 9
3 For package authors 13
3.1 Building a package via the command line . . . . . . . . . . . . . . . . . . . . . . . . . . . . 13
3.2 Building a package via the GUI . . . . . . . . . . . . . . . . . . . . . . . . . . . . . . . . . . . 16
3.3 Common requirements . . . . . . . . . . . . . . . . . . . . . . . . . . . . . . . . . . . . . . . 21
3.4 Gretl package idioms . . . . . . . . . . . . . . . . . . . . . . . . . . . . . . . . . . . . . . . . 23
3.5 Publishing a package . . . . . . . . . . . . . . . . . . . . . . . . . . . . . . . . . . . . . . . . . 30
3.6 Maintaining a package . . . . . . . . . . . . . . . . . . . . . . . . . . . . . . . . . . . . . . . . 30
Appendix A: The CLI on Windows . . . . . . . . . . . . . . . . . . . . . . . . . . . . . . . . . . . . 32
Appendix B: Makefile basics . . . . . . . . . . . . . . . . . . . . . . . . . . . . . . . . . . . . . . . . 34
4 Package specification details 37
4.1 Basic elements . . . . . . . . . . . . . . . . . . . . . . . . . . . . . . . . . . . . . . . . . . . . . 37
4.2 GUI-related elements . . . . . . . . . . . . . . . . . . . . . . . . . . . . . . . . . . . . . . . . . 38
4.3 Bundle-related elements . . . . . . . . . . . . . . . . . . . . . . . . . . . . . . . . . . . . . . . 40
4.4 Extra elements . . . . . . . . . . . . . . . . . . . . . . . . . . . . . . . . . . . . . . . . . . . . 41
4.5 A note on gretl versioning . . . . . . . . . . . . . . . . . . . . . . . . . . . . . . . . . . . . . 41
5 Zip package details 42
5.1 Basic specification . . . . . . . . . . . . . . . . . . . . . . . . . . . . . . . . . . . . . . . . . . 42
5.2 Example: almonreg . . . . . . . . . . . . . . . . . . . . . . . . . . . . . . . . . . . . . . . . . . 42
5.3 Example: GHegy . . . . . . . . . . . . . . . . . . . . . . . . . . . . . . . . . . . . . . . . . . . . 43
5.4 Example: HIP . . . . . . . . . . . . . . . . . . . . . . . . . . . . . . . . . . . . . . . . . . . . . . 43
Bibliography 45
i

Chapter 1
Introduction
1.1 The purpose of function packages
The primary purpose of gretl function packages is to add estimators, hypothesis tests or otheranalytical procedures to gretl’s repertoire of built-in procedures. While function packages may alsobe used for other purposes (e.g. pedagogy, replication exercises), those made available via the gretlserver are expected to extend gretl’s functionality in non-trivial ways.1
1.2 The form of function packages
The core component of a gretl function package—in simpler cases, the sole component—is a gfnfile. This is an XML file conforming to the Document Type Definition gretlfunc.dtd, which issupplied in the gretl distribution; the latest version can always be found online.2 Such files contain
• the hansl code for at least one function;
• various items of metadata (author, version, date, etc.);
• help text for the function(s), or a pointer to help in PDF format; and
• a sample script that illustrates a call to the packaged function(s).
While it is possible in principle to create and edit a gfn file “manually”, using a suitable text editor,this is not recommended. Gretl provides tools (both command-line and GUI) to create and maintainpackage files, such that authors are not required to mess with raw XML.
We will refer to packages that consist of a gfn file alone as “simple packages” (the included hanslcode may not be simple, but the structure is).
The alternative to a simple package we will call a “zip package”. Such packages take the form of aPKZIP archive containing a gfn file along with other materials, which may include PDF documenta-tion (in place of plain text help), data needed by the package for internal use (for example, tablesof critical values for some test statistic), and/or extra data files or scripts intended to supplementthe required sample script. Zip packages can be built using command-line tools or with the help ofthe gretl GUI.
One point to note about zip packages is that the PKZIP wrapper is actually just a storage andtransport format. When such a package is installed, it is unpacked in a suitable location. Furtherdetails on this package format can be found in chapter 5.
1For an extended discussion of the rationale for such packages see “Extending gretl: addons and bundles” (Cottrell,2011). Note, however, that the distinction between regular packages and “addons” in that document has become some-what blurred, as regular packages have gradually acquired many of the rights and responsibilities previously confined toofficial gretl “addons”. On the rights side, regular packages are now able to hook into the gretl GUI; on the responsibilitiesside, contributed packages are now subject to (minimal) vetting before they can appear in the public download area onthe gretl server.
2See http://sourceforge.net/p/gretl/git/ci/master/tree/share/functions/gretlfunc.dtd.
1
Chapter 1. Introduction 2
1.3 Using this document
Chapter 2 gives an account of function packages from the user’s point of view. Even those who arefamiliar with packages might want to take a look, since there are some finer points that might notbe totally evident. Moreover, there are several changes and enhancements in recent gretl versions.
Chapter 3 gives a walk-through of the means of creating, refining and publishing function packages,both via the command-line and via the GUI.
Chapters 4 and 5 provide reference material on the details of package specification and structure,along with some tips on usage.
Please note that many of the statements and illustrations in this Guide reflect refinements made togretl’s package management facilities over recent months. If you plan to follow along you shouldupdate to gretl 2015d or higher.

Chapter 2
For package users
2.1 The two package browsers
Since we’ll be referring to the “browsers” for function packages quite a lot in the following, let usbe clear up front about the two package browser windows in gretl and how they are accessed.
One of these windows shows the packages installed on your own computer. To open it, either selectthe menu item “File, Function packages, On local machine” or use the short-cut button labeled “fx”on the toolbar at the foot of the main gretl window. With a new installation of gretl there will notbe much to see in this window at first.
The other browser shows all the packages available from the gretl server. It can be opened viathe menu item “File, Function packages, On server.” The same listing can be accessed via a webinterface,1 but for most purposes it will be more convenient to work from within gretl.
The two browsers are interconnected: from the “local machine” window you can open the “onserver” one by clicking on the Network button in the toolbar (tooltip, “Look on server”), while fromthe latter you can open or focus the “local machine” window by clicking the Home button (tooltip,“Local machine”). They are also connected via drag-and-drop: one way of installing a package fromthe server is by selecting it in the server window and dragging it onto the local one.
When we use the term “package browser” below we will generally mean the local window; we’lladd the qualification “on server” when we’re talking about the other one. For screenshots of bothbrowsers see section 2.2.1 below.
That said, let’s move on to the business of getting hold of a function package of interest.
2.2 Acquiring a package
We’ll focus here on packages available from the gretl server. These have passed a minimal checkingprocedure on the part of the gretl development team, designed to ensure that they are usable withthe current version of gretl. This does not mean, however, that they are guaranteed to be bug-free,or to deliver accurate results; those responsibilities rest on the shoulders of the package authors.
Some authors may choose to make their packages available via other means. In that case, once theuser has the package file available, either as a gfn file or a zip file (see section 1.2), the package canbe installed using the instructions below (section 2.2.2).
2.2.1 Installing a package via the GUI
We’ll use as an example Ignacio Díaz-Emparanza’s GHegy package. Suppose you’ve read Ignacio’sexcellent paper on seasonal unit-root tests (Díaz-Emparanza, 2014) and you’d like to use his results.You were told a gretl package is available. Here’s what you do. (We assume you have an Internetconnection.)
Open gretl, and select “File, Function packages, On server”. Since the package deals with seasonalunit roots, you’ll probably want to look for the word “seasonal”. After typing seasonal in thetop-right search box and hitting the Enter key a few times, you find what looks like it (Figure 2.1).
1See http://ricardo.ecn.wfu.edu/gretl/cgi-bin/gretldata.cgi?opt=SHOW_FUNCS.
3

Chapter 2. For package users 4
Figure 2.1: Finding GHegy among the packages on the gretl server
Skipping ahead a little, Figure 2.2 shows, for reference, the browser for installed packages—whichwe’ll be mentioning from time to time—after GHegy has been installed.
Figure 2.2: Browser for installed packages. It’s quite easy to tell this apart from the “on server” window.Apart from their title-bars, this one has a lot more toolbar buttons (you can do more with a package once itis installed).
Returning to the installation process, to make sure what you’ve found is really what you want,you can get more information on the package, either by clicking on the “Info” icon (top-left inFigure 2.1), or by right-clicking on the package entry and selecting Info from the context menu.You’ll be presented with a window like Figure 2.3.
Yes, this definitely looks like it. At this point, all you have to do is install the package: click onthe “Install” icon in the browser window, or, again, right-click on the package entry. Gretl will now

Chapter 2. For package users 5
Figure 2.3: Get more info on GHegy
download the package from the server at Wake Forest University and install it.
Figure 2.4: Let GHegy attach to a menu?
The final step of your installation is shown in Figure 2.4. Function packages may offer the optionof integrating into gretl’s GUI menus: in this case, the author chose to make it available amongthe other unit-root tests that gretl provides natively. You may choose to accept this option (whichmakes it handy to use the package from gretl’s graphical interface) or not, if you don’t want toclutter up your menus with anything more than the essential entries. Even if you say “No” here,however, the package will still be available to you from the GUI interface—it just won’t have adedicated menu entry. But note, this is not just a one-time option; see section 2.4.1 for an accountof how to add or remove installed packages from gretl’s menus.
Suppose, for now, you say “Yes” to GHegy’s offer of a menu attachment. Then the HEGY unit-roottest should be available where you’d expect to find it (Figure 2.5).2
2.2.2 Installing a package via the command line
An alternative mechanism is provided by gretl’s install command, which can be invoked in thegretl console or in the command-line program gretlcli. This command has three modes:
1. If you just type, for example,
install GHegy
the presumption is that you mean to install a package named GHegy (either .gfn or .zip,that will be determined automatically) from the gretl server. So, another way of doing whatwe just walked through, if you know in advance exactly what you want.
2You used to have to restart the program to get such dynamic menu items to appear, but from gretl 1.10.2 that’s nolonger necessary.

Chapter 2. For package users 6
Figure 2.5: The added menu item
2. Suppose a colleague has given you a link to a function package that’s not on the gretl server.Then you can download and install it on your own machine using the full URL, as in
install http://somewhere.net/gretl/splendid.gfn
3. Finally, suppose you have somehow got a copy of a function package independently of gretl:it’s on your computer but not installed. Then, to install it you want the --local option (andyou need to know the path to the file). So you might type
install /Users/Me/Downloads/splendid.gfn --local
We have illustrated variants 2 and 3 of the install command with gfn files, but note that they willalso work for packages in zip format.
2.2.3 Updating a package
Updating packages is easily done via the GUI. Look back at Figure 2.1: in the rightmost columnof the browser for packages on the server you’ll see a note of the local status of each availablepackage, either “Up to date,” “Not installed” or “Not up to date.” (It may be necessary to expandthe browser window or scroll to the right in order to see this column.) It’s a good idea to visit thislisting from time to time; if an installed package is marked as not up to date, just click the Installbutton to update it.
2.2.4 Uninstalling a package
This is also easily and intuitively done via the GUI. From the browser for locally-installed packages,select the package you want to get rid of and click on the “Unload/delete” icon, or right-click to thesame effect.
You will be asked if you want to (a) unload the package from memory (only) or (b) remove it fromyour system. The former might be useful during an interactive session in which you want to clearup all the functions you have in memory and start from scratch with no possible confusion between

Chapter 2. For package users 7
functions you have written and those provided by a package. The latter is of course more radical,and requires you to reinstall the package if you change your mind.
Packages can also be removed via the command line: use the install command with the nameof an installed package plus --remove or --purge. The former option unloads a package frommemory and also removes its menu attachment, if any (see section 2.4.1); the latter option performsthese actions but also deletes the package file(s).
2.3 Using function packages: the basics
The browser window for installed packages has quite a rich set of toolbar buttons and right-clickcontext menu choices. If you’re not sure what a button might do, try mousing over it to get a“tooltip.” If you’re still not sure, you might just try clicking it—gretl won’t do anything destructivewithout asking for confirmation first!
We’ll discuss some of the less obvious choices in the window later, but we would encourage you toexplore.
2.3.1 Using packages via scripting
If you’re interested in calling a function package via script you’ll probably want to examine its“sample script.” Hopefully this should provide a useful template. Opening the sample script is oneof the options on right-clicking an installed package in the local package browser. Of course youshould also read the help text for the function you want to call.
You’ll want to start your script by using the include command to load the package in question, asin
include GHegy.gfn
Note that even if a package comes in zip format, it’s the gfn file (which will be unpacked oninstallation) that you need to include. It will always have the same basename as the zip packagethat contained it.
The only effect of the include command above is to make the functions contained in the packageavailable to you. To use them, you call them as if they were native gretl functions. So, for example,the sample script for GHegy contains the following commands:
include GHegy.gfnopen data9-3.gdt
# Tests with constant + dums + trend and fixed AR order 4,# without printing the regressionbundle H1 = GHegy_test(reskwh, 0, 4, 3, 0)
# Tests with constant + dums, AR order determined by BIC with# a maximum of 10, printing the regressionbundle H2 = GHegy_test(reskwh, 2, 10, 2, 1)
The purpose of the first two commands is obvious and needs no comment. However, the two invo-cations of the GHegy_test function may not be totally transparent. In general you should expectsome documentation on (a) which functions are contained in the package and (b) their syntax: theparameters they accept, what they do, what they return.3 To find this, go to the list of locally-installed packages and click on the “Info” icon. A text box will appear showing the documentation
3This is something that the package authors are completely in charge of: we, as the gretl development team, try toensure that packages obtained via the gretl server contain at least minimal documentation, but we cannot guaranteeanything more.
Chapter 2. For package users 8
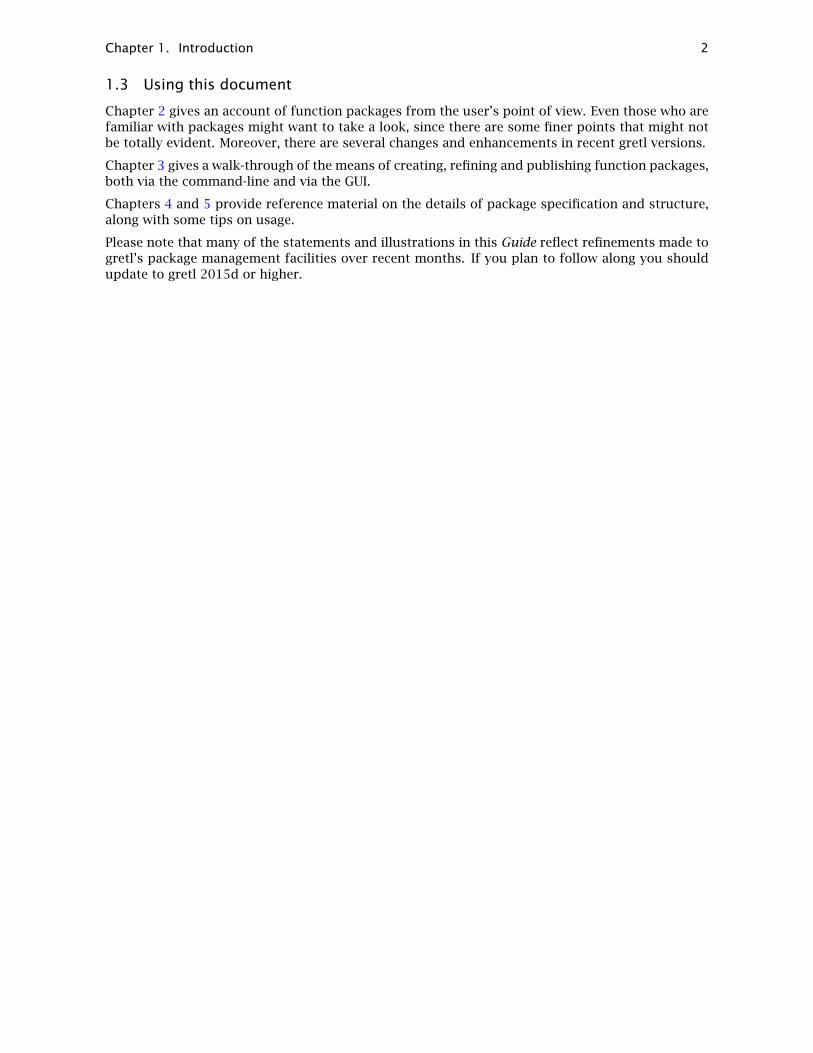
provided by the package author. In the GHegy case, for example, not only are we told all we needto know about the GHegy_test function, but we also discover that the package contains two addi-tional functions we can use, namely GHegy_bundle_print and GHegy_test_plot. So, for example,we could use the latter to enhance Ignacio’s sample script, appending the line
GHegy_test_plot(&H2)
Running it will then produce a graphic similar to the one displayed in Figure 2.6.
2500 3000 3500 4000 4500 5000 5500 6000
1973 1978 1983 1988 1993
reskwh0_1
-200-150-100
-50 0
50 100 150 200 250
1973 1978 1983 1988 1993
reskwha1_1
-400-300-200-100
0 100 200 300 400
1973 1978 1983 1988 1993
reskwhpi_1
Figure 2.6: Output of the GHegy_test_plot function
Some more complex packages offer help documentation in PDF format, for example the DPB pack-age (see Lucchetti and Pigini, 2015). If such documentation is available for a given package, the PDFbutton on the local package browser toolbar becomes active when the package is selected; clickingit will display the file in your default PDF reader.
Other than that, there’s not much to say here. For help on scripting in general, see the Hansl Primer(Cottrell and Lucchetti, 2016).
2.3.2 Using packages via the GUI
Of course, if a package offers to attach to a gretl menu, and you accepted that offer when youinstalled the package (see p. 5) then you should know where to find it. But if a package doesn’thave its own place in the menus, the package browser is the place to go to invoke it by GUI means.
You can launch a package by double-clicking on it. What exactly happens here depends on whetherthe package’s data requirement is met. Most packages require that a dataset is open, and somehave more specific requirements (time series data, or panel data).
If you have a suitable dataset in place you will get a dialog box to specify arguments to the function,much as you would with a built-in gretl procedure. (However, if the package offers more than onepublic interface you may get an initial dialog asking you to choose a particular function to call.) Ifthe package’s data requirement is not met, you’ll be told what’s wrong and asked if you’d like torun the sample script. This should load suitable data and “demo” the package.4
4By the way, if a package’s sample script does not run correctly you are encouraged to report that to the author ofthe package or the gretl-users mailing list. Although gretl function packages carry no warranty it is supposed to be anabsolute requirement that the sample script runs OK.

Chapter 2. For package users 9
Figure 2.7: GUI call to the GHegy package
Figure 2.7 illustrates a function-call dialog, this one put up by the GHegy package. Each argumentto the function is represented by either a drop-down selector or a check box. Note that the “+”button next to a selector allows you to define a new variable as an argument if you wish. Figure 2.8then shows part of the output from this call.
Figure 2.8: Output window from call to GHegy
We have moved the mouse pointer over the “bundle” icon in the toolbar of this window to reveal thetooltip, “Save bundle content.” What’s going on here is that GHegy has constructed a gretl bundlecontaining various details of the unit root test, and we can extract these details if we wish. Packageauthors: for an account of how to do this sort of thing see section 3.4.
2.4 Some finer points
2.4.1 Managing menu attachments
We mentioned above that you can revise your initial choice of whether or not to have a functionpackage insert itself into the gretl menus. We’ll now explain how.
Again, start from the browser for installed packages. One of the buttons on the toolbar is a “+”icon (with tooltip “Add to menu”). This button should be active when you select a package which
Chapter 2. For package users 10
offers a menu attachment but is not currently attached. Click it and you’ll get the sort of dialogshown above in Figure 2.4; say “Yes” to attach the package to the specified menu.
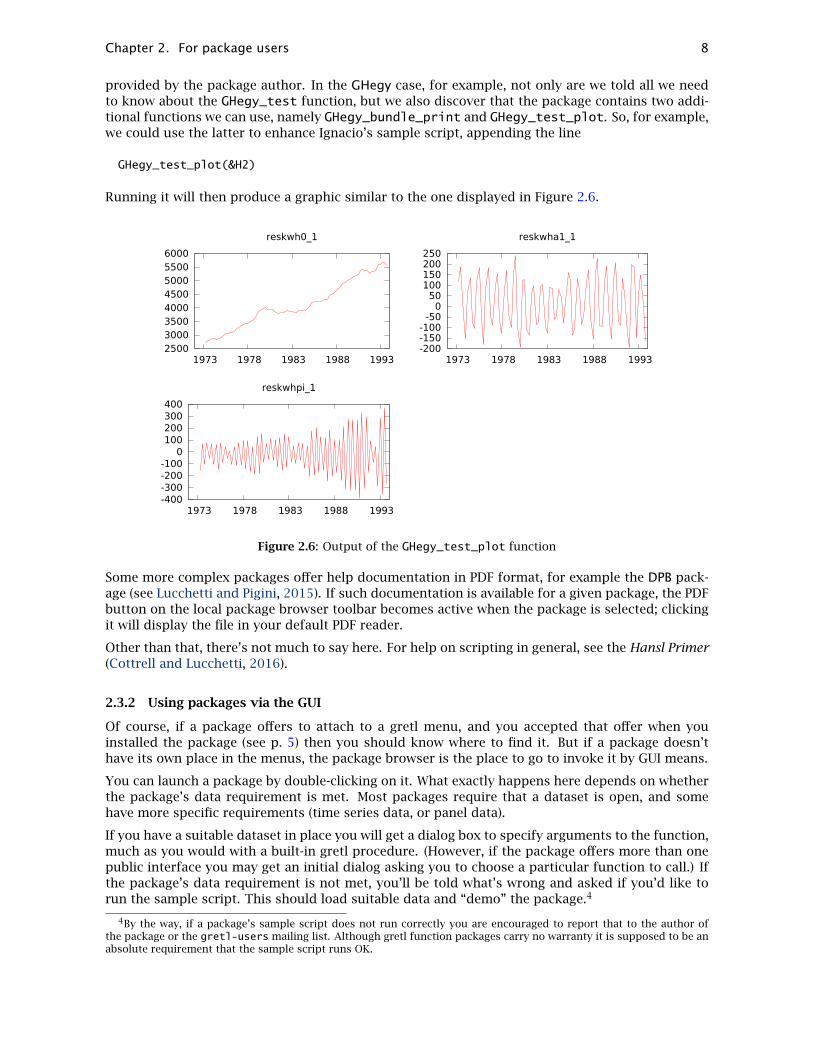
To go the other way—that is, remove a package from a menu—use the button with the “Prefer-ences” icon (tooltip “Package registry”). This brings up a window showing the packages that arecurrently attached to menus (Figure 2.9). For each package you can see whether its attachment isin the main gretl window or in model windows (at present these are the only two possibilities), aswell as the specific “path” to the menu item. To remove a package from the menus, use the deletebutton or the right-click menu. Removing a package from the menu system does not delete ordisable the package, it just means it won’t have its own menu item—which is easily reversed, as wehave just seen.
Figure 2.9: The GUI package “registry”: from here you can remove dynamic menu items
Changes made in this way will have immediate effect on main-window menus; the effect on model-window menus will be apparent only for newly opened windows.
2.4.2 What does “installed” mean?
We’ve talked about installing packages, but what exactly does it mean for a package to be installed?Basically, it means that the package file(s) are placed in one or other of two standard locationswhere gretl should always be able to find them automatically—for example, in response to thecommand “include mypkg.gfn” without any path specification.
These two standard locations are the “system” and “per-user” gretl function directories. In eachcase we’re talking about a subdirectory named functions, the actual path to which differs byplatform (and on MS Windows, by national language).
On an English-language Windows installation typical values are, for the system and per-user pathsrespectively,
C:\Program Files\gretl\functionsC:\Users\login\AppData\Roaming\gretl\functions
where “login” is a placeholder for your username. On Linux they are likely to be
/usr/share/gretl/functions$HOME/.gretl/functions
and on Mac OS X
/Applications/Gretl.app/Contents/Resources/share/gretl/functions$HOME/Library/Application Support/gretl/functions

Chapter 2. For package users 11
where $HOME is your “home” directory, which is always defined on Linux and OS X.
However, you don’t need to guess at these locations: in the gretl console you can do
eval $gretldireval $dotdir
to get the respective base directories on your system: append “functions” and you’ll have thecanonical package paths.5
When you install a package via gretl it will go to one of these locations, depending on the platformand whether or not you have permission to write to the “system” directory.
We said gretl will automatically find packages in these places. Well, there’s one possible catch tolook out for. The gfn file for a package may be placed in the functions directory itself, or in asubdirectory with the same name as the package; that is, on one or other of the following patterns:
functions/mypkg.gfnfunctions/mypkg/mypkg.gfn
Here’s the thing: if a package includes PDF documentation, or any other files besides the gfn, itmust be in its own subdirectory (the second pattern). If the package consists of a gfn file only, thenin general it should go directly into the functions directory (the first pattern). Gretl should getthis right when installing a package for you but if you install a package by hand, copying it to thefunctions directory yourself, you need to pay attention to this point.
2.4.3 Examining a package in depth
Suppose you get interested in some function package to the point where you don’t just want touse it—you want to see how it works, maybe borrow ideas from it, even fix bugs in the package ormodify it for your own purposes.6
Once again, you can start from the browser window for packages “on local machine.” The Viewcode button or right-click menu item brings up a window showing all the function code. From hereyou may copy material and paste it into a script of your own.
Making changes to an existing package, however, cannot be done via the package browser window:it’s necessary to go via the main-window menu item “File, Function packages, Edit package.” Thisroute will let you edit a package only if you have write permission on the file in question. Here’s aplausible scenario: you have package XYZ installed, and you don’t want to (or don’t have permissionto) mess with the installed version, but at the same time you’d like to do some exploration and/orexperimentation. Solution: go to the web interface to gretl packages mentioned in section 2.1and download a copy of XYZ, placing it somewhere other than one of the standard gretl functiondirectories. Then go to “File, Function packages, Edit package...” and navigate to find the gfn file.(If the package is in zip format you’ll have to unzip it first.)
In the package editor window, the button labeled Edit function code takes you into the hansl code(function by function, if the package contains more than one function). With a complex, multi-function package it may be difficult to get a good overview of the package in this way but here’san alternative: click the Save... button and select Save as script. This enables you to write out agretl inp file containing all the functions in the package, which you can then open in gretl’s scripteditor—or, of course, the text editor of your choice.
An alternative way of opening a specific package for editing, via the command line in a terminalwindow, is to invoke gretl with the flag -p plus the name of the package, as in
5OK, there’s an exception here: on Mac OS X the path to the per-user functions directory, which is shown above, is notthe same as the $dotdir path.
6If you do come up with any fixes or enhancements, then naturally we ask that you share them with the package author.

Chapter 2. For package users 12
cd XYZ_work_dirgretl -p XYZ.gfn
Either way, opening the specified gfn file for editing has the effect of loading the package intomemory. Thereafter, operations related to XYZ will refer to the version you loaded initially.
2.4.4 Redirecting the package browser
Another way of getting at uninstalled gfn files is to redirect the function package browser. Thiscan be done via the directory button at the left-hand end of the toolbar, which calls up a selectiondialog. If you select a directory that turns out to contain no gfn files you just get a message to thateffect, otherwise you are given the option of replacing the original contents of the browser windowwith the newly found packages.
When the browser is redirected in this way, clicking the directory button gives you two options:choose another directory, or revert to displaying the installed packages (which may come frommore than one directory, as explained in section 2.4.2).
When the browser is newly opened it always shows the installed packages. However, gretl willremember (during a given session) which alternative gfn directory you visited last, and will offerthat as the default selection on using the directory button.

Chapter 3
For package authors
Recall from section 1.2 that the core elements of a gretl function package are as follows:
1. One or more hansl functions;
2. the package metadata (author, version and so on);
3. some documentation (at least a few lines of text); and
4. an example script.
These elements are all contained in a gfn XML file. Optionally, you can ship additional materialwith your package (PDF documentation, a richer assortment of sample scripts, and so forth), inwhich case all the components including the gfn must be wrapped in a zip file.
In this chapter, we will go through the creation and maintenance of these basic ingredients, plusthe process of baking them together into a working function package. This result can be achievedeither by command-line methods or via gretl’s graphical interface.
We’ll start with the command line. Yes, we know that many readers may prefer to use a graphicalinterface whenever possible, but we recommend that you at least skim this section rather thanskipping forward. The command-line approach is likely to pay off if you ever decide to tackle anambitious function-package project.
3.1 Building a package via the command line
Here we assume you are at least somewhat familiar with the shell—that is, the command processorwhich awaits your input when you open a terminal window. So we assume you know how to performsimple operating-system tasks such as copying/deleting files, listing the contents of a directory andso on via the appropriate shell commands. A reminder of the basics is provided in Table 3.1. Onunix-type systems (such as Linux and OS X) you can get help on a command by typing man followedby the command word, as in man cp. On windows, get help by typing the command word followedby a slash and a question mark, as in copy /?.
action unix Windows
copy file(s) cp copy
move files(s) mv move
delete files(s) rm del
make a directory mkdir mkdir
change directory cd cd
list files ls dir
emit a string echo echo
Table 3.1: Basic shell commands by platform
With the exception of subsection 3.1.2 all the commands used in this section have been tested onWindows’ cmd.exe as well as the bash shell.
13
Chapter 3. For package authors 14
First of all, we strongly recommend that when starting work on a package you create a specificdirectory to hold the makings of the package. For illustration we’ll suppose the package is called“mypkg”. (Naturally, you should replace all occurrences of mypkg below with the actual name ofthe package you’re building.) So, starting from some suitable point in your file system, you mightbegin with
mkdir mypkgcd mypkg
Now, the minimum requirement for building your package (as a “simple package” or stand-alonegfn file) is the following set of files:
1. At least one (for now, let’s just say one) hansl inp file containing definitions of the functionsyou wish to package. Let’s call this mypkg.inp.
2. A spec file, which supplies metadata and tells gretl how the package should be assembled;call this mypkg.spec.
3. A sample script (inp file) which exercises your package; call this mypkg_sample.inp.
4. A plain text file containing help on the packaged function(s); call this mypkg_help.txt.
The four files listed above are all UTF-8 text files that you can view and modify using any text editorof your choice (no word processors, please). Each text file corresponds to one of the four basicconstituents of a gfn file. Therefore, once you have these four files ready, building the package issimply a matter of transcribing their contents into XML and putting everything together into thepackage file.
You will need to create such files in the current directory (or maybe copy or move them fromelsewhere if you’ve already made a start). It’s not absolutely necessary that all the filenames areregimented as shown (starting with the name of the package in each case), but as we’ll see beforelong this can make life easier.
The inp file containing your function definitions we won’t say much about here. If you’re con-templating writing a package you should already be pretty comfortable with hansl. See the HanslPrimer (Cottrell and Lucchetti, 2016) if in doubt.
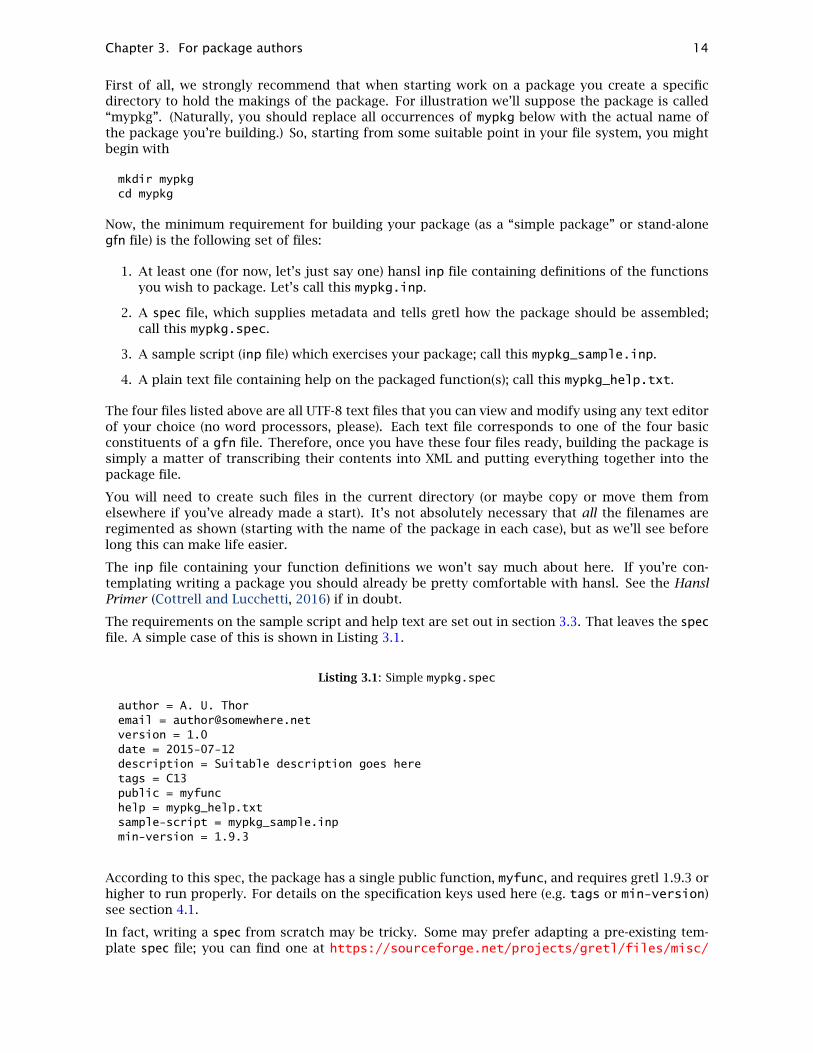
The requirements on the sample script and help text are set out in section 3.3. That leaves the specfile. A simple case of this is shown in Listing 3.1.
Listing 3.1: Simple mypkg.spec
author = A. U. Thoremail = [email protected] = 1.0date = 2015-07-12description = Suitable description goes heretags = C13public = myfunchelp = mypkg_help.txtsample-script = mypkg_sample.inpmin-version = 1.9.3
According to this spec, the package has a single public function, myfunc, and requires gretl 1.9.3 orhigher to run properly. For details on the specification keys used here (e.g. tags or min-version)see section 4.1.
In fact, writing a spec from scratch may be tricky. Some may prefer adapting a pre-existing tem-plate spec file; you can find one at https://sourceforge.net/projects/gretl/files/misc/
Chapter 3. For package authors 15
template.spec. Regardless, you still may want to refer to chapter 4 for a fuller description of thevarious entries.
Now, assuming all the required files are in place, how do we actually build the package? Simple:the shell command
gretlcli --makepkg mypkg.inp
tells gretlcli to run mypkg.inp, hence loading your function definitions into memory; process thecorresponding spec file (which must have the same basename as the inp file); load the auxiliary files(help, sample script); and, if all goes well, write out mypkg.gfn. For reference, using the --makepkgflag with gretlcli is just a convenient shorthand: it’s equivalent to running the following script,using the makepkg command.
include mypkg.inpmakepkg mypkg.gfn
You can further abbreviate the above by using the “short” syntax for options, as in
gretlcli -m mypkg.inp
We’ve said this package offers a single public function, myfunc: that’s the only function that will bemade directly available to users. However, you may want to include one or more private “helper”functions, designed to be called only by myfunc. To do so, just put definitions of these functionsinto mypkg.inp; gretlcli will pick them up and, seeing that they don’t appear in the public listing,will mark them as private.1
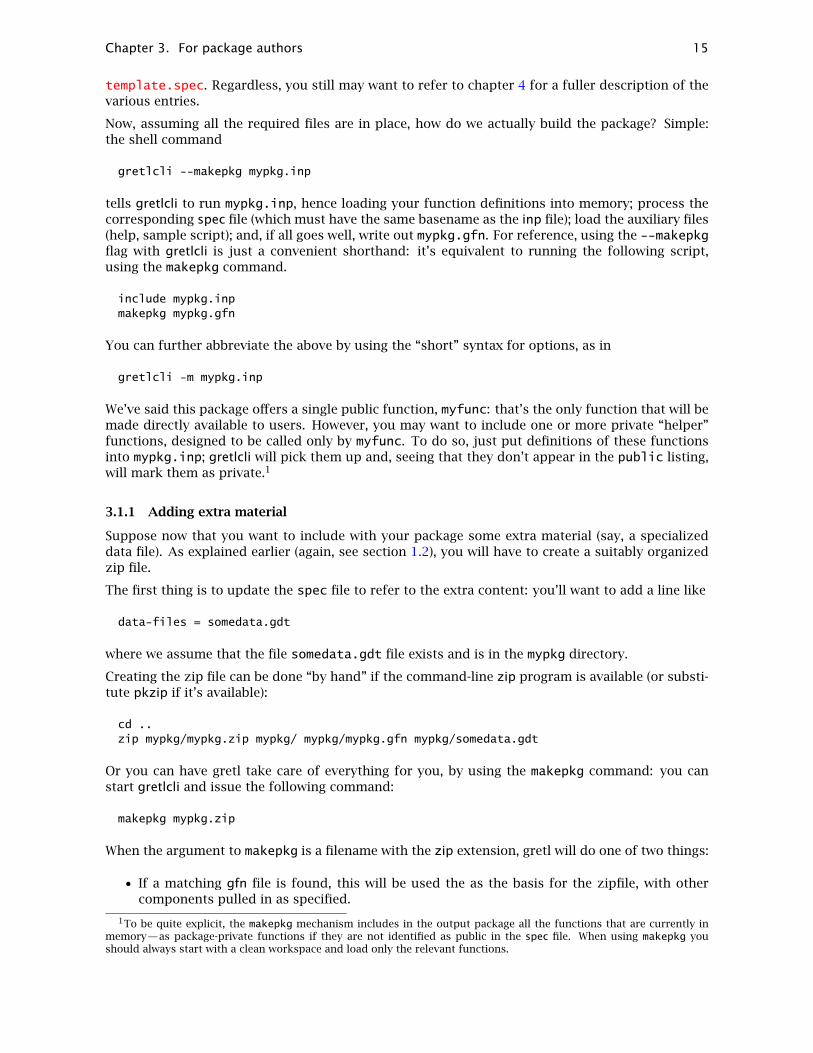
3.1.1 Adding extra material
Suppose now that you want to include with your package some extra material (say, a specializeddata file). As explained earlier (again, see section 1.2), you will have to create a suitably organizedzip file.
The first thing is to update the spec file to refer to the extra content: you’ll want to add a line like
data-files = somedata.gdt
where we assume that the file somedata.gdt file exists and is in the mypkg directory.
Creating the zip file can be done “by hand” if the command-line zip program is available (or substi-tute pkzip if it’s available):
cd ..zip mypkg/mypkg.zip mypkg/ mypkg/mypkg.gfn mypkg/somedata.gdt
Or you can have gretl take care of everything for you, by using the makepkg command: you canstart gretlcli and issue the following command:
makepkg mypkg.zip
When the argument to makepkg is a filename with the zip extension, gretl will do one of two things:
• If a matching gfn file is found, this will be used the as the basis for the zipfile, with othercomponents pulled in as specified.
1To be quite explicit, the makepkg mechanism includes in the output package all the functions that are currently inmemory—as package-private functions if they are not identified as public in the spec file. When using makepkg youshould always start with a clean workspace and load only the relevant functions.
Chapter 3. For package authors 16
• Failing that, if a matching spec file is found (plus the other files that it references), gretl willfirst build the gfn and then build the zipfile wrapper.
A neater way of doing this is to “pipe” the makepkg command into gretlcli directly from the com-mand line, as in
echo makepkg mypkg.zip | gretlcli -b -
where the -b flag makes gretlcli operate non-interactively and the following dash tells the programto read commands from “stdin” instead of an inp file.
3.1.2 Using a Makefile
If you’re working on a platform that supports the make utility, you might find a Makefile helpful. Itis not obligatory to use this approach, but especially if your project is large, it can definitely makeyour life easier. MS Windows does not provide make, but it can be installed; see Appendix A to thischapter for some options.
Make is a program that gives you a consistent interface for performing complex tasks. Its useful-ness is particularly evident when there is some dependency structure between the tasks you wantto perform. For example, when building a large software project, there is a series of operations thatmust be performed in a certain order (compiling, linking, installing); or, as another example, whenyou have a large LATEX document you have to compile it first, then run BibTEX, then compile it again,etc. Make is excellent at automating such tasks.
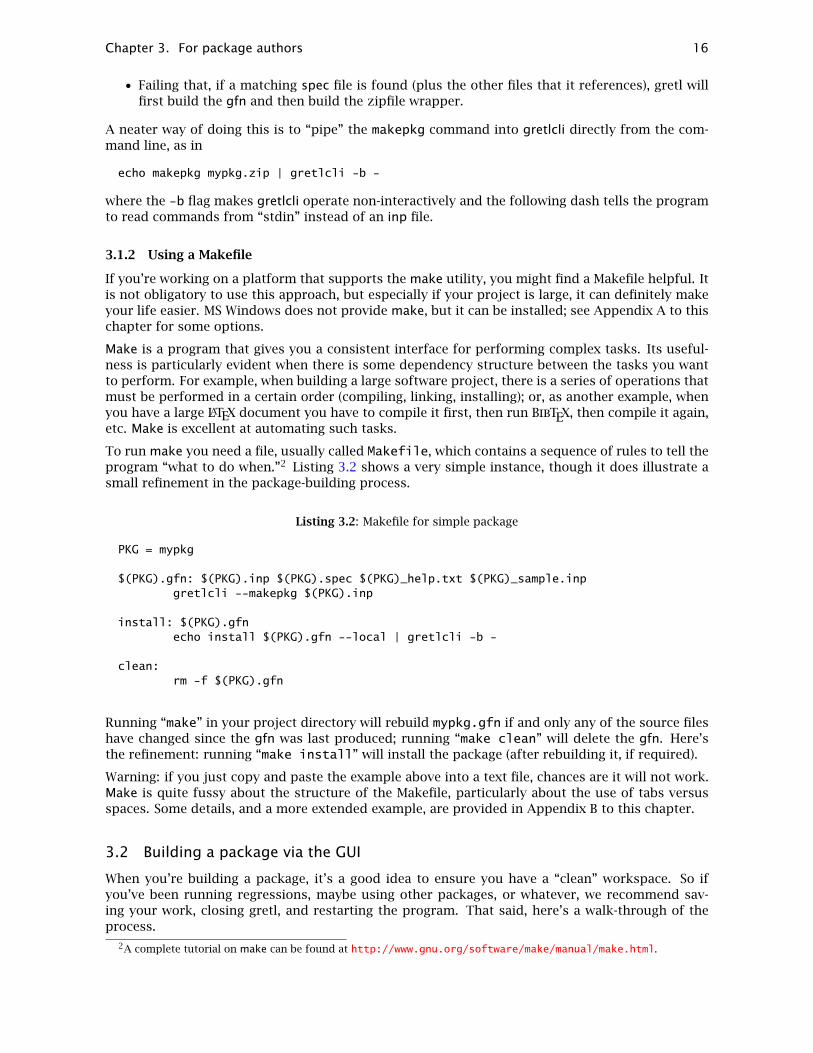
To run make you need a file, usually called Makefile, which contains a sequence of rules to tell theprogram “what to do when.”2 Listing 3.2 shows a very simple instance, though it does illustrate asmall refinement in the package-building process.
Listing 3.2: Makefile for simple package
PKG = mypkg
$(PKG).gfn: $(PKG).inp $(PKG).spec $(PKG)_help.txt $(PKG)_sample.inpgretlcli --makepkg $(PKG).inp
install: $(PKG).gfnecho install $(PKG).gfn --local | gretlcli -b -
clean:rm -f $(PKG).gfn
Running “make” in your project directory will rebuild mypkg.gfn if and only any of the source fileshave changed since the gfn was last produced; running “make clean” will delete the gfn. Here’sthe refinement: running “make install” will install the package (after rebuilding it, if required).
Warning: if you just copy and paste the example above into a text file, chances are it will not work.Make is quite fussy about the structure of the Makefile, particularly about the use of tabs versusspaces. Some details, and a more extended example, are provided in Appendix B to this chapter.
3.2 Building a package via the GUI
When you’re building a package, it’s a good idea to ensure you have a “clean” workspace. So ifyou’ve been running regressions, maybe using other packages, or whatever, we recommend sav-ing your work, closing gretl, and restarting the program. That said, here’s a walk-through of theprocess.
2A complete tutorial on make can be found at http://www.gnu.org/software/make/manual/make.html.

Chapter 3. For package authors 17
3.2.1 Load at least one function into memory
If you have a script file containing relevant function definitions, open that file and run it. Otherwiseyou can create a script file from scratch in the GUI script editor: include at least one functiondefinition, and run the script.
For example, suppose you decide to package a function that returns the percentage change of atime series.3 Open the script editor window and type
function series pc(series y "Series to process")series ret = 100 * diff(y)/y(-1)string dsc = sprintf("Percentage change of %s", argname(y))setinfo ret --description="@dsc"return ret
end function
Note that we have appended a string to the function argument, so as to make our interface moreinformative. This is not obligatory: if you omit the descriptive string, gretl will supply a predefinedone (in this case, series).
x dpcx
1 0.44286252 0.3737993 -15.59473 0.1570864 -57.97574 0.6896227 339.00865 0.8510148 23.40306 0.07757 -90.88517 0.1454557 87.51808 0.8260684 467.91749 0.4328073 -47.6064
10 0.3566473 -17.5967
Listing 3.3: Output of function check
Now run your function. You may want to make sure it works properly by running a few tests. Forexample, you may open the console and type
series x = uniform()series dpcx = pc(x)print x dpcx --byobs
You should see something similar to Listing 3.3. The function seems to work OK. Once your func-tion is debugged, you may proceed to the next step.
3.2.2 Create your package
In the gretl main window, go to the “File, Function packages” menu, and select “New package.”A first dialog should appear (see Figure 3.1), in which the left-hand panel lists all the functionsyou have available for packaging; you must specify the name of the package, one or more publicfunctions to package, and zero or more “private” helper functions.
Public functions are directly available to users; private functions are part of the “behind the scenes”mechanism in a function package. So, at this point, you select the pc function from the left-hand
3Strictly as an illustration, of course! Don’t expect something like this to pass muster for inclusion on the gretl server.

Chapter 3. For package authors 18
Figure 3.1: Starting a new function package: you specify a name for the package and select the functions tobe included from the list on the left.
panel and put it into the “Public functions” box. You also give the package a name. Leave off thegfn extension, that will be added as required; here we name the package pcchange.
Figure 3.2: The package editor window
On clicking OK a second dialog should appear (see Figure 3.2), where you get to enter the packageinformation (author, email, version, date, etc.). Unless you have a PDF file containing help, youshould also enter help text for the public interface: use the Edit button to open a text entry window.(If you have documentation in PDF format, see section 3.2.3.) You have a further chance to edit thecode of the function(s) to be packaged, by clicking on Edit function code. (If the package contains

Chapter 3. For package authors 19
more than one function, a drop-down selector will be shown.)
And you get to (in fact, you must) add a sample script that exercises your package. This will behelpful for potential users, and also for testing. For this package, a suitable sample script mightlooks like this:
include pcchange.gfnopen denmark.gdtseries pcLRM = pc(LRM)print LRM pcLRM --byobs
where (a) we’ve decided that the package is to be called pcchange, and (b) we’re going to illus-trate using Søren Johansen’s Danish macroeconomic data (included with the gretl package). Seesection 3.3.2 for details on what’s required of a sample script.
At this point you should also consider the metadata items Minimum gretl version, Data requirementand Tag. You can read all about these in section 4.1. For the moment, suffice it to say that since thefunction code above doesn’t do anything exotic you may be OK leaving the minimum gretl versionat its default value, though if you want to check when some function or command was introducedyou can look at the gretl ChangeLog.4 As for the data requirement, well, percentage changes fromobservation to observation probably don’t make sense for cross-sectional data (which in most casescan be ordered any old how, arbitrarily), so you might pull down the list of options and select “Time-series data.” And as regards the tag for this package, the most general category, “C10 Econometricand Statistical Methods: General” is probably the only one that’s applicable.
Clicking the Save button in the package editor window brings up a little menu. For the present, it’sjust the first item, Save gfn, that’s relevant. If there’s something missing from your package spec-ification at this point (e.g. no help text), you’ll get a nag box when you select this item. Otherwiseyou’ll see a dialog where you get to choose whether to save the gfn file to an “installed” location(see section 2.4.2) or in some other place (Figure 3.3).
Figure 3.3: Where do you want your new package to go?
If you select the first option you will get feedback on where the gfn file was actually written;5 if youselect the second you’ll get a regular File Save dialog box. The advantage of the first choice is thatthe package will be found automatically by gretl. However, if you’re just experimenting and don’twant to “install” the package yet, by all means choose a different location.
3.2.3 Adding PDF documentation
The prerequisite here is that you have available a suitable PDF file containing documentation foryour package. We can’t help you with that. But if you have such a file, then click on the PDF fileradio button to the right of the “Help text” field in the package editor. If you have already enteredplain-text help you will see a dialog box warning you that this will be lost (not right away, but if andwhen you save the package). Otherwise you go straight to a file chooser window where you selectthe PDF file.
4See http://gretl.sourceforge.net/ChangeLog.html.5Technical note: this option will take care of saving the gfn to a named subdirectory of the relevant functions
directory, if the specification includes PDF documentation or other additional files.

Chapter 3. For package authors 20
To be included with your package, the PDF file must (a) be in the same location as the gfn file, and (b)have the same “basename” (for example mypkg.pdf if the package is called mypkg). Nonetheless,you can select a PDF file of any name from any location, and gretl will take care of copying it intoplace under the correct name. But please note: if gretl has to copy the file into place, any changesmade to the PDF in its original location will not propagate to the copy included in the package.Having selected PDF documentation, however, you can use the Select button (see Figure 3.2) tocheck where gretl is finding the file, or to update it from another location.
Please note: PDF help is an alternative to plain text help; you cannot combine the two (not atpresent, anyway).
3.2.4 Saving a zip file
In the little menu that is brought up by the Save button in the package editor window, one ofthe items is “Save zip file...”. This item becomes active if and only if the following conditions aresatisfied:
• Your package offers PDF documentation and/or additional data files. That is, the specifiedmaterials can’t all be packed into the straight gfn XML format.
• The gfn file is up-to-date with any current changes made in the package editor.
If you think you ought to be able to save a zip file but that option is not enabled, chances are thegfn file needs to be saved first (to keep things in sync).
3.2.5 Check your package!
Before sharing your package with others, you must check that it actually works, outside of thepackage-editing context. You need to emulate the context of somebody who has installed yourpackage from scratch.
First off, that means that if you didn’t choose to write your package into a standard location at thestep in section 3.2.2 you should do so now. Use the “Save...” button in the GUI package editor orsee section 2.2.2 for other options.
Once your package is in the right place, close gretl then reopen it. Now go to “File, Functionpackages, On local machine”. If all has gone OK so far, you should see the file you packaged andsaved, with its short description. If you click on “Info” you get a window with all the informationgretl has gleaned from the package. If you click on the “View code” icon in the toolbar of this newwindow, you get a script view window showing the actual function code. Fine.
Now, back to the “Function packages” window. Think for a moment: you required time-series data(didn’t you?) so you should know that a double-click on your package will just offer the option ofrunning your sample script if time-series data are not loaded (section 2.3.2). And if you’re followingdirections you have no dataset open at present. OK, it’s worth trying that; your sample script really,really should work regardless (section 3.3.2), so go ahead and double-click.6
Now, if that went OK, let’s next try a “clean” invocation of your function. (Close and restart gretlif you’ve messed with your package at all in the interim.) First we’ll load suitable data—preferablysomething different from the sample script, for example the file np.gdt (From Nelson and Plosser,also supplied with gretl among the sample datasets, under the Gretl tab). We’ll compute the rate ofchange for the variable iprod via your new function and store the result in a series named foo.
Return to “File, Function packages, On local machine,” find your package, and double-click on it. Awindow similar to that shown in Figure 3.4 will appear. Notice that the description string “Series toprocess,” supplied with the function definition, appears to the left of the top series chooser.
6By the way, here’s another thing: after loading the function(s) from the package, open the GUI console. Try typinghelp pc: the help text you entered should be presented.

Chapter 3. For package authors 21
Figure 3.4: Using your package
Click OK and the series foo will be generated. Yay! See Figure 3.5 (right-click on foo in the gretlmain window and choose Time series plot).
Figure 3.5: Percent change in industrial production
3.3 Common requirements
Whether you’re building a function package from the command line or composing a package viathe gretl GUI, certain requirements must be met if your package is to be made available via the gretlserver. Here we spell out what’s needed in regard to the help text and the sample script.
Chapter 3. For package authors 22
3.3.1 Help text
This must give a clear (if brief) account, in English, of what the package does, and also what eachparameter does, for each public function, insofar as explanation is reasonably required. (A booleanverbose parameter probably doesn’t need much if any comment, but most parameters do needcomment.)
If the help is not in PDF format it must be encoded in UTF-8 (or plain ASCII, which is a propersubset of UTF-8). We also recommend that lines of text are kept to around 70 characters in width:some people may like to run gretl windows at full-screen size, but many of us do not!
3.3.2 Sample script
This is crucial. The sample script must work “out of the box” on all platforms, and must not taketoo long to execute.
The sample script is what curious users are likely to run if they just want to see what a packagedoes and check that it’s not broken. It’s what we gretl developers want to run for the same reasons,but also in the process of regression-testing new gretl release candidates. It’s important that a gretlrelease doesn’t break existing packages, but we can’t assess that if a package’s sample script isbroken in the first place.
Here are the key things to watch out for in relation to sample scripts:
Include yourself : Right at the top, the sample script must include the gfn file in question. This willnever do any harm, and is needed when the script is run “from scratch”, without the package beingalready loaded. The name of the gfn file should be given without any added path, and withoutquotation marks, as in
include mypkg.gfn
Dataset: If the package requires that a dataset be in place the sample script must arrange for thisin a portable manner. The options are as follows.
1. Open a data file that’s supplied with the gretl distribution (that is, under the Gretl, Greene orRamanathan tabs in the built-in datafile browser). But if none of the supplied data files aresuitable, then
2. construct an artificial dataset using the nulldata command and gretl’s random-number gen-eration facilities, or
3. specify a downloaded data file using the http prefix with the open command, or
4. include a suitable data file in your package—this requires that the package be in zip format.
In the case of artificial data, the script should include a set seed command so that the results arereproducible. In the case of downloaded data the URL should be reasonably stable, not somethingthat’s likely to disappear or be moved before long.
In no case should a datafile be specified with a full path, as in
open /usr/share/gretl/... # No!open C:\Program Files\gretl\... # No!
This is obviously not portable, and is never necessary when opening a supplied data file, givengretl’s path-searching capability.
Execution time: Some packages carry out Monte Carlo analyses and/or bootstrapping and we allknow that such procedures are inherently time consuming. Nonetheless, a sample script shouldexecute on current hardware in a reasonably short time—preferably less than 15 seconds and
Chapter 3. For package authors 23
certainly less than a minute. Otherwise both casual users and testers will lose patience. If thismeans that only a “toy” example can be run, that’s OK. The author can add comments to the scriptsaying that this is just an illustration, serious use requires many more iterations. And/or onecan add a more “realistic” invocation of the function(s), commented out, with a statement such as“Uncomment this for a real test”.
Commenting out: In some cases an author may wish to indicate alternative ways of calling his orher package. That’s fine, but if an alternative call requires a dataset other than the one opened bythe script it must be commented out; we don’t want any lines in the sample script that will generateerrors when the script is called “as is”.
The intent of the sample script in a gfn package is not just “a rough idea of how you might call thispackage”, or “something that ran OK for the author on some machine at some time”, but somethingthat will run for any user of gretl on any platform, without modification, provided only that theirgretl installation satisfies the stated version requirement of the package.
3.4 Gretl package idioms
The previous section set out certain basic requirements that must be met if a package is to bepublished (on which see section 3.5). Nothing in the present section is a requirement as such, butwe urge you to take a look at our discussion of the “idioms” that are found in many of the bestpackages. If your package “speaks gretl” fluently that will give users a better experience and makea more noteworthy contribution to the gretl ecosystem.
Two main points are considered here (they often, but do not have to, go together), namely offeringa gretl bundle as the return value from a packaged function, and offering placement of a functionpackage on one or other of the gretl menus.
3.4.1 Working with bundles
The use of a bundle as the return type for a function allows it to pass back a conveniently wrappedcollection of information of various kinds and dimensions. Furthermore, a package can containfunctions whose job is to access and process “its own” bundles, thereby offering convenient GUI orscripting functionality for the user.
There’s a close analogy between this facility and the built-in handling of models in gretl. Youspecify a model via a dialog box, and what happens? Execution burrows off into libgretl, wherethe calculations are done and the results assembled into a data structure called a MODEL, which isthen returned to the GUI. The GUI program then puts up a window displaying various aspects ofthe model. In the background the full MODEL is “attached” to the window, and the menu items inthe window call functions that access the underlying data structure to display things not shown bydefault (e.g. the residuals), to make graphs (e.g. the residual correlogram), to carry out diagnostictests, and so on.
A function that returns a bundle can do just this sort of thing, and wherever it’s appropriate werecommend that this facility be exploited.
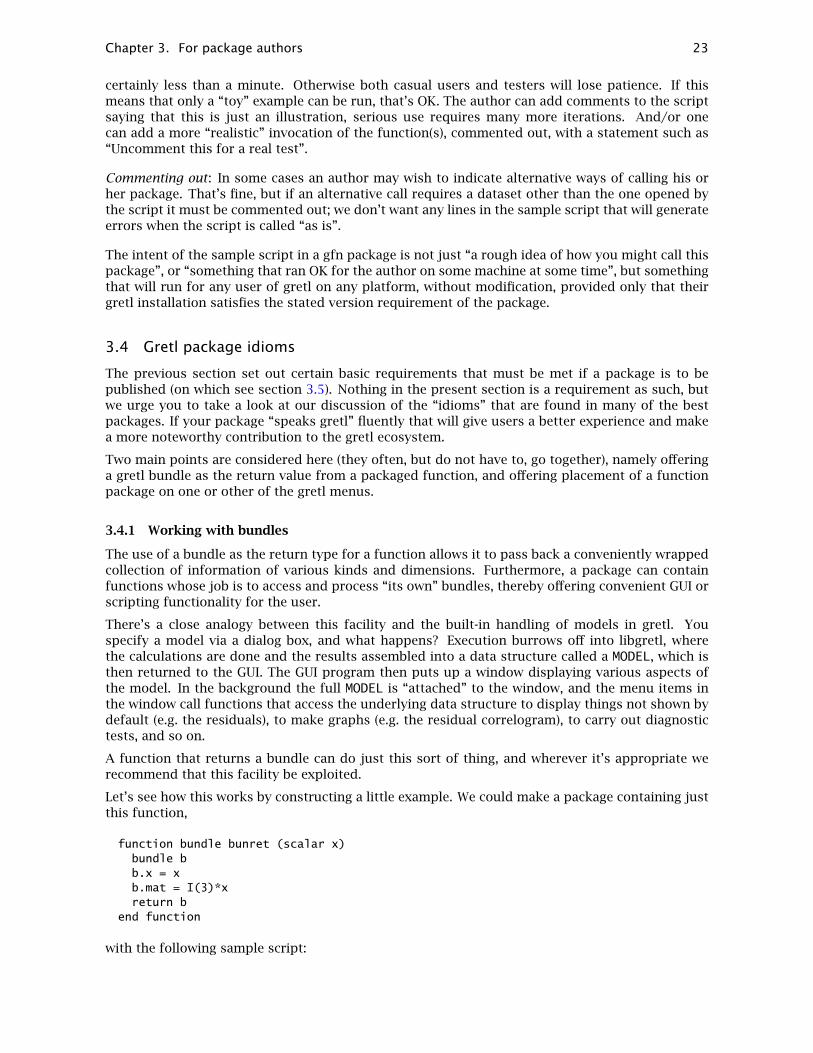
Let’s see how this works by constructing a little example. We could make a package containing justthis function,
function bundle bunret (scalar x)bundle bb.x = xb.mat = I(3)*xreturn b
end function
with the following sample script:

Chapter 3. For package authors 24
include bunret.gfnbundle b = bunret(42)
Now this function and the bundle it returns are frankly silly, but that’s alright. Our focus is onhow gretl handles bundles and we don’t want to get distracted by interesting econometric content.Let’s create a menu entry for the package, under gretl’s Tools menu. In the GUI package editoryou would go to “Extra properties”, open the “Menu attachment” tab, type in bunret for the label,select “main window” in the Window selector, and in the pane below, select Tools. In CLI mode youwould add these lines to the project’s spec file:
label = bunretmenu-attachment = MAINWIN/Tools
What happens when we call this function via the menu? In the first instance we get this dialog
Something may seem strange here: the function bunret returns a bundle, but we’re not seeing aslot to specify assignment of the return value. But let’s continue. If we type some value into the xargument selector and click OK we get the window shown in Figure 3.6, which gives two view of thetop part with two different menu buttons activated.
Figure 3.6: bunret output window
So although we didn’t get the option of assigning the bundle in the function-call dialog, gretl hassnagged the bundle on our behalf, and will let us save its contents individually (upper picture), orthe whole thing “as an icon” (lower picture).
Another thing is noteworthy about the output window: its text area is empty. That shouldn’tbe a surprise because the bunret function doesn’t print anything. Functions don’t have to printanything, and gretl’s built-functions generally do not, they just return something useful. However,

Chapter 3. For package authors 25
if a function is intended for GUI use it probably should give some visible output, or in other wordsit should be “command-like.”
So let’s revisit the package code. We could add suitable printing commands within the bunretfunction itself, but for reasons that will become apparent shortly, let’s instead write a separateprinting function and add it to the package.
function void bunret_print (bundle *b)printf "=== Hello from bunret_print ===\n\n"printf "The x member of %s is %g\n\n", argname(b), b.xprintf "The matrix member is\n\n%10.3f\n", b.mat
end function
Having added this function (note, it should be public) we could then call it from the main bunretfunction, but we won’t do that. Instead we’ll select this function for the bundle-print role inour package. In the GUI, you go to the “Special functions” tab under “Extra properties” to do that.And while we’re at it, since the package now has two public functions, we’ll select bunret for thegui-main role and in addition mark it as “no print,” because it’s not going to do any printing itself(Figure 3.7). In CLI mode, this means adding three spec lines:
gui-main = bunretbundle-print = bunret_printno-print = bunret
Figure 3.7: Selecting functions for special roles
Here’s how things will now work if we go back and call bunret from the menu: gretl will snag thebundle as before, will notice that this function is no-print, and will see if the bunret package hasa bundle-printer function. Since it does, it will call that function on the bundle and put the resultinto the output window, which will therefore no longer be blank. Your package’s bundle window isnow somewhat like a gretl model window: it shows you some stuff and allows you the possibilityof saving some or all of it.
In addition, if the user decides to save your bundle “as an icon,” then subsequently double-clickingon the icon will again invoke the bundle-print function, and re-create a window like the originalone.
+ A word to the wise, in relation to the last Figure: clicking on Help in the “Extra properties” window bringsup help text that is both specific to the active tab and reasonably complete. ’Nuff said.

Chapter 3. For package authors 26
One more refinement here. This is a bit of a stretch when we’re looking at a little toy package, butyou probably want to think about both GUI users and users who may wish to call your package viascripting. In the former case, as we’ve said, some visual feedback is wanted, but in the latter caseit should probably be optional (assuming your function returns something).
Listing 3.4 shows a modification of our toy package to accommodate this. Hopefully it shouldbe self-explanatory. We would now make GUI_bunret the gui-main function and mark it as no-print. Plain bunret (now intended for script use) would not be “no-print” any more: it’s silentby default but the user can make it print by supplying a non-zero value for the optional secondargument. In CLI mode the relevant spec file lines would be:
public = GUI_bunret bunret bunret_printgui-main = GUI_bunretbundle-print = bunret_printno-print = GUI_bunret
Listing 3.4: Toy package with GUI-specific function
function void bunret_print (bundle *b)printf "=== Hello from bunret_print ===\n\n"printf "The x member of %s is %g\n\n", argname(b), b.xprintf "The matrix member is\n\n%10.3f\n", b.mat
end function
function bundle bunret (scalar x, bool verbose[0])bundle bb.x = xb.mat = I(3)*xif verbosebunret_print(&b)
endifreturn b
end function
function bundle GUI_bunret (scalar x)return bunret(x)
end function
Further reading: For more on the special roles for functions within packages see sections 4.2 and4.3. In particular section 4.3 explains the requirements for a function to be a candidate for a “bundlespecial” role. For a discussion of how a real package—gig, or GARCH in gretl, by Jack Lucchetti—does this sort of thing see section 4 of Cottrell (2011), and for the internals of gig itself, find gig inthe browser for packages on your local machine and select “View code.”7 The GUI-related functionsare found towards the end of the code listing: start from gig_bundle_print and GUI_gig_plot.You can also open gig in the package editor and inspect its “Extra properties.” The chapter titled“User-defined functions” in Cottrell and Lucchetti (2017), besides providing essential backgroundfor package writers, details various refinements available when defining parameters to a functionfor use in the GUI.
7Depending on your platform, you may have to install gig first. Since gig is an official “addon” rather than a contributedpackage, installation is via the menu item “Help, Check for addons” in the gretl main window.

Chapter 3. For package authors 27
3.4.2 Model-related packages
The packages we’ve considered above offer “top-level” functionality, in the sense that if they are tobe shown in a menu they would naturally appear somewhere in gretl’s main window.
One can also write packages that do something interesting based on data embedded in a gretlmodel—create a graph, run a test, do a piece of analysis. Such functions (which may, but are notrequired to, return bundles) have their proper place in menus on a gretl model window, not themain menus.
Here’s an overview of how such packages work.
1. The user estimates a model in the GUI and gretl constructs a window to show the output.
2. In the process of setting up the model-window menus, we check to see if any possibly relevantmodel-related packages are available.
3. If so, we run a “pre-check” (see below) to determine if the package can handle the particularsort of model in question.
4. If yes, we add a menu item for the package, and selecting this item pulls up a function calldialog for the package.
5. The function is then executed in an environment in which gretl’s model-related accessors,such as $uhat, target the displayed model.
Let’s consider this in some more detail. First, how do we tell if any possibly relevant packagesare available? The mechanism here relies on the package “registry” discussed in section 2.4. Thisinformation is stored between gretl sessions in a file named packages.xml in the user’s gretlfunctions directory, which is automatically read on start-up.
Second, how do we tell, for each model-related package, if it can actually do something with amodel that we’re displaying? Two criteria are relevant here, both under the control of the packageauthor.
First there’s the model-requirement field in the package spec file. Valid entries for the field arethe gretl command-words corresponding to the various built-in estimators (ols, logit, mle and soon). So for a function specifically designed to handle logit models one could specify
model-requirement = logit
(or make the equivalent selection under the “Menu attachment” tab of the “Extra properties” win-dow in the GUI package editor).
The above would imply that your package can handle all (and only) logit models. In some casesyou may want more fine-grained control (e.g. you can handle both logit and probit, but only thebinary variants of these estimators). In that case you can use a second mechanism, specifying agui-precheck function (section 4.2).
This special function should not be included in the listing of public interfaces; it is intended onlyfor internal use by gretl. It must take no arguments and must return a scalar, which is interpretedas an error code (0 for OK, non-zero for not-OK). On execution it has access to the $-variables forthe model in question. Among these is the $command accessor, which gives the command-wordfor the estimator. So, for example, the pre-check function for a package which targets binary logitand probit models might look like Listing 3.5 (it could be written a good deal more tersely, but theexample shows the logic very explicitly).
Anything printed by a gui-precheck function goes to stderr. This can be useful for debugging,but in the “production” version of a package the checker should operate silently.

Chapter 3. For package authors 28
function scalar lpbin_precheck (void)string c = $commandif c != "logit" && c != "probit"# can’t handle this estimatorreturn 1
elif !isdummy($ylist[1])# logit/probit but non-binary, can’t handle itreturn 1
endifreturn 0
end function
Listing 3.5: GUI pre-check for binary logit or probit
3.4.3 Example: bandplot
For a simple but idiomatic example of a model-related package, you might take a look at bandplot(version 0.3 or higher), which creates a a plot displaying a confidence band for the effect of aselected regressor in the context of a multiple regression. In GUI use, this package latches ontowindows displaying models estimated via OLS, attaching itself to the Graphs menu.
Here’s the relevant part of bandplot.spec:
description = Confidence band plotmin-version = 1.10.1gui-main = GUI_bandplotlabel = Confidence band plotmenu-attachment = MODELWIN/Graphsmodel-requirement = olspublic = GUI_bandplot bandplotno-print = GUI_bandplot bandplotmenu-only = GUI_bandplothelp = bandplot.helpgui-help = bpgui.help
The purpose of the optional gui-help keyword is to specify help text to be presented in response tothe Help button in a dialog box. Note that in the online help for core gretl commands, a distinctionis made (maybe not quite as consistently as it should be) between text to be shown for scripting useand text to be shown if the user clicks on Help. The former may refer to option flags and arguments,the latter to buttons and pull-down lists. The gui-help spec file item extends this possibility tofunction packages. The string to the right of the equals sign should give the name of a plain text(UTF-8) file containing the GUI-specific help text. In the GUI you can edit or add GUI help under“Extra properties” via a button in the “Menu attachment” tab.
You may wonder, what happens if your package offers PDF documentation but you also choose togive some gui-help text? Answer: when the user clicks on Help in your GUI function-call dialog,she will see the GUI help text in the first instance, but the window showing this text will display ahyperlink to the PDF doc.
This package also illustrates some special GUI-related inflections in the parameter listing for auser-defined function. Here’s the signature of GUI_bandplot, designed to be called from a menu:
function void GUI_bandplot (int xvar[$xlist] "x-axis variable",scalar conf[0.5:0.99:0.95:.01] "confidence level")
Take the conf parameter first. Besides the usual [min:max:default] fields for a scalar parameter,you can add a fourth field to specify a “step”. This is used only for non-integer scalar parameters.To make the step value active, the other three numerical fields must also be given. In this case conf

Chapter 3. For package authors 29
will be represented by a “spin-button” with a minimum of 0.5, a maximum of 0.99, an initial valueof 0.95, and a step or increment of 0.01 when the button is clicked. The step specifier is ignoredoutside the context of a GUI function-call dialog. (This is not specific to model-related packages.)
The xvar parameter above illustrates a a facility specific to model-related packages, and in par-ticular to packages that target models carrying a list of regressors: you can replace the usual[min:max:default] fields for an integer-valued parameter with a single special symbol, [$xlist].The effect is that in a GUI dialog the parameter is represented by a drop-down list showing thenames of the regressors (skipping the constant, if any). See Figure 3.8.
Figure 3.8: Call to bandplot, with special parameter-list inflections. Note the spin-button selector for conf(scalar) and the drop-down selector for xvar (int) as described in the text.
Based on the user’s selection from the list, the argument is filled out with the 1-based index of theposition of the selected regressor in the array of coefficients. For example, if the list of regressorsis const x1 x2 x3 then the drop-down list will show x1, x2 and x3, and if the user selects x2 thevalue 3 will be given to xvar.
The idea is that if a package wants to single out a regressor, much the most user-friendly way ofconveying this to the user is to show a list of names. There is no way that a package can arrangefor this in advance, so we want a means of signaling to gretl that the list should be constructedat runtime, based on the particular model. But please note, this special feature is not ignored innon-GUI use; it will cause trouble. That’s one reason why, as we saw in the spec file extract above,GUI_bandplot is marked as menu-only. Note that the menu-only attribute is also visible andsettable via the GUI package editor (Figure 3.7).
The other reason why GUI_bandplot is “menu-only” is evident from the first line of code in thefunction, namely
matrix b = $coeff
This assumes that the model-related $-accessors are primed to refer to a valid model that, more-over, was estimated via OLS. That’s a safe assumption when coming off a model-window menu(pre-screened by model-requirement and/or gui-precheck), but in general it’s not at all safe.
3.4.4 No-print, once again
We’ve already come across the no-print attribute of packaged functions, but it’s worth revisitingthis in the context of functions whose sole job is to produce a graph or plot of some kind (whetheror not they are model-related).
By default, when a packaged function is invoked via the GUI a window is opened showing thecommand along with any printed output, but for graph-only output such a window is superfluousand potentially confusing. You can suppress the text window by marking the function in question

Chapter 3. For package authors 30
as no-print. This applies to bandplot, but would also apply to a main-window function whose jobis just to produce a plot.
3.5 Publishing a package
If you decide that you’d like to publish a package—that is, make it available via the channelsdescribed in section 2.2—here’s the procedure.
Preliminary: please double-check your package to ensure you have met the requirements in sec-tion 3.3. This will save everyone’s time.
3.5.1 Uploading to the gretl server
If you don’t already have a login to the gretl package server, you need to begin by creating one(please note, this is not the same thing as a sourceforge login).8
With a login in hand, there are two ways of uploading a package using gretl. There’s also a way ofdoing this independently of gretl, via the shell, though this may not be convenient on MS Windows.
First gretl method: open your package’s gfn file in the GUI package editor (you can get there via thepackage browser, or via the main-window menu item “File, Function packages, Edit package”). Onclicking the Save... button you’ll find an item titled Upload to server. This will ask for your logininformation then perform the upload. If your package specification is such that a zip package isneeded, gretl will take care of building an up-to-date zip file and uploading that.
Second gretl method: In the main gretl window, go to “File, Function packages, Upload package”and choose the package to upload. The file selection dialog will offer a choice of looking for gfnor zip files. If you select a gfn file and gretl determines that it’s actually a zip file that needs to beuploaded, it will attempt to build the zip package first.
Shell method: Listing 3.6 shows two shell scripts, the first suitable for uploading a stand-alone gfnpackage and the second for uploading a zip package. The first three lines of each would, of course,have to be filled out appropriately for your case. These recipes rely on various components thatare standard kit on unix-type systems such as Linux and OS X: a Bourne-type shell; the basic utilityprograms basename and stat; and the curl program for doing the actual upload. See Appendix Afor some comments on doing this sort of thing on MS Windows.
3.5.2 Staging
When your package is successfully uploaded, it first goes into a “staging” area on the server, andthe gretl developers who are responsible for package-checking are notified by email. Before toolong, hopefully, you should hear from one of the developers, with a response of Accept, Reject, orRevise and Resubmit.
Typically, packages will be rejected only if they are considered too trivial, if it turns out that they’rereally just duplicating functionality that’s already available in gretl, or if they clearly make noattempt to comply with the stated requirements (section 3.3 again). Revise and Resubmit is a likelyresponse if your package seems basically sound but some improvements are warranted.
Once your package is accepted it is moved out of staging and will appear in the public packagelisting, both within gretl (“On server”) and via the web interface.
3.6 Maintaining a package
Once you’ve uploaded a function package to the gretl server, hopefully that won’t be the end of thestory: unless your package was totally perfect on its first release (Ha!) you’ll want to revisit it from
8The URL will be given to you by gretl if you go to upload a package via the GUI, but for reference it’s http://gretl.ecn.wfu.edu/cgi-bin/apply/.

Chapter 3. For package authors 31
Listing 3.6: Shell scripts for uploading packages
# (1) simple gfn file variantuser=your_gretl_loginpassword=your_gretl_passwordpkg=/path/to/your_package.gfn
savename=‘basename $pkg‘curl -F login="${user}" -F pass="${password}" \-F "pkg=@${pkg};filename=${savename};type=text/plain;charset=utf-8" \http://ricardo.ecn.wfu.edu/gretl/cgi-bin/gretldata.cgi
# (2) zip file variantuser=your_gretl_loginpassword=your_gretl_passwordpkg=/path/to/your_package.zip
bytes=‘stat $pkg --printf="%s"‘savename=‘basename $pkg‘echo "Uploading $pkg ($bytes bytes) as $savename ..."
curl -F login="${user}" -F pass="${password}" -F datasize="${bytes}" \-F "pkg=@${pkg};filename=${savename};type=application/x-zip-compressed" \http://ricardo.ecn.wfu.edu/gretl/cgi-bin/gretldata.cgi
time to time with fixes or enhancements in mind.
The question arises: if your initial work was via the GUI, or via the CLI, are you thereby committed tothat mode of operation forever? Certainly not. You can mix and match the two approaches, subjectto some basic requirements—although, if your package is truly complex, we advise sticking withthe commmand-line approach throughout.
Case 1: You started via the GUI but you’d like to explore maintaining your package by CLI means.Fine, you can disassemble your gfn file by opening it in the GUI package editor, going to the “Save...”button and selecting the options Save as script (decline the option to save the sample script alongwith the packaged functions) and Write spec file (accept the options to save the auxiliary files). Thiswill create the source files you need to rebuild your package by CLI means (section 3.1).
Case 2: You started via the CLI but you’d like to explore maintaining your package by GUI means.Fine, you know that the makepkg command will create a gfn file, which you can then open in theGUI package editor to make changes. But you’d be wise to use the “Save...”-button options, asdescribed above, to keep your text-file sources in sync with your GUI-edited gfn File, so that on thenext revision it doesn’t matter where you start.

Chapter 3. For package authors 32
Appendix A: The CLI on Windows
If you would like to use the command-line approach under MS Windows you must make a prelimi-nary choice: you can either
• Stick to the native Windows way of doing things, or
• install software which mimics a unix environment on Windows.
The first option is simpler, and probably best for most users. In this case you will presumably beusing cmd.exe as your shell. The advantage of the second option is that it provides a much morepowerful and versatile shell, but if you just want to do the sorts of things discussed in section 3.1cmd.exe is quite adequate, with some help from a few small additions. We offer some more detailon the two options below.
Native Windows: cmd.exe
This supports all the commands shown in section 3.1 except that the make utility is not present.But make for Windows can be downloaded from the GnuWin32 project on sourceforge: see http://gnuwin32.sf.net/packages/make.htm, which provides a nice easy self-installer. You may alsowant command-line zip and unzip from GnuWin32: http://gnuwin32.sf.net/packages/zip.htm. (In both cases you should select the option “Complete package, except sources”.)
For anyone who’s interested but not very familiar with cmd.exe, a basic guide follows. First, to geteasy access to the program go to the Windows desktop, right-click, and select New, Shortcut. You’llbe asked for the location of the target for the shortcut. Most likely this should be
c:\windows\system32\cmd.exe
(but you can browse to find it if need be). Click Next, give the item a name, then Finish. Nowright-click on the new shortcut and select Properties: let’s make this dude a bit more functional.
1. Under the Shortcut tab, find “Start in:”; this is the directory in which the shell will start andby default it’s the directory that contains cmd.exe, which is not a useful place to be for ourpurposes. Change it to %userprofile% and it will open in your personal file space (make itsomething more specific if you like).
2. Under the Font tab, choose a decent TrueType font in place of the primitive raster default, forexample Lucida Console at size 14.
3. Under the Layout tab, Window Size panel, give yourself a comfortable height for the window—say, 35 lines.
4. If you like, under the Colors tab select black for “Screen text” and white for “Screen back-ground” to get a more modern look.
Having fixed its properties, double-click on the new shortcut and you should have a fairly decent-looking terminal window. The cmd.exe window is sometimes called a “DOS box.” In fact it has littleto do with DOS—a long-obsolete 16-bit operating system—but its default appearance is indeed anasty blast from the past. Hopefully we’ve improved on that.
A couple of other things are needed to get a usable shell: the programs we’ll be using have to be inthe PATH, and we need a decent text editor.
As regards the PATH, recent versions of the gretl installer will ensure that the directory holding gretland gretlcli is included, but that leaves the GnuWin32 utilities. In cmd.exe you can do somethinglike
PATH %PATH%;c:\program files\gnuwin32\bin
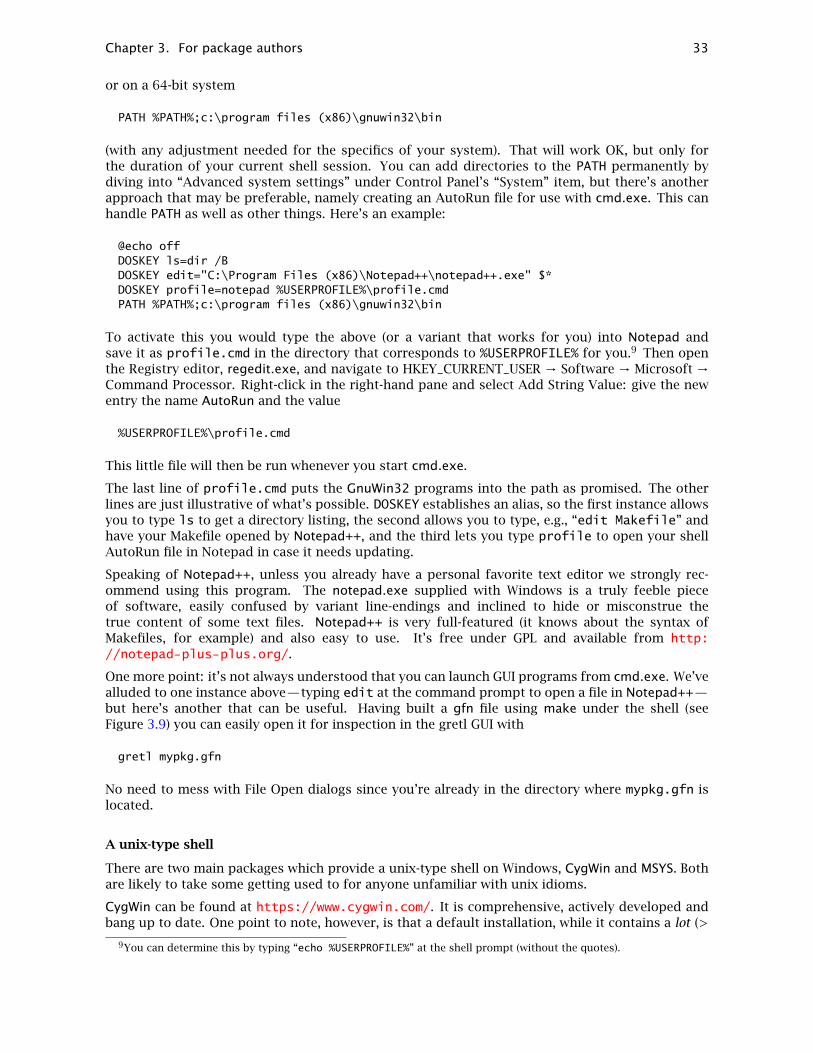
Chapter 3. For package authors 33
or on a 64-bit system
PATH %PATH%;c:\program files (x86)\gnuwin32\bin
(with any adjustment needed for the specifics of your system). That will work OK, but only forthe duration of your current shell session. You can add directories to the PATH permanently bydiving into “Advanced system settings” under Control Panel’s “System” item, but there’s anotherapproach that may be preferable, namely creating an AutoRun file for use with cmd.exe. This canhandle PATH as well as other things. Here’s an example:
@echo offDOSKEY ls=dir /BDOSKEY edit="C:\Program Files (x86)\Notepad++\notepad++.exe" $*DOSKEY profile=notepad %USERPROFILE%\profile.cmdPATH %PATH%;c:\program files (x86)\gnuwin32\bin
To activate this you would type the above (or a variant that works for you) into Notepad andsave it as profile.cmd in the directory that corresponds to %USERPROFILE% for you.9 Then openthe Registry editor, regedit.exe, and navigate to HKEY_CURRENT_USER → Software → Microsoft →Command Processor. Right-click in the right-hand pane and select Add String Value: give the newentry the name AutoRun and the value
%USERPROFILE%\profile.cmd
This little file will then be run whenever you start cmd.exe.
The last line of profile.cmd puts the GnuWin32 programs into the path as promised. The otherlines are just illustrative of what’s possible. DOSKEY establishes an alias, so the first instance allowsyou to type ls to get a directory listing, the second allows you to type, e.g., “edit Makefile” andhave your Makefile opened by Notepad++, and the third lets you type profile to open your shellAutoRun file in Notepad in case it needs updating.
Speaking of Notepad++, unless you already have a personal favorite text editor we strongly rec-ommend using this program. The notepad.exe supplied with Windows is a truly feeble pieceof software, easily confused by variant line-endings and inclined to hide or misconstrue thetrue content of some text files. Notepad++ is very full-featured (it knows about the syntax ofMakefiles, for example) and also easy to use. It’s free under GPL and available from http://notepad-plus-plus.org/.
One more point: it’s not always understood that you can launch GUI programs from cmd.exe. We’vealluded to one instance above—typing edit at the command prompt to open a file in Notepad++—but here’s another that can be useful. Having built a gfn file using make under the shell (seeFigure 3.9) you can easily open it for inspection in the gretl GUI with
gretl mypkg.gfn
No need to mess with File Open dialogs since you’re already in the directory where mypkg.gfn islocated.
A unix-type shell
There are two main packages which provide a unix-type shell on Windows, CygWin and MSYS. Bothare likely to take some getting used to for anyone unfamiliar with unix idioms.
CygWin can be found at https://www.cygwin.com/. It is comprehensive, actively developed andbang up to date. One point to note, however, is that a default installation, while it contains a lot (>
9You can determine this by typing “echo %USERPROFILE%” at the shell prompt (without the quotes).

Chapter 3. For package authors 34
Figure 3.9: Running make to build a gfn file on Windows
100 MB), does not include all of the utilities you’ll want. When running the CygWin setup programyou have the option of adding packages on top of the “base”: if you want to be able to do everythingdiscussed in this chapter you’ll need to select zip and unzip from the Archive package-set; makefrom the Devel set; and curl from the Net set.
As for MSYS, the place to start is http://sf.net/projects/mingw/files/Installer/; fromthere you can download mingw-get-setup.exe. Run this to set up the MinGW and MSYS installa-tion manager. For our purposes here the base install of MSYS is sufficient, except that you maywant to add the “bin” packages for msys-zip and msys-unzip, and possibly the “ext” package formsys-coreutils. An installation with these extras weighs in at about 24 MB. Note that curl is notavailable as a specific MSYS package, but it’s pretty much an optional extra, and can be installedseparately if you want it; see http://curl.haxx.se/download.html.
We haven’t given full details on running the installers for CygWin or MSYS; If you’re taking this routewe assume you know what you’re doing, and these programs are reasonably intuitive. Nonethelesswe advise you to take it slowly and pay close attention to (a) the installation path and (b) whichpackages you are selecting for installation.
Once one or other of these packages is installed, you have access to a terminal window running abash shell. With CygWin this should be apparent in the form of a desktop icon (unless you chose todisable it). With MSYS you have to establish the desktop link yourself: create a “shortcut” pointingat msys.bat in the MSYS installation. If you followed the defaults this will be at
c:\mingw\msys\1.0\msys.bat
In this case you can customize the window that appears as described in section 3.6.
As a final note, even if you decide not to go “all the way” with command-line methods, using gretlcliunder either cmd.exe or a unix-type shell is a very nice way of exploiting certain gretl features(output redirection, use of environment variables, etc.) and may be quite useful in it own right.
Appendix B: Makefile basics
Here we give a brief summary of some aspects of Makefile syntax and usage that are likely to beuseful for package-building with gretl.
A Makefile has (or can have) two main parts: a first section which defines variables, and a secondsection which defines rules. The initial definition of variables is optional but it allows for convenient

Chapter 3. For package authors 35
shorthand when writing the rules, and also allows for easy “portability” (names can be changed injust one place).
Each Makefile rule has (up to) three components: a target; zero or more dependencies; and zeroor more instructions for making the target. The target should be up against the left margin andfollowed by a colon. The dependencies, if any, should be listed following the colon. The instruc-tions should be listed directly below the target line, offset from the left margin with a single tabcharacter.10
Listing 3.7 shows a variant of the simple Makefile from section 3.1.2, where we have added PDFdocumentation to the package. In this example the initial section defines just one variable, PKG.Note the special syntax for using the value of a Makefile variable in the rules: the name of thevariable must be placed in parentheses, preceded by a dollar sign: $(PKG).
Listing 3.7: Makefile for package with PDF documentation
PKG = mypkg
$(PKG).gfn: $(PKG).inp $(PKG).spec $(PKG)_sample.inpgretlcli --makepkg $(PKG).inp
$(PKG).pdf: $(PKG).texpdflatex $<bibtex $(PKG)pdflatex $<pdflatex $<
$(PKG).zip: $(PKG).gfn $(PKG).pdfecho makepkg $(PKG).zip | gretlcli -b -
install: $(PKG).zipecho install $(PKG).zip --local | gretlcli -b -
clean:rm -f $(PKG).gfn $(PKG).pdf $(PKG).zip
This Makefile specifies five targets. The first target (in this case, the gfn file) is invoked if you simplytype “make”; to invoke the other targets you have to name them, as in “make install”.
If a target has no dependencies (like clean here) its associated instructions are carried out uncon-ditionally, so “make clean” will always attempt to delete the three files that can be generated bymake. By the way, using the -f (“force”) flag with the rm (“remove”) command means that it willnot seek confirmation, nor will it complain if the file to be deleted doesn’t actually exist.11
If the target of a Makefile rule is the name of a file, and the rule has dependencies, then the instruc-tions will be carried out if and only if any of the dependencies were modified more recently thanthe target file. So “make” (with this Makefile) will simply report
make: ’mypkg.gfn’ is up to date.
if the gfn file has already been built and nothing has changed since among the files listed as depen-dencies.
10Explicit instructions are not always necessary, since make knows natively how to build certain kinds of targets.However, it doesn’t know anything about gretl files.
11This rule contain the only unix-specific idiom in the Makefile: under cmd.exe you would substitute del for rm -f.

Chapter 3. For package authors 36
On the other hand, if a target does not name a file, but is rather a generic identifier such as install,it will get built regardless. So “make install” in this example will always (re-)install the package.
A couple of things should be noted about the $(PKG).pdf target: the bibtex instruction is wantedonly if the TEX source contains a bibliography (which it probably should); and we use here thebuilt-in Makefile variable “$<”, which refers to the first (or only) dependency of a rule.
Makefile rules are applied recursively—this is what makes make so powerful. So, for example,“make install” will not fail just because the zip file has not yet been built, so long as the Makefilecontains a recipe for building the latter (which of course it does). By the same token, if you invokethe install target when the zip file already exists, it will be checked automatically for up-to-dateness and rebuilt if necessary—which also means that the gfn and PDF files will be checked andpossibly rebuilt.
Any files specified as dependencies must either (a) feature as the target of a rule, or (b) be providedas “primitive” inputs. In this example the primitives are the inp file containing function defini-tions, the spec file for the package, the sample script, and the TEX source for the documentation.Everything else gets generated by make.

Chapter 4
Package specification details
Here we list and explain the usage of all the currently allowed elements in the specification of afunction package. We focus on the spec file (from which a gretl function package may be con-structed by command-line means) but we also indicate the representation of each specificationelement in the GUI package editor.
We begin with a few general points on the spec file. Each entry in this file takes the form
keyword = value(s)
Where multiple values are allowed, they should be separated by spaces. An entry can be continuedover more than one line if required, using a trailing backslash (\) as the continuation character.Blank lines are ignored, as are lines beginning with the hash mark (#), which can be used to insertcomments. As usual with gretl files, any non-ASCII characters should be UTF-8 encoded.
4.1 Basic elements
The elements described in the section apply to all function packages, whether or not they offeran interface specifically designed for use via the gretl GUI and whether or not the main publicfunction(s) return a gretl bundle.
Elements in the first block below are all represented in the upper panel of the GUI package editorwindow (see Figure 3.2).
author (required): The name of the author of the package. Multiple names may be given, separatedby “and”, although note that this string may be truncated for presentation purposes in somecontexts.
example: author = Riccardo "Jack" Lucchetti and Allin Cottrell
email (required): The email address to which correspondence should be directed. Only one ad-dress should be given.
example: email = [email protected]
version (required): The version number for the package release. This should be parseable as aninteger or floating-point number (in the C locale). That is, it should contain only digits and atmost one dot (.).
example: version = 1.2
date (required): The date on which the release was prepared, in ISO 8601 format, YYYY-MM-DD.
example: date = 2015-03-28
description (required): A short plain-text (UTF-8) string describing what the package does.
example: description = logit/probit marginal effects
data-requirement (optional): If this element is supplied, it must be one of the following strings:no-data-ok, needs-time-series-data, needs-qm-data (meaning, quarterly or monthlytime-series data), or needs-panel-data. Note that the default requirement is that a datasetof some sort is in place (cross sectional, time series or panel). If your function does not take
37

Chapter 4. Package specification details 38
any series or list arguments (for example, it does something with matrices), you should useno-data-ok to indicate that a dataset is not required.
example: data-requirement = needs-panel-data
tags (required): Here you must specify at least one “tag” for your package based on the classifi-cation developed by the American Economic Association for use with the Journal of EconomicLiterature (hence known as JEL tags). This is to help users who are searching on the gretlserver for packages that will perform some specific function. If you supply more than onetag, the tags should be separated by spaces. You can find a listing of the available tags athttp://ricardo.ecn.wfu.edu/gretl/cgi-bin/tags.cgi.
example: tags = C13
min-version (required): The identifier for the minimum gretl version on which the package issupported. Ideally, this should truly be the first gretl version on which the package will runOK, but if in doubt it is preferable to specify a later version (users can always update) ratherthan an earlier one (on which the package might fail and give the user a bad impression). Seesection 4.5 for further details.
example: min-version = 2012a
The remaining “basic” elements are represented in the GUI in various ways, as described below.
public (required): A list of names of the public interfaces offered by the package.
example: public = GUI_lp_mfx lp_mfx_print mlogit_mfx \mlogit_dpj_dx ordered_mfx
GUI : this list can be accessed and modified via the Add/Remove functions button.
sample-script (required): the name of a hansl script (.inp) file that serves as exemplar for useof the package.
example: sample-script = keane-mfx.inp
GUI : access and edit via the Edit sample script button.
help (required): The name of the file in which Help for this package can be found. This shouldeither be a plain text (UTF-8) file, in which case the filename suffix doesn’t really matter—although we suggest .txt—or a PDF file, in which case the suffix must be .pdf and the base-name of the file must be the same as that of the package (as in mypkg.gfn and mypkg.pdf).
example: help = lp-mfx_help.txt
4.2 GUI-related elements
The elements described in this section are applicable only if at least one function in the package isdesigned to be called via gretl’s graphical interface. In the GUI package editor these elements areshown in one or other tab of the the window that appears on clicking the Extra properties button.
menu-attachment (optional): Specifies a place within the gretl menu system under which thepackage should be made available. At present packages can attach to menus (a) in themain gretl window and (b) in windows displaying model estimates (only). In specifying amenu-attachment these are represented by the strings MAINWIN and MODELWIN respectively.The “path” to the entry for your package should start with one of these identifiers; this shouldbe followed by one or more slash-separated elements, using the internal representation of themenu tree in gretlmain.xml or gretlmodel.xml—these XML UI files can be found in thegretl source package or in git.1
example: menu-attachment = MODELWIN/Analysis
1See http://sourceforge.net/p/gretl/git/ci/master/tree/gui/.

Chapter 4. Package specification details 39
label (conditionally required): A very short string that can be displayed in a GUI menu. This isrelevant only if the package specifies a menu-attachment, in which case it is required.
example: label = Marginal effects
gui-main (optional): This entry is relevant only if a package offers more than one public interface.Its effect is to select one particular interface when a user accesses the function package via thegretl GUI (other public interfaces can be selected via the command line if the user so chooses).If a package offers multiple public interfaces and gui-main is not specified, the user will begiven a choice of interfaces whenever he or she calls the package. (If a package offers onlyone public interface, we can think of this as implicitly its “gui-main”.)
example: gui-main = GUI_lp_mfx
gui-help (optional): The name of a UTF-8 file containing GUI-specific help text, to be shownwhen the user clicks on Help in a dialog box representing the package. Such text may makereference to buttons, pull-down lists and the like rather than using language appropriate tocommand-line usage.
example: gui-help = bpgui.help
menu-only (optional): A list of public interfaces (in practice, probably only one) that are specifi-cally designed to be called from a suitable GUI menu and that should not be offered via thebrowser for installed packages. If any function falls in this category it’s likely to be the onedesignated as gui-main.
example: menu-only = GUI_lp_mfx
model-requirement (optional): When the “gui-main” function of a package is designed to becalled from a menu in a gretl model-output window, this element can be used to indicate thatonly models of a certain type are supported (and therefore the package will shown only forsuch models). The right-hand value should be the gretl command-word corresponding to thesupported estimator. See also gui-precheck.
example: model-requirement = tobit
gui-precheck (optional): Applies only when a menu-attachment is specified. This element iden-tifies a function to be called to check whether the package is supported in context. It offers amore flexible testing mechanism than model-requirement.
The gui-precheck function should not be included in the listing of public interfaces; it isintended only for internal use by gretl. It must take no arguments and must return a scalar.On execution it has access to all the $-accessors for the model in question. On this basis thefunction should return 0 if the model is supported, non-zero otherwise.
example: gui-precheck = lp_mfx_precheck
list-maker (optional): Applies only when a model-window menu-attachment is specified. Thiselement identifies a function to be called to construct a list of series bearing some specificrelationship to the gretl model which the package “targets,” from which the user is thenexpected to select a member. This is a generalization of the $xlist mechanism described insection 3.4.3 above, and is best explained by example. In the exogtest package the designatedlist-maker function reads as follows:
function list exogtest_listmaker (void)bundle m = $modellist L = m.xlist - m.instlistif nelem(L) == 0funcerr "No endogenous regressors were found"
endifreturn L
end function
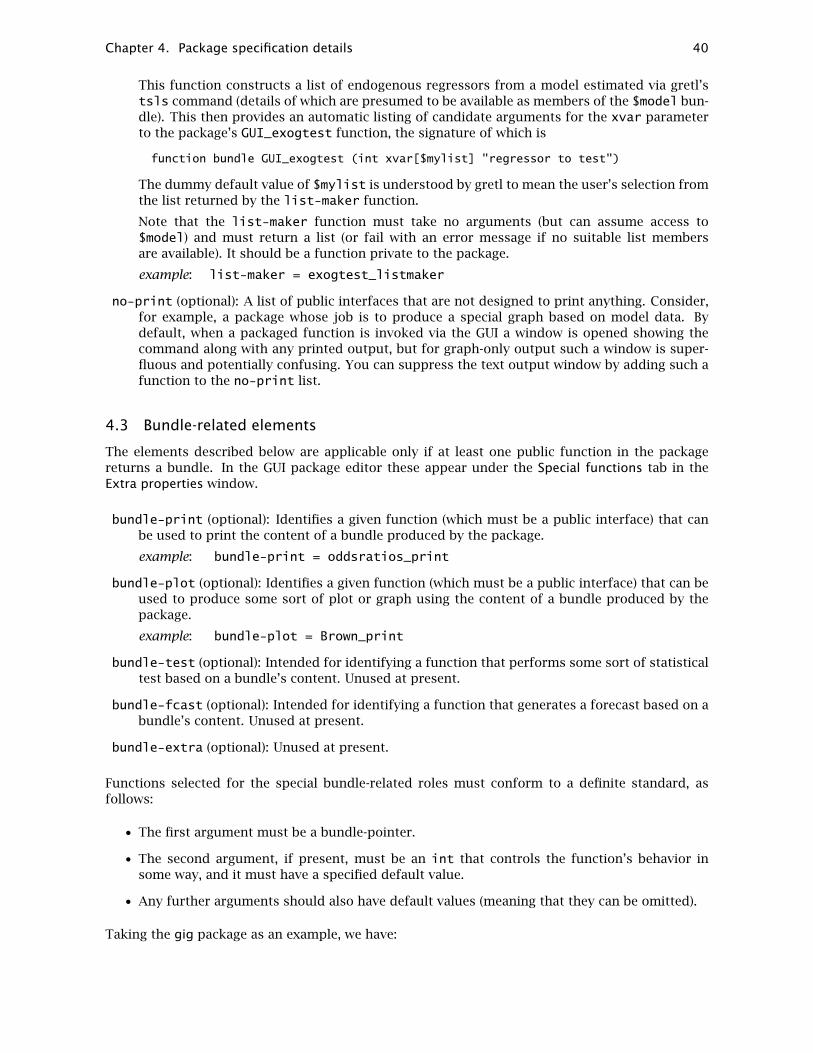
Chapter 4. Package specification details 40
This function constructs a list of endogenous regressors from a model estimated via gretl’stsls command (details of which are presumed to be available as members of the $model bun-dle). This then provides an automatic listing of candidate arguments for the xvar parameterto the package’s GUI_exogtest function, the signature of which is
function bundle GUI_exogtest (int xvar[$mylist] "regressor to test")
The dummy default value of $mylist is understood by gretl to mean the user’s selection fromthe list returned by the list-maker function.
Note that the list-maker function must take no arguments (but can assume access to$model) and must return a list (or fail with an error message if no suitable list membersare available). It should be a function private to the package.
example: list-maker = exogtest_listmaker
no-print (optional): A list of public interfaces that are not designed to print anything. Consider,for example, a package whose job is to produce a special graph based on model data. Bydefault, when a packaged function is invoked via the GUI a window is opened showing thecommand along with any printed output, but for graph-only output such a window is super-fluous and potentially confusing. You can suppress the text output window by adding such afunction to the no-print list.
4.3 Bundle-related elements
The elements described below are applicable only if at least one public function in the packagereturns a bundle. In the GUI package editor these appear under the Special functions tab in theExtra properties window.
bundle-print (optional): Identifies a given function (which must be a public interface) that canbe used to print the content of a bundle produced by the package.
example: bundle-print = oddsratios_print
bundle-plot (optional): Identifies a given function (which must be a public interface) that can beused to produce some sort of plot or graph using the content of a bundle produced by thepackage.
example: bundle-plot = Brown_print
bundle-test (optional): Intended for identifying a function that performs some sort of statisticaltest based on a bundle’s content. Unused at present.
bundle-fcast (optional): Intended for identifying a function that generates a forecast based on abundle’s content. Unused at present.
bundle-extra (optional): Unused at present.
Functions selected for the special bundle-related roles must conform to a definite standard, asfollows:
• The first argument must be a bundle-pointer.
• The second argument, if present, must be an int that controls the function’s behavior insome way, and it must have a specified default value.
• Any further arguments should also have default values (meaning that they can be omitted).
Taking the gig package as an example, we have:

Chapter 4. Package specification details 41
function void gig_bundle_print(bundle *model)
and
function void GUI_gig_plot(bundle *model, int ptype[0:1:0] \"Plot type" {"Time series", "Density"})
That is, gig’s bundle-print function has no options, but its bundle-plot function has a controlparameter ptype. Note how this parameter is set up: it has a minimum value of 0 and a maximumof 1 (these options could be extended), and 0 is the default. Further, the parameter is given a namefor display in the GUI, “Plot type”, and it also has strings—“Time series” and “Density”—associatedwith its two possible numerical values. The latter strings will be used to populate a menu on thewindow displaying a gig bundle.
4.4 Extra elements
At present there is only one spec file entry in this category; in the GUI package editor it appearsunder the Data files tab in the Extra properties window.
data-files (optional): Specifies extra files that should be included in the package. Use of thisoption implies that the package should take the form of a zipfile. See chapter 5 for details.
example: data-files = special.gdt extradir
4.5 A note on gretl versioning
As time passes this note should become redundant, but as of this writing (October 2015) gretl is intransition between two versioning schemes.
For many years, gretl version identifiers have taken the form M.N.P: three integers with the tradi-tional interpretation M = “major version”, N = “minor version”, P = “patch-level”. However, at thebiennial gretl conference in Berlin in the summer of 2015 it was suggested (and broadly accepted)that this scheme doesn’t make a great deal of sense for gretl releases (although it does make goodsense for software libraries that are widely used by other programs, for reasons that we needn’t gointo here—but see http://semver.org/ if you’re interested).
The idea is that the development of gretl is a more or less continuous process, and it’s more relevantto identify gretl releases by the year of the release (e.g. 2015) plus a letter to represent the releasesequence in any given year: so 2015a, 2015b, and so on.2
For authors of function packages the question arises: given this change, how should you identifythe minimal gretl version with which your function package is compatible?
In a package spec file the best policy is to use the “historical” identifiers for gretl releases up to1.10.2, and the new style for gretl 2015d onward. In the GUI package editor only the new styleis supported. The gretl ChangeLog (http://gretl.sourceforge.net/ChangeLog.html) can beused to map from historical identifiers to their new-style equivalents. For example, the old-styleversion number 1.9.8 maps to 2012a (being the first release in 2012).
2Not that we’re devoted to copying anyone else, but this is how Matlab currently identifies its releases.

Chapter 5
Zip package details
The zip format was originally supported only for officially recognized “addons” such as gig andSVAR, but since gretl 1.10.1 it is also supported for contributed function packages.
5.1 Basic specification
At minimum, a zip package must contain a top-level directory with the same name as the packageitself, and this directory must contain the gfn file. Suppose the name of the package is mypkg; inthat case the minimal zipfile looks like this (as shown by the unzip program with its -l option tolist the contents of an archive):
Archive: mypkg.zipLength Date Time Name
--------- ---------- ----- ----0 2015-06-07 10:54 mypkg/
10708 2015-06-07 10:54 mypkg/mypkg.gfn--------- -------
10708 2 files
There would be little point in creating a package with just the content shown above; the advantageof the zipfile format lies in the possibility of including extra materials that cannot be stuffed into agfn file. Such materials fall into four main categories:
• PDF documentation. This should take the form of a pdf file with the same basename as thepackage, included in the top-level package directory. Thus, to continue the example above,the directory mypkg might contain mypkg.pdf as well as mypkg.gfn.
• Data to support a sample script. This answers the case where a package author wishes touse specific data, not present in the gretl distribution, with his or her sample script. For ex-ample, the almonreg package contains the datafile almon.gdt to permit replication of ShirleyAlmon’s original modeling.
• Data for internal use. For example, gretl matrix files containing tables of critical value forsome hypothesis test implemented by the package.
• Extra examples: scripts and/or data files that go beyond the required sample script to giveusers a full sense of the scope and usage of a complex package.
5.2 Example: almonreg
Here’s a fairly simple real case, the almonreg package:
Archive: almonreg.zipLength Date Time Name
--------- ---------- ----- ----0 02-12-2015 13:27 almonreg/
55861 02-12-2015 13:27 almonreg/almonreg.pdf
42

Chapter 5. Zip package details 43
4409 02-12-2015 13:27 almonreg/almonreg.gfn1969 02-12-2015 13:27 almonreg/almon.gdt
--------- -------62239 4 files
The relevant portion of the almonreg spec file, calling for inclusion of the PDF and gdt files, readsthus:
help = almonreg.pdfdata-files = almon.gdt
Note that when the almonreg sample script opens the data file almon.gdt it must employ the--frompkg option to tell gretl where to find the file:
open almon.gdt --frompkg=almonreg
5.3 Example: GHegy
Another illustration: Ignacio Díaz-Emparanza’s GHegy package (abbreviated):
Archive: GHegy.zipLength Date Time Name
--------- ---------- ----- ----0 2015-03-12 13:51 GHegy/
18610 2015-03-12 13:51 GHegy/GHegy.gfn0 2015-03-12 13:51 GHegy/coeffs/
52960 2015-03-12 13:51 GHegy/coeffs/CFt_c_fijo.mat.gz53276 2015-03-12 13:51 GHegy/coeffs/CFt_cD_fijo.mat.gz42990 2015-03-12 13:51 GHegy/coeffs/Ct2_c_BIC.mat.gz... ... ...
--------- -------3798063 83 files
In this instance we don’t have PDF documentation, but we do have a large number of gzippedgretl matrix files, holding response-surface coefficients by means of which the package is able tocompute P -values for the HEGY seasonal unit-root test. The relevant spec file clause is
data-files = coeffs
Note that putting coeffs (the name of a directory) into the data-files list ensures that all the con-tents of this directory will be included in the zip package. At run time GHegy can access its matrixfiles using the accessor variable $pkgdir, which will expand to the appropriate platform-dependentpath, as in
string matname = sprintf("%s/coeffs/CFt_c_fijo.mat.gz", $pkgdir)matrix C = mread(matname)
5.4 Example: HIP
Our final illustration is the HIP package (which now has official “addon” status), written by JackLucchetti and Claudia Pigini. Looking in the zipfile we see:
Archive: HIP.zipLength Date Time Name
--------- ---------- ----- ----0 03-19-2015 19:58 HIP/

Chapter 5. Zip package details 44
0 03-19-2015 19:58 HIP/examples/75210 03-19-2015 19:58 HIP/examples/camtriv_chap14.gdtb657 03-19-2015 19:58 HIP/examples/camtriv_chap14.inp
1941 03-19-2015 19:58 HIP/examples/MonteCarlo.inp383278 03-19-2015 19:58 HIP/HIP.pdf27691 03-19-2015 19:58 HIP/HIP.gfn
--------- -------488777 7 files
We have PDF documentation plus an examples directory. The latter is special: if a zip packagecontains a directory named examples (exactly that, in English and all lower case), then in the GUIfunction package browser the “Resources...” button (open folder icon) and menu item becomeactive. Selecting this item opens a file dialog pointing at the examples directory, from which youcan open any scripts or datafiles that are provided. These are intended to supplement the requiredsample script.

Bibliography
Cottrell, A. (2011) ‘Extending gretl: addons and bundles’. Presented at second gretl conference,Torun. URL http://gretl.sourceforge.net/papers/addons.pdf.
Cottrell, A. and R. Lucchetti (2016) A Hansl Primer, gretl documentation. URL http://sourceforge.net/projects/gretl/files/manual/.
(2017) Gretl User’s Guide, gretl documentation. URL http://sourceforge.net/projects/gretl/files/manual/.
Díaz-Emparanza, I. (2014) ‘Numerical distribution functions for seasonal unit root tests’, Compu-tational Statistics and Data Analysis 76: 237–247.
Lucchetti, R. and C. Pigini (2015) ‘DPB: Dynamic panel binary data models in gretl’. gretl workingpapers 1, Università Politecnica delle Marche (I), Dipartimento di Scienze Economiche e Sociali.URL http://ideas.repec.org/p/anc/wgretl/1.html.
45


![Gretl guide-es[1]](https://img.dokumen.tips/doc/110x75/54876d56b47959d30c8b54c9/gretl-guide-es1.jpg)