Embed Size (px)
Citation preview
Using Textures as Light Sources(Standard Glowing Textures)
In this tutorial we will briefly discuss the advantages of textures used as lights in combination with Mental Ray.This tutorial was written for those who already have a basic understanding of 3DS Max.
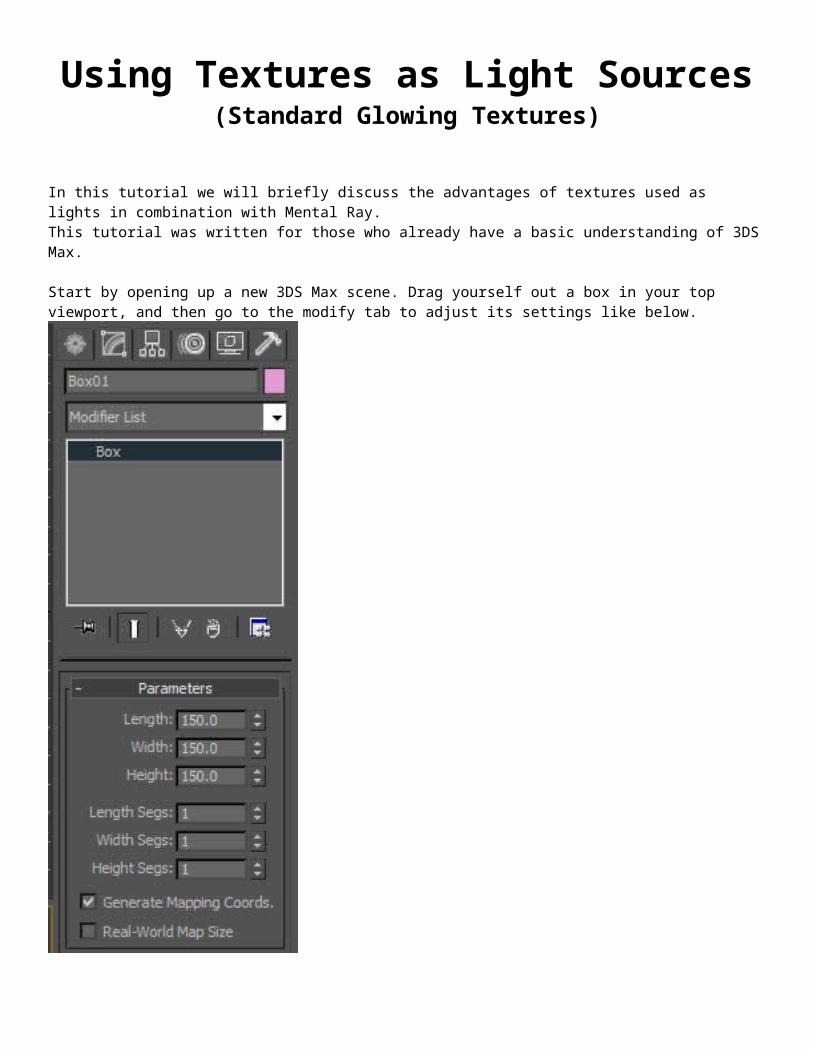
Start by opening up a new 3DS Max scene. Drag yourself out a box in your top viewport, and then go to the modify tab to adjust its settings like below.
This box is going to serve as a room with 4 walls, a ceiling and a floor. It is going to allow us to see our glowing textures full effects on the scene with mental ray renderer and Final Gather lighting.
Once you have your box set up with 150 units for length, width, and height go up to your modifier list and add a Shell Modifier.

---->
The Shell modifier is going to make the walls of our box a bit thicker. This will allow a couple of things to happen for us.
Since we are using the box as a stand in for a room, it will make the walls on the inside of the box as well as the outside visible.
These are called Normals.
3DS Max will save processing power whenever it can and only render the side of an object that is visible to the view or camera. Normally when a box is created, the program assumes that you will be viewing it from the outside in. The shell modifier makes the walls solid, so we can see the normals facing both in and out of the box.
It will also give us some darkness when we create a light on the outside of our box. The walls will cast shadows on the inside, so our glowing materials will have darkness to illuminate themselves as though they were the only light source.
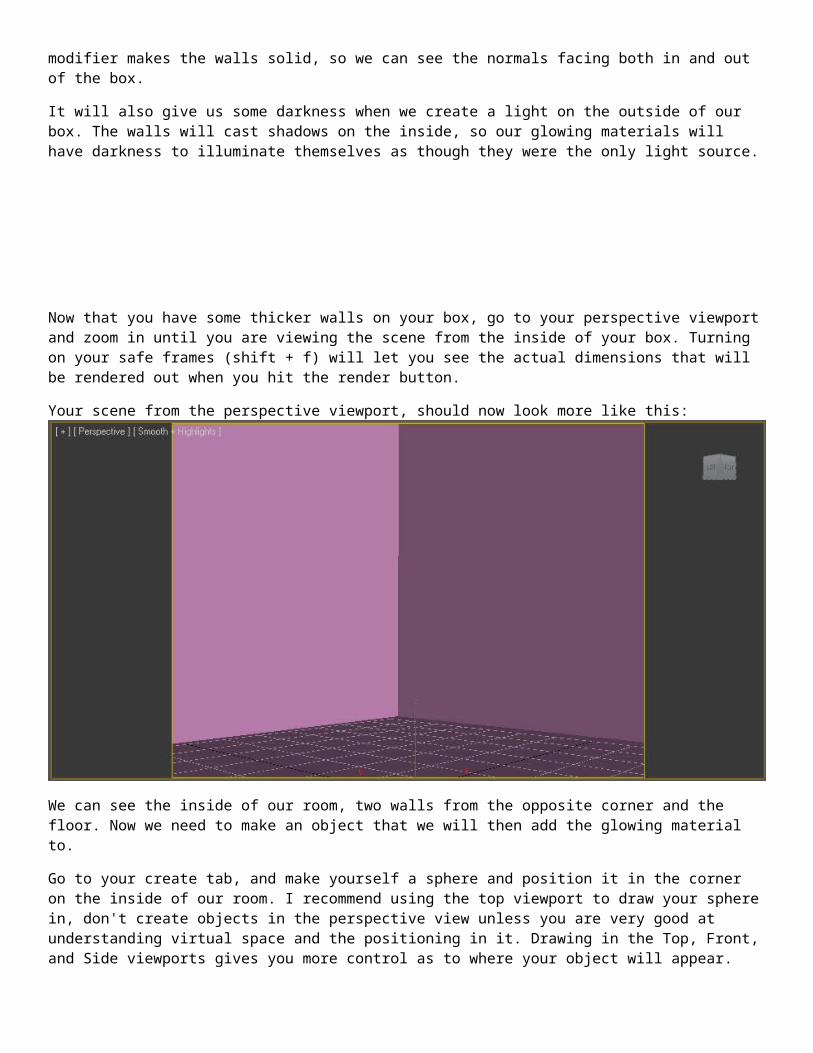
Now that you have some thicker walls on your box, go to your perspective viewport and zoom in until you are viewing the scene from the inside of your box. Turning on your safe frames (shift + f) will let you see the actual dimensions that will be rendered out when you hit the render button.
Your scene from the perspective viewport, should now look more like this:
We can see the inside of our room, two walls from the opposite corner and the floor. Now we need to make an object that we will then add the glowing material to.
Go to your create tab, and make yourself a sphere and position it in the corner on the inside of our room. I recommend using the top viewport to draw your sphere in, don't create objects in the perspective view unless you are very good at understanding virtual space and the positioning in it. Drawing in the Top, Front, and Side viewports gives you more control as to where your object will appear.
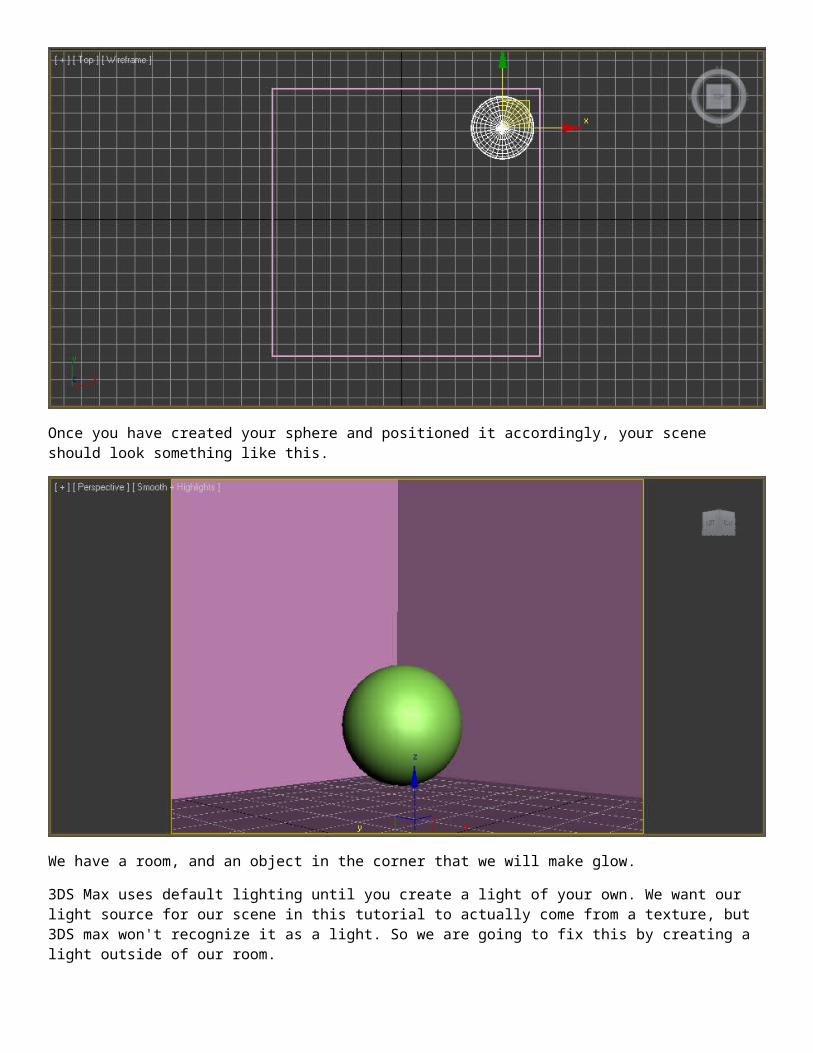
Once you have created your sphere and positioned it accordingly, your scene should look something like this.
We have a room, and an object in the corner that we will make glow.
3DS Max uses default lighting until you create a light of your own. We want our light source for our scene in this tutorial to actually come from a texture, but 3DS max won't recognize it as a light. So we are going to fix this by creating a light outside of our room.
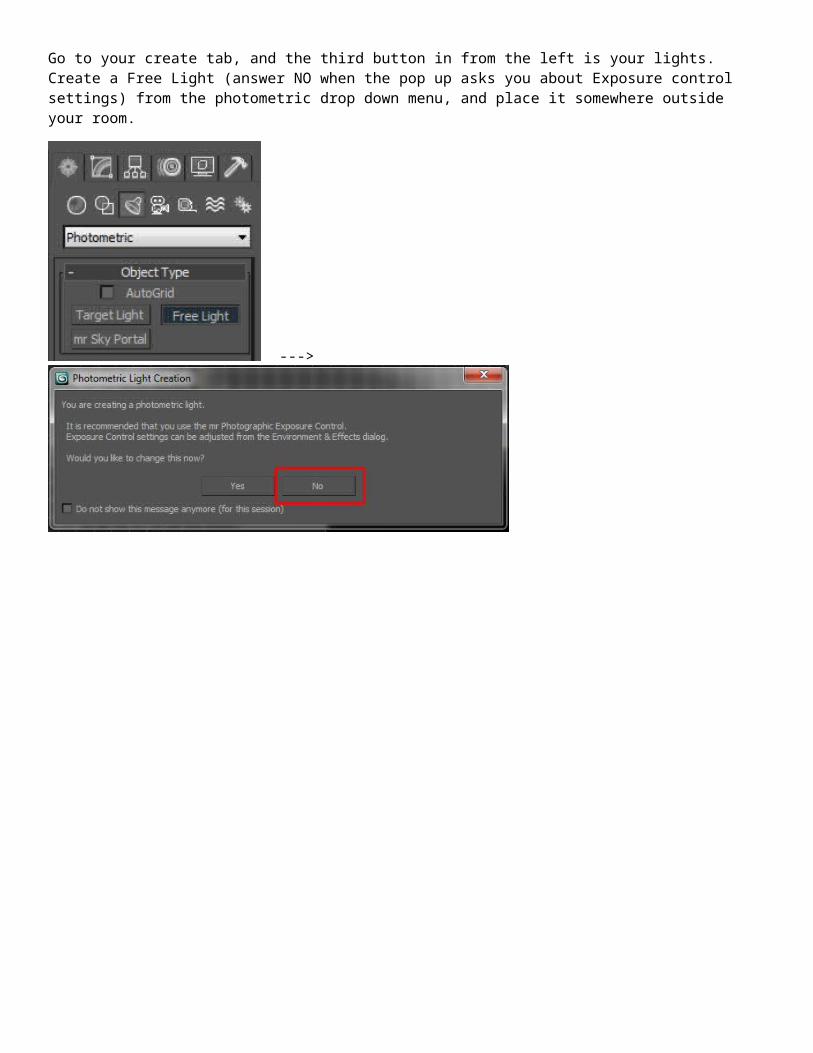
Go to your create tab, and the third button in from the left is your lights. Create a Free Light (answer NO when the pop up asks you about Exposure control settings) from the photometric drop down menu, and place it somewhere outside your room.
--->
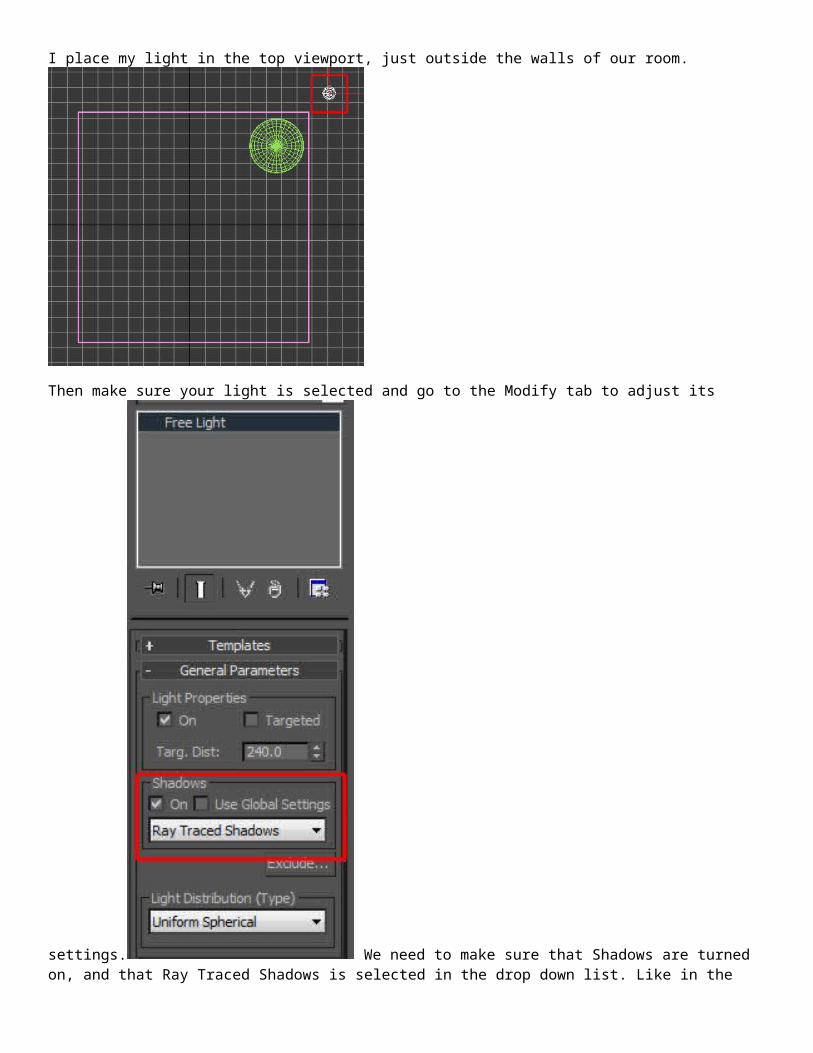
I place my light in the top viewport, just outside the walls of our room.
Then make sure your light is selected and go to the Modify tab to adjust its settings.
We need to make sure that Shadows are turned on, and that Ray Traced Shadows is selected in the drop down list. Like in the image above. This way our walls cast shadows into our room, making it a nice dark environment for a glowing texture.
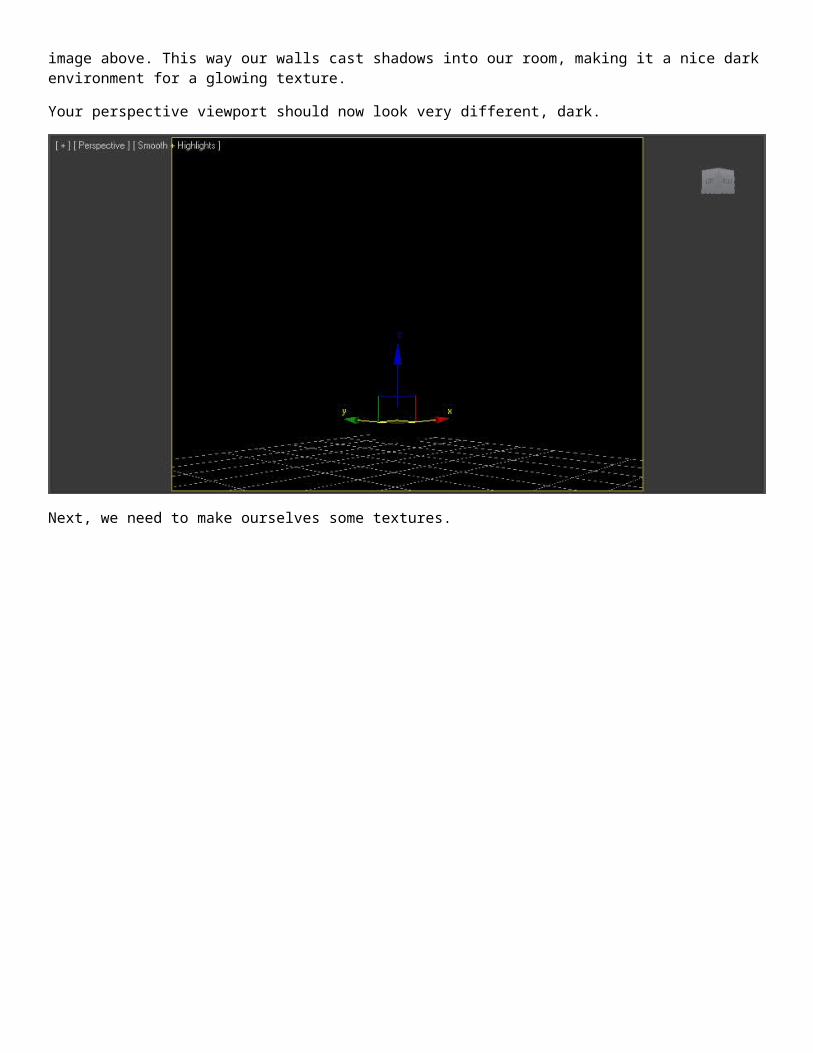
Your perspective viewport should now look very different, dark.
Next, we need to make ourselves some textures.
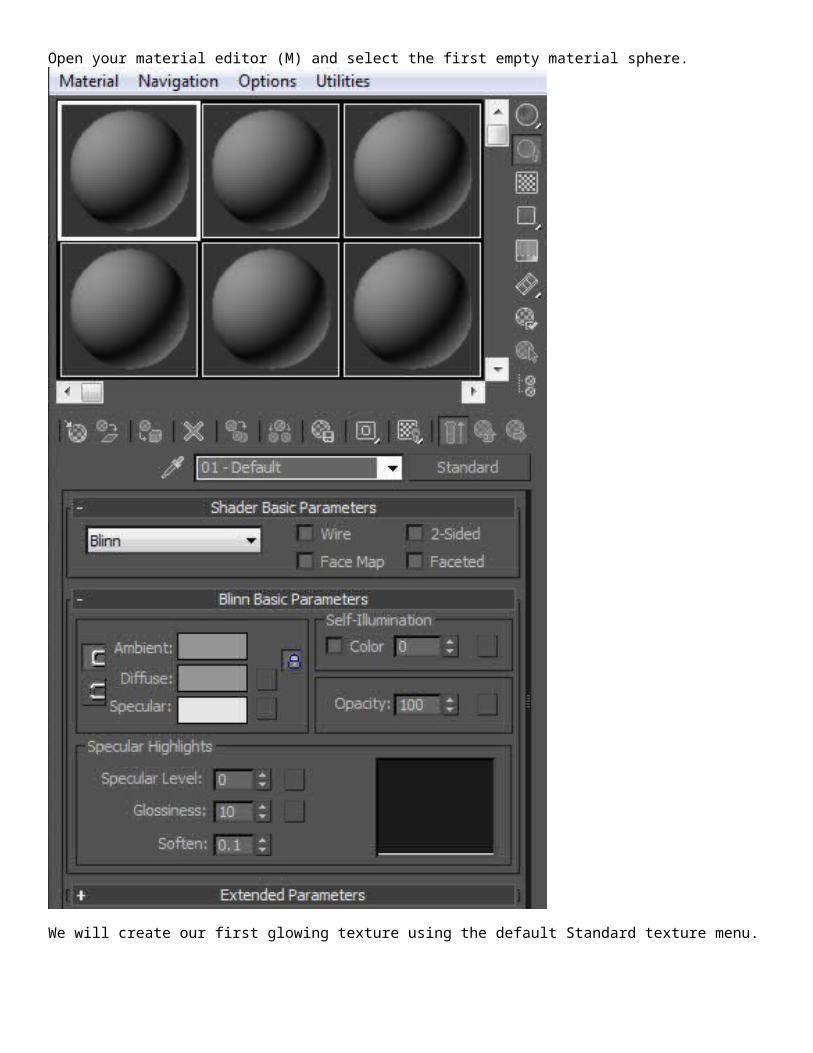
Open your material editor (M) and select the first empty material sphere.
We will create our first glowing texture using the default Standard texture menu.

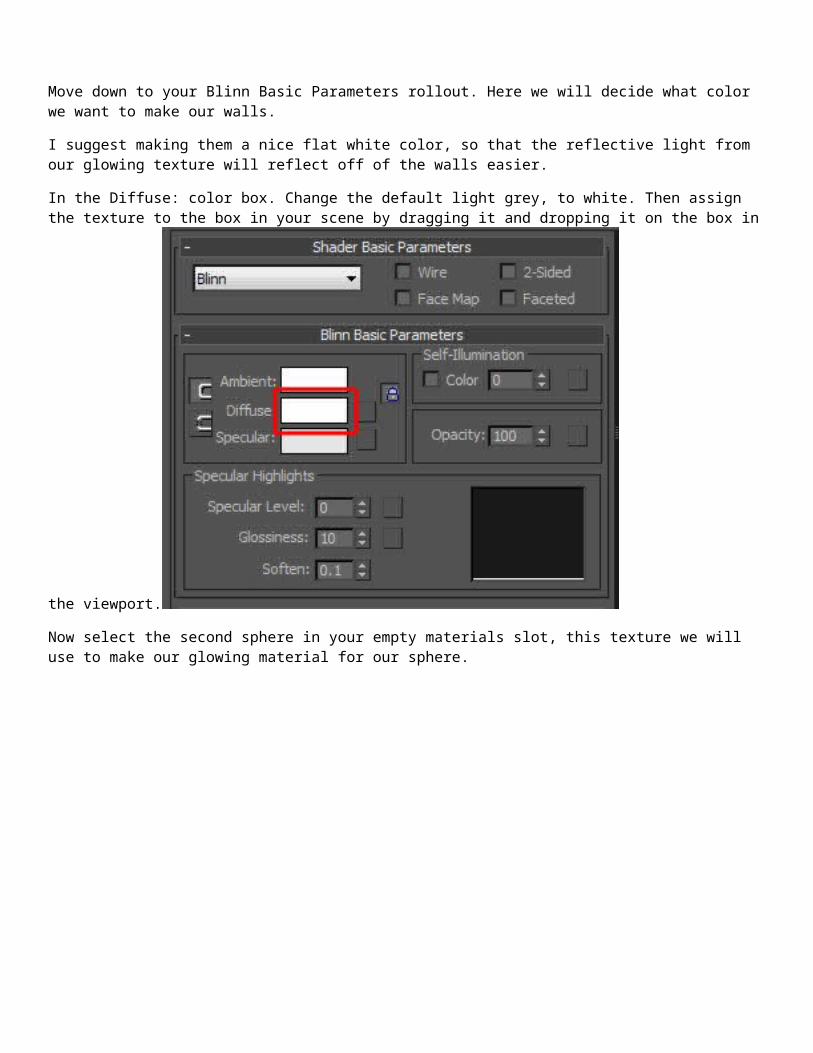
Move down to your Blinn Basic Parameters rollout. Here we will decide what color we want to make our walls.
I suggest making them a nice flat white color, so that the reflective light from our glowing texture will reflect off of the walls easier.
In the Diffuse: color box. Change the default light grey, to white. Then assign the texture to the box in your scene by dragging it and dropping it on the box in the viewport.
Now select the second sphere in your empty materials slot, this texture we will use to make our glowing material for our sphere.
Move down to the Blinn Basic Parameters again, and change the Diffuse color to whatever color you want your glowing material to be. I have chosen kind of a light blue.
The next area of settings we are going to want to change for this, is the Self-Illumination area.We have 3 options for creating a standard glowing material.
First we can check the box for Color. This will change the number next to it to a color swatch that we can assign a color to. This is what the texture will then glow as, whatever color you have chosen. It does not change the base color of the texture which is our light blue. Sometimes choosing a different color for self illumination other than the diffuse, can give you some interesting results.
Our second option is not to check the color box, but instead use the slider to the right of it to move it to a number from 0 to 100. 100 being the brightest and 0 being the dimmest amount of light you can get (which is none)
Our third option is the little empty box to the left of the number slider. This is where we can put a texture map to define the amount of light our texture emits. In a Self- Illumination map, anything that is white or lighter colored will glow more brightly, and anything that is black or dark colored will glow more dim. Black won't glow at all.
First, we'll just push up the number in our slider to 100 and start there.
You should notice the texture sphere will lose its shadows and start to look as though it is glowing blue. Just like our diffuse color is set at.
Now we can apply this texture to our sphere in the scene. Drag the texture onto the sphere in the viewport.
You perspective view should now look like this.
You perspective view should now look like this.

Try doing a render to see the final results as is.
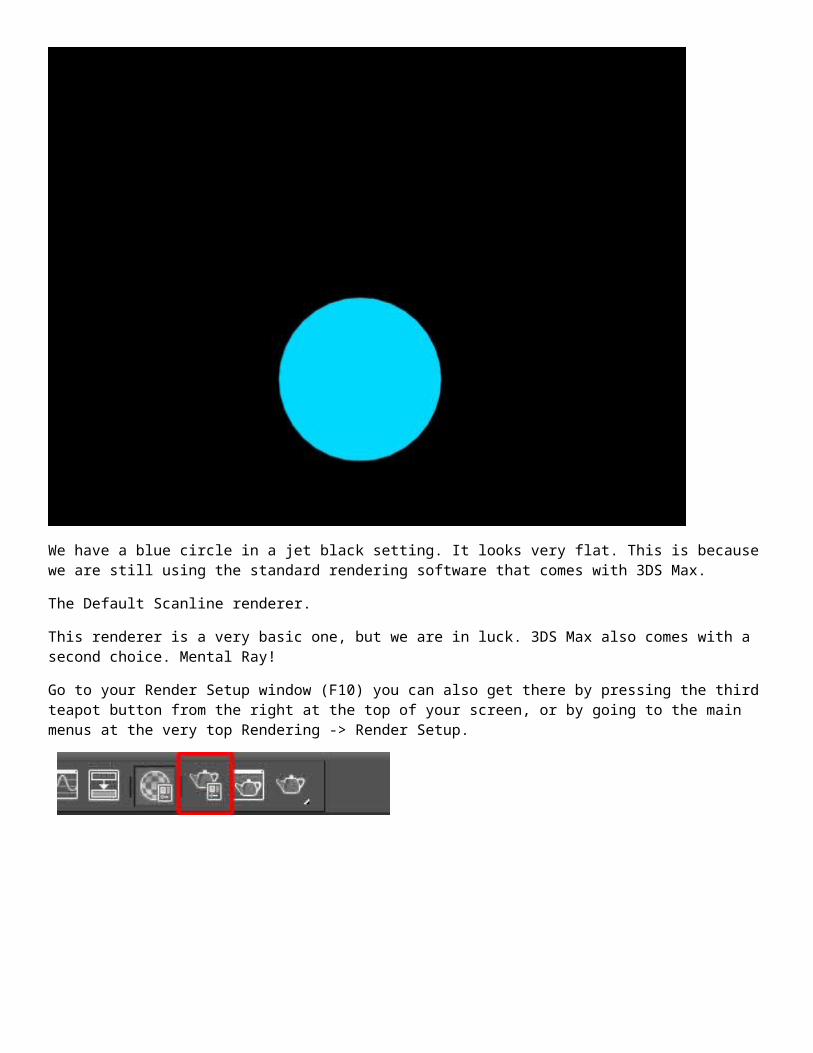
We have a blue circle in a jet black setting. It looks very flat. This is because we are still using the standard rendering software that comes with 3DS Max.
The Default Scanline renderer.
This renderer is a very basic one, but we are in luck. 3DS Max also comes with a second choice. Mental Ray!
Go to your Render Setup window (F10) you can also get there by pressing the third teapot button from the right at the top of your screen, or by going to the main menus at the very top Rendering -> Render Setup.

A window will open that looks like this.
Here you can set the time output from rendering a single frame, to an animation. Adjust the size of your render, and most importantly. Change the default render software from the Default Scanline to Mental Ray.

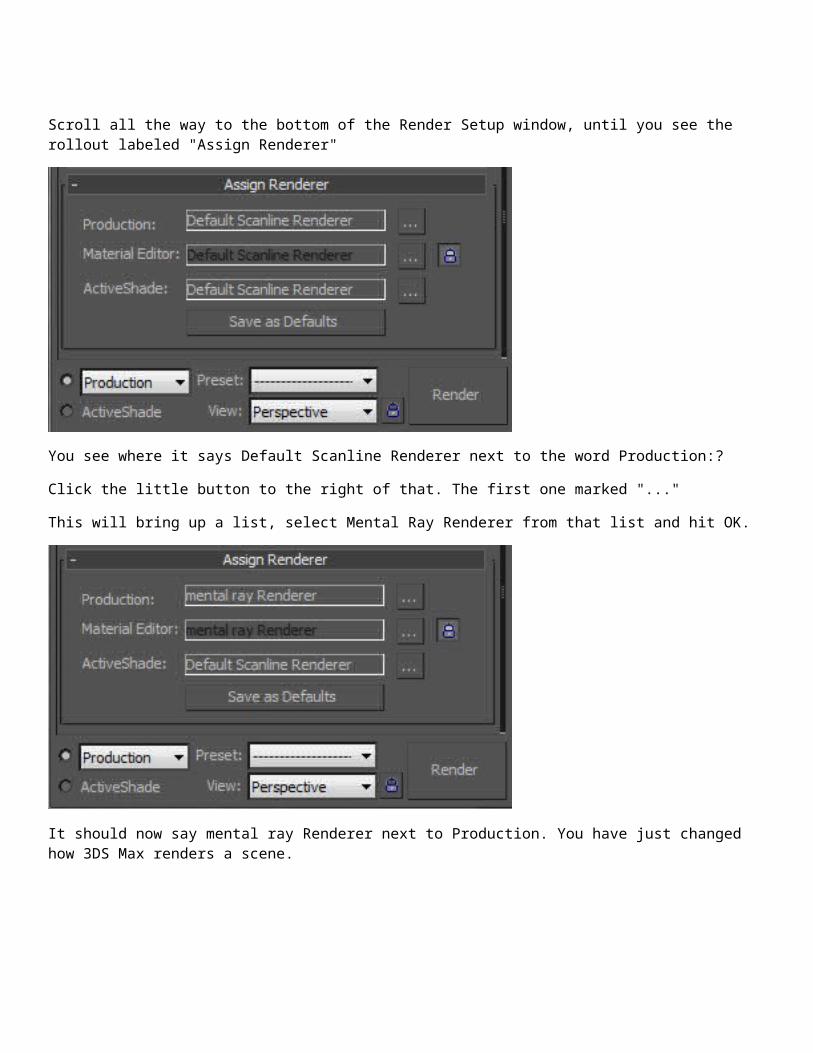
Scroll all the way to the bottom of the Render Setup window, until you see the rollout labeled "Assign Renderer"
You see where it says Default Scanline Renderer next to the word Production:?
Click the little button to the right of that. The first one marked "..."
This will bring up a list, select Mental Ray Renderer from that list and hit OK.
It should now say mental ray Renderer next to Production. You have just changed how 3DS Max renders a scene.
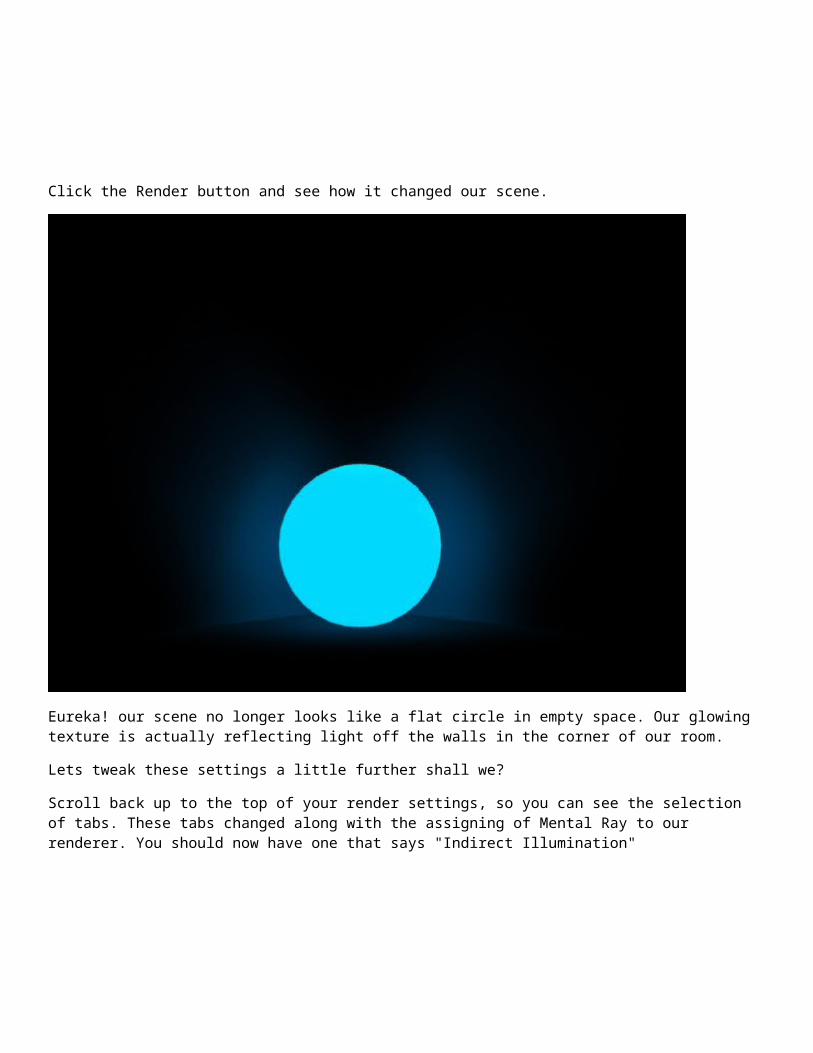
Click the Render button and see how it changed our scene.
Eureka! our scene no longer looks like a flat circle in empty space. Our glowing texture is actually reflecting light off the walls in the corner of our room.
Lets tweak these settings a little further shall we?
Scroll back up to the top of your render settings, so you can see the selection of tabs. These tabs changed along with the assigning of Mental Ray to our renderer. You should now have one that says "Indirect Illumination"

Click on that tab.
This is where all the lighting settings are for your scene. Adjusting these settings can make a huge difference in any scene with lights or illuminated textures.
The first thing to notice is the little check box next to "Enable Final Gather" this should be defaulted to on, but if it isn't make sure there is a checkmark in that box.
The next setting to notice is to the right of the Enable checkbox. It is marked Multiplier: and is defaulted to 1.0 This is the amount of final gather light in your scene. If your scene needs to be a little brighter, you can try upping the number here. a setting of 2.0 would let twice the light into the scene.
Try it out and do a test render if you like.
I'm going to leave it at 1.0 for now until we see some of the other settings.
Below the Multiplier: number you have the FG (Final Gather) Precision Presets: it defaults you at the lowest settings.
On the far left is Draft settings. Which is pretty much nothing, and equally as useless.
To the far right you have the "Very High" setting. This jumps our preset settings up to an astronomical number. Look down at the settings below. You'll see numbers like 10,000 in the Rays per FG Point: where as in the Draft setting those rays were set at 30.
The Very High preset is almost equally as useless as the Draft setting in a small scene like ours. It will take way too long to render, and will probably flood your scene with more light than it possibly needs.
Instead of using presets, let's talk about the individual settings and do the work ourselves.
Below the presets we have our first setting.
Initial FG Point Density: 0.1 - Start this at a very low setting like 0.1 at first, this setting will raise the density of the points of light in your scene. It will make them smaller and more compact which helps remove splotchy lighting and fine tunes your light the higher the setting is. Just know, that the higher you set this number the longer the wait time will be for rendering.
Below that we have the "Rays per FG Point:" setting. This is an important one to get right. The more rays you add, the more light you'll get, and the fewer the less light. Getting the right number for your scene will take some practice.
In a small room like ours 10,000 rays, like on the Very High preset, is astronomically high. For a small room like our 150x150 box, we probably only need somewhere between 250 to 350. Go ahead and set yours to about 300 now.
The setting below that is the Interpolate Over Num. FG Points: This is how your points of light are going to be spread out. The higher the number the more even the spread, and the better your lights look. For our scene, I'd just keep it around 30.
Below that, is the next super important setting. Diffuse Bounces.
Light in the real world bounces around and reflects off of the surfaces around it. This can light up a room even if the only light source is the sun through closed window blinds. The smallest amount of light can still bounce around a scene and light up the entire thing.
The Diffuse Bounces setting lets you set how many times your light is allowed to bounce off of a surface. The higher the number, the more light will bounce around a room, the lower the number, the less times it will bounce. Again, getting carried away here can really mess things up.
Try upping the number to 3 or 4 and do another test render.
our room is lighting up a bit more, and the light has softened up around the glowing sphere. The distance the light travels and the number of times it bounces can bring your scenes a good amount of realism.
All this from a simple standard texture. Play with these Indirect Illumination settings some more and see what you can do with them.
Whether using these settings for a real photometric light source, or a texture light source like our blue glow. The Indirect Illumination and Final Gather settings can make or break your scene.
The only true limitation of the Standard Glowing texture, is that you can only ever get it to 100 brightness in the Self-Illumination settings.
Keep this scene for our next chapter in glowing materials.
In the next section of glowing materials, we'll talk about the Mental Ray "Arch and Design" textures with Self-Illumination.