Embed Size (px)
Citation preview
8/7/2019 G Tablet Quick Start 1.7.10
http://slidepdf.com/reader/full/g-tablet-quick-start-1710 1/18
QUICK START GUIDE
Thank you for purchasing the gTablet!
Following, is a quick reference to setting up your gTablet, as well anoverview of key features. For greater detail on how to use the gTablet,
specifications, and caring for your gTablet, please refer to the UserManual available on the Viewsonic website at
www.viewsonic.com/gtablet.

8/7/2019 G Tablet Quick Start 1.7.10
http://slidepdf.com/reader/full/g-tablet-quick-start-1710 2/18
2
Important Icons Defined
Caution: This icon warns against potential damage to the
gTablet and to avoid improper operations.
Important Note: This icon provides information, notes, definitions,
general knowledge and references which are important to note.
Other trademarks and trade names may be used in this manual to refer to
either the entities claiming the marks and names, or their products. Themanufacturer disclaims any proprietary interest in trademarks and trade
names other than its own. Information in this manual is subject tochange without notice. Product images in this manual are for yourreference only.
Reproduction without the written consent from the manufacture is
strictly prohibited.
For Customer Service, please visit www.viewsonic.com/gtablet.
8/7/2019 G Tablet Quick Start 1.7.10
http://slidepdf.com/reader/full/g-tablet-quick-start-1710 3/18
3
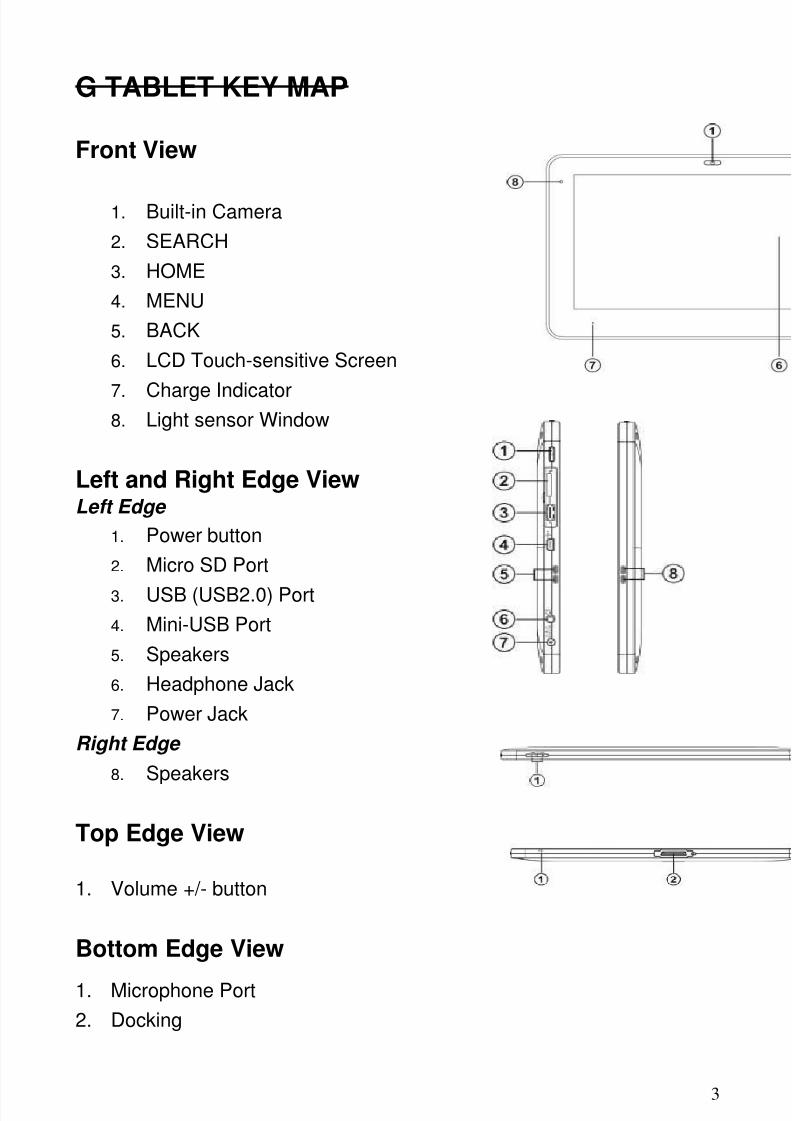
G TABLET KEY MAP
Front View
1. Built-in Camera
2. SEARCH
3. HOME
4. MENU
5. BACK
6. LCD Touch-sensitive Screen
7. Charge Indicator 8. Light sensor Window
Left and Right Edge ViewLeft Edge
1. Power button
2. Micro SD Port
3. USB (USB2.0) Port
4. Mini-USB Port
5. Speakers
6. Headphone Jack
7. Power Jack
Right Edge
8. Speakers
Top Edge View
1. Volume +/- button
Bottom Edge View
1. Microphone Port
2. Docking
8/7/2019 G Tablet Quick Start 1.7.10
http://slidepdf.com/reader/full/g-tablet-quick-start-1710 4/18
4
GETTING STARTED
1. You must fully charge your gTablet before using for the first
time. When fully charged, a green indicator light will display on
the gTablet (shown above).
2. Once green indicator light is on, turn system on by pressing the
power button (shown above).
3. When turning on for the very first time, your gTablet will prompt
you through a quick setup process with 4 easy steps including theend user license agreement, setting the date and time, setting up
your wireless network, and configuring user profiles.
4. Follow the prompts and enjoy your gTablet!
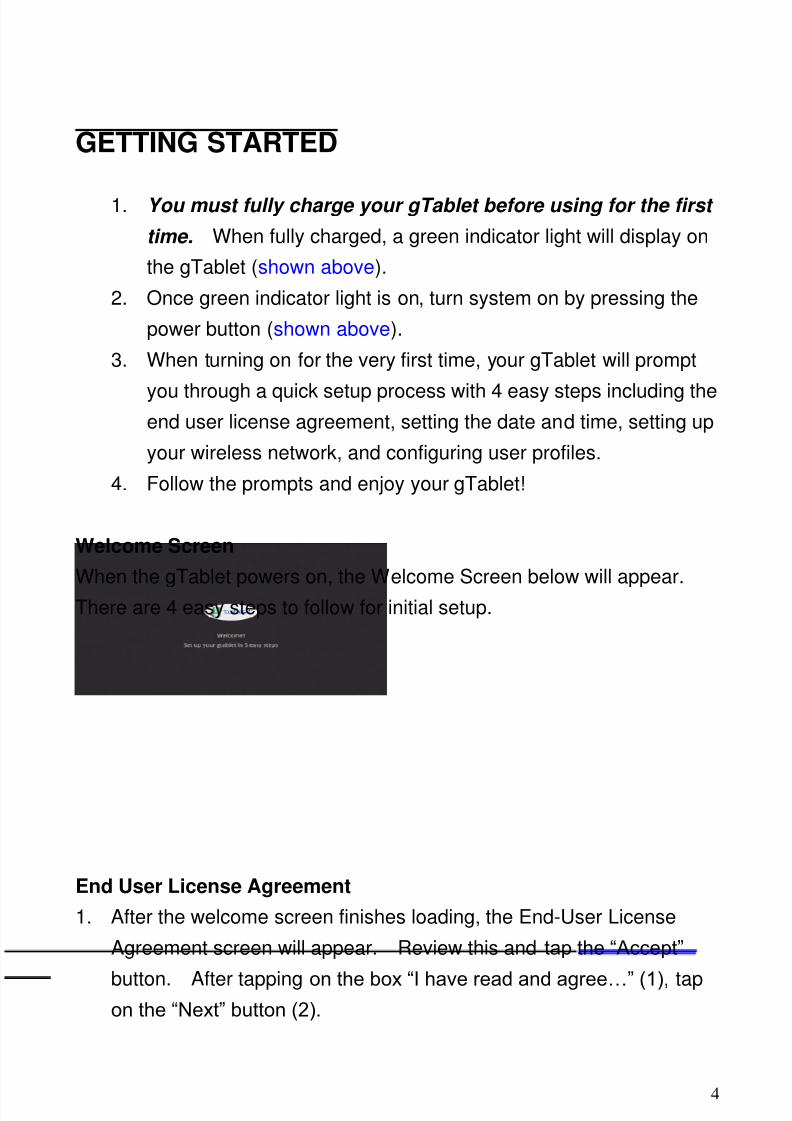
Welcome Screen
When the gTablet powers on, the Welcome Screen below will appear.
There are 4 easy steps to follow for initial setup.
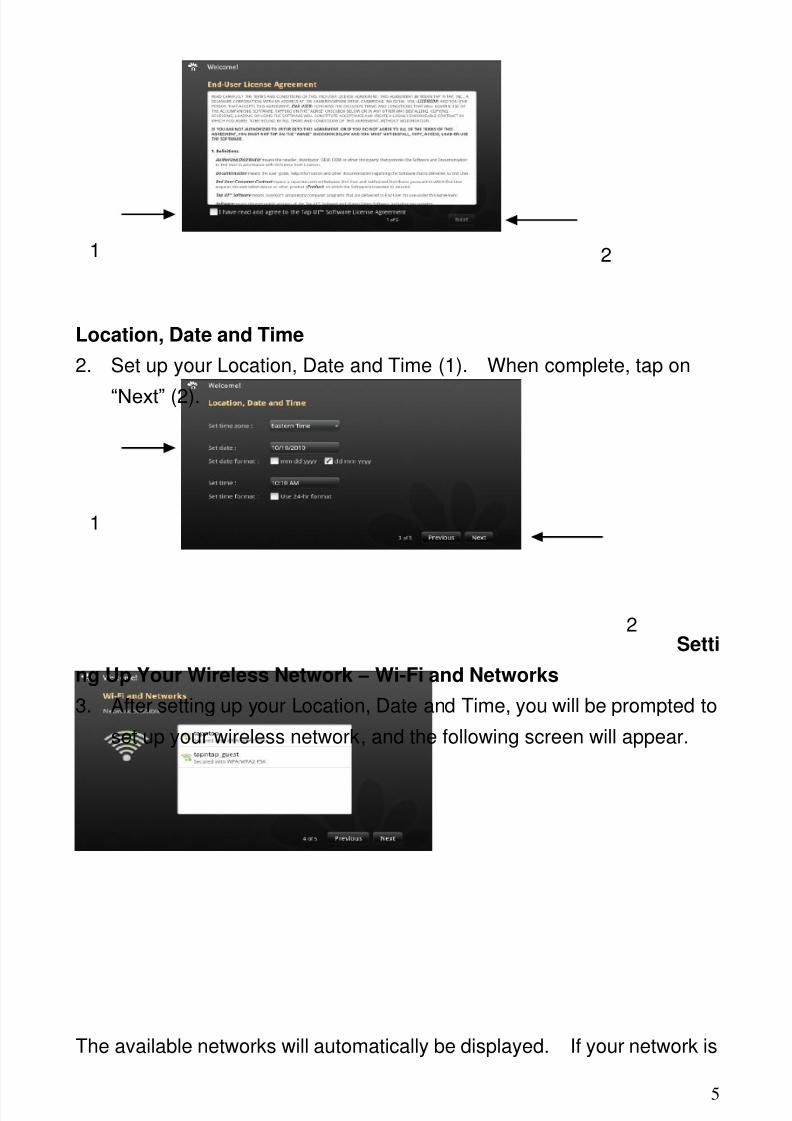
End User License Agreement
1. After the welcome screen finishes loading, the End-User License
Agreement screen will appear. Review this and tap the “Accept”
button. After tapping on the box “I have read and agree…” (1), tapon the “Next” button (2).
8/7/2019 G Tablet Quick Start 1.7.10
http://slidepdf.com/reader/full/g-tablet-quick-start-1710 5/18
5
1 2
1
2
Location, Date and Time
2. Set up your Location, Date and Time (1). When complete, tap on
“Next” (2).
Setti
ng Up Your Wireless Network – Wi-Fi and Networks
3. After setting up your Location, Date and Time, you will be prompted to
set up your wireless network, and the following screen will appear.
The available networks will automatically be displayed. If your network is
8/7/2019 G Tablet Quick Start 1.7.10
http://slidepdf.com/reader/full/g-tablet-quick-start-1710 6/18
6
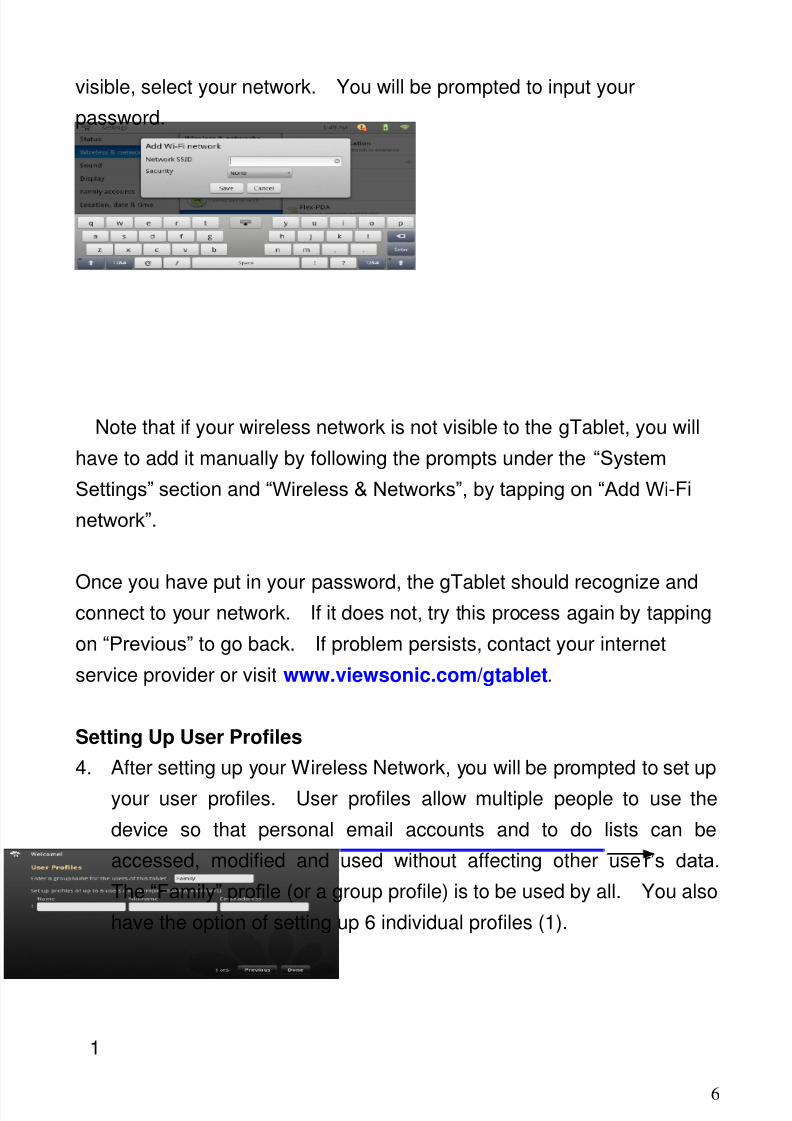
visible, select your network. You will be prompted to input your
password.
Note that if your wireless network is not visible to the gTablet, you will
have to add it manually by following the prompts under the “System
Settings” section and “Wireless & Networks”, by tapping on “Add Wi-Fi
network”.
Once you have put in your password, the gTablet should recognize andconnect to your network. If it does not, try this process again by tapping
on “Previous” to go back. If problem persists, contact your internet
service provider or visit www.viewsonic.com/gtablet.
Setting Up User Profiles
4. After setting up your Wireless Network, you will be prompted to set up
your user profiles. User profiles allow multiple people to use the
device so that personal email accounts and to do lists can be
accessed, modified and used without affecting other user’s data.
The “Family” profile (or a group profile) is to be used by all. You also
have the option of setting up 6 individual profiles (1).
1

8/7/2019 G Tablet Quick Start 1.7.10
http://slidepdf.com/reader/full/g-tablet-quick-start-1710 7/18
7
ON, OFF, and SLEEPTurning the gTablet OnIn order to turn the gTablet ON from an Off state, you must hold the powerbutton for about 2 seconds. To turn the gTablet on from “Sleep” mode,
simply press the on button.
Turning the gTablet Off
In order to turn the gTablet off completely, you must hold the power buttondown for about 2 seconds. A menu will appear. Select “Power Off”.
This is important when traveling with the device, or when the tablet is not
in use for extended periods of time, and to save battery.
Sleep
The most common mode for frequent and daily use for the gTablet is to
put the system into ”Sleep” mode. This save battery and requires a
much shorter boot up time. To put the tablet in sleep mode, simply press
the power button briefly. To turn the gTablet on from the sleep mode,
also briefly press the power button.
OVER THE AIR UPDATES (OTA)
The Updates application allows your tablet to receive the latest
8/7/2019 G Tablet Quick Start 1.7.10
http://slidepdf.com/reader/full/g-tablet-quick-start-1710 8/18
8
version of the tablet software. This application runs automatically and
will always prompt you before any updates are downloaded, allowing you
to decline the update. Also, no personal information is ever tracked.
The only information sent is the network adapter number and application
version / revision numbers.
To access this application manually, find the “Updates” icon on the Home
screen by tapping on the “Menu” icon in the bottom right corner of the
screen. This brings up the Over the Air Updates application. If there
are updates available, follow the instructions to download when you are
ready.
Important Note: Over the Air Updates may erase some
applications which you have downloaded and you will need to
reinstall them.
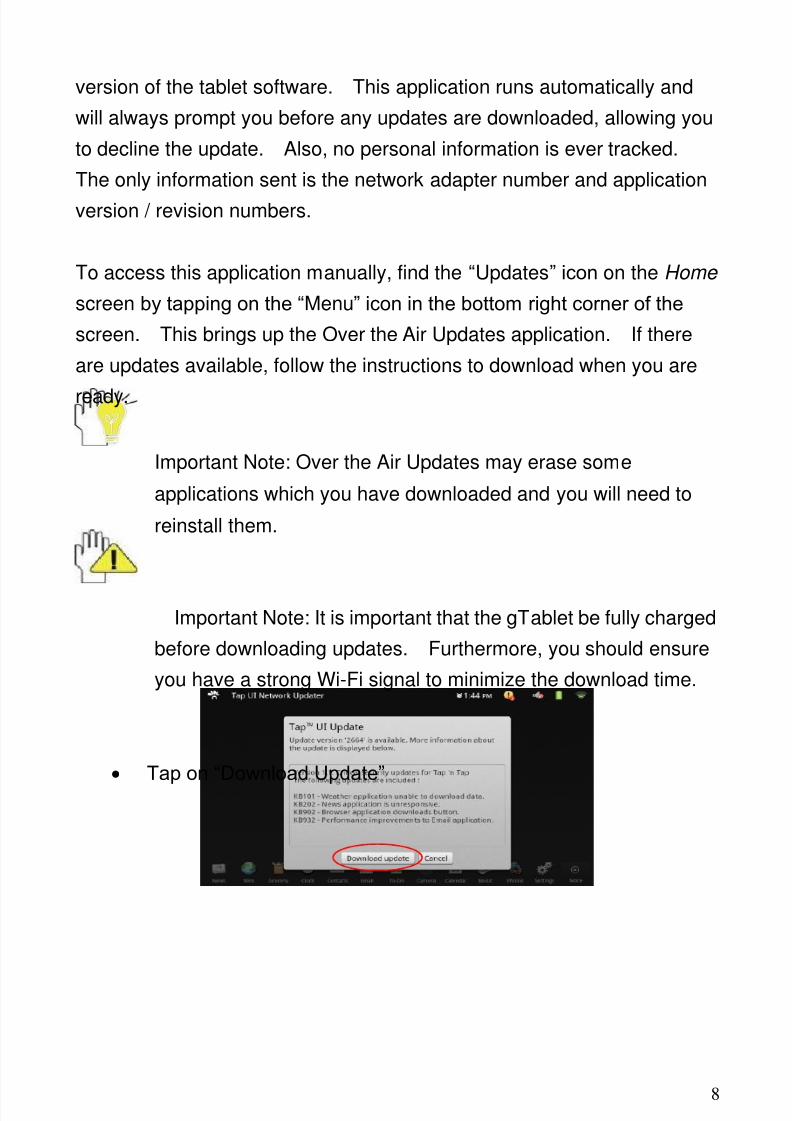
Important Note: It is important that the gTablet be fully charged
before downloading updates. Furthermore, you should ensure
you have a strong Wi-Fi signal to minimize the download time.
Tap on “Download Update”

8/7/2019 G Tablet Quick Start 1.7.10
http://slidepdf.com/reader/full/g-tablet-quick-start-1710 9/18
9
Review and accept the End User License Agreement.
Wait for download to complete. The progress will be shown on
the indicator bar.
Once download is complete, you will have the option to “Apply
Update” or “Postpone”. Applying Update will reboot the tablet.

8/7/2019 G Tablet Quick Start 1.7.10
http://slidepdf.com/reader/full/g-tablet-quick-start-1710 10/18
10
You can also visit the gTablet website for additional information and
online documentation. http://www.viewsonic.com/gtablet
WIRELESS SETUPIf you were unable to setup your wireless connection during the setup
process, tap on the “Settings” icon from the Home screen at the right
(gear icon), then tap on “Wireless & networks”. Tap on “Wi-Fi Settings”.
And then “Scan for Networks”. When the list of available networks
appears, select the network you wish to connect to.
Note that if your wireless network is not visible to the gTablet, you will
have to add it manually by following the prompts under the “System
Settings” section and “Wireless & Networks”, by tapping on “Add Wi-Fi
network”.
IMPORTANT BUTTONS
On the right side of the LCD Screen there are 4 buttons.
1. SEARCH – Pressing the search button from the
Home screen will bring up the Google search
web site.
2. HOME – Pressing the Home button takes you
back to either the Home screen or the
Dashboard depending on which screen you
1
2
3
4
8/7/2019 G Tablet Quick Start 1.7.10
http://slidepdf.com/reader/full/g-tablet-quick-start-1710 11/18
11
3 1 2
were last in.
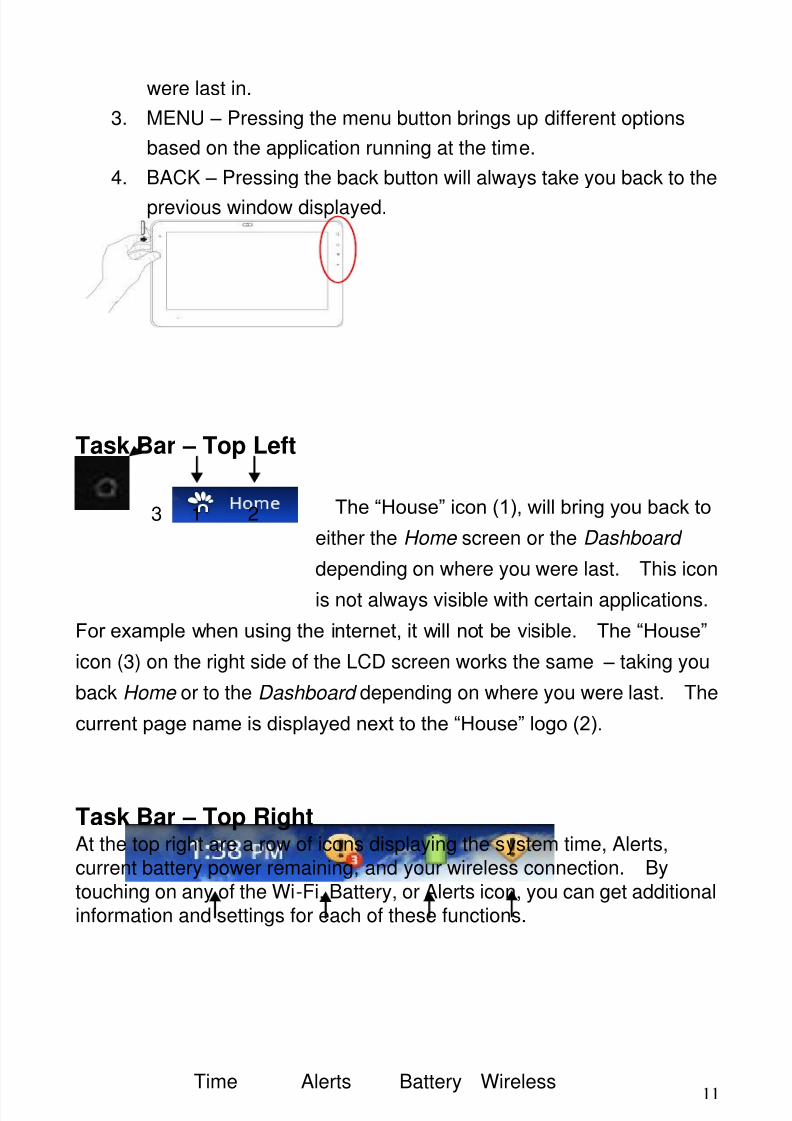
3. MENU – Pressing the menu button brings up different options
based on the application running at the time.
4. BACK – Pressing the back button will always take you back to the
previous window displayed.
Task Bar – Top Left
The “House” icon (1), will bring you back to
either the Home screen or the Dashboard
depending on where you were last. This icon
is not always visible with certain applications.
For example when using the internet, it will not be visible. The “House”
icon (3) on the right side of the LCD screen works the same – taking you
back Home or to the Dashboard depending on where you were last. The
current page name is displayed next to the “House” logo (2).
Task Bar – Top RightAt the top right are a row of icons displaying the system time, Alerts,current battery power remaining, and your wireless connection. By
touching on any of the Wi-Fi, Battery, or Alerts icon, you can get additionalinformation and settings for each of these functions.
Time Alerts Battery Wireless

8/7/2019 G Tablet Quick Start 1.7.10
http://slidepdf.com/reader/full/g-tablet-quick-start-1710 12/18
12
1
GET TO KNOW THE HOME SCREEN
The gTablet’s Home screen is a traditional Android user interface
commonly used on Android cell phones. To access the Home screen
from any application, tap on the “Home” button on the right side
of the LCD screen (1). Please note that this button toggles
between Home and the Dashboard depending on where you
were last. You may also tap on the “Home” icon in the bottom right of the
Dashboard screen (see section on Dashboard).
Quick Launch BarOn the right of the Home screen, there are 5 icons (visible from
each of the 5 Home screens). These include web, mail, menu,settings, and Dashboard (1). By tapping on these icons, you willinstantly be taken to the application or feature.
Web – takes you to your Internet home page. By default,it is se up to go directly to Google.
8/7/2019 G Tablet Quick Start 1.7.10
http://slidepdf.com/reader/full/g-tablet-quick-start-1710 13/18
13
Mail – takes you to the email application.
Applications Menu – opens up the Android menu screen whereall of your applications and features are listed.
Settings – opens up the settings menu for the GTablet.
Dashboard – takes you directly to the Dashboard .
CustomizationThe Home screen has 5 screens that are customizable. To
access these additional screens, swipe left and right with yourfinger. These pages allow you to conveniently view your
favorite applications by dragging and dropping them on thepreferred screen. To identify which screen you are on, in the bottom left
and bottom right corners of the Home screen are dots that represent thenumber of pages remaining to the left and number of pages remaining tothe right of the screen you are on.
Features Long tap – the long tap is done by touching the screen and
holding your finger still on an icon for about 2 seconds. This
action can often bring up different options.
Menu – Long tapping on an open space on the Home screen will
bring up a menu option which allows you to add Shortcuts,
Widgets, and Wallpapers.
Moving an icon – You can move an icon from the applications
menu to the Home screen or vice versa. Simply long tap the
icon by holding down for 2 seconds. When the icon lifts off the
page, drag and drop it to the location desired.
Trash can – By long tapping an icon sitting on the Home screen,
the trash can will appear on the right side of the screen. From
here you can drag and drop the icon into the trash can. This will
remove the icon from the Home screen but still keeps it in your
Applications Menu.
8/7/2019 G Tablet Quick Start 1.7.10
http://slidepdf.com/reader/full/g-tablet-quick-start-1710 14/18
14
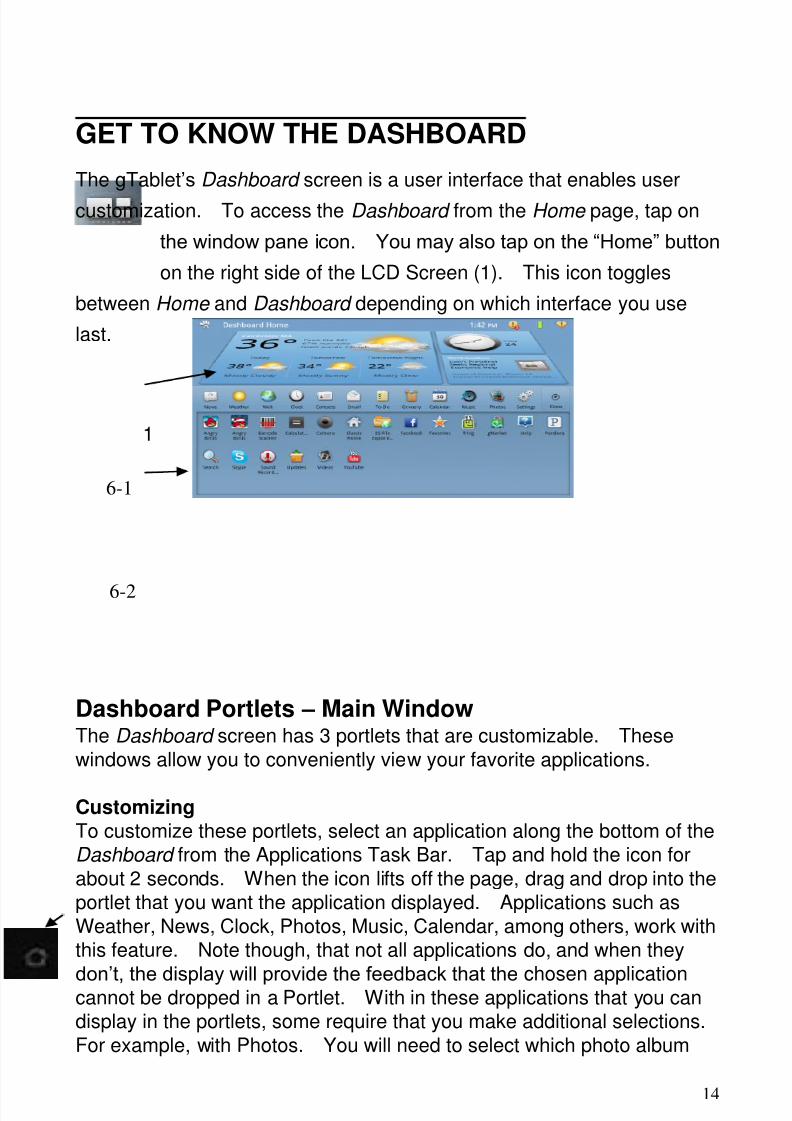
GET TO KNOW THE DASHBOARD
The gTablet’s Dashboard screen is a user interface that enables user
customization. To access the Dashboard from the Home page, tap on
the window pane icon. You may also tap on the “Home” button
on the right side of the LCD Screen (1). This icon toggles
between Home and Dashboard depending on which interface you use
last.
Dashboard Portlets – Main WindowThe Dashboard screen has 3 portlets that are customizable. These
windows allow you to conveniently view your favorite applications.
CustomizingTo customize these portlets, select an application along the bottom of the
Dashboard from the Applications Task Bar. Tap and hold the icon for
about 2 seconds. When the icon lifts off the page, drag and drop into theportlet that you want the application displayed. Applications such as
Weather, News, Clock, Photos, Music, Calendar, among others, work withthis feature. Note though, that not all applications do, and when they
don’t, the display will provide the feedback that the chosen applicationcannot be dropped in a Portlet. With in these applications that you candisplay in the portlets, some require that you make additional selections.
For example, with Photos. You will need to select which photo album
6-1
6-2
1
8/7/2019 G Tablet Quick Start 1.7.10
http://slidepdf.com/reader/full/g-tablet-quick-start-1710 15/18
15
you want running in the window by going into the Photo application andunder settings, choosing a photo album using the drop down menu. See
the Photos section for more information.
Multiple Dashboard Screens
The Dashboard has 3 different screens identifiable by the backgroundcolor. The screens are blue, black and gray. To access these screens,
simply touch the screen and swipe either left or right with your finger.Each of these screens will allow you to populate the three portlets.
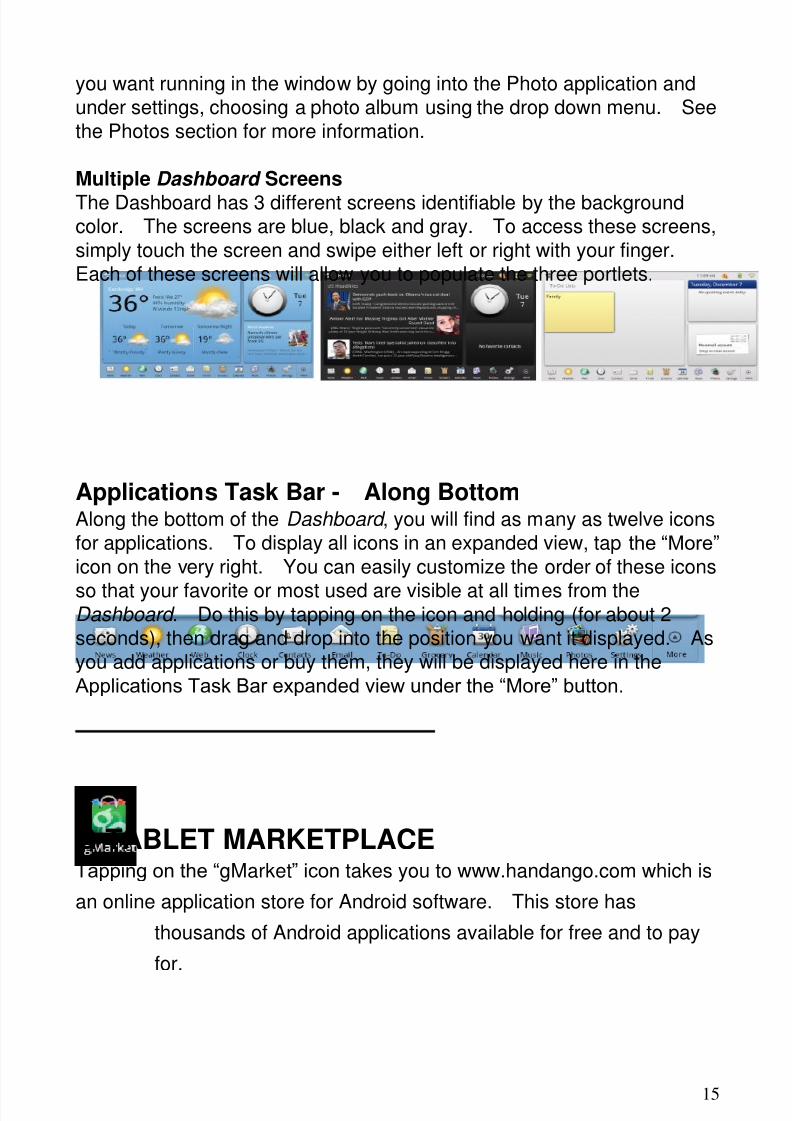
Applications Task Bar - Along BottomAlong the bottom of the Dashboard , you will find as many as twelve iconsfor applications. To display all icons in an expanded view, tap the “More”
icon on the very right. You can easily customize the order of these icons
so that your favorite or most used are visible at all times from theDashboard . Do this by tapping on the icon and holding (for about 2seconds), then drag and drop into the position you want it displayed. Asyou add applications or buy them, they will be displayed here in the
Applications Task Bar expanded view under the “More” button.
G TABLET MARKETPLACETapping on the “gMarket” icon takes you to www.handango.com which is
an online application store for Android software. This store has
thousands of Android applications available for free and to pay
for.

8/7/2019 G Tablet Quick Start 1.7.10
http://slidepdf.com/reader/full/g-tablet-quick-start-1710 16/18
16
Downloading Applications
To download applications from handango, simply follow the below
instructions:
1. Launch the “gMarket” application by tapping on the icon
from the applications menu. This brings up the
handango website.
2. Search the available applications by category, or by most
popular, or by price, or Free Apps, etc.
3. After selecting the application you wish to download, tap
on download.
4. From the download screen, select “download to PC”.
5. From the Home screen, tap on the “Alerts” icon in the top
corner next to the clock.
6. The download status will be displayed.
7. Once “download complete”, tap on the application name
8. The “Package Installer” screen will appear.
9. Tap on “Install”. 10. To launch the application, tap on “Open”.
You will also find the application in the ES File Explorer under the
“download” folder.
IMPORTANT LINKSFavoritesTapping on the “Favorites” icon from the Applications Menu takes you to
the Viewsonic website. Here you will find valuable information and links
that improve your experience such as important applications to
download, additional marketplace resources, etc. It is
recommended that you refer to this link periodically as the
information will change in order to keep the gTablet relevant.

8/7/2019 G Tablet Quick Start 1.7.10
http://slidepdf.com/reader/full/g-tablet-quick-start-1710 17/18
17
HelpTapping on the “Help” icon takes you to the Viewsonic website where you
will find resources available to help you such as the users manual.
IMPORTING AND ACCESSING FILESThere are three methods for transferring and accessing files with the
gTablet, a mini USB cable connected to your PC, a USB flash memory
stick, and a micro SD card. The preferred method and simplest method
for importing files is the mini USB cable which is outlined below.
Mini USB Cable – Preferred Method for Importing Files
1. Connect the gTablet to your PC using a
mini USB cable.2. When the gTablet recognizes that the USB
is connected, you will be prompted to “Turn
on USB storage”. On the gTablet, tap on
“Turn on USB storage” to proceed.
3. Your PC should recognize the gTablet as a “removable disk”.
4. Using Windows Explorer on your PC, you can drag and drop any
music, photos, or videos that you want loaded onto your gTablet listed
as a “Removable Disk” under “Computer” in Windows Explorer.
5. Once you are done transferring files, tap “Turn off USB storage” on
the gTablet.
6. To locate your files, go to the appropriate application in the
applications menu – Videos, Photos, or Music and open up
the application.
Micro SD Card

8/7/2019 G Tablet Quick Start 1.7.10
http://slidepdf.com/reader/full/g-tablet-quick-start-1710 18/18
The unit is designed with a micro SD Card slot which allows you to inserta micro SD card into the unit as shown right. This enables you to both
access media and files as well as save media and files to the gTablet.You can open and play files directly from the micro SD card (such asmusic), or you can copy or delete the files to and from the micro SD card.
The gTablet currently supports up to 64GB micro SD cards. It isrecommended that the gTablet be used with at least a 32GB micro SD
card to ensure the best user experience. For directions on accessingmedia files from your micro SD card, please refer to the section on
Importing and Accessing Files in the User Manual for instructions.
The micro SD card can only be inserted in one orientation.
Forcing the card in the wrong direction may result in damage.
USB Memory Stick
Please refer to the user manual for specific directions on importing or
accessing files with a USB Memory Stick.
For Customer Service, please visit www.viewsonic.com/gtablet.