Embed Size (px)
Citation preview

ITEM PART # QTY DESCRIPTION
1 00083 8 NUT, .50NC HEX
2 00084 8 WASHER, .50 LOCK
3 14189-76 4 411 FRAME BRACKET
4 14266 8 BOLT, .50NC X 1-3/4” HEX KNURLED GR.5
5 14238 1 FISH WIRE .50 (NOT SHOWN)
Please order replacement parts by PART NO. and DESCRIPTION.
HJ32009, Rev 602/19
FRAME BRACKET 8552009Ford, Chevrolet/GMC, Dodge & Toyota

Page 2 HJ32009
WARRANTY POLICY, OPERATOR MANUALS & REGISTRATIONGo online to www.demco-products.com to review Demco warranty policies, operator manuals and register your Demco product.
Introduction8552009 General Assembly & Install Instructions
BOLT TORQUE SPECIFICATIONSSTANDARD BOLTS
Size Grade Torque5/16” 5 18 ft/lbs.3/8” 5 30 ft/lbs.7/16” 5 50 ft/lbs.1/2”
5 75 ft/lbs.
Size Grade Torque8mm 8.8 23 ft/lbs.10mm 8.8 45 ft/lbs.12mm 8.8 78 ft/lbs.14mm
8.8 125 ft/lbs.16mm 8.8 160 ft/lbs.
METRIC BOLTS
5/8” 5 150 ft/lbs.53/4” 290 ft/lbs.
INSTALLATION
1. a. Completely assemble hitch. See GENERAL INSTRUCTIONS and SAFETY supplied. b. Set hitch into back of truck, center it side to side. c. Measure 29 1/4” from back edge of truck box to square hole centers in rear bed rail.2. Check underneath box at bolt hole locations for any obstructions (frame members, etc.).3. a. Drill two 5/8” holes thru FRONT BED RAIL, THIRD HOLE POSITION, as shown. Drop in two bolts. b. Drill two holes in REAR BED RAIL, THIRD HOLE POSITION. Drop in two bolts.4. a. Under box, loosely install washers (2” wide flat bar), 411 frame brackets, flat washers and lock nuts onto
bolts (4 places). b. Press each bracket tight against frame member; tighten nuts snug against box.5. a. Pilot drill* and drill 1/2” holes into truck frame, at two places thru holes each frame bracket--BE CARE-
FUL OF ELECTRIC OR FLUID LINES behind frame members. b. Brackets will be bolted onto frame by drilling frame and fishing knurl bolt through frame with fish wire
and attach with hex nut and lock washer on outside of bracket. c. TIGHTEN ALL BOLTS ACCORDING TO BOLT TORQUE SPECIFICATIONS.
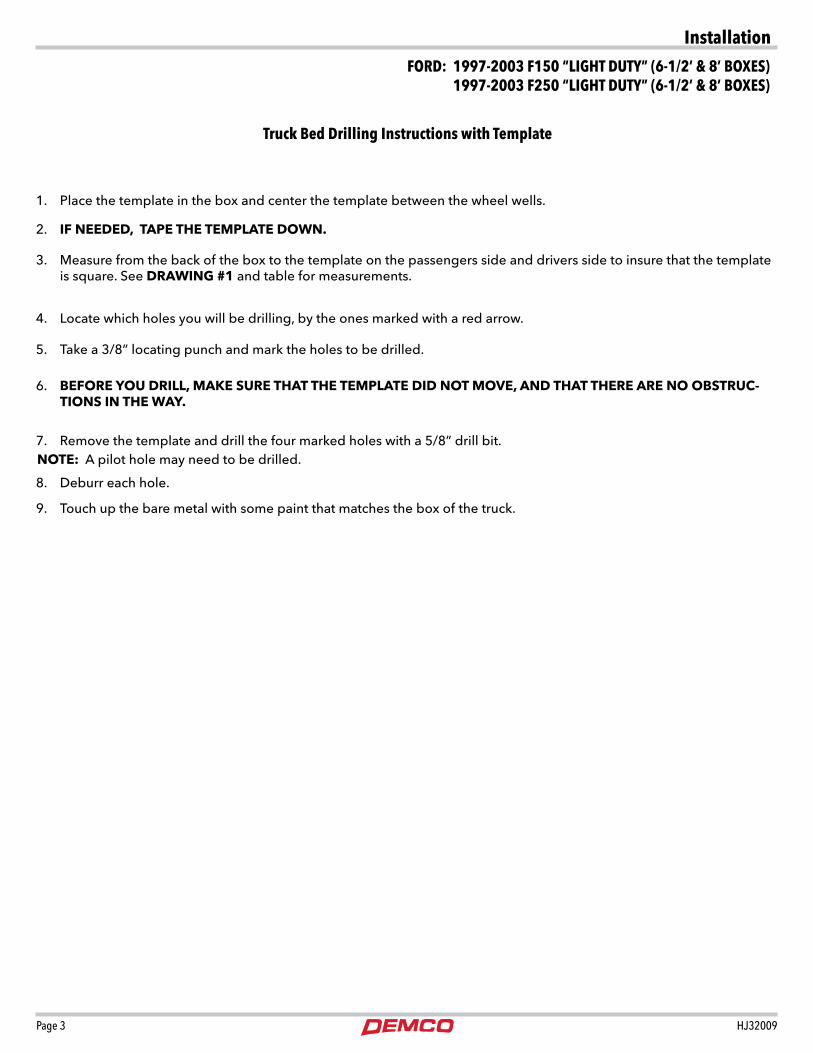
FORD: 1997-2003 F150 “LIGHT DUTY” (6-1/2’ & 8’ BOXES) 1997-2003 F250 “LIGHT DUTY” (6-1/2’ & 8’ BOXES)
Page 3 HJ32009
InstallationFORD: 1997-2003 F150 “LIGHT DUTY” (6-1/2’ & 8’ BOXES)
1997-2003 F250 “LIGHT DUTY” (6-1/2’ & 8’ BOXES)
1. Place the template in the box and center the template between the wheel wells.
5. Take a 3/8” locating punch and mark the holes to be drilled.
4. Locate which holes you will be drilling, by the ones marked with a red arrow.
3. Measure from the back of the box to the template on the passengers side and drivers side to insure that the template is square. See DRAWING #1 and table for measurements.
2. IF NEEDED, TAPE THE TEMPLATE DOWN.
7. Remove the template and drill the four marked holes with a 5/8” drill bit.
6. BEFORE YOU DRILL, MAKE SURE THAT THE TEMPLATE DID NOT MOVE, AND THAT THERE ARE NO OBSTRUC-TIONS IN THE WAY.
8. Deburr each hole.
9. Touch up the bare metal with some paint that matches the box of the truck.
Truck Bed Drilling Instructions with Template
NOTE: A pilot hole may need to be drilled.

Page 4 HJ32009
Installation
Truck Bed Drilling Instructions with Template
Drawing #1
BOX LENGTH DIMENSIONS MEASUREMENTFORD 1997-2003 F150 “LIGHT DUTY”
6-1/2’ A *24-3/4”8’ A *24-3/4”
FORD 1997-2003 F250 “LIGHT DUTY” 6-1/2’ A *24-3/4”
8’ A *24-3/4”*ALL MEASUREMENTS ARE FROM THE BACK OF THE BOX

Page 5 HJ32009
InstallationCHEVROLET/GMC: 2001-2007 SILVERADO & SIERRA 2500 HD (6-1/2’ BOX)
INSTALLATION
1. a. Completely assemble hitch. See GENERAL INSTRUCTIONS and SAFETY supplied. b. Set hitch into back of truck, center it side to side. c. Measure 30” from back edge of truck box to square hole centers in rear bed rail.2. Check underneath box at bolt hole locations for any obstructions (frame members, etc.).3. a. Drill two 5/8” holes thru FRONT BED RAIL, SECOND HOLE POSITION, as shown. b. Drop in two bolts. c. Drill two holes in REAR BED RAIL, SECOND HOLE POSITION. Drop in two bolts.4. a. Under box, place washers (2” wide flat bar) and frame brackets onto bolts. b. Loosely install washers and lock nuts.
c. Press brackets tight against frame member; tighten nuts snug against box.5. a. Pilot drill* and drill 1/2” holes into truck frame, at two places thru holes each frame bracket--BE CARE-
FUL OF ELECTRIC OR FLUID LINES behind frame members. b. Brackets will be bolted onto frame by drilling frame and fishing knurl bolt through frame with fish wire
and attach with hex nut and lock washer on outside of bracket. c. TIGHTEN ALL BOLTS ACCORDING TO BOLT TORQUE SPECIFICATIONS.

Page 6 HJ32009
InstallationCHEVROLET/GMC: 2001-2007 SILVERADO & SIERRA 2500 HD (6-1/2’ BOX)
1. Place the template in the box and center the template between the wheel wells.
5. Take a 3/8” locating punch and mark the holes to be drilled.
4. Locate which holes you will be drilling, by the ones marked with a red arrow.
3. Measure from the back of the box to the template on the passengers side and drivers side to insure that the template is square. See DRAWING #2 and table for measurements.
2. IF NEEDED, TAPE THE TEMPLATE DOWN.
7. Remove the template and drill the four marked holes with a 5/8” drill bit.
6. BEFORE YOU DRILL, MAKE SURE THAT THE TEMPLATE DID NOT MOVE, AND THAT THERE ARE NO OBSTRUC-TIONS IN THE WAY.
8. Deburr each hole.
9. Touch up the bare metal with some paint that matches the box of the truck.
Truck Bed Drilling Instructions with Template
NOTE: A pilot hole may need to be drilled.

Page 7 HJ32009
InstallationCHEVROLET/GMC: 2001-2007 SILVERADO & SIERRA 2500 HD (6-1/2’ BOX)
Drawing #2
Truck Bed Drilling Instructions with Template
BOX LENGTH DIMENSIONS MEASUREMENTCHEVROLET/GMC 2001-2007 SILVERADO & SIERRA 2500 HD
6-1/2’ A *25-1/2”*ALL MEASUREMENTS ARE FROM THE BACK OF THE BOX

Page 8 HJ32009
InstallationCHEVROLET/GMC: 2001-2007 SILVERADO & SIERRA 3500 HD (8’ BOX)
INSTALLATION
1. a. Completely assemble hitch. See GENERAL INSTRUCTIONS and SAFETY supplied. b. Set hitch into back of truck, center it side to side. c. Measure 34” from back edge of truck box to square hole centers in rear bed rail.2. Check underneath box at bolt hole locations for any obstructions (frame members, etc.).3. a. Drill two 5/8” holes thru FRONT BED RAIL, SECOND HOLE POSITION, as shown. b. Drop in two bolts. c. Drill two holes in REAR BED RAIL, SECOND HOLE POSITION. Drop in two bolts.4. a. Under box, place washers (2” wide flat bar) and frame brackets onto bolts. b. Loosely install washers and lock nuts.
c. Press brackets tight against frame member; tighten nuts snug against box.5. a. Pilot drill* and drill 1/2” holes into truck frame, at two places thru holes each frame bracket--BE CARE-
FUL OF ELECTRIC OR FLUID LINES behind frame members. b. Brackets will be bolted onto frame by drilling frame and fishing knurl bolt through frame with fish wire
and attach with hex nut and lock washer on outside of bracket. c. TIGHTEN ALL BOLTS ACCORDING TO BOLT TORQUE SPECIFICATIONS.

Page 9 HJ32009
InstallationCHEVROLET/GMC: 2001-2007 SILVERADO & SIERRA 3500 HD (8’ BOX)
1. Place the template in the box and center the template between the wheel wells.
5. Take a 3/8” locating punch and mark the holes to be drilled.
4. Locate which holes you will be drilling, by the ones marked with a red arrow.
3. Measure from the back of the box to the template on the passengers side and drivers side to insure that the template is square. See DRAWING #3 and table for measurements.
2. IF NEEDED, TAPE THE TEMPLATE DOWN.
7. Remove the template and drill the four marked holes with a 5/8” drill bit.
6. BEFORE YOU DRILL, MAKE SURE THAT THE TEMPLATE DID NOT MOVE, AND THAT THERE ARE NO OBSTRUC-TIONS IN THE WAY.
8. Deburr each hole.
9. Touch up the bare metal with some paint that matches the box of the truck.
Truck Bed Drilling Instructions with Template
NOTE: A pilot hole may need to be drilled.

Page 10 HJ32009
Drawing #3
Truck Bed Drilling Instructions with Template
BOX LENGTH DIMENSIONS MEASUREMENTCHEVROLET/GMC 2001-2007 SILVERADO & SIERRA 3500 HD
8’ A *29-1/2”*ALL MEASUREMENTS ARE FROM THE BACK OF THE BOX
InstallationCHEVROLET/GMC: 2001-2007 SILVERADO & SIERRA 3500 HD (8’ BOX)

Page 11 HJ32009
InstallationCHEVROLET/GMC: 2007-2010 SILVERADO & SIERRA 2500 HD (6-1/2’ BOX NEW STYLE)
INSTALLATION
1. a. Completely assemble hitch. See GENERAL INSTRUCTIONS and SAFETY supplied. b. Set hitch into back of truck, center it side to side. c. Measure 28 1/2” from back edge of truck box to square hole centers in rear bed rail.2. Check underneath box at bolt hole locations for any obstructions (frame members, etc.).3. a. Drill two 5/8” holes thru FRONT BED RAIL, SECOND HOLE POSITION, as shown. b. Drop in two bolts. c. Drill two holes in REAR BED RAIL, SECOND HOLE POSITION. Drop in two bolts. d. Place a plated shim under base rail in bed depression closest to each bolt (see above).4. a. Under box, place frame brackets onto bolts. b. Loosely install washers and lock nuts.
c. Press brackets tight against frame member; tighten nuts snug against box.5. a. Pilot drill* and drill 1/2” holes into truck frame, at two places thru holes each frame bracket--BE CARE-
FUL OF ELECTRIC OR FLUID LINES behind frame members. b. Brackets will be bolted onto frame by drilling frame and fishing knurl bolt through frame with fish wire
and attach with hex nut and lock washer on outside of bracket. c. TIGHTEN ALL BOLTS ACCORDING TO BOLT TORQUE SPECIFICATIONS.

Page 12 HJ32009
InstallationCHEVROLET/GMC: 2007-2010 SILVERADO & SIERRA 2500 HD (6-1/2’ BOX NEW STYLE)
1. Place the template in the box and center the template between the wheel wells.
5. Take a 3/8” locating punch and mark the holes to be drilled.
4. Locate which holes you will be drilling, by the ones marked with a red arrow.
3. Measure from the back of the box to the template on the passengers side and drivers side to insure that the template is square. See DRAWING #4 and table for measurements.
2. IF NEEDED, TAPE THE TEMPLATE DOWN.
7. Remove the template and drill the four marked holes with a 5/8” drill bit.
6. BEFORE YOU DRILL, MAKE SURE THAT THE TEMPLATE DID NOT MOVE, AND THAT THERE ARE NO OBSTRUC-TIONS IN THE WAY.
8. Deburr each hole.
9. Touch up the bare metal with some paint that matches the box of the truck.
Truck Bed Drilling Instructions with Template
NOTE: A pilot hole may need to be drilled.

Page 13 HJ32009
InstallationCHEVROLET/GMC: 2007-2010 SILVERADO & SIERRA 2500 HD (6-1/2’ BOX NEW STYLE)
Drawing #4
Truck Bed Drilling Instructions with Template
BOX LENGTH DIMENSIONS MEASUREMENTCHEVROLET/GMC 2007-2010 SILVERADO & SIERRA 2500 HD
6-1/2’ NEW STYLE A *24”*ALL MEASUREMENTS ARE FROM THE BACK OF THE BOX

Page 14 HJ32009
InstallationCHEVROLET/GMC: 2007-2010 SILVERADO & SIERRA 2500 HD (8’ BOX NEW STYLE)
INSTALLATION
1. a. Completely assemble hitch. See GENERAL INSTRUCTIONS and SAFETY supplied. b. Set hitch into back of truck, center it side to side. c. Measure 34 1/2” from back edge of truck box to square hole centers in rear bed rail.2. Check underneath box at bolt hole locations for any obstructions (frame members, etc.).3. a. Drill two 5/8” holes thru FRONT BED RAIL, SECOND HOLE POSITION, as shown. b. Drop in two bolts. c. Drill two holes in REAR BED RAIL, SECOND HOLE POSITION. Drop in two bolts. d. Place a plated shim under base rail in bed depression closest to each bolt (see above).4. a. Under box, place frame brackets onto bolts. b. Loosely install washers and lock nuts.
c. Press brackets tight against frame member; tighten nuts snug against box.5. a. Pilot drill* and drill 1/2” holes into truck frame, at two places thru holes each frame bracket--BE CARE-
FUL OF ELECTRIC OR FLUID LINES behind frame members. b. Brackets will be bolted onto frame by drilling frame and fishing knurl bolt through frame with fish wire
and attach with hex nut and lock washer on outside of bracket. c. TIGHTEN ALL BOLTS ACCORDING TO BOLT TORQUE SPECIFICATIONS.

Page 15 HJ32009
InstallationCHEVROLET/GMC: 2007-2010 SILVERADO & SIERRA 2500 HD (8’ BOX NEW STYLE)
1. Place the template in the box and center the template between the wheel wells.
5. Take a 3/8” locating punch and mark the holes to be drilled.
4. Locate which holes you will be drilling, by the ones marked with a red arrow.
3. Measure from the back of the box to the template on the passengers side and drivers side to insure that the template is square. See DRAWING #5 and table for measurements.
2. IF NEEDED, TAPE THE TEMPLATE DOWN.
7. Remove the template and drill the four marked holes with a 5/8” drill bit.
6. BEFORE YOU DRILL, MAKE SURE THAT THE TEMPLATE DID NOT MOVE, AND THAT THERE ARE NO OBSTRUC-TIONS IN THE WAY.
8. Deburr each hole.
9. Touch up the bare metal with some paint that matches the box of the truck.
Truck Bed Drilling Instructions with Template
NOTE: A pilot hole may need to be drilled.

Page 16 HJ32009
InstallationCHEVROLET/GMC: 2007-2010 SILVERADO & SIERRA 2500 HD (8’ BOX NEW STYLE)
Drawing #5
Truck Bed Drilling Instructions with Template
BOX LENGTH DIMENSIONS MEASUREMENTCHEVROLET/GMC 2007-2010 SILVERADO & SIERRA 2500 HD
8’ NEW STYLE A *30”*ALL MEASUREMENTS ARE FROM THE BACK OF THE BOX

Page 17 HJ32009
InstallationCHEVROLET/GMC: 2007-2010 SILVERADO & SIERRA 3500 HD (8’ BOX NEW STYLE)
INSTALLATION
1. a. Completely assemble hitch. See GENERAL INSTRUCTIONS and SAFETY supplied. b. Set hitch into back of truck, center it side to side. c. Measure 33 1/2” from back edge of truck box to square hole centers in rear bed rail.2. Check underneath box at bolt hole locations for any obstructions (frame members, etc.).3. a. Drill two 5/8” holes thru FRONT BED RAIL, SECOND HOLE POSITION, as shown. b. Drop in two bolts. c. Drill two holes in REAR BED RAIL, SECOND HOLE POSITION. Drop in two bolts. d. Place a plated shim under base rail in bed depression closest to each bolt (see above).4. a. Under box, place frame brackets onto bolts. b. Loosely install washers and lock nuts.
c. Press brackets tight against frame member; tighten nuts snug against box.5. a. Pilot drill* and drill 1/2” holes into truck frame, at two places thru holes each frame bracket--BE CARE-
FUL OF ELECTRIC OR FLUID LINES behind frame members. b. Brackets will be bolted onto frame by drilling frame and fishing knurl bolt through frame with fish wire
and attach with hex nut and lock washer on outside of bracket. c. TIGHTEN ALL BOLTS ACCORDING TO BOLT TORQUE SPECIFICATIONS.

Page 18 HJ32009
InstallationCHEVROLET/GMC: 2007-2010 SILVERADO & SIERRA 3500 HD (8’ BOX NEW STYLE)
1. Place the template in the box and center the template between the wheel wells.
5. Take a 3/8” locating punch and mark the holes to be drilled.
4. Locate which holes you will be drilling, by the ones marked with a red arrow.
3. Measure from the back of the box to the template on the passengers side and drivers side to insure that the template is square. See DRAWING #6 and table for measurements.
2. IF NEEDED, TAPE THE TEMPLATE DOWN.
7. Remove the template and drill the four marked holes with a 5/8” drill bit.
6. BEFORE YOU DRILL, MAKE SURE THAT THE TEMPLATE DID NOT MOVE, AND THAT THERE ARE NO OBSTRUC-TIONS IN THE WAY.
8. Deburr each hole.
9. Touch up the bare metal with some paint that matches the box of the truck.
Truck Bed Drilling Instructions with Template
NOTE: A pilot hole may need to be drilled.

Page 19 HJ32009
InstallationCHEVROLET/GMC: 2007-2010 SILVERADO & SIERRA 3500 HD (8’ BOX NEW STYLE)
Drawing #6
Truck Bed Drilling Instructions with Template
BOX LENGTH DIMENSIONS MEASUREMENTCHEVROLET/GMC 2007-2010 SILVERADO & SIERRA 3500 HD
8’ NEW STYLE A *29”*ALL MEASUREMENTS ARE FROM THE BACK OF THE BOX

Page 20 HJ32009
InstallationCHEVROLET/GMC: 2007-2013 SILVERADO & SIERRA 1500 (5-1/2’, 6-1/2’ & 8’ BOXES)
INSTALLATION
1. a. Completely assemble hitch. See GENERAL INSTRUCTIONS and SAFETY supplied. b. Set hitch into back of truck, center it side to side. c. Measure 27 1/2” for 5 1/2’ & 6 1/2’ box or 33 1/2” for 8’ box from back edge of truck box to square hole
centers in rear bed rail.2. Check underneath box at bolt hole locations for any obstructions (frame members, etc.).3. a. Drill two 5/8” holes thru FRONT BED RAIL, SECOND HOLE POSITION, as shown. b. Drop in two bolts. c. Drill two holes in REAR BED RAIL, SECOND HOLE POSITION. Slide 3/8” plated shims under base rails
in valley closest to bolt at both ends.4. a. Under box, place washers (2” wide flat bar) and frame brackets onto bolt. b. Loosely install washers and lock nuts.
c. Press brackets tight against frame member; tighten nuts snug against box.5. a. Brackets will be bolted onto frame by drilling frame and fishing knurl bolt thru frame with a fish wire
and attach with hex nut and lock washer on outside of bracket. Use a 1/2” drill for holes. BE CAREFUL OF ELECTRIC OR FLUID LINES behind frame members.
b. Brackets will be bolted onto frame by drilling frame and fishing knurl bolt through frame with fish wire and attach with hex nut and lock washer on outside of bracket.
c. TIGHTEN ALL BOLTS ACCORDING TO BOLT TORQUE SPECIFICATIONS.

Page 21 HJ32009
InstallationCHEVROLET/GMC: 2007-2013 SILVERADO & SIERRA 1500 (5-1/2’, 6-1/2’ & 8’ BOXES)
1. Place the template in the box and center the template between the wheel wells.
5. Take a 3/8” locating punch and mark the holes to be drilled.
4. Locate which holes you will be drilling, by the ones marked with a red arrow.
3. Measure from the back of the box to the template on the passengers side and drivers side to insure that the template is square. See DRAWING #7 and table for measurements.
2. IF NEEDED, TAPE THE TEMPLATE DOWN.
7. Remove the template and drill the four marked holes with a 5/8” drill bit.
6. BEFORE YOU DRILL, MAKE SURE THAT THE TEMPLATE DID NOT MOVE, AND THAT THERE ARE NO OBSTRUC-TIONS IN THE WAY.
8. Deburr each hole.
9. Touch up the bare metal with some paint that matches the box of the truck.
Truck Bed Drilling Instructions with Template
NOTE: A pilot hole may need to be drilled.

Page 22 HJ32009
InstallationCHEVROLET/GMC: 2007-2013 SILVERADO & SIERRA 1500 (5-1/2’, 6-1/2’ & 8’ BOXES)
Drawing #7
Truck Bed Drilling Instructions with Template
BOX LENGTH DIMENSIONS MEASUREMENTCHEVROLET/GMC 2007-2013 SILVERADO & SIERRA 1500
5-1/2’ A *23”6-1/2’ A *23”
8’ A *29”*ALL MEASUREMENTS ARE FROM THE BACK OF THE BOX

Page 23 HJ32009
InstallationCHEVROLET/GMC: 1999-2007 SILVERADO & SIERRA 1500/1500HD (5-1/2’ & 6-1/2’ BOXES)
1999-2007 SILVERADO & SIERRA 2500 (6-1/2’ BOX)
INSTALLATION
1. a. Completely assemble hitch. See GENERAL INSTRUCTIONS and SAFETY supplied. b. Set hitch into back of truck, center it side to side. c. Measure 28” from back edge of truck box to square hole centers in rear bed rail.2. Check underneath box at bolt hole locations for any obstructions (frame members, etc.).3. a. Drill two 5/8” holes thru FRONT BED RAIL, SECOND HOLE POSITION, as shown. b. Drop in two bolts. c. Drill two holes in REAR BED RAIL, SECOND HOLE POSITION. Drop in two bolts.4. a. Under box, place washers (2” wide flat bar) and frame brackets onto bolts. b. Loosely install washers and lock nuts.
c. Press brackets tight against frame member; tighten nuts snug against box.5. a. Pilot drill* and drill 1/2” holes into truck frame, at two places thru holes each frame bracket--BE CARE-
FUL OF ELECTRIC OR FLUID LINES behind frame members. b. Brackets will be bolted onto frame by drilling frame and fishing knurl bolt through frame with fish wire
and attach with hex nut and lock washer on outside of bracket. c. TIGHTEN ALL BOLTS ACCORDING TO BOLT TORQUE SPECIFICATIONS.

Page 24 HJ32009
InstallationCHEVROLET/GMC: 1999-2007 SILVERADO & SIERRA 1500/1500HD (5-1/2’ & 6-1/2’ BOXES) 1999-2007 SILVERADO & SIERRA 2500 (6-1/2’ BOX)
1. Place the template in the box and center the template between the wheel wells.
5. Take a 3/8” locating punch and mark the holes to be drilled.
4. Locate which holes you will be drilling, by the ones marked with a red arrow.
3. Measure from the back of the box to the template on the passengers side and drivers side to insure that the template is square. See DRAWING #8 and table for measurements.
2. IF NEEDED, TAPE THE TEMPLATE DOWN.
7. Remove the template and drill the four marked holes with a 5/8” drill bit.
6. BEFORE YOU DRILL, MAKE SURE THAT THE TEMPLATE DID NOT MOVE, AND THAT THERE ARE NO OBSTRUC-TIONS IN THE WAY.
8. Deburr each hole.
9. Touch up the bare metal with some paint that matches the box of the truck.
Truck Bed Drilling Instructions with Template
NOTE: A pilot hole may need to be drilled.

Page 25 HJ32009
InstallationCHEVROLET/GMC: 1999-2007 SILVERADO & SIERRA 1500/1500HD (5-1/2’ & 6-1/2’ BOXES)
1999-2007 SILVERADO & SIERRA 2500 (6-1/2’ BOX)
Drawing #8
Truck Bed Drilling Instructions with Template
BOX LENGTH DIMENSIONS MEASUREMENTCHEVROLET/GMC 1999-2007 SILVERADO & SIERRA 1500/1500HD
5-1/2’ A *23-1/2”6-1/2’ A *23-1/2”
CHEVROLET/GMC 1999-2007 SILVERADO & SIERRA 25006-1/2” A *23-1/2”
*ALL MEASUREMENTS ARE FROM THE BACK OF THE BOX

Page 26 HJ32009
InstallationCHEVROLET/GMC: 1999-2007 SILVERADO & SIERRA 1500/2500 (8’ BOX)
INSTALLATION1. a. Completely assemble hitch. See GENERAL INSTRUCTIONS and SAFETY supplied. b. Set hitch into back of truck, center it side to side. c. Measure 32” from back edge of truck box to square hole centers in rear bed rail.2. Check underneath box at bolt hole locations for any obstructions (frame members, etc.).3. a. Drill two 5/8” holes thru FRONT BED RAIL, SECOND HOLE POSITION, as shown. b. Drop in two bolts. c. Drill two holes in REAR BED RAIL, SECOND HOLE POSITION. Drop in two bolts.4. a. Under box, place washers (2” wide flat bar) and frame brackets onto bolts. b. Loosely install washers and lock nuts.
c. Press brackets tight against frame member; tighten nuts snug against box.5. a. Pilot drill* and drill 1/2” holes into truck frame, at two places thru holes each frame bracket--BE CARE-
FUL OF ELECTRIC OR FLUID LINES behind frame members. b. Brackets will be bolted onto frame by drilling frame and fishing knurl bolt through frame with fish wire
and attach with hex nut and lock washer on outside of bracket. c. TIGHTEN ALL BOLTS ACCORDING TO BOLT TORQUE SPECIFICATIONS.

Page 27 HJ32009
InstallationCHEVROLET/GMC: 1999-2007 SILVERADO & SIERRA 1500/2500 (8’ BOX)
1. Place the template in the box and center the template between the wheel wells.
5. Take a 3/8” locating punch and mark the holes to be drilled.
4. Locate which holes you will be drilling, by the ones marked with a red arrow.
3. Measure from the back of the box to the template on the passengers side and drivers side to insure that the template is square. See DRAWING #9 and table for measurements.
2. IF NEEDED, TAPE THE TEMPLATE DOWN.
7. Remove the template and drill the four marked holes with a 5/8” drill bit.
6. BEFORE YOU DRILL, MAKE SURE THAT THE TEMPLATE DID NOT MOVE, AND THAT THERE ARE NO OBSTRUC-TIONS IN THE WAY.
8. Deburr each hole.
9. Touch up the bare metal with some paint that matches the box of the truck.
Truck Bed Drilling Instructions with Template
NOTE: A pilot hole may need to be drilled.

Page 28 HJ32009
InstallationCHEVROLET/GMC: 1999-2007 SILVERADO & SIERRA 1500/2500 (8’ BOX)
Drawing #9
Truck Bed Drilling Instructions with Template
BOX LENGTH DIMENSIONS MEASUREMENTCHEVROLET/GMC 1999-2007 SILVERADO & SIERRA 1500/2500
8’ A *27-1/2”*ALL MEASUREMENTS ARE FROM THE BACK OF THE BOX

Page 29 HJ32009
InstallationCHEVROLET/GMC: 1988-1998 SILVERADO & SIERRA 1500/2500 (8’ BOX)
1988-2000 SILVERADO & SIERRA 3500 (8’ BOX)
INSTALLATION
1. a. Completely assemble hitch. See GENERAL INSTRUCTIONS and SAFETY supplied. b. Set hitch into back of truck, center it side to side. c. Measure 34 1/4” from back edge of truck box to square hole centers in rear bed rail.2. Check underneath box at bolt hole locations for any obstructions (frame members, etc.).3. a. Drill two 5/8” holes thru FRONT BED RAIL, SECOND HOLE POSITION, as shown. b. Drop in two bolts. c. Drill two holes in REAR BED RAIL, THIRD HOLE POSITION. Drop in two bolts.4. a. Under box, place washers (2” wid flat bar) and frame brackets onto bolts. b. Loosely install washers and lock nuts.
c. Press brackets tight against frame member; tighten nuts snug against box.5. a. Pilot drill* and drill 1/2” holes into truck frame, at two places thru holes each frame bracket--BE CARE-
FUL OF ELECTRIC OR FLUID LINES behind frame members. b. Brackets will be bolted onto frame by drilling frame and fishing knurl bolt through frame with fish wire
and attach with hex nut and lock washer on outside of bracket. c. TIGHTEN ALL BOLTS ACCORDING TO BOLT TORQUE SPECIFICATIONS.

Page 30 HJ32009
InstallationCHEVROLET/GMC: 1988-1998 SILVERADO & SIERRA 1500/2500 (8’ BOX) 1988-2000 SILVERADO & SIERRA 3500 (8’ BOX)
1. Place the template in the box and center the template between the wheel wells.
5. Take a 3/8” locating punch and mark the holes to be drilled.
4. Locate which holes you will be drilling, by the ones marked with a red arrow.
3. Measure from the back of the box to the template on the passengers side and drivers side to insure that the template is square. See DRAWING #10 and table for measurements.
2. IF NEEDED, TAPE THE TEMPLATE DOWN.
7. Remove the template and drill the four marked holes with a 5/8” drill bit.
6. BEFORE YOU DRILL, MAKE SURE THAT THE TEMPLATE DID NOT MOVE, AND THAT THERE ARE NO OBSTRUC-TIONS IN THE WAY.
8. Deburr each hole.
9. Touch up the bare metal with some paint that matches the box of the truck.
Truck Bed Drilling Instructions with Template
NOTE: A pilot hole may need to be drilled.

Page 31 HJ32009
InstallationCHEVROLET/GMC: 1988-1998 SILVERADO & SIERRA 1500/2500 (8’ BOX)
1988-2000 SILVERADO & SIERRA 3500 (8’ BOX)
Truck Bed Drilling Instructions with Template
Drawing #10
BOX LENGTH DIMENSIONS MEASUREMENTCHEVROLET/GMC 1988-1998 SILVERADO & SIERRA 1500/2500
8’ A *29-3/4”CHEVROLET/GMC 1988-2000 SILVERADO & SIERRA 3500
8’ A *29-3/4”*ALL MEASUREMENTS ARE FROM THE BACK OF THE BOX

Page 32 HJ32009
InstallationCHEVROLET/GMC: 1988-1999 SILVERADO & SIERRA 1500 (5-1/2’ & 6-1/2’ BOXES) 1988-1999 SILVERADO & SIERRA 2500 (6-1/2’ BOX) 2003-2007 1500 & 1500 HD (5-1/2’ & 6-1/2’ BOXES) 1998-2000 3500 (6-1/2’ BOX)
INSTALLATION
1. a. Completely assemble hitch. See GENERAL INSTRUCTIONS and SAFETY supplied. b. Set hitch into back of truck, center it side to side. c. Measure 28” from back edge of truck box to square hole centers in rear bed rail.2. Check underneath box at bolt hole locations for any obstructions (frame members, etc.).3. a. Drill two 5/8” holes thru FRONT BED RAIL, SECOND HOLE POSITION, as shown. b. Drop in two bolts. c. Drill two holes in REAR BED RAIL, THIRD HOLE POSITION. Drop in two bolts.4. a. Under box, place washers (2” wid flat bar) and frame brackets onto bolts. b. Loosely install washers and lock nuts.
c. Press brackets tight against frame member; tighten nuts snug against box.5. a. Pilot drill* and drill 1/2” holes into truck frame, at two places thru holes each frame bracket--BE CARE-
FUL OF ELECTRIC OR FLUID LINES behind frame members. b. Brackets will be bolted onto frame by drilling frame and fishing knurl bolt through frame with fish wire
and attach with hex nut and lock washer on outside of bracket. c. TIGHTEN ALL BOLTS ACCORDING TO BOLT TORQUE SPECIFICATIONS.

Page 33 HJ32009
InstallationCHEVROLET/GMC: 1988-1999 SILVERADO & SIERRA 1500 (5-1/2’ & 6-1/2’ BOXES)
1988-1999 SILVERADO & SIERRA 2500 (6-1/2’ BOX)2003-2007 1500 & 1500 HD (5-1/2’ & 6-1/2’ BOXES)
1998-2000 3500 (6-1/2’ BOX)
1. Place the template in the box and center the template between the wheel wells.
5. Take a 3/8” locating punch and mark the holes to be drilled.
4. Locate which holes you will be drilling, by the ones marked with a red arrow.
3. Measure from the back of the box to the template on the passengers side and drivers side to insure that the template is square. See DRAWING #11 and table for measurements.
2. IF NEEDED, TAPE THE TEMPLATE DOWN.
7. Remove the template and drill the four marked holes with a 5/8” drill bit.
6. BEFORE YOU DRILL, MAKE SURE THAT THE TEMPLATE DID NOT MOVE, AND THAT THERE ARE NO OBSTRUC-TIONS IN THE WAY.
8. Deburr each hole.
9. Touch up the bare metal with some paint that matches the box of the truck.
Truck Bed Drilling Instructions with Template
NOTE: A pilot hole may need to be drilled.

Page 34 HJ32009
Truck Bed Drilling Instructions with Template
Drawing #11
BOX LENGTH DIMENSIONS MEASUREMENTCHEVROLET/GMC 1988-1999 SILVERADO & SIERRA 1500
5-1/2’ A *23-1/2”6-1/2’ A *23-1/2”
CHEVROLET/GMC 1988-1999 SILVERADO & SIERRA 25006-1/2’ A *29-3/4”
CHEVROLET/GMC 2003-2007 1500 & 1500 HD5-1/2’ A *23-1/2”6-1/2’ A *23-1/2”
CHEVROLET/GMC 1998-2000 35006-1/2’ A *23-1/2”
*ALL MEASUREMENTS ARE FROM THE BACK OF THE BOX
InstallationCHEVROLET/GMC: 1988-1999 SILVERADO & SIERRA 1500 (5-1/2’ & 6-1/2’ BOXES) 1988-1999 SILVERADO & SIERRA 2500 (6-1/2’ BOX) 2003-2007 1500 & 1500 HD (5-1/2’ & 6-1/2’ BOXES) 1998-2000 3500 (6-1/2’ BOX)

Page 35 HJ32009
InstallationCHEVROLET/GMC: 2001-2007 SILVERADO & SIERRA 2500 HD (8’ BOX)
INSTALLATION
1. a. Completely assemble hitch. See GENERAL INSTRUCTIONS and SAFETY supplied. b. Set hitch into back of truck, center it side to side. c. Measure 33 3/4” from back edge of truck box to square hole centers in rear bed rail.2. Check underneath box at bolt hole locations for any obstructions (frame members, etc.).3. a. Drill two 5/8” holes thru FRONT BED RAIL, SECOND HOLE POSITION, as shown. b. Drop in two bolts. c. Drill two holes in REAR BED RAIL, SECOND HOLE POSITION. Drop in two bolts.4. a. Under box, place washers (2” wid flat bar) and frame brackets onto bolts. b. Loosely install washers and lock nuts.
c. Press brackets tight against frame member; tighten nuts snug against box.5. a. Pilot drill* and drill 1/2” holes into truck frame, at two places thru holes each frame bracket--BE CARE-
FUL OF ELECTRIC OR FLUID LINES behind frame members. b. Brackets will be bolted onto frame by drilling frame and fishing knurl bolt through frame with fish wire
and attach with hex nut and lock washer on outside of bracket. c. TIGHTEN ALL BOLTS ACCORDING TO BOLT TORQUE SPECIFICATIONS.)

Page 36 HJ32009
InstallationCHEVROLET/GMC: 2001-2007 SILVERADO & SIERRA 2500 HD (8’ BOX)
1. Place the template in the box and center the template between the wheel wells.
5. Take a 3/8” locating punch and mark the holes to be drilled.
4. Locate which holes you will be drilling, by the ones marked with a red arrow.
3. Measure from the back of the box to the template on the passengers side and drivers side to insure that the template is square. See DRAWING #12 and table for measurements.
2. IF NEEDED, TAPE THE TEMPLATE DOWN.
7. Remove the template and drill the four marked holes with a 5/8” drill bit.
6. BEFORE YOU DRILL, MAKE SURE THAT THE TEMPLATE DID NOT MOVE, AND THAT THERE ARE NO OBSTRUC-TIONS IN THE WAY.
8. Deburr each hole.
9. Touch up the bare metal with some paint that matches the box of the truck.
Truck Bed Drilling Instructions with Template
NOTE: A pilot hole may need to be drilled.

Page 37 HJ32009
InstallationCHEVROLET/GMC: 2001-2007 SILVERADO & SIERRA 2500 HD (8’ BOX)
Truck Bed Drilling Instructions with Template
Drawing #12
BOX LENGTH DIMENSIONS MEASUREMENTCHEVROLET/GMC 2001-2007 SILVERADO & SIERRA 2500 HD
8’ A *29-1/4”*ALL MEASUREMENTS ARE FROM THE BACK OF THE BOX

Page 38 HJ32009
InstallationDODGE: 1993 & EARLIER RAM
INSTALLATION
1. a. Completely assemble hitch. See GENERAL INSTRUCTIONS and SAFETY supplied. b. Set hitch into back of truck, center it side to side. c. Measure 37” from back edge of truck box to square hole centers in rear bed rail.2. Check underneath box at bolt hole locations for any obstructions (frame members, etc.).3. a. Drill two 5/8” holes thru FRONT BED RAIL, THIRD HOLE POSITION, as shown. b. Drop in two bolts. c. Drill two holes in REAR BED RAIL, THIRD HOLE POSITION. Drop in two bolts.4. a. Under box, place washers (2” wid flat bar), 411 frame brackets, flat washer and lock nuts onto bolts (4
places). b. Press each bracket tight against frame member; tighten nuts snug against box.
5. a. Pilot drill* and drill 1/2” holes into truck frame, at two places thru holes each frame bracket--BE CARE-FUL OF ELECTRIC OR FLUID LINES behind frame members.
b. Brackets will be bolted onto frame by drilling frame and fishing knurl bolt through frame with fish wire and attach with hex nut and lock washer on outside of bracket.
c. TIGHTEN ALL BOLTS ACCORDING TO BOLT TORQUE SPECIFICATIONS.

Page 39 HJ32009
InstallationDODGE: 1993 & EARLIER RAM
1. Place the template in the box and center the template between the wheel wells.
5. Take a 3/8” locating punch and mark the holes to be drilled.
4. Locate which holes you will be drilling, by the ones marked with a red arrow.
3. Measure from the back of the box to the template on the passengers side and drivers side to insure that the template is square. See DRAWING #13 and table for measurements.
2. IF NEEDED, TAPE THE TEMPLATE DOWN.
7. Remove the template and drill the four marked holes with a 5/8” drill bit.
6. BEFORE YOU DRILL, MAKE SURE THAT THE TEMPLATE DID NOT MOVE, AND THAT THERE ARE NO OBSTRUC-TIONS IN THE WAY.
8. Deburr each hole.
9. Touch up the bare metal with some paint that matches the box of the truck.
Truck Bed Drilling Instructions with Template
NOTE: A pilot hole may need to be drilled.

Page 40 HJ32009
Drawing #13
InstallationDODGE: 1993 & EARLIER RAM
Truck Bed Drilling Instructions with Template
BOX LENGTH DIMENSIONS MEASUREMENTDODGE: 1993 & EARLIER RAM
8’ A *32-1/2”*ALL MEASUREMENTS ARE FROM THE BACK OF THE BOX

Page 41 HJ32009
InstallationDODGE: 1994-2001 RAM 1500 (5-1/2’ & 6-1/2’ BOXES)
1994-2002 RAM 2500/3500 (6-1/2’ BOX)
INSTALLATION
1. a. Completely assemble hitch. See GENERAL INSTRUCTIONS and SAFETY supplied. b. Set hitch into back of truck, center it side to side. c. Measure 31” from back edge of truck box to square hole centers in rear bed rail.2. Check underneath box at bolt hole locations for any obstructions (frame members, etc.).3. a. Drill two 5/8” holes thru FRONT BED RAIL, OUTSIDE POSITION, as shown. Use OUTSIDE hole locations,
front and rear. Drop in two bolts. b. Drill two holes in REAR BED RAIL, OUTSIDE POSITION. Drop in two bolts. You will have to use two
5/8” x 5” long bolts to go through cross member.4. a. Under box, place washers (2” wid flat bar), 411 frame brackets, flat washer and lock nuts onto bolts (4
places). b. Press each bracket tight against frame member; tighten nuts snug against box.
5. a. Pilot drill* and drill 1/2” holes into truck frame, at two places thru holes each frame bracket--BE CARE-FUL OF ELECTRIC OR FLUID LINES behind frame members.
b. Brackets will be bolted onto frame by drilling frame and fishing knurl bolt through frame with fish wire and attach with hex nut and lock washer on outside of bracket.
c. TIGHTEN ALL BOLTS ACCORDING TO BOLT TORQUE SPECIFICATIONS.

Page 42 HJ32009
InstallationDODGE: 1994-2001 RAM 1500 (5-1/2’ & 6-1/2’ BOXES) 1994-2002 RAM 2500/3500 (6-1/2’ BOXES)
1. Place the template in the box and center the template between the wheel wells.
5. Take a 3/8” locating punch and mark the holes to be drilled.
4. Locate which holes you will be drilling, by the ones marked with a red arrow.
3. Measure from the back of the box to the template on the passengers side and drivers side to insure that the template is square. See DRAWING #14 and table for measurements.
2. IF NEEDED, TAPE THE TEMPLATE DOWN.
7. Remove the template and drill the four marked holes with a 5/8” drill bit.
6. BEFORE YOU DRILL, MAKE SURE THAT THE TEMPLATE DID NOT MOVE, AND THAT THERE ARE NO OBSTRUC-TIONS IN THE WAY.
8. Deburr each hole.
9. Touch up the bare metal with some paint that matches the box of the truck.
Truck Bed Drilling Instructions with Template
NOTE: A pilot hole may need to be drilled.

Page 43 HJ32009
InstallationDODGE: 1994-2001 RAM 1500 (5-1/2’ & 6-1/2’ BOXES)
1994-2002 RAM 2500/3500 (6-1/2’ BOX)
Drawing #14
Truck Bed Drilling Instructions with Template
BOX LENGTH DIMENSIONS MEASUREMENTDODGE: 1994-2001 RAM 1500
5-1/2’ A *26-1/2”6-1/2’ a *26-1/2”
DODGE: 1994-2002 RAM 2500/35006-1/2’ A *26-1/2”
*ALL MEASUREMENTS ARE FROM THE BACK OF THE BOX

Page 44 HJ32009
InstallationDODGE: 1994-1997 RAM 1500/2500/3500 (8’ BOX)
INSTALLATION
1. a. Completely assemble hitch. See GENERAL INSTRUCTIONS and SAFETY supplied. b. Set hitch into back of truck, center it side to side. c. Measure 35 1/2” from back edge of truck box to square hole centers in rear bed rail.2. Check underneath box at bolt hole locations for any obstructions (frame members, etc.).3. a. Drill two 5/8” holes thru FRONT BED RAIL, OUTSIDE POSITION, as shown. Use OUTSIDE hole locations,
front and rear. Drop in two bolts. b. Drill two holes in REAR BED RAIL, OUTSIDE POSITION. Drop in two bolts. You will have to use two
5/8” x 5” long bolts to go through cross member.4. a. Under box, place washers (2” wid flat bar), 411 frame brackets, flat washer and lock nuts onto bolts (4
places). b. Press each bracket tight against frame member; tighten nuts snug against box.
5. a. Pilot drill* and drill 1/2” holes into truck frame, at two places thru holes each frame bracket--BE CARE-FUL OF ELECTRIC OR FLUID LINES behind frame members.
b. Brackets will be bolted onto frame by drilling frame and fishing knurl bolt through frame with fish wire and attach with hex nut and lock washer on outside of bracket.
c. TIGHTEN ALL BOLTS ACCORDING TO BOLT TORQUE SPECIFICATIONS.

Page 45 HJ32009
InstallationDODGE: 1994-1997 RAM 1500/2500/3500 (8’ BOX)
1. Place the template in the box and center the template between the wheel wells.
5. Take a 3/8” locating punch and mark the holes to be drilled.
4. Locate which holes you will be drilling, by the ones marked with a red arrow.
3. Measure from the back of the box to the template on the passengers side and drivers side to insure that the template is square. See DRAWING #15 and table for measurements.
2. IF NEEDED, TAPE THE TEMPLATE DOWN.
7. Remove the template and drill the four marked holes with a 5/8” drill bit.
6. BEFORE YOU DRILL, MAKE SURE THAT THE TEMPLATE DID NOT MOVE, AND THAT THERE ARE NO OBSTRUC-TIONS IN THE WAY.
8. Deburr each hole.
9. Touch up the bare metal with some paint that matches the box of the truck.
Truck Bed Drilling Instructions with Template
NOTE: A pilot hole may need to be drilled.

Page 46 HJ32009
InstallationDODGE: 1994-1997 RAM 1500/2500/3500 (8’ BOX)
Drawing #15
Truck Bed Drilling Instructions with Template
BOX LENGTH DIMENSIONS MEASUREMENTDODGE: 1994-1997 RAM 1500/2500/3500
8’ A *31”*ALL MEASUREMENTS ARE FROM THE BACK OF THE BOX

Page 47 HJ32009
InstallationDODGE: 1998-2001 RAM 1500 (8’ BOX)
1998-2002 RAM 2500/3500 (8’ BOX)
INSTALLATION
1. a. Completely assemble hitch. See GENERAL INSTRUCTIONS and SAFETY supplied. b. Set hitch into back of truck, center it side to side. c. Measure 34 1/2” from back edge of truck box to square hole centers in rear bed rail.2. Check underneath box at bolt hole locations for any obstructions (frame members, etc.).3. a. Drill two 5/8” holes thru FRONT BED RAIL, OUTSIDE POSITION, as shown. Use OUTSIDE hole locations,
front and rear. Drop in two bolts. b. Drill two holes in REAR BED RAIL, OUTSIDE POSITION. Drop in two bolts. You will have to use two
5/8” x 5” long bolts to go through cross member.4. a. Under box, place washers (2” wid flat bar), 411 frame brackets, flat washer and lock nuts onto bolts (4
places). b. Press each bracket tight against frame member; tighten nuts snug against box.
5. a. Pilot drill* and drill 1/2” holes into truck frame, at two places thru holes each frame bracket--BE CARE-FUL OF ELECTRIC OR FLUID LINES behind frame members.
b. Brackets will be bolted onto frame by drilling frame and fishing knurl bolt through frame with fish wire and attach with hex nut and lock washer on outside of bracket.
c. TIGHTEN ALL BOLTS ACCORDING TO BOLT TORQUE SPECIFICATIONS.

Page 48 HJ32009
InstallationDODGE: 1998-2001 RAM 1500 (8’ BOX) 1998-2002 RAM 2500/3500 (8’ BOX)
1. Place the template in the box and center the template between the wheel wells.
5. Take a 3/8” locating punch and mark the holes to be drilled.
4. Locate which holes you will be drilling, by the ones marked with a red arrow.
3. Measure from the back of the box to the template on the passengers side and drivers side to insure that the template is square. See DRAWING #16 and table for measurements.
2. IF NEEDED, TAPE THE TEMPLATE DOWN.
7. Remove the template and drill the four marked holes with a 5/8” drill bit.
6. BEFORE YOU DRILL, MAKE SURE THAT THE TEMPLATE DID NOT MOVE, AND THAT THERE ARE NO OBSTRUC-TIONS IN THE WAY.
8. Deburr each hole.
9. Touch up the bare metal with some paint that matches the box of the truck.
Truck Bed Drilling Instructions with Template
NOTE: A pilot hole may need to be drilled.

Page 49 HJ32009
InstallationDODGE: 1998-2001 RAM 1500 (8’ BOX)
1998-2002 RAM 2500/3500 (8’ BOX)
Drawing #16
Truck Bed Drilling Instructions with Template
BOX LENGTH DIMENSIONS MEASUREMENTDODGE: 1998-2001 RAM 1500
8’ A *30”DODGE: 1998-2002 RAM 2500/3500
8’ A *30”*ALL MEASUREMENTS ARE FROM THE BACK OF THE BOX

Page 50 HJ32009
InstallationDODGE: 2001 & EARLIER DAKOTA
INSTALLATION
1. a. Completely assemble hitch. See GENERAL INSTRUCTIONS and SAFETY supplied. b. Set hitch into back of truck, center it side to side. c. Measure 29” from back edge of truck box to square hole centers in rear bed rail.2. Check underneath box at bolt hole locations for any obstructions (frame members, etc.).3. a. Drill two 5/8” holes thru FRONT BED RAIL, THIRD HOLE POSITION, as shown. NOTE: use OUTSIDE
hole locations, front and rear, if desired. b. Drill two holes in REAR BED RAIL, THIRD HOLE POSITION. Drop in two bolts. 4. a. Under box, place washers (2” wid flat bar), 411 frame brackets, flat washer and lock nuts onto bolts (4
places). b. Press each bracket tight against frame member; tighten nuts snug against box.
5. a. Pilot drill* and drill 1/2” holes into truck frame, at two places thru holes each frame bracket--BE CARE-FUL OF ELECTRIC OR FLUID LINES behind frame members.
b. Brackets will be bolted onto frame by drilling frame and fishing knurl bolt through frame with fish wire and attach with hex nut and lock washer on outside of bracket.
c. TIGHTEN ALL BOLTS ACCORDING TO BOLT TORQUE SPECIFICATIONS.

Page 51 HJ32009
InstallationDODGE: 2001 & EARLIER DAKOTA
1. Place the template in the box and center the template between the wheel wells.
5. Take a 3/8” locating punch and mark the holes to be drilled.
4. Locate which holes you will be drilling, by the ones marked with a red arrow.
3. Measure from the back of the box to the template on the passengers side and drivers side to insure that the template is square. See DRAWING #17 and table for measurements.
2. IF NEEDED, TAPE THE TEMPLATE DOWN.
7. Remove the template and drill the four marked holes with a 5/8” drill bit.
6. BEFORE YOU DRILL, MAKE SURE THAT THE TEMPLATE DID NOT MOVE, AND THAT THERE ARE NO OBSTRUC-TIONS IN THE WAY.
8. Deburr each hole.
9. Touch up the bare metal with some paint that matches the box of the truck.
Truck Bed Drilling Instructions with Template
NOTE: A pilot hole may need to be drilled.

Page 52 HJ32009
InstallationDODGE: 2001 & EARLIER DAKOTA
Truck Bed Drilling Instructions with Template
Drawing #17
BOX LENGTH DIMENSIONS MEASUREMENT2001 Dakota & Earlier
- A *24-1/2*ALL MEASUREMENTS ARE FROM THE BACK OF THE BOX

Page 53 HJ32009
InstallationTOYOTA: 2000 & EARLIER T100 REGULAR & EXTENDS CAB (INCLUDES 4 x 4)
INSTALLATION
1. a. Completely assemble hitch. See GENERAL INSTRUCTIONS and SAFETY supplied. b. Set hitch into back of truck, center it side to side. c. Measure 39” from back edge of truck box to square hole centers in rear bed rail. This places hitch 2”
ahead of the axle.2. Check underneath box at bolt hole locations for any obstructions (frame members, etc.).3. a. Drill two 5/8” holes thru FRONT BED RAIL, OUTSIDE POSITION, as shown. b. Drop in two 5/8” x 3 1/2” long bolts. c. Drill two holes in REAR BED RAIL, OUTSIDE POSITION. Drop in two bolts. 4. a. Under box, place washers (2” wid flat bar), 411 frame brackets, flat washer and lock nuts onto bolts (4
places). b. Press each bracket tight against frame member; tighten nuts snug against box.
5. a. Pilot drill* and drill 1/2” holes into truck frame, at two places thru holes each frame bracket--BE CARE-FUL OF ELECTRIC OR FLUID LINES behind frame members.
b. Brackets will be bolted onto frame by drilling frame and fishing knurl bolt through frame with fish wire and attach with hex nut and lock washer on outside of bracket.
c. TIGHTEN ALL BOLTS ACCORDING TO BOLT TORQUE SPECIFICATIONS.

Page 54 HJ32009
InstallationTOYOTA: 2000 & EARLIER REGULAR & EXTENDS CAB (INCLUDES 4 x 4)
1. Place the template in the box and center the template between the wheel wells.
5. Take a 3/8” locating punch and mark the holes to be drilled.
4. Locate which holes you will be drilling, by the ones marked with a red arrow.
3. Measure from the back of the box to the template on the passengers side and drivers side to insure that the template is square. See DRAWING #18 and table for measurements.
2. IF NEEDED, TAPE THE TEMPLATE DOWN.
7. Remove the template and drill the four marked holes with a 5/8” drill bit.
6. BEFORE YOU DRILL, MAKE SURE THAT THE TEMPLATE DID NOT MOVE, AND THAT THERE ARE NO OBSTRUC-TIONS IN THE WAY.
8. Deburr each hole.
9. Touch up the bare metal with some paint that matches the box of the truck.
Truck Bed Drilling Instructions with Template
NOTE: A pilot hole may need to be drilled.

Page 55 HJ32009
InstallationTOYOTA: 2000 & EARLIER T100 REGULAR & EXTENDS CAB (INCLUDES 4 x 4)
Drawing #18
Truck Bed Drilling Instructions with Template
BOX LENGTH DIMENSIONS MEASUREMENTTOYOTA: 2000 & EARLIER T100 REGULAR & EXTENDS CAB (INCLUDES 4 x 4)
A *34-1/2”*ALL MEASUREMENTS ARE FROM THE BACK OF THE BOX

InstallationTOYOTA: 2000-2006 TUNDRA REGULAR & EXTENDS CAB (INCLUDES 4 x 4)
INSTALLATION
1. a. Completely assemble hitch. See GENERAL INSTRUCTIONS and SAFETY supplied. b. Set hitch into back of truck, center it side to side. c. Measure 35” from back edge of truck box to square hole centers in rear bed rail. This places hitch 2”
ahead of the axle.2. Check underneath box at bolt hole locations for any obstructions (frame members, etc.).3. a. Drill two 5/8” holes thru FRONT BED RAIL, OUTSIDE POSITION, as shown. Use OUTSIDE hole locations,
front and rear. Drop in two 5/8” x 3 1/2” bolts. b. Drill two holes in REAR BED RAIL, OUTSIDE POSITION. Drop in two 5/8” x 3 1/2” bolts. 4. a. Under box, place washers (2” wid flat bar), 411 frame brackets, flat washer and lock nuts onto bolts (4
places). b. Press each bracket tight against frame member; tighten nuts snug against box.
5. a. Pilot drill* and drill 1/2” holes into truck frame, at two places thru holes each frame bracket--BE CARE-FUL OF ELECTRIC OR FLUID LINES behind frame members.
b. Brackets will be bolted onto frame by drilling frame and fishing knurl bolt through frame with fish wire and attach with hex nut and lock washer on outside of bracket.
c. TIGHTEN ALL BOLTS ACCORDING TO BOLT TORQUE SPECIFICATIONS.

InstallationTOYOTA: 2000-2006 TUNDAR REGULAR & EXTENDS CAB (INCLUDES 4 x 4)
1. Place the template in the box and center the template between the wheel wells.
5. Take a 3/8” locating punch and mark the holes to be drilled.
4. Locate which holes you will be drilling, by the ones marked with a red arrow.
3. Measure from the back of the box to the template on the passengers side and drivers side to insure that the template is square. See DRAWING #19 and table for measurements.
2. IF NEEDED, TAPE THE TEMPLATE DOWN.
7. Remove the template and drill the four marked holes with a 5/8” drill bit.
6. BEFORE YOU DRILL, MAKE SURE THAT THE TEMPLATE DID NOT MOVE, AND THAT THERE ARE NO OBSTRUC-TIONS IN THE WAY.
8. Deburr each hole.
9. Touch up the bare metal with some paint that matches the box of the truck.
Truck Bed Drilling Instructions with Template
NOTE: A pilot hole may need to be drilled.

Page 58 HJ32009
InstallationTOYOTA: 2000-2006 TUNDRA REGULAR & EXTENDS CAB (INCLUDES 4 x 4)
Drawing #19
BOX LENGTH DIMENSIONS MEASUREMENTTOYOTA 2000-2006 TUNDRA REGULAR & EXTENDED CAB INCLUDES 4X4
- A *30-1/2”*ALL MEASUREMENTS ARE FROM THE BACK OF THE BOX