Embed Size (px)
Citation preview

Enterprise ePerformance 9.0 Created on 2/5/2010 9:59:00 AM

COPYRIGHT & TRADEMARKS
Copyright © 1998, 2009, Oracle and/or its affiliates. All rights reserved.
Oracle is a registered trademark of Oracle Corporation and/or its affiliates. Other names
may be trademarks of their respective owners.
This software and related documentation are provided under a license agreement
containing restrictions on use and disclosure and are protected by intellectual property
laws. Except as expressly permitted in your license agreement or allowed by law, you
may not use, copy, reproduce, translate, broadcast, modify, license, transmit, distribute,
exhibit, perform, publish or display any part, in any form, or by any means. Reverse
engineering, disassembly, or decompilation of this software, unless required by law for
interoperability, is prohibited.
The information contained herein is subject to change without notice and is not warranted
to be error-free. If you find any errors, please report them to us in writing.
If this software or related documentation is delivered to the U.S. Government or anyone
licensing it on behalf of the U.S. Government, the following notice is applicable:
U.S. GOVERNMENT RIGHTS
Programs, software, databases, and related documentation and technical data delivered to
U.S. Government customers are ―commercial computer software‖ or ―commercial
technical data‖ pursuant to the applicable Federal Acquisition Regulation and agency-
specific supplemental regulations. As such, the use, duplication, disclosure, modification,
and adaptation shall be subject to the restrictions and license terms set forth in the
applicable Government contract, and, to the extent applicable by the terms of the
Government contract, the additional rights set forth in FAR 52.227-19, Commercial
Computer Software License (December 2007). Oracle USA, Inc., 500 Oracle Parkway,
Redwood City, CA 94065.
This software is developed for general use in a variety of information management
applications. It is not developed or intended for use in any inherently dangerous
applications, including applications which may create a risk of personal injury. If you use
this software in dangerous applications, then you shall be responsible to take all
appropriate fail-safe, backup, redundancy and other measures to ensure the safe use of
this software. Oracle Corporation and its affiliates disclaim any liability for any damages
caused by use of this software in dangerous applications.
This software and documentation may provide access to or information on content,
products and services from third parties. Oracle Corporation and its affiliates are not
responsible for and expressly disclaim all warranties of any kind with respect to third
party content, products and services. Oracle Corporation and its affiliates will not be
responsible for any loss, costs, or damages incurred due to your access to or use of third
party content, products or services.

Training Guide Enterprise ePerformance 9.0
Page iii
Table of Contents Enterprise ePerformance 9.0 .........................................................................................1
Introduction to ePerformance............................................................................................... 1 Understanding Performance Documents ............................................................................................ 1 Understanding PeopleSoft ePerformance Business Processes............................................................. 3 Understanding PeopleSoft ePerformance Integration ......................................................................... 5
Defining Performance Criteria ............................................................................................. 7 Defining Development Tips .............................................................................................................. 8 Linking Development Tips to Competencies ................................................................................... 13 Linking Development Tips to Sub-Competencies ............................................................................ 17 Defining Result Writer Text for Competencies ................................................................................ 23 Defining Result Writer Text for Sub-Competencies ......................................................................... 28
Generating Performance Documents ................................................................................. 34 Generating Documents by a Background Process ............................................................................ 35 Generating Documents for Direct Reports ....................................................................................... 45
Accessing Performance Documents .................................................................................... 52 Accessing Documents ..................................................................................................................... 53 Viewing Performance Documents ................................................................................................... 60
Using Performance Documents ........................................................................................... 65 Understanding Review Document Statuses...................................................................................... 66 Entering Preliminary Review Ratings.............................................................................................. 76 Recording Performance Notes ......................................................................................................... 83 Modifying Evaluation Criteria ........................................................................................................ 88 Completing the Employee Self-Evaluation ...................................................................................... 97 Evaluating Employee Performance on the Manager's Document .................................................... 106 Using the Language Checker ........................................................................................................ 116 Incorporating Writing Tools Suggestions into Comments .............................................................. 123
Nominating and Tracking Participants ............................................................................ 131 Nominating Participants................................................................................................................ 132 Tracking Nomination Status.......................................................................................................... 143 Accepting or Declining Nominations ............................................................................................ 148 Completing Participant Evaluations .............................................................................................. 151 Reviewing Participant Evaluations ................................................................................................ 158
Managing Approvals ......................................................................................................... 165 Understanding Approval Statuses.................................................................................................. 166 Understanding the Approval Process ............................................................................................. 168 Understanding the Review Process Options ................................................................................... 169
Performing Administrative Tasks .................................................................................... 172 Transfering Performance Documents ............................................................................................ 172 Changing Document Status ........................................................................................................... 179 Canceling Documents ................................................................................................................... 184 Deleting Documents ..................................................................................................................... 191
Using Inquiry Pages .......................................................................................................... 196 Viewing Historical Documents ..................................................................................................... 197 Viewing View-Only Documents ................................................................................................... 199 Viewing Approval Status .............................................................................................................. 205 Viewing Evaluation Ratings.......................................................................................................... 208 Creating Summary Data ................................................................................................................ 215
Training Guide
Enterprise ePerformance 9.0
Page iv
Viewing Rating Summaries ........................................................................................................... 222 Viewing Document Status ............................................................................................................. 229
Generating Reports in ePerformance ............................................................................... 235 Generating the Missing Documents Report .................................................................................... 236 Generating the Late Documents Report.......................................................................................... 248

Training Guide Enterprise ePerformance 9.0
Page 1
Enterprise ePerformance 9.0 PeopleSoft ePerformance is a self-service performance management application for managers,
employees, and Human Resources (HR) administrators. Managers can use the application to generate forms, tailor planning & evaluation criteria to employees, communicate performance
results, and monitor the status of the performance process. Employees can maintain notes on their
performance, participate in the development of their performance plan, evaluate their own performance, view tips for developing or highlighting competencies, and review performance
history. HR administrators can generate forms and reports, as well as monitor and manage the
overall performance process. Workflow notifications keep managers, employees, and HR administrators up-to-date throughout the performance process cycle.
Upon completion of this module, you will be able to:
• Describe ePerformance functionality. • Define or update performance criteria.
• Generate, access, and use performance documents.
• Nominate and track participants. • Manage approvals in ePerformance.
• Perform administrative tasks in ePerformance.
• Use inquiry pages. • Generate reports in ePerformance.
Introduction to ePerformance PeopleSoft ePerformance is a self-service performance management application for managers,
employees, and Human Resources (HR) administrators.
PeopleSoft ePerformance: • Enables organizations to plan for performance. They can identify target performance attributes
and include them in individual employee performance plans.
• Is a collaboration and communication tool that enables the ongoing two-way communication of goals and expectations between managers and employees. It enables employees to see the
connection between individual efforts and organization goals and initiatives.
• Is an assessment and monitoring tool that measures an employee’s performance against the
goals and expectations outlined in the employee’s performance plan.
Upon completion of this lesson, you will be able to:
• Define a performance document. • Describe ePerformance business processes.
• Explain how ePerformance integrates with other PeopleSoft applications.
Understanding Performance Documents Although PeopleSoft ePerformance supports the complete planning, collaborating, managing,
adjusting, and reviewing phases of the performance process, some organizations may choose to
implement only selected phases. For example, your organization may focus primarily on planning for employee performance, while others may focus primarily on evaluating or reviewing
performance. Performance documents enable your organization to tailor performance forms to
meet your specific needs.

Training Guide
Enterprise ePerformance 9.0
Page 2
Performance documents can be generated for both the manager and employee, and each role can
independently edit its document. This topic discusses manager and employee performance
documents.
Procedure
Step Action
1. Organizations that focus primarily upon evaluating employee performance may
think of the performance document as an employee review, while organizations that focus more on planning and collaboration for performance may think of the
performance document as an employee performance plan.
2. The performance document is the container that holds all of the performance
information for a specific period of time and may contain: • The plan for an employee's performance.
• The evaluation of an employee's performance for a specific business purpose, such
as; annual plan, annual review, project plan, or project review.
3. This diagram illustrates the structure under which performance documents are organized.
4. A performance document can be made up of one or more sub-documents and sub-
documents can have many sections. In PeopleSoft ePerformance, there can be
multiple managers and employees participating in the performance process. Each participant in the process has their own sub-document, which can be edited and
maintained according to rules that you define.
5. Manager and employee sub-documents typically make up the performance
document. Generally, when the term document is used, it is referring to a sub-document.
6. The manager's document refers to the sub-document that is owned by the
employee's manager. The employee's document refers to the sub-document that is
owned by the employee that is the subject of the performance document.
7. Manager's Document Managers use this sub-document to update employees performance criteria, track
progress, and evaluate and comment on an employee's performance. There can be
only one manager's document per performance document. Once the performance
process is complete, the information contained in the manager's sub-document becomes the official source of information used by HR and other business processes
regarding an employee's performance.
8. Employee's Document Employees use this document to enter or update their own performance criteria, track their progress against their performance plan, and evaluate and comment on
their own performance. Managers can use this document throughout the
performance period for insight into the employee's perception of goals and objectives, progress, and assessments.
Training Guide Enterprise ePerformance 9.0
Page 3
Step Action
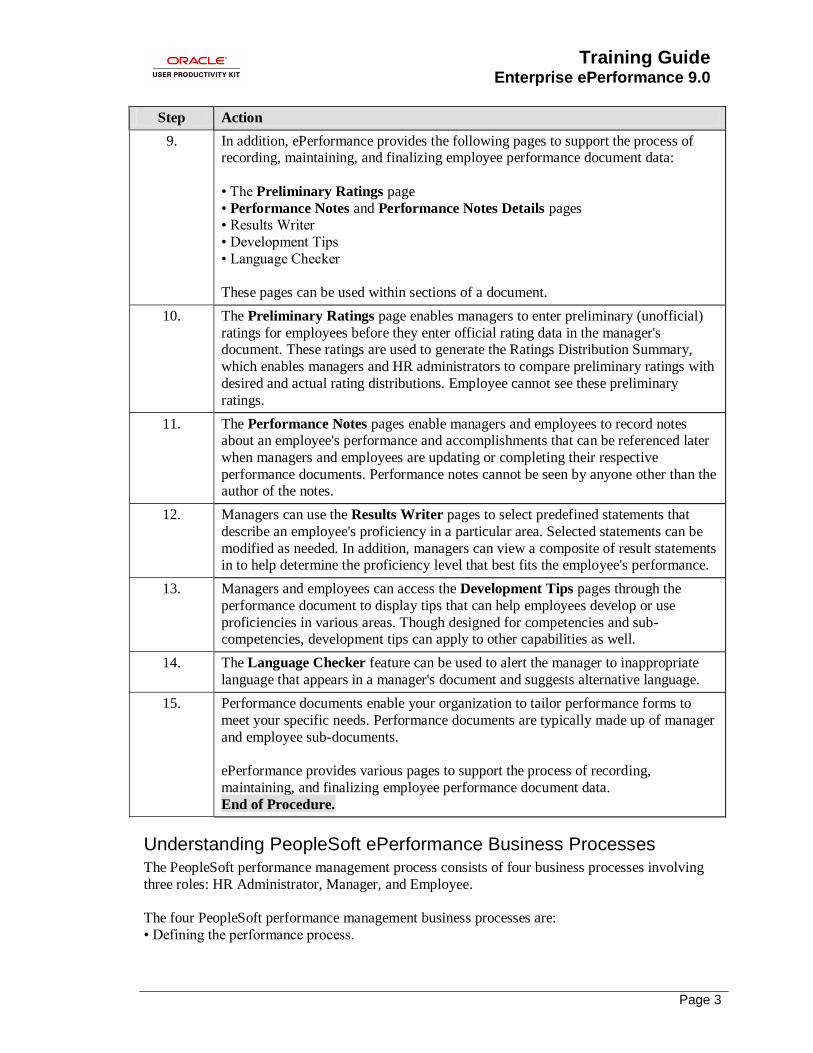
9. In addition, ePerformance provides the following pages to support the process of recording, maintaining, and finalizing employee performance document data:
• The Preliminary Ratings page
• Performance Notes and Performance Notes Details pages • Results Writer
• Development Tips
• Language Checker
These pages can be used within sections of a document.
10. The Preliminary Ratings page enables managers to enter preliminary (unofficial)
ratings for employees before they enter official rating data in the manager's document. These ratings are used to generate the Ratings Distribution Summary,
which enables managers and HR administrators to compare preliminary ratings with
desired and actual rating distributions. Employee cannot see these preliminary
ratings.
11. The Performance Notes pages enable managers and employees to record notes about an employee's performance and accomplishments that can be referenced later
when managers and employees are updating or completing their respective
performance documents. Performance notes cannot be seen by anyone other than the author of the notes.
12. Managers can use the Results Writer pages to select predefined statements that
describe an employee's proficiency in a particular area. Selected statements can be
modified as needed. In addition, managers can view a composite of result statements in to help determine the proficiency level that best fits the employee's performance.
13. Managers and employees can access the Development Tips pages through the
performance document to display tips that can help employees develop or use
proficiencies in various areas. Though designed for competencies and sub-competencies, development tips can apply to other capabilities as well.
14. The Language Checker feature can be used to alert the manager to inappropriate
language that appears in a manager's document and suggests alternative language.
15. Performance documents enable your organization to tailor performance forms to
meet your specific needs. Performance documents are typically made up of manager
and employee sub-documents.
ePerformance provides various pages to support the process of recording,
maintaining, and finalizing employee performance document data.
End of Procedure.
Understanding PeopleSoft ePerformance Business Processes The PeopleSoft performance management process consists of four business processes involving
three roles: HR Administrator, Manager, and Employee.
The four PeopleSoft performance management business processes are:
• Defining the performance process.

Training Guide
Enterprise ePerformance 9.0
Page 4
• Generating the performance document.
• Maintaining and tracking ongoing performance.
• Completing the performance process.
This topic discusses the tasks and roles associated with the PeopleSoft ePerformance business
process.
Procedure
Step Action
1. PeopleSoft ePerformance supports the entire planning and performance process—
not just the back-end review. This end-to-end performance process consists of planning for performance, collaboratively adjusting performance
criteria, tracking progress against plans, and evaluating performance against plans.
2. The PeopleSoft performance management business process includes:
• Defining the performance process. • Generating the performance document.
• Maintaining and tracking ongoing performance.
• Completing the performance process.
The marks on this chart indicate whether or not each role is involved with the
corresponding steps in the process.
3. HR Administrators plan the high-level initiatives, goals, responsibilities, and
competencies for the performance process and design templates used to create the performance documents.
4. Performance documents are created from the template definition, and performance
criteria may be added or updated.
5. The options to generate performance documents include:
• Create the performance document for the manager only or both the manager and the employee in batch mode by the ePerformance Administrator role.
• Create the performance document in online mode by the Manager role.
• Personalize the employee document to include goals and objectives specific to an employee before creating the employee performance document.
6. Managers maintain and track employee performance in the manager document.
Managers use manager documents to set performance expectations and assess
employee performance. They can use the Results Writer and Language Checker tools when commenting on an employee's performance.
Employees maintain, track, and evaluate their own performance in the employee
document.

Training Guide Enterprise ePerformance 9.0
Page 5
Step Action
7. Completing the performance process includes the following tasks: • The employee completes the performance document (self-appraisal).
• The manager completes the performance document.
• Approvals are obtained (if applicable). Depending on your rules, documents can go
through an approval process before they are completed. Five different approval process flows are available when completing documents. Completing a document
can be compared to finalizing a performance review or plan.
• The manager schedules the employee review, comments, and signoff (if applicable). Depending on your rules, managers may review the manager's
document with the employee either before or after any approvals are obtained.
• The performance document is submitted for approvals and signoff.
8. Manager Document status of Approved depends on process flow selected in the template.
9. HR administrators or managers can transfer documents to another manager, cancel
documents, extend due dates, and perform other administrative functions. HR
administrators can also view the distribution of performance results, the status of
documents, as well as late and missing documents. Both HR administrators and managers review past documents. If PeopleSoft Portal Pack is installed, managers
can view a pagelet to alert them to upcoming performance process milestones and
deadlines.
10. PeopleSoft performance management consists of four business processes: • Defining the performance process.
• Generating the performance document.
• Maintaining and tracking ongoing performance. • Completing the performance process.
HR Administrator, Manager, and Employee roles interact with each step in the
process in different ways.
End of Procedure.
Understanding PeopleSoft ePerformance Integration This topic will discuss how PeopleSoft ePerformance integrates with three other PeopleSoft Human Resources applications: Plan Salaries, Manage Competencies, and eDevelopment.
Procedure

Training Guide
Enterprise ePerformance 9.0
Page 6
Step Action
1. PeopleSoft ePerformance integrates with the three PeopleSoft Human Resources
applications shown here.
2. PeopleSoft ePerformance integrates with Plan Salaries by sending the overall
performance rating on official manager documents to Plan Salaries. This integration enables the customer to define merit increases for the results on performance
documents with a calculation method of Summation.
3. People ePerformance integrates with Manage Competencies via two way
integration. Competencies from the Manage Competencies pages can be used in PeopleSoft ePerformance templates and documents as performance criteria.
Competencies are the skills, abilities, knowledge, and behaviors that are pertinent to the employees in your organization, such as experience with office equipment,
knowledge of specialized manufacturing processes, expertise with computer
programming languages, or a background in financial planning. An example of a
competency might be Leadership.
4. Once managers complete performance documents that contain competencies, the
ratings from those competencies are sent to
Manage Competencies and are stored as competency evaluations.
5. ePerformance integrates with eDevelopment via the Manage Competencies
application.
Training Guide Enterprise ePerformance 9.0
Page 7
Step Action
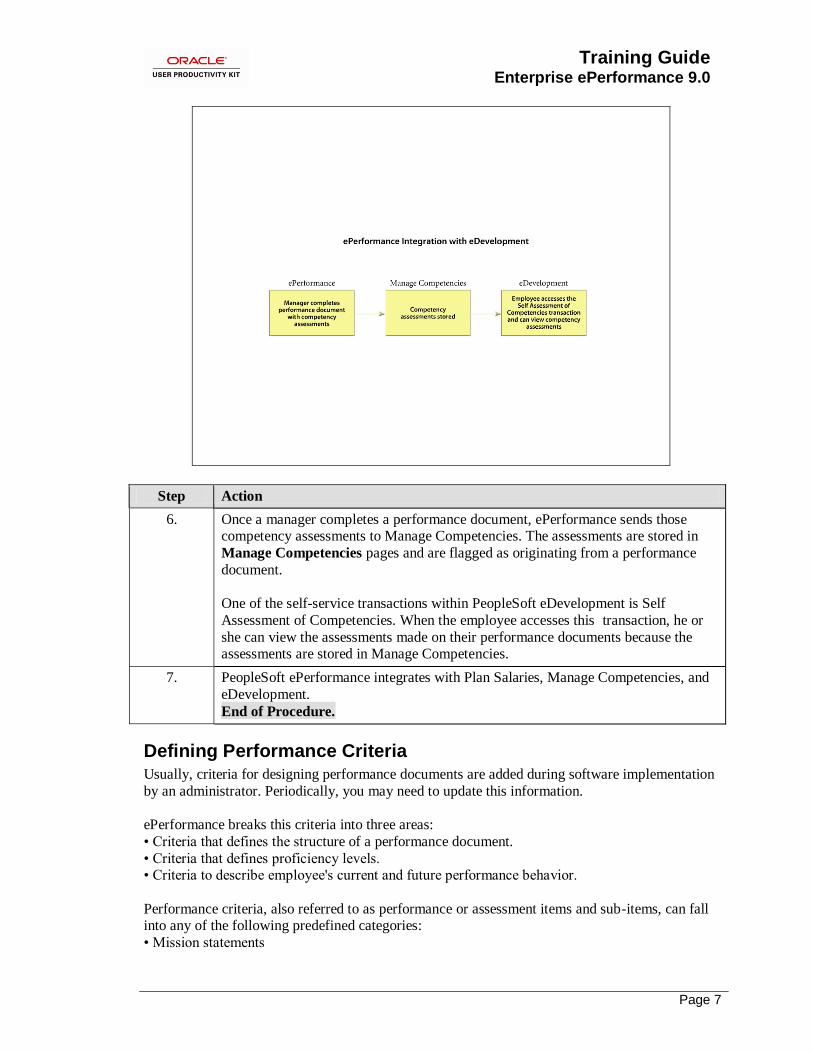
6. Once a manager completes a performance document, ePerformance sends those competency assessments to Manage Competencies. The assessments are stored in
Manage Competencies pages and are flagged as originating from a performance
document.
One of the self-service transactions within PeopleSoft eDevelopment is Self
Assessment of Competencies. When the employee accesses this transaction, he or
she can view the assessments made on their performance documents because the assessments are stored in Manage Competencies.
7. PeopleSoft ePerformance integrates with Plan Salaries, Manage Competencies, and
eDevelopment.
End of Procedure.
Defining Performance Criteria Usually, criteria for designing performance documents are added during software implementation
by an administrator. Periodically, you may need to update this information.
ePerformance breaks this criteria into three areas:
• Criteria that defines the structure of a performance document.
• Criteria that defines proficiency levels. • Criteria to describe employee's current and future performance behavior.
Performance criteria, also referred to as performance or assessment items and sub-items, can fall into any of the following predefined categories:
• Mission statements
Training Guide
Enterprise ePerformance 9.0
Page 8
• Initiatives
• Goals/objectives
• Responsibilities
Competencies and Sub-Competencies are also considered predefined performance criteria.
Competencies are the skills, abilities, knowledge, and behaviors that are pertinent to the employees in your organization, such as experience with office equipment, knowledge of
specialized manufacturing processes, expertise with computer programming languages, or a
background in financial planning. An example of a competency might be Leadership.
A sub-competency is a further breakdown of a competency into specific behaviors. For example:
the competency Leadership might have a sub-competency of Takes Initiative.
Development Tips and Result Writer are two tools that can help you define competencies and
sub-competencies.
Upon completion of this lesson, you will be able to:
• Define development tips.
• Link development tips to competencies.
• Link development tips to sub-competencies. • Define result writer text for competencies.
• Define result writer text for sub-competencies.
Defining Development Tips Development tips suggest ways for employees to improve, develop, or use a competency or sub-
competency based on their current rating level. If you're using PeopleSoft ePerformance this feature has been implemented, the system displays the appropriate set of tips when you click the
Development Tips link on the review form. If you click the link before a rating is entered, the
system displays all tips defined for that competency or sub-competency, provided they have been linked.
Both managers and employees can use the development tip suggestions when completing a
performance document. The development tip content may be purchased from a third-party supplier or self-authored by the company.
Before using development tips, the following must be set up: • Rating Models
• Competency Types
• Competency Criteria
• Competency Elements • Proficiency Description
The Section Definition on the Template defines if development tips are used. The page is an online aid only, and the tips are not included in the performance document.
In this example, you will create a development tip.
Procedure
Training Guide Enterprise ePerformance 9.0
Page 9
Step Action
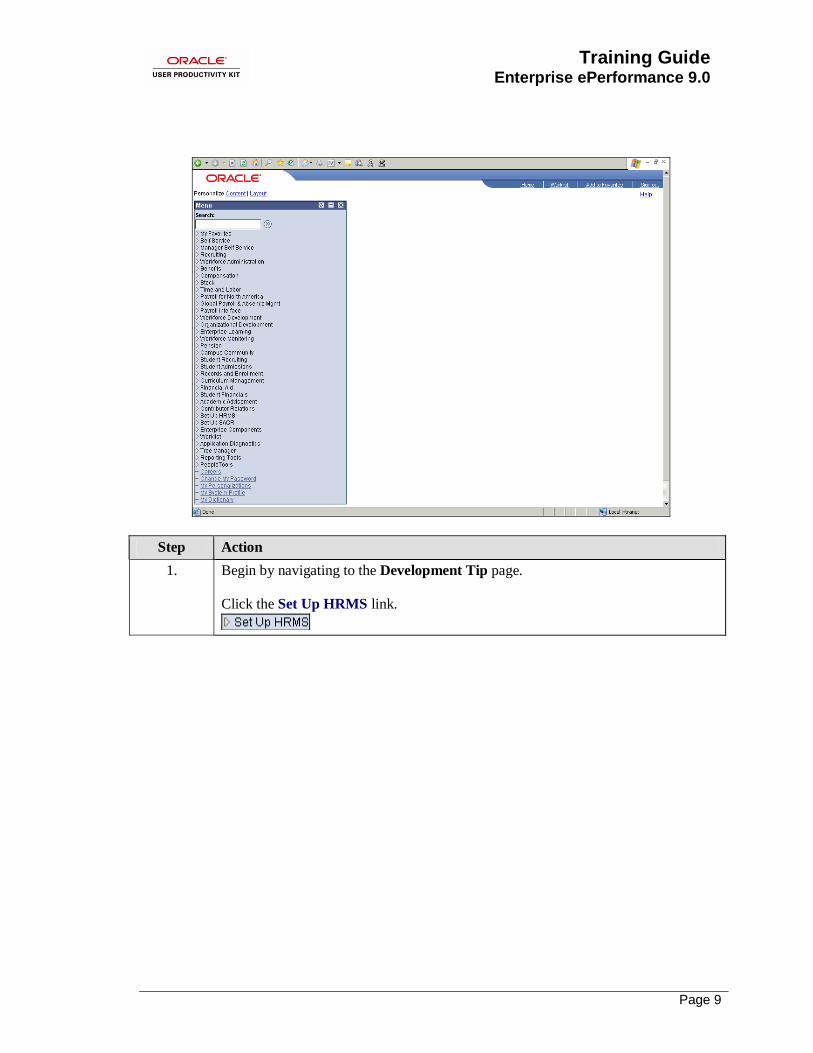
1. Begin by navigating to the Development Tip page.
Click the Set Up HRMS link.
Training Guide
Enterprise ePerformance 9.0
Page 10
Step Action
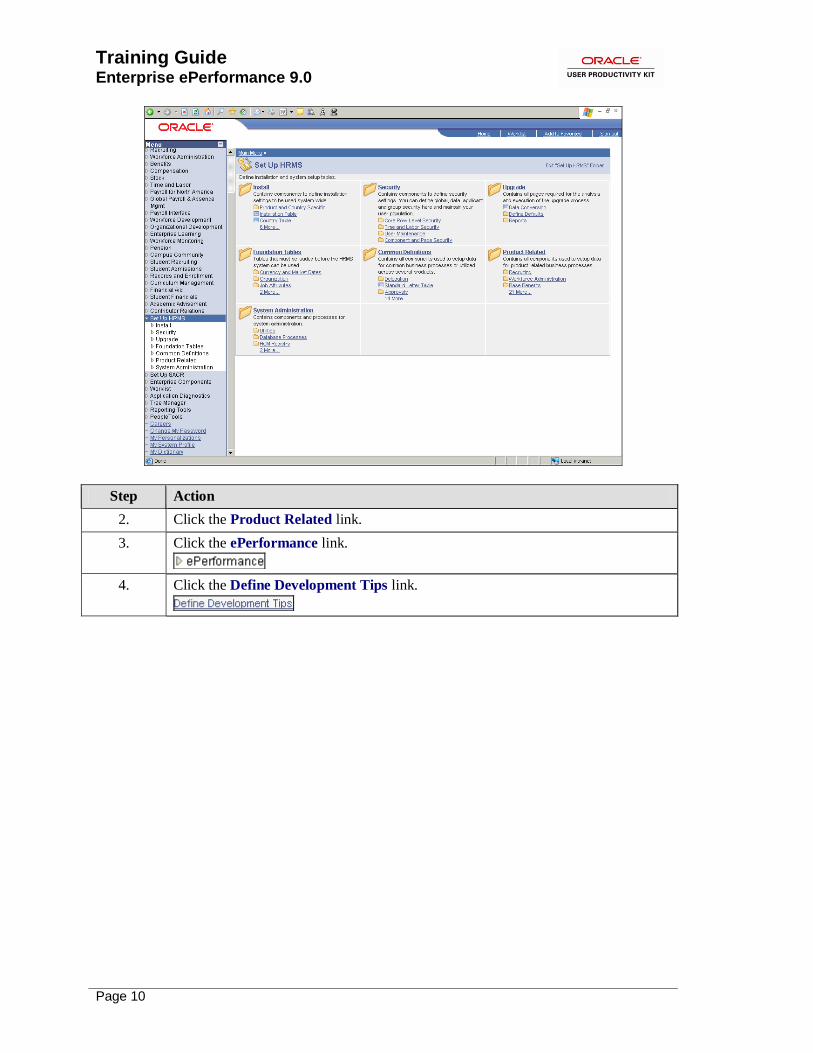
2. Click the Product Related link.
3. Click the ePerformance link.
4. Click the Define Development Tips link.

Training Guide Enterprise ePerformance 9.0
Page 11
Step Action
5. Click the Add a New Value tab.
6. Enter the desired information into the Development Tip ID field. Enter "CHANGE".
7. Click the Add button.
8. Use the Development Tip page to create development tips. You can also display and modify development tips imported from third-party suppliers.

Training Guide
Enterprise ePerformance 9.0
Page 12
Step Action
9. Use the Title field to enter the title of the development tip. The title automatically
appears when this item is linked to a competency or sub-competency.
Enter the desired information into the Title field. Enter "Adapts to Change -
Improve".
10. Use the Content Supplier field to select the source of the content for the
development tip. If your organization created the content, select Customer Defined. If a third party created it, select the appropriate third party from the drop-down list.
For this example, accept the default.
11. Enter the development tip content in the Description field.
Click in the Description field.
12. To save time in this exercise, the text has been entered for you.
13. To add another development tip, click the Add button.
14. Click the Save button.
15. You have successfully defined a development tip.
End of Procedure.

Training Guide Enterprise ePerformance 9.0
Page 13
Linking Development Tips to Competencies Development tips suggest ways for employees to improve, develop, or use a competency or sub-
competency based on their current rating level. If you're using PeopleSoft ePerformance and this
feature has been implemented, the system displays the appropriate set of tips when you click the Development Tips link on the review form. If you click the link before a rating is entered, the
system displays all tips defined for that competency or sub-competency, provided they have been
linked.
You can link one or more development tips to a competency.
In this example, you will link development tips to a competency.
Procedure
Step Action
1. Begin by navigating to the Competency page.
Click the Set Up HRMS link.

Training Guide
Enterprise ePerformance 9.0
Page 14
Step Action
2. Click the Product Related link.
3. Click the ePerformance link.
4. Click the Advisor Tools link.
5. Click the Link Development Tips link.

Training Guide Enterprise ePerformance 9.0
Page 15
Step Action
6. Enter the desired information into the begins with field. Enter "0154".
7. Click the Search button.
8. Use the Competency page to link one or more development tips to a competency.
Training Guide
Enterprise ePerformance 9.0
Page 16
Step Action
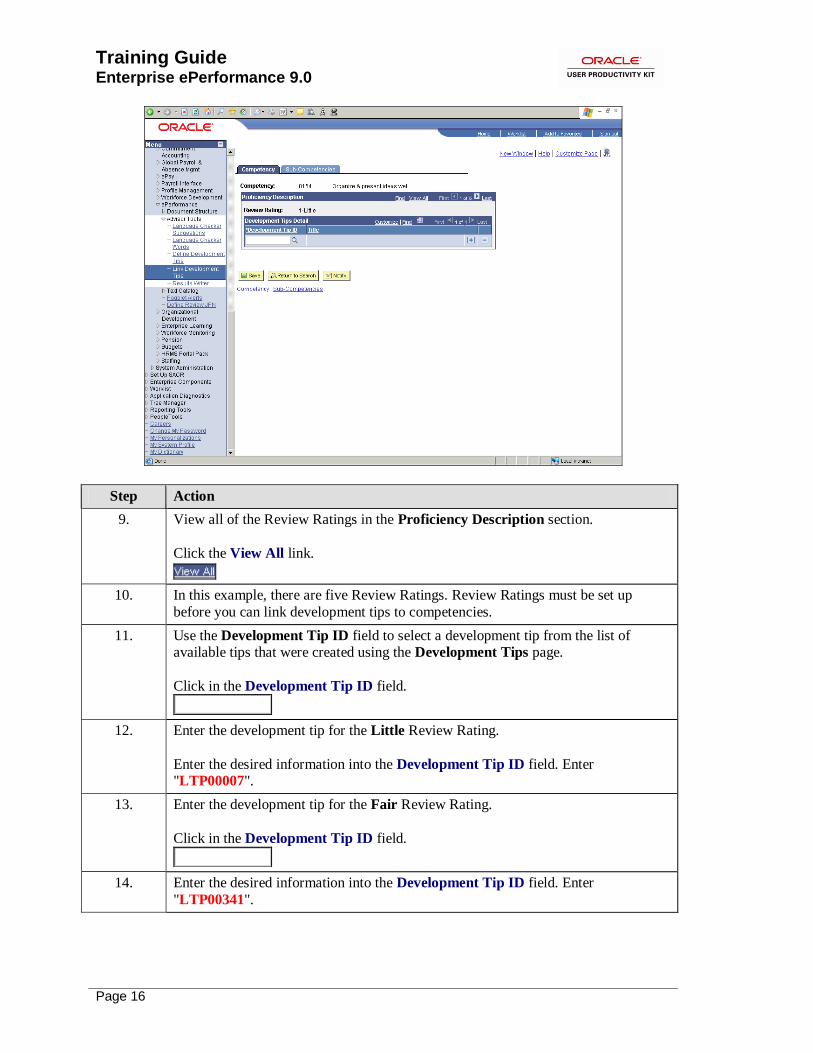
9. View all of the Review Ratings in the Proficiency Description section.
Click the View All link.
10. In this example, there are five Review Ratings. Review Ratings must be set up
before you can link development tips to competencies.
11. Use the Development Tip ID field to select a development tip from the list of available tips that were created using the Development Tips page.
Click in the Development Tip ID field.
12. Enter the development tip for the Little Review Rating.
Enter the desired information into the Development Tip ID field. Enter "LTP00007".
13. Enter the development tip for the Fair Review Rating.
Click in the Development Tip ID field.
14. Enter the desired information into the Development Tip ID field. Enter
"LTP00341".

Training Guide Enterprise ePerformance 9.0
Page 17
Step Action
15. Enter the development tip for the Good Review Rating.
Click in the Development Tip ID field.
16. Enter the desired information into the Development Tip ID field. Enter "LTP00239".
17. Enter the development tip for the Very Good Review Rating.
Click in the Development Tip ID field.
18. Enter the desired information into the Development Tip ID field. Enter
"LTP00342".
19. Click the vertical scrollbar.
20. Enter the development tip for the Expert Review Rating.
Click in the Development Tip ID field.
21. Enter the desired information into the Development Tip ID field. Enter
"LTP00492".
22. Click the Save button.
23. Notice that all the development tip titles appear after you click the Save button.
24. You have successfully added development tips to a competency.
End of Procedure.
Linking Development Tips to Sub-Competencies Development tips suggest ways for employees to improve, develop, or use a competency or sub-
competency based on their current rating level. If you're using PeopleSoft ePerformance and this
feature has been implemented, the system displays the appropriate set of tips when you click the Development Tips link on the review form. If you click the link before a rating is entered, the
system displays all tips defined for that competency or sub-competency, provided they have been
linked.
You can link one or more development tips to a sub-competency.
In this exercise you will link development tips to a sub-competency.
Procedure
Training Guide
Enterprise ePerformance 9.0
Page 18
Step Action
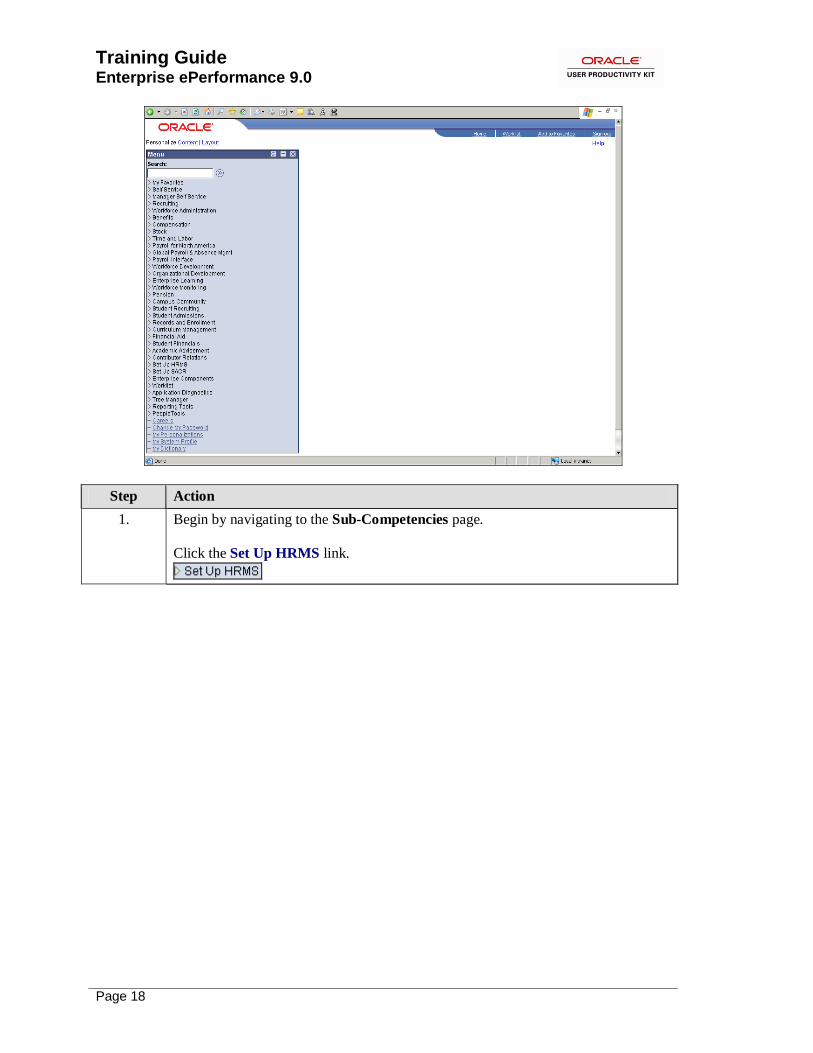
1. Begin by navigating to the Sub-Competencies page.
Click the Set Up HRMS link.

Training Guide Enterprise ePerformance 9.0
Page 19
Step Action
2. Click the Product Related link.
3. Click the ePerformance link.
4. Click the Advisor Tools link.
5. Click the Link Development Tips link.

Training Guide
Enterprise ePerformance 9.0
Page 20
Step Action
6. Enter the desired information into the begins with field. Enter "0154".
7. Click the Search button.
8. Use the Competency page to link one or more development tips to a competency.

Training Guide Enterprise ePerformance 9.0
Page 21
Step Action
9. Click the Sub-Competencies tab.
10. Use the Sub-Competencies page to link one or more development tips to a sub-competency.

Training Guide
Enterprise ePerformance 9.0
Page 22
Step Action
11. You can view all the sub-competencies, or one at a time. In this example, you want
to view all of the competencies before adding development tips.
Click the View All link.
12. All the sub-competencies appear displaying one Review Rating. To display all the Review Ratings for a sub-competency, you click the View All link in the
Proficiency Description section for the desired sub-competency.
13. Adjust the view so that you are only viewing sub-competency 1.
Click the View 1 link.
14. Begin adding the development tips to sub-competency 1 with a Review Rating of 1-
Little.
Click in the Development Tip ID field.
15. Use the Development Tip ID field to enter a development tip from the list of available tips that were created using the Development Tips page.
Enter the desired information into the Development Tip ID field. Enter "LTP00235".

Training Guide Enterprise ePerformance 9.0
Page 23
Step Action
16. Click the Add Row button.
17. Enter the desired information into the Development Tip ID field. Enter "LTP00240".
18. Click the Next Row button.
19. Continue by adding the development tips to sub-competency 1 with a Review Rating of 2-Fair.
Click in the Development Tip ID field.
20. Enter the desired information into the Development Tip ID field. Enter
"LTP00010".
21. Click the Add Row button.
22. Enter the desired information into the Development Tip ID field. Enter
"LTP00012".
23. When you have finished adding the development tips, view the tips for the rest of the Review Ratings.
Click the View All link.
24. Click the vertical scrollbar.
25. After you view development tips for all the Review Ratings, save the page.
Click the Save button.
26. You have successfully linked development tips to a sub-competency.
End of Procedure.
Defining Result Writer Text for Competencies The Results Writer is an ePerformance tool that enables managers to select predefined statements
that describe an employee's level of proficiency in a particular competency, sub-competency, or other area. Managers can use this tool when completing a performance document by clicking a
Results Writer link that appears next to an assessment item or sub-item on a review form. Once
the manager makes a selection, the system modifies the text based on the current context (that is,
the employee’s name and gender). The manager can adjust the text if required and include it in the Results field in the performance document.
You can import Result Writer content from third-party suppliers, or author it yourself. It can be associated with any section; however, it directly pertains to competencies or sub-competencies
stored in the system.
Training Guide
Enterprise ePerformance 9.0
Page 24
Before using the Result Writer, the following must be set up:
• Rating Models • Competency Types
• Competency Criteria
• Competency Elements • Proficiency Description
The Section Definition on the Template determines whether the Results Writer tool is active and
whether the results text comes from the competency definition or the sub-competency definition.
In this example, you will enter statements in Result Writer for the Organize & presents ideas
well competency.
Procedure
Step Action
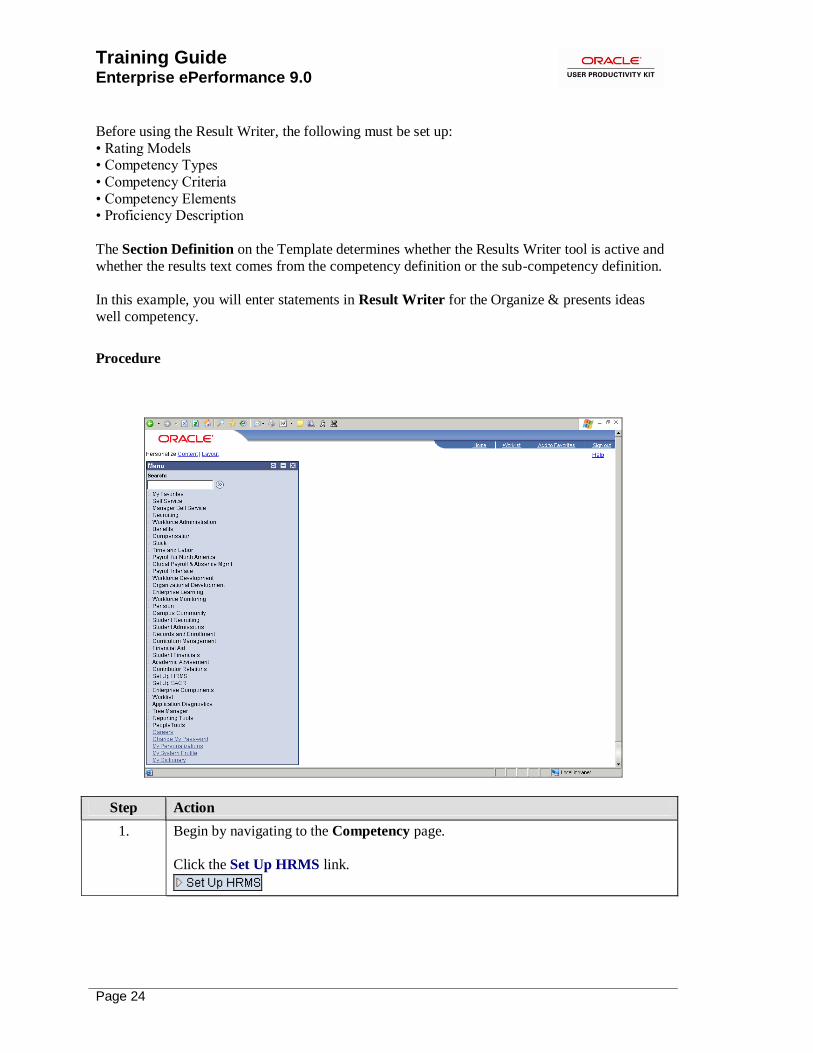
1. Begin by navigating to the Competency page.
Click the Set Up HRMS link.

Training Guide Enterprise ePerformance 9.0
Page 25
Step Action
2. Click the Product Related link.
3. Click the ePerformance link.
4. Click the Advisor Tools link.
5. Click the Results Writer link.
Training Guide
Enterprise ePerformance 9.0
Page 26
Step Action
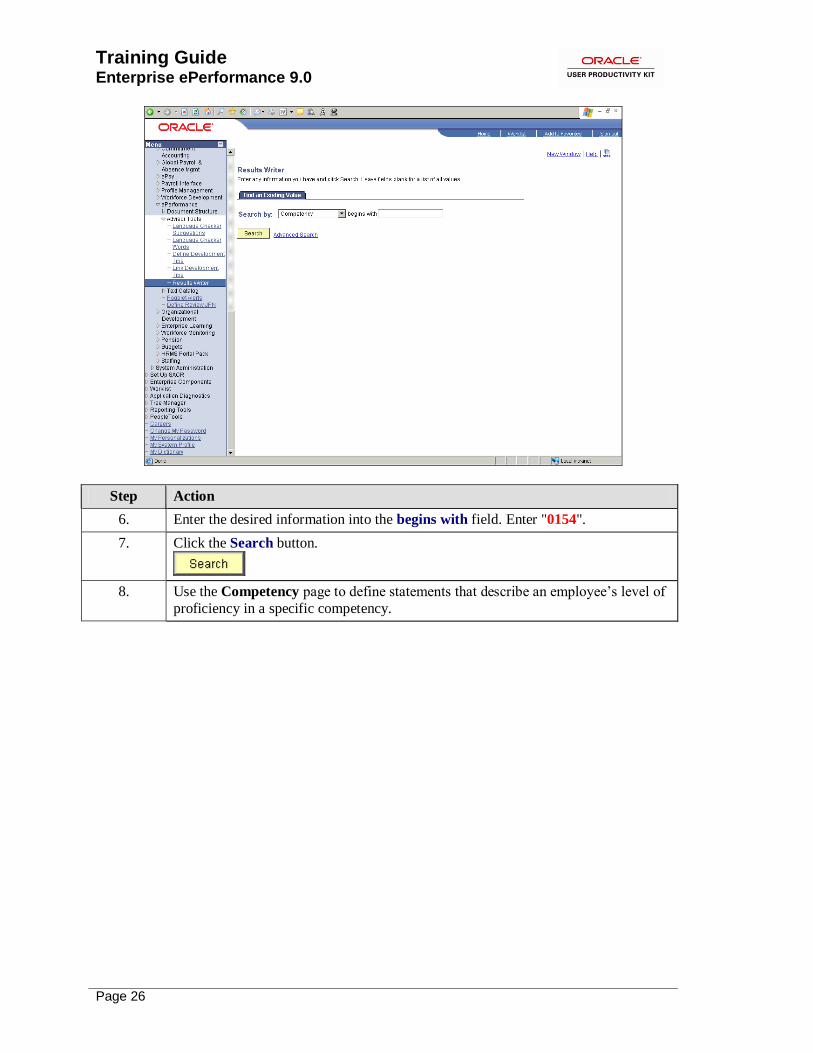
6. Enter the desired information into the begins with field. Enter "0154".
7. Click the Search button.
8. Use the Competency page to define statements that describe an employee’s level of
proficiency in a specific competency.

Training Guide Enterprise ePerformance 9.0
Page 27
Step Action
9. Use the View All link to view all the review ratings for the competency.
Click the View All link.
10. In this example, there are five review ratings associated with the Organize & presents ideas well competency.
For each review rating that's associated with the competency, you can define the statements that managers can use when they invoke the Results Writer tool to
describe an employee's level of proficiency. Create one or more statements for each
rating.
11. The Seq Nbr (sequence number) determines the order in which managers see the statements when they use the Results Writer tool for this competency.
Click in the Seq Nbr field.
12. Enter the desired information into the Seq Nbr field. Enter "1".
13. Use the Results Writer field to enter one or more sentences to describe the selected
proficiency level.
Click in the Results Writer field.

Training Guide
Enterprise ePerformance 9.0
Page 28
Step Action
14. You can insert the following characters to personalize the text based on the
employee's name and gender:
%1 = Employee’s First Name %2 = He/She
%3 = His/Her
%4 = Him/Her
%5 = Himself/Herself
Enter the desired information into the Results Writer field. Enter "%1 is unable to
plan, organize, or present projects effectively.".
15. Click the Add Row button.
16. Enter the desired information into the Seq Nbr field. Enter "2".
17. To save time in this exercise, the Results Writer text will be entered for you.
18. Click in the Seq Nbr field.
19. Enter the desired information into the Seq Nbr field. Enter "1".
20. To save time in this exercise, the Results Writer text will be entered for you.
21. Click in the Seq Nbr field.
22. Enter the desired information into the Seq Nbr field. Enter "1".
23. To save time in this exercise, the Results Writer text will be entered for you.
24. Click the vertical scrollbar.
25. Click in the Seq Nbr field.
26. Enter the desired information into the Seq Nbr field. Enter "1".
27. To save time in this exercise, the Results Writer text will be entered for you.
28. Click in the Seq Nbr field.
29. Enter the desired information into the Seq Nbr field. Enter "1".
30. To save time in this exercise, the Results Writer text will be entered for you.
31. Click the Save button.
32. You have successfully defined Result Writer text for a competency.
End of Procedure.
Defining Result Writer Text for Sub-Competencies
The Results Writer is an ePerformance tool that enables managers to select predefined statements that describe an employee's level of proficiency in a particular competency, sub-competency, or

Training Guide Enterprise ePerformance 9.0
Page 29
other area. Managers can use this tool when completing a performance document by clicking a Results Writer link that appears next to an assessment item or sub-item on a review form. Once
the manager makes a selection, the system modifies the text based on the current context (that is,
the employee’s name and gender). The manager can adjust the text if required and include it in the Results field in the performance document.
You can import Result Writer content from third-party suppliers, or author it yourself. It can be
associated with any section; however, it directly pertains to competencies or sub-competencies stored in the system.
Before using the Result Writer, the following must be set up: • Rating Models
• Competency Types
• Competency Criteria
• Competency Elements • Proficiency Description
The Section Definition on the Template determines whether the Results Writer tool is active and whether the results text comes from the competency definition or the sub-competency definition.
In this example, you will enter statements in Result Writer for the for the Organize & presents ideas well sub-competency.
Procedure

Training Guide
Enterprise ePerformance 9.0
Page 30
Step Action
1. Begin by navigating to the Sub-Competencies page.
Click the Set Up HRMS link.
Step Action
2. Click the Product Related link.
3. Click the ePerformance link.
4. Click the Advisor Tools link.
5. Click the Results Writer link.

Training Guide Enterprise ePerformance 9.0
Page 31
Step Action
6. Enter the desired information into the begins with field. Enter "0154".
7. Click the Search button.
8. Use the Competency page to define statements that describe an employee’s level of
proficiency in a specific competency.

Training Guide
Enterprise ePerformance 9.0
Page 32
Step Action
9. Click the Sub-Competencies tab.
10. Use the Sub-Competencies page to define statements that describe an employee’s
level of proficiency in a specific sub-competency.

Training Guide Enterprise ePerformance 9.0
Page 33
Step Action
11. The Seq Nbr (sequence number) determines the order in which managers see the statements when they use the Results Writer tool for this competency.
Enter the desired information into the Seq Nbr field. Enter "1".
12. Use the Results Writer field to enter one or more sentences to describe the selected proficiency level.
Click in the Results Writer field.
13. You can insert the following characters to personalize the text based on the employee's name and gender:
%1 = Employee’s First Name
%2 = He/She
%3 = His/Her %4 = Him/Her
%5 = Himself/Herself
Enter the desired information into the Results Writer field. Enter "%1 is unable to
communicate effectively in written form.".
14. In this example, there are five review ratings associated with the sub-competency.
For each review rating, you can define the statements that managers can use when
they invoke the Results Writer tool to describe an employee's level of proficiency.
You can create one or more statements for each rating.
In this example, you will create one statement for each review rating.
Training Guide
Enterprise ePerformance 9.0
Page 34
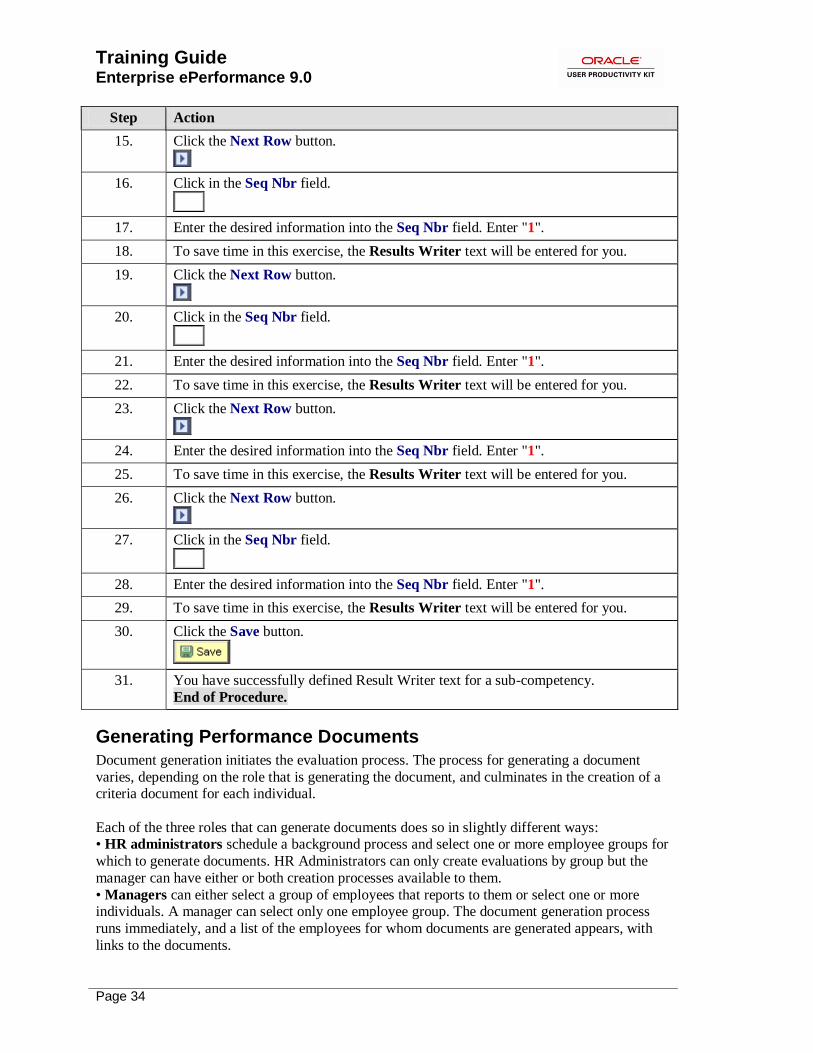
Step Action
15. Click the Next Row button.
16. Click in the Seq Nbr field.
17. Enter the desired information into the Seq Nbr field. Enter "1".
18. To save time in this exercise, the Results Writer text will be entered for you.
19. Click the Next Row button.
20. Click in the Seq Nbr field.
21. Enter the desired information into the Seq Nbr field. Enter "1".
22. To save time in this exercise, the Results Writer text will be entered for you.
23. Click the Next Row button.
24. Enter the desired information into the Seq Nbr field. Enter "1".
25. To save time in this exercise, the Results Writer text will be entered for you.
26. Click the Next Row button.
27. Click in the Seq Nbr field.
28. Enter the desired information into the Seq Nbr field. Enter "1".
29. To save time in this exercise, the Results Writer text will be entered for you.
30. Click the Save button.
31. You have successfully defined Result Writer text for a sub-competency.
End of Procedure.
Generating Performance Documents
Document generation initiates the evaluation process. The process for generating a document
varies, depending on the role that is generating the document, and culminates in the creation of a criteria document for each individual.
Each of the three roles that can generate documents does so in slightly different ways: • HR administrators schedule a background process and select one or more employee groups for
which to generate documents. HR Administrators can only create evaluations by group but the
manager can have either or both creation processes available to them.
• Managers can either select a group of employees that reports to them or select one or more individuals. A manager can select only one employee group. The document generation process
runs immediately, and a list of the employees for whom documents are generated appears, with
links to the documents.

Training Guide Enterprise ePerformance 9.0
Page 35
• Employees do not select the groups or individuals for whom to generate documents; employees can only generate documents for themselves.
After the individuals are identified, the process initiator must select the parameters for the document. These include the document type, document template, and evaluation period that is
covered. The language code might be required, depending on the installation settings. For
employee-initiated documents, if the employee has more than one job, the job title is required.
The employee might also need to select a manager/mentor for the evaluation, if specified for the document type.
Upon completion of this lesson, you will be able to: • Generate documents by a background process.
• Generate documents for direct reports.
Generating Documents by a Background Process HR administrators can generate mass employee documents in batch mode based on a Group ID.
To create mass documents, you must accesses the Create Documents run control page. On this
page you:
• Identify the employees you want to process using Group IDs. • Select the document type. For example: annual review, quarterly review, and so forth.
After you have created performance documents, you can review the results on the View
Document Creation Results pages. These pages display a list of the Manager Documents that
could and could not be successfully created during the HR mass creation process.
Consider this scenario: You are an HR administrator and need to create mass manager's performance documents for a group of employees. Afterwards, you will view the document
creation results.
Procedure
Training Guide
Enterprise ePerformance 9.0
Page 36
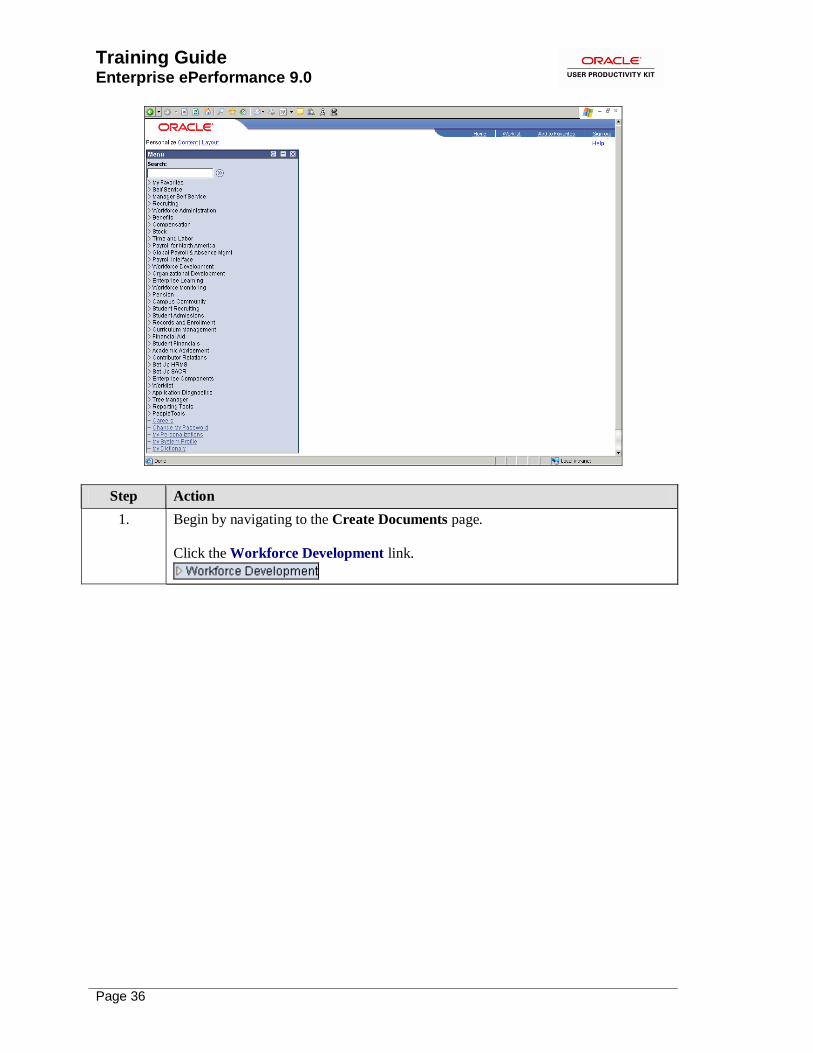
Step Action
1. Begin by navigating to the Create Documents page.
Click the Workforce Development link.

Training Guide Enterprise ePerformance 9.0
Page 37
Step Action
2. Click the Performance Management link.
3. Click the Create Documents link.

Training Guide
Enterprise ePerformance 9.0
Page 38
Step Action
4. You can run this process by searching for an existing Run Control ID or you can add
a new value.
Creating a Run Control ID that is relevant to the process may help you remember it
for future use.
Click the Add a New Value tab.
5. A Run Control ID is an identifier that, when paired with your User ID, uniquely
identifies the process you are running. The Run Control ID defines parameters that
are used when a process is run. This ensures that when a process runs in the background, the system does not prompt you for additional values.
Enter the desired information into the Run Control ID field. Enter "EPERF".
6. Click the Add button.
7. Use the Create Documents page to enter the request parameters. These parameters
will be used to define the processing rules and data to be included when the process is run.

Training Guide Enterprise ePerformance 9.0
Page 39
Step Action
8. The dates you enter in the Period Begin Date and Period End Date fields define the period of time that these documents will cover.
Click in the Period Begin Date field.
9. Enter the desired information into the Period Begin Date field. Enter "01/01/2002".
10. Click in the Period End Date field.
11. Enter the desired information into the Period End Date field. Enter "12/31/2002".
12. Use the Document Type field to select a document type such as Quarterly, Semi-
Annual, or Yearly.
Click the Document Type list.
13. Click the Annual Review list item.
14. Use the Template ID field to select the template ID to generate the documents. This
field is available if the template source on the Document Types page is User
Defined for this document type.
Click the Template ID list.
Training Guide
Enterprise ePerformance 9.0
Page 40
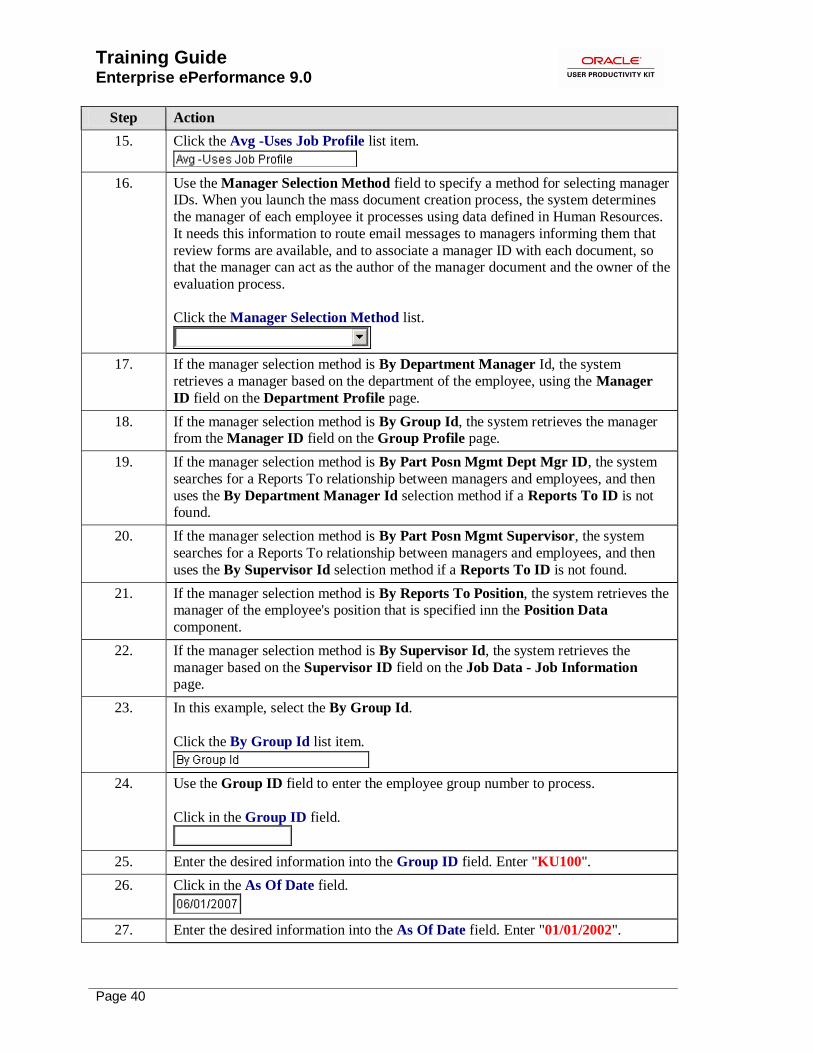
Step Action
15. Click the Avg -Uses Job Profile list item.
16. Use the Manager Selection Method field to specify a method for selecting manager IDs. When you launch the mass document creation process, the system determines
the manager of each employee it processes using data defined in Human Resources.
It needs this information to route email messages to managers informing them that
review forms are available, and to associate a manager ID with each document, so that the manager can act as the author of the manager document and the owner of the
evaluation process.
Click the Manager Selection Method list.
17. If the manager selection method is By Department Manager Id, the system
retrieves a manager based on the department of the employee, using the Manager
ID field on the Department Profile page.
18. If the manager selection method is By Group Id, the system retrieves the manager from the Manager ID field on the Group Profile page.
19. If the manager selection method is By Part Posn Mgmt Dept Mgr ID, the system
searches for a Reports To relationship between managers and employees, and then
uses the By Department Manager Id selection method if a Reports To ID is not found.
20. If the manager selection method is By Part Posn Mgmt Supervisor, the system
searches for a Reports To relationship between managers and employees, and then
uses the By Supervisor Id selection method if a Reports To ID is not found.
21. If the manager selection method is By Reports To Position, the system retrieves the manager of the employee's position that is specified inn the Position Data
component.
22. If the manager selection method is By Supervisor Id, the system retrieves the
manager based on the Supervisor ID field on the Job Data - Job Information
page.
23. In this example, select the By Group Id.
Click the By Group Id list item.
24. Use the Group ID field to enter the employee group number to process.
Click in the Group ID field.
25. Enter the desired information into the Group ID field. Enter "KU100".
26. Click in the As Of Date field.
27. Enter the desired information into the As Of Date field. Enter "01/01/2002".
Training Guide Enterprise ePerformance 9.0
Page 41
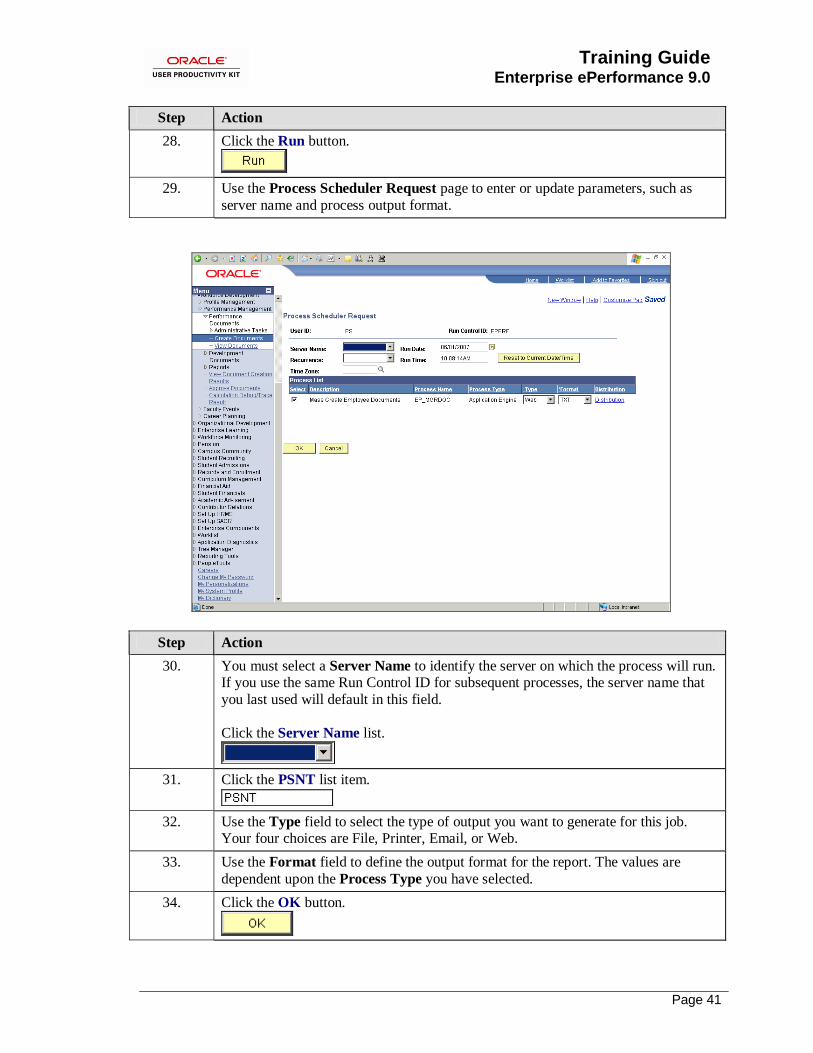
Step Action
28. Click the Run button.
29. Use the Process Scheduler Request page to enter or update parameters, such as
server name and process output format.
Step Action
30. You must select a Server Name to identify the server on which the process will run. If you use the same Run Control ID for subsequent processes, the server name that
you last used will default in this field.
Click the Server Name list.
31. Click the PSNT list item.
32. Use the Type field to select the type of output you want to generate for this job. Your four choices are File, Printer, Email, or Web.
33. Use the Format field to define the output format for the report. The values are
dependent upon the Process Type you have selected.
34. Click the OK button.
Training Guide
Enterprise ePerformance 9.0
Page 42
Step Action
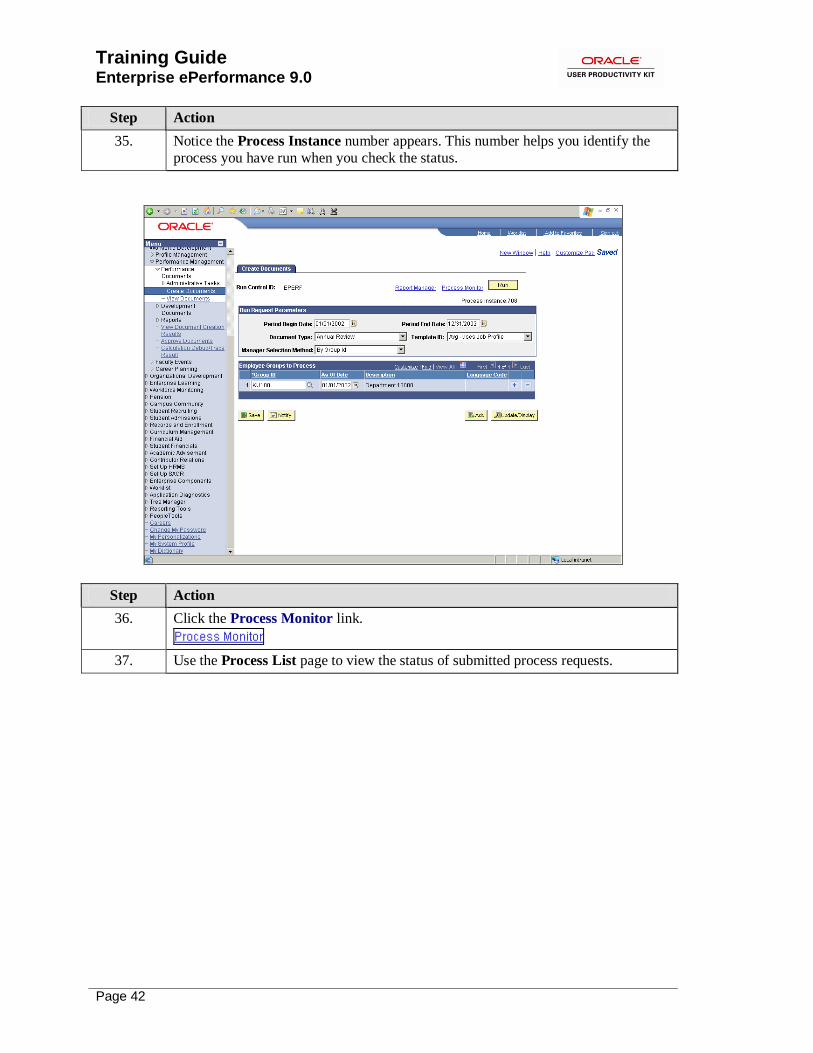
35. Notice the Process Instance number appears. This number helps you identify the
process you have run when you check the status.
Step Action
36. Click the Process Monitor link.
37. Use the Process List page to view the status of submitted process requests.
Training Guide Enterprise ePerformance 9.0
Page 43
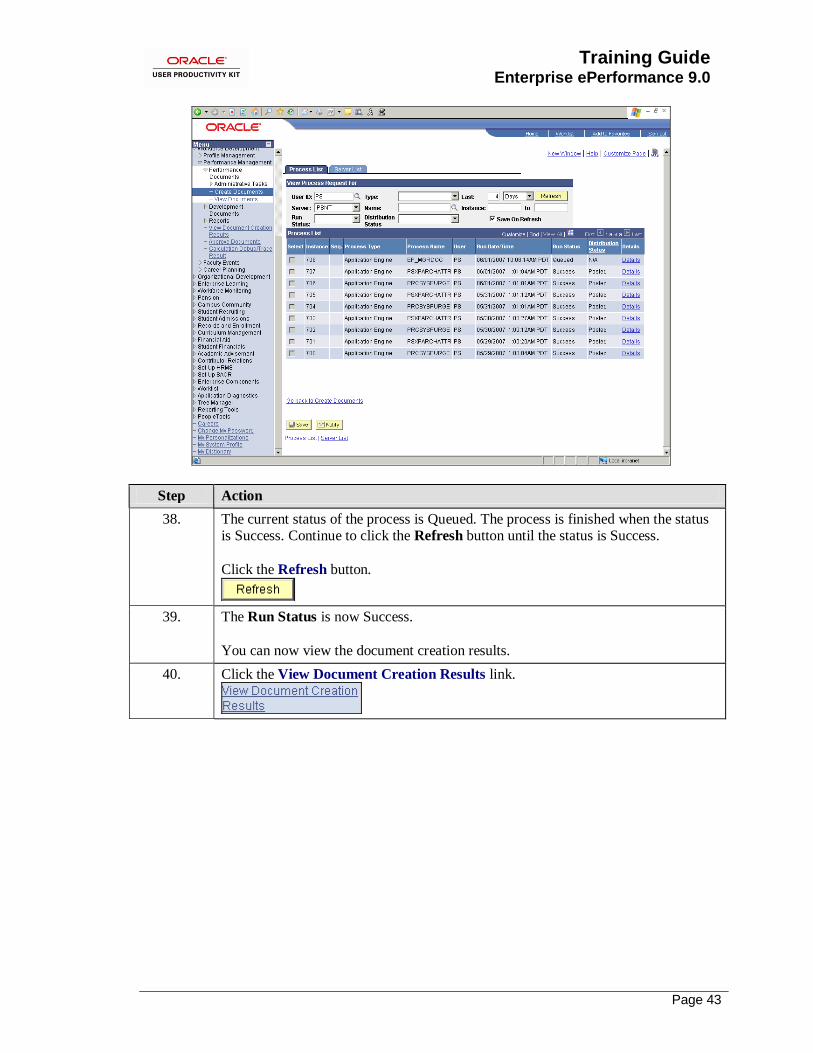
Step Action
38. The current status of the process is Queued. The process is finished when the status is Success. Continue to click the Refresh button until the status is Success.
Click the Refresh button.
39. The Run Status is now Success.
You can now view the document creation results.
40. Click the View Document Creation Results link.

Training Guide
Enterprise ePerformance 9.0
Page 44
Step Action
41. Enter the desired information into the Run Control ID field. Enter "EPERF".
42. Click the Search button.
43. Use this page to view a list of manager performance documents that were
successfully created using the mass creation process, as well as all documents that
not were not created.
44. A listing of all employees that are in the specified Group ID appears. In this example, all the employees in Group ID KU100 appear.
45. The Success? column displays a Yes if the manager document was created
successfully for the employee. Otherwise it displays an No.

Training Guide Enterprise ePerformance 9.0
Page 45
Step Action
46. Click the vertical scrollbar.
47. The Status column displays the document status of the manager document.
48. You have successfully created mass manager's performance documents for a group of employees, and viewed the document creation results.
End of Procedure.
Generating Documents for Direct Reports In the manager role, you can generate documents for direct reports by either: • Selecting a group and then selecting one or more employees within the group.
• Selecting one or more employees directly.
Regardless of which option you choose, you first need to select the As of date for determining
which employees report to you. You then select the employees for whom you want to generate
documents. Finally, you select the document template from which to generate the individual documents and enter the dates of the evaluation period that is covered.
You can generate either performance or development documents. The process is identical, except
for the page names and the navigation path by which you access the document generation pages.
Consider this scenario: You are a manager and want to create a performance document for an
employee for the Q1 2002 performance period.
Procedure

Training Guide
Enterprise ePerformance 9.0
Page 46
Step Action
1. Begin by navigating to the Create Performance Documents page.
Click the Manager Self Service link.

Training Guide Enterprise ePerformance 9.0
Page 47
Step Action
2. Click the Performance Management link.
3. Click the Create Documents link.
4. Use the Create Performance Documents page to initiate the document generation
process by entering the date for determining employees that report to you.

Training Guide
Enterprise ePerformance 9.0
Page 48
Step Action
5. This page is the first in a series of pages that guide you through the process of
generating documents for groups of employees.
Click the Continue button.

Training Guide Enterprise ePerformance 9.0
Page 49
Step Action
6. A listing of employees appears. You must select at least one employee.
Click the Cynthia Adams option.
7. Click the vertical scrollbar.
8. Use the Select All button to include all the direct reports in the list.
9. Click the Continue button.

Training Guide
Enterprise ePerformance 9.0
Page 50
Step Action
10. Use this page in the process to define the performance period begin and end dates,
and specify the review type and the review template ID on which to base the
document.
Enter the desired information into the Period field. Enter "01/01/2002".
11. Click in the Period field.
12. Enter the desired information into the Period field. Enter "03/31/2002".
13. Use the Document Type field to select the type of document to generate. You specify document types on the Document Types page.
Click the Document Type list.
14. Click the Annual Review list item.
15. Use the Template field to select the document template from which to generate the
documents. You create document templates in the Document Template component.
Click the Template list.
16. Click the Avg -Uses Job Profile list item.

Training Guide Enterprise ePerformance 9.0
Page 51
Step Action
17. Click the Create Documents to create the documents. After you create the documents, the list of employees appears with the document creation results for
each.
Click the Create Documents button.
18. The Status column shows that the document for Cynthia Adams was created
successfully.
Step Action
19. After you create documents, you can either return to the Create Documents page or
view a list of current documents.
Click the Current Documents link.
20. Use the Current Performance Documents page to vie a list of the current
performance documents for which you are the manager.

Training Guide
Enterprise ePerformance 9.0
Page 52
Step Action
21. Scroll down to review the one you just created.
Click the vertical scrollbar.
22. Click the Annual Review link.
23. Use the Document Details page to begin the performance documentation process.
24. You have successfully generated performance documents for a direct report.
End of Procedure.
Accessing Performance Documents
In ePerformance the most common way to access performance documents is by way of the
Document Selection page. This page displays a list of documents users can view, update, and
modify, or on which they can perform administrative actions such as changing due dates. The list of documents displayed on this page includes hyperlinks to those documents that are accessible to
the user. Because this page appears in different locations with only minor variations throughout
the application—users must pass through this page before they can access many other transaction pages.
Upon successful completion of this lesson, you will be able to:
• As a manager, access an employee's performance document. • As an Admin, view a performance document.

Training Guide Enterprise ePerformance 9.0
Page 53
Accessing Documents Use the Current Documents component to select documents and view document process, status,
and actions.
In this topic, you will view performance documents for one of your managers.
Procedure
Step Action
1. Begin by navigating to the Current Performance Documents page.
Click the Manager Self Service link.
Training Guide
Enterprise ePerformance 9.0
Page 54
Step Action
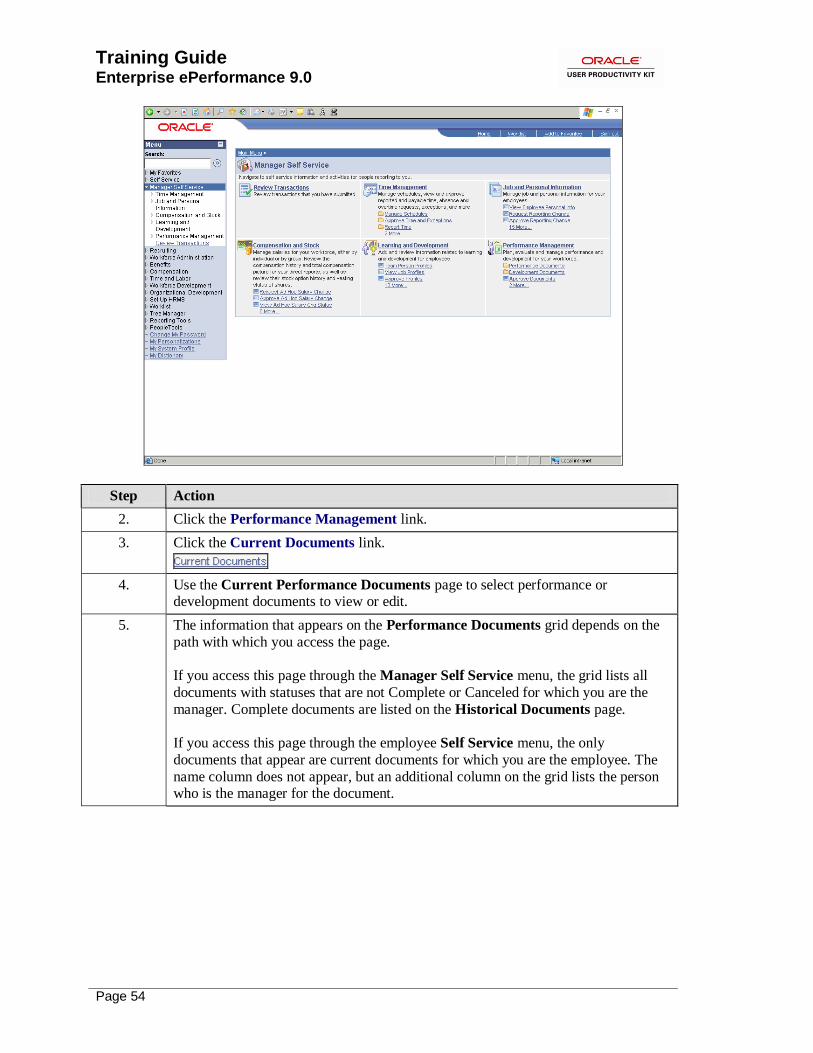
2. Click the Performance Management link.
3. Click the Current Documents link.
4. Use the Current Performance Documents page to select performance or development documents to view or edit.
5. The information that appears on the Performance Documents grid depends on the
path with which you access the page.
If you access this page through the Manager Self Service menu, the grid lists all
documents with statuses that are not Complete or Canceled for which you are the
manager. Complete documents are listed on the Historical Documents page.
If you access this page through the employee Self Service menu, the only
documents that appear are current documents for which you are the employee. The
name column does not appear, but an additional column on the grid lists the person who is the manager for the document.

Training Guide Enterprise ePerformance 9.0
Page 55
Step Action
6. Click a document on the Current Performance Documents page to view the document process, status, and actions.
Click the Project Review link.
7. Use the Document Details page to review the current status of the document
progress.
8. The information that appears in the Document Progress section of this page is
controlled by a combination of the document template, the role that accesses the page, and the status of each step.
The Establish Criteria step appears in the Document Progress grid only if the Establish Criteria check box is selected on the Document Template - General
page. This table shows the possible actions for the Establish Criteria step and the
conditions under which each step is enabled. You perform the document template
setup on the Establish Criteria region of the Template Definition - Process page.
9. The Nominate Participants step appears in the Document Progress grid only if the Nominate Participants check box is selected on the Document Template -
General page. This table shows the possible actions for the Nominate Participants
step and the conditions under which each step is enabled. You perform the document template setup on the Nominate Participants region of the Template Definition -
Process page.
Training Guide
Enterprise ePerformance 9.0
Page 56
Step Action
10. The Track Nominations step appears in the Document Progress grid only if the
Nominate Participants check box is selected on the Document Template -
General page.
11. The Review Participant Evaluations step appears in the Document Progress grid only if the Nominate Participants check box is selected on the Document
Template - General page. The only action available for this step is View. Only the
employee or manager role can view participant evaluations, depending on the settings in the Review Participant Evaluations page region on the Template
Definition - Process page. If the Accessed By check box is selected for the role, the
role can view a list of participants and their evaluation status. If the Viewed By
check box is also selected for the role, an active link to the document is available to view the document itself.
12. The Complete Self Evaluation or Review Employee Evaluation step appears in
the Document Progress grid if you select the Document check box for the
Employee role on the Document Template - General Information page. The step is labeled differently depending on the status of the step and the review process
selected.
13. The Complete Manager Evaluation step always appears in the Document
Progress grid because a manager evaluation is always required. The step is labeled differently depending on the status of the step and the review process selected.
The actions for this step are Start, Edit, and View. Depending on the review option
that is selected, the Mark Available, Review Held, Acknowledge, Submit, and Complete might also appear.
14. Additional actions for the manager evaluation are available if the document template
specifies a review process that requires review or approval. These are Mark
Available, Review Held, Acknowledge, Submit, and Complete.
15. For the purpose of publishing performance results, the definition of complete depends on the performance process that you select on the Template Definition
page when creating templates. Documents that require approval are considered
complete when the approval status is Approved and the document status is Complete. Reviews that do not require approval are considered complete when the
document status is Complete.

Training Guide Enterprise ePerformance 9.0
Page 57
Step Action
16. You can view the details of a document by clicking the View link.
Click the View link.
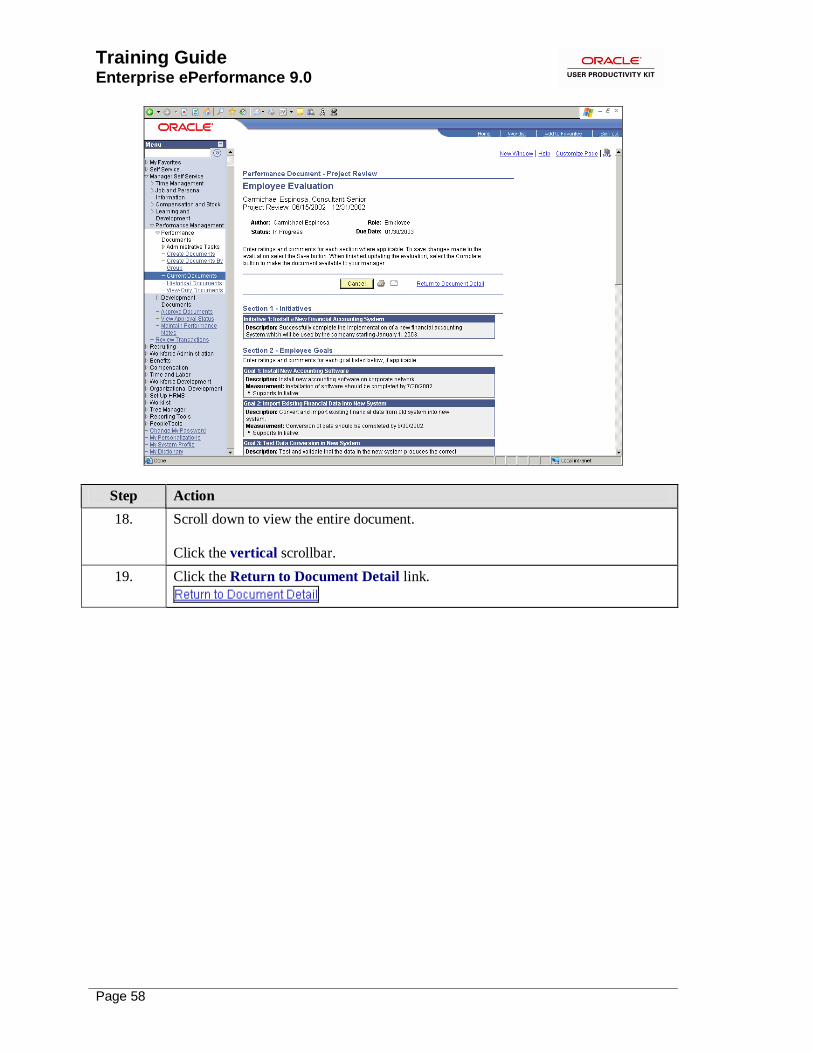
17. Use the Employee Evaluation page to view the comments submitted by the employee.
Training Guide
Enterprise ePerformance 9.0
Page 58
Step Action
18. Scroll down to view the entire document.
Click the vertical scrollbar.
19. Click the Return to Document Detail link.

Training Guide Enterprise ePerformance 9.0
Page 59
Step Action
20. Click the View link.
21. Use the Manager Evaluation page to review the comments submitted by the
manager.

Training Guide
Enterprise ePerformance 9.0
Page 60
Step Action
22. Click the vertical scrollbar.
23. Click the vertical scrollbar.
24. Click the vertical scrollbar.
25. Use the Reopen button to open the document to add or edit comments. This will set
the status back to In Progress and open the fields for editing.
26. Click the Return to Document Detail link.
27. You have successfully accessed a performance document.
End of Procedure.
Viewing Performance Documents If you have the ePerformance Admin role, you can view any document in any status for groups
that you manage, and perform certain tasks that change the document status or due date. This is a
―safety valve‖ in case the employee or manager are unable to complete the tasks.
The procedures for selecting documents, viewing document details, and performing tasks as an
administrator are the same as the procedures for any other role.
In this example, you will view a manager performance document for an employee by using the
View Documents menu navigation.
Procedure

Training Guide Enterprise ePerformance 9.0
Page 61
Step Action
1. Begin by navigating to the Document Details page.
Click the Workforce Development link.

Training Guide
Enterprise ePerformance 9.0
Page 62
Step Action
2. Click the Performance Management link.
3. Click the View Documents link.

Training Guide Enterprise ePerformance 9.0
Page 63
Step Action
4. Begin by entering selection criteria and selecting the document that you want to view from the results list.
Enter the desired information into the Employee First Name field. Enter
"Michelle".
5. Click in the Last Name field.
6. Enter the desired information into the Last Name field. Enter "Kelly".
7. Click the Document Type list.
8. Click the Annual Review list item.
9. Click the Search button.
10. The documents that match the search criteria are displayed in the Performance
Documents grid. Click the Document Type link to open the Document Details page for the document.
Click the Annual Review link.
11. Use the Document Details page to review the document progress.

Training Guide
Enterprise ePerformance 9.0
Page 64
Step Action
12. Click the View link next to a step to see the details of that step. You can view details
of a step only after the step is started.
Click the View link.
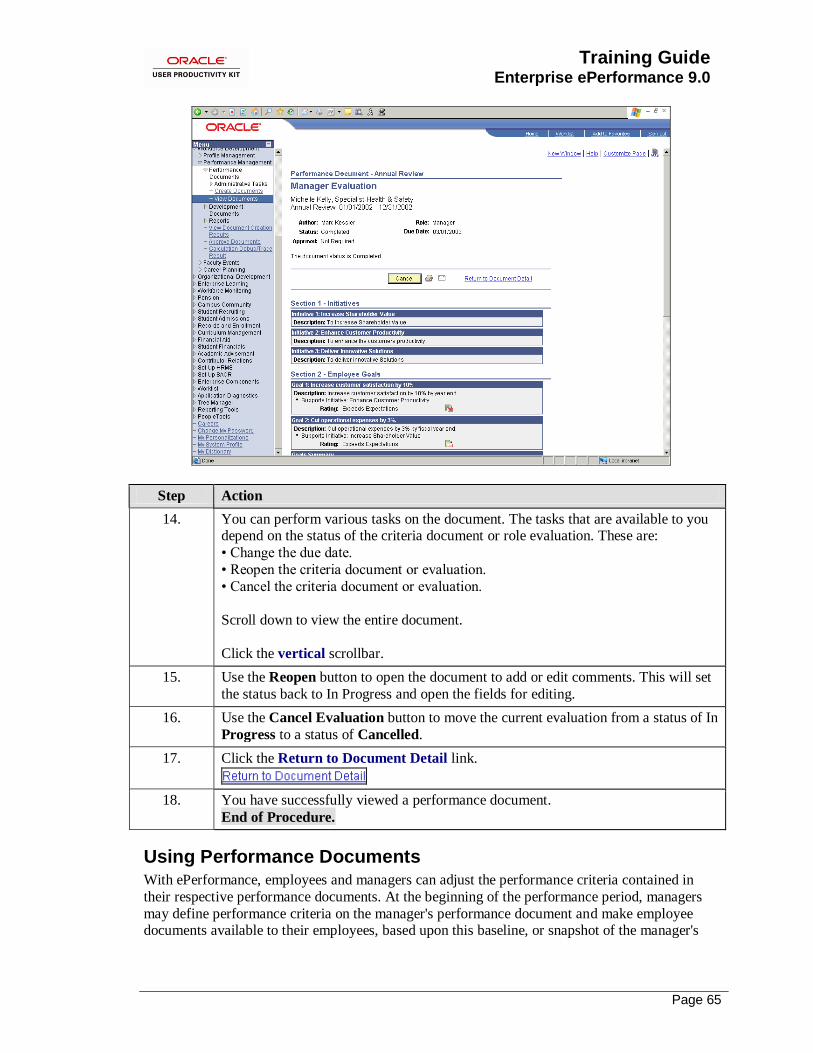
13. Use the Manager Evaluation page to review manager evaluation details.
Training Guide Enterprise ePerformance 9.0
Page 65
Step Action
14. You can perform various tasks on the document. The tasks that are available to you depend on the status of the criteria document or role evaluation. These are:
• Change the due date.
• Reopen the criteria document or evaluation.
• Cancel the criteria document or evaluation.
Scroll down to view the entire document.
Click the vertical scrollbar.
15. Use the Reopen button to open the document to add or edit comments. This will set
the status back to In Progress and open the fields for editing.
16. Use the Cancel Evaluation button to move the current evaluation from a status of In
Progress to a status of Cancelled.
17. Click the Return to Document Detail link.
18. You have successfully viewed a performance document.
End of Procedure.
Using Performance Documents With ePerformance, employees and managers can adjust the performance criteria contained in
their respective performance documents. At the beginning of the performance period, managers
may define performance criteria on the manager's performance document and make employee documents available to their employees, based upon this baseline, or snapshot of the manager's

Training Guide
Enterprise ePerformance 9.0
Page 66
document. Managers and employees can both adjust the performance criteria contained in their
respective documents in a collaborative environment (if permitted by the template).
A performance document can comprise multiple sub-documents. Each sub-document is owned by
an author acting in a specific role. ePerformance has two types of authors and sub-documents:
managers with manager documents and employees with employee documents. These two typically make up the performance document. Generally, when the term document is used it is
referring to a sub-document.
Manager's Document Managers use this sub-document to update employees performance criteria, track progress, and
evaluate and comment on an employee's performance. There can be only one manager's
document per performance document. Once the performance process is complete, the information contained in the manager's sub-document becomes the official source of information used by HR
and other business processes regarding an employee's performance.
Employee's Document Employees use this document to enter or update their own performance criteria, track their
progress against their performance plan, and evaluate and comment on their own performance.
Managers can use this document throughout the performance period for insight into the employee's perception of goals and objectives, progress, and assessments.
In addition, ePerformance provides the following pages to support the process of recording, maintaining, and finalizing performance document data:
• The Preliminary Ratings page
• Performance Notes and Performance Notes Details pages • Results Writer
• Development Tips
• Language Checker
Upon completion of this lesson, you will be able to:
• Explain review document statuses.
• Enter preliminary review ratings. • Record performance notes.
• Modify evaluation criteria.
• Complete an employee self-evaluation.
• Evaluate employee performance as a manager. • Use the Language Checker feature.
• Incorporate Writing Tools suggestions into comments.
Understanding Review Document Statuses ePerformance tracks the status of manager and employee documents using a set of status codes.
Status codes provide a way of identifying the stages a performance document moves through during the performance cycle. They also control when users can view or edit documents and data
during the performance cycle, what actions they can perform, and what page controls are
available to them.
The statuses through which documents must pass and the sequence of these statuses are
determined by the performance process option defined on the template.

Training Guide Enterprise ePerformance 9.0
Page 67
This topic defines the following document statuses for manager and employee documents:
Manager Documents • In Progress
• Available for Review
• Review Held
• Acknowledged • Complete
• Cancelled
Employee Documents • In Progress
• Complete
• Cancelled
Procedure
Step Action
1. In Progress is the status of the manager's document when it is first created. The
document stays in this status until the manager selects Available for Review, Complete, or Submit for Approval depending on the setup and approval process
required.

Training Guide
Enterprise ePerformance 9.0
Page 68
Step Action
2. A document can only become Available for Review when the current status of the
document is In Progress and the following two conditions are met:
(1) Review Process is set to Approval Required After Review Held, or to No Approval – Review Held, or to Approval required Before Review Held.
(2) Approval Status is set to Approved.

Training Guide Enterprise ePerformance 9.0
Page 69
Step Action
3. To change the status of a document to Available, the manager must click the Available for Review button located on the manager's document. Now the
employee is able to view the document and add comments to section where Special
Processing is set to Employee Comments. The manager can only edit the document
in sections that are configured as Manager Comments.
Training Guide
Enterprise ePerformance 9.0
Page 70
Step Action
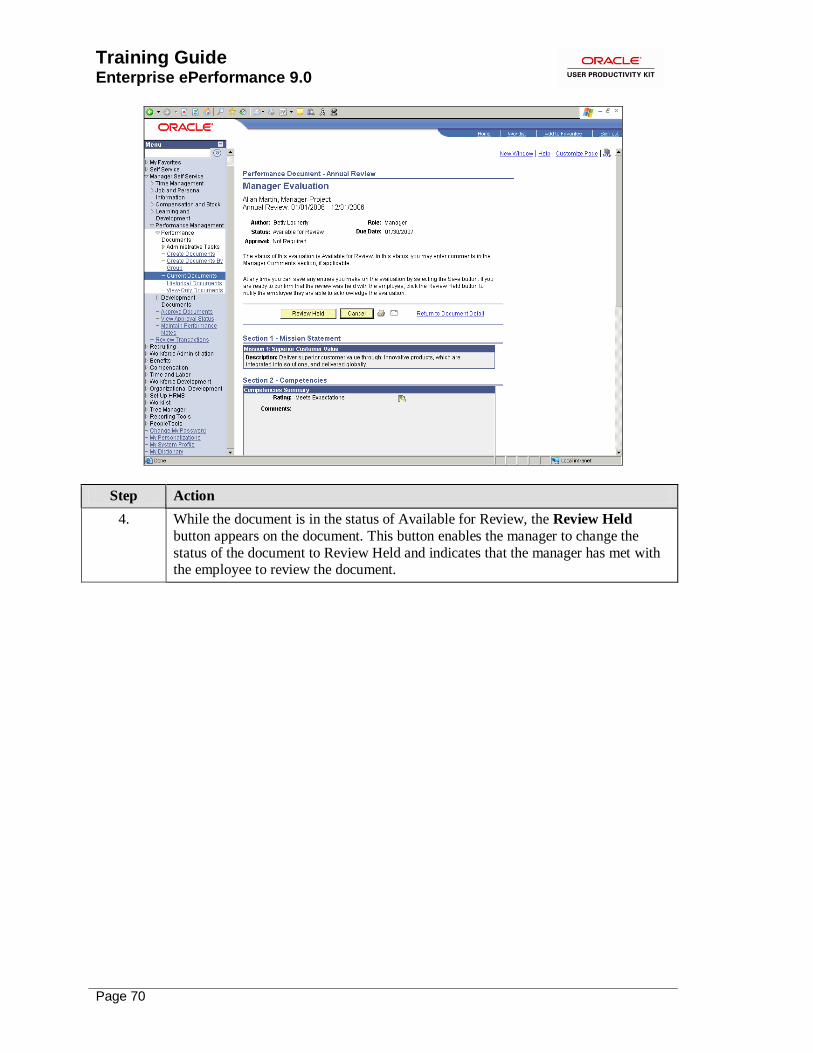
4. While the document is in the status of Available for Review, the Review Held
button appears on the document. This button enables the manager to change the
status of the document to Review Held and indicates that the manager has met with the employee to review the document.

Training Guide Enterprise ePerformance 9.0
Page 71
Step Action
5. The Review Held status indicates that the manager has discussed the document with the employee. While a performance document has the status of Review Held, the
employee and the manager have view only access to the document except to enter or
edit the Manager Comments or Employee Comments sections of a document, if
these sections exist.
Training Guide
Enterprise ePerformance 9.0
Page 72
Step Action
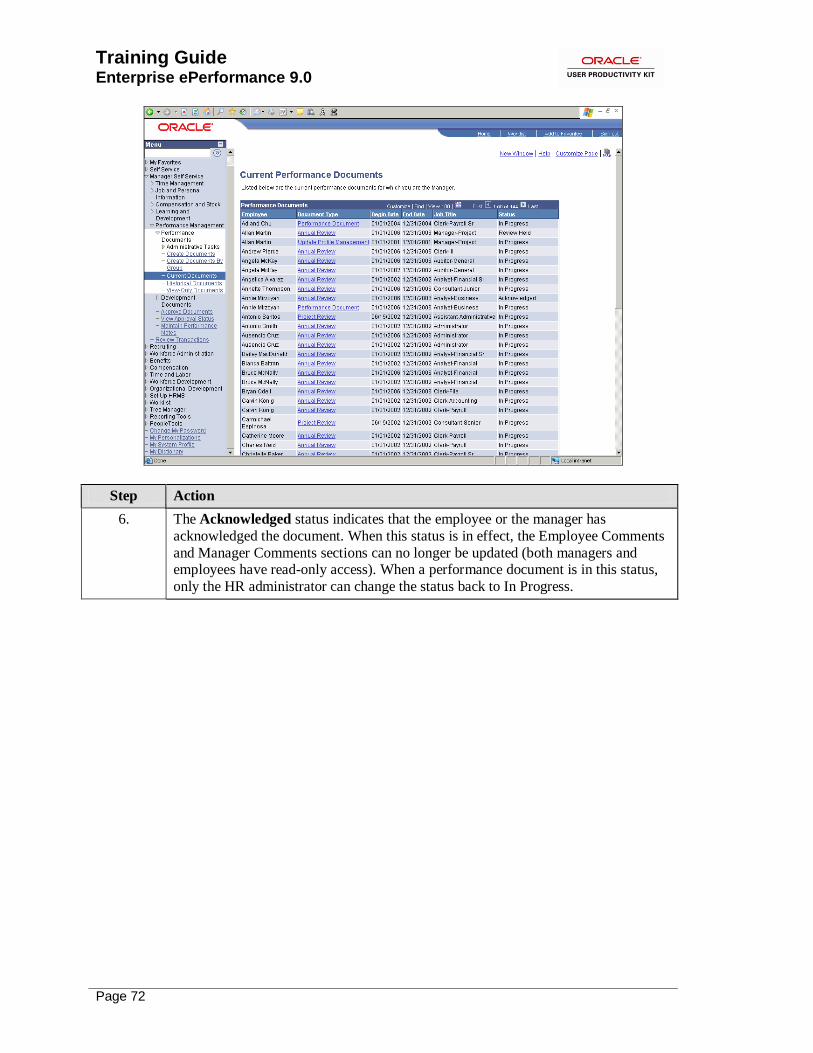
6. The Acknowledged status indicates that the employee or the manager has
acknowledged the document. When this status is in effect, the Employee Comments
and Manager Comments sections can no longer be updated (both managers and employees have read-only access). When a performance document is in this status,
only the HR administrator can change the status back to In Progress.
Training Guide Enterprise ePerformance 9.0
Page 73
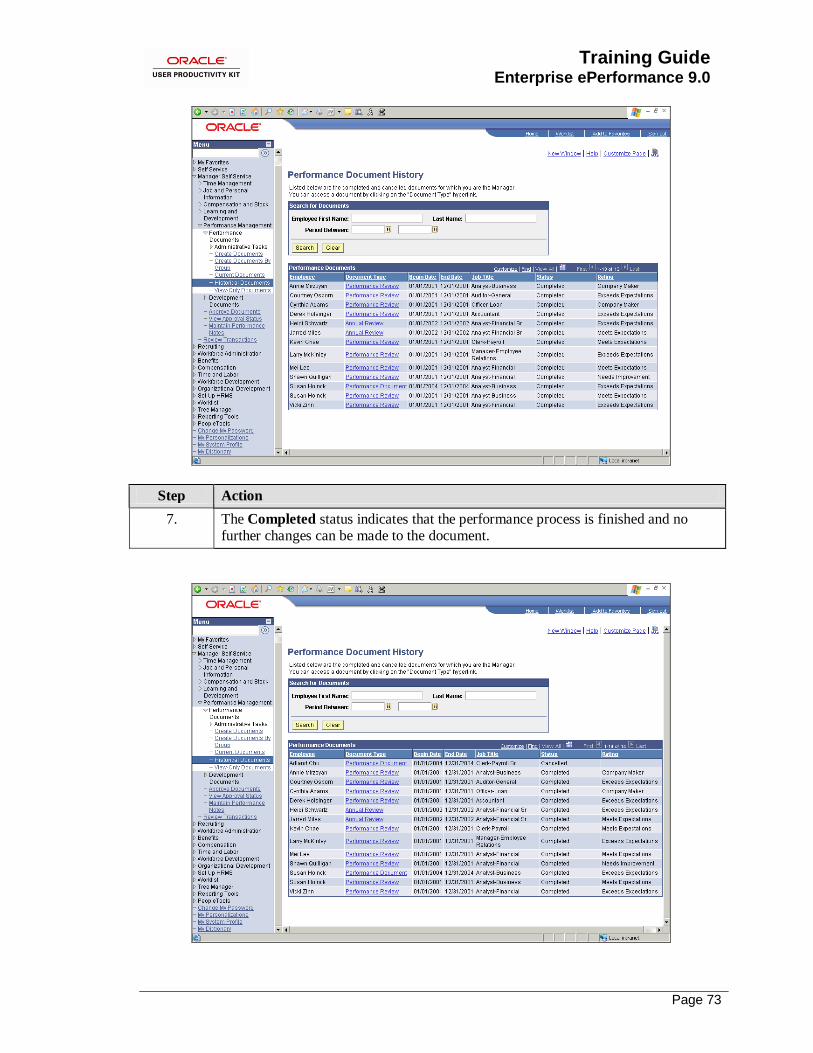
Step Action
7. The Completed status indicates that the performance process is finished and no further changes can be made to the document.
Training Guide
Enterprise ePerformance 9.0
Page 74
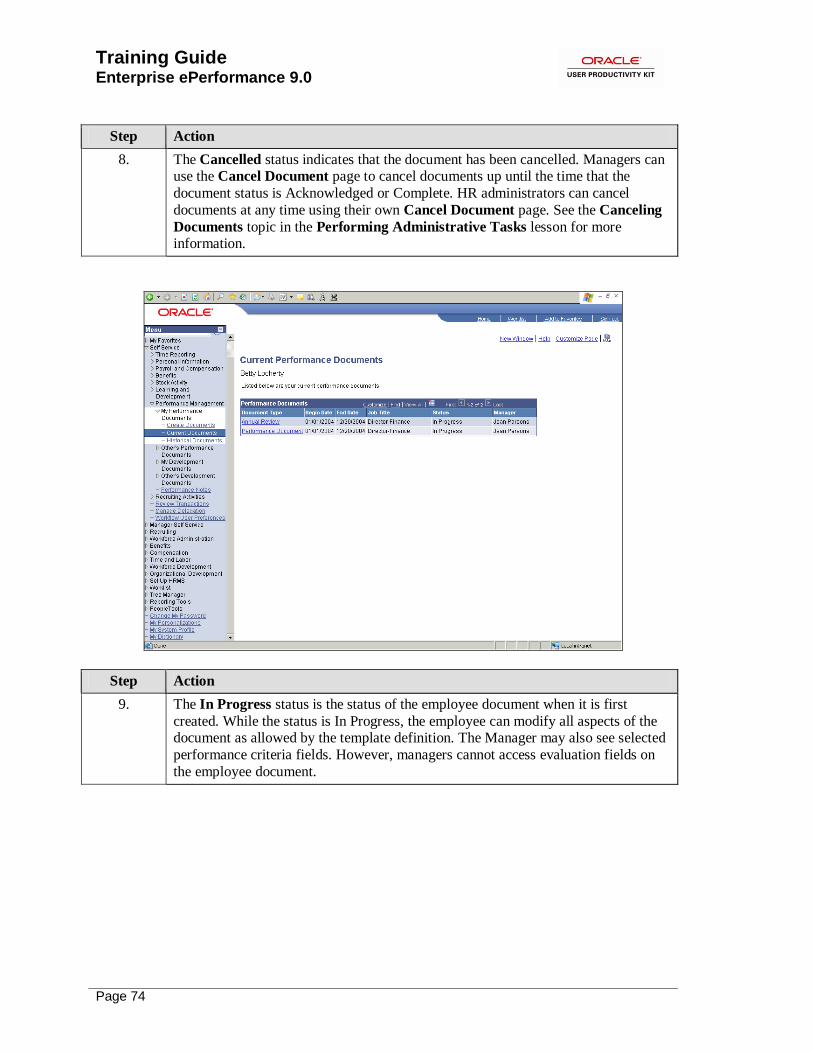
Step Action
8. The Cancelled status indicates that the document has been cancelled. Managers can use the Cancel Document page to cancel documents up until the time that the
document status is Acknowledged or Complete. HR administrators can cancel
documents at any time using their own Cancel Document page. See the Canceling
Documents topic in the Performing Administrative Tasks lesson for more information.
Step Action
9. The In Progress status is the status of the employee document when it is first
created. While the status is In Progress, the employee can modify all aspects of the document as allowed by the template definition. The Manager may also see selected
performance criteria fields. However, managers cannot access evaluation fields on
the employee document.

Training Guide Enterprise ePerformance 9.0
Page 75
Step Action
10. With the Completed status, employees have view only access to the document and are unable to edit or modify the content. Similarly, the manager has view only
access to the document but can select the Rework button to return the document to
the employee for revision. When the manager returns a document, the system
changes the self-appraisal status back to In Progress and makes the Complete button available again.
The employee changes the status of the employee document from In Progress to Complete by selecting the Complete button. This button becomes available when
the document is first created or sent back for rework.

Training Guide
Enterprise ePerformance 9.0
Page 76
Step Action
11. The status of the employee document changes to Cancelled only when the
manager's document is cancelled.
12. In summary, the review document statuses for manager documents are:
• In Progress • Available for Review
• Review Held
• Acknowledged • Complete
• Cancelled
The review document statuses for employee documents are: • In Progress
• Complete
• Cancelled
End of Procedure.
Entering Preliminary Review Ratings ePerformance enables you to enter preliminary ratings for an employee based upon the rating
model for the Overall Summary section defined on the template. You can update preliminary ratings at any time while a performance document has a status of In Progress. Preliminary ratings
are used only for planning, and to generate the Review Results Distribution report, which can be
used to determine whether your ratings are distributed in the expected manner. Employees cannot view preliminary ratings.
In this example, you will enter preliminary review ratings for two of your direct reports.
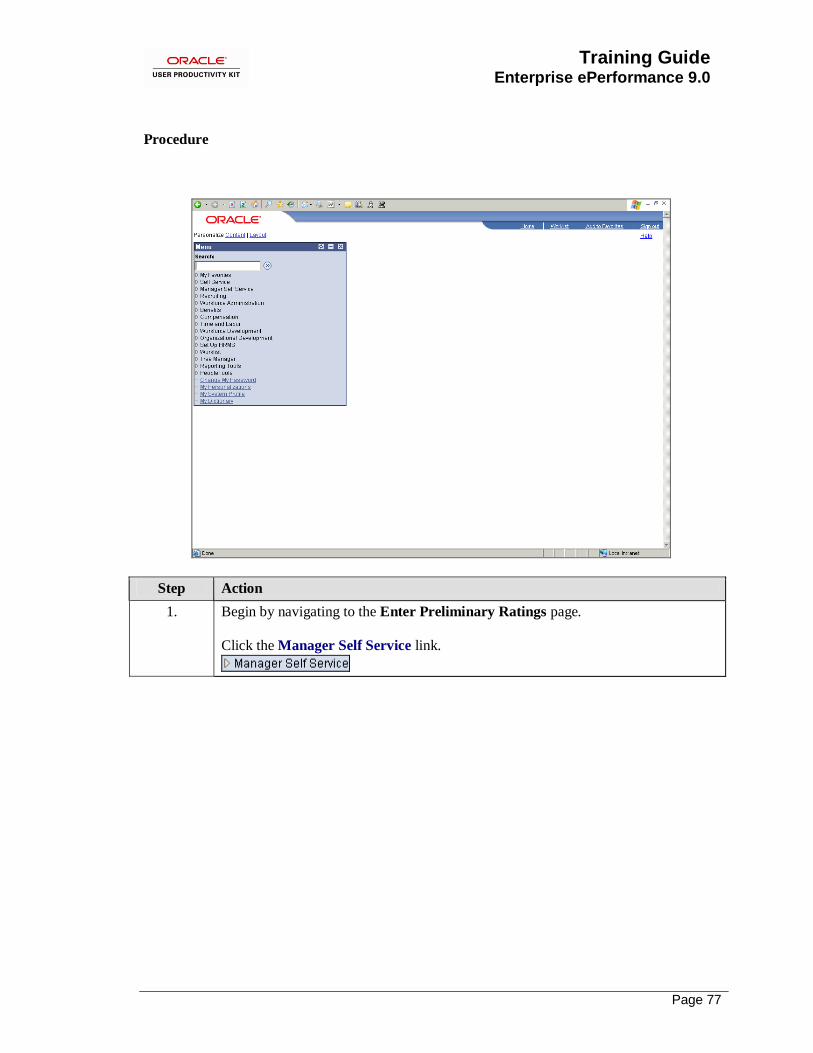
Training Guide Enterprise ePerformance 9.0
Page 77
Procedure
Step Action
1. Begin by navigating to the Enter Preliminary Ratings page.
Click the Manager Self Service link.

Training Guide
Enterprise ePerformance 9.0
Page 78
Step Action
2. Click the Performance Management link.
3. Click the Performance Documents link.
4. Click the Administrative Tasks link.
5. Click the Enter Preliminary Ratings link.
6. Use the Enter Preliminary Ratings page to select select the dcouments in which
you will enter your preliminary ratings.
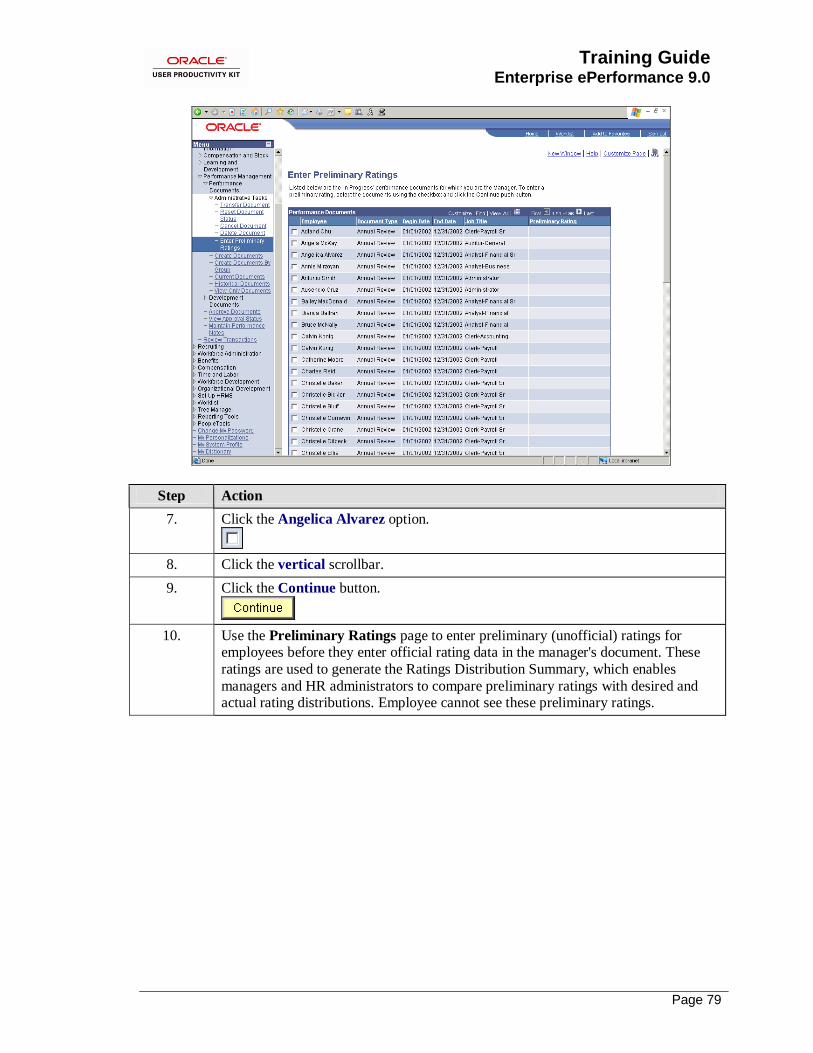
Training Guide Enterprise ePerformance 9.0
Page 79
Step Action
7. Click the Angelica Alvarez option.
8. Click the vertical scrollbar.
9. Click the Continue button.
10. Use the Preliminary Ratings page to enter preliminary (unofficial) ratings for employees before they enter official rating data in the manager's document. These
ratings are used to generate the Ratings Distribution Summary, which enables
managers and HR administrators to compare preliminary ratings with desired and actual rating distributions. Employee cannot see these preliminary ratings.

Training Guide
Enterprise ePerformance 9.0
Page 80
Step Action
11. This list of ratings is for the Rating Model that's associated with the Overall
Summary section of the document.
Click the Preliminary Rating list.
12. Click the Meets Expectations list item.
13. Click the Save button.
14. Use the Save Confirmation page to acknowledge that your changes have been
saved.

Training Guide Enterprise ePerformance 9.0
Page 81
Step Action
15. Click the OK button.

Training Guide
Enterprise ePerformance 9.0
Page 82
Step Action
16. Click the vertical scrollbar.
17. Click the Cynthia Adams option.
18. Click the vertical scrollbar.
19. Click the Continue button.
Step Action
20. Click the Preliminary Rating list.
21. Click the Exceeds Expectations list item.
22. Click the Save button.
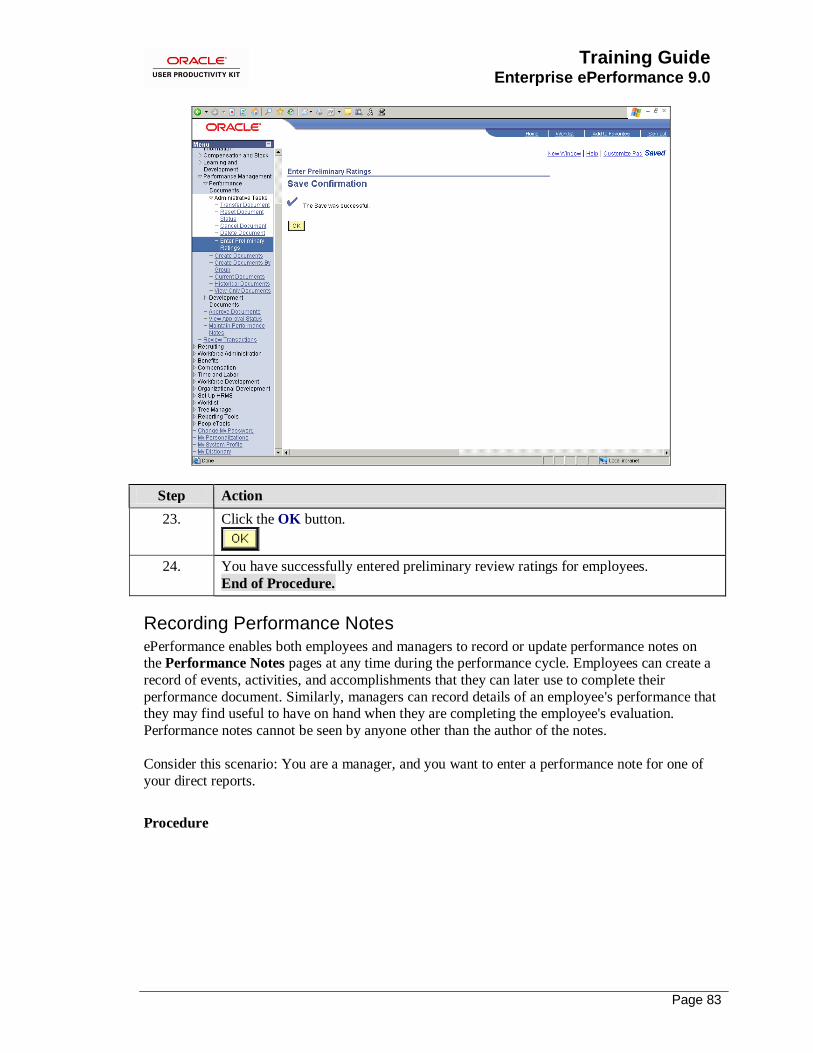
Training Guide Enterprise ePerformance 9.0
Page 83
Step Action
23. Click the OK button.
24. You have successfully entered preliminary review ratings for employees.
End of Procedure.
Recording Performance Notes ePerformance enables both employees and managers to record or update performance notes on the Performance Notes pages at any time during the performance cycle. Employees can create a
record of events, activities, and accomplishments that they can later use to complete their
performance document. Similarly, managers can record details of an employee's performance that they may find useful to have on hand when they are completing the employee's evaluation.
Performance notes cannot be seen by anyone other than the author of the notes.
Consider this scenario: You are a manager, and you want to enter a performance note for one of
your direct reports.
Procedure

Training Guide
Enterprise ePerformance 9.0
Page 84
Step Action
1. Begin by navigating to the My Performance Notes page.
Click the Manager Self Service link.

Training Guide Enterprise ePerformance 9.0
Page 85
Step Action
2. Click the Performance Management link.
3. Click the Maintain Performance Notes link.
4. Use the My Performance Notes page to view or update existing performance notes, or add new notes.

Training Guide
Enterprise ePerformance 9.0
Page 86
Step Action
5. Click in the Earliest Note Date field to refresh and activate the page.
Click in the Earliest Note Date field.
6. Use the ID field to enter the employee ID number for which you will enter
performance notes.
Click in the ID field.
7. Enter the desired information into the ID field. Enter "KU0070".
8. Click in a field to refresh the page.
Click in the Earliest Note Date field.
9. Click the Add a New Note button.
10. Use the Performance Note - New Note page to record notes about an employee's performance and accomplishments that can be referenced later when managers and
employees are updating or completing their respective performance documents.
Performance notes cannot be seen by anyone other than the author of the notes.

Training Guide Enterprise ePerformance 9.0
Page 87
Step Action
11. Click in the Subject field.
12. Enter the desired information into the Subject field. Enter "Communication
issues".
13. Use the Note Text field to enter your notes.
Click in the Note Text field.
14. To save time in this exercise, the text will be entered for you.
15. Click the Save button.
16. Return to the previous page.
Click the Performance Note Selection link.
17. If you made a mistake, or you want to edit an existing note, click the link for the
note.
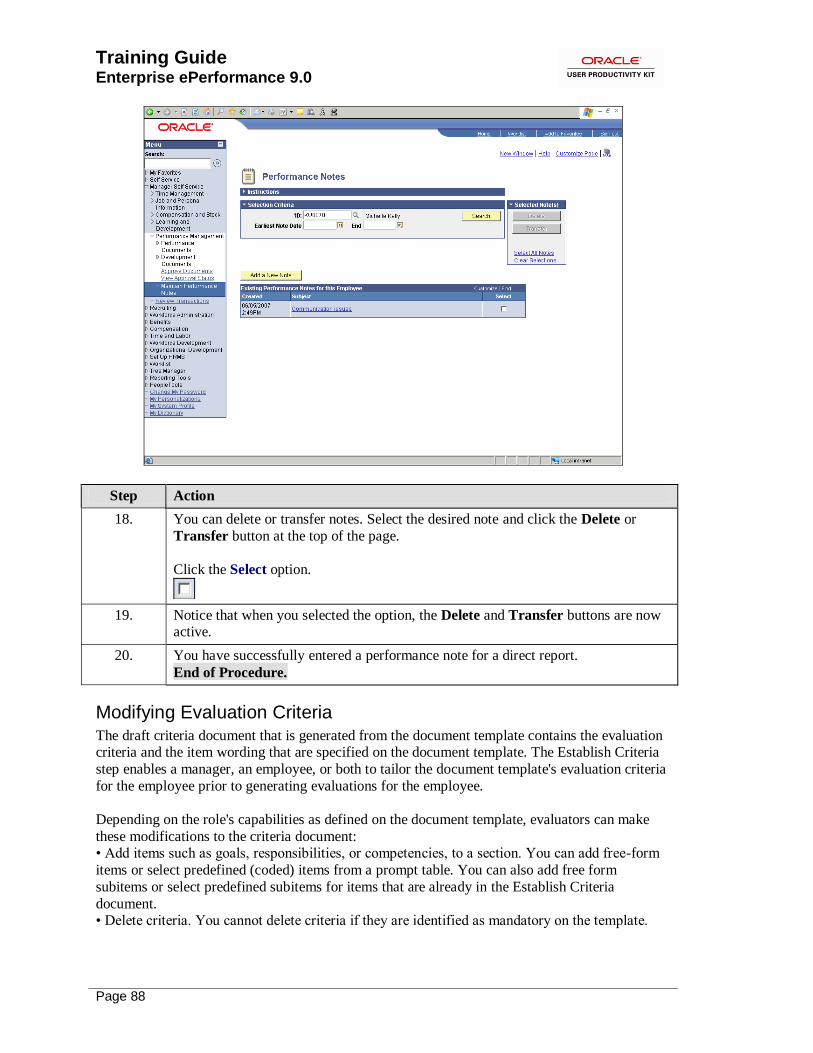
Training Guide
Enterprise ePerformance 9.0
Page 88
Step Action
18. You can delete or transfer notes. Select the desired note and click the Delete or
Transfer button at the top of the page.
Click the Select option.
19. Notice that when you selected the option, the Delete and Transfer buttons are now active.
20. You have successfully entered a performance note for a direct report.
End of Procedure.
Modifying Evaluation Criteria
The draft criteria document that is generated from the document template contains the evaluation criteria and the item wording that are specified on the document template. The Establish Criteria
step enables a manager, an employee, or both to tailor the document template's evaluation criteria
for the employee prior to generating evaluations for the employee.
Depending on the role's capabilities as defined on the document template, evaluators can make
these modifications to the criteria document: • Add items such as goals, responsibilities, or competencies, to a section. You can add free-form
items or select predefined (coded) items from a prompt table. You can also add free form
subitems or select predefined subitems for items that are already in the Establish Criteria
document. • Delete criteria. You cannot delete criteria if they are identified as mandatory on the template.

Training Guide Enterprise ePerformance 9.0
Page 89
• Update criteria. The criteria details that you can edit during the Establish Criteria step depend on whether or not the items are defined as mandatory and whether or not the items are coded.
When you are satisfied with the document criteria, the designated completer completes the document. You can generate individual evaluations, by role, from a completed criteria document.
You can also reopen the document for further modification.
Managers, employees, and other participants can update criteria from within their evaluations if the Update Item check box is selected for the role in the Section Roles: Items grid on the
Structure page. Criteria updates that one evaluator makes are not reflected in other role
evaluations, however other evaluators can view the comments and ratings that are made on added criteria if their role is enabled to do so on the document template.
Consider this scenario: You are a manager, and you want to modify the performance criteria of
one of your employees by adding a goal to their performance document.
Procedure
Step Action
1. Begin by navigating to the Current Performance Documents page.
Click the Manager Self Service link.

Training Guide
Enterprise ePerformance 9.0
Page 90
Step Action
2. Click the Performance Management link.
3. Click the Current Documents link.
4. Use the Current Performance Documents page to view performance documents that you own. Upon accessing the documents, you can view, update, modify, or
perform various administrative actions on them.

Training Guide Enterprise ePerformance 9.0
Page 91
Step Action
5. Click the Project Review link.
6. Use the Document Details page to view the current document progress and to
navigate to additional pages to and or complete the evaluation progress.
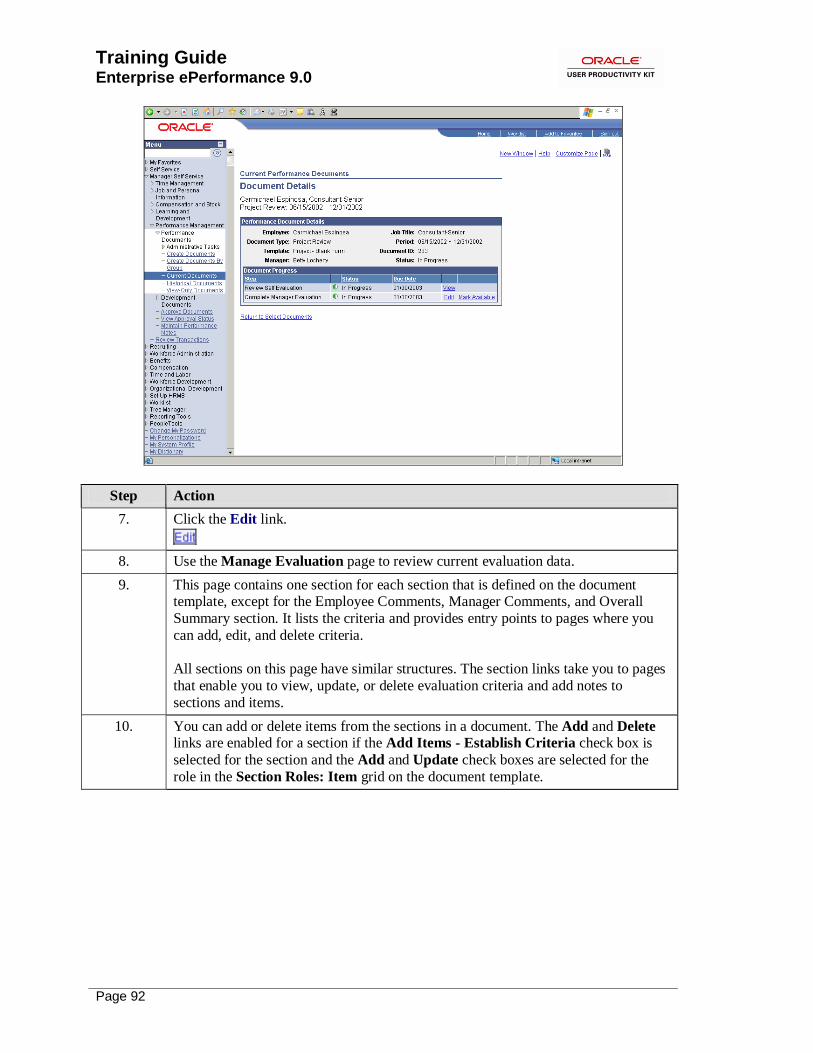
Training Guide
Enterprise ePerformance 9.0
Page 92
Step Action
7. Click the Edit link.
8. Use the Manage Evaluation page to review current evaluation data.
9. This page contains one section for each section that is defined on the document template, except for the Employee Comments, Manager Comments, and Overall
Summary section. It lists the criteria and provides entry points to pages where you
can add, edit, and delete criteria.
All sections on this page have similar structures. The section links take you to pages
that enable you to view, update, or delete evaluation criteria and add notes to
sections and items.
10. You can add or delete items from the sections in a document. The Add and Delete links are enabled for a section if the Add Items - Establish Criteria check box is
selected for the section and the Add and Update check boxes are selected for the
role in the Section Roles: Item grid on the document template.

Training Guide Enterprise ePerformance 9.0
Page 93
Step Action
11. Scroll down to view the goals already established for this document.
Click the vertical scrollbar.
12. Click the vertical scrollbar.
13. In this example, you are going to add another goal.
Click the Add Goal link.
14. Use the Add a Goal page to enter a pre-defined goal or to add your own gaol to the
evaluation documents.
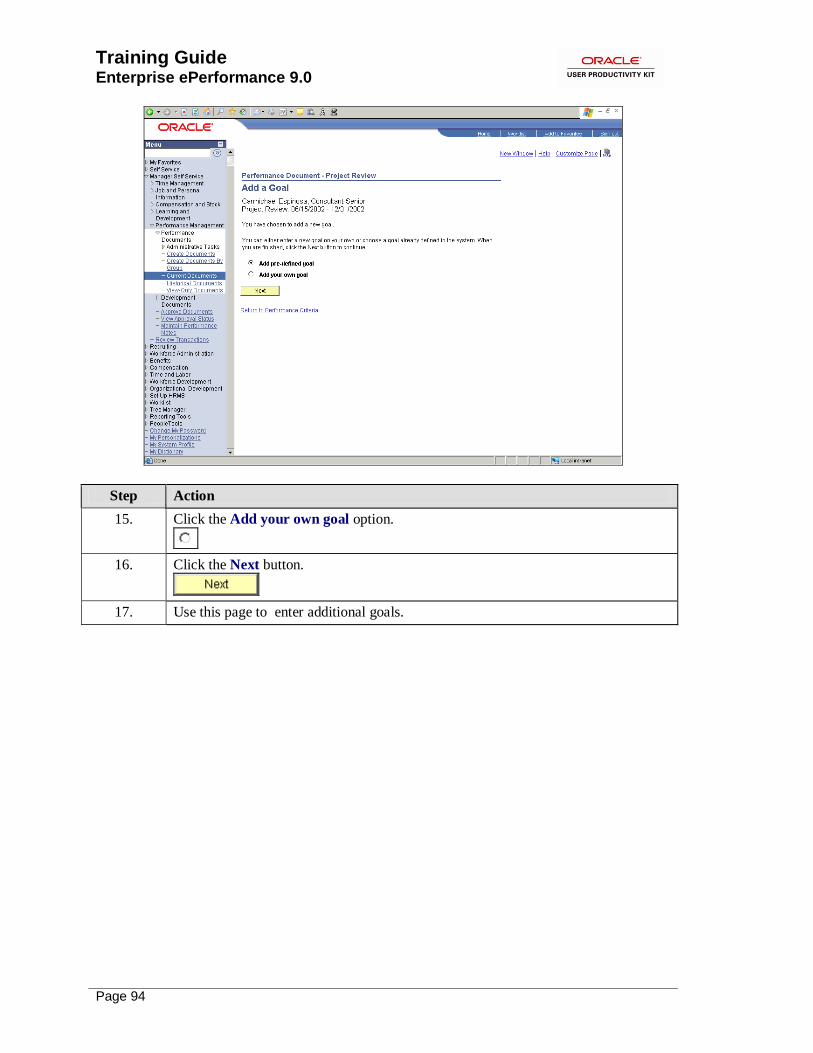
Training Guide
Enterprise ePerformance 9.0
Page 94
Step Action
15. Click the Add your own goal option.
16. Click the Next button.
17. Use this page to enter additional goals.

Training Guide Enterprise ePerformance 9.0
Page 95
Step Action
18. Use the Title field to enter up to 60 alphanumeric characters for the title of the goal or objective. The title automatically appears on performance documents, when this
item is included in a performance document.
Enter the desired information into the Title field. Enter "Reduce customer
complaints by 5%".
19. Enter the goal description in the Description field.
Click in the Description field.
20. To save time in this example, the text will be entered for you.
21. Enter a description of what will be used to measure the accomplishment of the goal in the Measurement field.
Click in the Measurement field.
22. To save time in this example, the text will be entered for you.
23. The Supports field defines which of the initiatives the goal supports. If there is only one initiative, that initiative will be used by default.
24. Click the Update button.

Training Guide
Enterprise ePerformance 9.0
Page 96
Step Action
25. Click the vertical scrollbar.
26. The new goal is displayed. You can assign a rating and a weight to this goal.
Click the Rating list.
27. Click the Needs Improvement list item.
28. Click in the Weight field.
29. Enter the desired information into the Weight field. Enter "10".
30. Once the goal has been added, you can save the updated document.
Click the vertical scrollbar.
31. Click the Save button.
32. Click the Return to Document Detail link.
33. You have successfully modified performance criteria as a manager.
End of Procedure.

Training Guide Enterprise ePerformance 9.0
Page 97
Completing the Employee Self-Evaluation Using ePerformance, an employee can record a self-evaluation of his or her performance against
the performance criteria contained in the employee's document. An employee document must be
created by the manager or HR administrator in order for the employee to enter a self-evaluation. Employee documents can be created by an HR administrator when the manager documents are
created, or can be created by managers.
In order to self-evaluate their performance, employees can enter ratings and/or comments at any
time during the performance period. This evaluation information can be updated at any time, and
is not visible to the manager until the employee marks the document as ―complete‖. Marking the
employee document ―complete‖ provides full access to the manager, including visibility into the self-evaluation information. If, after review, the manager finds it necessary to make changes on
the employee document, he or she can send the document back to the employee.
While updating self-evaluation information, the employee has access to the performance notes, if
any, that they have been maintaining throughout the performance period.
Consider this scenario: You are logged into the system and want to complete your self-evaluation form so that it will be accessible by your manager. Your goal is to enter ratings and comments to
complete your self-evaluation.
Procedure
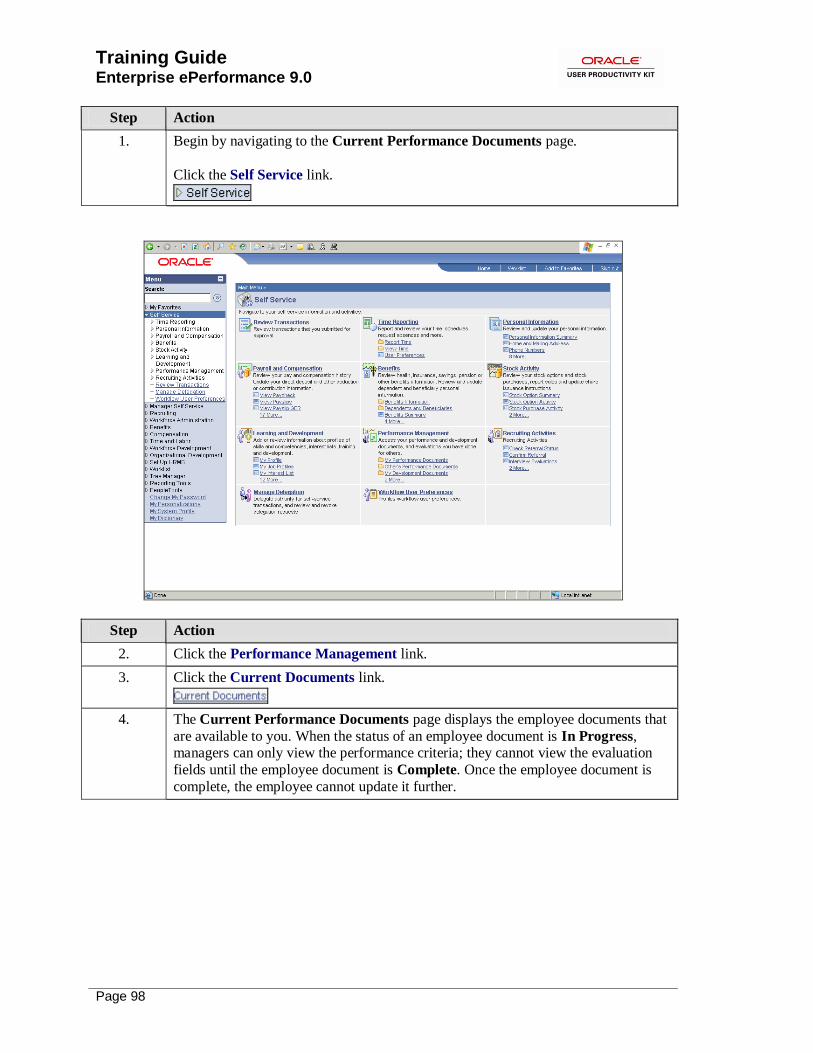
Training Guide
Enterprise ePerformance 9.0
Page 98
Step Action
1. Begin by navigating to the Current Performance Documents page.
Click the Self Service link.
Step Action
2. Click the Performance Management link.
3. Click the Current Documents link.
4. The Current Performance Documents page displays the employee documents that
are available to you. When the status of an employee document is In Progress, managers can only view the performance criteria; they cannot view the evaluation
fields until the employee document is Complete. Once the employee document is
complete, the employee cannot update it further.

Training Guide Enterprise ePerformance 9.0
Page 99
Step Action
5. Click the Annual Review link.
6. Use the Document Details page to begin the self-evaluation process.
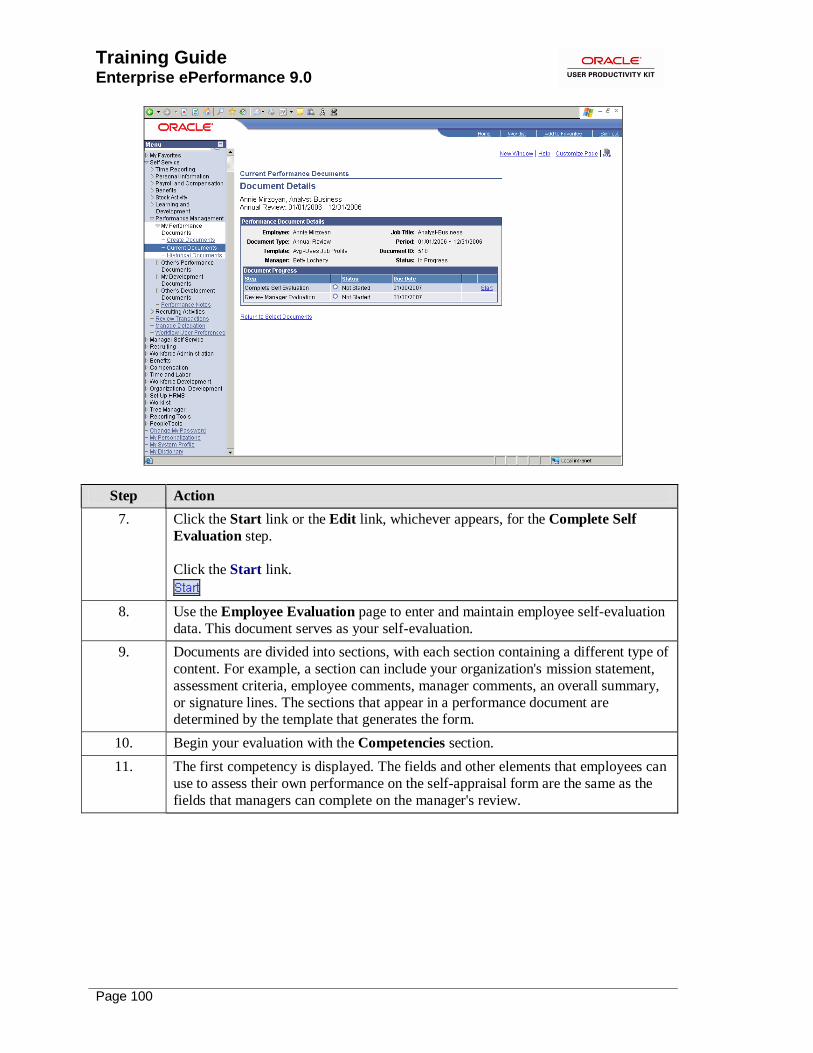
Training Guide
Enterprise ePerformance 9.0
Page 100
Step Action
7. Click the Start link or the Edit link, whichever appears, for the Complete Self
Evaluation step.
Click the Start link.
8. Use the Employee Evaluation page to enter and maintain employee self-evaluation
data. This document serves as your self-evaluation.
9. Documents are divided into sections, with each section containing a different type of
content. For example, a section can include your organization's mission statement,
assessment criteria, employee comments, manager comments, an overall summary,
or signature lines. The sections that appear in a performance document are determined by the template that generates the form.
10. Begin your evaluation with the Competencies section.
11. The first competency is displayed. The fields and other elements that employees can
use to assess their own performance on the self-appraisal form are the same as the
fields that managers can complete on the manager's review.

Training Guide Enterprise ePerformance 9.0
Page 101
Step Action
12. You can edit the details of the goal as well as rate yourself against the goal.
Click the Rating list.
13. Rate yourself for this goal. The action that is permitted depends on the level
(subitem, item, section) where the field occurs, if calculation is enabled in the document template, and the user actions that the template definition permits. For
example, at the overall summary and section summary levels, the rating field is
read-only unless the role has permission to override system-calculated ratings or
calculate field was not enabled on the document template.
Click the 4-Very Good list item.
14. Use the Comments field to enter descriptive text about your performance. For the
purposes of this example only, you will not enter text at this time.
15. Click the Spell Check icon displayed next to the Comments field to check the
spelling for comments that you enter into the field.
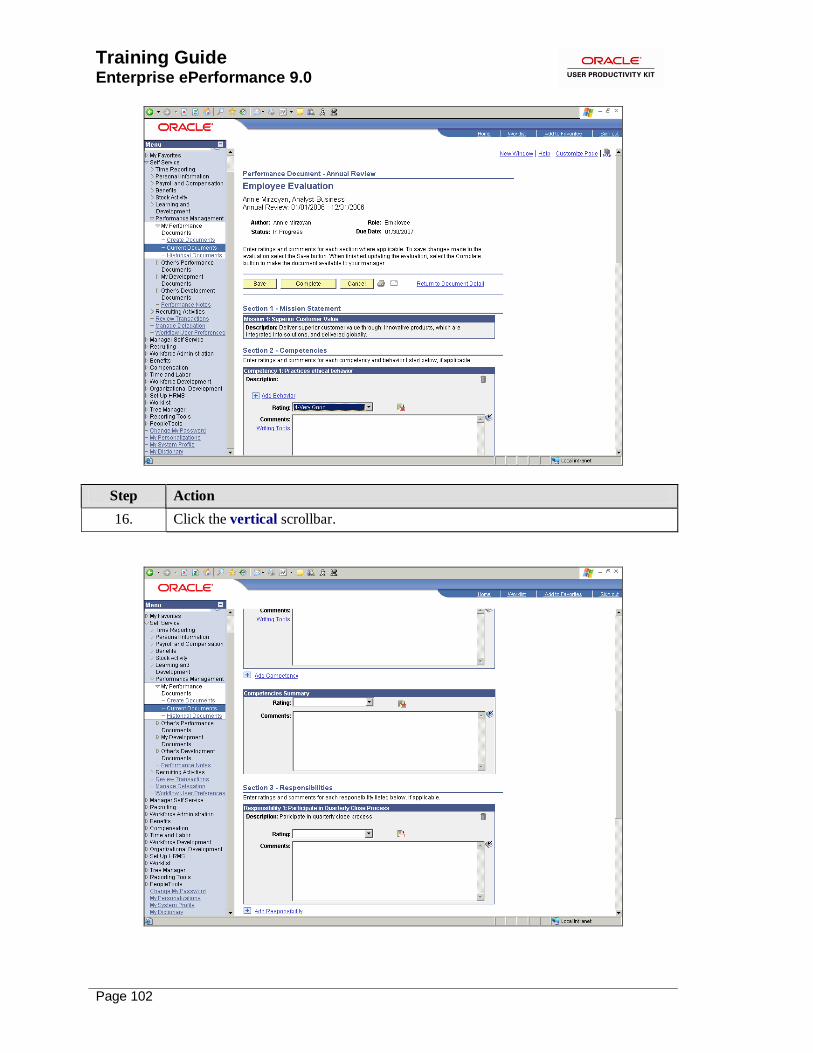
Training Guide
Enterprise ePerformance 9.0
Page 102
Step Action
16. Click the vertical scrollbar.

Training Guide Enterprise ePerformance 9.0
Page 103
Step Action
17. Enter your self-rating for the Competencies Summary.
Click the Rating list.
18. Click the Meets Expectations list item.
19. Next rate the first item listed in the Responsibilities section.
Click the Rating list.
20. Click the Exceeds Expectations list item.
21. Click in the Comments field.
22. To save time, the text has already been entered for you.
23. You can add additional responsibilities to your self-evaluation.
Click the Add Responsibility link.
24. Use the Add a Responsibility page to add pre-defined responsibilities or to add
your own.

Training Guide
Enterprise ePerformance 9.0
Page 104
Step Action
25. Click the Add your own responsibility option.
26. Click the Next button.
Step Action
27. Use the Title field to enter the new responsibility.
Enter the desired information into the Title field. Enter "New Hire Orientation
Program".
28. Use the Description field to enter the description of the new responsibility you are
adding.
Click in the Description field.
29. To save time, the description has been entered for you.
30. Click the Update button.

Training Guide Enterprise ePerformance 9.0
Page 105
Step Action
31. Next, you can rate yourself on the new responsibility you just added.
Click the Rating list.
32. Click the Exceeds Expectations list item.
33. Continue to complete your self-evaluation by entering comments, and/or adding additional data in each section of the evaluation page.
Click the vertical scrollbar.
34. Click the Save button.
35. Click the Complete button.
36. Use the Complete Evaluation page to confirm you have no further changes. Your self-evaluation will be finalized at this time and sent to your manager for review.

Training Guide
Enterprise ePerformance 9.0
Page 106
Step Action
37. Click the Complete button to change the status of the employee document from In
Progress to Complete.
If workflow is enabled for notifications, the manager is notified when the employee
clicks this button. The manager can then view all fields on the employee document.
Before the employee document is Complete, the manager cannot view the performance evaluation elements.
Click the Complete button.
38. Notice the status of your self-evaluation is Complete.
39. You have successfully completed an employee self-evaluation.
End of Procedure.
Evaluating Employee Performance on the Manager's Document To evaluate an employee's performance, managers can enter ratings and/or comments at any time during the performance period. This evaluation information can be updated at any time, is not
visible to the employee (or anyone else) until the manager marks the document as ―complete‖ and
ready for employee review. While updating evaluation information, the manager has full access to the performance notes that they have been maintaining on the subject employee. In addition,
the manager can also view the performance criteria contained in the employee's document (the
employee self-evaluation).

Training Guide Enterprise ePerformance 9.0
Page 107
To complete the performance cycle, the manager's document must be "finalized". The process of ―finalizing‖ the manager's document varies, depending upon settings in the template. At the end
of the performance period, after the manager has entered all evaluation information, and the
document is finalized, the manager's document is considered to be the official record of reference of the employee's performance.
Consider this scenario: It is the end of the performance period in your organization. As the
manager, you need to evaluate your employee's performance. Your goal is to review one of your employee's self-evaluation, and then enter the necessary data to update the manager's
performance document.
Procedure
Step Action
1. Begin by navigating to the Current Performance Documents page.
Click the Manager Self Service link.

Training Guide
Enterprise ePerformance 9.0
Page 108
Step Action
2. Click the Performance Management link.
3. Click the Current Documents link.
4. Use the Current Performance Documents page to view performance documents that you own. Upon accessing the documents, you can view, update, modify, or
perform various administrative actions on them.

Training Guide Enterprise ePerformance 9.0
Page 109
Step Action
5. Click the Annual Review link.
6. Use the Document Details page to view the document progress for your employee
and to navigate to the evaluation pages.
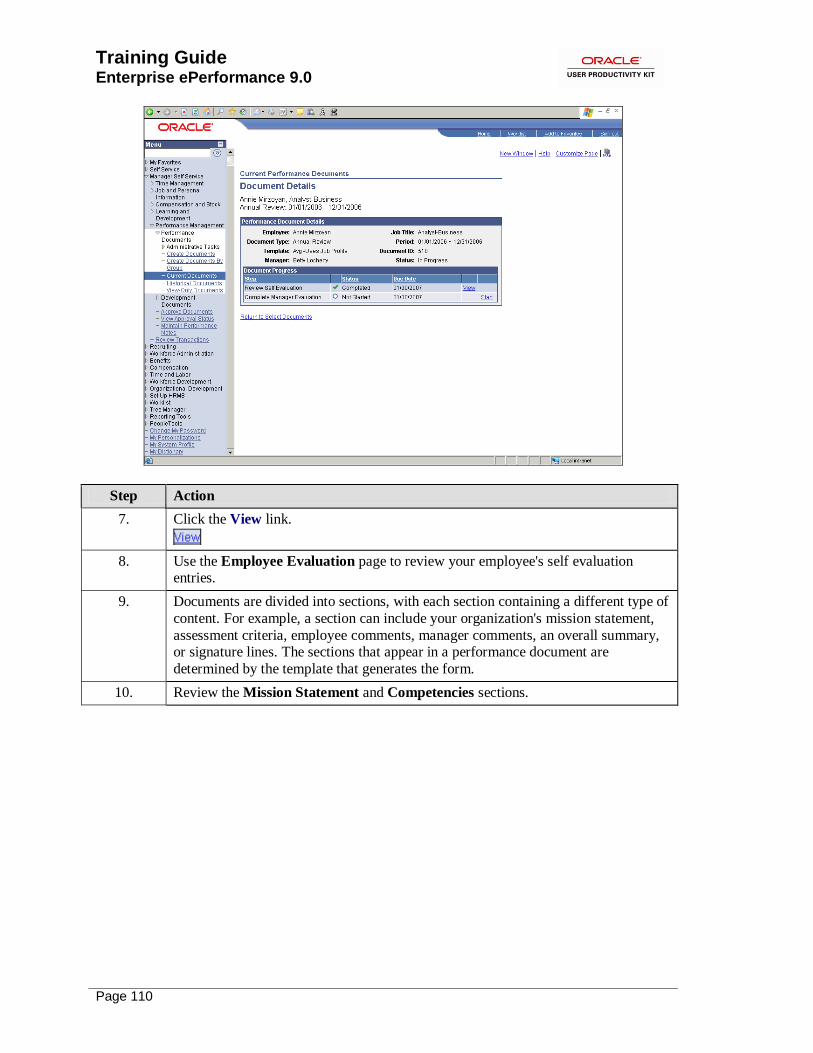
Training Guide
Enterprise ePerformance 9.0
Page 110
Step Action
7. Click the View link.
8. Use the Employee Evaluation page to review your employee's self evaluation entries.
9. Documents are divided into sections, with each section containing a different type of
content. For example, a section can include your organization's mission statement,
assessment criteria, employee comments, manager comments, an overall summary, or signature lines. The sections that appear in a performance document are
determined by the template that generates the form.
10. Review the Mission Statement and Competencies sections.
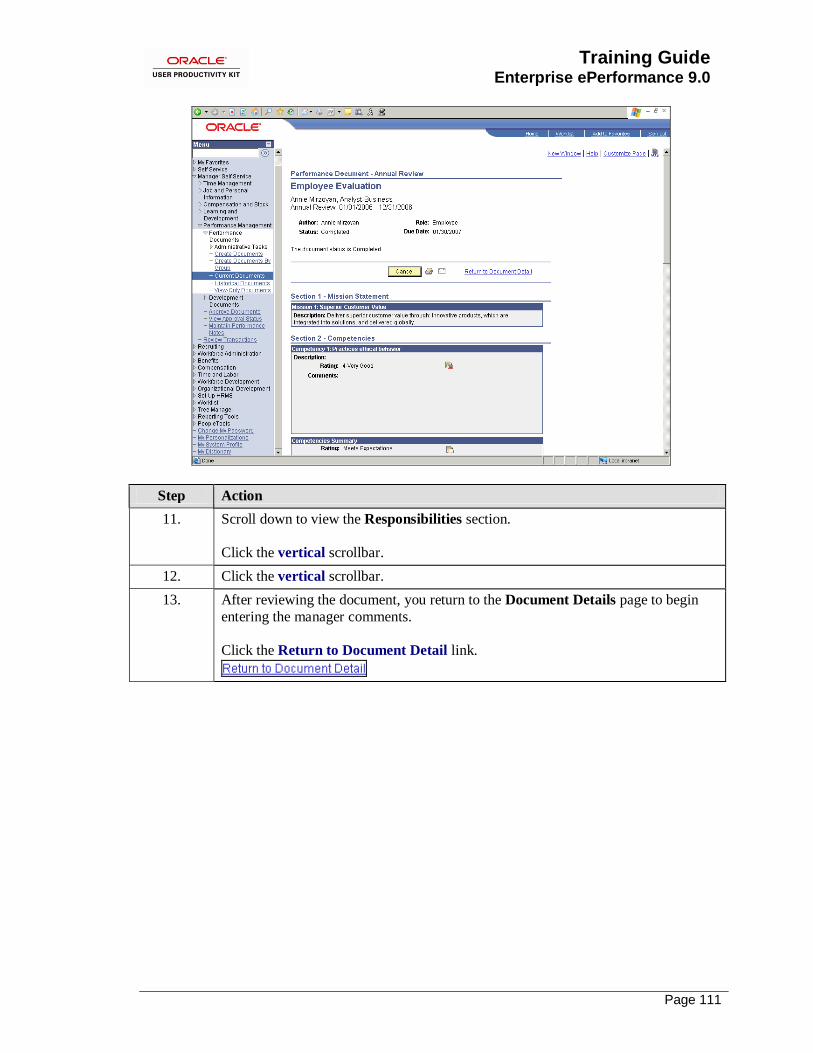
Training Guide Enterprise ePerformance 9.0
Page 111
Step Action
11. Scroll down to view the Responsibilities section.
Click the vertical scrollbar.
12. Click the vertical scrollbar.
13. After reviewing the document, you return to the Document Details page to begin
entering the manager comments.
Click the Return to Document Detail link.

Training Guide
Enterprise ePerformance 9.0
Page 112
Step Action
14. Click the Start link.
15. Use the Manager Evaluation page to enter your evaluation for your employees. You can add additional evaluation criteria or delete current ones.
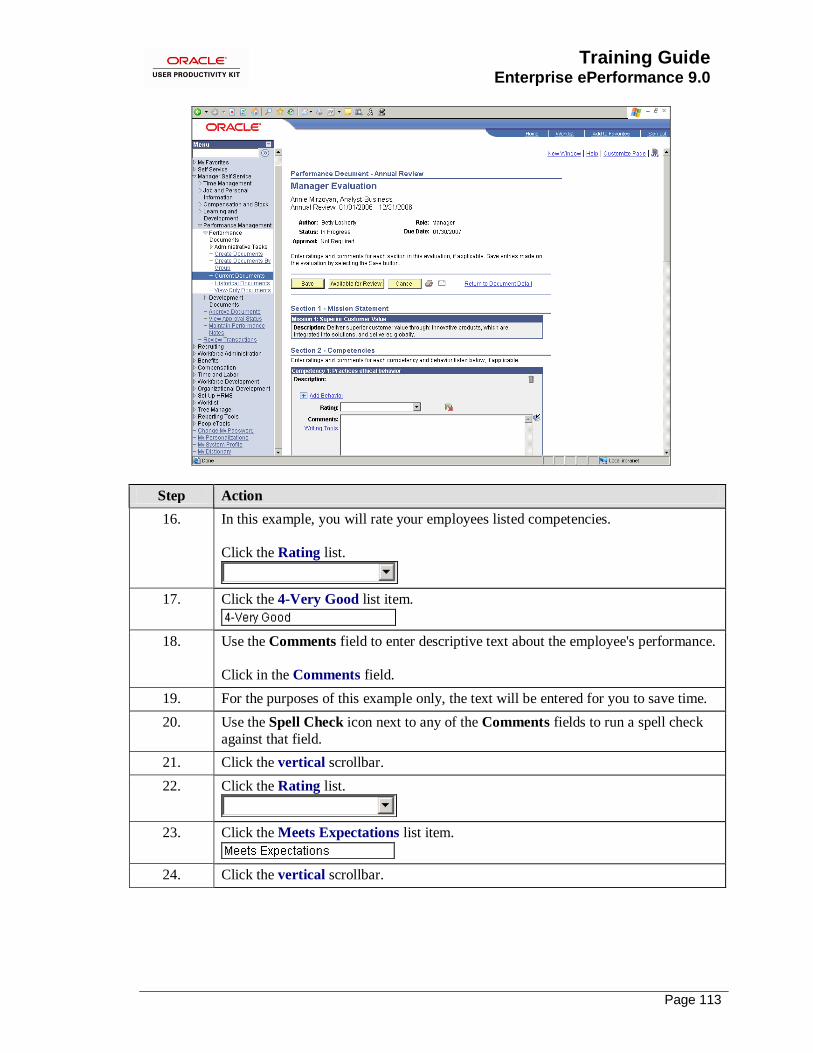
Training Guide Enterprise ePerformance 9.0
Page 113
Step Action
16. In this example, you will rate your employees listed competencies.
Click the Rating list.
17. Click the 4-Very Good list item.
18. Use the Comments field to enter descriptive text about the employee's performance.
Click in the Comments field.
19. For the purposes of this example only, the text will be entered for you to save time.
20. Use the Spell Check icon next to any of the Comments fields to run a spell check
against that field.
21. Click the vertical scrollbar.
22. Click the Rating list.
23. Click the Meets Expectations list item.
24. Click the vertical scrollbar.

Training Guide
Enterprise ePerformance 9.0
Page 114
Step Action
25. Continue rating your employee.
Click the Rating list.
26. Click the Exceeds Expectations list item.
27. Click in the Comments field.
28. To save time, the text will be entered for you.
Step Action
29. Click the vertical scrollbar.

Training Guide Enterprise ePerformance 9.0
Page 115
Step Action
30. Click the Rating list.
31. Click the Exceeds Expectations list item.
32. Click the Rating list.
33. Click the Exceeds Expectations list item.
34. Click in the Comments field.
35. To save time, the text will be entered for you.
36. Click the Save button to save your work and return to it later.
Click the Save button.
37. Click the Available for Review button to submit the document for review by the
employee, according to the review and approval rules.
Click the Available for Review button.
38. Use the Available for Review page to acknowledge that you choose the employee
to review this evaluation.

Training Guide
Enterprise ePerformance 9.0
Page 116
Step Action
39. Click the OK button.
40. The document is now available for review by the employee and the evaluation
process can continue.
41. You have successfully entered an evaluation for a direct report, and updated the
manager's document.
End of Procedure.
Using the Language Checker
If the Language Checker feature is set up for your system, a Check Language button appears at
the bottom of the manager's document. When you click this button, the system checks all Comments text boxes for inappropriate language, displays any objectionable words or phrases,
and suggests possible alternatives.
In this example, you will enter overall summary comments for one of your direct reports, and use
the Language Checker to verify that the comments are appropriate.
Procedure
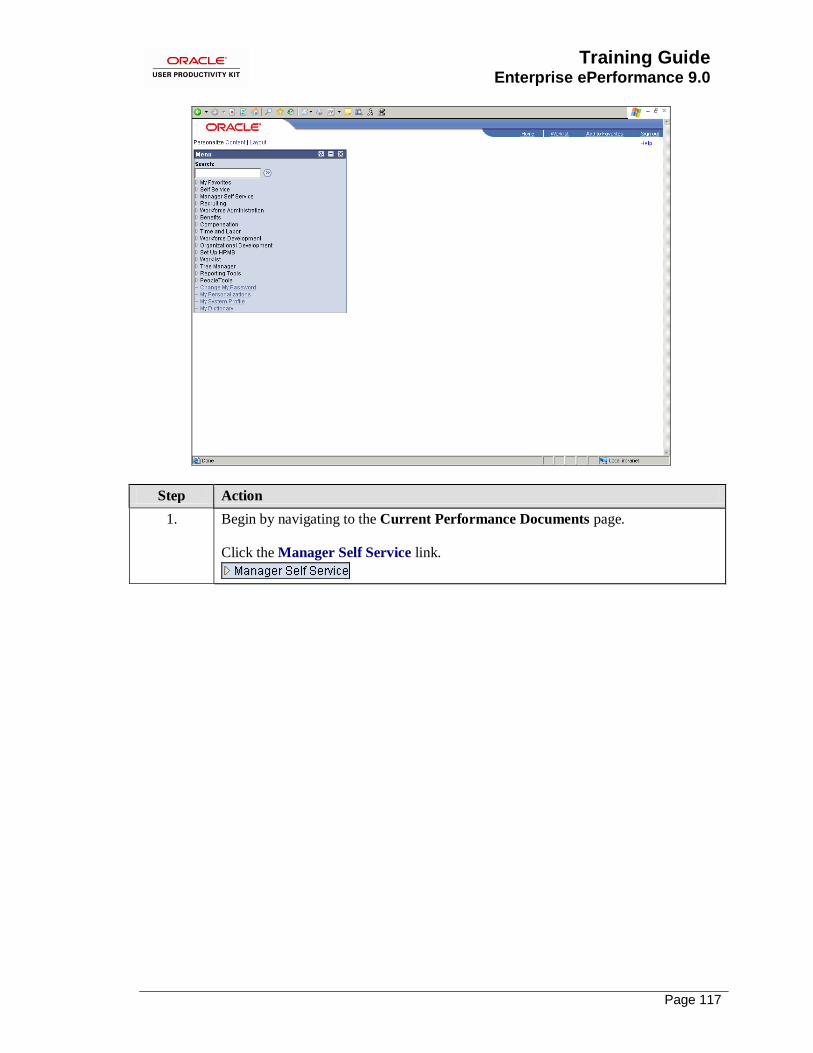
Training Guide Enterprise ePerformance 9.0
Page 117
Step Action
1. Begin by navigating to the Current Performance Documents page.
Click the Manager Self Service link.

Training Guide
Enterprise ePerformance 9.0
Page 118
Step Action
2. Click the Performance Management link.
3. Click the Current Documents link.
4. Use the Current Performance Documents page to view performance documents that you own. Upon accessing the documents, you can view, update, modify, or
perform various administrative actions on them.

Training Guide Enterprise ePerformance 9.0
Page 119
Step Action
5. Click the Annual Review link.
6. Use the Document Details page to review the document progress and to navigate to
the evaluation process pages.

Training Guide
Enterprise ePerformance 9.0
Page 120
Step Action
7. Click the Edit link.
8. Use the Manage Evaluation page to enter your evaluation ratings for your rated employee.
9. Documents are divided into sections, with each section containing a different type of
content. For example, a section can include your organization's mission statement,
assessment criteria, employee comments, manager comments, an overall summary, or signature lines. The sections that appear in a performance document are
determined by the template that generates the form.
For this example, enter comments in the Overall Summary section.

Training Guide Enterprise ePerformance 9.0
Page 121
Step Action
10. Click the vertical scrollbar.
11. Click the Rating list.
12. Click the Exceeds Expectations list item.
13. Click in the Comments field.
14. Enter the desired information into the Comments field. Enter "Annie has
performed well for a person her age.".
15. Click the Check Language button.
16. Use the Check Language page to check for inappropriate language within all the
Comments fields in a review, and review suggested alternatives.
17. The word or phrase that's deemed inappropriate appears at the top of the page. The
sentence in which it's used is shown below it.

Training Guide
Enterprise ePerformance 9.0
Page 122
Step Action
18. You can click the Ignore button to see the next sentence, or click the Change button
to access edit mode for the displayed sentence.
If more than one objectionable word or phrase is found in the document, each is
displayed in succession, and you can edit the field where the text is found by
repeating the procedure. If you click the Ignore button, the system continues to
check the remainder of the document without opening this field for edits. If you click the Ignore All button, the system will not notify you of this same
objectionable text if it appears elsewhere in the document. If you click the Close
button, the Language Checker will be terminated, and you'll be returned to the performance document.
Step Action
19. In this example, you want to edit the sentence.
Click the Change button.
20. Click in the Results field.
21. Enter the desired information into the Results field. Enter "Annie performed well
compared to her peers.".
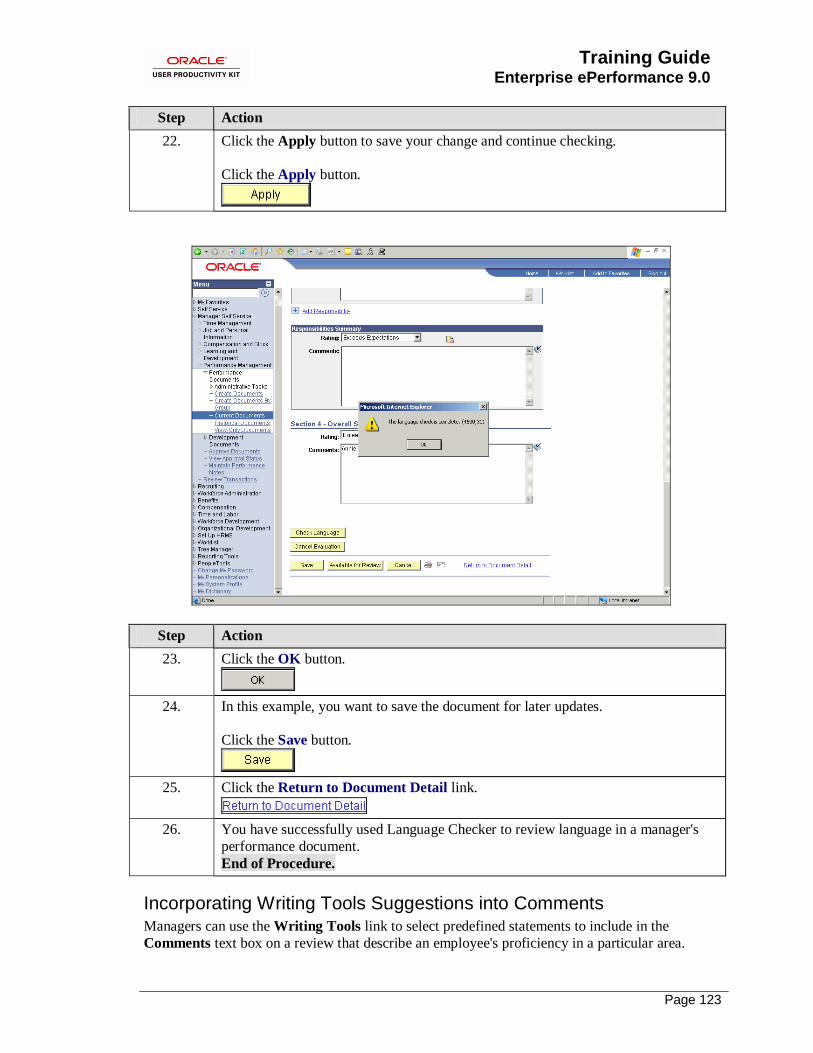
Training Guide Enterprise ePerformance 9.0
Page 123
Step Action
22. Click the Apply button to save your change and continue checking.
Click the Apply button.
Step Action
23. Click the OK button.
24. In this example, you want to save the document for later updates.
Click the Save button.
25. Click the Return to Document Detail link.
26. You have successfully used Language Checker to review language in a manager's
performance document.
End of Procedure.
Incorporating Writing Tools Suggestions into Comments Managers can use the Writing Tools link to select predefined statements to include in the
Comments text box on a review that describe an employee's proficiency in a particular area.
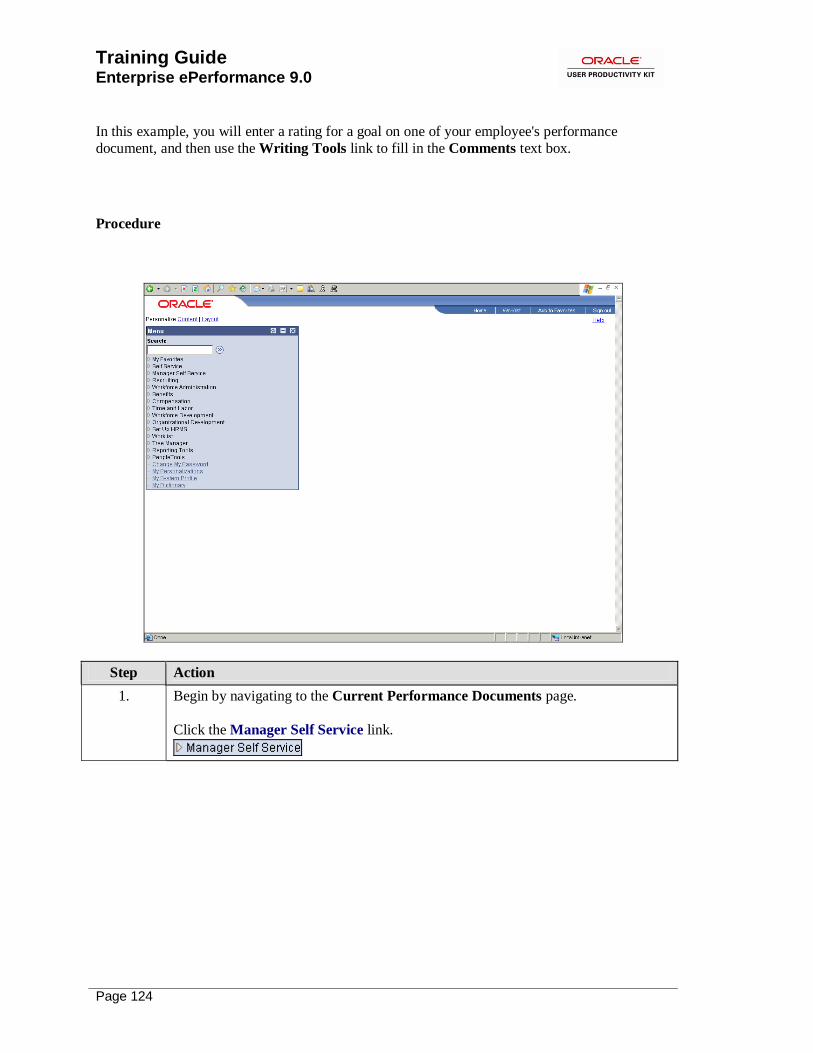
Training Guide
Enterprise ePerformance 9.0
Page 124
In this example, you will enter a rating for a goal on one of your employee's performance
document, and then use the Writing Tools link to fill in the Comments text box.
Procedure
Step Action
1. Begin by navigating to the Current Performance Documents page.
Click the Manager Self Service link.

Training Guide Enterprise ePerformance 9.0
Page 125
Step Action
2. Click the Performance Management link.
3. Click the Current Documents link.
4. The Current Performance Documents page displays performance documents that
you own. Upon accessing the documents, you can view, update, modify, or perform
various administrative actions on them.

Training Guide
Enterprise ePerformance 9.0
Page 126
Step Action
5. Click the vertical scrollbar.
6. Click the Performance Document link.
7. Use the Document Details page to review the document progress for the employee. You can navigate to the evaluation pages from this page.
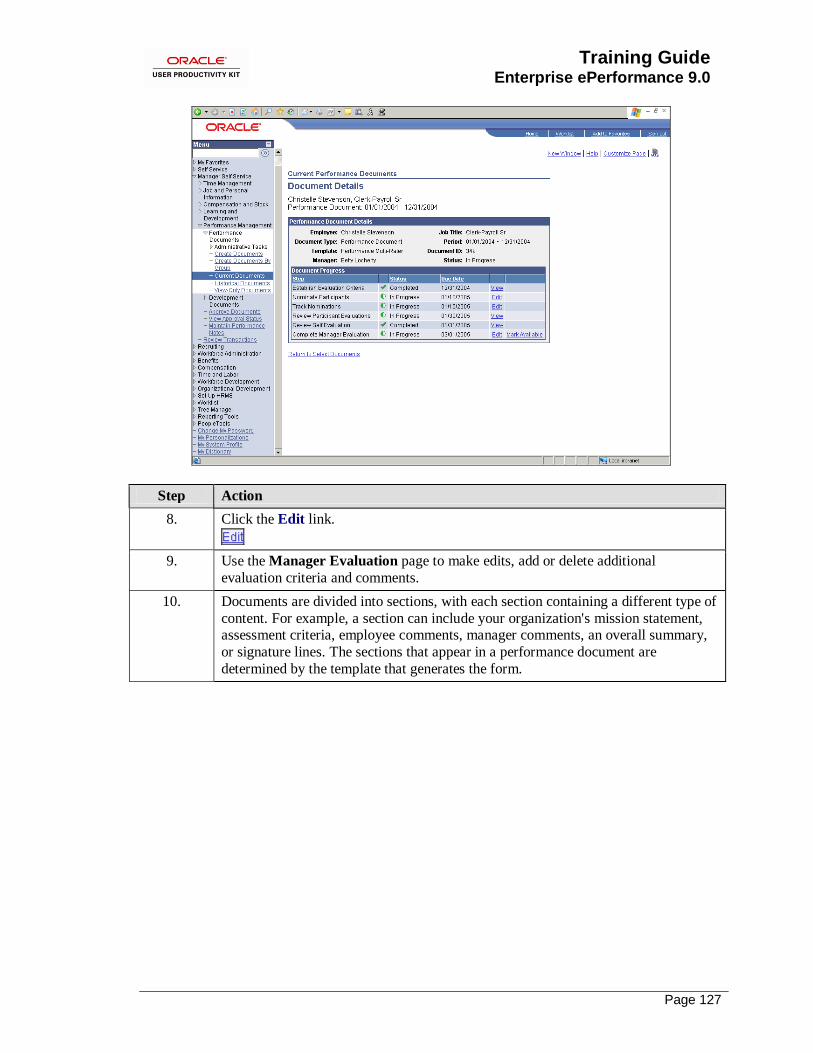
Training Guide Enterprise ePerformance 9.0
Page 127
Step Action
8. Click the Edit link.
9. Use the Manager Evaluation page to make edits, add or delete additional
evaluation criteria and comments.
10. Documents are divided into sections, with each section containing a different type of
content. For example, a section can include your organization's mission statement, assessment criteria, employee comments, manager comments, an overall summary,
or signature lines. The sections that appear in a performance document are
determined by the template that generates the form.

Training Guide
Enterprise ePerformance 9.0
Page 128
Step Action
11. In this example, you are rating the first goal listed.
Click the Rating list.
12. Click the Exceeds Expectations list item.
13. Click the Writing Tools link to incorporate text suggestions into comments.
Click the Writing Tools link.
14. Use the Writing Tools: Suggested Results page to select from predefined
performance statements that can be used in the Comments text box.
15. In this example, you accessed this page after entering a rating, so the system lists suggested statements that are specific to the employee's proficiency as determined
by the rating.
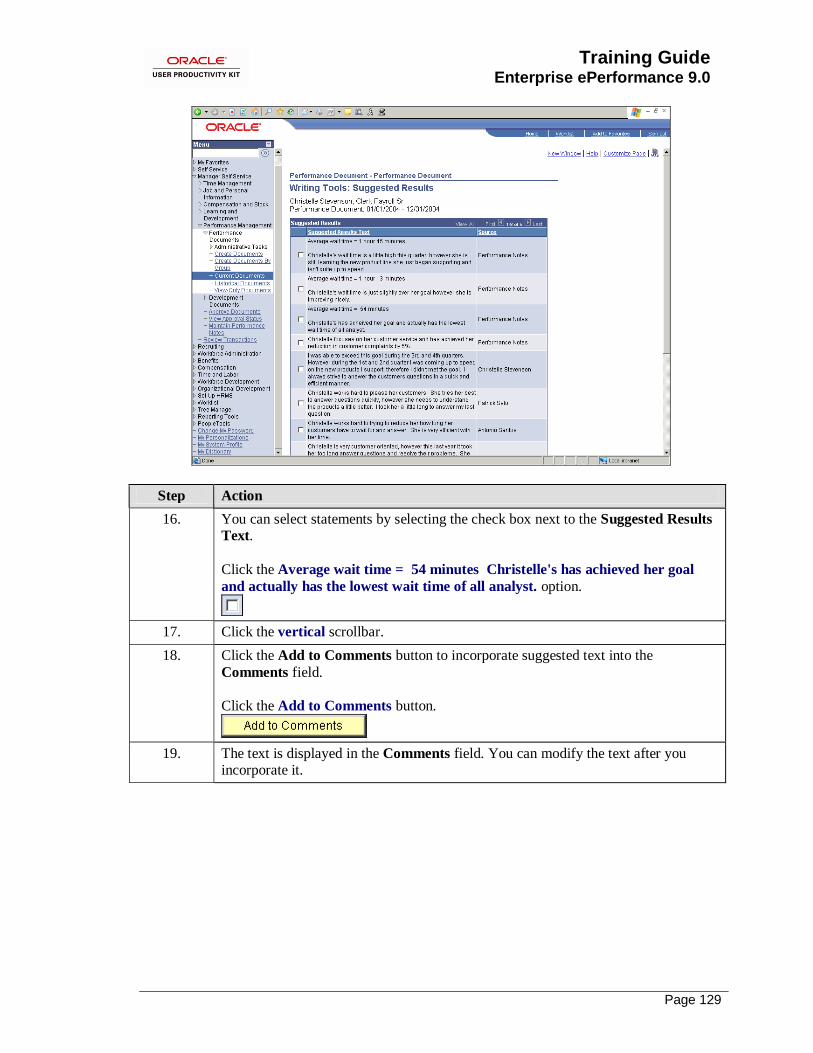
Training Guide Enterprise ePerformance 9.0
Page 129
Step Action
16. You can select statements by selecting the check box next to the Suggested Results
Text.
Click the Average wait time = 54 minutes Christelle's has achieved her goal
and actually has the lowest wait time of all analyst. option.
17. Click the vertical scrollbar.
18. Click the Add to Comments button to incorporate suggested text into the
Comments field.
Click the Add to Comments button.
19. The text is displayed in the Comments field. You can modify the text after you incorporate it.

Training Guide
Enterprise ePerformance 9.0
Page 130
Step Action
20. You can also use additional writing tools to aid in the creation of your Comments
text. Use the Find Additional Content field to find other text items to incorporate
into the comments box, in the case that you don't find suitable text in the Suggested
Results list. Only tools that are enabled for the role on the document template
appear. This grid can contain any or all of these items:
• Results Writer text.
• Development tips. • Performance notes.
• Comments from other evaluators.
You can select one or more comments and click the Add to Comments button to
add them to the comments for this section. Comments are added without line breaks
— you must manually insert line breaks to start each comment on a new line.
21. Click the Save and Return button.
22. Notice that the Comments field contains the text suggested from the Writing Tools
page.
Step Action
23. Click the Save button.

Training Guide Enterprise ePerformance 9.0
Page 131
Step Action
24. Click the Return to Document Detail link.
25. You have successfully entered comments to a goal in a performance document using
the Writing Tools feature.
End of Procedure.
Nominating and Tracking Participants
The multi-participant process enables individuals other than the manager and employee to
provide direct feedback into an employee's performance or development document. Additional
roles might include peers, mentors, customers, and other managers.
You select the roles and specify the capabilities of each role on the document template. The
options that you select on the document template also control how the manager and employee interact with the process. The multi-participant process can begin any time after the criteria
document is created. If the Establish Criteria step is enabled on the document template, you
cannot start the Nominate Participants step you complete that step, because nominees must be able to view the evaluation criteria before deciding whether to accept or decline a nomination.
The actions that managers and employees can perform relative to multiple participants are
defined on the Template Definition-Process page in the Nominate Participants and Review
Participant Evaluations page regions. These actions include:
• Nominate participants. Although both the manager and employee can nominate participants if
the Updated By check box is selected for their role, only the role that is selected in the Submitted By field can approve and submit the nominations.
• Track the status of nominations and cancel nominations. A tracker might cancel a nomination if
it is pending for too long. The tracker has the ability to resubmit cancelled nominations.
• Review participant evaluations. This step consists of two functions: tracking participant evaluations and accessing the content of participant evaluations. The ability to perform the two
functions is set separately on the Process page of the document template. If the Accessed By
check box is selected for the role, the role can view a list of participants and their evaluation status. If the Viewed By check box is also selected for the role, an active link to the participant
evaluation is available to open and view the evaluation itself. A user that can open evaluations
can also change the due date of the evaluation or send it back for rework. Both of these actions trigger notifications to the participant.
Optional features of the nomination process that are controlled on the document template include
the ability to: • Establish a minimum and maximum number of participants.
• Designate that nominee information is anonymous in the tracking nominations feature.
• Designate that feedback from a participant role is anonymous for either the manager and/or employee.
Upon completion of this lesson, you will be able to: • Nominate participants.
• Track nomination status.
• Accept or decline a nomination.
• Complete a participant evaluation.

Training Guide
Enterprise ePerformance 9.0
Page 132
• Review a participant evaluation.
Nominating Participants Use the Nominate Participants page to nominate participants for multi-source evaluations. On
this page, you can view the number of participants that are required for each role, view a list of
the nominees you selected, and submit evaluation requests to nominees.
Nominations are not submitted to nominees until the minimum number of participants are
nominated and the Establish Criteria step, if applicable, is complete. After a nomination is submitted, it has the status of Pending.
Nominees can view their evaluation requests and accept or decline nominations. When a nominee accepts a nomination, the nomination status changes to Accepted, and the system generates an
evaluation for the nominee.
Consider this scenario: Your organization uses a multi-participant process for performance evaluations. As a manager, you need to nominate participants for the employees that report to
you. In this topic, you will nominate participants for one of your rated employees.
Procedure

Training Guide Enterprise ePerformance 9.0
Page 133
Step Action
1. Begin by navigating to the Current Performance Documents page.
Click the Manager Self Service link.
Step Action
2. Click the Performance Management link.
3. Click the Current Documents link.
4. The Current Performance Documents page displays performance documents that you own. Upon accessing the documents, you can view, update, modify, or perform
various administrative actions on them.
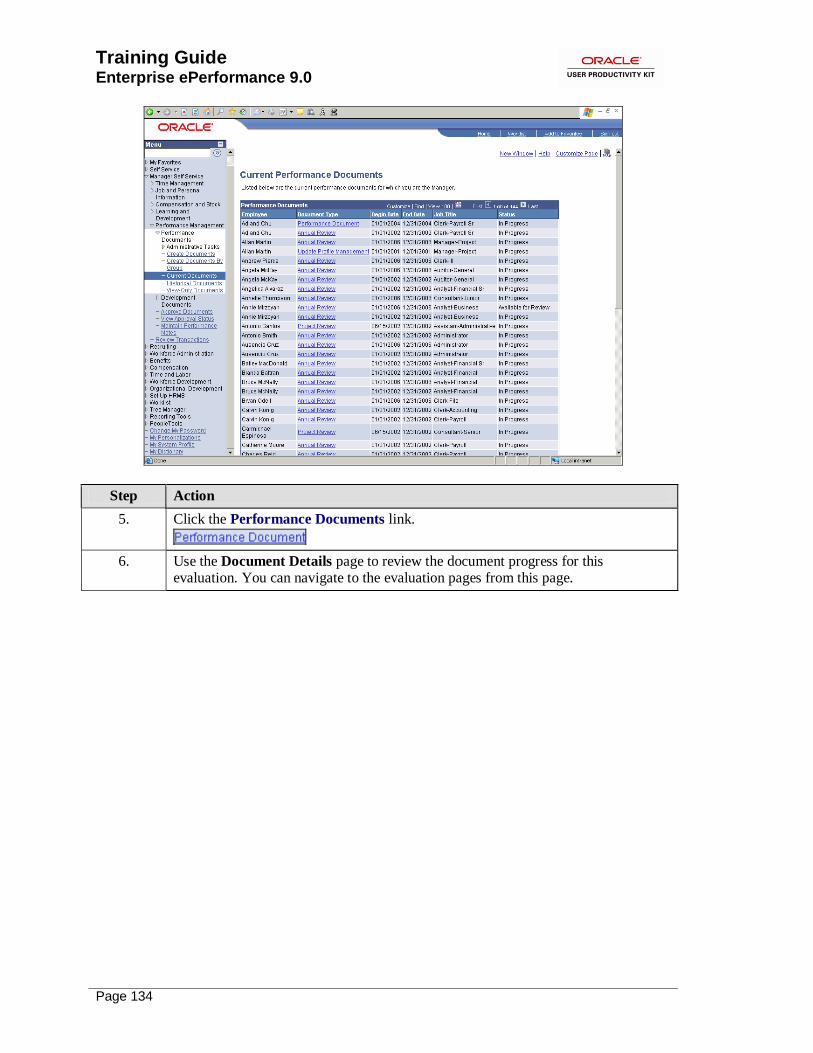
Training Guide
Enterprise ePerformance 9.0
Page 134
Step Action
5. Click the Performance Documents link.
6. Use the Document Details page to review the document progress for this evaluation. You can navigate to the evaluation pages from this page.
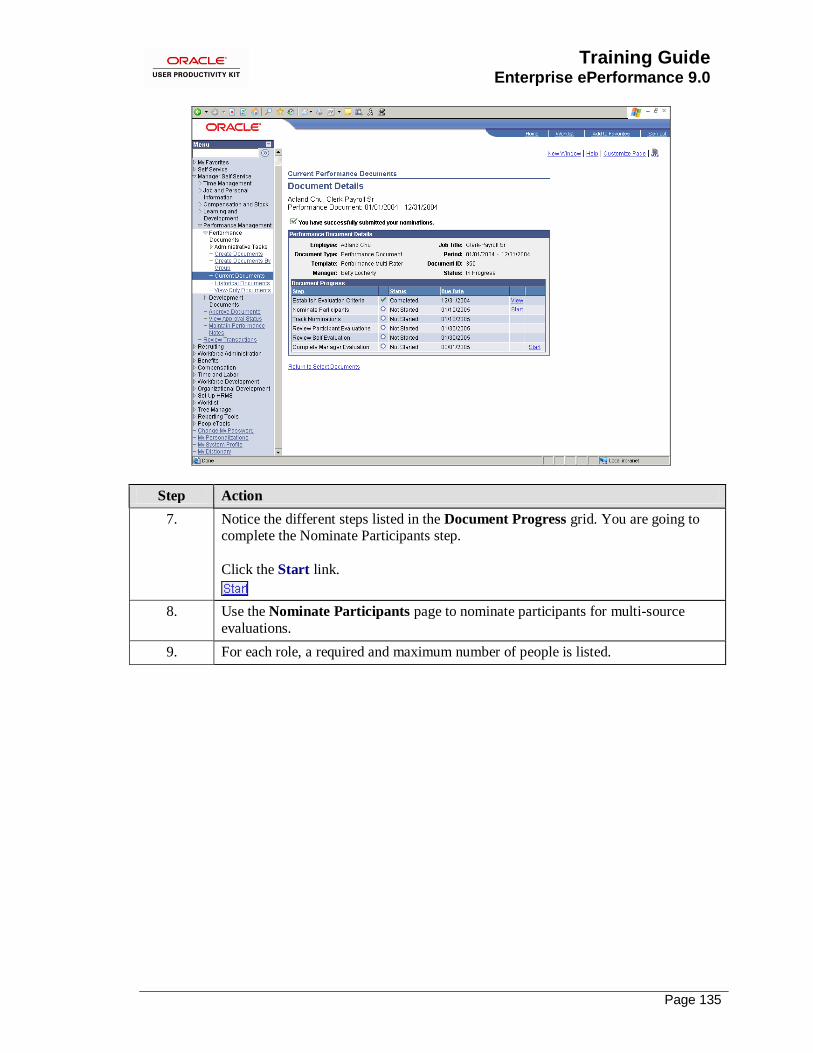
Training Guide Enterprise ePerformance 9.0
Page 135
Step Action
7. Notice the different steps listed in the Document Progress grid. You are going to complete the Nominate Participants step.
Click the Start link.
8. Use the Nominate Participants page to nominate participants for multi-source
evaluations.
9. For each role, a required and maximum number of people is listed.

Training Guide
Enterprise ePerformance 9.0
Page 136
Step Action
10. Click the Add links to access the Person Search - Simple page and search for
persons to nominate in the role that is listed.
One Add link appears for each participant role that is defined on the document
template. For example, the Add Peer link appears if the peer role is defined on the
document template.
Click the Add Other link.
11. Use the Person Search - Simple page to search for the participant your would like to add to this evaluation.

Training Guide Enterprise ePerformance 9.0
Page 137
Step Action
12. In this example, you are nominating another manager to be a participant in this employee's evaluation.
Enter the desired information into the Last Name field. Enter "Richards".
13. Click the Search button.
14. You can view information about the individuals listed to ensure you are selecting the
correct person.
Click the Information button.
15. From this page, you can select the individual or return to the list.
Click the Select This Person button.
16. The individual has been selected as indicated by the check mark next to the name.
Click the OK button.

Training Guide
Enterprise ePerformance 9.0
Page 138
Step Action
17. Next, you are going to nominate three peers (the minimum number required).
Click the Add Peer link.

Training Guide Enterprise ePerformance 9.0
Page 139
Step Action
18. Enter the desired information into the Last Name field. Enter "Bidar".
19. Click the Search button.
20. Click the Sanjay Bidar option.
21. Click the OK button.
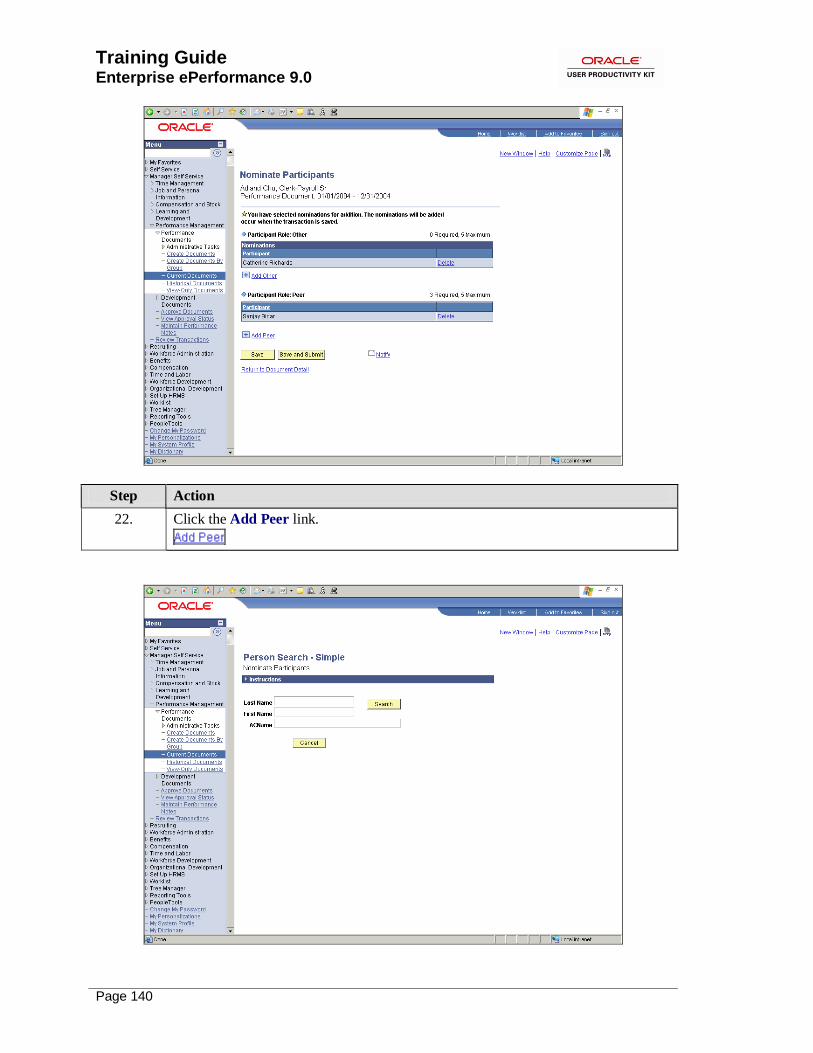
Training Guide
Enterprise ePerformance 9.0
Page 140
Step Action
22. Click the Add Peer link.

Training Guide Enterprise ePerformance 9.0
Page 141
Step Action
23. Enter the desired information into the Last Name field. Enter "Campos".
24. Click the Search button.
25. Click the Juliette Campos option.
26. Click the OK button.
Step Action
27. Click the Add Peer link.
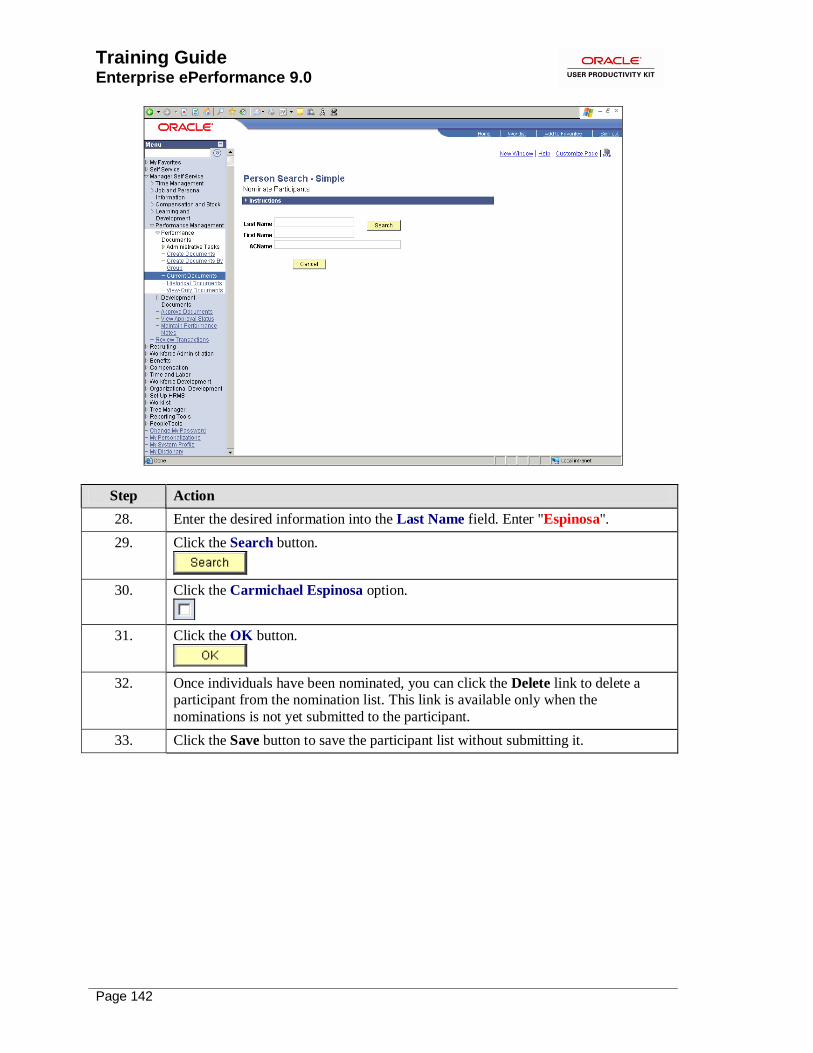
Training Guide
Enterprise ePerformance 9.0
Page 142
Step Action
28. Enter the desired information into the Last Name field. Enter "Espinosa".
29. Click the Search button.
30. Click the Carmichael Espinosa option.
31. Click the OK button.
32. Once individuals have been nominated, you can click the Delete link to delete a participant from the nomination list. This link is available only when the
nominations is not yet submitted to the participant.
33. Click the Save button to save the participant list without submitting it.

Training Guide Enterprise ePerformance 9.0
Page 143
Step Action
34. Click the Save and Submit button to save the participant list and submit the nominations to the nominees. This button only appears if the role you signed in with
is enabled to submit nominations on the document template and the Establish
Criteria step is complete. Submitted nominations appear on the nominee's My
Evaluation Requests page.
Click the Save and Submit button.
35. You have successfully nominated participants for an employee's performance evaluation.
End of Procedure.
Tracking Nomination Status Use the Track Nominations page to track the status of nominations that you submitted.
Consider this scenario: Your organization uses a multi-participant process for performance
evaluations. As a manager, you need to nominate participants for the employees that report to you. In this topic, you will review the status of participants that have been nominated to evaluate
an employee's performance.
Procedure
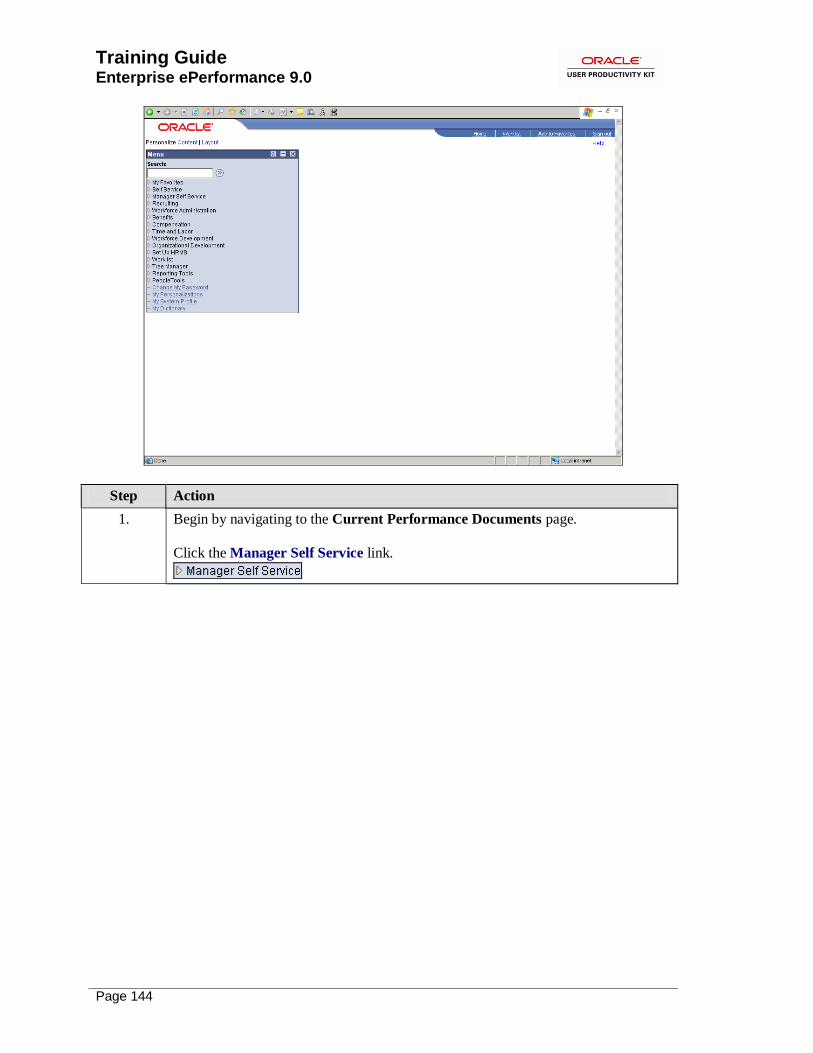
Training Guide
Enterprise ePerformance 9.0
Page 144
Step Action
1. Begin by navigating to the Current Performance Documents page.
Click the Manager Self Service link.
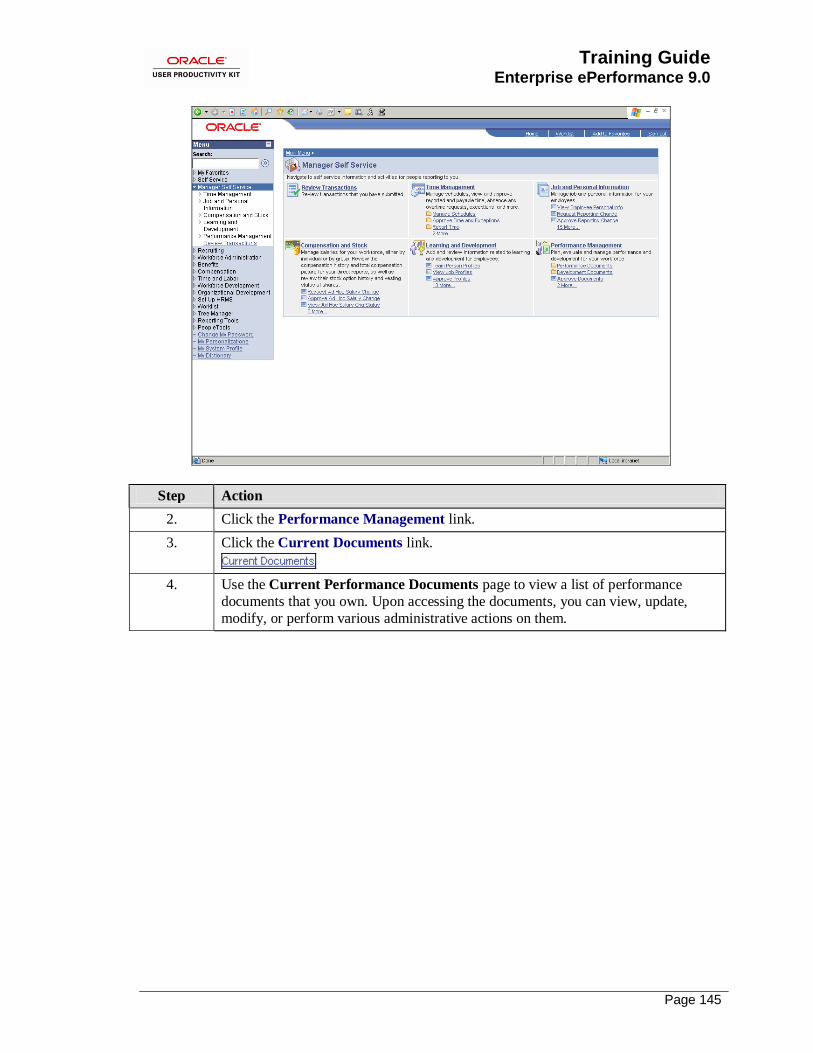
Training Guide Enterprise ePerformance 9.0
Page 145
Step Action
2. Click the Performance Management link.
3. Click the Current Documents link.
4. Use the Current Performance Documents page to view a list of performance
documents that you own. Upon accessing the documents, you can view, update,
modify, or perform various administrative actions on them.

Training Guide
Enterprise ePerformance 9.0
Page 146
Step Action
5. Click the Performance Document link.
6. Use the Document Details page to view the document progress. You can navigate to the evaluation pages from here.
7. Notice the different steps listed in the Document Progress grid. You are going to
complete the Track Nominations step.

Training Guide Enterprise ePerformance 9.0
Page 147
Step Action
8. Click the Edit link.
9. Use the Track Nominations page to track the status of your selected participants. A
summary of the nomination status for each participant role appears preceding the
participant list for the role. This summary lists the remaining required and maximum nominations that you must submit and have accepted before the Nominate
Participants step is complete.
10. Use the Nominations grids to view the status of each individual nominee, by role. If
the Anonymity check box is selected for a role, the nominee is identified by role and a number, otherwise the nominee's name appears in the list.
11. The following actions are available:
• Cancel. Click this link to cancel a nomination request.
• Resubmit. Click this link to resubmit a nomination request. This link appears for nominations that you previously cancelled.
• Decline. Click this link to view the nominee's comments on why they declined.
This link appears if the nominee declined the evaluation request.
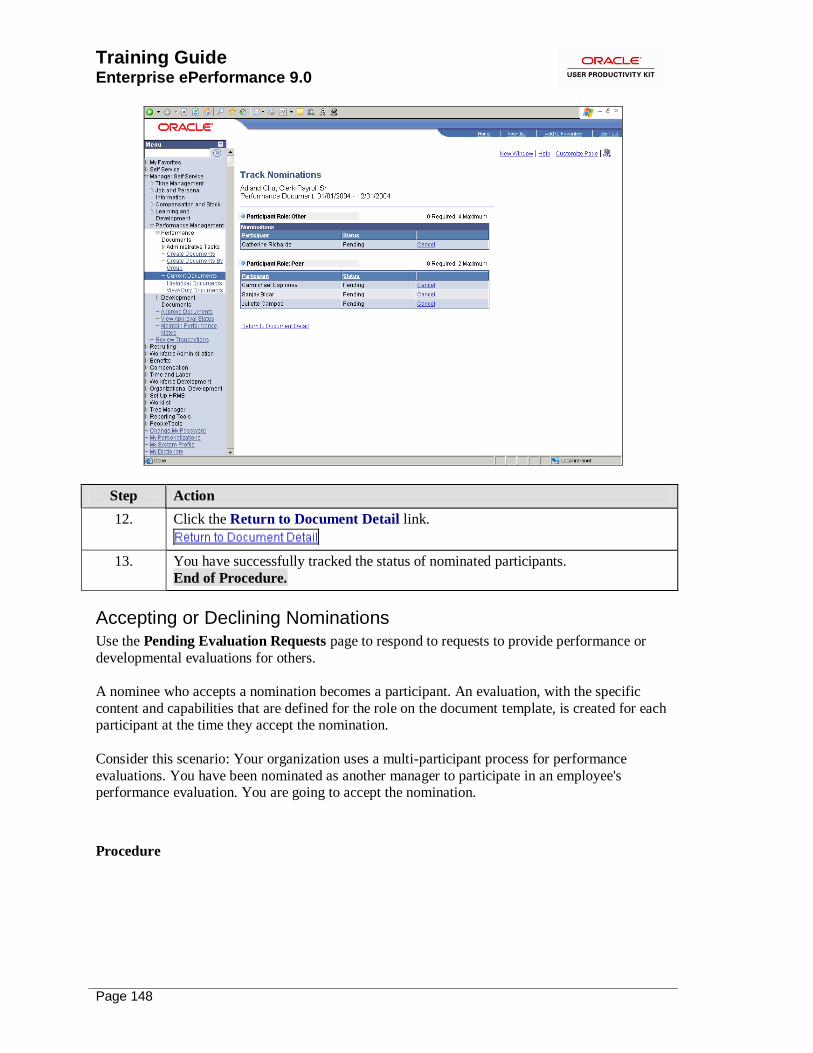
Training Guide
Enterprise ePerformance 9.0
Page 148
Step Action
12. Click the Return to Document Detail link.
13. You have successfully tracked the status of nominated participants.
End of Procedure.
Accepting or Declining Nominations Use the Pending Evaluation Requests page to respond to requests to provide performance or
developmental evaluations for others.
A nominee who accepts a nomination becomes a participant. An evaluation, with the specific
content and capabilities that are defined for the role on the document template, is created for each participant at the time they accept the nomination.
Consider this scenario: Your organization uses a multi-participant process for performance
evaluations. You have been nominated as another manager to participate in an employee's performance evaluation. You are going to accept the nomination.
Procedure

Training Guide Enterprise ePerformance 9.0
Page 149
Step Action
1. Begin by navigating to the Pending Evaluation Requests page.
Click the Self Service link.

Training Guide
Enterprise ePerformance 9.0
Page 150
Step Action
2. Click the Performance Management link.
3. Click the Pending Evaluation Requests link.
4. Use the Pending Evaluation Requests page to accept or decline a nomination.
5. Click the Accept button to accept the evaluation requests that you select.
This action changes the nomination status to Accepted, creates the evaluation
document, adds it to the Other's Performance Documents - Current Documents list, and transfers the user to this navigation. A notification is also sent to the
nominator.
6. Click the Decline button to decline the evaluation requests that you select.
This action brings up the Decline Evaluation Request Confirmation page, on
which you enter a reason for declining the nomination. The system changes the
nomination status to Declined and sends a notification to the nominator.

Training Guide Enterprise ePerformance 9.0
Page 151
Step Action
7. In this example, you are going to accept the nomination.
Click the Adland Chu option.
8. Click the Accept button.
9. You have successfully accepted a nomination.
End of Procedure.
Completing Participant Evaluations Use the My Current Evaluations for Others page to view a list of the evaluations that you are
performing for employees who are not in a reporting relationship to you. From this page, you can
select and complete the evaluation.
Consider this scenario: Your organization uses a multi-participant process for performance
evaluations. You have been nominated to participate in an employee's performance evaluation. You have accepted the nomination and are now going to complete the evaluation.
Procedure

Training Guide
Enterprise ePerformance 9.0
Page 152
Step Action
1. Begin by navigating to the My Current Evaluations for Others page.
Click the Self Service link.

Training Guide Enterprise ePerformance 9.0
Page 153
Step Action
2. Click the Performance Management link.
3. Click the Current Evaluations link.
4. Use the My Current Evaluations for Others page to select the document to
complete the participant evaluation process.

Training Guide
Enterprise ePerformance 9.0
Page 154
Step Action
5. Click the Performance Document link.
6. Use the Other Evaluation page to enter participant evaluation data. Documents are divided into sections, with each section containing a different type of content. For
example, a section can include your organization's mission statement, assessment
criteria, employee comments, manager comments, an overall summary, or signature
lines. The sections that appear in a performance document are determined by the template that generates the form.
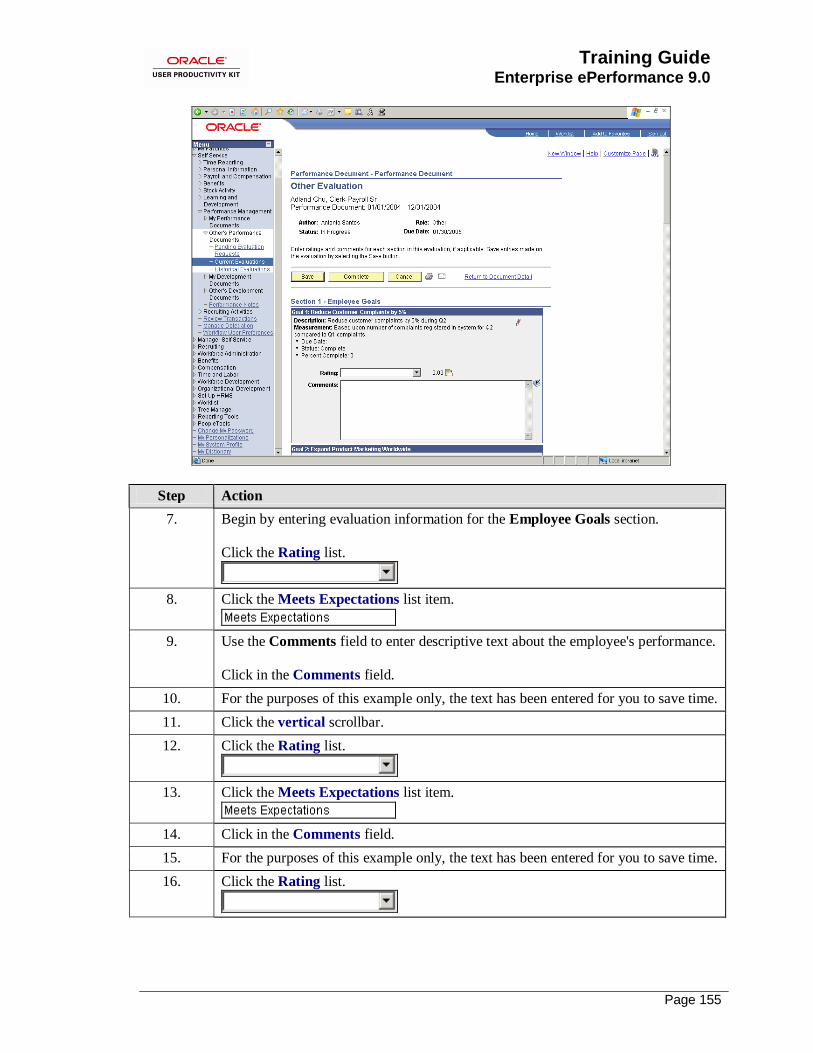
Training Guide Enterprise ePerformance 9.0
Page 155
Step Action
7. Begin by entering evaluation information for the Employee Goals section.
Click the Rating list.
8. Click the Meets Expectations list item.
9. Use the Comments field to enter descriptive text about the employee's performance.
Click in the Comments field.
10. For the purposes of this example only, the text has been entered for you to save time.
11. Click the vertical scrollbar.
12. Click the Rating list.
13. Click the Meets Expectations list item.
14. Click in the Comments field.
15. For the purposes of this example only, the text has been entered for you to save time.
16. Click the Rating list.
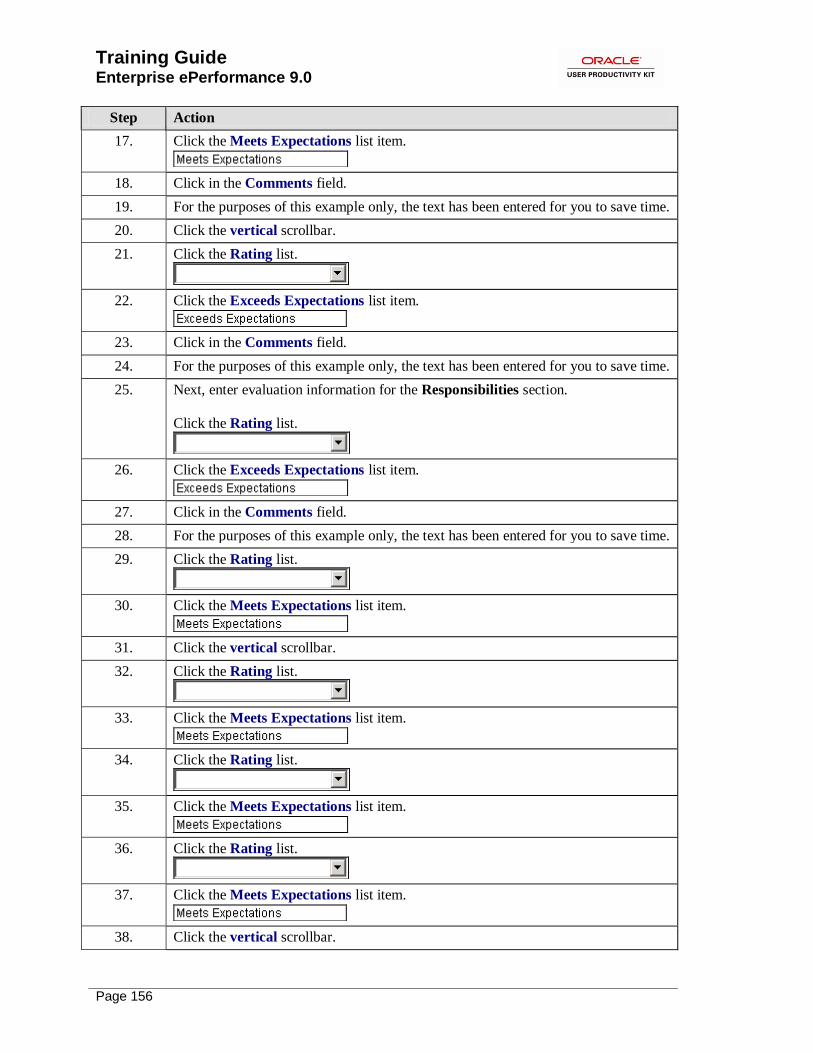
Training Guide
Enterprise ePerformance 9.0
Page 156
Step Action
17. Click the Meets Expectations list item.
18. Click in the Comments field.
19. For the purposes of this example only, the text has been entered for you to save time.
20. Click the vertical scrollbar.
21. Click the Rating list.
22. Click the Exceeds Expectations list item.
23. Click in the Comments field.
24. For the purposes of this example only, the text has been entered for you to save time.
25. Next, enter evaluation information for the Responsibilities section.
Click the Rating list.
26. Click the Exceeds Expectations list item.
27. Click in the Comments field.
28. For the purposes of this example only, the text has been entered for you to save time.
29. Click the Rating list.
30. Click the Meets Expectations list item.
31. Click the vertical scrollbar.
32. Click the Rating list.
33. Click the Meets Expectations list item.
34. Click the Rating list.
35. Click the Meets Expectations list item.
36. Click the Rating list.
37. Click the Meets Expectations list item.
38. Click the vertical scrollbar.

Training Guide Enterprise ePerformance 9.0
Page 157
Step Action
39. Click the Rating list.
40. Click the Meets Expectations list item.
41. Click the Save button.
42. Finally, complete your evaluation.
Click the Complete button.
43. Use the Complete Evaluation page to finalize your evaluation. If you have no further entires, click the Complete button at the bottom of the page.
Step Action
44. Click the Complete button.
45. Use the Complete Evaluation Confirmation page to mark your evaluation as final
and complete.

Training Guide
Enterprise ePerformance 9.0
Page 158
Step Action
46. Click the OK button.
47. You have successfully completed a participant evaluation.
End of Procedure.
Reviewing Participant Evaluations Use the Review Participant Evaluations page to track the status of multi-participant evaluations
and view the content of participant evaluations.
Consider this scenario: Your organization uses a multi-participant process for performance
evaluations. As a manager, you have nominated participants for the employees that report to you.
Some of the participants have completed their evaluations and you can now review them. In this topic, you are going to review a participant evaluation.
Procedure

Training Guide Enterprise ePerformance 9.0
Page 159
Step Action
1. Begin by navigating to the Current Performance Documents page.
Click the Manager Self Service link.
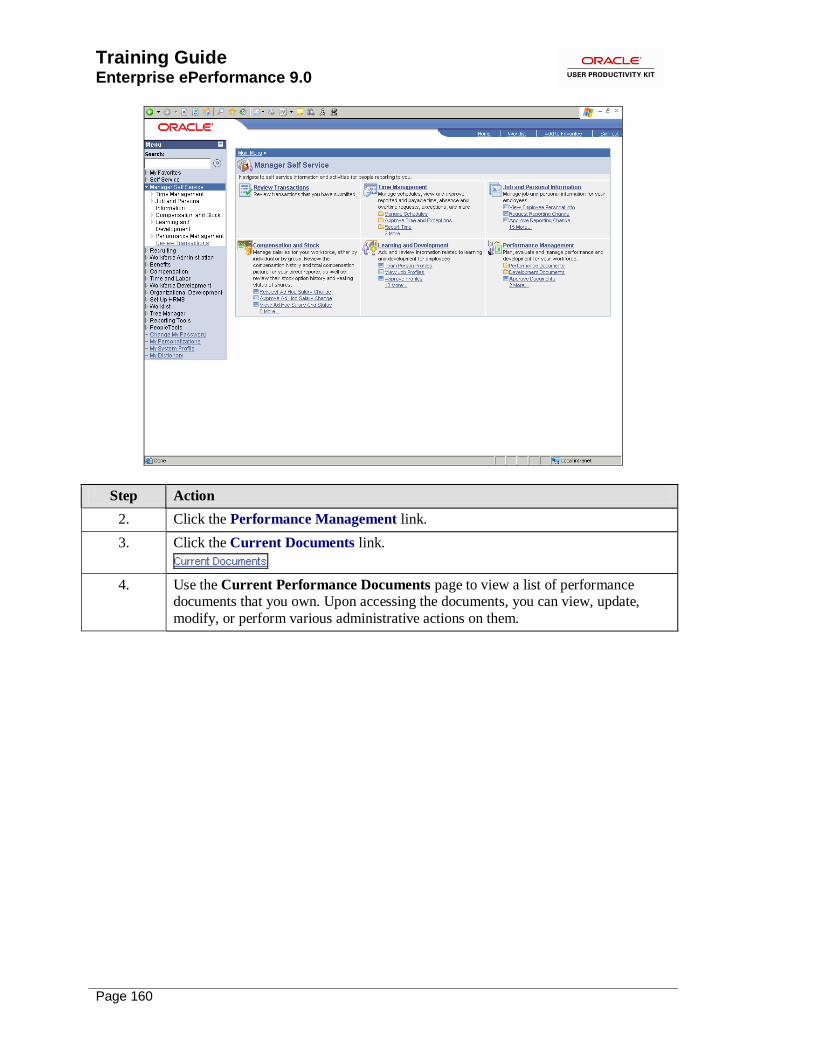
Training Guide
Enterprise ePerformance 9.0
Page 160
Step Action
2. Click the Performance Management link.
3. Click the Current Documents link.
4. Use the Current Performance Documents page to view a list of performance documents that you own. Upon accessing the documents, you can view, update,
modify, or perform various administrative actions on them.

Training Guide Enterprise ePerformance 9.0
Page 161
Step Action
5. Click the Performance Document link.
6. Use the Document Details page to view the document progress for this employee.
7. Notice the different steps listed in the Document Progress grid. You are going to
complete the Review Participant Evaluations step.

Training Guide
Enterprise ePerformance 9.0
Page 162
Step Action
8. Click the View link.
9. Use the Review Participants Evaluations page to select participant evaluations for your review.
10. If the Anonymity for Manager check box is selected on the document template, the
participants are listed by role: Peer1, Peer2, and so forth. If the Anonymity for
Manager check box is clear, the participant names are visible.
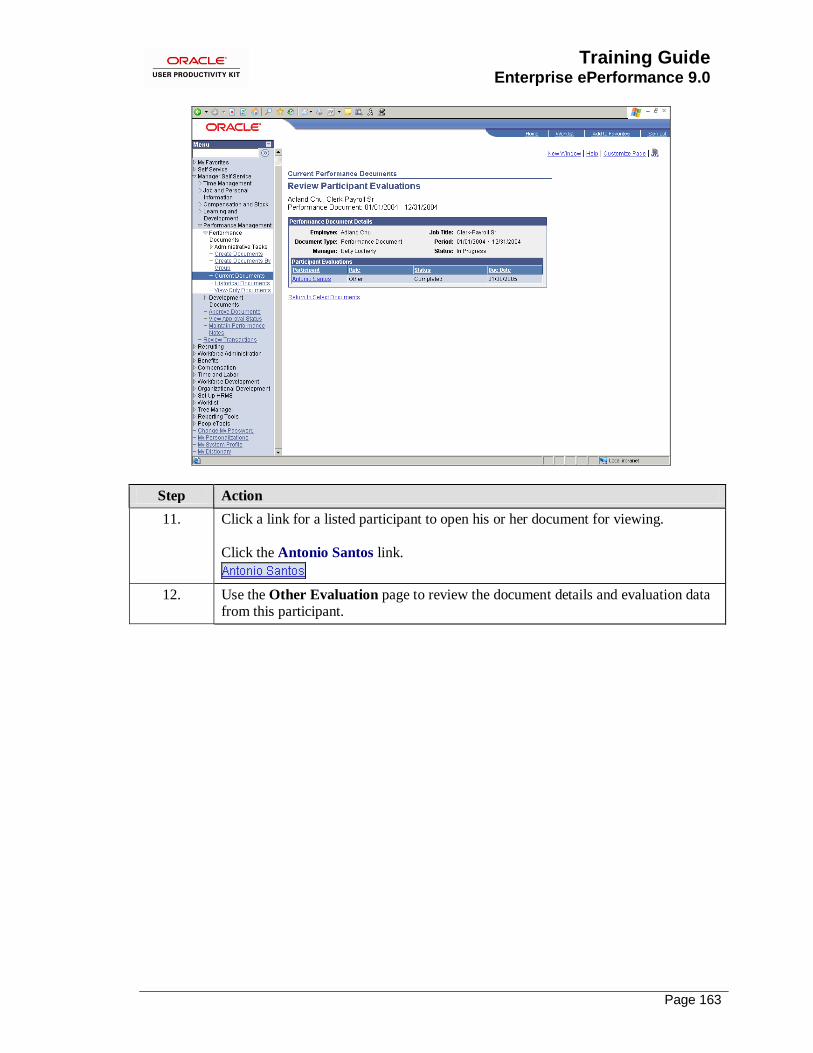
Training Guide Enterprise ePerformance 9.0
Page 163
Step Action
11. Click a link for a listed participant to open his or her document for viewing.
Click the Antonio Santos link.
12. Use the Other Evaluation page to review the document details and evaluation data from this participant.
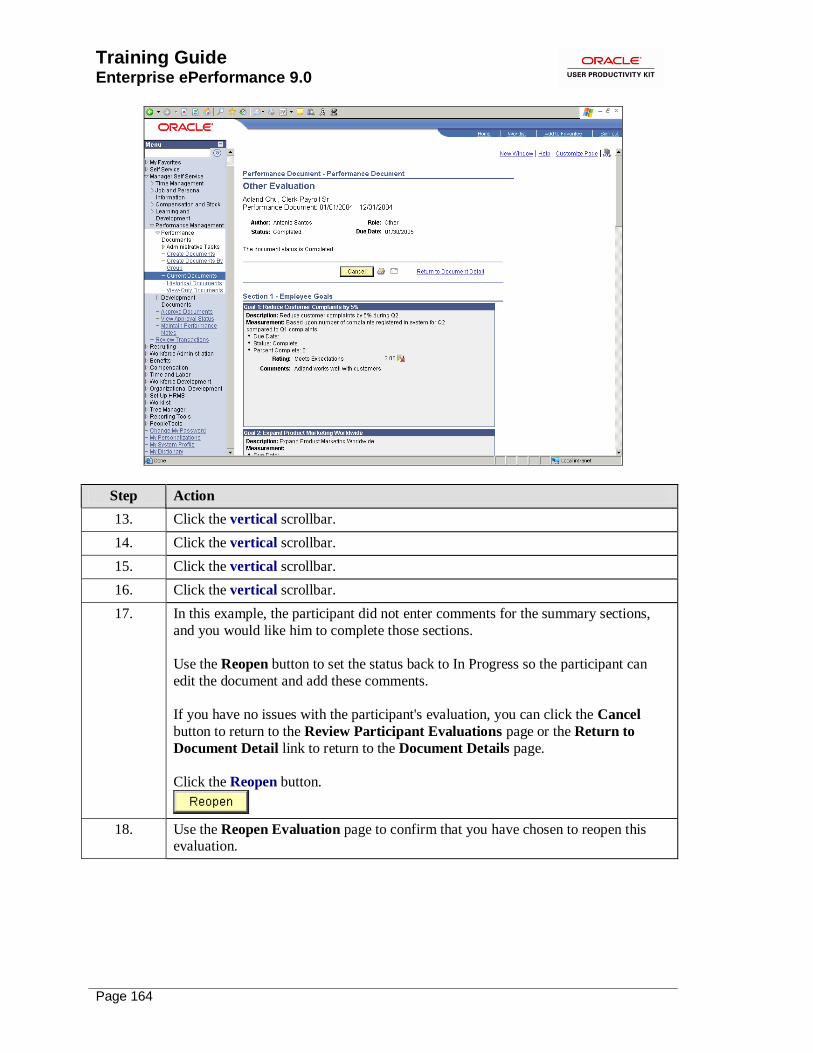
Training Guide
Enterprise ePerformance 9.0
Page 164
Step Action
13. Click the vertical scrollbar.
14. Click the vertical scrollbar.
15. Click the vertical scrollbar.
16. Click the vertical scrollbar.
17. In this example, the participant did not enter comments for the summary sections,
and you would like him to complete those sections.
Use the Reopen button to set the status back to In Progress so the participant can
edit the document and add these comments.
If you have no issues with the participant's evaluation, you can click the Cancel
button to return to the Review Participant Evaluations page or the Return to
Document Detail link to return to the Document Details page.
Click the Reopen button.
18. Use the Reopen Evaluation page to confirm that you have chosen to reopen this evaluation.

Training Guide Enterprise ePerformance 9.0
Page 165
Step Action
19. Click the OK button.
20. You have successfully reviewed a participant evaluation.
End of Procedure.
Managing Approvals
Because the process for approving performance documents varies greatly from one organization to another, ePerformance enables you to tailor the approval process to fit your organization by
doing the following:
• Controls where in the business process approvals must be obtained (if any).
A template determines when, and if, documents must be approved. The options are Approval
Before Review Held, Approval After Review Held, and Approval No Review Held.
• Controls who participates in the approval process.
Depending on how your system is set up, you can have performance documents approved by the
manager's manager and the ePerformance HR administrator, or the ePerformance HR administrator only.
• Identifies the approval status of documents. The system uses approval status values to track and manage the approval of documents. Certain
changes to the approval status automatically update the document status.
• Controls what users can do during different points in the approval process.
Training Guide
Enterprise ePerformance 9.0
Page 166
Approval Rulesets, Review Process options, Approval Status values, and Document Status values
control which page elements appear on the documents and what users can do during different
points in the approval process. For example, if the Review Process option is Approval After Review Held, the Submit button becomes available on the manager's document when the
document status changes from Review Held to Acknowledged.
Upon successful completion of this lesson, you will be able to:
• Define and distinguish between approval statuses.
• Describe how to initiate and complete the approval process.
• Describe the Review Process options.
Understanding Approval Statuses Approval status values track the status of manager documents through an optional approval
process. They work in combination with the document statuses to determine when and if
documents can be accessed, what actions a user can perform, and which page controls are
available to them. Certain changes to the approval status automatically update the document status.
In this topic, you will learn the descriptions of the following approval statuses in ePerformance: • Not Submitted
• Submitted
• Approved
• Denied • Approval Not Required
Procedure

Training Guide Enterprise ePerformance 9.0
Page 167
Step Action
1. The system uses approval status values to track and manage the approval of documents. Certain changes to the approval status automatically update the
document status.
This table illustrates how ePerformance tracks and manages the approval status of documents using approval status values.
2. Not Submitted is the initial status for performance documents that require approval.
It indicates that there has been no approval action.
When a performance document is first created, its approval status is set to Not
Submitted or Approval Not Required based on the Review Process option defined
on the template during setup.
3. The approval status of a performance document changes to Submitted when the manager submits a performance document for approval (by selecting the Submit
button on the performance document).
4. The Approved status is set when the last approval is obtained during the approval
process.
5. The Denied status indicates that an approver has denied or rejected the document. When a performance document is denied the document status of the manager's
document changes back to In Progress and the approval process must be initiated
again based upon the timing.
The manager must resolve the problem that led to approval being denied before
going through the employee review and employee acknowledgement process again.

Training Guide
Enterprise ePerformance 9.0
Page 168
Step Action
6. The Approval Not Required status is set if approval is not required based on the
performance process option selected during the template setup.
7. Approval status values track the status of manager documents through an optional
approval process.
End of Procedure.
Understanding the Approval Process
This topic outlines the general procedure for initiating and completing the approval of documents.
The specific steps you take depend on the performance process option selected on the template definition during setup, according to your organization's own business processes and rules.
Procedure
Step Action
1. This flowchart illustrates the general procedure for initiating and completing the
approval of documents.
2. The manager initiates the approval process by clicking the Submit button on the
manager's document. Once the document is submitted, this button is no longer visible unless the approval is denied. The manager can track the approval process for
the document through the View Approval Status page.

Training Guide Enterprise ePerformance 9.0
Page 169
Step Action
3. The first designated approver in the approval chain (a manager, an HR administrator, or other individual) is notified that the document is ready for
approval.
4. Each designated approver signs off on the document. Each time a reviewer gives his
or her approval, the system notifies all those who previously approved the
document. The current approver receives a confirmation notice of their approval.
5. If all required approvals are granted, the approval status of the document changes to Approved.
After approval is obtained, the manager cannot edit the ratings, review band, points, or weights.
6. If approval is denied at any point, the approval status of the document changes from
Submitted to Denied.
The system notifies the initiating manager and all previous approvers. The current
approver also receives a notice confirming the denial.
7. The status of the manager's document reverts to In Progress, giving the manager the
ability to edit the document and address the reason for the denial.
The manager must initiate the approval process from the beginning until the
document is approved.
8. This concludes the Understanding the Approval Process topic.
End of Procedure.
Understanding the Review Process Options
This topic includes descriptions of the three options that are available for document approvals. In
each case, the manager initiates the approval process by clicking the Submit button on the manager's document. The point at which this button becomes available depends on the document
status of the manager’s document, which is determined by the value in the Review Process field
on the template definition.
The three Review Process options are:
• Approval Before Review Held
• Approval After Review Held • Approval - No Review Held
Procedure
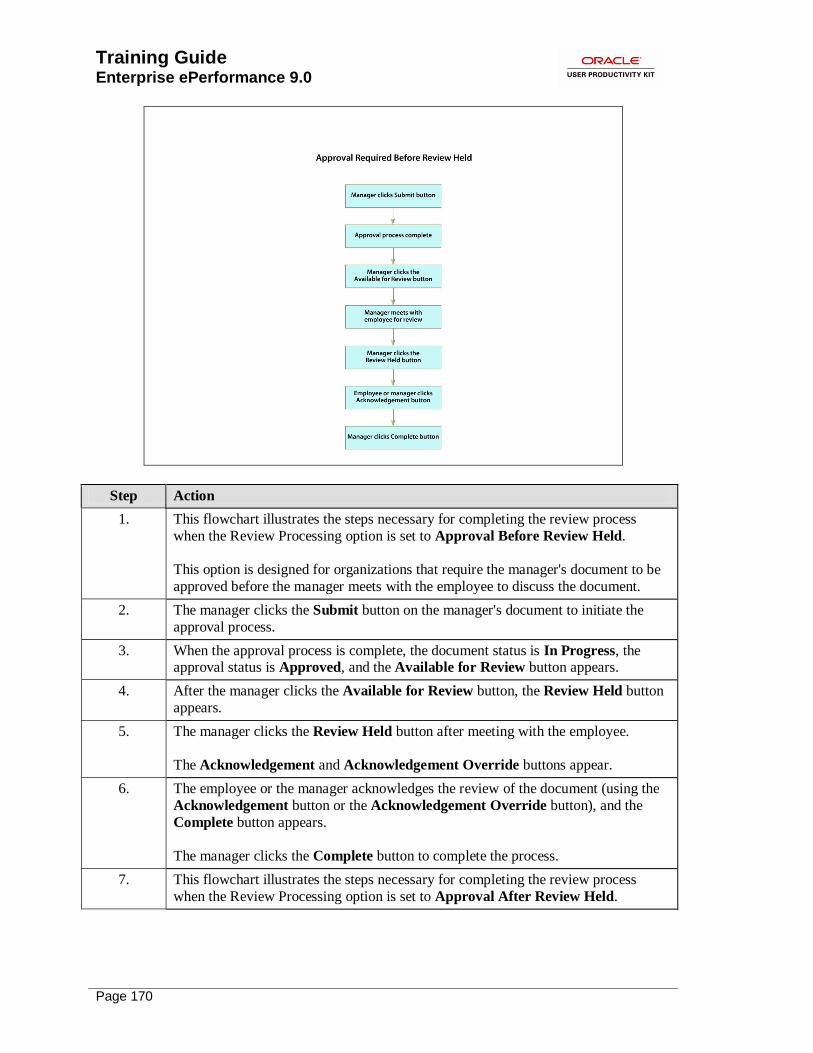
Training Guide
Enterprise ePerformance 9.0
Page 170
Step Action
1. This flowchart illustrates the steps necessary for completing the review process
when the Review Processing option is set to Approval Before Review Held.
This option is designed for organizations that require the manager's document to be
approved before the manager meets with the employee to discuss the document.
2. The manager clicks the Submit button on the manager's document to initiate the
approval process.
3. When the approval process is complete, the document status is In Progress, the approval status is Approved, and the Available for Review button appears.
4. After the manager clicks the Available for Review button, the Review Held button
appears.
5. The manager clicks the Review Held button after meeting with the employee.
The Acknowledgement and Acknowledgement Override buttons appear.
6. The employee or the manager acknowledges the review of the document (using the
Acknowledgement button or the Acknowledgement Override button), and the
Complete button appears.
The manager clicks the Complete button to complete the process.
7. This flowchart illustrates the steps necessary for completing the review process
when the Review Processing option is set to Approval After Review Held.

Training Guide Enterprise ePerformance 9.0
Page 171
Step Action
8. This option is designed for organizations that do not require approval until after the manager and employee have discussed the document and the employee or the
manager has acknowledged the document.
9. After the manager clicks the Available for Review button, the Review Held button
appears.
10. After meeting with the employee, the manager clicks the Review Held button.
The Acknowledgement and Acknowledgement Override buttons appear.
11. The employee or the manager acknowledges the document (using the
Acknowledgement button or the Acknowledgement Override button), and the
Submit button appears.
12. The manager clicks the Submit button to initiate the approval process.
The document status changes to Complete once all approvals are given.
Step Action
13. This flowchart illustrates the steps necessary for completing the review process
when the Review Processing option is set to Approval - No Review Held.
This option is designed for organizations in which approval is required, but no review meeting is held.

Training Guide
Enterprise ePerformance 9.0
Page 172
Step Action
14. If the performance process is set to Approval No Review Held, the manager clicks
the Submit button to initiate the approval process and the document status changes
to Complete once all approvals are given.
15. The three Review Process options in ePerformance are: • Approval Before Review Held
• Approval After Review Held
• Approval - No Review Held
End of Procedure.
Performing Administrative Tasks
You can perform certain administrative tasks outside of the evaluation cycle. Typically,
administrators perform these tasks for documents that belong to one or more groups of employees that do not report to them, while managers work only with documents for employees or groups
that report directly to them.
Upon completion of this lesson, you will be able to:
• Transfer a performance document.
• Change the status of a document.
• Cancel a document. • Delete a document.
Transfering Performance Documents There may be situations in which a performance document may need to be transferred from one
manager to another. A common situation is when a reorganization causes an employee to report
to a new manager. Managers and HR administrators can use the Transfer Document page to do this.
Only documents with statuses of In Progress, Available for Review, Review Held, or
Acknowledged are transferable. Administrators can transfer any documents with these statuses, while managers can transfer only documents that they currently own.
When a document is transferred, the system automatically notifies the new manager that he or she is responsible for completing the evaluation process that is in progress for that employee.
Consider this scenario: Your department has undergone a reorganization, and one of your direct reports is now reporting to another manager. Your goal is to transfer this employee's annual
review documents to their new manager.
Procedure

Training Guide Enterprise ePerformance 9.0
Page 173
Step Action
1. Begin by navigating to the Transfer Document page.
Click the Manager Self Service link.

Training Guide
Enterprise ePerformance 9.0
Page 174
Step Action
2. Click the Performance Management link.
3. Click the Performance Documents link.
4. Click the Transfer Document link.
5. Use the Transfer Document page to view all the performance documents that you own.
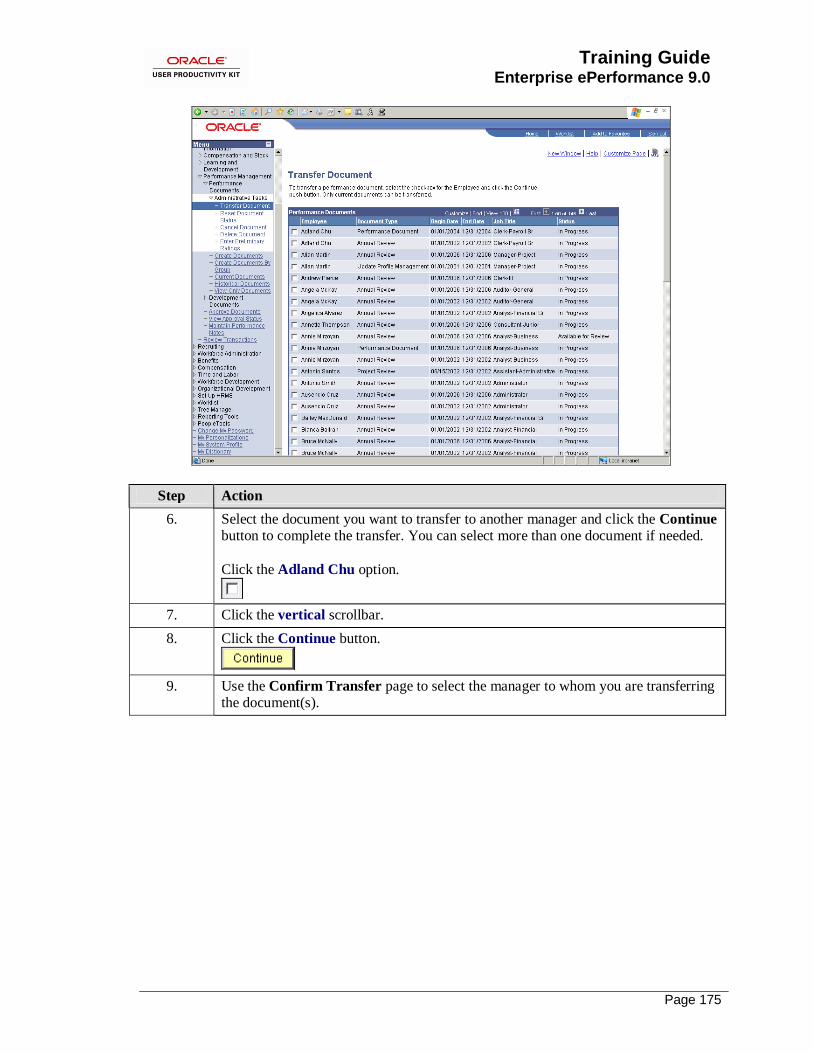
Training Guide Enterprise ePerformance 9.0
Page 175
Step Action
6. Select the document you want to transfer to another manager and click the Continue button to complete the transfer. You can select more than one document if needed.
Click the Adland Chu option.
7. Click the vertical scrollbar.
8. Click the Continue button.
9. Use the Confirm Transfer page to select the manager to whom you are transferring the document(s).
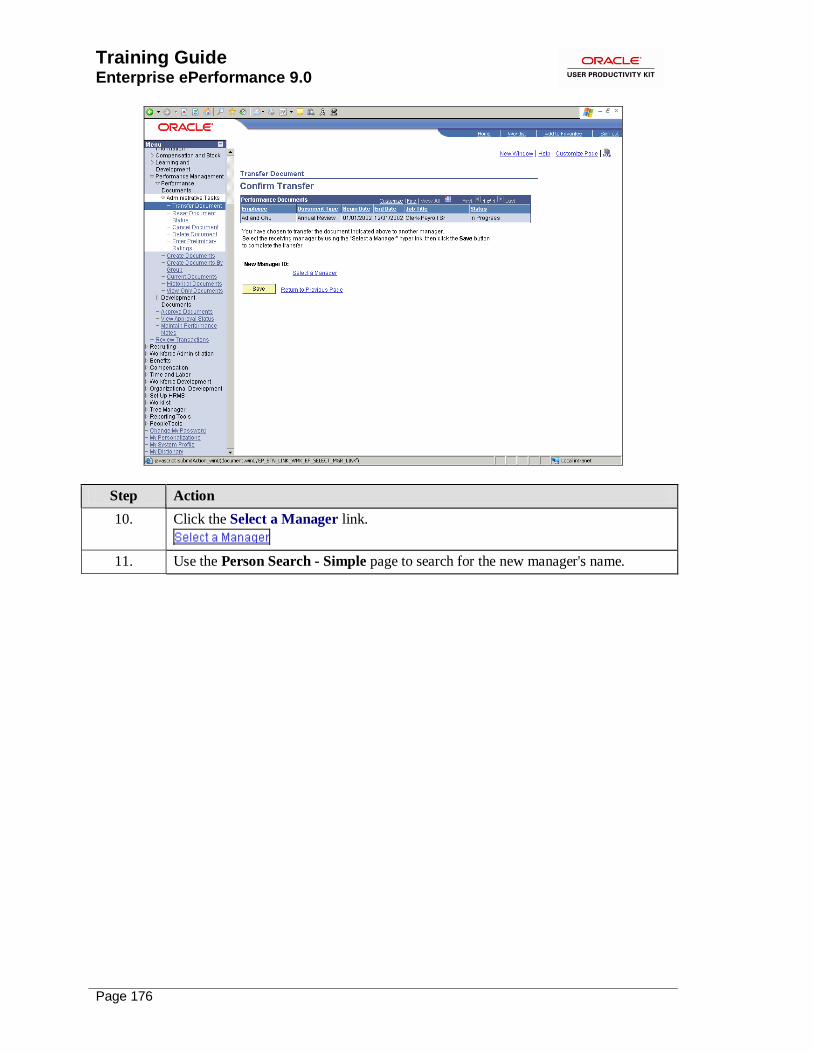
Training Guide
Enterprise ePerformance 9.0
Page 176
Step Action
10. Click the Select a Manager link.
11. Use the Person Search - Simple page to search for the new manager's name.

Training Guide Enterprise ePerformance 9.0
Page 177
Step Action
12. Enter the desired information into the Last Name field. Enter "Parsons".
13. Click the Search button.
14. You can click the Information icon to review detailed information about the
individual to confirm that this is the person you want to select.
15. Click the Jean Parsons option.
16. Click the OK button.
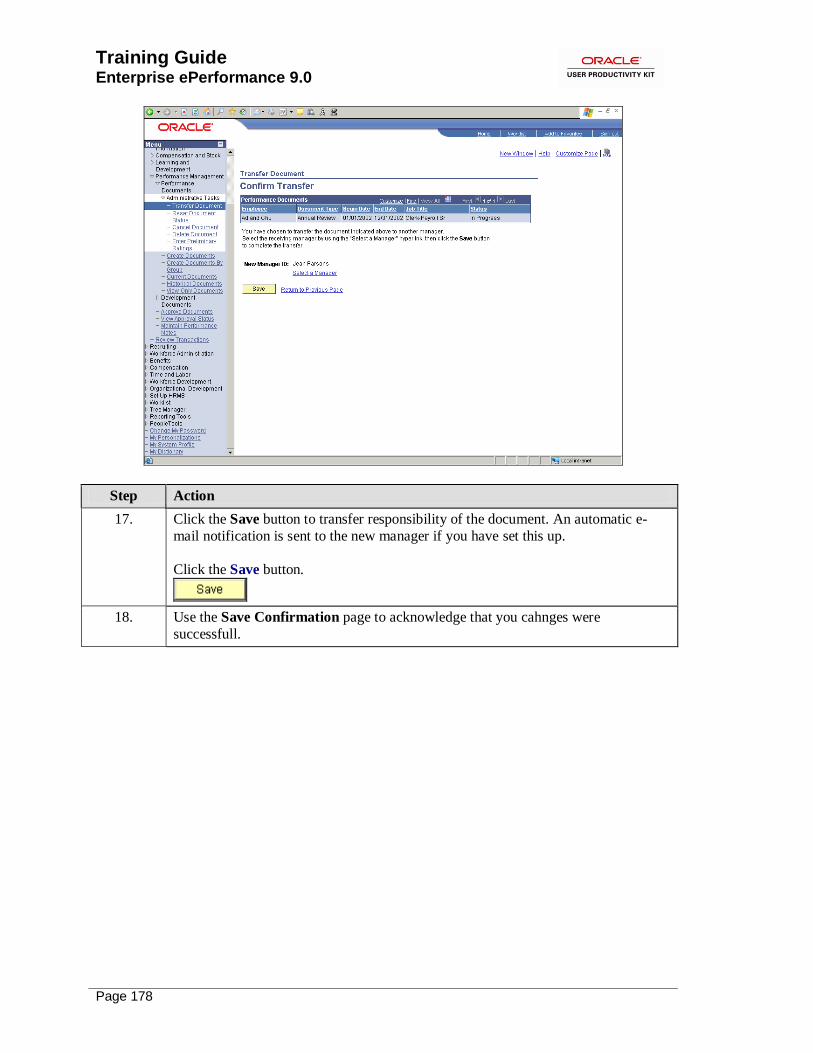
Training Guide
Enterprise ePerformance 9.0
Page 178
Step Action
17. Click the Save button to transfer responsibility of the document. An automatic e-
mail notification is sent to the new manager if you have set this up.
Click the Save button.
18. Use the Save Confirmation page to acknowledge that you cahnges were
successfull.

Training Guide Enterprise ePerformance 9.0
Page 179
Step Action
19. Click the OK button.
20. Notice that the annual review document no longer appears in your document list.
21. You have successfully transferred an annaul review document to another manager.
End of Procedure.
Changing Document Status The status of individual evaluations that are part of a document changes when employees and
managers perform tasks such as opening or completing the evaluation or managers mark an
evaluation as Available for Review, Review Held, or Acknowledged. The manager can also
change the status of an employee evaluation by clicking the Reopen button on the Employee
Evaluation page. This changes the status of the employee evaluation back to In Progress. The
Reopen button is available to the manager and ePerformance Administrator for evaluations when
they are not the owner (the manager can't reopen their own evaluation) and the evaluation status is Complete or Cancelled and the overall document status is In Progress. Once the manager
moves their document status past In Progress, they can not reopen the employee evaluation.
However, additional situations might occur where managers or ePerformance administrators need to change the statuses of documents as a whole. Document statuses are changed using pages that
are found on the Administrative Tasks menu. Document statuses can only be changed to In
Progress.
Managers can change documents to In Progress from any of these statuses:
• Available for Review

Training Guide
Enterprise ePerformance 9.0
Page 180
• Review Held
• Acknowledged
ePerformance Administrators can change document statuses to In Progress from any of the above
statuses plus:
• Complete • Cancelled
If a document is changed from Complete or Cancelled to In Progress status, the document is
removed from all approval queues and becomes inaccessible to the employee. If the status is changed from Complete to In Progress, the following steps on the Document Details page also
change to In Progress: Nominate Participants; Track Nominations; and Review Participant
Evaluations.
Any competency ratings that were pushed from the completed evaluation to competency
management are rolled back. Managers must then move the document back through the entire sequence of statuses until they can once again mark it as complete.
In this example, you will change the status of a performance document from Review Held to In
Progress.
Procedure

Training Guide Enterprise ePerformance 9.0
Page 181
Step Action
1. Begin by navigating to the Reset Document Status page.
Click the Manager Self Service link.
Step Action
2. Click the Performance Management link.
3. Click the Performance Documents link.
4. Click the Reset Document Status link.
5. Use the Reset Document Status page to reset the status of a document.
6. All documents in Available for Review, Review Held, or Acknowledged status
appear in the list.
The ePerformance administrator's view contains search fields to narrow the list by manager first or last name, employee first or last name, Document Type, Status, or
Period Between.
7. Notice the notes at the top of the page that describe which statuses can be changed.

Training Guide
Enterprise ePerformance 9.0
Page 182
Step Action
8. To change the document status, select one or more documents and click the
Continue button.
Click the Connie Chung option.
9. Click the Continue button.
10. Use the Confirm Status Reset page to either confirm the status change or return
without changing status.
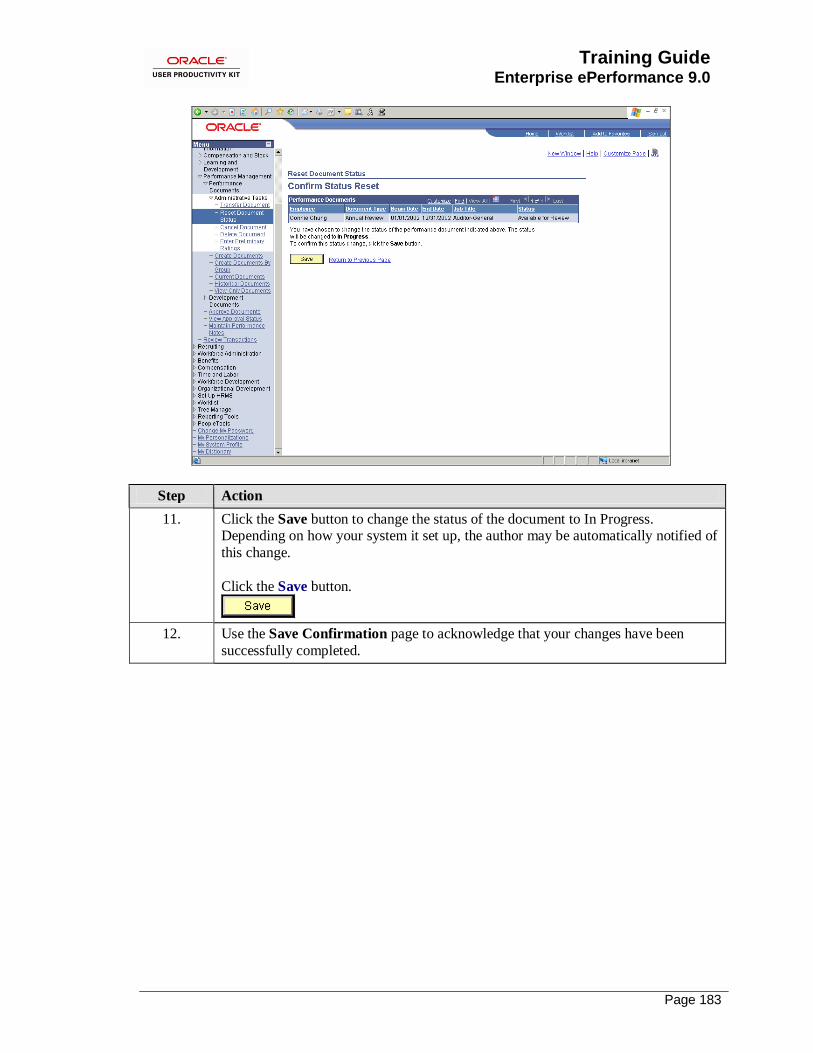
Training Guide Enterprise ePerformance 9.0
Page 183
Step Action
11. Click the Save button to change the status of the document to In Progress. Depending on how your system it set up, the author may be automatically notified of
this change.
Click the Save button.
12. Use the Save Confirmation page to acknowledge that your changes have been
successfully completed.

Training Guide
Enterprise ePerformance 9.0
Page 184
Step Action
13. Click the OK button.
14. Notice that the document no longer appears on the page.
15. You have successfully changed the status of a performance document.
End of Procedure.
Canceling Documents ePerformance enables managers and ePerformance administrators to cancel a document.
Managers can only cancel documents with a status of In Progress. ePerformance administrators can cancel any document that is not already cancelled.
After you cancel a document, it becomes inactive. Canceling a document does not remove it from
the system — it only marks it as cancelled and the document appears in the Historical
Documents page instead of Current Documents.
In this example, you will cancel an annual review document for one of your employees.
Procedure
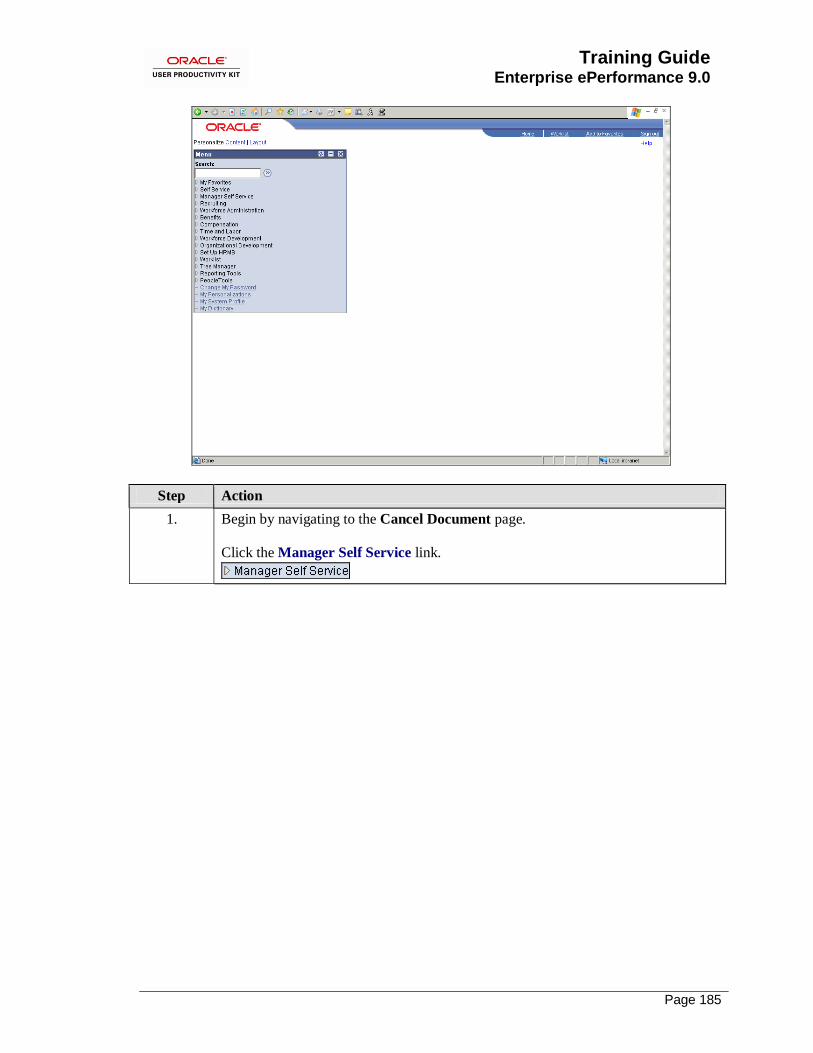
Training Guide Enterprise ePerformance 9.0
Page 185
Step Action
1. Begin by navigating to the Cancel Document page.
Click the Manager Self Service link.

Training Guide
Enterprise ePerformance 9.0
Page 186
Step Action
2. Click the Performance Management link.
3. Click the Performance Documents link.
4. Click the Cancel Document link.
5. Use the Cancel Document page to view In Progress documents that you own.
6. The ePerformance administrator's view enables you to select any non-cancelled document regardless of the manager. You can narrow the search by entering one or
more of the search fields. If you click Search without entering criteria, all employee
evaluations in the organization appear.
7. Notice the instructions at the top of the page that provide information on how to complete the process.
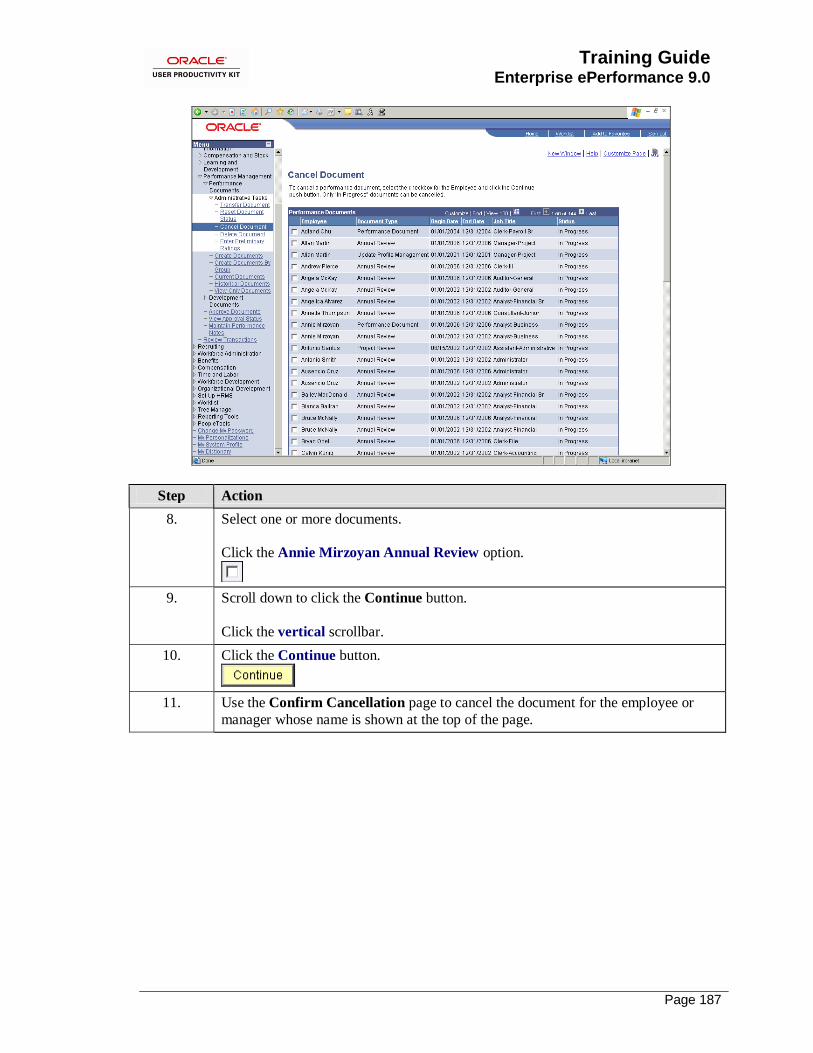
Training Guide Enterprise ePerformance 9.0
Page 187
Step Action
8. Select one or more documents.
Click the Annie Mirzoyan Annual Review option.
9. Scroll down to click the Continue button.
Click the vertical scrollbar.
10. Click the Continue button.
11. Use the Confirm Cancellation page to cancel the document for the employee or
manager whose name is shown at the top of the page.

Training Guide
Enterprise ePerformance 9.0
Page 188
Step Action
12. Click the Save button.
13. Use the Save Confirmation page to acknowledge that your changes were
successful.

Training Guide Enterprise ePerformance 9.0
Page 189
Step Action
14. Click the OK button.
15. The annual review document no longer appears in the list.

Training Guide
Enterprise ePerformance 9.0
Page 190
Step Action
16. Verify that the status of the document has been changed to Cancelled.
Click the Historical Documents link.
17. Use the Performance Document History page to view a list of completed and
cancelled documents for which you are the manager.
18. Click the Annual Review link.
19. Use the Document Details page to review the document progress for this
evaluation.
20. The document status has changed to Cancelled.

Training Guide Enterprise ePerformance 9.0
Page 191
Step Action
21. Click the Return to Select Documents link.
22. You have successfully cancelled a performance document.
End of Procedure.
Deleting Documents Because cancelled documents are not physically deleted from the system, ePerformance provides
a delete function that enables you to remove documents and all their associated evaluations
completely from the system.
In this topic, you will delete a performance document for an emaployee.
Procedure

Training Guide
Enterprise ePerformance 9.0
Page 192
Step Action
1. Begin by navigating to the Delete Documents page.
Click the Manager Self Service link.

Training Guide Enterprise ePerformance 9.0
Page 193
Step Action
2. Click the Performance Management link.
3. Click the Performance Documents link.
4. Click the Administrative Tasks link.
5. Click the Delete Document link.
6. Use the Delete Documents page to view cancelled documents that you own.

Training Guide
Enterprise ePerformance 9.0
Page 194
Step Action
7. Click the Annie Mirzoyan option.
8. Click the Continue button.
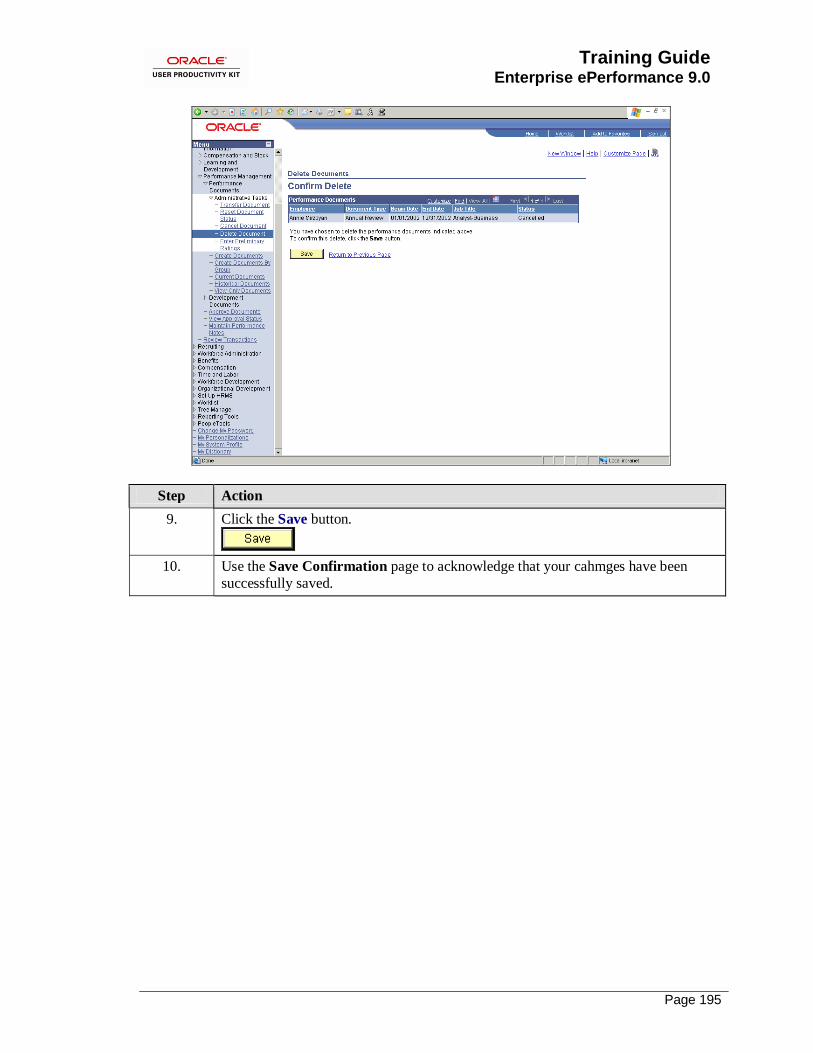
Training Guide Enterprise ePerformance 9.0
Page 195
Step Action
9. Click the Save button.
10. Use the Save Confirmation page to acknowledge that your cahmges have been
successfully saved.

Training Guide
Enterprise ePerformance 9.0
Page 196
Step Action
11. Click the OK button.
12. Notice, the doucment you deleted is no longer available for view.
13. You have successfully deleted a performance document.
End of Procedure.
Using Inquiry Pages
Managers, employees, and human resources (HR) administrators can access different inquiry
pages that enable them to view data of interest to their role.
Managers and employees can view lists of their completed documents for both performance and
development evaluations and can drill down to detail documents. Additionally, managers can
view the approval status of documents for their direct reports and access documents in view-only mode. If PeopleSoft Portal Pack is installed, managers can use the Employee Performance
pagelet to view the status of the documents for which they are responsible.
The following inquiry pages are designed specifically for HR administrators:
• Rating Distribution Summary page. Contains preliminary, actual, and desired rating
distributions for a group of employees, defined by group ID, in the form of a bar chart. Administrators use this page to determine whether ratings are distributed in the expected manner,
and to plan how to bring actual ratings in line with desired ratings.
• Status Summary page. Contains a pie chart that summarizes the status of documents for a
group of employees.

Training Guide Enterprise ePerformance 9.0
Page 197
• Debug/Trace Results page. Lists the detailed calculations that are associated with a particular document. An HR administrator can use this information to debug suspected problems with rating
calculations. Note that producing this page can have a significant impact on system performance.
Upon completion of this lesson, you will be able to:
• View historical performance documents.
• View view-only documents.
• View approval statuses. • View evaluation ratings.
• Create summary data.
• View rating summary data. • View document status data.
Viewing Historical Documents The Performance Document History page gives you access to completed documents for
yourself or for employees that you manage.
In this example, you will view performance document history for your direct reports.
Procedure
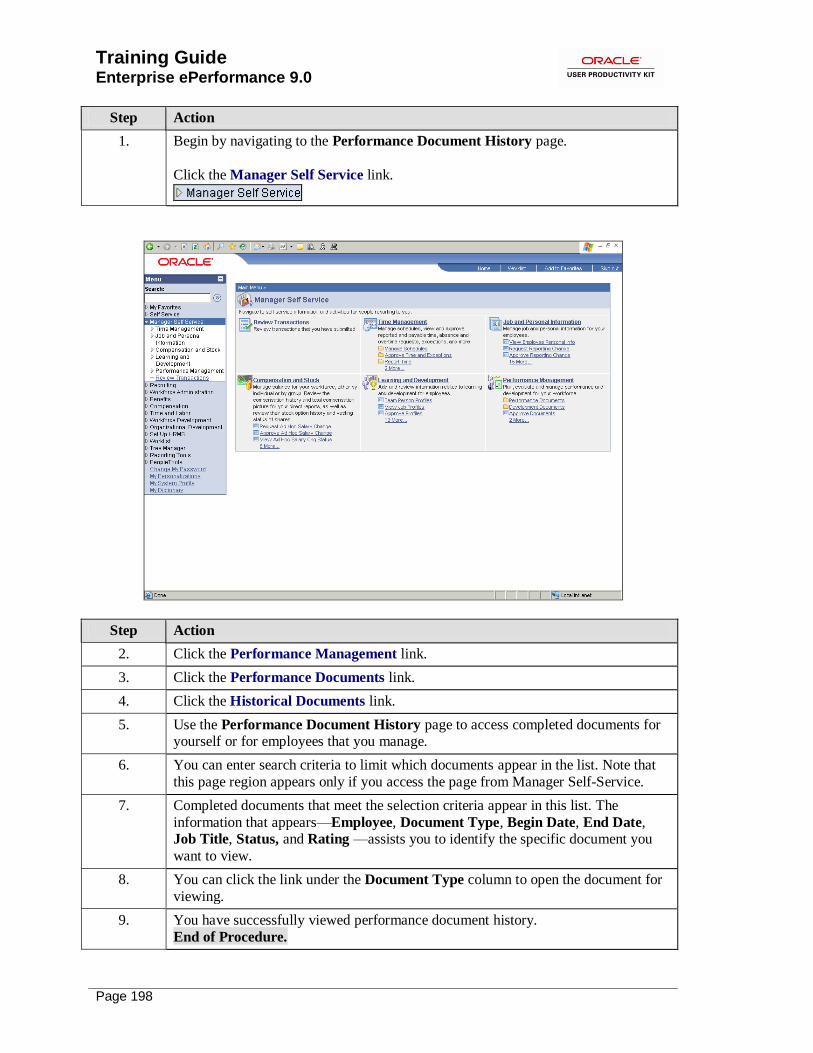
Training Guide
Enterprise ePerformance 9.0
Page 198
Step Action
1. Begin by navigating to the Performance Document History page.
Click the Manager Self Service link.
Step Action
2. Click the Performance Management link.
3. Click the Performance Documents link.
4. Click the Historical Documents link.
5. Use the Performance Document History page to access completed documents for yourself or for employees that you manage.
6. You can enter search criteria to limit which documents appear in the list. Note that
this page region appears only if you access the page from Manager Self-Service.
7. Completed documents that meet the selection criteria appear in this list. The
information that appears—Employee, Document Type, Begin Date, End Date, Job Title, Status, and Rating —assists you to identify the specific document you
want to view.
8. You can click the link under the Document Type column to open the document for
viewing.
9. You have successfully viewed performance document history.
End of Procedure.
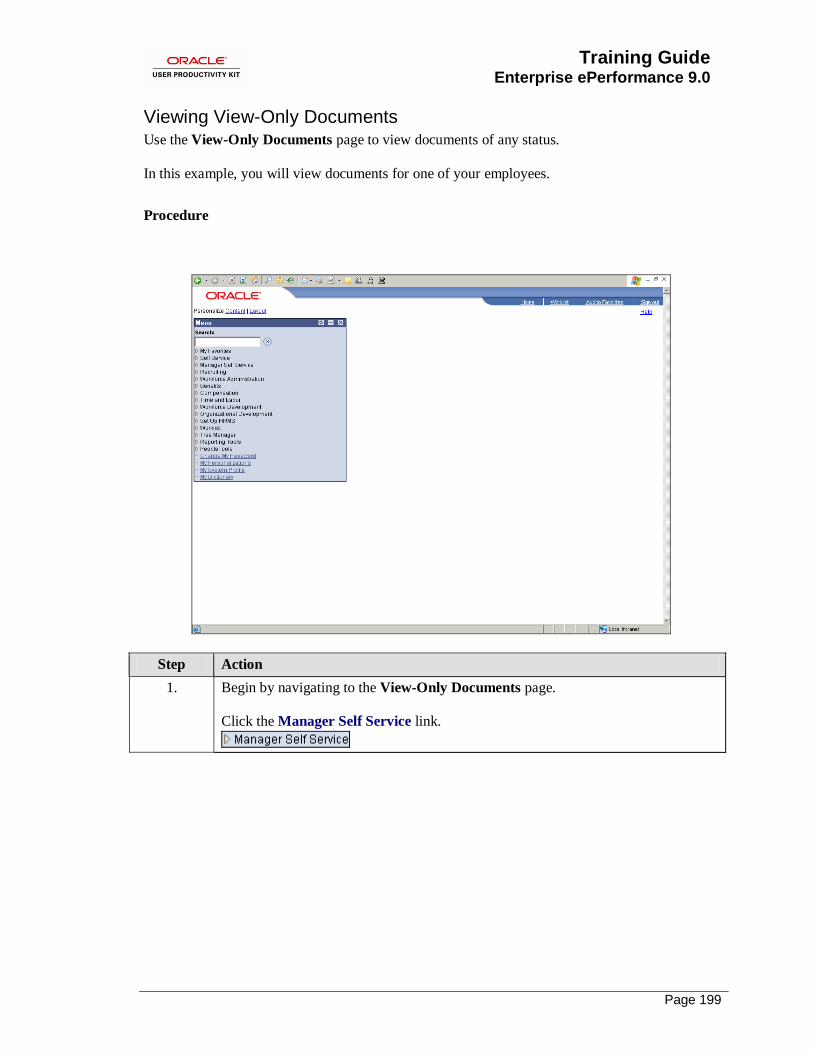
Training Guide Enterprise ePerformance 9.0
Page 199
Viewing View-Only Documents Use the View-Only Documents page to view documents of any status.
In this example, you will view documents for one of your employees.
Procedure
Step Action
1. Begin by navigating to the View-Only Documents page.
Click the Manager Self Service link.

Training Guide
Enterprise ePerformance 9.0
Page 200
Step Action
2. Click the Performance Management link.
3. Click the Performance Documents link.
4. Click the View-Only Documents link.
5. Use the View-Only Documents page to view documents for one of you employees.

Training Guide Enterprise ePerformance 9.0
Page 201
Step Action
6. Select the effective date for determining employees and click the Continue button. The date defaults to the current system date, but can be changed if needed.
Click the Continue button.

Training Guide
Enterprise ePerformance 9.0
Page 202
Step Action
7. Select an employee and click the Continue button.
Click the Cynthia Adams option.
8. Click the vertical scrollbar.
9. Click the Continue button.
10. Use the View Performance Documents page to view the document steps and statuses for the selected document. From this page, you can click the View link
wherever it appears to view details of the step.

Training Guide Enterprise ePerformance 9.0
Page 203
Step Action
11. Click the Performance Review link.
12. Use the Documents Details page to view the document progress for this employee.

Training Guide
Enterprise ePerformance 9.0
Page 204
Step Action
13. Click the View link.
14. Use the Manage Evaluation page to review the ratings and comments entered for this employee.
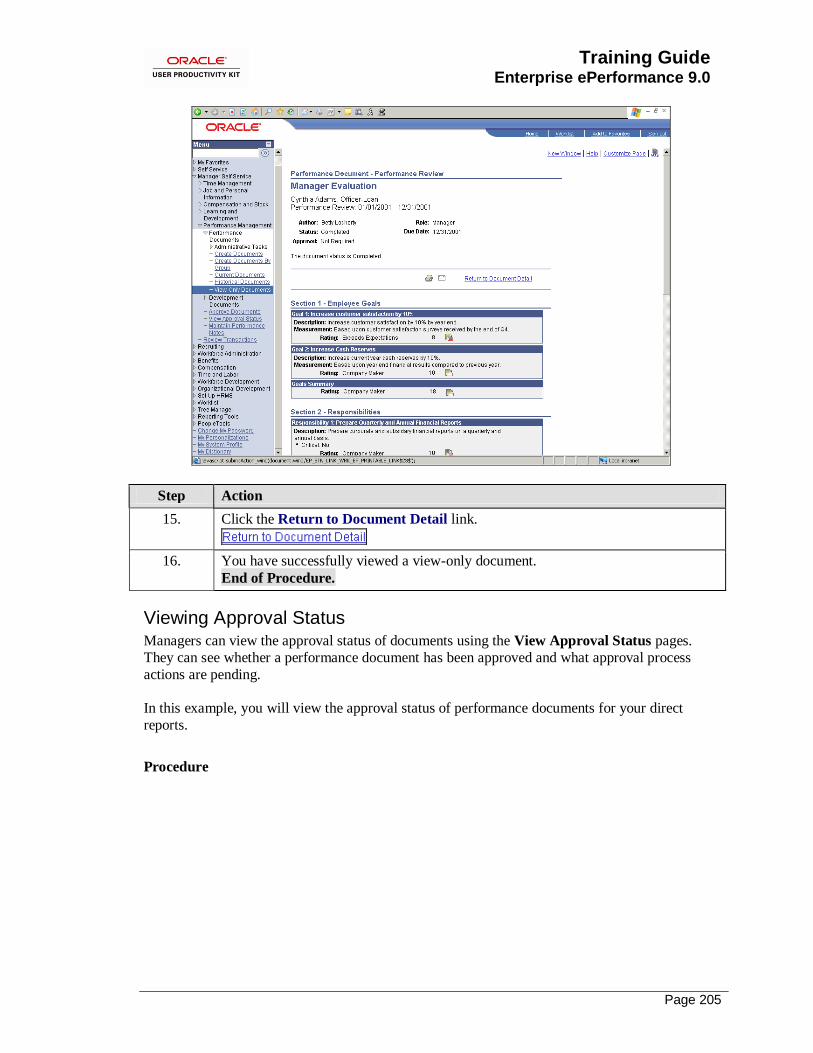
Training Guide Enterprise ePerformance 9.0
Page 205
Step Action
15. Click the Return to Document Detail link.
16. You have successfully viewed a view-only document.
End of Procedure.
Viewing Approval Status Managers can view the approval status of documents using the View Approval Status pages.
They can see whether a performance document has been approved and what approval process
actions are pending.
In this example, you will view the approval status of performance documents for your direct
reports.
Procedure

Training Guide
Enterprise ePerformance 9.0
Page 206
Step Action
1. Begin by navigating to the View Approval Status Summary page.
Click the Manager Self Service link.

Training Guide Enterprise ePerformance 9.0
Page 207
Step Action
2. Click the Performance Management link.
3. Click the View Approval Status link.
4. Use the View Approval Status Summary page to view a list of performance document transactions for which the user is a participant in the approval process.
In this example, there is one document listed.

Training Guide
Enterprise ePerformance 9.0
Page 208
Step Action
5. Click the Performance Document 2 link.
6. The View Approval Status Detail page displays approval status of a single employee review.
7. Use the Manager Evaluation page to view the details of the document that is
awaiting approval.
8. You have successfully viewed performance document approval status.
End of Procedure.
Viewing Evaluation Ratings Ratings are entered at either the section, item, or subitem level, as defined on the document
template. If the document is set up to automatically calculate ratings, ratings from lower levels
are averaged and rolled up to the higher levels. The manager rating (calculated or manually entered) on the manager's evaluation is used by the writing tools to select appropriate text.
In this example, you are going to view evaluation ratings in text, numerical, and graphical formats.
Procedure

Training Guide Enterprise ePerformance 9.0
Page 209
Step Action
1. Begin by navigating to the Current Performance Documents page.
Click the Manager Self Service link.

Training Guide
Enterprise ePerformance 9.0
Page 210
Step Action
2. Click the Performance Management link.
3. Click the Current Documents link.
4. The Current Performance Documents page displays performance documents that you own. Upon accessing the documents, you can view, update, modify, or perform
various administrative actions on them.
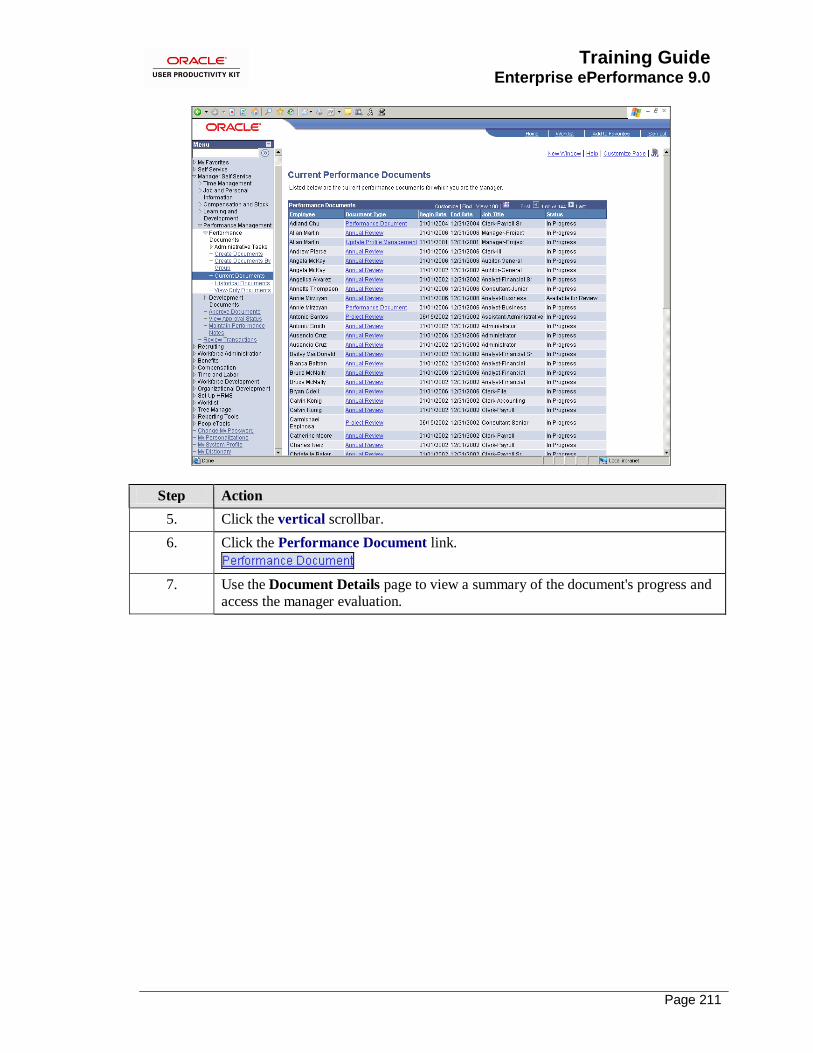
Training Guide Enterprise ePerformance 9.0
Page 211
Step Action
5. Click the vertical scrollbar.
6. Click the Performance Document link.
7. Use the Document Details page to view a summary of the document's progress and
access the manager evaluation.
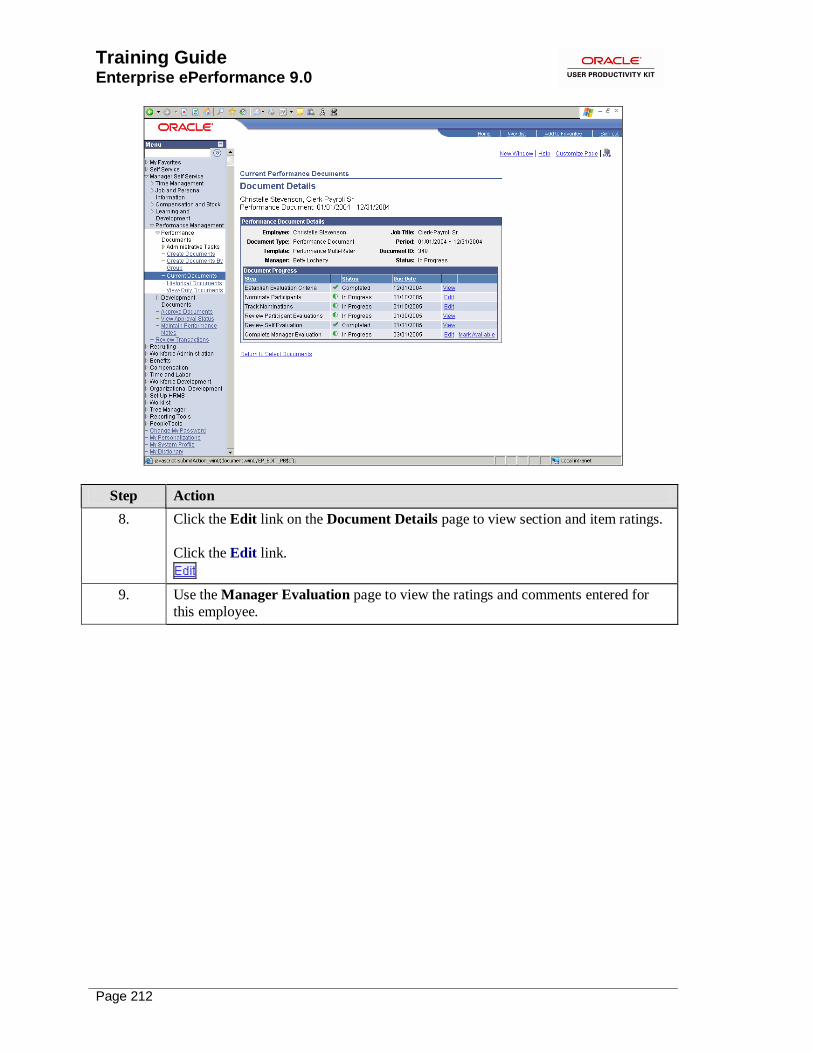
Training Guide
Enterprise ePerformance 9.0
Page 212
Step Action
8. Click the Edit link on the Document Details page to view section and item ratings.
Click the Edit link.
9. Use the Manager Evaluation page to view the ratings and comments entered for
this employee.

Training Guide Enterprise ePerformance 9.0
Page 213
Step Action
10. Click the View Graphical Rating button.
11. Use the Average Ratings page to view the average ratings, by role, from all
participants that rated a section, item, or sub-item. Summary ratings are rolled up
from lower-level ratings. The number in parentheses next to the role lists how many participants in that role are included in the average.
12. This page is available only from the Manager evaluation, and only if the role has the
View Average Ratings check box selected on the Template Definition - Process
page.
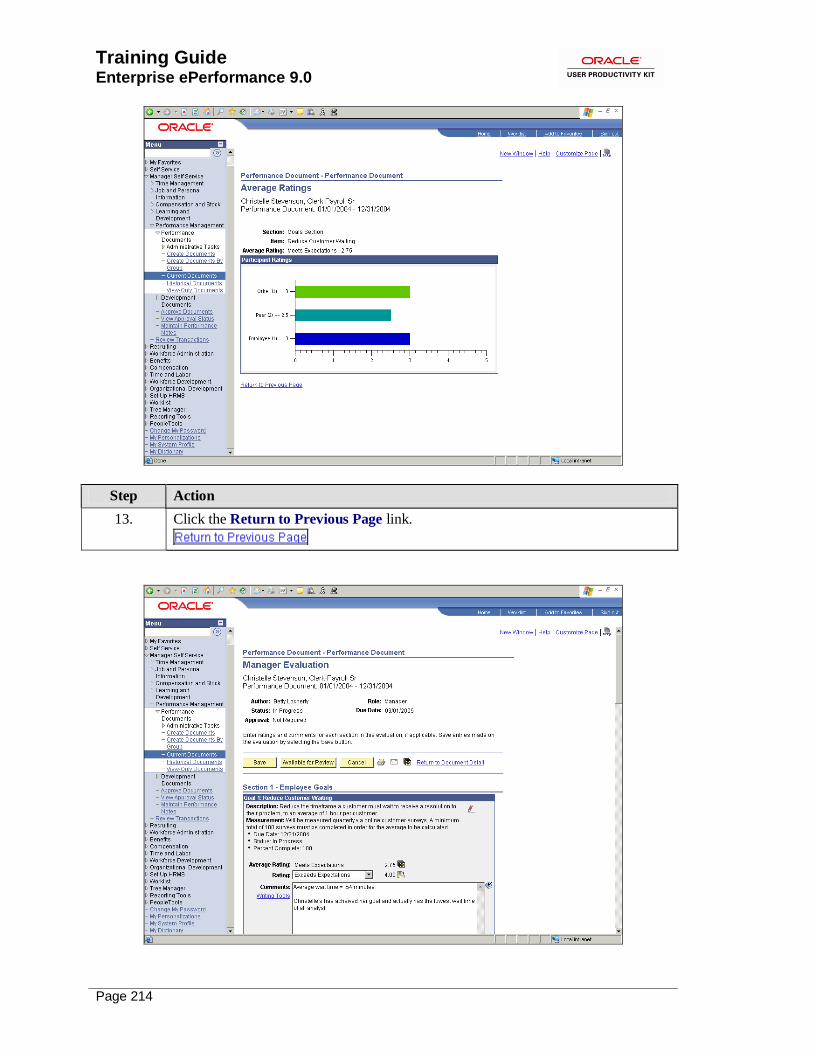
Training Guide
Enterprise ePerformance 9.0
Page 214
Step Action
13. Click the Return to Previous Page link.

Training Guide Enterprise ePerformance 9.0
Page 215
Step Action
14. Click the vertical scrollbar.
15. Click the vertical scrollbar.
16. Click the Return to Document Detail link.
17. You have successfully viewed evaluation ratings.
End of Procedure.
Creating Summary Data HR administrators can use the Rating Distribution page to display preliminary, actual, and
desired rating distributions for a group of employees and document type. Administrators can use this page to see how preliminary ratings compare to desired and actual results. This comparison
enables administrators to determine whether ratings are distributed in the expected manner, and
what actions they must take to bring actual ratings in line with desired ratings. For example, you might want 5% of employees to receive an outstanding rating, 10% to receive an excellent rating,
and so forth. The system uses these parameters to display data on the rating distribution inquiry
pages, which show the variance between desired performance results and the preliminary and actual results.
Before viewing rating distributions, you must prepare the data for display in the inquiry pages.
The Create Summary Data process collects the evaluation data from performance documents
that is represented in the rating distribution and status inquiry pages. You use the Create
Summary Data run control page to define which performance documents you want the inquiry pages to reflect for selected groups of employees.
In this example, you will run the process to create summary data for a specific Group ID.
Procedure

Training Guide
Enterprise ePerformance 9.0
Page 216
Step Action
1. Begin by navigating to the Create Summary Data page.
Click the Workforce Development link.
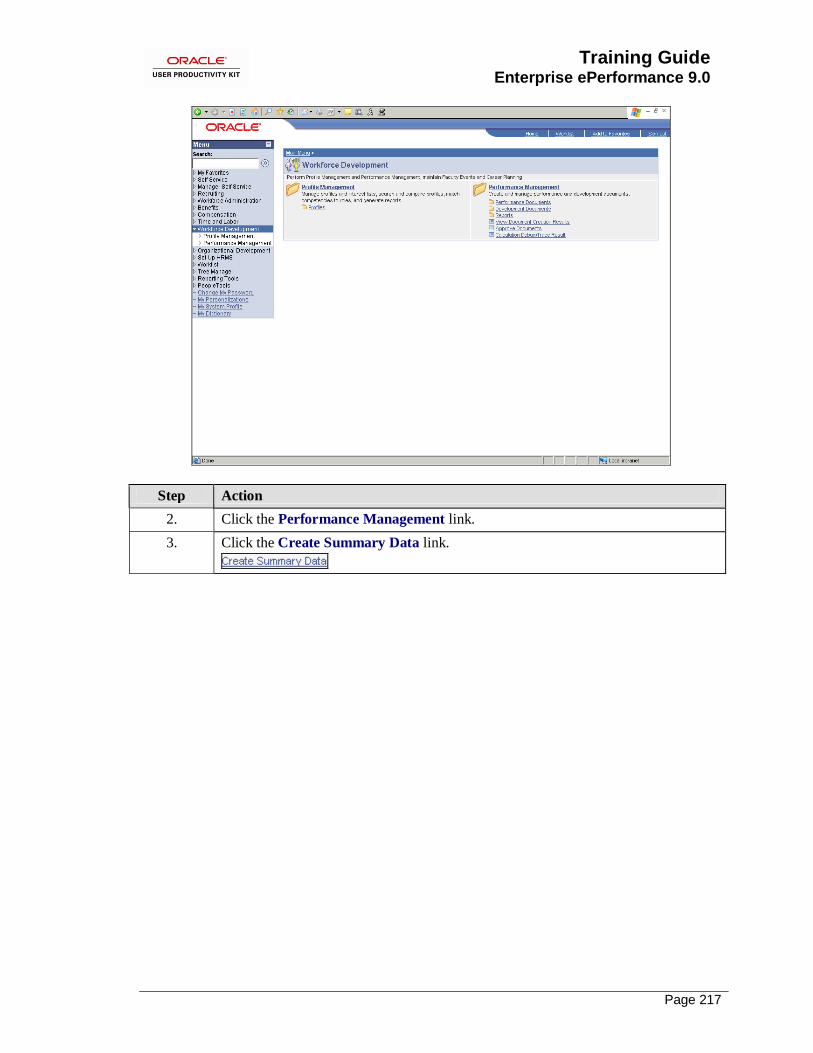
Training Guide Enterprise ePerformance 9.0
Page 217
Step Action
2. Click the Performance Management link.
3. Click the Create Summary Data link.

Training Guide
Enterprise ePerformance 9.0
Page 218
Step Action
4. You can run this process by searching for an existing Run Control ID or you can add
a new value.
Creating a Run Control ID that is relevant to the process may help you remember it
for future use.
Click the Add a New Value tab.
5. A Run Control ID is an identifier that, when paired with your User ID, uniquely
identifies the process you are running. The Run Control ID defines parameters that
are used when a process is run. This ensures that when a process runs in the
background, the system does not prompt you for additional values.
Enter the desired information into the Run Control ID field. Enter "INQUIRY".
6. Click the Add button.
7. Use the Create Summary Data page to enter the request parameters. These
parameters will be used to define the processing rules and data to be included when
the process is run.
8. The system summarizes data for employees belonging to the group defined in the
Group ID field as of the date specified in the Group As Of Date. The default is the
system date.
For this example, accept the default.

Training Guide Enterprise ePerformance 9.0
Page 219
Step Action
9. Use the Document Type field to enter a document type such as quarterly, annual, or yearly. If you leave this field empty, the system selects all document types.
Click in the Document Type field.
10. Enter the desired information into the Document Type field. Enter "PERFORM".
11. The From Date and To Date fields establish a date range that is used in conjunction
with the Period Basis option to select documents to include in the ―snapshot.‖
For example, if you define a From Date and To Date range of 1 January 01 to 31 December 01, and the Period Basis is Period End Date, the report only selects
performance documents whose period end dates falls between 1 January 01 and 31
December 01. If a performance document has a period begin date of 1 December 01, but a period end date of 31 Jan 02, that review will not be selected.
Click in the From Date field.
12. Enter the desired information into the From Date field. Enter "01/01/2002".
13. Click in the To Date field.
14. Enter the desired information into the To Date field. Enter "12/31/2002".
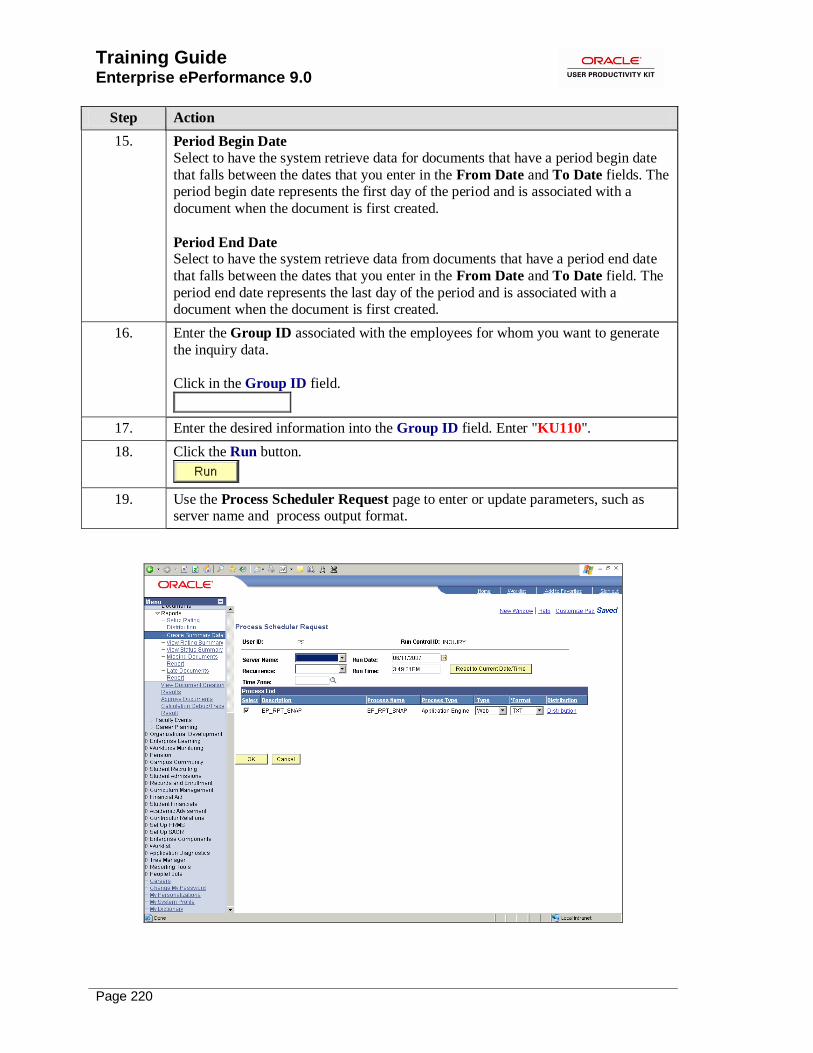
Training Guide
Enterprise ePerformance 9.0
Page 220
Step Action
15. Period Begin Date Select to have the system retrieve data for documents that have a period begin date
that falls between the dates that you enter in the From Date and To Date fields. The period begin date represents the first day of the period and is associated with a
document when the document is first created.
Period End Date Select to have the system retrieve data from documents that have a period end date
that falls between the dates that you enter in the From Date and To Date field. The
period end date represents the last day of the period and is associated with a document when the document is first created.
16. Enter the Group ID associated with the employees for whom you want to generate
the inquiry data.
Click in the Group ID field.
17. Enter the desired information into the Group ID field. Enter "KU110".
18. Click the Run button.
19. Use the Process Scheduler Request page to enter or update parameters, such as server name and process output format.

Training Guide Enterprise ePerformance 9.0
Page 221
Step Action
20. You must select a Server Name to identify the server on which the process will run. If you use the same Run Control ID for subsequent processes, the server name that
you last used will default in this field.
Click the Server Name list.
21. Click the PSNT list item.
22. Use the Type field to select the type of output you want to generate for this job.
23. Use the Format field to define the output format for the report. The values are
dependent upon the Process Type you have selected.
24. Click the OK button.
25. Notice the Process Instance number appears. This number helps you identify the process you have run when you check the status.
Step Action
26. Click the Process Monitor link.
27. Use the Process List page to view the status of submitted process requests.
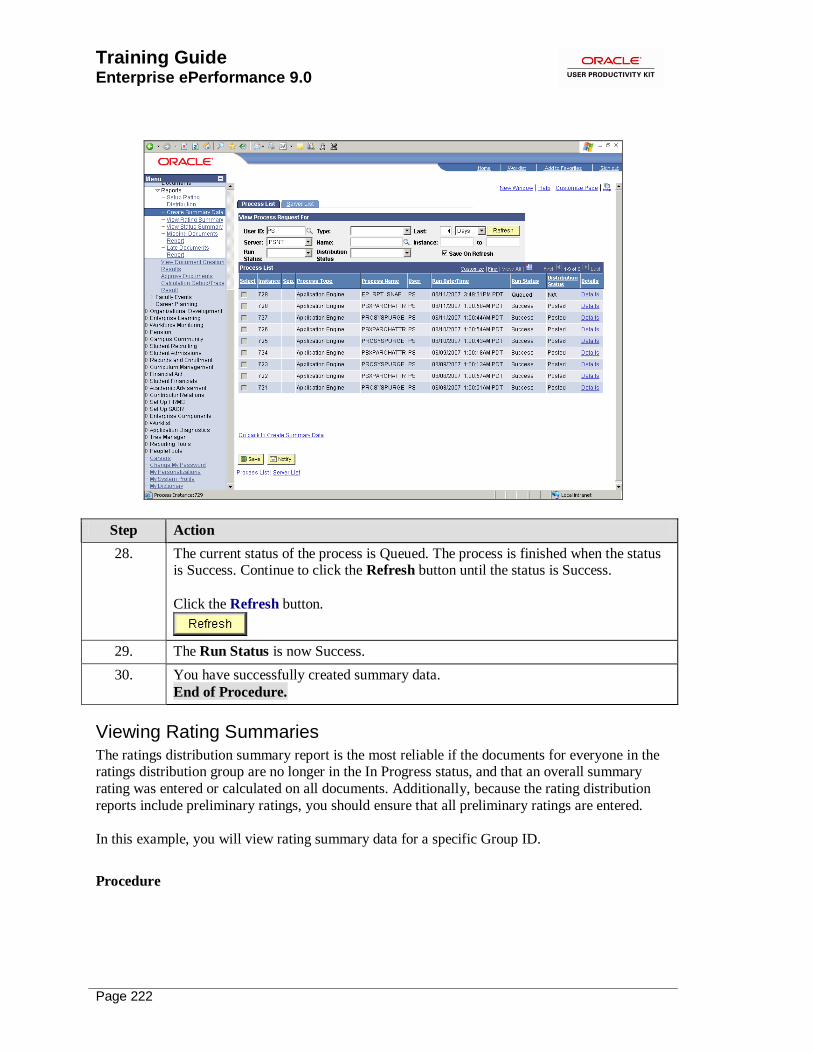
Training Guide
Enterprise ePerformance 9.0
Page 222
Step Action
28. The current status of the process is Queued. The process is finished when the status is Success. Continue to click the Refresh button until the status is Success.
Click the Refresh button.
29. The Run Status is now Success.
30. You have successfully created summary data.
End of Procedure.
Viewing Rating Summaries The ratings distribution summary report is the most reliable if the documents for everyone in the ratings distribution group are no longer in the In Progress status, and that an overall summary
rating was entered or calculated on all documents. Additionally, because the rating distribution
reports include preliminary ratings, you should ensure that all preliminary ratings are entered.
In this example, you will view rating summary data for a specific Group ID.
Procedure

Training Guide Enterprise ePerformance 9.0
Page 223
Step Action
1. Begin by navigating to the View Rating Summary page.
Click the Workforce Development link.

Training Guide
Enterprise ePerformance 9.0
Page 224
Step Action
2. Click the Performance Management link.
3. Click the View Rating Summary link.
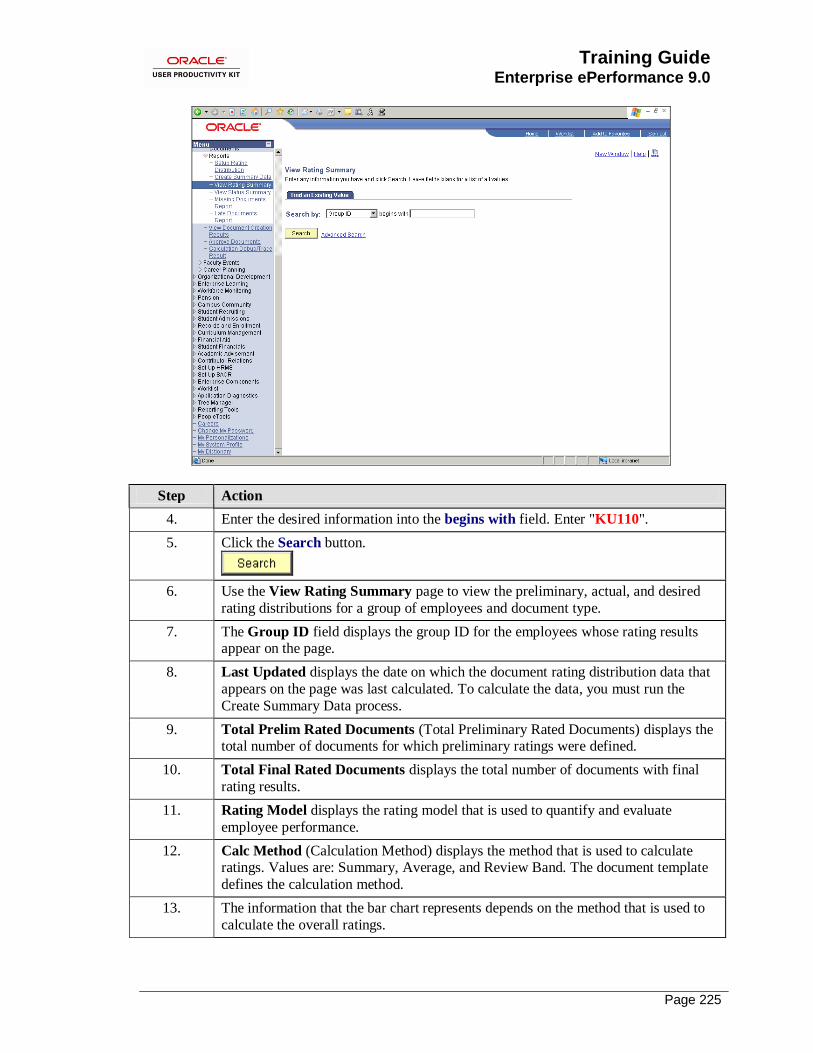
Training Guide Enterprise ePerformance 9.0
Page 225
Step Action
4. Enter the desired information into the begins with field. Enter "KU110".
5. Click the Search button.
6. Use the View Rating Summary page to view the preliminary, actual, and desired
rating distributions for a group of employees and document type.
7. The Group ID field displays the group ID for the employees whose rating results appear on the page.
8. Last Updated displays the date on which the document rating distribution data that
appears on the page was last calculated. To calculate the data, you must run the
Create Summary Data process.
9. Total Prelim Rated Documents (Total Preliminary Rated Documents) displays the total number of documents for which preliminary ratings were defined.
10. Total Final Rated Documents displays the total number of documents with final
rating results.
11. Rating Model displays the rating model that is used to quantify and evaluate
employee performance.
12. Calc Method (Calculation Method) displays the method that is used to calculate ratings. Values are: Summary, Average, and Review Band. The document template
defines the calculation method.
13. The information that the bar chart represents depends on the method that is used to
calculate the overall ratings.

Training Guide
Enterprise ePerformance 9.0
Page 226
Step Action
14. If the calculation method is Average or Review Band:
• The vertical axis shows the percentage of completed documents.
• The horizontal axis shows qualitative rating categories, for example: Company Maker or Exceeds Expectations.
15. If the calculation method is Summation:
• The vertical axis shows the percentage of documents that fall into each point range
that is defined on the Desired Rating Distribution page. • The horizontal axis shows each from and to point range that is defined on the
Desired Rating Distribution page.
16. For both calculation methods, the bar chart compares preliminary, final, and desired
results. Preliminary results come from the Preliminary Ratings page; final ratings
come from the Manager Evaluation page; desired results come from the Desired
Rating Distribution Table page.
Step Action
17. Click a preliminary or final bar to access the Rating Distribution Details page, where you can see detailed information for the selected rating category or point
spread.
Click the Final chart.
18. Use the Rating Distribution Detail page to vie a list of detailed information for the employees within the rating category or point spread that you selected on the Rating
Distribution Summary page.
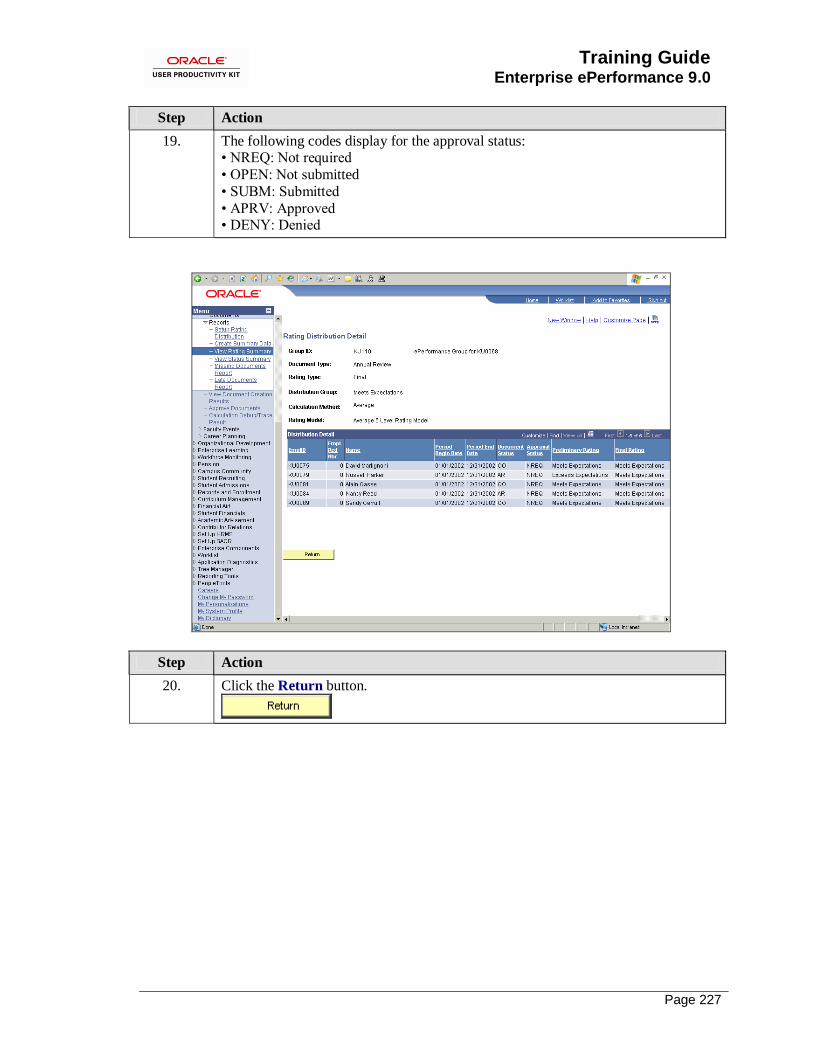
Training Guide Enterprise ePerformance 9.0
Page 227
Step Action
19. The following codes display for the approval status: • NREQ: Not required
• OPEN: Not submitted
• SUBM: Submitted
• APRV: Approved • DENY: Denied
Step Action
20. Click the Return button.

Training Guide
Enterprise ePerformance 9.0
Page 228
Step Action
21. Click the Preliminary chart.
22. View the details for the Preliminary rating type.

Training Guide Enterprise ePerformance 9.0
Page 229
Step Action
23. Click the Return button.
24. You have successfully viewed rating summary information.
End of Procedure.
Viewing Document Status
HR administrators can use the Status Summary pages to view the status of performance documents for a group of employees.
To access the status inquiry pages, you select the employees whose document statuses you want to display by entering either a Group ID or a Document Type. All members of the group should
share the same document type. If more than one document template was used to generate the
performance documents, and the review process options differ (for example, some performance
documents require approval and some do not), then not every member of the group may go through the same set of statuses to reach the Complete status. The inquiry pages always represent
the correct percentage of performance documents in each status; however, if more than one
performance process option is represented, the pages may not give you a complete picture of the statuses through which performance documents must pass.
Before you can use inquiry pages to view the status of performance documents, use the Create
Summary Data page to create a snapshot of the data to be used by the inquiry page. See the Creating Summary Data topic in this lesson for more information.
In this example, you will review the Status Summary for a specific Group ID.
Procedure

Training Guide
Enterprise ePerformance 9.0
Page 230
Step Action
1. Begin by navigating to the View Status Summary page.
Click the Workforce Development link.
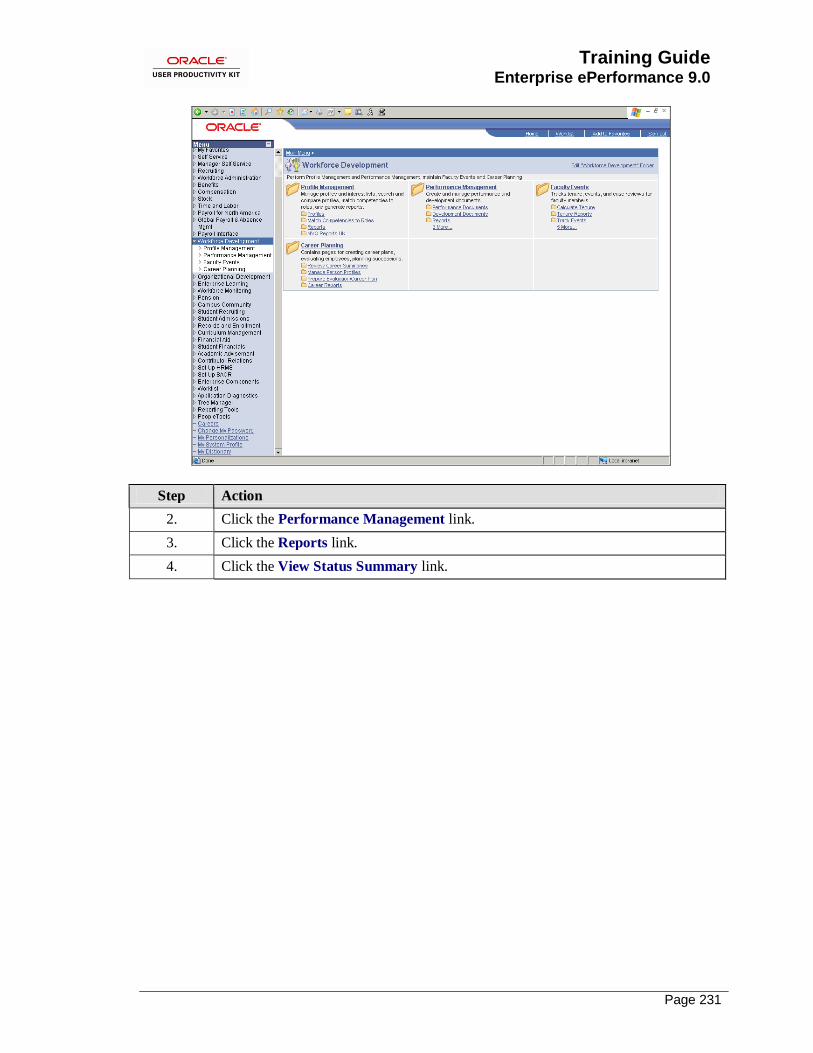
Training Guide Enterprise ePerformance 9.0
Page 231
Step Action
2. Click the Performance Management link.
3. Click the Reports link.
4. Click the View Status Summary link.
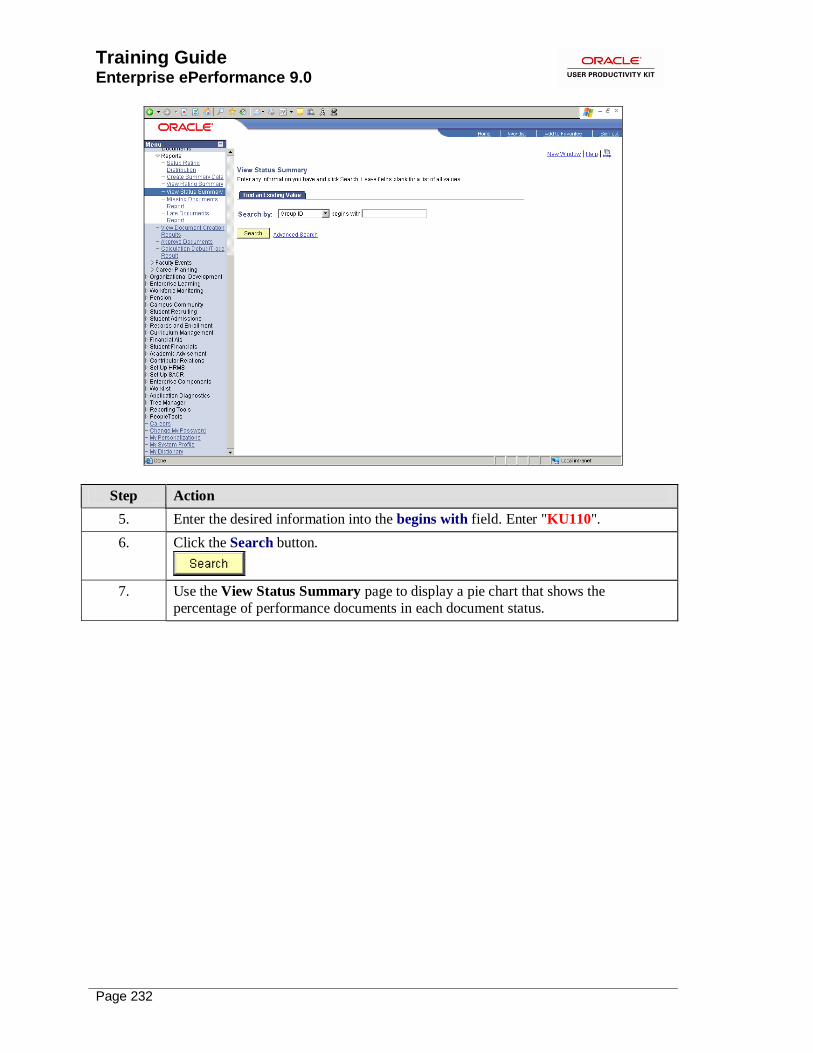
Training Guide
Enterprise ePerformance 9.0
Page 232
Step Action
5. Enter the desired information into the begins with field. Enter "KU110".
6. Click the Search button.
7. Use the View Status Summary page to display a pie chart that shows the
percentage of performance documents in each document status.
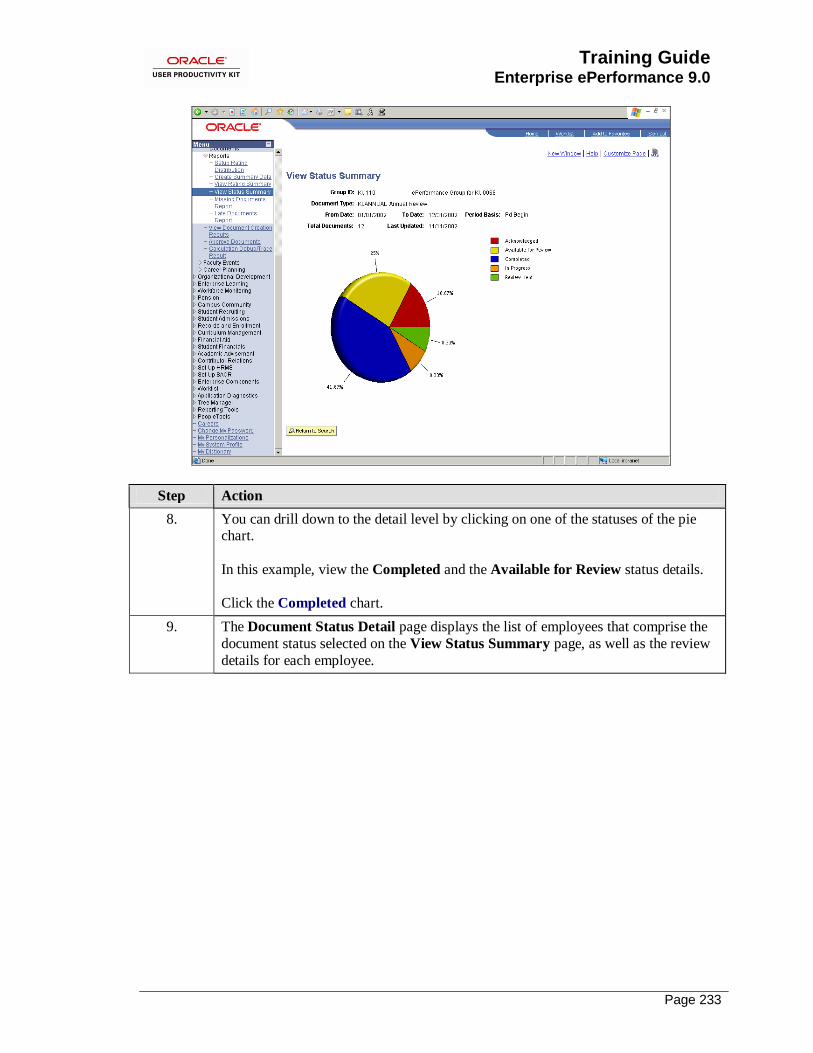
Training Guide Enterprise ePerformance 9.0
Page 233
Step Action
8. You can drill down to the detail level by clicking on one of the statuses of the pie chart.
In this example, view the Completed and the Available for Review status details.
Click the Completed chart.
9. The Document Status Detail page displays the list of employees that comprise the
document status selected on the View Status Summary page, as well as the review
details for each employee.

Training Guide
Enterprise ePerformance 9.0
Page 234
Step Action
10. Click the Return button.

Training Guide Enterprise ePerformance 9.0
Page 235
Step Action
11. Click the Available for Review chart.
12. Review the details for document status: Available for Review.
Step Action
13. Click the Return button.
14. You have successfully viewed the Status Summary for a group of employees.
End of Procedure.
Generating Reports in ePerformance PeopleSoft ePerformance provides reports to enable HR administrators to track late or missing
performance documents. Knowing whether performance documents are missing is important if
the HR department has defined desired rating distribution percentages, as the results of the distribution report will not be reliable unless everyone in the group has received a rating during
the performance period.
Use the Missing Documents report to generate a list of missing performance documents for a
group of employees (group ID) and a given document type and date range.
Use the Late Documents report to generate a list of late performance documents, by document
type, for a group of employees.

Training Guide
Enterprise ePerformance 9.0
Page 236
Upon completion of this lesson, you will be able to:
• Generate the Missing Documents report. • Generate the Late Documents report.
Generating the Missing Documents Report The Missing Documents report is used to identify individuals that do not have performance
documents. This report can be used to insure everyone within a specific group currently has a
document based upon the criteria entered. You can generate the list of missing performance documents for a group of employees, and a given document type and date range.
In this example, as the HR administrator, you will generate the Missing Documents report for employees within a specific Group ID.
Procedure
Step Action
1. Begin by navigating to the Missing Documents page.
Click the Workforce Development link.

Training Guide Enterprise ePerformance 9.0
Page 237
Step Action
2. Click the Performance Management link.
3. Click the Reports link.
4. Click the Missing Documents Report link.
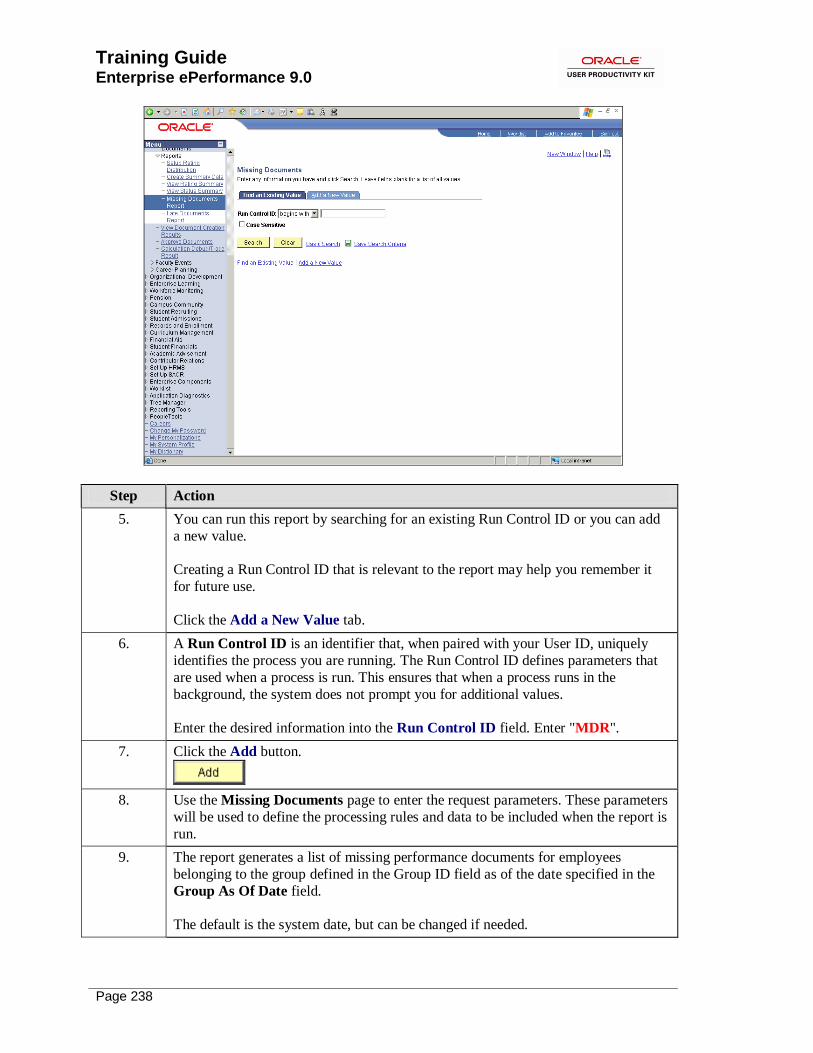
Training Guide
Enterprise ePerformance 9.0
Page 238
Step Action
5. You can run this report by searching for an existing Run Control ID or you can add
a new value.
Creating a Run Control ID that is relevant to the report may help you remember it
for future use.
Click the Add a New Value tab.
6. A Run Control ID is an identifier that, when paired with your User ID, uniquely
identifies the process you are running. The Run Control ID defines parameters that
are used when a process is run. This ensures that when a process runs in the
background, the system does not prompt you for additional values.
Enter the desired information into the Run Control ID field. Enter "MDR".
7. Click the Add button.
8. Use the Missing Documents page to enter the request parameters. These parameters
will be used to define the processing rules and data to be included when the report is
run.
9. The report generates a list of missing performance documents for employees
belonging to the group defined in the Group ID field as of the date specified in the
Group As Of Date field.
The default is the system date, but can be changed if needed.
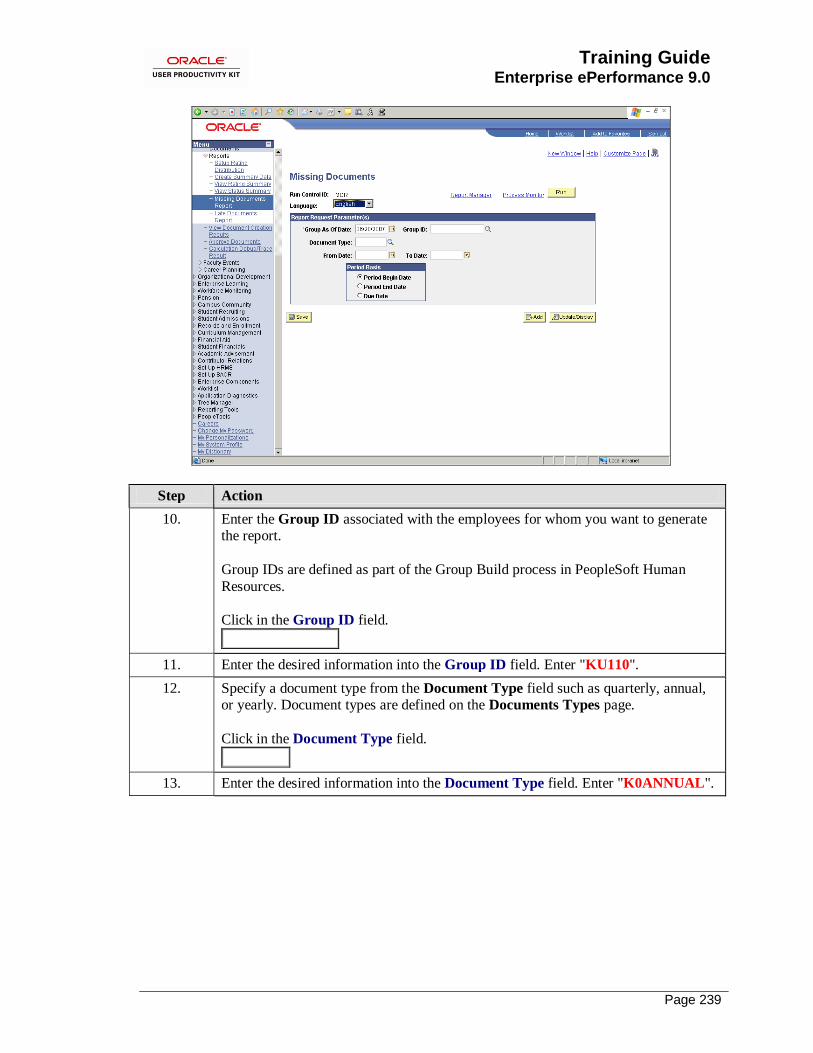
Training Guide Enterprise ePerformance 9.0
Page 239
Step Action
10. Enter the Group ID associated with the employees for whom you want to generate the report.
Group IDs are defined as part of the Group Build process in PeopleSoft Human
Resources.
Click in the Group ID field.
11. Enter the desired information into the Group ID field. Enter "KU110".
12. Specify a document type from the Document Type field such as quarterly, annual, or yearly. Document types are defined on the Documents Types page.
Click in the Document Type field.
13. Enter the desired information into the Document Type field. Enter "K0ANNUAL".

Training Guide
Enterprise ePerformance 9.0
Page 240
Step Action
14. The values in the From Date and To Date fields establish a date range that is used
in conjunction with the Period Basis to select performance documents to include in
the report. For example, if you define a From and To date range of 1 January 01 to 31 December 01 and the Period Basis is Period End Date, the report only selects
performance documents whose period end date falls between 1 January 01 and 31
December 01.
Click in the From Date field.
15. Enter the desired information into the From Date field. Enter "01/01/2002".
16. Click in the To Date field.
17. Enter the desired information into the To Date field. Enter "01/01/2003".
18. The Period Basis determines which of the dates on the manager evaluation the
system uses when selecting missing documents to publish in the report. Options are:
• Period Begin Date. Select this option to look for employees who do not have a document of the specified type with a period begin date falling within the range that
you entered in the From Date and To Date fields.
• Period End Date. Select this option to look for employees who do not have a
document of the specified type with a period end date falling within the range entered in the From Date and To Date fields.
• Due Date. Select this option to look for employees who do not have a document of
the specified type with a due date falling within the range entered in the From Date and To Date fields.
19. Click the Run button.
20. Use the Process Scheduler Request page to enter or update parameters, such as server name and report output format.

Training Guide Enterprise ePerformance 9.0
Page 241
Step Action
21. You must select a Server Name to identify the server on which the report will run. If you use the same Run Control ID for subsequent processes, the server name that
you last used will default in this field.
Click the Server Name list.
22. Click the PSNT list item.
23. Use the Type field to select the type of output you want to generate for this job.
Your four choices are File, Printer, Email, or Web. File: This enables you to write the output to a file that will appear in the Output
Destination.
Printer: You can enter a custom printer location if you have the appropriate security access.
Email: You can enter the destination information to send to a particular e-mail
recipient(s) Note that e-mail is available only for SQR, PS/nVision, and Crystal.
Web: Sends all output of the process to the report repository, including log and trace files.
Click the Type list.
24. Click the Web list item.
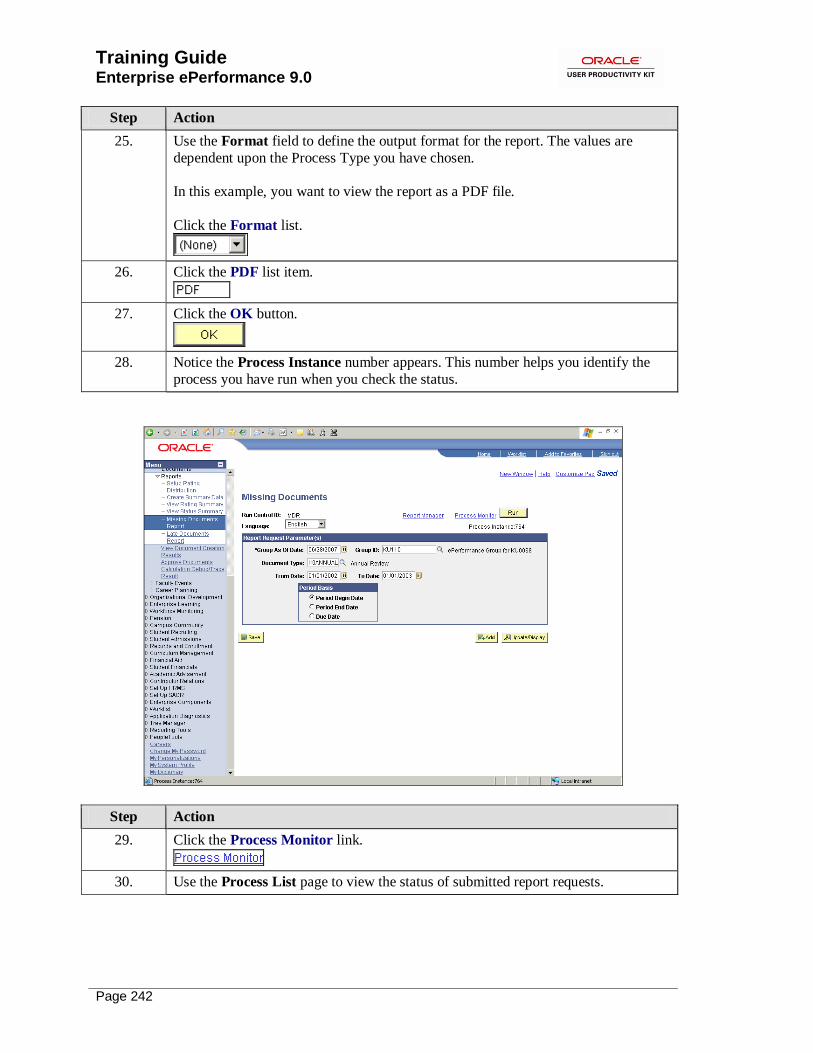
Training Guide
Enterprise ePerformance 9.0
Page 242
Step Action
25. Use the Format field to define the output format for the report. The values are
dependent upon the Process Type you have chosen.
In this example, you want to view the report as a PDF file.
Click the Format list.
26. Click the PDF list item.
27. Click the OK button.
28. Notice the Process Instance number appears. This number helps you identify the
process you have run when you check the status.
Step Action
29. Click the Process Monitor link.
30. Use the Process List page to view the status of submitted report requests.

Training Guide Enterprise ePerformance 9.0
Page 243
Step Action
31. The current status of the report is Processing. The report is finished when the status is Success. Continue to click the Refresh button until the status is Success.
Click the Refresh button.
32. The Run Status is now Success. Next, view the details of your report request.
Click the HEPJOB01 link.

Training Guide
Enterprise ePerformance 9.0
Page 244
Step Action
33. Choose the link for which you want to view details.
Click the 766 - HEP001 Success link.
34. Use the Process Detail page to view such details as request parameters and
message logs.
Click the View Log/Trace link to display links that enable you to view the message
log and trace file in a browser.

Training Guide Enterprise ePerformance 9.0
Page 245
Step Action
35. Click the View Log/Trace link.
36. Use the View Log/Trace page to choose a file to view.
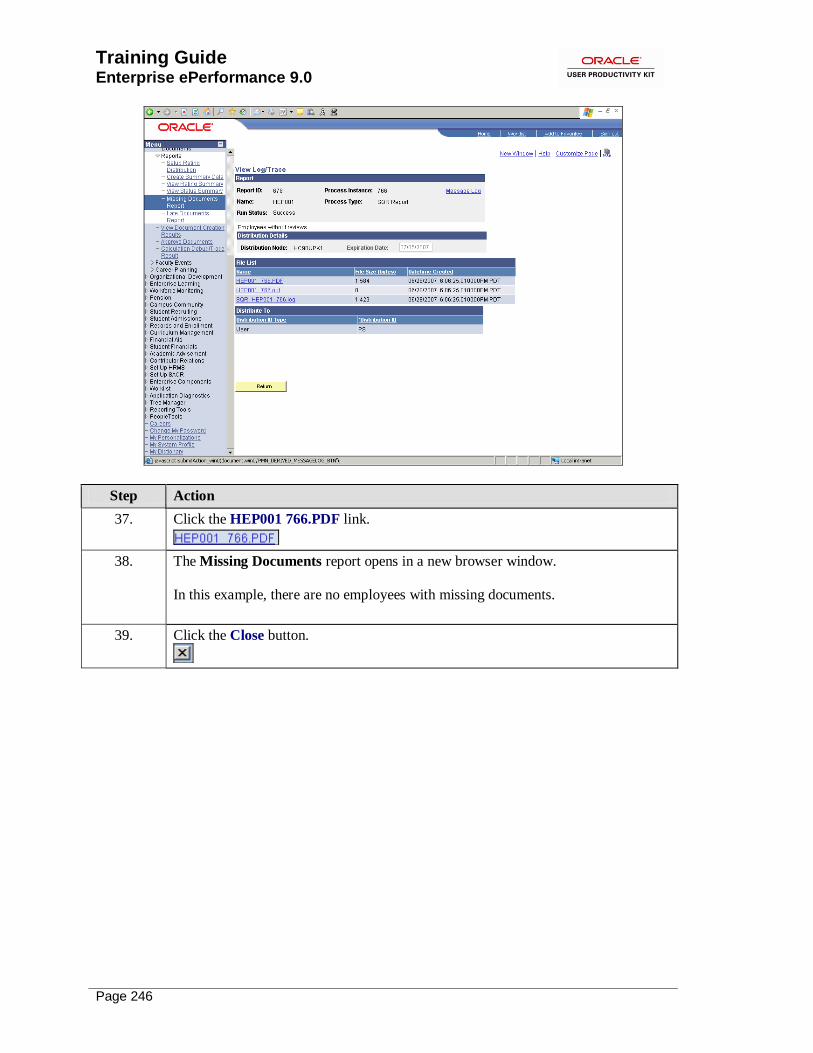
Training Guide
Enterprise ePerformance 9.0
Page 246
Step Action
37. Click the HEP001 766.PDF link.
38. The Missing Documents report opens in a new browser window.
In this example, there are no employees with missing documents.
39. Click the Close button.
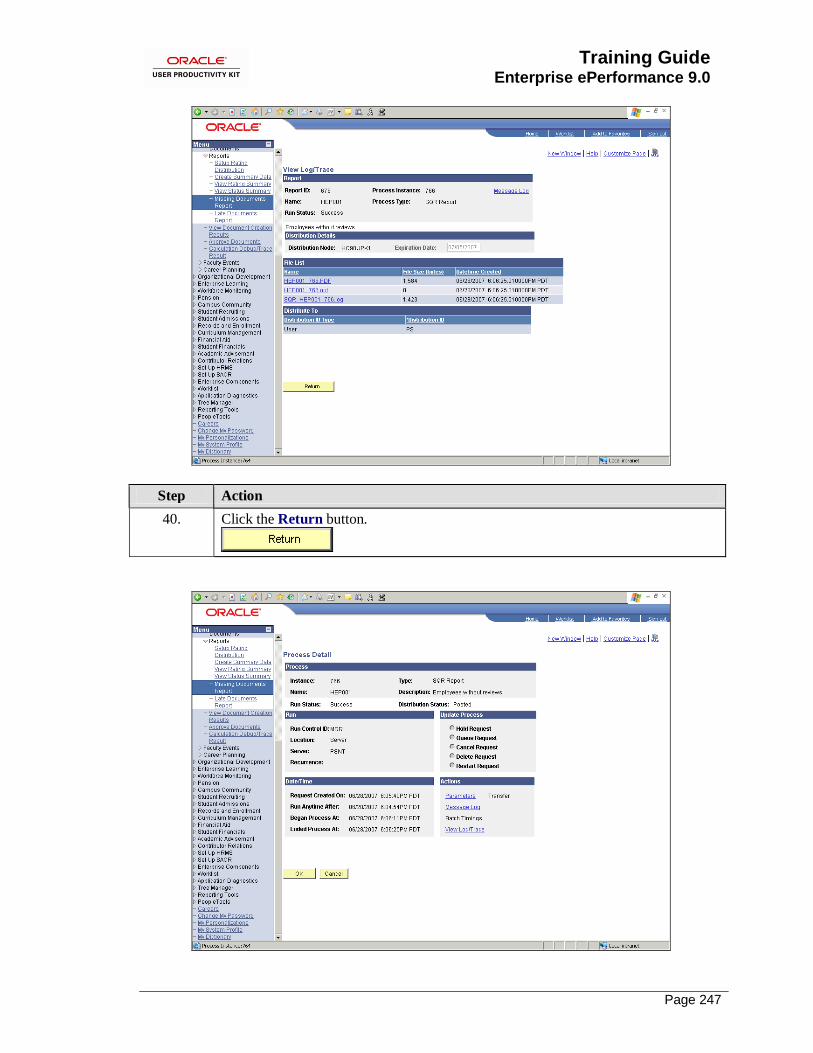
Training Guide Enterprise ePerformance 9.0
Page 247
Step Action
40. Click the Return button.

Training Guide
Enterprise ePerformance 9.0
Page 248
Step Action
41. Click the OK button.
Step Action
42. Click the Return button.
43. You have successfully generated the Missing Documents report.
End of Procedure.
Generating the Late Documents Report Use the Late Documents report to generate a list of late performance documents, by document
type, for a group of employees.
To determine whether a report is late, the system looks at the document due date and compares
this date to the current date. If the current date is greater than the due date, and the status of the document is not yet Complete, the document is reported as late (the report ignores performance
documents that have been cancelled).
In this example, as the HR administrator, you will generate the Late Documents report for employees within a specific Group ID.

Training Guide Enterprise ePerformance 9.0
Page 249
Procedure
Step Action
1. Begin by navigating to the Late Documents page.
Click the Workforce Development link.

Training Guide
Enterprise ePerformance 9.0
Page 250
Step Action
2. Click the Performance Management link.
3. Click the Reports link.
4. Click the Late Documents Report link.

Training Guide Enterprise ePerformance 9.0
Page 251
Step Action
5. You can run this report by searching for an existing Run Control ID or you can add a new value.
Creating a Run Control ID that is relevant to the report may help you remember it
for future use.
Click the Add a New Value tab.
6. A Run Control ID is an identifier that, when paired with your User ID, uniquely
identifies the process you are running. The Run Control ID defines parameters that are used when a process is run. This ensures that when a process runs in the
background, the system does not prompt you for additional values.
Enter the desired information into the Run Control ID field. Enter "LDR".
7. Click the Add button.
8. Use the Late Documents page to enter the request parameters. These parameters will be used to define the processing rules and data to be included when the report is
run.
9. The report generates a list of late performance documents for employees belonging
to the group defined in the Group ID field as of the date specified in the Group As
Of Date field.
The default is the system date. In this example, accept the default.

Training Guide
Enterprise ePerformance 9.0
Page 252
Step Action
10. Enter the Group ID of the employees for whom you want to generate the report.
Group IDs are defined as part of the Group Build process in PeopleSoft.
Click in the Group ID field.
11. Enter the desired information into the Group ID field. Enter "KU110".
12. Specify a document type in the Document Type field such as quarterly, annual, or project review. Document types are defined on the Document Types page.
Click in the Document Type field.
13. Enter the desired information into the Document Type field. Enter "K0ANNUAL".
14. Click the Run button.
15. Use the Process Scheduler Request page to enter or update parameters, such as
server name and report output format.
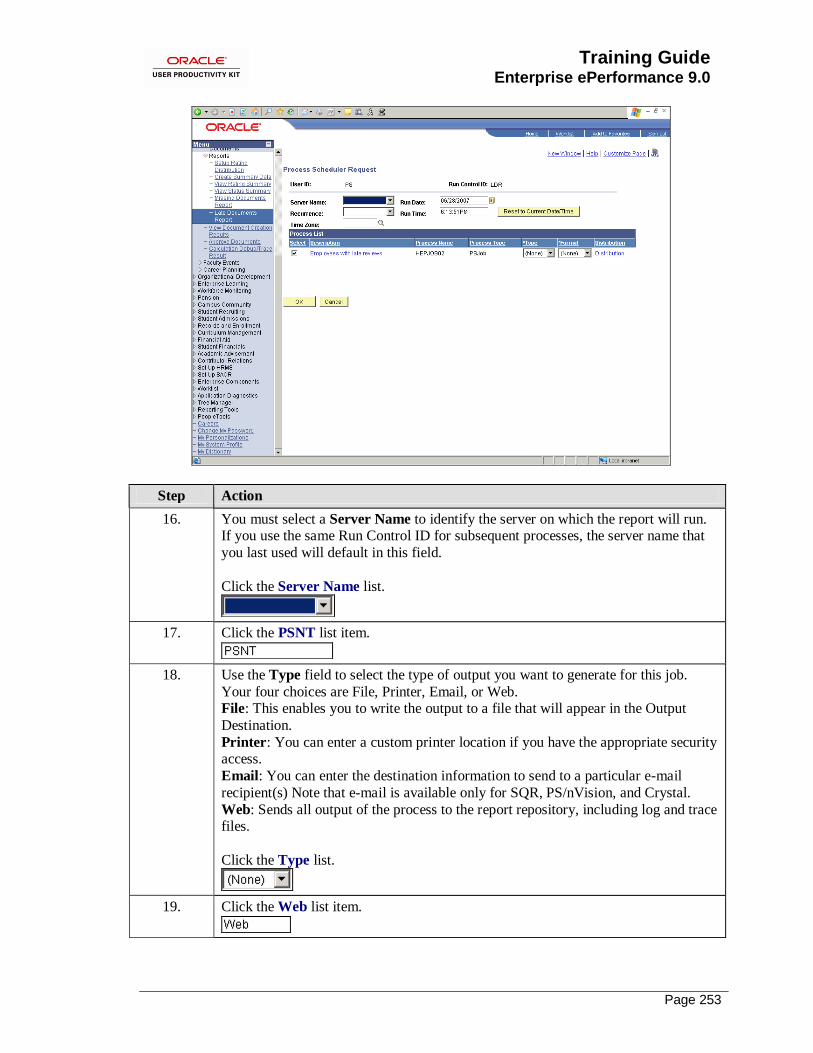
Training Guide Enterprise ePerformance 9.0
Page 253
Step Action
16. You must select a Server Name to identify the server on which the report will run. If you use the same Run Control ID for subsequent processes, the server name that
you last used will default in this field.
Click the Server Name list.
17. Click the PSNT list item.
18. Use the Type field to select the type of output you want to generate for this job.
Your four choices are File, Printer, Email, or Web. File: This enables you to write the output to a file that will appear in the Output
Destination.
Printer: You can enter a custom printer location if you have the appropriate security access.
Email: You can enter the destination information to send to a particular e-mail
recipient(s) Note that e-mail is available only for SQR, PS/nVision, and Crystal.
Web: Sends all output of the process to the report repository, including log and trace files.
Click the Type list.
19. Click the Web list item.

Training Guide
Enterprise ePerformance 9.0
Page 254
Step Action
20. Use the Format field to define the output format for the report. The values are
dependent upon the Process Type you have chosen.
In this example, you want to view the report as a PDF file.
Click the Format list.
21. Click the PDF list item.
22. Click the OK button.
23. Notice the Process Instance number appears. This number helps you identify the
process you have run when you check the status.
Step Action
24. Click the Process Monitor link.
25. Use the Process List page to view the status of submitted report requests.
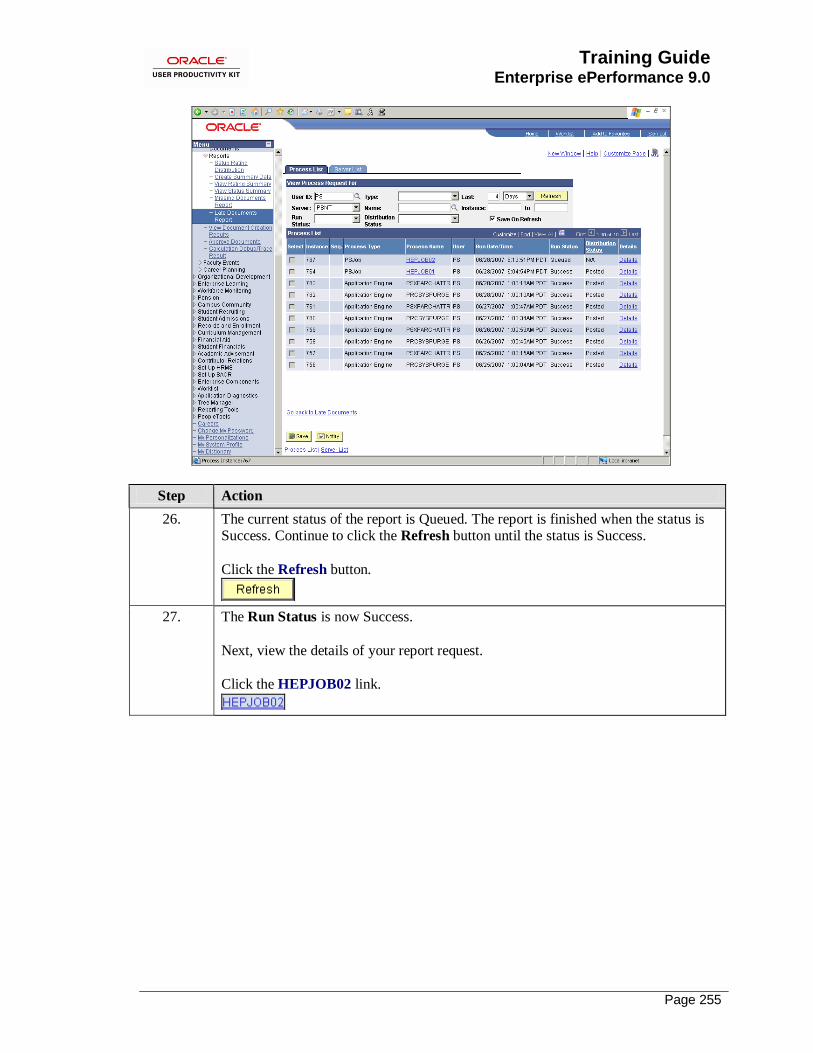
Training Guide Enterprise ePerformance 9.0
Page 255
Step Action
26. The current status of the report is Queued. The report is finished when the status is Success. Continue to click the Refresh button until the status is Success.
Click the Refresh button.
27. The Run Status is now Success.
Next, view the details of your report request.
Click the HEPJOB02 link.
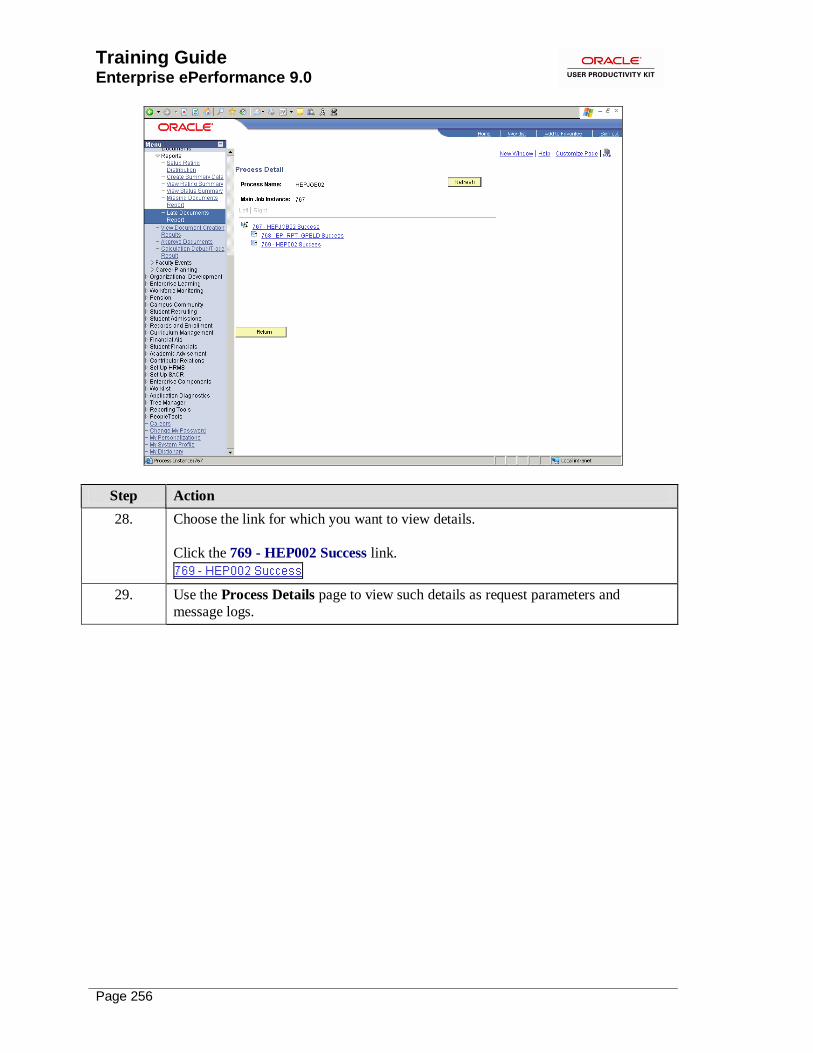
Training Guide
Enterprise ePerformance 9.0
Page 256
Step Action
28. Choose the link for which you want to view details.
Click the 769 - HEP002 Success link.
29. Use the Process Details page to view such details as request parameters and
message logs.

Training Guide Enterprise ePerformance 9.0
Page 257
Step Action
30. Click the View Log/Trace link to display links that enable you to view the message log and trace file in a browser.
Click the View Log/Trace link.
31. Use the View Log/Trace page to choose a file to view.

Training Guide
Enterprise ePerformance 9.0
Page 258
Step Action
32. Click the HEP002 769.PDF link.
33. The Late Documents report opens in a new window.
34. In this example, there are 7 late documents.
Close the report after viewing it.
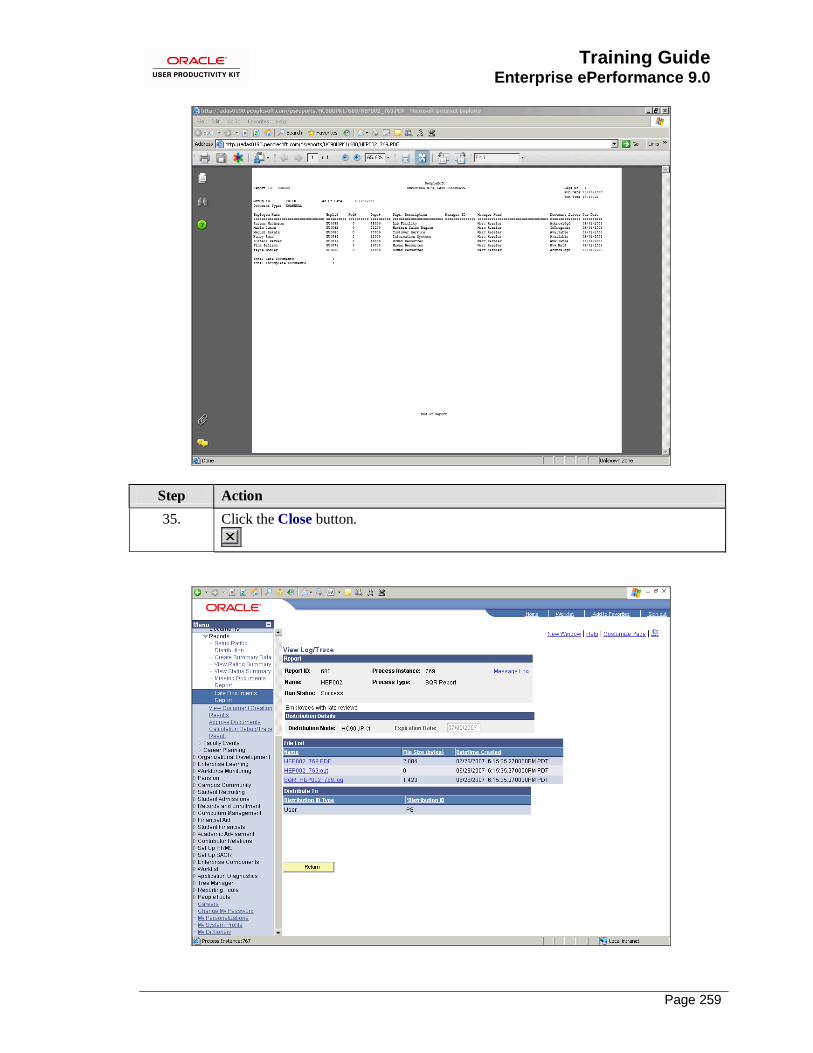
Training Guide Enterprise ePerformance 9.0
Page 259
Step Action
35. Click the Close button.

Training Guide
Enterprise ePerformance 9.0
Page 260
Step Action
36. Click the Return button.
Step Action
37. Click the OK button.

Training Guide Enterprise ePerformance 9.0
Page 261
Step Action
38. Click the Return button.
39. You have successfully generated the Late Documents report.
End of Procedure.