Embed Size (px)
Citation preview
Financials
Oracle/PeopleSoft 9.0
Voucher Entry
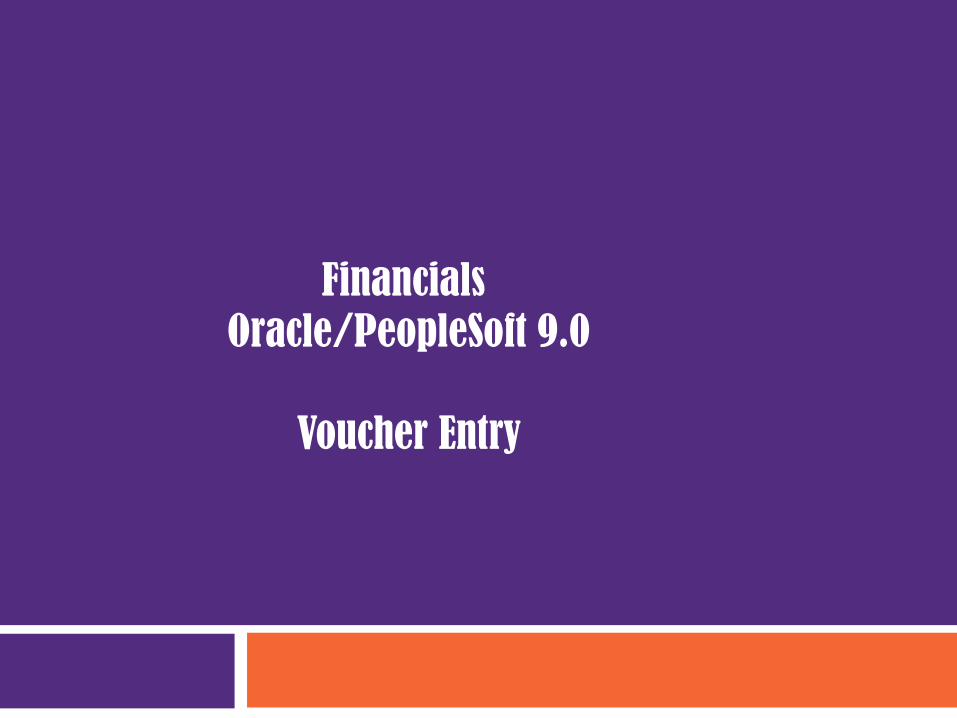
Learning Objectives
When to Use a Direct Purchase and a Travel
Voucher
How to Get to the Voucher Screen
Overview of Business Units
How to Add a Direct Purchase Voucher
How to Add a Travel Voucher
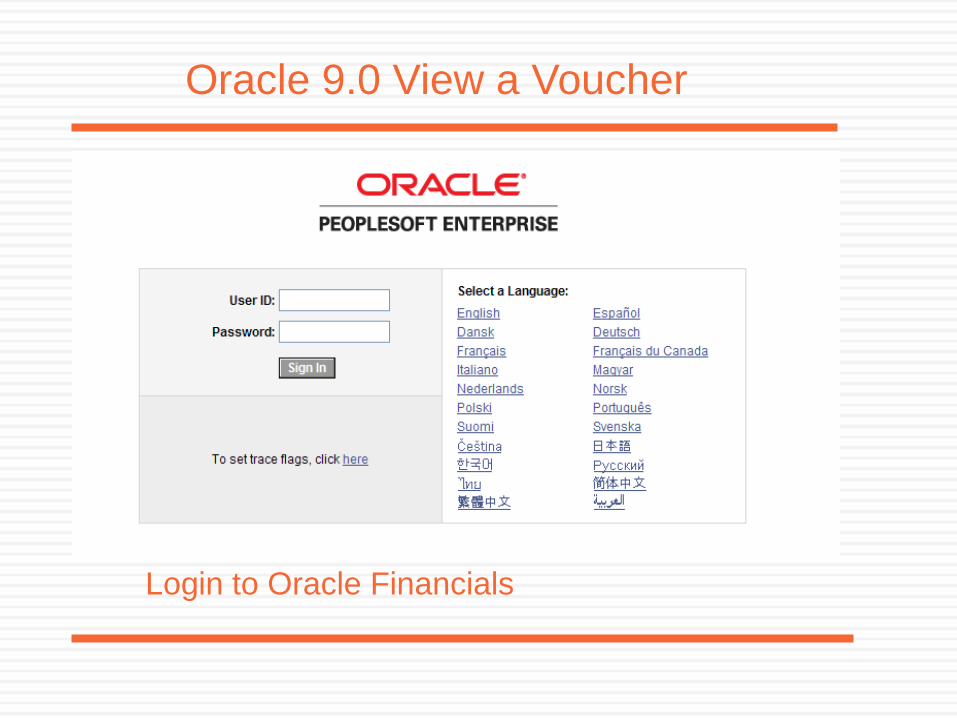
Oracle 9.0 View a Voucher
Login to Oracle Financials

Select the Vouchers Link from the menu
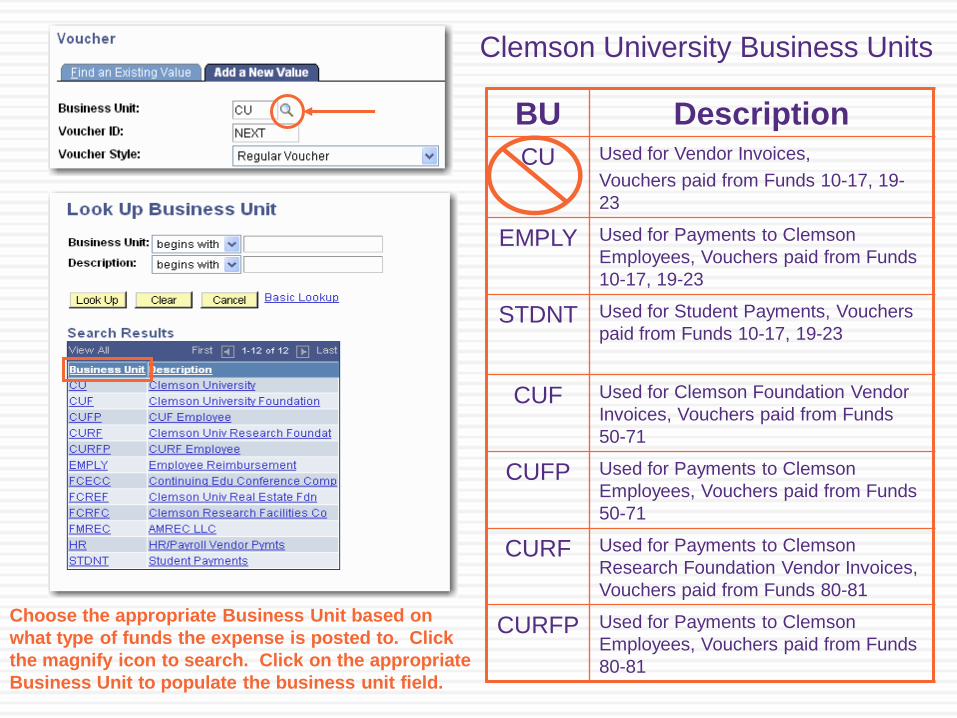
BU Description
CU Used for Vendor Invoices,
Vouchers paid from Funds 10-17, 19-
23
EMPLY Used for Payments to Clemson
Employees, Vouchers paid from Funds
10-17, 19-23
STDNT Used for Student Payments, Vouchers
paid from Funds 10-17, 19-23
CUF Used for Clemson Foundation Vendor
Invoices, Vouchers paid from Funds
50-71
CUFP Used for Payments to Clemson
Employees, Vouchers paid from Funds
50-71
CURF Used for Payments to Clemson
Research Foundation Vendor Invoices,
Vouchers paid from Funds 80-81
CURFP Used for Payments to Clemson
Employees, Vouchers paid from Funds
80-81
Clemson University Business Units
Choose the appropriate Business Unit based on
what type of funds the expense is posted to. Click
the magnify icon to search. Click on the appropriate
Business Unit to populate the business unit field.
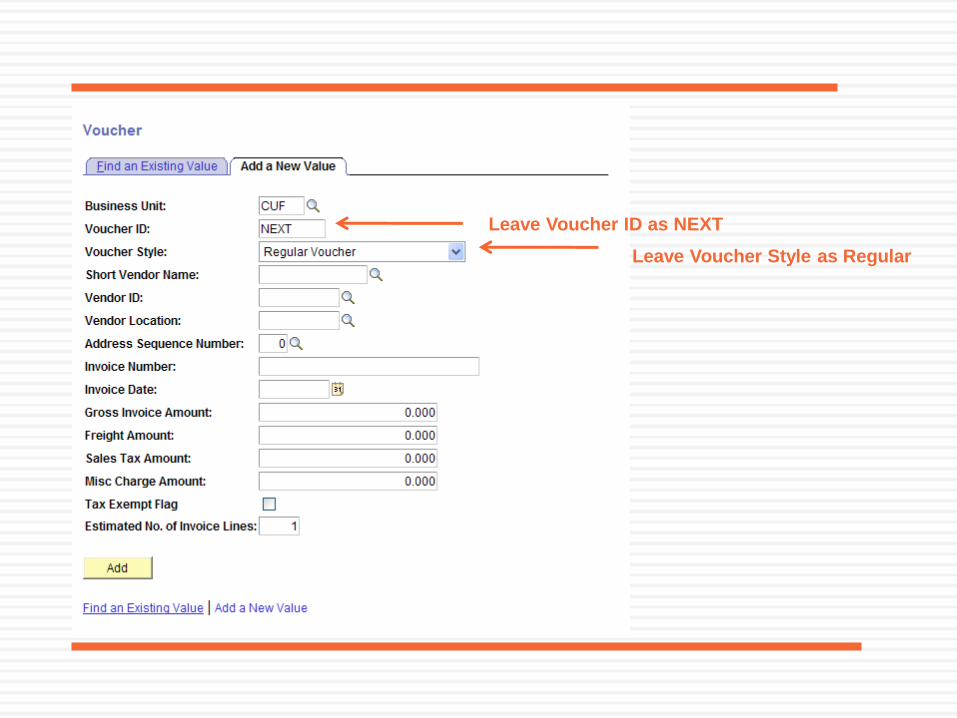
Leave Voucher ID as NEXT
Leave Voucher Style as Regular
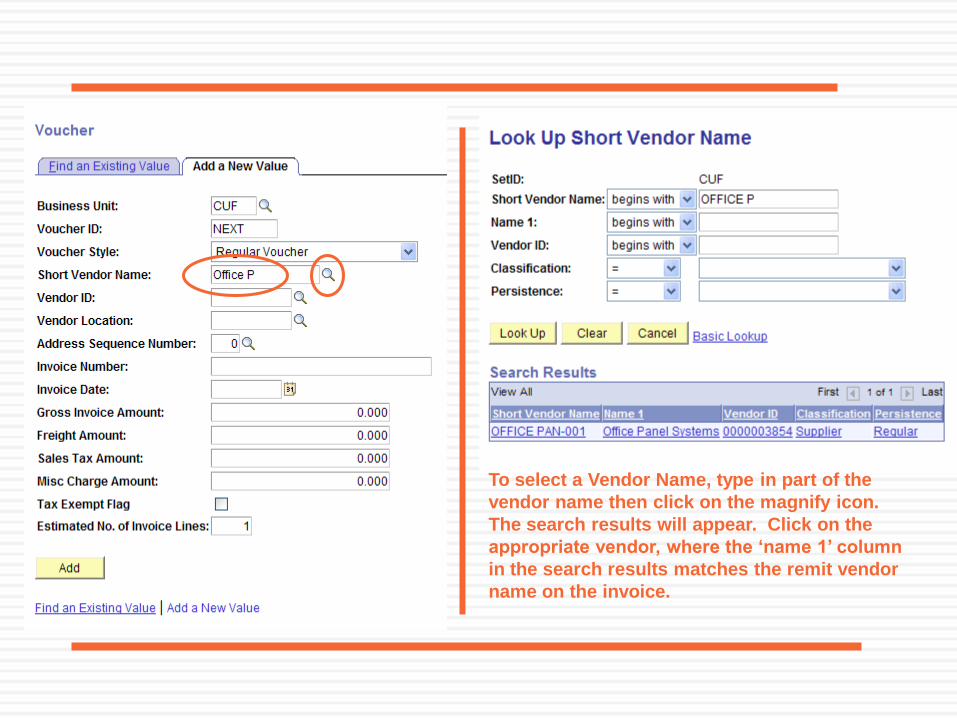
To select a Vendor Name, type in part of the
vendor name then click on the magnify icon.
The search results will appear. Click on the
appropriate vendor, where the „name 1‟ column
in the search results matches the remit vendor
name on the invoice.
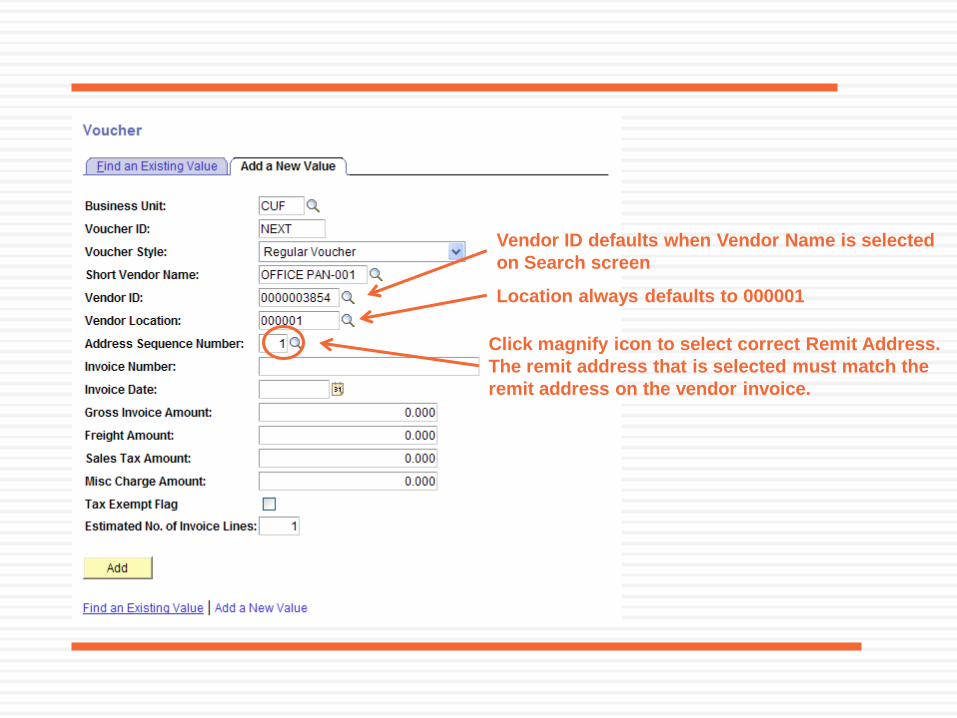
Vendor ID defaults when Vendor Name is selected
on Search screen
Location always defaults to 000001
Click magnify icon to select correct Remit Address.
The remit address that is selected must match the
remit address on the vendor invoice.
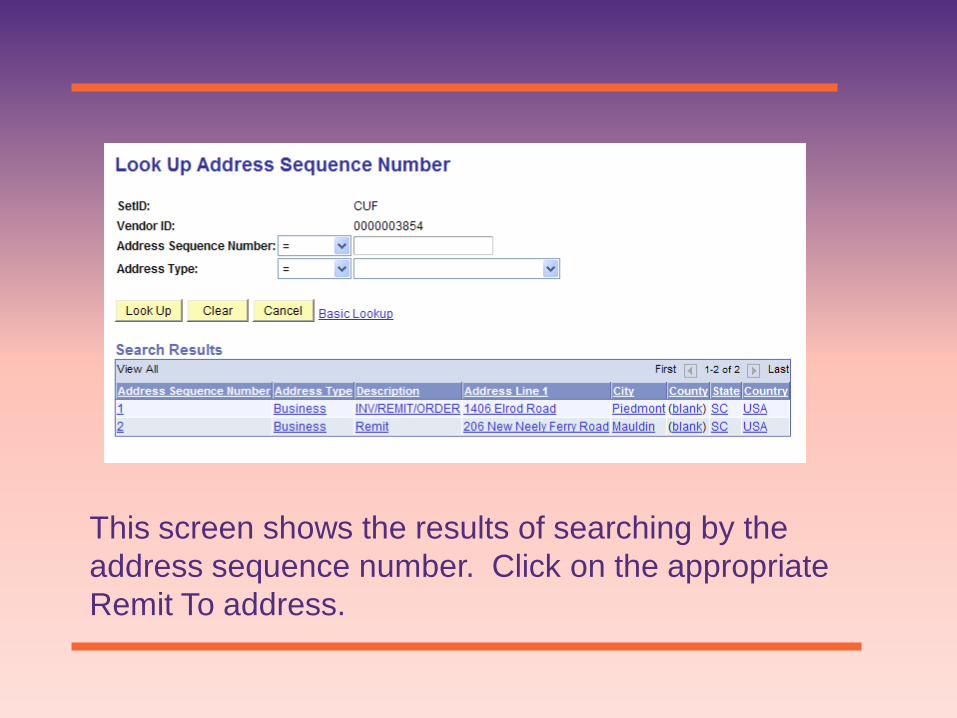
This screen shows the results of searching by the
address sequence number. Click on the appropriate
Remit To address.
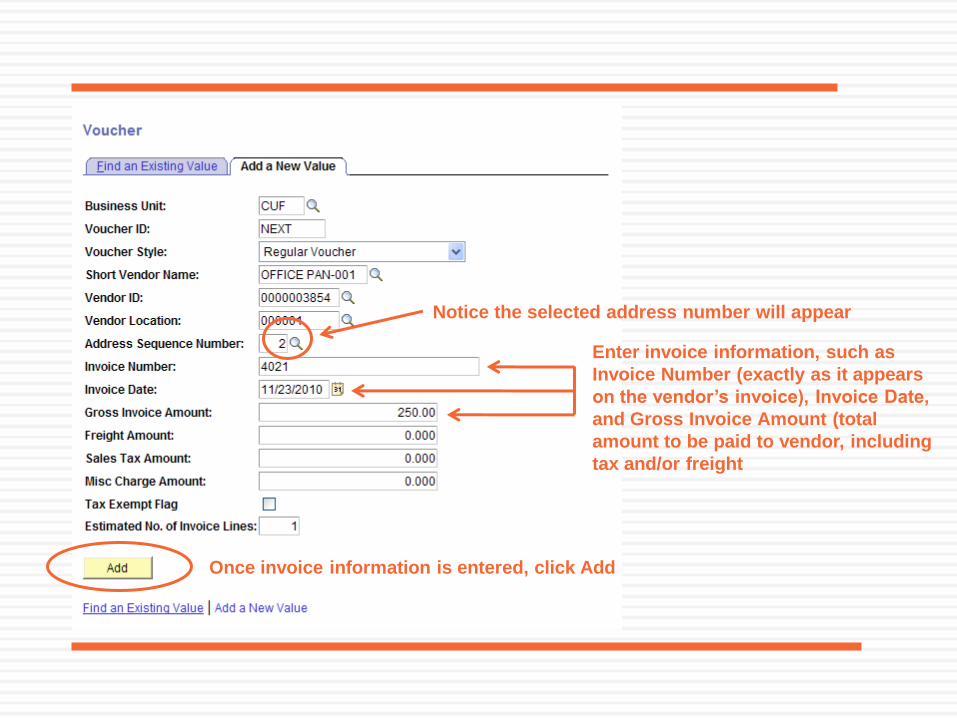
Notice the selected address number will appear
Enter invoice information, such as
Invoice Number (exactly as it appears
on the vendor‟s invoice), Invoice Date,
and Gross Invoice Amount (total
amount to be paid to vendor, including
tax and/or freight
Once invoice information is entered, click Add
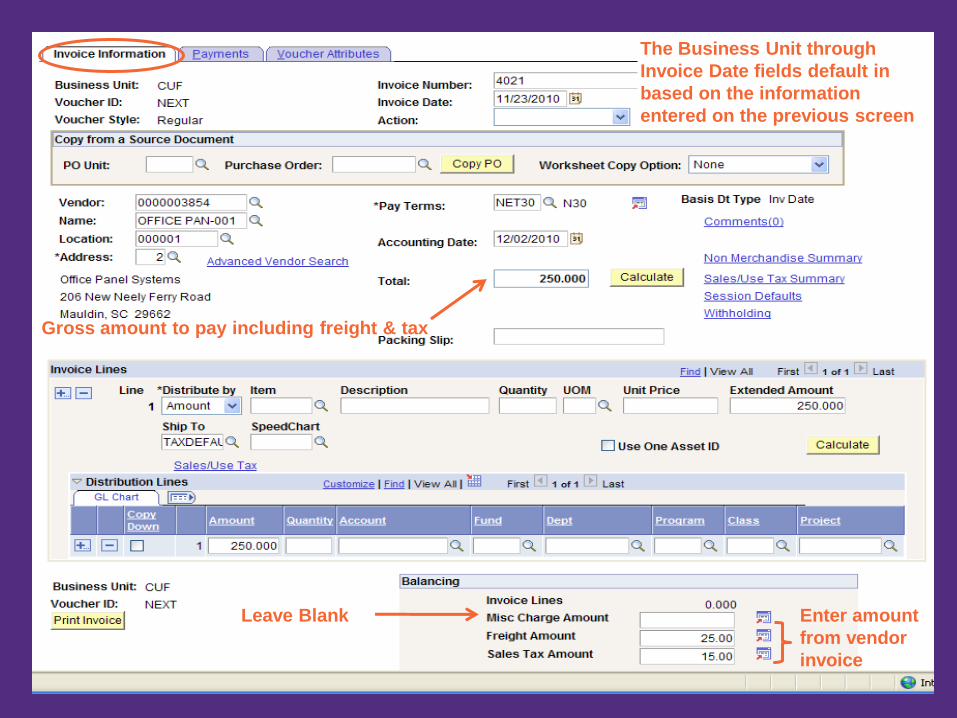
Gross amount to pay including freight & tax
Leave Blank Enter amount
from vendor
invoice
The Business Unit through
Invoice Date fields default in
based on the information
entered on the previous screen
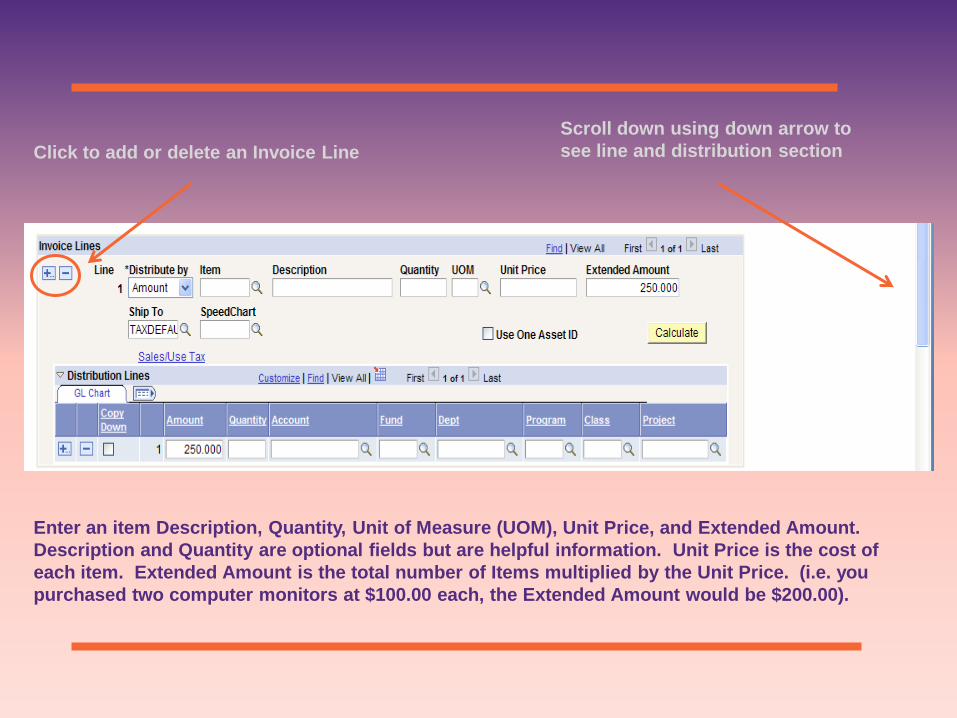
Scroll down using down arrow to
see line and distribution sectionClick to add or delete an Invoice Line
Enter an item Description, Quantity, Unit of Measure (UOM), Unit Price, and Extended Amount.
Description and Quantity are optional fields but are helpful information. Unit Price is the cost of
each item. Extended Amount is the total number of Items multiplied by the Unit Price. (i.e. you
purchased two computer monitors at $100.00 each, the Extended Amount would be $200.00).
This defaults in. Do not change unless you pay
invoices for multiple counties with different tax
rates
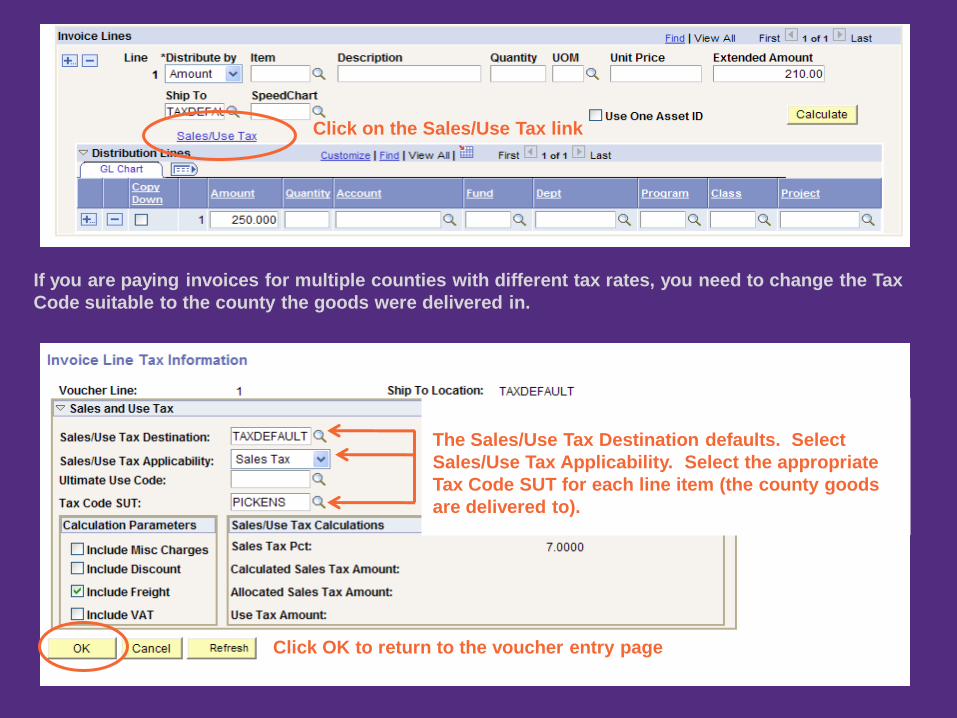
If you are paying invoices for multiple counties with different tax rates, you need to change the Tax
Code suitable to the county the goods were delivered in.
The Sales/Use Tax Destination defaults. Select
Sales/Use Tax Applicability. Select the appropriate
Tax Code SUT for each line item (the county goods
are delivered to).
Click on the Sales/Use Tax link
Click OK to return to the voucher entry page
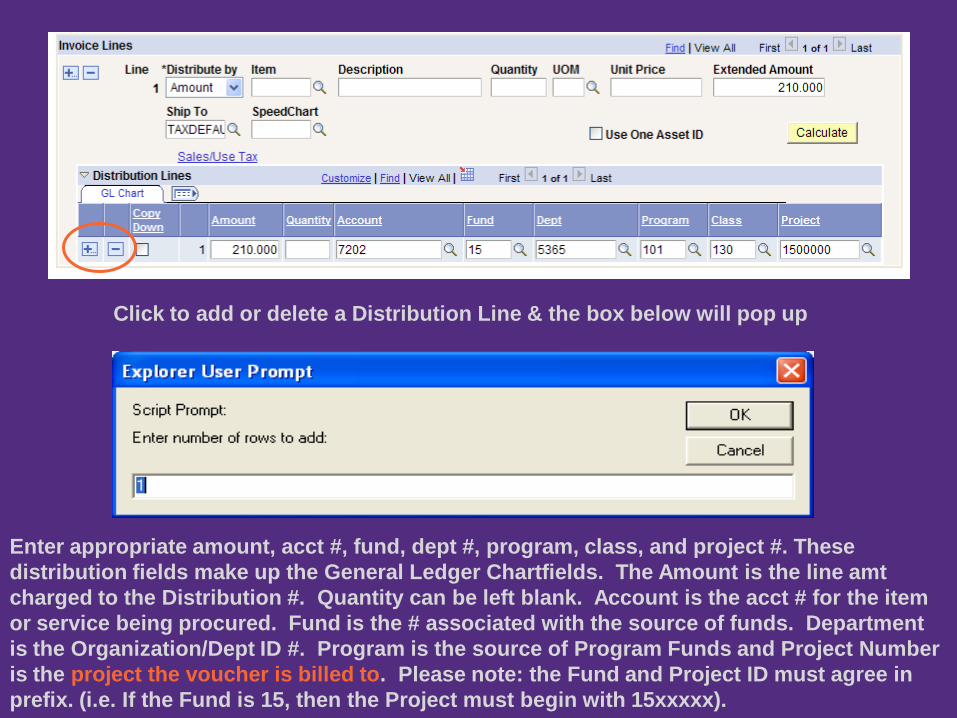
Click to add or delete a Distribution Line & the box below will pop up
Enter appropriate amount, acct #, fund, dept #, program, class, and project #. These
distribution fields make up the General Ledger Chartfields. The Amount is the line amt
charged to the Distribution #. Quantity can be left blank. Account is the acct # for the item
or service being procured. Fund is the # associated with the source of funds. Department
is the Organization/Dept ID #. Program is the source of Program Funds and Project Number
is the project the voucher is billed to. Please note: the Fund and Project ID must agree in
prefix. (i.e. If the Fund is 15, then the Project must begin with 15xxxxx).
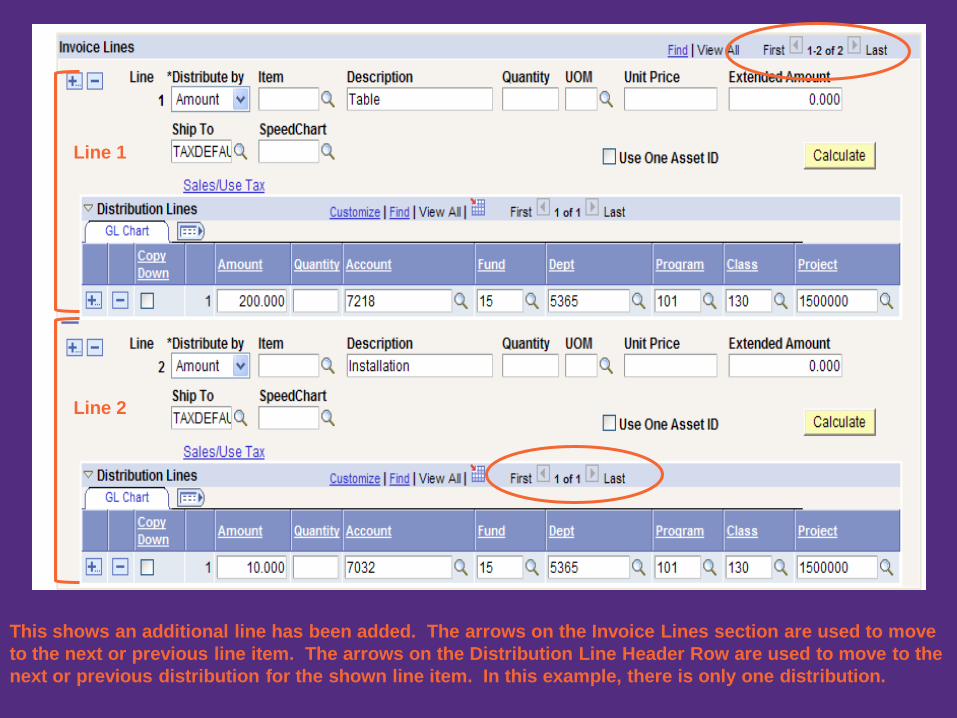
Line 1
Line 2
This shows an additional line has been added. The arrows on the Invoice Lines section are used to move
to the next or previous line item. The arrows on the Distribution Line Header Row are used to move to the
next or previous distribution for the shown line item. In this example, there is only one distribution.
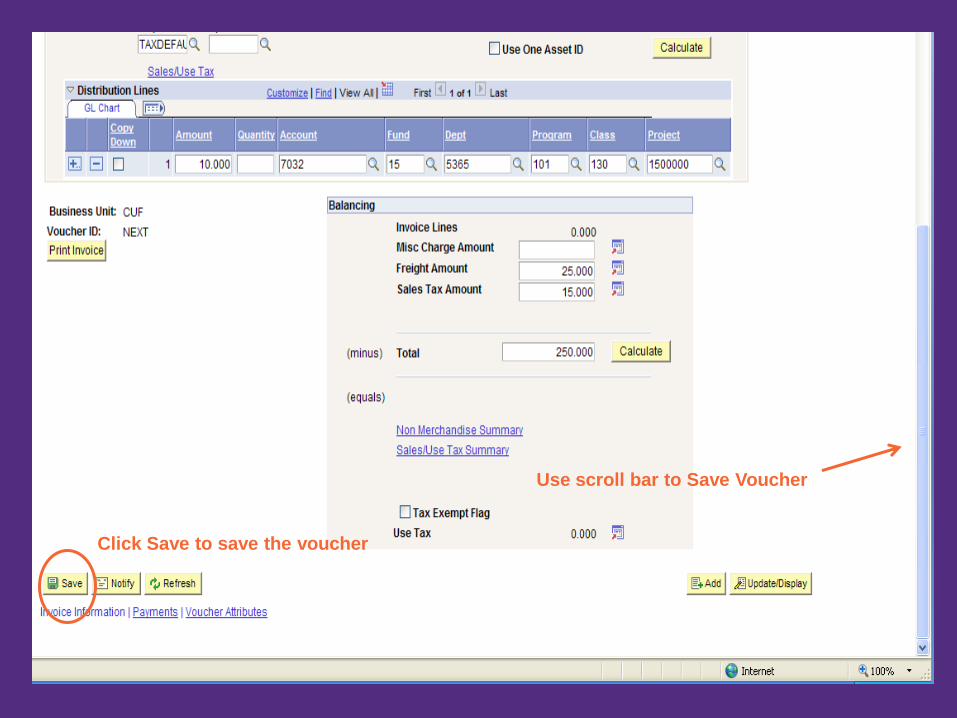
Use scroll bar to Save Voucher
Click Save to save the voucher
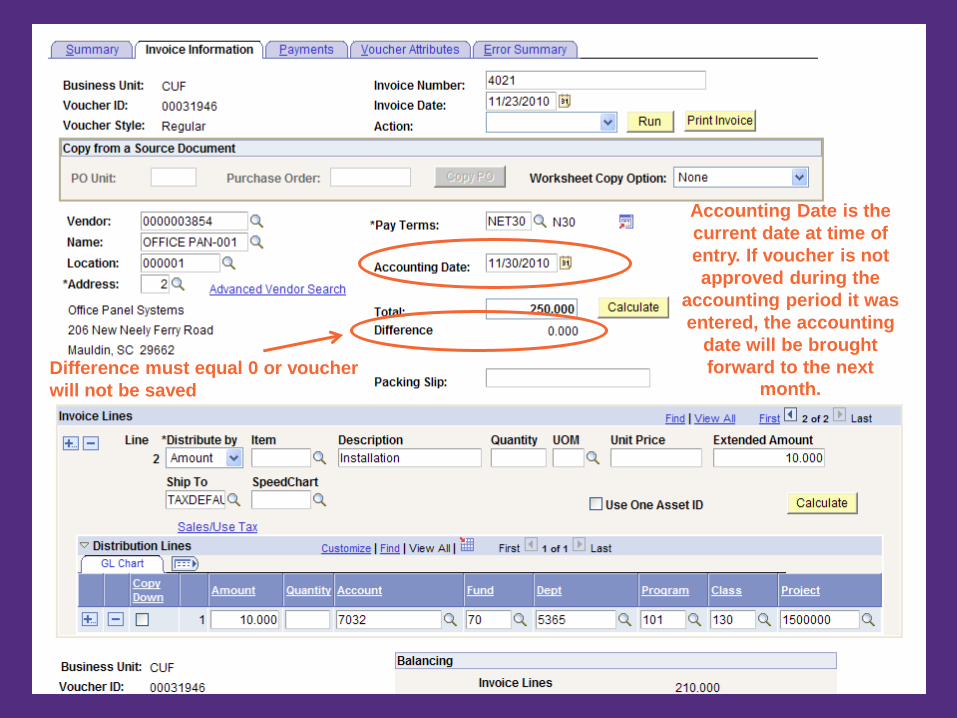
Difference must equal 0 or voucher
will not be saved
Accounting Date is the
current date at time of
entry. If voucher is not
approved during the
accounting period it was
entered, the accounting
date will be brought
forward to the next
month.
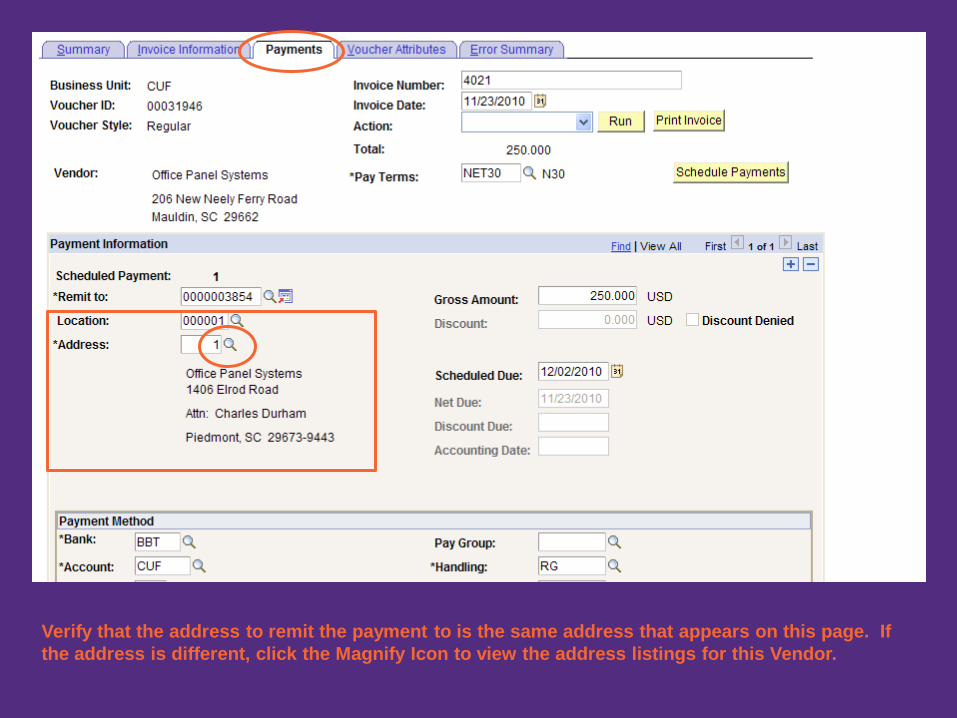
Verify that the address to remit the payment to is the same address that appears on this page. If
the address is different, click the Magnify Icon to view the address listings for this Vendor.
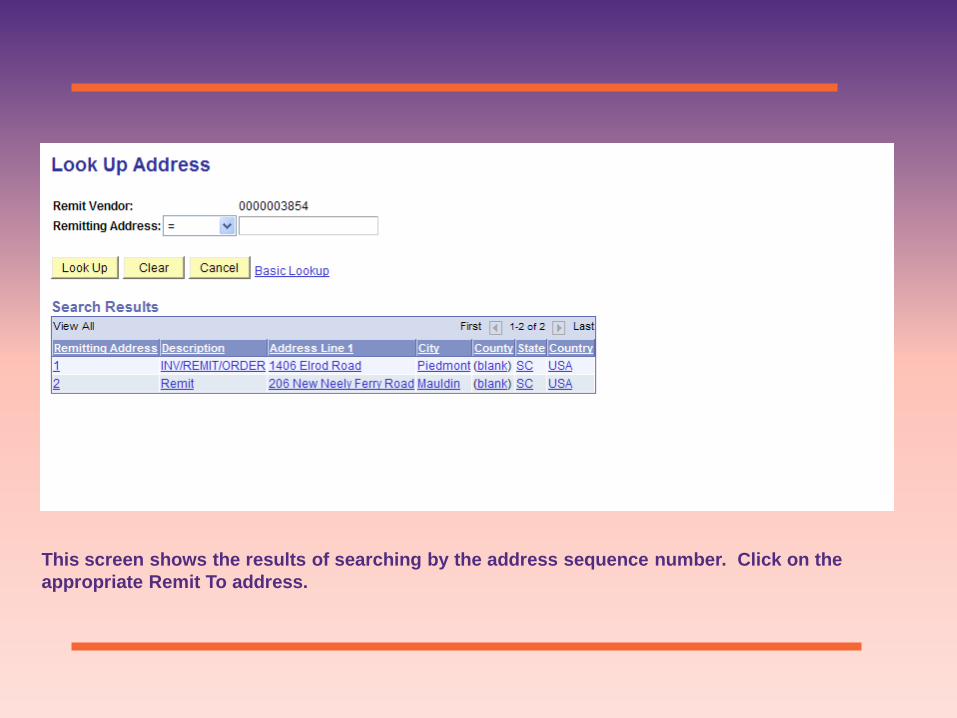
This screen shows the results of searching by the address sequence number. Click on the
appropriate Remit To address.
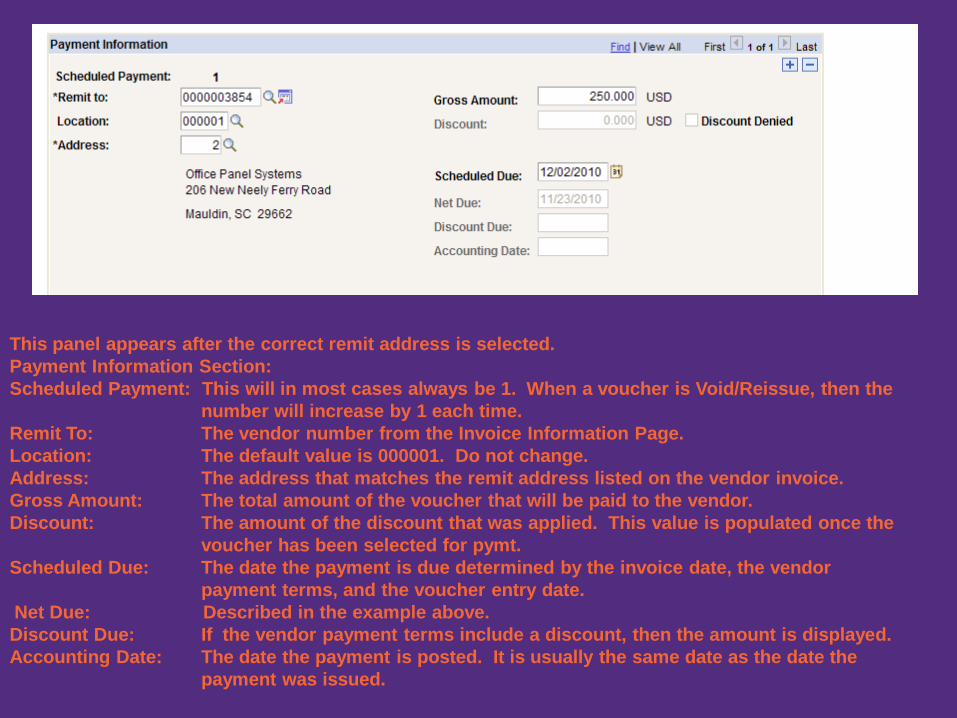
This panel appears after the correct remit address is selected.
Payment Information Section:
Scheduled Payment: This will in most cases always be 1. When a voucher is Void/Reissue, then the
number will increase by 1 each time.
Remit To: The vendor number from the Invoice Information Page.
Location: The default value is 000001. Do not change.
Address: The address that matches the remit address listed on the vendor invoice.
Gross Amount: The total amount of the voucher that will be paid to the vendor.
Discount: The amount of the discount that was applied. This value is populated once the
voucher has been selected for pymt.
Scheduled Due: The date the payment is due determined by the invoice date, the vendor
payment terms, and the voucher entry date.
Net Due: Described in the example above.
Discount Due: If the vendor payment terms include a discount, then the amount is displayed.
Accounting Date: The date the payment is posted. It is usually the same date as the date the
payment was issued.
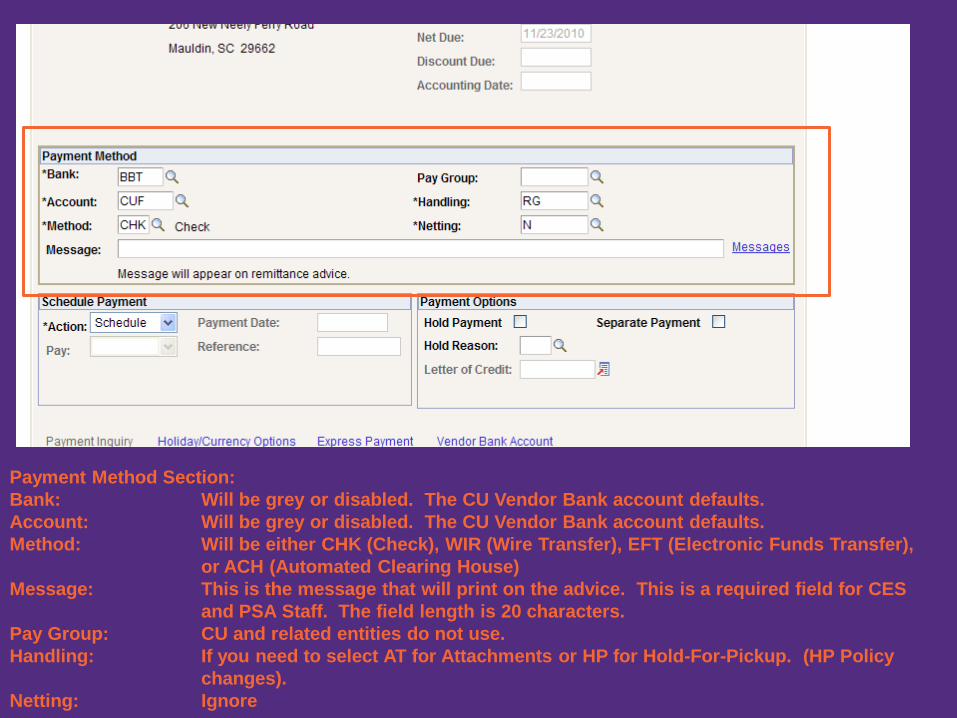
Payment Method Section:
Bank: Will be grey or disabled. The CU Vendor Bank account defaults.
Account: Will be grey or disabled. The CU Vendor Bank account defaults.
Method: Will be either CHK (Check), WIR (Wire Transfer), EFT (Electronic Funds Transfer),
or ACH (Automated Clearing House)
Message: This is the message that will print on the advice. This is a required field for CES
and PSA Staff. The field length is 20 characters.
Pay Group: CU and related entities do not use.
Handling: If you need to select AT for Attachments or HP for Hold-For-Pickup. (HP Policy
changes).
Netting: Ignore
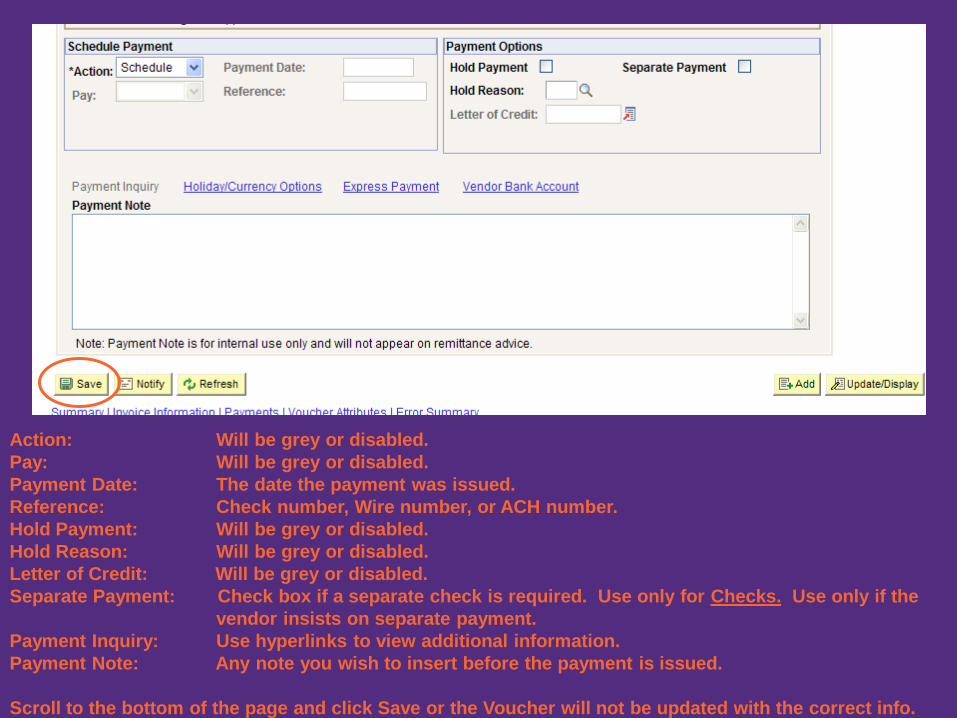
Action: Will be grey or disabled.
Pay: Will be grey or disabled.
Payment Date: The date the payment was issued.
Reference: Check number, Wire number, or ACH number.
Hold Payment: Will be grey or disabled.
Hold Reason: Will be grey or disabled.
Letter of Credit: Will be grey or disabled.
Separate Payment: Check box if a separate check is required. Use only for Checks. Use only if the
vendor insists on separate payment.
Payment Inquiry: Use hyperlinks to view additional information.
Payment Note: Any note you wish to insert before the payment is issued.
Scroll to the bottom of the page and click Save or the Voucher will not be updated with the correct info.
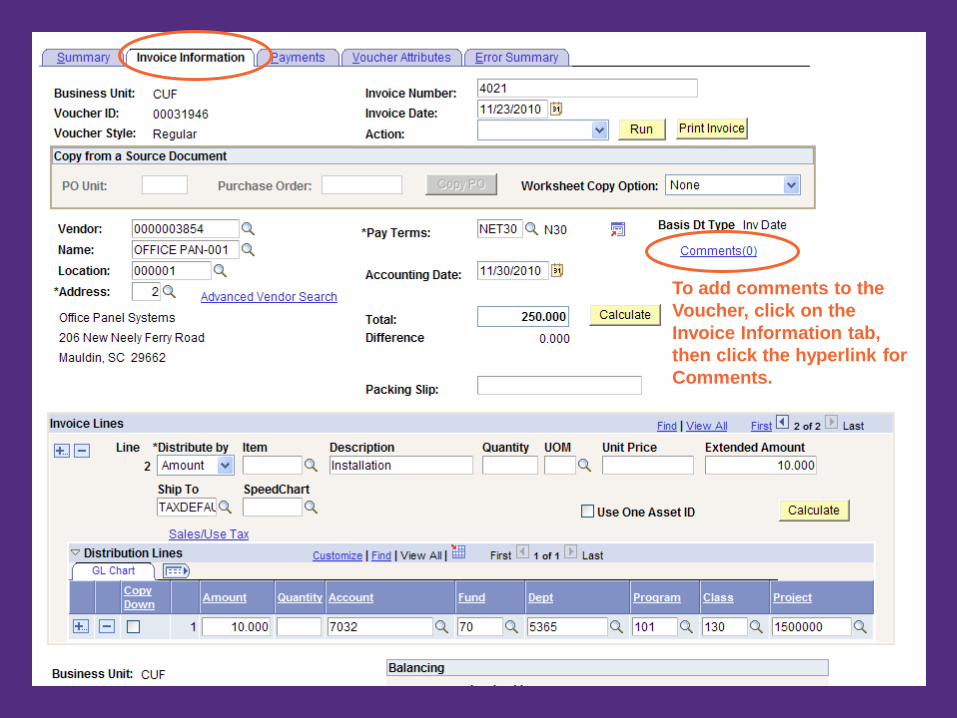
To add comments to the
Voucher, click on the
Invoice Information tab,
then click the hyperlink for
Comments.
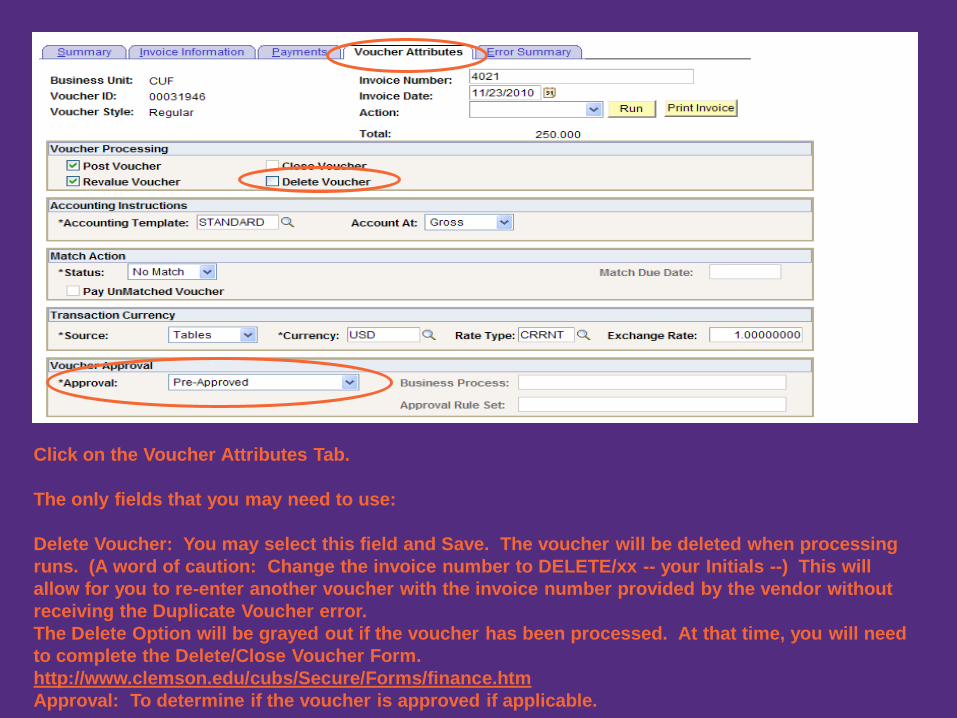
Click on the Voucher Attributes Tab.
The only fields that you may need to use:
Delete Voucher: You may select this field and Save. The voucher will be deleted when processing
runs. (A word of caution: Change the invoice number to DELETE/xx -- your Initials --) This will
allow for you to re-enter another voucher with the invoice number provided by the vendor without
receiving the Duplicate Voucher error.
The Delete Option will be grayed out if the voucher has been processed. At that time, you will need
to complete the Delete/Close Voucher Form.
http://www.clemson.edu/cubs/Secure/Forms/finance.htm
Approval: To determine if the voucher is approved if applicable.
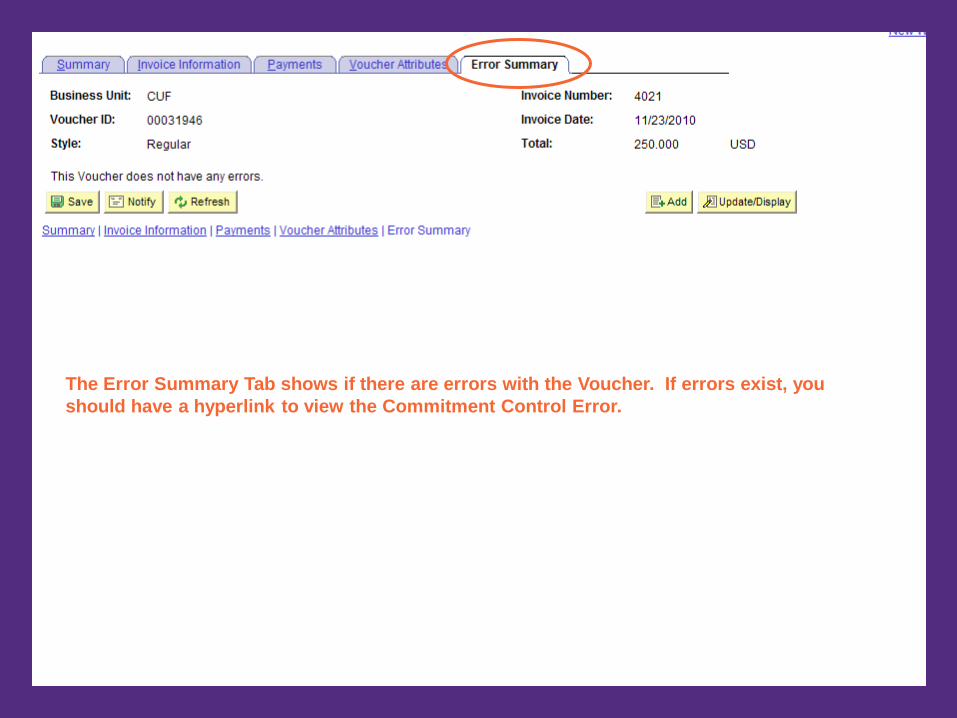
The Error Summary Tab shows if there are errors with the Voucher. If errors exist, you
should have a hyperlink to view the Commitment Control Error.
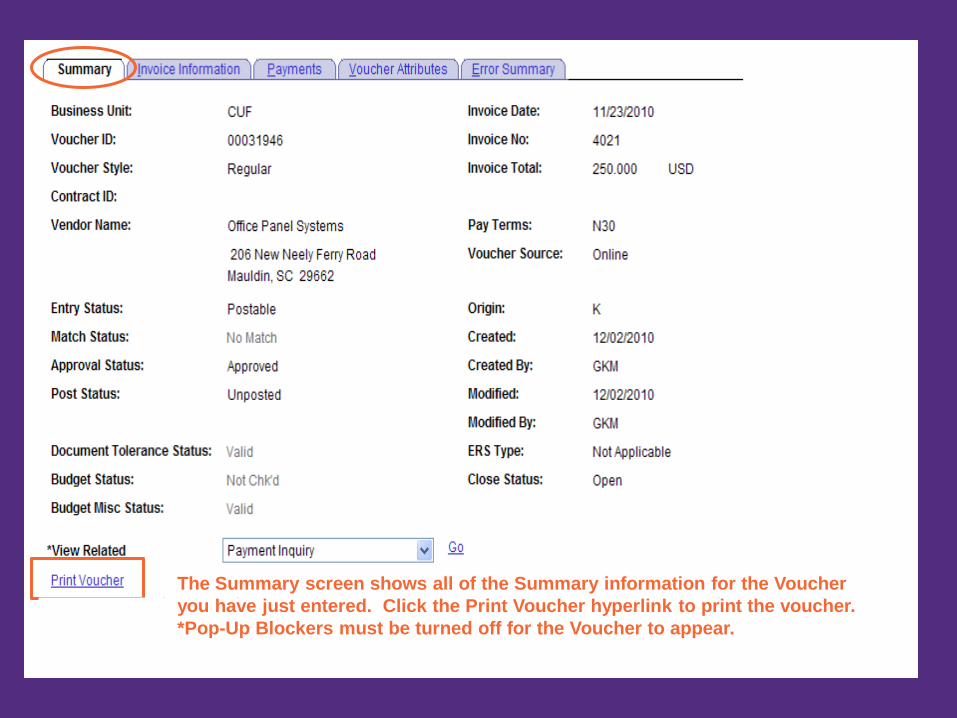
The Summary screen shows all of the Summary information for the Voucher
you have just entered. Click the Print Voucher hyperlink to print the voucher.
*Pop-Up Blockers must be turned off for the Voucher to appear.
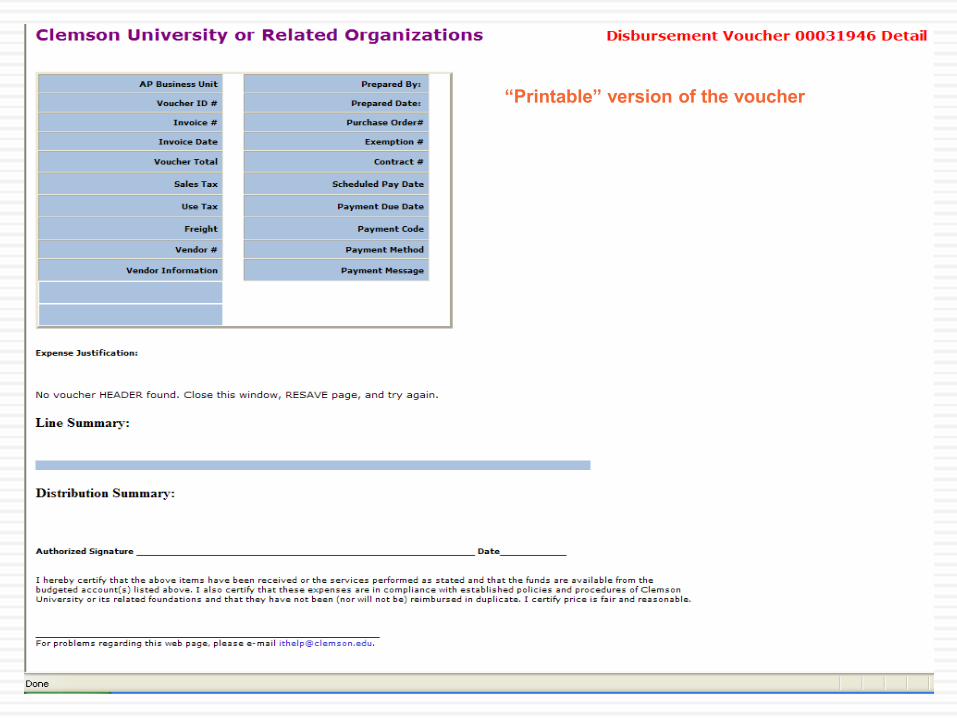
“Printable” version of the voucher