Embed Size (px)
Citation preview

Enpass User Manual - Modern WindowsRelease 4.6.0
Sinew Software Systems
November 10, 2015

CONTENTS
App Version– 4.6 . . . . . . . . . . . . . . . . . . . . . . . . . . . . . . . . . . . . . 1
1 Introduction to Enpass 2
2 Whats New in 4.6 3Sync through ownCloud Added . . . . . . . . . . . . . . . . . . . . . . . . . . . . . 3See history of password changes . . . . . . . . . . . . . . . . . . . . . . . . . . . . . 3Improved password strength detection . . . . . . . . . . . . . . . . . . . . . . . . . . 3Search mechanism improved . . . . . . . . . . . . . . . . . . . . . . . . . . . . . . . 3Option to hide subtitles in list . . . . . . . . . . . . . . . . . . . . . . . . . . . . . . 3
3 Getting Started 43.1 Prerequisites . . . . . . . . . . . . . . . . . . . . . . . . . . . . . . . . . . . . . . . . . . . . . . . 43.2 Setting up Enpass . . . . . . . . . . . . . . . . . . . . . . . . . . . . . . . . . . . . . . . . . . . . 4
3.2.1 As an existing user . . . . . . . . . . . . . . . . . . . . . . . . . . . . . . . . . . . . . . . 43.2.2 As a new user . . . . . . . . . . . . . . . . . . . . . . . . . . . . . . . . . . . . . . . . . . 6
4 Record Keeping 84.1 Create . . . . . . . . . . . . . . . . . . . . . . . . . . . . . . . . . . . . . . . . . . . . . . . . . . . 84.2 Edit . . . . . . . . . . . . . . . . . . . . . . . . . . . . . . . . . . . . . . . . . . . . . . . . . . . . 104.3 Customize . . . . . . . . . . . . . . . . . . . . . . . . . . . . . . . . . . . . . . . . . . . . . . . . 11
4.3.1 Editing field type . . . . . . . . . . . . . . . . . . . . . . . . . . . . . . . . . . . . . . . . 124.3.2 Adding fields . . . . . . . . . . . . . . . . . . . . . . . . . . . . . . . . . . . . . . . . . . 144.3.3 Deleting fields . . . . . . . . . . . . . . . . . . . . . . . . . . . . . . . . . . . . . . . . . . 16
4.4 Duplicate . . . . . . . . . . . . . . . . . . . . . . . . . . . . . . . . . . . . . . . . . . . . . . . . . 184.5 Search . . . . . . . . . . . . . . . . . . . . . . . . . . . . . . . . . . . . . . . . . . . . . . . . . . 194.6 Delete . . . . . . . . . . . . . . . . . . . . . . . . . . . . . . . . . . . . . . . . . . . . . . . . . . . 214.7 Share . . . . . . . . . . . . . . . . . . . . . . . . . . . . . . . . . . . . . . . . . . . . . . . . . . . 22
5 Password Generator 265.1 Generating Passwords . . . . . . . . . . . . . . . . . . . . . . . . . . . . . . . . . . . . . . . . . . 265.2 Password History . . . . . . . . . . . . . . . . . . . . . . . . . . . . . . . . . . . . . . . . . . . . . 28
6 Organizing Data 296.1 Marking Favorites . . . . . . . . . . . . . . . . . . . . . . . . . . . . . . . . . . . . . . . . . . . . 29
6.1.1 From favorite list . . . . . . . . . . . . . . . . . . . . . . . . . . . . . . . . . . . . . . . . 296.1.2 From detail screen . . . . . . . . . . . . . . . . . . . . . . . . . . . . . . . . . . . . . . . 30
6.2 Managing Folders . . . . . . . . . . . . . . . . . . . . . . . . . . . . . . . . . . . . . . . . . . . . 316.2.1 Creating Folder . . . . . . . . . . . . . . . . . . . . . . . . . . . . . . . . . . . . . . . . . 316.2.2 Populating Folder . . . . . . . . . . . . . . . . . . . . . . . . . . . . . . . . . . . . . . . . 336.2.3 Editing Folder . . . . . . . . . . . . . . . . . . . . . . . . . . . . . . . . . . . . . . . . . . 366.2.4 Deleting Folder . . . . . . . . . . . . . . . . . . . . . . . . . . . . . . . . . . . . . . . . . 37
i

6.3 Maintaining the Shortcuts . . . . . . . . . . . . . . . . . . . . . . . . . . . . . . . . . . . . . . . . 38
7 Syncing with Cloud 397.1 Supported clouds . . . . . . . . . . . . . . . . . . . . . . . . . . . . . . . . . . . . . . . . . . . . . 397.2 Sync Timings . . . . . . . . . . . . . . . . . . . . . . . . . . . . . . . . . . . . . . . . . . . . . . . 397.3 Time Stamps . . . . . . . . . . . . . . . . . . . . . . . . . . . . . . . . . . . . . . . . . . . . . . . 40
8 Settings Overview 418.1 Security . . . . . . . . . . . . . . . . . . . . . . . . . . . . . . . . . . . . . . . . . . . . . . . . . . 41
8.1.1 Change Master Password . . . . . . . . . . . . . . . . . . . . . . . . . . . . . . . . . . . . 428.1.2 Autolocking and Quick Unlock . . . . . . . . . . . . . . . . . . . . . . . . . . . . . . . . . 43
Lock After . . . . . . . . . . . . . . . . . . . . . . . . . . . . . . . . . . . . . . . . . . . . 43Lock on Leaving . . . . . . . . . . . . . . . . . . . . . . . . . . . . . . . . . . . . . . . . . 44PIN Code . . . . . . . . . . . . . . . . . . . . . . . . . . . . . . . . . . . . . . . . . . . . . 45Change PIN . . . . . . . . . . . . . . . . . . . . . . . . . . . . . . . . . . . . . . . . . . . . 45
8.1.3 Hide Sensitive . . . . . . . . . . . . . . . . . . . . . . . . . . . . . . . . . . . . . . . . . . 468.2 Sync . . . . . . . . . . . . . . . . . . . . . . . . . . . . . . . . . . . . . . . . . . . . . . . . . . . 478.3 Backup and Restore . . . . . . . . . . . . . . . . . . . . . . . . . . . . . . . . . . . . . . . . . . . 48
8.3.1 Taking Backups . . . . . . . . . . . . . . . . . . . . . . . . . . . . . . . . . . . . . . . . . 498.3.2 Restoring Backups . . . . . . . . . . . . . . . . . . . . . . . . . . . . . . . . . . . . . . . 49
8.4 Customize . . . . . . . . . . . . . . . . . . . . . . . . . . . . . . . . . . . . . . . . . . . . . . . . 528.4.1 Unlock Feedback . . . . . . . . . . . . . . . . . . . . . . . . . . . . . . . . . . . . . . . . 538.4.2 Shortcuts . . . . . . . . . . . . . . . . . . . . . . . . . . . . . . . . . . . . . . . . . . . . 54
8.5 Advanced . . . . . . . . . . . . . . . . . . . . . . . . . . . . . . . . . . . . . . . . . . . . . . . . . 558.5.1 Erase Everything . . . . . . . . . . . . . . . . . . . . . . . . . . . . . . . . . . . . . . . . 568.5.2 Language . . . . . . . . . . . . . . . . . . . . . . . . . . . . . . . . . . . . . . . . . . . . 58
9 Importing data from other software 59
ii

Enpass User Manual - Modern Windows, Release 4.6.0
App Version– 4.6
Welcome to the Enpass user manual for Modern Windows. This manual features detailed guidelines to make youwell-acquainted with the app’s functionality.
CONTENTS 1

CHAPTER
ONE
INTRODUCTION TO ENPASS
Enpass is an easy to use password-management app. Not just passwords, Enpass gives you the freedom to store allkinds of important credentials like credit cards, bank accounts, ID cards and what not. All this data will be encryptedby a master password and stored in your own device and optionally you can sync through your cloud account on majorcloud service providers.
So with Enpass, you can afford to forget all of your secret data and put your mind to better use.
2
CHAPTER
TWO
WHATS NEW IN 4.6
Few of the major attainments are:-
Sync through ownCloud Added
Version 4.6 now support syncing through ownCloud/WebDAV across all supported platforms.
See history of password changes
Every password field holds history up-to last 5 changes.
Improved password strength detection
Color-coded password strength indicator got wiser with improved algorithm to push you to use strong passwords.
Search mechanism improved
Searching in items got better with restriction to search in Titles only or in All fields.
Option to hide subtitles in list
Display of secondary text below the item’s title in main list is now optional.
See also:
For complete list of other changes, please check Release notes.
3

CHAPTER
THREE
GETTING STARTED
Enpass is fun to understand and use. Throughout the manual, you will find a few tips, warnings and notes; keep themin mind while using the app.
3.1 Prerequisites
The Enpass version 4.5 requires Modern Windows 8.1 or later.
3.2 Setting up Enpass
Here are the two possibilities and their relative ways of setting up the app.
3.2.1 As an existing user
If you already use Enpass, you should be having a backup of your data on your system. The welcome screen allowsyou to directly restore your existing data from a local file or from a cloud where you synced before.
4

Enpass User Manual - Modern Windows, Release 4.6.0
Available Backup options
3.2. Setting up Enpass 5

Enpass User Manual - Modern Windows, Release 4.6.0
3.2.2 As a new user
New users need to set a Master Password. It is the only password that you’ll have to remember. Here’s some advicefor thinking of a strong master password.
Aim to set a long and strong master password.
3.2. Setting up Enpass 6

Enpass User Manual - Modern Windows, Release 4.6.0
Warning: In case you forget your master password, there is no way that we could recover it for you. Hence, makesure that you keep a copy of it in a safe place.
3.2. Setting up Enpass 7

CHAPTER
FOUR
RECORD KEEPING
Your secret information is stored in the form of records. We refer to them as Items. You can perform the followingoperations on these items:
4.1 Create
Here are the steps to create an Item:
• Tap the + sign.
• You will be provided with a list of categories to choose from.
8

Enpass User Manual - Modern Windows, Release 4.6.0
• Let’s say, you choose- Login. You will notice a blank form. Add title, username, password and email.
Tip: To generate strong and unguessable passwords, we recommend that you use the built-in Password Generator.Every password field has its button next to it.
• Enter the URL of the Login page you’d want to be directed to when tapped. You can also customize your itemto add multiple URLs. Tap the Save icon.
4.1. Create 9

Enpass User Manual - Modern Windows, Release 4.6.0
Hint: Enpass automatically puts up the icon, corresponding to some popular URLs that you enter. You can tap theicon to put another one.
Your item would be saved in its Category.
4.2 Edit
Here are the steps that will help you with editing items in Enpass:
• Open the item and tap Edit button from its detail screen.
4.2. Edit 10

Enpass User Manual - Modern Windows, Release 4.6.0
• You can update item values, add new fields, delete fields or change the icon. Tap the Save button once you havemade all the changes.
Note: With the Free desktop version you can change an item’s category as well.
4.3 Customize
You can customize or edit an item by adding new fields or editing the pre-existing fields.
4.3. Customize 11

Enpass User Manual - Modern Windows, Release 4.6.0
4.3.1 Editing field type
You can edit field’s label and field’s type of any item as per your needs. Let’s say if you want to change Username toName then follow the steps below.
• While you are at the Edit screen, tap that field’s label.
• You can give any name to the field.
The Field-type can also be changed.
4.3. Customize 12

Enpass User Manual - Modern Windows, Release 4.6.0
• Tap Save after making the changes.
• To pertain the changes finally, you need to Save the item as well.
4.3. Customize 13

Enpass User Manual - Modern Windows, Release 4.6.0
4.3.2 Adding fields
Sometimes you might need to add new fields in any template for better customization. Lets say you want to add aGmail URL. For that follow the steps below.
• While you are at the Edit screen, tap Add Field.
• Enter the new field’s name and choose the appropriate type.
4.3. Customize 14

Enpass User Manual - Modern Windows, Release 4.6.0
• Tap Save after making changes and you will see the newly added field on Edit screen.
• To pertain the changes finally, you need to Save the item as well.
4.3. Customize 15

Enpass User Manual - Modern Windows, Release 4.6.0
Important: We recommend that you keep the Sensitive mode on for passwords or security answers. This way yourpasswords, PINs and other similar texts would stay safe from shoulder surfers when you use the app in public places.
4.3.3 Deleting fields
• While you are at the Edit screen, tap the label of that field you want to delete. Let’s say you tapped Phone.
• Field’s details will be loaded next on Edit Field flyout. Tap Delete.
4.3. Customize 16

Enpass User Manual - Modern Windows, Release 4.6.0
• A warning message will be displayed for confirmation of deletion. Tap Ok to remove that field.
• To pertain the changes finally, you need to Save the item as well.
4.3. Customize 17

Enpass User Manual - Modern Windows, Release 4.6.0
4.4 Duplicate
Enpass lets you replicate pre-existing items. This feature is especially beneficial when you have customized the fieldsof your items and want to create similar items. Here are the steps to help you with duplicating items:
• Tap the Duplicate button from the detail screen of the item you want to duplicate.
• A new item with the text - (copy) appended in title, would be ready for editing.
4.4. Duplicate 18

Enpass User Manual - Modern Windows, Release 4.6.0
• After making the changes, tap Save.
4.5 Search
Every list in Enpass (namely All Items, Favorites, Folders and all the categories) is provided with a search bar.
4.5. Search 19

Enpass User Manual - Modern Windows, Release 4.6.0
Simply tap it and start typing in the text you are looking for, and Enpass would refine the results as you type.
Enpass performs deep search i.e., the search is performed not just on item titles but on all of the following details:
• Item Titles
• Field Values
• Custom created field-names
• Notes
4.5. Search 20

Enpass User Manual - Modern Windows, Release 4.6.0
4.6 Delete
You can delete an item from the Enpass keychain through the item-list following the steps below.
From Lists of items (namely All Items and all the category lists):
• Long press the item from a list. You’d notice a list of options pop-up.
• Tap the Delete button. You’d be prompted with a Warning message.
• Tap OK and the item would be permanently deleted from Enpass.
From item’s detail screen:
4.6. Delete 21

Enpass User Manual - Modern Windows, Release 4.6.0
• Tap the Delete button.
• Tap OK from the warning screen and the item would be permanently deleted from Enpass.
4.7 Share
You will find the Share button on the item-detail screen.
4.7. Share 22

Enpass User Manual - Modern Windows, Release 4.6.0
Items can be shared in the following two formats:
1. Plain Text: Plain text item can be read by anyone.
2. Scrambled: Scrambled item can only be accessed by Enpass users.
Warning: Plain text poses a security threat, in case of sensitive data. Sharing private data in plain text should beavoided unless it’s an urgency.
Enpass offers multiple ways to share items:
• You can share items via mail.
4.7. Share 23

Enpass User Manual - Modern Windows, Release 4.6.0
Sharing via mail.
• To share an item using other apps such as, messengers, you can Copy it and paste within the messenger of yourchoice.
Sharing via Skype
4.7. Share 24

Enpass User Manual - Modern Windows, Release 4.6.0
You can even share a field-value by copying it to the clipboard.
• Long press (or right click in PC) on the field, you want to copy the value of and you’d notice a Copy button.
• Tap this Copy button. You can paste your text wherever you’d like to (even outside the app).
4.7. Share 25

CHAPTER
FIVE
PASSWORD GENERATOR
Enpass has a built-in password generator that creates a strong and unique password every time you require one.
5.1 Generating Passwords
The password’s complexity can be altered by adjusting password recipes, i.e. pronounceable password recipe andrandom password recipe.
Random Password
Pronounceable Password
26

Enpass User Manual - Modern Windows, Release 4.6.0
Here’s how to do it:
• While generating random passwords, you can decide the number of digits, symbols and uppercase letters youwant in your password, in that particular priority.
• For pronounceable password, you can choose to use mixed case and any one from the three available seperators.
5.1. Generating Passwords 27

Enpass User Manual - Modern Windows, Release 4.6.0
The Avoid Ambiguity button removes the following ambiguous letters from your password:
1 (one), l (small L) and I (eye); O (oh) and 0 (zero).
5.2 Password History
Enpass keeps a record of the last five passwords that you generated and used along with their timestamps.
Afterwards version 4.6, every password you change gets recorded into password history of that particular passwordfield and the maximum storage limit is up-to last 5 changes.
5.2. Password History 28
CHAPTER
SIX
ORGANIZING DATA
You can organize your Enpass data in the following ways:
6.1 Marking Favorites
Favorites can be marked in two simple ways:
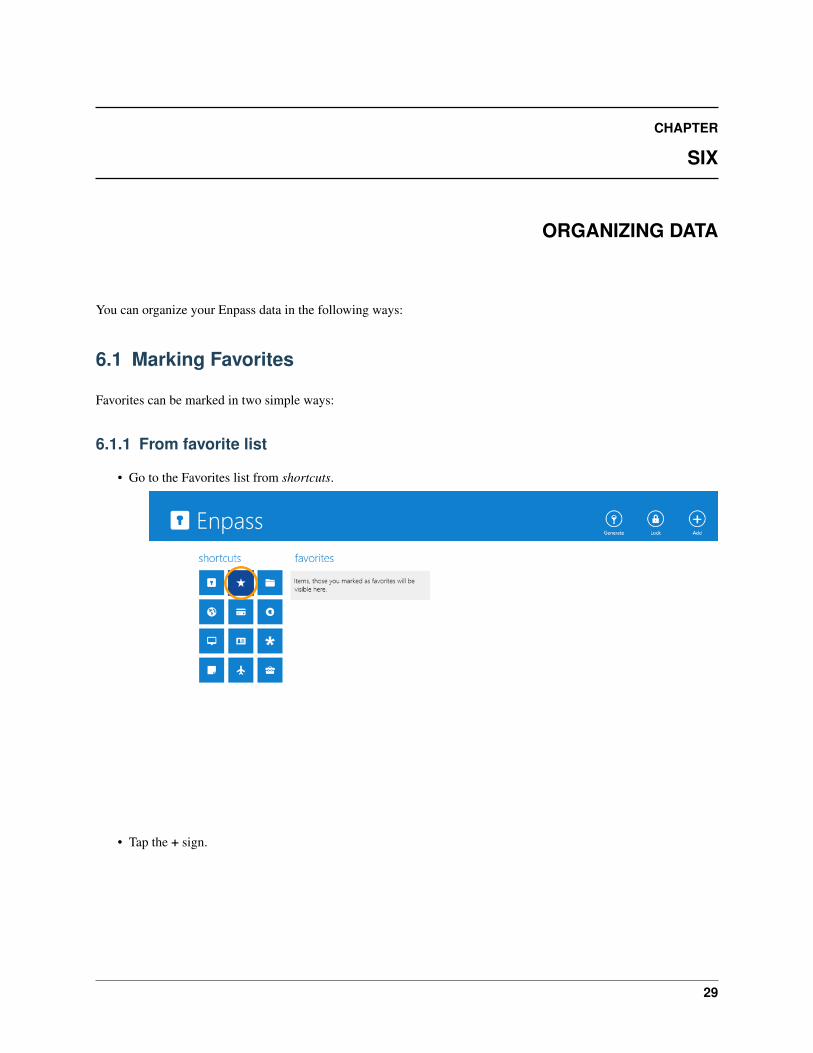
6.1.1 From favorite list
• Go to the Favorites list from shortcuts.
• Tap the + sign.
29

Enpass User Manual - Modern Windows, Release 4.6.0
• You will see options to select from the pre-existing items or create new ones to add to Favorites.
6.1.2 From detail screen
• Tap the Star button on the item-detail screen.
6.1. Marking Favorites 30

Enpass User Manual - Modern Windows, Release 4.6.0
6.2 Managing Folders
Folders let you manage your data in traditional and better way.
6.2.1 Creating Folder
• Select Folders from the shortcuts.
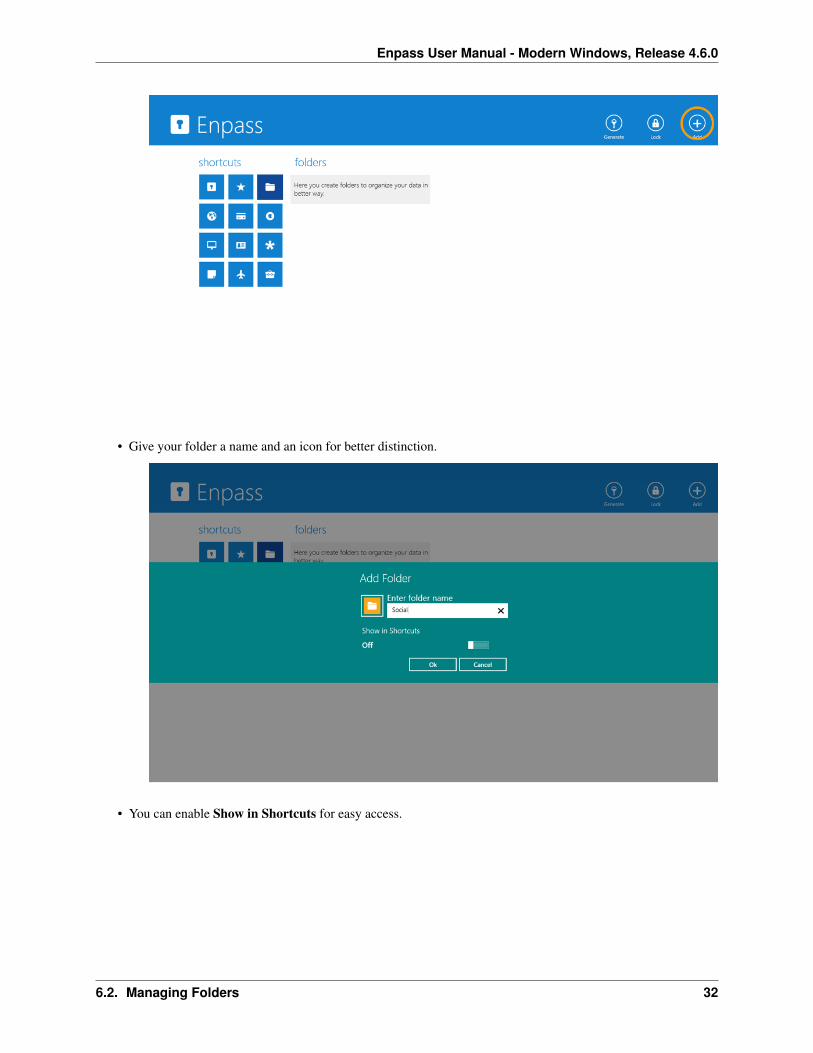
• Tap the + sign.
6.2. Managing Folders 31
Enpass User Manual - Modern Windows, Release 4.6.0
• Give your folder a name and an icon for better distinction.
• You can enable Show in Shortcuts for easy access.
6.2. Managing Folders 32

Enpass User Manual - Modern Windows, Release 4.6.0
• Tap Ok.
6.2.2 Populating Folder
Any folder can be populated with items or sub-folders by following the steps below.
• Select Folders from shortcuts and go into folder by tapping its name. Lets say you choose Social.
6.2. Managing Folders 33

Enpass User Manual - Modern Windows, Release 4.6.0
• Tap the + sign.
• You will see various options to populate your folder with. You can add existing items, create sub-folder or createnew item and directly add that into folder. If you want to add existing items, choose Existing items.
6.2. Managing Folders 34

Enpass User Manual - Modern Windows, Release 4.6.0
• A list of all your existing items will be displayed. You can multi-select the items you want to add into that folder.
• Tap Add and all the selected items will be added into that folder.
6.2. Managing Folders 35

Enpass User Manual - Modern Windows, Release 4.6.0
6.2.3 Editing Folder
• Lets say you want to edit Social folder. Long press (on handheld devices) or Right click (on PC) for contextmenu and choose Edit.
• You can edit that folder’s name and sidebar visibility. Tap Ok after making changes.
6.2. Managing Folders 36

Enpass User Manual - Modern Windows, Release 4.6.0
6.2.4 Deleting Folder
• Lets say you want to delete Social folder. Long press (on handheld devices) or Right click (on PC) for contextmenu and choose Delete.
• If the folder is not empty you will see a warning message as below. Tap Ok to continue with removal process.
6.2. Managing Folders 37

Enpass User Manual - Modern Windows, Release 4.6.0
6.3 Maintaining the Shortcuts
Shortcuts works as sidebar and plays a crucial role in organizing your data.
It can be customized from Settings -> Customize.
6.3. Maintaining the Shortcuts 38

CHAPTER
SEVEN
SYNCING WITH CLOUD
Syncing your data with cloud is not manadatory to use Enpass. It is just an option to ensure that your data staysupdated on all your devices, across all platforms. Enpass sync is as much secure as seamless its process is. Thesyncing of data is always performed offline on device, after the encrypted file is downloaded from remote cloud. Thenthe new encrypted file is pushed to the cloud.
By the term cloud-sync, we mean that your data can be synced with the cloud of your choice (check supported clouds)and not with our server as we don’t store any of your private data.
Sync creates an automatic back-up over the cloud. Hence, you can be reassured of data-restore, in case of device-damage or theft.
7.1 Supported clouds
Currently Enpass supports syncing of data across devices through your own account on following clouds where we donot store any of your data on our server.
• Dropbox
• OneDrive
• Google Drive
• Box
• ownCloud/WebDAV
7.2 Sync Timings
• Every time you unlock your Enpass keychain, an auto-sync is initiated. (If Sync is turned on).
• Auto-sync also happens after every 15 secs, while the app is in the foreground.
• When you save any change in item details or master password, Enpass waits for 5 secs and initiates an auto-sync.
Note:• Time taken in completion of a sync process depends on the data size, i.e, the no. of items in your Enpass
keychain.
• Any changes in settings are not synced to cloud (except for the master password).
• When existing Enpass users restore their data from the welcome screen of a new device, their auto-sync isswitched on, by default.
39

Enpass User Manual - Modern Windows, Release 4.6.0
7.3 Time Stamps
Enpass keeps you informed about the latest successful data sync (Last synchronized) and the latest check for changes(Last attempt).
7.3. Time Stamps 40

CHAPTER
EIGHT
SETTINGS OVERVIEW
Charms bar for settings can be invoked by moving the cursor in bottom-right corner or swiping in from right side incase of handheld.
Following are the Settings that you can alter in Enpass.
8.1 Security
This section deals with security of the Enpass app in your device.
41

Enpass User Manual - Modern Windows, Release 4.6.0
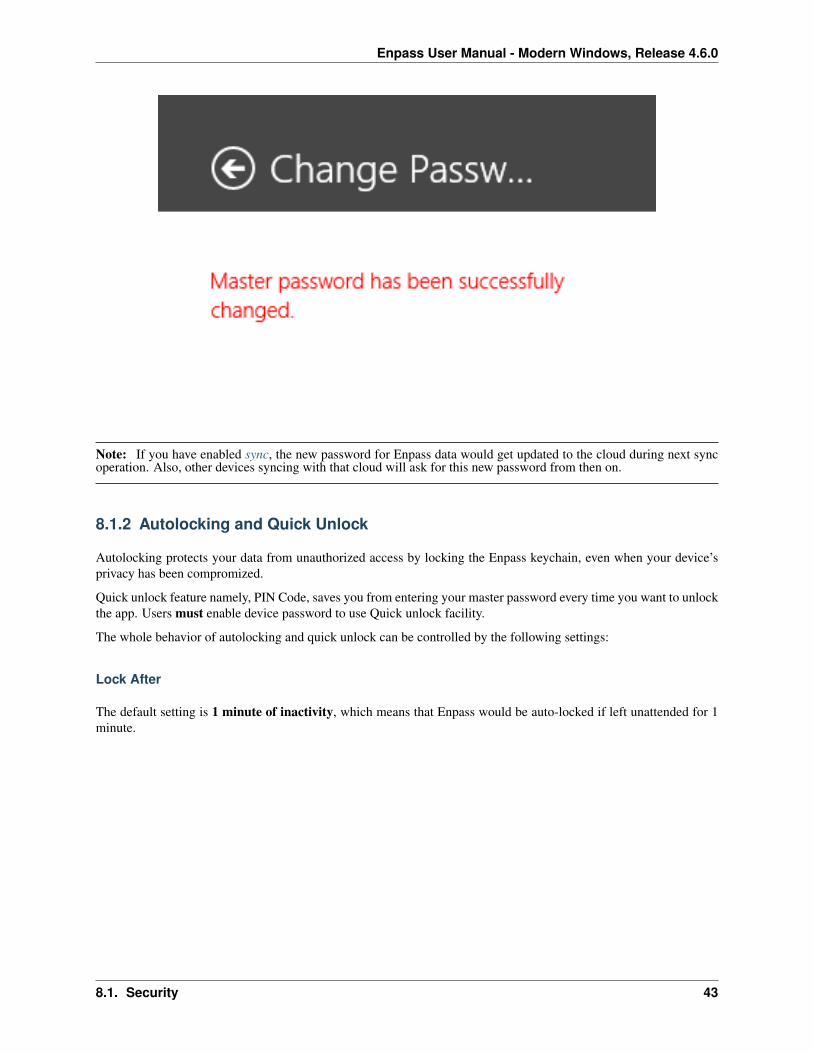
8.1.1 Change Master Password
• To change your master password you’d first have to enter the old password and then set (and confirm) the newone.
• You’d be informed about the success of the password change.
8.1. Security 42
Enpass User Manual - Modern Windows, Release 4.6.0
Note: If you have enabled sync, the new password for Enpass data would get updated to the cloud during next syncoperation. Also, other devices syncing with that cloud will ask for this new password from then on.
8.1.2 Autolocking and Quick Unlock
Autolocking protects your data from unauthorized access by locking the Enpass keychain, even when your device’sprivacy has been compromized.
Quick unlock feature namely, PIN Code, saves you from entering your master password every time you want to unlockthe app. Users must enable device password to use Quick unlock facility.
The whole behavior of autolocking and quick unlock can be controlled by the following settings:
Lock After
The default setting is 1 minute of inactivity, which means that Enpass would be auto-locked if left unattended for 1minute.
8.1. Security 43

Enpass User Manual - Modern Windows, Release 4.6.0
You can change it to match your comfort.
Lock on Leaving
If the switch is enabled, the app gets locked immediately when sent to background, irrespective of the inactivity-timesetting. By default, this switch is turned on.
8.1. Security 44

Enpass User Manual - Modern Windows, Release 4.6.0
PIN Code
Master password is set as the default authentication requirement. You can avoid entering your master passwordaltogether by using a four-digit PIN Code.
Now on, you’d be asked for the four-digit PIN to unlock the app. Although, after an unsuccessful attempt you’d haveto enter the master password.
Change PIN
• Just tap Change PIN button.
8.1. Security 45

Enpass User Manual - Modern Windows, Release 4.6.0
• Enter the new PIN.
Your PIN would be changed.
8.1.3 Hide Sensitive
By default, all sensitive fields are concealed by bullets.
8.1. Security 46

Enpass User Manual - Modern Windows, Release 4.6.0
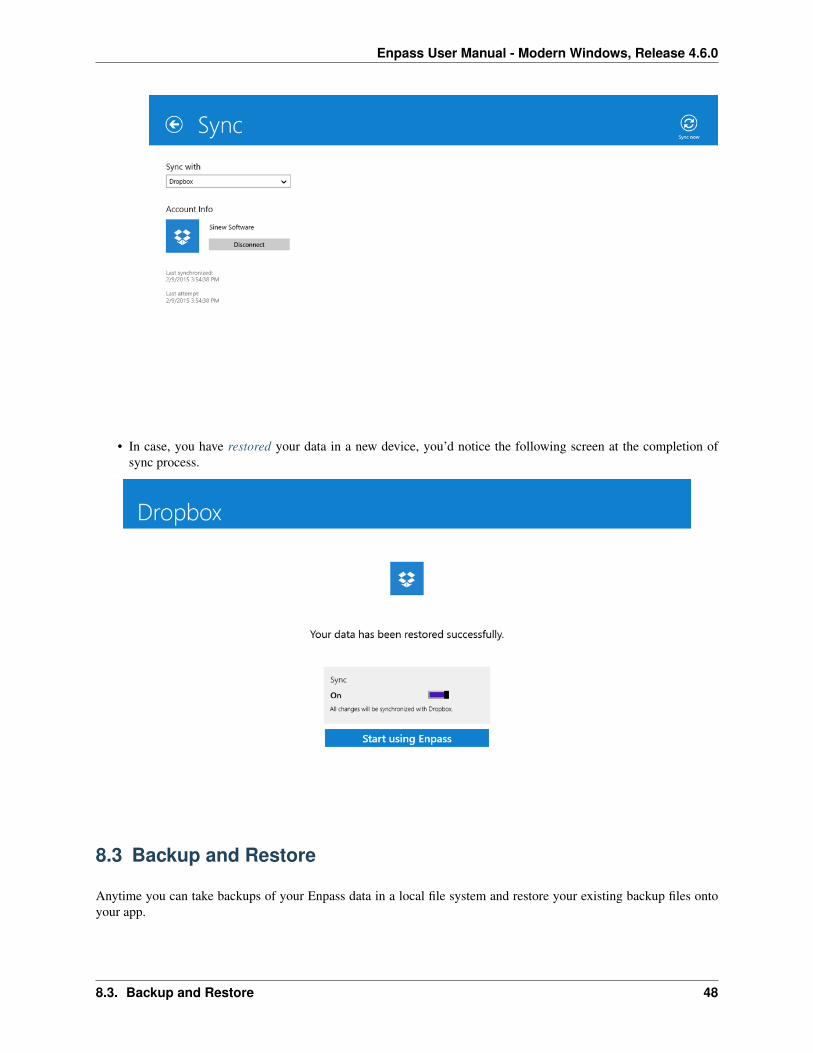
8.2 Sync
Following steps should guide you through the cloud sync (or restore) process:
• Select your cloud from the list. You’d be directed to the authentication screen of that cloud.
• Enter your credentials in its login screen. Grant permissions to the cloud to continue with the sync process.
• Your data would be synced successfully. Time stamps would also get updated.
8.2. Sync 47
Enpass User Manual - Modern Windows, Release 4.6.0
• In case, you have restored your data in a new device, you’d notice the following screen at the completion ofsync process.
8.3 Backup and Restore
Anytime you can take backups of your Enpass data in a local file system and restore your existing backup files ontoyour app.
8.3. Backup and Restore 48

Enpass User Manual - Modern Windows, Release 4.6.0
8.3.1 Taking Backups
• Tap Backup from the Backup and Restore settings options.
• Browse to location and rename the Backup file, if you want to. And tap Save. you will see a confirmationmessage after successful backup operation.
8.3.2 Restoring Backups
• Tap Restore from the Backup and Restore settings options.
8.3. Backup and Restore 49

Enpass User Manual - Modern Windows, Release 4.6.0
• Browse to location and select the file you want to restore. Tap Open.
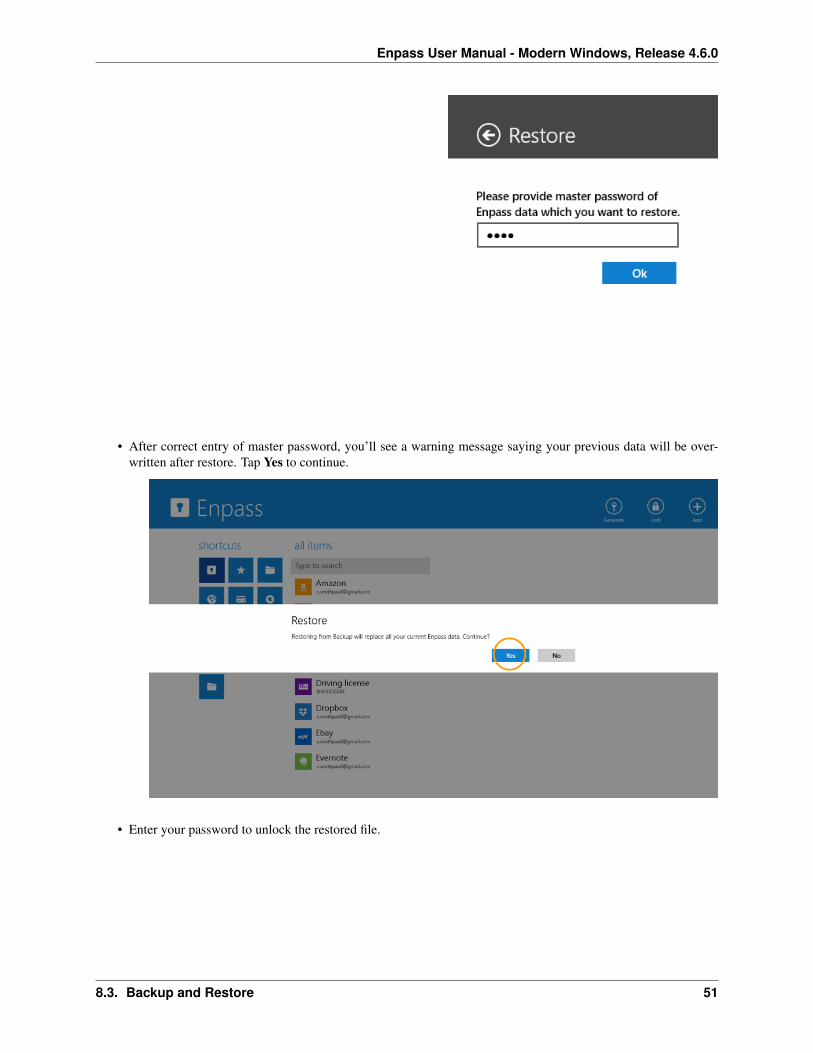
• If the Enpass data file you’re trying to restore is of version 4.5.0 or above, you would be asked to enter themaster password of that file. Otherwise the file will be successfully restored on your device after a confirmationmessage.
8.3. Backup and Restore 50
Enpass User Manual - Modern Windows, Release 4.6.0
• After correct entry of master password, you’ll see a warning message saying your previous data will be over-written after restore. Tap Yes to continue.
• Enter your password to unlock the restored file.
8.3. Backup and Restore 51

Enpass User Manual - Modern Windows, Release 4.6.0
Note: The restored file would replace the pre-existing one in your device.
We suggest that you take regular backups so that data consistency is maintained among all your cross-platform devices.This way unfavorable situations such as, device theft, can be tackled. Also, if you have enabled sync, all your changeswould be auto-updated to the cloud.
8.4 Customize
Options to control customization settings are located under More in charms bar as Customize.
8.4. Customize 52

Enpass User Manual - Modern Windows, Release 4.6.0
The following features would help you customize your app to match your unique requirements.
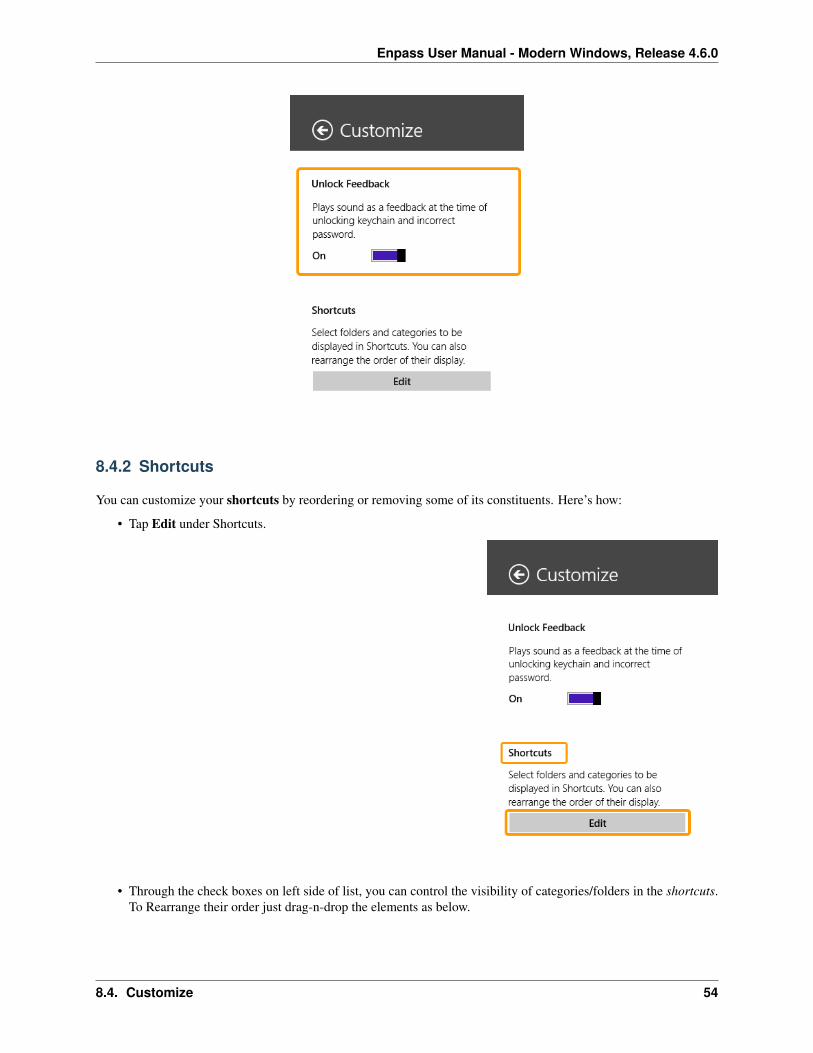
8.4.1 Unlock Feedback
By default, Enpass plays sound (and vibrates) as a feedback at the time of unlocking the app (or when you enter anincorrect password). You can toggle it off as well.
8.4. Customize 53
Enpass User Manual - Modern Windows, Release 4.6.0
8.4.2 Shortcuts
You can customize your shortcuts by reordering or removing some of its constituents. Here’s how:
• Tap Edit under Shortcuts.
• Through the check boxes on left side of list, you can control the visibility of categories/folders in the shortcuts.To Rearrange their order just drag-n-drop the elements as below.
8.4. Customize 54

Enpass User Manual - Modern Windows, Release 4.6.0
• Tap Save after making changes.
8.5 Advanced
Options to control advance settings are located under More in charms bar as Advanced.
8.5. Advanced 55

Enpass User Manual - Modern Windows, Release 4.6.0
8.5.1 Erase Everything
You would choose this option to erase all Enpass data and current settings from your system.
Tip: Before erasing everything from the device, you should take a backup of your Enpass data on a cloud or a localPC.
• Tap Erase Everything.
8.5. Advanced 56

Enpass User Manual - Modern Windows, Release 4.6.0
• You’d be asked to enter your master password.
• After correct entry of your master password, you’d be prompted with a Warning message. Tap Ok.
8.5. Advanced 57

Enpass User Manual - Modern Windows, Release 4.6.0
You’d reach the Welcome screen from where you can start over or restore existing data.
8.5.2 Language
By default, Enpass Matches the Default Language of your device, if it’s supported. You can also choose from a listof other operational languages.
8.5. Advanced 58

CHAPTER
NINE
IMPORTING DATA FROM OTHER SOFTWARE
If you are using any other password manager and want to switch to Enpass, the Free Desktop Version of Enpass letsyou import data from other password managers with just one click.
Have a look at list of supported software and steps to import your data from them in Enpass.
59