Embed Size (px)
Citation preview

Email Proxy using Microsoft Exchange 2013 & Outlook Anywhere Guide
Version 1.3 March 2016

Copyright © 2016 iWebGate. All Rights Reserved.
No part of this publication may be reproduced, transmitted, transcribed, stored in a retrieval system, or translated into any language in any form or by any means without the written permission of iWebGate as provided by the explicit terms and conditions of our license agreement.
Basic Rights of Use
Thank you for choosing iWebGate. Registration of your product is required during the installation process outlined in this document. Registration of a single product entitles you to begin using the product for the specific purposes of the product. Additional licensing might be required to use additional features. For more information about iWebGate, visit us at http://www.iwebgate.com.
Trademarks
Microsoft, Windows, Windows NT, and Vista are registered trademarks of Microsoft Corporation. Other brand and product names are registered trademarks or trademarks of their respective holders.
Statement of Conditions
To ensure proper operational function and/or reliability of the product is maintained, iWebGate reserves the right to make changes to the product described within this document, via electronic means or otherwise, without notice. iWebGate does not assume any liability that may occur due to the use, or application of, the product described herein.

Table of Contents
Introduction 4
1. Upload Signed Certificate in VSP 5
2. Configure Folder Proxy in VSP 8
3. Adjust Exchange Server Settings 11
4. Adding and Changing DNS Entries 12
5. Change Outlook Anywhere Settings 13
6. Test Outlook Settings 21

4
Introduction This guide is for those with an on premise VSP used to protect their Exchange server with a
proxy before connecting an Outlook client to the Exchange server using Outlook
Anywhere (RPC over HTTP) via the VSP proxy.
For those with an off premise VSP, please reference Securing Connections with Network
LinkUp Guide.
The steps for establishing a folder proxy with an on premise VSP are:
1. Upload Signed Certificate in VSP
2. Configure the Folder Proxy in VSP
3. Adjust Exchange Server Settings
4. Configure DNS Entry
5. Change Outlook Anywhere Settings
6. Test Outlook
Since this is a guide of how to setup a folder proxy for Microsoft Exchange 2013 server
using Outlook Anywhere, additional information on the VSP can be found in its detailed
manuals.
Requirements:
Functioning Microsoft Exchange 2013 server (SP1)
A PFX format file containing a public certificate, intermediate certificate and
primate key for the email domain
Administrator login credentials to the Virtual Segmentation Platform (VSP) and
Exchange server (if not already configured for Outlook Web Access/Outlook
Anywhere)
Administrator access to DNS records
5
1. Upload Signed Certificate in VSP Log into the Virtual Segmentation Platform (VSP) with your administrator credentials.
Click Certificate Manager on the Administration menu of the Virtual Segmentation Platform
(VSP).
Click Upload Signed Certificate in Certificate Manager.

6
Click Choose File to open File Explorer to select the certificate off your device before
clicking Upload.
Make sure to assign
the certificate by
clicking Assign
It is possible to use the same FQDN as your existing public facing
Exchange Client Access Server (CAS). Export existing certificate/key pair
from the CAS, or choose a new FQDN for the proxy before purchasing a
new certificate for it. The certificate/key pair must be in PFX or P12
format.
.

7
Assign this certificate as the new VSP certificate, by checking Assign and click Save.
After assigning the new certificate, you may need to refresh your browser to continue
your session.

8
2. Configure Folder Proxy in VSP While logged into the VSP, click Proxy LP on the sidebar before selecting Reverse Proxy
from the list.
Click Add in Backends.

9
Set the internal address of the Exchange CAS port (typically 443), and check SSL. Click
Save.

10
In the main Proxy menu, click Add in Backends.
Name the new proxy and click the Folder Proxy option under the Type section of the new
proxy.

11
Under Folder Mapping, select Exchange Web Services with RPC and ActiveSync from the
drop-down list under Pre-Configured Folder Maps, and click Add.
3. Adjust Exchange Server Settings This guide uses default identities from a stock-standard installation of Exchange 2013 SP1
on Server 2012. Your identities may be different. To obtain the identity for any of the
commands below, use the Get- form of the Set- command e.g.: Get-OutlookAnywhere
The domain in this example is test.local, the external host name is mail.test.local and the
internal host name is exchange.test.local – change these appropriately. The external
host name is the FQDN of the proxy chosen in Step 2. The internal host name is typically
the Exchange server host name.
On the Exchange server, open Exchange Management Console and configure as
follows:
Set-OutlookAnywhere -Identity "Rpc (Default Web Site)"
-ExternalClientsRequireSsl 1
-ExternalClientAuthenticationMethod basic
-ExternalHostname mail.test.local
Set-OutlookAnywhere -Identity "Rpc (Default Web Site)"
-DefaultAuthenticationMethod basic
Set-OutlookAnywhere -Identity "Rpc (Default Web Site)"
-IISAuthenticationMethods basic
-InternalClientAuthenticationMethod basic
Note existing exchange settings before making any changes.

12
Set-AutodiscoverVirtualDirectory -Identity "Autodiscover (Default Web Site)"
-WSSecurityAuthentication 0
-BasicAuthentication 1
-DigestAuthentication 0
-WindowsAuthentication 0
-OAuthAuthentication 0
Set-OabVirtualDirectory -Identity "OAB (Default Web Site)"
-WindowsAuthentication 0
-BasicAuthentication 1
-ExternalUrl https://mail.test.local/OAB
If Exchange 2013 Service Pack 1 (SP1) or later is installed: Set-MapiVirtualDirectory -Identity "mapi (Default Web Site)"
-InternalURL http://mail.test.local/mapi
-ExternalURL https://mail.test.local/mapi
-IISAuthenticationMethods Basic
If Exchange 2013 Service Pack 1 (SP1) or later is installed: Set-OrganizationConfig -MapiHTTPEnabled 1
4. Configure DNS Entry If choosing to use a new fully qualified domain name (FQDN) for the proxy server, then
you can add it to your DNS and test without danger of disrupting existing Exchange
clients.
If choosing the same FQDN as existing public facing Exchange server for the proxy, you
would need to change the DNS record to point it to the proxy's IP address. However, it is
recommended to first test that the proxy and Exchange server configurations are working
as expected before making a change to the DNS configuration.
To test Outlook on the client PC before changing DNS, put an entry in
C:\Windows\System32\Drivers\etc\hosts on the client PC for the FQDN of the proxy for
testing. Once verified that the configuration is correct, change the DNS and remove the
entry from the hosts file. This allows testing without disruption of existing Exchange clients.

13
5. Change Outlook Anywhere Settings To configure Outlook Anywhere on the client PC, go to Mail Setup to click E-mail
Accounts before clicking New.
Under the E-mail tab, click New to add a new account.

14
Select Manual setup or additional server types before clicking Next.

15
Select Microsoft Exchange Server or compatible service and click Next:
Under Server Settings, type the internal host name in the Server field along with the user’s
email address in the User Name field.

16
Click More Settings in the Add Account module.
Click the Connection tab before selecting Connect to Microsoft Exchange using HTTP.

17
Click Exchange Proxy Settings.

18
1. Set Use this URL to connect to my proxy server for Exchange to the external host
name.
2. Check Only connect to proxy servers that have this principal name in their
certificate and enter msstd:<external host name>.
3. Click the On fast networks, connect using HTTP first, then connect using TCP/IP
option.
4. Using the dropdown menu, select Basic Authentication for the authentication
method needed for proxy server for Exchange before clicking OK.
1
2
3
4

19
After adjusting the Exchange proxy settings, you will automatically return to the Add
Account module; click Check Name.
Enter the user’s email address and password before clicking OK.
20
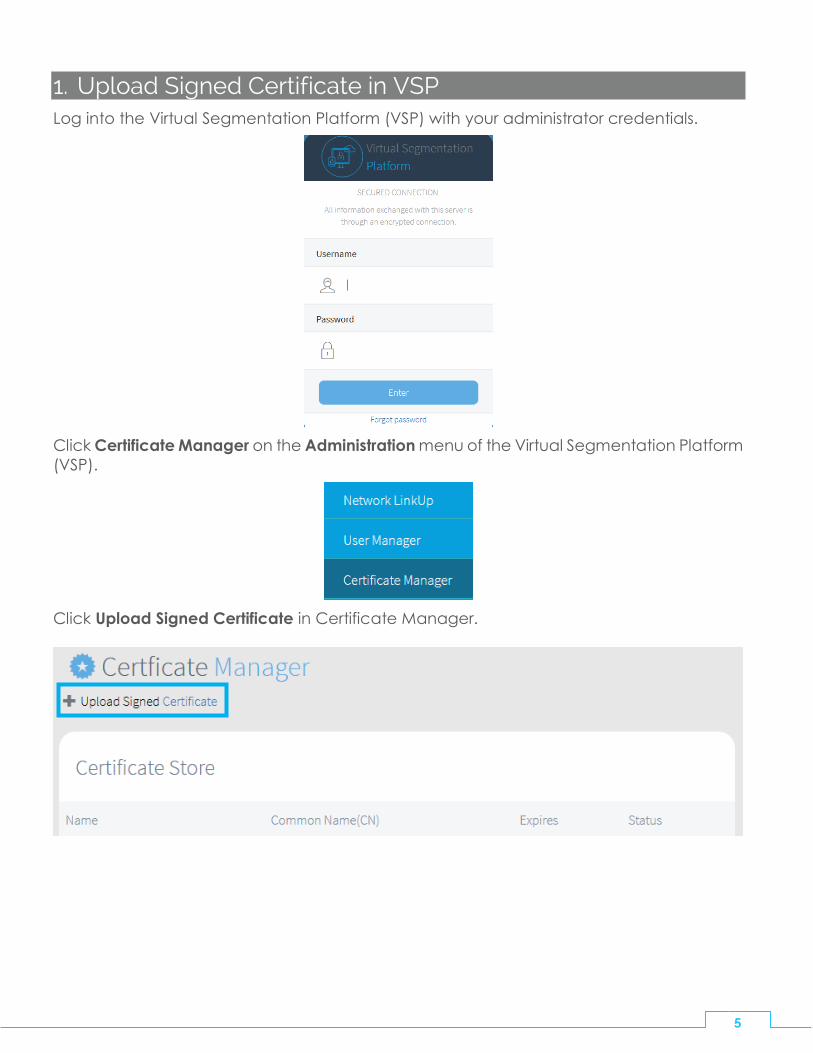
The server name will be now changed to a long hexadecimal number@your_domain.
Click Next.
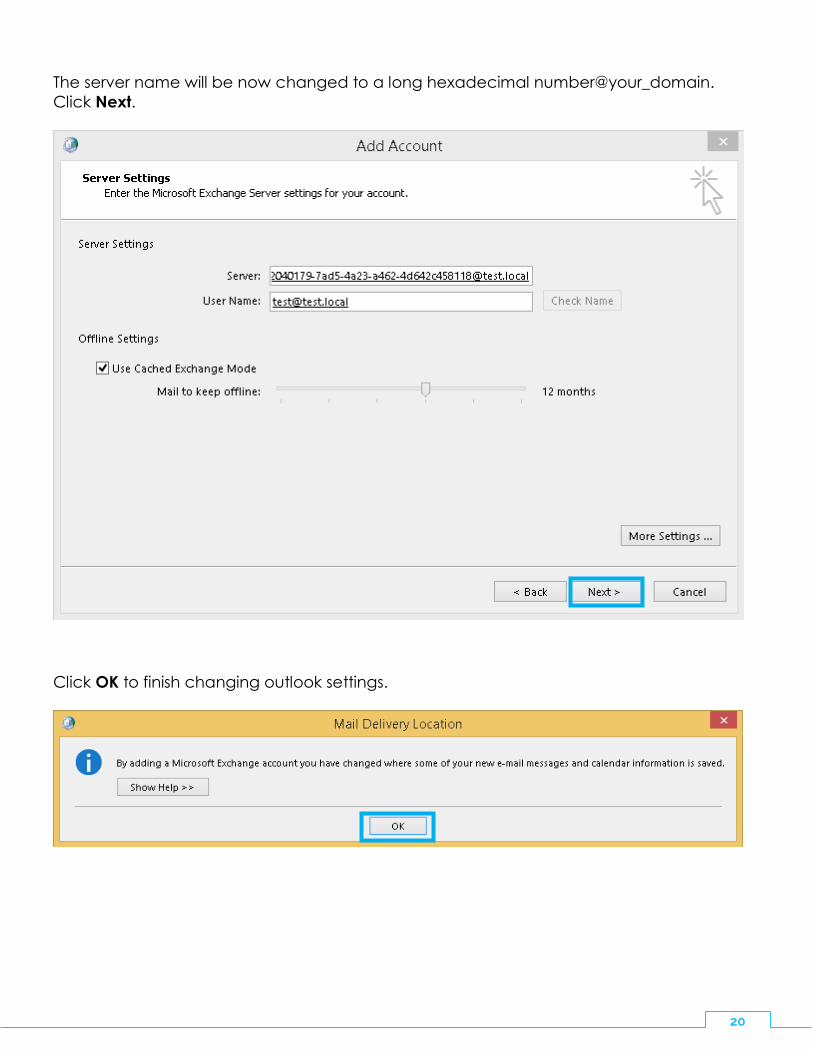
Click OK to finish changing outlook settings.

21
The account is now set up to open Outlook and connect to the Exchange server via the
proxy on the VSP. Click Finish.
6. Test Outlook Settings Test that all the features of Outlook work via the proxy. Specifically:
Sending and receiving of mail
Calendar access
Users can be found in the address book
Any additional features

Version 1.3 | March 2016