Embed Size (px)
Citation preview
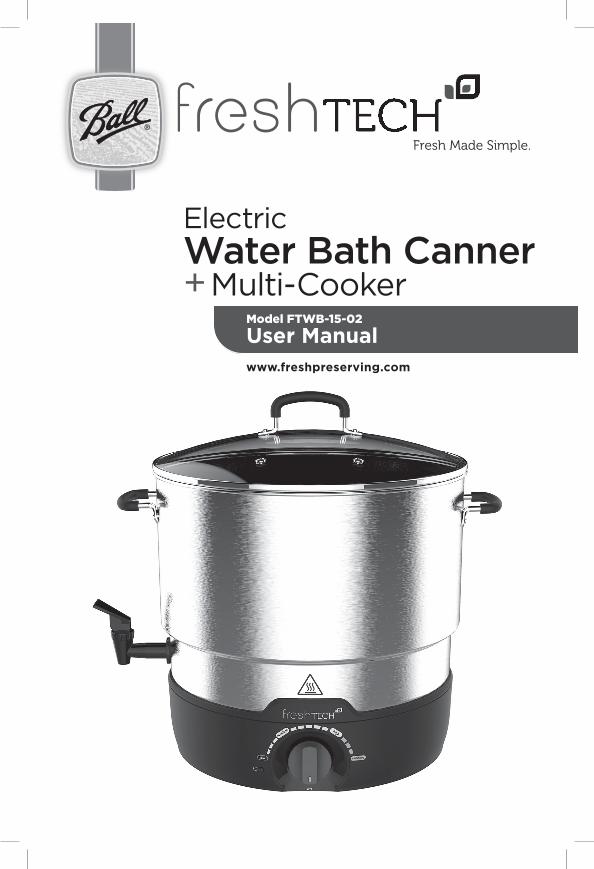
Fresh Made Simple.
ElectricWater Bath Canner+Multi-Cooker
Model FTWB-15-02
User Manualwww.freshpreserving.com

IMPORTANT SAFEGUARDSFailure to follow these instructions and warnings may cause personal injury or death and/or property damage. To reduce the risk of fire, electric shock and/or injury to persons, basic safety precautions should always be followed when using electrical appliances, including the following:
1. READ ALL INSTRUCTIONS, PRODUCT LABELS AND WARNINGS BEFORE USE.2. Close adult supervision is necessary when this appliance is in use or is used near
children. KEEP OUT OF REACH OF CHILDREN.3. This appliance is not to be used by persons (including children) with reduced
physical, sensory or mental capabilities, or lack of experience and knowledge, unless they have been given supervision or instruction.
4. Please use extreme caution when removing lid. Burns may result from residual steam escaping from inside the pot. Lift the lid with lid bottom facing away from you and allow the drops of water to trickle back from the lid into the pot.
5. Keep hands and face away from the lid and steam vents during operation of the appliance. Do not remove the lid while water is boiling.
6. Do not touch the appliance’s hot surfaces. When in use, the exterior walls and the heating unit attached to the base of the pot will become very hot to the touch. Always use the silicone handles.
7. Do not fill pot over the max fill line indicated on the inside of the pot. Overfilling may result in boil over. Do not fill pot under the minimum fill line indicated on the inside of the pot. Underfilling may result in complete water evaporation before desired process time is complete.
8. DO NOT DRY HEAT THE APPLIANCE. ALWAYS FILL THE POT FIRST WITH THE RECOMMENDED AMOUNT OF WATER OR LIQUID. Then add canning jars or other ingredients. This will help to ensure long life for your appliance.
9. Do not lift or move appliance during operation and/or while hot.10. Base does not permanently attach to the pot. USE CARE WHEN LIFTING POT FROM
BASE. Do not move the appliance by simply lifting it up by the handles as it easily detaches from the base.
11. Do not remove pot full of water from the base. Drain the water using the spigot prior to removing from the base.
12. Do not leave appliance unattended.13. Do not let the power cord hang over the edge of table or countertop. Do not allow the
cord to come into contact with hot or wet surfaces.14. To protect against electric shock, do not immerse the power cord, power plug, pot or
detachable base in water or any other liquids.15. Do not operate appliance with a damaged power cord or power plug, power
terminals, or operate appliance after it malfunctions, or has been damaged in any manner.
16. Always attach power plug to the appliance first, then plug cord into the wall outlet. To disconnect, turn the dial counterclockwise to “Off,” then remove plug from the wall outlet.
17. Unplug from outlet when not in use and before cleaning. Allow to cool before putting on or taking off parts.
18. Always use appliance in a well-ventilated area. Do not operate appliance directly under hanging cabinets.
19. Do not place any part of this appliance on or near a hot gas stove or electric burner or in a heated oven.
20. Place the appliance on a hard, flat, heat-resistant surface while in use. This will allow proper airflow underneath the appliance to keep components cool and reduce the risk of electrical fire.
2

21. Do not use any manual or electrical utensils to mash, beat or puree any ingredients in the pot. This may result in damage to the heater or the spigot.
22. Do not operate the appliance without the pot in place on the detachable base.23. Place appliance on the countertop next to the sink and fill with water using a pitcher
or sink spray hose. 24. Do not use the appliance outdoors.25. Do not use the appliance for any reason other than its intended use described in this
User Manual.26. Avoid sudden temperature changes to the glass lid and pot.27. If relocating or placing in storage, remove the pot from the base first, place the
canning rack into the bottom of the pot, then turn the base upside down with the handle facing up and slowly lower the base inside the pot. Stack all other components on top of the base inside the pot. Only after this disassembly process is followed is it safe to move the entire system by the pot handles. See the storage diagram on page 8.
28. Only approved freshTECH attachments or accessories are to be used with this appliance. Failure to use only approved attachments or accessories can lead to injury or warranty cancellation.
29. Only qualified service technicians may repair this product using authentic freshTECH parts and accessories. Never attempt to disassemble or repair the unit yourself. Contact 1-800-240-3340 for Consumer Service. Hours of Operation: Monday – Friday, 8.30 a.m. – 4.30 p.m. EST.
30. To reduce the risk of electrical fire, do not place anything directly on top of the appliance or against the side of the appliance when the appliance is in operation or hot.
31. SAVE THESE INSTRUCTIONS IN A PLACE WHERE YOU CAN EASILY LOCATE THEM.Please read ALL of the instructions in this manual carefully before you begin to use this appliance. Proper care and maintenance will ensure a long life and trouble-free operation for this appliance. Please save these instructions and refer to them for cleaning and care tips.
WARNING! To reduce the risk of fire or electric shock, do not remove any service covers. There are no user serviceable parts inside the Ball® freshTECH Electric Water Bath Canner + Multi-Cooker. Only authorized personnel should repair the appliance.
SAVE THESE INSTRUCTIONSFOR HOUSEHOLD USE ONLYSPECIAL CORD SET INSTRUCTIONS
1. A short detachable power-supply cord is provided and should be used to reduce the risk resulting from becoming entangled in or tripping over a longer cord.
2. Longer detachable power-supply cords or extension cords are available and may be used if care is exercised in their use. If a longer detachable power-supply cord or extension cord is used, the marked electrical rating of the cord set or extension cord must be at least as great as the electrical rating of the appliance (refer to the label on the base of the appliance) and the cord should be arranged so that it will not drape over the countertop or tabletop where it can be pulled on by children or tripped over unintentionally. The extension cord must be a grounded type 3 wire cord.
3. It is recommended that the appliance is only used as a single circuit device. Do not use this appliance along with other appliances on the same circuit. This could lead to an overloaded circuit and cause a fuse breaker to activate.
3

RECOMMENDED ACCESSORIES (SOLD SEPARATELY AT WWW.FRESHPRESERVING.COM)
• Ball® Secure-Grip Hot Jar Handler • Ball® Bubble Remover & Headspace Tool• Ball® Brand Secure-Grip Jar Lifter • Ball® Blue Book Guide To Preserving• Ball® Canning Rack • Ball® Collapsible Funnel
TABLE OF CONTENTS
IMPORTANT SAFEGUARDS . . . . . . . . . . . . . . . . . . . . . . . . . . . . . . . . . . . . . . . . . . . . . . . 2−3
PARTS DIAGRAM . . . . . . . . . . . . . . . . . . . . . . . . . . . . . . . . . . . . . . . . . . . . . . . . . . . . . . . .5−6
BEFORE FIRST USE . . . . . . . . . . . . . . . . . . . . . . . . . . . . . . . . . . . . . . . . . . . . . . . . . . . . . . . . 7Cleaning Before First Use 7
Assembly 7−8
Storage: Our Unique Nesting Design 8
HOW TO USE FOR WATER BATH CANNING . . . . . . . . . . . . . . . . . . . . . . . . . . . . . . . . . . . . 8Preheating Jars 8
Processing Jars 9
HOW TO USE AS A MULTI-COOKER . . . . . . . . . . . . . . . . . . . . . . . . . . . . . . . . . . . . . . . . . 10Steaming 10
Cooking Soups & Stews 10
Boiling Pasta 11
Hot Beverages 11
Blanching 11
CARE & MAINTENANCE . . . . . . . . . . . . . . . . . . . . . . . . . . . . . . . . . . . . . . . . . . . . . . . . . . . 12Cleaning Your Appliance After Each Use 12
Cleaning The Spigot 12
FREQUENTLY ASKED QUESTIONS (FAQs) . . . . . . . . . . . . . . . . . . . . . . . . . . . . . . . . . . . . 13
SERVICE . . . . . . . . . . . . . . . . . . . . . . . . . . . . . . . . . . . . . . . . . . . . . . . . . . . . . . . . . . . . . . . . . 14
WARRANTY INFORMATION . . . . . . . . . . . . . . . . . . . . . . . . . . . . . . . . . . . . . . . . . . . . . . . . 15
4

4
1 Glass Lid
2Steaming & Diffuser Rack
3 Canning Rack
Pot
5 Spigot
6 Terminals
7 Detachable Base
8 Dial
9 LED light
11 Power Plug
10 Spigot Plug
PARTS DIAGRAM
DIAL GUIDE1. Low2. Medium3. High4. Canning (setting for effective
water bath canning processing)
The LED light will display “green” when the appliance is plugged into the electrical outlet and there is power to the appliance. At dial settings of Low through High, appliance heat may cycle on and off to maintain a consistent cooking temperature.
5

SPIGOT1. Draining: Handle straight up2. Closed: Handle in 10:00 position3. Short Release: Handle down
INTERIOR POT1. Max. Fill2. Steam Fill3. Min. Fill
Within the pot are three measurement lines: Max. Fill, Steam Fill and Min. Fill.
Note: Do not operate the pot dry as this may damage the heating element.
STEAMING & DIFFUSER RACKThe steaming & diffuser rack featured below can be used to steam a variety of foods, such as vegetables, meat and seafood (see recipe guide). For jar processing, place the steaming & diffuser rack on top of the jars. The rack adds heat efficiency, diffuses the boiling water evenly within the pot and mitigates splattering water. The handle folds down flat or can be removed for easy storage.
1
3
2
3
2
1
WATER LEVEL PURPOSE RISK
Max. Fill Limit to which liquid can be filled
Overfilling may result in boil over
Steam Fill Desired level of water needed to steam
Excessive water may result in immersion of food in water
Min. Fill Lowest level of liquid required
Underfilling may result in complete water evaporation before desired process time and damage to the heater
Steaming & Diffuser RackPlacementOn Pot Ridge
6

BEFORE FIRST USEIMPORTANT NOTES:Before using your Ball® brand freshTECH Electric Water Bath Canner + Multi-Cooker for the first time, thoroughly review the Important Safeguards at the beginning of this User Manual.
• Keep the box and packaging materials for use at a later date, as appropriate.• Keep this manual in an easy to locate place for future use.• Ensure all parts illustrated on page 5 are included with the Appliance.
CLEANING BEFORE FIRST USE
Carefully clean your freshTECH Water Bath Canner + Multi-Cooker appliance before first use.
1. Remove all components from the box and lay out separately on the countertop next to the sink.
2. Make certain the power cord connector is removed from the appliance and that the appliance is not plugged into the power outlet before cleaning.
3. Ensure that the detachable base (part 7 on page 5) and power cord inlet stay dry. DO NOT submerge the detachable base in water or place in the dishwasher. If any water should happen to enter the power inlet, it must be dried before the appliance can be used.
4. Wash lid, canning rack, steaming & diffuser rack and spigot (see cleaning spigot instructions on page 12) in warm soapy water or dishwasher. Rinse well and dry.
5. Fill pot half-full with warm water. Add mild dish soap and wash the inside of the pot using a soft cloth. Open the spigot to let soapy water drain into the sink. Fill pot half-full with warm water. Rinse inside of pot using a clean soft cloth. Open the spigot to let water drain into the sink. Repeat process until all soap is removed from the pot.
6. All exterior surfaces of pot and base should be wiped down with a slightly damp cloth.
7. Your appliance is now ready for assembly!
ASSEMBLY
1. Place the base on the countertop next to the sink with spigot positioned over the sink and within 4 ft. of a power outlet.
2. Ensure the dial is rotated fully counterclockwise in the “off” position.3. To properly assemble the pot to the detachable base, align the freshTECH logo on the
pot to the dial on the base. Slowly lower the pot onto the base such that the pot nests into the base. See images below.
7

ASSEMBLY CONTINUED
4. Testing the spigot: Ensure the spigot is closed (see page 6) and fill with approximately 2 inches of water (5 quarts). Slightly open the spigot, pressing down on the handle, ensuring the water is safely draining into the sink and not onto the sink flange or countertop. Close the spigot after testing.
5. Place canning rack into the pot with the flat surface facing up and feet resting on the bottom of the pot. To prevent damage to the spigot, ensure the canning rack or jars are not in contact with the spigot.
6. Place lid on pot.7. Plug power cord into appliance first, then into power outlet.
STORAGE: OUR UNIQUE NESTING DESIGN
1. Remove the pot from the base.2. Place the canning rack into the bottom of the pot.3. Turn the base upside down with the handle facing up and slowly lower the base
inside the pot. 4. Stack all other components on top of the base inside the pot.
HOW TO USE FOR WATER BATH CANNINGThe Electric Water Bath Canner + Multi-Cooker makes water bath canning extremely convenient. Process jams, jellies, pickles, salsas, tomatoes, and fruits (high-acid or acidified foods) using your favorite recipes found in the Ball Blue Book® Guide to Preserving as well as new and existing recipes at www.freshpreserving.com. The unique design of this appliance allows you to process up to 7 quart jars, 8 pint jars or 12 half-pint jars at one time.Following the assembly process, place the fully assembled Electric Water Bath Canner + Multi-Cooker on the countertop next to your sink. Fill the pot half-full with warm/hot water using a pitcher or sink spray hose. Warm/hot water will decrease the amount of time necessary to bring the water to a boil.Helpful hint: add 1/4 cup of white vinegar to the water to help prevent hard water film build-up.
PREHEATING JARS
The Electric Water Bath Canner + Multi-Cooker can be used to preheat jars prior to canning. This will reduce the risk of jar breakage from thermal shock. Follow these simple steps:
1. Wash jars in warm soapy water and rinse. 2. Place the canning rack onto the bottom of the pot then place the jars on the rack.3. Add water to the jars and the pot until it reaches the top of the jars.4. Cover the pot and turn the dial to the right (clockwise) to the MEDIUM-HIGH setting.
Bring the water to a simmer. Preheat jars for 10 minutes at a simmer. Remove jars one at a time as they are needed for filling.
Steaming &Diffuser Rack
Glass Lid
Base
Canning Rack
8

PROCESSING JARS
The steps used to fill jars and to process jars in the Electric Water Bath Canner + Multi-Cooker are the same steps used for stovetop water bath canning.
1. Ensure jars are preheated prior to filling/processing.2. Prepare recipe following instructions for Hot Pack or Raw Pack.3. Remove one preheated jar at a time from the Electric Water Bath Canner + Multi-
Cooker. Fill jar with prepared recipe to the correct level indicated by headspace requirements: 1/4 inch for jams and jellies, 1/2 inch for tomatoes, fruits, and pickles.
4. Remove air bubbles from the jar with a Ball® Bubble Remover & Headspace Tool (sold separately) or non-metallic spatula.
5. Clean jar rim and threads of jar with a clean damp cloth.6. Place a clean and new lid on the jar rim, centering the lid so that only the sealing
compound is touching the jar rim. Adjust band onto jar until it is fingertip tight.7. Place filled jar onto the canning rack in canner of simmering water. Repeat filling
jars one at a time until all jars are filled. Jars must be covered by at least 1 inch of simmering water. Add boiling water, if needed.
8. Place steaming & diffuser rack on top of jars in the pot (see image below). The steaming & diffuser rack adds to the heat efficiency, diffuses the boiling evenly within the pot and mitigates splattering water. Place lid on pot.
9. Once all jars are filled and positioned inside the canner, turn the dial to the right (clockwise) to CANNING. Bring the water to a boil; maintain a boil throughout the entire processing period. In order to effectively and safely process, the dial must remain at the CANNING setting.
10. Set a timer for the length of processing time stated in the recipe. Start the timer countdown once the water is boiling. Processing is complete when the countdown time ends.
11. Turn off the heat by turning the dial to the left (counterclockwise) to the “off” position. Unplug the appliance from the power source. Carefully remove the lid with base of lid facing away from you, as residual steam may be present. Let the appliance cool 5 minutes and drain water from the pot using the spigot before removing jars.
12. Remove steaming & diffuser rack, then the jars and place upright on a dry towel or cutting board to cool for 12 hours, leaving 1 to 2 inches of space between jars so they cool at an even rate. Test jars for a vacuum seal. Note: Processing times given in the included recipe guide, the Ball® Blue Book Guide to Preserving, Ball® Complete Book of Home Preserving and freshpreserving.com are based on canning at or below 1,000 feet above sea level. When processing at altitudes higher than 1,000 feet above sea level, please adjust the processing time as follows: 1,001-3,000 ft. increase time by 5 minutes; 3,001-6,000 ft. increase time by 10 minutes; 6,001-8,000 ft. increase time by 15 minutes; 8,001-10,000 ft. increase time by 20 minutes.
Steaming &Diffuser Rack
Jars
9

HOW TO USE AS A MULTI-COOKERThe Electric Water Bath Canner + Multi-Cooker will function in the same manner as traditional methods for steaming, cooking, boiling and blanching. Simply follow the appliance instructions and cooking time for your specific recipe.Note: Due to the design of the heating element, browning meat and recipes containing high amounts of sugar, milk or cream are not recommended in this appliance, as burning or scorching may result.
STEAMING
Steaming food is a healthy alternative to other methods of cooking. Steam vegetables, chicken, fish or seafood in the Electric Water Bath Canner + Multi Cooker following these simple steps.
1. Fill pot with water to the steam line. 2. Place steaming & diffuser rack into the pot, resting the rack on the ridge inside (see
Steaming & Diffuser rack diagram on page 6).3. Turn the dial to the right (clockwise) to HIGH and bring the water to a boil and to
maintain a consistent production of steam. Do not turn down. Dial must remain on HIGH to ensure consistent boil throughout the steaming process.
4. Prepare food for steaming according to the recipe instructions. Place prepared food onto the steaming & diffuser rack inside the pot. Ingredients should not be immersed in water. Place lid on pot.
5. The length of time needed to steam foods will vary depending on the food type and amount of food steamed at one time. Refer to your recipe for instructions or see specific guidelines on page 16 of the accompanying Recipe Guide.
6. When the steaming time is completed, carefully remove the food from the steaming & diffuser rack inside the pot using a spoon, ladle or tongs. Continue with recipe preparation.
COOKING SOUPS & STEWS
Cook a variety of your favorite soups, stews or chili. The Electric Water Bath Canner + Multi-Cooker is portable, so it’s perfect to take to a potluck, party or large gathering!
1. Place the spigot plug into the spigot port located inside the pot. This is necessary to prevent food from entering the spigot during cooking.
2. Pour liquid ingredients of recipe into the pot before turning on the appliance. Do not sauté in bottom of pot.
3. Turn the dial to the right (clockwise) to the desired setting. Appliance heat will cycle on and off to maintain a consistent cooking temperature.
4. Add remaining recipe ingredients and follow directions as listed, adjusting temperature, time and stirring as needed.
5. To serve, turn off heat and ladle soup, stew or chili into serving bowls. Refrigerate any remaining servings.
6. Ensure all food is removed from the pot, then remove spigot plug from the spigot port before washing pot.
10

BOILING PASTA
The Electric Water Bath Canner + Multi Cooker makes boiling any variety of pasta and noodles quick and convenient.
1. Fill the pot with desired amount of water. 2. Turn the dial to the right (clockwise) to HIGH and bring the water to a boil. Do not
turn down. Dial must remain on HIGH to ensure consistent boil throughout the cooking process.
3. Add pasta or noodles to boiling water and boil according to the instructions on the package. Maintain a boil throughout the cooking time.
4. Drain pasta or remove using tongs, pasta spoon or scoop colander.5. Let the water in the pot cool. Open the spigot to drain water directly into the sink.
HOT BEVERAGES
Make delicious hot beverages in the Electric Water Bath Canner + Multi-Cooker.
1. Pour liquid ingredients of recipe into the pot before turning on the appliance.
2. Turn the dial to the right (clockwise) to the desired setting.
3. Add remaining ingredients listed in the recipe, stirring to evenly incorporate all ingredients. Place lid on pot. Adjust heat and cook for length of time indicated in your recipe. Reduce heat by turning the dial left (counterclockwise) to LOW to MEDIUM-LOW to keep beverages warm.
4. Ladle or use spigot to serve beverages. When using the spigot, it is not recommended to tip the pot for serving in order to empty all the liquid. Tipping may cause the pot to detach from the base or cause damage to the unit.
5. Turn off heat before emptying pot and allow pot to cool. Clean spigot assembly by following spigot cleaning instructions on page 12.
BLANCHING
Blanch a variety of fruits and vegetables in the Electric Water Bath Canner + Multi Cooker following these simple steps.
1. Fill pot with desired amount of water. 2. Turn the dial to the right (clockwise) to HIGH and bring the water to a boil. Do not turn
down. Dial must remain on HIGH to ensure consistent boil throughout the blanching process. Prepare a large bowl of ice water.
3. Rinse, peel, pit, trim or chop as appropriate for the fruit or vegetable to be blanched and depending upon your recipe. Place produce in the boiling water for the time specified in the recipe. For guidelines refer to page 18 of the accompanying Recipe Guide. Maintain a boil throughout the blanching time.
4. Lift blanched produce from the pot using a skimmer or scoop strainer; let water drain off produce. Transfer produce to ice water and stir to cool evenly. Drain.
5. After all produce is blanched, turn off the appliance by turning the dial to the left (counterclockwise) to “off”. Unplug appliance from power source. Use the spigot on the side of the pot to drain water directly into the sink.
11

CARE & MAINTENANCE
CLEANING YOUR APPLIANCE AFTER EACH USE
WARNING! As with all cooking appliances, the metal parts and even some plastic parts can become extremely hot to the touch. Always let the appliance cool completely – usually 20 to 30 minutes – before cleaning.
1. ALWAYS turn the dial to the “off” position (counterclockwise) and unplug your Electric Water Bath Canner + Multi-Cooker from the power source once you have completed processing your foods. Allow the appliance to cool before cleaning.
2. Remove any water left in the pot using the spigot.
3. The lid, canning rack and steaming & diffuser rack can be washed in the dishwasher or with warm soapy water, rinsed and dried.
4. It is recommended that you do not expose a hot lid to cold water. Sudden temperature changes may cause damage to the lid.
5. Cleaning the pot: add water and soap to pot. Do not submerge. Clean interior pot sidewalls and bottom with a soft washcloth. Let water drain into sink from spigot. Add clean water/no soap to the pot. Rinse and release into sink from spigot. Repeat as needed. Wipe external areas with a damp cloth and let air-dry.
6. The detachable base may be cleaned with a soft damp cloth. The power cord must be removed prior to cleaning the detachable base. If any water should happen to enter the power inlet, it must be dried before the appliance can be used again. Do not use abrasive cleaners. Never submerge the detachable base in water, in other liquids or place in the dishwasher.
7. Remove spigot assembly and clean- see cleaning instructions below.
8. Ensure all appliance parts are thoroughly dry before storing in original box.
CLEANING THE SPIGOT
REMOVING THE SPIGOT
1. Within the pot, turn the wing nut counterclockwise until threads have released.
2. Slowly remove the spigot body from the pot.
3. Turn plastic ring below the spigot handle counterclockwise to remove handle mechanism from the spigot body.
CLEANING
1. Wash all components in hot soapy water or in the dishwasher.
REASSEMBLING THE SPIGOT
1. Allow parts to air dry completely before reassembling so water does not collect in internal components
2. Reassemble following the diagram. (Hand tighten the wing nut and plastic ring. Do not use a tool to tighten.)
HandleHandle
BodyBody
Wing NutWing Nut
Plastic RingPlastic Ring
PortPort
PlugPlug
12

FAQ’SWill the bottom burn or scratch my countertop? No, the bottom of this appliance does not get hot and can be used on any suitable countertop surface. It also comes with small rubber pads on the bottom of the detachable base to prevent scratching the countertop.
Will the lid and pot be hot to the touch? Yes. The appliance gets hot similar to a stovetop canning pot. Use the silicone handles when handling the lid and pot.
Do the handles get hot? Your appliance was designed with heat resistant silicone handles to prevent discomfort during hot handling.
How easy is the appliance to clean? Easy! For cleaning convenience the pot easily detaches from the base. The lid, canning rack and steaming & diffuser rack are dishwasher safe. The pot can be hand washed with warm soapy water.
Can I use steel wool to clean the pot? No, this is not recommended. To remove stubborn residue, we recommend using a cloth or sponge and a mild, soft cleanser.
Can I drain hot water out of the spigot? Yes, as it will not harm the spigot, but for safety, we recommend waiting until the water is cool.
How long does it take to drain a pot of water through the spigot? It takes approximately 90 seconds to drain 4 quarts (1 gallon) of water. For example, it takes approximately 5-7 minutes to drain a pot of water used to process 7 quarts.
How long is the power cord? 4 feet long
Can I decrease the processing time for my recipes using this appliance? No, the time to process high-acid recipes is the same as traditional stovetop. It is important to follow the processing time recommended with each recipe.
Can I use my existing wire canning basket in this appliance? Yes, but the canning rack included with this appliance must first be placed in the bottom of the pot. This will prevent damage to the spigot port and allow the wire canning basket to rest flat on the bottom of the pot.
Does the appliance save energy? Yes, it uses less energy for heating and boiling water compared to the average 2000 watt stove.
What recipes can be used? All high-acid recipes tested for water bath canning can be used. We recommend the recipes included in this manual, the Ball® Blue Book Guide to Preserving and those posted on www.freshpreserving.com.
How many jars fit in the pot per batch? 7 quart jars, 8 pint jars or 12 half-pint jars. Additional pints or half pints will fit in the pot but are not recommended to ensure adequate water circulation.
Can I use this appliance outside? No. It is not recommended to use outdoors.
Can I move the appliance while it is in operation? No, as it will need to stay plugged into the power outlet to maintain a consistent temperature. In addition, the pot will be hot to the touch. Please see Important Safeguards on page 2.
Can I cook food in this appliance? Yes, this appliance is also a multi-cooker. It can be used for steaming fruits, vegetables, meat and seafood, boiling pasta, cooking stews/soups, hot beverages and blanching.
Can I use this appliance to keep food warm? The heating element is designed for recipes to be cooked and consumed as prepared. While serving, keep dial on LOW and stir frequently to prevent burning.
What is the height of the appliance once it is nested for storage? 12 inches high
Who can I contact if I need assistance or replacement parts? Jarden Home Brands Consumer Affairs Department at 1-800-240-3340, Monday- Friday 8:30 a.m. – 4:30 p.m.
13
SERVICE
REPLACEMENT PARTS
Pot, Canning Rack, Steaming & Diffuser Rack, Glass Lid, Dial, Spigot, Spigot Plug, Power Cord, Detachable Base, User Manual, Recipe Guide:
Call 1-800-240-3340To assist in serving you better, please have the freshTECH Electric Water Bath Canner + Multi-Cooker model number and date of purchase available when you call. The model number is located on the bottom of the appliance base and on the cover page of this instruction manual.
U.S. CONSUMER SERVICE 1-800-240-3340
HOURS OF OPERATION Monday - Friday, 8:30 a.m. - 4:30 p.m. EST
We welcome your questions, comments or suggestions. In all your communications, please include your complete name, address and telephone number and a description of the problem.
Visit our website at www.freshpreserving.com and discover the secret to making water bath canning simple and convenient for all your favorite high-acid canning recipes and the latest information on freshTECH products.
REGISTER YOUR BALL® freshTECH APPLIANCE
To register your Ball® freshTECH Electric Water Bath Canner + Multi-Cooker for
warranty coverage, retain proof of purchase along with product ID and visit www.freshpreserving.com
14

WARRANTY INFORMATION
1-YEAR LIMITED WARRANTY
Hearthmark, LLC doing business as Jarden Home Brands, Fishers, IN 46037, warrants that for a period of one year from the date of purchase this product will be free from defects in material and workmanship. Jarden Home Brands, at its option, will repair or replace this product or any component of the product found to be defective during the warranty period. Replacement will be made with a new or remanufactured product or component. If the product is no longer available, replacement may be made with a similar product of equal or greater value. This is your exclusive warranty.
DO NOT attempt to repair or adjust any electrical or mechanical functions on this product. Doing so will void its warranty.
The warranty is valid for the original retail purchaser from the date of initial retail purchase and is not transferable. Keep the original sales receipt. Proof of purchase is required to obtain warranty performance.
This warranty does not cover normal wear of parts or damage resulting from any of the following: negligent use or misuse of the product, use on improper voltage or current use contrary to the operating instructions, disassembly, repair or alteration by anyone other than Jarden Home Brands or an authorized Jarden Home Brands service center. Further, the warranty does not cover: Acts of God, such as fire, flood, hurricanes and tornadoes.
WHAT ARE THE LIMITS ON JARDEN HOME BRANDS’ LIABILITY?
Jarden Home Brands will not be liable for any incidental or consequential damages caused by the breach of any express, implied or statutory warranty or condition.
Except to the extent prohibited by applicable law, any implied warranty or condition of merchantability or fitness for a particular purpose is limited in duration to the duration of the above warranty.
Jarden Home Brands disclaims all other warranties, conditions or representations, express, implied, statutory or otherwise.
Jarden Home Brands shall not be liable for any damages of any kind resulting from the purchase, use or misuse of, or inability to use the appliance including special, consequential or similar damages or loss of profits, or for any breach of contract, fundamental or otherwise, or for any claim brought against purchaser by any other party.
HOW TO OBTAIN WARRANTY SERVICE
If you have any question regarding this warranty or would like to obtain warranty service, please call 1-800-240-3340 and a convenient service center address will be provided to you.
In the U.S.A., this warranty is offered by Hearthmark, LLC doing business as Jarden Home Brands located in Fishers, IN 46037.
If you have any other problem or have a claim in connection with this product, please write our Consumer Service Department.
PLEASE DO NOT RETURN THIS PRODUCT TO THE PLACE OF PURCHASE
15

©2014 Hearthmark, LLC doing business as Jarden Home Brands. All rights reserved. Distributed by Hearthmark, LLC doing business as Jarden Home Brands, Fishers, IN 46037. Hearthmark, LLC is a subsidiary of Jarden Corporation (NYSE: JAH).
and Ball® are trademarks of Ball Corporation, used under license.
U.S. 1-800-240-3340 Hours of Operation: Monday-Friday, 8:30a.m. – 4:30p.m. EST
Visit us online at www.freshpreserving.com for more exciting ideas, entertaining tips and delicious recipes!
Connect with us:
@ballcanning
Or for recipes or questions: www.freshpreserving.com
Rev 1.0 P.N. 143741 Printed in China Model FTWB-15-02
Fresh Made Simple.