Embed Size (px)
Citation preview
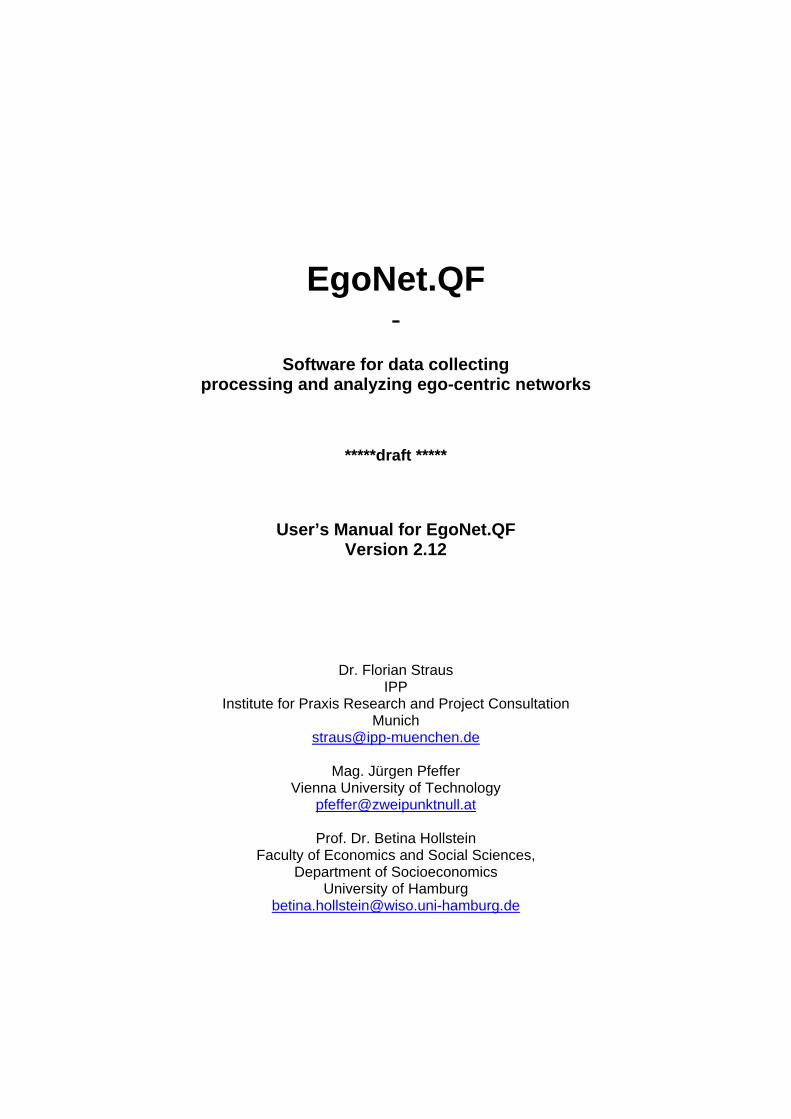
EgoNet.QF
-
Software for data collecting processing and analyzing ego-centric networks
*****draft *****
User’s Manual for EgoNet.QF
Version 2.12
Dr. Florian Straus IPP
Institute for Praxis Research and Project Consultation Munich
Mag. Jürgen Pfeffer Vienna University of Technology
Prof. Dr. Betina Hollstein Faculty of Economics and Social Sciences,
Department of Socioeconomics University of Hamburg
2
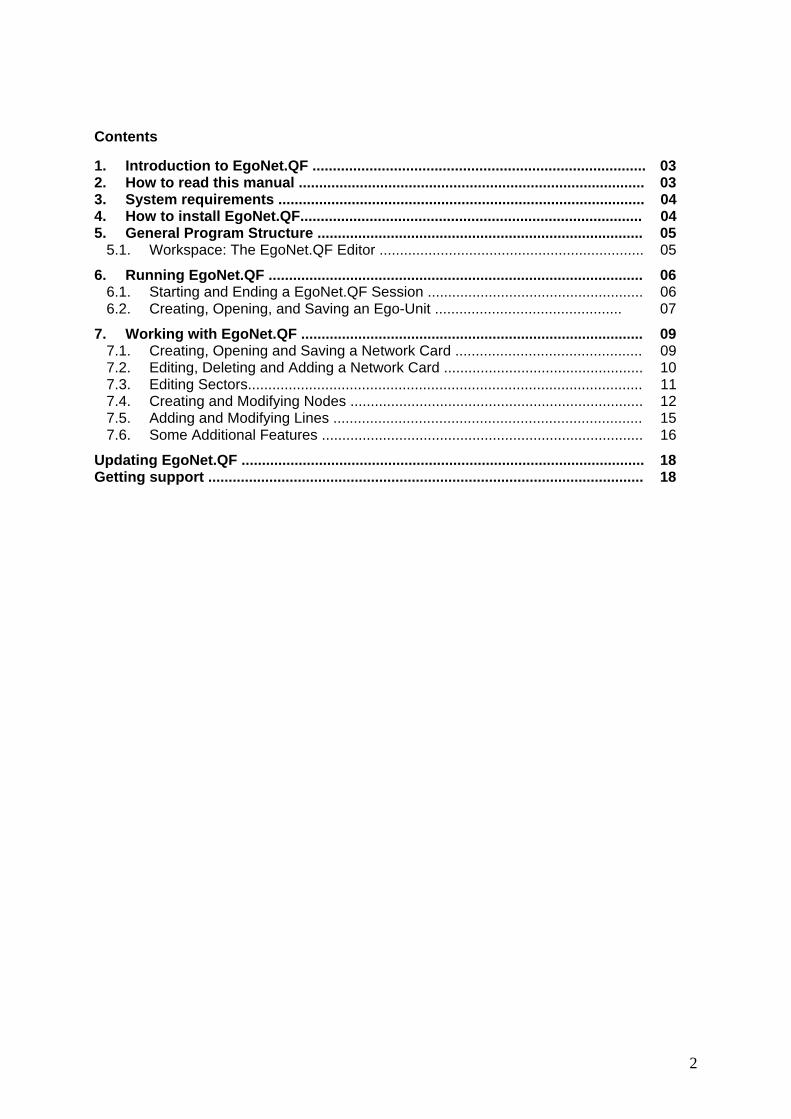
Contents
1. Introduction to EgoNet.QF .................................................................................. 03 2. How to read this manual ..................................................................................... 03 3. System requirements .......................................................................................... 04 4. How to install EgoNet.QF.................................................................................... 04 5. General Program Structure ................................................................................ 05 5.1. Workspace: The EgoNet.QF Editor ................................................................. 05
6. Running EgoNet.QF ............................................................................................ 06 6.1. Starting and Ending a EgoNet.QF Session ..................................................... 06 6.2. Creating, Opening, and Saving an Ego-Unit .............................................. 07
7. Working with EgoNet.QF .................................................................................... 09 7.1. Creating, Opening and Saving a Network Card .............................................. 09 7.2. Editing, Deleting and Adding a Network Card ................................................. 10 7.3. Editing Sectors................................................................................................. 11 7.4. Creating and Modifying Nodes ........................................................................ 12 7.5. Adding and Modifying Lines ............................................................................ 15 7.6. Some Additional Features ............................................................................... 16
Updating EgoNet.QF ................................................................................................... 18 Getting support ........................................................................................................... 18
3
1. Introduction to EgoNet.QF Egonet.QF supports the analysis of egocentric network data, collected by means of NETWORK CARDS or DIAGRAMMS. Egonet.QF is suitable for all sorts of network diagrams which make use of CONCENTRIC CIRCLES: Egonet.QF users can define the number of circles, the content of relations, characteristics of alteri according to their respective research questions and research purposes. EgoNet.QF offers various options for handling network cards and diagrams:
1. It supports the collection of egocentric network data according to the needs of researchers;
2. It offers various possibilities for data storage and the analysis of network cards; 3. It offers links to other Software-packages used in social network research; 4. It can be used as tool for visualisation and presentation of network cards; 5. Finally, with its interactive features Egonet.QF can also be used for network
intervention. In sum, Egonet.QF is applicable to a wide range of egocentric network types and questions related to egocentric network research: for personal network data as well as for informal networks in organizations or networks between organizations.
2. How to read this manual This manual describes the functions and concepts of EgoNet.QF. Methodological approaches to qualitative data analysis will not be featured. This manual is organized in the following way: After an introduction on EgoNet.QF, the third chapter outlines the general structure of the software. Following this, the fourth section gives an overview of running EgoNet.QF. This manual then provides a comprehensive step-by-step guide to the individual program modules, with each step described by way of an example. It is not required that you read the manual sequentially from beginning to end. You may skip sections that describe functions you are already familiar with, or you may jump directly to sections that describe functions you are interested in. For users with no prior knowledge of EgoNet.QF, we do, however, recommend that you especially read through the first part of the manual in order to gain an overview of the available functions. Throughout this manual, options that must be supplied by the user are indicated as Sample
4
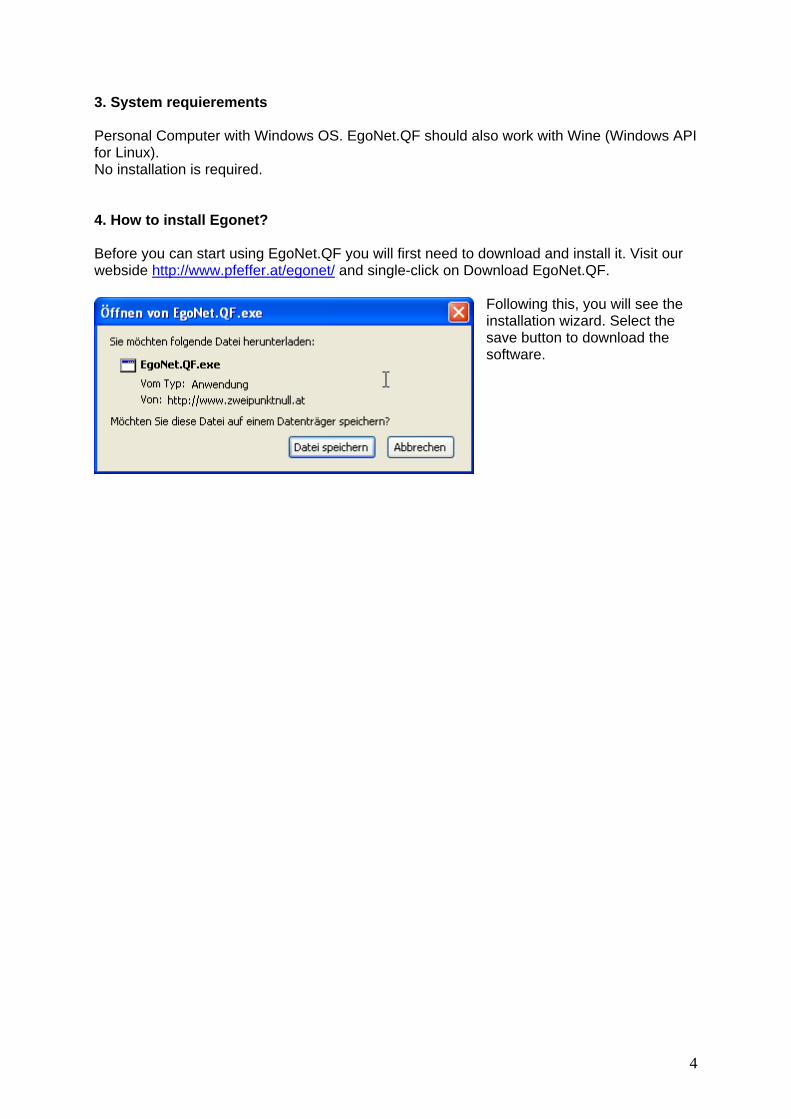
3. System requierements Personal Computer with Windows OS. EgoNet.QF should also work with Wine (Windows API for Linux). No installation is required. 4. How to install Egonet? Before you can start using EgoNet.QF you will first need to download and install it. Visit our webside http://www.pfeffer.at/egonet/ and single-click on Download EgoNet.QF.
Following this, you will see the installation wizard. Select the save button to download the software.

5
5. General Program Structure This section gives an overview of the general structure of EgoNet.QF. 5.1. Workspace: The EgoNet.QF Editor The EgoNet.QF Editor is the workspace. It is opened after the start of the program and will be your home page. The EgoNet.QF editor serves as the main editing tool and offers acces to all other workbench tools. Network Card Box (1): The dominant window box in EgoNet.QF is the network card. This box is the central workspace where cards are compiled, edited, pocessed or analysed. Open/Save Toolbar (2): Open or save Ego-Unit
Open Tool
Save Tool The Main Menu (3) is common to all windows and dialog boxes:
Submenus are used for commands that apply to the selected card. A Submenu is activated by a left mouse click at the current location of the mouse pointer.
The Workbench (4) below the main menu offers functions that are partly also availabe as menu commands. A short tool tip help text is displayed when the mouse pointer rests on a modus button. (workbench functions
see 5.1-5.4)

6
Workbench Modes
Add network card Add or modify Sectors Add Nodes
Modify Nodes Add or modify Lines The Info-Box (5) on the right offers acces to the different kinds of objects that populate an Ego-Unit: ego settings and current network card. Ego Settings displays the settings of the Ego-Unit that is currently being edited (see 4.2.) Current Network Card: below the ego settings you find the network card drop-down list that contains the network cards of your current Ego-Unit.
Click into the entry field or the drop down arrow on the right to select requested network card.
Number of Nodes: Number of network relationships / alteri Number of Lines: Number inter node lines and lines between nodes and ego. Interviewer: Name of interviewer Date: Date of performed interview Memo: Free for indiviudual use Node Infos: Identification number, label und role of node 6. Running EgoNet.QF This section describes how to start and end an EgoNet.QF session, how to create, open and save a project. 6.1 Starting and Ending EgoNet.QF
EgoNet.QF can be started like many other Windows applications via the Windows start menu or by clicking on program shortcuts.
If you double-click on the short cut EgoNet.QF you will see the welcome wizard which offers two options to start a session.
EgoNet.QF.exe

7
In order to start a new project, select the option Create New Ego. Read Ego from File: If you choose this option, you can select from a list of already existing Ego-Units. Each Ego-Unit is made up of one case and its corresponding network cards and is stored in a separate file. Single-click into one of the two options to start the session.
Ending EgoNet.QF: When you have finished working, select File/Exit from the main menu to close the session.
6.2. Creating, Opening, and Saving a Ego-Unit In order to create a new Ego-Unit fill in Ego Settings:
Name: Give each Ego-Unit a name EgoID: Each Ego-Unit needs a specified identification number Year of Birth: Fill in egos year of birth Sex: Select from the drop-down menu
Miscellaneous 1/2: Free for individual use
Name and EgoID indications are obligatory. If you forget to fill in these settings an error wizard will remind you to do so. Save your new Ego Settings by single-click on save botton. You can start working right away.
It is also possible to edit your Ego Settings by selecting Ego/EgoSettings of the the main menu.
[Recommendation: Make a habit of systematic indication and memo writing]

8
Opening a Ego-Unit (using the standard windows file dialog)
You can open an Ego-Unit by selecting Read Ego from file while starting EgoNet.QF or throughout the session by selecting File/Read from the main menu or single-click on open tool from
toolbar. The file dialog appears:
Select requested Ego-Unit and single-click on open button.
Saving a Ego-Unit If you haven’t saved your work already, you will be asked to save the Ego-Unit when you close the EgoNet Editor. If you leave EgoNet.QF, your work during your last session is lost.
In order to save the currently open Ego-Unit select File/SaveAs... from the main menu or single-click on
save tool from the tool bar.
The file dialog opens. Select a folder, enter the name for your Ego-Unit and single-click on safe button.

9
7. Working with EgoNet.QF Building on the worplace overview the manual then provides a comprehensive step-by-step guide to the individual program modules, with each step described by way of an example. 7.1. Creating and Saving a Network Card
In order to create (first) Network card select Ego/New NetworkCard of the main menu or the Add Network Card workbench modus.
If you single-click on button you will see the Network Card Settings Wizard, wich needs to be filled in: Card ID: Each file needs a specified identification number Number of Circles: Select requested number of circles (Interspace: 1-20) Show Ego as Node: Only if ego is specified as node, it is possible to color ego or to change its size (The same is true for drawing lines from nodes to ego 5.5.) Ego Color: Select requested color Ego Size: Select from the
drop-down menu requested Interviewer: Name of interviewer size of Ego. Date of Interview: Date of performed Interview Memo: Free for individual use In order to save your settings single-click on the save button.

10
7.2. Editing, Deleting and Adding a Network Card It is also possible to edit your Network Card Settings by selecting Card/CardSettings from the main menu.
In order to delete a network card select the requested card of the Info-Box
Following this, select Card/DeleteCard of the main menu to remove the chosen card from Ego-Unit.
If you want to add an additional network card select Ego/NewNetworkCard of the menu
or single-click on the add network card modus and fill in the additinal Network Card Settings.

11
7.3. Creating, Adding, Editing and Deleting Sectors It is possible to divide the card into different sectors. Each sector can be specified by means of name (e.g. family, friends, Study), color and size. Nodes positioned in these sectors will automatically be associated with the same role and be coloured same way.
To add a sector single-click on Add Sector modus of workbench. Following the location of the first sector border is set by a right-mouse click at the requested location.
You will see the Sector setting wizard in order to specify name and colour of the sector. Single-click on save button to add the first border. Always two borders are needed for specifying the first sector. In this way you can add clock-wise the number of sectors disired.

12
The Position of the border can be changed by dragging the sector to a different position of the network card. Left-mouse click on the little grey spot at the rear end of the sector-border to drag-and-drop it to the requested position.
Name and colour of the sector can be modified by right-mouse click on the little grey spot at the rear end of the sector-border. Select Modify of the pop-up menu and change Sector Settings.
Sector can be deleted by right-mouse click on the little grey spot at the rear end of the sector-border. In order to delete the sector from (current) network card select Delete of the pop-up menu.
In order to copy the sector into the same card, select CopyToThisCard of the pop-up menu. Beyond that sectors can as well be copied into the next card. Single-click on Copy ToNextCard.
7.4. Creating and Modifying Nodes
To add a Node single-click on the Add Node Modus of workbench. Following this, location of the node is set by a right-mouse click at the requested position. You

13
You will see the node setting wizard in order to specify node settings: Node ID: Each node needs a specified identification number Label: Each node needs a specified label (e.g.: name, initials) Role: Specify alteri relationship to ego (e.g.: mother, family member, friend). Sex: Select from the drop-down menu requested sex. Human/Non-Human: Default setting is set on human. Distance to Ego: On a Scale of 0.0 (Ego) to 1.0 (outside the outermost circle) Group: If a node represents more than one individual it can be visually marked as group.
Group Size: Each Group needs a number of members
Color: Each node needs a colour. The default setting is respectively in the colour of the sector. If necessary nodes can be (visually) marked whereby Symbol for example as Non-Human. The Symbol visually marks the node on the upper right side. Node Size: Select from the drop-down menu requested size of Node.
Or select Options/Nodes/Size
of the main menu to change all existing nodes automati-cally. (e.g. for the purpose of visualisation)
Memo 1/2: Free for Individual use Single-click on save button to add the first Node.

14
To modify a node single-click on Modify Node Modus of workbench.
The Position of the node can be changed by dragging the node to a different position of the network card. Left-mouse click on node to drag-and-drop it to the requested location.
The node can be modified by right-mouse click on node. Select modify of the pop-up menu in order to change Ego Settings.
Node can be deleted by right-mouse click on node. Following this single-click on Delete of the pop-up menu, wich removes node from the (current) card. In order to copy the node into the next card, select CopyToNextCard of the pop-up menu. Nodes can only be copied to the following card.1
1 Beyond that nodes can as well be copied into the same card. Single-click on CopyToThisCard.

15
7.5. Adding and Modifying Lines To add a Line single-click on Add Line Modus of workbench.
It is possible to draw lines between two nodes. In order to add a line left-mouse click on node to drag-and-drop the line upon the requested node. Only if ego is specified as node, it is possible to draw lines from nodes to ego.
Following this, you will see the Line Settings wizard to specify line value and colour. Single-click on save button to add the line.
To modify a or delete a Line right-mouse click on the line. Following this, either select Modify of the pop-up menu to change the settings or delete the line.

16
7.6. Some Additional Features: After the step-by-step guide to the individual program modules, the last section will exemplarly illustrate some additional features of EgoNet.QF.
The network Cards can be exported as JPGs for further analysis. Select File/Export/JPG Current Card or All Cards in 1 JPG of the main menu.
It is possible to denote an overview Duplicate Card by selecting of all drawn nodes. Select Card/DublicateCard Card/NodeTable of the main menu to of the main Menu.
display Node Table.
It is possible to search nodes by different indications. In order to serach node by Label select Nodes/Select/byLabel of the main menu.
You will see the Find wizard, to fill in label of wanted node. Single-click on ok button to start searching.
17
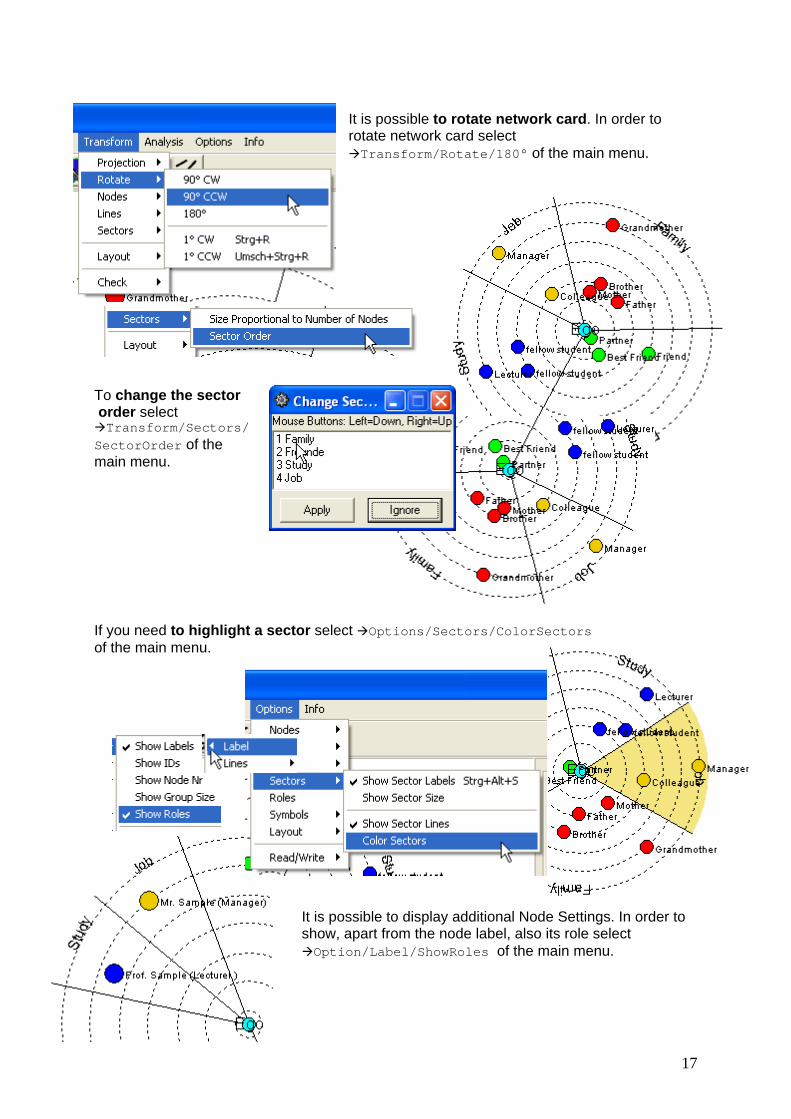
It is possible to rotate network card. In order to rotate network card select Transform/Rotate/180° of the main menu.
To change the sector order select Transform/Sectors/
SectorOrder of the main menu. If you need to highlight a sector select Options/Sectors/ColorSectors of the main menu.
It is possible to display additional Node Settings. In order to show, apart from the node label, also its role select Option/Label/ShowRoles of the main menu.

18
Updating EgoNet.QF After the installation of EgoNet.QF the online help offers if available upon start-up a modified version:
single-click on yes button to install modified version.
Manual updating is accessible via the main menu: Select Info/UpdateAvailable? from the main menu. If update is available single-click on yes button to install modified version. In each release of the software new features are continuative listed to get a detailed understanding of the performed work. In order to read the EgoNet History visit our webside http://www.pfeffer.at/egonet/ or use the short key Strg+h Getting support A primary resource for issues concerning the use of EgoNet.QF should be our webside www.pfeffer.at/egonet. In case of software failure or further questions please contact us by [email protected]


![Deep Dual Relation Modeling for Egocentric Interaction ...openaccess.thecvf.com/content_CVPR_2019/papers/Li_Deep_Dual_R… · Egocentric interaction recognition [11, 25, 31, 35, 39]](https://img.dokumen.tips/doc/110x75/5ea82ec0fafc5a38a37d1af4/deep-dual-relation-modeling-for-egocentric-interaction-egocentric-interaction.jpg)