Embed Size (px)
Citation preview
1
1065 South Rogers Circle • Boca Raton, FL 33487 • Phone (561) 998-9600 • Fax (561) 998-9609
Windows Driver Installation Guide
Do not connect the printer to your computer’s USB port until step #10
Please contact your software provider to confirm if the use of our driver is required for their ticketing software. We
recommend that the print driver is installed by either your system administrator or IT support staff. If you previously connected the printer or tried to install the print driver, take a screenshot of the “printers and drivers” dialog and attach it to the support form located at www.bocasystems.com/onlinesupportform.html.
1. Click on one of the two links below. Please contact your software provider to confirm which driver is
required for their system. Standard Drivers (released 2010) New Drivers With print monitor (Beta released June-2014). If this driver does not work properly with your software application then please see page 14 for driver adjustment.
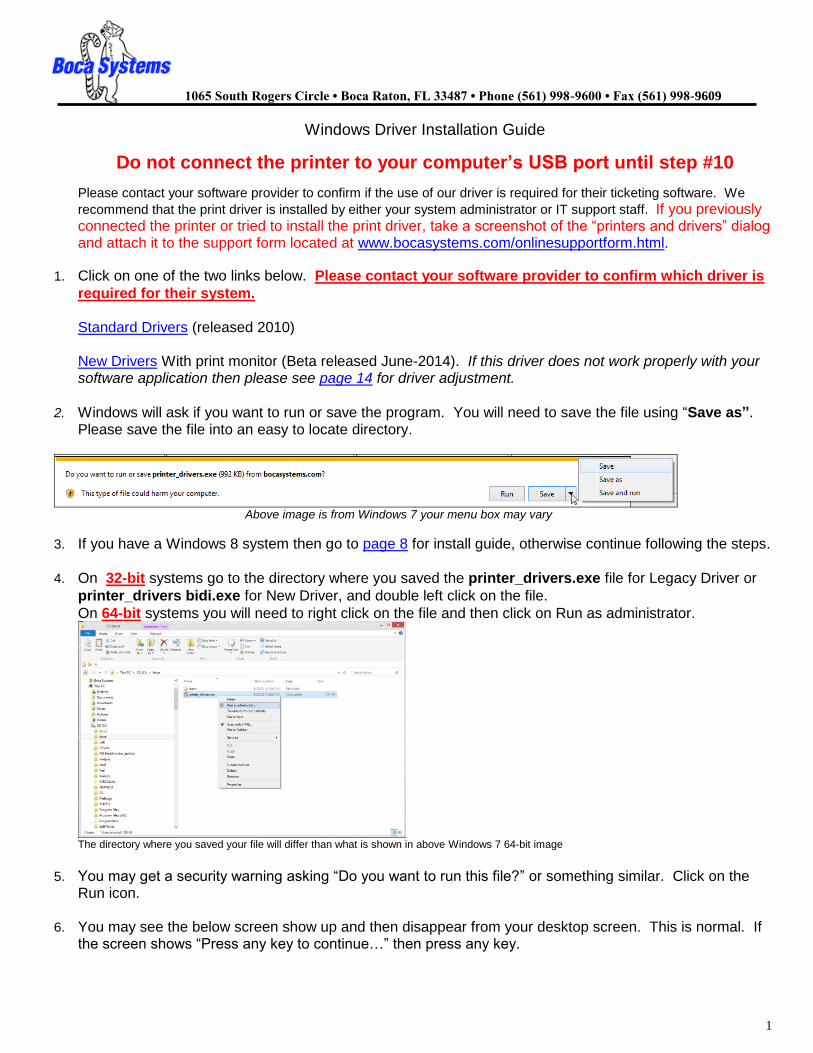
2. Windows will ask if you want to run or save the program. You will need to save the file using “Save as”. Please save the file into an easy to locate directory.
Above image is from Windows 7 your menu box may vary
3. If you have a Windows 8 system then go to page 8 for install guide, otherwise continue following the steps.
4. On 32-bit systems go to the directory where you saved the printer_drivers.exe file for Legacy Driver or
printer_drivers bidi.exe for New Driver, and double left click on the file.
On 64-bit systems you will need to right click on the file and then click on Run as administrator.
The directory where you saved your file will differ than what is shown in above Windows 7 64-bit image
5. You may get a security warning asking “Do you want to run this file?” or something similar. Click on the Run icon.
6. You may see the below screen show up and then disappear from your desktop screen. This is normal. If the screen shows “Press any key to continue…” then press any key.
2
7. For 64-bit systems please go to step # 10. For 32-bit system continue the steps below.
8. When the following dialog is seen, click on the Next button.
9. When the installer has finished putting the necessary driver files on your system, the below menu box will be displayed. Click on the Finish button.
10. Connect the USB cable to the host computer and power on the printer. If you are connecting to the printer via Ethernet or Wi-Fi then skip to step # 13.
11. Depending on your system, a notice box similar to the following picture should appear. Click on the Click
here for status. This will enable to see the status of the driver software installation.
Image is from Windows 7 The below Driver Software Installation pop up window will show up on a Windows 7 system. No action is needed.
If the below window shows up just click on the Yes button

3
12. The correct USB Printing Support and drivers will automatically install. The image below is of a 200dpi driver being installed on a Windows 7 system. The driver name may vary due to the printer’s DPI and logic board level. Go to Page 6.
Above image will vary based on DPI and software level of printer
Steps 13 through 24 are for Ethernet or Wi-Fi connection only.
13. The self-test ticket that is printed when the TEST button will show the IP address that the printer has.
14. Open up the “Printer and Faxes” (XP) or “Devices and Printer” (Widows 7) Menu.
15. Click on “Add a Printer”. In XP the Add Printer Wizard show up, click on the Next button. a. XP – Click on “Local printer attached to this computer”. b. Windows 7 – Click on “Add a local printer”
16. When the printer port menu comes up. Click on “Create a new port:” choose “Standard TCP/IP Port. Click on the Next button. XP – When the TCP/IP Port Wizard menu comes up, click on the Next button
Windows XP
Windows XP
Windows 7
Windows 7

4
17. Type in the IP address that is shown on the self-test ticket in the “Hostname or IP address:” field. When tying in the address don’t include the leading zeroes (If IP=189.010.000.002 then type in 189.10.0.2). You also have the option of typing in a specific Port name or leave as the IP address. Click on the Next button.
Windows 7 system will show the below screen (no action is needed). For both XP and Windows is may take a few minutes for the system to move on to the next screen. This will vary depending on system and Network speeds.
18. When the Additional Port information menu comes up click on the Next button. XP – When the Wizard menu comes up click on Finish.
19. When the Install print driver menu comes up: Under Manufacturer select “Boca”. Under Printers select the driver that matches your printer’s protocol (FGL or PCL) and DPI. Click on the Next button.
Windows XP
Windows XP
Windows XP
Windows 7
Windows 7
Windows 7
Windows 7 Your selection of drivers will vary from what is shown in above images

5
20. When the version driver menu comes up click on the Next button.
21. When the printer name menu comes up you may keep the default name or type in a different name. Click on the Next button.
22. When the Printer Sharing menu comes up you may choose to share this printer or not. Click on the Next button.
23. On the last menu you have the option to choice if you want to make the BOCA your default printer. a. XP – Click on the Next button.
b. Windows 7 - Do not click on Print a test page. Click on the Finish button.
24. XP - When the completing Add Printer Wizard menu comes up click on Finish button.
Windows XP
Windows XP
Windows XP
Windows XP
Windows 7
Windows 7
Windows 7
Windows 7
Your driver name will vary from what is shown in above images
Your driver name will vary from what is shown in above images

6
Windows Test Page The following will guide you through doing a Windows test page to confirm the driver is communicating with the printer. You will want to make sure the printer has stock loaded and is able to print a self-test ticket when the TEST button is pressed. The printing of this ticket confirms that the printer is working properly mechanically. If the printer is not able to print a self-test ticket, then consult the “4.0 Installation section of the user manual (www.bocasystems.com/documents/lemur_manual.pdf ).
1. On a Windows XP system, go to the Printer and Faxes page and on a Windows 7 system go to the
Devices and Printers page.
Windows XP Windows 7
2. When the Printer and Faxes or Devices and Printers page comes up, right-click on the BOCA driver that is
being used. When the drop down window pops up, left click on Properties (XP) or Printer properties (Windows 7). Your selection of driver may vary from what is shown in the below images.
Windows XP Windows 7
3. Once the driver’s properties menu comes up click on the Print Test Page button. Your drive properties may
vary from what is shown in the bel
Windows XP Windows 7
7
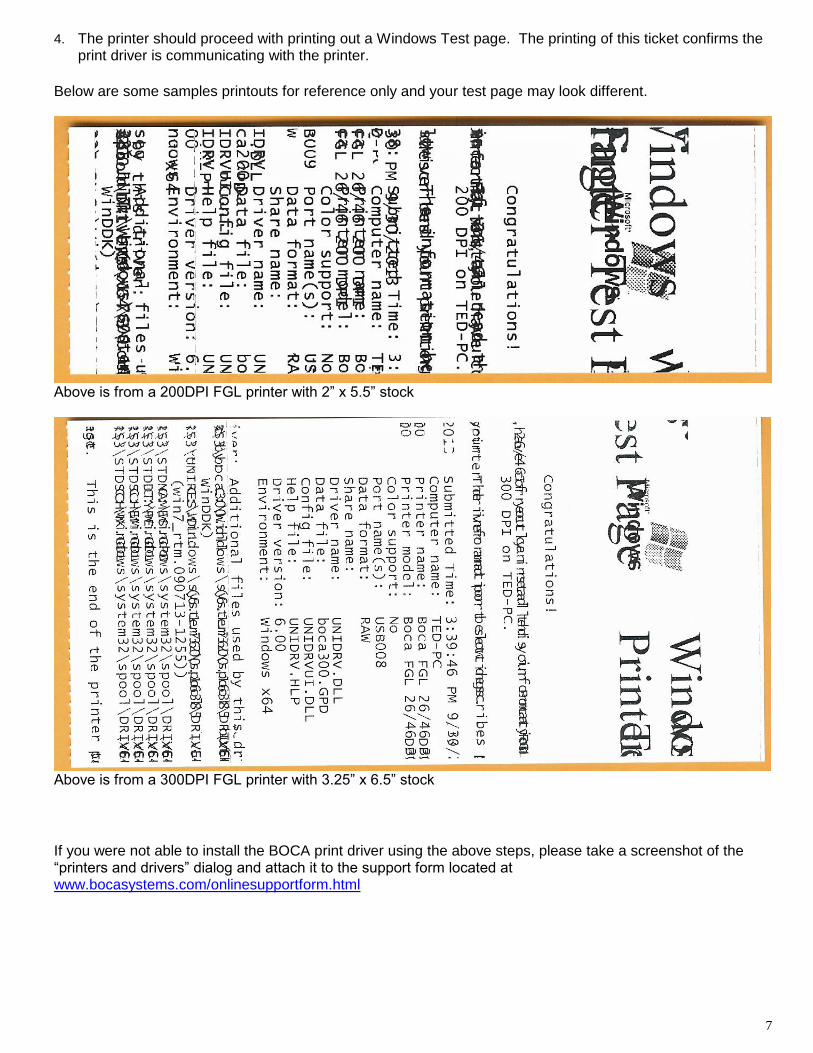
4. The printer should proceed with printing out a Windows Test page. The printing of this ticket confirms the print driver is communicating with the printer.
Below are some samples printouts for reference only and your test page may look different.
Above is from a 200DPI FGL printer with 2” x 5.5” stock
Above is from a 300DPI FGL printer with 3.25” x 6.5” stock
If you were not able to install the BOCA print driver using the above steps, please take a screenshot of the “printers and drivers” dialog and attach it to the support form located at www.bocasystems.com/onlinesupportform.html

8
Windows 8 Install Guide
Do not connect the printer to your computer’s USB port until step #3
1. Go to the directory where you saved the printer_drivers.exe file for Legacy Driver or printer_drivers
bidi.exe for New Driver and right click on the file. Click on Run as administrator.
The directory where you saved your file will differ than what is shown in above image
2. You may see the below screen show up your desktop screen. This is normal. If the screen shows “Press any key to continue…” then press any key.
3. Connect the USB cable to the host computer and power on the printer. If you are connecting to the printer via Ethernet or Wi-Fi then skip to step # 7.
4. Click on the device icon that shows up on your desktop task bar.
5. The correct USB Printing Support and drivers will automatically install. The image below is of a 300dpi driver being installed. The driver name may vary due to the printer’s DPI and logic board level.
Click on this icon
9
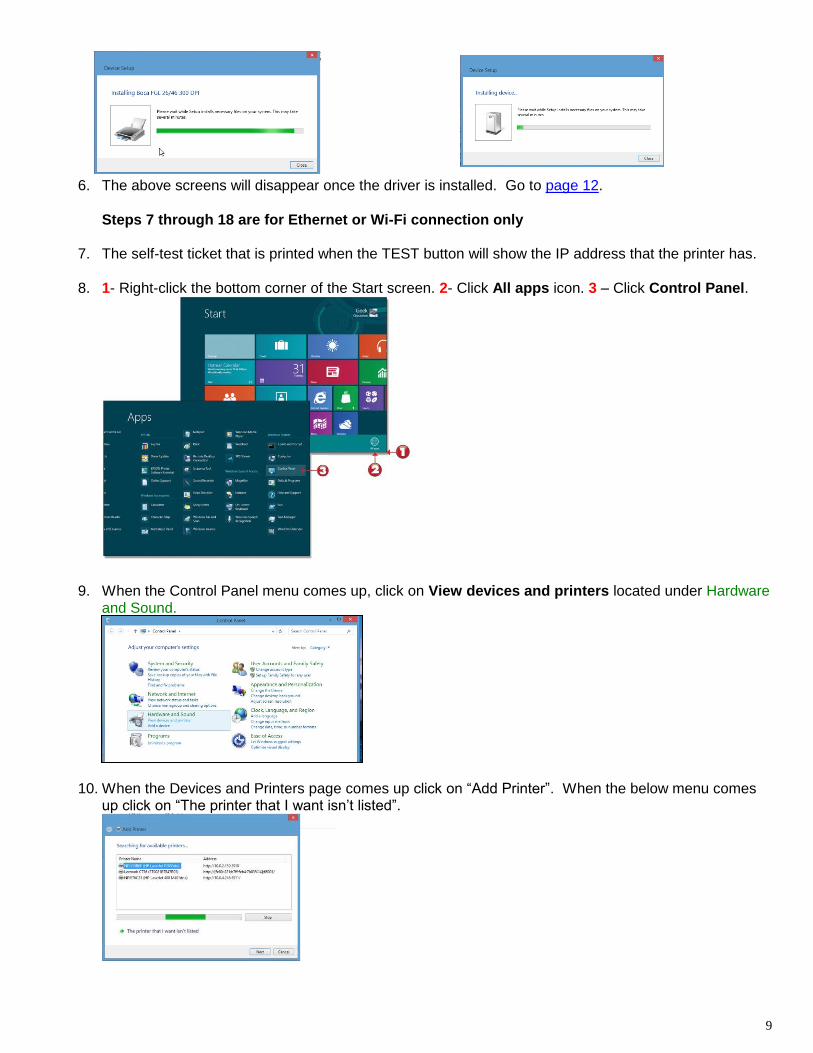
6. The above screens will disappear once the driver is installed. Go to page 12.
Steps 7 through 18 are for Ethernet or Wi-Fi connection only
7. The self-test ticket that is printed when the TEST button will show the IP address that the printer has.
8. 1- Right-click the bottom corner of the Start screen. 2- Click All apps icon. 3 – Click Control Panel.
9. When the Control Panel menu comes up, click on View devices and printers located under Hardware and Sound.
10. When the Devices and Printers page comes up click on “Add Printer”. When the below menu comes
up click on “The printer that I want isn’t listed”.

10
11. Click on “Add a printer using a TCP/IP address or hostname” radio button. Click on the Next button
12. Under Device type: select “TCP/IP Devices”. Type in the IP address that is shown on the self-test ticket in the “Hostname or IP address:” field. When tying in the address don’t include the leading zeroes (If IP=189.010.000.002 then type in 189.10.0.2). You also have the option of typing in a specific Port name or leave as the IP address. Click on the Next button.
13. The below screen will be displayed (no action is needed). It may take a few minutes for the system to move on to the next screen. This will vary depending on system and Network speeds.
14. When the Additional Port Information menu comes up click on the Next button.

11
15. When the Install print driver menu comes up: Under Manufacturer select “Boca”. Under Printers select the driver that matches your printer’s protocol (FGL or PCL) and DPI. Click on the Next button.
16. When the version driver menu comes up click on the Next button.
17. When the printer name menu comes up you may keep the default name or type in a different name. Click on the Next button.
18. On the last menu you have the option to choice if you want to make the BOCA your default printer. Do
not click on the “Print a test button. Click on the Finish button.
Your selection of drivers will vary from what is shown in above images
Your driver name will vary from what is shown in above images

12
Windows Test Page The following will guide you through doing a Windows test page to confirm the driver is communicating with the printer. You will want to make sure the printer has stock loaded and is able to print a self-test ticket when the TEST button is pressed. The printing of this ticket confirms that the printer is working properly mechanically. If the printer is not able to print a self-test ticket, then consult the “4.0 Installation section of the user manual (www.bocasystems.com/documents/lemur_manual.pdf ).
19. 1- Right-click the bottom corner of the Start screen. 2- Click All apps icon. 3 – Click Control Panel.
20. When the Control Panel menu comes up, click on View devices and printers located under Hardware and Sound.
21. When the Devices and Printers page comes up, right-click on the BOCA driver that is being used.
When the drop down window pops up, click on Printer properties. Your selection of driver may vary from
what is shown in the below images.

13
22. Once the driver’s properties menu comes up click on the Print Test Page button. Your drive properties
may vary from what is shown in the below images.
23. The printer should proceed with printing out a Windows Test page. The printing of this ticket confirms the print driver is communicating with the printer.
Below are some samples printouts for reference only and your test page may look different.
Above is from a 200DPI FGL printer with 2” x 5.5” stock
Above is from a 300DPI FGL printer with 3.25” x 6.5” stock If you were not able to install the BOCA print driver using the above steps, please take a screenshot of the “printers and drivers” dialog and attach it to the support form located at www.bocasystems.com/onlinesupportform.html

14
New Driver Adjustments Our new drivers allow both bidirectional communication and the use of the spooler, while our old drivers were limited to unidirectional, direct communication. These new features place additional overhead on the driver and result in somewhat slower response times. A software application that is not compatible with the new driver may lock up after one ticket. The following action may be taken:
Disable bidirectional support
1. Go to the Devices and Drivers page. 2. Right click on the Boca BIDI print driver in question and click on Printer properties. 3. Click on the Port tab and uncheck the Enable bidirectional support box (as shown below).
4. Click on the OK button and try your application again.
Make the below additional change if you are still having an issue.
Print directly to the printer
1. Go to the Devices and Drivers page. 2. Right click on the Boca BIDI print driver in question and click on Printer properties. 3. Click on the Advanced tab and click on the Print directly to the printer radio button (as shown below).
4. Click on the OK button and try your application again. If driver is still not working properly after making the above adjustments then please fill out an online support form so we may assist you further. www.bocasystems.com/onlinesupportform.html 09.03.14
Your driver name will vary from what is shown in above images
Your driver name will vary from what is shown in above images