Embed Size (px)
Citation preview

***************************
The Legend of Zelda: Four Swords Adventures
FAQ/Walkthrough
Latest Version: 1.1
Written by Matthew J. Dyl (TakerVersion1)
Copyright© TakerVersion1 2006
***************************
=======================================================================
DISCLAIMER
=======================================================================
This document was written entirely by me; hence I own all rights to it.
If
anyone wishes to reproduce this document please contact me.
([email protected]) If permission is given, by me and only me, I
request the
entirety of the walkthrough and this disclaimer remain intact. Since I
am the
creator and owner I can withdraw permission or request it be taken
down, NO
ACCEPTIONS!
=======================================================================
VERSION HISTORY
=======================================================================
Version 0.4: 7-3-06: Completed up to Level 3, Sections 2 & 4, parts of
5.
Version 0.5: 7-5-06: Completed Items Section and some more of the
Bosses and
General Walkthrough.
Version 0.7: 7-9-06: Completed through Level 6, edited Bosses
accordingly,
two levels left.
Version 0.9: 7-13-06: Completed the General FAQ and Bosses, The
Chronology
section to be up soon.
Version 1.0: 7-14-06: Everything completed, GO ME!!!
Version 1.1: 1-3-07: Edited the chronology (release dates),
because...well TP
is out and stuff.
=======================================================================
Table of Contents
=======================================================================
1: Introduction [INTRO]
2: Basic Information [BASIC]
2a: The Controls [2ABCO]
2b: Controlling the Links [2BCOL]

2c: Force Gems [2CFRG]
3: Walkthrough [WALK3]
3a: Whereabouts of the Wind [3AWOW]
3a-1: Lake Hylia [3A1LH]
3a-2: Cave of no Return [3A2CR]
3a-3: Hyrule Castle [3A3HC]
3b: Eastern Hyrule [3BEHY]
3b-1: The Coast [3B1TC]
3b-2: Village of the Blue Maiden [3B2BM]
3b-3: The Eastern Temple [3B3ET]
3c: Death Mountain [3CDEM]
3c-1: Death Mountain Foothills [3C1DM]
3c-2: The Mountain Path [3C2MP]
3c-3: Tower of Flames [3C3TF]
3d: Near the Fields [3DNTF]
3d-1: The Field [3D1TF]
3d-2: The Swamp [3D2TS]
3d-3: Infiltration of Hyrule Castle [3D3HC]
3e: The Dark World [3ETDW]
3e-1: The Lost Woods [3E1LW]
3e-2: Kakariko Village [3E2KV]
3e-3: Temple of Darkness [3E3TD]
3f: The Desert of Doubt [3FDOD]
3f-1: Desert of Doubt [3F1DD]
3f-2: Desert Temple [3F2DT]
3f-3: The Pyramid [3F3PY]
3g: Frozen Hyrule [3GFRH]
3g-1: Frozen Hyrule [3G1FH]
3g-2: The Ice Temple [3G2IT]
3g-3: Tower of the Winds [3G3TW]
3h: The Realm of the Heavens [3HRHE]
3h-1: Realm of the Heavens [3H1RH]
3h-2: The Dark Cloud [3H2DC]
3h-3: The Palace of the Winds [3H3PW]
4: Characters [4CHLZ]
5: Bosses [BOSSL]
6: Weapons & Items [WEAIT]
7: Frequently Asked Questions [LFAQZ]
8: Chronology [8CRON]
8a: Release Date [8REDA]
8b: Timeline [8TIMB]
9: Contact Information [CINFO]
10: Credits [LCRED]
=======================================================================
1: Introduction
[INTRO]
=======================================================================

Hello and let me start by thanking you for reading this FAQ. I am
putting a
lot of work into this and I hope you find it as helpful as can be. Now
I will
be doing a basic walkthrough of where to go, it will be written as if
it's
for a single person, so imagine it slightly different if you're playing
with
more than one person.
Now see the [TAGS1] next to everything on the Table of Contents? If you
wish
to skip right to that part highlight the appropriate tag and hit Ctrl +
C.
Then hit Ctrl + F and paste (Ctrl + V) the tag in. Hit enter and it
should
take you right to the tag, and its section.
=======================================================================
2: Basic Information
[BASIC]
=======================================================================
*** Controls ***
[2ABCO]
-GameBoy Advanced Controller-
D Pad - Control your primary Link, or your Links in a group
A Button - Use item, open chests, talk, switch items at a pedistal
B Button - Slash sword, (hold) spin attack
L Button - opens Formations window
R Button - Pick up item, (running) do a roll, jump while charging sword
Start - Pause
Select - Separate your respective Links
-GameCube Controller-
Analog Stick - Control your primary Link, or your Links in a group
A Button - Use item, open chests, talk, switch items at a pedistal
B Button - Slash sword, (hold) spin attack
L Button - Choose formation
R Button - Pick up item, (running) do a roll, jump while charging sword
X Button - gather Links

Y Button - separate Links
Z Button - Closes the GBA SP screen
C Stick - Quick Formations
*** Controlling the Links ***
[2BCOL]
Now based on how many players you have the Links will be controlled
differently.
-Single Player-
With one player you will mainly control the Green Link and the others
will
follow his direct path. They cannot attack like this but they are
immune to
damage. While in formations all four Links will do attacks and use
items in
unison, and thus they can all take damage. Your hearts will be for all
four
Links, so if one dies they all die. There are four formations
Cross Formation: In this pattern the Four Links will all stand in a
sort of
"t" shape back to back. You walk slow in this form, but you can attack
enemies from all sides.
Box Formation: In this pattern the Links make a box 2 by 2. They all
face the
same direction, best for close range fighting.
Long Formation: In this formation the Links will line up vertically
across
the screen. This is best when dealing with large groups attacking from
your
left or right.
Wide Formation: In this formation the Links line up horizontally across
the
screen, like the Long Formation. This is best when large groups are
attacking
from above or below you.
-Two Players-
In two players both people control two of the Links. Player 1 controls
Green
and Red Link, and Player 2 controls Blue and Purple Link. In this mode
you
have less formations to make, but you don't have to worry about
controlling
all four Links.

Long Formation: The Player's Links will line up one atop the other.
Wide Formation: The Player's Links will line up side by side.
-Three Players-
Three players is a lot different. Player 1 gets Green Link, Player 2
gets Red
Link, and Player 3 gets Blue Link. Anyone can take control of Purple
Link by
simply walking up to him and touching him. Like Two players there are
two
formations, but you must have Purple Link to do them.
Long Formation: The Player's Link will get in the Long Formation with
Purple
Link.
Wide Formation: The Player's Link will get in the Wide Formation with
Purple
Link.
-Four Players-
The main purples of the game, Four Players. In this each player
controls one
Link, and it's pretty obvious who gets who. In this each Link is on his
own
and there are no formations at all.
*** Force Gems ***
[4CFRG]
These are the equivalent to Rupees in Four Swords. You must gather
these as
you travel and you must have at least 2000 (combined total) at the end
of
each level to beat it. Gems can be found in bushes, chests, and enemies
drop
them. Some switches will make tons of Gems fall upon the players and
killing
bosses and Shadow Links also wields a lot of gems. I believe there are
at
least 5000 in each level, but it must vary.
=======================================================================
3: Walkthrough
[WALK3]
=======================================================================
+-------------------------+
| Level 1 |
| Whereabouts of the Wind |
+-------------------------+
[3AWOW]

This will begin after the opening cut scene. You have not seen the over
map
yet, however this level is just east of Hyrule Castle. This will be
pretty
basic, to begin, with no hard puzzles to solve right away. Well when
you're
ready begin.
***** Stage 1 *****
***** Lake Hylia *****
[3A1LH]
As you awaken you will see a giant owl, this is Kaebora Gaepora. Now
then, he
will tell you to head to Hyrule Castle, so wake all the Link' up by
hitting
L. Cut down the grass for some Force Gems, then head west. Here you can
learn
how to control the Links, but for that go to the Controls section so I
can
skip it. Go on, pass the giant boulder and hit the switch to get two 20
Piece
Gems. Get in the long formation and push the block into the water. Head
right
into the cave, get in the box formation and step on the switch. Grab
the
boomerang in the next room, leave and use the boomerang to grab the 20
piece
gem. So head north and kill all the Red Octrocks. Then approach Dark
Link. If
you can manage to kill him you get 100 Fore Gems. Use the boomerang to
get
the key, pick it up and enter the house. Head around to the back of the
house, have two Links pick up the boulder and get the Magic Rod.
From here, leave the house again and set the field on fire. (wow good
lesson
there!) After the field is burnt set the trees on fire that surround
the
boulder. Turn around and set the tree that is surrounded by rocks on
fire,
you'll get a lot of gems. Pick up the boulder and go down. Walk along
the
cave, climb the ladder and hit the crystal switch. Grab the gems from
the
chest and exit the cave. Head east, here we see Dark Link again. Now if
you
can reach and kill him super, if not then don't worry. Kill the
Octrocks and
set any fields on fire. Pick up the boulder to the south, set the field
on
fire. Then set the lone bush on fire to get a lot more gems. Go back to
where
Dark Link was and step on the switch to get even more gems. From here
move

the other boulder and head north.
Swim under the bridge, and lift the boulder to save…Tingle!!! (boo!)
Tingle
will talk for a while, then he'll fly away with his balloon. Now swim
out the
north-eastern way and grab 20 gems. Go back under the bridge, take the
lower
route out and grab the 80 gems total. Jump and climb the side out the
cliff
and enter the cave. Jump into the cannon and time is so you grab the
100
gems, land on the right platform. Jump down and hold right, open the
chest
for 50 more gems. Shoot back up and leave the cave, but enter the next
one.
Separate the team and enter the cave as one Link, shoot him out of the
cave.
As Red Link, cut the bushes and step on the switch. Go back to Green
Link and
grab the gems. Have another Link go back in the cave to grab the
boomerang
and the gems. Have him leave the cave, and bring your team back
together at
the top with L.
Head north and go around the pond. Stop at the waterfall, enter the
right
most cave. Break apart and step on each switch. Leave the cave and
enter the
middle door. Cross the bridge and open the chest for 100 gems and a
Heart
Container. Break apart, have Green Link stand on the switch. As Red
Link
cross the bridge and reassemble on the other side. Jump into the pond
and get
in the wide formation. Jump down the center of the falls, hope you grab
the
100 gem piece. Ok then, dive under and grab all the 20 gems, and swim
south.
Swim through here to grab 200 more gems, then go back north. Go into
the
whirlpool to get under the water. Swim as fast as you can and exit the
lower
area.
Now in this part of the cave get in the wide formation and push the
block
down. Once the platform appears step on it to cross the abyss. Grab the
100
gem on the way and that should be 2000 by now. Step on the switch and
open
the chests for a Blue Ring and some gems. Head up and leave the cave.
Break
all the rocks and bushes, step into the hole. Hold left and fall onto
this
safe area. However send one Link down to the right to grab some gems.

Reassemble, and drop down to grab a boomerang if you need to. Leave the
cave.
Get ready, get in the wide formation and stand on the bridge. Kill the
soldiers, step on the switches ahead to get a total of 220 gems and a
Heart
Container. Head west for your first boss fight.
*-* Boss: Squad Leader *-*
I think this is a joke. First take out the six soldiers, and then get
in the
Cross Formation. Do the hurricane spin attack to kill the leader. Get
into
the wide/long formation and grab the gems that fall. Head west break
Vaati's
barrier and you've won.
***Good job, but it can only get harder from here, this was easy. You
should
also now have at least 3 Force Fairies. You get 1 for every 1000 gems
you
have at the end of a level.
***** Stage 2 *****
***** The Cave of No Return *****
[3A2CR]
Wait for the cave door to open, than enter. Now then work your way up
to the
lamps and grab them. Walk around the room and break pots for gems, then
head
up. Light the torches and enter this room. Attack and kill Shadow Link
if
possible for 100 gems. Then light the two torches to get about 300
gems. Push
the right most block in the second row to move on. Go around the top
and push
the blocks to get near the fire. Separate and have each Link push the
blocks
in the corner. (I find separating is faster.) The fire will go out,
grab the
chest. Head right and open the door with the key you got from the
chest. Now
in here get in the box formation and push the block from the left side.
Head
down, kill the rat and push the next block left as well. Head up, open
the
chest for 20 gems and loop around. Push the block from the top. Get in
the
long formation and push the giant block now. Get in the box formation
again,
push the final block on your left to the right, and grab the key.
Unlock the
door and leave this room.

Now here separate and have Green Link (GL from now on.) push his block.
Continue to work GL through until he reaches the chest with 100 gems.
Stop
and switch to RL. Now RL's main two blocks do nothing, so have him
wait,
switch to BL. Have BL push his blocks until he reaches the block RL
couldn't
push. Go up and grab the chest, switch back to RL. Have RL push the red
block, freeing GL. Go back to GL, have him go by BL and push his block.
Then
send GL right to another green block and have him push it to the left.
Send
RL to where GL is, grab the chest to the north. Then push RL's block
rightward. Step on the switch under the pot to free GL and RL. BL
again, have
him go down and push his block near the red one. RL again, send him to
where
BL just was and push the red block down. Push PL's first two blocks
right
then head up to a lone purple block near the top. Push that to the
right and
head down. Push the block to the south downward, ignore the block to
his
left. Now we are done here, but a lot of that was pointless. Reassemble
the
group and push the blocks to the south so you can move on, enter the
door.
Now there are a lot of trap doors here, separate the group. First send
GL,
light the torch in the northwestern corner and walk in the middle of
the
room. If he falls walk into the teleporter to return and try again.
Once you
make it to the other side reassemble and take out the monsters. First
head
into the right door. Get into the long formation and walk down the room
breaking every last pot while avoiding the fireballs. Break every last
pot in
the room, it's worth the gems, plus you'll find a heart container. Grab
the
key, leave and head into the upper door. Head up and unlock the door,
but
wait. Head back down and light the torches. Separate and have GL toss
another
Link over the hole. With that Link hit the crystal switch and
reassemble.
Grab the blue ring, and the Arrows. Leave through the northern door.
Ok in here line yourself up against each torch, fire an arrow to light
the
ones across the abyss. Once they are all light get in the wide
formation and
unload on the bats. You'll hit the switch, get into the center of the
bridge
and get into the long formation. Kill of any surviving bats. Gather all
the

games and cross the bridge. Hit the switch again and grab the 100 gem
on the
left. Now go to the right, wait until this gem is purple then grab it
for 300
gems!!! This should make about 2000 gems. Enter the door and head down
the
stairs. This part sucks…so much. First go right, grab the chests. Leave
and
go left this time, grab the chests once more. Go right one last time
and head
up the stairs. Get in the long formation, pull the leftmost lever to
get a
heart container. Then pull the other lever to open the door.
*-* Boss: Shadow Link *-*
I find shooting either SL or his bombs with the arrows pays off, so
when he's
stunned hit him. Eventually his tunic will change colors, separate and
attack
with the Link with that color. Continue to work on SL with the arrows
and
attacks, in no time he'll go down. Grab the gems he drops and head into
the
door. Break Vaati's barrier, stage 2 is down.
***Right now it'd be good to have at least 4 Fairies, but if you never
died
it should be at 6 or 7. Remember when you die it takes one fairy, not
four.
The more, the better, you'll need them. Also if you haven't yet,
memorize the
formation controls, it will be faster later on.
***** Stage 3 *****
***** Hyrule Castle *****
[3A3HC]
Upon arrival head north and speak with Kaebora Gaepora. After kill the
lone
soldier and head north. Head to the left side, cut your way to the
boulder
and lift it up. Walk along the passage an head up into the next area.
Open
the chest for 20 gems, separate and toss a Link to the other side near
the
pots. Have him step on the switch against the back wall, switch to
another
Link to step on the switch on his side if you aren't already.
Reassemble and
leave the passage, don't miss the 50 gems on the way out. Push the
blocks out
of the way and hit the crystal switch. Break the pot in the
northeastern
corner for a fairy. Enter through the gate, get ready to fight a Squad
Leader

and his soldiers. Attack the leader, then kill the soldiers. Get in
either
the long or wide formation to do the most damage to the leader. Grab
the gems
he drops, then open the chests for 100 more gems and a Heart Container.
Continue north.
Head right and pull the leaver, enter the castle. Head straight up the
stairs
and through the left most door. Head west, when you reach the locked
room
push the lone block to the left up to open the door. Open the chests
for a
Blue Ring and 100 gems, grab the Magic Rod, then step on the switches.
Leave
and grab the lone gem that falls, reenter the room, head around the
back and
grab all those gems. Head back into the main room of the castle, go
through
the right most door. Loop around this room, head outside and go east.
Grab
the gems, enter this room from behind. Grab the arrows, fire out the
door and
it will hit the crystal switch. Jump down into the courtyard and grab
the
chests for 120 gems.
Continue until you reach some Bomb Flower. Pick one, throw it next to
the
crack and it will explode the crack. If you placed the bomb right it
will set
the grass on fire around the castle, revealing about 30 more gems.
Enter the
newly opened door. Ok then, climb up the ladder and fall into the
cannon. Aim
to your left, land on the uppermost platform and get the key. Fall to
the
lower platform and shoot out of the passage. Jump down and reenter the
castle. Jump down, head up and push the block to grab 100 more gems.
Head
back into the main room and open the locked door you've seen a few
times.
Head up the stairs then go north to a large open area. Right the three
soldiers then battle the mace man. (The wide formation works best.)
Once he's
dead back yourself against a wall, get into the wide formation if you
aren't.
Kill as many soldiers with arrows as possible, once you are overwhelmed
get
in the cross or box formation and go nuts with the sword. Once they are
all
dead grab any gems you see, this should make over 2000. Head north.
Head left and separate. See SL? Have GL follow him but walk along an
outside
wall, or else you'll fall into a well placed trap door. Have RL stand
where

SL was. Approach SL with GL, once SL jumps switch to RL and kill SL for
100
gems. Reassemble on GL's side. Get in the cross formation, and spin
attack to
hit all the crystal switches. Break all the pots once you head up, then
push
a statue onto it. Enter the room you skipped. Push the block, break all
the
pots and step on the right switch to open the door. Talk to the thing
here
and it wants to follow you.
Head back to where the path split and go right this time. SL will be
here,
but we cannot get him so wait for him to run away. Get in the wide
formation,
pull the lever and enter the door. Take the bombs and blow up the door
in the
next room. In the passage blow up the wall and talk to the other thing.
On
your way out grab any item you want. Head back to the center of this
area
with the force field. They will form the Great Fairy (the one who hit
on you
in WW) and she breaks the barrier after disposing of some soldiers.
Enter this room, kill any soldiers. Head left and break the curtains to
reveal a path. Kill the lone soldier and leave again. Step on the two
switches and return to the room you were just in. Kill the other lone
guard,
step on the switches outside and head north. Quickly get into a box
formation
and head left. A bunch of soldiers will ambush, however if you have the
arrows go nuts and they won't even reach you. Go in, head to the left
door
upstairs and grab the gem. Leave, open the chest grab the other gem.
Jump
down, return into the room and go the right to get 100 gems. Head up,
kill
the large solider when they come to life. Push the chair out of the way
and
cut the curtain. Now choose either side and try to gather all 500 or so
gems
on the way up. Once you are out of here separate and have GL jump down
to the
chest for a Heart Container. Switch to RL and reassemble. Head north.
*-* Boss: Phantom Ganon *-*
This is also very easy like past bosses. Simply get in the wide
formation and
send his energy ball back at him. Once he's stunned go nuts with the
sword.
This shouldn't take more than three rounds before he is dead. Enter the
staircase that forms after grabbing the Force Gems. Break Vaati's
barrier and
save the Blue Shrine Maiden.

***Well done, one down six to go. You should have at least 8 Fairies by
now,
but 10-12 would make you safe for the time being. The game will
continue like
this from now on, two levels than a dungeon for the third. Note that
some
levels will just be running around solving mysteries, like Stage 2-2.
Also
you should have a feel for controlling all 4 Links by now, but keep
working
on the formations.
+------------------+
| Level 2 |
| Eastern Hyrule |
+------------------+
[3BEHY]
This level takes place just south of Level 1. The levels won't be so
much
"traveling". Level 1 is a beach like level, two is a mystery level, and
three
is a dungeon. It's pretty basic and some themes will return from Level
1.
***** Stage 1 *****
***** The Coast *****
[3B1TC]
Upon arrival move the boulders and hop down. Throw the things blocking
you
out of the way and clear out the octrocks and crabs. Enter the cave.
Push the
block, gather some bombs and bomb the northern wall. Open the two
chests for
15 gems, then bomb the other wall and head south. Clear out the crabs
here,
enter the cave and grab the slingshot. Use the slingshot to clear out
the
Zoras, open the chest for 50 gems then go get your bombs back, after
head
east. Take out the Octrock, then bomb the wall which has a small path
of
grass in front of it, enter the cave. Move the block, bomb the next one
and
get the 20 gems, leave the cave. Head north, cut the lone bush and grab
the
100 gems that appear. Go back up and bomb the wall next to the one that
had
the bush in front of it.
Open the chest for 50 gems, then cut through the bushes and blast the
wall on

the other side. Get in the long formation, break all the pots and step
on all
the switches to make a bridge appear and 100 gems appear. Bomb the
leftmost
wall for 40 gems, then bomb the upper wall, also bomb the rightmost
wall.
Enter the right door, break the pot and step on the switch. Separate
and send
another Link around through the northern door and step on the switch
under
that pot. Reassemble and cross to the other side. Make your way around,
bomb
the door and leave the cave. Quickly attack and kill SL, you should be
able
to do this a lot more often now. Also lift the boulder and catch the
moving
100 gem. Enter the house, open the chest for a Heart Container, then
head
east.
Jump down, bomb the door with the grass in front of it, get the chest
for 50
gems. After you clear out the Big Octrocks bomb the other "grass door'
for
100 gems. Head south, pull out the rock thing surrounded by flowers for
more
gems, then head westward, yes westward. Grab the boomerangs and head
east to
sections. Ok quickly dive into the whirlpool, grab the 100 gems and
surface
on the other side fast. Leave, enter the right door for the slingshots.
Then
head into the left door to power up the Slingshots. Quickly swim back,
step
on the switch and take out every last Zora. Head eastward. Use the
slingshot
to take out the crabs from a safe distance. Gather the gems, and make
sure
not to get caught by the Gem-Like, head east again.
Enter SL again, now you must avoid his giant bomb. Enter the small cave
and
resurface once the bomb explodes. Now you must travel through the
grass,
while taking cover before the bomb explodes, do not be afraid to hop
into
near by holes. In fact fall into the first one and grab the bombs.
Resurface
when it's safe, drop a bomb to light the grass on fire, fall into the
next
hole. Quickly climb out the other side, set this field ablaze and take
shelter in the nearest hole. Dive into the last hole, blow up the wall,
grab
the 100 gems, surface when it's safe. Swim into the canon, fire and
grab the
100 gems, this should be 2000. Fire out when it's safe and head east.
Now,

cut your way through the field until you find a hole, jump in and open
the
chest that has a Heart Container. There are many holes, but that's the
only
one I care about. Fight your way through the field and find a hole
along the
ledge, once you fall in it, it will be covered again.
Head south, push the large block and enter the left door. JACKPOT!
Wrong! The
gems will become warriors, fight them then gather the gems. Head north
into a
maze-block cave. Here are the directions: Up, right, down, right, up,
left,
up left, up, right. Open the chest, and exit the door. Head east,
prepare to
fight a lot of Purple Octrocks. It works best to wait for their fire,
then do
the tornado spin in the long formation to make quick work. Step in the
four
switches. Open the four chests for 7 gems and a Heart Container. Head
east.
SL again, this time to dodge his bomb go under water. Step on the
switch to
get 100 gems if you want, when ready go north for the boss.
*-* Boss: Manhandla *-*
This guy is simple, but annoying. Separate and have GL attack the green
thing. Move GL to safety after it's gone and switch to RL. Continue
this
process until he is dead, do not hit the wrong color or the others
might re-
grow. Gather the gems and head north. Break Vaati's barrier here, and
that's
one stage down for Level 2!
***By now you have a feel for the formations. Start to learn how to
take out
large groups of enemies and practice separating to save time. You
should have
at least 10 Force Fairies, but 13-15 is the highest thus far. Get ready
for a
low action mystery level.
***** Stage 2 *****
***** Village of the Blue Maiden *****
[3B2BM]
I will say this now, this level sucks! I mean it sucks BIG TIME! It's
so
boring, there's almost nothing to kill, and too much of the GBA Screen!
Anyway when you are ready begin.
Upon entering head north into the village. Right now you are probably
like

"WTF?!" Cut the bushes on the left, step on all four switches to make
some
chests appear. Walk over to the small flower field and it will sparkle.
Head
back south and talk to the old man. Carry in the Moon Pearl back to the
flowers and speak with the owl. When he's done enter the flower path
and
transport to the Dark World. Gather the gems, then cut the bushes and
enter
the small fountain for some more. Head up, speak with the mage if you
wish
than enter the portal. Open the two chests for 120 gems. Head north, SL
will
ambush you by running, kill him and get the 100 gems. Head west, walk
up to
the gem between the houses. Enter the left house from the back, grab
the gem
and talk to the guy. Now we must find the four Seekers.
Leave, then push the fat lady out of the way in the block formation.
Enter
her house and grab the Moon Pearl. Head down, there is a gate, open it
then
enter it. Get in box formation, activate the switch and talk to the
guy. You
must reach the kid in 20 seconds, it's easy, do it now! Enter the house
and
grab the Boots. Then enter the Seeker's Guild for a Heart Container.
Make
your way back to the Moon Gate. Ram the fountain to get 20 gems, notice
the
line move. Ram something and quickly get to the left of the line. Speak
with
the Seeker (than the mage if you want), 1 down. Cut the bush, drop down
into
the hole and resurface at the other side. Ram the three for 80 gems and
head
east. Use the boots, grab the gem behind the house and speak with the
Seeker
on the right. Half way done…with the Seekers.
Head south, then west. If you want play the game for some gems, then
speak to
the Seeker in the southwestern corner. Head into the trees, speak with
the
mage and you'll get a Moon Pearl! Head east two spaces, drop the Moon
Pearl
and quickly kill SL. Pick up the Pearl, head into the northeastern
house and
grab the lamps. Set the field on fire, enter the first door for some
bombs.
Enter the last door and speak with the last Seeker. Talk to the mage if
you
wish, return to the Seeker's Guild. The Seeker will give you the
shovel,
return to where the last Seeker was. Also note, now you can dig up gems
that
are sticking out of the ground. Dig in front of the "pot house" near
the
flowers to find a hole. Return to the lamp house a grab one. Return to
the
pot house and drop down into the hole. Open the Moon Gate on the other
side,
then head south, do not enter the gate, there is a small area to the
south,
you must cut the bushes.
Step on the four switches; get the gem and the Pearl. Head north and
into the
gate you opened. Head into the northeastern house, talk to the blue guy
to
get more Hearts. Step on the box switch and enter door 1 for 100 gems.
Head
right to get 200 more gems, leave. Set the bushes on the left on fire,
enter
for 80 gems. Do the same on the right, talk to the girl and return to
the
Light World, make sure you have the letter! Head west then north, talk
to the
guy in the field. Take Roc's Feather and head into the long building.
Jump
over the hole, push the block and talk to the mage. Leave the house,
head
north past the Seeker to open up another Moon Gate, enter it. Speak to
the
witch in the field where the guy was that gave you the Feather.
Return to the Light World. Go to either the bomb house or the Seeker's
guild
and get some bombs. Enter the guys house and then go into the basement.
Blast
your way through the top half, then hop down and climb up the ladder.
Head
east. If you still have the Feather grab the green gem. If you still
have the
shovel dig up the purple one too! Grab the large purple one and head
eastward
some more. Head east even more, a Moon Gate will open, prepare!
*-* Boss: Shadow Link v2 *-*
This guy again! However now there are two. If they enter the Dark World
chase
them. After a while one will die, or the other's tunic will change
colors.
Attack the main SL with the corresponding Link. Once SL dies grab his
gems,
you should have 2000. Head north and break Vaati's barrier!
***This wasn't to bad, but there aren't a lot like this. You should
have all
the item uses down by now, as well as formations. If you cannot kill SL
without trouble by now, FIX IT! You should have at least 12 Force
Fairies,
but 14 or 15 is the best.
***** Stage 3 *****
***** The Eastern Temple *****
[3B3ET]
Let me open by saying this temple is very similar to the Eastern Palace
from
Link to the Past. Also the Dark World is now a reoccurring theme from
this
point out, there will be many more Moon Gates.
Anyway once the doors open enter the dungeon. Head right, get in the
cross
formation and activate the switches. Open the chests for 20 gems and a
key,
head left and open the door. Kill all the Stafols, gather the gems and
leave
this room. Ok this room is taken almost right of out ALttP. Separate
and have
GL make it to the end, then reassemble, this is the easies way to do
it. Kill
the ropes and enter the door. Here, attack SL and get the 100 gems.
Then grab
the slingshot, head left and separate to active all the switches, enter
this
room. Hit the crystal switches, then push the block and head up.
Quickly kill
the Wizzrobe to make the Stafols die, grab the Moon Pearl.
Leave, push the block again and head left. Now then in here open only
the
right chest, the left has a Big Bomb! After that drop down these holds,
all
on the left, and the top and bottom ones on the right. You'll get a
good
amount of gems, a key, and a Heart Container. Leave the room, push the
block
and head down this time. Head down and you'll trigger a Moon Gate,
enter the
Dark World, as only on Link. Ok grab on of the other Link's while your
in the
Dark World, through him to the small area just below the ball shooting
range
thing. (It's a lot of gems in the Light World.) Send the other Link
right,
dodge the balls. Gather the gems, head up and exit the Moon Gate.
Reassemble
and activate the switches. Enter the door, head down the stairs and
grab the
bow, old school style!
Return to where you just were and run to safety, using one Link might
be best
again. When you reach the other side get in the wide formation and
shoot the

targets, grab the Blue Ring. Head up, push the block and go right now.
See
the vine on the upper wall, cut them to open a path and enter. Shoot
out the
large doorway to make a bridge appear, grab the gems. Head right, step
on the
lone switch and enter this area. Jump down, kill the rats then go into
the
upper door. Kill the Wizzrobes and grab the Pearl, open the Gate in the
center of the room. Read right, quickly pull the four levels then
return to
the Light World. Grab the gems and bombs, leave this room.
Head around and enter the door to the right in this room. I advise
separating
again. Walk around the room and bomb every crack to reveal some nice
treasures. In the lower right passage you'll head along the path, bomb
the
cracks, grab the gems then open the chest for a key. Climb up the
ladder and
make your way back to where you come. Finish bombing the cracks.
Regroup is
necessary then lave this room. Head down and open the locked door. Get
in the
wide formation, break all the pots and activate the switches. Continue
running until you fall into a pit a the end. Get the chest in the lower
left-
hand corner, then head to the upper right-hand corner and walk up the
stairs.
Enter this door then head up for a nice small section. Bomb the left
side and
go that way. Cut the vines in the upper left side to open a passage.
Cut the
middle vine at the bottom, head down the bomb the left wall. Push the
upper
left block to make a square, return to the last room you were in. Cut a
vine
above the wall you bombed, enter the room again. Bomb the upper wall
and go
that way. Cut a vine on the lower right side, open the chest. Cut the
vine
above the passage you just took and go that way. Cut the entire upper
wall,
enter the rightmost door. Push the block, cut a vine and enter. Open
the
chest, cut another vine in the center of the right side and enter. Move
the
large block, cut the center vine. Grab the gem, the lamp, push the lone
block
and leave this area.
Light the four torches to get 200 gems, head right. Head up into this
room,
push the third block left and leave. Head up, go along this entire room
and

light all the torches to get some gems in the center. However to do so
enter
the upper door again. Head down and right, light the torches and open
the
door. Light these two torches, then separate and have the lone Link
light the
rest of them. You should now have 2000 gems, exit through the left
door. Go
up the bridge we made earlier, light the torches and enter the room.
Run
around and dodge all the things that get tossed at you. After the
mayhem grab
the gems and head through the upper door. Four SL will charge, let them
hit
the wall then attack them all from behind. Gather them gems then blow
up all
the bomb flower.
Before heading up pick up a bomb flower and bomb the left crack on the
left
wall. Grab the chest, then bomb the crack on the right wall. Open the
chest
for the big key, leave and head through the upper door. Jump down, kill
the
Wizzrobes before they rape you of to many gems. Kill the rats and
gather any
gems that fall. Use the big key on the chest for 1000, YES 1000
GEMS!!!!
Enter this door and prepare for the boss!
*-* Boss: Stone Arrghus *-*
Drop down into any hole and grab the Boomerang, then walk back into the
room.
Use the boomerang to pull the rocks off and attack them. The long or
wide
formation is the best here. Once they are all gone you can attack
Arrghus.
Box formation is the best now. Don't let him jump on you, and let lose
when
he moves around the room. Once the beast is dead grab his gems (should
be
5000 with us now) and enter the door. Break Vaati's barrier and talk
with the
Yellow Shrine Maiden.
***You should have a feel for how temples work now. Also if you cannot
kill
SL with little effort, than that's a problem, you suck. You should have
the
formations dam near memorized, so start using them more often. Also you
should have 19 or 20 Fairies, but 23 is the recommended, although you
will
rarely use them. I just use them to show off! When ready prepare for
Level
3…Death Mountain!

+------------------+
| Level 3 |
| Death Mountain |
+------------------+
[3CDEM]
Death Mountain is directly north of Hyrule Castle. Unlike Level 2,
there will
be no level like the Village of the Blue Maiden. However, it does have
a lot
of puzzles to solve, so be ready.
***** Stage 1 *****
***** Death Mountain Foothills *****
[3B3ET]
Upon entering the Yellow Maiden tells you where to go. Head east, then
north
up into the mountain. Kill the soldiers you encounter, then cut the
bushes
for some Gems. Lift up the big rock on the second cliff, go inside.
Jump down
and grab the 5 gem. Head up, left and round, grab the 20 gem. Head up
one
last time, grab the chest for 20 gems. It might be faster to split up
and do
it. Head back out, pick up the other boulder for 100 gems. Head north
into
the next area.
Be on your guard here and run around the field killing all the soldiers
you
encounter. There are a lot hiding, so be careful, grab the 300 gem that
falls. Kill the soldiers and enter the northwestern house, kill the
guards
and get the Bow. Or if you want the Boomerang head into the other
house. Head
north once you can. If you got the Boomerang use it to grab all the
gems,
then grab the Bow if you still want it.
Here there are two SL to kill. After you grab their gems pick up the
bomb
flower and place it to the right of the center of the wall under the
stairs.
(The wall is indented a bit) In here break the pots, have GL stand on
the
switch and send RL forward to grab the Bow, and have another Link
leave. Send
this Link outside. Another wall closer to the bomb can be blown up, do
it and
go inside. Shoot the switches, then gather the Links. Head south down
the
bridge to get 100 gems and a Heart Container. Exit through the north
door.

In this area take out all the Cukemen with the Bow. You'll find a hole
on the
ledge, jump down, break the pots and active the switches. Open the
chests for
the Bomb Medallion and 100 gems. (use the Medallion to kill any left
over
baddies in areas.) Go up the path and use the right staircase. Kill the
Gem-
Knight and get 100 gems. Jump down, pick a spot near this old guy and
jump
down to land near the boulder, pull it up and grab the 300 gem. Head
back up
to the old guy, jump as far right as you can and leave this area.
This part is tricky, make your way past the monsters and head east.
This part
is tricky. Push and pull the house (not a typo) until all the guys here
are
dead, then grab the hammer. Head south here to the cave; use the hammer
to
kill the monsters. Enter the cave, break the poles with the hammer for
20
gems and a Fairy, Leave, head north, break the posts in your way.
Ignore SL,
break the posts and follow the path.
Here kill Hionx, try not to lose a lot of gems. There is a pit if you
need
cover too. Grab the gems and head north, active the box-switch. Kill
these
three Hionx and you may lose a lot of gems in the process. The trick is
to
isolate them, also try using the bomb flower from the cave, your call.
Once
the brutes are dead continue northward. Run into the cave, do not even
encounter the enemies here. Get the Quake Medallion and use it!!! Enter
the
"portal" and just go north until you leave the Hebra's Hill. The boss
is in
the next area.
*-* Boss: Chief Soldier *-*
Your first task is to take out all the soldiers, remember that some
will
burst out of the mountain. Once they're all taken down, kill this guy
like
you've done so many times before. Gather the gems, head east. Before
breaking
the seal pick the boulder up and gather all the gems. Break the
barrier.
***This was pretty standard. The next level is annoying as hell, but
not as
bad as the Village of the Blue Maiden. From this point try and sustain
at
least 20 Fairies and learn what items to use in what situations.
***** Stage 2 *****
***** The Mountain Path *****
[3C2MP]
This level sucks, really. Anyway go ahead and speak with the Owl. (to
lazy to
type is name) and then go up the large staircase. HORROR!!! This area
is on
fire, quickly head north into the cave. Pick up the jugs and head up
the
stairs. Here toss the jugs to extinguish the fires. It's best to
separate and
do it Link by Link. Jump off the lower end of the cliff, enter the cave
and
get the Feather.
From here, leave and jump the holes, get more jugs from the cave.
Extinguish
the fire over the stairs, go down and grab the gem. Go get more jugs,
and
remove the fire blocking the final cave entrance. Head up the stairs
and into
the next area. Ignore SL and enter the first cave, extinguish the fire
outside and enter the middle cave. Head right, jump up to the second
level
and head right to grab 100 gems. Climb the ladder, stand on top of the
stone
guy and drop one level, grab the hammer. Climb back up the ladder and
leave
the cave.
Break the posts outside and grab the gem. Jump down the left side and
enter
this cave. Head to the top left corner, smash in the poles to get about
150
gems, then head down the stairs in the middle of the room. Go outside,
grab
the bomb, run back in and blow up the wall to get some water jugs. Use
these
to extinguish the fire, then jump down and reenter the middle cave.
Grab the
bombs at the top level, and leave the way you cam in.
Enter the right cave, blow up the wall for 120 gems. Go back to the
middle
cave and grab the hammer. Go back to the right cave, go upstairs and
leave
the cave. Break the post, jump down and grab the 100 gems, enter this
cave.
Push the boulder up ahead, then when it falls into the pit toss one of
the
other Links to get the gem. Push the next rock up so it goes around to
the
other pit. Push the last boulder so it goes in the pit and grab the
fire

pots. Head all the way back out and send one Link down to the first
area
again. Toss the fire pot at the triangles to get some gems. Head up, go
back
to where the water jugs were and go up the large staircase.
Now in this area use the pots to ignite the fuses, and do this until
you get
the white pot to explode, get the gems. You also need to blow up the
top left
black pot. Enter the cave to avoid the explosion. Now, grab the
boomerang
from the cave and head up the cliff. Jump in the hole and get the Lv2
Boomerang, head east to the next area.
Get in the wide formation and make your away across the cliff, get as
many
gems as you can too, they respawn. Do this until a rock falls into the
hole,
and go east. Repeat in this area, then head north. Enter the house, get
the
hammer and break the posts outside. Move the house, enter the cave and
get
the pots. Use the fire to get all the gems in this area, get all of
them!!!
There's about 500 in all, it should give you at least 2000 total. Enter
the
small hole that appeared in the lower left corner for the Blue
Bracelet. Go
east to the next area.
Kill the two SL in this area, then power up the hammer and slam the
ground.
Hit any mounds that aren't under fire until you find a key. Go in the
cave,
use the key and remove all the fire with the jugs. It should take five
for
six trips. After, use the hammer on any more mounds that appear. Gather
the
gems, grab the boomerang from the cave and go north. One of the mounds
had a
Heart Container!!! Use the boomerangs to get the gems, go north.
Here we must battle four SL, but they are not the boss. Cut them down
like
we've done before, and gather their gems. Once the leader is dead head
north,
grab any item you wish from the houses. If you still have the
boomerang, use
it to grab some gems, and continue north. Talk with the Owl again and
head
east. Keep going until you reach an area with two caves. Enter the
first
cave, get the hammer, leave and... boss fight!
*-* Boss: Helmaroc King *-*

First, it might be best to separate for a while. Use the bombs to hit
the
King out of the sky, and he'll crash into a cave. Run into the cave and
wail
on him with the hammer until he leaves. Continue this until his mask is
gone,
should take no more than three times. Gather the Links now and hit him
out of
the sly with the bombs some more. When he lands go nuts on the giant
bird,
use all Four Links to attack. Do this until he dies, you should have to
hit
him out of the sky no more than six times. Gather the gems and exit the
the
east to leave the level.
***Many future levels will have a theme like this, if you've noticed,
it's
usually the second Stage. Try and maintain 20 Fairies and you're good
to go
in the Tower of Flames.
***** Stage 3 *****
***** The Tower of Flames *****
[3C3TF]
This level is much easier than the Eastern Palace, because it's more
straight
forward. Upon entering break the two pots near the fire jets, then when
the
stop step on the switch. Grab the Slingshots that appear. Shoot the
crystal
switches for a some gems, then charge up and shoot a crystal far to the
left.
Head up and pass the first set of jets. At the second one, break the
pots and
active the switch near the jets for a 50 gems. At the third jet do the
same
for 100 gems. Head upstairs.
Ok, here head left, down, left, down, right, right, down, right, up,
up,
right, up, left, and get the boomerang. Use it to grab any more gems
and 100
ones that move. Break some pots for more gems, then exit right. In here
kill
the annoying blue things the Boomerang is good for stunning. Break all
the
pots, in the right bottom corner find a switch, open the chest for a
Heart
Container. Exit north of here.
Ok third floor, get on the platform and exit left. Separate and toss
RL over
the pit, switch to him and regroup. Break the pots and separate to
active the

four switches. Do your best to dodge the pots and tiles, then grab
Roc's
Feather. Exit, head down and hop the gaps. Grab the two chests for a
total of
150 gems, then go north.
Fourth floor! Kill the two SL you'll encounter then break the pots
between
the jets. Active the switches on Box Formation when the stop. Now head
to
either row of pots on the top or bottom and jump in a hole under one of
them.
Climb either staircase to the second floor. Go up the stairs the right
most
hole, jump down for a Heart Container. Head back up to the hole area,
jump
into the hole just south of the top right statue get the chests for a
key and
20 gems. Leave this area, jump the gap near the jets and exit to the
left.
Here you must battle a fire-mace knight. Simply jump over the ring of
fire
and do a down thrust, after three or so he'll be good and dead. Exit to
the
north.
This area is trickier. Separate and sent GL down to get the bow. Have
RL run
down and find the two switches near the flames. Shoot the left one,
quickly
switch to PL or BL and grab the gems. Go back to RL, shoot the right
switch
and use the crystals to move the flames, and grab the gems. Gather at
the end
and go right. Separate again and send GL ahead. Shoot the crystal to
make the
flame go counter-clockwise. Shoot the switch off to the right, then
shoot the
crystal to make the flame go clockwise again. Grab the gems, change the
flames direction, gather, and exit north.
Board the platform and shoot the switch if you need to. Get off at the
right,
break the pots, active the switches, open the chests for 120 gems.
Break the
pot, go down and get the bombs. Bomb the wall for the Blue Bracelet!
Jump
back down and grab Roc's Feather. Use it to get the floating gem, then
exit
left. (You should have 2000.) Here you will battle four SL again. Take
them
out however you like. I like to kill the leader last, the others tend
to
commit suicide so you can't get their gems! Once SL is taken care of,
exit
north.

Last floor! Head down and jump to the left. Open the chest and hit the
switch, grab the pots if you want some more gems. Jump right, hit the
switch
then go up to the Goron. Break the pots, active the switch under the
top left
and grab the chest for 100 gems. Go down and jump left. Break the pots
near
the jets and get in Box Formation for the switches. Hit the last
switch, then
grab the Bombs. Exit to the right.
*-* Boss: Dodongos *-*
This is a classic 2D Zelda boss battle. It's best to separate and use
just
one Link. Simply patrol each Dodongo and when he breaths in toss a
bomb. Do
this three times to each one, grab the gems and head north. You must go
east,
do so and head outside to talk with the Owl. Go back inside, head up
and
release the Green Shrine Maiden.
***We are now done with Level 3, 5 more remain. Now we are headed back
to
Hyrule Castle, but by way of the Fields to the south. These areas are
very
different, but are not big problem solvers. (Well Stage 1 kind of is).
I hope
your ready!
+-------------------+
| Level 4 |
| Near the Fields |
+-------------------+
[3DNTF]
The first two stages are similar in the fact that they are both
straight
forward. However, Stage 1 involves a lot of running around near the
end,
Stage 2 doesn't. Stage 3 is a lot like the Gerudo Fortress or the
Pirate's
Fortress in OoT and MM.
***** Stage 1 *****
***** The Fields *****
[1D1TF]
This level is very, not-fun, IMO. Anyways, upon entering speak with the
Green
Shrine Maiden and head north. Avoid the flames and speak with the girl,
this
is Malon. Take her east, make sure the flames don't kill her. It may be
best

to split up. Here be wary of any guards who try to ambush. Follow the
path,
slay guards as you go and head east.
Malon will go and speak with Talon here. After head south into the cave
and
get any item you want. Go back out and head east. Approach the stone
tablet
and toss the carrot on the ground. Head back to the western area and
jump
over the fences. Break the grass and rocks to find holes. Fall in the
hole in
the middle area, break the pots and hit the switch. Get the Heart
Container
and gems from the chests, head back eastward.
Here get on horseback and go south. Continue to go counter-clockwise in
a
circle to gather a lot of gems. When you want, head north, but you
should try
and have at least 500 gems before going north. As long as you collect
carrots
as you ride you can blaze a trail northward. Blaze northward, then head
east
for a few screens, stay on the horses as long as you can and kill as
many
soldiers as you can. Soon you'll cross a bridge, get in the wide
formation
and cut through the enemy lines. You will turn east into a canyon, make
your
way through that too, make sure to grab many carrots. You'll reach an
area
with 10 or so soldiers, kill them and turn northward.
You'll lose the horse and the rain stops. Cut all the grass until you
find
four switches, then active them all at once. Grab the gem and go north.
Head
west and enter the house. Get the key and go back east, enter the shed.
Grab
the Pegasus boots. Leave, get in the Long Formation and pull the log
out of
the cave, enter it. Break the barriers with the boots and read the
tablet,
head west afterwards. Go south if you want, your goal is to uncover
four
switches, hit them all at once, and gather as many gems possible before
it
explodes.
Anyway in the area with the house (where you got the key) cut a small
bush,
jump down for 51 gems. If you get in the Box Formation you can move the
giant
log, jump down in the hole and get the Heart Container. Go north, push
the

log going north to south, left and jump down for some gems. Go back up
and
push the other log down, drop down for some more gems and leave. Go
east.
In this area kill as many SL as possible and gather their gems. You'll
see a
huge green gem that you can't reach, it's worth 1000 and good news,
Tingle
can't pick it up! Pick up the large log and go north. Move the boulder,
go
down and get the Lv2 Boots. Use them to run around this cave and get
the
chest. Leave, head north over the holes for 100 more gems. After head
south,
west and north.
Kill the SL here and again, gather their gems. This should make 2000.
Move
the log out of the cave and go in. Head downstairs then up the large
ladder
to the left. Pull the log out a little bit and enter the cave above
you.
Leave GL behind and send RL back out and to where you fought the two
SL. Have
him run over the large cap and enter the other cave. Gather and go
downstairs. Go down the stairs and step on the left switch. After, go
out the
left exit and head north.
Enter the cave here and head left. Grab the key and use it in the door.
Go
right to get 100 gems under the boulder, then enter the door you used
the key
one. Grab the bow and leave, head back to the cave area. (where you
moved the
logs. Jump down, climb the ladder and fire at the switch. Walk across
and
shoot up and out of the cave. Head south. Now we need to kill all the
Gohma,
you might want to get the Lv2 Bow too.
There are three, after they are killed, talk to the guy who gave you
the shed
key. Now take your new shovel and get the Lv2 Shovel. Head to the 1000
Gem
area and cut up all the grass. Walk around and when you head a noise
dig in
that area. Do this until you find the right hole. When you do, climb
the
ladder and hit the switch, grab the chest then jump into the canon and
fire
out. Grab the 1000 gem and head east.
Now go north from here and a battle will begin. Grab the bow from
inside the

house and clean house with the soldiers. Go back in the house and grab
Rocs
Feather. Use it to kill the mace knights. After a General will appear,
kill
him and all his knights too. When this is done, go north.
*-* Boss: Blue Stafols Knight *-*
Right when it starts kill off the two Stafols who patrol the area,
avoid the
big dark shadow. After they are dead you'll enter the Dark World. Kill
this
guy like you would the Generals and in no time he'll go down. After the
scene
occurs you'll have the Blue Royal Gem (Water Element), go east and
break
Vaati's barrier.
***In addition to saving a Maiden in each level you'll also get a Royal
Gem.
You will always find these, usually in the first level too.
***** Stage 2 *****
***** The Swamp *****
[3D2TS]
This level is refreshing...unlike the last two Stage 2 levels it is
incredibly easy and you don't have to go in circles. Upon entering
speak with
Keapora, grab the near by gem, and then head north. In this area run
into the
caves for safety. First, bomb an area just left of the main cave, enter
and
grab 200 gems, wait the bomb out. After that bomb the wall just left of
the
center, it is lined up with the first wall. Go in, when the SL bomb is
gone
blow up the far left corner and go in. Grab the fairy in this cave and
leave
again. Bomb the very middle of the cliff and go in. Head through the
cave,
grab the bomb and blow up the wall just left of this cave's exit. Go
downstairs to get Roc's Feather, exit to the west and get to safety.
Head south, move the giant boulder and go down. Head through the cave
and
exit when you can. Hop across west, then north, then east. Lift the
boulder
and go down. Break through the blocks, then climb the ladder to the
left.
Break the blocks then grab the chest for 100 gems. Jump down one more
level,
break more blocks and get the Heart Container. Use the cannon to leave
and go
west.

Go north, then jump on the moving pad. Try and grab the gem while it's
purple, continue west then south. Jump on this pad, grab the 100 gems
and go
west. In this are kill the General and his soldiers. Grab any gems they
drop
and continue westward.
Now head south, get on the pad and wait for it to launch you across.
Cut the
grass and leave two Links on the switches. Now you must send the other
two
Links to the middle section to the north, where two more switches are
hidden
under a bush. Grab the gems that fall, go for the Blue first, it's more
important. Afterwards go north.
There are three switches here. First separate and leave GL on this one
here.
Take RL, have him go east and down onto that switch, then send BL to
the one
above this. More pads have appeared now so send PL to the one on the
top left
corner. After that head up to the 200 gems, grab it and head north.
Head
around to the bomb flower and separate. Send GL around to the right
entrance
to the cave. Go in for 100 gems and a Heart Container. Switch to one of
the
other Links, regroup and bomb the wall above you, go in the cave.
Take a bomb into the cave and bomb the wall here. Go up the stairs,
head left
and up, then down the ladder. Grab the chest for 150 gems and then
leave. Go
north. Now it begins to suck, ignore the poes and evil rocks of doom
and push
the third grave to the left in the first row. Go down for the bow. Jump
left
and down thrust the ground to break the pot. Hit the switch and grab
the bow.
Shoot the switches and leave this area. Head around and go south then
east.
Kill SL and dodge the graves of doom. Push the middle grave and jump
down.
Head up and move the blocks. Hit the switches and go up some more. Go
left
and fire at the switches. He back to the main room and then go right.
Grab
the key, return to the main room and use it. In this room break the top
rightmost pot, active the switch, try and avoid the trap. Head left,
this can
be tricky, but kill off the bats while avoiding the trap. Once they are
dead
cross the bridge and go down. Fire at the switches and grab the key. Go
back

up and right, use the key here. Break the pots and avoid the traps to
get
some chests with a Heart Container and some gems, continue right. Push
the
second to left block on the top to open the door, get the Moon Pearl
from the
chest.
Go into this room and leave the cave. Head back west then north. From
here go
west to find the Moon Gate, enter the Dark World! Head north and leave
via
the other Moon Gate. Enter the house and get the Power Bracelet. Now
head
south, but the bushes to active four switches to kill the Poes. Go
south and
around to the large tree. Lift it up and go east. Get to the lamps in
the
southwest corner. Pick up some trees here to get 2000 gems and continue
east.
*-* Boss: Big Poe *-*
First kill the small Poes, they are just annoying. Now you must find
the
switches and lure Big Poe into the light, much like you did in Wind
Waker.
Once you can hit this guy do so. Repeat until he's good an dead. Gather
the
gems and head north, break the barrier.
***No post-stage advice or commentary here.
***** Stage 3 *****
***** Infiltration of Hyrule Castle *****
[3D3HC]
This is a level I find rather fun, but that's just me. Jump down, swim
across
the stream and enter Hyrule Castle's gardens. Cut the bushes for gems
and
stuff, then go north. Break the pots and get caught by the light, just
do it!
Break the pot and jump down into the hole. Hit the crystal switch and
send GL
across the bridge. Have RL hit the switch so GL falls next to the
chest. Get
the gems, get the bridge up again and leave. Get the boomerangs and go
back
to the first cell. Toss the boomerangs at the pots below you, get the
key and
leave. Kill SL if he hasn't ran away yet. Toss the boomerangs north to
hit
the four switches. Enter the cell and get the hammer. Leave and go
outside.

Head west to get some chests and gems, avoid the lights. Head back to
where
you got caught, break the posts and jump in the water. Swim west and
grab up
any gems you see. Get up to land when you reach the dock. Try and kill
the SL
before they break the pots, or else, dodge the lights. Head down and
around
to find two chests with, 100 gems and another Heart Container. Head
back to
where SL was and enter the castle.
Break all the pots and kill all the Poes to get a lot of gems, you
should
have over 1000 by now. Head up. Head down and around towered the locked
door.
Head around so you can push the block down, grab the key in the chest
and
open the door, Head up, get in the Long Formation to pull the level and
exit
to your left. Get in the Wide Formation and pull this lever to get a
Moon
Pearl. Head back to where you got the key and open the Moon Gate.
Make your way north, grab the Bow and open a chest for 100 gems. Exit
back
through the Moon Gate and head right. In here shoot switches to active
paths.
So as I say, shoot the lower switch and go right. From here go right,
up, up,
right (chest), left, down, right, right, down, right. Then head up and
shoot
at the switch near the chest for the key. Exit this room. Fire through
all
the torches to make a bridge and head down and back outside.
Get caught again. Break another pot here and jump down. Hit the switch,
get
the chest and hit it so the bridge is gone. Hit the other switch and
leave
this area. Head down, then west and go into another hole. Pass through
the
passageway, then jump down into the courtyard. Open the chests for the
key
and some gems, then go back into the torch room. Head north and use the
key.
Grab the lantern and head back into the torch room. Use it to light the
torches at once (Cross Formation) and exit north. Light the torches and
exit
north.
*-* Boss: Big Poe "Round 2" *-*
Yep, he's alive and well. Light the torches and he will blow them out.
Relight them until he is venerable and have a field day. When he
inhales you

attack the green thing. (By the way this thing ran away after the first
Poe
fight) Continue until he is dead. Gather the gems and you should have
2000
now. Go north and break Vaati's barrier, free the White Shrine Maiden.
***Three more Maidens and three more gems. Now we go to the Forest, the
Lost
Woods, the Dark World itself in Hyrule. This world is not easy, I hope
you're
ready. We must get the Dark Mirror.
+------------------+
| Level 5 |
| The Dark World |
+------------------+
[3ETDW]
This level takes place in the forested region in northwest Hyrule. Like
ALttP, this area contains the Lost Woods and Kakariko Village. Those
are the
first two levels, and trust me, they are annoying. The final level is
obviously the Temple of Darkness, which was not present in ALttP.
(However
some consider it "Thieves Town" due to the location)
***** Stage 1 *****
***** The Lost Woods *****
[3E1LW]
This looks a lot like the Skull Forest in the Dark World from ALttP,
that's
because this region of Hyrule has been taken by the Dark World. After
speaking with the White Maiden head west. Be careful of the Floor
Masters and
head south then east to kill the two SL. Return west then go south
twice.
Kill the SL here and step on the switch. Kill the Wizzrobes as best you
can
and grab the key. Enter the skull and open the door inside, grab Roc's
Feather and leave.
Now head north, jump over the gap and head east. Kill the SL and get in
the
Cross Formation. Get in the middle of the switches and spin attack to
hit
them all. Grab the chests for some gems and a Moon Pearl. Head west,
north
and east. Open the Moon Gate and enter the Dark World. Grab the lantern
and
return to the Light World. Burn the stumps, get the chest and go west
twice.
Burn the northern path and go north, avoid Floor Masters.
Go west from here and go south. Burn more stumps here to get to a
chest, go
south some more. Turn east then go south, burn the stumps. That
should've
uncovered some switches, activate them and open the two chests for some
gems
and a Heart Container. Go north, west then south again. Enter the Moon
Gate
talk to the scrub and remember the items. (I think they change). Go
gather
the items, jugs and fire pots can be found back north, east and south
in the
area that you burned.
Once you get them give them to the Scrub in the Light World. Go see the
one
in the Dark World and get the Power Bracelet. Light up the tree near
the Moon
Gate for some gems, then go north. Move these trees and go west. Try
and
ignite the field if you can, then hit the four switches and gather the
gems,
it should give you 2000. You should've uncovered some holes, fall in
the
upper one and grab the Bow. Leave, go in the lower hole and grab the
chest.
Leave and go north. Kill the two Gohma and go north.
*-* Boss: Queen Gohma *-*
Kill her like you would any other Gohma and go east, you aren't done
yet,
even though this was the boss.
Get the key and follow my directions: Go west, south, south, east,
north,
north, east, north. Enter the skull and open the door. Get the shovel
and
leave. Dig a hole between some flowers and jump down for 250 gems. From
here
so south, west and north. Kill SL and get his gems. Kill the Cukemen
here
with bushes and enter the skull to get the Lv2 Shovel.
From here go south, east, east and north. Dig in the northwest corner
until
you find a hole, jump down, and get the gems. Go to the northeast
corner and
find another hole, jump down. Follow the path and go east. Avoid the
big bomb
and jump into the hole when you need cover. Dig near where SL is to
find your
hole and jump down. Follow the path and exit north. Break Vaati's
barrier and
the level is done.

***Note that the next level is just like the Village of the Blue
Maiden.
There is less running around, but the same idea.
***** Stage 2 *****
***** Kakariko Village *****
[3E2KV]
As I've said, this level is a lot like the Village of the Blue Maiden,
it
just has less walking around in circles. Head north to speak with
Kaepora,
enter the village. Head west and dodge an SL ambush, then move the
boulder.
Do not go down yet, enter the left house, form the back. Dodge the
Thief, get
the Heart Container in the chest and go north. Jump in the hole, time
to get
lucky. Drop down these holes, right, right, left, right, left, right,
and get
the bombs.
Enter the house and bomb the back wall. Kill SL (you might not be able
to)
and get the chest. Take a Cucco and go east then south, enter the left
house.
Give it to the man, open the block and take the chest. Go east, try and
kill
the SL here and enter the house. Talk to him and get the Shovel. You
can find
a hole to the left of the house, you'll need to go down there later, gt
the
bombs back.. Go back west, and reenter Cucco-Man's house. Go to the
chest and
go up, get the two chests for 150 gems and the Power Bracelet.
Move the tree here for some gems and go south. Find a path going down
and
bomb the wall, you'll need to come here later. Head north twice. Move
the to
the left of the house and enter. Talk to the guy, you must capture all
ten
thieves. Head back to any underground paths, ect, you've found for some
thieves. Others are around town. Simply pick them up and toss them into
the
pen near this guys house. Under a large tree in this area you can find
two
thieves. Head west, then south. In this area you can find four thieves.
In the entrance you can find another thief, and one is hiding in the
hole you
dug up. That should make all ten, talk to the guy in the house, grab
the
chests for 355 gems, then go north. Make your way around to the leftern
boulder by going counterclockwise and then go down. Bomb the wall, hit
the

switch and get the fire rod! Head north from here. Destroy every tree
to get
a lot of gems, you should have well over 2000. Light the four torches
and it
will rain!
Go south, grab the chest for a Heart Container and continue south. Head
west
and south again, enter the right house and go out back. Find the hole
and
jump down for some gems. Go east twice, to the hole area, and go east
again.
Here you must kill Four SL. If they run into holes you need another
Link to
stand on the switch to light the caves. Kill them off until the leader
is
dead and gather the gems.
After they're gone continue eastward to the river. Go with the current
and
let it take you downstream, get any gems you might need or want. As you
go
further downstream it gets trickier, and not that the current usually
flows
south in all areas. Eventually it stops, swim through here and dodge
the Zora
fire. The current starts up again, continue to follow it. It kicks up a
lot,
so be careful. Head east after the rain stops, boss battle!!!
*-* Boss: Green Stafols Knight *-*
This battle is just like the BSK. Kill off the two guards then enter
the Dark
World. Dodge his attacks and hit him from the side when you can. After
the
battle, speak with him to get the Green Royal Jewel. (Wind Element) So
it
seems Vaati isn't working alone after all...Head north and break
Vaati's
barrier.
***2 Jewels and 3 Maidens Remain, 4 Levels and 1 Stage all together.
Now the
story begins to unfold, who is the man working with Vaati? Didn't the
Deku
Scrubs mention Ganondorf? Hm...all will be revealed in the Temple of
Darkness!
***** Stage 3 *****
***** Temple of Darkness *****
[3E3TD]
Enter the Temple, this will be a lot like the Eastern Palace. Hit the
switch
and go north. Grab the bow and hit the other switch. Grab the chests
for 105

gems. Go north into the next room. Kill off the bad guys with the bow
and
enter to the right. Hit the crystal switch and go north and into the
other
door. Hit the switch and break the pots. Hit the switches, leave, grab
the
gems then go north.
Do not open this chest, head left and into this room. Kill the Stafols
and
get the key. Go around to the right and use it, the chest has 50 gems.
From
here go back into the Stafols room and go down the stairs. Get the
hammer
form downstairs. Now jump down into the pit and kill the Ropes. Open
the
right chest only, then break the left pot and jump down. Go get the
chest and
heave back upstairs and around back to where you fought the Ropes. Go
down
the stairs here.
Clear out the Stafols and go get the bomb flower. Use it to destroy the
two
walls in the square "room" here to the left. Now we can move it! Push
is so
it covers the hole here, walk thought it to reach the door going south.
Head
left, push the blocks so the door opens. Head right, get in the Cross
Formation to hit the switches and leave. Use the statue to destroy the
spikes
to the right and head down.
Break the posts and get on the platform. Pull the levers at once to
open the
door. Go up now and through the opened door. Kill the Mace Knight here
and
gather the gems, head west. Kill the annoying blue things and get the
Moon
Pearl and some gems out of the chests, go east two rooms, and to the
southern
door. Kill your way right and get the Heart Container from the chest.
Head
into the upper door now.
Open the Moon Gate here and enter. Get the Slingshot and hit the first,
middle and last switches. Get the hammer back and return to the Light
World.
Break the posts and head north. Enter the Moon Gate here and get the
chest.
Leave and jump down. Kill the enemies here, the hammer is very
effective.
Break the post here and enter the Moon Gate. With all the enemies dead
get
the chest with a small key in it. Jump off as far to the left as
possible and
open the block. Exit to the Light World and go west.

Hit the switch and enter the left door, get the Boots. Go in the right
door,
break the block and get the Boomerang. Go back and get the Bow (just do
it!)
and hit the switch across the gap. Shoot the switch to the south and go
get
the Boomerang again. Toss it at the last switch, then go get any item
you
want. Gather the gems to the north and go south, ignore the chest to
the
west.
Get in the Box Formation, break the pots and hit the switches. Get the
key
from the chest and return north. Now head west into the locked room.
Kill the
Stafols and hit the switch. (so it's blue). Get the two chests outside
the
pit. Head back east, then south and west. Get the four chests for 76
gems,
and it should make 2000. Head east then north twice. Kill SL and return
south. Go into the item rooms and get the Lantern.
Return south, west and west into another room. Light the torch to the
north
and go down. Light the four torches and jump into the hole. Head
southeast
for 100 gems. Go north for a key, then west for a Heart Container. Go
south
to exit. Leave this room and go east, north and west. Push the right-
most
block up and enter to the north. Kill all the Wizzarobes and do it
fast, some
will steal gems. Open the door to the west and go that way.
If you can't get by head east and south to make the switch red. Head
northwest, lighting torches as you go. Make the switch blue and grab
some of
the chests. When every torch is light go northeast and down the stairs.
Toss
the oil pots at the gem to get it. Then stand where the pots were and
push
left. A path will appear, after that push north, you can see the spot
to push
from on the ground. Get the Moon Pearl and go south for the Gate. Enter
the
Dark World and gather the gems.
Exit to the left. Kill the first set of annoying blue guys and grab the
chest. Back into the wall and let the next set walk on the narrow path.
Kill
them all off, and then head north. Hit the switch to get 250 gems. Get
hearts
from the bottles, then go north for the boss!
*-* Phantom Ganon's Revenge *-*

This time around, there are four Phantom Ganon! The fakes will fire
colorless
balls that will disintegrate on impact with the Four Sword. My way is
to get
in the Wide Formation and go nuts until the Real Phantom Ganon gets hit
by
his ball. Go nuts when he goes down and repeat until he's dead. Gather
the
gems and go north.
What's this?! The Dark Mirror has been taken!!! It seems that's how
Shadow
Link came into being! Head west and release the Red Shrine Maiden. Her
and
the White Shine Maiden! Who is Ganon and has he stolen the Dark Mirror?
It's
time to go to the Gerudo Village and investigate.
***1 Maiden and Zelda remain. Where is the Purple Maiden? and whole
stole the
Dark Mirror? It's call coming together now. Level 6, is just ahead!
+---------------------+
| Level 6 |
| The Desert of Doubt |
+---------------------+
[3FDOD]
This level takes place in the southwestern corner of Hyrule, in the
same
location of the desert in ALttP. The only significant changes is the
terrain,
the Gerudos and a Pyrimad!
***** Stage 1 *****
***** Desert of Doubt *****
[3F1DD]
First head north to the village and talk to some of the Gerudo to learn
about
Ganondorf and the Trident of Power. Head to the northwestern tent and
speak
with the woman. Speak with the gatekeeper and go north into the desert
after
you're all done.
Now, if you go the wrong way you get sent back. Remember, that if the
wind
blows from the east, you must go east. In this first area it is, but we
can't
get that way. Head up onto the cliff, move the pyramid out of the way
and
enter the cave. Head down stairs and get the gem. Head to the far right
to
get the Boots, break the wall here. Go down and get the chest, head
back

left. Go to the ladder in the middle of the room and leave. Kill the
monster
here and head east.
Now you must go north. Kill the guys so they enter the Dark World, go
into
the cave. Run down the fourth path to the left. Push the block and get
the
chests. Take the Pearl and leave. Find the Moon Gate, enter the Dark
World.
Kill the Stafols, there are 5 all together. To kill the other two on
the
other side you must go in the Moon Gate to the northeast. Kill them in
the
Light World and do the same in the Dark World. After they all die, go
north.
We must go east again. Kill all the SL in this area and get their gems.
Kill
the remaining monsters and go into the cave. Break the blocks on the
right
and jump down for 50 gems. Pick the boulder up and go downstairs. Push
all
the blocks out of the way (must separate) and hit the large switch.
Kill the
enemies, enter the left cave for 100 gems, the right for 1, and the
middle
for the Lv2 Boots. Go back upstairs, run across the gap to the north in
this
cave to leave. Get the gems if you want. Run across the giant hole to
the
east and exit this area.
Here we must go north. Kill all the enemies here to make it easier for
you.
After that, pick up the boulder, kill the Teketies and get the gems.
Fall
into the pit to the north for some more gems. After that, run over it
and go
north some more.
You'll enter another village, now if you get sent back you go here.
Head into
the northwestern house to find a hidden passage under a boulder with a
game
to play, do it if you want. When your done in this village head west
into the
desert.
This time, we go west...again. First head into the staircase and not
the
location of things. When your ready, leave and jump down to the ground.
You'll fall into a lot of pits here, so run into walls and stuff to
reveal
most of them. You should try and get to the whirlpool in the water.
When you

do get in swim down once then turn left for 100 gems. Go back for air,
them
swim all the way down and go left to find another way out. Surface and
go
west.
We need to go south from here. Your goal here is not to get sucked into
the
moving holes. Make your way to the cave in the far corner. When you get
in
you'll find a wall maze. Go up, right, down, right, up over the gap,
left,
up, left over a gap, down over a gap, right, up, right. Hit the switch
and
get the gem that falls. Now loop around and go south.
You need to go west now. Go straight down opt the stairs to get some
gems and
leave. Run into some obstacles to reveal trap doors now. Get the two
chests
to the east, do not go east. You should have 2000 by now. Make your way
west
best as possible; it might be hard to get there in one try. When you
finally
find a path take you have one last big hole to deal with. Get in the
long
formation and walk across. Once you manage to move a coconut thing, go
west.
We need to go north now. Go down the stairs; run across to get 100
gems. Now
jump into the cannon and shoot out. First kill off the vultures and hit
all
four switches under the pots at once. Now grab the bomb and bomb the
northern
wall. Go in for 100 gems and a Heart Container. Leave and fall into one
of
the holes. Run down into the sand, you won't get hurt now. Grab the
chest to
the right for 100 gems and exit to the left. Leave, and head north. In
this
area you need to kill Four Shadow Link. It's pretty easy, if they run
into
caves chase them. After the fight is over, head north for the boss.
*-* Boss: Red Stafols Knight *-*
*Sigh*...not again. Ok you know the drill, kill the Light World enemies
first
and get pulled into the Dark World. This time the RSK has some helpers
here
too. Take them out and use the usual strategy for the RSK. After the
fight,
get the Red Jewel. (Fire Element) Head north and break Vaati's barrier.
***** Stage 2 *****

***** The Desert Temple *****
[3F2DT]
Enter the temple, wow it looks like the Desert Palace huh? Get in the
Box
Formation to move the statue and go north. Go and kill SL to get his
gems
then go east. Do your best to kill the two SL in here and go east
again. Now,
in here hit the top right switch then hit the other ones clockwise, or
separate to do it, your pick. Hit the switch after and get the hammers.
Return to the west.
Now kill off the enemies in here and break all the mounds for some gems
and a
key. Open the block below you and find the switch, go west again. Avoid
most
of the statues and move one to the north to get to the door. You cannot
kill
these guys yet, however get the right one to move so you can pull the
lever.
Go down the stairs to find the Bow. Go back up, kill the statures and
go
north.
Head left and up, dodge enemies and the statues here. Grab the chest
here for
a Heart Container. There is a chest to the right with 100 gems. If you
want,
use the Bomb to blow up the statues. When your done go north. Use your
Bow to
kill all the statues and hit the switches. Each switch provides, 50
gems,
four Bows, and a Lv2 Bow. When they are all dead, go north, you should
have
close to 2000 gems.
In here kill the Moldrem then hit the switches in the Cross Formation.
Get
the 20 gems and the Moon Pearl. Head south two rooms to find the Moon
Gate to
the right near the center of the room, enter the Dark World. Gather all
the
gems, find a key and leave. Open the door to the west. Kill the SL as
quick
as possible then kill the statues. Shoot through the unlighted torches
to
light the other ones and go north.
This room sucks, you must avoid statues and Armos Knights!!! Light the
torches until they are all light and the Knights will die. I forgot,
you can
kill the laser-statues by shooting them in the "eye". Grab the key and
exit
west. Kill off the Moldrem in here and go south. Kill off the enemies
then

hit the switch to get a lot of gems. When your done, go west. Do your
best to
kill all four SL and hit the switch. Kill off the enemies and reenter
the
Temple. In here we need to kill a Queen Gohma, she's isn't the boss
though.
After three hits go north.
*-* The Shadow Links *-*
Once again we must battle Shadow Link, and it's Dark World-mania this
time.
Kill the laser-statue if you can and then work on the SL. Go for the
leader
and then the others will die after him. It's kinda unfair since the SL
can
hop over the walls in the Dark World. When it's over head north and
break
Vaati's barrier.
***Long time since SL was the real boss. The next dungeon is, well
another
dungeon. This is the first of two world's with two dungeons. In the
Pyramid
we will encounter an original boss, first time in a while.
***** Stage 3 *****
***** The Pyramid ***** [3F3PY]
This is the final stage and second dungeon of Level 6, sounds fun. Upon
entering, pull the lever and go north. Kill the enemies and go into the
door.
Pull the left lever to open the door, and the right if you feel like
killing
a horde of Ropes. I did, you get a lot of gems from it. Break the pot
on the
left and exit to the north.
Do not run straight, there is a trap door, dam you SL!!! IF you do fall
down
try and get the chest on the right. Either wall you want to go down
after.
Try and kill SL, then get the right chest for the key. Do not get the
left
one. Jump down if you want the chest, if not, go north.
In this area, we must dodge SL and his giant bombs! Joy. Break the pot
to
uncover a switch and enter the room. Kill the Stafols and move the
block to
find another exit. Out here find another switch and go back in the
other
door. Head down to kill the Stafols then find the switch under a pot.
Head
back west and north to find another door. Find the next switch and go
back

in. Kill the Stafols and go east for a Heart Container. Now go. Grab
the
chest and pass through the next room to the west. Just pull the first
four
switches in the Long Formation and the door should open, exit north.
Dodge an SL ambush and head counterclockwise. Kill all the enemies
along the
way and you should reach, a door on the eastern wall, don't go in yet.
Head
back to the western edge, find a door between some torches, push a
small nub
coming out of the wall into it to open the door. Kill the enemies, then
the
Moldrems and get the Slingshot. Exit and go north. Notice another door
and
nub, push the nub and enter the door.
Kill the enemies and enter the room. (How did Ganondorf do this alone?)
Break
the northwestern pot to find a switch. Now get in the Cross Formation,
charge
and shoot out of each door to hit the switches. (It's the only way to
hit
them at once) Leave and get the key. Now go clockwise until you see a
locked
door on the eastern wall, open it. Make your way right to find some
pots,
smash them and hit all the switches at once. Now kill the enemies, they
will
morph into Stafols after and enter the Dark World!!! Once they're all
in the
Dark World, find the Moon Pearl in the pot to the south and open the
Gate to
the north. Finish them and grab the lanterns. Go back to the Light
World,
gather the gems and leave.
Go counterclockwise again and light the two torches for some gems, that
should make 2000. Continue onward and light the two next torches to
open the
door. Get the Pegasus Boots! Remember the first door on the eastern
wall, go
to that. Run across the center so you don't fall in the holes. Get the
Moon
Pearl and gems from the chests. Pull the lever and go in the door. Make
your
way back around and leave.
Go to the Moon Gate just north of you in the little alcove and enter
the Dark
World. Leave, yes leave, and go get your Lantern. Go to the Slingshot
room
and light the four torches here. Go grab your Boots again and take them
into
the room you just opened, to get the Lv2 Boots. Return to the Dark
World and

use the Boots to grab the chests, one is to the south, the other you
can see.
The last chest is also just southwest of the second chest. Head down to
the
large switch to get to the Moon Gate and reenter the Light World. Head
west.
In this treasure room kill SL and the other enemies. Then grab these
chests,
third on the top (bombs), fourth on top (20 gems), and all the bottom
ones.
Use the large key to open the middle chest for 1000 gems!!! Bomb the
northern
wall to leave. To open the door break the pots and hit the switches.
Blow up
the wall above you after this. Get the Slingshot if you care that much
about
the chest, or head right.
Bomb the wall here to pass through a large hole. Kill the Ropes and go
north
for the Slingshot! Hit all the switches. Cross and go back inside. Make
it so
only the first and fourth switches are green, then finish crossing.
Exit to
the north. Kill off the Moldroms here and head west. Turn north then
east to
battle some more Moldroms. Grab the Force Fairy when the all die and
head
north. Get hearts from the posts if you need to, then enter the eastern
door.
*-* Boss: Big Moldrom *-*
This guy isn't really new, but he's new in this game. Hop into his lair
and
then get in the Box Formation. If you want, separate, your call. Hit
with
tail with the Link that needs to and it will change colors. Don't fall
off
the side, or you must start over. Soon he'll break into two, target one
and
wait for the other later. When one dies target the other.
When it's all over exit to the east. Oh my god...Ganondorf has also
stolen
the Trident of Power!!! Ganondorf...the King of Darkness? It looks like
we
were to late, Gannodorf's plan to get the Trident and Mirror has
succeeded...thanks to Link! Go east and free the Purple Shrine Maiden.
The
Six Maidens will gather and tell Link to head to the frozen region
caused by
Vaati's darkness to find Zelda in the Tower of Winds!
***Frozen Hyrule is the second to last level! It doesn't really make
since,

but nonetheless this region is frozen, caused by Vaati no doubt. 1
Jewel and
Zelda remain, yet two levels.
+-----------------+
| Level 7 |
| Frozen Hyrule |
+-----------------+
[3GFRH]
This level is just to the west of Level 4, the region has totally
frozen
over. This level is a lot like the previous, with two dungeons.
***** Stage 1 *****
***** Frozen Hyrule *****
[3G1FH]
The name looks vaguely familiar. Speak with the 6 Maidens, we must find
the
last Jewel. Head north and find a boulder in the northwest corner, move
it.
Grab the bomb flower, go down and blow up the blocks. Grab any item you
want.
Go north, head counterclockwise to the east. If you have the bow kill
all the
soldiers, minus the general, with it. After, kill move the boulder in
the
bottom corner and go down. Kill the guards to get the Quake Medallion.
Use
that to kill the general.
Gather the gems that fall and move north. Kill the soldiers then SL to
get
some gems. Head east. Dodge the snowballs of death and head north. Kill
SL
and head north one more screen. Now here you cannot be outside when the
wind
gets fast, so find holes under grass now and then. When you reach the
boulder
move it and go down. Find the Heart to the east, then follow the gem
path to
leave. Go north afterwards.
Continue to press on, finding holes as you go. When you reach the cliff
find
a hole off to the right. Inside are some bombs, use them to blow up a
hole in
the cliff. Go in and get the Fire Rod! Use it as you head back, getting
a lot
of gems. When you reach the area where you last saw SL begin to melt
the snow
wall. Gather the frozen gems, you should be about 500 away from 2000.
Head
south.

Use the fire to melt one of the balls of death to find a key, head west
and
open the door to the house, do not go in yet. Head south and get some
more
gems if you want, then go back north and into the house. Get the chest
and
head down stairs. Grab another one of the items if you wish, I kept the
Fire
Rod, then exit to the west. Kill the enemies if you have the hammer,
get the
gems and move west. Open the chest for the Power Bracelet and head
north for
more gems, that should make 2000.
Return east, get your Fire Rod if you don't have it. Go back through
the
house and go south, then west. Melt the large balls for a lot of gems,
then
move west again. Lift the tree here, and melt the gems to the west and
go
west. Step on the switch to the far west. Kill off the penguin army,
you
might take a lot of damage. Grab the Moon Pearl, go east then north.
Melt the wall and kill the guards. Grab the chest for a Heart Container
and
grab any gems in the area. Return south, east then go north. Melt
another
snow wall and kill the guards. Open the Moon Gate and enter the Dark
World.
Pull the four levers, return to the Light World and go north. Grab the
gems
here, there are many walls for you to bomb, look for the indents. The
two on
the right contain useless levers. The left ones contain a gem and the
lever
you need. The middle ones start a snowstorm and the other makes a Big
Bomb
appear. Head north.
Get up as fast as you can, some Wizzrobes will steal your gems. Move
the
boulder at the top for some more gems, and then jump down. Move the
boulders
to recover some hearts, jump down and head north again. Here you will
battle
a Manhandla, use the same strategy you used at The Coast. When it's
dead
enjoy the gem-a-paloza, then head north.
*-* Boss: Puruple Stafols Knight *-*
You know the drill, kill off the guards and enter the Dark World. Dodge
hit
blows and kill him. After getting the Purple Gem (Earth Element) head
north,

we now have all four! Break Vaati's barrier, we now have to pass
through the
Ice Temple!
***Now it's the same drill as Level 6, two dungeons and we're all
clear.
Zelda is the last Maiden left, remember that.
***** Stage 2 *****
***** The Ice Temple *****
[3G2IT]
Upon entering the temple uncover a switch under the pots in the top
left
corner and move the statue onto it. Head left to find four more
switches, hit
them in the Cross Formation. Get the key from the chest and exit north.
Kill
the two SL in here and head left. Kill the statues and pull the giant
lever.
Now go right, and get the Boomerang. Go into the middle now and exit to
the
north.
As you head up dodge the bumpers and grab the large green gems. If you
fall
down, head to the southeastern corner for a staircase. Go north when
you're
all done. Kill the two Ice Wizzrobes in here and get the gems that
fall. Head
to the right and kill the SL in here. Now, your goal is to toss the
bombs
onto the ice sheet so they explode the skulls. There's no easy way to
describe it, so do your best and eventually you'll get it. Grab the
Fire Rods
and return to the west.
Use the Fire Rod to burn all the ice caps in here then head into the
northern
doors. You can find 5 gems, a Heart Container, and a gem. Leave, and
head
left now. As you pas through melt every ice cap you encounter. Also,
melt the
one on the separated platform and toss a Link over to get 100 gems.
Leave to
the left when your all done.
This room sucks because those annoying things will keep coming!!! Find
the
four switches to cover the holes, once they are all hit grab the gems
that
fall. You should have about 1500 now, head left. Go down, burn a path
across
the bridge and get the key. Use the key in that door and wait. Go back
to

where you got the key and burn the ice on the platform. Toss a Link
over and
get the Heart in the chest. No exit to the north.
Nope this is not the boss, haha tricked you didn't it? Kill the SL and
be
careful of their new ice making trick. This isn't hard at all, SL is a
joke
at this point. They didn't even enter the Dark World for me, so when
they die
go north. Go north and head clockwise around the ice platform. Reach
the
moving one and get on, exit to the north.
Now then, head west first, light the torches to open the door. Continue
across and go into another door. Start with GL and his block. Move the
grey
block next to the green one down, then move the green one left, you
must melt
the ice block. Now we move to RL. Move the blocks to the right so you
can
then push the middle one down. Now, melt the ice blocks and move the
red
block left onto the switch. BL is easy, just melt the ice block and
push the
blue block up. PL is last. Head up to the purple block, to the right
are
three ice blocks going up. Melt them from the bottom and push the
purple
block right onto the switch. Regroup, break the pots and hit the
switches in
the Cross Formation, get the chest and leave.
Melt the ice caps and head down the stairs. Open the chest and go down
again.
Talk to the fairy to get the Lv2 Fire Rod, return to the main floor.
Use the
rod on the "?" and exit to the right. Go right from here, light the
torches
and go in. This room also sucks. Toss the bombs across to hit the last
two
switches, pretty easy. The last one you must time right. When you get
it, go
grab the gems and open the chests for more and a key. Go back west,
then
north and open the door.
Ok, from the entrance hit the right "?", go up then hit the left "?" to
go
left. Hit the lower one from there and go as far right as possible. Go
in the
door. Go to the top and bottom, break all the pots and have two Links
stand
on the switches. Toss another Link across, have him use the Rod on one
switch
and stand on the last one. Gather the chests for 300 gems, a Heart
Container

and the key. Return west, and make your way to the locked door. First
you'll
kill off all the soldiers after you hit the switch, no problem. Gather
the
gems and head north. Melt the ice caps and head north, kill the guard
and hit
the four switches to the right, and put a block on the left switch to
open
the door. Grab Roc's Feather and move north.
*-* Boss: Mace Knights *-*
This is easy, use the down thrust strategy and the battle will end in
seconds. Go north to speak with the White Maiden and follow her. After
a
scene the Four Jewels will open the path to the Tower of the Winds,
we're
back to were we started.
***The Tower of Winds is last in this level, and it's mainly side-
scrolling.
I hope you're ready for a fun and not to hard level.
***** Stage 3 *****
***** The Tower of Winds *****
[3G3TW]
Upon entering you'll say "My stars this is all side-scrolling!!!" And
it is
with a few "GBA" areas as well, that's it. Your first task it to climb
the
ladders and drop to the platforms to kill the gels. Grab the gems and
climb
to the next level. Head up and kill the gels, then go right into the
door. Go
get the slingshot and leave. Climb up and go in the door. Hit the
switch to
make some Stafols appear, kill them.
Now head west and find the pot to the north with a switch under it. Hit
it
and jump down for a key. Leave, climb back up and go in the door again.
Head
east now and go up the stairs. Head down to find a locked door and get
on the
platform. Hit the four switches, go back north and then north to the
main
part of the tower. Toss the Links across the gaps here and enter the
door on
the left side. Grab the gem from the chest and climb up. Get the Fire
Rod, go
back down and to the right ladder.
Head back up and enter the door. Now then, push the green block left,
the

blue one up, the red right and the purple down. Get on the small
platform and
toss a Link onto the switch. Go up the stairs and get the gem, you need
to
melt a wall. Go back down, cross the bridge and get Roc's Feather.
Return up
the stairs. Go to the far left door for a Hear Container, then go to
the one
on the right.
Head south and hit the switch. Kill the four Gem-knights then return
north
and go up the stairs. Head to the left door and find the switches under
the
pots to make a ladder appear. Head back out, and go to the far right
door. Go
down to get the chest for the Blue Ring. Return up the stairs, leave
and
climb the ladder. Gather the gems and get the chest for another Heart
Container. Climb up to the next level.
No then, head right and dodge the Thwomps. Break the cracked blocks and
go
into the door below you. Make each Link move his respective blocks and
head
left for another Bracelet. Go right for another Heart Container and
leave to
the north. Now climb the ladder and have each Link hit a switch along
the
top, dodge the Thwomps. After that grab the floating gem, the key and
head
into the door below the Thwomps. Open the locked door and go in. Hit
the
switch and kill the Stafols, head left. Get in the Box Formation. spin
attack
to hit all the switches and leave. Head to the ladder and climb to the
next
level.
Head right, dodge the icicles and break the pots for some gems, you
should be
near 2000. Climb up and head left, let the icicles make a bridge over
the
spikes and enter the door. Hit the switch and kill the Gem-knights,
that
should be 2000. Head right from here and get the Fire Rod. Leave and
climb up
the ladder. Melt the ice block, thing, and climb to the next level.
Melt the wall and go in the door. Separate to hit the four switches and
head
right for Roc's Feather. Leave and go back to the main area through the
left
door. Dodge or kill the enemies as you go, and enter the door right
after the
first ladder. Make your way across and hit the switches, return via the
platform and leave. Head left then up to the next door. Now get in the
Long
Formation and spin attack, to hit the switches, head right. Open the
chests
for 100 gems and another Heart Container. Return left, then go north.
Climb
to the next level.
Kill the ice-bird things then kill the mass amounts of jellies that
fall.
Grab the orgy of gems that fall and make your way to the ladder at the
top
corner. Walk across and enter the lower right door for the Fire Rod.
Then,
melt the ice around the middle door and go in. Spin attack in the Long
Formation to hit the switches, then leave. Head over to the ladder and
go to
the next level.
*-* Boss: Frostare *-*
This guy reminds me a lot of Kholdstare from ALttP. Melt the right wall
and
go in to get Roc's Feather. Head into the top right door for four
switches
that make some platforms. After that go to the top left and kill the
red guy.
The boss will fall down, get the chest and leave. Now work on his eye
until
he finally dies.
Gather his gems and exit at the top right corner to leave to tower.
Enter the
light and you'll be transported to the roof. Break the barrier to free
Zelda.
Talk to her and prepare for the final level.
***This is it, three more Stages. Vaati waits at the Palace of the
Winds.
What about Ganon? It's all about to come together, in the Realm of the
Heavens.
+--------------------------+
| Level 8 |
| The Realm of the Heavens |
+--------------------------+
[3HRHE]
This level takes place above Hyrule, it takes you a new level map.
There is
only one dungeon here, it's old school now, Vaati awaits.
***** Stage 1 *****
***** Realm of the Heavens *****
[3H1RH]

Yeah they ran out of names for the first Stages. Dodge the flames as
you head
east. Kill all the soldiers here and then head south. Kill the General
and
his soldiers, and then head onto the ground. (portal thing) Kill the
soldiers
here then open the chests for a Heart and some gems, go back to the
clouds.
Head into the lower portal now and hit the right switch, leave and get
the
gems.
Now head north and kill the soldiers, then go north again. Kill SL and
dodge
his volley of arrows. Enter the top portal first. Get a Heart and gems
from
the chests and return to the clouds. Now go into the bottom portal. Hit
the
left switch for some gems, then leave. Enter the only portal you
haven't been
in and go north past the Gate. Hit the switches at once and leave. Kill
the
enemies here, its not to hard. Gather the gems, get the Moon Pearl from
the
chest and go south twice.
Find the Moon Gate and go in the Dark World. Kill the guards, grab a
Feather
and leave. Go north and now, finally, head east. Make your way east to
get
about 400 more gems. Remember all those fairies we saved, bet they're
coming
in handy right now. Go east when your done. Kill the Flaming(hehe)-Mace
Knight for what should make 2000. Head south and kill the Manhandla.
Now go north two screens to an area with strong winds. Now head left
and hit
the switch to stop the winds. Keep hitting them as you go to stop the
wind,
gather gems on your path too. Go north and down into the portal. Head
north
to get the Hammer and leave. Return through the winds and back south.
Power
the hammer, break any mounds then head south to where the Manhandla
was.
Break all the mounds to find a Heart Container, some monsters, a key
and 600
gems. Get the key, return north and head east now.
Get onto the cloud platforms, ride them and kill the three soldiers
here.
When the flame stop, head east. Now, each Link can only cross his
color. So I
suggest sending one across, then, regrouping. Kill the enemies and
continue

east. Leave a Link behind on the switch and send another one left when
his
turn comes. Continue doing this until all four switches have been hit.
Also
watch out for Gem-Likes and grab the Heart from a chest. Grab the
Pegasus
Boots and go north.
Have any Link run across his part, then regroup and head east. Since
the area
sucks so much I'm gonna have you do the minimum amount of work! So just
head
south, and east a lot until you find the switch, hit it to make a
bridge
appear. Fall down to get back on the left side, cross the bridge and
exit to
the east, make sure to grab the Bombs. Kill the Dodongos here, it's not
to
hard at all. Guess what, your not done!
*-* Boss: King Dodongo *-*
Oh...my...God! He's big, bad and blue. Open the chests to get some big
bombs,
the only thing that can kill this guy. Now kill him like you would a
regular
Dodongo. When he does die gather the gems and move east. Break the
barrier,
two levels left!
***Yep, two more. The next level, the Dark Cloud, will be a sort of mix
between this level and the Tower of Winds. You'll see what I mean. The
last
standoff with Shadow Link is also near.
***** Stage 2 *****
***** The Dark Cloud *****
[3H2DC]
First off, no this has nothing to do with the game "Dark Cloud."
Anyways, see
what I meant when I said it was like the Tower of Winds? Make your way
right
and kill the vultures. Step on the cloud to go east and enter the large
cloud
like you would a door in the Tower of Winds. Grab all the gems, head
out then
go right into another area. Grab the gems on the way down, then the
chest.
Hop in the canon, when you shoot out do a down thrust over the cracked
blocks
and enter the door.
Get the Bow, then find the four switches under the pots, there are two
up and

two down. Hit them all at once, leave and jump onto the cloud to go
right.
Now, separate and send GL up the ladder and have him stand in the
middle of
the platform. With RL, hop on the cloud platform and as it moves fire
at the
switches. You can see them with GL at the top. When you hit them all,
switch
to GL to get the gems, then ride the cloud to the right to continue
onward.
Enter the door you see, climb the ladder and exit to the left. Hit the
switch, reenter the building and exit to the right. Fall down and shoot
the
switch on the roof. Now go into the right-most door. Kill the lone
soldier
and go to the right again. Go to the top for the bombs and leave. Back
outside, head into the middle door again. Head up, exit the right door
and
cross the bridge to the other door. Climb up and exit, bomb the walls
then
climb the ladders to go up.
Oh god, we still have to deal with SL and his Giant Bombs! Head into
the left
door, climb up and find a switch under the ladder. Leave, jump into the
cannon and shoot to the third highest door on the left. Hit the switch
in
there and leave. Now make your way to the right cannon and shoot up to
the
upper right door you can reach. Kill the lone solider, climb up the
ladder
and bomb the wall. Exit, head to the left and enter that door. In here
there
are four switches, one up and three down. Hit them all, then grab the
chest
and leave. Climb the ladders to head up some more.
Make your way into the light to transport, now it's time for normal
top-down
play! Head north from where you end up. Do not wait or you will lose
some
gems, dam Wizzrobes. (he caught me as I typed this) Step on the switch
and
kill the army of annoying blue things. When they die gather the gems
and open
the chest. Quickly head south and open the Moon Gate. Hit the 12
switches (at
three different times) in the Cross Formation with a Spin Attack and
return
to the light world. Kill the soldiers if you need to and get the
Hammer.
Return north, use the hammer to find some mounds and break them. After
that,
continue north. Head to the middle staircase and go down for a Heart.
Go back
up and head to the left most staircase and go down. Head down to get
the
chest for 100 gems, then make your way to the right staircase and head
up.
Now head up and exit to the east. As you walk use the hammer to uncover
the
spikes, make your way to each switch and hit it and get the gems. So
this to
each one then head east some more.
Do the same thing here; it is well worth the gems. Go east another
screen and
continue to do this. By the time you finish, you should have 2000 gems.
Return all the way west, then head north. From here, ignore the switch
and go
east, to another high-wind area. Hit the switch and loop around to the
staircase, go down. Get the chest and Slingshot, hit the switches as
you
leave. Return to the start and move west.
Hit the switch and move across, hitting the other ones to turn the
lighting
off. Go north from here. Head west to get the following: 1000 gems (nig
chest, read ahead for key), a crystal ball, a Heart, a Moon Pearl, a
Blue
Ring, some Big Bombs, and a lot of gems. Return to the east with the
Pearl.
Now separate and have on Link hit the switches as the other Link
crosses. The
two top switches and the bottom most one must be on to cross, the
remaining
can stay off. Regroup and head east.
Get the chest for the Big Key (see above for Big Chest) and open the
Moon
Gate. Since there is nothing in the Dark World just go to the other
Moon Gate
and reenter the Light World. Kill off the mass amounts of soldiers and
the
generals in this area, all our previous battles with them comes into
effect
here. In the end gather all the gems, if you don't have 2000 something
has
gone horribly wrong. Go north afterwards.
Go down the left stairs here for the lantern. Use it to light the first
set
of torches and go into the right stairs. Grab the Bow from down here.
Fire
through the torches to light them all. Break all the pots to heal
yourself
and get the chests for some gems. There is also four switches to find
under
all the pots, hit them at once and get some final gems. Head north, for
the
final showdown with Shadow Link.

*-* Boss: Shadow Link's Last Stand *-*
This is it, the final battle with Shadow Link. They will regenerate out
of
the Dark Mirror, so remember that. Eventually Zelda will tell Link that
Shadow Link can continually reproduce. Kill off the reaming Shadow
Links and
retrieve the Dark Mirror! After the scene head north and break Vaati's
final
barrier.
***One level remains, the Palace of Winds. I warn you, it is very
different
from the Palace in Four Swords and The Minish Cap. It seems Ganondorf
has
added his own sense of style to the dungeon. It will be long and hard
(no
sexual innuendo intended). I hope your ready for the final trial, and
the
final boss.
***** Stage 3 *****
***** The Palace of Winds *****
[3H3PH]
See what I meant by more Ganon-esque? Jump down after you enter and
head
left. Kill the mace-knight Go into the boxed area, hit the switch for
the
gems, then move the ones in the bottom right corner to leave. Head east
two
screens. Kill the knight here and break all the pots. Hit the switches,
then
open the chests for, 355 gems. Return west and then go north.
Hit the switch and kill the army of Stafols and Wizzrobes that appear.
When
they all die head north past the barrier. Now then, there are four
rooms to
go to, and four Moon Gates. Get the idea? First pull the lever in the
top
left corner of the room to make four items appear. Grab the Boomerang
and
first go to the lower left room. Hit the switch and leave, go to the
upper
left room. Use the boomerang to hit the switch behind the statues,
return to
the lower room
Cross the newly made bridge and exit to the west. Push the blocks into
the
corner, separate and have GL enter the Dark World. With GL pick up one
of the
other Links in the Light World and carry him to the switch, in the
Light
World. After that return to the Light World and switch to the Link you
put on
the switch. Hit the switch across the path and move the statue and
regroup.
Enter the Dark World again, cross to the other Moon Gate, go in back to
the
Light World and exit to the north. Open the chests for a key and the
Moon
Pearl, leave and return to the main room.
Use the Pearl in any of the Moon Gates, use the key in the right top
door.
Now grab the Bow and head into the top left door. Go down the stairs,
jump
down and hit the switch on the way down. Climb up, cross the bridge.
Jump
down into this hole and fire up at the switch as you fall. When you hit
it,
climb back up and fire into the two holes to the far east to hit the
last
switches. Go back up the stairs and head north. Do as I say, go right,
up,
right, up get the chest. Go down, left, down, left, down, left, down,
left,
up, and up to the other chest. Now you must hit the switches, find a
path so
there are no spikes in your way and fire at them. Get the chests for
another
Pearl and a Bracelet.
Return to the main room and use the Pearl in any gate. Get the hammer
and go
into the bottom right room. Do what you did on the Dark Cloud to get
across
the spike floor. The chest has some gems. Make sure all four posts are
down,
then head into the lower door. Hit the posts so they match with the
four
pots. Head into the opened path now and go down. As you head through
kill the
Stafols and find the gems in the chests and the Moon Pearl. Return to
the
main room, use the Pearl in any Gate.
Get the Boots and get the bomb. Quickly run into the top right room and
bomb
the northern wall. Go in to get the Lv2 Boots. Run across the gap and
hit the
switch on the other side. Get the gems and go north. Dodge the Wall
Masters
and go down the stairs. Get the chest down here then head up the
ladder. Get
the chests and go down the other staircase. Nothing to get here so go
to the
other ladder and climb out. Get the chests and go down the last
staircase.

Get the chest for another Bracelet then go in the door. Now you need to
run
across, dodging the spikes and Wall Masters. Get the Pearl and gems on
the
other side (2000) them move the blocks.
Return to the main room and open the last Moon Gate. Enter the Dark
World, in
here there are four chests and four switches. So, leave a Link on each
switch, it will take a little while to do, and get the chests for 400
gems.
When the gate is opened, return to the Light World. Grab any item you
wish,
upgrade it to Lv2 if you want, then head north.
Kill the Hill Giants and get the key, exit to the north. If you have
the Bow,
which I did, use it to kill the Queen Gohmas. When they die, go east.
Find a
hole to the north and jump in. Fall to the right and climb up the left
ladder
to get a gem. Leave, you need to go get the hammer. Upgrade if you
want, or
go north twice then east again. Hit the giant panel with the hammer and
fall
down. Explore this area, and go to the top to make some bridges across.
Jump
down at the end and break the blocks. Get the chests for 200 gems and a
key.
Leave, exit to the west and open the locked door. Use the bomb to break
the
blocks and get a Heart. Hit the large switch then leave. Go back and
get the
Boots, upgrade them and return to this area. Run across the hole and
exit to
the north. Now you need to cross the bridge and break Vaati's barrier,
so
this is the last one, my bad. Go north when it's over.
*-* Boss: Vaati, The Wind Mage *-*
If you played FS, then you know what to do. Dodge his tornado and pick
up the
bombs, toss them into the tornado and they should explode upon Vaati.
If you
fall down, don't worry, you can climb back up. Get the gems that fall
when a
bomb does hit him, do this for a while. Soon he learns, now fall into
the
middle hole. Go in the cannon, and when Vaati is near shoot out, get
over him
and deliver a down thrust. After doing this go down the stairs, or into
a
hole. Hit him down there, wow he shrunk. He'll go back up after that,
so

repeat this process. When Vaati is finally disappears he's gone for
good.
Now you'll flee the castle and speak with Zelda. OH NO!!! It's
collapsing!
You'll be followed by something. Is it Ganondorf? The Tower is also
collapsing, so like in OoT you get to run down it while saving Zelda,
yay!
There is no time limit either, so that's kind of lame. Just kill the
monsters
along the way, easy enough. When soldiers come just use the Boots to
flatten
them.
Soon you'll need to make the path. Take the time to kill the enemies
then
head over to the chest. Break the pot to find a switch, then grab the
chest.
On the next level head into the door below you. Get the Feather and
head down
another level. Grab the chest for some gems, go back up and to where
Zelda
is. Hit the switches to let Zelda cross, then enter the door. Hit the
switch
and get the chests for another Bracelet and gems.
Go into the door again and head right and out. Hit the switches under
the
pots, go back out the other door. Now jump to the lone pot below you
for
another switch. Kill the enemies and head down another level. Follow
Zelda
and get the Bow. Kill the Gohmas along the path. GO get the chest if
you want
it, and follow Zelda out of the Temple. You'll kill a Mace-knight on
the way.
*-* GANON, THE KING OF DARKNESS *-*
After the scene the battle begins. As Ganon jumps around hit him when
he
lands, it's easy to dodge his earliest attacks. If Ganon holds up the
Trident
it will fill with energy, firing many lightning blots at you. After he
does
this you'll go to the Dark World, where you must battle some Stafols to
escape. Do this a few times and soon Ganon will start doing other
moves. Soon
he'll start to teleport faster, giving you less chances to hit him.
When he
lands and the screen flashes, your on the next part.
Ganon should toss the Trident, which will go after you like in ALttP.
Dodge

it and still continue to deal some damage. Continue to work him over
for a
while, he'll throw the Trident a lot so beware of it. Soon Ganon will
rest on
the Trident, he's almost dead. Zelda will come down for another scene.
Now,
like in TWW you must fire at Zelda's energy ball and have it hit Ganon.
Once again go to work on Ganon, protecting Zelda as she gathers energy.
Ganon
has some more attacks, and now it's also harder to hurt him. To do so
you
must hit his energy balls back at him, old school style. Make sure
Zelda does
not get hit. When Ganon does down fire at the ball when it's in line
with the
evil king. It will kill him, and now Ganon is sealed in the Four Sword
by the
Maidens.
Congratulations, you just beat Zelda: Four Swords Adventure. Enjoy the
ending!!!
=======================================================================
4: Characters
[4CHLZ]
=======================================================================
- Link -
This it the main character, or should I say, characters. Link is a
young boy,
probably between the ages of 10 and 12. Link was asked to go to the
Four
Sword Shrine with Zelda, and then Shadow Link appeared. Link drew the
Four
Sword to fight Shadow Link, and he released Vaati the wind mage. Link
split
into four copies of himself and took up the destiny set by the Four
Sword.
- Zelda -
Zelda is the Princess of Hyrule and it's assumed she and Link are the
same
ages. Zelda went to the Four Sword Shrine to check the seal on Vaati
and then
Shadow Link appeared and took her and the Six Maidens with darkness.
Zelda is
the final Maiden who waits for Link and the Six in Frozen Hyrule.
- Shadow Link -
This is a mysterious "clone" of Link. There are seemingly endless
amounts of

him and he often tries to slow the advance of the Four Links. Shadow
Link is
merely the Dark World copy of Link, manifested by the Dark Mirror.
Shadow
Link protects the Dark Mirror at all costs, and his main "base" is atop
the
Dark Cloud.
- Vaati -
Vaati is the Wind Mage who was released when Link pulled out the Four
Sword.
Vaati was originally of the Minish race, and he used the Minish Cap to
become
a God so to speak. He was beaten by TMC-Link and sealed in the Four
Sword.
Decades later be broke out of the Four Sword and the events of FS took
place.
Vaati's goal in this game seems to involve covering Hyrule in darkness.
However, Shadow Link seems to work under some other force and not under
Vaati. Could the rumors about a man named "Ganondorf" be true, and
could
Vaati be working under him? Vaati resides in the Palace of the Winds,
which
underwent some major reworking since Four Swords.
- Kaepora Gaebora -
This is the large Owl you walk to a lot in this game, he is also in
Ocarina
of Time, Majora's Mask and Link's Awakening amongst others. He is a
universal
symbol of wisdom, as many owl statues of him are found in many lands
including Termania, Holodrum and Lybrinna.
- Ganondorf -
We never actually see Ganondorf in this game, however by the time the
Dark
World level rolls around it's clear Ganondorf has some motives that
involve
Vaati being releases. He seeks the Dark Mirror to make Hyrule into a
"Dark
World" and he also seeks the Trident of Power from the Pyramid.
- Six Shrine Maidens -
These six are pretty much, the Sages. They are probably descended from
each
Sage respectfully and are related to the Maidens in A Link to the Past.
They
protect the Four Sword Shrine, but are taken by darkness along with
Zelda by
Shadow Link and probably Vaati as well.
- The Knights of Hyrule -

The KoH are the guardians to the Royal Family and the four Royal
Jewels. The
Jewels themselves resemble the Four Elements and are probably thus.
(Earth,
Wind, Fire, Water) The Four Knights have been turned into the Stafols
Knights
in this game, which leads some to believe that FSA is, or takes place
after
the Imprisoning War.
=======================================================================
5: Bosses
[BOSSL]
=======================================================================
*This section is incomplete*
This is the setup:
------------------------
Location: Stage Name - Level Name
Name: Bosses Name
Difficulty: Out of 5 *
Recommend Formation: Best Formation
------------------------
***
------------------------
Location: Lake Hylia - Whereabouts of the Wind
Name: The Squad Leader
Difficulty: *
Recommended Formation: Box Formation or Cross Formation
------------------------
------------------------
Location: Cave of no Return - Whereabouts of the Wind
Name: Shadow Link
Difficulty: *
Recommended Formation: None
------------------------
------------------------
Location: Hyrule Castle - Whereabouts of the Wind
Name: Phantom Ganon
Difficulty: **
Recommended Formation: Wide Formation
------------------------
------------------------
Location: The Coast - Eastern Hyrule
Name: Manhandla
Difficulty: *1/2
Recommended Formation: Separate Links
------------------------
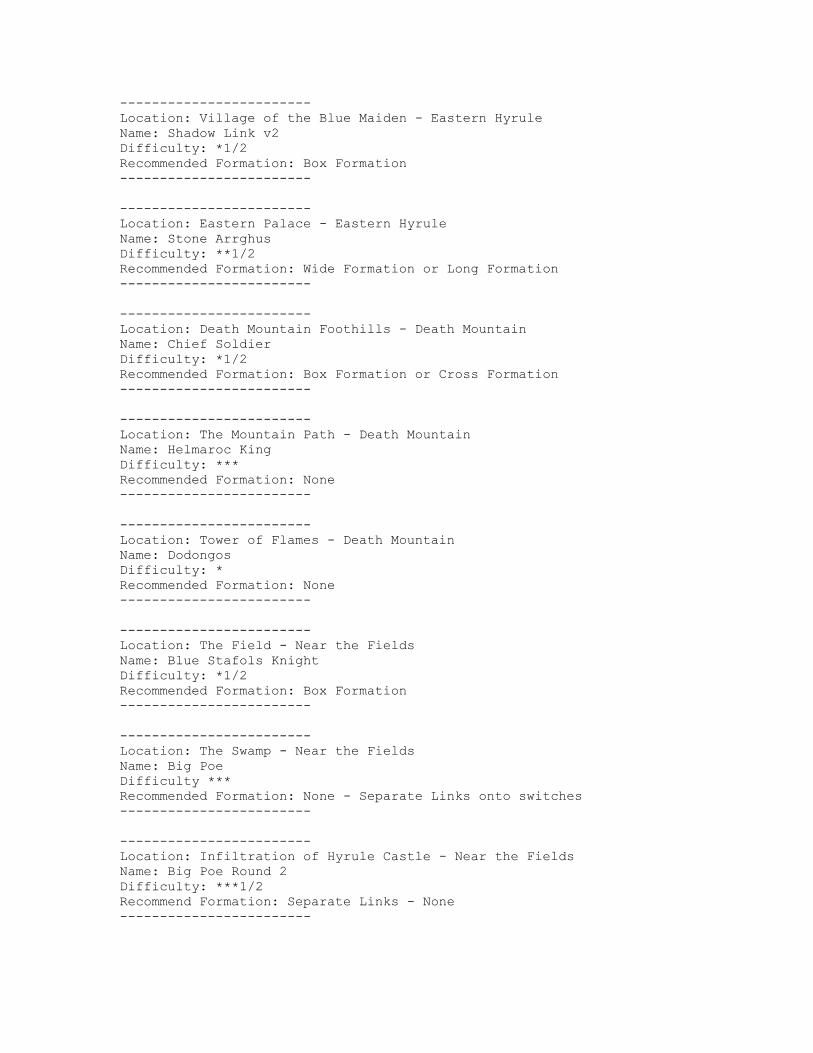
------------------------
Location: Village of the Blue Maiden - Eastern Hyrule
Name: Shadow Link v2
Difficulty: *1/2
Recommended Formation: Box Formation
------------------------
------------------------
Location: Eastern Palace - Eastern Hyrule
Name: Stone Arrghus
Difficulty: **1/2
Recommended Formation: Wide Formation or Long Formation
------------------------
------------------------
Location: Death Mountain Foothills - Death Mountain
Name: Chief Soldier
Difficulty: *1/2
Recommended Formation: Box Formation or Cross Formation
------------------------
------------------------
Location: The Mountain Path - Death Mountain
Name: Helmaroc King
Difficulty: ***
Recommended Formation: None
------------------------
------------------------
Location: Tower of Flames - Death Mountain
Name: Dodongos
Difficulty: *
Recommended Formation: None
------------------------
------------------------
Location: The Field - Near the Fields
Name: Blue Stafols Knight
Difficulty: *1/2
Recommended Formation: Box Formation
------------------------
------------------------
Location: The Swamp - Near the Fields
Name: Big Poe
Difficulty ***
Recommended Formation: None - Separate Links onto switches
------------------------
------------------------
Location: Infiltration of Hyrule Castle - Near the Fields
Name: Big Poe Round 2
Difficulty: ***1/2
Recommend Formation: Separate Links - None
------------------------

------------------------
Location: The Lost Woods - The Dark World
Name: Queen Gohma
Difficulty: 1/2*
Recommend Formation: Long Formation or None
------------------------
------------------------
Location: Kakariko Village - The Dark World
Name: Green Stafols Knight
Difficulty: **
Recommend Formation: Box Formation, Long Formation, Wide Formation
------------------------
------------------------
Location: Temple of Darkness - The Dark World
Name: Phantom Ganon's Revenge (Phantom Ganon x4)
Difficulty: ***
Recommend Formation: Wide Formation
------------------------
------------------------
Location: Desert of Doubt - The Desert of Doubt
Name: Red Stafols Knight
Difficulty: **
Recommended Formation: Wide Formation, Long Formation or Box Formation
------------------------
------------------------
Location: The Desert Temple - The Desert of Doubt
Name: The Shadow Links
Difficulty: *1/2
Recommended Formation: None
------------------------
------------------------
Location: The Pyramid - The Desert of Doubt
Name: Big Moldrom
Difficulty: ****1/2 (for being annoying)
Recommended Formation: Separate Links
------------------------
------------------------
Location: Frozen Hyrule - Frozen Hyrule
Name: Purple Stafols Knight
Difficulty: **1/2
Recommended Formation: Box Formation or Long Formation or Wide
Formation
------------------------
------------------------
Location: The Ice Temple - Frozen Hyrule
Name: Mace Knights
Difficulty: *
Recommended Formation: Box Formation
------------------------

------------------------
Location: The Tower of Winds - Frozen Hyrule
Name: Frostare
Difficulty: ****
Recommended Formation: N/A
------------------------
------------------------
Location: Realm of the Heavens - The Realm of the Heavens
Name: King Dodongo
Difficulty: *1/2
Recommended Formation: None
------------------------
------------------------
Location: The Dark Cloud - The Realm of the Heavens
Name: Shadow Link's Last Stand
Difficulty: ** (pathetic)
Recommended Formation: None
------------------------
------------------------
Location: The Palace of the Winds - The Realm of the Heavens
Name: Vaati, The Wind Mage
Difficulty: ***** (the beginning is annoying)
Recommended Formation: Box Formation or None
------------------------
------------------------
Location: Beneath the Tower of the Winds - The Final Showdown
Name: Ganon, The King of Darkness
Difficulty: ****
Recommended Formation: Box Formation or Long/Wide Formation
------------------------
=======================================================================
6: Weapons and Items
[WEAIT]
=======================================================================
- The Four Sword -
This is the primary weapon that the Links will use. To use it simply
press
the B button. Repeatedly taping causes multiple strikes, and holding
direction buttons can make the Links roll or lunge. By holding B you
can
perform a Spin Attack, and if you have 2000 gems hold for a few more
seconds
to do a Tornado Spin from Wind Waker. The Four Sword is a divine sword
with a
lot of power. It was forged many years ago (The Minish Cap) and it is
the
only thing that can seal Vaati's power.
- The Hero's Shield -

Link will always have the Shield, from start to finish. You do not have
to
hit anything to use it, Link will block on his own provided you don't
attack
something. This is much easier than holding R or something.
- Bow & Arrows -
What Zelda game is complete without Links' trusty Bow? This item allows
the
Links to fire arrows at their enemies. To fire a stronger shot hold
down the
A Button. By getting the Lv2 Bow, the Links can fire up to three rounds
at
once. The Bow first appeared in LoZ and has been forever the item
needed to
defeat Ganon. The arrows can be silver or light, but they are always
involved
in the final battle.
- Bombs -
The bombs are the most basic of all the Zelda items. In this game you
have an
unlimited supply. Simply place it down where you want, and pick it up
if you
need to toss it. By striking the bombs you can detonate them, instead
of
waiting for the fuse to blow. The bombs first appears in LoZ, and since
have
made numerous appearances and made many other bombs (remote bombs,
bombchu,
ect)
- Boomerang -
The boomerang is an item that allows Link to stun enemies and grab
things
that are out of reach. This item is always trusted and reliable. The
Lv2
Boomerang can reach further then the Lv1. This debuted in LoZ and has
since
spawned the Super Boomerang and the Magic Boomerang.
- Fire Rod-
The Fire Rod is a very rare item in this game. It can be used like a
Flamethrower and it can shoot individual balls of fire. It's great for
setting entire fields ablaze for gems. The Lv2 Rod acts like the Cane
of
Somaria as it makes a block. This item first debuted in ALttP, it goes
by the
same name.
- Hammer -

The Hammer allows Link to crush certain enemies and remove posts from
his
path. He can also power it up to slam the ground hard, revealing items
buried
under mounds of dirt. The Lv2 Hammer is just a lot stronger, that's
really
it. This item first appeared in AoL, it was only usable in the world
map. Not
until ALttP was it usable in fights.
- Lantern -
The Lantern allows the Links to light torches and see in dark areas.
This
basic item was first introduced in ALttP, and since then, has not
appeared a
lot.
- Pegasus Boots -
These boots allow Links to run really fast and cut through many
enemies.
Links can also run into trees to find hidden gems, or break through
cracked
blocks. The Lv2 boots allow Link to run over gaps, a very good upgrade
indeed. These boots appeared in AoL and they let Link cross to the
Island
Palace. However, in ALttP you could use them like we know them today.
- Roc's Feather -
Roc's Feather allows the Links to jump up ledges (side-scrolling) and
jump
over small holes. This item can also let the Links perform a down
thrust, one
of Link's best attacks. The Lv2 lets Link perform a mid-air jump after
the
first jump, like Roc's Cape. This item debuted in LA, and since has
seen an
upgrade, Roc's Cape.
- Shovel -
The shovel isn't a very useful item, however when you need it, it comes
in
handy. The Lv2 Shovel gives off a sort of chime, alerting the Links of
a
hidden treasure or passage. The Shovel first debuted in LA, and was
usually
traded for the Boomerang.
- Slingshot -
This item works a lot like the bow, minus some power. It will usually
stun
enemies, and kill the weaker ones. To get distance you must charge it
with A.

The Lv2 Slingshot fires three rocks in different directions. This item
debuted in OoT as a child-only item.
=======================================================================
7: Frequently Asked Questions
[LFAQZ]
=======================================================================
NONE SUBMITTED!!!
=======================================================================
8: Chronology
[8CRON]
=======================================================================
*** Release Date ***
[8REDA]
This is the release dates for the Zelda games, including some remakes,
etc.
These are not in chronological order, just when they were released to
the
public.
-------- Released Titles --------
+----------------------------------------+
| The Legend of Zelda |
| 1987, Nintendo Entertainment System |
+----------------------------------------+
+----------------------------------------+
| Zelda II: Link's Adventure |
| 1988, Nintendo Entertainment System |
+----------------------------------------+
+-----------------------------------------+
| The Legend of Zelda: A Link to the Past |
| 1991, Super NES |
+-----------------------------------------+
+-----------------------------------------+
| The Legend of Zelda: Link's Awakening |
| 1993, Nintendo GameBoy |
+-----------------------------------------+
+-----------------------------------------+
| The Legend of Zelda: Ocarina of Time |
| 1998, Nintendo 64 |
+-----------------------------------------+

+-----------------------------------------+
| The Legend of Zelda: Link's AwakeningDX |
| 1998, Nintendo GameBoy Color |
+-----------------------------------------+
+-----------------------------------------+
| The Legend of Zelda: Majora's Mask |
| 2000, Nintendo 64 |
+-----------------------------------------+
+-----------------------------------------+
| The Legend of Zelda: Oracles of Ages |
| The Legend of Zelda: Oracles of Seasons |
| 2001, Nintendo GameBoy Color |
+-----------------------------------------+
+-----------------------------------------+
| The Legend of Zelda: ALttP/Four Swords |
| 2002, Nintendo GameBoy Advance |
+-----------------------------------------+
+-----------------------------------------+
| The Legend of Zelda: OoT - Master Quest |
| 2003, Nintendo GameCube |
+-----------------------------------------+
+-----------------------------------------+
| The Legend of Zelda: The Wind Waker |
| 2003, Nintendo GameCube |
+-----------------------------------------+
+-----------------------------------------+
| The Collector's Edition |
| |
| The Legend of Zelda |
| Zelda II: Link's Adventure |
| The Legend of Zelda: Ocarina of Time |
| The Legend of Zelda: Majora's Mask |
| 2003, Nintendo GameCube |
+-----------------------------------------+
+-----------------------------------------+
| The Legend of Zelda: FS Adventures |
| 2004, Nintendo GameCube |
+-----------------------------------------+
+-----------------------------------------+
| Classic NES Series: The Legend of Zelda |
| 2004, Nintendo GameBoy Advance |
+-----------------------------------------+
+-----------------------------------------+
| Classic NES Series: Zelda II |
| 2004: Nintendo GameBoy Advance |
+-----------------------------------------+

+-----------------------------------------+
| The Legend of Zelda: The Minsih Cap |
| 2005: Nintendo GameBoy Advance |
+-----------------------------------------+
+-----------------------------------------+
| The Legend of Zelda: Twilight Princes |
| 2006(Nov): Nintendo Wii |
| 2006(Dec): Nintendo GameCube |
+-----------------------------------------+
-------- Announced Titles --------
+-----------------------------------------+
| The Legend of Zelda: Phantom Hourglass |
| Nintendo Duel-Screen |
+-----------------------------------------+
*** Timeline ***
[8TIMB]
Now, few things
- If you do not believe in a timeline at all, take yourself to the "X"
on
your computer screen
- This will not help you one bit if you believe in a Single Timeline,
this is
based solely on the existence of a Double Timeline.
- I will only focus on FSA, and the games involving it, these being The
Four
Swords Trilogy, ALttP and the Imprisoning War.
- For other information please check out the Timeline Topic on the
Twilight
Princess Message Board.
http://boards.gamefaqs.com/gfaqs/gentopic.php?board=920769
Now then, many people have wondered where exactly FSA fits in on the
Zelda
Timeline, well I can tell you, but nobody knows for sure. First let me
say, I
looked at another FAQ on this game, and his timeline is horrible
inaccurate.
However, given he has not updated in a few years I can let it slide.
- The Older Stories -
Anyways, back to the matter on hand. To fully understand the Timeline,
one
must understand it's origins, and, easily enough, thanks to an
interview with
Eiji Aonuma we know that Four Swords comes before OoT, which, until
that

interview, was the first game on the Timeline. So, since The Minish Cap
must
take place before Four Swords, it is logical to place it first.
For you see, in the Minish Cap we learn not only the origin oh Vaati,
but the
Four Sword, and even Link's trademark hat. In the end, Vaati has
completely
lost his "humanity" (as a Minish) and is forever stuck in the form of
the
Wind Mage. He is sealed within the Four Sword, these events are
mentioned in
Four Swords. Four Swords, takes place many years after TMC, probably a
good
century since the true tale of the TMC events had been changed.
However, once
again Vaati breaks free and kidnaps Zelda. This leads Link, to save
her, in
the events of Four Swords.
- The Story at Hand -
Now, in the intro to this game, the events of both TMC and FS are
explained
before the game itself takes place. Vaati breaks free again, however
this
time a more sinister plot had occurred since Vaati could no longer
break free
on his own. Ganondorf, the true villain in this game, stole the Dark
Mirror
for once purpose. It was not to create a Dark World, but to create
Shadow
Link, who would trick Link into pulling the Four Sword, and in turn,
releasing Vaati.
Shadow Link then proceeds to kidnap the Six Maidens and Zelda to
distract
Link while Vaati covers Hyrule in darkness. This too, aids Ganondorf,
who
takes the opportunity to take the Magic Trident from the Pyramid. After
that,
Ganondorf turned the Knights of Hyrule into the Dark Stafols Knights,
then by
scattering the Four Royal Jewels he departed to the Palace of the Winds
to
join Vaati. It was only by luck, that the Four Links came about the
Jewels on
their travels, but in the end they do climb the Tower of Winds and
defeat
Vaati for the last and final time.
What of Ganon? An epic battle took place between him and the Links, but
he
was not killed. Ganon took Vaati's place and was sealed within the Four
Sword. This is where the timeline comes in. What happened after? Well,
first

we need to understand something that has a lot in common with this
game, and
that is the Imprisoning War.
- The Imprisoning War -
If you have ever played A Link to the Past then you've noticed many
similarities with this ancient war. The Dark World, and the Dark Tribe
are
many things. It has been argued by some (like myself) that the IW and
this
game are in fact, the same even, only with small inconsistencies. These
however, become larger and it's clear that the FSA = IW Theory is not
cannon.
So where does this all tie in? Well, based on other facts, many assume
the IW
happens shortly after FSA, sometime when Link is gone. Ganon, somehow
breaks
free from the Four Sword and wages war upon Hyrule to get the Triforce.
The
events of the IW take place, and the Seven Sages (descendents of Zelda
and
the Six Maidens) seal Ganon after he acquires the Triforce. So, now the
Dark
World has taken over the Golden Land, the same Dark World, that was
once just
a prison. The events of ALttP follow this, so we know this, FSA - The
IW -
ALttP
- The Triforce -
Ah yes, the golden triangles that are the embodiment of Hyrule. Why
didn't
Ganon lust for this power as he did in OoT? I tend to belive that
Ganondorf,
did not know of such a power until he was sealed in the Four Sword, a
Realm
that is very mysterious.
For, this Ganondorf was not the same Ganondorf from OoT. He never did
get the
Triforce, yet he still had the spirit of Ganon, within him. Without the
Triforce of Power Ganondorf could not transcend to immortality and
become
Ganon, thus we assume, is the purpose of the Trident. It gave Ganondorf
power
beyond his wildest dreams, and this way he became Ganon, The King of
Darkness, who would claim the Triforce years later.
- Ganondorf and Ganon -
The spirit of Ganon is what some speculate, to be an undying will that
will
never truly be vanquished and will always love on so long as the fates
of

Ganon-Link-Zelda and the Triforce are tied together. Ganon was not
entered
into the mortal world until the birth of Ganondorf, years before OoT
takes
place.
However, in OoT we all know that Ganondorf did in fact use Link to
enter the
Sacred Realm and take the Triforce of Power. In this sense, he became
Ganon,
and yet the events of OoT would "erase" these events. For, Zelda,
although
indivertibly, created another paradox universe identical to the real
one,
only seven years earlier in time.
- The Double-Timeline -
I do not want to get into the specifics, however, there are in fact two
Zelda
timelines, each containing various games. One, the original is often
called
the Adult or Old Timeline. In this, Ganondorf did get the Triforce, and
was
sealed, etc. And following OoT, comes TP, TWW and PH, ok sure.
However, when Zelda did send Link back she created an alternate
universe. It
is here, where Ganondorf misses out on his power. By not pulling the
Master
Sword, the child Link did not allow Ganondorf to enter the Sacred
Realm, and
this, lead into OoT. Instead Child Link headed off for Termania, and
what
became of Ganondorf? Many suspect that he knew that the Triforce was
out of
reach and passed on, but of course, Ganon lives on.
After the events in MM many, many years pass. The legend is almost
forgotten,
but another male was born into the Gerudo Tribe, bearing the name, of
Ganondorf. Perhaps it was the same Ganondorf reincarnated, who knows,
but he
knew of the monster inside him, and the Triforce. Thus, all the above
events
take place, followed by the IW, ALttP and many other games.
- Closing -
While there are many variations of the alternate timelines, there is no
doubt
that FSA takes place before ALttP. The rest is up to you, again, see
the
timeline topic for more details. In closing, this is what I believe to
be
true:

The Old Timeline
TMC -> FS -> OoT -> TP -> TWW -> PH
The New Timeline
TMC -> FS -> pre-OoT -> MM -> FSA -> The IW -> ALttP -> LA -> LoZ ->
AoL ->
Oracles
There are some variations of this, including the Child Line going right
from
MM to the Oracles, and having FSA-AoL on the Old. It's up to you, but I
hope
I cleared many things up.
=======================================================================
9: Contact Information
[CINFO]
=======================================================================
If you have any questions or wish to contribute to this walkthrough
please
feel free to e-mail me at [email protected]. Please do not send me any
complaints or hate mail, because I will not take kindly to it. If you
provide
anything I may have missed for this Walkthrough please give me a name
so I
can mention you in the credits.
=======================================================================
10: Credits
[LCRED]
=======================================================================
Myself - For writing this up
Nintendo & Capcom - For making a most excellent game
GameFAQs & CJayC - For having the site!
*********************************************************************** This guide has been licensed for use on zeldasages.com and the above listed
entities if any. Reproduction or use on another website without permission of
the author *not zeldasages, the original writer* is considered illegal.