Embed Size (px)
Citation preview

New
Intermediate
DVD
Sue Kay & Vaughan Jones
Sue Kay & Vaughan Jones
DigitalNewInside Out
Elementary
User’s Guide
Digital booklet_final.indd 1 27/5/09 11:18:07

2
Macmillan EducationBetween Towns Road, Oxford OX4 3PPA division of Macmillan Publishers LimitedCompanies and representatives throughout the worldISBN 978-1-4050-9950-9 (single-user)ISBN 978-0-2304-0016-0 (multiple-user)© Macmillan Publishers Limited 2009First published 20092013 2012 2011 2010 200910 9 8 7 6 5 4 3 2 1
All rights reserved; no part of this publication may be reproduced, stored in aretrieval system, transmitted in any form, or by any means, electronic, mechanical,photocopying, recording, or otherwise, without the prior written permission of the publishers.
Software developed by MPS Learning and New Media ServicesCEF material by Chris DawsonVideo material created by DVAPronunciation chart © Adrian Underhill
Student’s Book materialText © Sue Kay & Vaughan Jones 2007Design and illustration © Macmillan Publishers Limited 2007Review units by Peter Maggs and Catherine SmithIllustrated by Beach pp 6, 9, 15, 21, 27, 32, 37, 39, 43, 49, 55, 63, 65, 69, 71, 77,81, 83, 93, 99, 105, 111, 118, 123; Cyrus Deboo p 107; Ed McLachlan pp 8, 14, 20,28, 36, 40, 42, 46, 48, 54, 57, 64, 70, 76, 79, 82, 84, 92, 98, 101, 104, 110, 112,127, 129, 131, 133; Montana Forbes p 22; Andy Parker p 94; Gavin Reece pp 119,124; Tobatron p 61; Lucy Truman p 63; Adrian Valencia p 85The authors and publishers would like to thank the following for permission toreproduce their photographs: Actionplus/B.Ainslee p44(f); Alamy/J.Waterman p5(b),N.Price p11(a), Uripos p12(b), P.Solloway p12(c), All Star Picture Library pp26(t),88(1), TNT Magazine p100(tr), Jake Norton p102(t), Peter Horree p102(bl),W.Bibikow p106(tl), W.Manning Photography p106(tr), M.Brivio p106(b), P.Doyle pp59(tr), 114(l); Anglia/B.Hobbs p73; Corbis/M.Prince p11(d), J.Craigmyle p11(c), R.Lewine p11(b), T.Tadder p12(d), T.Reed p23(m), RCWW Inc. p24(l), F.Trapper p26(mt), Reuters pp26(mb), (b), 35, 38(b), 41(m), 41(b), 84(r), D.Raymer p31, S.Marcus p34(t), P.Turnley p34(m), R.Hellestad p38(t), S.McLaughlin p44(b), H.Trygg p44(g), C.Carroll p44(bl), J.Springer Collection p52, M.Anzuoni p58(c), R.Folkks p58(a), B.Kraft p58(b), Sygma p58(3), S.Frink p59(mr), R.Landau p59(br), Bettmann Archive p80(d), J.Schmelzer p85, J.Bilic p86(b), S.Frink p87(l), G.Baden p87(t), B.Harris p87(m), D.Munoz p88(3), S.Cardinale p88(2), L.O’Connor p88(4), Creasource p89, R.Gomez p95(a), E.Bock pp95(b), 96, D.Galante p95(c), B.Pepone p95(d), M.Watson p95(e), A.Scott p97(l), Imagesource p100(l), J.Feingersh p102(tl), Grace p102(bl), Troy p107, U.Wiesmeier p115(b), DK Library p45; Empics/D.Ockenden p86(t); Getty pp115(t), p58(br), S.Murphy p4, Stock4B p5(d), H.Sorensen p5(c), S.Stafford p5(a),
A.Caulfield p7, Fotos International p10, D.Arsenault p11(a), Longview p12(e), C.Wilhelm p12(f), E.O’Brien p18(l), J.Knowles p18(r), Giantstep Inc. p19, Z.Shroff p22(l), C.Gullung p22(r), W.Packert p23(l), R.Ross p23(r), M.Harris p25, J.Tisne p30(l), E.Nathan p20(tr), Z.Smith p30(mr), S.Indermaur Photography p30(b), B.Wilson p33, A.Mo p34(b), R.Scorza p41(1), F.Caffrey p41(l), M.Cosslett p44(c), D.Sacks p44(d), J.Nicholson p44(a), D.Vervits p44(br), C.Allegri p47(l), N.Kamm p58(bl), M.Cardy p59(tl), G.George p68, P.Harvey p69, F.Harrison pp75(m), (r), F.Micelotta p75(l), P.Cade p78(b), E.Agostini p84(l), Handout p86(m), DreamPictures p86(r), N.Dolding p87(b), C.Harvey p91, D.Anschutz p95(f), China Tourism Press p100(b), A.Murrell p108(t), H.Merten p109(1), M.Epstein p109(2), R.Johnston p109(3), J.Wyman p109(4), M.Mehlig p113, J.Feingersh p115(mr), Cayman p115(ml); A.Gramer p32; Guinness World Records p80(b); Idols Licensing p28; Masterfile/G.Shelley p109(b); Panos Pictures/C.Penn p114(r); Photolibrary pp12(g), 17, 24(r), 44(e), 47(r), 67, 103; Reuters/F.Paredes p90; Rex Features pp51(l), (r), 80(a), 80(c), 97(r), 108(b), D.Stone p5(f), Conrad p16, Sipa Press p58(tl), Roderick Angle Photography p74; Science Photo Library/J.Cole p12(h); The Kobal Collection/Plunge Pictures p47(b). Hotel Hurricane with kind permission ofwww.hotelhurricane.com p53; Emirates Palace Hotel pp60(b), 61; Noble House Hotel p60(t).Commissioned photography by Haddon Davies pp50, 66, and Dean Ryan p6.Photographs on p72 with kind permission of Sue Kay and Vaughan Jones; photo on p78(t) with kind permission of Karyn.
DVD Teacher’s Book materialText @Macmillan Publishers Limited 2007Design and illustration @Macmillan Publishers Limited 2007Text by Julia Starr Keddle, Martyn Hobbs, and Peter MaggsThe material in this book is copyright. However, the publisher grants permission for copies to be made without fee on those pages marked with the photocopiable symbol.Private purchasers may make copies for their own use of for use by classes of which they are in charge; school purchasers may make copies for use within and by the staff and students of the school only.For copying in any other circumstances, prior permission in writing must be obtained from Macmillan Publishers Limited.The authors and publishers would like to thank the following for permission to reproduce their material: Rose MedleyThe authors and publishers would like to thank the following for permission to reproduce their photographic material: Alamy IAdam Tiernan Thomas pI2(tr), Alamy IEgmont Strigl pI4(d, c); Brand XPictures p6(t); Corbis/David Corio/S.I.N. pI3(b), Corbis/Tony Savino pI4(f), Corbis/Richard Cummins pI4(b); Hotel Cuevas Pedro Antonio de Alarcon pI4(a, e); Redferns Music Picture Library ppI2(l, br), 13(t); Robert Harding World Imagery p15.
Digital booklet_final.indd 2 27/5/09 11:18:07

3
Contents
8
101213 14 16 17
IntroductionGetting startedWhat is New Inside Out Digital?
50
51525354
59
The Digital BookWhat is the Digital Book and how is it accessed?The Navigation PaneThe ToolboxThe Pen, Highlighter and Eraser toolsThe Zoom tools The Stopwatch and Reveal toolsThe Note tool
The Teacher’s AreaWhat is the Teacher’s Area?The ToolboxThe Pen, Highlighter, Eraser and Text toolsThe Shape tool Inserting imagesInserting audioInserting linksThe Stopwatch, Reveal, Copy and Paste toolsThe Select tool The Undo, Delete, Background Colour toolsThe Navigation PaneAdding, deleting, organising and printing pages
Teaching ideasFour ways to use the Pen and Highlighter toolsFive ways to use the Reveal tool Four ways to use the Stopwatch Four ways to check answers Five ways to use shapes
Technical information
262728
2930313233
3436
3738
The Scroll, Select, Undo and Delete toolsPlaying audioPlaying videoGrammar explanationsAnswer keysInteractive activitiesCreating, saving and opening saved annotations and notes
18
20 21222324 25
Saving, opening and creating pages in the Teacher’s AreaCreating, saving and opening saved gamesCustomising, opening and saving the Games Word ListCustomising, opening and saving the Games Question ListHow to play Word ScramblingHow to play Picture MatchingHow to play ConnectionsHow to play RacingThe Phonemic Chart and additional ResourcesVideo
39
40
42
43
4445464748
49
467
Four ways to record vocabulary Five ways to use video clips Four ways to use the audio playerFive ways to use links in the Teacher’s Area
55 5657
58
Digital booklet_final.indd 3 27/5/09 11:18:07

4
An Introduction to Interactive Whiteboards
I have worked for many years in English language teaching, as a teacher, a teacher trainer, and an author. I have always been passionate about the role of technology in teaching
and learning. In Blended Learning (Macmillan: 2007), when I first wrote about interactive whiteboards, they were a relatively new phenomenon. Today, they are becoming increasingly common in classrooms around the world. Interactive whiteboards (IWBs) come in all sizes, from small and portable to wall-mounted IWBs for use with full-size classes. Some IWBs require the use of an e-pen; with others, you can interact with the board using your finger. It is also possible to use interactive whiteboard software with just a computer and data projector. An IWB allows the teacher to incorporate the power of multimedia in the classroom in new and exciting ways.
New Inside Out Digital allows the teacher to access and display the interactive version of any page from the book in front of the class. This digital material is ready to use, requiring no preparation from the teacher, and is designed to help the flow of the lesson. This handbook includes a number of practical ideas which can help you enhance your lessons.
Many language teachers enjoy creating their own digital materials. Using an interactive whiteboard, they can use shapes and colours in imaginative ways, changing the background colour to hide and reveal text for instance; they can easily insert
Digital booklet_final.indd 4 27/5/09 11:18:07

5
audio clips and web-links into their pages. A special Teacher’s Area within Macmillan’s New Inside Out Digital provides a digital ‘blank canvas’ which can be accessed at any point during a lesson. A teacher can build up a complete repository of teacher and student generated material to support each unit of the coursebook. This authoring facility offers the creative teacher the best of both worlds – quality material from the coursebook working seamlessly alongside a locally produced, personalised and reusable materials bank. All the lessons created can be saved and reused, or even sent to other New Inside Out Digital users!
New Inside Out Digital also contains digital game templates which are easily customised with your own content, but require minimal preparation time. Students can play motivating language games and at the same time recycle material selected by the teacher, such as a set of words which have cropped up in a previous class.
It is important to bear in mind that the IWB is a powerful and effective learning tool. By simply following sound pedagogical guidelines, teachers can easily integrate the new technology into their teaching, and provide students with motivating language learning experiences. This handbook will show you how to link principled teaching with the potential of the IWB to produce a range of new, practical teaching ideas. We hope you enjoy teaching with New Inside Out Digital. Pete Sharma
Digital booklet_final.indd 5 27/5/09 11:18:07

6
Getting startedAdjusting the screen resolution of your computerTo optimise the display of New Inside Out Digital for your projector, it’s recommended to set the screen resolution of your computer to 1024 by 768 pixels before running New Inside Out Digital. To do this, open the control panel and then click on Display. Go to the settings tab and adjust the screen resolution.
Calibrating your interactive whiteboardIt is important to calibrate your interactive whiteboard before each new session. You should do this using the software provided with your board.
■ If you have a Promethean board, right click the Activcontrol icon in the taskbar and click ‘calibrate’. Then follow the onscreen instructions.
■ If you have a Smartboard, right click the Smartboard icon in the task bar and click ‘orient’. Then follow the onscreen instructions.
■ If you have another type of interactive whiteboard, please refer to the manufacturer’s handbook on how to calibrate your board.
Using the New Inside Out Digital toolsNew Inside Out Digital has its own set of interactive whiteboard tools. When using these tools, it’s recommended to close any other tools provided in your interactive whiteboard software.
Running New Inside Out Digital with Multiple DisplaysIf you have a monitor and projector connected to your computer, it is advisable to mirror the displays, so that New Inside Out Digital appears on both the projector and monitor.Users running in extended desktop mode should be aware that New Inside Out Digital will run on the primary display.
Digital booklet_final.indd 6 27/5/09 11:18:07

7
What is New Inside Out Digital?
■ The Digital Book is a digital version for the coursebook, with multimedia assets and tools which allow you to interact with the material.
■ The Teacher’s Area allows you to create and save your own material, and also provides interactive game templates which can be customised.
■ The Resources section provides access to coursebook-related additional material, which can be viewed on screen and printed.
■ The Video section provides access to all the video clips which accompany the coursebook.
New Inside Out Digital is a digital component designed for classroom use which accompanies the New Inside Out coursebook.
It is designed to be used with an interactive whiteboard, and can also be used with a computer and projector.There are four main areas to New Inside Out Digital, which can be accessed from the Home page:
Digital booklet_final.indd 7 27/5/09 11:18:07

8
What is the Digital Book and how is it accessed?
■ This is a digital version of the coursebook with multimedia assets linked to the book pages.
■ When you select the Digital Book option on the Home page, a unit menu will appear listing all the main units of the Student’s Book.
■ Click on the unit you wish to view, and the Digital Book will open on the first page of the relevant unit.
➤
Unit 4, page 22
Digital booklet_final.indd 8 27/5/09 11:18:08

9
The Digital Book
The Digital Book contains:
■ All the pages from the main units in the coursebook.
■ A navigation pane which allows you to move to different pages of the book.
■ A toolbox which provides tools to enable you to interact with the Digital Book pages, for example by zooming into activities and writing on the page.
■ Asset tabs on the left of the book pages which provide links to audio files , video clips , grammar reference sections , answer keys and interactive versions of many exercises .
The Navigation Pane – see page 10
Student’s Book page with multimedia assets - see pages 20-24Unit 4, page 22
The Toolbox – see page 12
Digital booklet_final.indd 9 27/5/09 11:18:09

10
The Navigation PaneWhen in the Digital Book, the navigation pane appears on the left of the screen. It provides a number of functions:
■ You can select a page from anywhere in the Digital Book. Use the scroll bar to move through thumbnails of the Digital Book pages and click on a thumbnail to select a page. The current page is highlighted with a green outline in the navigation pane, and the chosen page appears in the centre of the screen.
■ You can use the forward and back page buttons to move to the next or previous page of the Digital Book.
Unit 4, page 22
Digital booklet_final.indd 10 27/5/09 11:18:09

11
The Digital Book
■ The List View button changes the book thumbnails to a list of the Digital Book content, with options to view by Unit and page, Skill or Media Type. To select a page or activity click on the relevant section in the list and the page or activity appears in the centre of the screen.
■ To return to view the book thumbnails, click on the Thumbnail View button.
At the bottom of the navigation pane there are four general page navigation buttons:
Home. This takes you directly to the Home page.
Help. This provides access to the Help Tutorial.
Minimise. This allows you to access other programmes without closing New Inside Out Digital.
Close. This closes New Inside Out Digital.
To maximise space on screen, the navigation pane can be minimised by clicking on the arrow on the Digital Book tab.
Unit 4, page 22
Digital booklet_final.indd 11 27/5/09 11:18:10

12
The ToolboxThe toolbox provides a number of tools which enable you to interact with the Digital Book pages.
The toolbox can be adjusted in the following ways:■ To move the toolbox anywhere on the screen, click and drag
the tab at the top.
■ To collapse the labels so only the tool icons are showing, click on the red arrow in the bottom right corner of the toolbox.
■ To minimise the whole toolbox, click on the red arrow in the bottom left corner.
■ To view further options, click on the red arrow next to the selected tool.
PB
The Toolbox
Unit 4, page 22
Digital booklet_final.indd 12 27/5/09 11:18:11

13
The Digital Book
The Pen, Highlighter and Eraser toolsThe Pen and Highlighter■ The pen and highlighter can be used to make
annotations on the Digital Book pages.
■ When the Pen or Highlighter tools are selected, you can choose from a number of different line widths and colours by clicking on the red arrow on the left of the selected tool.
Editing annotations■ To move an annotation to a new position, click on the
Select tool and then move the annotation by clicking and dragging it across the screen.
■ To resize an annotation, select it using the Select tool and a box will appear around the annotation. Drag the handles on the edges of this box to change the size of the annotation. Dragging the bottom right handle will maintain the shape of the annotation without stretching.
■ To rotate an annotation, select it using the Select tool . Drag in a circular motion from the annotation frame.
The Eraser Annotations can be erased from the page using the Eraser tool.
1 Select the Eraser tool.
2 Click on the annotation you want to erase.
13Unit 4, page 22
Digital booklet_final.indd 13 27/5/09 11:18:11

14
The Zoom toolsZoom 1The Zoom 1 tool allows you to zoom in on pre-defined areas of the Digital Book pages with just one click.
1 Select Zoom 12 Hover the cursor over the page, and the different pre-defined zoom areas will become highlighted.3 Click on one of the zoom areas, and it will zoom into that section.4 To return to the main page view, select the Zoom out tool.
Unit 4, page 22
Digital booklet_final.indd 14 27/5/09 11:18:13

15
The Digital Book
Zoom 2 The Zoom 2 tool allows you to zoom in on any part of the Digital Book pages.
1 Select Zoom 2.
2 Click and drag the cursor to select the area you wish to zoom into.
3 To zoom out, select the Zoom out tool.
Unit 4, page 22
Digital booklet_final.indd 15 27/5/09 11:18:13

16
The Stopwatch and Reveal ToolsStopwatchThe Stopwatch can be used to time activities in class.
1 Select Stopwatch.
2 Click on the up and down arrows beneath each digit to set the time.
3 You can set the Stopwatch to count down or up by selecting one of the circles next to ‘down’ or ‘up’.
4 To choose the sound you want to hear at the end of the selected time, click on the audio symbol and select a sound, or ‘none’ from the list. To close the list, click on the audio symbol again.
5 Click on the Play symbol to start the Stopwatch.
6 You can move the Stopwatch anywhere on the screen by clicking and dragging it.
7 To close the Stopwatch, click on the cross in the bottom right corner.
Reveal The Reveal tool can be used to hide and then gradually reveal anything on the screen.
1 Select Reveal, and the content of the page will be hidden.
2 Gradually reveal the page by dragging the arrows at the top, bottom, left or right of the screen. The masked area can also be moved around the screen.
3 To turn off the Reveal tool, click on the Reveal icon in the toolbox.
PB
Unit 4, page 22
Digital booklet_final.indd 16 27/5/09 11:18:14

17
The Digital Book
The Note ToolThe Stopwatch and Reveal ToolsThe Note toolText notes can be added to any page of the Digital Book.
1 Select Note and a yellow box will appear on the screen.2 Click in the yellow box, and type your note.3 To move the note to a new position, click and drag it across the page.4 To minimise the note, click on the arrow pointing upwards in the top right corner or the note.5 To minimise the note further, click on the arrow pointing left in the top right corner of the note.6 To delete a note, click on the cross in the top left corner of the note.7 If you wish to save your notes, select either ‘Save notes and annotations’ or ‘Save notes only’ from the prompt when you are closing New Inside Out Digital.
Unit 4, page 22
Digital booklet_final.indd 17 27/5/09 11:18:15

18
The Scroll, Select, Undo and Delete tools
Scroll The Scroll tool allows you to move the selected Digital Book page up or down the screen and move to the next or previous page.
1 Select Scroll.2 Click and drag the page into the required position.
Select The Select tool can be used to select and then manipulate
items you have added to the page.
■ To select an annotation, click on the Select tool and then on the annotation. When an annotation is selected a grey box will appear around it.
For more information on the Select tool, see page 34.
Unit 4, page 22
Digital booklet_final.indd 18 27/5/09 11:18:15

19
The Digital Book
Undo ■ You can reverse your last actions by selecting the Undo tool.
DeleteDeleting pen annotations and notes on the current page■ To delete individual pen annotations, select the annotation you
want to delete using the Select tool, and then select Delete.
■ To delete a number of pen annotations at the same time, click on Select and then click and drag the cursor over the annotations. Click on Delete and all the selected annotations will be deleted.
■ To delete all the pen annotations on a page, select Delete and click on the red arrow on the left of Delete tool. Click on ‘All’ and select the option ‘Clear pen annotations from current page’.
■ To delete all the pen annotations and notes on a page, select Delete and click on the red arrow on the left of Delete tool. Click on ‘All’ and select the option ‘Clear current page’.
Deleting all pen annotations and notes from the Digital Book■ To delete all pen annotations in the Digital Book select Delete and
click on the red arrow on the left of Delete tool. Click on ‘All’ and select the option ‘Delete pen annotations from the Digital Book’.
■ To delete all pen annotations and notes in the Digital Book select Delete and click on the red arrow on the left of the toolbox. Click on ‘All’ and select the option ‘Clear Digital Book’.
Unit 4, page 22
Digital booklet_final.indd 19 27/5/09 11:18:15

20
Playing audioNew Inside Out Digital includes audio tracks which are linked to the relevant pages of the Digital Book.
■ To access an audio track, click on the audio tab aligned with the exercise you are focusing on, and an audio player will appear. You can drag the audio player anywhere on screen.
■ The audio player includes the standard Play, Stop and Pause buttons.
■ To adjust the volume, drag the slider bar next to the audio symbol to the left or right.
■ To view the audio script, select the script button and the audio script will drop down from the audio player.
■ To cue the audio player to start playing from a particular point, click on a word in the audio script. The audio will begin playing from the beginning of the selected sentence.
■ To close the audio player, click on the cross in the top right corner.
Unit 4, page 22
Digital booklet_final.indd 20 27/5/09 11:18:16

21
The Digital Book
Playing videoNew Inside Out Digital includes video clips linked to the relevant pages of the Digital Book.
■ To play a video programme, click on the video tab on the left of the page, and a video player will appear.
■ The video player includes the standard Play, Stop and Pause buttons.
■ To view the video in full screen mode, click on the expand button on the right of the video player. To return to viewing the video in a window, click the expand button again.
■ To adjust the volume, drag the slider bar next to the audio symbol to the left or right.
■ s To view subtitles, select the subtitles button on the right of the video player. To turn the subtitles off, click the subtitles button again.
■ To move to a different point in the video, drag the slider bar next to the stop button to the right or left.
■ To close the video player, click on the cross in the top right corner.
Unit 4, page 26
Digital booklet_final.indd 21 27/5/09 11:18:17

22
Grammar explanationsNew Inside Out Digital includes Grammar explanation boxes linked to the relevant pages of the Digital Book. The students can see the same explanations in the back of their coursebooks.
■ To view a Grammar explanation, click on the Grammar tab aligned with the Grammar reference you wish to view. The explanation will appear in a box on the screen.
■ To move a Grammar explanation box to a new position, click and drag it across the screen.
■ To close a Grammar explanation, click on the cross in the top right corner of the box.
22
Unit 4, page 23
Digital booklet_final.indd 22 27/5/09 11:18:18

23
The Digital Book
Answer keysAnswer keys for all the exercises in the Digital Book are linked to the relevant pages.
■ To view an answer key, click on the answer key tab aligned with the exercise you are focusing on, and an answer key box will appear.
■ You can reveal the answers to an activity one by one by clicking on the numbered green circles on the left of the box. To hide the answers, click on the numbered green circles again.
■ To view all the answers at once, click on ‘Show All’ at the bottom of the answer key box.
■ To hide all the answers, click on ‘Hide All’ at the bottom of the answer key box.
■ To close an answer key box, click on the cross in the top right corner.
Unit 4, page 22
Digital booklet_final.indd 23 27/5/09 11:18:18

24
Interactive activitiesThere are interactive versions of many exercises in the Digital Book. The content is the same as in the coursebook, but the activity can be done in an interactive way. There are a range of activity types; including drag and drop, reordering sentences, and matching pictures and words.
■ To access an interactive activity, click on the interactive activity tab aligned with the exercise you are focusing on. The interactive activity will appear on the screen.
■ To check the answers one by one, click on the green circles next to each question.
■ To check all the answers, click on the ‘Check all’ button at the bottom of the screen.
■ To reveal all the answers without completing the activity, click on the ‘Show answers’ button at the bottom of the screen.
■ To reset the activity back to the start position, click on the ‘Try again’ button at the bottom of the screen.
■ When there is an audio track to accompany the activity, this can be accessed by clicking the audio button.
■ To close an interactive activity, click on the cross in the top right corner.
Unit 4, page 25
Digital booklet_final.indd 24 27/5/09 11:18:19

25
The Digital Book
Creating, saving and opening saved annotations and notesCreating annotations and notes■ Annotations can be added to the Digital Book
pages using the Pen and Highlighter tools. For more information on how to do this, see page 13.
■ Notes can be added to the Digital Book pages using the Note tool. For more information on how to do this, see page 17.
Saving annotations and notes■ You can save annotations and notes you have added to the
Digital Book. This can be done when exiting New Inside Out Digital. Before the program closes, you will be given three options: Save Notes and Annotations, Save Notes only and Do Not Save.
■ If Save Notes and Annotations or Save Notes only are selected, you will be asked to enter a fi le name and choose a location in which to save the fi le. When you have done this, click ‘Save’.
Opening saved annotations and notes■ You can open notes and annotations which you have
previously saved. When opening the Digital Book at the beginning of a new session, you will be given two options: New Session and Saved Session.
■ If you choose ‘Saved Session’, browse for the fi le you want to open. Find the fi le and click ‘open’.
Digital booklet_final.indd 25 27/5/09 11:18:20
26
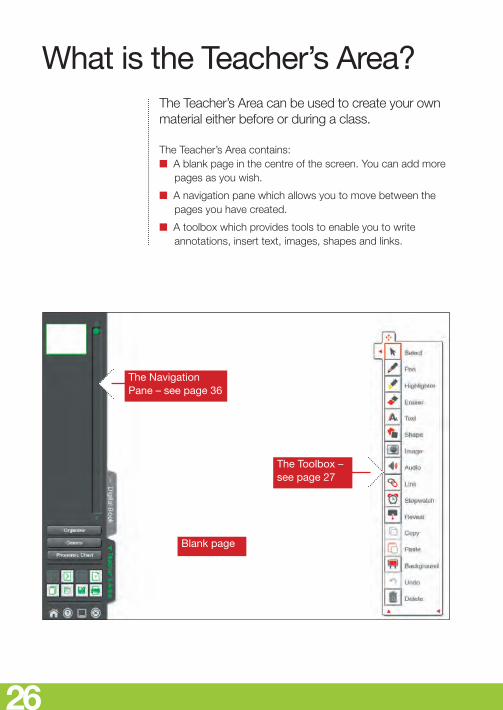
What is the Teacher’s Area?The Teacher’s Area can be used to create your own material either before or during a class. The Teacher’s Area contains: ■ A blank page in the centre of the screen. You can add more
pages as you wish.
■ A navigation pane which allows you to move between the pages you have created.
■ A toolbox which provides tools to enable you to write annotations, insert text, images, shapes and links.
The Navigation Pane – see page 36
The Toolbox – see page 27
Blank page
Digital booklet_final.indd 26 27/5/09 11:18:20

27
The ToolboxTeacher’s Area
■ The toolbox provides a number of tools which enable you to write annotations and create material for use in class.
■ Some of the tools in the toolbox are the same as in the Digital Book toolbox, while others are specific to the Teacher’s Area.
The toolbox can be adjusted in the following ways:
■ To move the toolbox anywhere on the screen, click and drag the tab at the top.
■ To collapse the labels so only the tool icons are showing, click on the red arrow in the bottom right corner of the toolbox.
■ To minimise the whole toolbox, click on the red arrow in the bottom left corner.
Digital booklet_final.indd 27 27/5/09 11:18:20

28
The Pen, Highlighter, Eraser and Text tools
The Pen, Highlighter and EraserThese tools work in the same way as in the Digital Book. For more information, see page 13.
The Text toolText can be added to any page in the Teacher’s Area.
1 Select Text, then click on the page and a text box will appear.
2 Choose the font, size and colour of the text.
3 Type your text into the box. When you have entered all your text, click on another part of the page.
4 To move the text to a new position, click on Select, click the text and drag it.
5 To edit text you have previously entered, double click the text, select the part of the text you wish to edit and change or delete it as required.
6 To delete a text object, select it using the Select tool and then select the Delete tool.
Digital booklet_final.indd 28 27/5/09 11:18:21

29
The Shape toolTeacher’s Area
You can add shapes to any page in the Teacher’s Area.
1 Select Shape and click on the red arrow on the left of the Shape tool.
2 Click on the shape you wish to insert.
3 For a shape with a fi ll colour, click on a colour under the fi ll icon. For a shape with no fi ll colour, select the fi rst box under the fi ll symbol.
4 For a shape with an outline, select a colour under the outline icon. For a shape with no outline, select the fi rst box under the outline symbol.
5 When you have chosen your shape and colours, click on the page and drag and the shape will be inserted.
To move a shape:1 Click on Select.
2 Click and drag the shape to a new position.
To resize a shape:1 Click on Select.
2 Click the shape you want to resize and a box will appear around it.
3 To adjust the height or width of the shape, click and drag the handles on the sides of the containing box.
4 To adjust the size of the shape while maintaining the same proportions, click and drag the handle in the bottom right corner of the box.
To rotate a shape:1 Click on Select.
2 Click the shape you want to rotate and a box will appear around it.
3 Click and drag the edges of the box.
To add text to a shape:1 Insert the text using the Text tool (see page 28).
2 Drag the text into the shape.See page 34 for how to group, lock and change the layer of text and shapes.
Digital booklet_final.indd 29 27/5/09 11:18:22

30
Inserting imagesImages can be added to any page in the Teacher’s Area.1 Click on Image and a browser box will appear.
2 Click on the browse button for the image you wish to insert.
3 When you have located the image, click on Open, and it will appear on the page.
To edit an image:To move an image around the page:
1 Click on Select.
2 Click and drag the image to a new position.
To resize an image:1 Click on Select.
2 Click the image you want to resize and a box will appear around it.
3 To adjust the height or width of the image, click and drag the handles on the sides of the box.
4 To adjust the size of the image while maintaining the same proportions, click and drag the handle in the bottom right corner of the box.
To rotate an image:1 Click on Select.
2 Click the image you want to rotate and a box will appear around it.
3 Click and drag the edges of the box.
Digital booklet_final.indd 30 27/5/09 11:18:22

31
Teacher’s Area
Inserting audioAudio can be added to any page in the Teacher’s Area.
1 Click on Audio and an information box will appear.
2 If you want to label the audio file, type this into the first text box.
3 Click on the browse button to search for the audio file you wish to insert.
4 Once you have located the audio file, click on Open and the audio file name will appear in the second text box.
5 Click on OK, and the audio button will appear on the page.
6 To move the audio button, click and drag the cross on the left of the button.
7 To edit an audio file, click on the edit symbol on the right of the button and change the information as required.
8 To play the audio file, select it using the Select tool. An audio player will appear with the standard play, pause and stop buttons.
9 To delete an audio button, select it using the Select tool and then click on Delete.
e
Digital booklet_final.indd 31 27/5/09 11:18:23

32
Inserting linksLinks to files, websites, pages of the Digital Book can be inserted onto any page in the Teacher’s Area.
To insert a link to a website or a page of the Digital Book:
1 00 Select Link.
2 Click anywhere on the page and a link information box will open.
3 If you want to label the link, type this into the first text box.
4 Select file, URL or Digital Book, depending of the type of link you want to insert.
5 Type in the URL or Digital Book page number into the second text box, or click on the browse button and search for a file.
6 Click OK and the link button will appear on the page.
7 To move the link button, click and drag the cross on the left of the button.
8 To edit a link, click on the edit symbol on the right of the button and change the information as required.
9 To open the link, select it using the Select tool and the file, website or Digital Book page will open.
10 To delete a link, select it using the Select tool and then click on Delete.
e
Digital booklet_final.indd 32 27/5/09 11:18:23

33
The Stopwatch, Reveal, Copy and Paste tools
Teacher’s Area
The Stopwatch and Reveal ToolsThese work in the same way as in the Digital Book. For more information on how to use them, see page 16.
Copy and Paste You can copy and paste annotations, text, shapes, pictures and links onto the same page or a different page in the Teacher’s Area.
1 Click Select.
2 Click the item you wish to copy.
3 Click Copy.
4 Click Paste and the new item will appear on the page.
5 To move the new item, click and drag it.
6 If you want to paste onto a different page, move to the required page and click Paste.
You can also copy and paste text and images from other applications.
Digital booklet_final.indd 33 27/5/09 11:18:23

34
The Select tool
The Select tool offers a number of functions to control the items, such as pen annotations and shapes that you create. To select an item, click on Select and then on the item. When an item is selected a grey box will appear around it.
Moving, resizing and rotating annotations, text, shapes and images.■ To move an item anywhere on the screen, click on Select
and then click and drag the item.
■ To change the height or width of an item, select it and click and drag the circles on the left, right, top or bottom sides of the box.
■ To adjust the size of an item while maintaining the same proportions, select it and click and drag one of the circles in the corners of the box.
■ To rotate an item, select it and click next to the circles on the edges of the box. When a circular arrow appears, click and drag to rotate the image.
Locking itemsItems can be locked to the page to prevent them being moved accidentally.
■ To lock an item, select it and click on the red arrow on the left of the Select tool to view the list of options. Click on the cross beneath the lock symbol, which will change to a tick, signifying the item is locked to the page.
■ To unlock an item, select it and click on the tick beneath the lock symbol, which will change to a cross, signifying the item has been unlocked.
Digital booklet_final.indd 34 27/5/09 11:18:23

35
Teacher’s Area
Moving items to the front and back
When you create new items, they are created on top of existing items. It is possible to move any item to the front or back of this order.
■ To move an item to the front, select it and click on the red arrow on the left of the Select tool to view the list of options. Click on the button with an arrow pointing upwards. The annotation will be moved to the front.
■ To move an item to the back, select it and click on the red arrow on the left of the Select tool to view the list of options. Click on the button with an arrow pointing downwards. The item will be moved to the back.
Grouping itemsItems can be grouped together and moved, resized and rotated as one item.
■ To group a number of items, click Select and then click and drag the cursor over the items you want to group together. Click on the red arrow on the left of the Select tool to view the list of options. Click the button with four arrows pointing inwards. The selected annotations will then behave as one item.
■ To ungroup items, click Select and then click and drag the cursor over the items you want to ungroup. Click on the red arrow on the left of the Select tool to view the list of options. Click the button with four arrows pointing outwards. The selected items will be separated back to the original items.
Digital booklet_final.indd 35 27/5/09 11:18:24

36
The Undo, Delete and Background Colour tools
Undo ■ You can reverse your last actions by selecting the Undo tool.
Deleting pen annotations, text, shapes and images■ To delete an item, select Delete, click on an item and it will be
deleted.
■ To delete a number of items at the same time, click on Select and then click and drag the cursor over the items. Click on Delete and everything within the selected area will be deleted.
■ To delete all the pen annotations on a page, select Delete and click on the red arrow on the left of Delete tool. Select ‘All’ and the option ‘Clear pen annotations from current page’.
■ To delete everything on a page, select Delete and click on the red arrow on the left of Delete tool. Select ‘All’ and the option ‘Clear current page’.
■ To delete all the pen annotations from all the pages in the Teacher’s Area, select Delete and click on the red arrow on the left of Delete tool. Select ‘All’ and the option ‘Clear pen annotations from all pages’.
Background colourThe background colour of any flipchart page can be customised.
1 Select the background colour tool and a colour chart will appear.
2 Select a colour and the background will change to this colour.
PB Digital booklet_final.indd 36 27/5/09 11:18:25

37
The Navigation PaneTeacher’s Area
The Navigation Pane displays thumbnails of the pages you have created in the Teacher’s Area.
■ Use the scroll bar to move through the thumbnails of the Teacher’s Area pages and click on a thumbnail to select a page. The current page appears with a green outline in the navigation pane.
■ You can use the forward and back page buttons to move to the next or previous page of the Teacher’s Area.
■ You can add and delete pages. For more information, see page 38.
■ The Games button provides access to game templates which you can customise with your own content. For more information, see page 40.
■ The Organise button provides access to the Page Organiser. For more information, see page 38.
■ You can create new sets of Teacher’s Area pages. For more information, see page 38.
■ You can open pages you have previously created and saved in the Teacher’s Area. For more information, see page 39.
■ You can save pages you have created in the Teacher’s Area. For more information, see page 39.
■ You can print pages you have created in the Teacher’s Area. ■ Clicking on the Digital Book tab at the side of the navigation
pane gives you instant access to the Digital Book. To return to the Teacher’s Area, click on the Teacher’s Area tab.
Digital booklet_final.indd 37 27/5/09 11:18:25

38
Adding, deleting, organising and printing pages
Adding and deleting pages■ To add a new page, click on the new page button at
the bottom of the navigation pane, and a new page will be added after the current page.
■ To delete the current page, click on the delete page button at the bottom of the navigation pane.
Organising pagesTo access the Page Organiser, click on the Organise button in the navigation pane. The Page Organiser will open, showing all the pages you have created.
■ To change the page order, click on a page and drag it into a new position.
■ To add a new page, click on the add page button and a new page will be added after the last page.
■ To delete a page, select the page you wish to delete and then click on the delete page button.
■ To copy a page, select the page you wish to copy and click on the copy button. Then click on paste and the new page will appear after the copied page.
■ To close the Page Organiser, click on the cross in the top right hand corner.
PrintingYou can print pages from the Teacher’s Area.
1 Click on the Print button at the bottom of the navigation pane.2 Select either ‘All Pages’, ‘Current Page’ or type in the page numbers you wish to print from and to. 3 When you have selected an option, click OK.
Digital booklet_final.indd 38 27/5/09 11:18:26

39
Saving, opening and creating pages in the Teacher’s Area
Teacher’s Area
You can save pages you have created in the Teacher’s Area.1 Click on the Save button at the bottom of the navigation pane. A dialogue box will open.2 Select ‘Save’.3 Add a file name and choose the location where you wish to save your document and then click on Save.
Opening saved pagesYou can open pages you have previously created in the Teacher’s Area and saved. Only one set of pages can be open at once.1 Click on the open button at the bottom of the navigation pane. 2 As only one set of pages can be open at any time, a prompt will appear asking you if you want to save your current pages. Select the option you require. 3 Browse your computer to find the file you wish to open.4 When you have selected the file, click on Open.
Creating a new set of pages1 Click on the new pages button at the bottom of the navigation pane. 2 As only one set of pages can be open at any time, a prompt will appear asking you if you want to save your current pages. Select the option you require.3 Your current pages will be closed, and a single blank page will appear in the Teacher’s Area.
Digital booklet_final.indd 39 27/5/09 11:18:26

40
Creating, saving and opening saved games
The games section in the Teacher’s Area provides interactive game templates to which you can add your own content. To access the Games menu, click on the Games button in the Teacher’s Area navigation pane.
The Games menu gives you the option to create a new game, edit or play a previously saved game.The content of the games is selected from the word and question lists, which are also accessed here from the Games menu. The word and question lists can be customised with your own content, and saved. For more information on how to do this, see pages 42 and 43.
Digital booklet_final.indd 40 27/5/09 11:18:26

41
Teacher’s Area
To create a new game:■ Click on the Games button.
■ Select Create Game and the four game options will appear.
■ Click on the game you wish to play, and the word or question list will appear.
■ Choose the words or questions you want to include by clicking on the plus symbols in the word list. You will see the words or questions added to the list on the right.
■ To remove a word or question from the game, click on the minus symbol.
■ To play the game immediately, click the Play button at the bottom of the screen.
To save a game:■ To save the game click on the Save As button at the bottom
of the Games Editor screen, enter a file name and choose a location to save the game in.
To open a saved game:■ To open a game you have previously saved, click on the
Games button in the navigation pane, and then select Play Saved Game. A box will open which allows you to search for your game. When you have found the game you wish to play, click Open.
Digital booklet_final.indd 41 27/5/09 11:18:26

42
Customising, opening and saving the Games Word List
Content for the Picture Matching, Connections and Word Scrambling games is taken from the word list in the Games area. New Inside Out Digital comes with a default word list which can be customised with your own content and saved.
To add a new word to the word list:1 Click on the Games button in the navigation pane.2 Click on Word List in the Game Menu.3 Click on Create Word at the top of the word list.4 You can then enter the new word, a prompt and add an image if you wish.5 Click on Save and the new word will be added to the word list.
To delete a word from the word list:1 Click on the Games button in the navigation pane.2 Click on Word List in the Game Menu.3 Click on the Delete option in the row of the word you wish to delete.
To edit a word in the word list:1 Click on the Games button in the navigation pane.2 Click on Word List in the Game Menu.3 Click on the Edit option in the row of the word you wish to edit.4 You can then edit the word, prompt and and image.5 To save your changes, click on Update.
Saving and opening word lists■ To save a word list, click on Save Word List. Enter a filename
for your list, choose a location to save it, and click on Save.
■ To open a word list, click on Open Word List. Browse for your saved file and click on Open.
Digital booklet_final.indd 42 27/5/09 11:18:26

43
Teacher’s Area
Customising, opening and saving the Games Question ListContent for the game Racing is taken from the question list in the Games area. New Inside Out Digital comes with a default question list which can be customised with your own content and saved.
To add a new question to the question list:1 Click on the Games button in the navigation pane.2 Click on Question List in the Game Menu.3 Click on Create Question at the top of the question list.4 You can then enter the new question with up to three multiple choice answer options. 5 Select the correct answer.6 Click on Save and the new question will be added to the question list.
To delete a question from the question list:1 Click on the Games button in the navigation pane.2 Click on Question List in the Game Menu.3 Click on the Delete option in the row of the question you wish to delete.
To edit a question in the question list:1 Click on the Games button in the navigation pane.2 Click on Question List in the Game Menu.3 Click on the Edit option in the row of the question you wish to edit.4 You can then edit the question and multiple choice answers.5 To save your changes, click on Update.
Saving and opening question lists■ To save a question list click on Save Question List. Enter
a filename for your list, choose a location to save it in and click on Save.
■ To open a question list, click on Open Question List. Browse for your saved file and click on Open.
Digital booklet_final.indd 43 27/5/09 11:18:26

44
How to play Word ScramblingWord Scrambling is a vocabulary game which can be played with up to four teams, or as a whole class activity. The aim of the game is to score points by putting the letters of the scrambled words into the correct order. The team with the most points at the end of the game wins.
■ On opening the game, select the number of teams that will be playing and click OK.
■ The letters of the scrambled word displayed on the screen can be dragged into the correct order.
■ If you want to provide a prompt, click on the clue button, and the prompt will appear on the screen. To remove the prompt, click on the clue button again.
■ To check if the letters are in the correct order, click on the check button.
■ You can award points to the different teams by clicking on the plus buttons to add counters to the boxes. You can also deduct points by clicking on the minus symbols.
■ To move on to the next word, click on the forward arrow. You can move back to previous words by clicking on the back arrow.
■ This game can be played in various ways. You could ask students or teams to take it in turns to come to the board to unscramble the words. Alternatively, you could ask teams to note down their answers and then check and award points as appropriate.
■ When you have finished playing, you can close the game by clicking on the cross in the top right corner.
Digital booklet_final.indd 44 27/5/09 11:18:26

45
How to play Picture MatchingTeacher’s Area
Picture Matching is a vocabulary game which can be played with up to four teams, or as a whole class activity. The aim of the game is to match the picture cards with the correct words or phrases by memorising their positions. The team with the most matching pairs at the end of the game wins.
■ To begin the game, ask the first team to choose two cards. The cards with the pink stars contain pictures, and the cards with the blue stars contain words or phrases.
■ First, select the team’s colour by clicking on one of the circles at the bottom of the screen, and then click on the chosen cards to turn them over and reveal their content. To check whether the cards are a matching pair, click on the Check button. If they are a match, they will be highlighted with the team’s colour and the team will be awarded a point.
■ If the cards are not a matching pair and they will turn back over so their content is hidden again.
■ If your students are struggling, you can show the content of all the cards. To do this, click on the Show all button. To turn the cards back over, click on this button again.
■ To play the game again with the same cards in different positions, click on the Play again button.
■ To close the game, click on the cross in the top right corner.
Digital booklet_final.indd 45 27/5/09 11:18:27
46
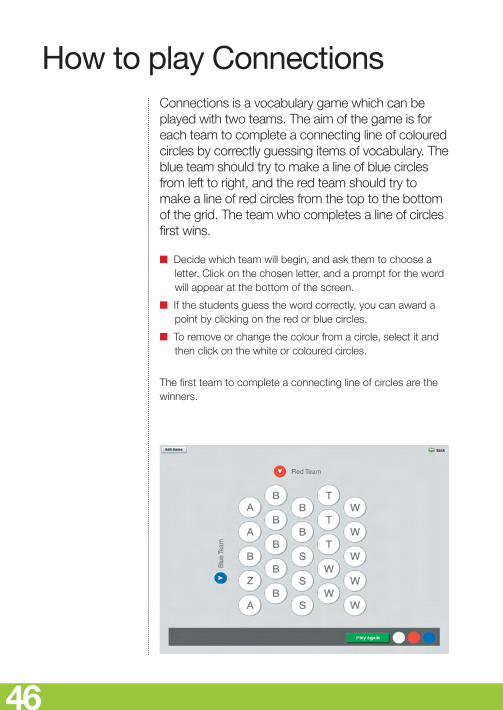
How to play ConnectionsConnections is a vocabulary game which can be played with two teams. The aim of the game is for each team to complete a connecting line of coloured circles by correctly guessing items of vocabulary. The blue team should try to make a line of blue circles from left to right, and the red team should try to make a line of red circles from the top to the bottom of the grid. The team who completes a line of circles first wins.
■ Decide which team will begin, and ask them to choose a letter. Click on the chosen letter, and a prompt for the word will appear at the bottom of the screen.
■ If the students guess the word correctly, you can award a point by clicking on the red or blue circles.
■ To remove or change the colour from a circle, select it and then click on the white or coloured circles.
The first team to complete a connecting line of circles are the winners.
Digital booklet_final.indd 46 27/5/09 11:18:27

47
How to play RacingTeacher’s Area
Racing is a multiple choice game which can be played with up to four teams. The aim of Racing is to reach the finish line first by correctly answering multiple choice questions.
■ On opening the game, select the number of teams that will be playing and click OK.
■ The first multiple choice question is displayed at the top of the screen. To select an answer, click on one of the multiple choice answers. To check if the answer is correct, click on the Check button. To move to the next question, click on the forward arrow, and to move back to previous question, click on the back arrow.
■ To award points, click on the plus symbols next to the runners. To remove points, click on the minus symbols.
Racing can be played in various ways:
■ You could ask students or teams to take it in turns to come up to the board and select one of the multiple choice answers. Alternatively you could ask teams to note down the answer to the first question and then check and award points as appropriate before moving on to the next question.
■ To end the game, click on the End Game button, and the team closest to the finish line will be the winners.
■ To start the game again click on the Play Again button and the runners will return to their start positions.
■ To close the game, click on the cross in the top right corner.
Digital booklet_final.indd 47 27/5/09 11:18:27

48
The Phonemic Chart and additional Resources
The Phonemic ChartAn interactive phonemic chart can be accessed from the Teacher’s Area.
■ To view the chart, click on the phonemic chart button in the navigation pane and the chart will open in a separate box.
■ Click on the symbols to hear the phonemic sounds and example words.
■ To close the chart, click on the cross in the top right corner of the box.
ResourcesNew Inside Out Digital provides a number of additional resources related to the coursebook. These can be accessed from the Resources section on the main menu page. These include:
■ Common European Framework checklists and answer keys
■ The Elementary DVD Teacher’s Book with worksheets
■ The Elementary Workbook answer keys
■ A user’s guide to New Inside Out Digital
All of the resources can be viewed as PDFs. They can be viewed in the class on an interactive whiteboard or with a computer and projector, and can also be printed.
Digital booklet_final.indd 48 27/5/09 11:18:28

49
Teacher’s Area
VideoThe video option on the main menu page provides access to video clips which accompany the coursebook. These clips can also be accessed from the pages of the Digital Book.
■ To access the videos from the main menu page, select the Video option.
■ Click on the video clip you want to watch, and the video player will open.
■ The video player includes the standard Play, Stop and Pause buttons. To adjust the volume, drag the slider bar next to the audio symbol to the left or right.
■ To view the video in full screen mode, click on the expand button. To return to viewing the video in a window, click the expand button again.
■ To view subtitles, select the subtitles button on the right of the video player. To turn the subtitles off, click the subtitles button again.
■ To move to a different point in the video, drag the slider bar next to the stop button to the right or left.
■ To close the video player, click on the cross in the top right corner.
Digital booklet_final.indd 49 27/5/09 11:18:28

50
Four ways to use the Pen and Highlighter tools
1 Gap-fi ll activitiesYou can use the Pen tool to turn texts in the Digital Book
into gap-fi ll activities. For example, to review a grammar point you could create a gap-fi ll using a grammar note, or to focus on specifi c language you could use a reading text or dialogue.
To create a gap-fi ll, zoom into the text you want to use and then select the Pen tool. Select a wide pen width and choose a colour. Then create gaps by drawing a line over the words or phrases you want to hide. This can be done before a class and saved or during a class.
When the students have noted down the missing words, you could write their answers in the gaps by writing over the pen lines using a different pen colour. To reveal the hidden words, select the Delete tool and then click on the pen lines, or use the Eraser tool to erase them.
2 Highlight new vocabulary Use the Highlighter tool to draw attention to new words
or phrases in the Digital Book. For example, when the students have fi nished reading a text in their coursebooks, zoom into the text on the board and then ask them to highlight any words they don’t know or want to check. You can then either ask the students to check the meaning of the words in groups or check them as a whole class.
3 Colour code words and phrases Use different highlighter colours to signify different parts
of speech, tenses or categories of vocabulary. This could be done when explaining grammar, categorising vocabulary, and focusing on different parts of speech. You could also ask the students to add the highlights themselves to check their understanding.
4 Mark stress and intonation Use the Pen or Highlighter tool to mark the stress and
intonation on words and phrases. For example, you could highlight intonation in the Useful phrases sections of the Digital Book.
Digital booklet_final.indd 50 27/5/09 11:18:28

51
Teacher’s ideas
Five ways to use the Reveal tool
1 To introduce a topicYou can use the Reveal tool as a way of introducing a topic to
the class. For example, you could gradually reveal a picture or photo connected to the topic, while asking students to guess what, who or where they think it is.
2 To introduce or review vocabulary To introduce or review vocabulary, you could add pictures to
a page in the Teacher’s Area, or zoom into part of the Digital Book. Then reveal the pictures one by one, asking students to name the items. You could also reveal a photo or picture of a scene, asking the students to describe what they see as you reveal it.
3 To control pace and focus You can use the Reveal tool to control which parts of an
activity the students can see. For example, when focusing on an exercise in the Digital Book, use the Reveal tool to show each question one by one. This ensures that all the students are looking at the same questions at the same time.
4 To hide the video player For listening and speaking practice in class, you can use
the Reveal tool to hide the picture in the video player so only the audio can be heard. To do this, open the video player and press Play. Then select the Reveal tool, so the students can hear the audio but cannot see the video. After listening ask the students to describe what they think was happening in the video clip or how they imagine the different characters appear. Then show the video with both the audio and picture and ask the students to check their ideas with the video footage.
5 Backs to the board Write a list of the vocabulary you want to practise on a page in
the Teacher’s Area or on a note in the Digital Book and hide it from the students by selecting the Reveal tool. Ask the students to work in teams, with one member of each team sitting with their back to the board. Reveal the fi rst word, and ask each team to describe the word to the team member who cannot see the board. The fi rst student to guess the word scores a point for their team. Continue to reveal the words one by one, setting a time limit for each word if you wish.
Digital booklet_final.indd 51 27/5/09 11:18:28

52
Four ways to use the Stopwatch
1 Time a classThe Stopwatch can be used as a clear and easy way
to keep track of time during a class. At the beginning of the class, open the Stopwatch and place it in the corner of the screen. Set it either to count up or count down and then leave it running to time the class.
2 Time individual activitiesYou can also use the Stopwatch to set clear time limits for
individual activities and games. You could also ask the students to decide how long they think they need for an activity, and ask them to set the timer.
3 Use the alarms You can use the Stopwatch alarms to gain the attention of
your students even when you are not timing an activity. To do this, select the sound you wish to play and then press the Play symbol. You could use different alarms to represent different class instructions. For example, the bell could mean ‘stop and listen’, and a cheer could mean ‘change partners’ or ‘check your answers’.
4 Fluency practice The Stopwatch can be used to time speaking activities
for fluency practice. For example, when the students have completed one of the anecdotes from the coursebook, ask them to change partners and tell their anecdote again. This time set a reasonable time limit using the Stopwatch and tell the students that they should try to finish their anecdotes within the time period set. When both partners have done this, ask them to swap partners again. This time set a slightly shorter time limit and ask them to repeat their anecdotes. Repeat this process as many times as you wish, decreasing the time limit each time and encouraging the students to speak as fluently as possible.
Digital booklet_final.indd 52 27/5/09 11:18:29
53
Teacher’s ideas
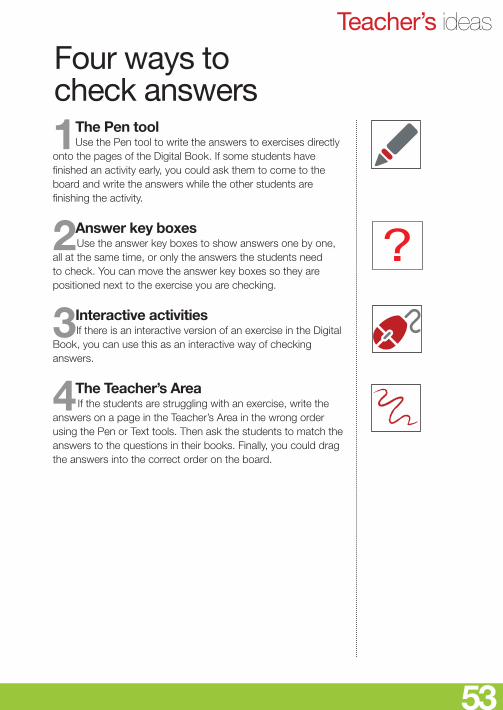
Four ways to check answers
1 The Pen toolUse the Pen tool to write the answers to exercises directly
onto the pages of the Digital Book. If some students have finished an activity early, you could ask them to come to the board and write the answers while the other students are finishing the activity.
2 Answer key boxes Use the answer key boxes to show answers one by one,
all at the same time, or only the answers the students need to check. You can move the answer key boxes so they are positioned next to the exercise you are checking.
3 Interactive activities If there is an interactive version of an exercise in the Digital
Book, you can use this as an interactive way of checking answers.
4 The Teacher’s Area If the students are struggling with an exercise, write the
answers on a page in the Teacher’s Area in the wrong order using the Pen or Text tools. Then ask the students to match the answers to the questions in their books. Finally, you could drag the answers into the correct order on the board.
Digital booklet_final.indd 53 27/5/09 11:18:29

54
Five ways to use shapes
1 Hiding and revealingYou can use filled shapes to hide and reveal text and
pictures in the Teacher’s Area. To do this, make sure the shapes are positioned in front of the text (see page 34).
2 TablesYou can create tables in the Teacher’s Area by using the
square or rectangle shapes and straight lines. Use a square or rectangle for the border of the table, and straight lines to add columns and rows. You can add text to a table using the pen or text tools. To create a drag and drop activity, add text or pen annotations outside the table, and then ask students to drag them into the correct columns.
3 Timelines You can create timelines using the arrow shape and
straight lines. For example, to show the order of events in a story, draw an arrow on the page and then write the events of the story using the pen or text tools. Then connect the events to the arrow using lines, or add other shapes such as crosses or circles to the arrow to represent events.
4 Useful phrases The speech and thought bubble shapes can be used to
display and record useful phrases and language you want to encourage your students to use. Add some speech or thought bubbles to a page and then add phrases to the bubbles using the pen or text tools. This could be prepared before a class, or phrases could be added during a class. They can then be displayed during the class for reference, printed and handed out to the students and saved for the next class.
5 Point scoring You can use shapes to award points during team games
and activities. Create a shape for each team, or allow the teams to choose their own shapes and colours. These could be the same shapes with different fill colours, or a different shape and colour for each team. When a team is awarded a point, select their shape and then click on copy and then paste. This will create another shape to represent the point they have scored.
Digital booklet_final.indd 54 27/5/09 11:18:29

55
Teacher’s ideas
Four ways to record vocabulary
1 The Note toolAdd a note to a page in the Digital Book and create a
vocabulary list which you can add to during the class and save.
2 The Games Word ListYou can add words you want to revise with your class to
a word list in the Games section in the Teacher’s Area. These words can then be used in the interactive game templates. As a round-up activity at the end of a class you could ask the students to choose some vocabulary items from the class that they would like to record, and then ask them to write the prompts in pairs. These words and prompts can then be added to the Word List.
3 Images Add pictures to a page in the Teacher’s Area to illustrate
key vocabulary. As a review, you could ask the students to label the pictures, or write the vocabulary with the text or pen tools at the bottom of the page and ask the students to drag the words to match the pictures.
4 Spider diagrams You can create spider diagrams in the Teacher’s Area
using the circles and straight lines provided by the Shape tool. You can add vocabulary to the circles using the pen or text tools.
Digital booklet_final.indd 55 27/5/09 11:18:29

56
Five ways to use video clips
1 Picture onlyShow the video with the sound turned down and the
subtitles turned off. Ask the students to work in pairs and to predict that they think the people are saying, or what the voiceover is describing.
2 Subtitles only Show the video with the sound turned down and with
the subtitles turned on. Pause the video periodically and ask the students to discuss with a partner what they expect the intonation of the language to be. Then watch with the sound turned up and ask them to compare their ideas with what they hear.
3 No picture You can play video clips and hide the picture using the
Reveal tool. To do this, open the video player and press play. Then select the Reveal tool, and the video player will be hidden. Ask the students to listen and note down what they think is happening in the video clip and what they think the characters will look like, or the expressions they will have. Then deselect the Reveal tool and show the video, asking the students to compare their ideas with what they see.
4 Freeze frame While watching a video clip, pause the video player
periodically and ask the students to work with a partner and recount what has happened so far, predict what is going to happen next, or ask them to describe what they can see.
5 Watching or listening for vocabulary Open the video player so it is displayed in a window, and
next to the window add a note using the Note tool containing words or phrases which are in the video. Then play the video clip with the subtitles turned off, and ask the students to watch and note down the words in the list they hear or see, or to write the words in the order they are heard or seen.
Digital booklet_final.indd 56 27/5/09 11:18:29

57
Teacher’s ideas
Four ways to use the audio player
1 Script onlyPlay the audio player with the sound turned down and
with the audio script showing. Ask the students to read the script on the screen as the sentences are highlighted. Alternatively, the students could read the audioscript in their coursebooks. Then ask them to work with a partner and discuss how they expect the intonation, tone of voice and so on to sound. Then play the audio and ask the students to compare their ideas with what they hear.
2 Predicting contentUse the ‘hide’ button on your projector remote control to
hide the contents of the screen, or cover the projector beam. Then use the cue function on the audio player to play a few sentences from different parts of the listening. Ask the students to listen and then discuss with a partner what they think the listening is about and who they think the speakers are. Then play the whole audio and ask the students to compare their ideas with what they hear.
3 Answer checking When checking the answers to a listening activity, if there
are any questions the students found difficult to answer, use the cue function to play these parts of the listening again. Repeat them as many times as necessary.
4 Pronunciation practice Use the cue function to play individual phrases or
sentences and ask the students to listen and repeat, focusing on stress, intonation and contractions as appropriate.
Digital booklet_final.indd 57 27/5/09 11:18:29

58
Five ways to use links in the Teacher’s Area
1 Link to the Digital Book When creating content in the Teacher’s Area, you can add
links to the relevant Digital Book pages. During the class, you can then click on the links and move directly to the linked page.
2 Introduce or expand on a topicYou can add links to websites or files to pages of the
Teacher’s Area. For example, to introduce the topic of holidays you could add a link to a holiday website, or to expand on the topic of news, link to a news website.
3 Online dictionaries By inserting a link to an online dictionary such as www.
macmillandictionary.com, you or your students can quickly check the meaning of words at any time during a class.
4 Online activities and games You could add links to online coursebook-related
material such as www.macmillanpracticeonline.com and www.insideout.net. You could display the activities on the board for whole class activities, or to check answers with the students after they have done them individually.
5 Files in other applications You can also add links to files created in other
applications. For example, you can open activities which have been saved as Word documents or PDFs. You could add links to pieces of work the students have written, or work you have corrected.
00
Digital booklet_final.indd 58 27/5/09 11:18:29

59
Installation InstructionsTechnical information
Before you install New Inside Out Digital, please make sure that your computer meets the minimum system requirements mentioned below.
To install and run New Inside Out Digital single-user versionWindows Please select the DVD-ROM drive and double click Install from the Install_Win folder. Follow the on-screen instructions.Once the installation is complete, an icon will be created on the desktop. To run the application click on the icon.In order to run the program, the DVD has to be present on the DVD-ROM drive.Macintosh Please select the DVD-ROM drive and double click Install from the Install_Mac folder. Follow the on-screen instructions. Once installed, you may wish to drag the application icon from the applications folder to your dock for easy access. Alternatively, double click the application from the applications folder to launch. In order to run the program, the DVD must be present in the DVD-ROM drive.
To install and run New Inside Out Digital multiple-user versionWindows The installation process will begin automatically on most Windows computers. If you have autorun turned off, please select the DVD-ROM drive and double click Install from the Install_Win folder. Follow the on-screen instructions.Once the installation is complete, an icon will be created on the desktop. To run the application click on the icon.Macintosh Please select the DVD-ROM drive and double click Install from the Install_Mac folder. Follow the on-screen instructions. Once installed, you may wish to drag the application icon from the applications folder to your dock for easy access. Alternatively, double click the application from the applications folder to launch.
Minimum System RequirementsWindows Processor: Pentium 4, 2ghz or fasterHard disk: Minimum 1 GB free, 1.5 GB free on the system DriveOperating systems: Windows Vista, XP SP2, Windows 732 MB Video RAM1 GB RAMAudio sound cardDVD DriveInternet Connection (For Registration/live updates)Macintosh Intel Core™ Duo 1.33 GHz or faster processor1 GB RAM32 MB video RAMOperating systems: Mac OS X v.10.4 or laterHard disk: Minimum 1 GB free, 1.5 GB free on the system DriveDVD DriveInternet Connection (For Registration/live updates)
Recommended System RequirementsWindows Processor: Pentium 4, 3ghz or Intel Core 2 DuoHard disk: Minimum 2 GB free, 2 GB free on the system DriveOperating systems: Windows Vista, XP SP2, Windows 732 MB Video RAM2 GB RAMAudio sound cardDVD DriveInternet Connection (For Registration/live updates)Macintosh Intel Core™ Duo 1.33 GHz or faster processor2 GB RAM32 MB video RAMOperating systems: Mac OS X v.10.4 or laterHard disk: Minimum 2GB free, 2 GB free on the system DriveDVD DriveInternet Connection (For Registration/live updates)

60
END USER LICENCE AGREEMENT FOR New Inside Out Digital Elementary single-user version (ISBN: 9781405099509)
This is an agreement between you (the “User”) and Macmillan Publishers Limited (the “Supplier”). 1. Licence The Supplier grants the User a personal, non-exclusive, non-transferable licence to use the Supplier’s software product, New Inside Out Digital Elementary single-user version, as acquired with this licence (the “Program”). The Supplier grants the User the licence to use one copy of the Program (i) on a single stand-alone computer for use by the User and one or more people provided that only one person uses it at any one time, and (ii) on a second computer for the purpose of preparing lessons (provided the Program is only used on one stand alone computer at a time). The User shall not: (i) loan, rent, lease or license the Program; (ii) copy or authorize copying of the Program, reverse-engineer, disassemble or decompile the Program (other than to the extent permitted under applicable law), (iii) operate the Program from a network or mainframe system unless with prior consent.2. Copyright and other intellectual property rights The intellectual property rights in the Program and any documentation or materials supplied with the Program are owned by and remain with the Supplier or its third party licensors. 3. Statutory rights If the User is a consumer and has in that capacity purchased the Program, the exclusions and limitations contained in this agreement do not affect any statutory rights to which the User is entitled as a consumer and which may not under applicable law be excluded or limited. 4. Warranty Subject to clause 3, the Supplier warrants that the Program and any disc or other medium on which the Program is supplied will be free from defects which have a materially adverse effect on its use in accordance with this agreement. The Supplier does not warrant that the Program will be entirely free from errors or that the information accessible via use of the Program is entirely accurate or error free. The User’s sole remedy for breach of this warranty is to return the Program and all documentation to the Supplier, together with proof of purchase, and the Supplier will, at the User’s option, either replace the Program or provide the User with a full refund. 5. No other warranties SUBJECT TO CLAUSE 3, EXCEPT AS EXPRESSLY PROVIDED OTHERWISE BY THIS AGREEMENT, NO CONDITIONS, WARRANTIES, REPRESENTATIONS OR OTHER TERMS APPLY WITH RESPECT TO THE PROGRAM OR USER DOCUMENTATION (INCLUDING ANY SUCH TERMS AS TO QUALITY, PERFORMANCE, SUITABILITY OR FITNESS FOR A PARTICULAR PURPOSE). 6. Limitation of liability SUBJECT TO CLAUSE 3 AND SAVE AS EXPRESSLY PROVIDED OTHERWISE BY
THIS AGREEMENT: (A) THE SUPPLIER SHALL NOT BE LIABLE TO THE USER OR TO ANY THIRD PARTY FOR: LOSS OF PROFITS; LOSS OF SALES OR BUSINESS; LOSS OF USE OF COMPUTER EQUIPMENT, SOFTWARE OF DATA OR ANY INDIRECT OR CONSEQUENTIAL LOSS HOWSOEVER SUCH LOSS ARISES; AND (B) THE SUPPLIER’S TOTAL AGGREGATE LIABILITY UNDER THIS AGREEMENT SHALL BE LIMITED IN ALL CASES TO THE PRICE OF THE PROGRAM; PROVIDED THAT NOTHING IN THIS AGREEMENT LIMITS THE SUPPLIER’S LIABILITY TO THE USER IN THE EVENT OF DEATH OR PERSONAL INJURY RESULTING FROM THE SUPPLIER’S NEGLIGENCE OR FOR ANY OTHER LIABILITY THAT MAY NOT BE EXCLUDED OR LIMITED UNDER APPLICABLE LAW.7. Termination The User’s licence to use the Program automatically terminates if the User fails to comply with any provisions of this agreement.
8. Title The Supplier shall at all times retain ownership of the Program but the User shall retain title in the media on which the Program is supplied. 9. Entire agreement, applicable law and jurisdiction This agreement is the complete and exclusive statement of the agreement between the User and the Supplier with respect to the Program. This agreement is governed by English law and both parties submit to the exclusive jurisdiction of the English Court.
END-USER SOFTWARE LICENSE AGREEMENT (SLA) between the company which is granting this license (“Macmillan Publishers Limited”) and end-user (“Licensee”). By installing this Software product you agree to this licence.
1. DEFINITIONS“Software” means the computer programs provided to Licensee by Macmillan and/or computer programs in which Macmillan has proprietary rights and/or sublicense rights granted by a third party licensor, and any related materials or documents, and any subsequent revisions provided to Licensee. “Configuration” means central processing unit (“CPU”) or any group of CPUs, connected by a local area network, that operate together for the purpose of performing the functions of the Software and/or restricting the use of the Software to the maximum number of licensed users.2. SCOPE OF AUTHORIZED USE2.1 You may install this software in a single computer that acts as host to a data projector for use with or without any interactive whiteboard. The Software is furnished under a personal, non-transferable, non-exclusive license in executable/object code solely for Licensee’s own use. In addition, one further copy of the Software may be used for lesson preparation. When using the prepatory license, presentation of this application on a projector, or usage with any other manufacturer’s tablet or interactive whiteboard connected to the Teachers preparation computer is a
breach of license.Further installations than those defined above may become chargeable. Please contact Macmillan if you require additional licensed copies of this application 2.2 Licensee shall not copy nor permit any party to copy Software, except to make a single copy solely for backup or archival purposes as necessary for use on the Configuration, but only with the inclusion of copyright and proprietary notices. If Licensee is unable to operate Software on the Configuration due to an equipment malfunction, the Software may be used temporarily on another Configuration during the period of equipment malfunction. Licensee shall not sublicense or transfer or otherwise make Software available to any third party. Licensee shall not modify, decompile, disassemble or otherwise reverse engineer Software or create derivative works based on the Software. The Licensee may only exercise rights under s50 of the Copyright Designs and Patents Act 1988 or similar legislation if it has first asked Macmillan to disclose the required information and Macmillan has declined to do so.2.3 Licensee shall allow Macmillan and its nominated representatives reasonable access to its premises to audit Licensee’s compliance with this Agreement.3. TITLE AND OWNERSHIP; CONFIDENTIALITYTitle to, ownership of the Software and any patent, copyright, underlying trade secret and other intellectual property rights in it or any of its parts shall not transfer to Licensee but shall remain in Macmillan or its third party licensors. Software is confidential and proprietary to Macmillan and/or its third party licensors and Licensee shall observe the proprietary nature thereof. Licensee shall not disclose, provide or otherwise make available Software or any part (which includes without limitation, database structures and message formats) or copies thereof to any third party. Licensee shall take action by instruction or agreement with its employees who are permitted access to Software, to protect the confidentiality of Software. Licensee shall keep Software and such materials secure, and prevent unauthorised access, copying or use thereof. Licensee agrees to notify Macmillan immediately it becomes aware of any unauthorised knowledge, possession, or use of Software or any such materials by any person or entity.Additional terms may apply where the Software is owned by a third party and provided by Macmillan under license; in such cases, those terms will be provided separately.4. LIMITED WARRANTYA. Macmillan warrants that all unmodified Software, when used under the conditions described in the applicable Macmillan published specifications furnished to Licensee, if any, will conform to said Macmillan published specifications at time of shipment and for a period of ninety (90) days. If Licensee determines that a non-conformity exists which is a substantial deviation from the Macmillan published specification, Licensee shall provide proper written notification to Macmillan, within the warranty period, explaining the alleged nonconformity. Upon receipt of such written notification Macmillan’s or
Digital booklet_final.indd 60 27/5/09 11:18:29

61
its third party Licensors’ sole liability and Licensee’s sole and exclusive remedy shall be for Macmillan to use reasonable efforts to provide, at no cost to Licensee, programming corrections by telephone and/or mail to correct such documented nonconformity. Provided Macmillan determines that the alleged nonconformity is a defect in the unaltered version of the Software and is not the result of (i) Licensee’s use of the Software other than in accordance with the Macmillan published specification; or (ii) modifications to the Software made by parties other than Macmillan; or (iii) damage due to improper use or neglect, Macmillan shall use reasonable efforts to remedy such nonconformity by issuing corrected information to Licensee, including corrected documentation or code or a work-around if available. Macmillan does not warrant that the operation of Software will be uninterrupted or error free or that all errors will be remedied. Macmillan does not warrant that Software will meet Licensee’s specific requirements or operate with any hardware or software other than as specified in the Macmillan published specification, if any shall have been provided.B. Macmillan does not warrant the performance of Macmillan products if used with third party products not approved by Macmillan.C. NEITHER MACMILLAN NOR ANY OF ITS THIRD PARTY LICENSORS MAKES ANY OTHER REPRESENTATION OR WARRANTY REGARDING THE SOFTWARE, INCLUDING EXPRESS OR IMPLIED WARRANTIES OF SATISFACTORY QUALITY, MERCHANTABILITY AND FITNESS FOR A PARTICULAR PURPOSE AND NONINFRINGEMENT OF THIRD PARTY RIGHTS AND ALL OTHER WARRANTIES ARE HEREBY EXPRESSLY DISCLAIMED. SOME JURISDICTIONS DO NOT ALLOW THE EXCLUSION OF IMPLIED WARRANTIES, SO THE ABOVE LIMITATIONS MAY NOT APPLY TO YOU. LICENSEE RETAINS FULL CONTROL OVER AND RESPONSIBILITY FOR THE USE OF SOFTWARE. MACMILLAN DOES NOT WARRANT THE MERCHANTABILITY OF ANY OF LICENSEE’S PRODUCTS THROUGH THE USE OF THE SOFTWARE. THIS WARRANTY GIVES YOU SPECIFIC LEGAL RIGHTS. YOU MAY HAVE OTHER RIGHTS, WHICH VARY FROM JURISDICTION TO JURISDICTION.5. LIMITATION OF LIABILITYIN NO EVENT IS MACMILLAN OR ITS THIRD PARTY LICENSORS LIABLE FOR DAMAGES INCLUDING, BUT NOT LIMITED TO LOSS OF PROFITS, OPPORTUNITY, DATA OR FOR INDIRECT, INCIDENTAL, SPECIAL OR CONSEQUENTIAL DAMAGES ARISING OUT OF OR IN CONNECTION WITH THE USE OR PERFORMANCE OF SOFTWARE, EVEN IF NOTICE HAS BEEN GIVEN OF THE POSSIBILITY OF SUCH DAMAGES. THIS LIMITATION OF LIABILITY SHALL NOT APPLY TO LIABILITY FOR FRAUD AND DEATH OR PERSONAL INJURY RESULTING FROM MACMILLAN’S NEGLIGENCE TO THE EXTENT APPLICABLE LAW PROHIBITS SUCH LIMITATION. SOME JURISDICTIONS DO NOT ALLOW EXCLUSIONS OR LIMITATIONS LIABILITY, SO THIS EXCLUSION AND
LIMITATION MAY NOT APPLY TO YOU. IN NO EVENT WILL MACMILLAN OR ITS THIRD PARTY LICENSORS BE LIABLE FOR ANY AMOUNT GREATER THAN THE INITIAL LICENSE FEE PAID FOR THE SOFTWARE WHICH ALLEGEDLY CAUSED THE DAMAGE, EVEN IF MACMILLAN SHALL HAVE BEEN INFORMED OF SUCH DAMAGES OR OF ANY CLAIM BY ANY THIRD PARTY.6. INFRINGEMENT INDEMNITYMacmillan shall defend any action, suit or proceeding brought against Licensee which alleges that any Macmillan proprietary Software infringes a U.S. or U.K. patent or copyright that Macmillan is aware of, on the condition that Licensee promptly notifies Macmillan of the action and gives Macmillan the opportunity, full authority, information and assistance for the defense of the action. Macmillan shall pay all resulting damages and costs awarded against Licensee but shall not be responsible for any settlement made without its consent. Macmillan may, at its option and expense: (i) replace or modify Software so that infringement will not exist; (ii) remove Software involved and refund Licensee a portion of the price paid therefor as depreciated or amortised by an equal annual amount over the lifetime of the Software as established by Macmillan; or (iii) obtain for Licensee the right to continue using the Software. Macmillan and its third party licensors disclaim all other liability for copyright, patent or other infringement, including any incidental or consequential damages. Macmillan shall have no liability for any infringements or claims thereof based upon: (i) the combination of Software with products not supplied by Macmillan, (ii) modification or alteration of Software by Macmillan in accordance with Licensee’s instructions or by parties other than Macmillan, or (iii) failure to install updates provided by Macmillan.7. TERM AND TERMINATION7.1 This License shall become effective upon Software shipment and terminate at such time as Licensee discontinues use of Software on the Configuration, or upon sale, lease, or transfer by operation of law or otherwise, of the Configuration.7.2 If Licensee fails to cure any breach of this Agreement, including failure to pay any required license fees, within ten (10) days after receipt of written notice of such breach, the license(s) as to which the breach exists shall be terminated.7.3 Upon termination of any license, Licensee shall immediately terminate use of Software for which the license has been terminated and immediately either return or destroy all copies of such Software and other proprietary materials and certify in writing as to such destruction or return. Sections 3, 4, and 5 shall survive termination of this Agreement.8. NON-WAIVERThe failure or delay of either party to exercise any right or remedy provided for herein shall not be deemed a waiver of that right or of any other rights or remedies available hereunder.9. MISCELLANEOUS9.1 Licensee agrees not to export Software, or re-export or resell Software from or in country of installation, without first complying with all applicable export laws and regulations. The Software may not be downloaded into any country which the United Kingdom has prohibited
export.9.2 Software support shall be provided under terms and conditions specified and in a separately executed Macmillan Software located in Support Agreement.9.3 Where Licensee is located in the United States, its agencies or instrumentalities whether located within or outside of the United States, all Software and Documentation furnished hereunder is Commercial Computer Software and Commercial Computer Software Documentation provided only with the rights specified in this SLA customarily provided to the public by Macmillan in accordance with FAR 12.212 (a) and (b) (OCT 1995) or DFARS 227.7202-3(a) (JUN 1995) as applicable.9.4 The Software may contain an electronic version of this SLA intended to have the same force and effect as a hardcopy SLA. 9.5 This Agreement shall be governed by English law. The United Nations Convention on Contracts for the International Sale of Goods is specifically disclaimed. Licensee’s order documents shall state that the terms and conditions of this Agreement are the sole terms and conditions governing such order. This SLA states the entire understanding between the parties as to Software licensed by Licensee and shall take precedence over any omitted, conflicting or additional terms in any Licensee purchase order. If any provision of this SLA is determined to be invalid or unenforceable by a court of competent jurisdiction hereunder, the remaining provisions of this SLA shall not be affected and shall remain in full force and effect as though said invalid or unenforceable provision were not contained herein. The English language version of this Macmillan End-User Software License Agreement shall prevail and any translation into other languages other than English is for convenience only. No third party may enforce any of its terms under the Contracts (Rights of Third Parties) Act 1999.9.6 Written notices required by this SLA shall be sent to the following:Legal DepartmentMacmillan LtdMacmillan HouseLower Philips RoadBlackburnLancs BB1 5THUnited Kingdom
9.7 Notwithstanding anything to the contrary provided herein, in the event of a change in control of all or substantially all of the assets of Macmillan, Macmillan may assign any or all of the rights and obligations under this Agreement to its successor in interest or to a third part assignee.
This product contains Adobe® AIR™ Runtime by Adobe® Systems Incorporated. All rights reserved. Adobe® and Adobe® AIR™ are trademarks of Adobe® Systems Incorporated.
©Macmillan Limited 200
Digital booklet_final.indd 61 27/5/09 11:18:30

END USER LICENCE AGREEMENT FOR New Inside Out Digital Elementary multiple-user version (ISBN: 9780230400160) This is an agreement between you (the “User”) and Macmillan Publishers Limited (the “Supplier”). 1. Licence The Supplier grants the User a personal, non-exclusive, non-transferable licence to use the Supplier’s software product, New Inside Out Digital Elementary multiple-user version, as acquired with this licence (the “Program”). The Supplier grants the User the licence to use the Program in up to twenty computers. The User shall not: (i) loan, rent, lease or license the Program; (ii) copy or authorize copying of the Program, reverse-engineer, disassemble or decompile the Program (other than to the extent permitted under applicable law), (iii) operate the Program from a network or mainframe system unless with prior consent. 2. Copyright and other intellectual property rights The intellectual property rights in the Program and any documentation or materials supplied with the Program are owned by and remain with the Supplier or its third party licensors. 3. Statutory rights If the User is a consumer and has in that capacity purchased the Program, the exclusions and limitations contained in this agreement do not affect any statutory rights to which the User is entitled as a consumer and which may not under applicable law be excluded or limited. 4. Warranty Subject to clause 3, the Supplier warrants that the Program and any disc or other medium on which the Program is supplied will be free from defects which have a materially adverse effect on its use in accordance with this agreement. The Supplier does not warrant that the Program will be entirely free from errors or that the information accessible via use of the Program is entirely accurate or error free. The User’s sole remedy for breach of this warranty is to return the Program and all documentation to the Supplier, together with proof of purchase, and the Supplier will, at the User’s option, either replace the Program or provide the User with a full refund. 5. No other warranties SUBJECT TO CLAUSE 3, EXCEPT AS EXPRESSLY PROVIDED OTHERWISE BY THIS AGREEMENT, NO CONDITIONS, WARRANTIES, REPRESENTATIONS OR OTHER TERMS APPLY WITH RESPECT TO THE PROGRAM OR USER DOCUMENTATION (INCLUDING ANY SUCH TERMS AS TO QUALITY, PERFORMANCE, SUITABILITY OR FITNESS FOR A PARTICULAR PURPOSE). 6. Limitation of liability SUBJECT TO CLAUSE 3 AND SAVE AS EXPRESSLY PROVIDED OTHERWISE BY THIS AGREEMENT: (A) THE SUPPLIER SHALL NOT BE LIABLE TO THE USER OR TO ANY THIRD PARTY FOR: LOSS OF PROFITS; LOSS OF SALES OR BUSINESS; LOSS OF USE OF COMPUTER EQUIPMENT, SOFTWARE OF DATA OR ANY
INDIRECT OR CONSEQUENTIAL LOSS HOWSOEVER SUCH LOSS ARISES; AND (B) THE SUPPLIER’S TOTAL AGGREGATE LIABILITY UNDER THIS AGREEMENT SHALL BE LIMITED IN ALL CASES TO THE PRICE OF THE PROGRAM; PROVIDED THAT NOTHING IN THIS AGREEMENT LIMITS THE SUPPLIER’S LIABILITY TO THE USER IN THE EVENT OF DEATH OR PERSONAL INJURY RESULTING FROM THE SUPPLIER’S NEGLIGENCE OR FOR ANY OTHER LIABILITY THAT MAY NOT BE EXCLUDED OR LIMITED UNDER APPLICABLE LAW. 7. Termination The User’s licence to use the Program automatically terminates if the User fails to comply with any provisions of this agreement. 8. Title The Supplier shall at all times retain ownership of the Program but the User shall retain title in the media on which the Program is supplied. 9. Entire agreement, applicable law and jurisdiction This agreement is the complete and exclusive statement of the agreement between the User and the Supplier with respect to the Program. This agreement is governed by English law and both parties submit to the exclusive jurisdiction of the English Court.
END-USER SOFTWARE LICENSE AGREEMENT (SLA) between the company which is granting this license (“Macmillan Publishers Limited”) and end-user (“Licensee”). By installing this Software product you agree to this licence.
1. DEFINITIONS“Software” means the computer programs provided to Licensee by Macmillan and/or computer programs in which Macmillan has proprietary rights and/or sublicense rights granted by a third party licensor, and any related materials or documents, and any subsequent revisions provided to Licensee. “Configuration” means central processing unit (“CPU”) or any group of CPUs, connected by a local area network, that operate together for the purpose of performing the functions of the Software and/or restricting the use of the Software to the maximum number of licensed users.2. SCOPE OF AUTHORIZED USE2.1 You may install this software in up to a twenty computers, either (i) on a single computer that acts as host to a data projector for use with or without any interactive whiteboard or (ii) in a computer used for lesson preparation, provided that the total does not exceed twenty. The Software is furnished under a personal, non-transferable, non-exclusive license in executable/object code solely for Licensee’s own use.You may install the Software on a network server, subject to the restrictions on the number of whiteboards and teacher preparation licenses described above.Further installations than those defined above may become chargeable. Please contact Macmillan if you require additional licensed copies of this application 2.2 Licensee shall not copy nor permit any party to copy Software, except to make a single copy solely for backup or archival purposes as necessary for use on the Configuration, but only with the inclusion
of copyright and proprietary notices. If Licensee is unable to operate Software on the Configuration due to an equipment malfunction, the Software may be used temporarily on another Configuration during the period of equipment malfunction. Licensee shall not sublicense or transfer or otherwise make Software available to any third party. Licensee shall not modify, decompile, disassemble or otherwise reverse engineer Software or create derivative works based on the Software. The Licensee may only exercise rights under s50 of the Copyright Designs and Patents Act 1988 or similar legislation if it has first asked Macmillan to disclose the required information and Macmillan has declined to do so.2.3 Licensee shall allow Macmillan and its nominated representatives reasonable access to its premises to audit Licensee’s compliance with this Agreement.3. TITLE AND OWNERSHIP; CONFIDENTIALITYTitle to, ownership of the Software and any patent, copyright, underlying trade secret and other intellectual property rights in it or any of its parts shall not transfer to Licensee but shall remain in Macmillan or its third party licensors. Software is confidential and proprietary to Macmillan and/or its third party licensors and Licensee shall observe the proprietary nature thereof. Licensee shall not disclose, provide or otherwise make available Software or any part (which includes without limitation, database structures and message formats) or copies thereof to any third party. Licensee shall take action by instruction or agreement with its employees who are permitted access to Software, to protect the confidentiality of Software. Licensee shall keep Software and such materials secure, and prevent unauthorised access, copying or use thereof. Licensee agrees to notify Macmillan immediately it becomes aware of any unauthorised knowledge, possession, or use of Software or any such materials by any person or entity.Additional terms may apply where the Software is owned by a third party and provided by Macmillan under license; in such cases, those terms will be provided separately.4. LIMITED WARRANTYA. Macmillan warrants that all unmodified Software, when used under the conditions described in the applicable Macmillan published specifications furnished to Licensee, if any, will conform to said Macmillan published specifications at time of shipment and for a period of ninety (90) days. If Licensee determines that a non-conformity exists which is a substantial deviation from the Macmillan published specification, Licensee shall provide proper written notification to Macmillan, within the warranty period, explaining the alleged nonconformity. Upon receipt of such written notification Macmillan’s or its third party Licensors’ sole liability and Licensee’s sole and exclusive remedy shall be for Macmillan to use reasonable efforts to provide, at no cost to Licensee, programming corrections by telephone and/or mail to correct such documented nonconformity. Provided Macmillan determines that the alleged nonconformity is a defect in the unaltered version of the Software and is not the result of (i) Licensee’s use of the Software other than in accordance with the Macmillan published specification; or
Digital booklet_final.indd 62 27/5/09 11:18:30

63
(ii) modifications to the Software made by parties other than Macmillan; or (iii) damage due to improper use or neglect, Macmillan shall use reasonable efforts to remedy such nonconformity by issuing corrected information to Licensee, including corrected documentation or code or a work-around if available. Macmillan does not warrant that the operation of Software will be uninterrupted or error free or that all errors will be remedied. Macmillan does not warrant that Software will meet Licensee’s specific requirements or operate with any hardware or software other than as specified in the Macmillan published specification, if any shall have been provided.B. Macmillan does not warrant the performance of Macmillan products if used with third party products not approved by Macmillan.C. NEITHER MACMILLAN NOR ANY OF ITS THIRD PARTY LICENSORS MAKES ANY OTHER REPRESENTATION OR WARRANTY REGARDING THE SOFTWARE, INCLUDING EXPRESS OR IMPLIED WARRANTIES OF SATISFACTORY QUALITY, MERCHANTABILITY AND FITNESS FOR A PARTICULAR PURPOSE AND NONINFRINGEMENT OF THIRD PARTY RIGHTS AND ALL OTHER WARRANTIES ARE HEREBY EXPRESSLY DISCLAIMED. SOME JURISDICTIONS DO NOT ALLOW THE EXCLUSION OF IMPLIED WARRANTIES, SO THE ABOVE LIMITATIONS MAY NOT APPLY TO YOU. LICENSEE RETAINS FULL CONTROL OVER AND RESPONSIBILITY FOR THE USE OF SOFTWARE. MACMILLAN DOES NOT WARRANT THE MERCHANTABILITY OF ANY OF LICENSEE’S PRODUCTS THROUGH THE USE OF THE SOFTWARE. THIS WARRANTY GIVES YOU SPECIFIC LEGAL RIGHTS. YOU MAY HAVE OTHER RIGHTS, WHICH VARY FROM JURISDICTION TO JURISDICTION.5. LIMITATION OF LIABILITYIN NO EVENT IS MACMILLAN OR ITS THIRD PARTY LICENSORS LIABLE FOR DAMAGES INCLUDING, BUT NOT LIMITED TO LOSS OF PROFITS, OPPORTUNITY, DATA OR FOR INDIRECT, INCIDENTAL, SPECIAL OR CONSEQUENTIAL DAMAGES ARISING OUT OF OR IN CONNECTION WITH THE USE OR PERFORMANCE OF SOFTWARE, EVEN IF NOTICE HAS BEEN GIVEN OF THE POSSIBILITY OF SUCH DAMAGES. THIS LIMITATION OF LIABILITY SHALL NOT APPLY TO LIABILITY FOR FRAUD AND DEATH OR PERSONAL INJURY RESULTING FROM MACMILLAN’S NEGLIGENCE TO THE EXTENT APPLICABLE LAW PROHIBITS SUCH LIMITATION. SOME JURISDICTIONS DO NOT ALLOW EXCLUSIONS OR LIMITATIONS LIABILITY, SO THIS EXCLUSION AND LIMITATION MAY NOT APPLY TO YOU. IN NO EVENT WILL MACMILLAN OR ITS THIRD PARTY LICENSORS BE LIABLE FOR ANY AMOUNT GREATER THAN THE INITIAL LICENSE FEE PAID FOR THE SOFTWARE WHICH ALLEGEDLY CAUSED THE DAMAGE, EVEN IF MACMILLAN SHALL HAVE BEEN INFORMED OF SUCH DAMAGES OR OF ANY CLAIM BY ANY THIRD PARTY.6. INFRINGEMENT INDEMNITYMacmillan shall defend any action, suit or proceeding brought against Licensee
which alleges that any Macmillan proprietary Software infringes a U.S. or U.K. patent or copyright that Macmillan is aware of, on the condition that Licensee promptly notifies Macmillan of the action and gives Macmillan the opportunity, full authority, information and assistance for the defense of the action. Macmillan shall pay all resulting damages and costs awarded against Licensee but shall not be responsible for any settlement made without its consent. Macmillan may, at its option and expense: (i) replace or modify Software so that infringement will not exist; (ii) remove Software involved and refund Licensee a portion of the price paid therefor as depreciated or amortised by an equal annual amount over the lifetime of the Software as established by Macmillan; or (iii) obtain for Licensee the right to continue using the Software. Macmillan and its third party licensors disclaim all other liability for copyright, patent or other infringement, including any incidental or consequential damages. Macmillan shall have no liability for any infringements or claims thereof based upon: (i) the combination of Software with products not supplied by Macmillan, (ii) modification or alteration of Software by Macmillan in accordance with Licensee’s instructions or by parties other than Macmillan, or (iii) failure to install updates provided by Macmillan.7. TERM AND TERMINATION7.1 This License shall become effective upon Software shipment and terminate at such time as Licensee discontinues use of Software on the Configuration, or upon sale, lease, or transfer by operation of law or otherwise, of the Configuration.7.2 If Licensee fails to cure any breach of this Agreement, including failure to pay any required license fees, within ten (10) days after receipt of written notice of such breach, the license(s) as to which the breach exists shall be terminated.7.3 Upon termination of any license, Licensee shall immediately terminate use of Software for which the license has been terminated and immediately either return or destroy all copies of such Software and other proprietary materials and certify in writing as to such destruction or return. Sections 3, 4, and 5 shall survive termination of this Agreement.8. NON-WAIVERThe failure or delay of either party to exercise any right or remedy provided for herein shall not be deemed a waiver of that right or of any other rights or remedies available hereunder.9. MISCELLANEOUS9.1 Licensee agrees not to export Software, or re-export or resell Software from or in country of installation, without first complying with all applicable export laws and regulations. The Software may not be downloaded into any country which the United Kingdom has prohibited export.9.2 Software support shall be provided under terms and conditions specified and in a separately executed Macmillan Software located in Support Agreement.9.3 Where Licensee is located in the United States, its agencies or instrumentalities whether located within or outside of the United States, all Software and Documentation furnished hereunder is Commercial Computer Software and Commercial Computer Software Documentation provided only with the rights specified in this SLA customarily provided to the public by Macmillan in
accordance with FAR 12.212 (a) and (b) (OCT 1995) or DFARS 227.7202-3(a) (JUN 1995) as applicable.9.4 The Software may contain an electronic version of this SLA intended to have the same force and effect as a hardcopy SLA. 9.5 This Agreement shall be governed by English law. The United Nations Convention on Contracts for the International Sale of Goods is specifically disclaimed. Licensee’s order documents shall state that the terms and conditions of this Agreement are the sole terms and conditions governing such order. This SLA states the entire understanding between the parties as to Software licensed by Licensee and shall take precedence over any omitted, conflicting or additional terms in any Licensee purchase order. If any provision of this SLA is determined to be invalid or unenforceable by a court of competent jurisdiction hereunder, the remaining provisions of this SLA shall not be affected and shall remain in full force and effect as though said invalid or unenforceable provision were not contained herein. The English language version of this Macmillan End-User Software License Agreement shall prevail and any translation into other languages other than English is for convenience only. No third party may enforce any of its terms under the Contracts (Rights of Third Parties) Act 1999.9.6 Written notices required by this SLA shall be sent to the following:Legal DepartmentMacmillan LtdMacmillan HouseLower Philips RoadBlackburnLancs BB1 5THUnited Kingdom
9.7 Notwithstanding anything to the contrary provided herein, in the event of a change in control of all or substantially all of the assets of Macmillan, Macmillan may assign any or all of the rights and obligations under this Agreement to its successor in interest or to a third part assignee.
This product contains Adobe® AIR™ Runtime by Adobe® Systems Incorporated. All rights reserved. Adobe® and Adobe® AIR™ are trademarks of Adobe® Systems Incorporated.
©Macmillan Limited 2009
Digital booklet_final.indd 63 27/5/09 11:18:30

www.macmillanenglish.com
© Macmillan Publishers Limited 2009
New
Produced by DVA DVD all regions
All rights reserved. For institutional use only. Any unauthorised copying, hiring, lending, exhibition, diffusion, sale, public performance or other exploitation of this DVD is strictly prohibited.
NewInside OutDigital
www.insideout.net
The evolution of the coursebook
For technical support visit www.macmillanenglish.com
Windows: Developed to run on Windows 2000, XP, Vista and Windows 7Macintosh: Developed to run on Macintosh OS X 10.4 or higher
For minimum and recommended system requirements see Tecnical information on page 59
Digital booklet_final.indd 64 27/5/09 11:18:33