Embed Size (px)
Citation preview

D7.4 MOOC 1
D7.4 MOOC
This project has received funding from the European Union’s Horizon 2020 Research and Innovation programme under grant agreement No. 788217

D7.4 MOOC 2
Work Package 7
Task 7.5 Creation of an online course
Due Date 28/02/2021
Submission Date 28/02/2021
Deliverable Lead ECSITE
Dissemination Level PU
Document Nature ☐ R-Report Ⅹ O-Other
Authors Carmen Fenollosa, Lucie Steigleder Reviewers Felicitas Schmittinger
Status
☐ Plan ☐ Draft ☐ Working Ⅹ Final ☐ Submitted ☐ Approved

D7.4 MOOC 3
Revision History Revision Date Author Organization Description
0.1 26/02/2021 Carmen Fenollosa Lucie Steigleder
ECSITE Draft and writing of contents
0.2 28/02/2021 Felicitas Schmittinger POLIMI Review and finalisation
The information, documentation and figures in this deliverable are written by the SISCODE project consortium under EC grant agreement 788217 and do not necessarily reflect the views of the European Commission. The European Commission is not liable for any use that may be made of the information contained herein.

D7.4 MOOC 4
TABLE OF CONTENTS
1. ExecutiveSummary......................................................................................................6
2. Introduction.....................................................................................................................6
2.1. IntroductiontoSISCODE....................................................................................6
2.2. IntroductiontotheMassiveOpenOnlineCourse(MOOC)..................7
3. Initialresearchanddevelopment...........................................................................8
3.1. Inspirationandinitialresearch.......................................................................8
3.2. Basisforcontentdevelopment......................................................................10
3.3. Contentdevelopment.........................................................................................113.3.1. Distribution of contents by weeks ................................................. 123.3.2. Target audience .............................................................................. 163.3.3. Learning outcomes ........................................................................ 16
4. Technicaldevelopment.............................................................................................17
4.1. Liaisonwithspeakers........................................................................................17
4.2. Videoshooting......................................................................................................17
4.3. Postproduction....................................................................................................18
4.4. Hostingplatform..................................................................................................19
5. TheMOOC.......................................................................................................................22
5.1. Visualandcommunication..............................................................................22
6. Disseminationandaccessibility............................................................................24
6.1. Promotion...............................................................................................................24
6.2. Translationinotherlanguages......................................................................25
7. Annexes............................................................................................................................25

D7.4 MOOC 5
LIST OF ABBREVIATIONS
ABBREVATIONS EXPLANATION WP Work package RRI Responsible Research and Innovation MOOC Massive Open Online Course
LIST OF FIGURES
FIG 1 – SISCODE DESIGN-BASED LEARNING FRAMEWORK 11
FIG 2-4 – SCREENSHOTS FROM THE VIDEO LECTURES 23
FIG 4-5 – SCREENSHOTS FROM THE TRAILER OF THE MOOC 24
LIST OF TABLES TAB 1 – WEEK 0 – ABOUT THIS MOOC 12
TAB 2 – WEEK 1 – WHY DO WE NEED INNOVATION IN POLICY MAKING 13
TAB 3 – WEEK 2 – HOW CAN USER-CENTRICITY AND CO-CREATION IMPROVE POLICIES? 13
TAB 4 – WEEK 3 – WHAT IS THE (REAL) PROBLEM? 14
TAB 5 – WEEK 4 – HOW CAN WE CO-DESIGN SOLUTIONS TO OUR COMMUNITY’S PROBLEMS? 15
TAB 6 – WEEK 5 – HOW CAN WE IMPLEMENT SOLUTIONS AND MAKE THEM SUSTAINABLE? 16
LIST OF ANNEXES ANNEX 1 – MOOC VIDEO GUIDELINES
ANNEX 2 – HOW TO RECORD AN INTERVIEW VIA ZOOM
ANNEX 3 – SISCODE MOOC BRIEF
ANNEX 4 – SISCODE MOOC – POST-PRODUCTION PROPOSAL
ANNEX 5 – OVERVIEW OF THE VIDEO STYLE
ANNEX 6 – LINKS TO THE SINGLE VIDEOS

D7.4 MOOC 6
1. Executive Summary As part of the Work Package (WP) dealing with communication and dissemination of the
results of the SISCODE project, the conceptual framework and the outputs of the project
were to be made publicly available to citizens, communities and stakeholders through a
Massive Open Online Course (MOOC).
Apart from the distribution and dissemination of SISCODE results and findings, it has the
aim to increase awareness and understanding of the potential that co-creation holds in the
fields of Responsible Research and Innovation (RRI) and policy making.
Furthermore, it will support the acquisition of new capacities in relation to the application of
design methodologies.
The wide variety of speakers internal and external to the project offer manifold perspectives
and experiences in numerous contexts.
The contents of the MOOC are results and findings transversally collected from all activities
conducted in SISCODE combining insights from research and practice to promote a user-
centric approach in policy making based on the principles of co-creation.
It consists in an online course composed by 5 sets of lectures, visual and textual, and each set
is concluded with an interactive quiz to assess the uptake and understanding of the provided
contents.
The material is distributed over 5 weeks to support a continuous and consistent learning
process.
2. Introduction
2.1. Introduction to SISCODE SISCODE is a three-year project aiming to understand the co-creation phenomenon that is
flourishing in Europe (in fab labs, living labs, social innovations, smart cities, communities
and regions) and to analyse the context and conditions that support its effective introduction,
scalability and replication. Eventually this will help bridge the gap between the process of co-
constructing policies and their implementation.
Co-creation is analysed in particular in the light of Responsible Research and Innovation and
Science, technology and innovation policies. SISCODE is running a European study to
compare co-creation ecosystems and describe effective dynamics and outcomes of the

D7.4 MOOC 7
integration of society in science and innovation. Project partners (fab labs, living labs and
Science centres and Museums) experiment in 10 co-creation labs around Europe with design
as a new system of competences capable to support the development of implementable RRI
and STI solutions and policies. The project is also creating a playground for policy makers to
test co-creation of policies and to understand the transformations needed to embed co-
creation in STI policy making, overcoming barriers and resistance to change and considering
organisational transformation.
The project is run by 18 European partners from different countries and backgrounds:
Universities, agencies for the promotion of science, science centres and museums, fab labs,
living labs and three European networks. The project is coordinated by the Politecnico di
Milano.
2.2. Introduction to the Massive Open Online Course (MOOC)
Over the past three years, SISCODE has carried out an extensive research around the topic of
co-creation in the field of policy-making, combining a classical approach to research with
experimentation on real world challenges using a network of 10 labs. For the project partners
linked to the co-creation labs this has been a journey of deepening existing knowledge but
also of discovery: for many it has confirmed a number of intuitions they had and the learnings
have been a necessary step into giving a theoretical frame to their practices. The research,
contacts and networks of actors established in these three years, have been the seed of the
MOOC we present today. With it we want to share this very needed frame to others, that
might be willing to take the plunge and explore new ways of producing policy but who lack
the necessary foundations. The MOOC is a 101 introduction to policy innovation, it presents
an introductory course to the use of co-creation and design methodologies especially tailored
to those working in the field of policy-making. For those interested, follow-up materials can
be found in the SISCODE Learning Hub
This course called “Co-creation for policymakers: an introduction” is composed of 5 chapters
delivered in 5 weeks that will guide participants through the main building blocks of these
methodologies. Within each chapter, different experts in the field will walk participants
through the specific aspects of the whole co-creation process cycle. Each session is based on
original videos recorded especially for this MOOC as well as on reading materials published
and available to all.

D7.4 MOOC 8
The MOOC will start by analysing the limitations of current policy-making practices and the
strong need for innovation if we are to make them more efficient.
Early on, the MOOC will introduce the capacity and opportunity that lies in using user-
centred methods and service design in policy-making to tackle these issues. From here,
participants will be introduced to problem framing and to the role of different stakeholders, as
well as power dynamics, at this initial and crucial step of the process. A special focus will
then be made on prototyping and new on forms of action for policymakers to support
interactions in the innovation process. Finally, the audience will be familiarised with the
process that takes prototypes and turns them into actual sustainable solutions as well as the
evaluation and assessment methodologies that need to back them.
Participants will go away with an understanding of the potential and benefit in using user-
centredmethodologies, such as co-creation, in the field of RRI and policymaking.
The week will be divided as follows:
• Week 0: The SISCODE project
• Week 1: Why do we need innovation in policy-making?
• Week 2: How can human-centricity and co-creation improve policies?
• Week 3: How can problems and their root causes be identified and framed?
• Week 4: How can co-design be used to solve community problems?
• Week 5: How can solutions be implemented and sustained over time?
The MOOC will be available from 15 March 2021 for a duration of 5 years on the POK
platform and a year on the EU-Academy platform.
3. Initial research and development
3.1. Inspiration and initial research
At the time of the development of the MOOC, a quick desk research in terms of existing
MOOCs around the topic of co-creation, Responsible Research and Innovation and design
applies to policy making has been carried out with few results.
The following benchmark helped us identify a number of MOOCs that could prove relevant
to the SISCODE project, whether it be as a source of skills, of inspiration or as a best-case
study. We classified them in several categories depending on their subject matter.

D7.4 MOOC 9
1) MOOCs relating directly to co-creation:
• Unow offers a French-speaking course, Travail collaboratif, on collaborative work
practices in companies, including collaboration tools, tactics and strategy.
• The Delft University of Technology and Wageningen University & Research offer
(through a variety of platforms) a free course titled Co-Creating Sustainable Cities,
which deals with “the dynamics of co-creation for sustainable cities worldwide,”
including participative democracy, ICTs and big data, infrastructural challenges, and
the everyday impact of SMART and new technologies.
• The University of Illinois offers a video-based, strongly academical MOOC (Digital
Concept: Co-Creation) about customer co-creation mostly in the corporate
environment.
2) MOOCs relating to policymaking:
• The German Hertie School of Governance offers a MOOC on policy, political
agenda-setting and political consulting titled Governance & Policy Advice: How
Political Decisions Come to Life.
• Coursera has a course on policymaking, lobbying and political challenges (Public
Policy Challenges of the 21st Century), although it seems to be more centred on the
USA.
• The University of California – Berkeley’s Goldman School of Public Policy is
offering Solving Public Policy Problems: UC Berkeley’s Eightfold Path, a MOOC on
public policy that employs an eight-step method of analysis and solution.
3) MOOCsrelatingtoRRI:
• The Higher Education Institutions and Responsible Research and Innovation project
(HEIRRI) offers a MOOC on RRI, Concepts and Practice of Responsible Research
and Innovation, that Ecsite is already promoting on its website.
• The Delft University of Technology also offers a MOOC titled Responsible
Innovation: Ethics, Safety and Technology, which deals with the ethics and risks of
new technologies and potential ways to deal with them.
4) Miscellaneous:
• A European project called IC-Health already exists that aims to co-create a number
of MOOCs with various categories of citizens in order to improve digital health

D7.4 MOOC 10
literacy in Europe. As of now, it has developed two MOOCs about – respectively –
back pain management and mental wellbeing, both in the over-60 age group. It has
also developed a course unit on co-creation processes themselves.
• Open Science MOOC: At the time of our desktop research there was a group of
researchers developing collectively a MOOC on Open Science. The contents at that
time were still at a definition stage.
• Metrics to decide on a MOOC: https://www.reviews.com/mooc-platforms/
• Other interesting resources: https://www.uaces.org/resources/designing-a-
• massive-open-online-course-mooc
Besides this desk research, we also interviewed a number of contacts that had been involved
in MOOCs or that were linked to institutions that develop MOOCs, including the University
of Groningen and European Schoolnet which own their own platform and revised the work of
Ecsite in 2 MOOCs: HEIRRI’s and Sea Change MOOC: From ABC to ABSEAS: Ocean
Literacy for all.
From this first scoping exercise, research and interviews we were able to establish that there
was a gap in a basic co-creation course for policy makers, gather the basic documents to
structure our knowledge and information, existing platforms, and the platforms’ advantages
and disadvantages.
3.2. Basis for content development
This identified lack of an initial, basic course for co-creation addressed directly to policy
makers lead to an interconnection of SISCODE preliminary results with this gap by
developing this course following the design-based learning framework adopted by the overall
project throughout its research (Fig 1).

D7.4 MOOC 11
FIG 1 – SISCODE DESIGN-BASED LEARNING FRAMEWORK
Considering specifically the needs of policy makers identified in the previous phases of the
project for a solid introduction as well as the effective implementation of solutions, 5 main
themes following roughly the initial framework have been defined, each one with a specific
focus.
Following an initial set of lectures providing a more general introduction to the need of
innovation in the field of policy making (Week 1) and one with a specific focus on co-
creation and user centricity (Week 2), the following weeks were aligned to the phases of the
framework resulting in one week of lectures dedicated to the analysis of the context and the
precise framing of problems (Week 3), one shedding light on the possibilities of ideation and
prototyping (Week 4) and, finally, concluding with the implementation of solutions making
them sustainable over time.
3.3. Content development Having found this interesting angle, giving a foundational knowledge of co-creation to
policy-makers, each of the 5 weeks of the MOOC was assigned to one SISCODE partner.
DDC, Ecsite, IAAC, Polimi and UCL were each in charge of the content development,
selection of the speakers and production of all the materials.

D7.4 MOOC 12
3.3.1. Distribution of contents by weeks
TheoverallcontentoftheMOOChasbeendividedin5weeksoflecturesdistributedasstatedinthefollowing.
Week0-AboutthisMOOC
Lesson number
Title Speaker / Author Format
0.1 What are we talking about? Alessandro Deserti (project coordinator)
Video
0.2 The SISCODE project N/A Text
0.3 How to navigate the course Politecnico di Milano Text
0.4 How to answer the quizzes Politecnico di Milano Text
0.5 Try it Politecnico di Milano Quiz
0.6 About you Politecnico di Milano Survey
TAB 1 – WEEK 0 – ABOUT THIS MOOC
Week1–Whydoweneedinnovationinpolicymaking?
Objectives:
- Identify the limitations of current policy-making practices: The barriers, pitfalls and
failures that current policy-making practices are facing
- Point to the need for innovation in the field of policy-making to counter the barriers,
pitfalls and failures that current policy-making practices are facing - present and
discuss what public sector innovation entails and aims to do
- Present and discuss innovation in policy-making in the shape of co-creation
Module title Lesson
number Title Speaker / Author Format
Intended learning outcomes
1.0 Intended learning outcomes Lucie Steigleder Text
Introduction to design for policy making
1.1 An introduction to design for policy makers
Christian Bason Video
1.2 The right way to lead Design Thinking
Christian Bason & Robert D. Austin
Text
Why do we need innovation in policy making?
1.3 The benefits of co-creation Melanie Smallman Video
1.4 Co-design in policy: Learning by ‘doing’
Becky Miller Text

D7.4 MOOC 13
Co-creation from a human-centred perspective
1.5 Co-creation from a human-centred perspective
Sabine Junginger Video
The concept of co-creation
1.6 The concept of co-creation Christian Bason Video
Weekly quiz 1.7 - Lucie Steigleder Quiz
TAB 2 – WEEK 1 – WHY DO WE NEED INNOVATION IN POLICY MAKING
Week2–Howcanuser-centricityandco-creationimprovepolicies?
Objectives:
- Create an understanding of user centered methods in policy making
- Introduce participants in what public sector innovation entails and what it aims to
do
- Using examples and theory, introduce service design specifically devised for policy
making
Module title Lesson number
Title Speaker / Author Format
Intended learning outcomes
2.0 Intended learning outcomes Lucie Steigleder Text
How can user-centricity and co-creation improve policies?
2.1 Human-centred design for the public sector
Francesca Rizzo Video
2.2 Designing human-centred organisational culture
Iain Baker Text
Embedding design for innovation in policy making
2.3 Embedding design for innovation in policy making
Marzia Mortati Video
Case study – Public sector innovation – Inland Design
2.4 Public sector innovation: Inland Design
Mariana Salgado Video
2.5 Designing a HR chatbot personality Mariana Salgado Text
Service Design for policy implementation
2.6 Service Design for policy implementation
Beatrice Villari Video
Weekly quiz 2.7 - Lucie Steigleder Quiz
TAB 3 – WEEK 2 – HOW CAN USER-CENTRICITY AND CO-CREATION IMPROVE POLICIES?

D7.4 MOOC 14
Week03–Whatisthe(real)problem?
Objectives:
- Create an understanding of the concept of problem framin
- Create an understanding of why stakeholders need to be involved in problem
framing and why it might be challenging
- Build knowledge of tools and approaches available to involve stakeholders in
problem framing
Module title Lesson number
Title Speaker / Author Format
Intended learning outcomes
3.0 Intended learning outcomes Lucie Steigleder Text
Introduction to problem framing
3.1 Introduction to problem framing Melanie Smallman Video
3.2 Problem framing and co-creation Graeme Nicholas Text
Co-creating problem framing in practice
3.3 Case study: Co-creating problem framing in practice
Grace D’Arcy Video
Tools to engage stakeholders in problem framing
3.4 Tools to engage stakeholders in problem framing
Lucie Steigleder Video
Weekly quiz 3.5 - Lucie Steigleder Quiz
TAB 4 – WEEK 3 – WHAT IS THE (REAL) PROBLEM?
Week04–Howcanweco-designsolutionstoourcommunity’sproblems?
Objectives
- Understand the concept of prototyping and its importance in territorial and societal
transformation
- Discover tools and practices to engage with prototyping in your institution
- Envisioning new forms of actions for policy makers to support interactions in
innovation process

D7.4 MOOC 15
Module title
Lesson number
Title Speaker / Author Format
Intended learning outcomes
4.0 Intended learning outcomes Lucie Steigleder Text
Enhancing the core values and tools of prototyping
4.1 Enhancing the core values and tools of prototyping
Gene Bertrand Video
Illustrations: prototyping for circular transition
4.2 Illustrations: prototyping for circular transition
Asger Nørregård-Rasmussen
Video
Illustrations: prototyping policy programs with regional authorities
4.3 Illustrations: prototyping policy programs with regional authorities
Agnieszka Włodarczyk-Gębik
Video
New Roles of Policy Makers for supporting prototyping
4.4 New Roles of Policy Makers for supporting prototyping
Kate Armstrong Video
4.5 Labs as ambassadors of prototyping. FabLab Network
Marion Real Text
4.6 Labs as ambassadors of prototyping. ENoLL
Ines Vaittinen Text
4.7 Labs as ambassadors of prototyping. ECSITE
Lucie Steigleder Text
Weekly quiz 4.8 - Lucie Steigleder Quiz
TAB 5 – WEEK 4 – HOW CAN WE CO-DESIGN SOLUTIONS TO OUR COMMUNITY’S PROBLEMS?
Week05–Howcanweimplementsolutionsandmakethemsustainableovertime?
Objectives:
- Familiarise the audience with the transformation from prototypes into the actual
implementation of solutions and its opportunities & barriers
- Introducing evaluation methodologies and frameworks to evaluate success or
failure over longer time spans
- Discuss the different opportunities to make solutions sustainable over time

D7.4 MOOC 16
Module title
Lesson number
Title Speaker / Author Format
Intended learning outcomes
5.0 Intended learning outcomes Lucie Steigleder Text
From prototyping to implementation
5.1 From prototyping to implementation Jakob Schjørring
Video
5.2 Solving government’s problems with a Silicon Valley mindset
Jakob Schjørring
Text
Monitoring and assessment
5.3 Monitoring and assessment Alessandro Deserti Video
Making solutions sustainable
5.4 Making solutions sustainable Tedora Aibu Video
5.5 Co-designing sustainable solutions through design leadership
Georgi Lewis Text
Weekly quiz 5.6 - Lucie Steigleder Quiz
TAB 6 – WEEK 5 – HOW CAN WE IMPLEMENT SOLUTIONS AND MAKE THEM SUSTAINABLE OVER
TIME?
3.3.2. Target audience
The MOOC potential interested audiences are policy makers (local, national and European
level), but also scientific and research community, industry innovation community, civil
Society, NGOs. Participants will be professionals from all over Europe, working in their local
context or at a more global scale.
3.3.3. Learning outcomes
By actively participating in this MOOC, you will achieve the following different intended
learning outcomes:
• Question current policy-making practices and their limitations and recognise the
potential of co-creation (advocating for individual or community needs S1.2.4).
• Understand the concept of human-centred design (engaging with others to identify
needs S1.7.2) and examine service design methodologies when applied to policy-
making (plan social service process).
• Explain the importance of problem framing (solving problems S1.9) and experiment
different stakeholder engagement methods(working with others S1.8.0).

D7.4 MOOC 17
• Identify the characteristics of prototyping and apply its methods to a specific
challenge (communication, collaboration and creativity S1.0).
• Evaluate a co-creation process and ensure the sustainability of its outcomes. (manage
government policy implementation)
4. Technical development This chapter outlines how the task leader has planned and carried out the production of
MOOC throughout the development phase with a specific focus on the management of the
speakers and the remote production of the footage due to the COVID-19 pandemic.
4.1. Liaison with speakers In the course of January 2020, a series of individual calls were organised with the different
week hosts to align the contents and speakers. Their exact involvement and tasks were
clarified, namely identifying and contacting potential speakers for their respective week.
Then, Ecsite also provided a constant assistance for the writing of the scripts, with different
rounds of reviews and suggestions to align all the scripts in order to keep a coherence and
consistency throughout the whole MOOC.
4.2. Video shooting
The initial idea for the recording of the videos was to rent a studio and bring all speakers to
shoot together. A number of studios were approached to gather quotes. However, these plans
were rapidly dismissed due to the COVID 19 pandemic. The situation was uncertain and
planning became complicated if not near impossible.
Ecsite together with Politecnico di Milano and the rest of the week leads decided to prepare a
contingency plan: Each of the speakers will record to the better of its possibilities depending
on their own country situation and institutional and personal capacity. Ecsite would prepare a
toolkit and provide supporting materials to all of the speakers to try and secure the best
possible and homogeneous recordings.
All of the speakers were briefed with extensive guidelines that included all possible guidance.
The guidelines can be found in Annex 1 to this deliverable. A second shorter set of

D7.4 MOOC 18
guidelines, explaining how to conduct recorded interviews via Zoom, has also been shared
with the partners requiring it. (See Annex 2)
Besides, calls were organised individually to ensure that lighting was optimal and that the
quality of the recordings would be as close to professional as possible. All of the speakers
were required to prepare at least two versions of the same recording to allow for editing.
Finally, for those speakers with more limited means, Ecsite purchased a technical shooting
kit, comprising: a lamp, a tripod, a microphone and a white screen, to support their home
filming. These materials were shipped as needed.
4.3. Post production
Ecsite worked with an external company to carry out the post-production of all the MOOC
videos. This part of the work has been key in making sure all the videos had a professional
quality and to try to minimise differences as well as to give a unique look and feel to the
MOOC.
The call (see Annex 3) requested a company to support in the post-production, editing and
animating of a series of videos. The call included the following details:
• No. of videos – total of 20 videos for the entire MOOC + 1 for the course trailer
• Length of each video – Max 7 minutes
• Total length – 110 minutes
• Special request – 2D animations for some data visualisations & subtitles
• Language – English
• Quality of videos: Due to current circumstance all videos will be filmed by different
organisations using cameras with varying quality (different resolutions and frame rates).This
should be considered when costing up and setting a timeline for this work.
The call for tender was published on the 14/07/2020 on the Ecsite website and circulated to
the consortium using Basecamp (the project management tool of the project). Partners were
asked to circulate this call to their networks.
The timeline given was as follows:
• Deadline for applications: 16 August
• Final decision: 31 August
• Start of the work: 1 September
• Deadline for first version: 15 October

D7.4 MOOC 19
• Deadline for second version and/or second batch of videos: 10 November
The call also included the criteria for the selection of proposals:
• Price efficiency and effectiveness
• Demonstrated track record of working with similar projects and/or formats
• Excellent understanding and creative interpretation of the project
• Clear and well-defined working process
Ecsite received 15 proposals that were all reviewed together with the coordinator. Finally,
Tripwire was the selected company (See Annex 4).
Ecsite has been in close contact with Tripwire throughout the whole development of the
videos, and the final result can be seen in the Annex 5.
4.4. Hosting platform
To find the most suitable platform to host the MOOC, Ecsite contacted different educational
platforms specialised in MOOCs and compared them and their different features. The priority
was set on finding a platform that could help our course reach as many participants as
possible, by hosting courses of a similar area and quality. The budget allocated for the
hosting was €5000
For that, several platforms were contacted and the choice was made by exclusion according
to the following criteria:
1. Exclusion for price
• Futurelearn: this platform is one of the most renowned and was of course one of the
first choices. It had been recommended by several partners from other projects
(University of Groningen or ECSA). After an initial call, during which they explained
the possibilities provided by their platform, they sent a quote with the rates they could
offer:
o Associatepartnership:£8,000(€9200)with15%ofallrevenuesgenerated from the
sale of certificates and upgrades)
o EnhancedAssociatepartnership:£12,000(€13,800)percourseforwith50% of all
revenues generated from the sale of certificates and upgrades

D7.4 MOOC 20
These offers exceeded our budget and the fact that our content would have only been
available for a limited amount of time or against payment was not aligned with our vision of
open access.
• Moodle was also one of the usual suspects. Unfortunately, they do not provide
any guidance on the development of the MOOC itself, which was crucial to us.
They sent us to Avetica, one of their partners based in Belgium. After a first
contact by email, and a call during which they presented the platform, their offer
was based on two modules:
o One-time-costs: > €3,510 for the initial setup
o Yearly costs:€2.625/year
This offer did not include the optional costs of € 1.390 for a branding
design.
This option has been identified as beyond the budget available for the MOOC.
2. Missing availability
• Opensciencemooc: after a first contact by email, they declined to collaborate with us
offer due to an internal transition period that did not allow them to take on any new
project at the time.
• edX: due to an overwhelming number of organizations and individuals contacting
them, they were at the moment unable to discuss a formal partnership with all
interested parties right away.
• UCLeXtend: the educational platform of our partner UCL was at the time in the
process of moving all of their content to Moodle, which means that they had no
availabilities to guide us through the development of the MOOC, and Moodle was
already an alternative that we explored (see above)
• EUN: After an initial call with their team, EUN informed us that our topic was not in
the scope of their activities and that their expertise was in the design of courses for a
different target audience than ours.
• Apolitical: They are only accepting applications for courses developed directly by
civil servants.
3. Noresponsetotheinitialcontact
• Iversity

D7.4 MOOC 21
• maize.PLUS
• Coursera
4. Not meeting the criteria • European Multiple MOOCs Aggregator (EMMA): The current state of their
website did not allow us to establish the first contact with them.
• Openuped: the design and vision of the courses developed within this
platform was too far from our MOOC.
5. Final choice
The MOOC will be published in two platforms: Polimi Open knowledge and the European
Commission’s EU Academy.
While we were exploring these different opportunities and contacting various platforms, we
decided to look for expertise and opportunities within our own consortium, and were put in
contact with the team of Polimi Open Knowledge (POK) through SISCODE coordinators
Polimi.
Their platform was fulfilling our expectations as well as our needs, while our MOOC was
perfectly aligned with their vision and the scope of the courses already available on their
website. A mutual decision has then me made to collaborate with them for the publication of
our MOOC that will then stay available on their website for 5 years.
While our coordination with PoK was undergoing, we had the chance to experiment the
newly created European Commission platform, EU-Academy, at the occasion of the 3rd
Citizen Engagement Festival.
An official request had to me made by our project officer at the European Commission,
which allowed us to get in contact with them and engage the conversation. As well as for
POK, the EU-Academy content was perfectly aligned with the topic and content of our
MOOC. As their platform is still at its early stages, the EU-Academy team was happy to host
our MOOC for free for a duration of a year.
The links to all the videos (both from the POK youtube channel and the Ecsite youtube
channel, for the EU-Academy platform) can be found on the Annex 6.

D7.4 MOOC 22
5. The MOOC As a final result, the online course consists in 18 videos produced specifically and according
to the developed structure and contents as well as in a variety of articles, adademic
publications and other additional material to enhance the learning in relation to the specific
topics and provide empirical evidence and cases combined with the scientific background.
5.1. Visual and communication
The visuals and look of the MOOC are aligned with the general graphic style of SISCODE
(see D.7.2).
In addition to the spoken content, the videos provide a set of keywords and graphics
enhancing the understanding of the content with a visual support on screen providing a clean
and interesting look. Annex 5 and 6 provide an overview of the graphic style adopted for the
single elements as well as a table with the direct links to all videos produced.

D7.4 MOOC 23
FIG 2 - 4 – SCREENS FROM THE VIDEO LECTURES PRODUCED FOR THE MOOC

D7.4 MOOC 24
6. Dissemination and accessibility
6.1. Promotion For the promotion and dissemination of the MOOC, a trailer with a duration of 80 seconds
has been developed summarising the contents of the course and giving an outlook on the
materials and opportunities for learning provided during the course.
It will be distributed across SISCODE channels, during activities that are part of the project
like workshops or the final conference as well as used by the partners of the consortium
during events and activities beyond SISCODE but related to the issues of co-creation, RRI
and policy making.

D7.4 MOOC 25
FIG 4 & 5 – SCREENSHOTS FROM THE TRAILER OF THE MOOC
6.2. Translation in other languages
The SISCODE MOOC is addressed to policymakers interested in using co-creation
methodologies at different scales: European, National and Local. The language of our courses
is naturally English, as it is the international language. But in order to also reach out local
policymakers or participants that might not feel comfortable enough in English, Ecsite
decided in agreement with the consortium to translate the subtitles of the MOOC’s videos.
Five languages have been selected, based on an assessment of needs amongst the SISCODE
partners and our analysis of the European situation: French, German, Italian, Spanish and
Polish.
Our partners have been asked to assist with the translation of the communication materials,
while Ecsite took care of the subtitling translation.
7. Annexes The annexes contain the video guidelines that have been developed for the speakers to
provide support for the production of homogenous and precise footage as well as instructions
on how to record an interview via Zoom. Furthermore, the brief developed for the post-
production is attached together with the proposal that has been chosen. Finally, a table with
the links to all videos is provided.

MOOC VIDEO GUIDELINES
This project has received funding from the European Union’s Horizon 2020 Research and Innovation programme under grant agreement No. 788217
Annex 1: MOOC video guidelines

Table of Contents
1. Introduction ............................................................................................................ 3
2. Content of your video ............................................................................................... 3
2.1. Script ................................................................................................................ 4
2.2. Visual items ...................................................................................................... 4
3. Technical instructions .............................................................................................. 4
3.1. Recording yourself ............................................................................................ 5
3.2. Use of slides ...................................................................................................... 5
3.3. Audio ............................................................................................................... 5
4. How to setup ........................................................................................................... 6
4.1. Choosing the right location ................................................................................ 6
4.2. Use of light ....................................................................................................... 6
4.3. Background ...................................................................................................... 7
4.4. Placement of camera ........................................................................................ 10
4.5. Where to look .................................................................................................. 10
5. Other things to consider .......................................................................................... 11
5.1. Recording ........................................................................................................ 11
5.2. Feeling comfortable ......................................................................................... 11
5.3. What to wear .................................................................................................... 11
5.4. Tone ................................................................................................................ 12
6. Step by step ............................................................................................................ 12
7. Sending us the files ................................................................................................. 12
8. Annex 1 – Visual aid options .................................................................................... 13

1. Introduction
This document has been made to act as a guide for filming your part of the MOOC. The
guidelines and the measures were decided with simplicity and quality in mind. This is a
general document. Not all the suggestions have to be followed but we have made sure that
all the steps can be achievable in any home. At Ecsite we are here to guide and help you
through this process so prior to you filming an individual call will be set up to answer any
questions you may have.
The equipment you need:
• A phone
• A laptop
• A microphone (will be provided for those that don’t have one)
• A tripod (will be provided for those that don’t have one)
• A phone clip to attach to the tripod (will be provided for those that don’t have one)
• A plain white background (will be provided for those that don’t have one)
• Lights/lamps (one will be provided to you)
For some of you we will be liaising with you to send a MOOC recording kit to you, which
will hold the equipment you need. You will then be required to send this equipment back to
us at Ecsite or onto someone else. The length of videos must not exceed 7 minutes.
2. Content of your video
To help you plan your slides and allow you to think about what graph/quotes/diagram is
important, Polimi made a simple shot list document that you can use. This has been sent in
conjunction with this document. Each row corresponds to an idea (a theoretical “slide” if
you were presenting a slideshow). The columns correspond to the script, the visual aids
that you might want to add, and it also provides space to add citations and names of other
speakers (if applicable).

2.1. Script We would highly recommend you to write the script of your video (e.g. the text you will say)
in advance, to be sure to cover every aspect of the subject you will be addressing. It will also
help you during the recording, to avoid any blanks or freezes.
Please send us your script ahead of your recording day. Of course, we will not ask for any
modification on the substance of your content, but we want to ensure a coherence and
homogeneity between the different speakers. This will also considerably ease our task
when we produce the subtitles.
You can write your script on the first column of Polimi’s document.
2.2. Visual items Napoleon used to say: “A good sketch is better than a long speech.”
Besides the words you will say, you might want to use visual support during your video.
These can include graphics, but also keywords or pictures. We will take care of adding the
materials in the post production phase. Please make sure to indicate which visual aid you
want to use in the document provided by polimi next to the corresponding text. If this
material is a file (graphic, picture etc), you can simply upload it in this Google Folder and
clearly add its name on the document.
To have an idea of the different types of visuals objects that we could include, we created an
non-exhaustive list of different options that you can find on the Annex 1 of this document.
We in collaboration with a visual specialist company will take care of harmonising the
visuals with the Siscode visual identity, so don’t be afraid to send us “raw” files.
3. Technical instructions
This section outlines the technical things to consider prior to filming. We have decided that
where possible each person fill using their phone instead of the webcam on their laptop.
However, the webcam on the laptop can always be used as a backup. This section also some
covers guidelines on slides.

3.1. Recording yourself To record yourself we would be asking you to use the native camera app on your phone and
use the camera on the back of the phone – not the front facing camera. This will be set up
on a small tripod directly behind your laptop (for setup refer to section 3.3).
3.2. Use of slides Alongside the script you write you can also prepare slides to help you record more easily
and structure your 5-7-minute presentation. Please note: Making slides is not mandatory
and will not be included in the post production. Making slides can however act as a tool in
helping to guide you through the presentation you give. As you will see in section 4.3, I have
placed my laptop below my phone camera. On the laptop I can either have my script or I
can prepare some slides beforehand – like cue cards – to help guide me. Think about what
is easiest for you.
3.3. Audio In built microphones in laptops and phones are – how do I put it – like you are recording
your audio through a potato. What I am basically saying is audio from in built microphones
are not great. So, for this, you will use a lavalier microphone that plugs straight into your
phone. No settings in the camera need to be changed, it is as simple as plugging it in.
Once the lavalier mic is plugged into your phone through the headphone jack feed the cable
up through your top/blazer so the cable is not seen and clip the mic near the top of your
clothing (around your sternum area). This will make sure the mic is not too close or too far
away. Some phones no longer have a headphone jack. For ones that don’t please let us
know as you will need an inexpensive adapter that we can provide to you. Examples of
lavalier mic placement:

To reduce the chances of rustling on the mic, generally cotton and woollens are less prone
to clothing noise. Silks and synthetics on the other hand are noisier.
4. How to setup
Here we provide you with tips and instructions on how you can get the best recording
quality from your home. To follow these, you may have to set up or rearrange a space in
your home, and of course you may not be able to follow all of these measures. However,
following as many of these actions as possible will produce the best viewing and listening
experience for the MOOC participants.
4.1. Choosing the right location Choosing the right room in your house will be key in getting the best sound quality. Choose
a room that is preferably carpeted/rugged as this will reduce echo in your audio. If this
cannot be achieved choose a quiet space that does not have too many windows (see 4.2 for
more information on use of windows and light). If the room you have chosen is echoey you
can reduce this by placing rugs or towels on the floor to dampen out the sounds. If you have
a clothes rail this can also act as a stand for you to put towels/blankets over. Placing this
behind your phone will contain your voice from travelling far, reducing echo. How much
effort you put into here depends on your time, and of course the space you have.
4.2. Use of light Since we are using phones to record for us this means having a good source of light is very
important to help out with the tiny sensors present in phone cameras. The optimum
scenario would be to set up some studio lights, however this is not possible. But, there is a
light source you can use that is almost as good – natural light.
Using natural light will produce even diffused light that you can use to help your picture
quality look better. By diffused light, I mean even light that is flattering on a person’s face.
However, there are key steps to take to use this light correctly. First, as mentioned in 4.1
choosing a room with not many windows is optimal. However, you want a room to have at
least one window that you can use to position in front of or next too. When setting up,

position yourself directly in front of the window or to the side so the camera is pointing
away from the window – not directly into it. See examples below.
Image B was shot with a window directly behind. Here the camera is struggling with
exposing the highlights and the shadows of the image correctly. For us however going for a
picture close to image A would be optimal. This was taken with the window directly in front
of me producing a nice diffused light and image. This image can also be obtained if the
window is positioned to the side of you – just as long as the window is not directly in the
shot the image will look good.
Couple of other things to note: time of day is important. Choose a day which is not too
overcast and a time where the sun is not shining directly on the window. If you cannot
replicate a room described above, try to close the curtains on the other windows present in
the room and just keep one window uncovered to act as your main source of light. If for any
reason a window cannot be utilised find a well-lit room and place a lamp behind your
phone and laptop to provide a light source on your face. Depending on the strength and
intensity of the light you may have to adjust your distance from the light source.
4.3. Background For this MOOC we are hoping that each of you will be able to find a spot in your home that
shows off a blank background – plain white or grey wall would be best. As long as it not too
dark any colour will do. The idea is to have a clear background with nothing else in the
frame apart from you. The goal would be to create a shot similar to the one below:
A B

However, a large space would be needed with a large blank backdrop for this (for those
shooting in a studio space or for anyone who thinks they can replicate this, we can talk with
you in organising and arranging this set up). For those filming at home a look illustrated
below would also work. I have positioned myself directly in the centre of the frame and
what we will do is cast up graphs/diagrams/quotes that you have highlighted as being
important in the document provided by Polimi over the top of you.
Depending on the placement of your window (if it is not directly in front of you) you may
give off some strong shadows on the wall that we don’t want. Try to give yourself (if you
can) about a metre space between you and the wall as to prevent shadows from forming. In
my setup above I have a window to my right. Since it is quite an overcast day in Brussels at
the time of doing this, shadows are appearing on the back wall. The shadows given off here
are not that problematic. However, depending on your room, the space you have and the
light available, your shadows might be more pronounced. Another option would be to take
a light and place it directly behind you shining up against the wall or directly to the side of
you to fill in the shadows (a light will be provided in the kit we send you with full
instructions on how to use it). The added light is subtle but you can see that my image is
now more evenly lit and the shadows less harsh.

If a plain background cannot be obtained, we will liaise with you and provide you a white
projector screen to set up in your home. Here is the complete set up I manufactured at
home in 10 minutes that got me the images above.
To my left you can see the small light I used to fill in the shadows. Wherever possible, using
only natural light would be best. However, if the room is too dark, using the main lights or
lamps in your home can be used.

4.4. Placement of camera Once a location has been selected using the guidelines above, attach your phone to the
tripod. For those that will be provided with a tripod, the tripod will not be full size, so you
will be following a similar setup to the one shown in 4.3.
Attach your phone to the tripod supplied using the phone clip mount and place it directly
behind your laptop on a desk. Prop the tripod on a stack of books or a high table so that the
camera is directly at eye level. Often phone cameras and especially webcam cameras are
manufactured to give you a wide field of view which can distort the image (facial features
etc.). Placing the camera at eye level reduces the chances of that happening and provides a
more flattering image.
When positioning your camera think of the “rule of thirds” (see image below).
You want to be in the centre of the frame but you also want to position yourself so your eyes
are aligned around the top third of this imaginary grid. Obviously when setting up you
won’t have this on your image but it is good to keep in mind when setting up your
composition. To make sure you have positioned the camera at eye level and are following
the “rule of thirds” perform a couple of test videos to see if you need to raise the tripod up
or down. Or, get a friend/partner to help you position yourself correctly.
For those that are using their own full-size tripod, it is best to record your presentation
standing up. Standing up can make you feel more enthusiastic (like you are presenting to an
audience) and prevents you from slouching on a chair. Same rules apply.
4.5. Where to look Often on conference calls people tend to not look at the camera when speaking and instead
look at themselves in the small window. This is normal but for the MOOC we want you to be
looking directly at the camera. Since we are using your phones back camera you won’t be

able to see yourself, but you still might find it uncomfortable talking to the lens of the
camera. One thing you can do to make the whole process easier is to print off a picture of
one of your relatives or friends or get a bit of blue tac to stick just below the camera. That
way you can focus on this instead of the camera but make it seem like you are looking
directly at the camera.
5. Other things to consider
5.1. Recording A good tip to be sure to have enough usable material without spending the entire day in
front of the camera is to take 3 “full” takes:
• The first one to familiarise yourself with the camera.
• The second one as the final one
• The third one as a back-up plan.
Please send us the second and the third one.
5.2. Feeling comfortable It is always easier to follow and understand someone that is comfortable giving a lecture.
Your message will be best received by the audience if you don’t show obvious signs of stress
(which is of course easier said than done). So relax and don’t hesitate to take several shots.
If you make a mistake mid-recording you do not have to restart the whole presentation. Go
back a few sentences and retry. In post-production we will be able to cut out the mistake.
Drinking a hot cup of tea beforehand is great for warming up the vocals too and to calm the
nerves.
5.3. What to wear As we are going to add subtitles to each video, we would highly recommend you to avoid
any kind of pattern on your clothes, in particular stripes or small shapes or shiny clothing.
Ideally, wearing light clothes will help participants read the subtitles, because it avoids
creating shades that overlap with the text. If your backdrop is particularly dark wearing

lighter clothing would be best. If your backdrop is light wearing darker clothing would be
best. This will create colour contrast in the image making you stand out more.
Please avoid any jewellery.
5.4. Tone For a better idea on how best to come across please refer to this MOOC video that Polimi
shared with us. This kind of approach and tone is the one we want to emulate. Make sure
you introduce your presentation by mentioning what this lesson will cover. e.g. “Welcome
to the second video of week 3, this lesson will cover…”.
6. Step by step
We have encapsulated a lot of information in this document. Please find below a quick
checklist to go through just before you hit record to make sure you have the key measures
in place:
1. Choose the right location and time of day to shoot.
2. Set up the space you will film in (you may have to move/clean a space).
3. Place a sign on the door “filming in progress” so as not to be disturbed.
4. Set up your phone camera and laptop (if using slides) on a table. Make sure your
phone is fully charged and has 2GB of storage free and is at eye level.
5. Once you have completed your presentation stop recording on your phone.
6. Have a quick watch through to make sure everything sounds and looks okay. If you
are happy, then send over the footage to us at Ecsite.
7. Sending us the files
And breathe. You made it. Well done. For us to get the files it is best to send the files via
wetransfer or through google drive (whichever is easiest for you). Before sending have a
watch through to make sure everything looks and sounds okay.

8. Annex 1 – Visual aid options
Besides your presentations at the post production stage we will be able to add text,
graphs, and pictures to your presentation to help you bring your message across. Keep this
in mind when preparing your script. Besides that, we can also add some “easy” visual
effects: some parts of the graphs can pop at different times, we can highlight different
sections, etc.
In order to help you think of elements we have created a short (non-exhaustive) list:
• You may want to use keywords to make a point, or highlight a concept for instance:
“Co-Creation”
“user-driven innovation”
• If your idea can be summarized with an icon, this could of course be an option:
• You could also want to add snappy sentences that also include a keyword to help you
share an idea.
“Policies that are co-created are better”
• If you are describing a process you could use keywords/ concepts linked with arrows
• You want to support visually of more complex notions using graphs including cycle
charts, flowcharts, pie charts, or timelines
Co-Design Co-production
Co-creation

x And of course, you could always add pictures or illustrations

How to record an interview via Zoom
Annex 2: Guidelines: How to record an interview using ZOOM

Call setup
If one member of the Ecsite team cannot be available, the ZOOM call will beset up to grant you the permission to record by being just a participant.
During the recorning, please do not share anything on the screen. If you want to show an infographic or highlight a keyword, we will add it at the post-production phase.
From a technical point of view, the points raised in the “guidelines for recording” still apply (use of an external microphone, setting up the material, paying attention to the light and the background etc)
From your interviewer side, here are the few steps that would allow you to record the best quality video possible:
C L E UA L S T P 2

1. Make sure your interviewee will be the only one on screen
Right-click on your video and click on “Hide self view”.
MAKE SURE YOUR INTERVIEWEE WILL BE THE ONLY ONE ON SCREEN 3

1. Make sure your interviewee will be the only one on screen
The interviewee will then be the only one to appear on the full screen for the whole duration of the call (unlike the “speaker view” mode on which you could appear if you make a noise).
MAKE SURE YOUR INTERVIEWEE WILL BE THE ONLY ONE ON SCREEN 4

2. Recording settings
To access the general settings, and the recording settings in particular, the easiest solution is to go through the Audio settings (this also works with the video settings)
R C R I G S T I GE O D N E T N S 5

2. Recording settings
Here, in the “Video” settings, make sure that your video is on “16:9 (Widescreen)”, to keep a similar format to what we could have with a camera.
R C R I G S T I GE O D N E T N S 6

2. Recording settingsIn the “recording” settings, make sure to tick the two following boxes:- “Record a separate audio file for each participant who speaks”: this will prevent any overlap between your audio and the one from your interviewee.- “Optimize for 3rd party video editor”: this will give a better quality of the video, more suitable for post-production edition.
R C R I G S T I GE O D N E T N S 7

3. Final tips for speakers- In the final version of the MOOC, the questions will appear on screen. There is then noneed to repeat them at the beginning of the answer.- Please avoid as much as possible starting the sentences with words such as “So, [...]”,“Ok, [...]”, this can be quite tricky in the editing if we have to cutYou are now ready to hit the “record” button and start your interview :) .
3 F N L T P F R S E K R. I A I S O P A E S 8

SISCODE MOOC BRIEF
This project has received funding from the European Union’s Horizon 2020 Research and Innovation programme under grant agreement No. 788217
Annex 3: Call for post-production company
Annex 3: Call for post-production company

1
Table of Contents
1. Introduction and Context ........................................................................................ 2
2. Description of the MOOC ........................................................................................ 2
3. The SISCODE project .............................................................................................. 2
4. Factsheet............................................................................................................... 3
5. Service requested ................................................................................................... 4
6. SISCODE identity and visual look............................................................................. 4
7. Budget .................................................................................................................. 5
8. How to apply ......................................................................................................... 5
9. Selection Criteria ................................................................................................... 6

2
1. Introduction and Context
Ecsite is looking for a company (individual consultant or a company) to work with us in
producing a Massive Open Online Course (MOOC) for the EU project SISCODE. This brief
conveys our vision for this MOOC, and the specific challenges behind its design and
development. Companies answering this Call for Tender, should bring their own ideas and
vision based on industry expertise, and technical capability, to incorporate our goals –
introducing co-creation to policymakers – into that vision.
2. Description of the MOOC
This MOOC presents an introductory course to the use of co-creation and design
methodologies especially tailored to those working in the field of policy-making. The course
is composed of 5 chapters delivered in 5 weeks that will guide participants through the
main building blocks of these methodologies. Within each chapter, different experts in the
field will walk participants through the specific aspects of the whole co-creation process
cycle. Breakdown:
• Week 1: Why is policymaking in urgent need of innovation?
• Week 2: How can user-centricity and co-creation improve policies?
• Week 3: What is the (real) problem?
• Week 4: How can we use co-design solutions to solve our community’s problems?
• Week 5: How can we implement solutions and make them sustainable over time?
3. The SISCODE project
SISCODE is a three-year project aiming to understand the co-creation phenomenon that is
flourishing in Europe (in fab labs, living labs, social innovations, smart cities, communities
and regions) and to analyse the context and conditions that support its effective
introduction, scalability and replication. Eventually this will help bridge the gap between
the process of co-constructing policies and their implementation.
Co-creation is analysed in particular in the light of Responsible Research and Innovation
and Science, technology and innovation policies. SISCODE is running n a European study to

3
compare co-creation ecosystems and describe effective dynamics and outcomes of the
integration of society in science and innovation. Project partners (fab labs, living labs and
Science centres and Museums) experiment in 10 co-creation labs around Europe with
design as a new system of competences capable to support the development of
implementable RRI and STI solutions and policies. The project is also creating a playground
for policy makers to test co-creation of policies and to understand the transformations
needed to embed co-creation in STI policy making, overcoming barriers and resistance to
change and considering organisational transformation.
The project is run by 18 European partners from different countries and backgrounds:
Universities, agencies for the promotion of science, science centres and museums, fab labs,
living labs and three European networks. The project is coordinated by the Politecnico di
Milano and the communication and dissemination is led by Ecsite.
For more information refer to SISCODE’s website.
4. Factsheet
SISCODE is looking for a company to support in the post-production, editing and animating
of a series of videos. MOOC breakdown:
No. of videos – total of 20 videos for the entire MOOC + 1 for the course trailer
Length of each video – Max 7 minutes
Total length – 110 minutes
Special request – 2D animations for some data visualisations & subtitles
Language – English
Quality of videos: Due to current circumstance all videos will be filmed by different
organisations using cameras with varying quality (different resolutions and frame rates).
This should be considered when costing up and setting a timeline for this work.
The target audience: Policy makers, but also scientific and research community, industry
innovation community, civil Society, NGOs. Participants will be professionals from all over
Europe, working in their local context or at a more global scale.
Timeline:
4
- Deadline for applications: 16 August
- Final decision: 31 August
- Start of the work: 1 September
- Deadline for first version: 15 October
- Deadline for second version and/or second batch of videos: 10 November
Post-production might be requested in two stages e.g. first batch of videos edited in
September and second batch in October. This is due to the difficulty that may arise in
getting all the footage filmed in time with current restrictions because of COVID-19.
5. Service requested
Complete support throughout the whole curation of the MOOC. We seek a company that
can provide:
- Post-production support
o Full edit of all 20 videos + 1 trailer (1 minute long)
o Colour correction and grading
o Sound design
o 2D animations
o Provide SISCODE with final footage and all shot footage taken
o Separate English language subtitle/transcript file
- one round of corrections per video upon request.
6. SISCODE identity and visual look

5
The project already has its graphic identity (Fig. 1):
The SISCODE identity stands for - fresh, modern, youthful, highlighting innovation and
future thinking and emboldening a creative approach. The MOOC will be made in
similar light to the ethos of SISCODE’s identity, representing a professional, but
engaging course made for an audience that is often hard to reach.
7. Budget
The budget set for this output of the project is max EUR 15,000, all taxes included.
The contract will be awarded against the criteria stated in section 9.
8. How to apply
Please send a single document, considering the criteria set out in section 9, including:
● Motivation letter and company’s profile– describing your expertise● Your proposal
● Brief description of the project timeline● Resources needed● Breakdown of budget by item
● Showreel and portfolio showing examples of similarly-complex projects
Figure 1: SISCODE logo in its different colour variations. SISCODE stamp and tagline.

6
Share your vision by animating the SISCODE logo and a diagram we would like to display in the videos. Find all files here (.eps and .png). Animating graphs/diagrams will be an important part of the MOOC, so we want to see what creative approach you will take to the project.
For additional information please write to [email protected]
Please send the proposal to [email protected] with the subject: “SISCODE MOOC – Post
production 2020” by 16 August 23:59 CET.
9. Selection Criteria
Proposals will be assessed based on the following criteria:
1. Price efficiency and effectiveness
2. Demonstrated track record of working with similar projects and/or formats
3. Excellent understanding and creative interpretation of the project
4. Clear and well-defined working process
Only completed proposals will be assessed.

SISCODE MOOCPost-production
Proposal
by TRIPWIRE VIDEO& ANIMATION
Annex 4: Tripwire proposal

SISCODE MOOC Post-productionPROPOSAL
TRIPWIRE VIDEO & ANIMATION2020
SISCODE MOOC Post-productionPROPOSAL
TRIPWIRE VIDEO & ANIMATION2020
Brief The post-production of a professional and engaging MOOC designed for an audience that can be hard to reach. Support will be provided throughout the curation of the course.
The full edit of 20 course videos (max. 7’) and one trailer (approx. 1’) including attractive 2D data visualisation animations, colour grading and sound design.
All videos to be subtitled in English.

SISCODE MOOC Post-productionPROPOSAL
TRIPWIRE VIDEO & ANIMATION2020
SISCODE MOOC Post-productionPROPOSAL
TRIPWIRE VIDEO & ANIMATION2020
About us Tripwire is a creative agency based in Barcelona specialising in video and 2D animation. We are passionate about what we do and throw ourselves wholeheartedly into every new assignment. We are a small and agile team, working with other professionals on a case by case basis to create the perfect setup for each new project. We typically take our assignments from their conception through to delivery, but are just as excited collaborating in the later stages of the production process. Over the years we have worked for clients big and small on a diverse range of topics. We have considerable experience working with NGOs, charities, universities and governmental organisations at local and national level and have produced graphics and animation for TV and online entertainment outlets.

SISCODE MOOC Post-productionPROPOSAL
TRIPWIRE VIDEO & ANIMATION2020
SISCODE MOOC Post-productionPROPOSAL
TRIPWIRE VIDEO & ANIMATION2020
The development of the SISCODE MOOC is an ambitious and excit-ing project with some interesting aesthetic and technical challenges for post-production. We recognize that co-creation is about engaging differently, that it rep-resents a shift in mindset, and that the SISCODE MOOC requires an aesthetic to match, conveying a sense of the dynamism, innovation and potential of this new approach. At Tripwire, editing to combine live action footage and 2D animation is one of our strengths. We have recently worked on the edit and produc-tion of animations for a series of online courses for both EADA Business School in Barcelona and for the Universitat Autònoma, and we would love to experiment further with this type of content. Over the last decade, much of our core work has involved communicat-ing policies. It is something we have developed a passion for. To do it successfully, we have needed to get to grips with complex ideas, under-standing the mechanics of policy making and delivery as well as explor-ing creative ways to connect with viewers and meet their needs. We are comfortable working on relatively large scale projects and within complex project structures where the needs and views of multiple part-ners need to be accommodated. We find that clients appreciate our flex-ibility, rigour and creativity.
Our interestin this projectMotivation letter

SISCODE MOOC Post-productionPROPOSAL
TRIPWIRE VIDEO & ANIMATION2020
SISCODE MOOC Post-productionPROPOSAL
TRIPWIRE VIDEO & ANIMATION2020
A light, playful and dynamic logo animation to capture the energy of the SISCODE project.
Two semicircles in constant motion, they shift, explore and fit together. The second part of the animation reels the logo back and forth allowing viewers to take in the tagline. We propose a breezy, modern audio track
with some techy undertones to accompany the animation.
Our diagram proposal uses a semitransparent slide as a means to seamlessly move between live action footage and data visualisations. Here
we have opted for a clean, simple look, where clarity is key and colour may be used to organise different types of information or ideas.

SISCODE MOOC Post-productionPROPOSAL
TRIPWIRE VIDEO & ANIMATION2020
SISCODE MOOC Post-productionPROPOSAL
TRIPWIRE VIDEO & ANIMATION2020
Logo & diagram animationproposal
These are our first proposals for SISCODE’s MOOC visual identity:
LOGO: https://vimeo.com/448172734
DIAGRAM: https://vimeo.com/448171574
Password: SISCODE
At the beginning of the creative process we will present you with a virtu-al mood board replete with sketches and references presenting a selec-tion of styles and ideas to find out exactly what you are looking for.

SISCODE MOOC Post-productionPROPOSAL
TRIPWIRE VIDEO & ANIMATION2020
SISCODE MOOC Post-productionPROPOSAL
TRIPWIRE VIDEO & ANIMATION2020
week 0101.09-06.09
week 0207.09-13.09
week 0314.09-20.09
week 0421.09-27.09
week 0528.09-04.10
week 0605.10-11.10
week 0712.10-18.10
week 0819.10-25.10
week 0926.10-01.11
week 1002.11-08.11
week 1109 & 10.11
CoordinationBriefing Review Review Review Review Review
Window for receiving content
Editing
Edit pilot(Video1) v01
v01
Final modifications
Videos 2-6 Videos 7-11 Videos 12-16 Videos 17-20 Trailer
Edit pilot v02 v02Videos 2-6 Videos 7-11 Videos 12-16 Videos 17-20 Trailer
Design
Design pilot + prep graphics
v01Videos 2-6 Videos 7-11 Videos 12-16 Videos 17-20 Trailer
Revisions to design and graphics pilot
v02Videos 2-6 Videos 7-11 Videos 12-16 Videos 17-20 Trailer
Sound Sound design pilot Videos 2-6 Videos 7-11 Videos 12-16 Videos 17-20
GradingGrading
Videos 1-11Grading
Videos 12-20Grading trailer
SubtitlingSubbtitling
Videos 1-11Subtitling
Videos 12-20Subtitle trailer
The following timeline respects the deadlines set out in the tender document and allows for a delay in receiving some footage.
1stbatch submission
finalsubmission
Timeline

SISCODE MOOC Post-productionPROPOSAL
TRIPWIRE VIDEO & ANIMATION2020
SISCODE MOOC Post-productionPROPOSAL
TRIPWIRE VIDEO & ANIMATION2020
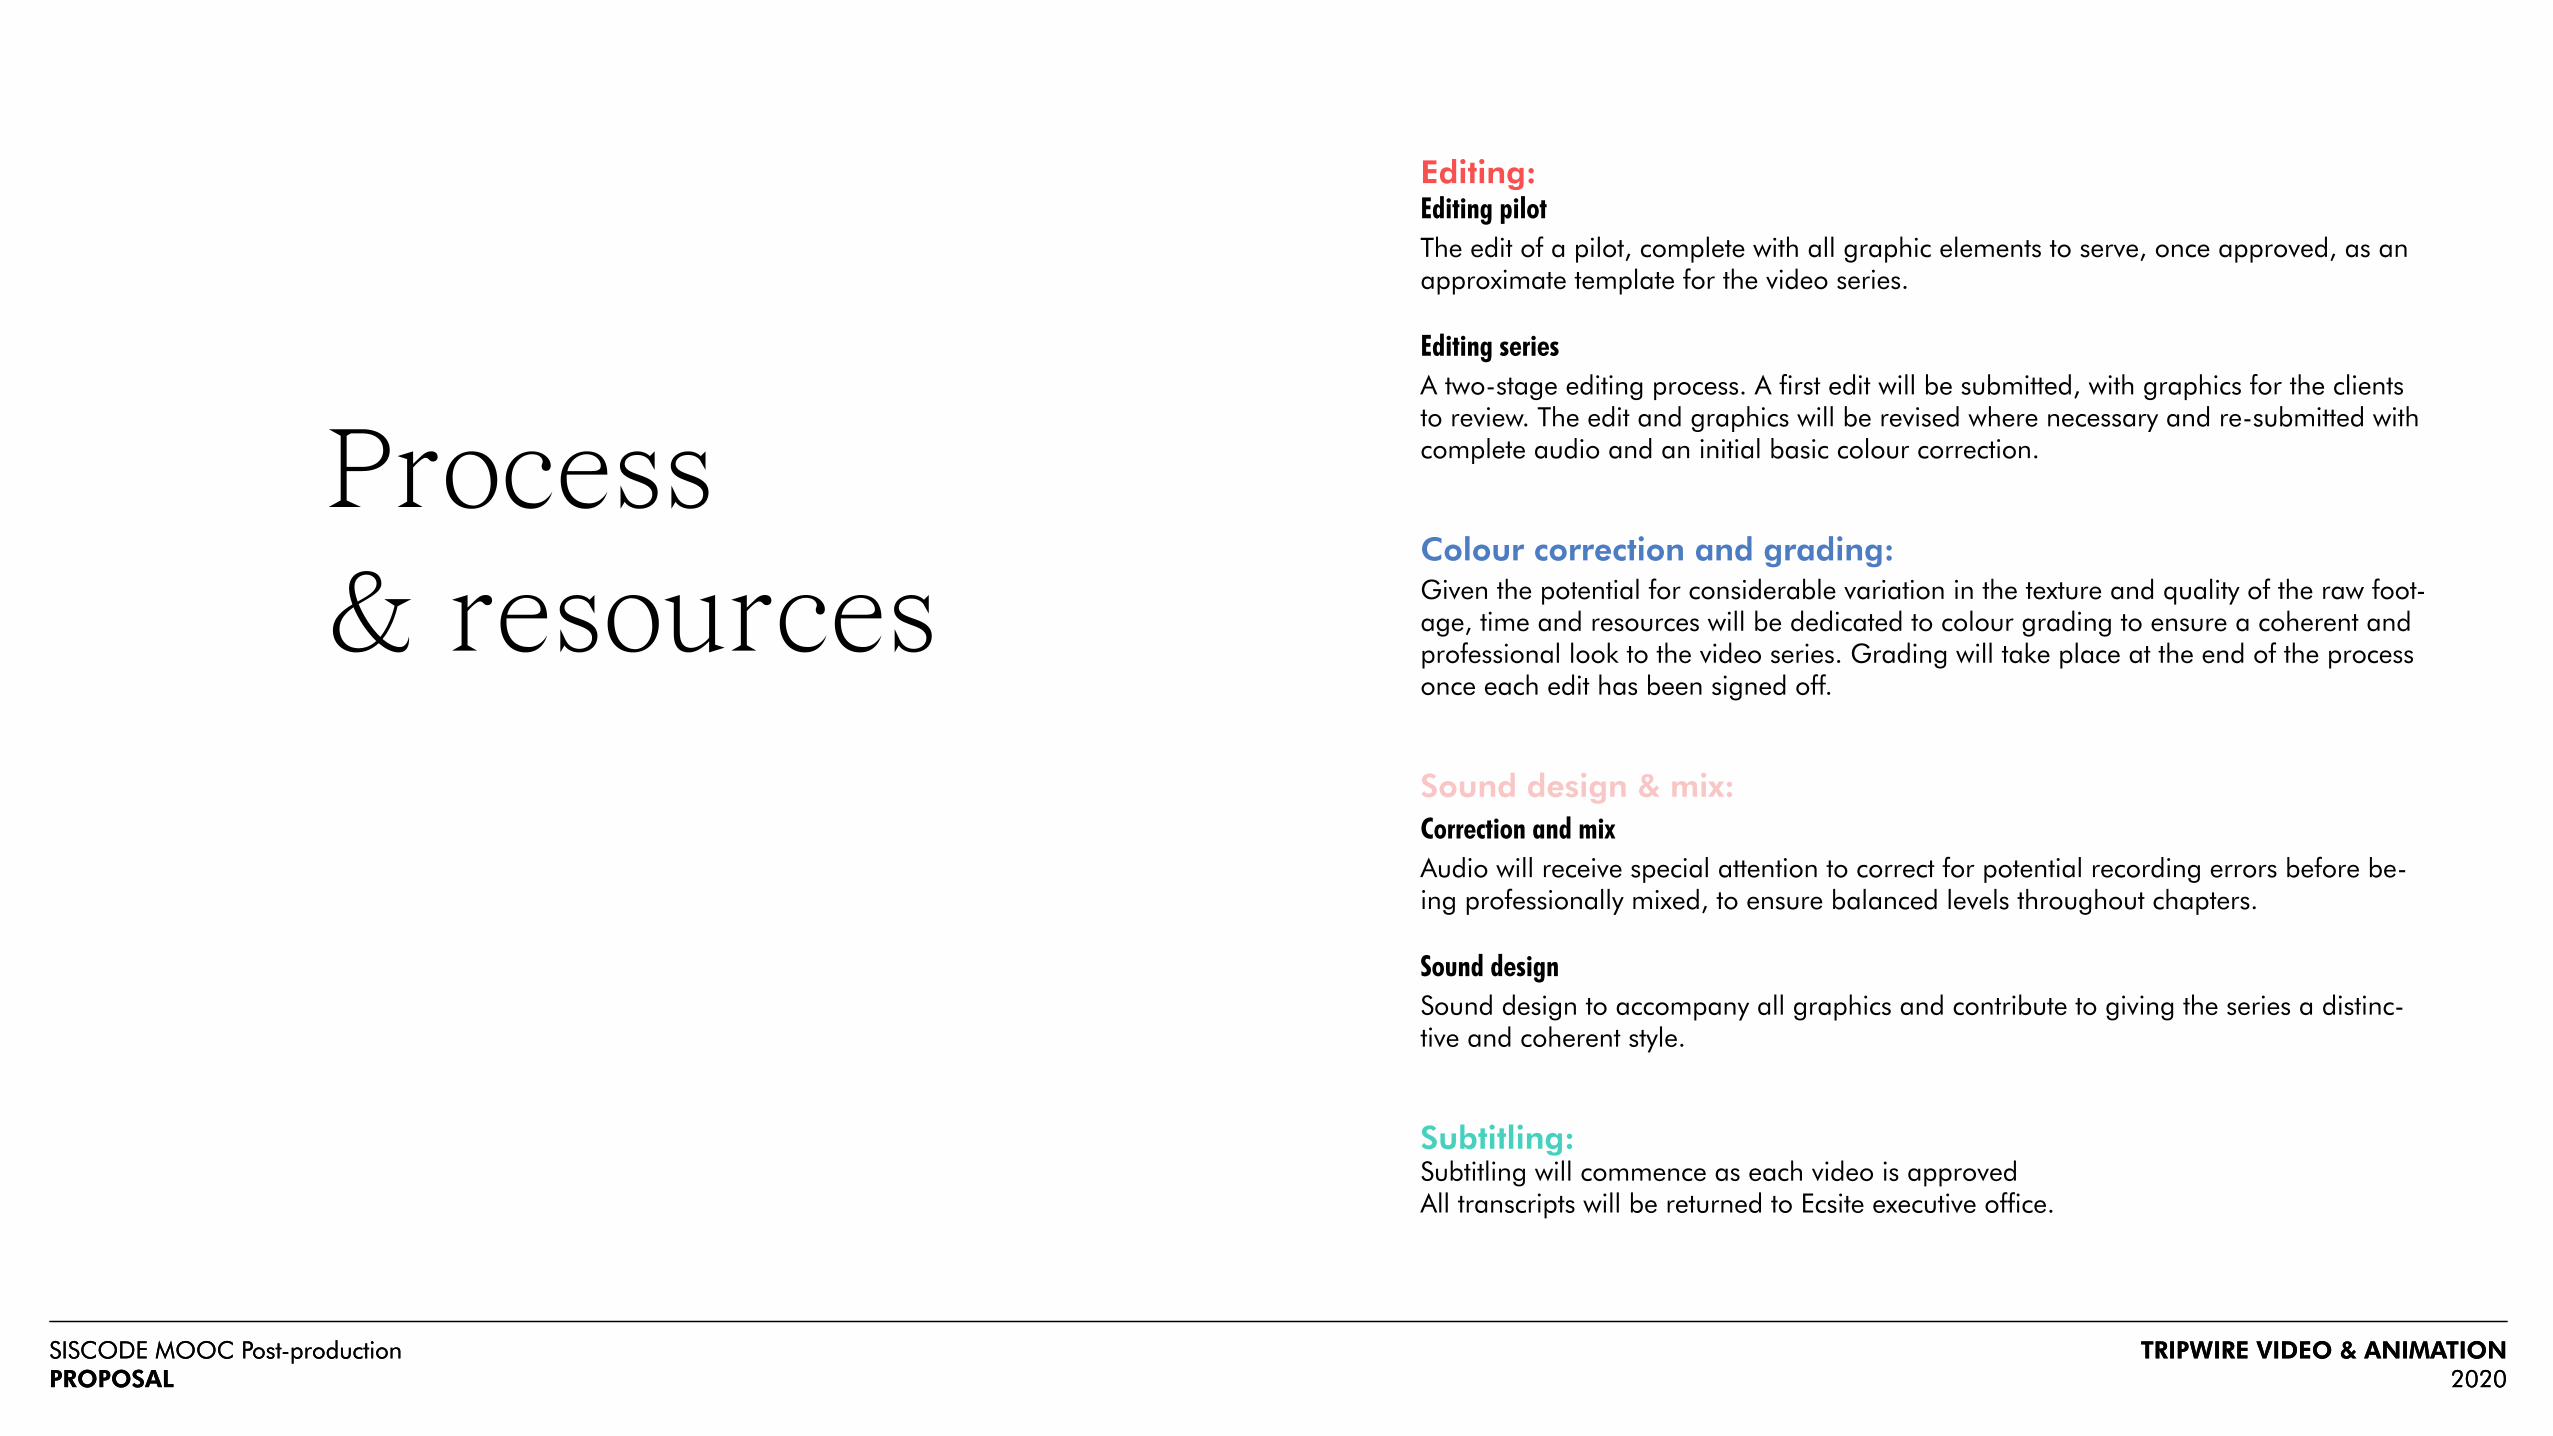
Process & resources
Tasks are divided into 6 distinct packages:
Coordination & project management:Collaboration
Maintaining close contact with Ecsite – and additional partners and contributors where appropriate. This timeline foresees a series of briefing and review meetings throughout the post-production process.
Content management
Gathering content from participating organisations and organising material in prepa-ration for edit, re-encoding footage where necessary. All footage will be stored, or-dered and returned to the Ecsite executive office at the end of the project.
Design & 2D animation:MOOC design
Creating a fresh, stylish and exciting MOOC design in line with SISCODE’s established graphic identity. Designing proposals for a modern and youthful intro/logo animation, transitions, graphics and lower thirds. Design elements to distinguish individual course chapters.
Data visualisations
Developing 2D animations for each video to visualise data and ideas, based on briefs provided by the client. The client will have the opportunity to provide feedback as each draft video is submitted.
SISCODE MOOC Post-productionPROPOSAL
TRIPWIRE VIDEO & ANIMATION2020
SISCODE MOOC Post-productionPROPOSAL
TRIPWIRE VIDEO & ANIMATION2020
Editing:Editing pilot
The edit of a pilot, complete with all graphic elements to serve, once approved, as an approximate template for the video series.
Editing series
A two-stage editing process. A first edit will be submitted, with graphics for the clients to review. The edit and graphics will be revised where necessary and re-submitted with complete audio and an initial basic colour correction.
Colour correction and grading:Given the potential for considerable variation in the texture and quality of the raw foot-age, time and resources will be dedicated to colour grading to ensure a coherent and professional look to the video series. Grading will take place at the end of the process once each edit has been signed off.
Sound design & mix:Correction and mix
Audio will receive special attention to correct for potential recording errors before be-ing professionally mixed, to ensure balanced levels throughout chapters.
Sound design
Sound design to accompany all graphics and contribute to giving the series a distinc-tive and coherent style.
Subtitling:Subtitling will commence as each video is approvedAll transcripts will be returned to Ecsite executive office.
Process & resources

SISCODE MOOC Post-productionPROPOSAL
TRIPWIRE VIDEO & ANIMATION2020
SISCODE MOOC Post-productionPROPOSAL
TRIPWIRE VIDEO & ANIMATION2020
BudgetDAYS DAY RATE TOTAL
Coordination 5 days 5 175 875
Design 5 days 5 175 875
Editing 20 videos 7’ 10hrs x 20 25 175 4,375
Editing trailer 1’ 1.5 days 1.5 175 262.5
Colour correction& grading
3.5hrs x 20 8.75 175 1,531.25
2D animation 8hrs x 20 20 175 3,500
Sound design & mix 4hrs x 20 10 175 1,750
Subtitling& revisions
2hrs x 20 5 175 875
TOTALincl taxes and charges
14,043.75all rates in EUR
A transparent breakdown of our costs so you can see exactly where your money goes.

SISCODE MOOC Post-productionPROPOSAL
TRIPWIRE VIDEO & ANIMATION2020
SISCODE MOOC Post-productionPROPOSAL
TRIPWIRE VIDEO & ANIMATION2020
Eurocities Network of European cities
Innovative approach to benchmarking local integration governance
Innoserv Pan-European consortia of 20 universities and research organisations
Series of videos presenting cases of social innovation from across Europe
EASPD European network of service providers for people with disabilities
Set of short documentary reports looking at policy from the perspective of service users and exploring its impact on their lives
Barcelona City Council
Department of Commerce
Graphics to accompany the presentation of a new set of strategiesDepartment of Citizens’ Rights and Diversity
Campaign to encourage residents to enroll to vote in local elections
UIA Urban Innovative Actions
Report on an innovative reception centre for refugees and asylum seekers
Barcelona’sPublic Health Agency
Set of lighthearted musical videos to communicate food hygiene and safety regulations
EFI European Forest Institute
Explainer video on the benefits of FLEGT-licensed timber productsIn charge of vector illustrations animation and sound production
Similar recent projects
We have compiled some of the more recent work that we think relevant to the SISCODE call: https://vimeo.com/448162850

Thanks for your considerationProposal by TRIPWIRE VIDEO
www.tripwirevideo.com16th August 2020
[email protected] 6002045740034 656646022

Annex 5: Overview of the Videos style
Screenshot Week 1: Week presentation:
Screenshot Week 2: Lesson presentation:

Screenshot Week 3: Speaker presentation
Screenshot Week 4: Keyword highlighted

Screenshot Week 5: Graphic element

Annex 6: Links to the videos Week Names Lesson Names Link to the Ecsite
Youtube account
Link to the POK
Youtube account
0
Trailer https://youtu.be/
EmSP7phfAN8
https://youtu.be/
H9XyRZyTw_g
0
Co-creation for
policymakers:
https://youtu.be/
yhVCeXQdG1s
https://youtu.be/
AP3O0lPzYfo
WH
Y D
O W
E N
EED
INN
OV
AT
ION
IN
POLI
CYM
AK
ING
?
An introduction to
design for
policymaking
https://youtu.be/
U8c0_Z4RNBk
https://youtu.be/
hdaam9JeiZA
The benefits of co-
creation
https://youtu.be/
qgqC3LKRICY
https://youtu.be/
G0uxFPp3YA0
Co-creation from a
human-centered
perspective
https://youtu.be/
uQBLNkhTP7w
https://youtu.be/
H960BtQA27c
The concept of co-
creation
https://youtu.be/
5xm3SojjEok
https://youtu.be/
NKChBbUFlos
HO
W C
AN
HU
MA
N-C
ENT
RIC
ITY
AN
D C
O-
CREA
TIO
N IM
PRO
VE
POLI
CIES
?
Human-centred
design for the public
sector
https://youtu.be/
T7G4nmKEMxY
https://youtu.be/
f-6pBvb1aMA
Embedding design
for innovation in
policymaking
https://youtu.be/
UKIzL7-Ujj4
https://youtu.be/
9hnVUoapq94
CASE STUDY: Public
sector innovation -
Inland design
https://youtu.be/
CektjeQNmhU
https://youtu.be/
WMpWFlWJZvo
Service design for
policy
implementation
https://youtu.be/
H63zMAY7uuI
https://youtu.be/
ngKklJKRhBE

HO
W C
AN
PR
OB
LEM
S A
ND
TH
EIR
RO
OT
CA
USE
S B
E
IDEN
TIF
IED
AN
D F
RA
MED
?
An introduction to
problem framing
https://youtu.be/
iwNhE1wws6M
https://youtu.be/
PDQP4SXAnKw
CASE STUDY: Co-
creating problem
framing in practice
https://youtu.be/
hbwkCpeahkY
https://youtu.be/
hW2fr93vsdU
Tools to engage
stakeholders in
problem framing
https://youtu.be/
w0XUMIBTJu8
https://youtu.be/
muqSyNyvqKI
HO
W C
AN
CO
-DES
IGN
BE
USE
D T
O S
OLV
E
COM
MU
NIT
Y PR
OB
LEM
S?
Enhancing the core
values and tools of
prototyping
https://youtu.be/
AxPpEq1BXIQ
https://youtu.be/
-aqIC6yxH3A
ILLUSTRATION:
Prototyping for
circular transitions
https://youtu.be/
x9GD_ah9yZE
https://youtu.be/
mqqEwfzbf2o
ILLUSTRATION:
Prototyping policy
programs with
regional authority
https://youtu.be/
KPiWExOEB5Y
https://youtu.be/
ccd4pfelksg
New roles for policy
makers to support
prototyping
https://youtu.be/
3MtPYJW6Jfs
https://youtu.be/
-8H_0JNI18w
HO
W C
AN
SO
LUTI
ON
S B
E
IMPL
EMEN
TED
AN
D S
UST
AIN
ED
OV
ER T
IME?
From prototypes to
implementation
https://youtu.be/
LNDJHaLOBOU
https://youtu.be/
7Ll85pcU3Lg
Monitoring and
assessment
https://youtu.be/
QPdT4y8UpbQ
https://youtu.be/
k3DKMjkr9k0
Making solutions
sustainable
https://youtu.be/
MeXeDX1RZjE
https://youtu.be/
wOE9em8rNLo